
My first wire-tuck EG Coupe
 06-11-2011, 06:05 PM
#26
Honda-Tech Member
Thread Starter
Go for it bro nothings holding you back but reading up on the information, time, and money. I spent like 2 years reading this stuff before I jumped into it. Next time I do this is will be like chase bays expensive harness Ill do it all raychem heat shrink and mill spec everything. The information is the hard part to get and the rest is easy if you can use tools and have patience.
 06-11-2011, 06:12 PM
#27
Honda-Tech Member
Join Date: Nov 2006
Location: NY
Posts: 6
Likes: 0
Received 0 Likes
on
0 Posts
Go for it bro nothings holding you back but reading up on the information, time, and money. I spent like 2 years reading this stuff before I jumped into it. Next time I do this is will be like chase bays expensive harness Ill do it all raychem heat shrink and mill spec everything. The information is the hard part to get and the rest is easy if you can use tools and have patience.
06-11-2011, 06:20 PM
#28
Honda-Tech Member
Thread Starter
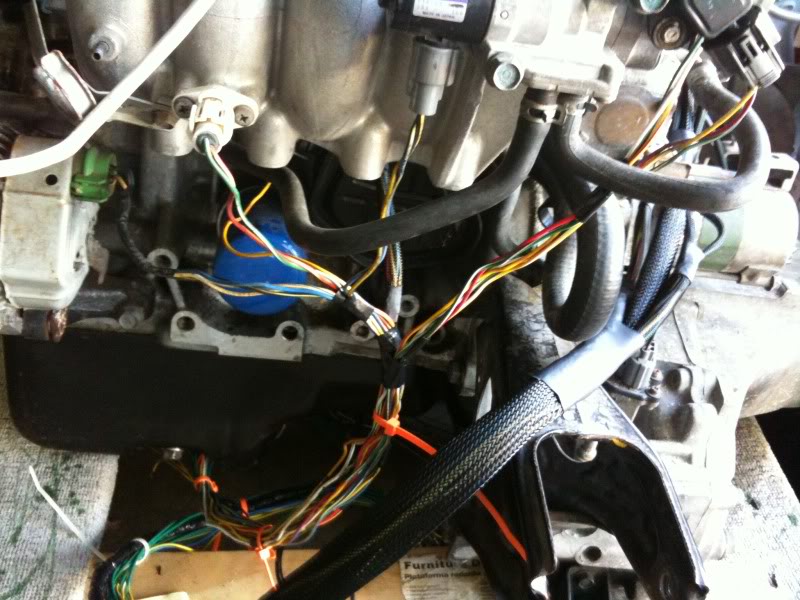
Alright I got a lot of post in the same day but just recently started back up on the project. I got my engine and began a engine harness tuck as well and you can see here how far I got for now. I ran out of loom and heat shrink tubing. I had to order more so the rest of the harness will have to wait. I also need larger gauge wire for the starter and the alternator along with some of those slick terminal things for the engine bay. That stuff can be ordered later on. Anyways here you go guys.
First strip all the crap off the harness. I looks like a nightmare from hell to most people. If you have wiring diagrams don’t fear just trace one connector on the engine at a time and you will be fine. The majority of the wires need to be extended and sorted out. Seems like when the guy that made the harness originally didn’t give a rats *** about which direction the wires went in and it has 4 or so *** backwards splices! So if you don’t have access to wiring diagrams you can just cut off all the fat connectors that go to the engine bay harness and extend them at your leisure until you get them all labeled and extended. I don’t recommend doing this without diagrams because you will get lost no doubt about that.
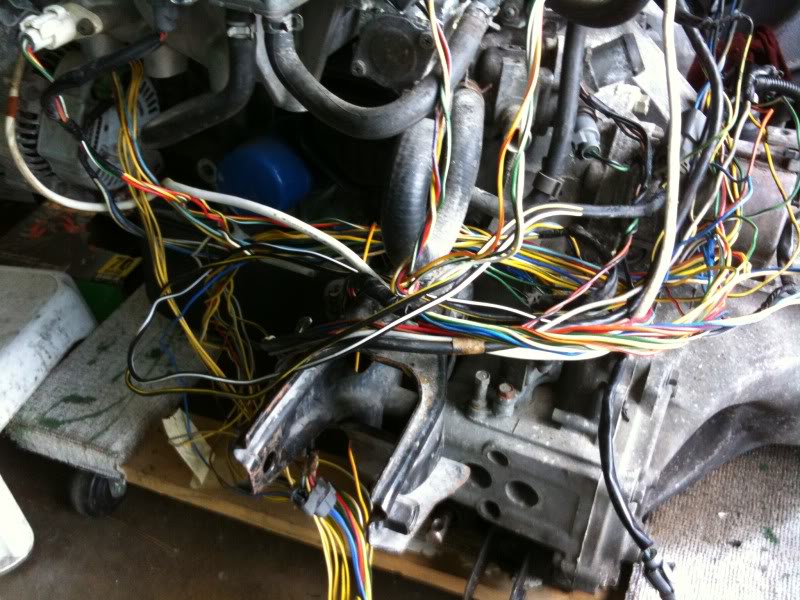
I did not do that I just started from the left by the alternator and sorted out and unpinned working my way left to right and then to the front of the engine. And taping where I thought a break out should be and where the main harness should route.

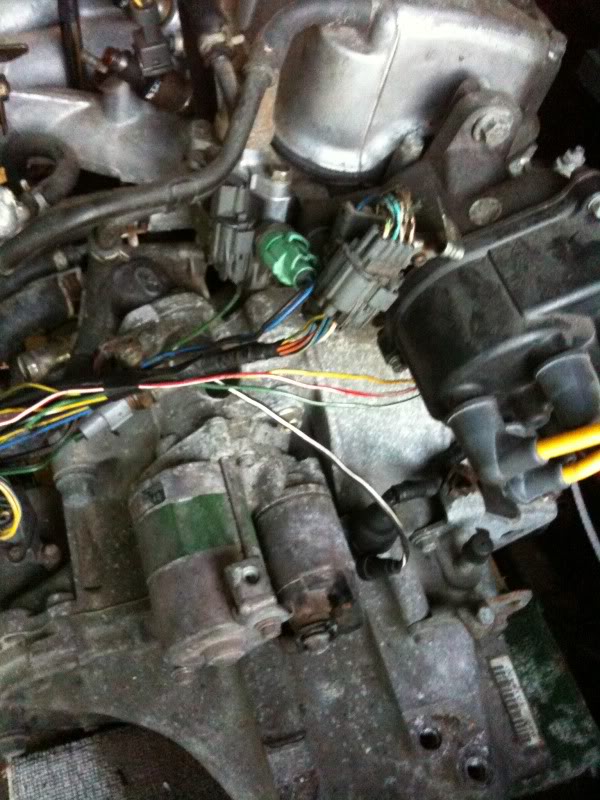
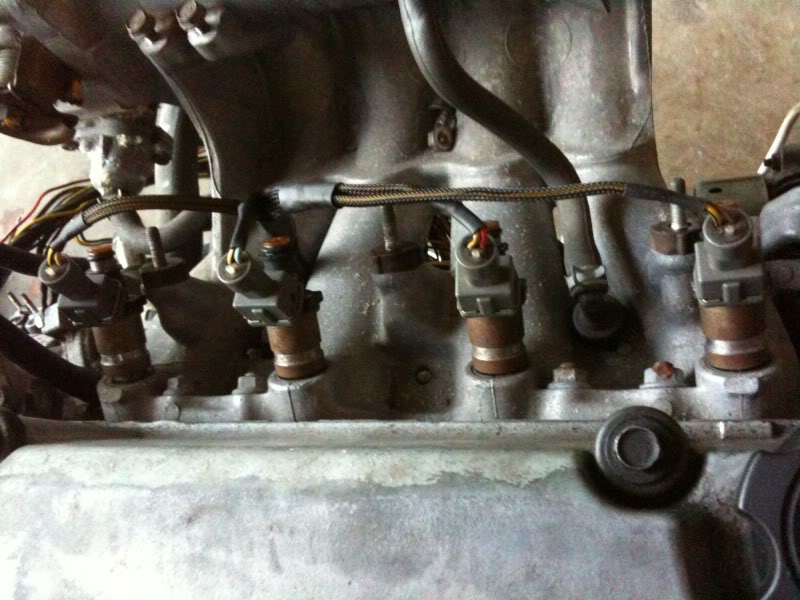
I only had enough material to loom the injector clips. So I just loomed the injector clips and mounted for testing purposes. More materials are on the way so just sit and wait now I guess. I did a something wrong too, I did not leave the fuel rail on to make sure there was enough room it’s a tight squeeze but I can push the harness up a little more to give it some more slack it worked out fine. Just remember to leave as much crap on to make sure everything fits right like radiator hoses and all that good stuff. Oh and the revers sensor i think will look cleaner going under the starter so you can hide that connector.
First strip all the crap off the harness. I looks like a nightmare from hell to most people. If you have wiring diagrams don’t fear just trace one connector on the engine at a time and you will be fine. The majority of the wires need to be extended and sorted out. Seems like when the guy that made the harness originally didn’t give a rats *** about which direction the wires went in and it has 4 or so *** backwards splices! So if you don’t have access to wiring diagrams you can just cut off all the fat connectors that go to the engine bay harness and extend them at your leisure until you get them all labeled and extended. I don’t recommend doing this without diagrams because you will get lost no doubt about that.
I did not do that I just started from the left by the alternator and sorted out and unpinned working my way left to right and then to the front of the engine. And taping where I thought a break out should be and where the main harness should route.
I only had enough material to loom the injector clips. So I just loomed the injector clips and mounted for testing purposes. More materials are on the way so just sit and wait now I guess. I did a something wrong too, I did not leave the fuel rail on to make sure there was enough room it’s a tight squeeze but I can push the harness up a little more to give it some more slack it worked out fine. Just remember to leave as much crap on to make sure everything fits right like radiator hoses and all that good stuff. Oh and the revers sensor i think will look cleaner going under the starter so you can hide that connector.
06-11-2011, 06:34 PM
#29
Honda-Tech Member
Thread Starter
I am in no way condoning any random Joe-schmoe do this kind work of course; I have a 2 year degree from Honda Pact and serviced Honda's professionally for 3 years (I am going back to school now). My professor was top technician of the US for like 4 years and drilled electrical into my head so this is not a problem for me. I also have a "desire or drive" to want to make this the best car that I have built or worked on to this date. And I think that "desire and drive" goes a long way if your willing to commit or start and just succumbed to laziness. There is a definite commitment in building cars and I tell that to everyone. Whether your willing to dig in and DIY or Pay some one gobs of money (its there business of course) or just not do it at all is going to be your choice in the end. Just my 2 cents on the topic of DIY anything on your car. Sorry for the rambling.
There is a lot of information to find on honda-tech search that is how I found out about this stuff. You will defiantly find all you need to know on the threads. I kind of skipped some steps towards the end because I forget to take a lot of pictures. Ask me anything you want man I dont mind helping fellow Honda-techers were all Bros here !
06-11-2011, 07:14 PM
#30
Honda-Tech Member

Join Date: Nov 2009
Location: BALTIMORE MD
Posts: 548
Likes: 0
Received 0 Likes
on
0 Posts
looking good i wish i had a second car and a garage i would be doing a tuck to... keep it up... cant wait to see that it looks like


 06-12-2011, 05:21 PM
#33
Honda-Tech Member
Thread Starter
Thanks! I am trying my best hope it runs right -___- lol
Thanks, just got to try it yourself too thats what I did!
06-14-2011, 10:45 PM
#34
Honda-Tech Member
Thread Starter
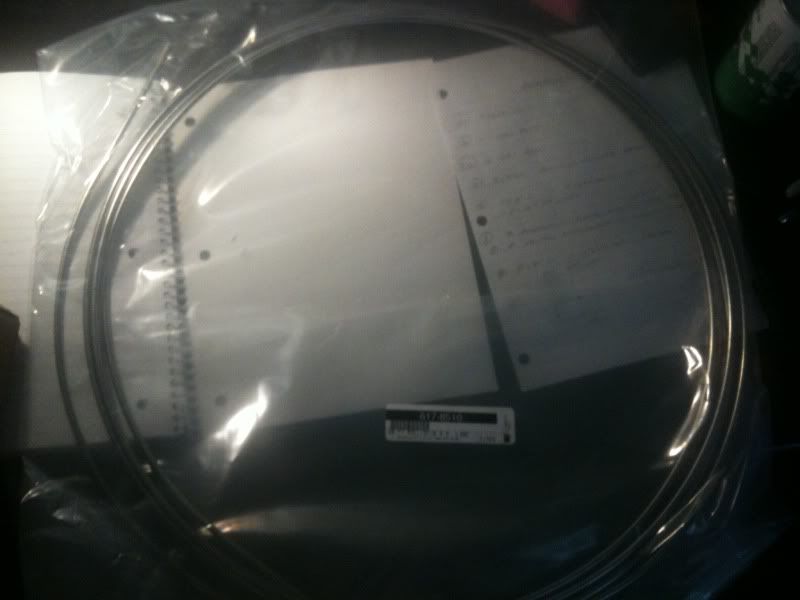
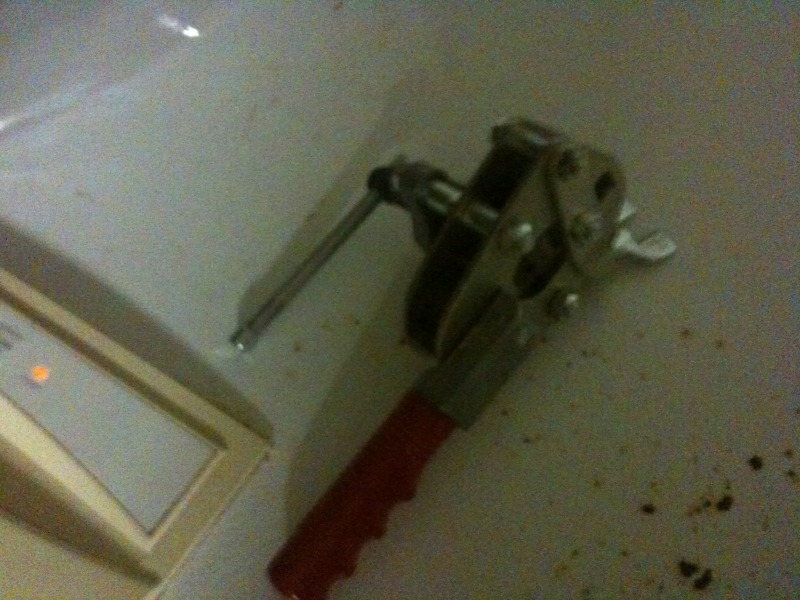
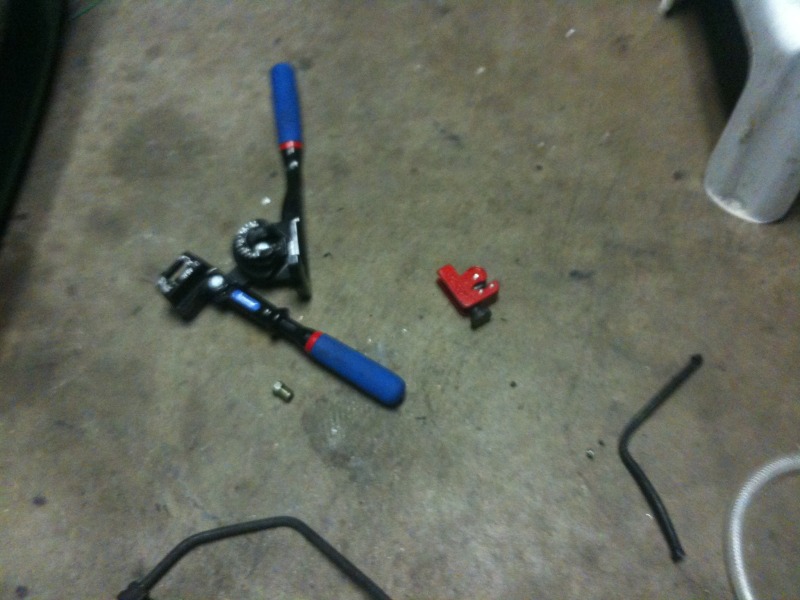
Sweet just got my brake stuff in today. I am ready to redo all the hard lines to Stainless Steel and all AN plumbing minus the fittings that go into the rubber brake lines those will reuse the OEM metric fittings. I did a budget check and making your own steel braided brake lines it would cost more due to the need for metric to AN fittings and the hose ends are like 20+ dollars each per fitting that’s a whopping 160 for just hose ends. I would rather just pay for some Goodridge brake lines at 80-90 for all 4 lines you can’t beat that and they mount to the chassis in the OEM place. Anyways here is how to flare 37 degree brake lines in thin wall SS. I’ll show a whole shake down of replacing the lines on the car this weekend!
Tools needed:
37 degree Flaring tool (Parker Handheld)
Pipe Bender (Imperial brand ratcheting)
Hand File
Small Pipe cutter
Oil
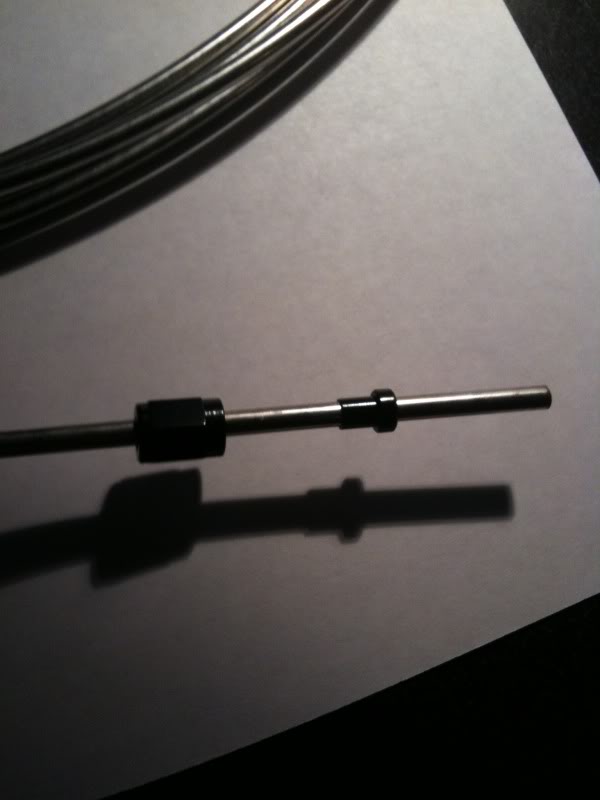
Remember to slip the AN nut on first then the tube sleeve or else you be FUBAR and have to cut the end off and redo the whole thing. Don’t be afraid to cut it off at the end and redo it you don’t feel it is going to seal properly. I wouldn’t chance it this thing can kill you!!!!
My BA flaring tool is easy to use just unscrew the locking latch. Change both dies to 3/16 it has 2 sides. Slip the SS line in and there is no measuring, just push it in till it can’t go anymore. Remember to back the anvil back all the way.
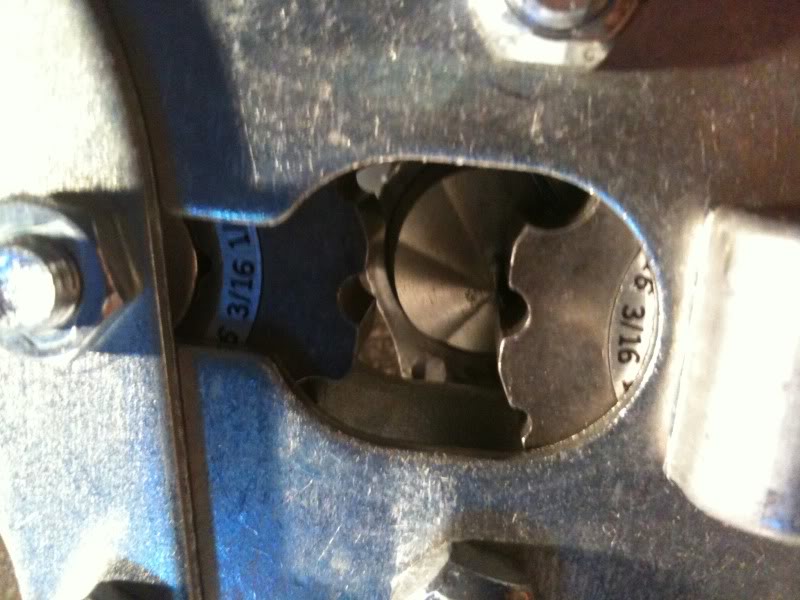
Then lock the latch back in place tight as it can go. Then put a drop of oil onto the line and drive the anvil in. The anvil is supposed to cause gouging….? If you don’t add oil, all I know is it probably helps it reduce fiction on the locks that hold it in place. I just threw a drop of synthetic gun oil since it was in my room already. You can see the oil in this picture.
Last step back the anvil off and release the latch. The hose pops out. I check it with a male side fitting and inspected it for even circular fitting. Looks good fits snug and firm no movement side to side when tightened. So I think it turned out good.

That’s that, if you’re bending lines I’d recommend you slip the fitting on one side and flare it. Then measure how long you need and account for radius of tool. You don’t need to multiply by 2pi or something just Ball Park. Then bend it with the tool and cut the other side off. Remember that the fitting ends are metal so you will need to get it to the last bend and save some room for the flaring. Then make the last bend. If you bend the line before you flare you won’t be able to flare it if you didn’t save enough room on the other side. I made that mistake twice before on double flares and had to cut 2 whole new lines. The SS lines are freaking expensive so measure twice cut once.
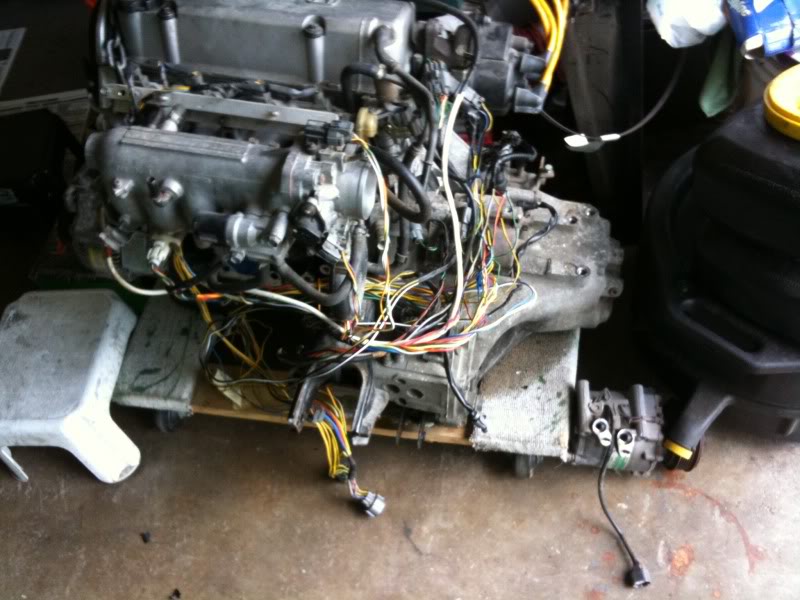
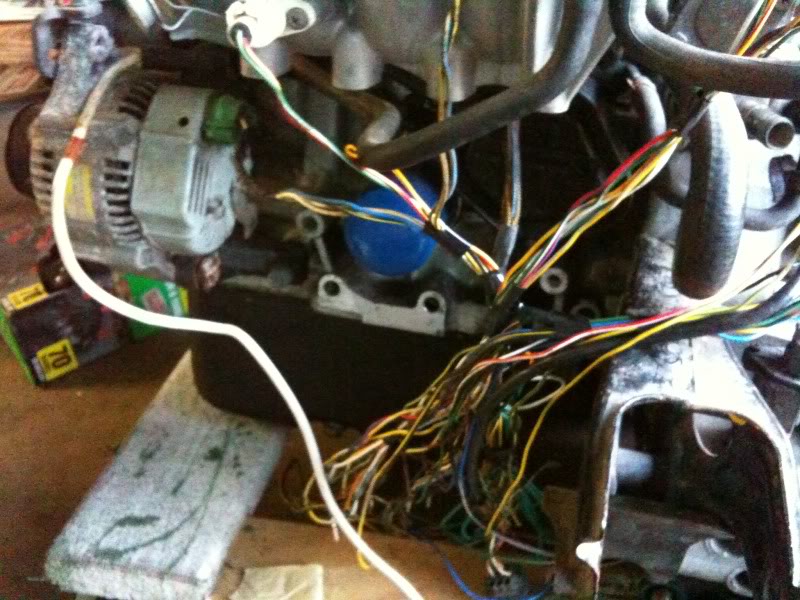
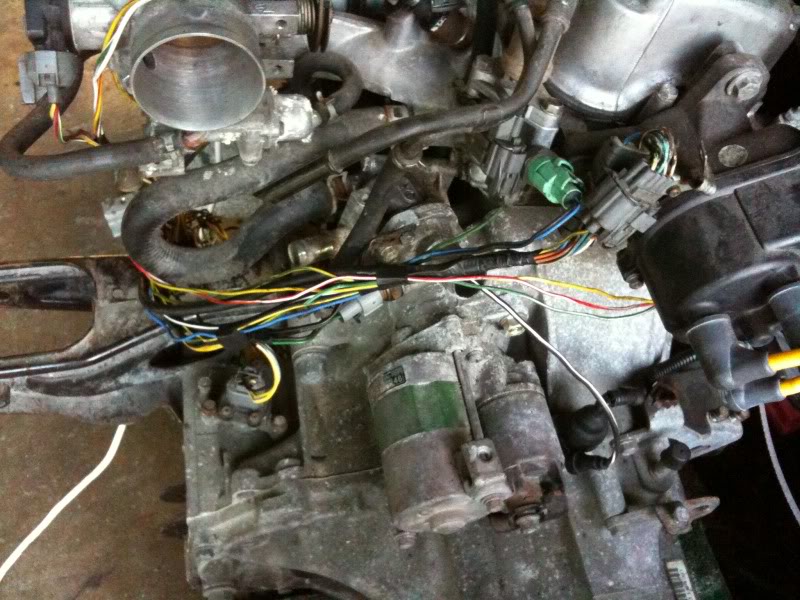
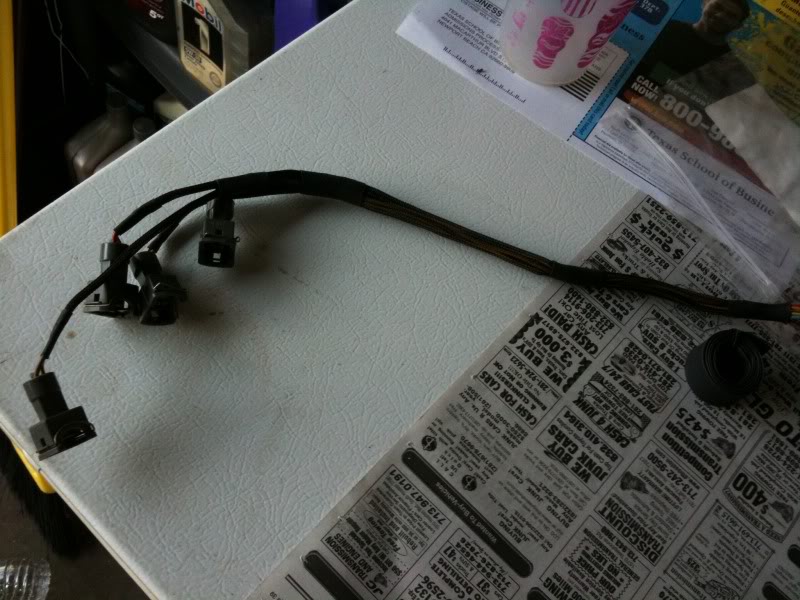
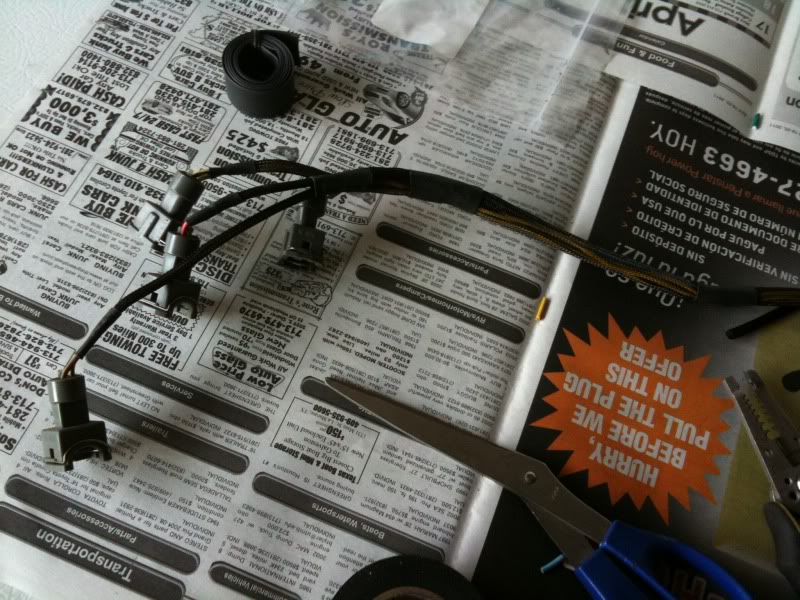
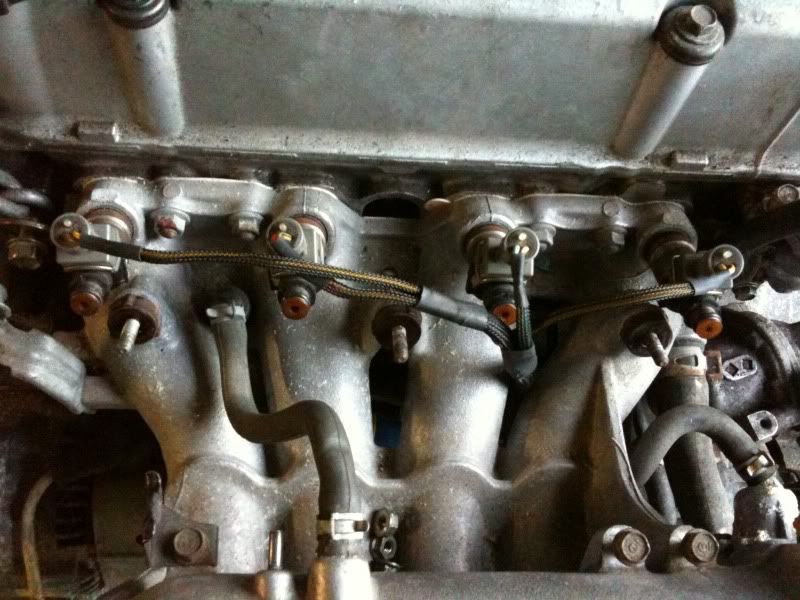
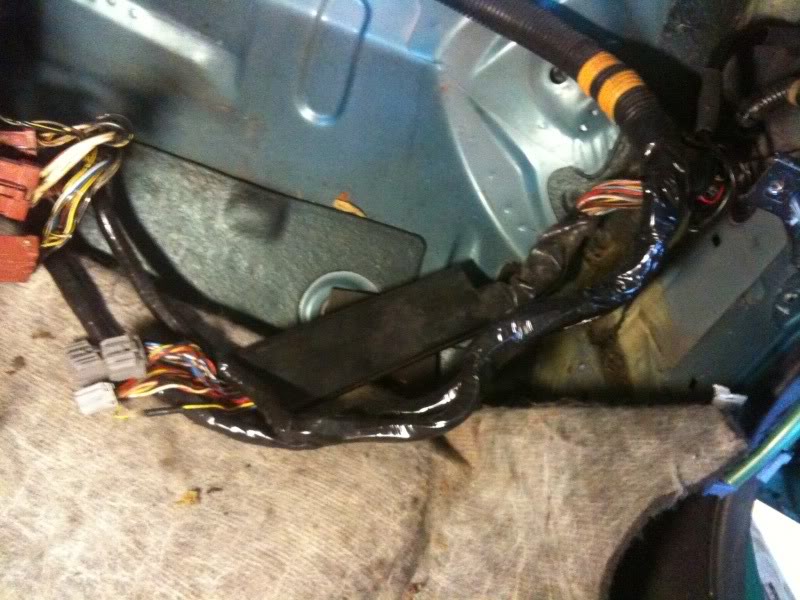
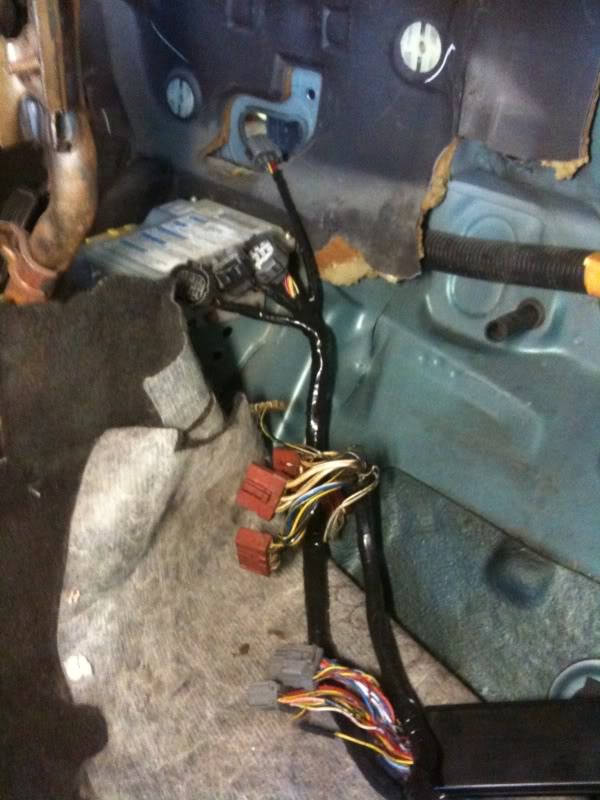
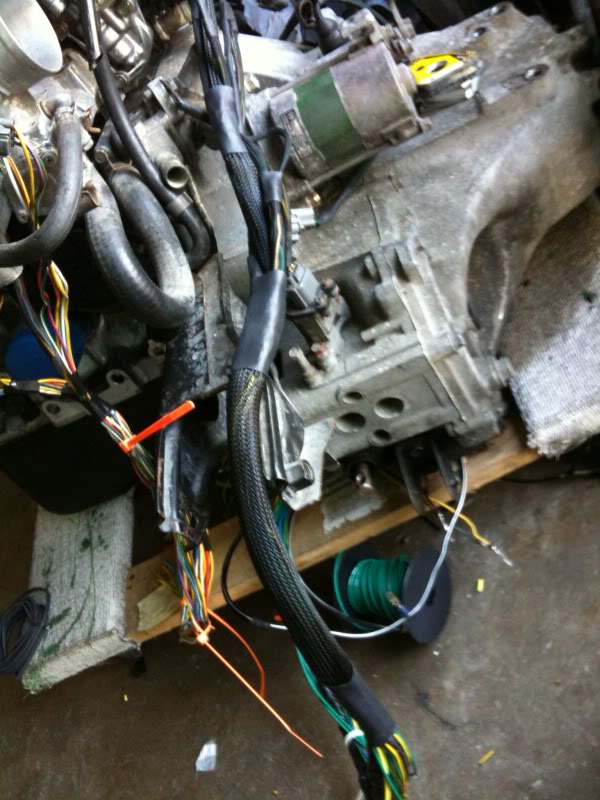
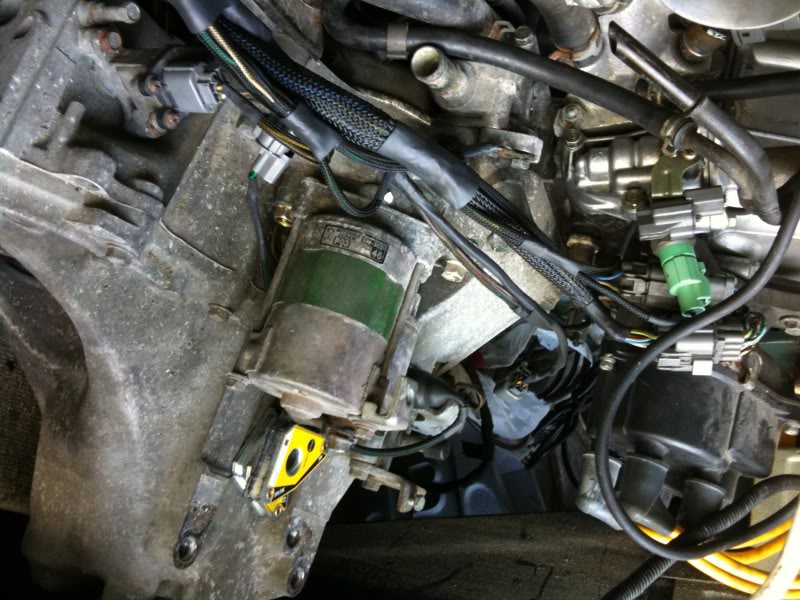
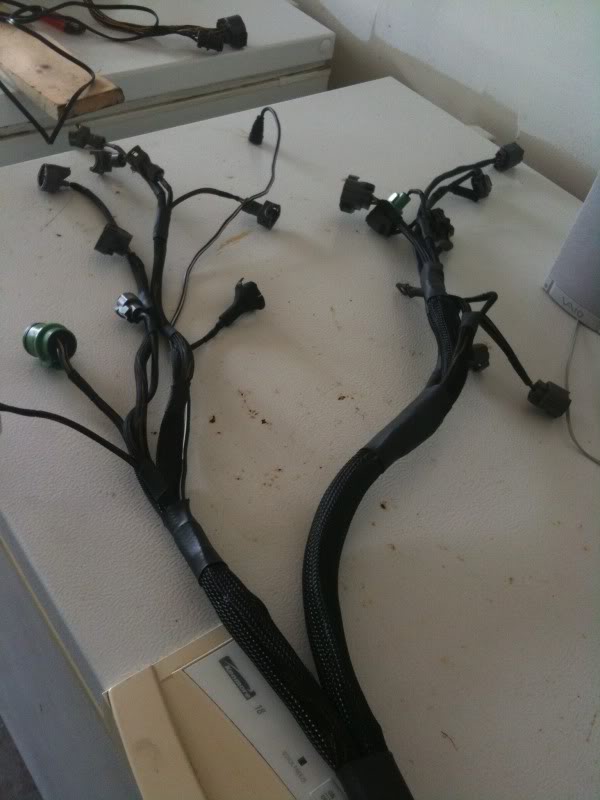
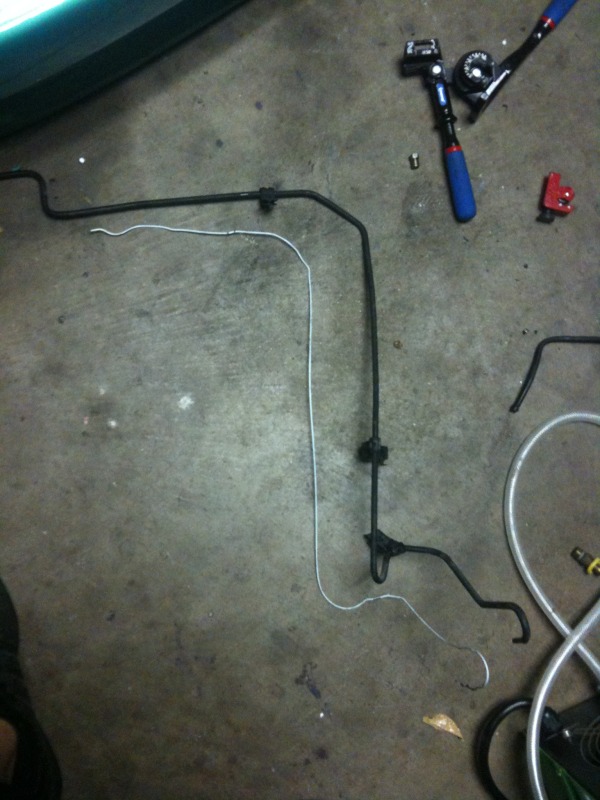
Here are some more updated pictures of my engine harness it’s coming along good. This is a serious labor of love it takes hours to get even this far. I think I spent like 12 hours just extending and looming wires. I also cleaned up the inside the cabin and show everyone how long the wires are exactly.
Progress so far. I am almost done with the trans side of the engine harness.
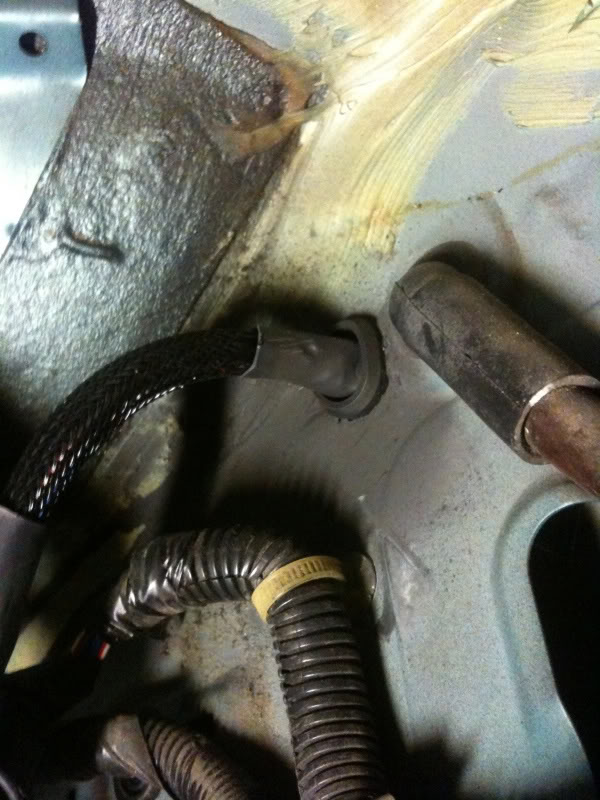
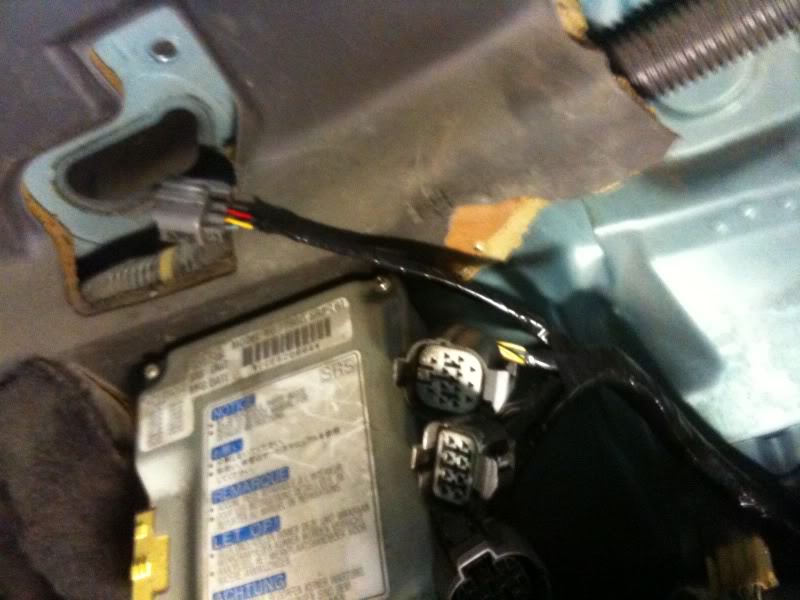
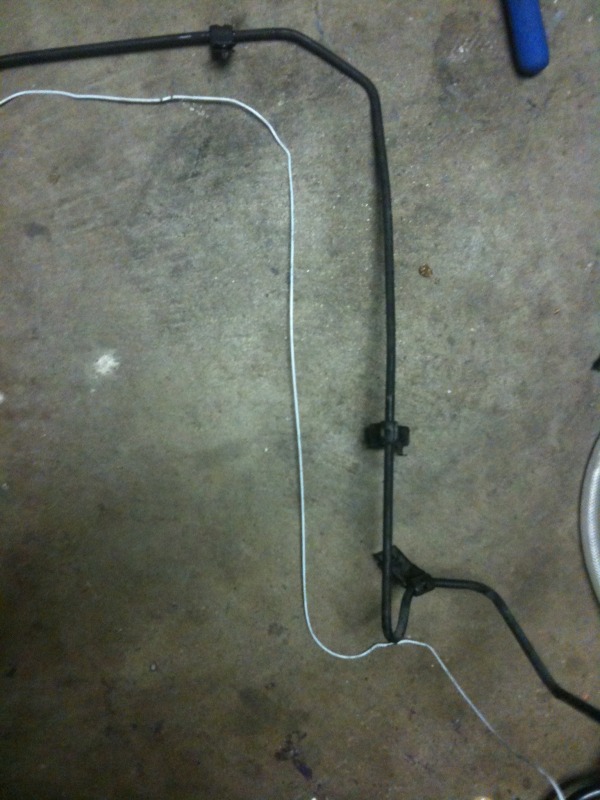
Where the wire tuck comes out on the passenger side.
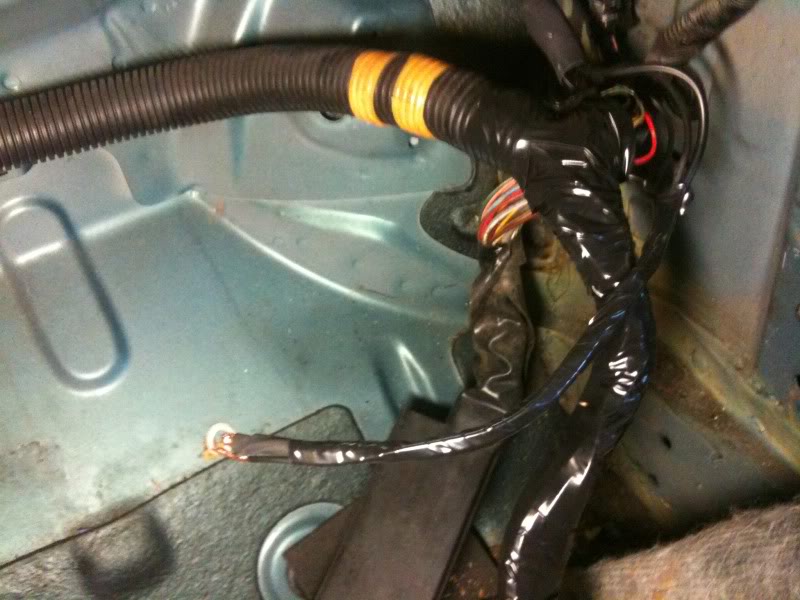
I cleaned and taped up the entire inside harnesses and organized them.
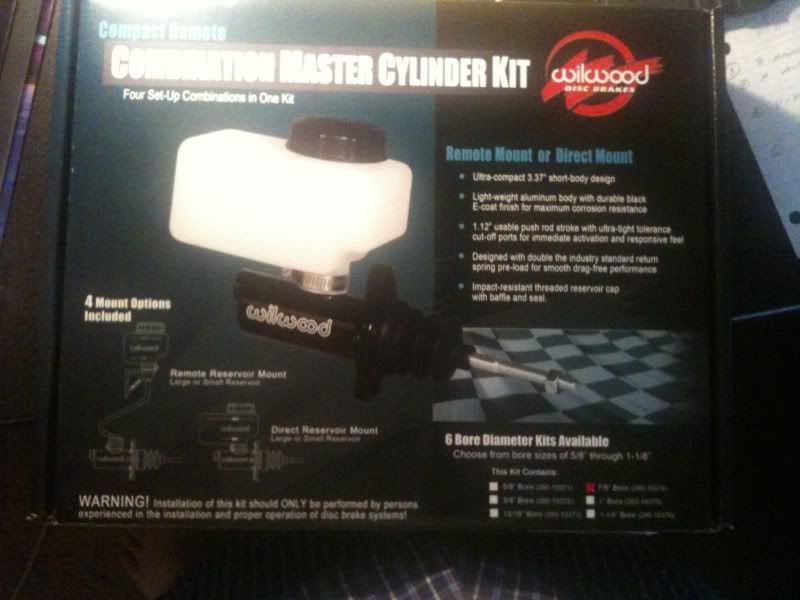
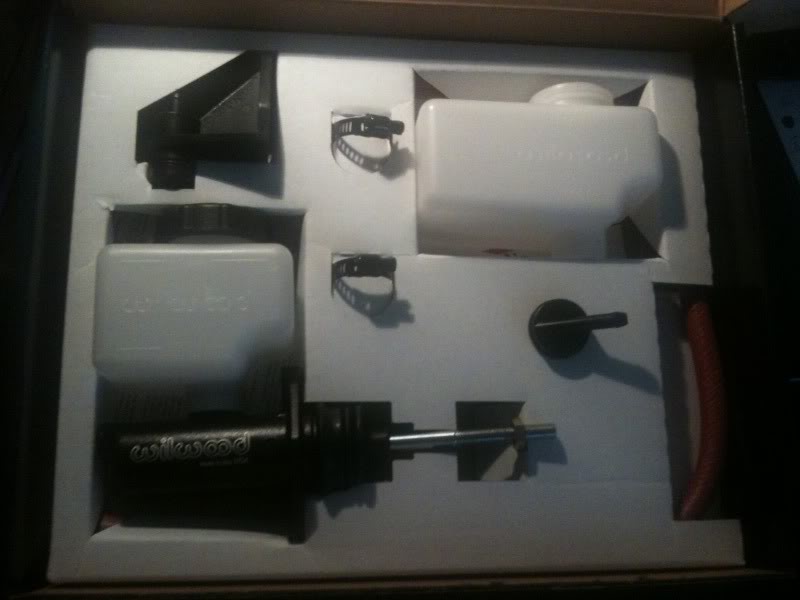
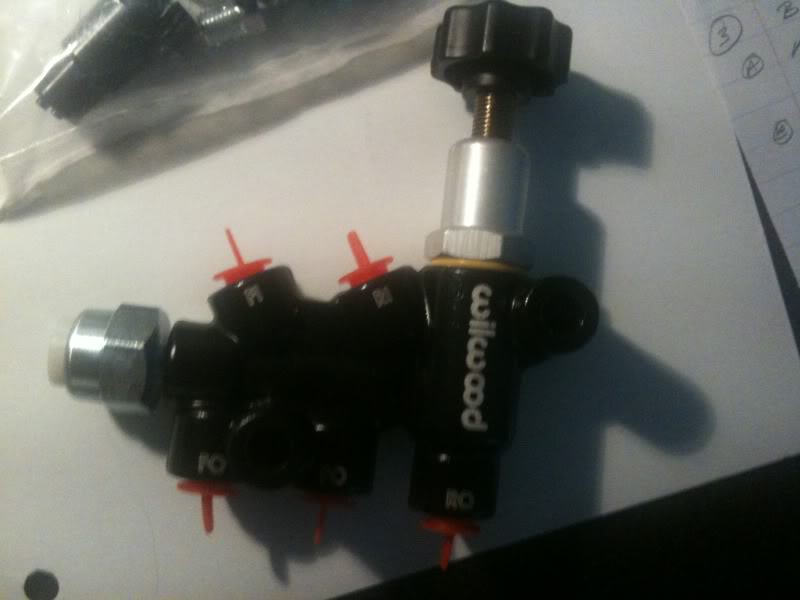
Here’s the other 2 goodies I am really excited about. I am going to show you guys where and how to install this next time.
The inside harness is really long as you can see it almost reaches the heater hose hole. So seriously you won’t need to extend it much. Just find obvious wires that are short and extend them but I might end up shortening stuff.
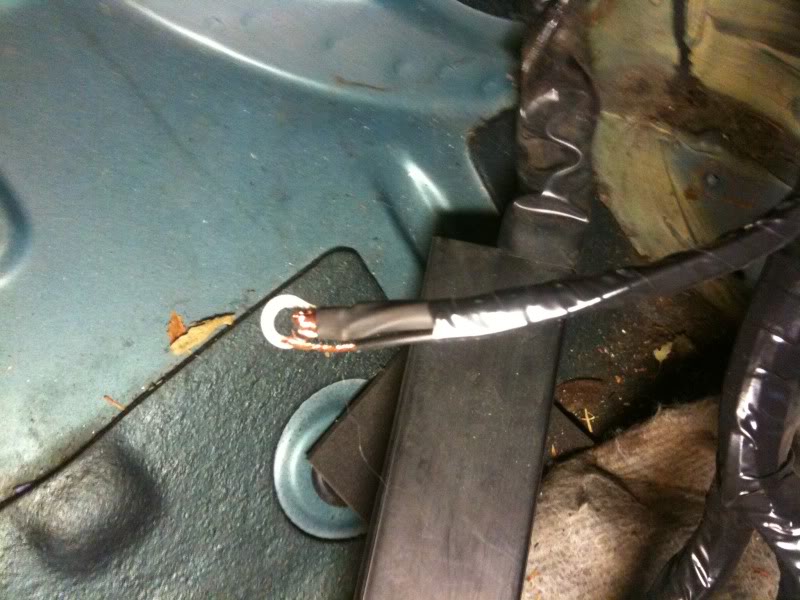
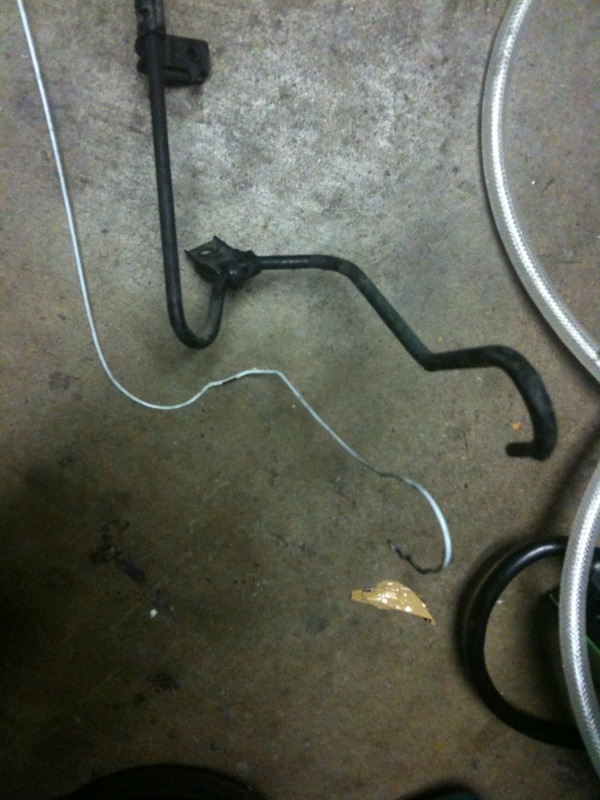
New made ground and I also managed to miss one ground wire. I’ll just add another eye and double it up on one ground. Makes sure you guys organize before you crimp and tape or loom! Mistakes suck!
I will be mounting my fuse box to where the ECU used to go. I am going to make a trip the hardware store and get some bolts and some sheet steel and cut it and weld it into a mount of that guy. That will be this weekend hopefully.
Tools needed:
37 degree Flaring tool (Parker Handheld)
Pipe Bender (Imperial brand ratcheting)
Hand File
Small Pipe cutter
Oil
Remember to slip the AN nut on first then the tube sleeve or else you be FUBAR and have to cut the end off and redo the whole thing. Don’t be afraid to cut it off at the end and redo it you don’t feel it is going to seal properly. I wouldn’t chance it this thing can kill you!!!!
My BA flaring tool is easy to use just unscrew the locking latch. Change both dies to 3/16 it has 2 sides. Slip the SS line in and there is no measuring, just push it in till it can’t go anymore. Remember to back the anvil back all the way.
Then lock the latch back in place tight as it can go. Then put a drop of oil onto the line and drive the anvil in. The anvil is supposed to cause gouging….? If you don’t add oil, all I know is it probably helps it reduce fiction on the locks that hold it in place. I just threw a drop of synthetic gun oil since it was in my room already. You can see the oil in this picture.
Last step back the anvil off and release the latch. The hose pops out. I check it with a male side fitting and inspected it for even circular fitting. Looks good fits snug and firm no movement side to side when tightened. So I think it turned out good.
That’s that, if you’re bending lines I’d recommend you slip the fitting on one side and flare it. Then measure how long you need and account for radius of tool. You don’t need to multiply by 2pi or something just Ball Park. Then bend it with the tool and cut the other side off. Remember that the fitting ends are metal so you will need to get it to the last bend and save some room for the flaring. Then make the last bend. If you bend the line before you flare you won’t be able to flare it if you didn’t save enough room on the other side. I made that mistake twice before on double flares and had to cut 2 whole new lines. The SS lines are freaking expensive so measure twice cut once.
Here are some more updated pictures of my engine harness it’s coming along good. This is a serious labor of love it takes hours to get even this far. I think I spent like 12 hours just extending and looming wires. I also cleaned up the inside the cabin and show everyone how long the wires are exactly.
Progress so far. I am almost done with the trans side of the engine harness.
Where the wire tuck comes out on the passenger side.
I cleaned and taped up the entire inside harnesses and organized them.
Here’s the other 2 goodies I am really excited about. I am going to show you guys where and how to install this next time.
The inside harness is really long as you can see it almost reaches the heater hose hole. So seriously you won’t need to extend it much. Just find obvious wires that are short and extend them but I might end up shortening stuff.
New made ground and I also managed to miss one ground wire. I’ll just add another eye and double it up on one ground. Makes sure you guys organize before you crimp and tape or loom! Mistakes suck!
I will be mounting my fuse box to where the ECU used to go. I am going to make a trip the hardware store and get some bolts and some sheet steel and cut it and weld it into a mount of that guy. That will be this weekend hopefully.


 06-15-2011, 06:55 PM
#39
Honda-Tech Member
Thread Starter
That's what it do
Yeah when I saw this cars wiring I was like wow you drive it like this the freaking injector wires were cut and twisted togeather lol. This jack *** wires a wire directly from his rear trunk mounted batter to the fuel pump. I just have had a nightmare so I had to redo a lot of stuff.
I am bro I just havent had time to probably this weekend that is why I got all that crap.
I am bro I just havent had time to probably this weekend that is why I got all that crap.
06-15-2011, 11:21 PM
#41
Honda-Tech Member
Thread Starter
06-17-2011, 04:24 PM
#43
Honda-Tech Member
Thread Starter
07-08-2011, 08:42 PM
#45
Honda-Tech Member
Thread Starter
Okay sorry for no updates lot of stuff going on and just now got back to the car. The harness is almost done just a few more wires to extend and loom. Then all connectors go back and its off to the brakes. Here is update pictures!
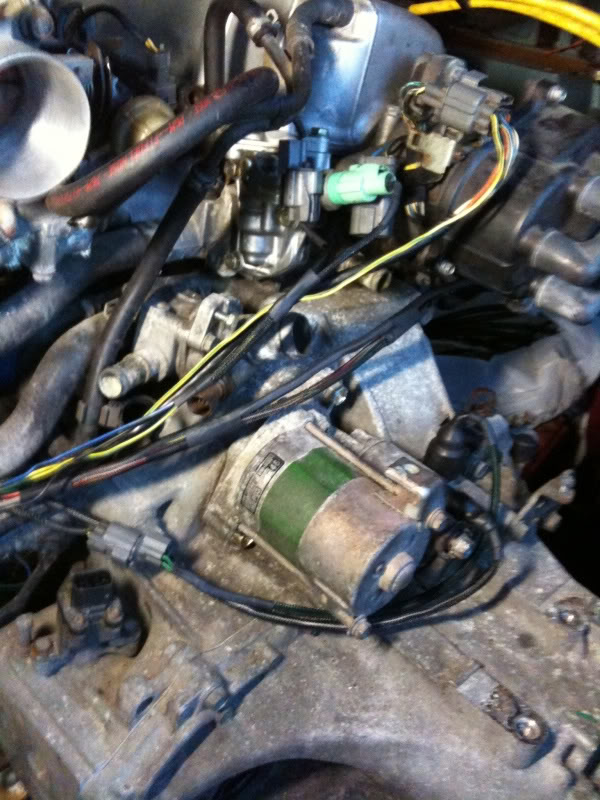
Oh I decided to go with a terminal junction on the firewall to supply power to the battery for the starter and the alternator in a separate location so it does not cause frequency interference with the engine harness wires. I also made my own shielding around the distributor sensors wires and the o2 sensor wires.
One more day of hard work and I should be done with the harness. I am ready to move to another part of the car now. If I ever redo this again I will most defiantly redo all the harness with new wires. I found a few cracked and split wires but it was already to late so I made some repairs for now. I will never use OEM harness ever again. I spent more time soldering and heat shrinking splices and all that crap then anything else. If you make new harnesses it just 2 cuts and 2 terminals and you would be done.
07-26-2011, 08:22 AM
#47
Honda-Tech Member
Thread Starter
Okay tuck is done just going to wait to put end of the harness connectors on just in case when the engine goes in it needs to be extend further or whatever. Over all looks good besides he fact that I loomed the harness and almost forgot the starter wire and had to do a ghetto sticking it in at the last minute. Just need to make a charge harness that can be done later because it will just consist of the alternator wire and the starter power wire all connected to the fuse box and battery.

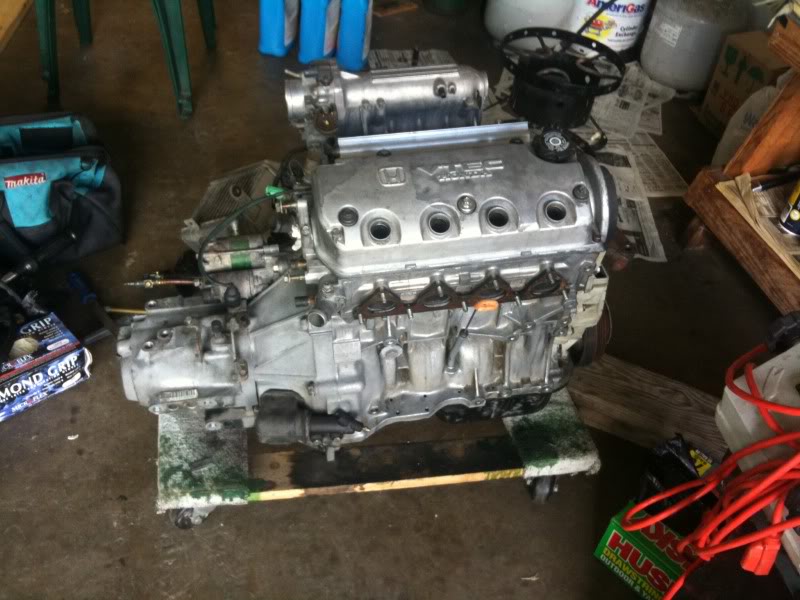
Took a wire brush and some cleaner to the engine to make it look semi nice.
Next is brake tuck, engine bay cleaning semi-shaving, and painting and I should be putting it back togeather. I never knew this would take so long for me to do.
Took a wire brush and some cleaner to the engine to make it look semi nice.
Next is brake tuck, engine bay cleaning semi-shaving, and painting and I should be putting it back togeather. I never knew this would take so long for me to do.
08-03-2011, 08:40 PM
#48
Honda-Tech Member
Thread Starter
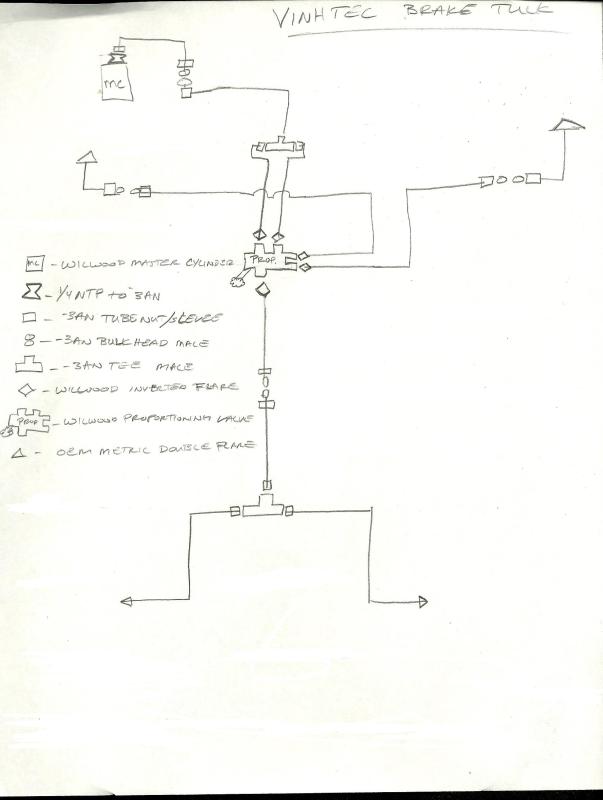
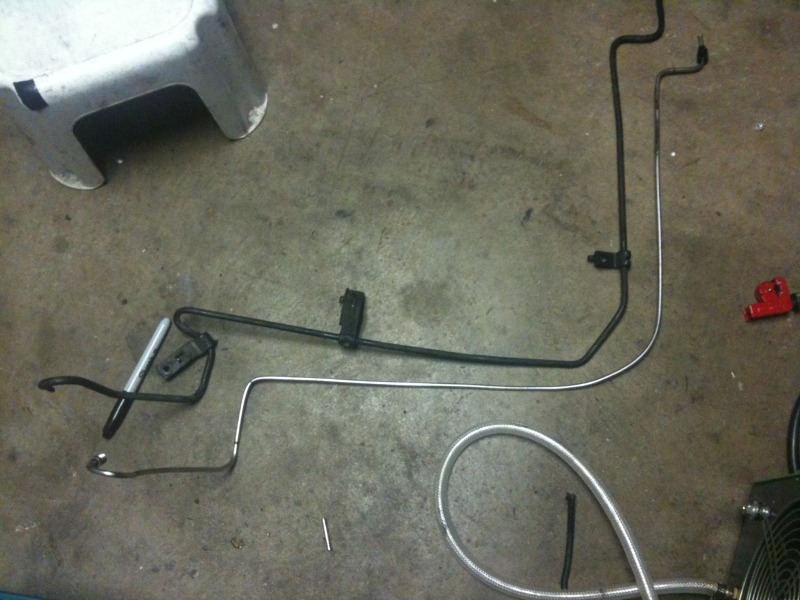
Okay sorry for late updates guys. I got one rear line bent and flared. My plan is to replace all the OEM brake lines with stainless and route the in the rear almost OEM omitting a few bends for ease. Someone probably going to say why not re-flare your OEM lines to accept 37 degree AN fittings my take is I am going to do the lines I might as well do them all. At the end of the line where it goes into the rubber brake line to the calipers I wanted to keep that an OEM metric flare so that it can accept aftermarket brake lines. I actually priced out making my own custom -3 AN ss line and the fittings were so expensive it would be more expensive than buying off the self good ridge lines or something. Anyways here is one line made hopefully I’ll have the time to do the other rear side and them the middle line up into the body.
Before you start you got to think of a plan how to set the brake tuck here is my schematic:
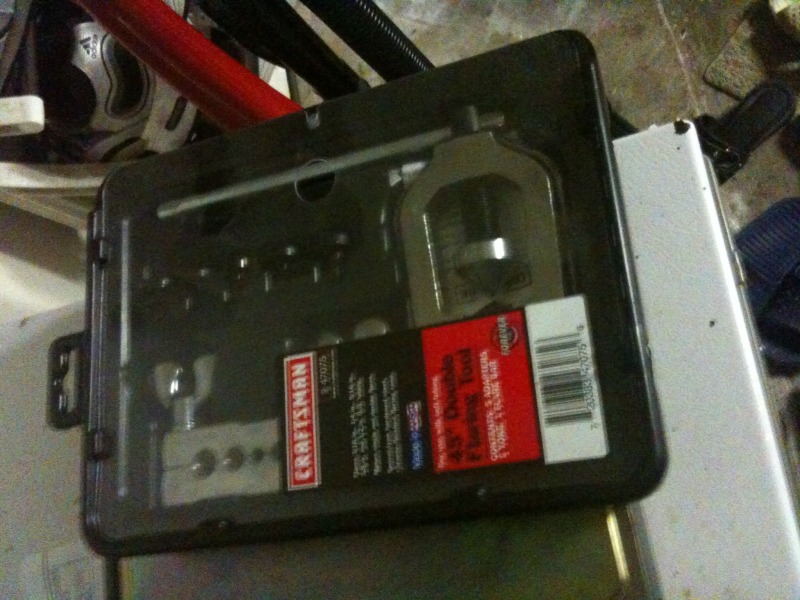
Tools needed:
Tube cutter
37 degree flare tool
Double flare tool 45 degree
Tube bender 3/16 (I used a � and it worked fine)
Cutting Pliers
3/8 ratchet
10 mm socket with a 3 inch extension
10 mm open end wrench
10 mm line wrench
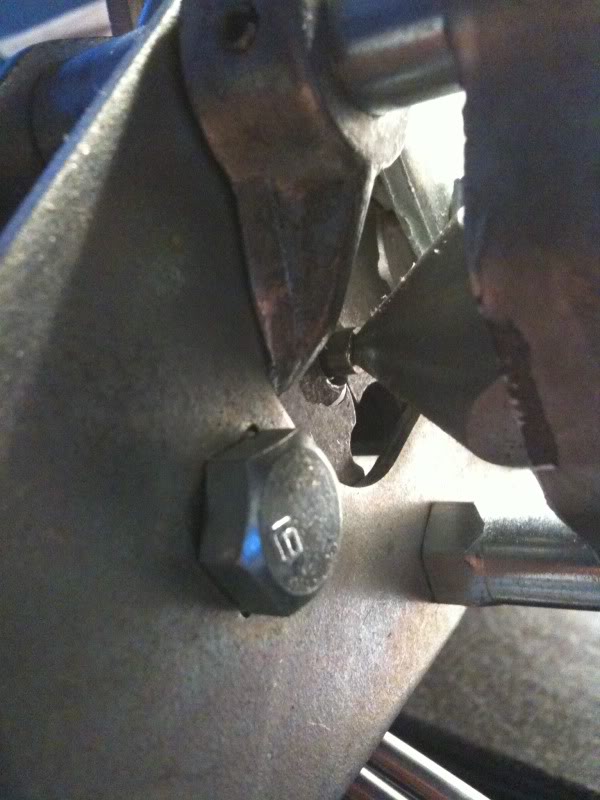
1. Chop off your OEM lines with the pliers. I cut mine right in front of the gas tank it was tough but put some strength in it. Remember don’t cut it until you’re ready there’s really no going back after you chop.
2. Take off all the 10 MM bolts that hold the line in and it drops out with a little work.
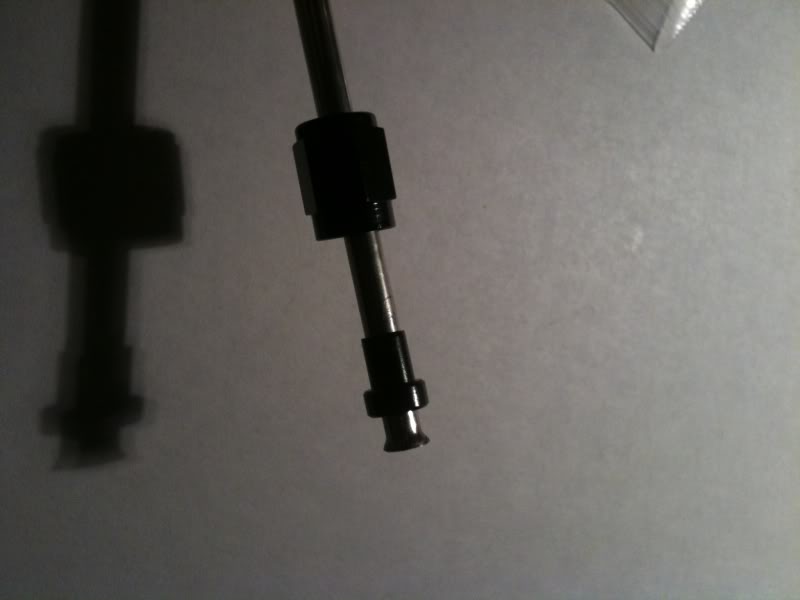
3. Once out image where you and how you want to route your lines. I used a close hanger to kind of stage how I wanted to bend the line in comparison to the OEM line. Then I tested the bender on the end of the OEM line note the S bend there very nice. It was a necessary bend to travel around some body parts.
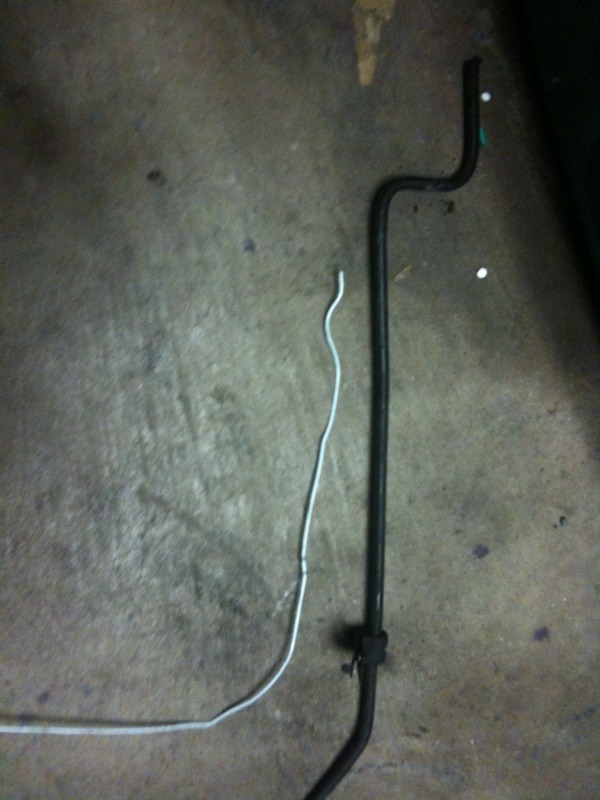
4. I hate bending lines because if you F*** it up your screwed and have to start over again. So measure and think twice bend once. The radius of the bend is important so start to bend the line with a little slack in it so the radius will take up that slack and end up where you want it. I used a sharpie to kind of mark my position and then bend it.
5. Make sure you flare the start end before you start bending. I had already flared the AN side already so I was ready to go. Chop the line off with the tube cutter after you have an idea of how much tube you will need. And save yourself enough room at the end to flare the OEM double flare. You won’t be able to flare it after all the bend are in because the tube nuts can’t bend as with the tube.
6. In the end it should look something like this. Granted I F***** up my line at the end where the 180 bend was I was daydreaming for a second and made it a little short.
7. I test fitted it and it looks like it will fit but I don’t have my tools at home to take my tire off I’ll have to bring something home from the shop and check it out tomorrow night.
So far so good hopefully I don’t mess it up again and it should work out. Double flaring the SS line is crazy hard you should do it in a vise. Other than that repeat for the other line and keep moving forward. I started in the back because I had no idea at the start where I would mount the proportioning valve. I kind of have a rough idea now so Ill need some scrap steel to make a mounting plate and weld it on the body somewhere. Ill show more work on this in later post. Sorry about lack of pictures its just hard to work and camera yourself if you remember if you need any tips on flaring lines youtube is your best friend that is how I learned. Ask me too if you need help
Before you start you got to think of a plan how to set the brake tuck here is my schematic:
Tools needed:
Tube cutter
37 degree flare tool
Double flare tool 45 degree
Tube bender 3/16 (I used a � and it worked fine)
Cutting Pliers
3/8 ratchet
10 mm socket with a 3 inch extension
10 mm open end wrench
10 mm line wrench
1. Chop off your OEM lines with the pliers. I cut mine right in front of the gas tank it was tough but put some strength in it. Remember don’t cut it until you’re ready there’s really no going back after you chop.
2. Take off all the 10 MM bolts that hold the line in and it drops out with a little work.
3. Once out image where you and how you want to route your lines. I used a close hanger to kind of stage how I wanted to bend the line in comparison to the OEM line. Then I tested the bender on the end of the OEM line note the S bend there very nice. It was a necessary bend to travel around some body parts.
4. I hate bending lines because if you F*** it up your screwed and have to start over again. So measure and think twice bend once. The radius of the bend is important so start to bend the line with a little slack in it so the radius will take up that slack and end up where you want it. I used a sharpie to kind of mark my position and then bend it.
5. Make sure you flare the start end before you start bending. I had already flared the AN side already so I was ready to go. Chop the line off with the tube cutter after you have an idea of how much tube you will need. And save yourself enough room at the end to flare the OEM double flare. You won’t be able to flare it after all the bend are in because the tube nuts can’t bend as with the tube.
6. In the end it should look something like this. Granted I F***** up my line at the end where the 180 bend was I was daydreaming for a second and made it a little short.
7. I test fitted it and it looks like it will fit but I don’t have my tools at home to take my tire off I’ll have to bring something home from the shop and check it out tomorrow night.
So far so good hopefully I don’t mess it up again and it should work out. Double flaring the SS line is crazy hard you should do it in a vise. Other than that repeat for the other line and keep moving forward. I started in the back because I had no idea at the start where I would mount the proportioning valve. I kind of have a rough idea now so Ill need some scrap steel to make a mounting plate and weld it on the body somewhere. Ill show more work on this in later post. Sorry about lack of pictures its just hard to work and camera yourself if you remember if you need any tips on flaring lines youtube is your best friend that is how I learned. Ask me too if you need help
Last edited by VinhTEC; 08-03-2011 at 09:27 PM.