
JBPnoman/NotARacist/DblDtchRddr/whatever-you-want-to-call me build thread
 12-21-2013, 11:38 PM
#1
Let me start this off by giving a HUGE thank you to Myles at English Racing. Just because their site doesn't list it doesn't mean they can't get it. Give them a call next time you need a part. Also, Summit Racing for their great timeliness in shipping. Ordered parts at 1730 on Wednesday, they were on a truck an hour later, and arrived at my doorstep on Friday.
This thread is starting to have a healthy number of DIY's in it, so I'm adding a table of contents. Need one DIY? click the link!
Interior
CL-S seat install
Black leather power door conversion
Cleaning
Block cleaning and oil pump removal
Bottom End
Bottom end assembly - Bearing and crank installation (Includes ARP main stud torque specs)
Bottom end assembly - Rear main carrier and oil pump installation (Includes OEM torque specs)
Bottom end assembly - Pistons, rods, and rod bearings (Includes Eagle/ARP torque specs, and Wiseco ring gap specs)
Bottom end assembly - Windage tray, oil pickup, oil pan gasket, oil pan (Includes OEM oil pan stud torque specs)
Bottom end assembly - water pump, water tube, thermostat housing (Includes crank nose bolt torque specs)
Top End
Top end assembly - ARP head studs (Includes proper orientation)
Top end assembly - Cometic head gasket (Includes proper orientation)
Top end assembly - Valve stem seal replacement (Includes me raging out)
Top end assembly - Head install, cam seal replacement, rocker arm and cam install, setting TDC, timing belt install (Includes ARP head stud torque spec, OEM cam cap torque spec, OEM cam gear torque spec)
Top end assembly - Timing belt covers install, timing belt tensioner adjustment (Includes tensioner torque spec)
Top end assembly - Valve lash adjustment (just the specs)
Top end assembly - Valve lash adjustment (this time, the actual procedure!)
Top end diagnostics - Semi-leakdown test DIY
Transmission
Half shaft and transmission seal install
Transmission drain/fill
Transmission fill the right way!
Clutch fluid flush
Braking System
Complete brake system replacement
How to flush a hydraulic system (See bottom for brake-specific information)
Swap Related
Driver side mount install - Yonaka mount
Parts List
B18B1 longblock
OEM accessories
OEM intake manifold
OEM CTR transmission w/ factory LSD
DSM 450 "Blue Top" injectors
Eagle Rods
Wiseco 9.4:1 pistons
My Honda Habit oil pan stud kit
ARP head studs P# 208-4302
Cometic top end gasket kit P# PRO2004T
Cometic bottom end gasket kit P# PRO2004B
Gates timing kit P# TCKWP184A
OEM T bracket P# 50827-S04-N10
ARP flywheel bolts P# 208-2802
ARP pressure plate bolts P# 108-2202
Downstar Inc. B series engine hardware hardware
Downstar Inc. B series transmission to engine hardware
Downstar Inc. B series starter hardware
Xenocron custom basemap
Fluids
HondaBond sealant
HondaLok thread locker
Honda OEM coolant
Torco MPZ assembly lube
Torco TBO break-in oil
Torco MTF transmission fluid
Yes, I finally decided to make a build thread. For anyone who doesn't know me, I'm the *** quoted in a couple of signatures who doesn't put up with stupid. The people who know me always want me involved in their builds, but I live in a constant state of "too broke for a build of his own." I've worked with my cousin on a frame-off restoration of a '67 GT500 (one of six class 1 '67 GT500's in the world), done head work on an F430, helped my uncle build an 800 BHP supercharged Mustang, and helped an old college suite-mate build an 1100 WHP supercharged, and a V12 swapped Ford Explorer, that also had almost 5000 watts of stereo (which was all done in a college dorm parking lot - my most impressive feat).
My first car was an '87 Subaru Justy turbo wagon - Lisa - my father gave to me when he passed, that I took care of myself until my mother decided to total it out while I was away at college. From there I got a '91 Honda Accord EX - Heather - for $2000. Unfortunately, it was an autotragic, so I didn't waste much time or money on it. It got a full Borla system from header to muffler, a set of Eibach springs, and some grippy summer tires. Unfortunately, I got cut off by a tractor trailer and put it into a guard rail (better option than crushing it under the rear tires). Swapped out a couple of front end parts from a junk yard, got it aligned, and kept driving it until the inspection station told me that everything I needed to get it to pass would be twice what the car was worth, so I traded it in towards a '98 Civic DX sedan - Ann. Bone stock 5 speed, one owner who was an old mortician's wife (no, the car didn't have any funky smells).
Ann has been through a lot with me, and has the scars and parts to show for it. It got some Eibach springs, Motegi MR7's, and Falken 912's right off the bat. Then the battery went to the trunk and got oversized to the largest Diehard Platinum marine battery I could buy. That was done to accommodate a JL 10W7HO that took up half of the trunk, a matching JL 500W SlashV2 to power it, and an Alpine Digital 660/4 amp powering JL ZR650's up front and some MB Quart Reference series 5.25" in the rear. That system destroyed two trunk latches and one trunk hinge. I finally got tired of loud and obnoxious, sold off the stereo (PS: car stereo does NOT hold resale value for ****), and decided to go for fast, comfortable, and stylish - something you could take to the track, stop by a car wash, toss on your suit, and pick up your date for a nice night out. That's what I'm working on now. As far as track useage goes, I'm not interested in autocross. Been there, done that, got the tee shirt. I'm looking at proper road race and Grand Touring, and that's what I'm building for. You could call an M3, S80, or an E-class my inspiration.
Here's the part you've all been waiting for: the build!
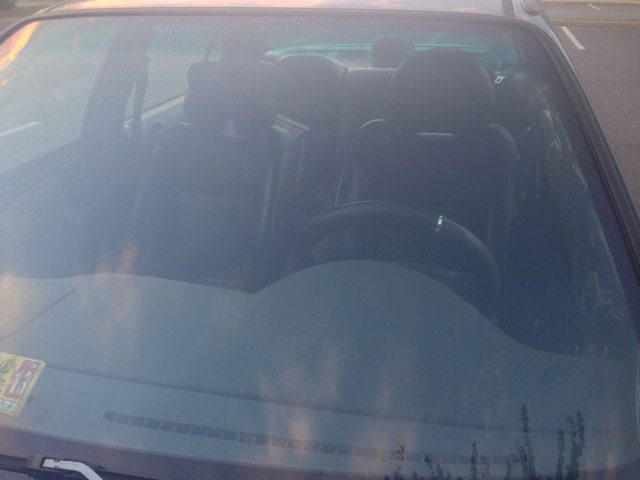
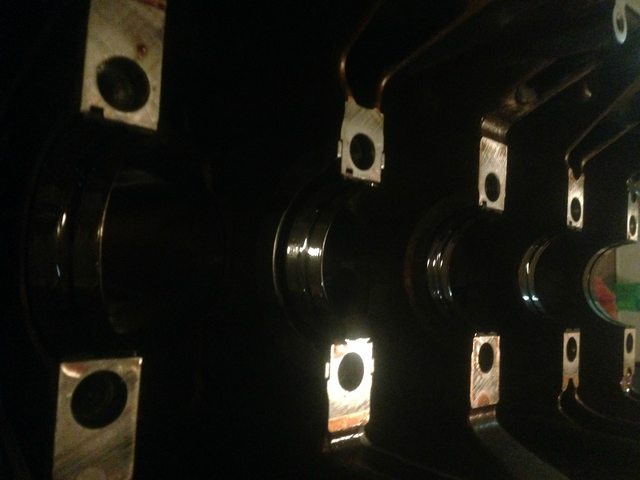
Rule #1 of luxury sport is leather and comfort. There's no denying it. Since the EJ6 chassis wasn't available with leather, I had to do some research, outsourcing, and fabrication. I met a friendly face here on Honda Tech who lives in Canada. He took a trip to a junk yard for me, found some mint condition Acura EL rear leathers, and shipped them down to me. The EL is exactly the same as the EJ6 for the interior, so they bolted right in with zero problems. Also, notice how bright the interior light is? I ordered every interior bulb from Superbright LEDs, and swapped them out with no problems.
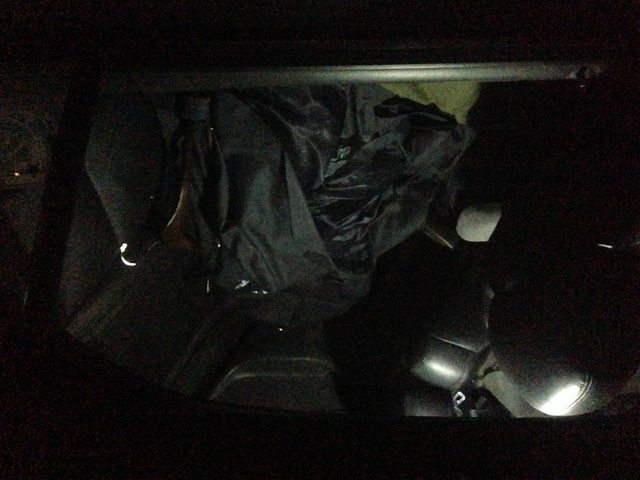
Ignore the suit sitting back there - I had just gotten back from a business trip and hadn't cleaned out the car yet.
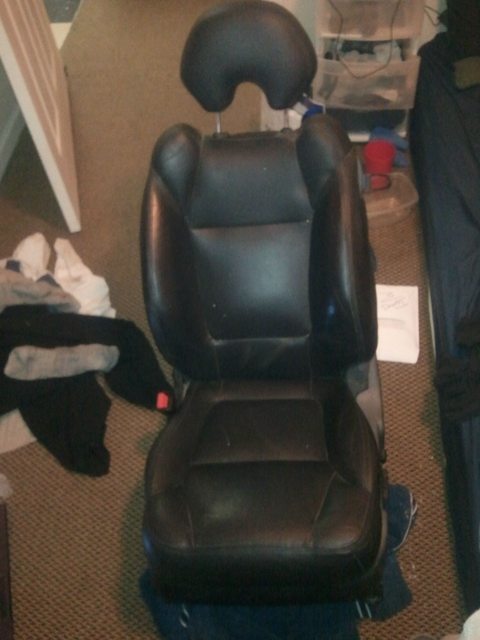
Check out the picture again. Notice the headrests? Yeah, those aren't stock Civic headrests, and the seats they're on aren't stock Civic seats either. I drove a couple hours to a pick-a-part junk yard and pulled out some '03 Acura CL Type S seats. 8/4-way power adjustable, heated, black leather, better bolsters than GSR leathers, and some of the most comfortable seats any of my friends have ever sat on. Hell, my mother even loves them, and she's a Mercedes kind of woman.
Sitting in my bedroom.
Trying to comprehend the clusterfuck of wiring (this is just the passenger's seat ).
).
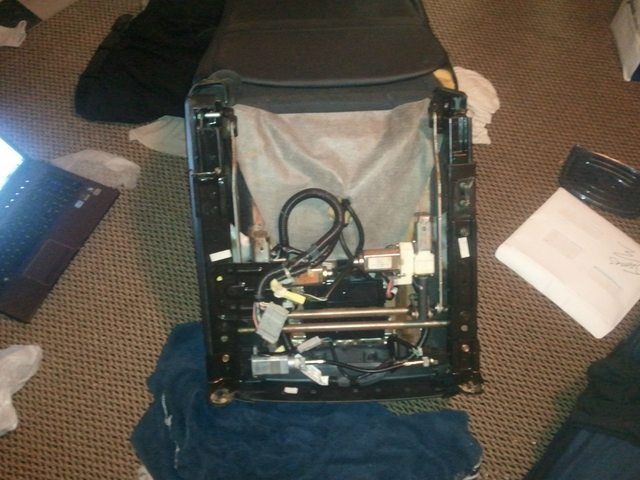
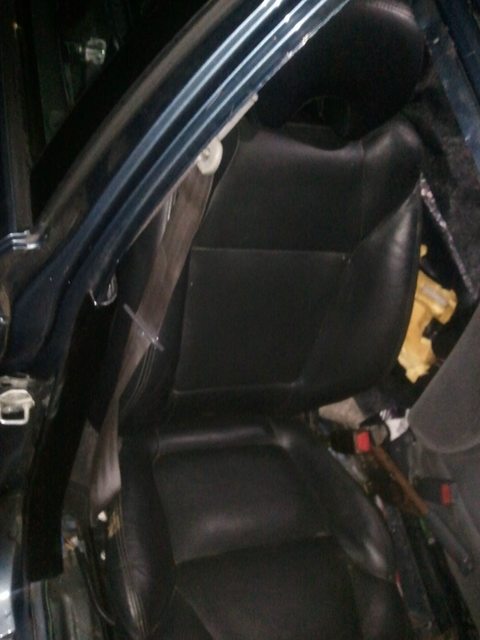
Installed and fully functional. Heated seats are amazing during the winter.
This was all done while I replaced my old stock gray carpet with a new, plush black carpet. It's plush as hell - one of my exes used to always take off her shoes and enjoy it under her feet. I went the extra step and got the "upgraded" batting under the carpet, and while the carpet was out, I removed the sound deadening under it.
The interior isn't finished yet. The roof liner and door cards are being recovered in black vinyl, and the door inserts will be blue crush velvet. I've considered getting an EDM/GDM dash shipped over, but it just isn't worth the cost to me. I'll be recovering it in black vinyl as well. The gauge cluster bulbs have been replaced with blue LEDs, and my gauges have also been blue digital to keep it all the same. I'm still up in the air for what steering wheel I'll go for, but I have a lot of options that'll be in black.
Now, onto the motor.
The car comes stock with a dinky little D16Y7, and a stupidly long geared 5 speed. I slapped a Greddy TD04H-15G on it, EBC'd it out to 10PSI, installed some 440CC/m injectors and a P28, chipped and street tuned myself on Chrome. Made 200 WHP on 93 until the stock clutch gave out. Replaced it with a Competition Clutch 6 puck hub sprung clutch. While it was all off, I also installed a Fidanza 7 pound flywheel (BIG MISTAKE), and rebuilt the transmission. The input shaft bearing was shot to ****, and came out in 4 different pieces, so I did the full rebuild while I was in there. 6 months after the clutch job, my oil seals decided to take a **** on me - I was burning so much oil, a cop pulled me over 5 minutes after it happened. As soon as I explained what it was to her, she radioed in to call off the fire truck Pulled the turbo, blocked the oil feed and return lines, tossed a cheap header on it, and got the defective exhaust ticket thrown out.
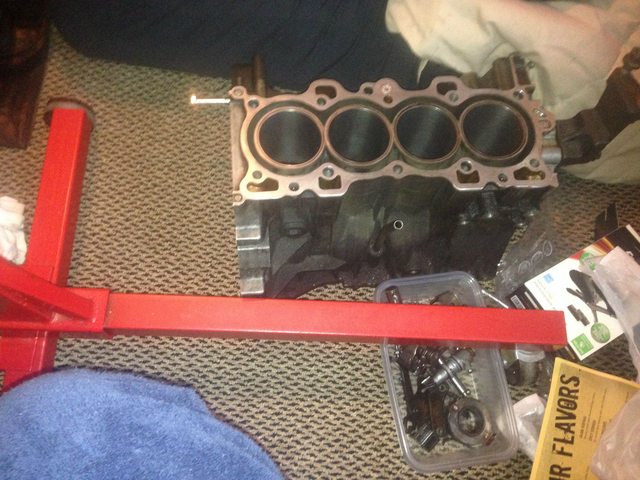
Decided that I didn't want to be limited by the measly 200 horse a stock D series can handle, which leads us to where I sit now. My friend swapped out his B18B1 because the rings were fried, and gave me his blown long block. He pulled it out just in time, too - the rings were fine, the ring lands were cracked. The motor had maybe another oil change left in it before they separated and took the whole block with them. Had a machine shop check it out, hone it, and check bearing clearances for me, and then onto the rack it went.
Sitting under the engine rotisserie, getting ready to mount.
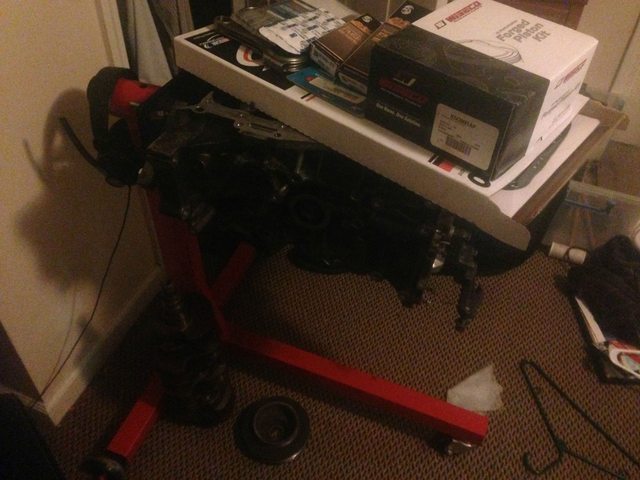
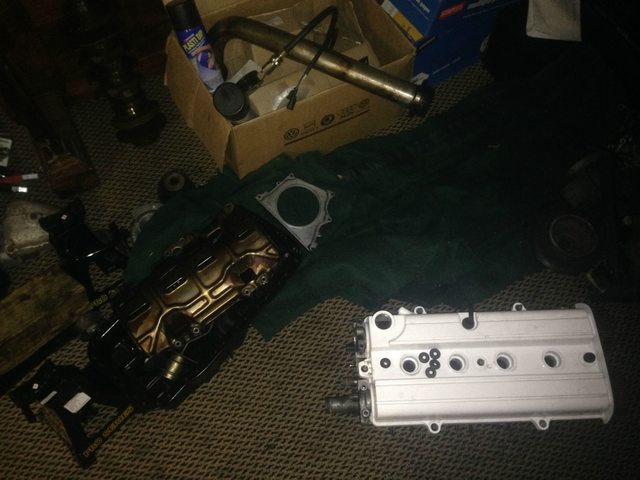
Motor on the rotisserie, with what parts I've ordered so far sitting on it.
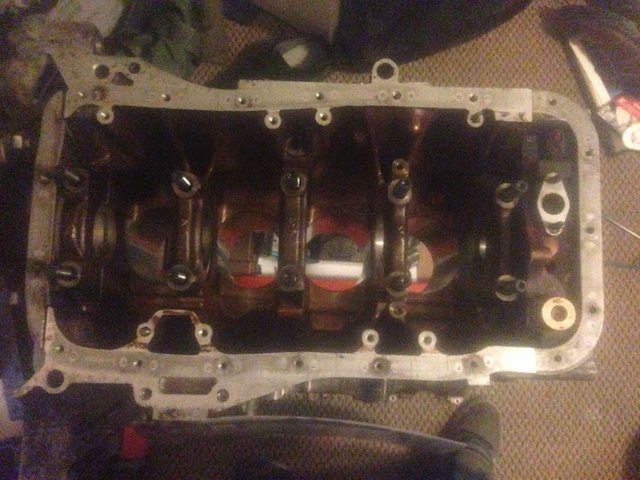
Test fitting ARP main studs. They're only threaded in there right now, barely hand tight, but there seems to be a clearance problem between the front #3 stud and the windage tray. Once I get it all torqued down I'll re-check it.
Here's the head. I've stripped it down, spec'd it out, and had a machine shop check for trueness. Everything in there right now is just hand tight and hanging out until I get replacement seals.
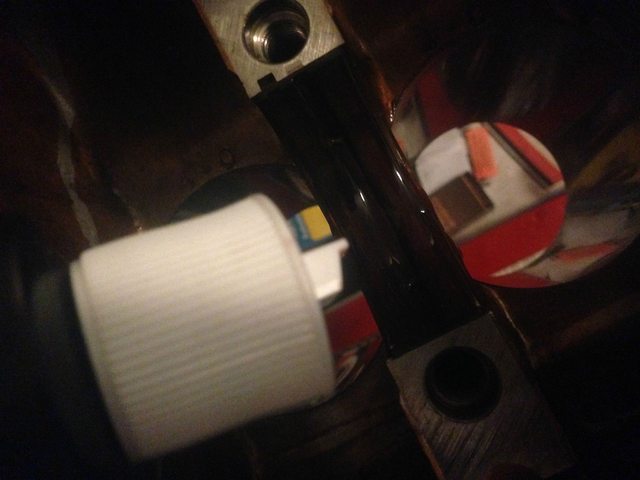
Found a local guy with an LS transmission with "a 3rd gear grind, no other problems though" (his words) for $50. Pulled it apart to replace the synchros, come to find out the seals were all shot, synchros were all fucked (5th was actually spinning freely), the input shaft bearing had literally melted solid, and the differential was fried to hell. On the plus side, he left the mount on it because he couldn't get it off - it's a damn Hasport mount, worth $100 by itself.
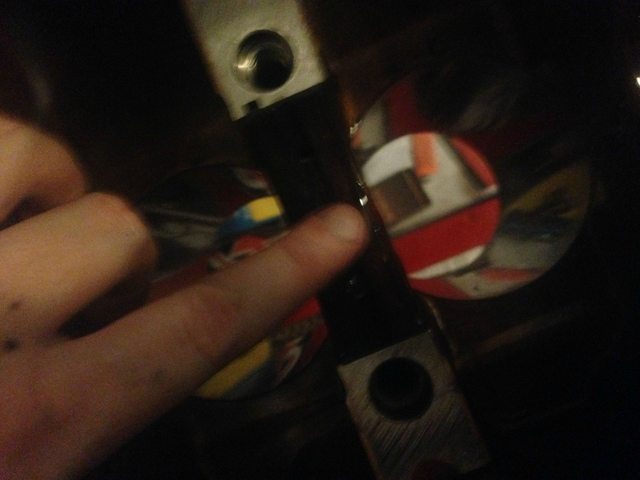
The ISB. Notice that chunk? Yeah, that's not gunk...that's two ***** that got hot enough to weld themselves together.
Clutch housing and shift forks being kept safe in a plastic tub. Drum sticks were there for disassembly, to keep the input shaft off the floor.
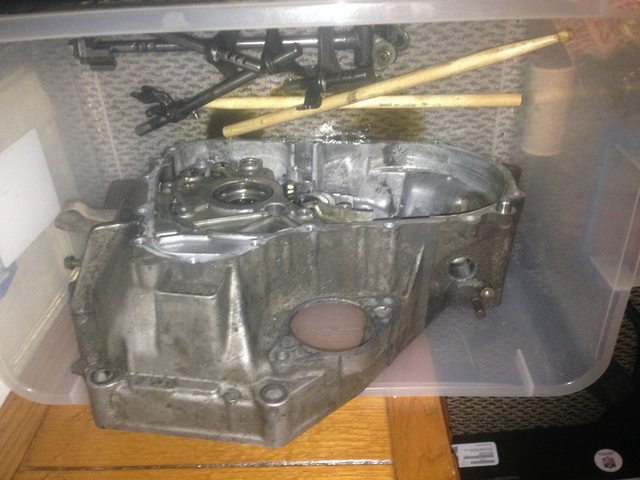
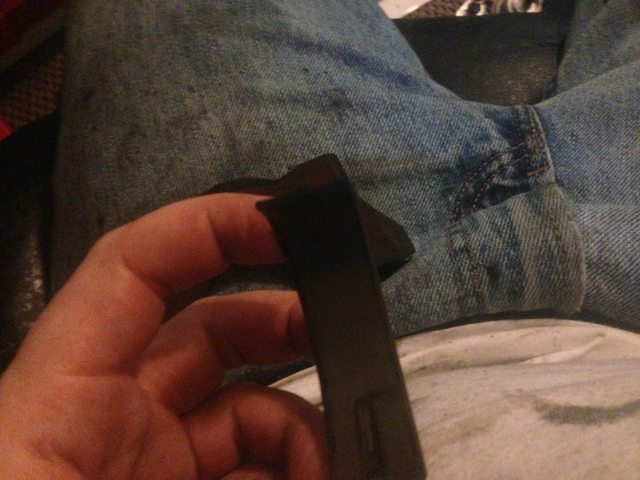
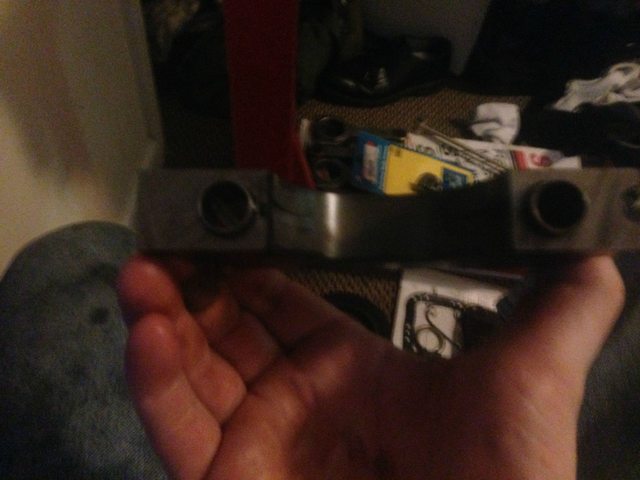
Transmission housing, hanging out in the living room.
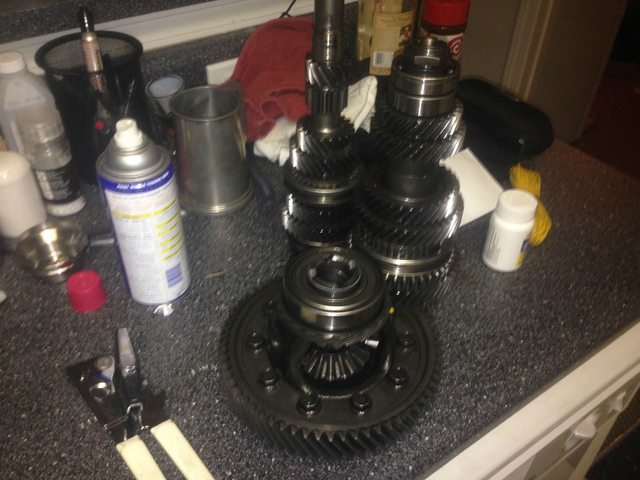
Transmission gear sets. Already disassembled and spec'd the gears and sleeves - thankfully they're perfectly fine.
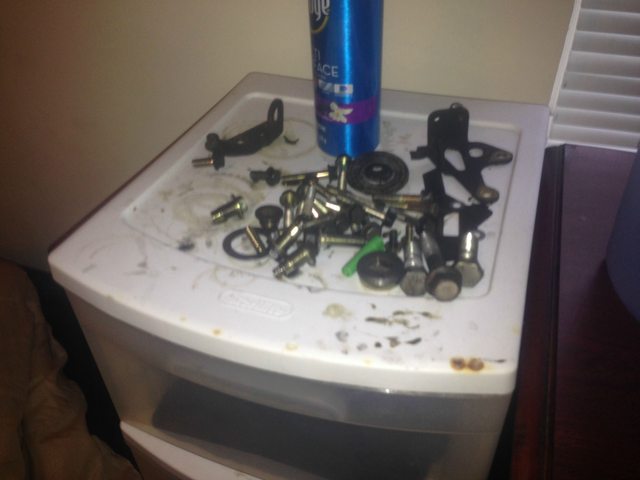
Transmission nuts and bolts.
That's how it sits for now. Torco assembly lube should arrive here Monday, and new oil pan studs should be on my doorstep Tuesday. As soon as the lube gets here, I'll be continuing this thread with an extensive write-up, from swap, to interior, to boost and tune, to track readiness, to track use. That might take a while though. The only thing holding me back at this point is budget - I'm $2300 from having my swap done, another $2200 from having it boosted and professionally tuned, and then another $1300 from having it track-ready, not counting tires and brakes.
that said, if anyone wants to donate $5800...
This thread is starting to have a healthy number of DIY's in it, so I'm adding a table of contents. Need one DIY? click the link!
Interior
CL-S seat install
Black leather power door conversion
Cleaning
Block cleaning and oil pump removal
Bottom End
Bottom end assembly - Bearing and crank installation (Includes ARP main stud torque specs)
Bottom end assembly - Rear main carrier and oil pump installation (Includes OEM torque specs)
Bottom end assembly - Pistons, rods, and rod bearings (Includes Eagle/ARP torque specs, and Wiseco ring gap specs)
Bottom end assembly - Windage tray, oil pickup, oil pan gasket, oil pan (Includes OEM oil pan stud torque specs)
Bottom end assembly - water pump, water tube, thermostat housing (Includes crank nose bolt torque specs)
Top End
Top end assembly - ARP head studs (Includes proper orientation)
Top end assembly - Cometic head gasket (Includes proper orientation)
Top end assembly - Valve stem seal replacement (Includes me raging out)
Top end assembly - Head install, cam seal replacement, rocker arm and cam install, setting TDC, timing belt install (Includes ARP head stud torque spec, OEM cam cap torque spec, OEM cam gear torque spec)
Top end assembly - Timing belt covers install, timing belt tensioner adjustment (Includes tensioner torque spec)
Top end assembly - Valve lash adjustment (just the specs)
Top end assembly - Valve lash adjustment (this time, the actual procedure!)
Top end diagnostics - Semi-leakdown test DIY
Transmission
Half shaft and transmission seal install
Transmission drain/fill
Transmission fill the right way!
Clutch fluid flush
Braking System
Complete brake system replacement
How to flush a hydraulic system (See bottom for brake-specific information)
Swap Related
Driver side mount install - Yonaka mount
Parts List
B18B1 longblock
OEM accessories
OEM intake manifold
OEM CTR transmission w/ factory LSD
DSM 450 "Blue Top" injectors
Eagle Rods
Wiseco 9.4:1 pistons
My Honda Habit oil pan stud kit
ARP head studs P# 208-4302
Cometic top end gasket kit P# PRO2004T
Cometic bottom end gasket kit P# PRO2004B
Gates timing kit P# TCKWP184A
OEM T bracket P# 50827-S04-N10
ARP flywheel bolts P# 208-2802
ARP pressure plate bolts P# 108-2202
Downstar Inc. B series engine hardware hardware
Downstar Inc. B series transmission to engine hardware
Downstar Inc. B series starter hardware
Xenocron custom basemap
Fluids
HondaBond sealant
HondaLok thread locker
Honda OEM coolant
Torco MPZ assembly lube
Torco TBO break-in oil
Torco MTF transmission fluid
Yes, I finally decided to make a build thread. For anyone who doesn't know me, I'm the *** quoted in a couple of signatures who doesn't put up with stupid. The people who know me always want me involved in their builds, but I live in a constant state of "too broke for a build of his own." I've worked with my cousin on a frame-off restoration of a '67 GT500 (one of six class 1 '67 GT500's in the world), done head work on an F430, helped my uncle build an 800 BHP supercharged Mustang, and helped an old college suite-mate build an 1100 WHP supercharged, and a V12 swapped Ford Explorer, that also had almost 5000 watts of stereo (which was all done in a college dorm parking lot - my most impressive feat).
My first car was an '87 Subaru Justy turbo wagon - Lisa - my father gave to me when he passed, that I took care of myself until my mother decided to total it out while I was away at college. From there I got a '91 Honda Accord EX - Heather - for $2000. Unfortunately, it was an autotragic, so I didn't waste much time or money on it. It got a full Borla system from header to muffler, a set of Eibach springs, and some grippy summer tires. Unfortunately, I got cut off by a tractor trailer and put it into a guard rail (better option than crushing it under the rear tires). Swapped out a couple of front end parts from a junk yard, got it aligned, and kept driving it until the inspection station told me that everything I needed to get it to pass would be twice what the car was worth, so I traded it in towards a '98 Civic DX sedan - Ann. Bone stock 5 speed, one owner who was an old mortician's wife (no, the car didn't have any funky smells).
Ann has been through a lot with me, and has the scars and parts to show for it. It got some Eibach springs, Motegi MR7's, and Falken 912's right off the bat. Then the battery went to the trunk and got oversized to the largest Diehard Platinum marine battery I could buy. That was done to accommodate a JL 10W7HO that took up half of the trunk, a matching JL 500W SlashV2 to power it, and an Alpine Digital 660/4 amp powering JL ZR650's up front and some MB Quart Reference series 5.25" in the rear. That system destroyed two trunk latches and one trunk hinge. I finally got tired of loud and obnoxious, sold off the stereo (PS: car stereo does NOT hold resale value for ****), and decided to go for fast, comfortable, and stylish - something you could take to the track, stop by a car wash, toss on your suit, and pick up your date for a nice night out. That's what I'm working on now. As far as track useage goes, I'm not interested in autocross. Been there, done that, got the tee shirt. I'm looking at proper road race and Grand Touring, and that's what I'm building for. You could call an M3, S80, or an E-class my inspiration.
Here's the part you've all been waiting for: the build!
Rule #1 of luxury sport is leather and comfort. There's no denying it. Since the EJ6 chassis wasn't available with leather, I had to do some research, outsourcing, and fabrication. I met a friendly face here on Honda Tech who lives in Canada. He took a trip to a junk yard for me, found some mint condition Acura EL rear leathers, and shipped them down to me. The EL is exactly the same as the EJ6 for the interior, so they bolted right in with zero problems. Also, notice how bright the interior light is? I ordered every interior bulb from Superbright LEDs, and swapped them out with no problems.
Ignore the suit sitting back there - I had just gotten back from a business trip and hadn't cleaned out the car yet.
Check out the picture again. Notice the headrests? Yeah, those aren't stock Civic headrests, and the seats they're on aren't stock Civic seats either. I drove a couple hours to a pick-a-part junk yard and pulled out some '03 Acura CL Type S seats. 8/4-way power adjustable, heated, black leather, better bolsters than GSR leathers, and some of the most comfortable seats any of my friends have ever sat on. Hell, my mother even loves them, and she's a Mercedes kind of woman.
Sitting in my bedroom.
Trying to comprehend the clusterfuck of wiring (this is just the passenger's seat
).Installed and fully functional. Heated seats are amazing during the winter.
This was all done while I replaced my old stock gray carpet with a new, plush black carpet. It's plush as hell - one of my exes used to always take off her shoes and enjoy it under her feet. I went the extra step and got the "upgraded" batting under the carpet, and while the carpet was out, I removed the sound deadening under it.
The interior isn't finished yet. The roof liner and door cards are being recovered in black vinyl, and the door inserts will be blue crush velvet. I've considered getting an EDM/GDM dash shipped over, but it just isn't worth the cost to me. I'll be recovering it in black vinyl as well. The gauge cluster bulbs have been replaced with blue LEDs, and my gauges have also been blue digital to keep it all the same. I'm still up in the air for what steering wheel I'll go for, but I have a lot of options that'll be in black.
Now, onto the motor.
The car comes stock with a dinky little D16Y7, and a stupidly long geared 5 speed. I slapped a Greddy TD04H-15G on it, EBC'd it out to 10PSI, installed some 440CC/m injectors and a P28, chipped and street tuned myself on Chrome. Made 200 WHP on 93 until the stock clutch gave out. Replaced it with a Competition Clutch 6 puck hub sprung clutch. While it was all off, I also installed a Fidanza 7 pound flywheel (BIG MISTAKE), and rebuilt the transmission. The input shaft bearing was shot to ****, and came out in 4 different pieces, so I did the full rebuild while I was in there. 6 months after the clutch job, my oil seals decided to take a **** on me - I was burning so much oil, a cop pulled me over 5 minutes after it happened. As soon as I explained what it was to her, she radioed in to call off the fire truck
Pulled the turbo, blocked the oil feed and return lines, tossed a cheap header on it, and got the defective exhaust ticket thrown out.Decided that I didn't want to be limited by the measly 200 horse a stock D series can handle, which leads us to where I sit now. My friend swapped out his B18B1 because the rings were fried, and gave me his blown long block. He pulled it out just in time, too - the rings were fine, the ring lands were cracked. The motor had maybe another oil change left in it before they separated and took the whole block with them. Had a machine shop check it out, hone it, and check bearing clearances for me, and then onto the rack it went.
Sitting under the engine rotisserie, getting ready to mount.
Motor on the rotisserie, with what parts I've ordered so far sitting on it.
Test fitting ARP main studs. They're only threaded in there right now, barely hand tight, but there seems to be a clearance problem between the front #3 stud and the windage tray. Once I get it all torqued down I'll re-check it.
Here's the head. I've stripped it down, spec'd it out, and had a machine shop check for trueness. Everything in there right now is just hand tight and hanging out until I get replacement seals.
Found a local guy with an LS transmission with "a 3rd gear grind, no other problems though" (his words) for $50. Pulled it apart to replace the synchros, come to find out the seals were all shot, synchros were all fucked (5th was actually spinning freely
), the input shaft bearing had literally melted solid, and the differential was fried to hell. On the plus side, he left the mount on it because he couldn't get it off - it's a damn Hasport mount, worth $100 by itself.The ISB. Notice that chunk? Yeah, that's not gunk...that's two ***** that got hot enough to weld themselves together.
Clutch housing and shift forks being kept safe in a plastic tub. Drum sticks were there for disassembly, to keep the input shaft off the floor.
Transmission housing, hanging out in the living room.
Transmission gear sets. Already disassembled and spec'd the gears and sleeves - thankfully they're perfectly fine.
Transmission nuts and bolts.
That's how it sits for now. Torco assembly lube should arrive here Monday, and new oil pan studs should be on my doorstep Tuesday. As soon as the lube gets here, I'll be continuing this thread with an extensive write-up, from swap, to interior, to boost and tune, to track readiness, to track use. That might take a while though. The only thing holding me back at this point is budget - I'm $2300 from having my swap done, another $2200 from having it boosted and professionally tuned, and then another $1300 from having it track-ready, not counting tires and brakes.
that said, if anyone wants to donate $5800...
Last edited by NotARaCist; 12-18-2015 at 05:58 PM.
 12-21-2013, 11:56 PM
#2
If you're curious about my past endeavors with this car, I've posted most of them in the Tell Us What You Did To Your EG/EK/Del Sol Today thread. Those posts also nicely bring anyone up to speed with where I am now.
#204
#218
#278
#284
#286
#410
#665
#791
#816
#969
#971
#988
#1060
#1062
#1073
#1090
#1133
#1156
#1206
#1222
#1275
#1290
#204
#218
#278
#284
#286
#410
#665
#791
#816
#969
#971
#988
#1060
#1062
#1073
#1090
#1133
#1156
#1206
#1222
#1275
#1290
 12-22-2013, 07:24 AM
#4
Yeah, a garage would be useful, but I'm working with what I have...and hey, there's just something cool about waking up with an engine at the foot of your bed 
12-22-2013, 07:30 AM
#5
If you loved me, you'd all sell me your magic cards to me today
Join Date: Oct 2005
Location: Atlantic Ocean Florida
Posts: 2,698
Likes: 0
Received 0 Likes
on
0 Posts
I like it, more interior pics. I am looking to go the same route interior wise. When I do expect some PMs on that wiring.
12-22-2013, 08:02 AM
#6
Wiring was...entertaining. With the amount of soldering required, it took my fingers weeks to recover
 The way I wired my seats, though, was so basic, that it should be the same for any power seat.
Trending Topics
12-22-2013, 12:44 PM
#8
PHANTOM MENACE
iTrader: (2)
Join Date: May 2005
Location: SYCUAN NINE, CA, USA
Posts: 6,042
Likes: 0
Received 3 Likes
on
3 Posts
Never made the connection with your avatar. Why multiple screen names? Anyway I like where you're going with the thread. 
12-22-2013, 01:02 PM
#9
Well, the first screen name has some fancy red letters under it, thus the second name here...and then I've got some friends in other online communities that I point this direction.
I'm the only guy rocking a Star of David though
Also, UPS is really failing this time of the year. My assembly lube was the first thing I ordered, and it's poised to be the last thing to arrive. It arrived at the local depot Saturday morning at 3 AM. When I went by at 1645, they told me it was still locked up on one of the tractor trailers, and they couldn't get it. I had no clue it took more than 13 hours to unload a truck
They aren't open today, so I couldn't go pick it up, but it's "scheduled" to be delivered tomorrow. If it isn't, an unpleasant conversation might have to happen. FedEx got **** to me in under three days for all of my orders (even across the country), USPS has only handled one package from Carnation, WA to here, and it should be here on Tuesday, with a remote chance of it arriving tomorrow. For reference, I ordered the assembly lube on the 14th.
What can brown do for me? Not ****, evidently.
 12-23-2013, 12:02 AM
#11
Honestly, I'm not trying to start anything about it, and I'll just ask politely that you leave it in the past.
Ski plans for today were canceled (50-60 degree weather is great...just not in December!), so my motor assembly will be starting early!
I tried cleaning my block with a wire wheel on my Dremel, but anyone who has used a wire wheel knows that wires fall off. Those wires decided to infest my clothes, and now my hands feel like I spent all of yesterday installing fiberglass insulation without any gloves. It's not a fun feeling. If you've never felt it before, imagine when your hand falls asleep. Now add in a constant itch that you can't scratch, because it feels like little needles are poking you when you touch it. On top of the pain, it just wasn't giving me the results I wanted.
Manageable, and acceptable to some, but not up to my standards.
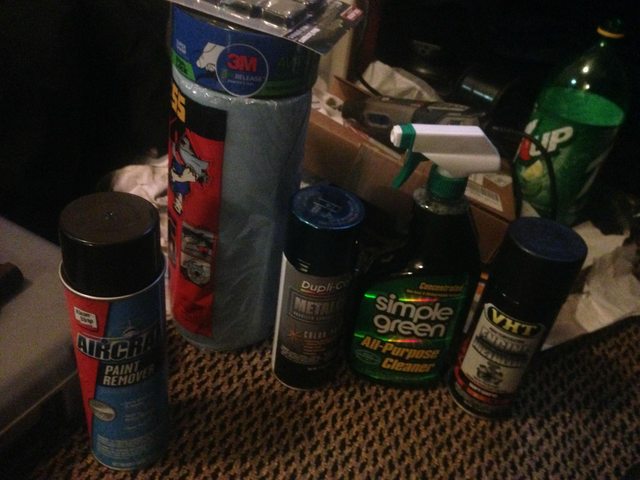
Decided to move onto option 2. I've ordered some Simple Green, 3M masking tape, two rolls of Scott shop towels, and some Klean-Strip Aircraft remover. I also ordered some VHT Black Pearl engine enamel for the block and head, and Duplicolor Metal Cast Blue Anodized paint for the valve cover. The general color scheme of the car is black, blue, and bronze, so it should all blend together very well. Total cost after coupon codes, $40.36, all available for local pick-up today when Lowes and Advance opens. Lowes opens at 7, Advance opens at 7 30, so I'll probably drive up there around 8, pick all of that up (plus some wiper blades for the Subaru), knock out the blades real quick, then drop the block in my bath tub, clean the everliving hell out of it, let it dry, then paint everything. A how-to for properly painting an engine, from valve cover to oil pan, will also end up becoming part of my build thread.
Of course, more obligatory "yay I bought this" pictures.


Ski plans for today were canceled (50-60 degree weather is great...just not in December!), so my motor assembly will be starting early!
I tried cleaning my block with a wire wheel on my Dremel, but anyone who has used a wire wheel knows that wires fall off. Those wires decided to infest my clothes, and now my hands feel like I spent all of yesterday installing fiberglass insulation without any gloves. It's not a fun feeling. If you've never felt it before, imagine when your hand falls asleep. Now add in a constant itch that you can't scratch, because it feels like little needles are poking you when you touch it. On top of the pain, it just wasn't giving me the results I wanted.
Manageable, and acceptable to some, but not up to my standards.
Decided to move onto option 2. I've ordered some Simple Green, 3M masking tape, two rolls of Scott shop towels, and some Klean-Strip Aircraft remover. I also ordered some VHT Black Pearl engine enamel for the block and head, and Duplicolor Metal Cast Blue Anodized paint for the valve cover. The general color scheme of the car is black, blue, and bronze, so it should all blend together very well. Total cost after coupon codes, $40.36, all available for local pick-up today when Lowes and Advance opens. Lowes opens at 7, Advance opens at 7 30, so I'll probably drive up there around 8, pick all of that up (plus some wiper blades for the Subaru), knock out the blades real quick, then drop the block in my bath tub, clean the everliving hell out of it, let it dry, then paint everything. A how-to for properly painting an engine, from valve cover to oil pan, will also end up becoming part of my build thread.
Of course, more obligatory "yay I bought this" pictures.
12-23-2013, 05:23 AM
#12

Now that that's out of the way, I just got home from Lowes and Advance. Picked up the cleaning and finishing supplies! Aircraft stripper, roll of shop towels, 3M masking tape, some razors, Metallic Blue for the valve cover, Simple Green, and Pearl Black for the block. Assembly lube is on the UPS truck out for delivery - if it doesn't come in today, I'll be more than livid.
Gotta prep a proper work place!...oh wait. Yes, I'm doing this entire engine assembly from the comfort of my bedroom.
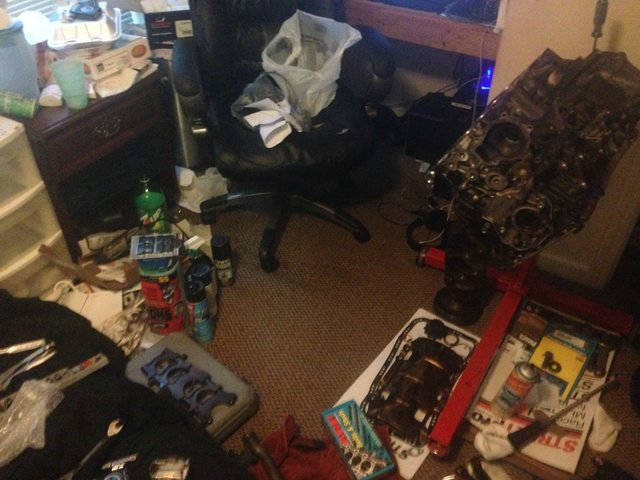
The block desperately needs to be cleaned. It spent two 150k+ tours in my friend's Integra, and has the gunk and grime to show for it.
Now of course, I wouldn't go hosing down a block in the middle of my bedroom. What's the next logical place? The bathtub, of course! Laid a throwaway towel under it for protection.
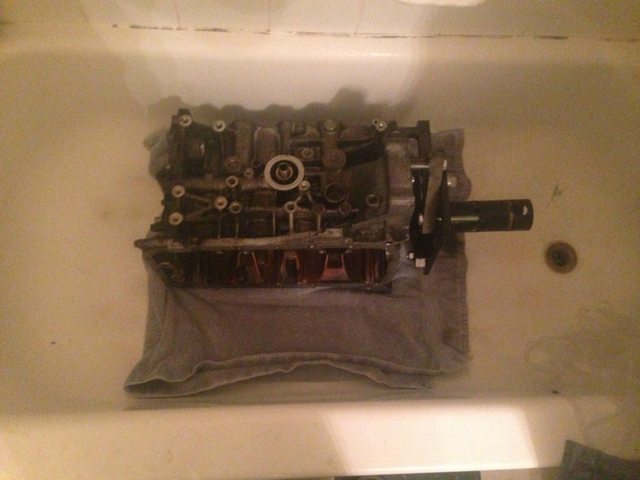
Hose it down in Simple Green (it's OK - this stuff won't hurt the metal), and let it sit for 10 minutes. That said, don't go intentionally spraying it on your cylinder walls. This stuff is for cleaning the OUTSIDE of the block. If you need to clean oil journals, or the water jackets, or the cylinder walls, take it to a machine shop.
We'll just let that soak for a bit, I'm going to enjoy a quick smoke and come back to it later. I'll assume you guys don't need a play-by-play of me wiping it down, flipping it over, and doing the other four sides. If you do...well, rebuilding an engine might be a little over your head
 12-23-2013, 05:26 AM
#13
If you loved me, you'd all sell me your magic cards to me today
Join Date: Oct 2005
Location: Atlantic Ocean Florida
Posts: 2,698
Likes: 0
Received 0 Likes
on
0 Posts
lol at the block in the bathtub.
12-23-2013, 05:47 AM
#14
Hell yeah man.
After trying to wipe down the first side, though, you'll realize that there's a MUCH easier way to do this. Simple Green is great, but it's no miracle cure (although it makes your bathroom smell AMAZING). Also, your assembly lube will have arrived. You'll set the block upright, soak the everliving **** out of it in Simple Green, then load it up for a trip to the nearest pressure washer. For me, that's about 15 minutes up on the other side of town.
After trying to wipe down the first side, though, you'll realize that there's a MUCH easier way to do this. Simple Green is great, but it's no miracle cure (although it makes your bathroom smell AMAZING). Also, your assembly lube will have arrived. You'll set the block upright, soak the everliving **** out of it in Simple Green, then load it up for a trip to the nearest pressure washer. For me, that's about 15 minutes up on the other side of town.
12-23-2013, 08:55 AM
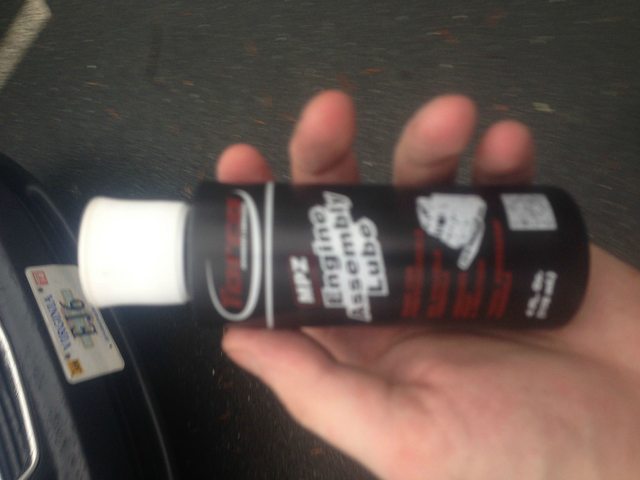
#16
Picked up my assembly lube :D I always have parts shipped to work - you can't trust anyone to deliver a box properly in an apartment complex, and I don't want some random person walking by and picking up a random box sitting outside a door, especially during the holiday season.
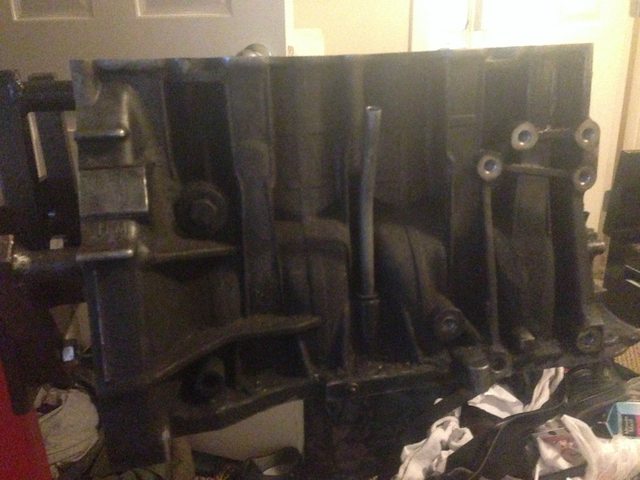
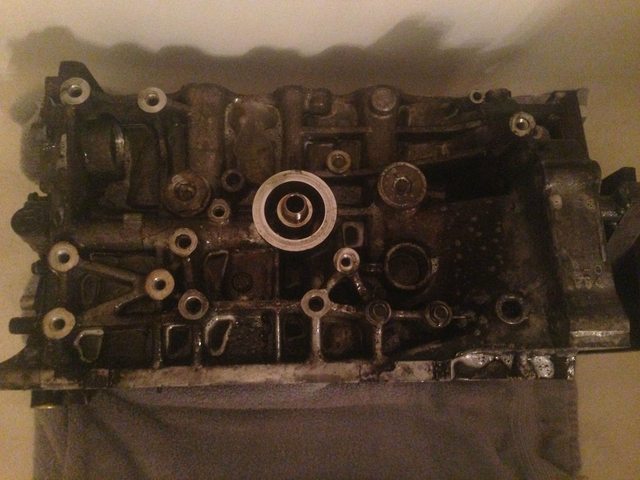
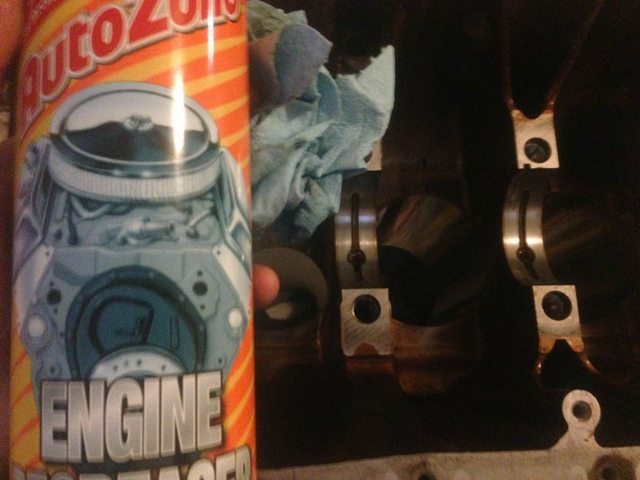
So yeah, degreaser and a rag was working well, but it was no miracle cure for the amount of gunk built up on that block. I'm not kidding when I said it saw 300k worth of use. Loaded it up into the back of my car, and took it up to the local DIY car wash.

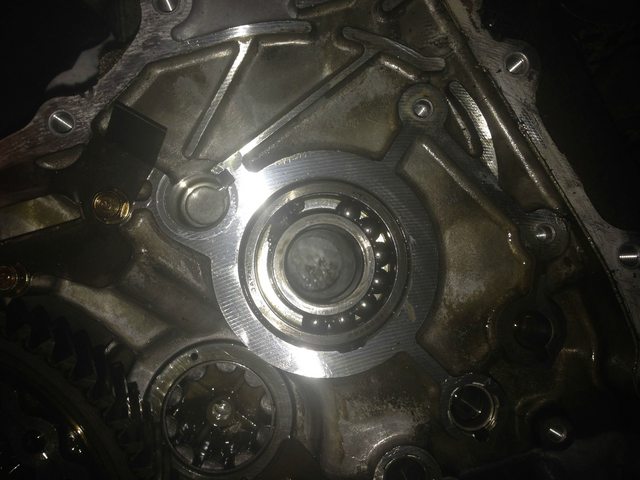
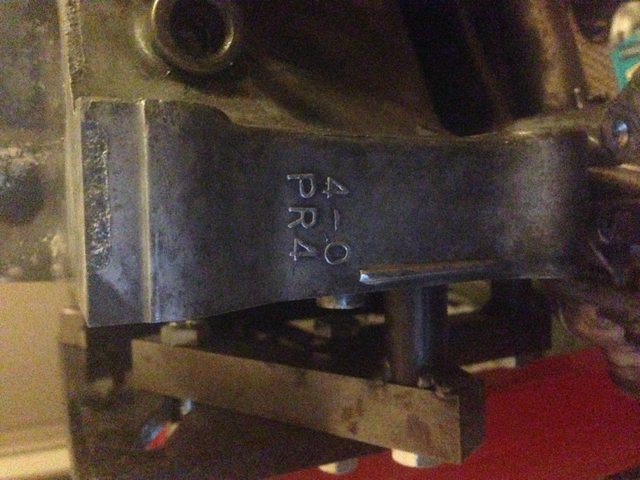
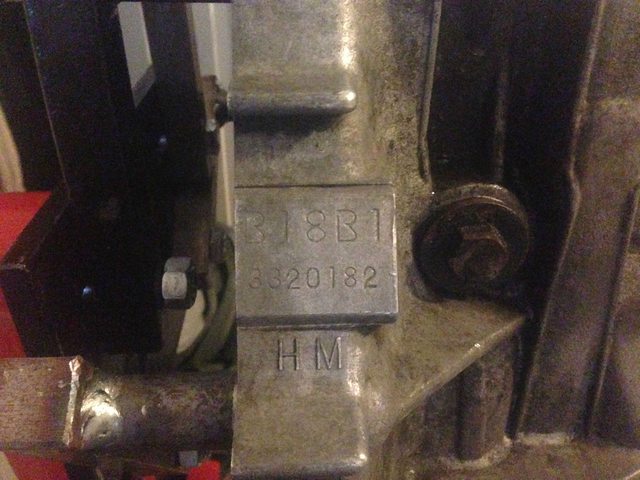
Hosed it down with more degreaser, and hit it with the pressure washer. Not perfect, but it came out REALLY well. Now you can see the engine stamp, and even read the original VIN stamp!

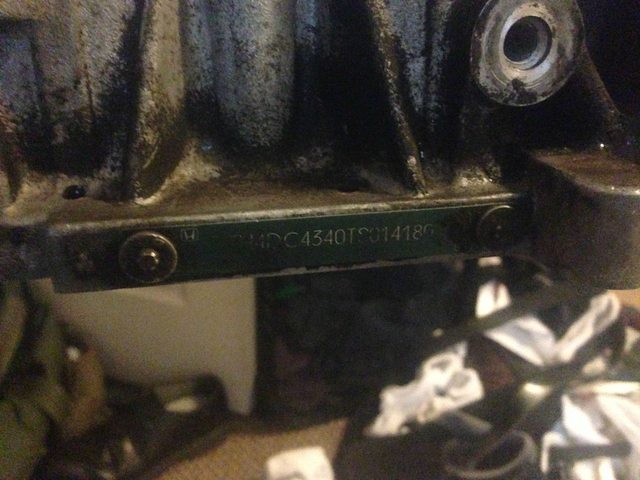
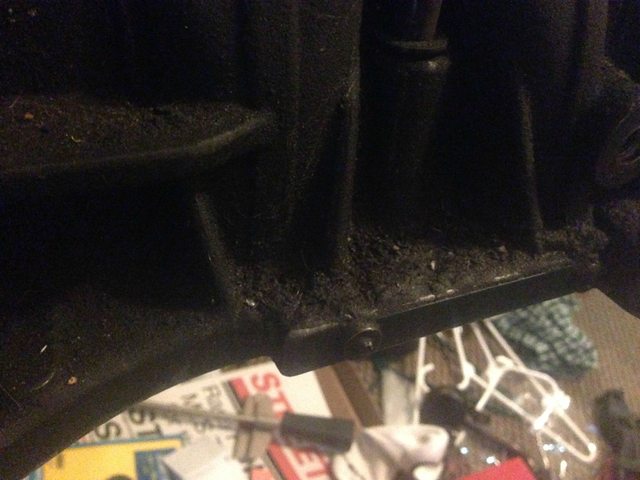
Now we need to remove the oil pump, and rear main seal carrier, if you haven't already. I reinstalled them for the degreasing process. The main seal carrier has 5 10mm bolts, and the oil pump has 4 10mm bolts, and 2 12mm bolts. Once you remove all of the bolts, lightly tap it out with a dead blow hammer or rubber mallet. Be careful and apply force evenly and centrally. There are cotter sleeves on each piece, and if you bend or damage them, you're fucked.
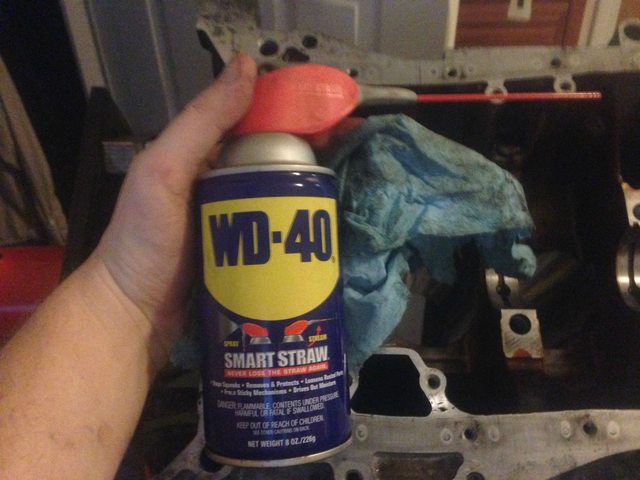
After using water on a motor, it is extremely important to lubricate the sleeves. They will flash rust EXTREMELY fast if you don't. It's easy - spray it with a boatload of WD40, then wipe it smooth with a clean cloth.
So yeah, degreaser and a rag was working well, but it was no miracle cure for the amount of gunk built up on that block. I'm not kidding when I said it saw 300k worth of use. Loaded it up into the back of my car, and took it up to the local DIY car wash.
Hosed it down with more degreaser, and hit it with the pressure washer. Not perfect, but it came out REALLY well. Now you can see the engine stamp, and even read the original VIN stamp!
Now we need to remove the oil pump, and rear main seal carrier, if you haven't already. I reinstalled them for the degreasing process. The main seal carrier has 5 10mm bolts, and the oil pump has 4 10mm bolts, and 2 12mm bolts. Once you remove all of the bolts, lightly tap it out with a dead blow hammer or rubber mallet. Be careful and apply force evenly and centrally. There are cotter sleeves on each piece, and if you bend or damage them, you're fucked.
After using water on a motor, it is extremely important to lubricate the sleeves. They will flash rust EXTREMELY fast if you don't. It's easy - spray it with a boatload of WD40, then wipe it smooth with a clean cloth.
12-23-2013, 09:18 AM
#17
Now, onto the bearings. Unless you have the tools necessary (you probably don't), take your bare block with caps, as well as your crank to a machine shop, and have them spec it for you. They'll be able to tell you what bearing sizes you need. All of my journals were even, and standard sized ACL Race bearings were within spec to one thousandth, so I went with them.
Once you have your bearings ordered, get some carb cleaner and spray down the main journals. Wipe them with a clean, dry cloth, and make sure they are smooth and free of debris. Seriously, you need to be willing to eat off these *******. Don't use anything even remotely rough - shop rags are your best friend for everything inside the motor.
Now for bearing placement. ACL Race bearings come in a single shrink wrapped blister. There are top and bottom bearings, and they are different.
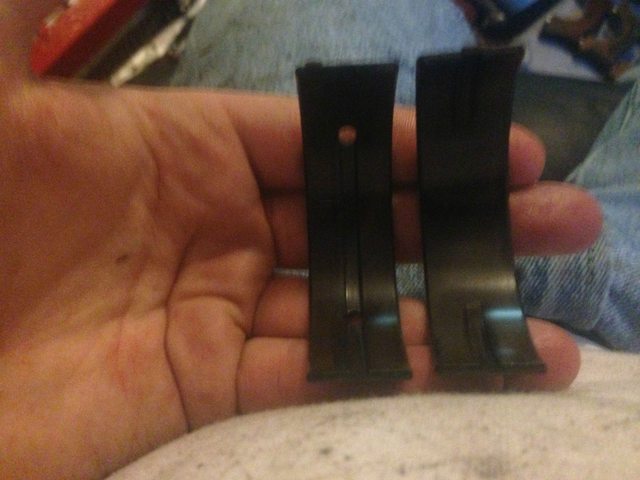
Notice the tabs sticking out (they're called tangs), the groove down the middle of the bearing on the left, as well as the oiling holes on the bearing on the left? The bearing on the left goes on the block journal, and the bearing on the right goes in the cap journal. The block and cap journals also have notches so you can't mix them up. Before installing the bearings, wipe them down with a clean cloth. Do not spray them with any kind of cleaners - bearings are extremely delicate and precise, and even the most gentle of cleaning agents can damage them. Just gently wipe them, and pop them in. Make sure they are flush with the journals. This picture shows the #5 bearing installed in the block journal.
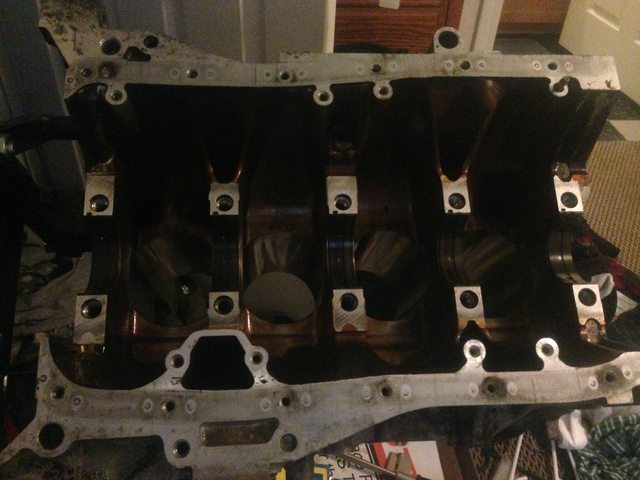
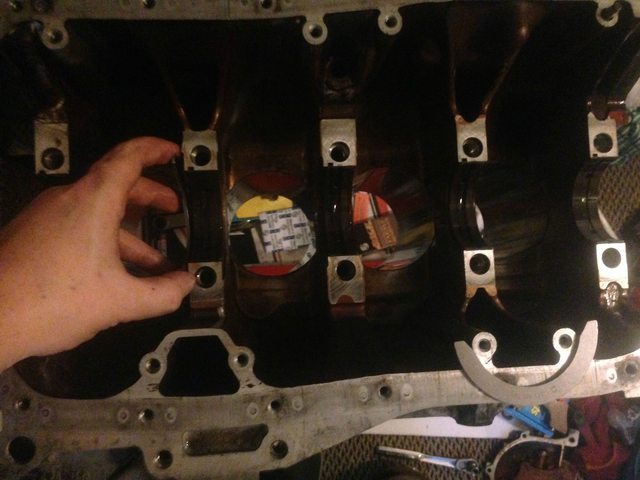
A second picture showing all five block journals. You can clearly see the little tab that the tangs go into. Bearing 5 is installed, the other four are not.

And one more, with all five bearings installed.
If you plan on plastigauging to verify your clearances, do it now. I trust my machinist, so I'm skipping it.
Once you have all of the bearings popped into the block journals, lube them up. Once you think you have enough lube on them, do it again. Rub it in gently with your finger to make sure it's completely covered. Now that you've done that...do it again. Seriously, there's no such thing as too much assembly lube. I bought the 4 oz. bottle of Torco MPZ, and probably used a third of it total on the main bearings.
Now that you have that done, repeat the procedure on your cap journals. Clean them with parts cleaner, rub them down with a dry, clean cloth, rub down the bearings, and snap them in.

Once again, notice the tang. The cap journal notches are centered, and the tang on the bearing is centered - they snap right into each other.
More assembly lube! Seriously, no such thing as too much. Same procedure as the block journal bearings.
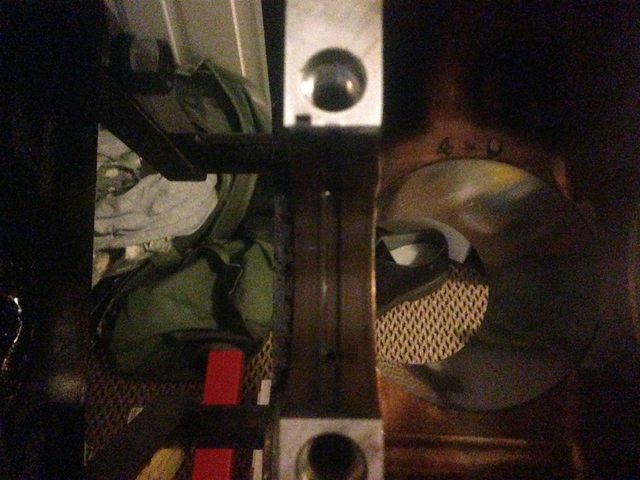
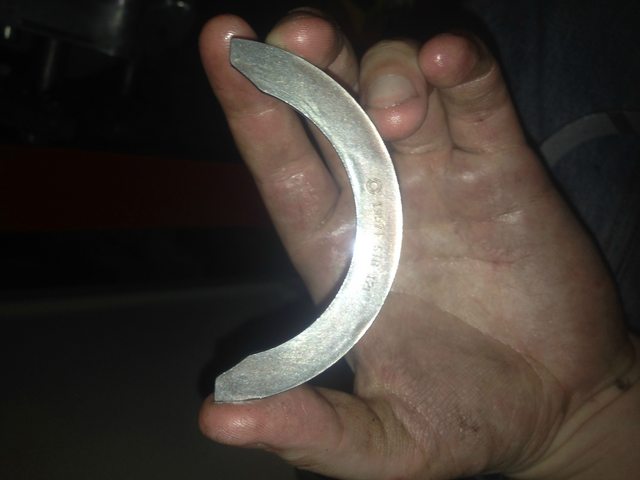
Before dropping in the crank, you need to install the thrust washers. Once again, ARP Race thrust bearings were within my spec, so I went with them.

Apply assembly lube to the flat part of each thrust bearing, and stick it in. They go on either side of the #4 block journal. The assembly lube here is mainly just to keep it "stuck" on the block until you drop in the crank. You don't need to overdo it here. The notched side of both thrust bearings should be facing out. One goes on each side of the journal.
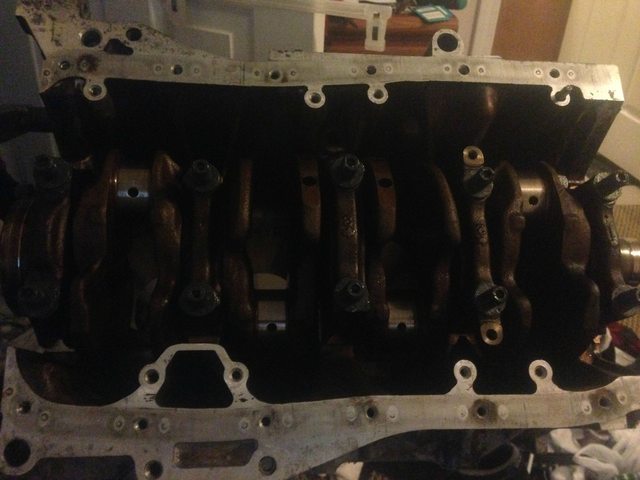
Now then, put some more assembly lube on your block journal bearings, then slowly, gently, and carefully put the crank down on the block. Give it a half spin to spread some assembly lube. Put more assembly lube on the cap bearings (yes, serious), and place them on top of the crank. Here's one thing the FSM won't tell you, and without a little common sense, you might completely miss. Those arrows on the caps point away from the flywheel, and count down from the flywheel. It should look like this.
5 4 3 2 1
> > > > >
Once you have the main caps settled, gently tap them down with a dead blow hammer or rubber mallet until they're fully seated. If you don't seat them, you won't get proper torque values on your main bolts, and also risk cracking the caps or damaging the bearings.
I'm replacing my main bolts with ARP hardware, so stock torque values don't apply to my build. For ARP main studs, you drop them in and "hand tighten" them after cleaning and chasing the threads. ARP's documentation isn't very specific on the definition of "hand tight", but if you give them a call, the answer is "tighten them down with a hex key, then loosen them one quarter turn."
Once the studs are hand tightened, cut open that little package of fastener assembly lube. It's a graphite lubricant that allows you to keep torque values reliable when tightening everything down, and is nothing like engine assembly lube. Don't try to replace one with the other - it won't end well for you. Apply the lubricant liberally to the ends of the studs, as well as the washers and the bottoms of the nuts. Before you install the nuts, it should look like this.
Once you have your bearings ordered, get some carb cleaner and spray down the main journals. Wipe them with a clean, dry cloth, and make sure they are smooth and free of debris. Seriously, you need to be willing to eat off these *******. Don't use anything even remotely rough - shop rags are your best friend for everything inside the motor.
Now for bearing placement. ACL Race bearings come in a single shrink wrapped blister. There are top and bottom bearings, and they are different.
Notice the tabs sticking out (they're called tangs), the groove down the middle of the bearing on the left, as well as the oiling holes on the bearing on the left? The bearing on the left goes on the block journal, and the bearing on the right goes in the cap journal. The block and cap journals also have notches so you can't mix them up. Before installing the bearings, wipe them down with a clean cloth. Do not spray them with any kind of cleaners - bearings are extremely delicate and precise, and even the most gentle of cleaning agents can damage them. Just gently wipe them, and pop them in. Make sure they are flush with the journals. This picture shows the #5 bearing installed in the block journal.
A second picture showing all five block journals. You can clearly see the little tab that the tangs go into. Bearing 5 is installed, the other four are not.
And one more, with all five bearings installed.
If you plan on plastigauging to verify your clearances, do it now. I trust my machinist, so I'm skipping it.
Once you have all of the bearings popped into the block journals, lube them up. Once you think you have enough lube on them, do it again. Rub it in gently with your finger to make sure it's completely covered. Now that you've done that...do it again. Seriously, there's no such thing as too much assembly lube. I bought the 4 oz. bottle of Torco MPZ, and probably used a third of it total on the main bearings.
Now that you have that done, repeat the procedure on your cap journals. Clean them with parts cleaner, rub them down with a dry, clean cloth, rub down the bearings, and snap them in.
Once again, notice the tang. The cap journal notches are centered, and the tang on the bearing is centered - they snap right into each other.
More assembly lube! Seriously, no such thing as too much. Same procedure as the block journal bearings.
Before dropping in the crank, you need to install the thrust washers. Once again, ARP Race thrust bearings were within my spec, so I went with them.
Apply assembly lube to the flat part of each thrust bearing, and stick it in. They go on either side of the #4 block journal. The assembly lube here is mainly just to keep it "stuck" on the block until you drop in the crank. You don't need to overdo it here. The notched side of both thrust bearings should be facing out. One goes on each side of the journal.
Now then, put some more assembly lube on your block journal bearings, then slowly, gently, and carefully put the crank down on the block. Give it a half spin to spread some assembly lube. Put more assembly lube on the cap bearings (yes, serious), and place them on top of the crank. Here's one thing the FSM won't tell you, and without a little common sense, you might completely miss. Those arrows on the caps point away from the flywheel, and count down from the flywheel. It should look like this.
5 4 3 2 1
> > > > >
Once you have the main caps settled, gently tap them down with a dead blow hammer or rubber mallet until they're fully seated. If you don't seat them, you won't get proper torque values on your main bolts, and also risk cracking the caps or damaging the bearings.
I'm replacing my main bolts with ARP hardware, so stock torque values don't apply to my build. For ARP main studs, you drop them in and "hand tighten" them after cleaning and chasing the threads. ARP's documentation isn't very specific on the definition of "hand tight", but if you give them a call, the answer is "tighten them down with a hex key, then loosen them one quarter turn."
Once the studs are hand tightened, cut open that little package of fastener assembly lube. It's a graphite lubricant that allows you to keep torque values reliable when tightening everything down, and is nothing like engine assembly lube. Don't try to replace one with the other - it won't end well for you. Apply the lubricant liberally to the ends of the studs, as well as the washers and the bottoms of the nuts. Before you install the nuts, it should look like this.
12-23-2013, 09:25 AM
#18
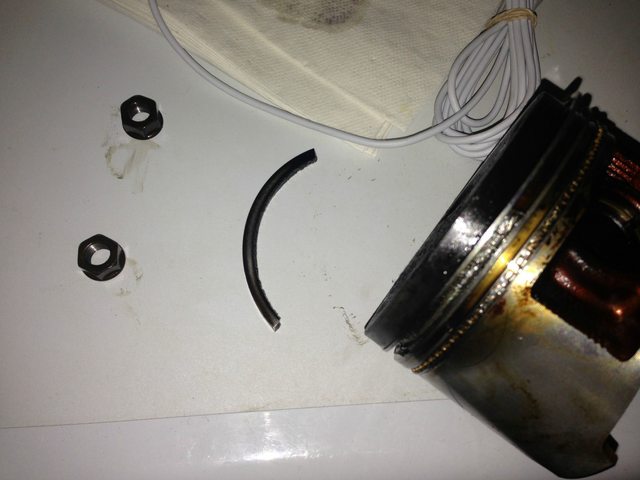
And this brings me to my current impasse. Evidently lot number 68797.1 was shipped by ARP with the wrong sized nuts  So now I'm stuck sitting here staring at a half-assembled short block. I immediately called ARP, they collected basic information to verify that I bought them at an authorized dealer, and to figure out who or what made the mistake (packager 27). They got my name and address, and shipped new nuts to me. They told me to do whatever I wanted with the old nuts, and M10-1.25 (the wrong nuts) is a pretty common size, so I'll just toss them in my box and find a use for them. I asked what shipper they used (UPS) and politely asked that they ship FedEx or USPS because of the dumb **** UPS has been putting me through. They agreed to send them priority mail. No charge, no interrogation, no problems at all. Mistakes happen, and ARP did a great job of taking care of it for me.
The motor build will, unfortunately, be on hold until I get the new main nuts. They should be here by the end of the week.
So now I'm stuck sitting here staring at a half-assembled short block. I immediately called ARP, they collected basic information to verify that I bought them at an authorized dealer, and to figure out who or what made the mistake (packager 27). They got my name and address, and shipped new nuts to me. They told me to do whatever I wanted with the old nuts, and M10-1.25 (the wrong nuts) is a pretty common size, so I'll just toss them in my box and find a use for them. I asked what shipper they used (UPS) and politely asked that they ship FedEx or USPS because of the dumb **** UPS has been putting me through. They agreed to send them priority mail. No charge, no interrogation, no problems at all. Mistakes happen, and ARP did a great job of taking care of it for me.The motor build will, unfortunately, be on hold until I get the new main nuts. They should be here by the end of the week.
12-23-2013, 09:33 AM
#19
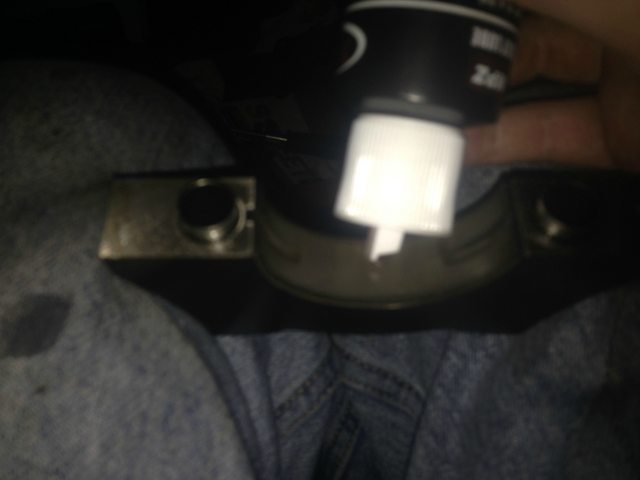
On the plus side, my oil pan stud kit just came in from My Honda Habit, so I'm headed to pick that up now, and I'll thread it in at least for a visual. I'll also go ahead and start installing the Cometic bottom end gasket kit.
12-27-2013, 01:33 AM
#20
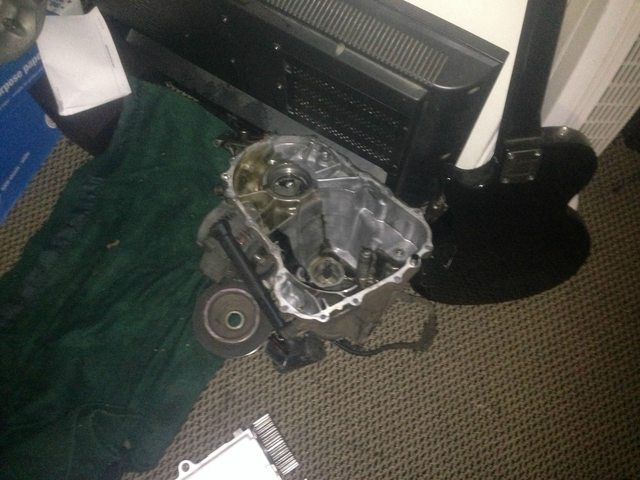
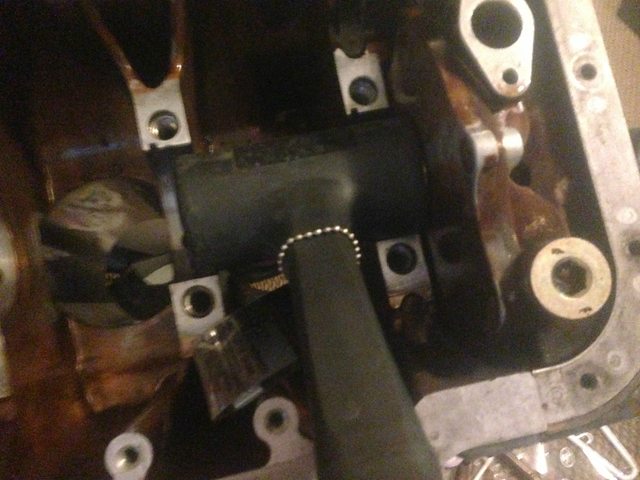
Got tired of my motor sitting here and not doing anything to it, so I decided to turn some wrenches and found something to do. Since the crank is clearanced and installed, and I'm just waiting on the nuts for my mains, I could go ahead and install my oil pump and rear main carrier.
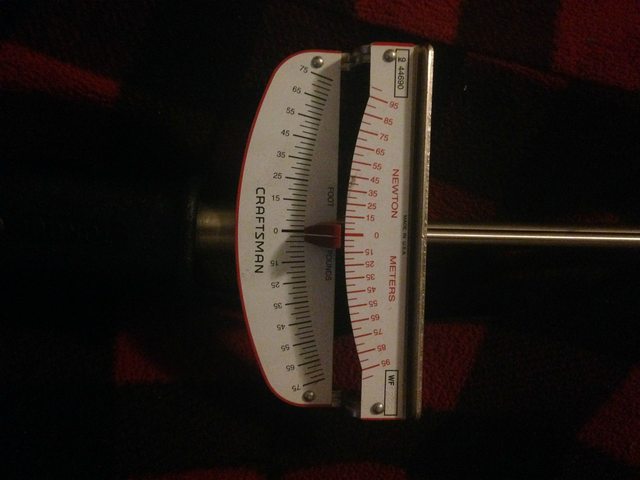
FSM calls for 8 ft/lbs of torque on the 10mm bolts for the carrier and pump. I turned it up to 11 (figuratively and literally).
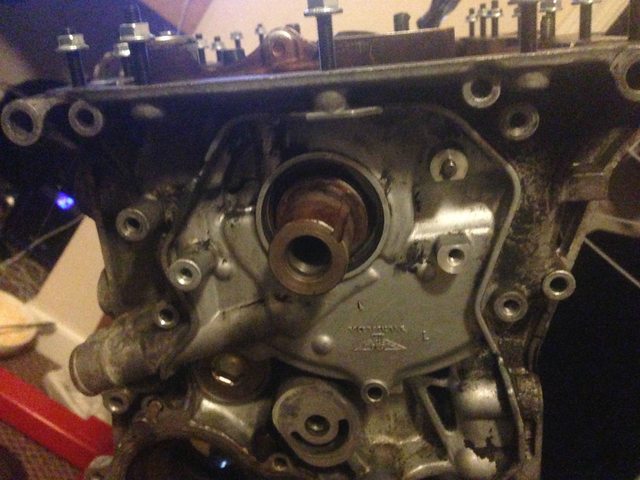
HondaBond applied.
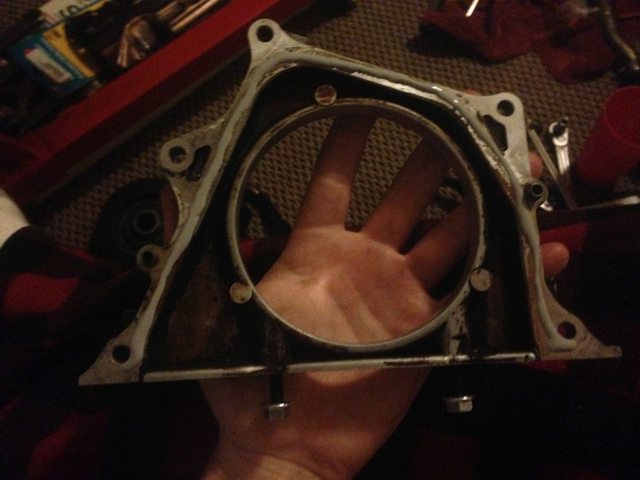
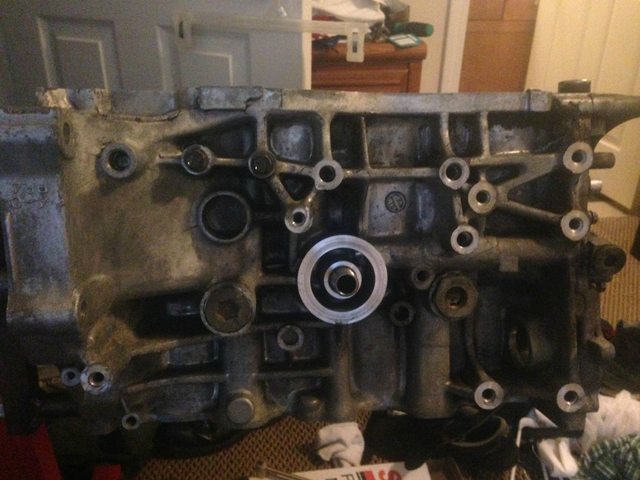
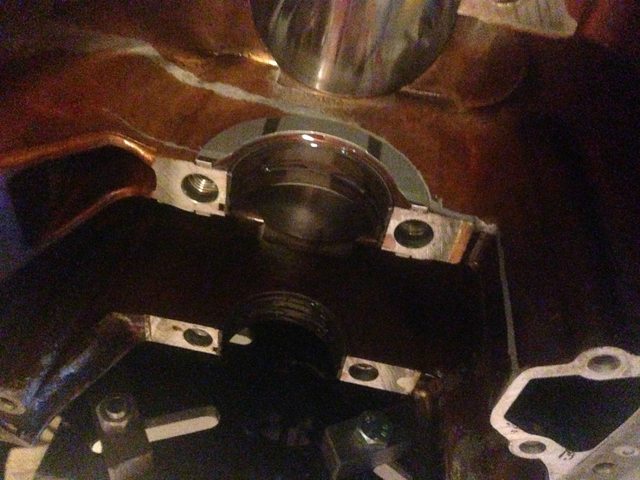
Rear main carrier installed and torqued down.
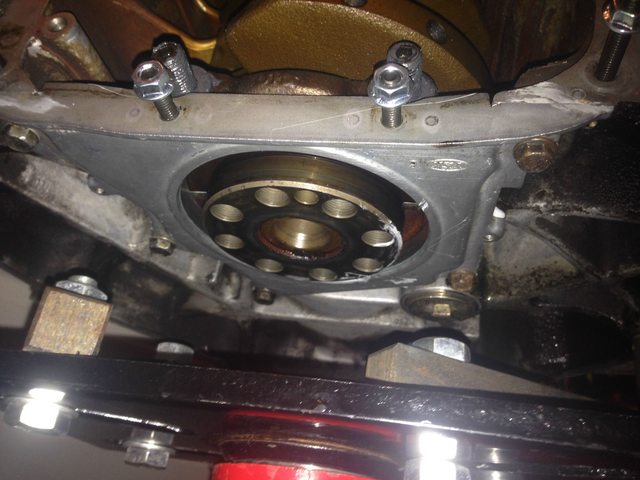
Oil pump side, HondaBond applied.
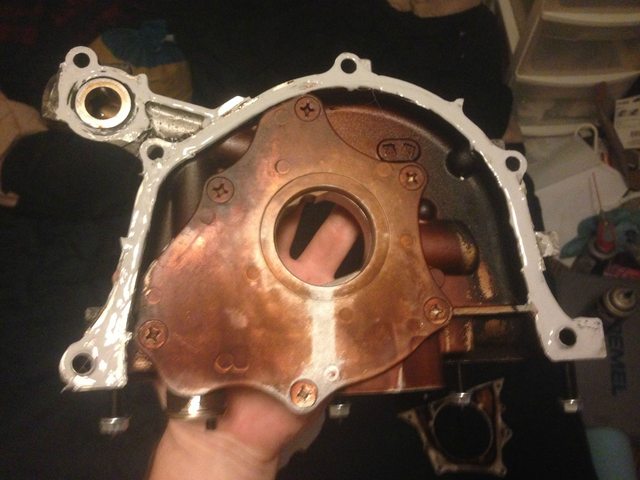
Installed and torqued down. The top two bolt heads got fucked up in removal (12mm heads), so I'm waiting for some replacements.
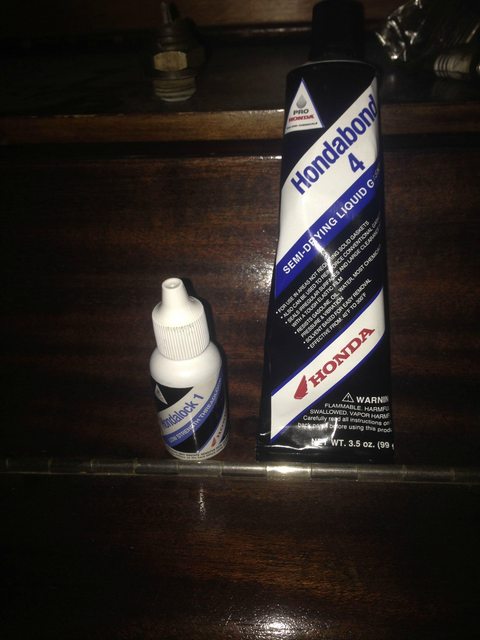
Also went ahead and threaded in my new oil pan studs. Great kit, no complaints. This is just temporary - I'll be removing them, hitting the holes with a thread chaser, and reinstalling them with a dab of blue HondaLock.

Yes, Honda has their own branded thread locker.
FSM calls for 8 ft/lbs of torque on the 10mm bolts for the carrier and pump. I turned it up to 11 (figuratively and literally).
HondaBond applied.
Rear main carrier installed and torqued down.
Oil pump side, HondaBond applied.
Installed and torqued down. The top two bolt heads got fucked up in removal (12mm heads), so I'm waiting for some replacements.
Also went ahead and threaded in my new oil pan studs. Great kit, no complaints. This is just temporary - I'll be removing them, hitting the holes with a thread chaser, and reinstalling them with a dab of blue HondaLock.
Yes, Honda has their own branded thread locker.
 12-31-2013, 07:06 AM
#23
That was one of the stock pistons that came out of the engine after my buddy gave it to me. He thought the rings were shot with how much it was smoking...nope, ring lands were cracked. Minor miracle the ring lands didn't gouge the cylinder walls - I don't think it had more than another 3k in it before the motor grenaded. This, ladies and gents, is why you don't push stock internals too far when boosting.
12-31-2013, 07:27 AM
#25
I have two counters. One is for cooking, the other is for...uh...transmissions, right now. Also, are you trying to play word games with my name?

