
Jackal's DIY: Cluster mod, change the directional color
 12-26-2009, 07:59 PM
#1
Honda-Tech Member
Thread Starter
Join Date: Apr 2009
Location: San Diego, CA
Posts: 434
Likes: 0
Received 0 Likes
on
0 Posts
In my opinion, every little custom aspect of your ride is what makes it stand out, what makes it truly unique. Call it a waste of time, call it rice (HELLO, we drive RICE BURNERS!), call it gay, call it whatever the F*** you want. I've changed the color of the directional indicators in my cluster on every car I've owned with this method, just finally doing a write-up so all you kiddies can do the same if you so choose.
So here goes...
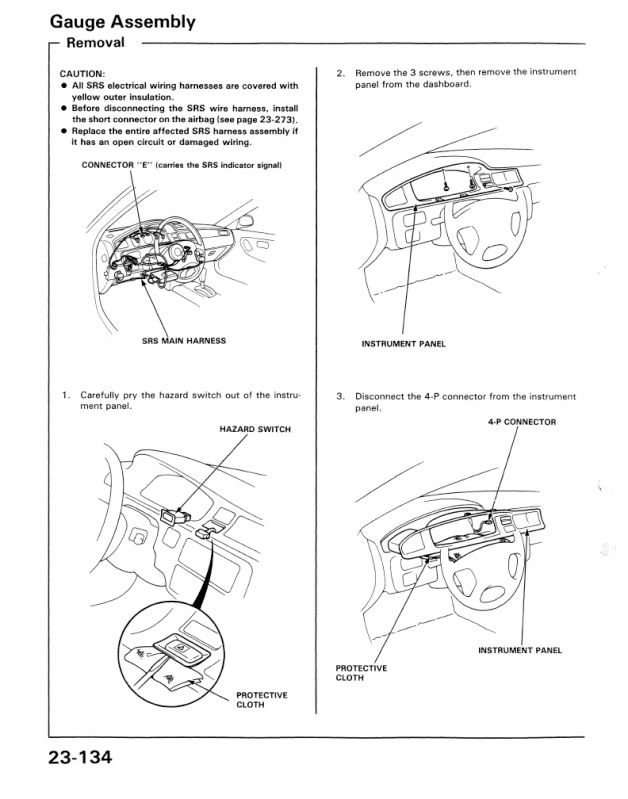
(1.) - Remove the gauge cluster as described in the Factory Service Manual

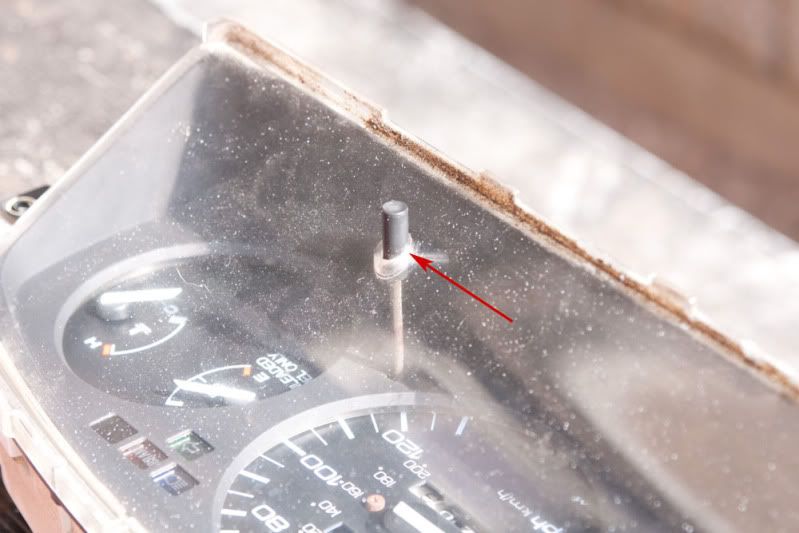
(2.) - Once you have the cluster out, go to wherever you've decided to work on it and grab a beer. You'll only need one or possibly two since this is a very quick DIY. Use some pliers or something if you have a girly grip to pull off the trip odometer reset plastic pointed out in the image below:
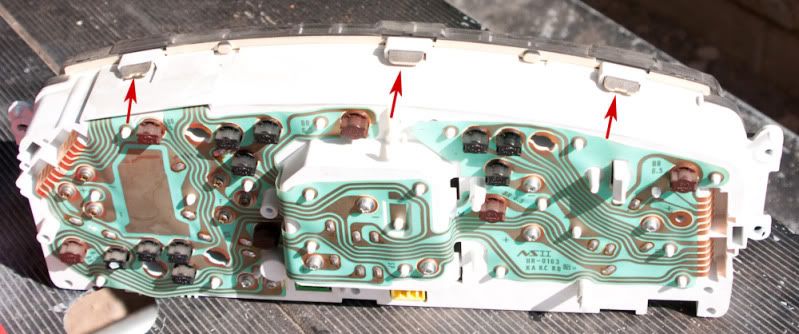
(3.) - There are three locking tabs on the top and bottom of the cluster. Simply press them down to remove the front section of the cluster. The tabs I'm talking about are pointed out in the image below:
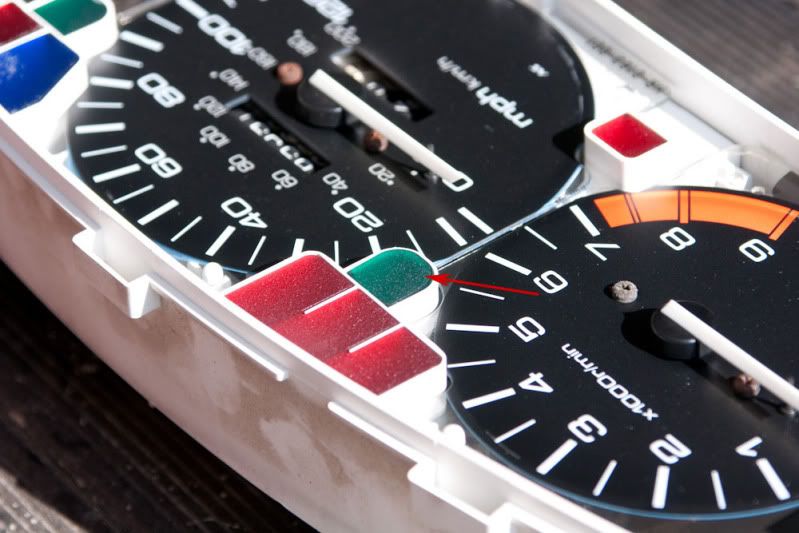
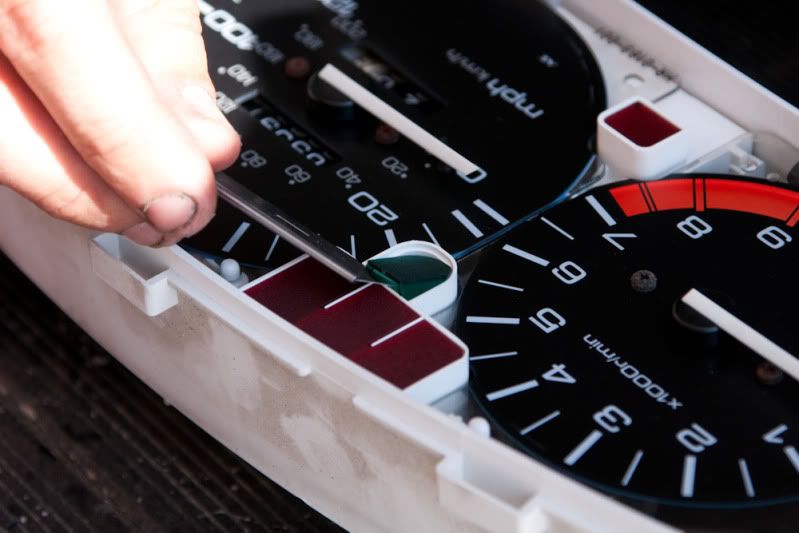
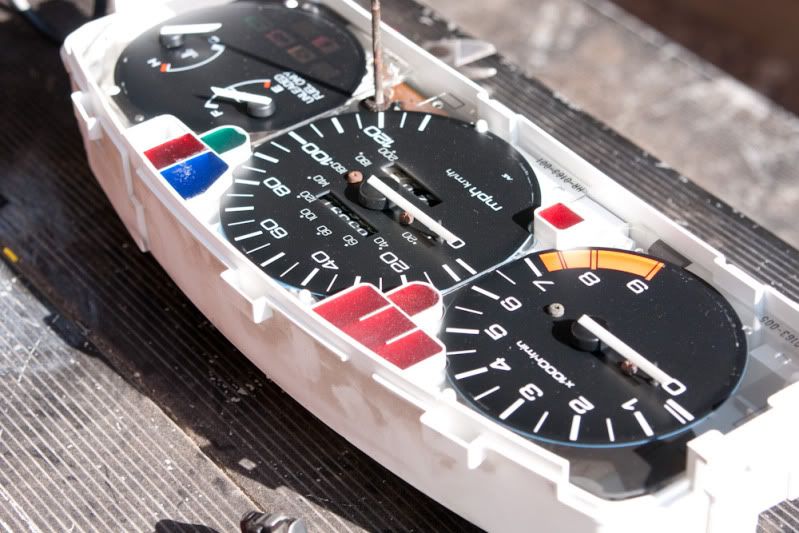
(4.) - Now that you have the cluster apart you'll simply remove the green plastic lenses for the directional indicators as pointed out in the below image. I just used a box cutter to pop it out.
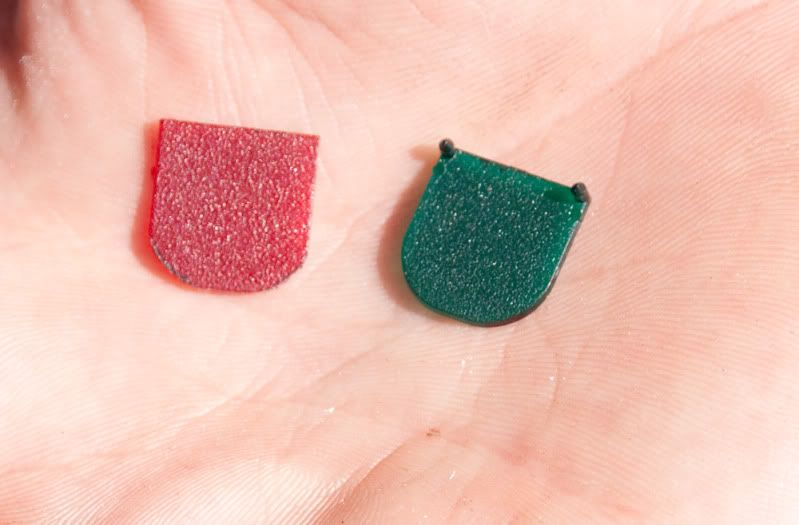
(5.) - You can use any 1/16" to 1/8" colored plastic for changing the color. I always use plastic from a donor cluster to keep that OE "grain" you see on the plastic.
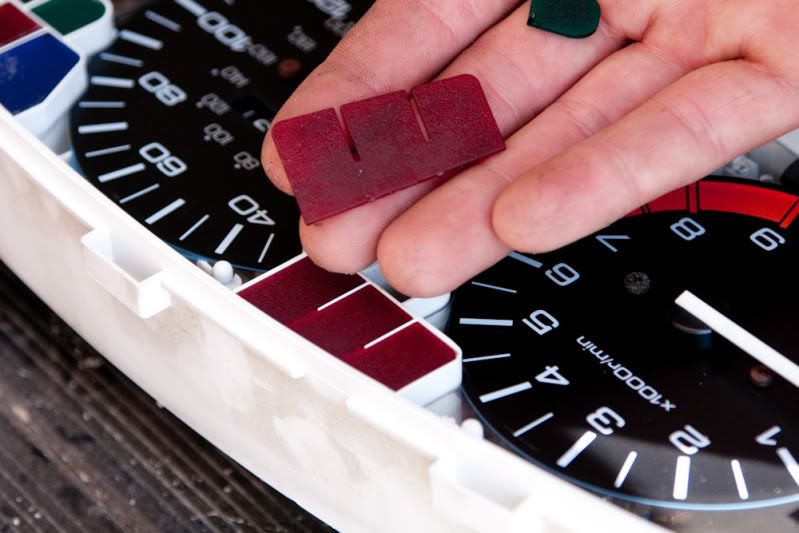
(6.) - Lay the old green part on top of your new replacement plastic.
Trace around it.
Cut it to size using a dremel or whatever you have for this step. You can see in this image the OE "grain" I'm talking about.
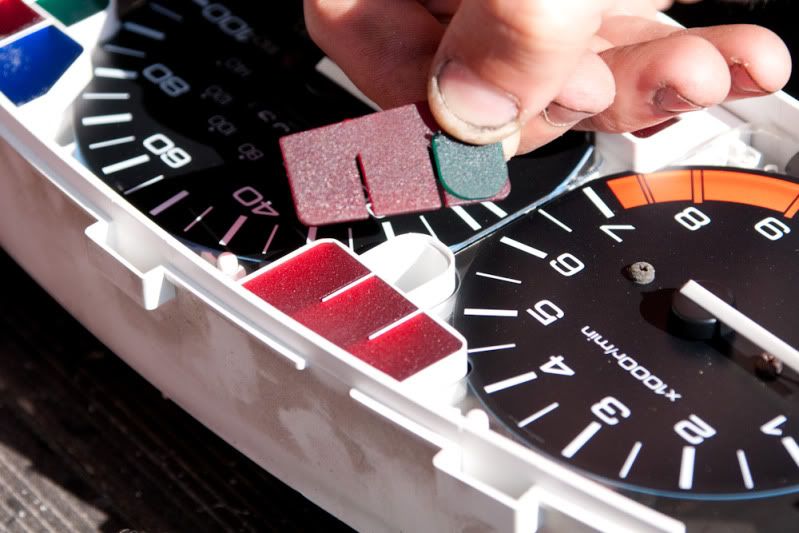
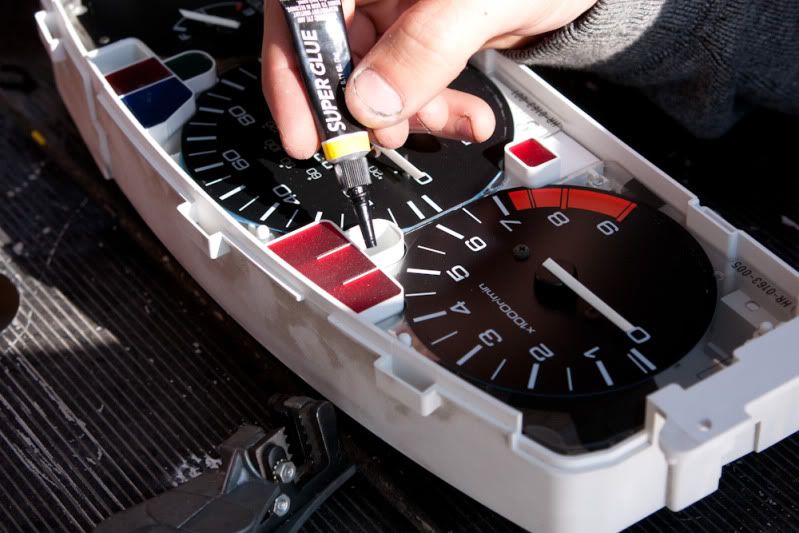
(7.) - Test fit the new piece.
Then glue it in place... Don't use a **** ton of super glue, just two really small dabs in the corners to hold in the new plastic. Put too much and it will run onto the plastic and make it foggy, you know what I'm talking about... And then the quality of the final product will be degraded.
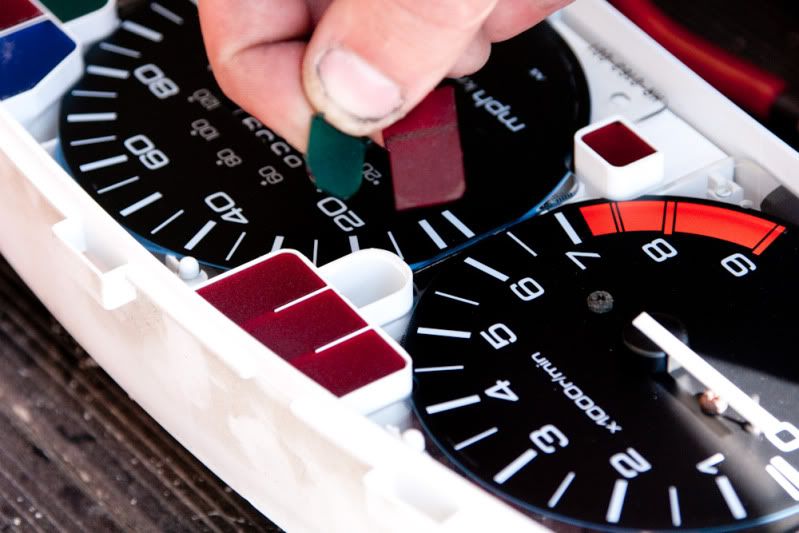
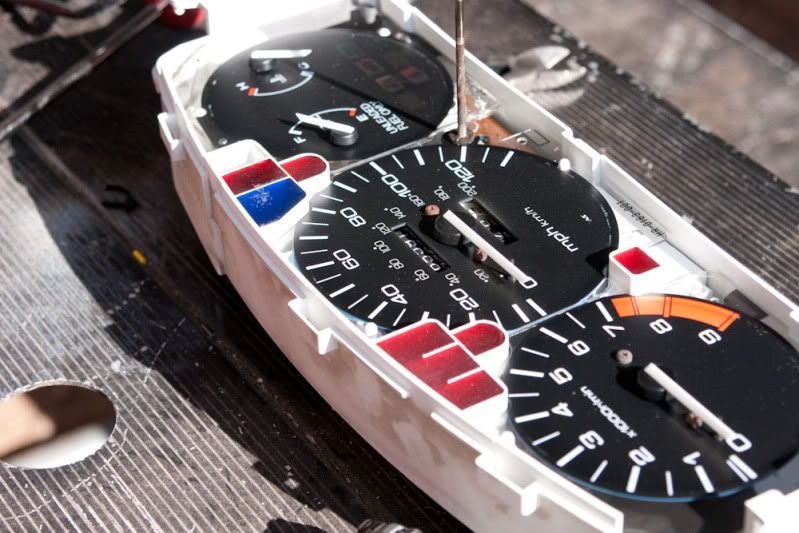
(8.) - Repeat the process for the other side.
The completed project, ready for reassembly/installation.
(9.) - Push the from part of the cluster back on until all six locking tabs engage, then install the cluster back in the vehicle in the reverse order of removal from the Factory Service Manual.
Now you're directional indicators in the cluster have that custom look you've been searching for.
If there are any questions PM me or email me, jackal6042@yahoo.com
Stand by for more DIY threads. I'm one of those who always has some little project going on.
So here goes...
(1.) - Remove the gauge cluster as described in the Factory Service Manual
(2.) - Once you have the cluster out, go to wherever you've decided to work on it and grab a beer. You'll only need one or possibly two since this is a very quick DIY. Use some pliers or something if you have a girly grip to pull off the trip odometer reset plastic pointed out in the image below:
(3.) - There are three locking tabs on the top and bottom of the cluster. Simply press them down to remove the front section of the cluster. The tabs I'm talking about are pointed out in the image below:
(4.) - Now that you have the cluster apart you'll simply remove the green plastic lenses for the directional indicators as pointed out in the below image. I just used a box cutter to pop it out.
(5.) - You can use any 1/16" to 1/8" colored plastic for changing the color. I always use plastic from a donor cluster to keep that OE "grain" you see on the plastic.
(6.) - Lay the old green part on top of your new replacement plastic.
Trace around it.
Cut it to size using a dremel or whatever you have for this step. You can see in this image the OE "grain" I'm talking about.
(7.) - Test fit the new piece.
Then glue it in place... Don't use a **** ton of super glue, just two really small dabs in the corners to hold in the new plastic. Put too much and it will run onto the plastic and make it foggy, you know what I'm talking about... And then the quality of the final product will be degraded.
(8.) - Repeat the process for the other side.
The completed project, ready for reassembly/installation.
(9.) - Push the from part of the cluster back on until all six locking tabs engage, then install the cluster back in the vehicle in the reverse order of removal from the Factory Service Manual.
Now you're directional indicators in the cluster have that custom look you've been searching for.
If there are any questions PM me or email me, jackal6042@yahoo.com
Stand by for more DIY threads. I'm one of those who always has some little project going on.

 12-26-2009, 09:20 PM
#3
Honda-Tech Member
Thread Starter
Join Date: Apr 2009
Location: San Diego, CA
Posts: 434
Likes: 0
Received 0 Likes
on
0 Posts
I appreciate the props, been doing this for years and finally decided to do a DIY on it. I got a few more DIYs posting tonight, just have to finish the write ups and finish the projects. I'm bored on a Saturday night and I got some beer, hahaha!
12-26-2009, 09:55 PM
#4
Honda-Tech Member
Thread Starter
Join Date: Apr 2009
Location: San Diego, CA
Posts: 434
Likes: 0
Received 0 Likes
on
0 Posts
BTW I didn't state this in the DIY post, but this write up was done on my EJ1 but I'm sure it can be done on most any vehicle.
12-26-2009, 11:00 PM
#6
Honda-Tech Member
Trending Topics
12-26-2009, 11:05 PM
#8
Honda-Tech Member
12-26-2009, 11:21 PM
#9
Honda-Tech Member
 12-26-2009, 11:32 PM
#10
Honda-Tech Member
12-26-2009, 11:45 PM
#12
Honda-Tech Member
Thread Starter
Join Date: Apr 2009
Location: San Diego, CA
Posts: 434
Likes: 0
Received 0 Likes
on
0 Posts
12-26-2009, 11:48 PM
#13
Honda-Tech Member
I guess if thats what floats your boat. I'd rather be at the mall picking up on some sweet honeys.
12-26-2009, 11:50 PM
#14
Honda-Tech Member
Thread Starter
Join Date: Apr 2009
Location: San Diego, CA
Posts: 434
Likes: 0
Received 0 Likes
on
0 Posts
Hahahaha! Not sure what mall in SoCal is open at 12:48 AM but good on ya! This literally takes 30-45 minutes. Much longer than you'd last with one of these "honeys" before getting shot down.
 12-27-2009, 12:03 AM
#17
Honda-Tech Member
Actually if your good at seducing women you can go alot farther than you would have ever thought. Plus, a "no" from a women or her shooting you down is just another one down before you get a "yes". Its all a numbers game.
12-27-2009, 01:50 AM
#18
Honda-Tech Member
Thread Starter
Join Date: Apr 2009
Location: San Diego, CA
Posts: 434
Likes: 0
Received 0 Likes
on
0 Posts
 12-27-2009, 06:33 AM
#19
Honda-Tech Member
12-27-2009, 06:40 AM
#20
Honda-Tech Member
Join Date: Aug 2009
Location: Charlotte, NC
Posts: 1,431
Likes: 0
Received 0 Likes
on
0 Posts
Haha nice thread. Everyone knows honeys will be impressed if your blinker indicator lights are a different color when you're turning out of the mall. It works every time for me.
12-27-2009, 09:15 AM
#22
Honda-Tech Member
Join Date: Dec 2008
Location: For me to know.
Posts: 124
Likes: 0
Received 0 Likes
on
0 Posts
I got a question, did you paint your cluster red too? I did the same thing but never got around to installing it.
12-27-2009, 09:29 AM
#23
Honda-Tech Member
Join Date: Aug 2008
Location: Southwest, PA
Posts: 502
Likes: 0
Received 0 Likes
on
0 Posts
12-27-2009, 10:30 AM
#24
Honda-Tech Member
12-27-2009, 10:35 AM
#25
Honda-Tech Member
Thread Starter
Join Date: Apr 2009
Location: San Diego, CA
Posts: 434
Likes: 0
Received 0 Likes
on
0 Posts