
How to remove Del Sol cluster and CCU and replace bulbs with DIY ambers
 09-07-2013, 07:57 PM
#1
Honda-Tech Member
Thread Starter

Join Date: Feb 2011
Posts: 10
Likes: 0
Received 0 Likes
on
0 Posts
I've got a 93 Del Sol Si, and I've been unhappy with the lights in my gauge cluster and climate control unit for awhile. I spent a fair amount of time cruising threads all over the web, and just wasn't finding enough information about bulb-type and how-to, as relating to Del Sols. There are a few similar write ups out there, but I'm going to show you guys how to pull the cluster, which lights to replace/upgrade/etc, and how to get that pesky CCU out of the dash. Not only that, but you have a few options when it comes to bulbs, especially if you prefer the incandescent route. Because of the confusion, I ended up spending a few extra bucks. Here's to saving someone else some money and making their project a little easier.
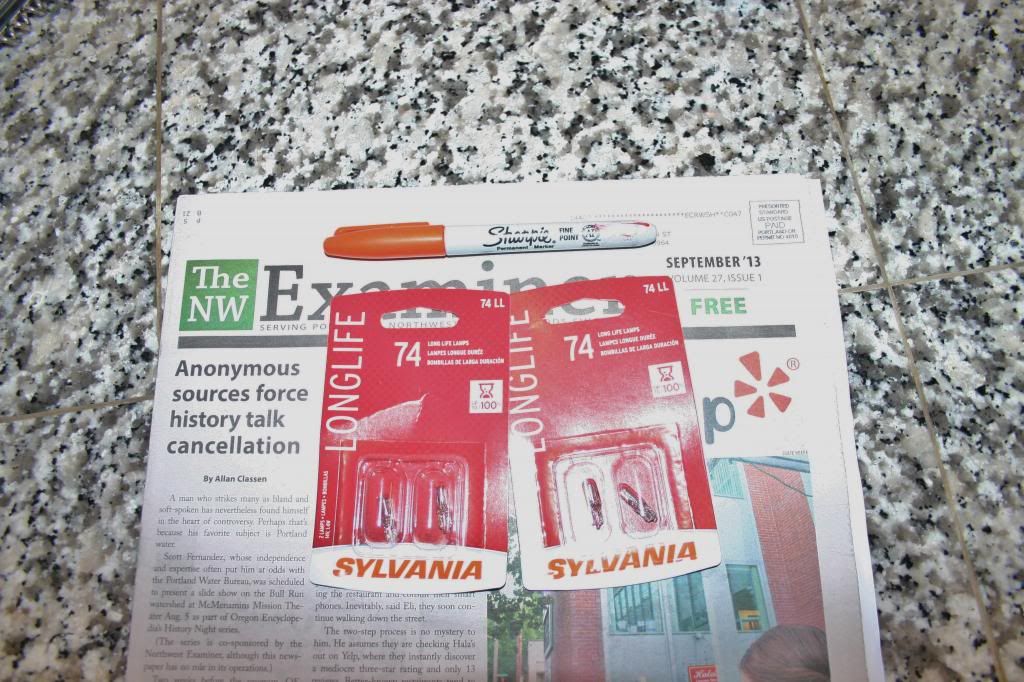
First of all, many sources out there say that #24 bulbs can fit in your cluster sockets. This isn't exactly true. For any Del Sol cluster, there are 7 different illuminating bulbs. And they are all #74. But not a regular #74 bulb, they are somewhat smaller. I've been lead to believe that you can get the right ones for cheap from retailers like Hondapartscheap and the like, but if you plan on going to AZ or some other local store, the SYLVANIA #74 bulbs will not fit as easily as anyone might like them to, and in one location won't work at all--but more on that in a minute.
#24 bulbs run at a higher voltage but will work just fine. The problem is that they aren't likely to fit neatly into your cluster sockets. You'll have to do a few modifications if you intend to use #24 bulbs as replacements. Based on some of the other threads out there that relate to SPECIFICALLY Sol clusters (which are in fact different not only in appearance but also in bulb spread from Civics), I went ahead with #24's. The first problem I ran into was getting them to stay in the sockets. I tried my luck and put them in, but I ended up having to reuse three of the stock #74 bulbs for this.
<a href="http://s847.photobucket.com/user/jedidontplaycountrymusic/media/IMG_0438_zpsd9021a6e.jpg.html" target="_blank"><img src="http://i847.photobucket.com/albums/ab32/jedidontplaycountrymusic/IMG_0438_zpsd9021a6e.jpg" border="0" alt=" photo IMG_0438_zpsd9021a6e.jpg"/></a>
Not okay... and I wasn't digging the color I was getting. So, the next day I went back at it, this time with the intention of taking some pictures and showing anyone who cares to know a few options they might consider when replacing or upgrading the interior lights of their Sol.
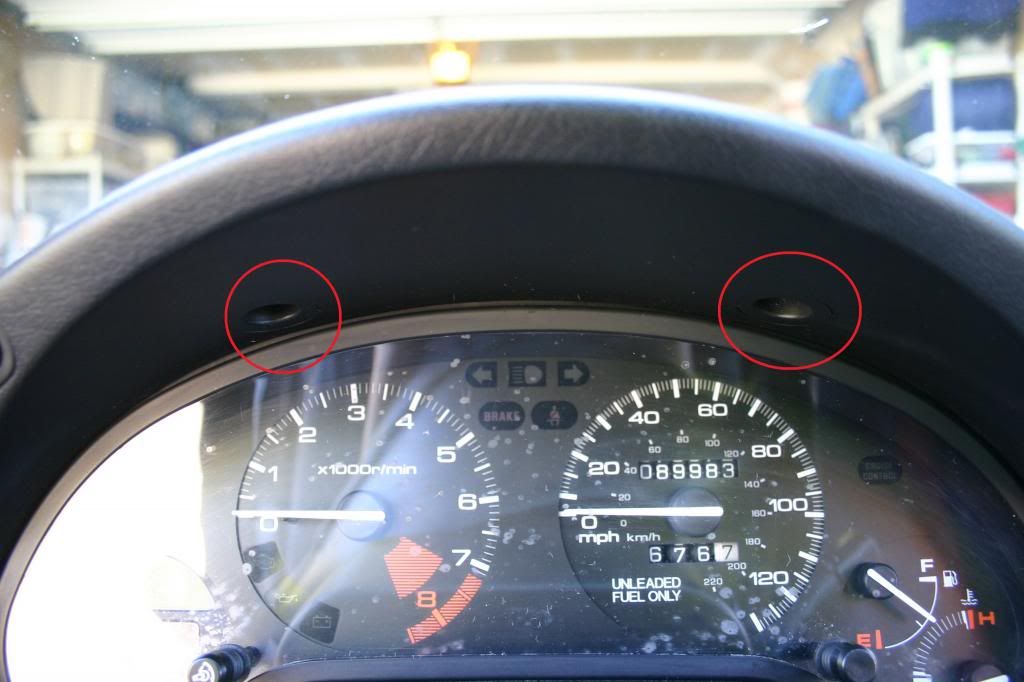
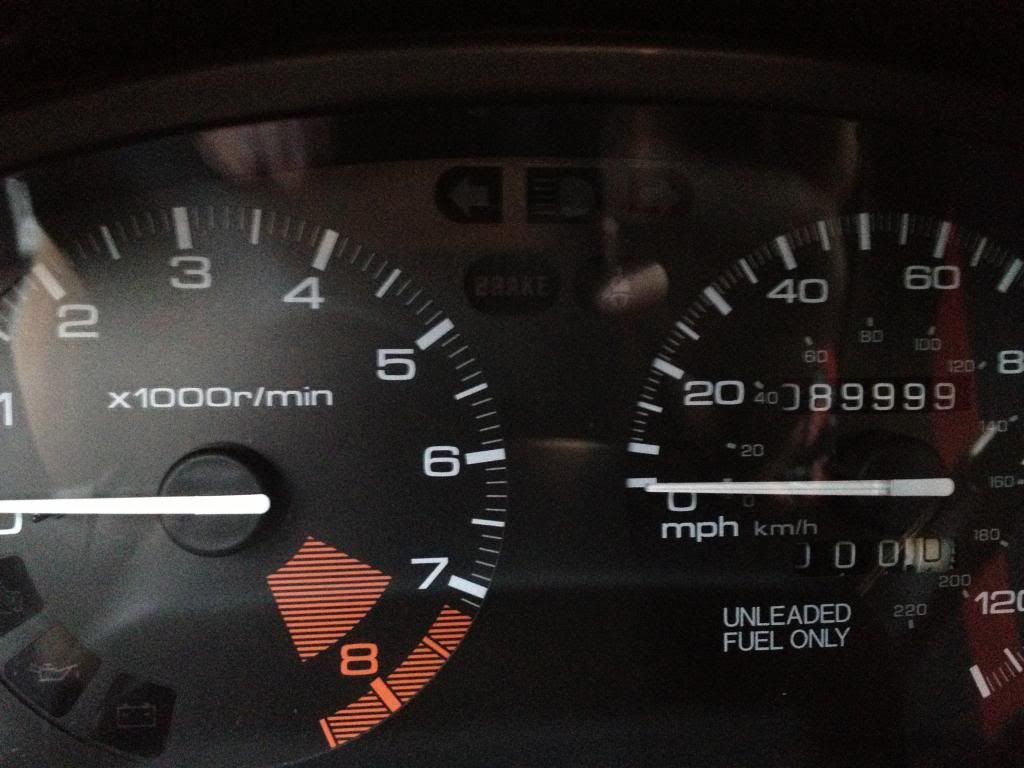
So to get this thing started, you're going to want to pull the cluster. It's pretty simple.
First remove the two screws shown in the picture below:
Never mind my cluster lens. It's not dirty, it's scored. Tried everything to get it off and no luck. If anyone happens to have one laying around, let me know!")
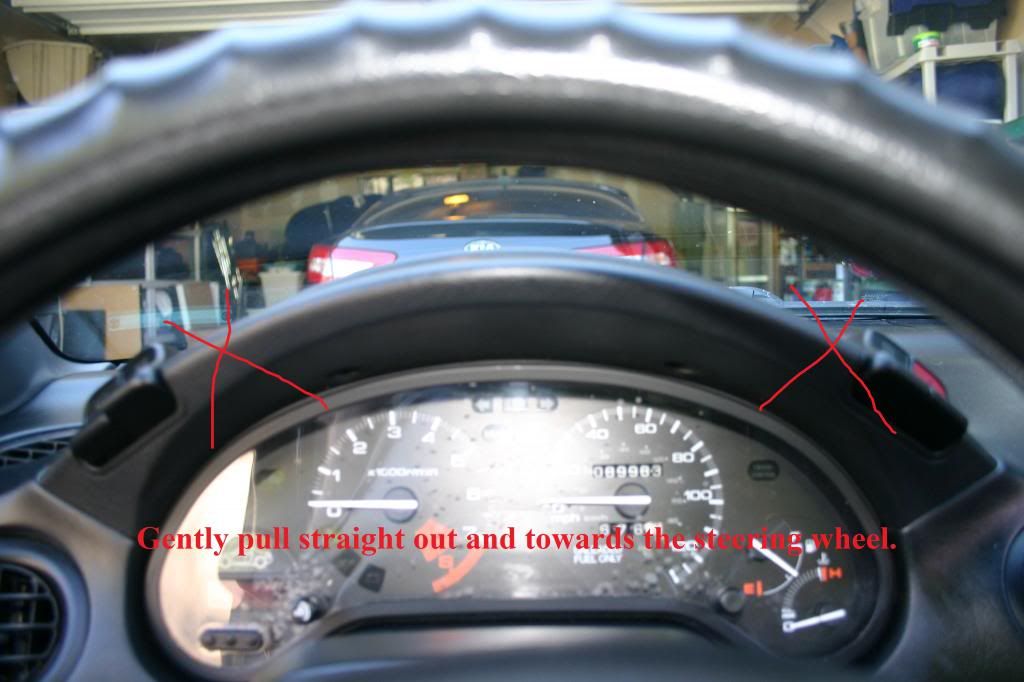
Then, remove the bezel from the dash, pulling gently and straight towards the steering wheel:
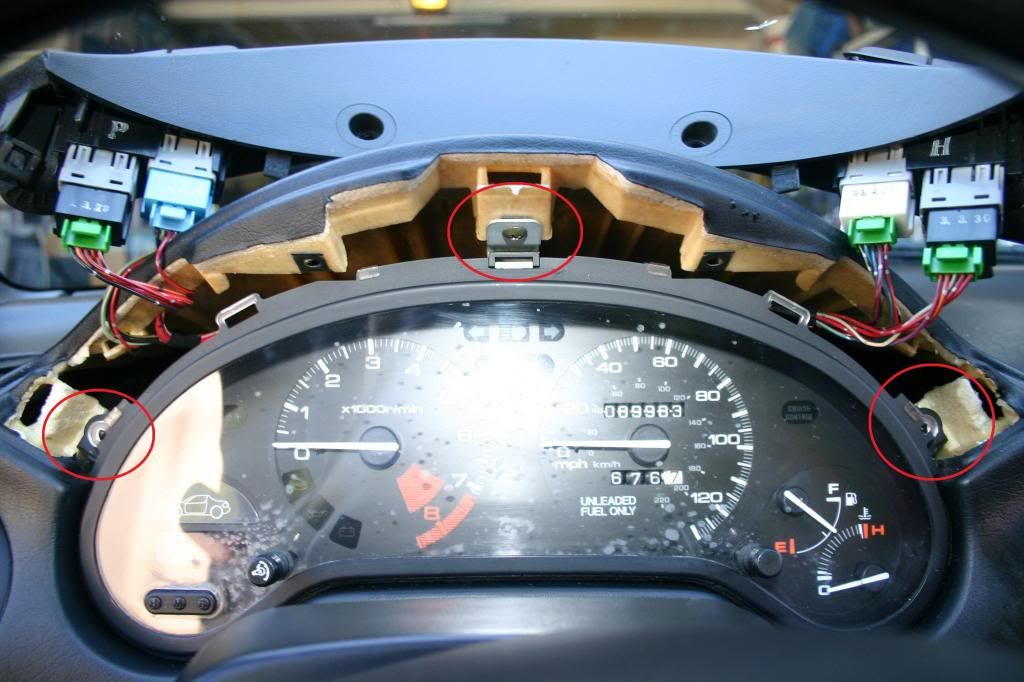
Once it's out, you can just "peel" it back and rest it on the dashboard. Then there are three screws that hold the cluster in. Pull these:
You'll probably want to use a magnetic driver for that part. Dropping the screws can be a really big hassle.
Once you've got the retaining screws out, the cluster will pull forward quite easily. Don't stress it though! Especially if you live in colder climates. These wires and connections are getting old guys and gals, we don't want to stress them any more than we have to:

Those clips can be a little stiff and tricky so please be careful! They are notorious for breaking!
And now your cluster is out. You might want to take a moment to clean the cavity left where your cluster used to be, but maybe it doesn't bother you. Anyway, now that you've got your cluster out, set it somewhere very dry and very safe, like face down on some cloth. You don't want to scratch your lens, and make sure you avoid carpeted areas as much as possible. Any static discharge could be disadvantageous. I recommend using latex gloves while handling the cluster, but it's up to you.
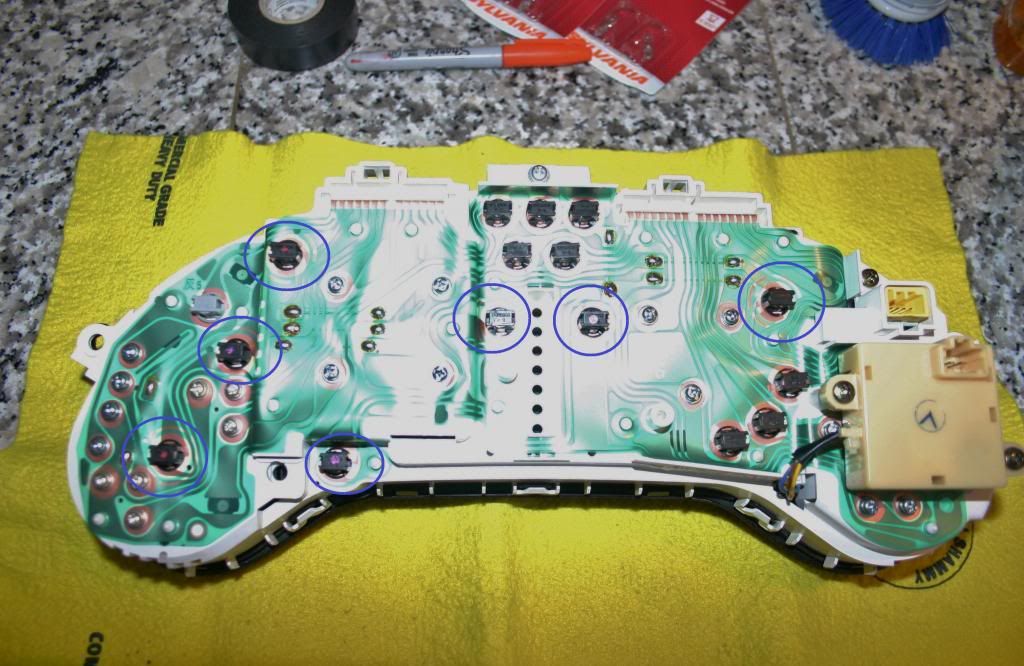
There are 7 illuminating bulbs in the Sol's cluster. I have labeled them for you here:
Removing these is easy. Turn counter clockwise about 45 degrees and lift straight up. They may be a little "sticky" the first time or two, but don't worry. I think you'd have to try really hard to break these, just don't scratch the connection sites any more than you have to.
And here's where things get real tricky. PLEASE NOTE THAT THE LEFT-BOTTOM-MOST SOCKET (as shown in the picture above) IS A TROUBLED SOCKET. Now, I am a big fan of Honda, but this socket is poorly designed. The trouble is that there isn't enough clearance for USDM #24 OR #74 bulbs to fit. This is a big problem. However, you have some options.
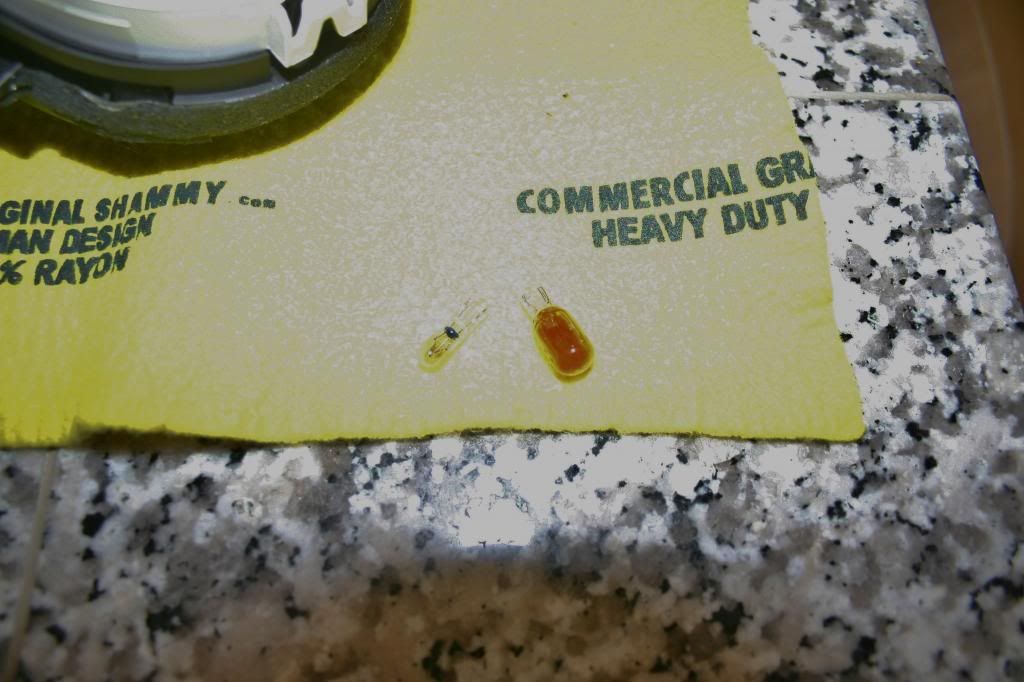
Depending on which route you take as far as chosen bulbs, you can work with what you've already got. So, I wanted amber lights, and fresh ones. I put SYLVANIA #24 AMBER lights in all but the three left-bottom-most sockets. The reason for this is I wanted my gas/oil temp gauges to be slightly off-color from the SPEEDO and TACH. In all but the trouble socket, I put fresh 74's I'd colored with sharpie. And the troubled socket got to reuse a bulb that I had also colored with sharpie.
USDM SYLVANIA #74 bulbs will fit without modifications in any of the other sockets. No problem. This is probably the best way to go, but I was trying to work with what I already had, and that was 24's. If you want to do this, you need to consider how to get 24's to stay in your sockets. You can use:
1) An INCREDIBLY fine amount of something like plastic glue on the bottom nipple of the light.
2) A fair amount of electrically conductive adhesive, but you CANNOT cross leads by creating contact points if you choose this glue.
3) You can construct a saddle for the light using electrical tape, but it must be fairly thin to allow clearance through the socket holes.
4) You can soldier the leads directly to the socket holes, but I'm not a big fan of this option.
Here's the size difference between the stock 74's and USDM 24's:
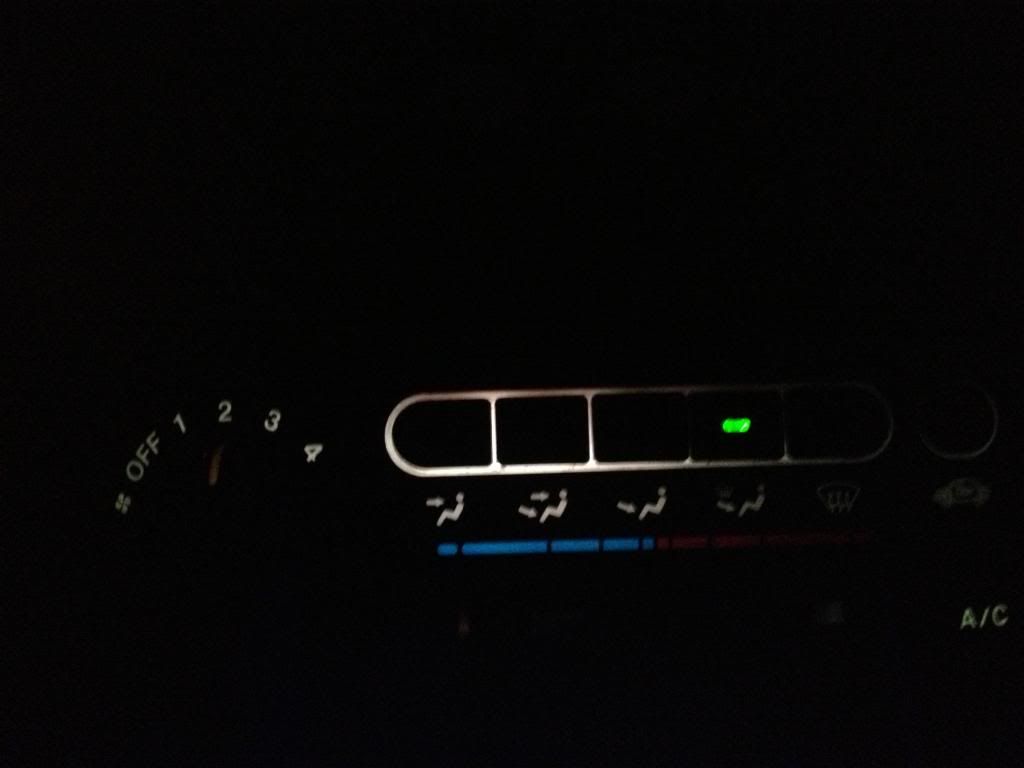
DIY amber for a few 74s I'll need for our problem sockets and the CCU:
Side by side with factory ambers and DIY 74 ambers:

Size differential between USDM 74's and Honda's stock 74's. You can see why there are issues:

And my homemade "saddles" for ensuring the 24's weren't going to fly out their sockets when the Vtec cracks:
Whatever option you choose, remember the problem socket that sits just behind the oil temp gauge. Purchasing 74's from an online retailer that are as close to stock as possible is definitely the best option, but not the only one. You can color them with sharpie quite effectively, or I've also read that you can purchase new bulb condoms online for pretty cheap and in whatever color you choose. Regardless of what option you want to go with, just fill in all seven sockets accordingly and shove that cluster back in. Always make sure that you test the lights before sealing everything back up. You don't want to have to do everything twice!
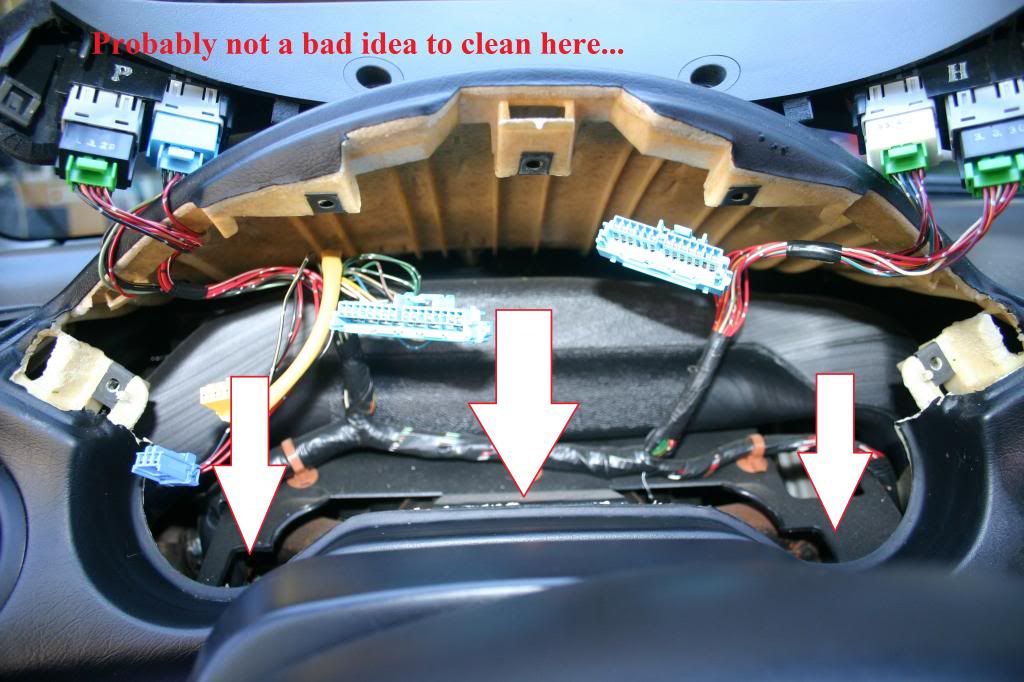
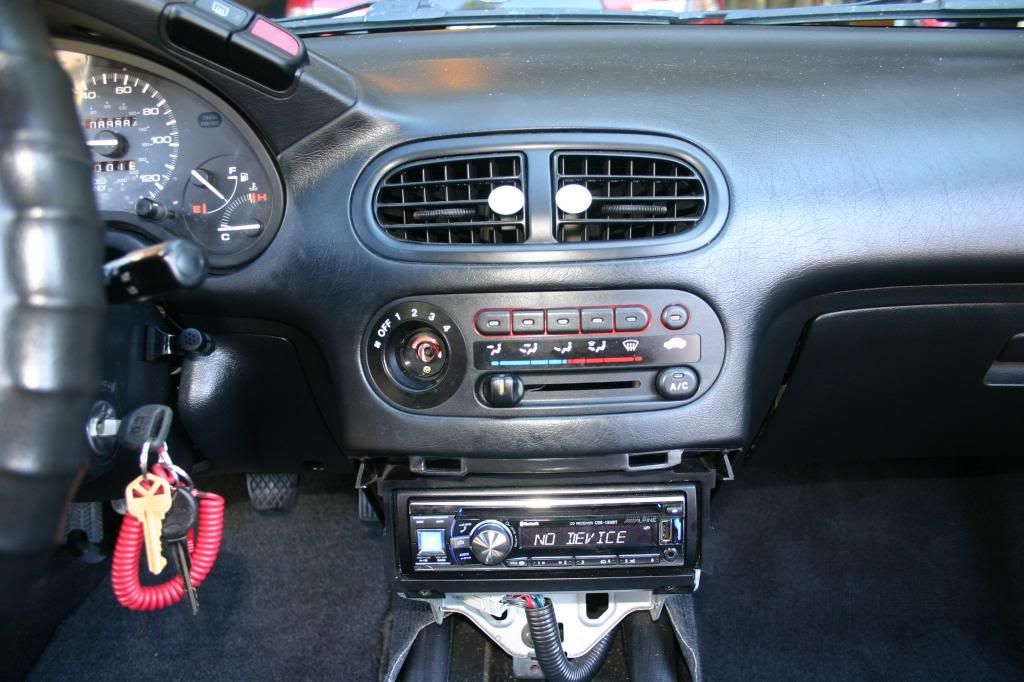
Okay, so now that the cluster is in and looking the way you want it to, let's move to the CCU. This part is not much fun, but if you're looking at dirty, faded lights or maybe no lights at all in your interior, the final result is well worth it!
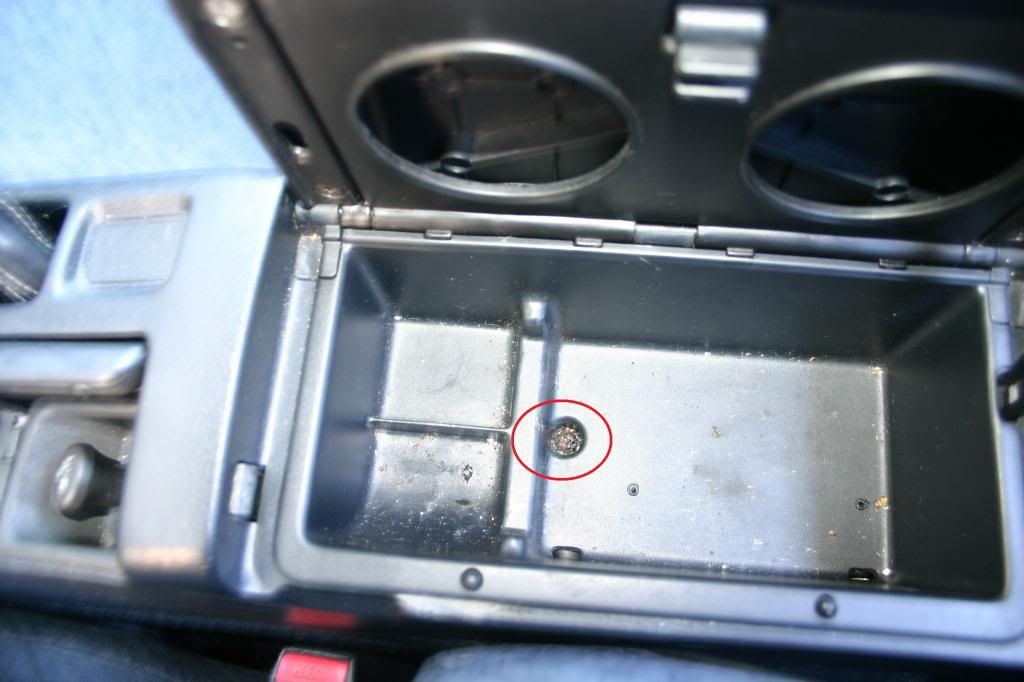
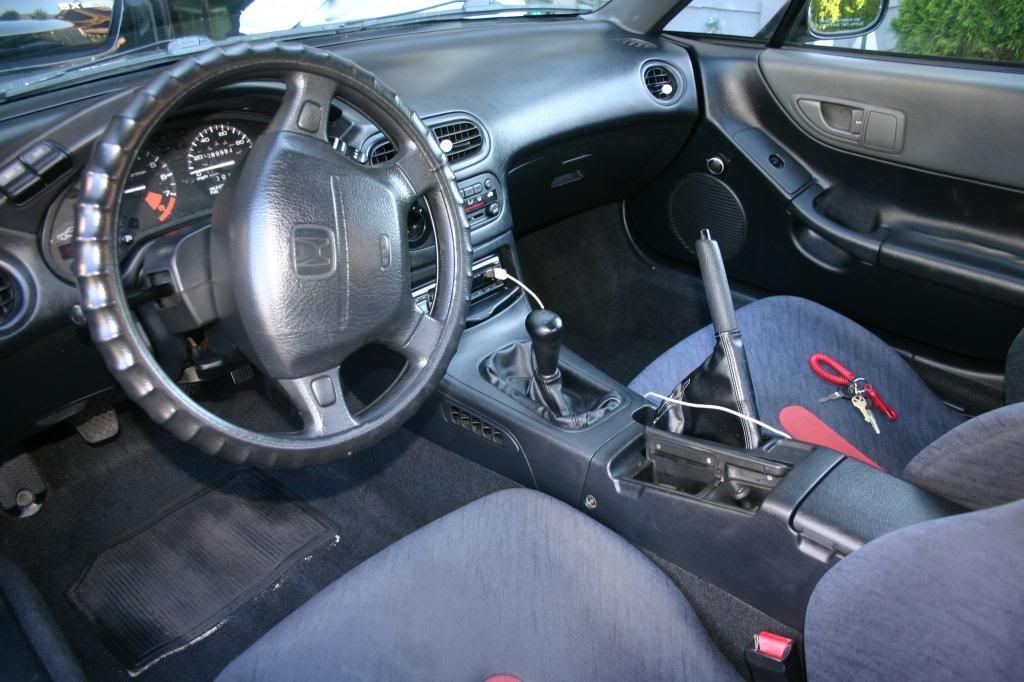
So we're going to start by pulling the interior plastics from around the e-brake and gear shift in much the same we would go about it if we were replacing the deck. Start by removing the three screws that run along the trim, three on each side:

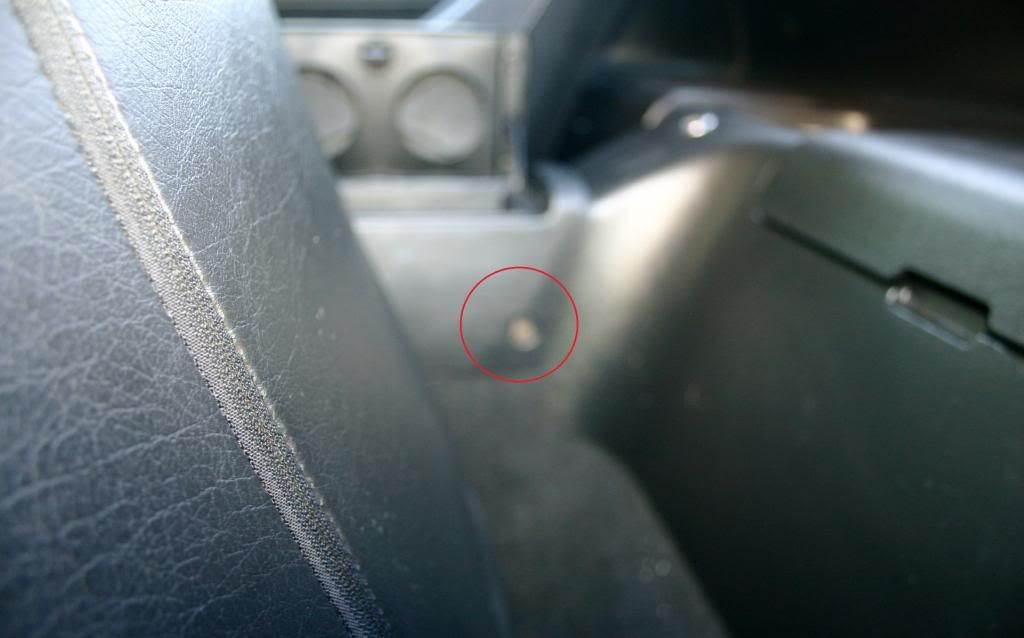
And don't forget about the little guy hiding in your center console:
It's also a little easier to work with if you pull the ashtray now:
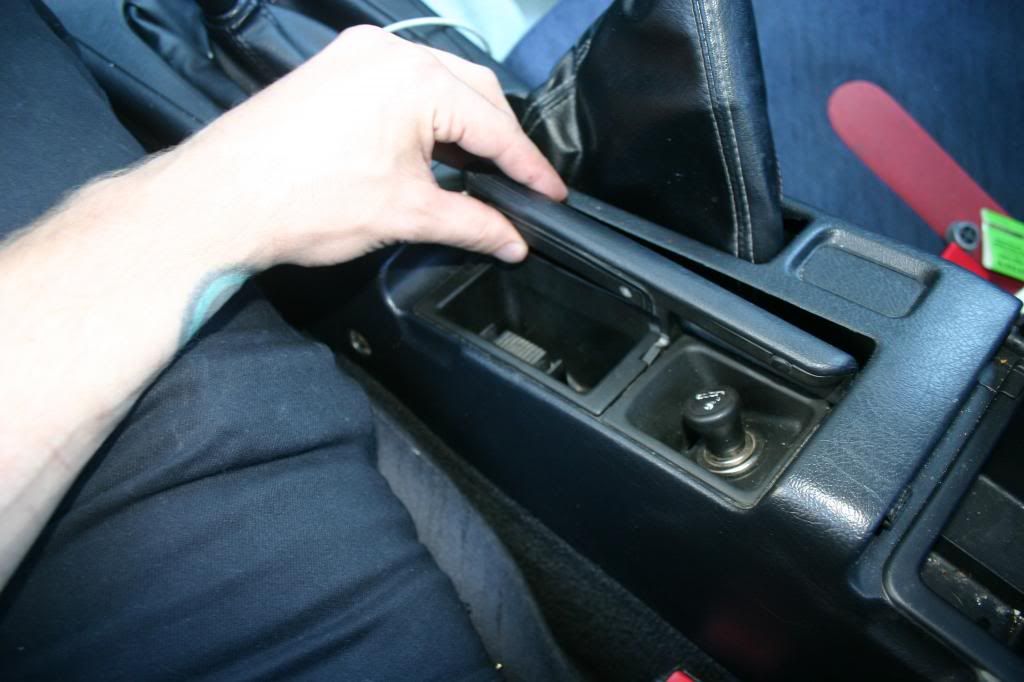
Now before you start pulling at the plastics, make sure you remove the shift ****. I SHOULD ALSO NOTE THE CAR SHOULD NOT BE IN GEAR IF IT'S A MANUAL. You don't want to pop it out gear while you're removing the plastics. Just pull that ebrake tight baby!
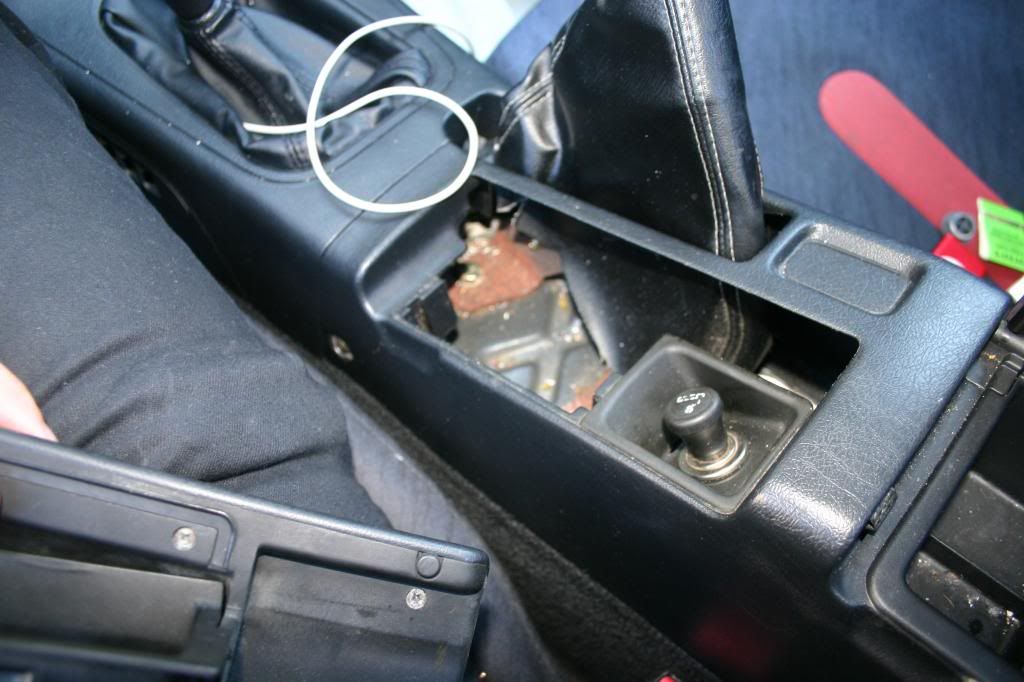
Then just work the two interior plastic pieces out, they lift together from the middle but are two separate pieces. If you wish to remove the back half, and you'll get more room to play if you do, make sure to disconnect the cigarette lighter gently. Those wires are tiny and frail!
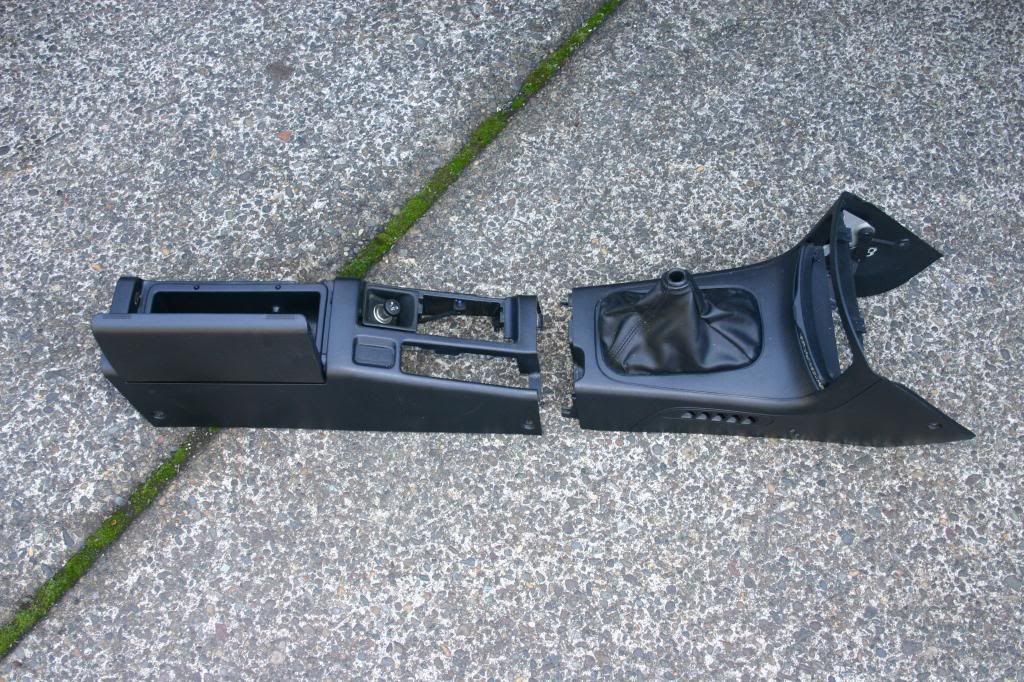
Set that aside, maybe for some cleaning:
Here's the guts of my Sol. You might want to take some time to clean that gunk out. I smoke, so there was a bit of ashy build-up. I might recommend waiting until you have the CCU out. You're likely to cut yourself a time or two in the next steps: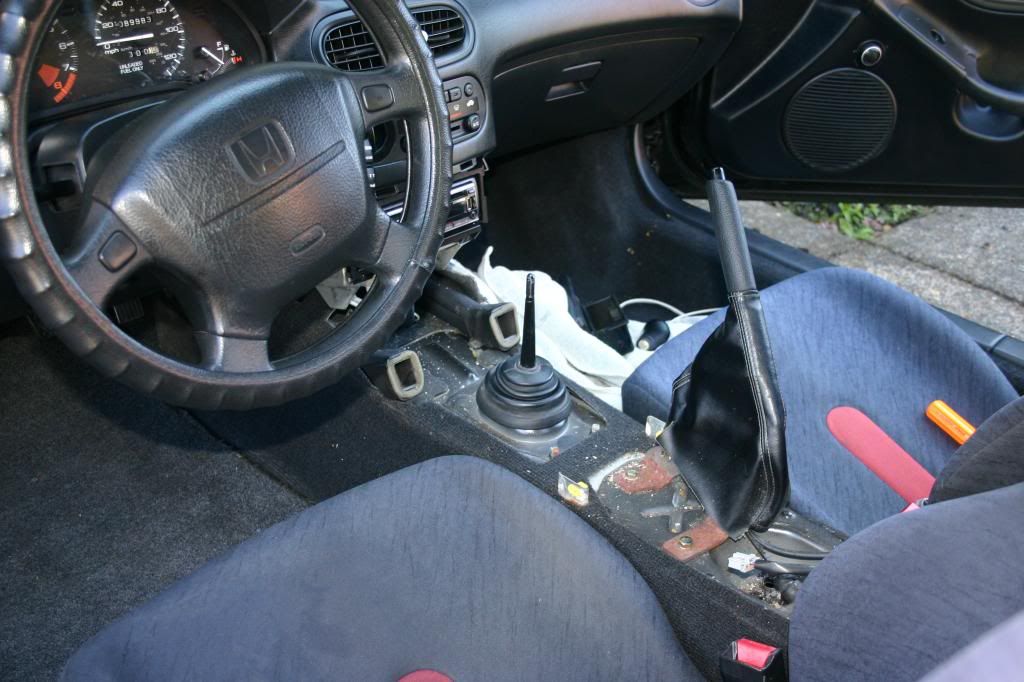
Then pull your deck by removing the four screws from the mounting bracket:
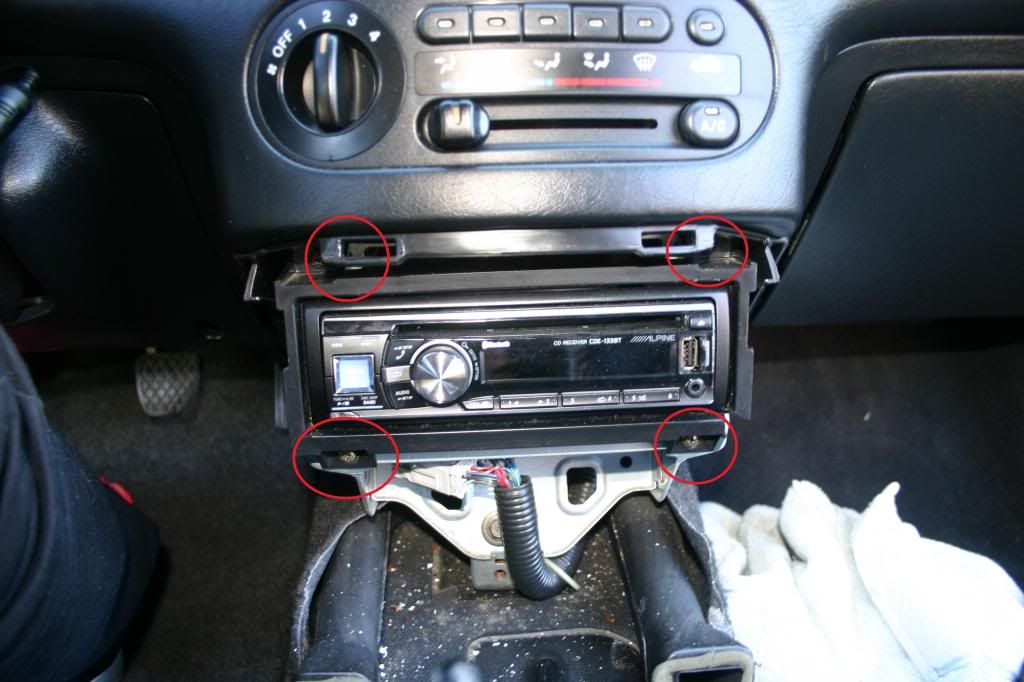
And disconnect the cord running from the temperature selector to the passenger side leg area:
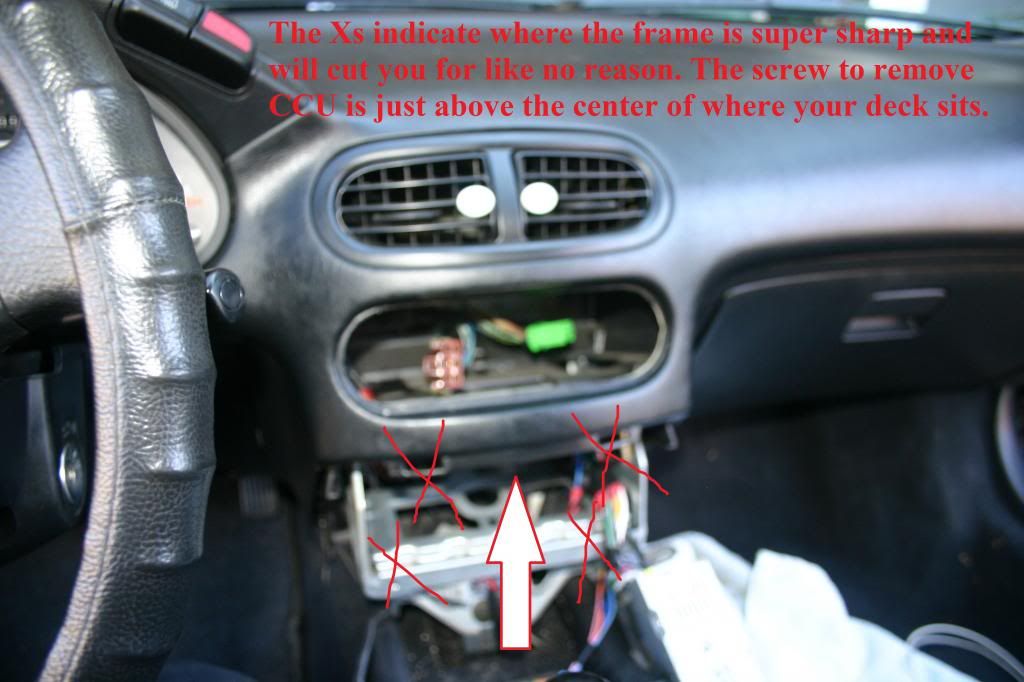
Next, take some time to get familiar with the sharp edges of the frame, noted in the picture, and locate the single mounting screw for the CCU directly centered above your deck. You will need a SUPER stubby driver or an off-set driver to access this screw:
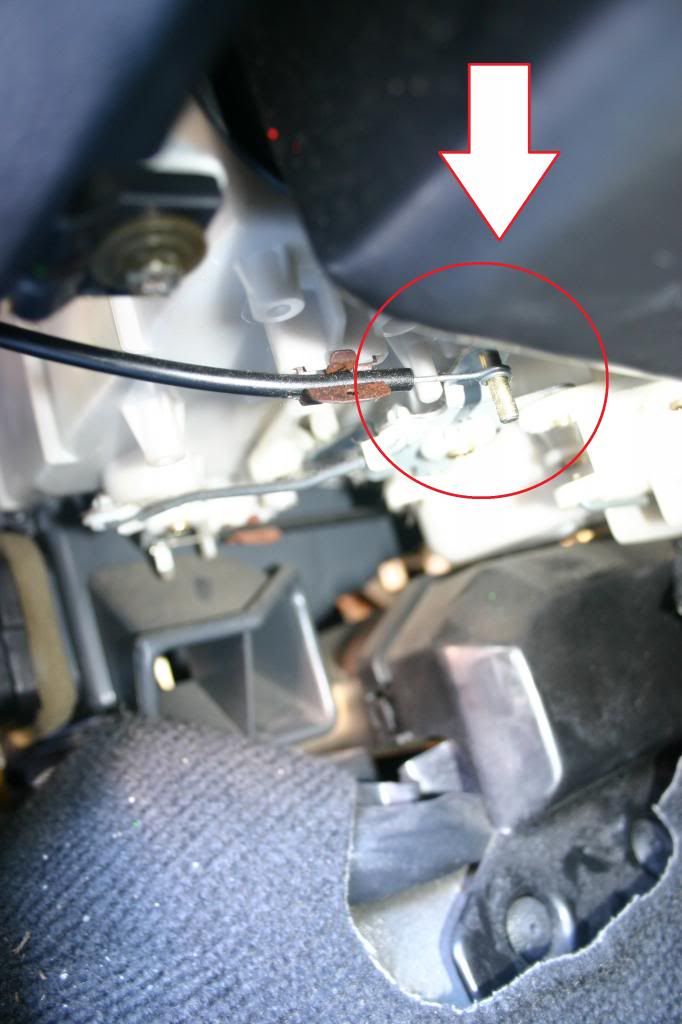
Once it's out, just feed the CCU from the dashboard by pushing against the back of the unit. There are two connections to the CCU, and there isn't much slack. Be very gentle and patient as your figure out the best way to remove the clips in back, trying not to stress the wire or plastic clips. They will come out eventually, I promise.
Once freed from the wires, you can pull your CCU out and take it away from the car. You'll probably need to go wash your hands because the frame got you pretty good:
There are 2 #74 bulbs in there. Again, I couldn't get my USDM ones to fit, so I had to reuse the stock bulbs that I had colored with orange sharpie. To remove the bulbs doesn't require disassembling the CCU. You can just pull at them from the bottom, removing the wires from their saddles if necessary:
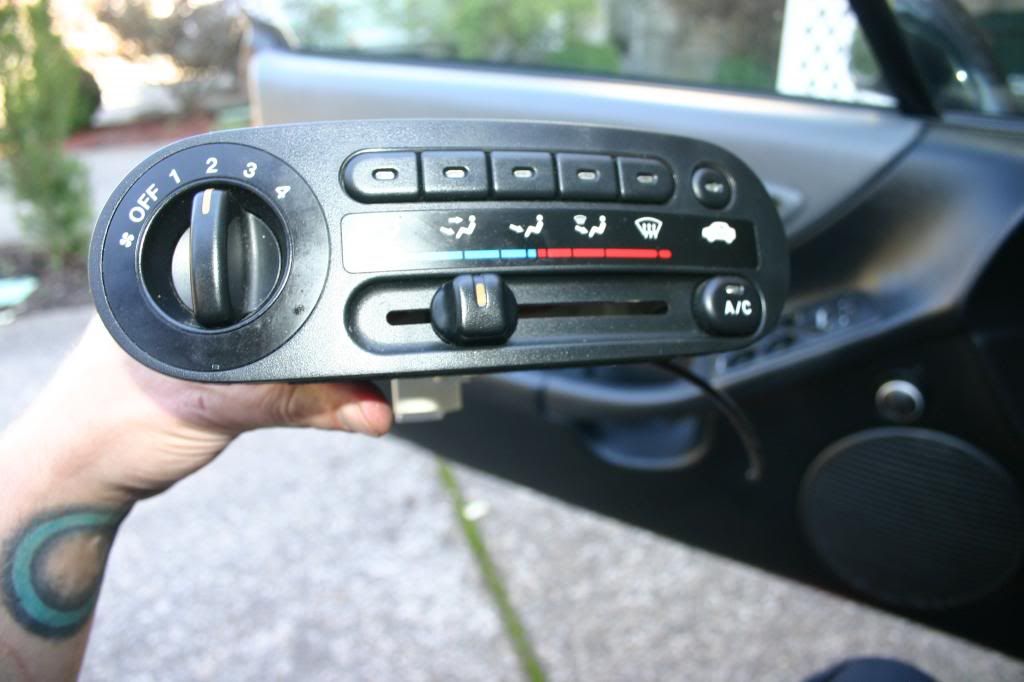
My fan control **** was cracked, so when I turned it, the stress would spread the tube apart, and slip over the connector. I couldn't change the fan settings! Here it is drying after I epoxied the cracks:
Slip your CCU back in, connecting the two clips and the temperature selector cord. Sometimes, you might not get it connected so that the selector moves completely from edge to edge. The best way to reconnect it is pushing the connection all the way toward the engine bay and moving your temperature selector all the way to "HOT." This is probably the best way to get a flush fit again. Make sure you test that the lights are working before replacing the CCU mounting screw. Again, you don't want to have to do it twice. Then put your deck back in:
Checking the lights before putting it back together:
Putting the interior back together is cake. It can be a little tricky to maneuver around the e-brake, but just be patient. Replacing the center console screw first can be helpful in making sure you get a flush fit again.
Reassembly is a breeze:
And now you've got a full set of ambers, or regular incandescent bulbs, whatever you were after.
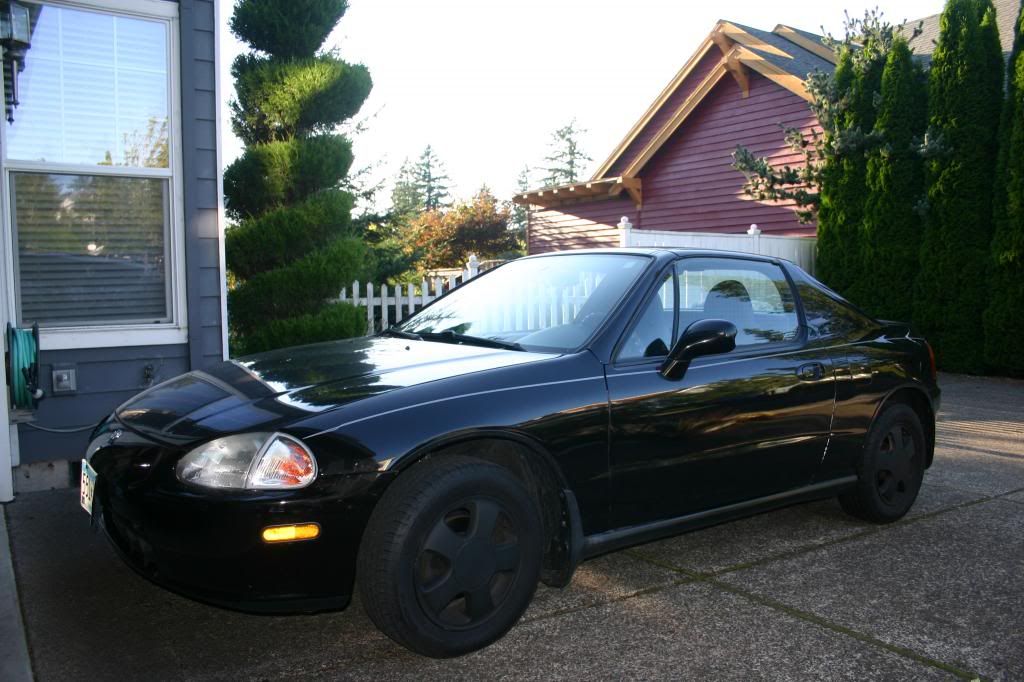
Here's my Sol after the day's work:
It's just getting dark enough now to take a final picture of the lights. I'll be sure to post one later. Also, I'm sure I'm forgetting something helpful, so if something occurs to me, I'll update. Thanks for reading everyone. I hope this write-up may be of use to someone!
First of all, many sources out there say that #24 bulbs can fit in your cluster sockets. This isn't exactly true. For any Del Sol cluster, there are 7 different illuminating bulbs. And they are all #74. But not a regular #74 bulb, they are somewhat smaller. I've been lead to believe that you can get the right ones for cheap from retailers like Hondapartscheap and the like, but if you plan on going to AZ or some other local store, the SYLVANIA #74 bulbs will not fit as easily as anyone might like them to, and in one location won't work at all--but more on that in a minute.
#24 bulbs run at a higher voltage but will work just fine. The problem is that they aren't likely to fit neatly into your cluster sockets. You'll have to do a few modifications if you intend to use #24 bulbs as replacements. Based on some of the other threads out there that relate to SPECIFICALLY Sol clusters (which are in fact different not only in appearance but also in bulb spread from Civics), I went ahead with #24's. The first problem I ran into was getting them to stay in the sockets. I tried my luck and put them in, but I ended up having to reuse three of the stock #74 bulbs for this.
<a href="http://s847.photobucket.com/user/jedidontplaycountrymusic/media/IMG_0438_zpsd9021a6e.jpg.html" target="_blank"><img src="http://i847.photobucket.com/albums/ab32/jedidontplaycountrymusic/IMG_0438_zpsd9021a6e.jpg" border="0" alt=" photo IMG_0438_zpsd9021a6e.jpg"/></a>

Not okay... and I wasn't digging the color I was getting. So, the next day I went back at it, this time with the intention of taking some pictures and showing anyone who cares to know a few options they might consider when replacing or upgrading the interior lights of their Sol.
So to get this thing started, you're going to want to pull the cluster. It's pretty simple.
First remove the two screws shown in the picture below:

Never mind my cluster lens. It's not dirty, it's scored. Tried everything to get it off and no luck. If anyone happens to have one laying around, let me know!
Then, remove the bezel from the dash, pulling gently and straight towards the steering wheel:

Once it's out, you can just "peel" it back and rest it on the dashboard. Then there are three screws that hold the cluster in. Pull these:

You'll probably want to use a magnetic driver for that part. Dropping the screws can be a really big hassle.
Once you've got the retaining screws out, the cluster will pull forward quite easily. Don't stress it though! Especially if you live in colder climates. These wires and connections are getting old guys and gals, we don't want to stress them any more than we have to:


Those clips can be a little stiff and tricky so please be careful! They are notorious for breaking!
And now your cluster is out. You might want to take a moment to clean the cavity left where your cluster used to be, but maybe it doesn't bother you. Anyway, now that you've got your cluster out, set it somewhere very dry and very safe, like face down on some cloth. You don't want to scratch your lens, and make sure you avoid carpeted areas as much as possible. Any static discharge could be disadvantageous. I recommend using latex gloves while handling the cluster, but it's up to you.
There are 7 illuminating bulbs in the Sol's cluster. I have labeled them for you here:

Removing these is easy. Turn counter clockwise about 45 degrees and lift straight up. They may be a little "sticky" the first time or two, but don't worry. I think you'd have to try really hard to break these, just don't scratch the connection sites any more than you have to.
And here's where things get real tricky. PLEASE NOTE THAT THE LEFT-BOTTOM-MOST SOCKET (as shown in the picture above) IS A TROUBLED SOCKET. Now, I am a big fan of Honda, but this socket is poorly designed. The trouble is that there isn't enough clearance for USDM #24 OR #74 bulbs to fit. This is a big problem. However, you have some options.
Depending on which route you take as far as chosen bulbs, you can work with what you've already got. So, I wanted amber lights, and fresh ones. I put SYLVANIA #24 AMBER lights in all but the three left-bottom-most sockets. The reason for this is I wanted my gas/oil temp gauges to be slightly off-color from the SPEEDO and TACH. In all but the trouble socket, I put fresh 74's I'd colored with sharpie. And the troubled socket got to reuse a bulb that I had also colored with sharpie.
USDM SYLVANIA #74 bulbs will fit without modifications in any of the other sockets. No problem. This is probably the best way to go, but I was trying to work with what I already had, and that was 24's. If you want to do this, you need to consider how to get 24's to stay in your sockets. You can use:
1) An INCREDIBLY fine amount of something like plastic glue on the bottom nipple of the light.
2) A fair amount of electrically conductive adhesive, but you CANNOT cross leads by creating contact points if you choose this glue.
3) You can construct a saddle for the light using electrical tape, but it must be fairly thin to allow clearance through the socket holes.
4) You can soldier the leads directly to the socket holes, but I'm not a big fan of this option.
Here's the size difference between the stock 74's and USDM 24's:

DIY amber for a few 74s I'll need for our problem sockets and the CCU:


Side by side with factory ambers and DIY 74 ambers:

Size differential between USDM 74's and Honda's stock 74's. You can see why there are issues:

And my homemade "saddles" for ensuring the 24's weren't going to fly out their sockets when the Vtec cracks:

Whatever option you choose, remember the problem socket that sits just behind the oil temp gauge. Purchasing 74's from an online retailer that are as close to stock as possible is definitely the best option, but not the only one. You can color them with sharpie quite effectively, or I've also read that you can purchase new bulb condoms online for pretty cheap and in whatever color you choose. Regardless of what option you want to go with, just fill in all seven sockets accordingly and shove that cluster back in. Always make sure that you test the lights before sealing everything back up. You don't want to have to do everything twice!
Okay, so now that the cluster is in and looking the way you want it to, let's move to the CCU. This part is not much fun, but if you're looking at dirty, faded lights or maybe no lights at all in your interior, the final result is well worth it!
So we're going to start by pulling the interior plastics from around the e-brake and gear shift in much the same we would go about it if we were replacing the deck. Start by removing the three screws that run along the trim, three on each side:


And don't forget about the little guy hiding in your center console:

It's also a little easier to work with if you pull the ashtray now:


Now before you start pulling at the plastics, make sure you remove the shift ****. I SHOULD ALSO NOTE THE CAR SHOULD NOT BE IN GEAR IF IT'S A MANUAL. You don't want to pop it out gear while you're removing the plastics. Just pull that ebrake tight baby!
Then just work the two interior plastic pieces out, they lift together from the middle but are two separate pieces. If you wish to remove the back half, and you'll get more room to play if you do, make sure to disconnect the cigarette lighter gently. Those wires are tiny and frail!
Set that aside, maybe for some cleaning:

Here's the guts of my Sol. You might want to take some time to clean that gunk out. I smoke, so there was a bit of ashy build-up. I might recommend waiting until you have the CCU out. You're likely to cut yourself a time or two in the next steps:

Then pull your deck by removing the four screws from the mounting bracket:

And disconnect the cord running from the temperature selector to the passenger side leg area:

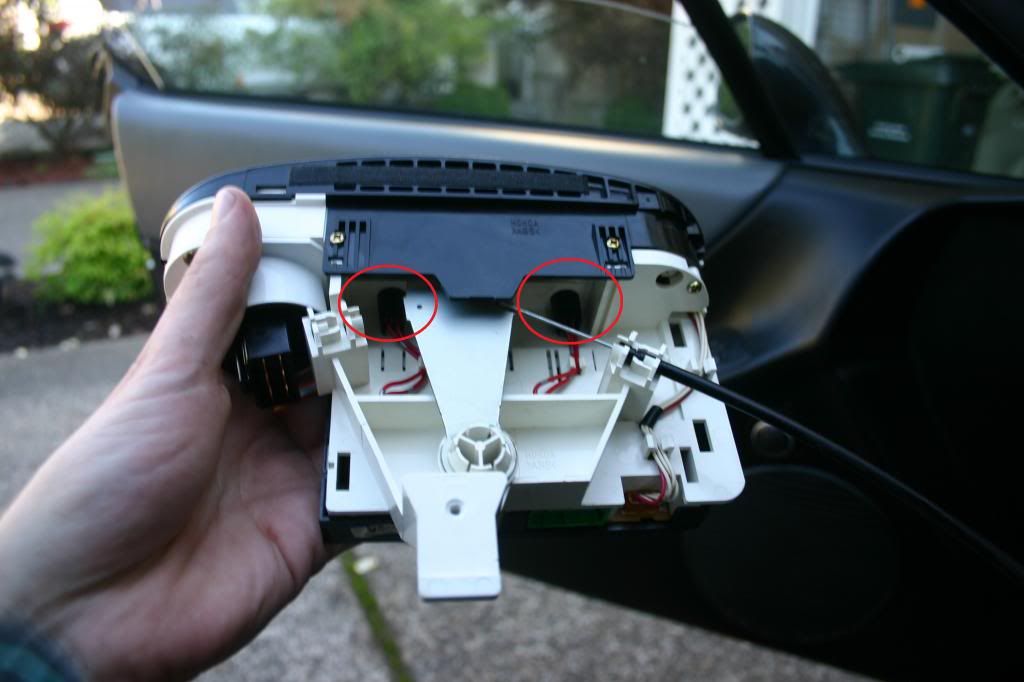
Next, take some time to get familiar with the sharp edges of the frame, noted in the picture, and locate the single mounting screw for the CCU directly centered above your deck. You will need a SUPER stubby driver or an off-set driver to access this screw:

Once it's out, just feed the CCU from the dashboard by pushing against the back of the unit. There are two connections to the CCU, and there isn't much slack. Be very gentle and patient as your figure out the best way to remove the clips in back, trying not to stress the wire or plastic clips. They will come out eventually, I promise.
Once freed from the wires, you can pull your CCU out and take it away from the car. You'll probably need to go wash your hands because the frame got you pretty good:

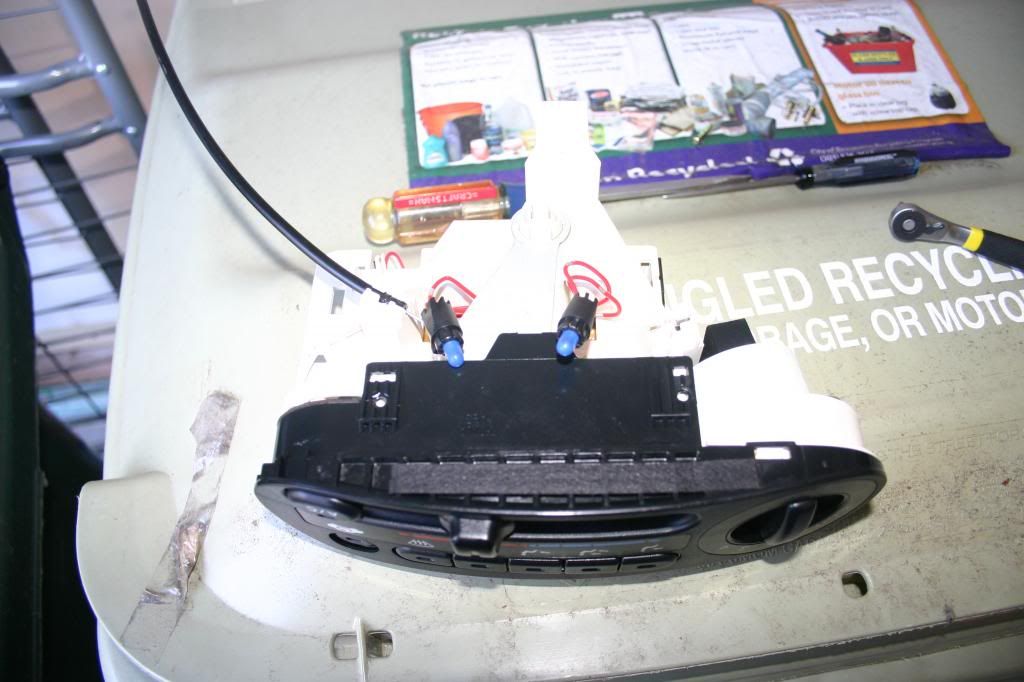
There are 2 #74 bulbs in there. Again, I couldn't get my USDM ones to fit, so I had to reuse the stock bulbs that I had colored with orange sharpie. To remove the bulbs doesn't require disassembling the CCU. You can just pull at them from the bottom, removing the wires from their saddles if necessary:


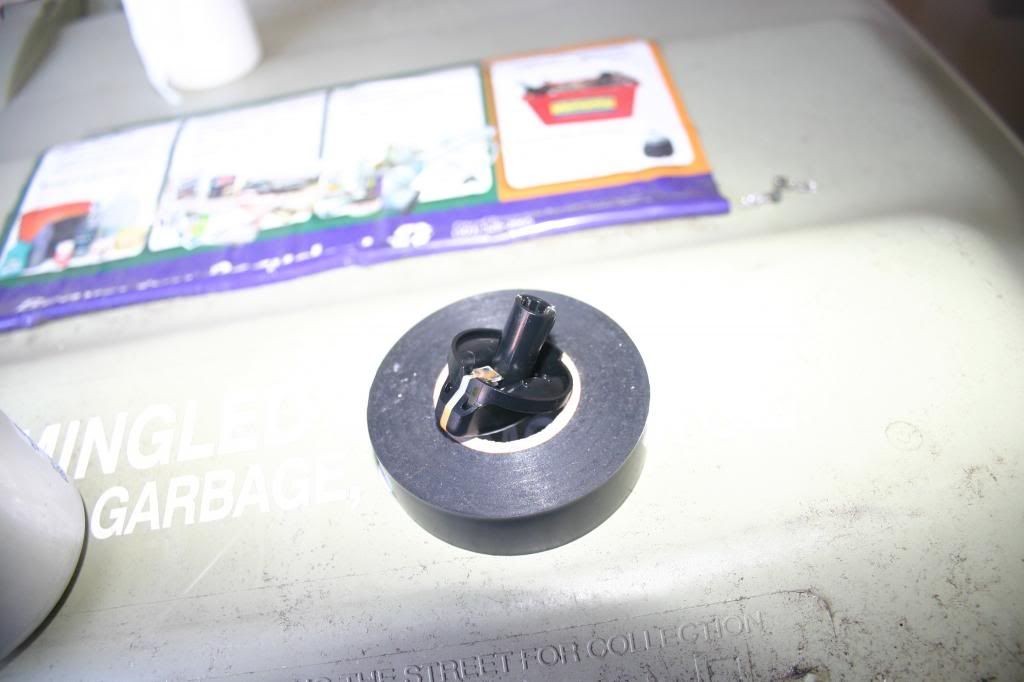
My fan control **** was cracked, so when I turned it, the stress would spread the tube apart, and slip over the connector. I couldn't change the fan settings! Here it is drying after I epoxied the cracks:

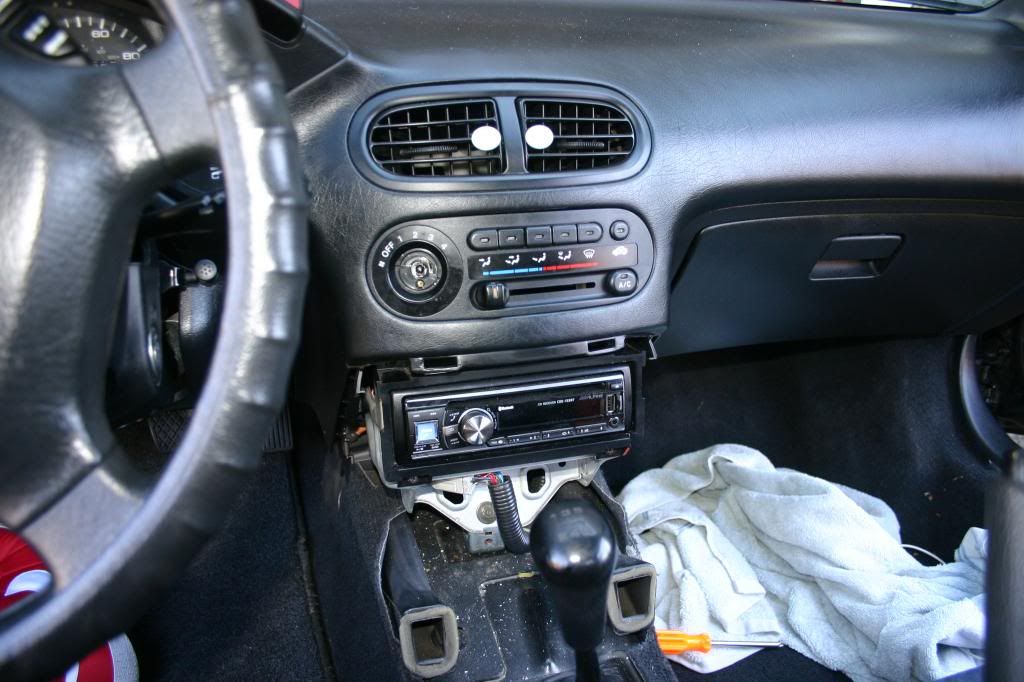
Slip your CCU back in, connecting the two clips and the temperature selector cord. Sometimes, you might not get it connected so that the selector moves completely from edge to edge. The best way to reconnect it is pushing the connection all the way toward the engine bay and moving your temperature selector all the way to "HOT." This is probably the best way to get a flush fit again. Make sure you test that the lights are working before replacing the CCU mounting screw. Again, you don't want to have to do it twice. Then put your deck back in:

Checking the lights before putting it back together:

Putting the interior back together is cake. It can be a little tricky to maneuver around the e-brake, but just be patient. Replacing the center console screw first can be helpful in making sure you get a flush fit again.
Reassembly is a breeze:

And now you've got a full set of ambers, or regular incandescent bulbs, whatever you were after.
Here's my Sol after the day's work:

It's just getting dark enough now to take a final picture of the lights. I'll be sure to post one later. Also, I'm sure I'm forgetting something helpful, so if something occurs to me, I'll update. Thanks for reading everyone. I hope this write-up may be of use to someone!
 09-11-2013, 06:49 PM
#2
Honda-Tech Member
Thread Starter
Join Date: Feb 2011
Posts: 10
Likes: 0
Received 0 Likes
on
0 Posts
And as long as we're at it, here's a few pictures after cleaning up the cluster lens. Meguire's Plast-x and elbow grease work wonders.
Before:
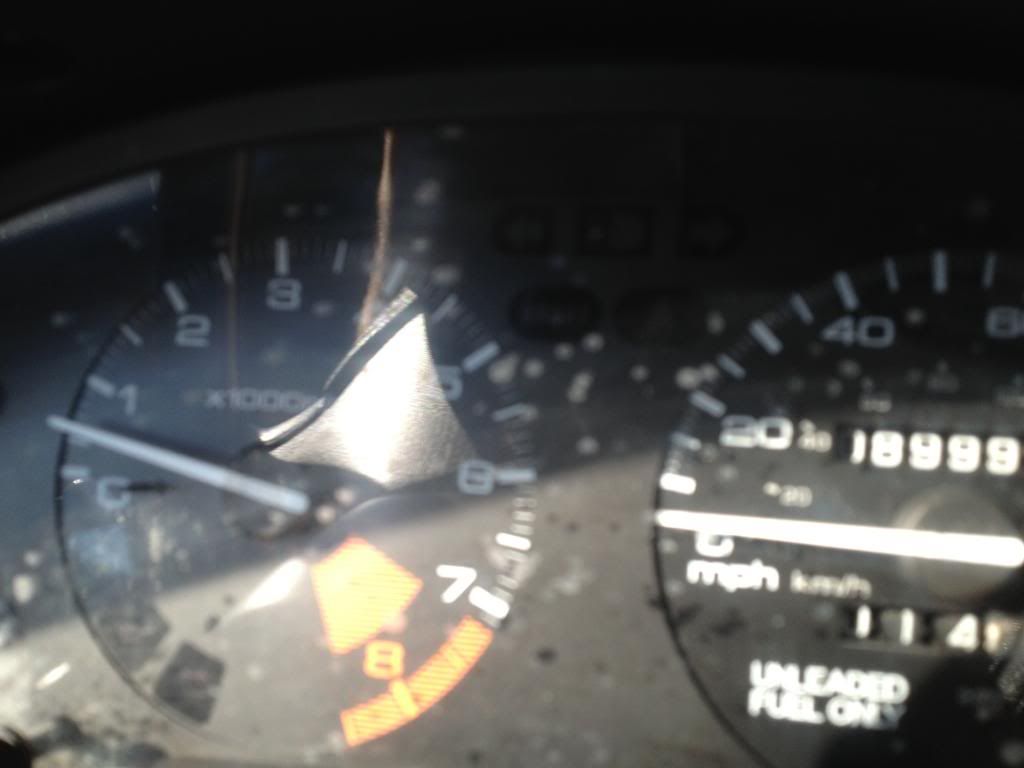
And after:
Now my cluster is looking great!
Before:

And after:

Now my cluster is looking great!
09-11-2013, 07:29 PM
#3
Nice DIY info. You know you could of googled lightsonleds and emailed them on Facebook. They sell full led cluster conversions as well as other led stuff and could of avoided the hassle.
09-13-2013, 11:55 AM
#4
Honda-Tech Member
Thread Starter
Join Date: Feb 2011
Posts: 10
Likes: 0
Received 0 Likes
on
0 Posts
Yeah, that wouldn't be a bad option to go with. I'm personally a fan of incandescent bulbs on account of their longevity, but as the days go on I see more and more real nice looking LED set-ups. But when it comes to redoing the lights, anything is better than 20 year-old bulbs!

Thread
Thread Starter
Forum
Replies
Last Post
FamousSI
Honda Civic / Del Sol (1992 - 2000)
4
03-08-2011 12:58 PM
310HPS2k
Honda Civic / Del Sol (1992 - 2000)
15
04-29-2009 06:35 AM
phantom_sol
Honda Civic / Del Sol (1992 - 2000)
8
04-10-2003 10:41 AM