When you click on links to various merchants on this site and make a purchase, this can result in this site earning a commission. Affiliate programs and affiliations include, but are not limited to, the eBay Partner Network.
Like the title says....so here we go. First a few WARNINGS and DISCLAIMERS:
1.) As always when working on your car be sure ahead of time that you have all the tools, time needed, and are COMFORTABLE with doing this yourself. If not call a friend or take it to a trustworthy shop and ask them to do it for you.
2.) Always TEST whatever you've done in a safe, lightly trafficked area like a parking lot by yourself (i.e. without the wife, s/o, kids, Rover the Rottweiler, etc in the vehicle)
3.) I can't stress this enough: when working on your brakes (i.e. the THINGS THAT MAKE YOUR CAR STOP) test it, test it, test it once you're done and make absolutely certain they work as intended.
This write up covers the brake pedal for all Sedans (EJ6/8 & EN1 ref: here) 1996-2000. Other 1992-2000 Civic/Del Sol may or may not be similar to this so if you are working on something else please take this writeup as a guideline not a step by step how to.
Grab the tools you'll need:
Required:
17, 15, and 12mm wrenches, crescent wrenches are better but any will do.
Pliers
Ratchet & 10mm Socket (Only required for A/T equipped cars)
Ruler
Optional:
Phillips screwdriver
A pillow or towel to lay under your shoulders-you'll be upside down for a while and doing this without something soft to pad the area your feet normally are (like I did) results in sore neck, and shoulders
Ensure you have a minimum of 2 hours to do this-your time may be longer or shorter but don't start unless you know you'll have nothing pressing in the next 2 hours. Also read from start to finish so you don't screw up. Read it repeatedly if you have to.
For starters:
a.) park your car on a level flat surface,
b.) turn it off,
c.) remove the keys from the ignition, and
d.) BLOCK THE WHEELS (rears at a minimum).
e.) While you're at it give the e-brake a good yank too for safety's sake.
f.) Write down whatever number below is applicable to your vehicle.
Pedal Height Numbers:
M/T: 160mm (6.30 in)
A/T: 165mm (6.50 in) With floor mat and rubber pedal cover removed
1a.) If you have an adjustable steering wheel give the lever a good yank and pull it up as high as you can-then lock it there.
1b.) Then slide the driver's seat as far back as it will go-you want as much room as possible.
2a.) On Auto Transmission (A/T) equipped cars you have to remove the foot rest where the clutch pedal would be on a Manual Transmission (M/T) equipped vehicle (two (2) 10mm bolts)-this is required for removal of the floor mat. Now take it out and set it aside. Also remove the rubber cover from your brake pedal-those numbers you wrote down earlier are measured without either of them present and you want the pedal adjusted correctly.
.
b.) If you need the room to work remove the left side kick panel (Philips screwdriver)and the bracket (two (2) 10mm bolts) bolted onto the inner frame that it screws into-should help keep you from smacking your head every few minutes-and literally save you some headaches later. (Purely optional)
3.)Now get ready to hang upside down for a while If you've got that towel throw it down under your brake pedal and crawl under your dash with your head between the brake and clutch pedals (if so equipped). I find that it is easiest to hook your knees over the seat having your waist to head mostly on the mat free floor. Also toss all your wrenches (12,15, 17mm), ruler, and pliers down there before making like a bat.
Locate the brake light switch plunger and the connector that goes into it. It looks like this:
a.) Unplug the plug. The right nut is RIVETED/WELDED to the metal bracket & is where your 17mm wrench comes in handy and the left one is the actual adjustment nut-15mm.
b.) Grip the right and left nuts with your wrenches simultaneously and rotate them in opposite directions to free the adjuster then-temporarily mind you-adjust this so that all of the thread is visible on the LEFT SIDE of the metal bracket with only the white plunger (brake light trigger) showing on the left side (aka the OPPOSITE of the picture). If you accidentally thread it all the way out-no big deal just screw it back in a bit until it's where it's supposed to be.
4.) Now locate the freeplay adjuster/brake booster pushrod. It looks like this:
The bottom (closer to the pedal) adjustment nut is 12mm and needs to be freed-while the top (closest to the firewall) is 17mm.
a.) Just like you did with the brake light adjuster grip them both simultaneously and free the adjuster nut by twisting in opposite directions.
b.) Dial the adjustment nut as far "towards" you (i.e. towards the large immovable 17mm nut) as you possibly can once you've freed it. There is a stop point and don't try going past that or your nuts will end up like mine (slightly rounded with scoring on them)....no jokes please
5a.) Grab your pliers and ruler. The pliers are used to move the pushrod "in" or "out". Turning the pushrod counter-clockwise moves the pedal closer to the floor (lower), while turning it clockwise moves it farther from the floor (higher). It's adjustment time. Now grab your ruler and hopefully those numbers you wrote down or remembered from earlier (above). Just in case here they are again:
M/T: 160mm (6.30 in)
A/T: 165mm (6.50 in) With floor mat and rubber pedal cover removed
b.) Adjust the pedal using the pliers on the pushrod in the needed direction as noted above until the pedal is the correct height.
c.) *VERY IMPORTANT STEP* Clamp the pushrod still SO IT DOES NOT MOVE with your pliers and DO NOTallow it to turn as you tighten the pushrod adjuster locknut. Tighten it to spec (11 ft/lbs, 1.5kg/ms, 15N/ms) Failing to do so will leave you with large amounts of redoing your work and cussing your head off like I did. Recheck your measurements before and after tightening the adjuster locknut and make any corrections if necessary.
6.) Once you've got that pushrod adjustment locknut good and snugged down to the proper torque screw the brake light switch plunger back in until the plunger is fully depressed by the brake pedal arm. Then back it out 1/4 turn and TIGHTEN THE ADJUSTMENT NUT until it doesn't move anymore. Plug the switch connector back in and you're (almost) done!
7.) TEST YOUR BRAKES TO ENSURE THEY WORK!!!!!
BOTH AT LOW SPEED (PARKING LOT) AND HIGHER SPEEDS. FAILURE TO DO THIS MAY RESULT IN BODILY HARM OR DEATH DUE TO BRAKE FAILURE. YOU HAVE BEEN WARNED!

 10-25-2014, 05:07 PM

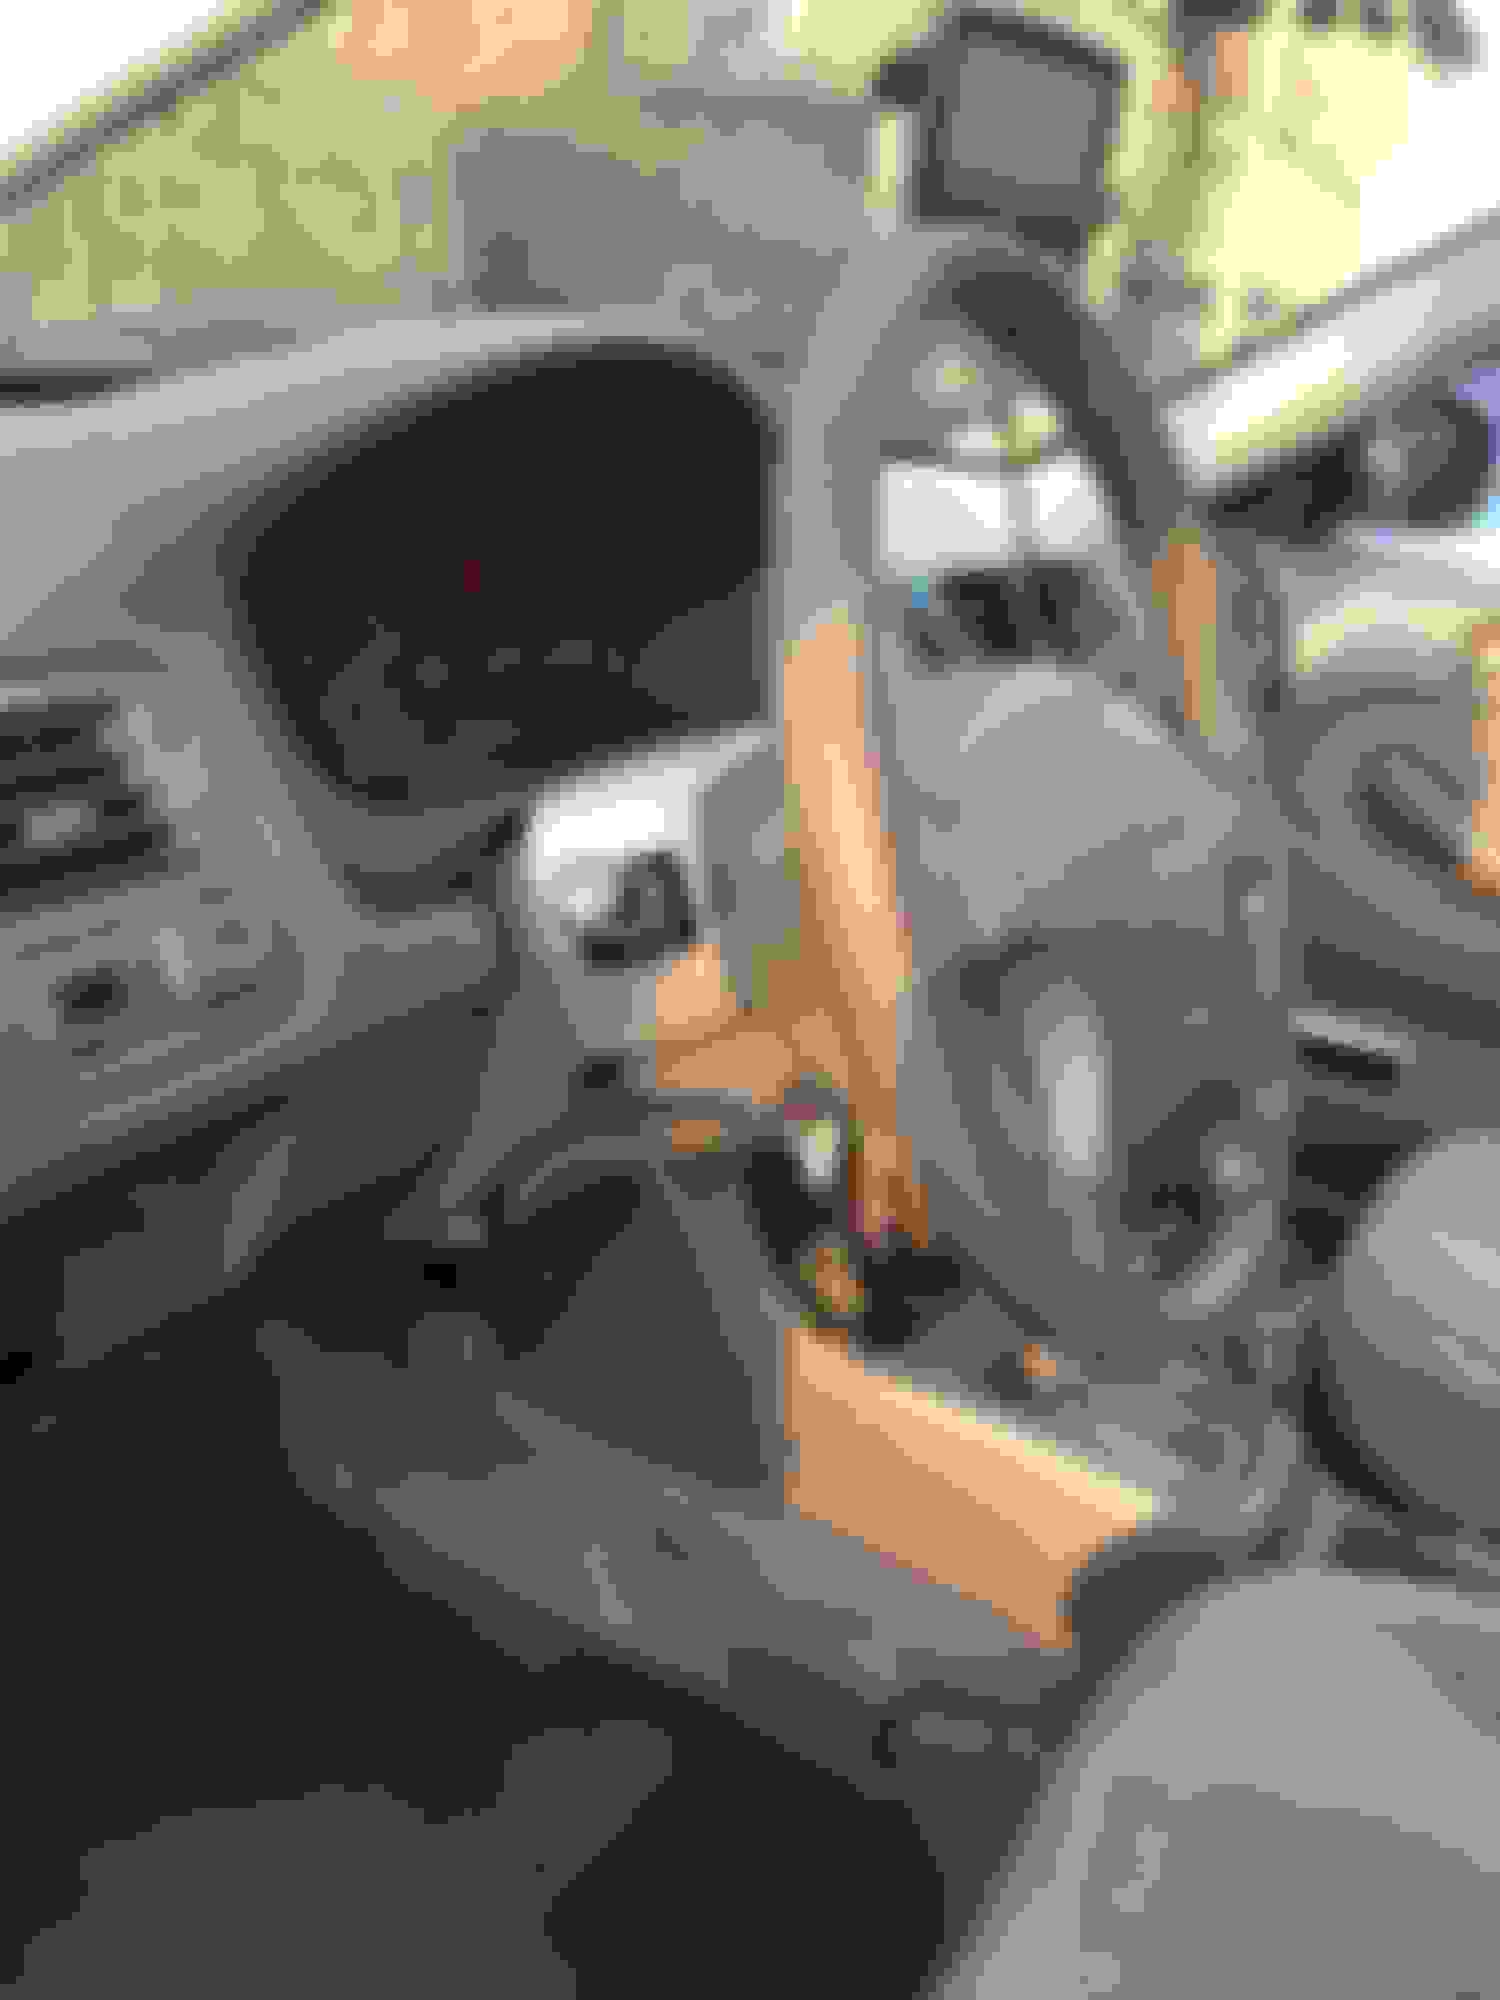
 If you've got that towel throw it down under your brake pedal and crawl under your dash with your head between the brake and clutch pedals (if so equipped). I find that it is easiest to hook your knees over the seat having your waist to head mostly on the mat free floor. Also toss all your wrenches (12,15, 17mm), ruler, and pliers down there before making like a bat.