
GSR EG Hatch Build
 09-04-2011, 10:14 AM
#1
Honda-Tech Member
Thread Starter

*Note* I'm Migrating to HT because my other Forum sucks ***** now. So heres my Build Thread From the other site. From start to finish it took from March to Current Time. Hope you like it!
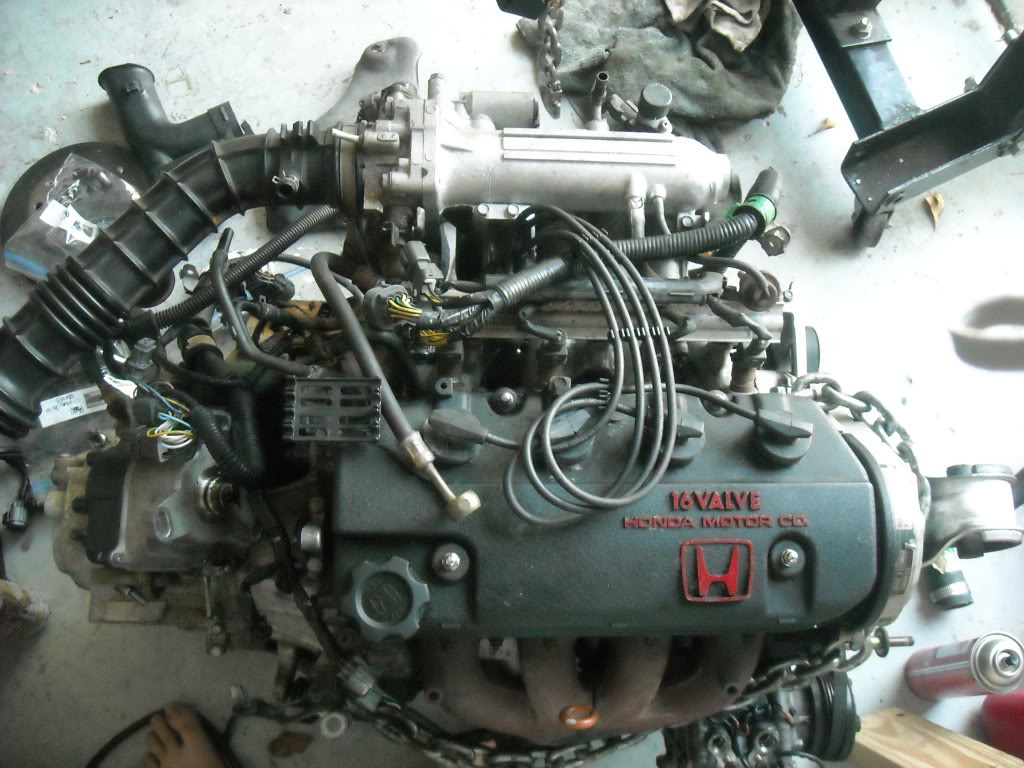
Ok so I've been going back and forth on the idea of building up my car. But things changed once i had the money to buy a GSR Swap for my baby. I found the motor on the Tampa Racing Forums yesterday. It's a rebuilt B18C1 Motor with a 5 Speed Type R Trans w/LSD. i picked this bad boy up for 1,700 :D (Awesome Price!). The only things i need to pick up before this is ready to go in is the motor mounts, a Head Gasket, and the head studs.
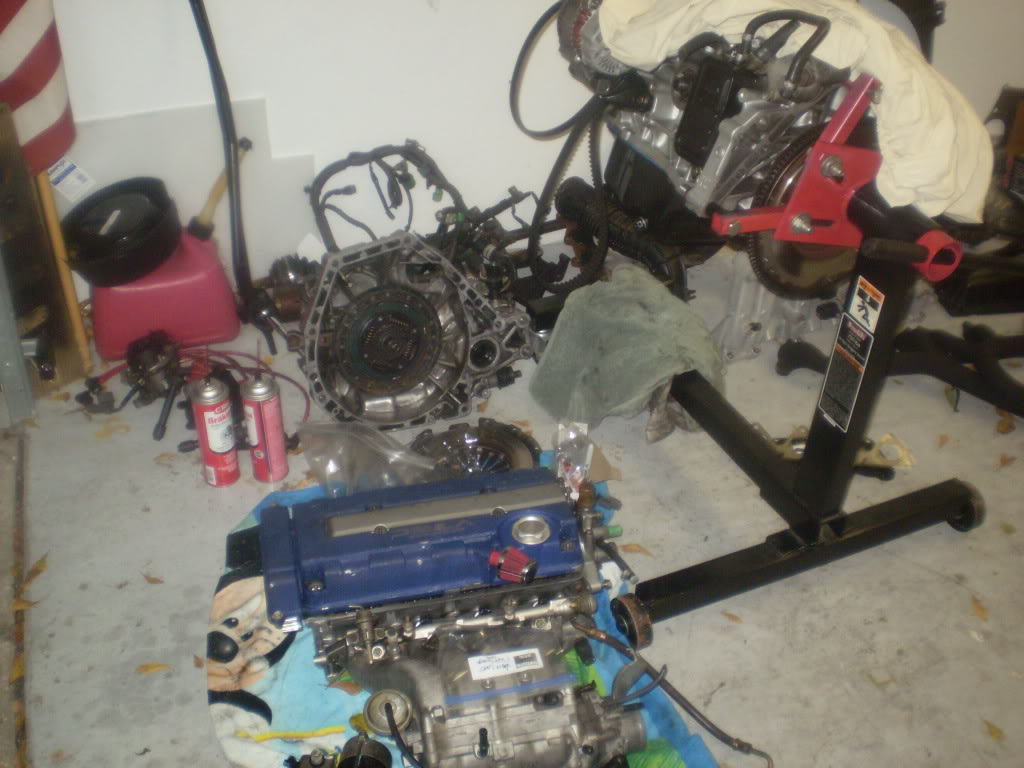
Once i got it all home
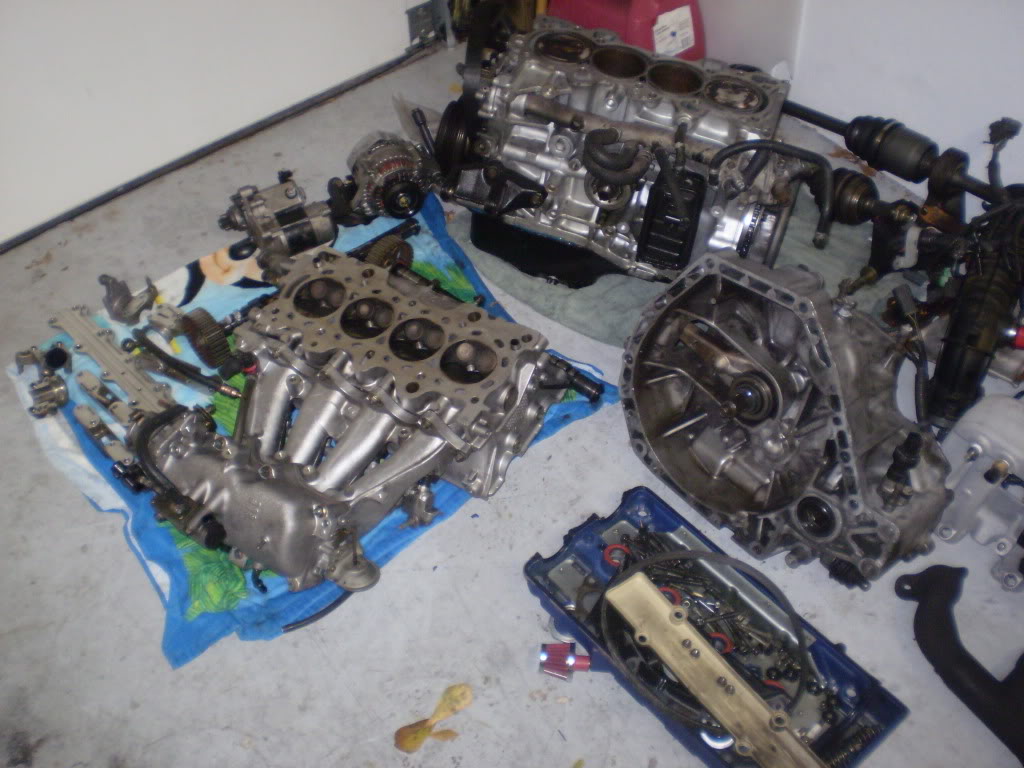
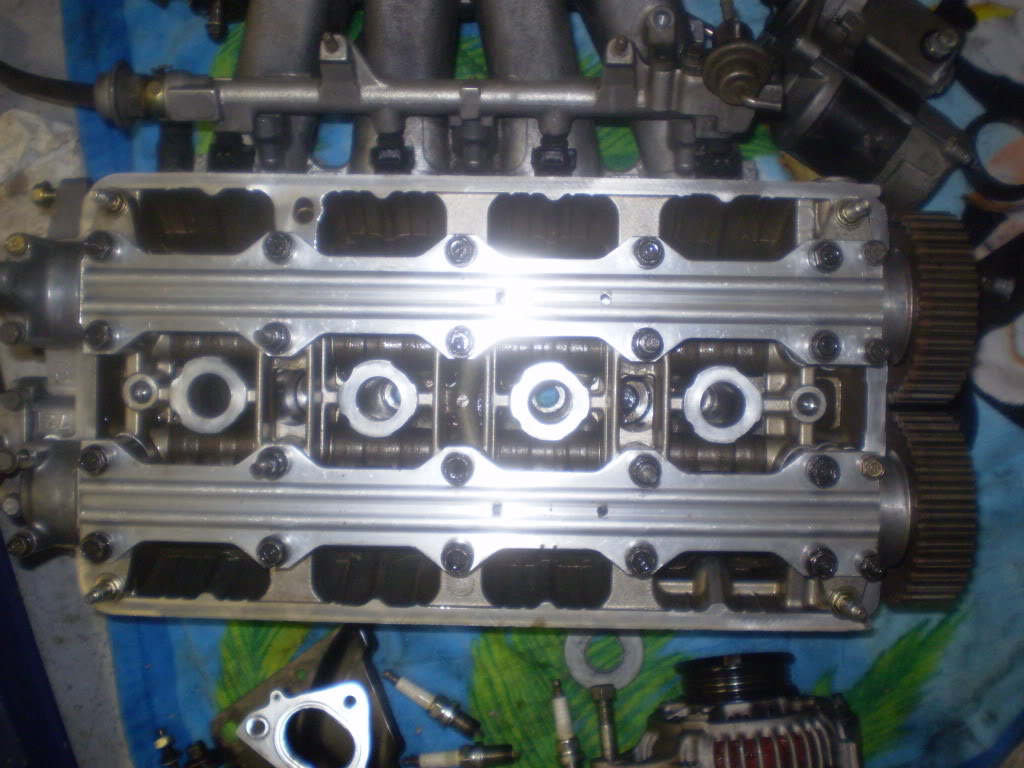
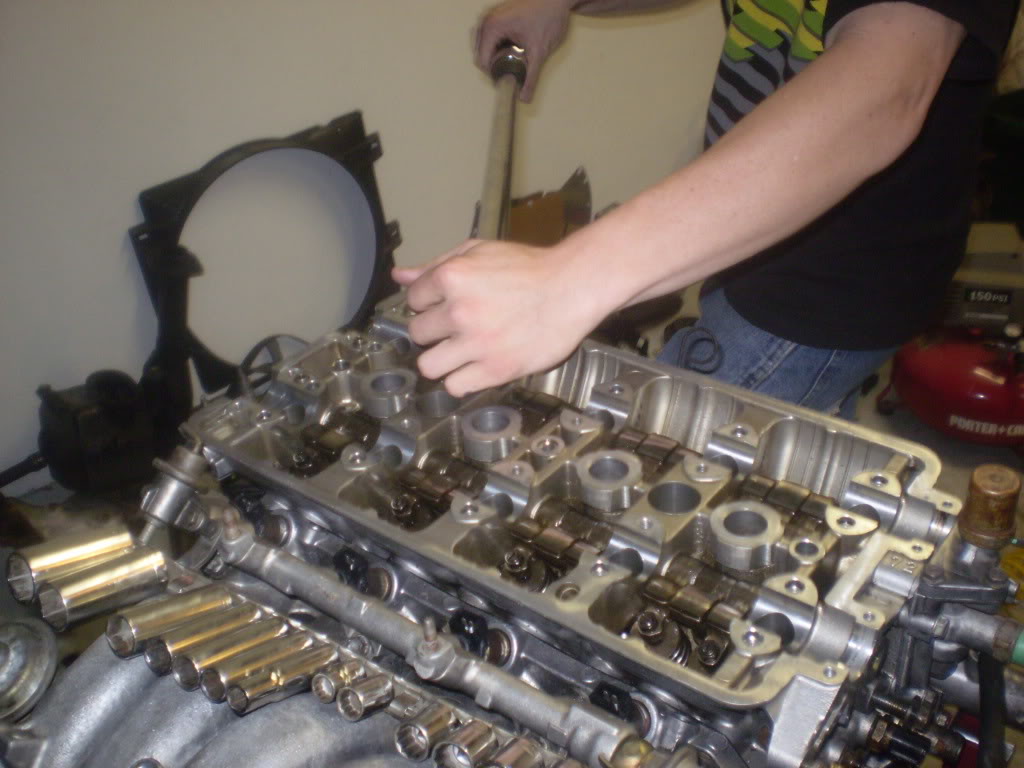
Bottom of the Head
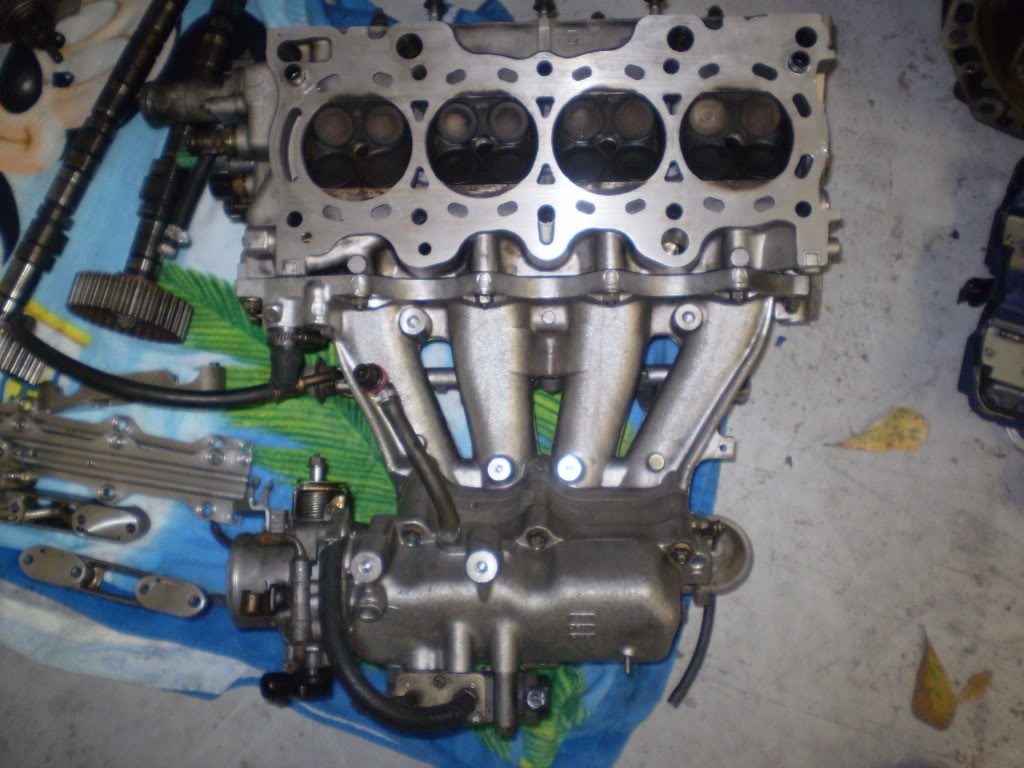
Inside the Head
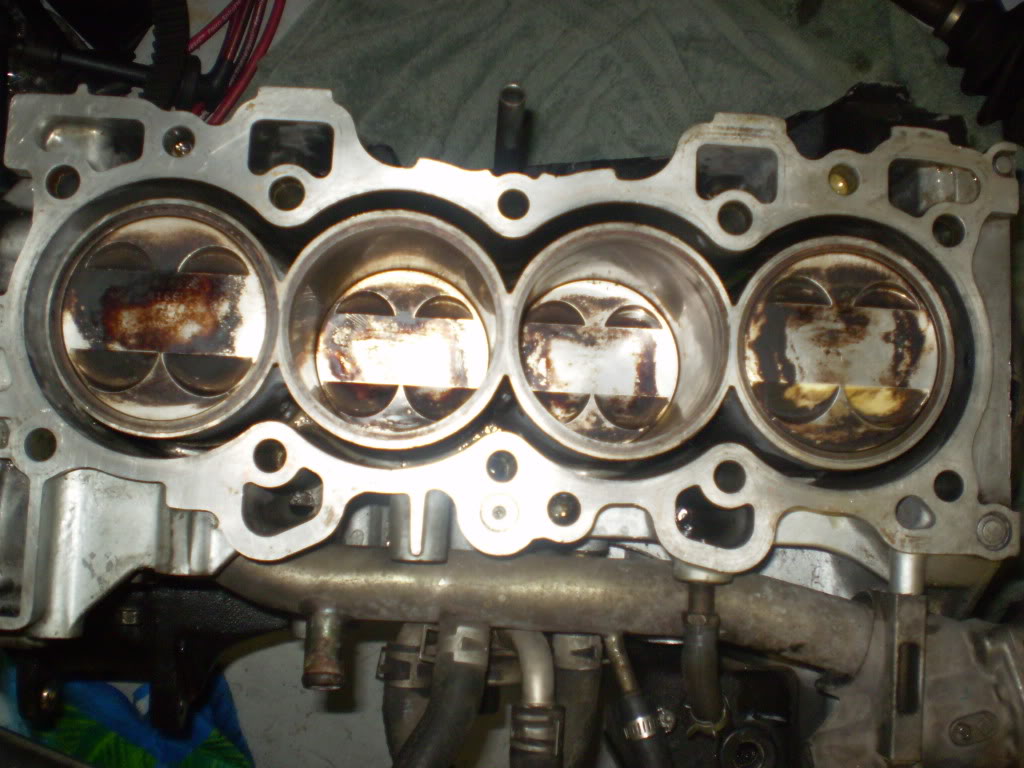
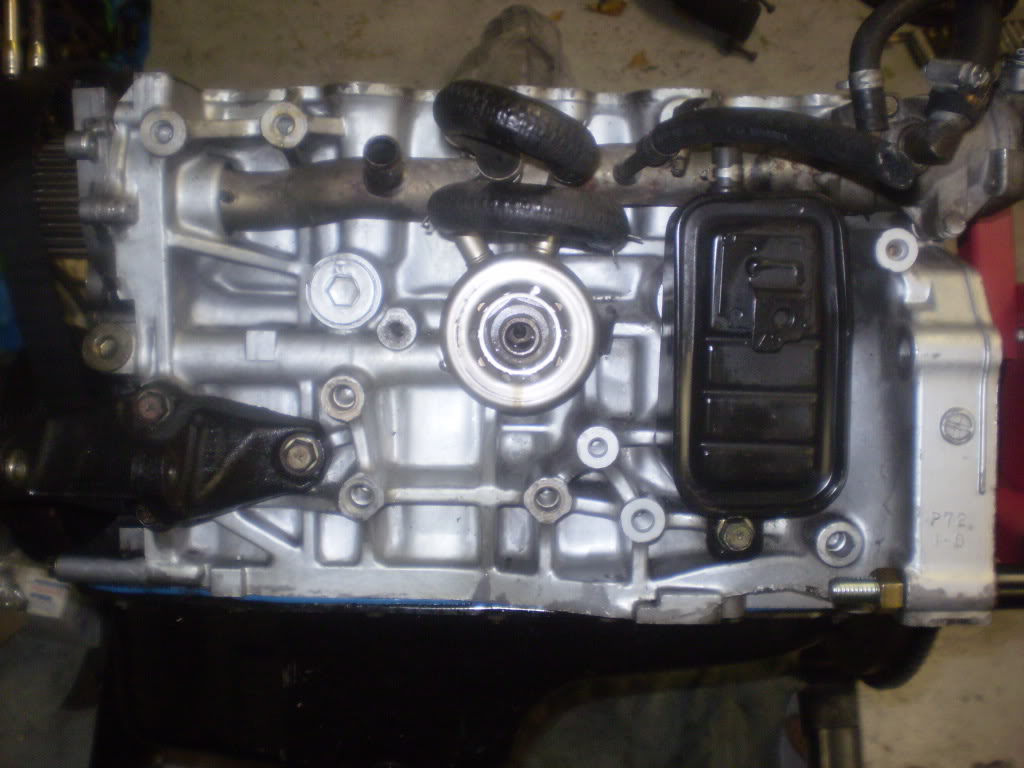
Top of the Block
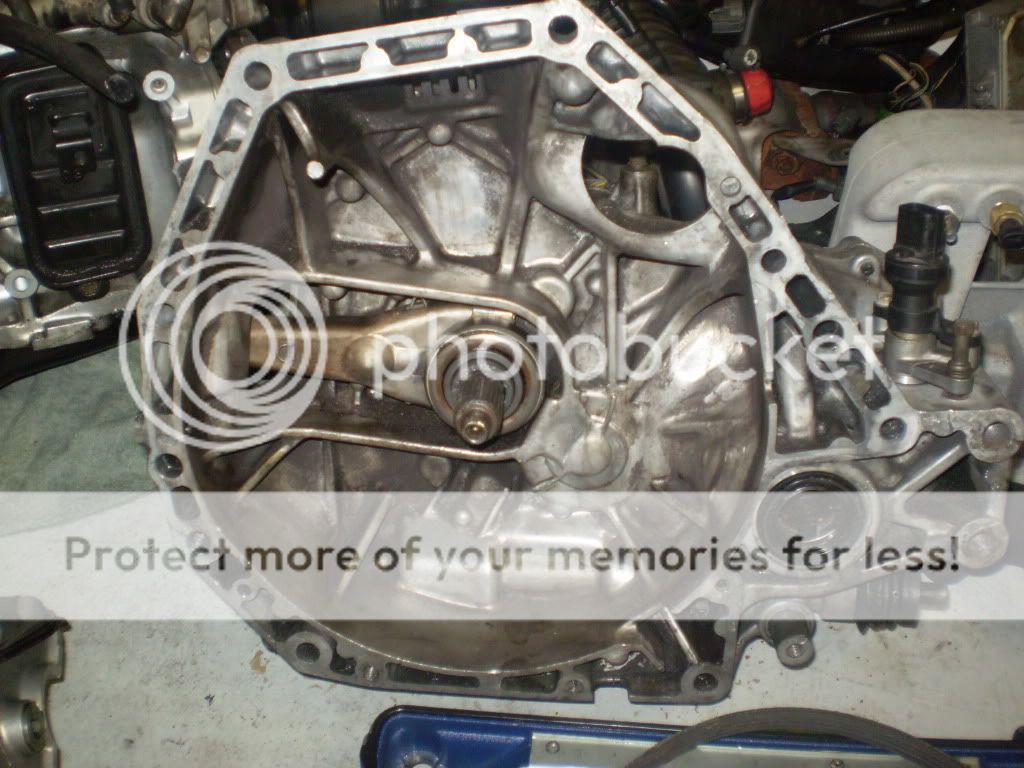
Type R Trans w/LSD
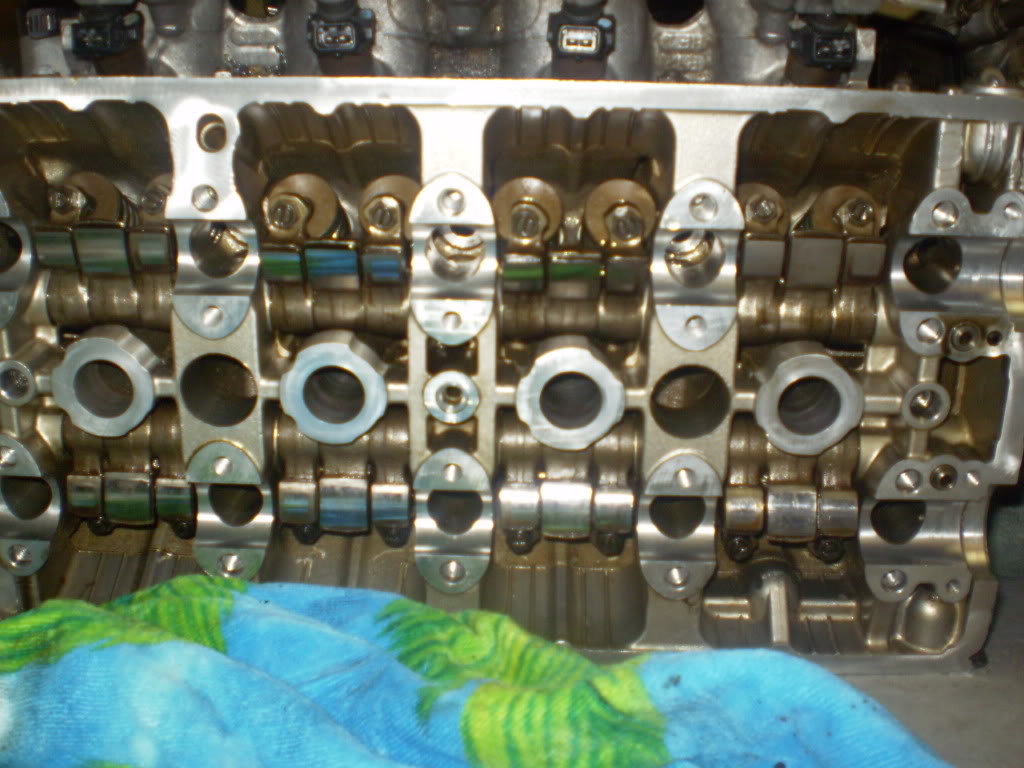
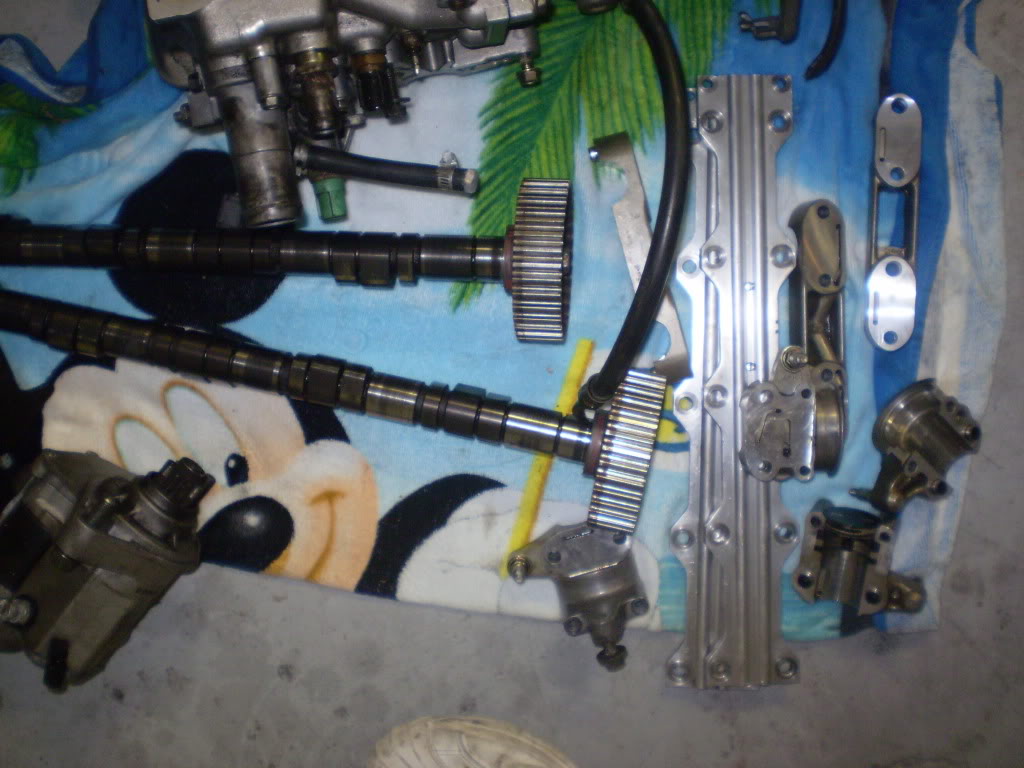
Camshafts and covers
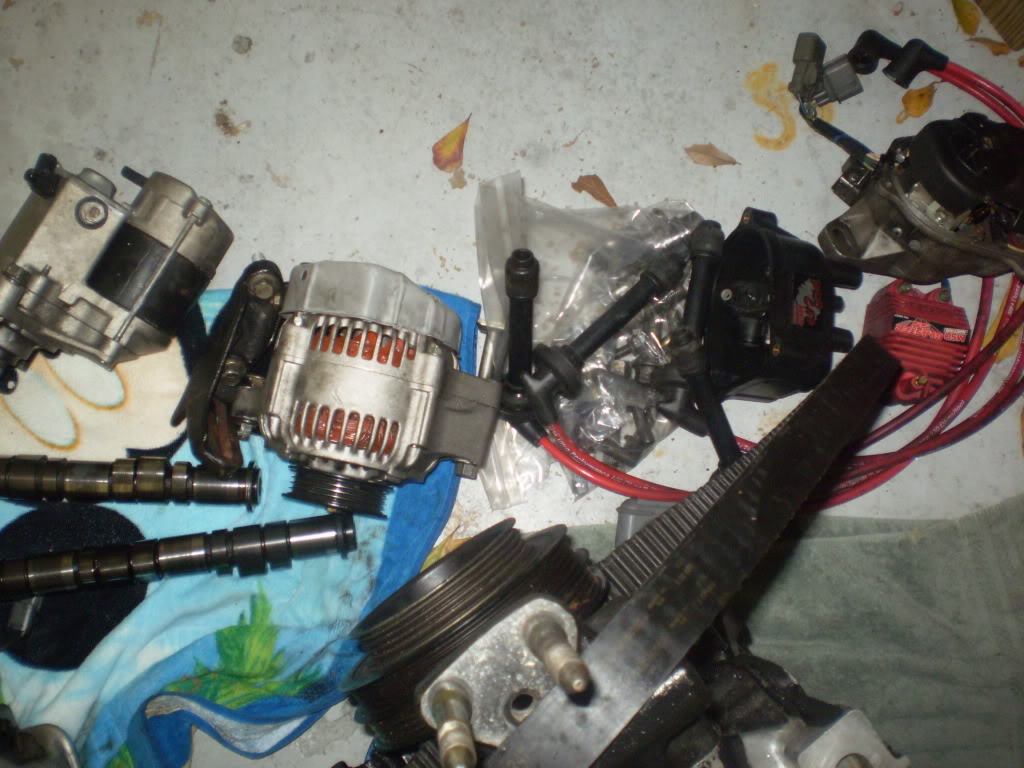
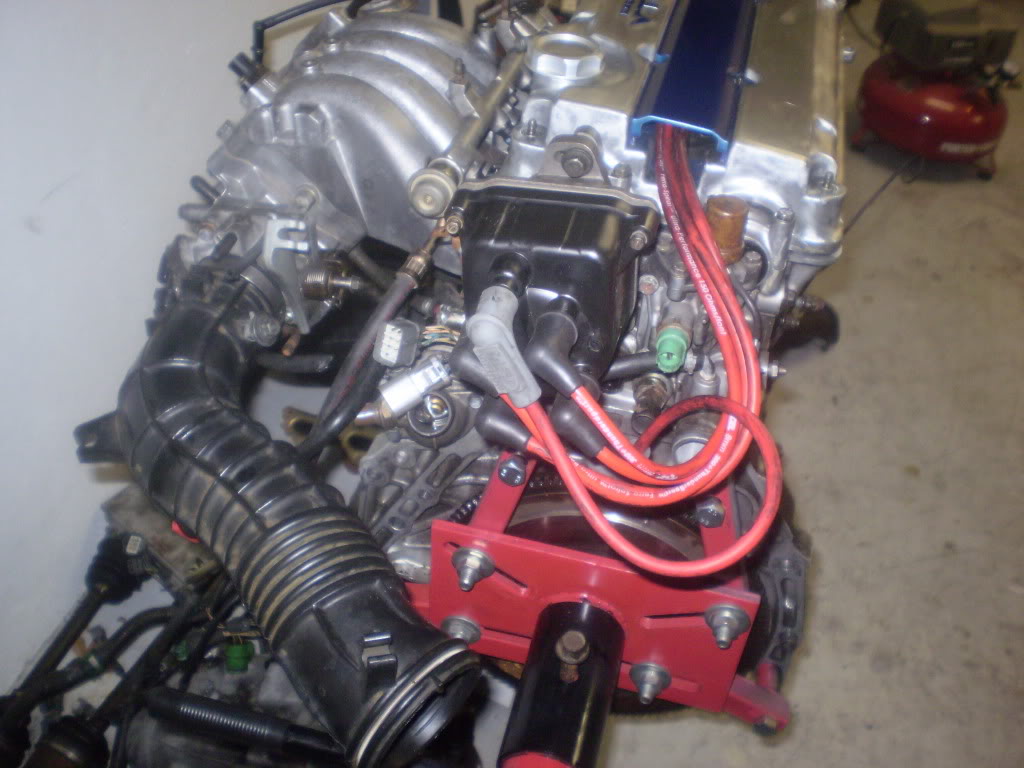
Dizzy, Alternator, Starter, and MSD Ignition Box w/ all wires
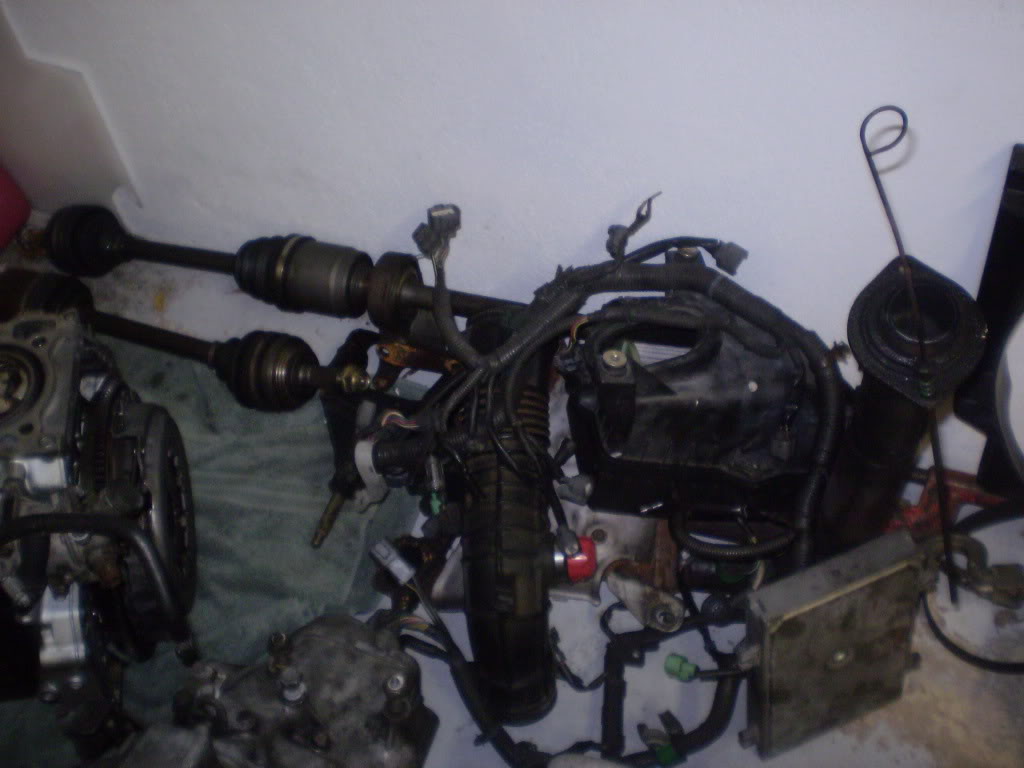
Axels, Air Box, ECU, Wire Harness, and the Exhaust Manifold is buried underneath it all
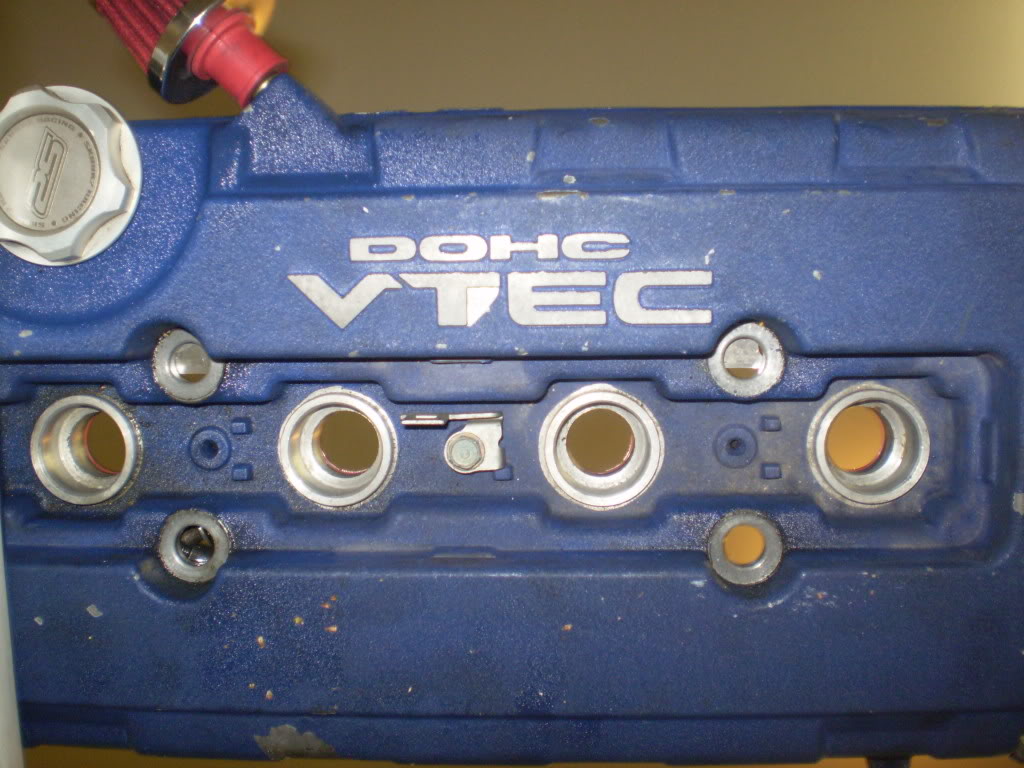
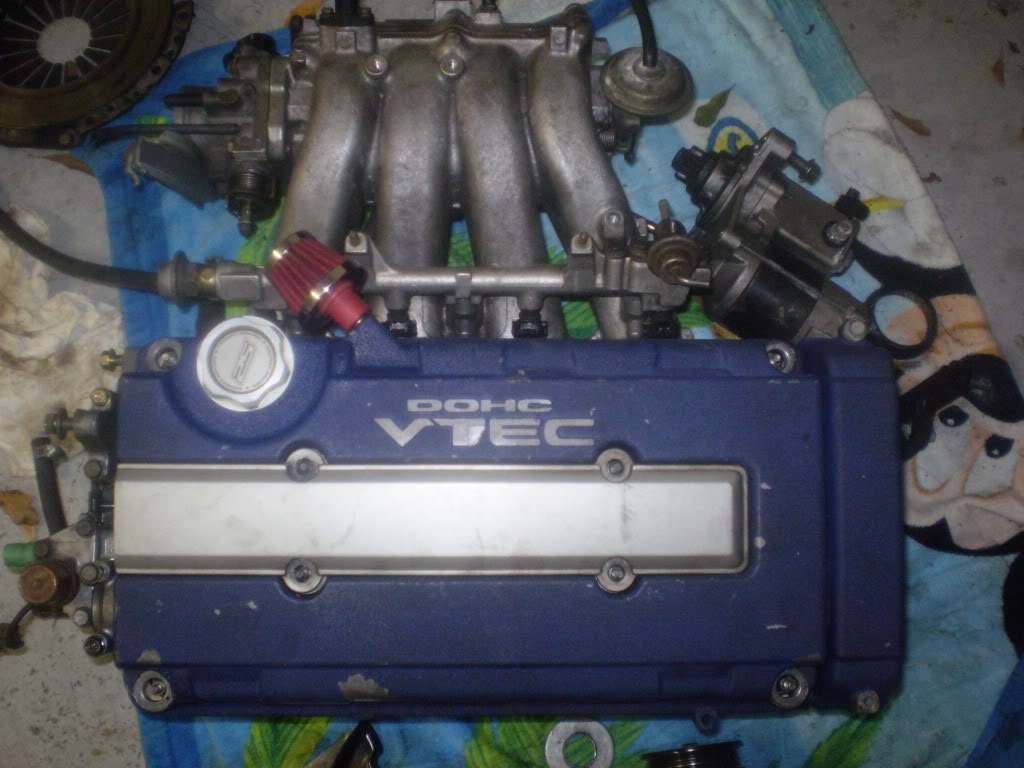
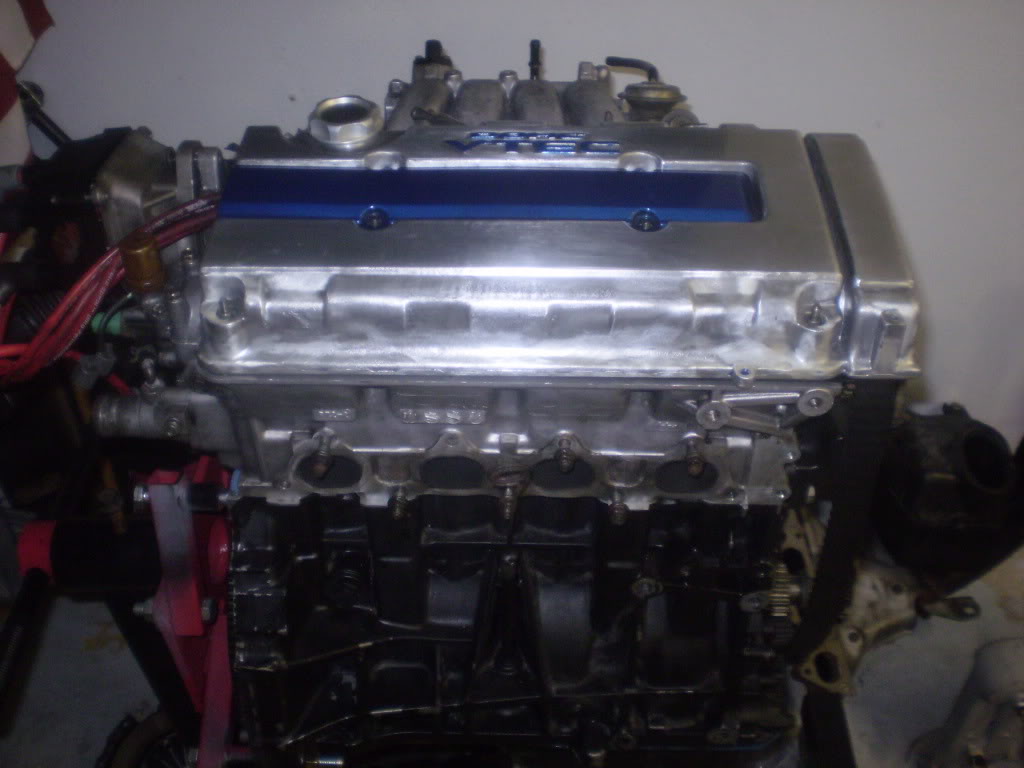
Valve Cover(Needs Paint)
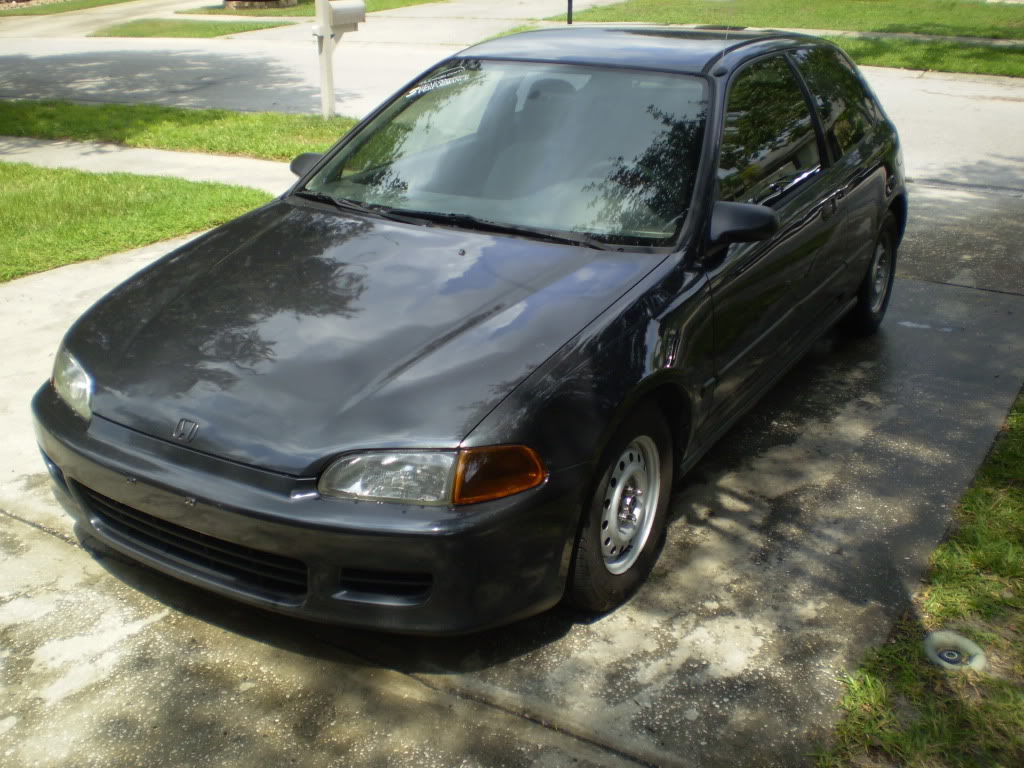
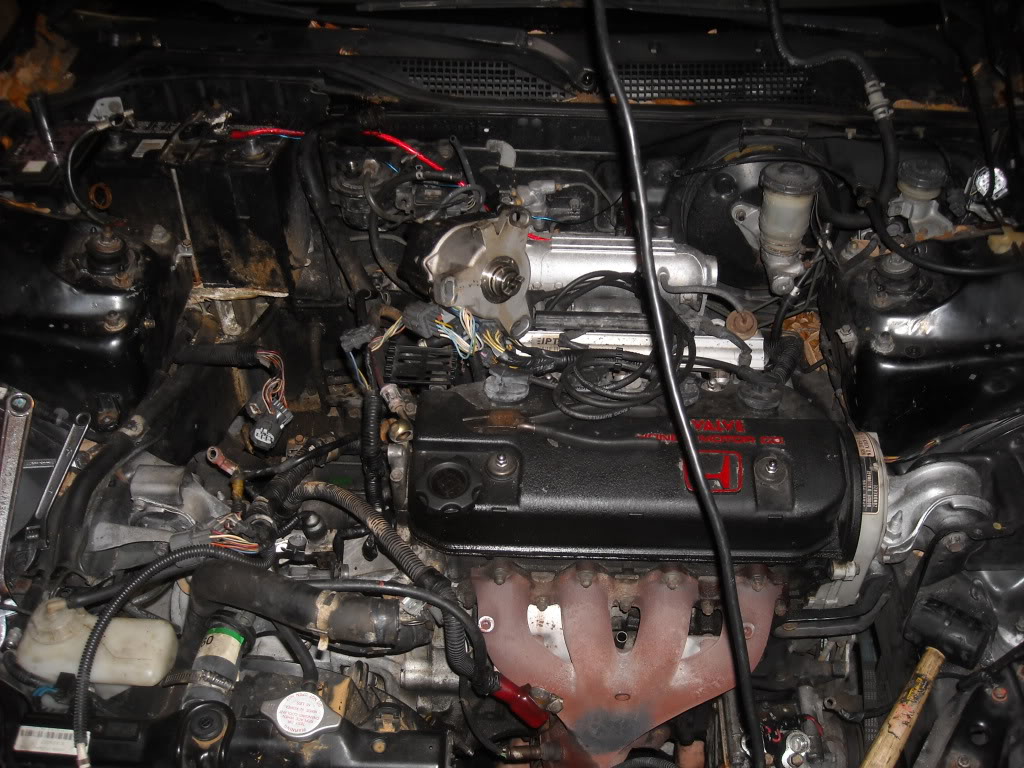
Here's my car

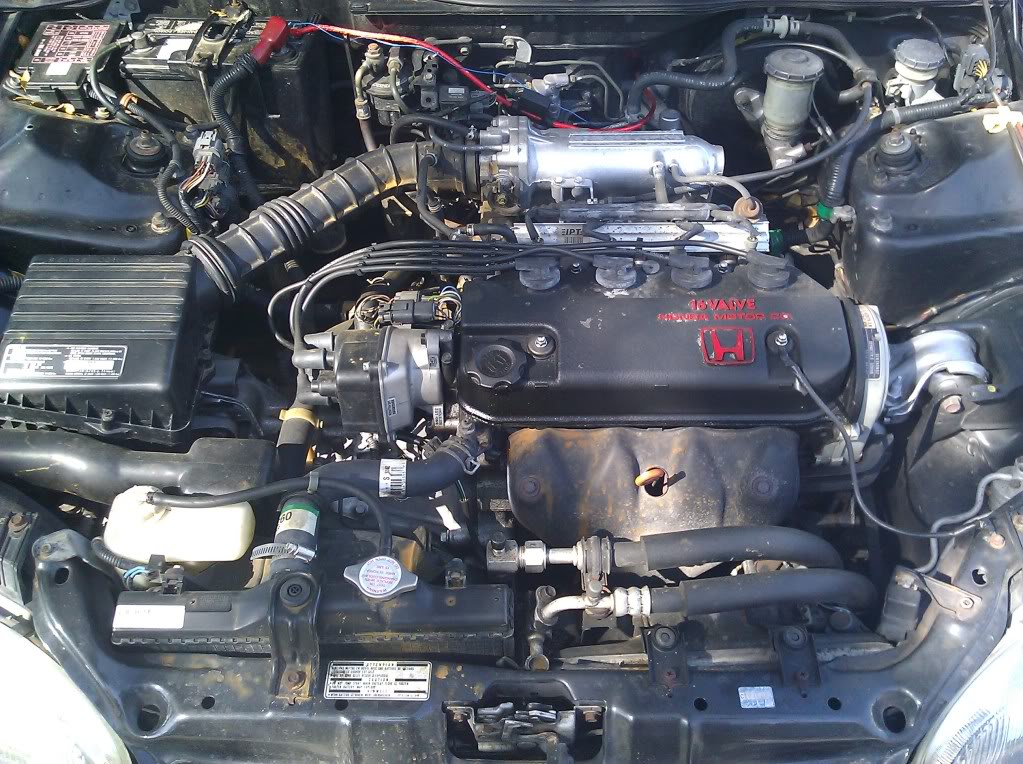
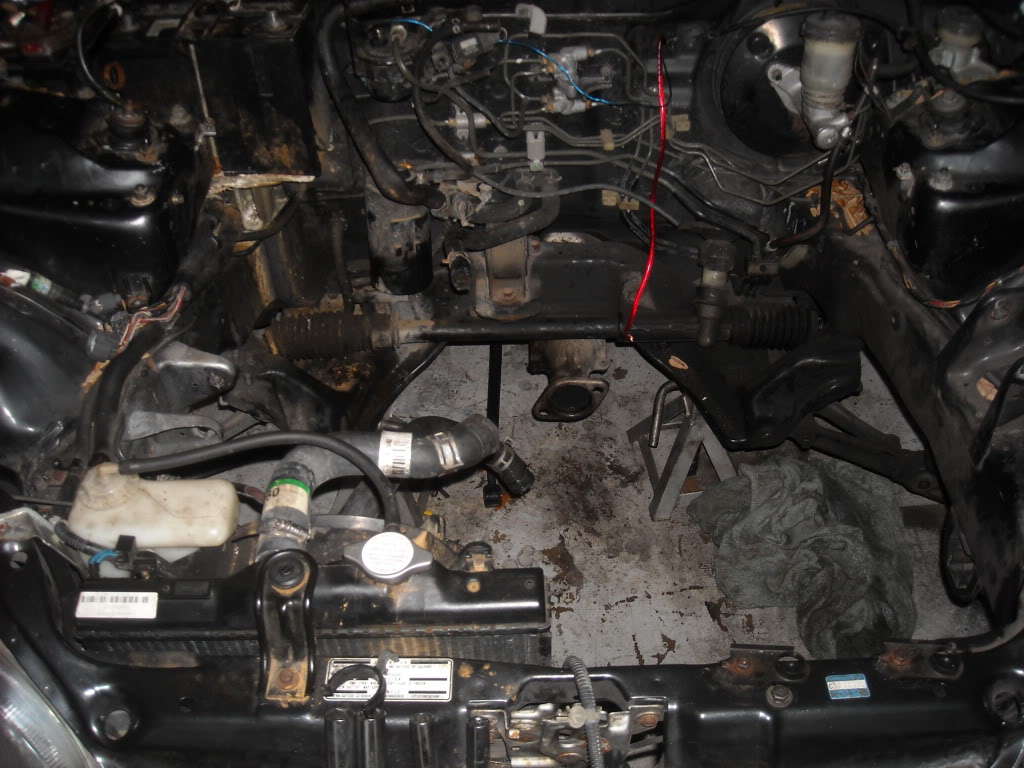
And the Stock Motor In it at the moment
I also got 2 10" Alpine Type R's in my Trunk that blow off my rear view mirror :music:

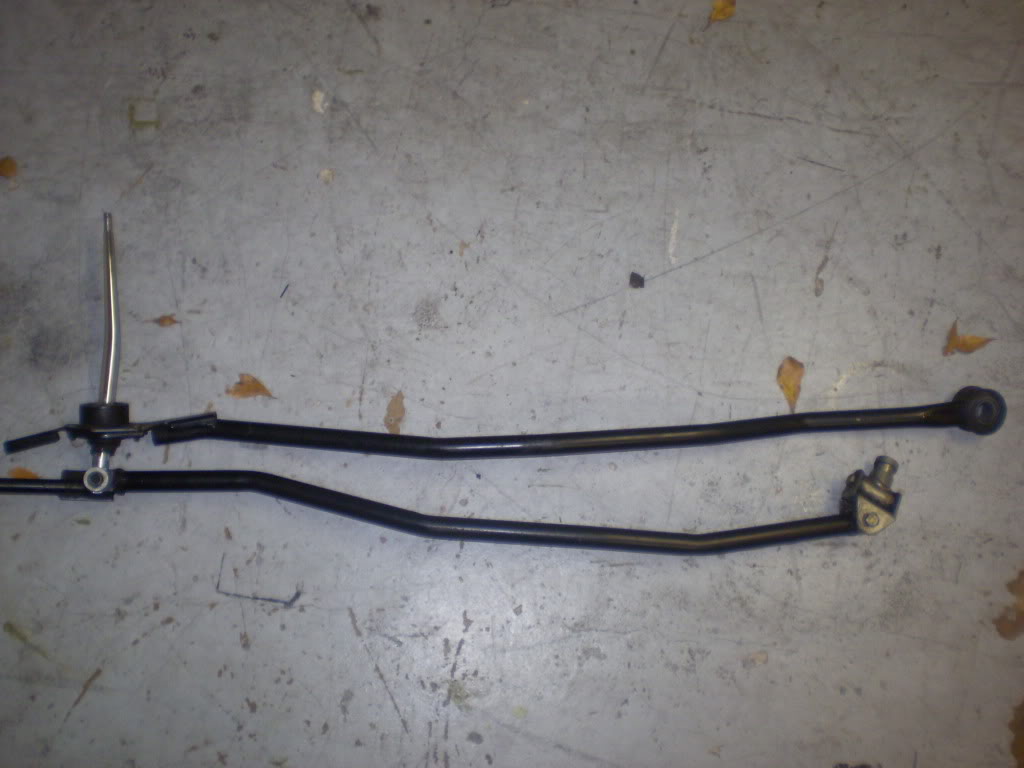
Just picked up the shift linkage w/short shifter today for 65 bucks
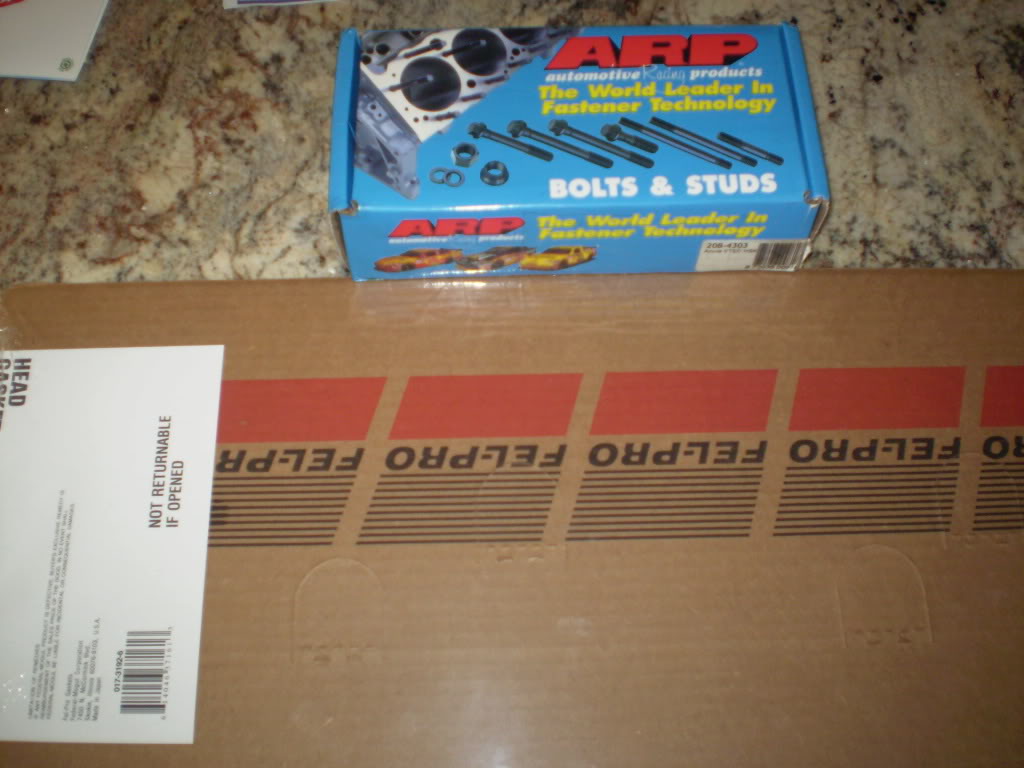
Ok I just picked up my arp head studs and my Fel-Pro Head Gasket today. so i came home ready to put my motor back together and ready for my swap. Just ran into one slight problem...they gave me the wrong head studs. I have to return them tomorrow and hopfully find a store nearby that has the right ones in stock so i can put this beast together tomorrow. But i was able to get some cleaning done so it wasnt a total waste of a day.
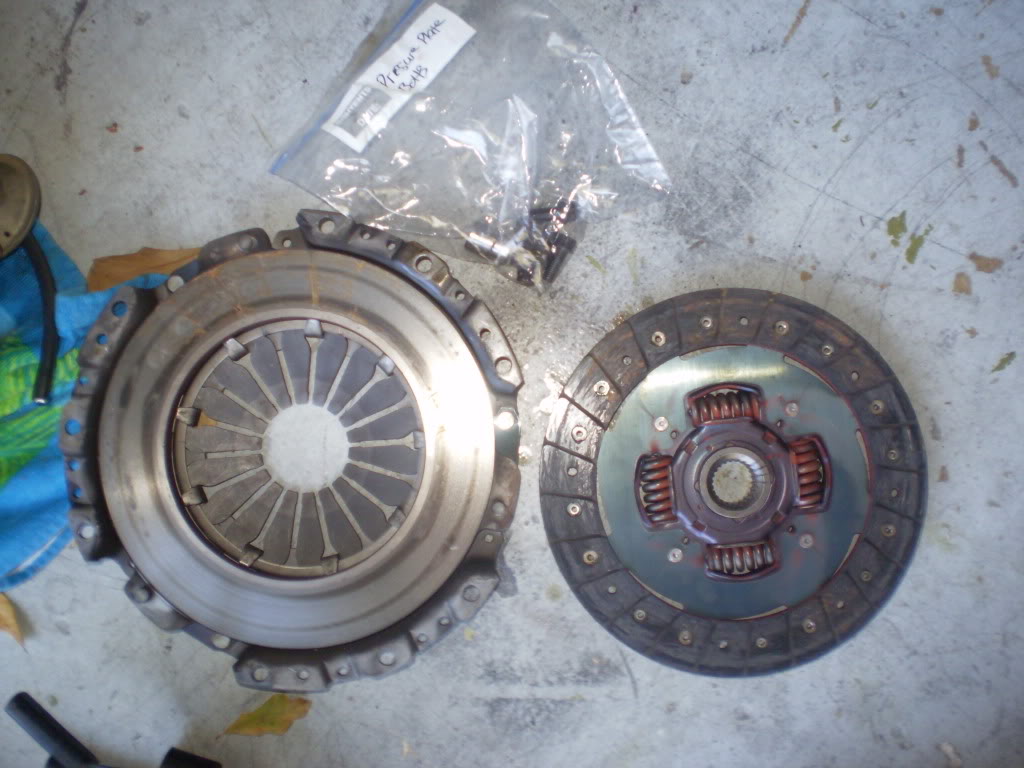
Took off the clutch and Pressure Plate to get the block on the engine stand
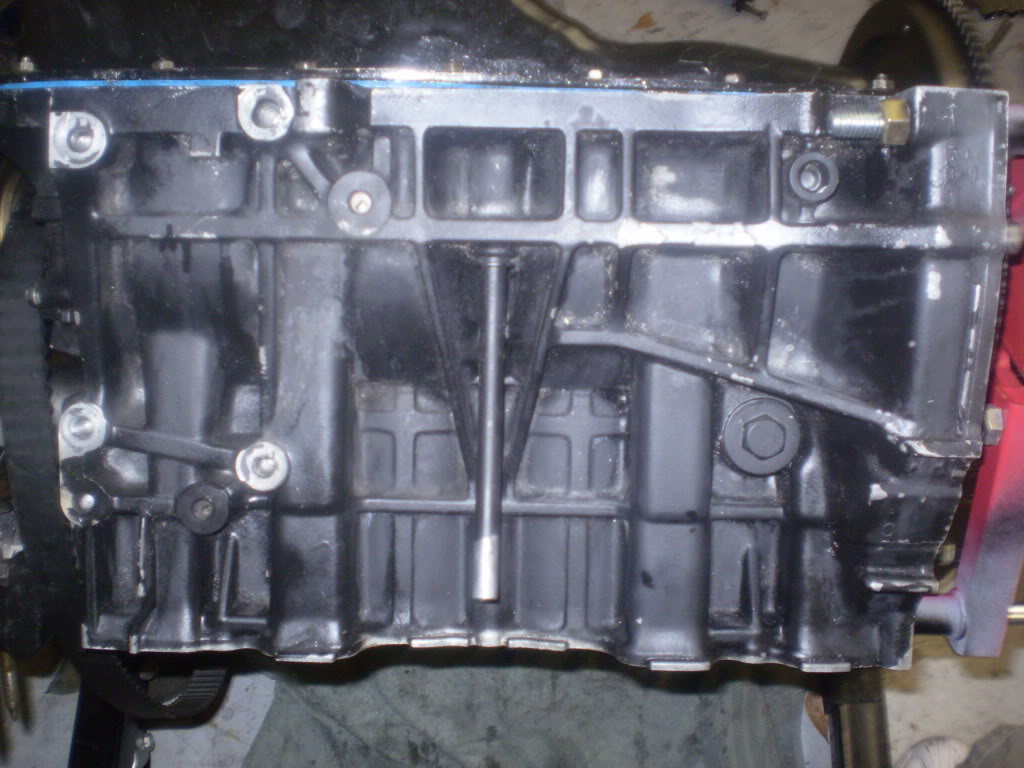
Flipped the block over to drain out any fluids in the block because i cleaned it with some brake cleaner
Got the Gasket on the head and this is when i found out the head studs were the wrong ones
So i gave the beast a wipe down
Just hand tightened the cam covers and **** on to make sure i had all the bolts and parts
Heres the head with the valve cover resting ontop
Mounted the altenator for safe keeping.(not entirely sure this is how it really goes on.)
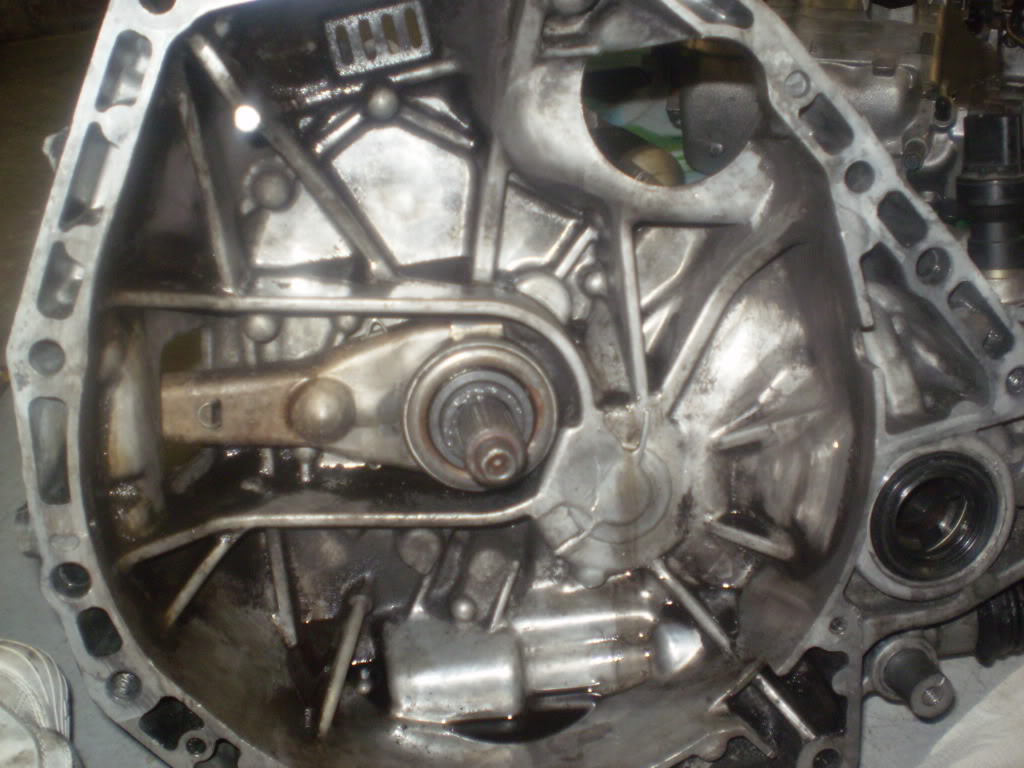
Cleaned out the inside of the trans and the outside
Bunched it all together to save space till i start working on it tomorrow
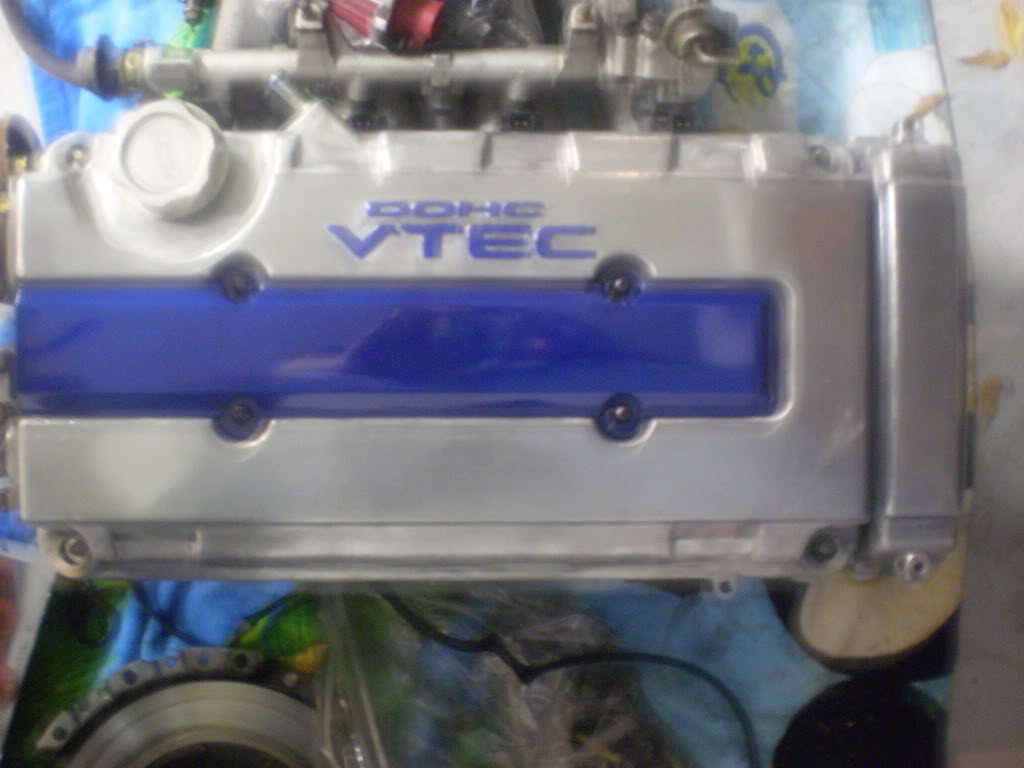
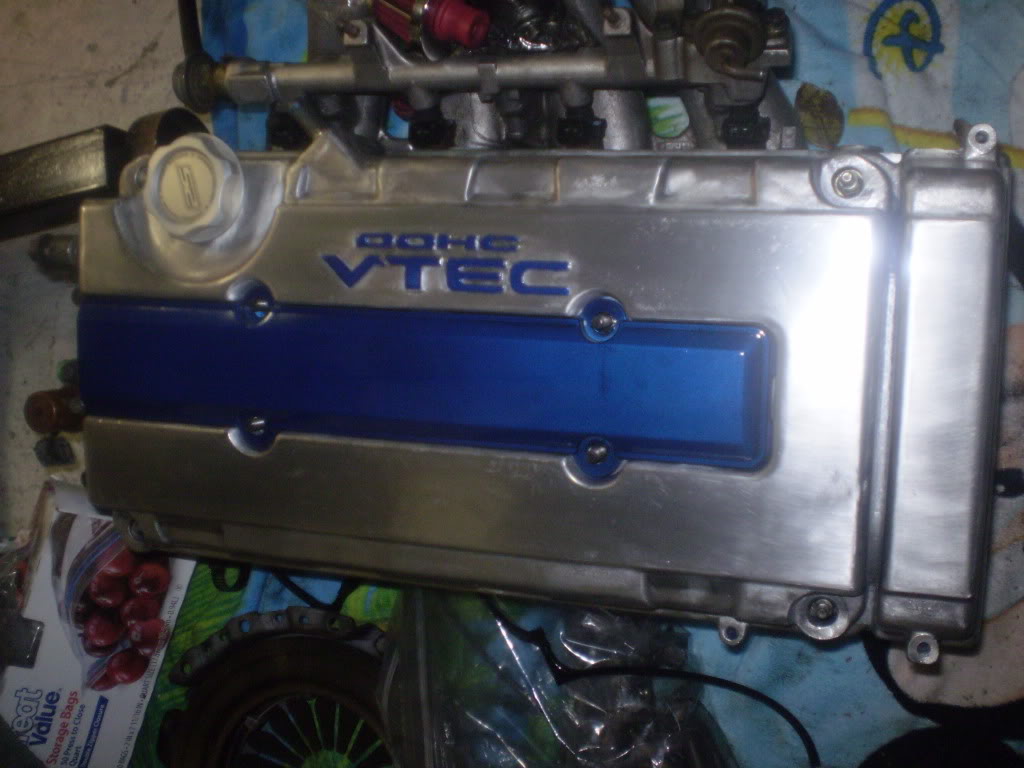
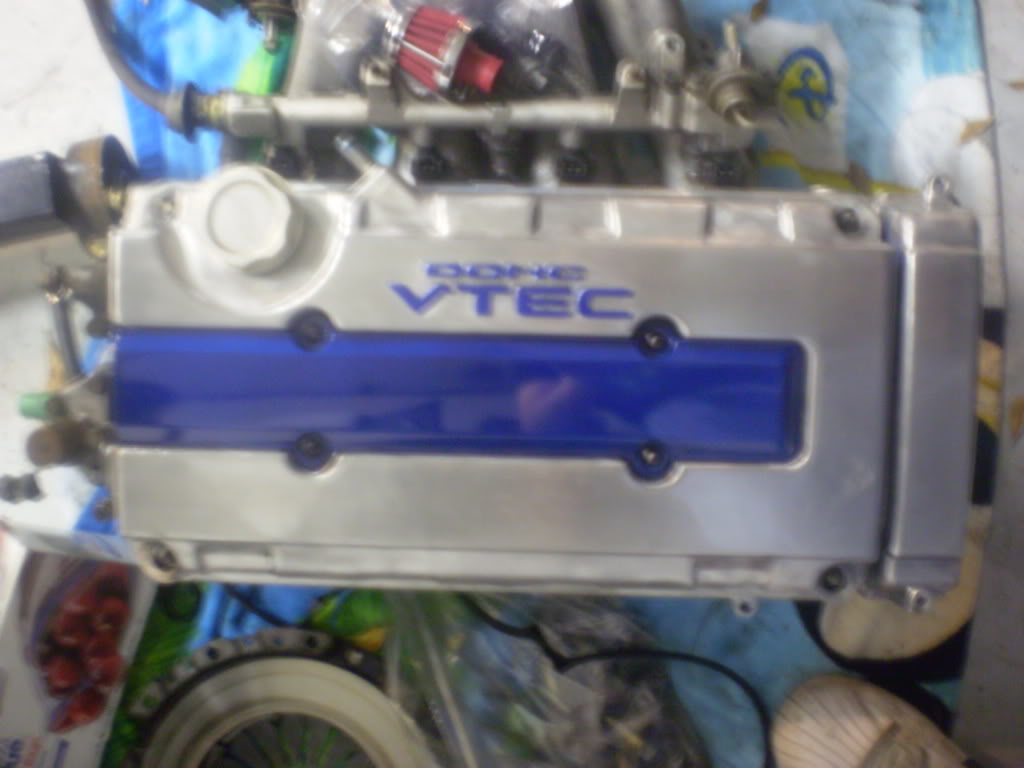
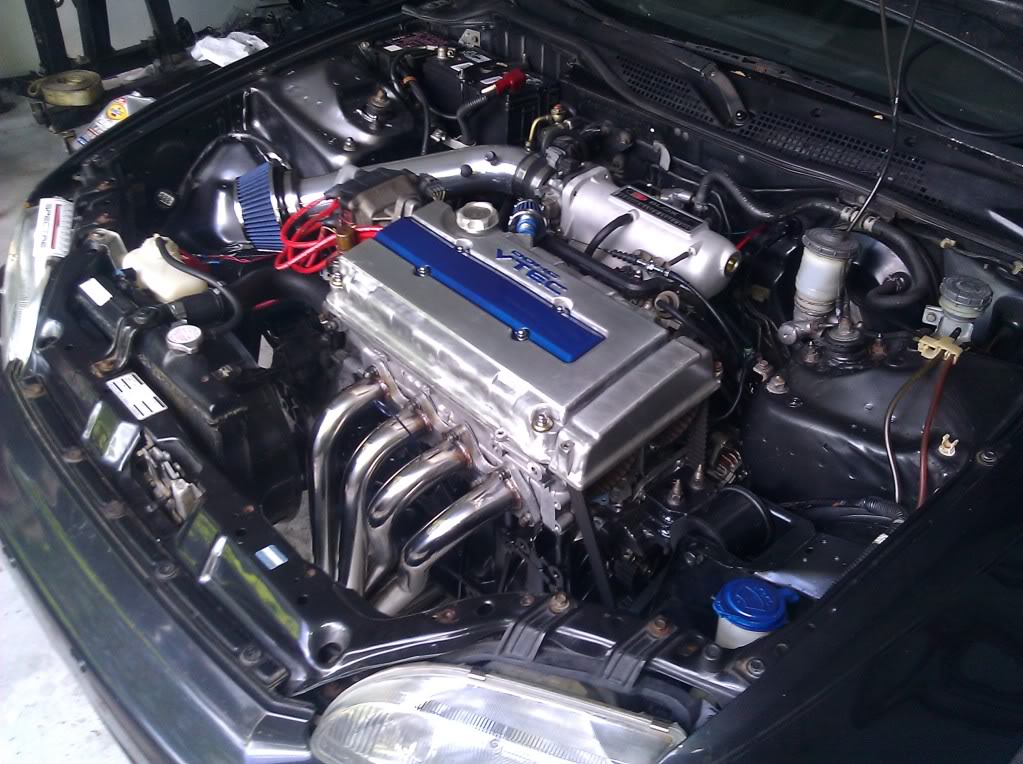
Alright i searched everywhere but there are only two stores around me that carry ARP products and neither of them had the studs i needed. i got them ordered and they should be here on monday. So i decided to paint my valve cover but ended up just sanding it and throwing some blue paint on the letters and cover plate. It took me and two other friends about 8 hours to give new life to my valve cover.
Heres the cover with the chipping paint still on
And heres what we got out of 8 hours of hard labor :2thumbs:
i also ordered my motor mounts today and they should be here no later than the 21st and my ARP studs will be here monday. So far everything is going kinda to plan.
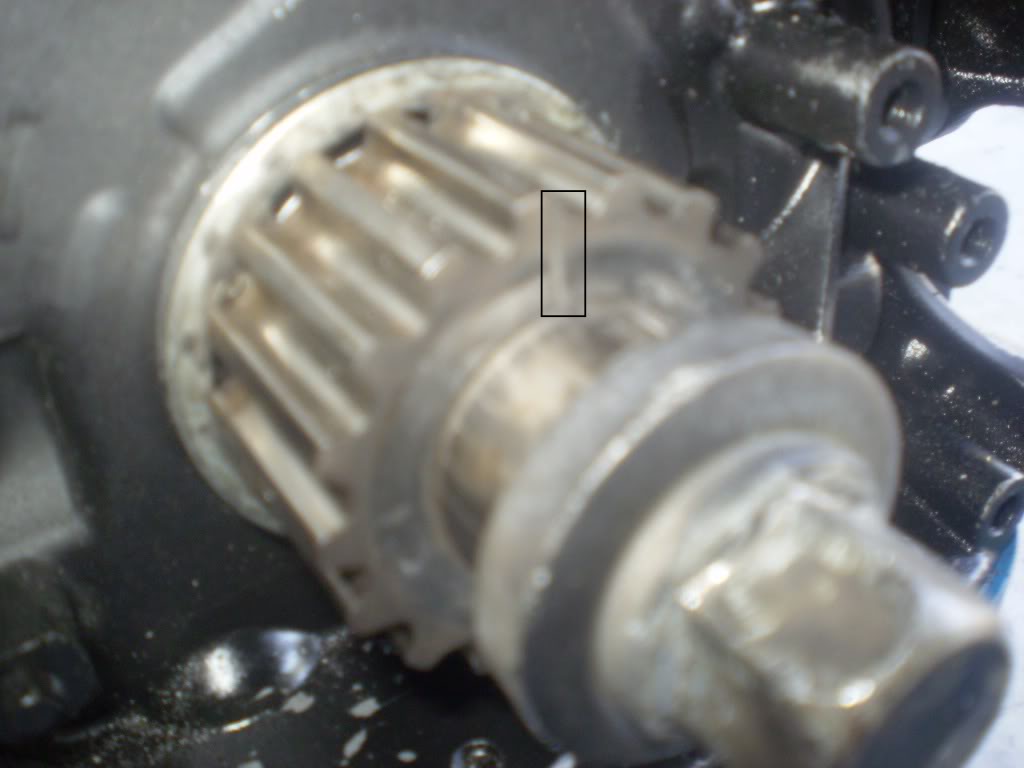
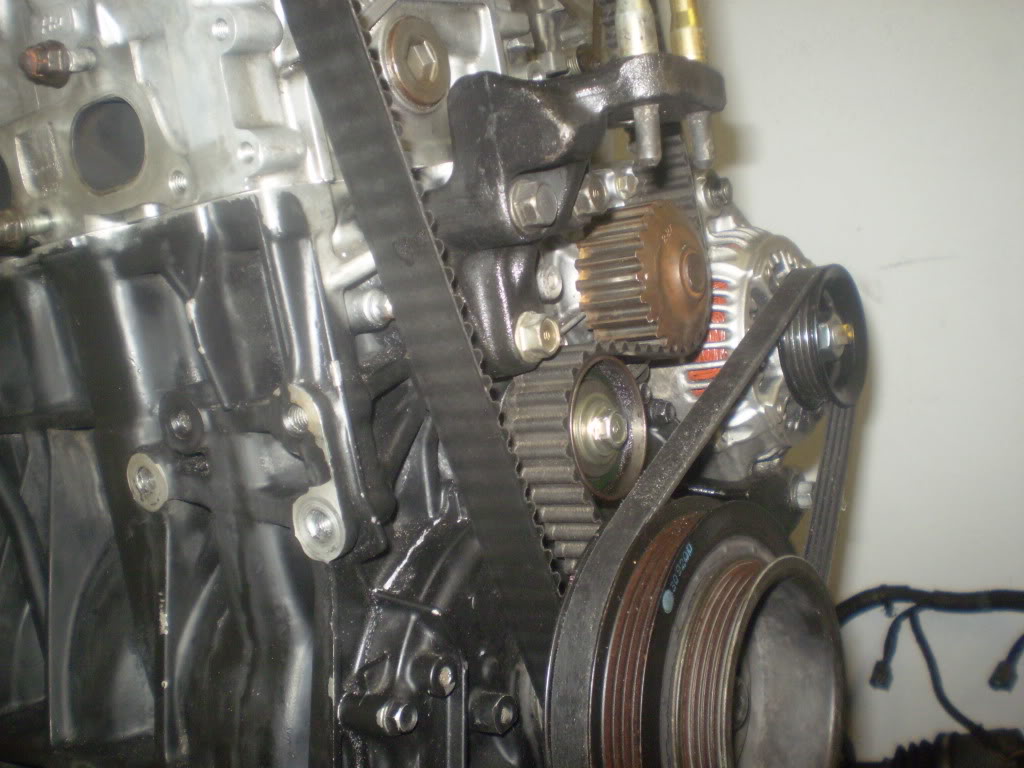
Just got my ARP head studs today(the right ones this time). so i finally get to put the head on the block. just make sure your piston closest to the timing belt is top dead center and its on the compression stroke(otherwise your motor wont start). the way you do this is pretty simple there is a notch on the gear behind the pulley system(to get the pulley's off i used a impact wrench) then you can see the notch on the gear the timing belt goes on.
Heres the notch(i outlined where it is bc you cant really see it that well with my camera but you should have no trouble finding it)
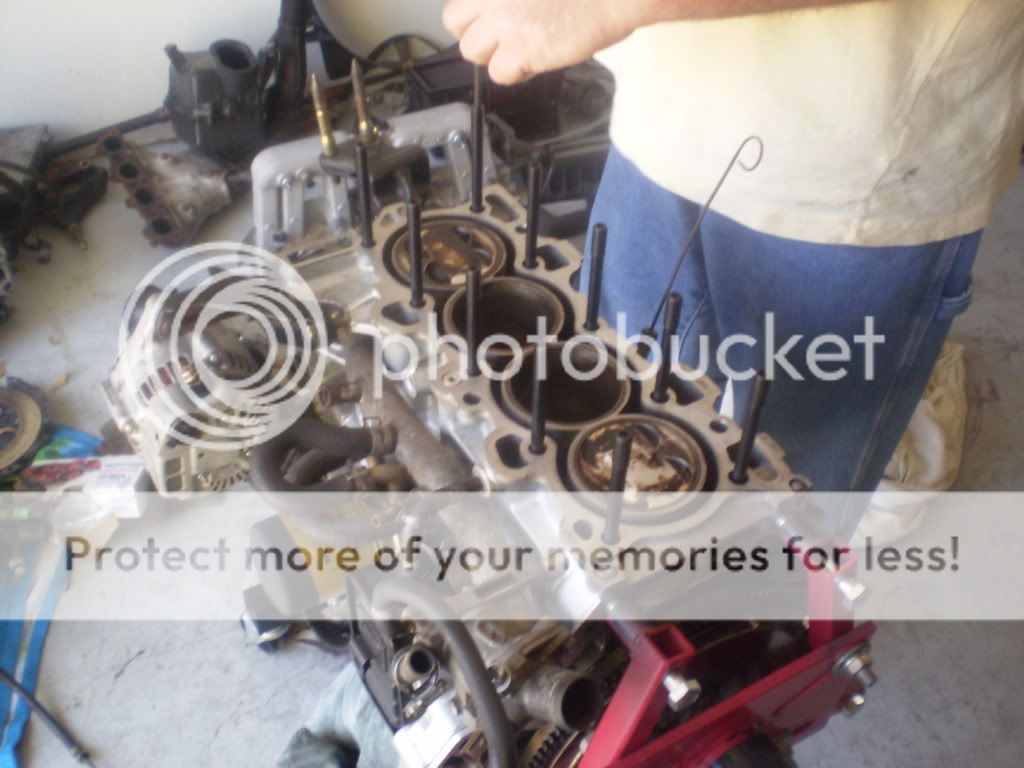
Heres what the right head studs look like(there should be ten long *** studs)
i know theres only 9 in this pic but thats bc i was starting to put them on.

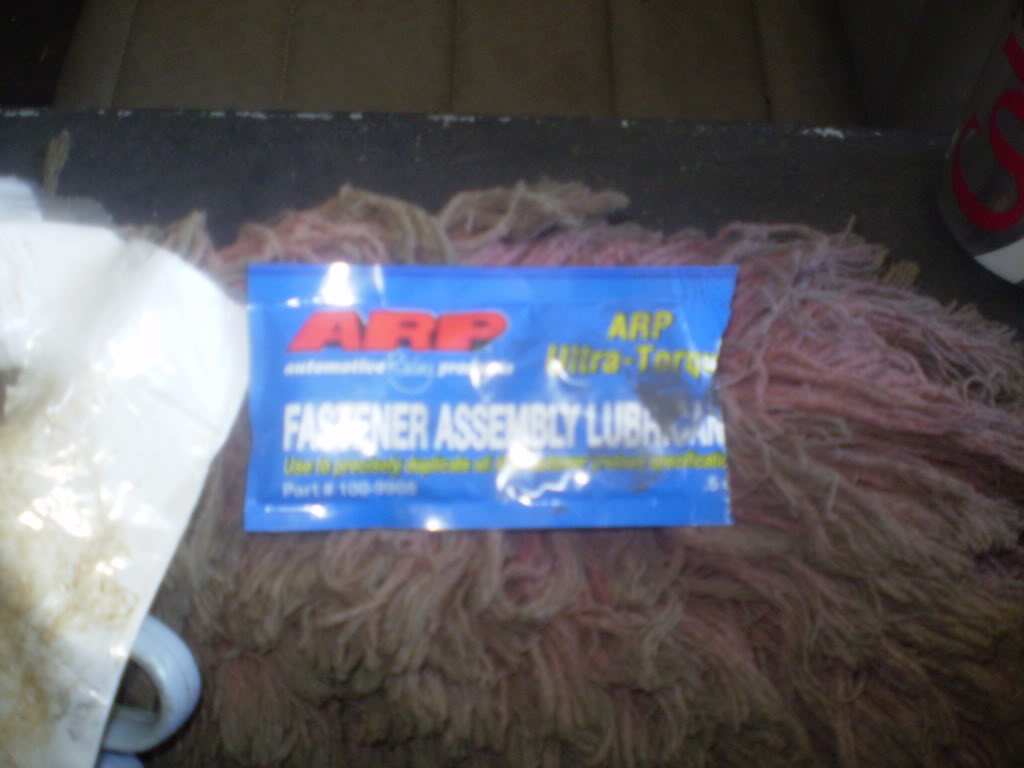
Also you want to make sure you lube them up nice(i used the lube that came with them)
Alright you want to tighten these up with an allen key
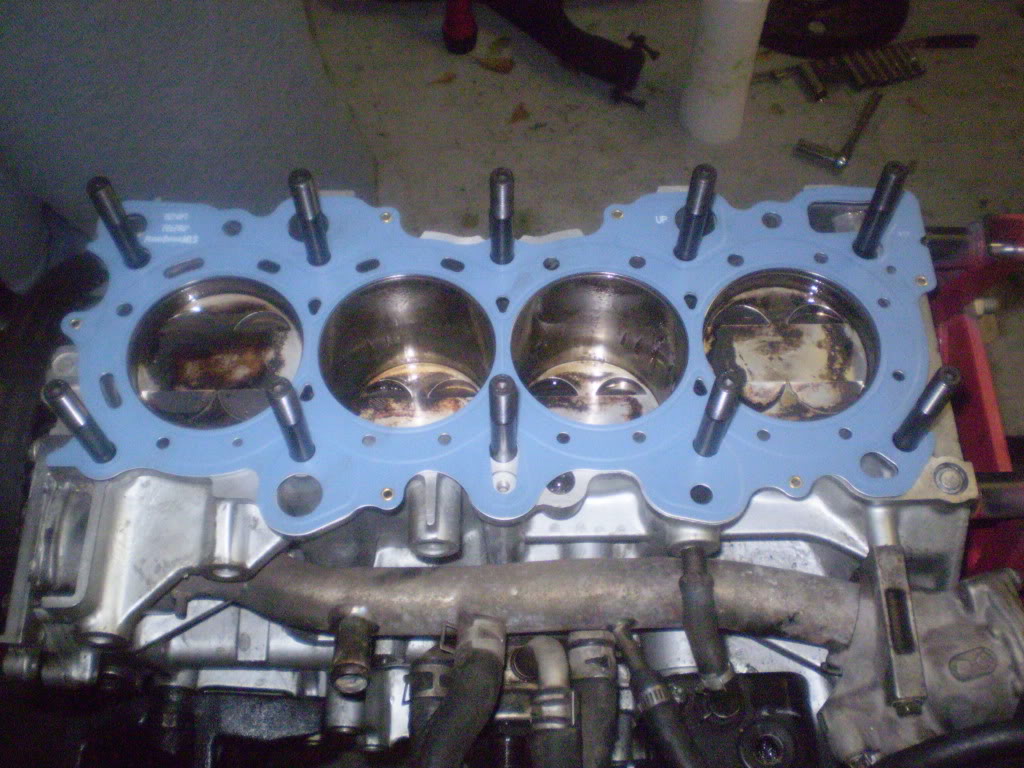
Then put your head gasket on
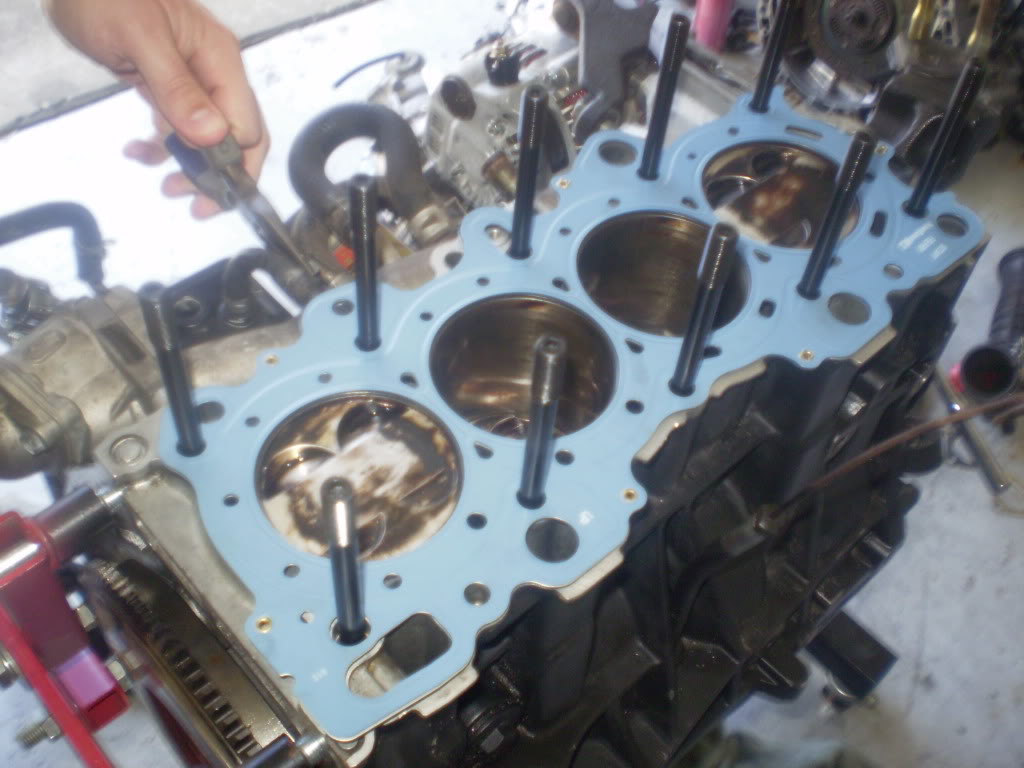
and then drop the head on the block(make sure its sitting flush before tightening the studs)
to get the washers on right i used a little magnetic grabber thing and a screwdriver to pull the washer off the
magnet and onto the stud.
You want to also lube up the nuts before you put them on the studs.
heres what it looks like just hand tightened
Now unfortunetly i thought i had a torque wrench but it seems i lost it and have no clue where it is.
So now im stuck till my friend gets home and brings me his torque wrench.
Just thought i should share so info i found about torque specs for my head studs. i found this this from Honda-Tech. and im not sure where i found the pictures.
This guy has the torque specs for everything in your B Series motor
https://honda-tech.com/forums/honda-crx-ef-civic-1988-1991-3/faq-b-series-torque-specs-953151/
and heres how to identify which number goes with which stud and cam cover bolts
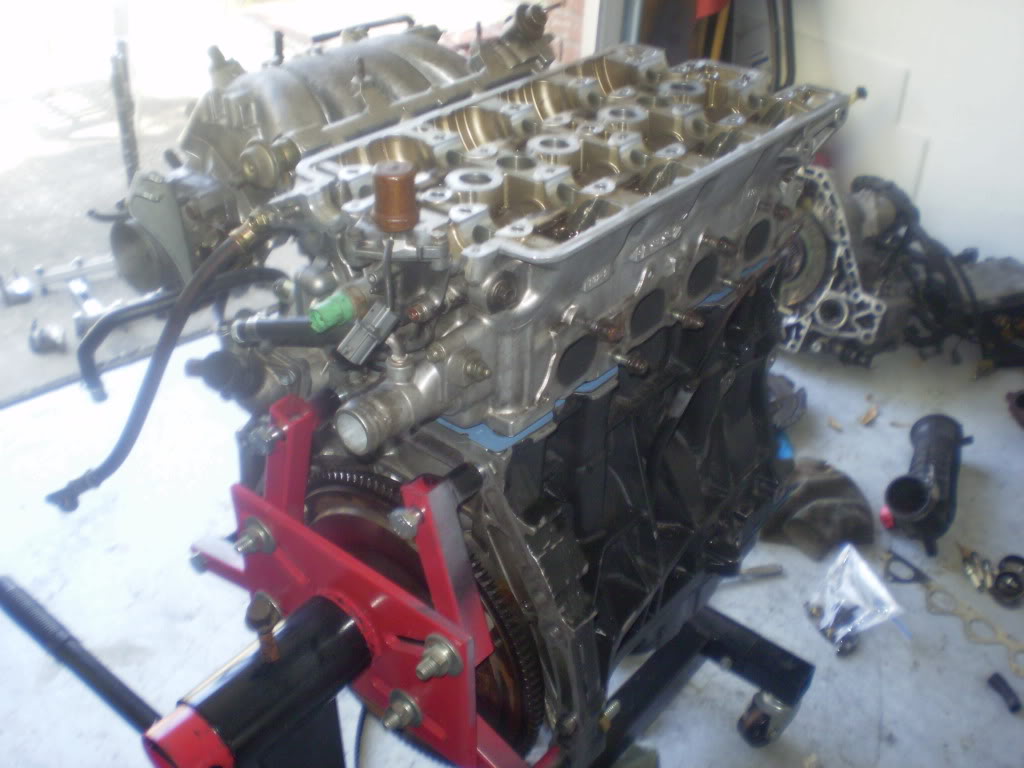
my friend came over tonight and brought a torque wrench with him. Finally getting the head on the block
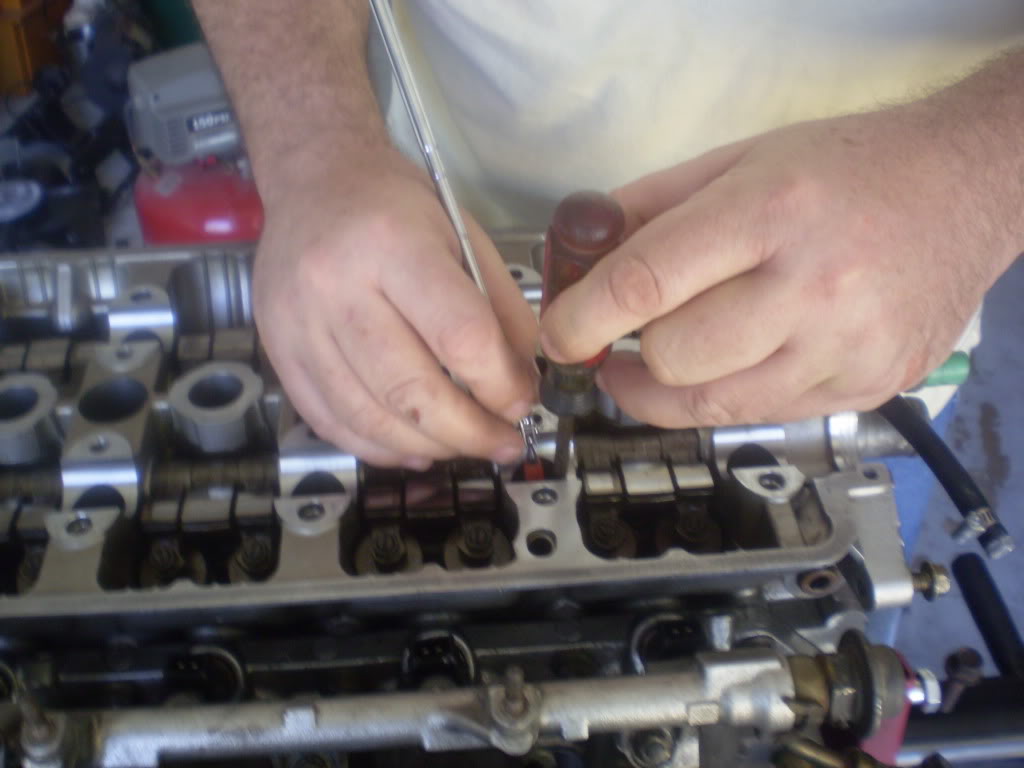
Then we torqued the cam covers

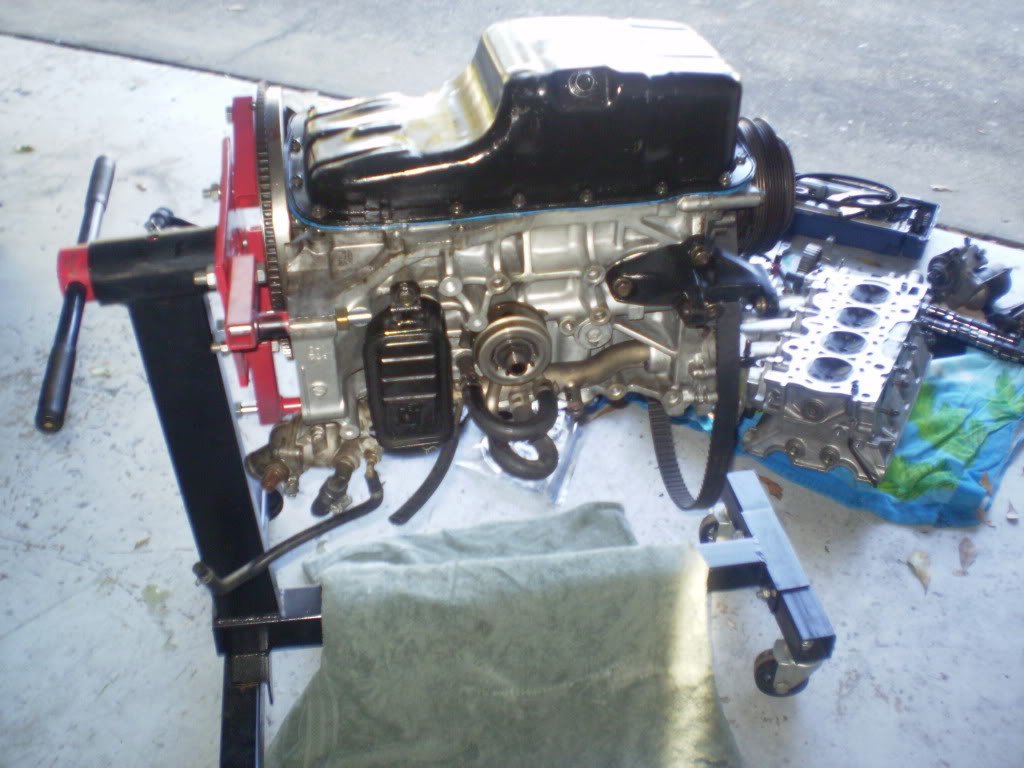
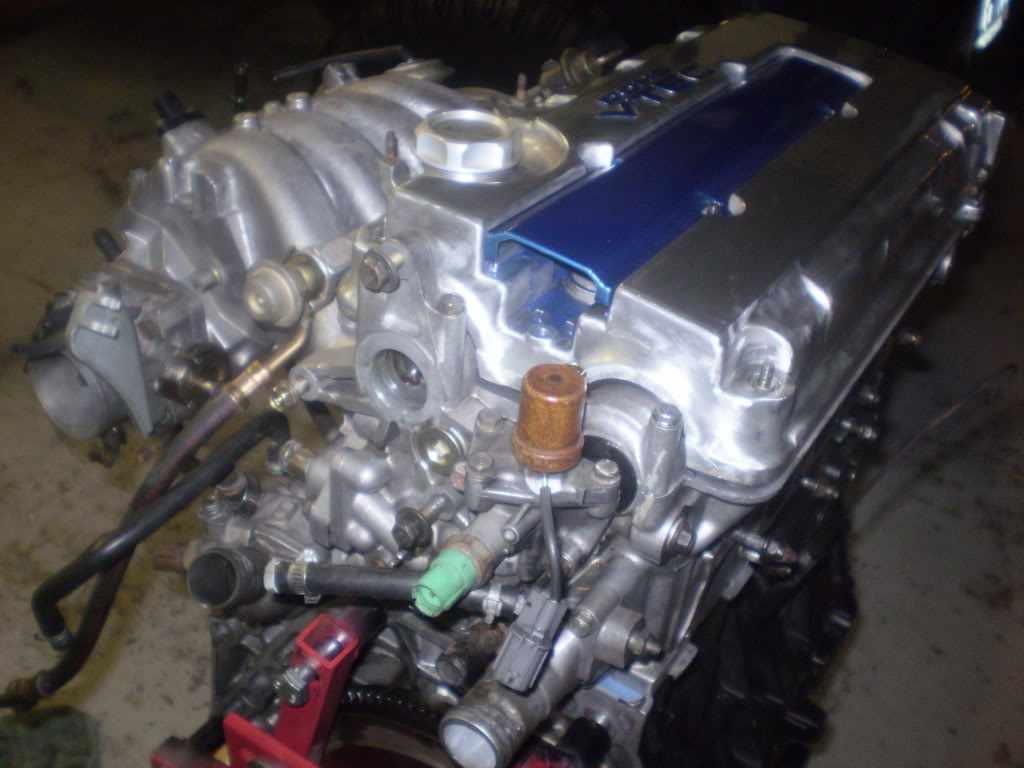
Here it is fully assembled. i didnt bolt on the vavle cover yet because i still have to put the timing belt on.
i also didnt really tighten anything but just losely bolted stuff on to get the 20 parts laying on my floor out of the way.

Well thats it till i get more parts near the end of the week. i should be getting my motor mounts and headers
no later than saturday.
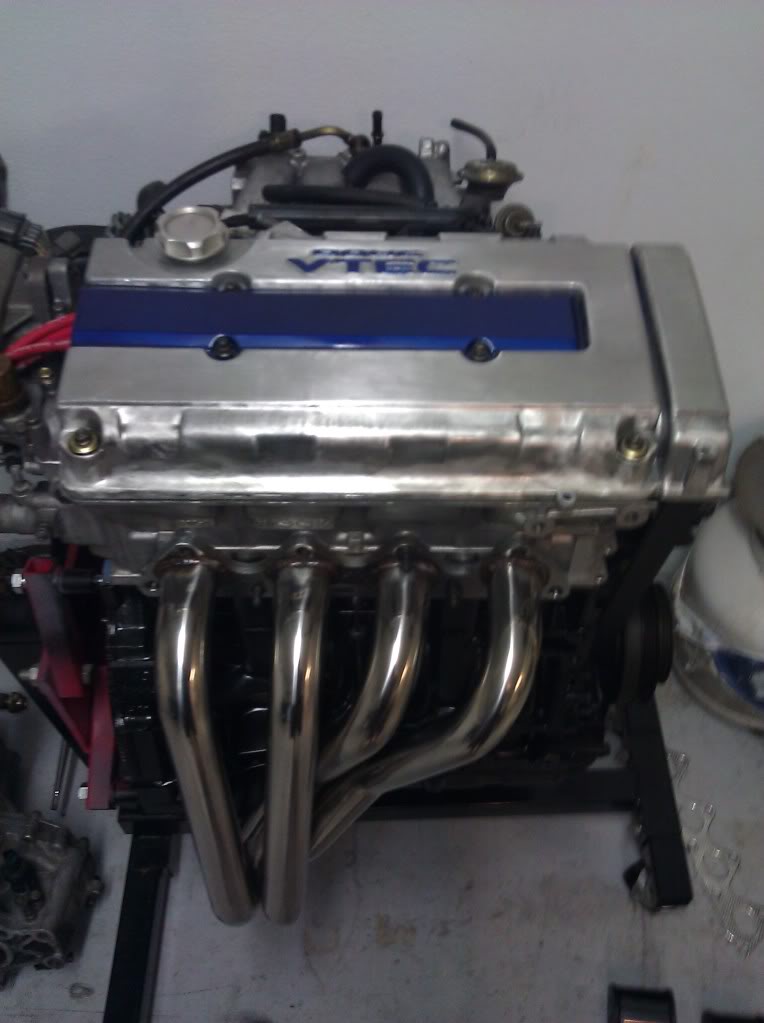
I got my headers last Friday and also got my motor mounts! Now I just got to buy a clutch this weekend and I'll be good to swap it in 2 weeks!
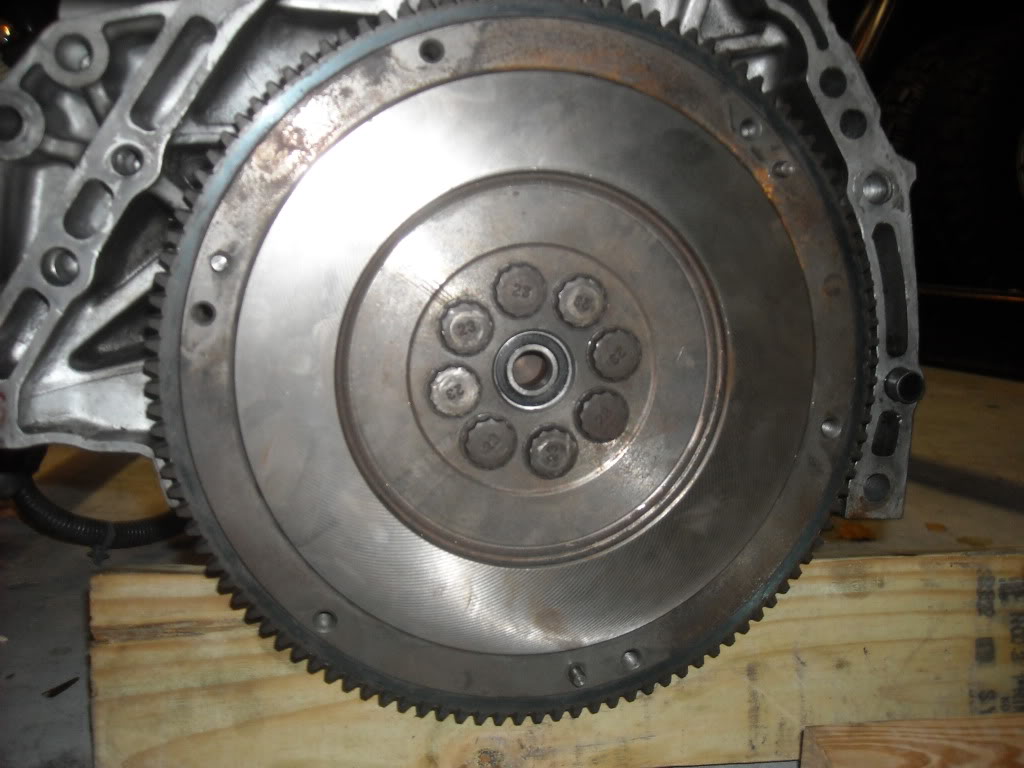
Ok i've been extremely busy with my swap and everything and forgot to take pics of my clutch and pressure plate. Its a stage one XTD Clutch and Pressure plate. i also got my flywheel resurfaced for $40. Well i got the transmission on and the wire harness all hooked up(which you should definetly do before you drop the engine in your car). This is when i relized im missing the entire IAB solenoid! so instead of having to track one of those down im just gonna get a aftermarket Intake Manifold(one less thing to wire for vtec also ). Alright so now i will begin with the pictures that i have of what i've done last weekend and throw in a couple goodies you should know as well.
ok first off, here is my Resurfaced Flywheel
Then i put the clutch and flywheel on(tourque specs are listed in the link i provided earlier in this thread)
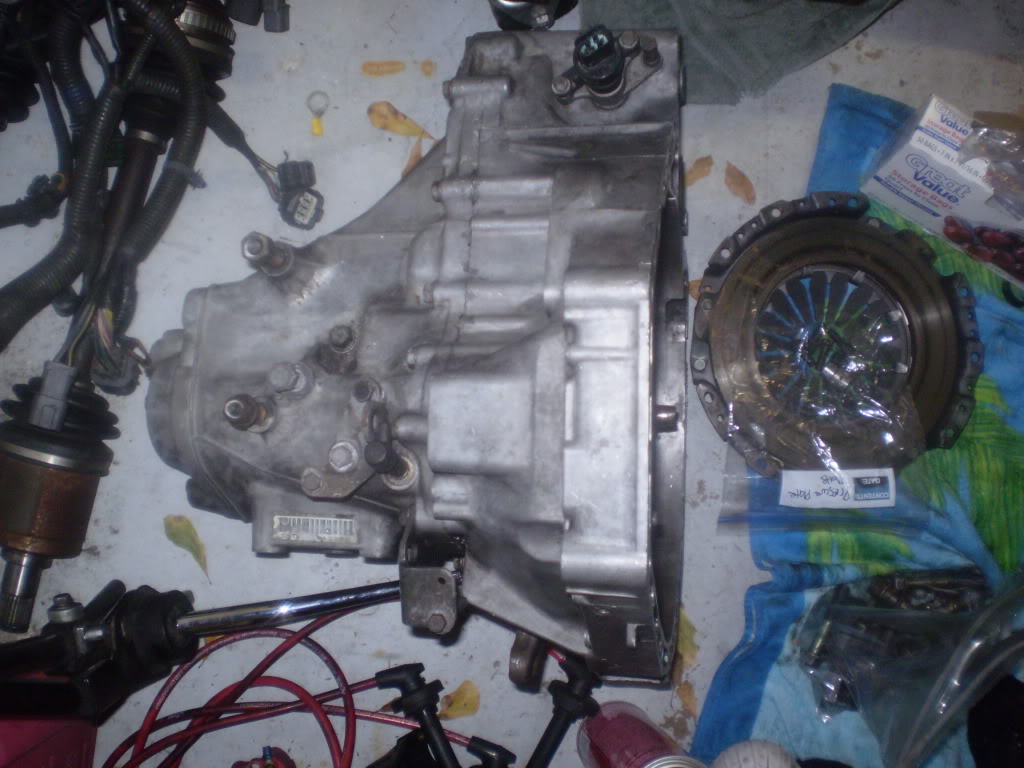
I dont have pics of the clutch and flywheel but here is the transmission bolted on the block
Ok then i hooked up the wire harness. i basically worked my way from the obvious connections to the ones i didnt know(they all pretty much fall in place once you snap on a couple). this is when i found out i dont have my IAB Solenoid!
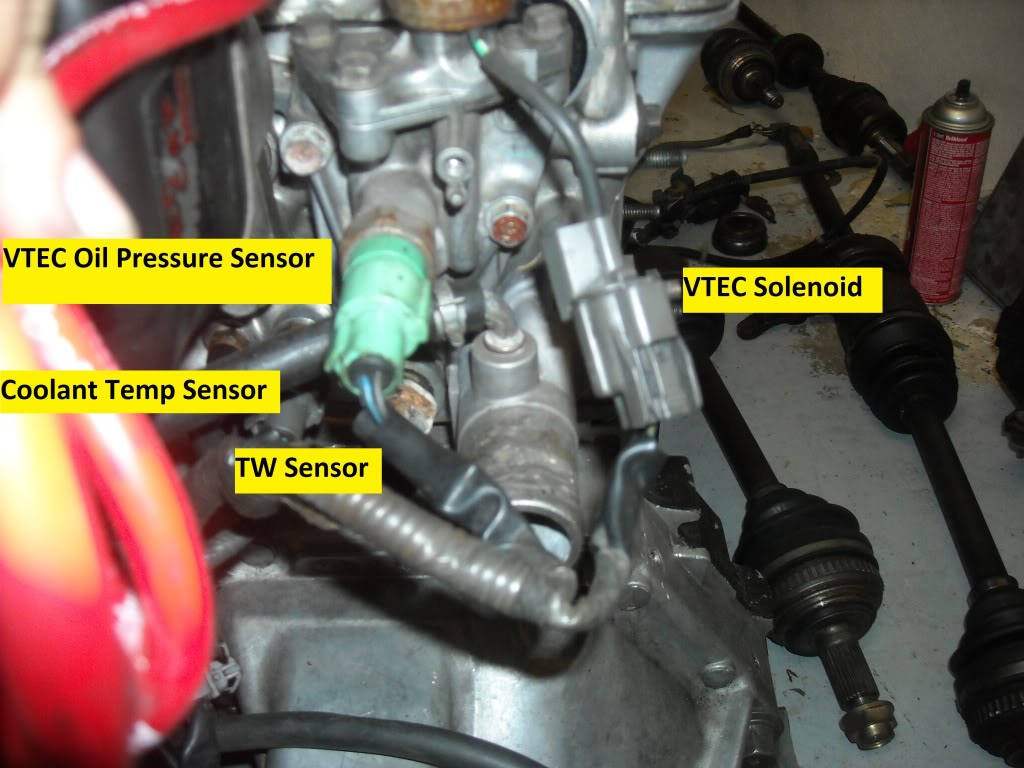
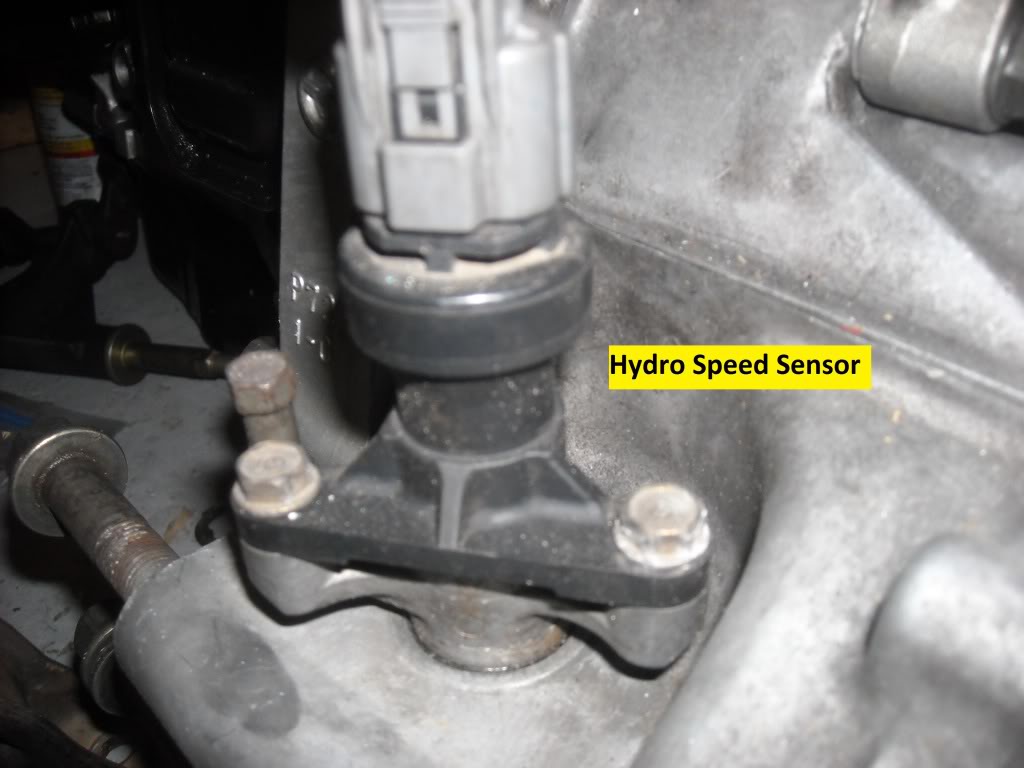
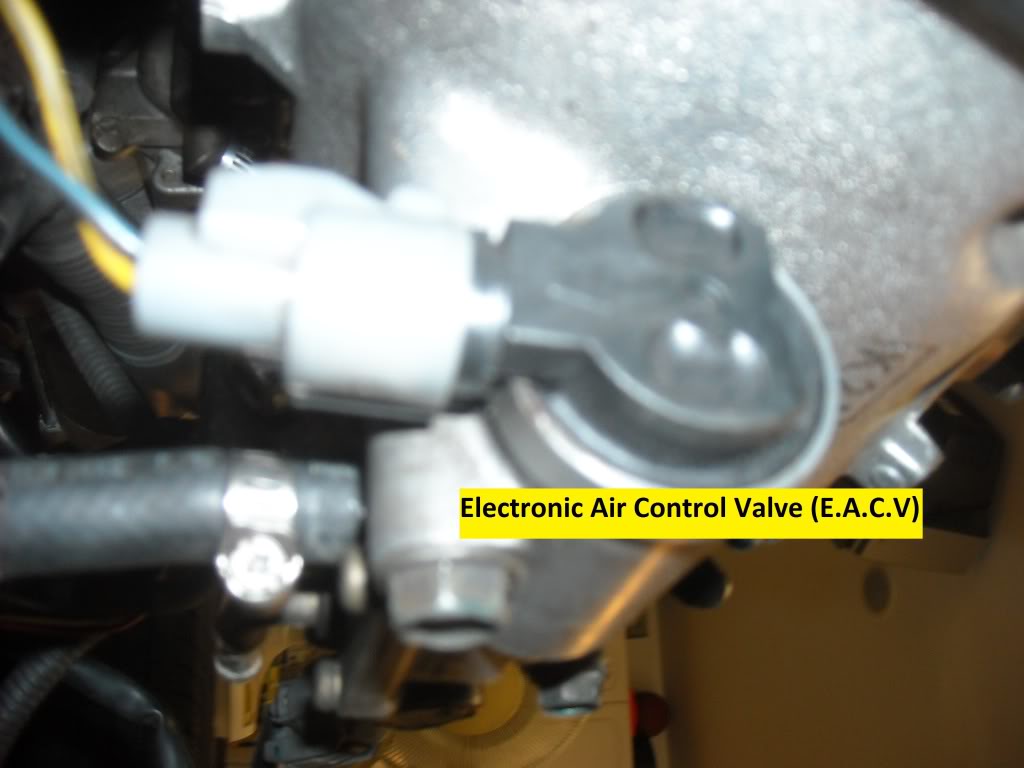
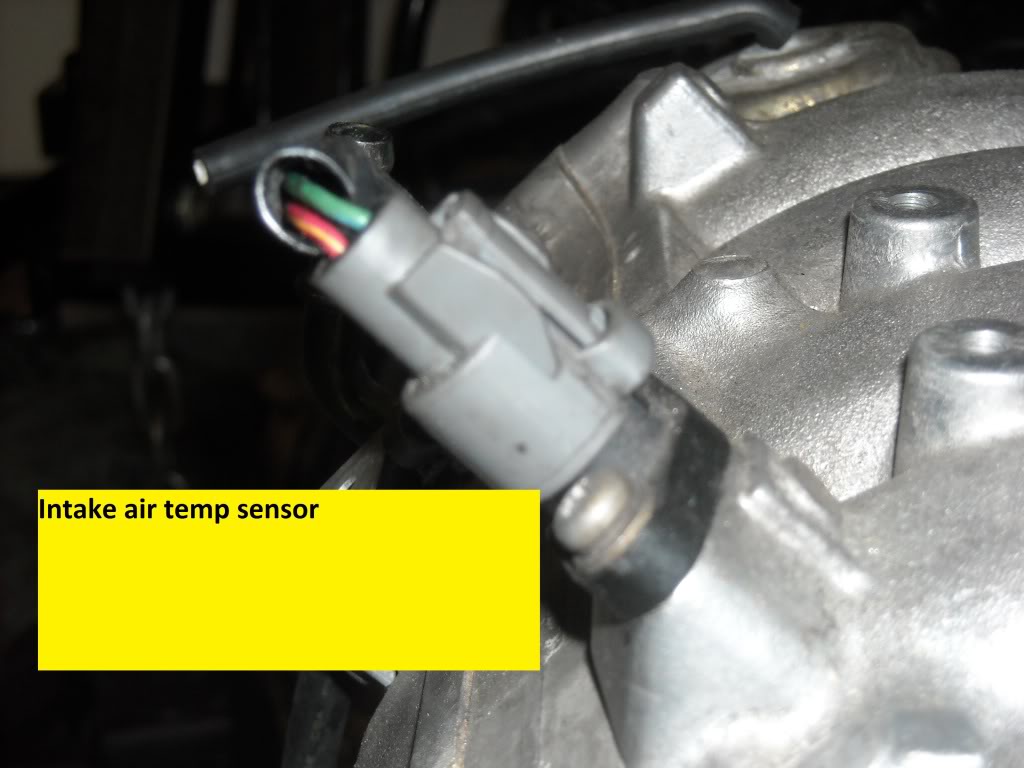
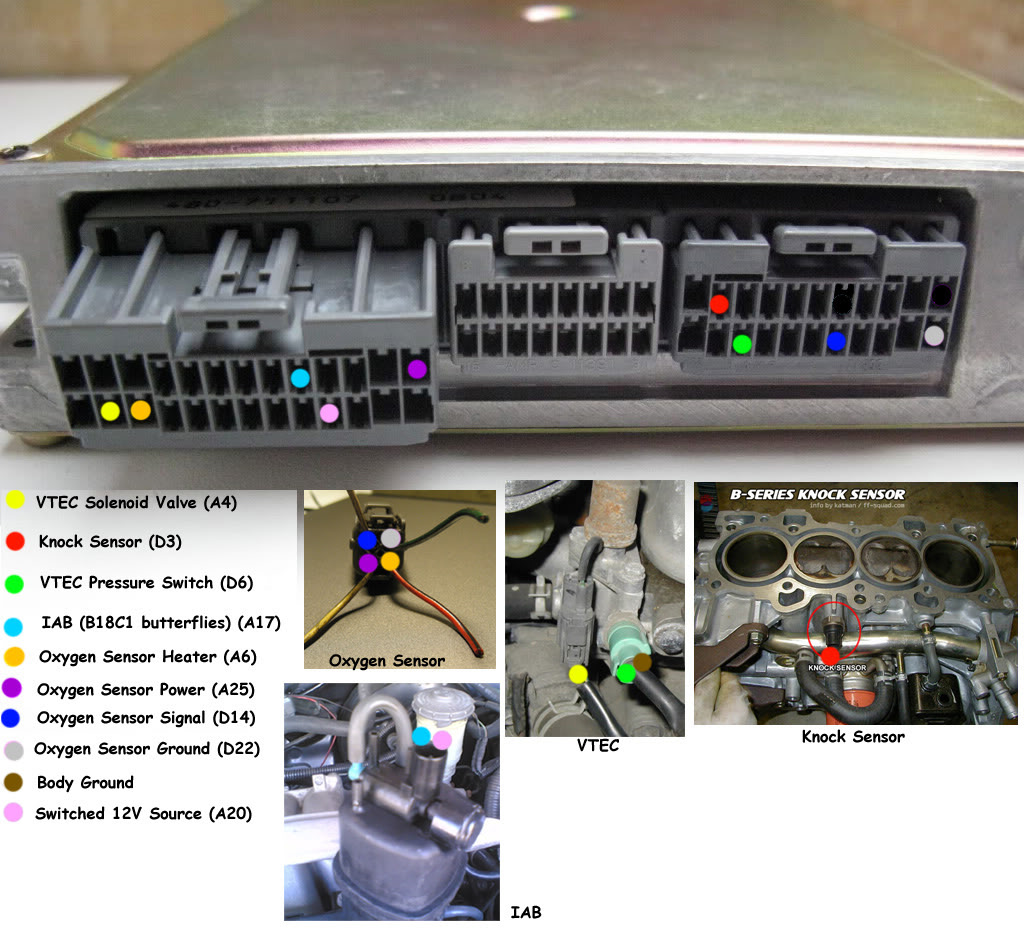
Heres some pics and lables i made of most of the sensors.
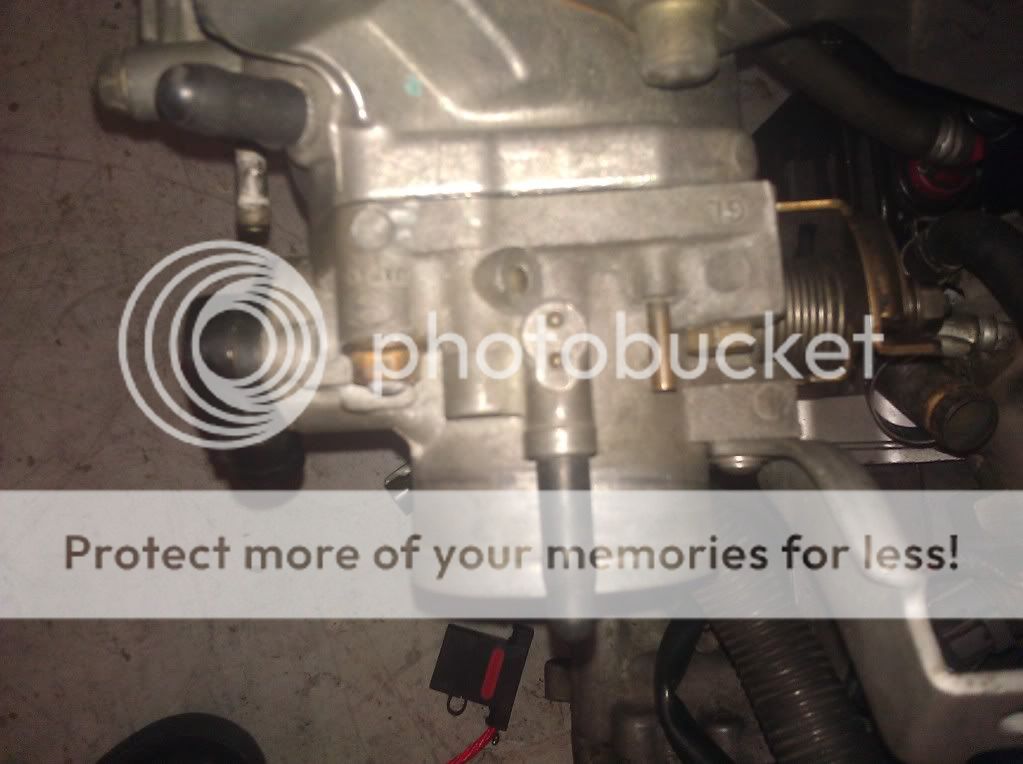
Heres the TPS Sensor but i do not have a spot for my map sensor on the top of my throttle body! I figured it must not be the stock one.(i'll just get an aftermarket TB once i get the Intake manifold also)
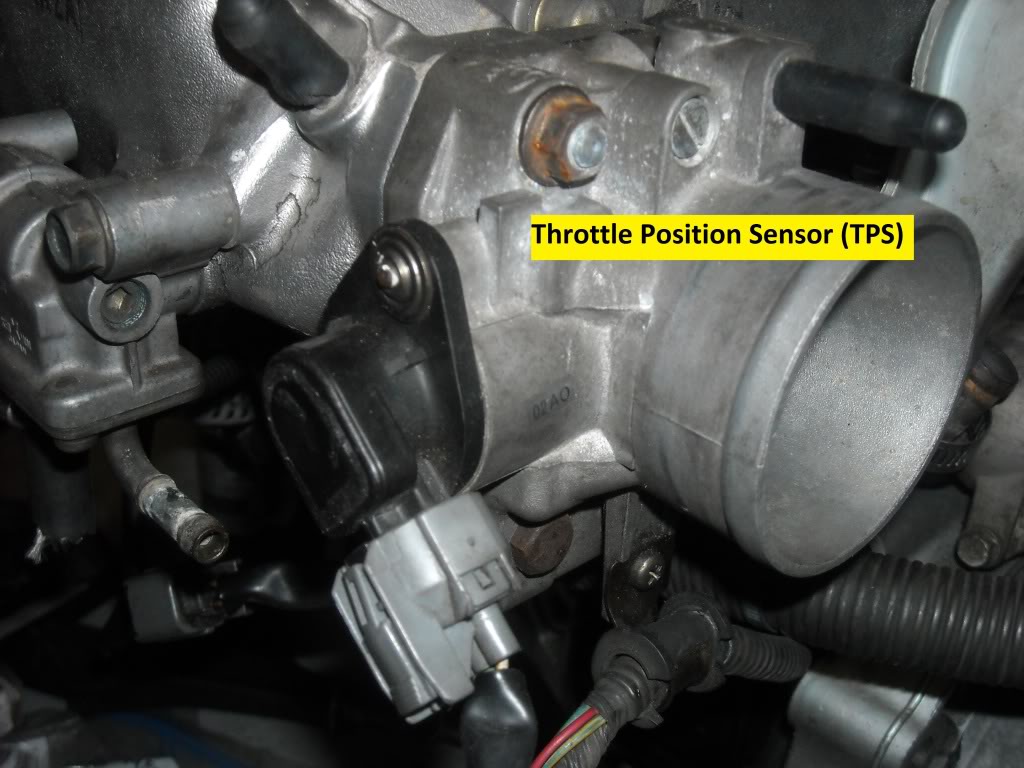
LOOK! theres no spot for my map sensor
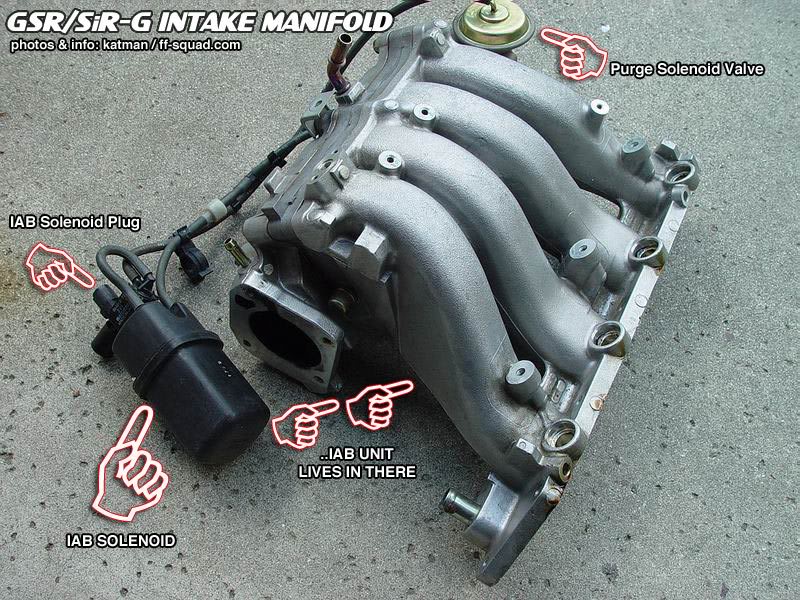
Alright now this is the IAB Solenoid that i am missing as well. but here it is for those of you who actually got a COMPLETE Swap lol
OK there are 2 more sensors left. the Oil Pressure Switch and the Knock Sensor. the oil pressure switch is located to the left of your oil filter and the knock sensor is right above of the oil filter. if you do not have these...find them. i got my knock sensor from ebay for $20 and the Oil Pressure switch from advanced auto for about $9.
that should be all/most of the sensors. now heres some wiring info you guys will love. i know i did. because before i didnt have a damn clue what the hell to do lol.
ok heres the holy grail of vtec wiring diagrams(for OBD1)
heres the shock tower and where to run your wires to
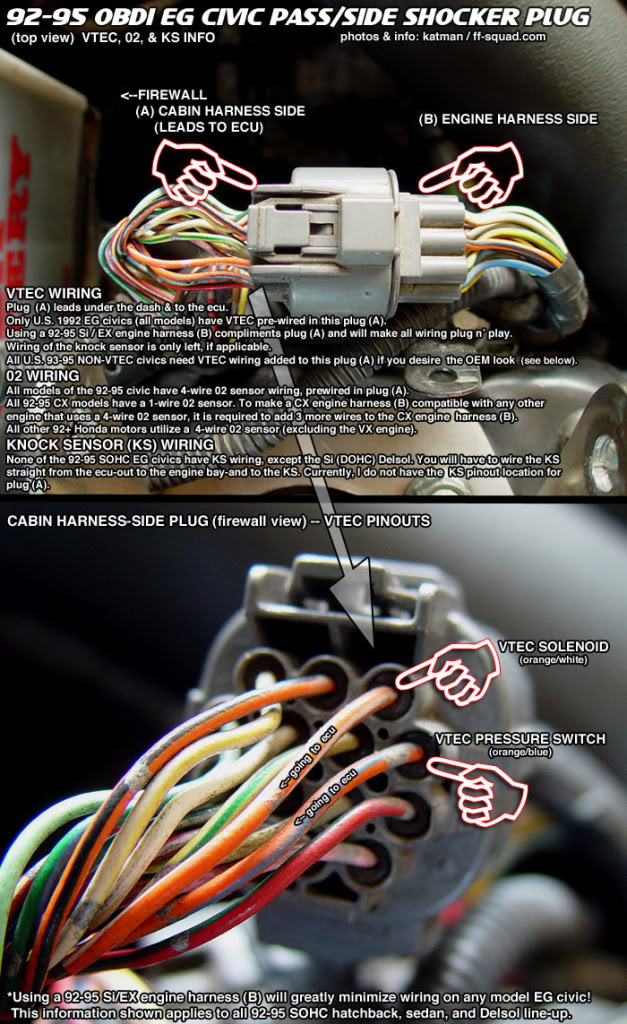
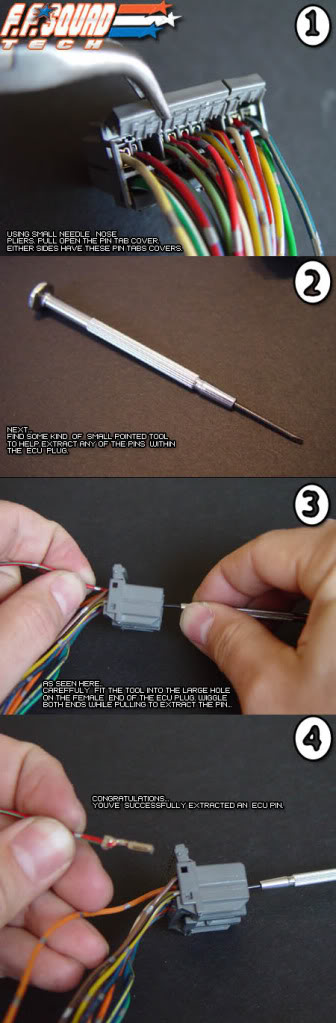
and heres how to depin the ecu wires
ok and if you do not want to do all that wiring then go to this guy, hes got a harness that makes all of that wiring plug n play
url]http://motors.shop.ebay.com/hondapartshero/m.html?_nkw=&_armrs=1&_from=&_ipg=[/url]
Alright. that takes care of all the wiring. now for the removal of the original engine.
tada! all done lol. um didnt really have the time or energy to stop and take pictures inbtween everything i was doing...sorry :D. But what the basics are is you first take of the axles( you may want to drain the transmission fluid before to pull the passenger side axle off, unless you want a facial of tranny fluid), then disconnect all wires and pipes holding your engine to the car, then you want to take off the shift linkage by knocking out the BITCH! Pin located where the linkage and trans. meet. its covered by a rubber boot.(seriously, if your swaping motors and already have the other shift linkage...do yourself a favor and just hack off the damn thing. Took me at least 4 hours to get that ****in pin out) then put the on your lift and take off the motor mounts. then just fanagle your motor out of the engine bay and go good to go!
heres the few pics i managed to take while taking out the old engine
Before(a little ways into the removal)
After(12 hours after to be exact)...which is just a tad ridiculous, but not bad for my first time i guess?
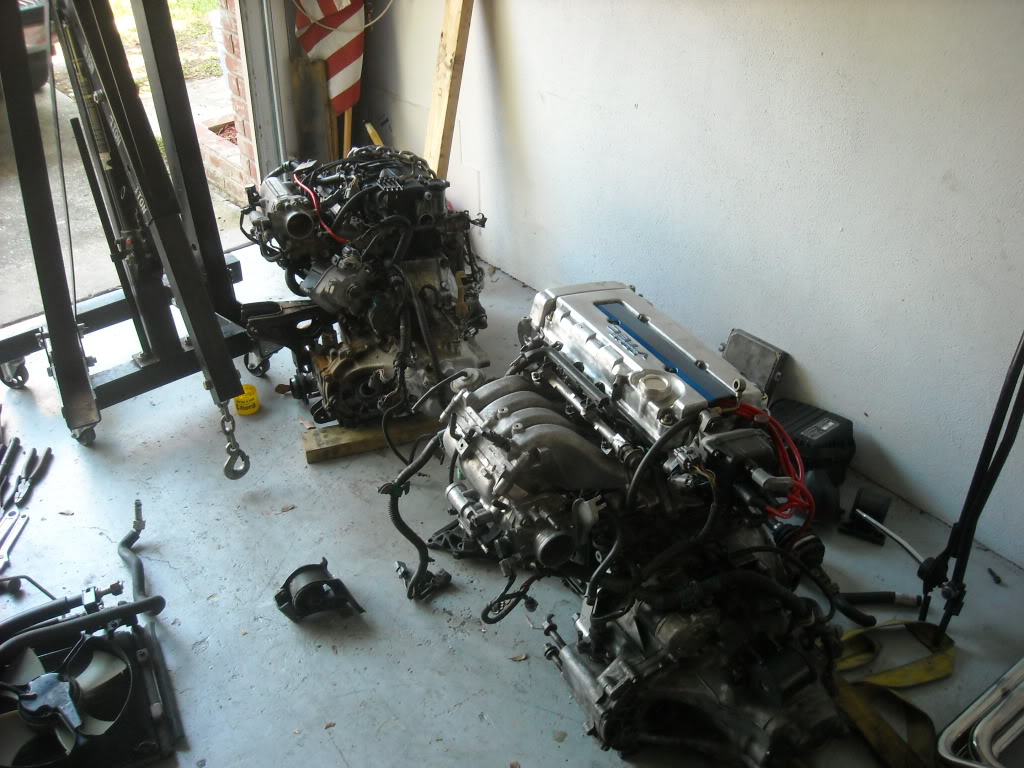
And heres my 2 babies laying side by side.
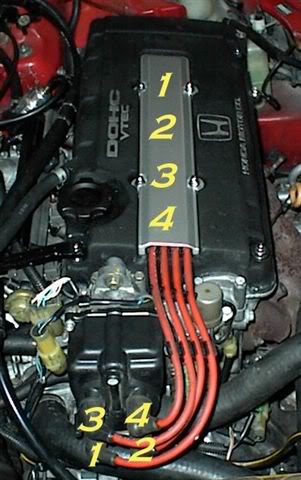
ok so i've been off for awhile and again when i was putting the car back together i didn't take any pictures. but what you need to know is in addition to the 3 basic motor mounts you also need the "T" Bracket from a 94-01 GSR. its the rear bracket for the transmission. you also need a lower radiator hose from a 94 delsol VTEC and a upper radiator hose from a GSR. Make sure if your getting a aftermarket intake manifold to put it on before you put the engine in your car. i couldn't because i had no choice but to put my engine in before i got it and it sucks to bolt it on after. anyways, recheack all your wiring and triple check that everything is hooked up and then turn the key! If your like me and your car doesn't start the first time make sure you got the spark plug wires plugged in correctly.
heres the correct spark plug wire setup
once you checked that then try to start again, if not then check your fuel and if not that then check all your wiring or see if your getting a CEL and what one your getting.
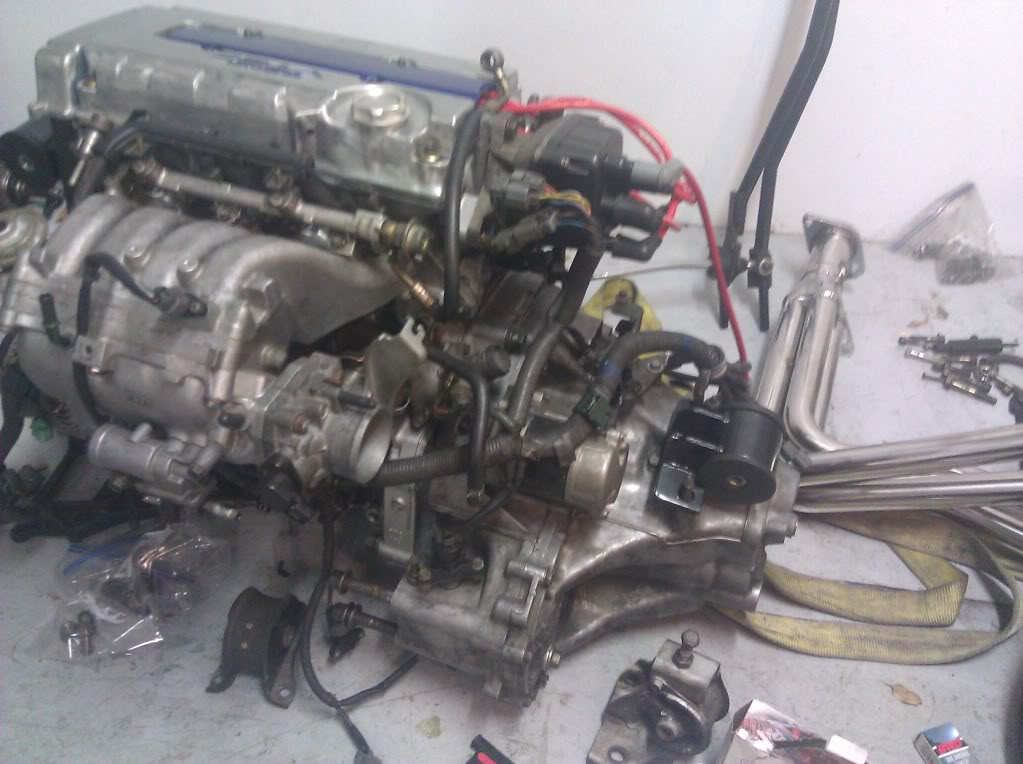
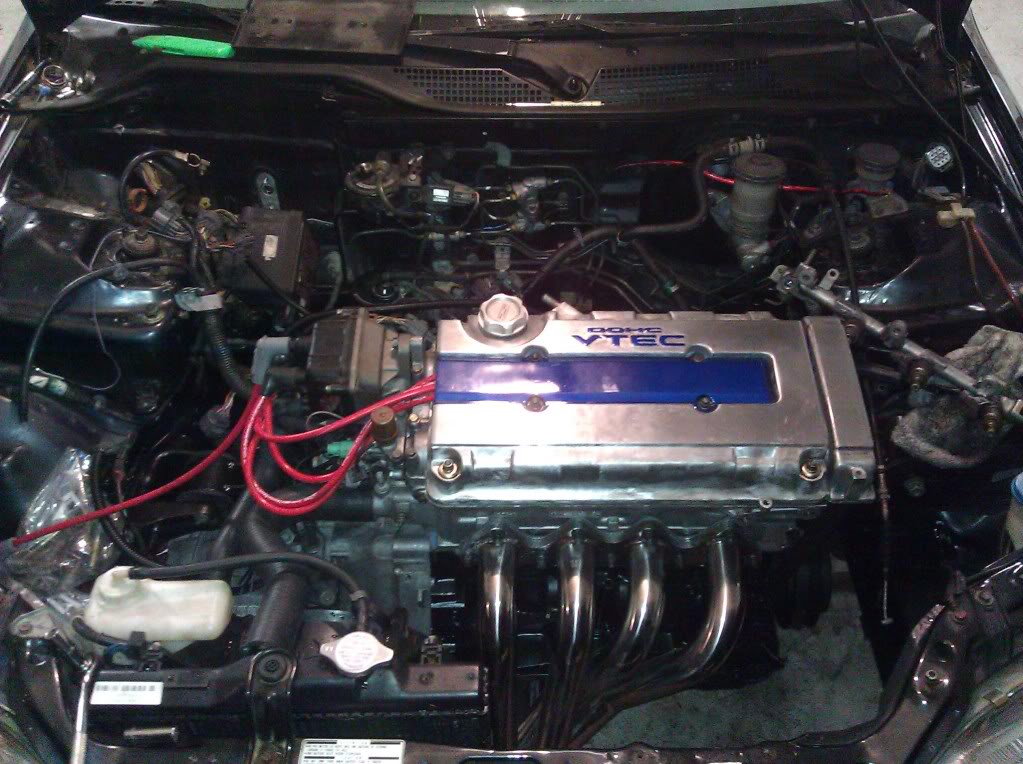
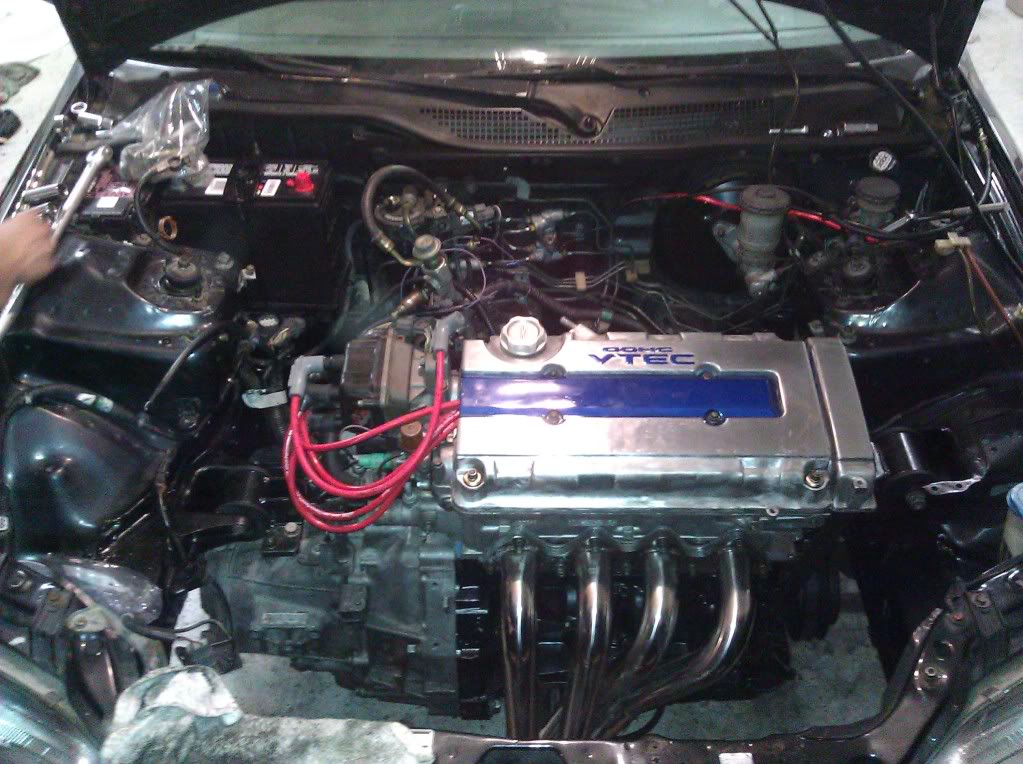
heres what pictures i have from start to finish on the new motor.
No intake or battery
Heres the battery
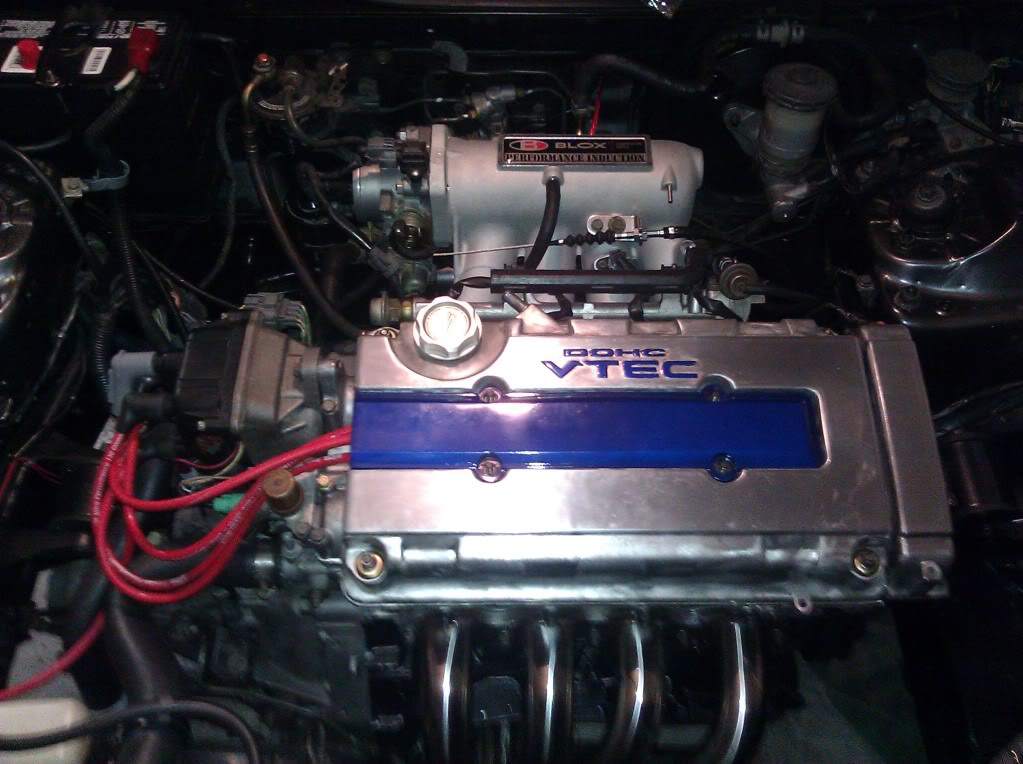
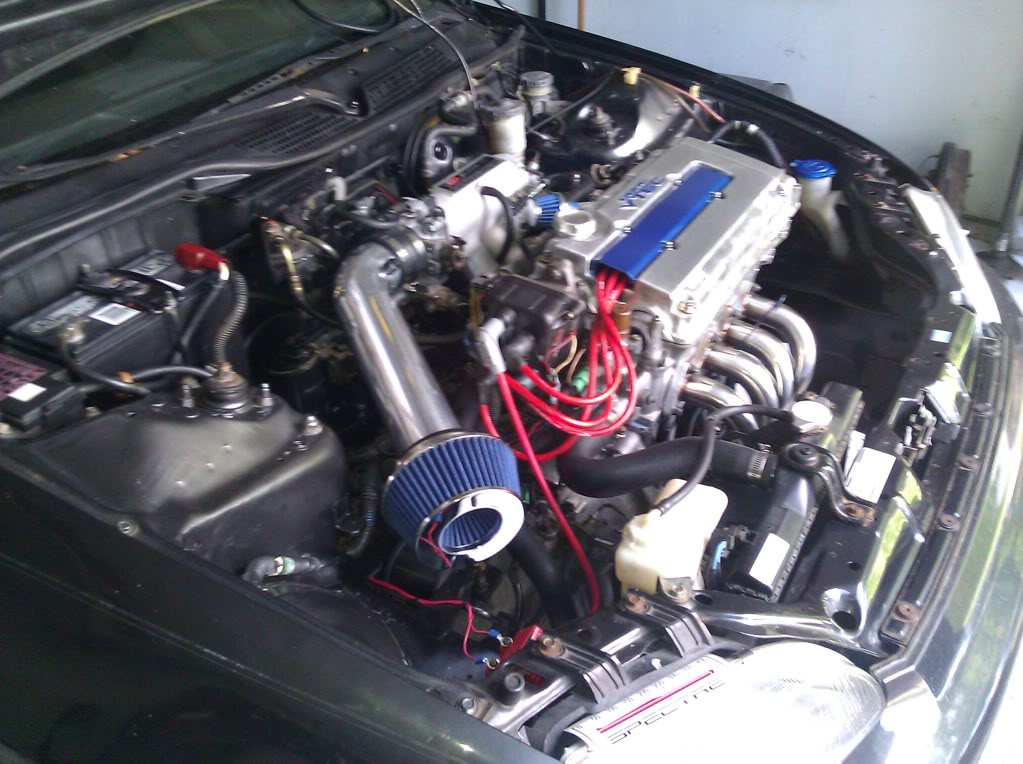
New Blox Intake Manifold
then i thought about leaving the stock air intake(bad idea...looks like ****)
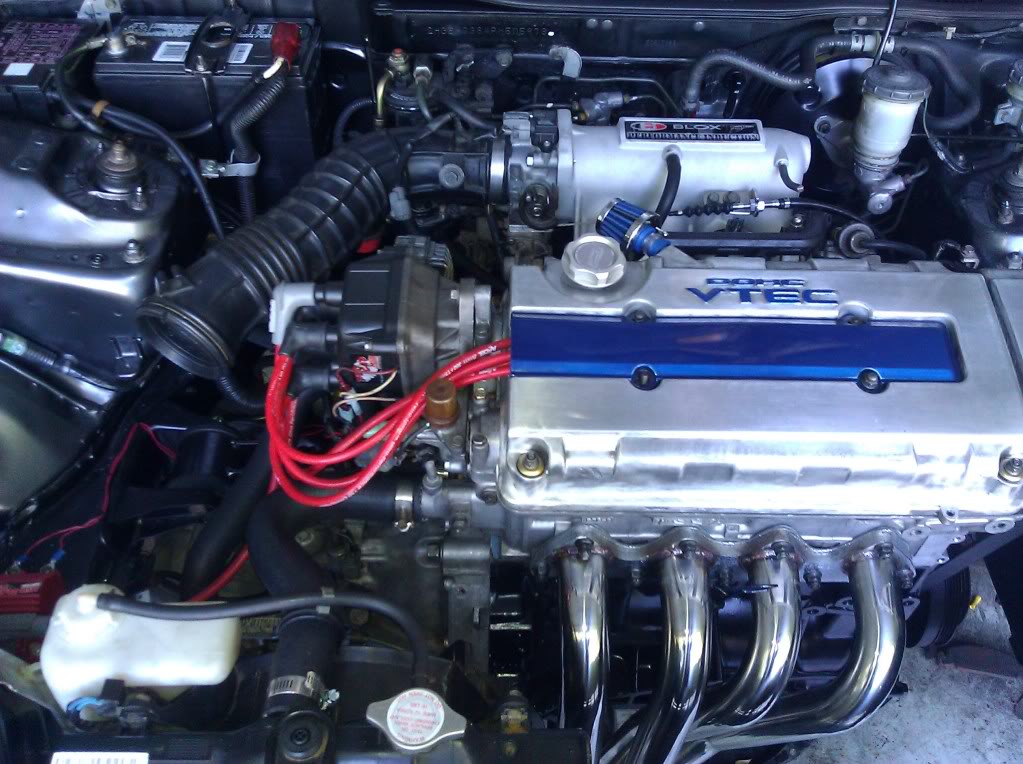
So i went and picked up a cheap one for now(not final! just temporary)
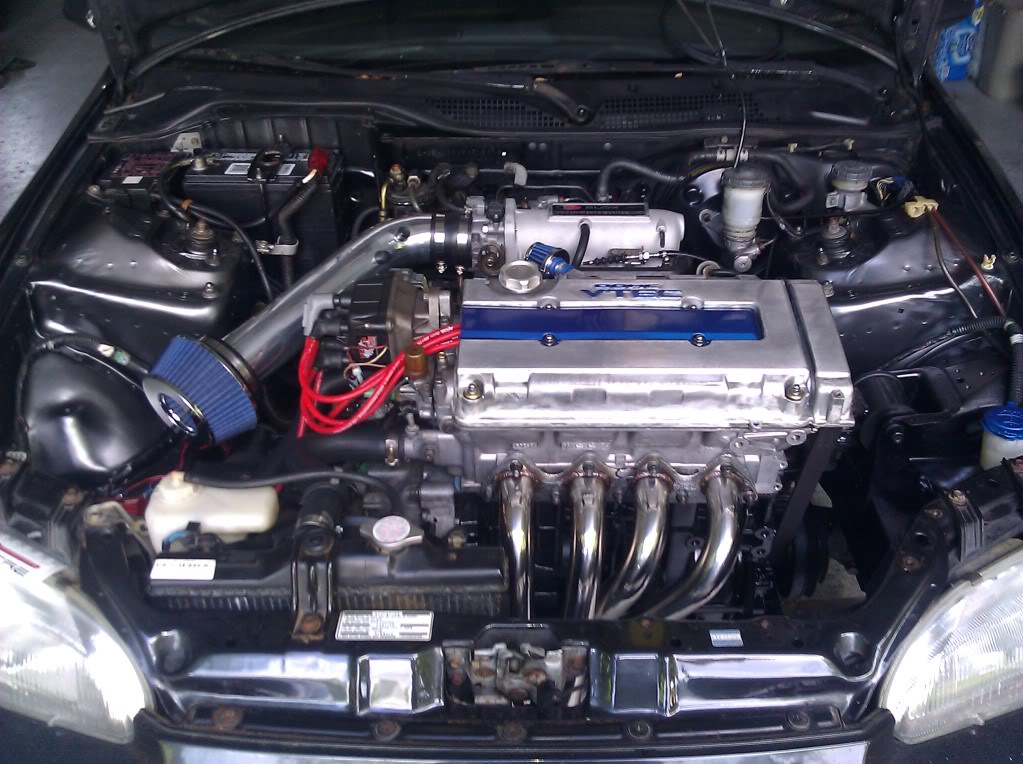
and after that, shove your axles back on and get your tires on and GO GO GO!
Just for my records and in case anymore cares(or runs into similar problems) I'll list all the problems i have gone though and fixed and ones yet to be fixed since/before my motor has been in my car...
First I noticed my motor didn't come with a Oil Pressure Sensor or a Knock Sensor. $20-$25 Bucks for both(eBay KS)
Then i got my Flywheel resurfaced. $40 Bucks
Then my shift linkage didn't reach...so me and a buddy cut it and welded a solid metal bar in place to make it fit...just an FIY don't do that. it barely works and the shift **** does not sit in place and it moves around everywhere and is a bitch to get in reverse and first. I'm thinking i got a 90-93 linkage instead of 94-01. Yet to be determined since i haven't replaced it yet...but i am going to as soon as i get the money.
Then i had to get a flange to weld onto my cat(which took for ever to grind down because the pipe we used to weld the flange on was to thick) because I was using my stock exhaust for a temporary solution but i kinda fell off the fixing my car thing for awhile and its still stock exhaust until i have the money for a Borla XR-1 and some pipe. about 5-6 hours of work. $7 Bucks for the Flange.
Then i needed a new Throttle Body because the one that came with my motor didnt have a spot for a MAP Sensor? WTF!? Still havent figured that one out. And i didnt want to bypass it or anything weird. 1 hour of work. $45 Bucks.
Then i got an air intake from advanced auto because i refused to use the stock air box and wanted sometime to last me for a while until i got or need a better one. took about 1 hour to put on. $65 for the pipe and the filter.
Then (because i was stupid lol) I didn't think about a torque sequence for my Intake Manifold so i had to redo that(because my car ran like crap obviously). Took about a day to realize and fix. No Cost.
Then after i fixed that it still ran pretty shitty so i noticed...(bare with me i wasn't to car smart or proactive for awhile ops: ) my Throttle Body Gasket was on upside down causing a leak. Then it ran a little better...very little. took about 4-5 days to realize and fix. No Cost
Then i noticed one of my header pipes was not deteriorating/bronzing along with the others. Did a compression test...it came out fine. Then checked my fuel injectors and the number one cylinder injector was driping and not spraying. Took about a week or two to figure that one out and fix. $60 bucks.
Then i got new NGK Plugs since they were the ones i got with the motor and the first cylinder one was shot from the bad fuel injector. 15 minutes of work. $15-$20 Bucks.
Then i got an oil leak. Found out it was the gasket. about a days work but didnt fix the leak for like a week or two. $25 bucks.
When i got the motor it didn't come with the bolts for the flywheel inspection plate so i had to order those but didn't for like 2 months. its now installed. about $10-$15 Bucks
My motor also didnt come with a lower timing cover or the bolts for it. Ordered it the same time i ordered my inspection plate bolts. $50-$65 Bucks.
Then i did a valve adjustment because i didn't before i put the motor in. Had to buy Feelers and modify a 10mm wrench. $10 bucks. 1 1/2 hours of work.
Before i put my timing cover on i redid the mechanical timing just to be sure it was correct...then i found out the tensioner pulley was bad but had to put it back on(it is tight enough to not skip teeth but still kinda loose on one side at a time. Still have not gotten the Pulley. No Cost. 3 hours of work.
Then i was able to check and fix my ignition timing for the time being(it had a long way to go before i wouldn't have to set it almost every time i did something to my car). about 10-15 minutes of work. No Cost
Then the oil pan gasket i put on i must have over tightened because it was ripped in 4 different places :eek: so i out RTD on it for now and it hasn't leaked since(Big Surprise lol).
While i RTD'd the Oil pan gasket i had to put new bolts on my exhaust flange because the old(Remember Temporary) Bolts fell out and caused me to have open header for about a day. No Cost about 1 hour of work. oh and it was open header and clanking around while it had roaming idle :evil: ...(What i get for putting **** off and not putting more money in my car when i had the resources :-| )
Everything was kinda alright for a while until i just recently(about a month ago) started to get roaming idle. the car ran alright but kinda boggy all over but it was still drivable until the roaming idle started to **** me off. so then i did my research and found out about the IACV. So i Cleaned it...it did nothing. So then i opted that it was broken and needed a new one. $40 bucks later(craigslist part) it still didn't fix my idle problems. So to rule out the fact of both of the IACV's i had being shot i did some more research and found out(of course after i bought the other IACV) about the idle control screw inside the FITV. Fixed that because it was all the way loose. and while i was in the middle of doing all this i replaced any hose clamp that was the shitty OEM ones because i had a slight Coolant leak in about 4 different places.
After doing all of these things my car still felt kinda off...so tonight i figured i should do a ignition timing check one last time( i could do this in my sleep now). And now my car runs the best it ever has ever! the only things i have left to do are:
Get the Right Shift Linkage
Get a Borla XR-1 and redo the exhaust piping
Get a Timing Belt Tensioner and a Timing Belt
And then set the Mech Timing and Ignition Timing.
Then my car should be ready for a Dyno tune and be in tip top shape and completely done...until it's Turbo Time
Ok so I've been going back and forth on the idea of building up my car. But things changed once i had the money to buy a GSR Swap for my baby. I found the motor on the Tampa Racing Forums yesterday. It's a rebuilt B18C1 Motor with a 5 Speed Type R Trans w/LSD. i picked this bad boy up for 1,700 :D (Awesome Price!). The only things i need to pick up before this is ready to go in is the motor mounts, a Head Gasket, and the head studs.
Once i got it all home
Bottom of the Head
Inside the Head
Top of the Block
Type R Trans w/LSD
Camshafts and covers
Dizzy, Alternator, Starter, and MSD Ignition Box w/ all wires
Axels, Air Box, ECU, Wire Harness, and the Exhaust Manifold is buried underneath it all
Valve Cover(Needs Paint)
Here's my car
And the Stock Motor In it at the moment
I also got 2 10" Alpine Type R's in my Trunk that blow off my rear view mirror :music:
Just picked up the shift linkage w/short shifter today for 65 bucks
Ok I just picked up my arp head studs and my Fel-Pro Head Gasket today. so i came home ready to put my motor back together and ready for my swap. Just ran into one slight problem...they gave me the wrong head studs. I have to return them tomorrow and hopfully find a store nearby that has the right ones in stock so i can put this beast together tomorrow. But i was able to get some cleaning done so it wasnt a total waste of a day.
Took off the clutch and Pressure Plate to get the block on the engine stand
Flipped the block over to drain out any fluids in the block because i cleaned it with some brake cleaner
Got the Gasket on the head and this is when i found out the head studs were the wrong ones
So i gave the beast a wipe down
Just hand tightened the cam covers and **** on to make sure i had all the bolts and parts
Heres the head with the valve cover resting ontop
Mounted the altenator for safe keeping.(not entirely sure this is how it really goes on.)
Cleaned out the inside of the trans and the outside
Bunched it all together to save space till i start working on it tomorrow
Alright i searched everywhere but there are only two stores around me that carry ARP products and neither of them had the studs i needed. i got them ordered and they should be here on monday. So i decided to paint my valve cover but ended up just sanding it and throwing some blue paint on the letters and cover plate. It took me and two other friends about 8 hours to give new life to my valve cover.
Heres the cover with the chipping paint still on
And heres what we got out of 8 hours of hard labor :2thumbs:
i also ordered my motor mounts today and they should be here no later than the 21st and my ARP studs will be here monday. So far everything is going kinda to plan.
Just got my ARP head studs today(the right ones this time). so i finally get to put the head on the block. just make sure your piston closest to the timing belt is top dead center and its on the compression stroke(otherwise your motor wont start). the way you do this is pretty simple there is a notch on the gear behind the pulley system(to get the pulley's off i used a impact wrench) then you can see the notch on the gear the timing belt goes on.
Heres the notch(i outlined where it is bc you cant really see it that well with my camera but you should have no trouble finding it)
Heres what the right head studs look like(there should be ten long *** studs)
i know theres only 9 in this pic but thats bc i was starting to put them on.
Also you want to make sure you lube them up nice(i used the lube that came with them)
Alright you want to tighten these up with an allen key
Then put your head gasket on
and then drop the head on the block(make sure its sitting flush before tightening the studs)
to get the washers on right i used a little magnetic grabber thing and a screwdriver to pull the washer off the
magnet and onto the stud.
You want to also lube up the nuts before you put them on the studs.
heres what it looks like just hand tightened
Now unfortunetly i thought i had a torque wrench but it seems i lost it and have no clue where it is.
So now im stuck till my friend gets home and brings me his torque wrench.
Just thought i should share so info i found about torque specs for my head studs. i found this this from Honda-Tech. and im not sure where i found the pictures.
This guy has the torque specs for everything in your B Series motor
https://honda-tech.com/forums/honda-crx-ef-civic-1988-1991-3/faq-b-series-torque-specs-953151/
and heres how to identify which number goes with which stud and cam cover bolts
my friend came over tonight and brought a torque wrench with him. Finally getting the head on the block
Then we torqued the cam covers
Here it is fully assembled. i didnt bolt on the vavle cover yet because i still have to put the timing belt on.
i also didnt really tighten anything but just losely bolted stuff on to get the 20 parts laying on my floor out of the way.
Well thats it till i get more parts near the end of the week. i should be getting my motor mounts and headers
no later than saturday.
I got my headers last Friday and also got my motor mounts! Now I just got to buy a clutch this weekend and I'll be good to swap it in 2 weeks!
Ok i've been extremely busy with my swap and everything and forgot to take pics of my clutch and pressure plate. Its a stage one XTD Clutch and Pressure plate. i also got my flywheel resurfaced for $40. Well i got the transmission on and the wire harness all hooked up(which you should definetly do before you drop the engine in your car). This is when i relized im missing the entire IAB solenoid! so instead of having to track one of those down im just gonna get a aftermarket Intake Manifold(one less thing to wire for vtec also
). Alright so now i will begin with the pictures that i have of what i've done last weekend and throw in a couple goodies you should know as well.ok first off, here is my Resurfaced Flywheel
Then i put the clutch and flywheel on(tourque specs are listed in the link i provided earlier in this thread)
I dont have pics of the clutch and flywheel but here is the transmission bolted on the block
Ok then i hooked up the wire harness. i basically worked my way from the obvious connections to the ones i didnt know(they all pretty much fall in place once you snap on a couple). this is when i found out i dont have my IAB Solenoid!
Heres some pics and lables i made of most of the sensors.
Heres the TPS Sensor but i do not have a spot for my map sensor on the top of my throttle body! I figured it must not be the stock one.(i'll just get an aftermarket TB once i get the Intake manifold also)
LOOK! theres no spot for my map sensor
Alright now this is the IAB Solenoid that i am missing as well. but here it is for those of you who actually got a COMPLETE Swap lol
OK there are 2 more sensors left. the Oil Pressure Switch and the Knock Sensor. the oil pressure switch is located to the left of your oil filter and the knock sensor is right above of the oil filter. if you do not have these...find them. i got my knock sensor from ebay for $20 and the Oil Pressure switch from advanced auto for about $9.
that should be all/most of the sensors. now heres some wiring info you guys will love. i know i did. because before i didnt have a damn clue what the hell to do lol.
ok heres the holy grail of vtec wiring diagrams(for OBD1)
heres the shock tower and where to run your wires to
and heres how to depin the ecu wires
ok and if you do not want to do all that wiring then go to this guy, hes got a harness that makes all of that wiring plug n play
url]http://motors.shop.ebay.com/hondapartshero/m.html?_nkw=&_armrs=1&_from=&_ipg=[/url]
Alright. that takes care of all the wiring. now for the removal of the original engine.
tada! all done lol. um didnt really have the time or energy to stop and take pictures inbtween everything i was doing...sorry :D. But what the basics are is you first take of the axles( you may want to drain the transmission fluid before to pull the passenger side axle off, unless you want a facial of tranny fluid), then disconnect all wires and pipes holding your engine to the car, then you want to take off the shift linkage by knocking out the BITCH! Pin located where the linkage and trans. meet. its covered by a rubber boot.(seriously, if your swaping motors and already have the other shift linkage...do yourself a favor and just hack off the damn thing. Took me at least 4 hours to get that ****in pin out) then put the on your lift and take off the motor mounts. then just fanagle your motor out of the engine bay and go good to go!
heres the few pics i managed to take while taking out the old engine
Before(a little ways into the removal)
After(12 hours after to be exact)...which is just a tad ridiculous, but not bad for my first time i guess?
And heres my 2 babies laying side by side.
ok so i've been off for awhile and again when i was putting the car back together i didn't take any pictures. but what you need to know is in addition to the 3 basic motor mounts you also need the "T" Bracket from a 94-01 GSR. its the rear bracket for the transmission. you also need a lower radiator hose from a 94 delsol VTEC and a upper radiator hose from a GSR. Make sure if your getting a aftermarket intake manifold to put it on before you put the engine in your car. i couldn't because i had no choice but to put my engine in before i got it and it sucks
to bolt it on after. anyways, recheack all your wiring and triple check that everything is hooked up and then turn the key! If your like me and your car doesn't start the first time make sure you got the spark plug wires plugged in correctly.heres the correct spark plug wire setup
once you checked that then try to start again, if not then check your fuel and if not that then check all your wiring or see if your getting a CEL and what one your getting.
heres what pictures i have from start to finish on the new motor.
No intake or battery
Heres the battery
New Blox Intake Manifold
then i thought about leaving the stock air intake(bad idea...looks like ****)
So i went and picked up a cheap one for now(not final! just temporary)
and after that, shove your axles back on and get your tires on and GO GO GO!
Just for my records and in case anymore cares(or runs into similar problems) I'll list all the problems i have gone though and fixed and ones yet to be fixed since/before my motor has been in my car...
First I noticed my motor didn't come with a Oil Pressure Sensor or a Knock Sensor. $20-$25 Bucks for both(eBay KS)
Then i got my Flywheel resurfaced. $40 Bucks
Then my shift linkage didn't reach...so me and a buddy cut it and welded a solid metal bar in place to make it fit...just an FIY don't do that. it barely works and the shift **** does not sit in place and it moves around everywhere and is a bitch to get in reverse and first. I'm thinking i got a 90-93 linkage instead of 94-01. Yet to be determined since i haven't replaced it yet...but i am going to as soon as i get the money.
Then i had to get a flange to weld onto my cat(which took for ever to grind down because the pipe we used to weld the flange on was to thick) because I was using my stock exhaust for a temporary solution but i kinda fell off the fixing my car thing for awhile and its still stock exhaust until i have the money for a Borla XR-1 and some pipe. about 5-6 hours of work. $7 Bucks for the Flange.
Then i needed a new Throttle Body because the one that came with my motor didnt have a spot for a MAP Sensor? WTF!? Still havent figured that one out. And i didnt want to bypass it or anything weird. 1 hour of work. $45 Bucks.
Then i got an air intake from advanced auto because i refused to use the stock air box and wanted sometime to last me for a while until i got or need a better one. took about 1 hour to put on. $65 for the pipe and the filter.
Then (because i was stupid lol) I didn't think about a torque sequence for my Intake Manifold so i had to redo that(because my car ran like crap obviously). Took about a day to realize and fix. No Cost.
Then after i fixed that it still ran pretty shitty so i noticed...(bare with me i wasn't to car smart or proactive for awhile
ops: ) my Throttle Body Gasket was on upside down causing a leak. Then it ran a little better...very little. took about 4-5 days to realize and fix. No CostThen i noticed one of my header pipes was not deteriorating/bronzing along with the others. Did a compression test...it came out fine. Then checked my fuel injectors and the number one cylinder injector was driping and not spraying. Took about a week or two to figure that one out and fix. $60 bucks.
Then i got new NGK Plugs since they were the ones i got with the motor and the first cylinder one was shot from the bad fuel injector. 15 minutes of work. $15-$20 Bucks.
Then i got an oil leak. Found out it was the gasket. about a days work but didnt fix the leak for like a week or two. $25 bucks.
When i got the motor it didn't come with the bolts for the flywheel inspection plate so i had to order those but didn't for like 2 months. its now installed. about $10-$15 Bucks
My motor also didnt come with a lower timing cover or the bolts for it. Ordered it the same time i ordered my inspection plate bolts. $50-$65 Bucks.
Then i did a valve adjustment because i didn't before i put the motor in. Had to buy Feelers and modify a 10mm wrench. $10 bucks. 1 1/2 hours of work.
Before i put my timing cover on i redid the mechanical timing just to be sure it was correct...then i found out the tensioner pulley was bad but had to put it back on(it is tight enough to not skip teeth but still kinda loose on one side at a time. Still have not gotten the Pulley. No Cost. 3 hours of work.
Then i was able to check and fix my ignition timing for the time being(it had a long way to go before i wouldn't have to set it almost every time i did something to my car). about 10-15 minutes of work. No Cost
Then the oil pan gasket i put on i must have over tightened because it was ripped in 4 different places :eek: so i out RTD on it for now and it hasn't leaked since(Big Surprise lol).
While i RTD'd the Oil pan gasket i had to put new bolts on my exhaust flange because the old(Remember Temporary) Bolts fell out and caused me to have open header for about a day. No Cost about 1 hour of work. oh and it was open header and clanking around while it had roaming idle :evil: ...(What i get for putting **** off and not putting more money in my car when i had the resources :-| )
Everything was kinda alright for a while until i just recently(about a month ago) started to get roaming idle. the car ran alright but kinda boggy all over but it was still drivable until the roaming idle started to **** me off. so then i did my research and found out about the IACV. So i Cleaned it...it did nothing. So then i opted that it was broken and needed a new one. $40 bucks later(craigslist part) it still didn't fix my idle problems. So to rule out the fact of both of the IACV's i had being shot i did some more research and found out(of course after i bought the other IACV) about the idle control screw inside the FITV. Fixed that because it was all the way loose. and while i was in the middle of doing all this i replaced any hose clamp that was the shitty OEM ones because i had a slight Coolant leak in about 4 different places.
After doing all of these things my car still felt kinda off...so tonight i figured i should do a ignition timing check one last time( i could do this in my sleep now). And now my car runs the best it ever has ever! the only things i have left to do are:
Get the Right Shift Linkage
Get a Borla XR-1 and redo the exhaust piping
Get a Timing Belt Tensioner and a Timing Belt
And then set the Mech Timing and Ignition Timing.
Then my car should be ready for a Dyno tune and be in tip top shape and completely done...until it's Turbo Time


")
Trending Topics
 09-05-2011, 08:32 AM
#12
Honda-Tech Member
Thread Starter
I read your build before on the other forum but that forum seems pretty dead.
itd be more bad *** with a black interior imo
09-05-2011, 10:27 AM
#13
Honda-Tech Member
dude sincerely, i would like to say its is so nice to see when we get really knowledgeable people that come to the H-T to spread there love of the game, i just made my final, FINAL list of parts n possible problems for my b swap, and got even more items to add to my check list for next week (fingers crossed)
thanks for such an informative and detailed thread
welcome to the community
p.s. your valve cover is fvckin sick!!!
thanks for such an informative and detailed thread
welcome to the community
p.s. your valve cover is fvckin sick!!!
09-05-2011, 10:42 AM
#14
Honda-Tech Member
Thread Starter
^^^ Thanks!
Haha thank you. Lots of Time/Sweat/Tears into that one lol
another thing i didn't mention in this thread( I didn't feel like copying/pasting my entire thread from the other site lol)
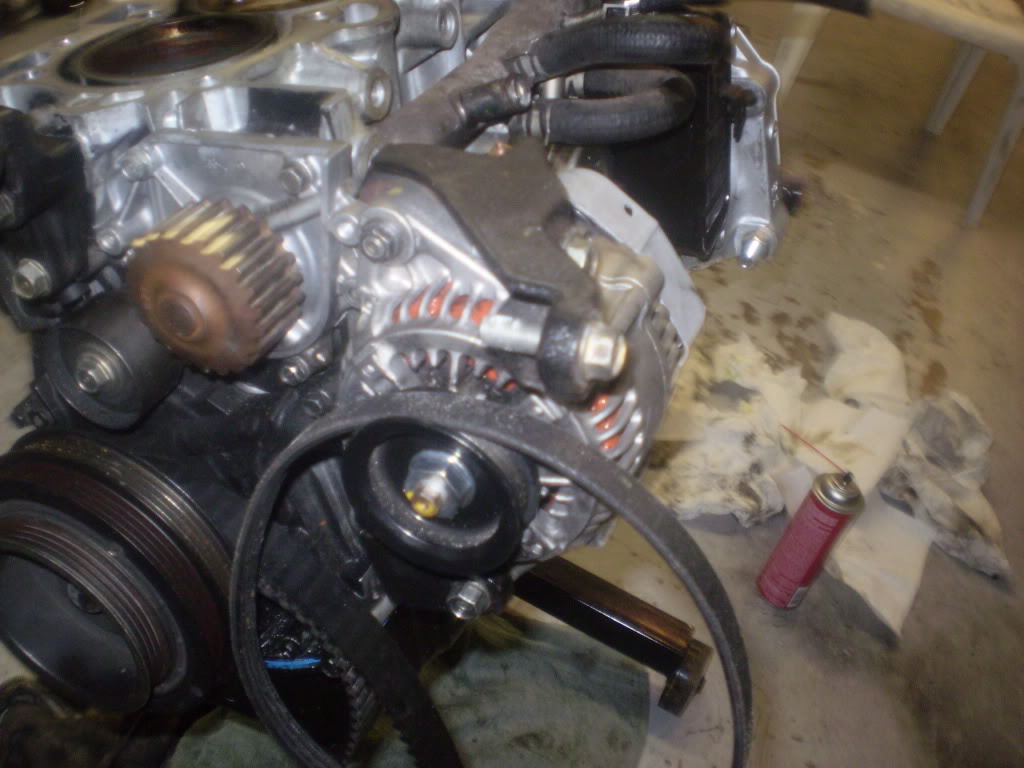
Alright i have a very important thing to tell you guys. there is a keyway that sits inside the pulley that bolts onto the crankshaft gear. when you take your pulley off do not lose this piece(otherwise your screwed). i lost mine because i did not know about it till a couple days after i took off my crank pulley lol and i had to search my garage forever to find it(luckily i did).
This is what it looks like(its about the size of a tylenol pill)
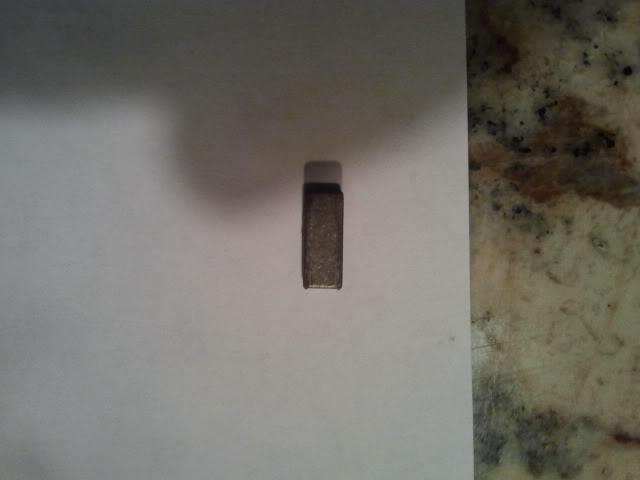
Once i got the keyway in i was able to put on the altenator belt
p.s. your valve cover is fvckin sick!!!
another thing i didn't mention in this thread( I didn't feel like copying/pasting my entire thread from the other site lol)
Alright i have a very important thing to tell you guys. there is a keyway that sits inside the pulley that bolts onto the crankshaft gear. when you take your pulley off do not lose this piece(otherwise your screwed). i lost mine because i did not know about it till a couple days after i took off my crank pulley lol and i had to search my garage forever to find it(luckily i did).
This is what it looks like(its about the size of a tylenol pill)
Once i got the keyway in i was able to put on the altenator belt
09-05-2011, 11:00 AM
#15
Honda-Tech Member
Thread Starter
Thanks again all for the Complements  (Haha best Smiley i could find)
I Came on here hoping to help people out with there B Series(But Specifically GSR) Questions and Troubleshooting. So that's my Story and I'll be glad to answer any EG-GSR Swap questions on here as to help out everyone who views this thread to the best of my ability/experience.
Once i get a job(stuck until then) there will be a lot more Updated Stuff on here too. So Keep an eye out in the near future!
(Haha best Smiley i could find)I Came on here hoping to help people out with there B Series(But Specifically GSR) Questions and Troubleshooting. So that's my Story and I'll be glad to answer any EG-GSR Swap questions on here as to help out everyone who views this thread to the best of my ability/experience.
Once i get a job(stuck until then) there will be a lot more Updated Stuff on here too. So Keep an eye out in the near future!
 10-27-2012, 11:51 PM
#17
Honda-Tech Member

dude sincerely, i would like to say its is so nice to see when we get really knowledgeable people that come to the H-T to spread there love of the game, i just made my final, FINAL list of parts n possible problems for my b swap, and got even more items to add to my check list for next week (fingers crossed)
thanks for such an informative and detailed thread
welcome to the community
p.s. your valve cover is fvckin sick!!!
thanks for such an informative and detailed thread
welcome to the community
p.s. your valve cover is fvckin sick!!!
Bought a 92 hatch with a B18B1 LS w.GSR tranny and i'm about to do a comprehensive checkdown my damned self in preparation of a a LSV build in the future..
Just gotta investigate this sloppy shifter.. HmmMmmm, bushings? most likely...
Again. Thanks for the write up and being honest about the shortcomings you ran into.. that kind of information goes a Long way


Thread
Thread Starter
Forum
Replies
Last Post
Jesse1920
Honda Civic / Del Sol (1992 - 2000)
3
09-18-2017 12:13 PM
f22suzuka
All Motor / Naturally Aspirated
8
12-24-2003 04:49 PM