
First build, H22 in 95 hatch
 06-24-2012, 06:33 PM
#1
Honda-Tech Member
Thread Starter

Join Date: May 2012
Location: Chicagoland
Posts: 19
Likes: 0
Received 0 Likes
on
0 Posts
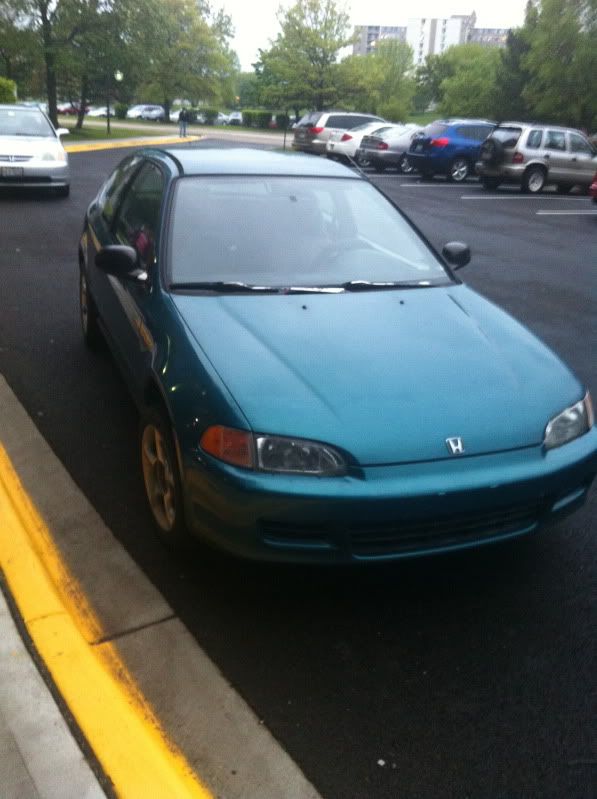
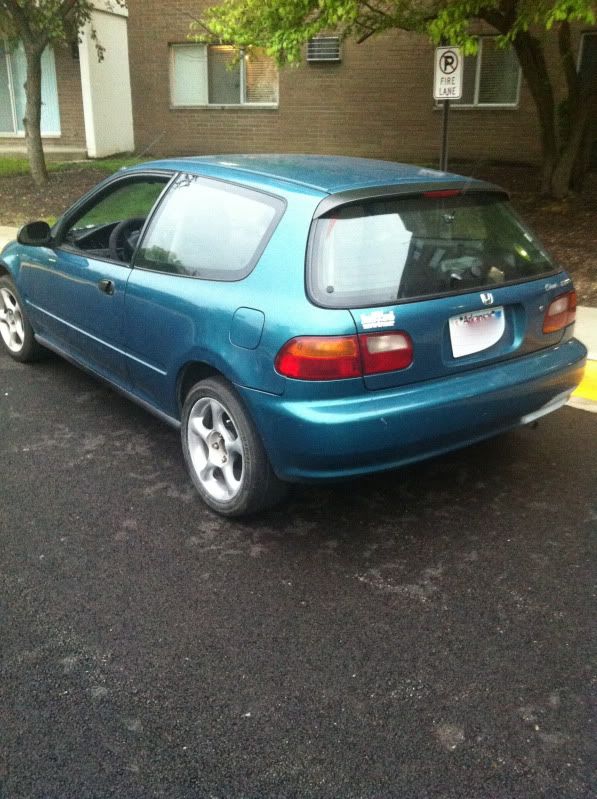
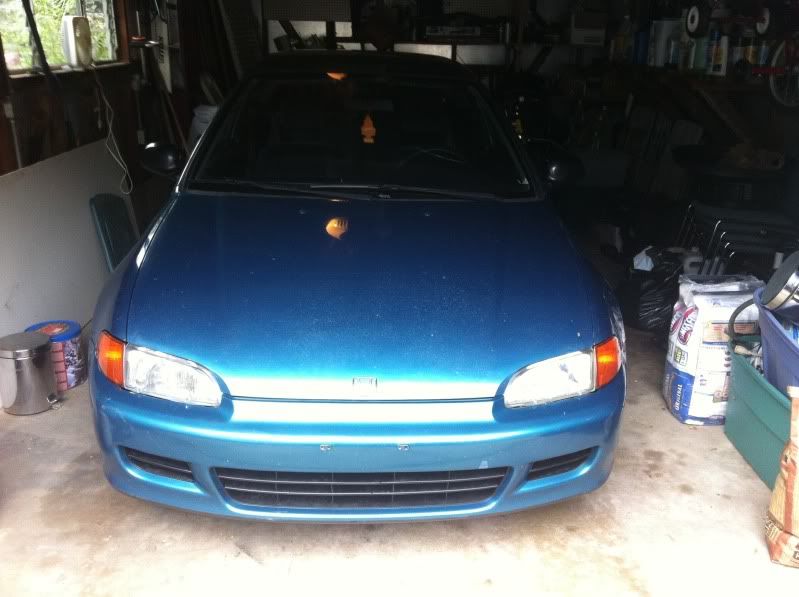
Thought I would share my build on here. First major build and swap I have done actually so here it is. Picked up a 95 CX hatch that was in ok shape (no rust as it came from down south, big plus for sure) but lots of door dings and in need of some paint. But, I dont particularly care about how it looks since its not a big eyesore, what had to be fixed immediately was getting this D15 out of this car. I like to say its dangerously slow. So found an H22 complete swap on here for sale that had a blown motor. Decided to take a chance and pick it up. Auxilary parts alone were worth more than the asking price IMO...on with some pictures. Heres the car when I picked it up
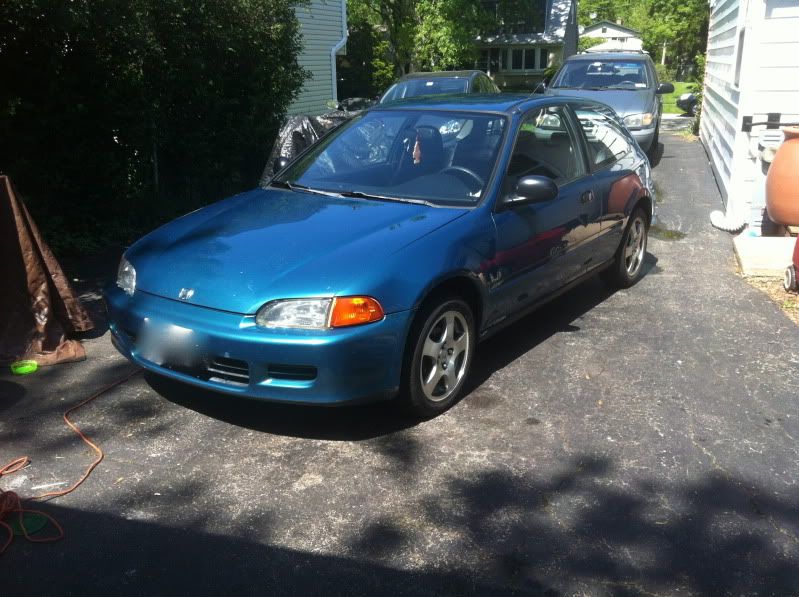
And here it is after I cleaned it and put some oem wheels back on it (those aftermarket cheapos were pretty hideous.
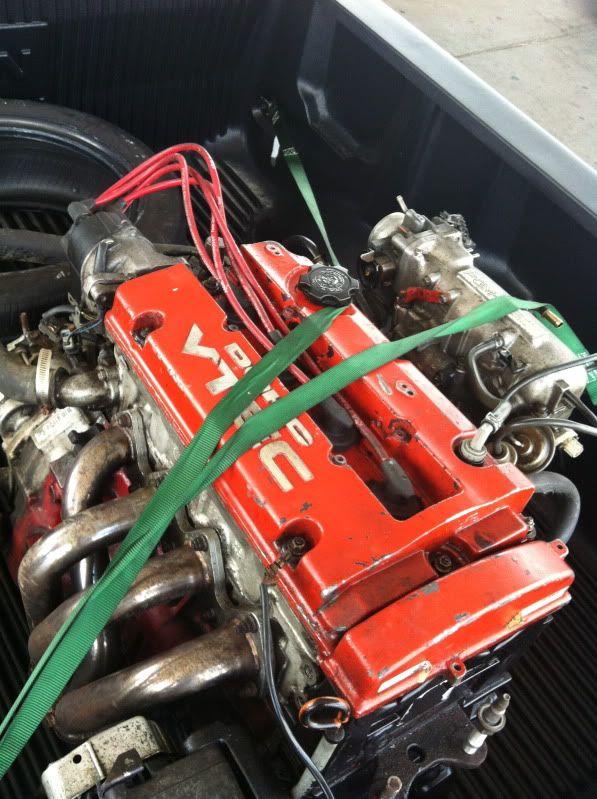
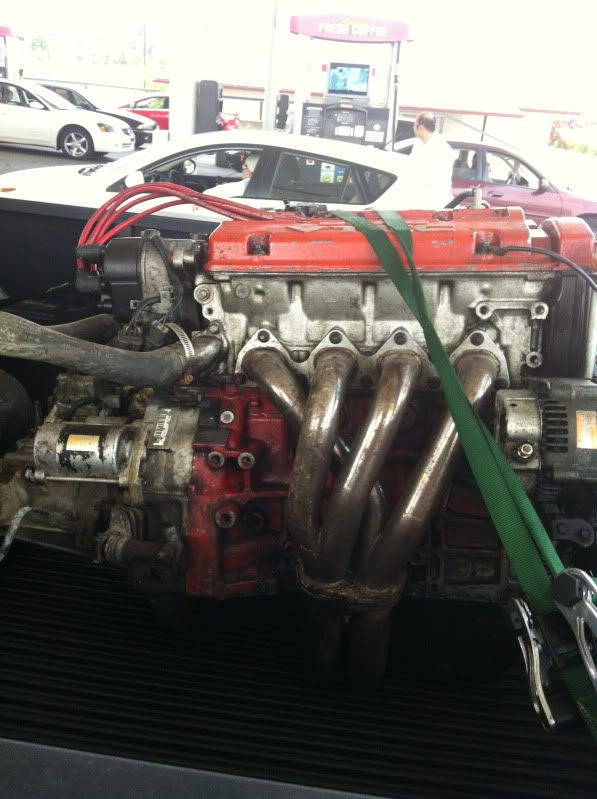
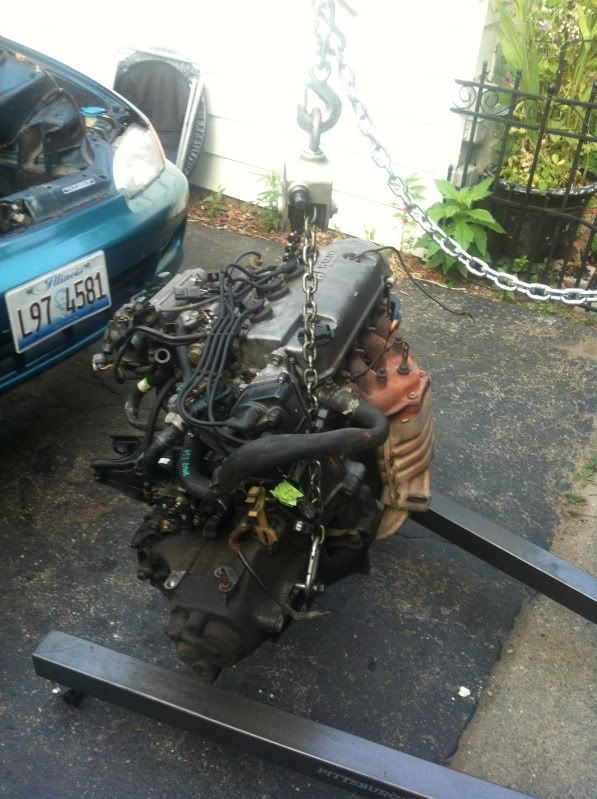
Heres the H22A I picked up, told all 4 cylinders had extremely low compression but it came with mounts for an EG, cables and shifter base, trans, manifolds, all that stuff. So I figured what the hell.
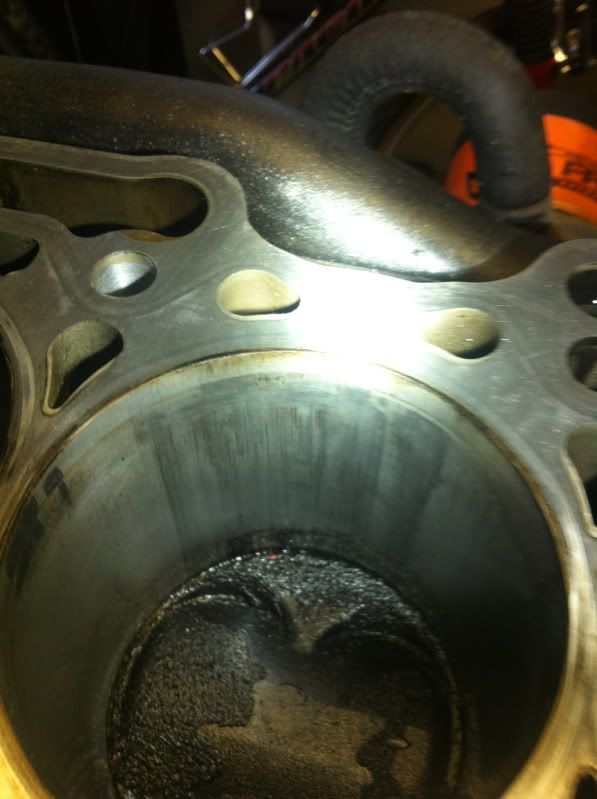
So I got to tearing the thing down, figured the head was salvageable so put that off to the side to be torn down and gone through. Once the head was off I saw this though, cylinder 3 was in bad shape. Pretty deep gouging in the walls, definitely not repairable on this engine.
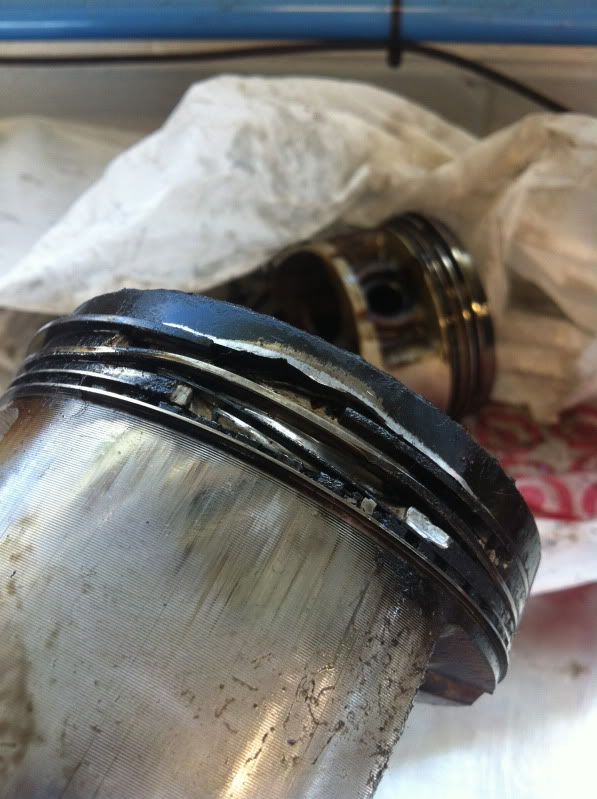
Found the cause, the ring lands pretty much exploded. The oil pan had a tap in it for a oil drain from a turbo. I speculate the engine was boosted beyond its limit and destroyed the pistons causing the damage. All 4 pistons had broken ring lands, cylinder 3 was the only one to no longer be contained by the rings though. Bits of it were all over inside the engine.
Enter a replacement H22A block, found it semi locally. A short hour and a half drive away and picked it up with my wifes car. Whole family came along for the trip actually haha. Came with crank, rods, pistons, pan, a full short block really.

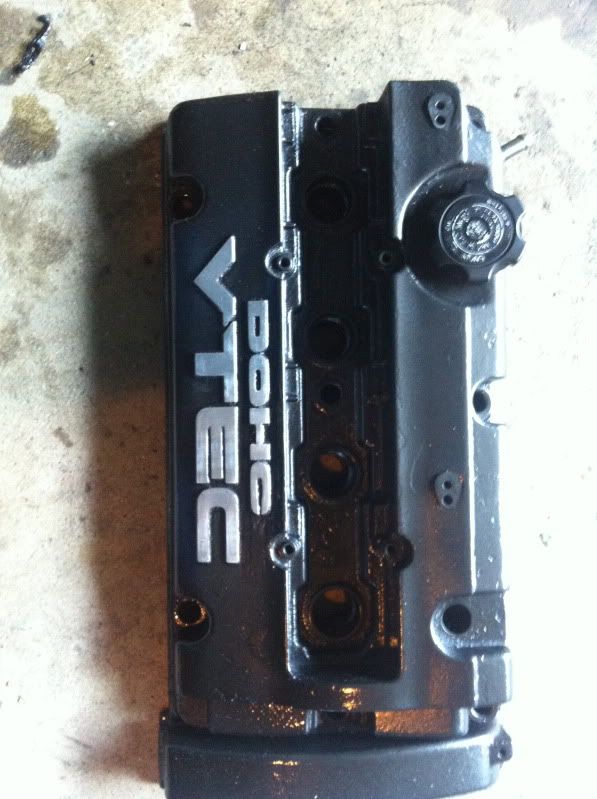
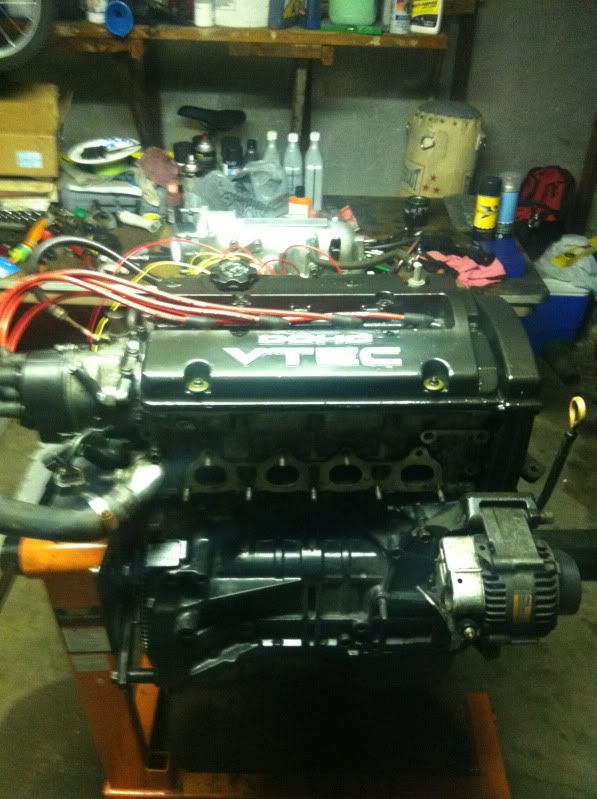
Redid the valve cover, the engine actually wasnt a red top H22, it was painted red by someone who owned it before. Under the peeling red was the textured black paint. So sanded the valve cover and repainted it with hammered black finish then sanded the letters so they are exposed metal. Also repainted the motor mounts but dont have a picture of those right now.
Got a bunch of parts for the build on friday and was stoked, its always nice getting a whole bunch of parts at once.
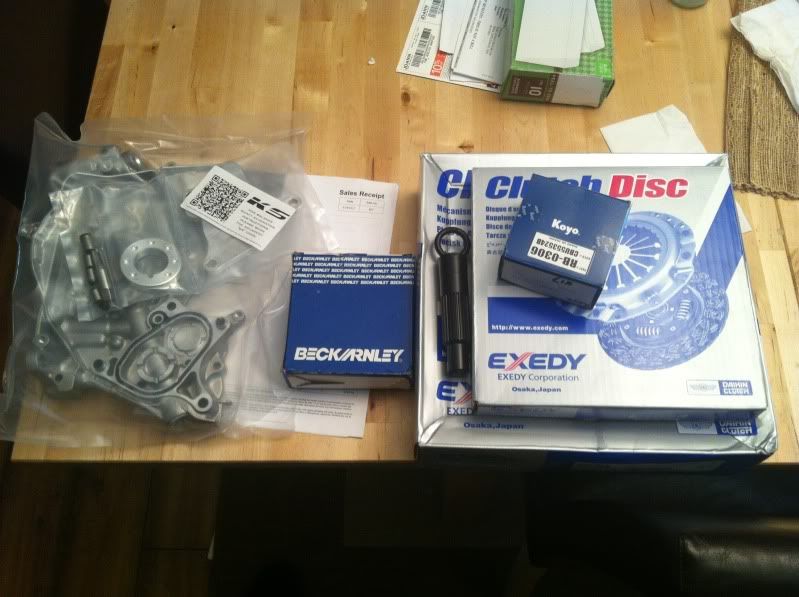
Installed new piston rings over this last weekend (except cylinder 3, rod bearing fell off while I was putting the piston back in and got mucked up so I ordered a new set of bearings for that rod) and installed the Kaizenspeed balance shaft delete with new oil pump. Looks so good I feel bad knowing its going to be covered up with the plastic timing cover.

And that's where I stand currently. The cylinder head has actually been torn down, valves lapped, new valve guide seals and is waiting for supertec valve springs. Cams going in will be Crower St 2 and once I have the new rod bearings later this week the bottom end will be all ready to be mated back up with the cleaned and prepped cylinder head. Other things I have done so far has been removed the butterfly flaps from the intake manifold and completely cleaned the ports out, opened up the transmission and inspected the gears and syncros and all looked in good shape, and have begun collecting all the other bits I need for the swap (Axles, upgraded radiator, P28 hondata chipped ecu ordered, ect). I will update this as progress is made and post up final numbers and breakdown when that point is reached. Thanks for looking")
And here it is after I cleaned it and put some oem wheels back on it (those aftermarket cheapos were pretty hideous.
Heres the H22A I picked up, told all 4 cylinders had extremely low compression but it came with mounts for an EG, cables and shifter base, trans, manifolds, all that stuff. So I figured what the hell.
So I got to tearing the thing down, figured the head was salvageable so put that off to the side to be torn down and gone through. Once the head was off I saw this though, cylinder 3 was in bad shape. Pretty deep gouging in the walls, definitely not repairable on this engine.
Found the cause, the ring lands pretty much exploded. The oil pan had a tap in it for a oil drain from a turbo. I speculate the engine was boosted beyond its limit and destroyed the pistons causing the damage. All 4 pistons had broken ring lands, cylinder 3 was the only one to no longer be contained by the rings though. Bits of it were all over inside the engine.
Enter a replacement H22A block, found it semi locally. A short hour and a half drive away and picked it up with my wifes car. Whole family came along for the trip actually haha. Came with crank, rods, pistons, pan, a full short block really.
Redid the valve cover, the engine actually wasnt a red top H22, it was painted red by someone who owned it before. Under the peeling red was the textured black paint. So sanded the valve cover and repainted it with hammered black finish then sanded the letters so they are exposed metal. Also repainted the motor mounts but dont have a picture of those right now.
Got a bunch of parts for the build on friday and was stoked, its always nice getting a whole bunch of parts at once.
Installed new piston rings over this last weekend (except cylinder 3, rod bearing fell off while I was putting the piston back in and got mucked up so I ordered a new set of bearings for that rod) and installed the Kaizenspeed balance shaft delete with new oil pump. Looks so good I feel bad knowing its going to be covered up with the plastic timing cover.
And that's where I stand currently. The cylinder head has actually been torn down, valves lapped, new valve guide seals and is waiting for supertec valve springs. Cams going in will be Crower St 2 and once I have the new rod bearings later this week the bottom end will be all ready to be mated back up with the cleaned and prepped cylinder head. Other things I have done so far has been removed the butterfly flaps from the intake manifold and completely cleaned the ports out, opened up the transmission and inspected the gears and syncros and all looked in good shape, and have begun collecting all the other bits I need for the swap (Axles, upgraded radiator, P28 hondata chipped ecu ordered, ect). I will update this as progress is made and post up final numbers and breakdown when that point is reached. Thanks for looking
 07-27-2012, 06:10 AM
#2
Honda-Tech Member
Thread Starter
Join Date: May 2012
Location: Chicagoland
Posts: 19
Likes: 0
Received 0 Likes
on
0 Posts
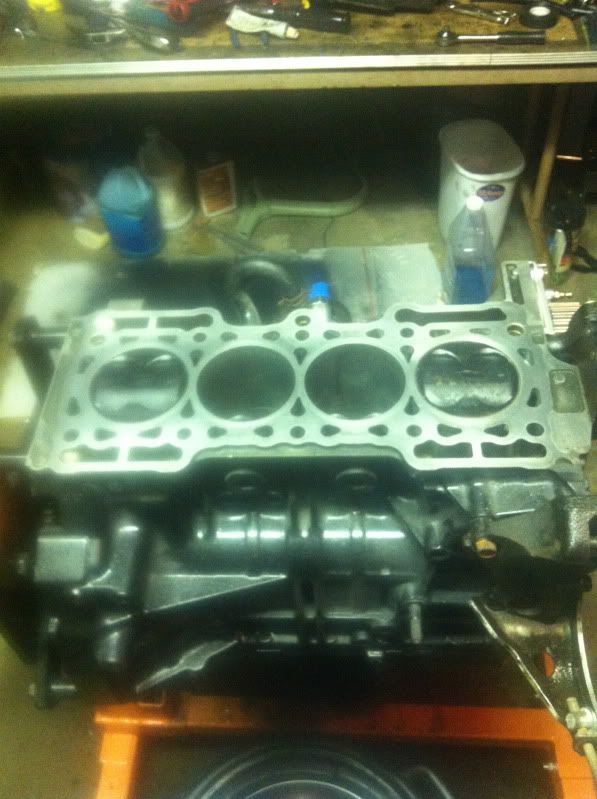
Project is about 95% complete. Aside from final tuning the car is done with the swap. Here are some more pictures for your viewing pleasure. Here is the new block with freshly ringed pistons back in it.
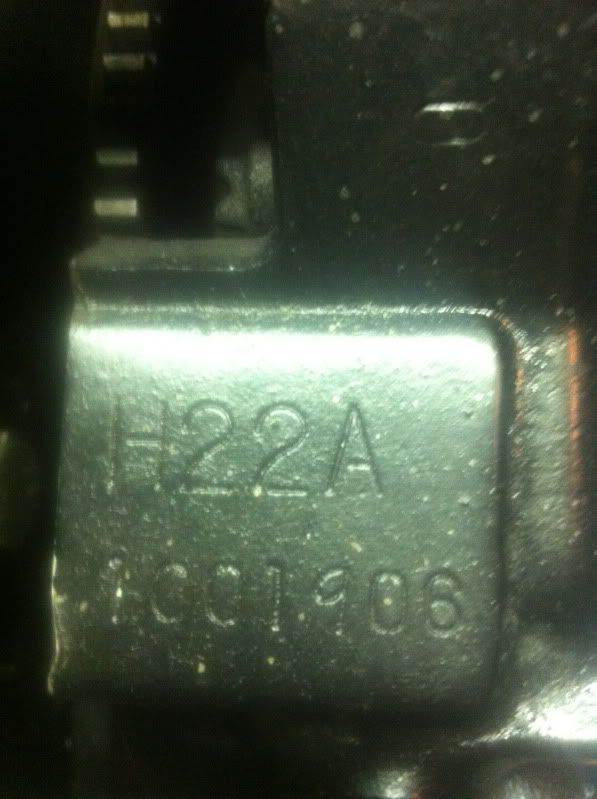
Engine code!
Fully assembled and ready to go
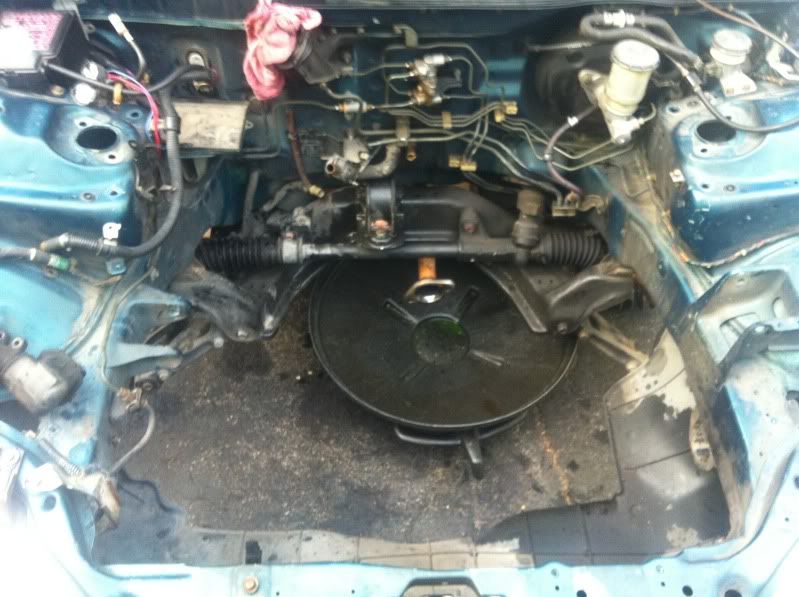
Out with the old
The obligatory empty engine bay pic
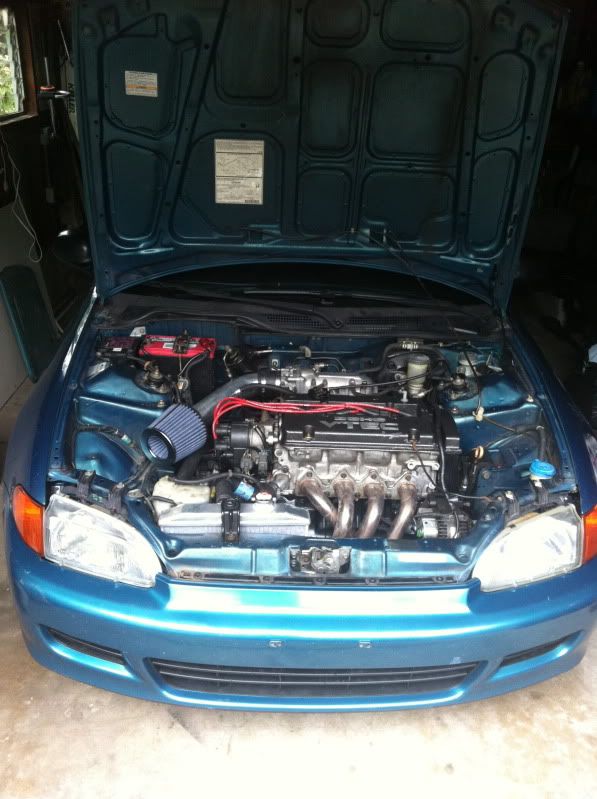
In with the new! Picture done before some of the final wiring/ relocations were performed.
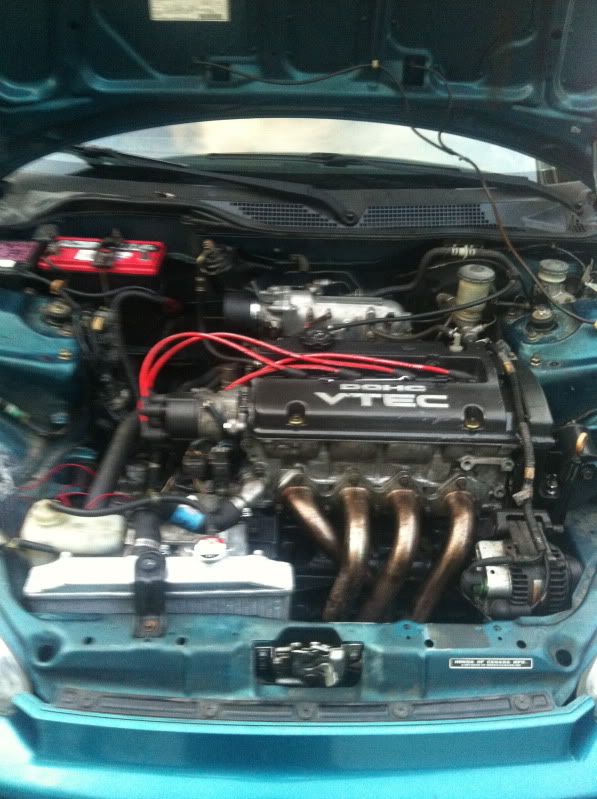
Final product
Dyno numbers will be posted up once tuning is done. getting it done a few weeks from now.
Engine code!
Fully assembled and ready to go
Out with the old
The obligatory empty engine bay pic
In with the new! Picture done before some of the final wiring/ relocations were performed.
Final product
Dyno numbers will be posted up once tuning is done. getting it done a few weeks from now.
 10-24-2012, 07:43 AM
#5
Honda-Tech Member

Join Date: Mar 2012
Posts: 128
Likes: 0
Received 0 Likes
on
0 Posts
how did you come across solving the axle binding issues?. i just got done with my jdm h22a swap in my red 95 cx hatch haha and i was having hell with the axles... the entire car would shake and vibrate ive tryed all the different axle combinations and none worked on my car. now im running hasport swap axles and driver mount and its still not perfect. turns out theres a brand called yonaka and a buddy on mine has those axles and mounts and he has no vibrations. oh and if your car is basically sitting on the ground it will shake even more.


Trending Topics
10-24-2012, 12:09 PM
#8
Honda-Tech Member
Join Date: Nov 2008
Location: palm bay, fl, usa
Posts: 99
Likes: 0
Received 0 Likes
on
0 Posts
how did you come across solving the axle binding issues?. i just got done with my jdm h22a swap in my red 95 cx hatch haha and i was having hell with the axles... the entire car would shake and vibrate ive tryed all the different axle combinations and none worked on my car. now im running hasport swap axles and driver mount and its still not perfect. turns out theres a brand called yonaka and a buddy on mine has those axles and mounts and he has no vibrations. oh and if your car is basically sitting on the ground it will shake even more.
10-29-2012, 06:07 AM
#11
Honda-Tech Member
Thread Starter
Join Date: May 2012
Location: Chicagoland
Posts: 19
Likes: 0
Received 0 Likes
on
0 Posts
I'll happily update the thread. There seemed to be zero interest in it before so i stopped posting.
I haven't had any axle binding issues, I have yonaka axles installed and I think the mount kit is a cheap one (not sure since its what came with the swap). I am currently running completely stock suspension though.
Power it put down was 202hp/156wtq. I also ran it at the local drag strip where I pulled a 13.6 at 102. I don't claim to be an excellent driver but for comparison I raced my friends BMW 135i and handidly beat him all three times we raced. I also raced a 2011 or later wrx and eat him by about a car length.
10-29-2012, 06:29 PM
#13
Honda-Tech Member
Join Date: Nov 2008
Location: palm bay, fl, usa
Posts: 99
Likes: 0
Received 0 Likes
on
0 Posts
06-24-2013, 06:57 PM
#15
Honda-Tech Member
Thread Starter
Join Date: May 2012
Location: Chicagoland
Posts: 19
Likes: 0
Received 0 Likes
on
0 Posts
Updates!
After the long winter I have started doing some more work on the Honda. Here's some of the progress made.
Out with the old restrictive DC header
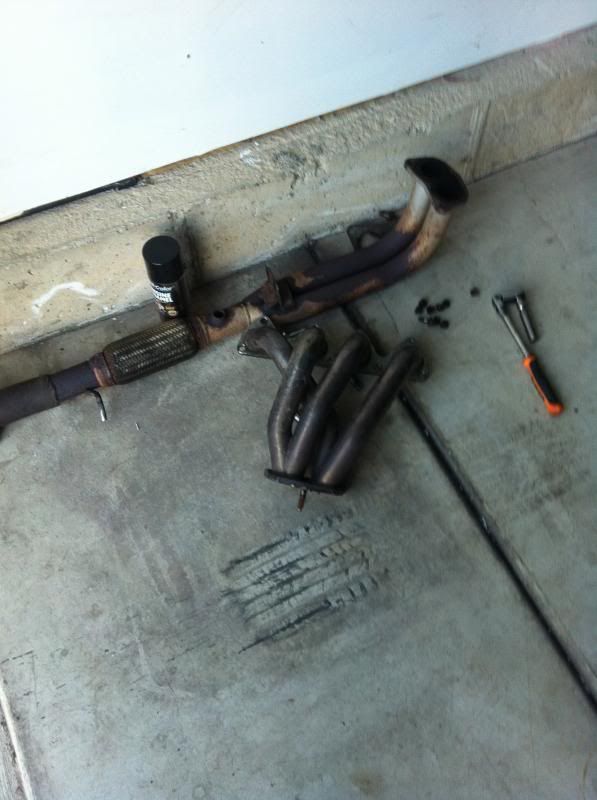
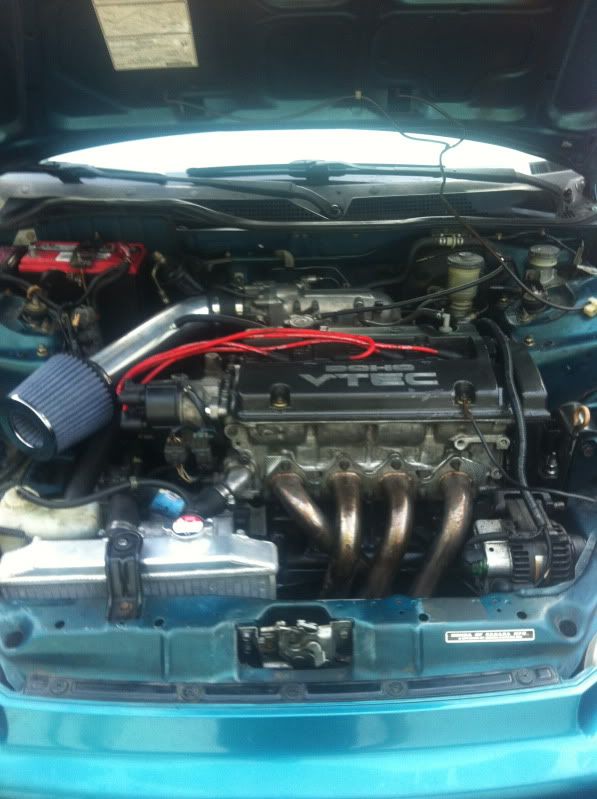
And in with the new Hytech (replica) header
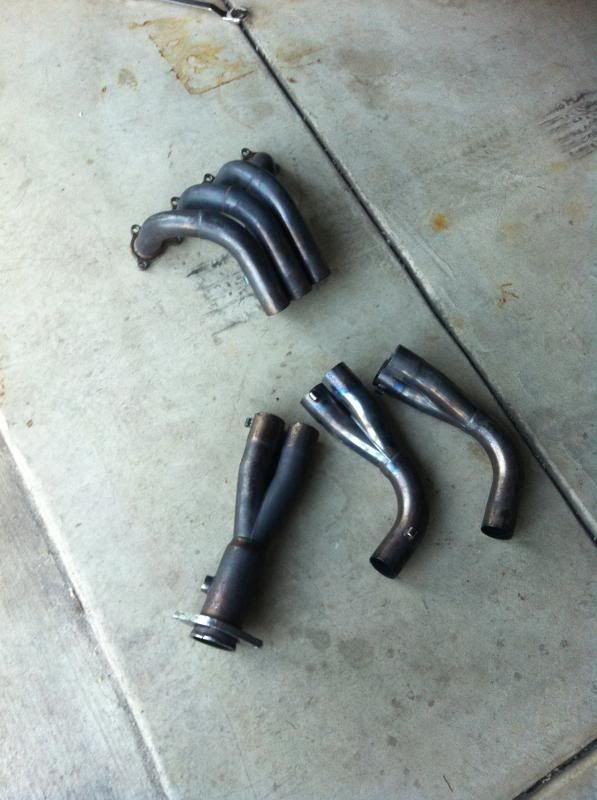
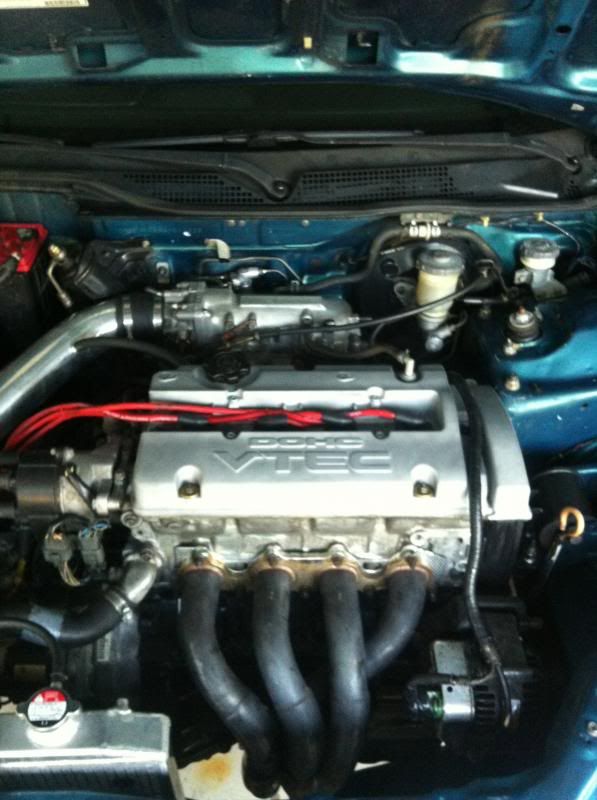
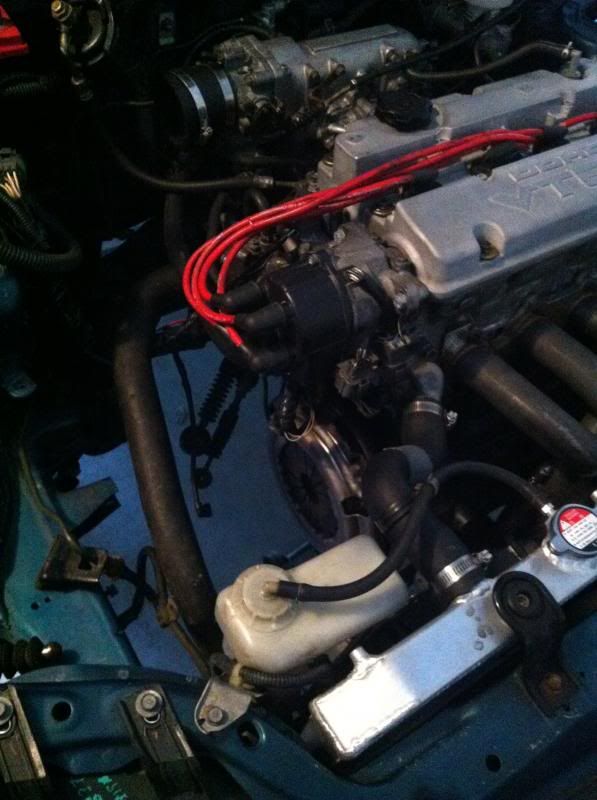
I also stripped the paint off the valve cover so it didnt look like total garbage like before. I like the bare aluminum look a lot actually. Heres a shot of the header installed on the newly cleaned up engine.
The new header came up about a foot and a half short of the exhaust system on the civic so I had to weld a flange onto an extension pipe.
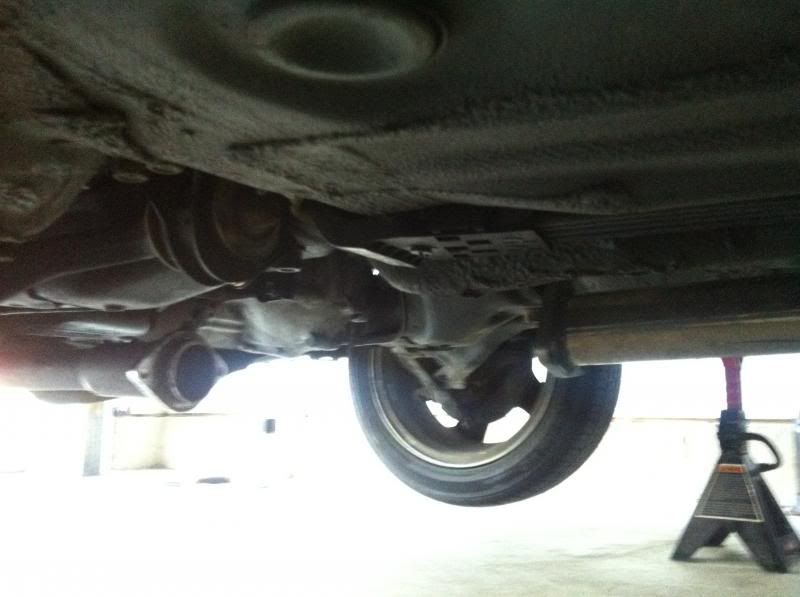

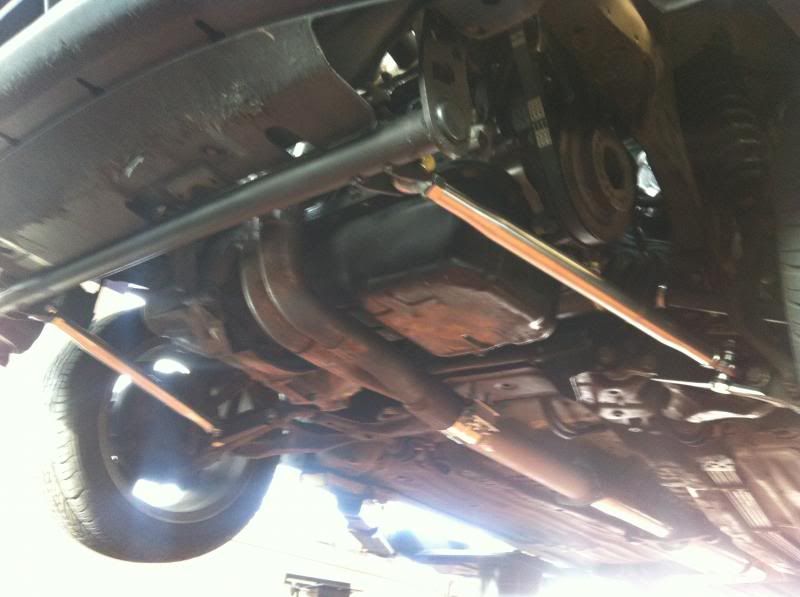
Also installed some traction bars. Reinforced the welds on the mounts and repainted the support bar. Here it is with the traction bars installed and new header with extension pipe.
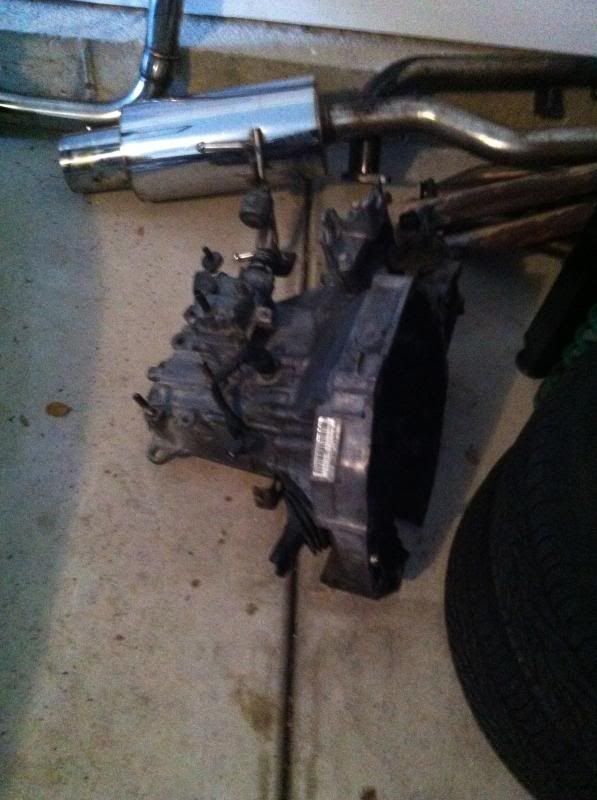
So after all that I took the car to the drag strip again. A co worker wanted to race his z3 one more time before he got rid of it and it's always fun to run this thing all out down the strip. Had a couple of nagging issues while I was at the track though. First I couldnt launch the car because the clamp I used to connect the extension pipe to the header would come loose due to the engine movement when launching at higher rpms with the ensuing axle hop on street tires. Second issue was I had to shift very aggressively to get the trans into gear (3rd especially) and it was still grinding. So I have the car back under the knife now. I have pulled the transmission out and am going to rebuild it with new syncros, shift sleeves, a LSD diff and new final drive. I am looking at the M factory helical LSD and M factory 4.64 FD so as i make progress on that I will post updates. I will also be welding in a piece of flex pipe exhaust to eliminate the need for that clamp and fix the seperating issue on hard launches.
As it sits now
After the long winter I have started doing some more work on the Honda. Here's some of the progress made.
Out with the old restrictive DC header

And in with the new Hytech (replica) header

I also stripped the paint off the valve cover so it didnt look like total garbage like before. I like the bare aluminum look a lot actually. Heres a shot of the header installed on the newly cleaned up engine.

The new header came up about a foot and a half short of the exhaust system on the civic so I had to weld a flange onto an extension pipe.


Also installed some traction bars. Reinforced the welds on the mounts and repainted the support bar. Here it is with the traction bars installed and new header with extension pipe.

So after all that I took the car to the drag strip again. A co worker wanted to race his z3 one more time before he got rid of it and it's always fun to run this thing all out down the strip. Had a couple of nagging issues while I was at the track though. First I couldnt launch the car because the clamp I used to connect the extension pipe to the header would come loose due to the engine movement when launching at higher rpms with the ensuing axle hop on street tires. Second issue was I had to shift very aggressively to get the trans into gear (3rd especially) and it was still grinding. So I have the car back under the knife now. I have pulled the transmission out and am going to rebuild it with new syncros, shift sleeves, a LSD diff and new final drive. I am looking at the M factory helical LSD and M factory 4.64 FD so as i make progress on that I will post updates. I will also be welding in a piece of flex pipe exhaust to eliminate the need for that clamp and fix the seperating issue on hard launches.
As it sits now

 06-25-2013, 06:13 PM
#17
Honda-Tech Member
Thread Starter
Join Date: May 2012
Location: Chicagoland
Posts: 19
Likes: 0
Received 0 Likes
on
0 Posts
I used yonaka axles and I don't even know what mounts I used, they came with the swap when I bought it used (used up haha). I'm not having any axle binding issues, internal transmission issues is what I'm addressing now. And in the process will be making it go faster with the final drive upgrade. On a sidenote I like how you painted your hatch! I wish mine looked that good. Soooo many dents on mine it's just awful. And the paint has seen better days

Thread
Thread Starter
Forum
Replies
Last Post