
Draft: DIY HOW TO : Putting on those Front Lower Tie Bars / Strut Bars for your civic !!
 05-26-2007, 11:14 PM
#1
Honda-Tech Member
Thread Starter
iTrader: (1)
Join Date: Feb 2007
Location: Snohomish County, WA
Posts: 3,683
Likes: 0
Received 0 Likes
on
0 Posts
So the only good tutorial on how to install your lower tie bars don't have any pictures, so I'm going to make one with some. I will get some good digi-pix from my camera tomorrow up, but for now, the cell phone pix will have to do. I will update sometime tomorrow evening.
THINGS YOU NEED:
2 -- (at least) TWO ton jacks
2 Jack Stands
1 3/8" or 1/2" ratchet
1 - 14MM socket (not a deep socket) (either 3/8" or 1/2" socket end size)
A flashlight OR A lighting set-up of some kind
PB Blaster or KROIL
ANTI-SEIZE paste, like Permatec Anti-Seize
--------------------------------------------------------------------------
(May need, depends on the brand/type of tie bar you get)
Electric or Air Dremel with a grinder attachment
Eye Protection (Plastic Face shield or eye goggles that are impact resistant) / Ear Plugs
10-16 medium size split washers (~$0.09 ea)
2 --HEX NOT FLANGE 14MM by 1.5MM BY 100MM bolts long (~$3.00 ea)
7/8 inch socket (either 3/8" or 1/2" socket end size)
Flat Screwdriver
Vice
Claw Hammer
8MM hex key piece
STEP ONE:
Jack up car on either side of the front of the car, on the jack points.
[Pic up Tomorrow]
STEP TWO:
Place jack stands as supports under the area of your choosing.. I put them directly under the CV axle.
[Pic up Tomorrow]
STEP THREE: Once you've jacked the car up enough and have jack stands in place, get under the car with a 3/8" or 1/2" ratchet with a 14MM socket. Make sure it's NOT a deep socketed one, cause you will have clearance issues, since the oil pan will prevent you from even getting the ratchet in place to loosen/tighten the bolts.
STEP FOUR: There are two bolts that you need to pop out in order to install the front lower tie bar. Make sure that you have handy that Torque wrench because they will needed to be tightened down to 76 FT/LBS (Warning: I won't remind you later on in the tutorial, so don't forget!).
STEP FIVE: Attach the socket to the ratchet and loosen the bolt after spraying a bit of PB Blaster, KROIL, or some kind of penetrating liquid for an optimal experience.

Here's a picture of the bolt (seen with ratchet on it) that you need to loosen. This is the same for the other side, just compare to the right side as pictured.

Here's a wider angle of the area you need to work with:

STEP SIX: Once you've taken both bolts out,

you need to grab your front lower tie bar and get those new HEX 14X1.5X100MM bolts if the Honda Genuine bolts won't tighten properly.. I couldn't use the Honda genuine bolts because of how the tie bar was set-up.. The flange part of the bolt just prevented me from being able to even to get close to tightening them down.. Besides, with the space that the tie bar takes up when the bolt is put through, a longer bolt is a smart choice; that way there is PLENTY of thread to spare. Lube up each bolt with anti-seize paste.
Be aware, though, that the hex bolts that you bought may have a larger diameter head, so you may need a larger socket (I had to use my 7/8's of an inch socket to tighten the bolt down). If two places for the bolts on the tie bar piece(s) aren't big enough, it's time to get that dremel out! Grind away (carefully) any area that prevents the bolt from going through easily. Once you've gotten that accomplished, it's time to get those split washers out!
STEP SEVEN: With the way that theTie Bars that I ordered are made, they prevent the full tightening of the bolt because in the place that the bolt goes, there's almost a small wall on either side of the bolt, necessitating the use of anywhere from 5 to 8 split washers on the bolt to have enough clearance to be able to get the bolt tightened to spec, or at least to a safe amount (that's why you bought the 100MM long bolts). If your tie bar isn't set-up that way, skip this step and the next one.
STEP EIGHT: Grab one split washer and put 45% of it (split end up) [SEE Pic, tomorrow] on a vice grip. (OR buy the correct washers for the bolt, which I didn't do, ). )Tighten the Vice down and then put a screwdriver on the split part of the washer. Get a hammer and tap the screwdriver tip into the washer til it separates enough to get the screwdriver into the washer piece. Once you've done that, make sure the washer is clamped down good enough still, and use the claw portion of the hammer to pry the washer away from itself. Take the washer out and flip it around. Keep doing this this to each side until you can fit the washer OR slide it onto the bolt. Repeat Step 8 until you have enough washers to allow you to tighten the bolt down.
STEP NINE: Fit the bolt with the appropriate # of washers unto the tie bar (if you need ed to in the 1st place) and get a friend to help you hold that piece on the car that part of the bolt threaded through ( ) that probably moved, making it very hard to get the bolt threaded back on the car. Have them move the part into place so you can get the bolt threaded in.
STEP TEN: Tighten the bolt down.
STEP ELEVEN: There will be a NUT or two (one on each side) that is horizontal to the actual bar on the tie bar

that will, after you loosen it, allow you to make the tie bar longer if you need it to be in order to get the tie bar properly attached to your civic. Get it to the appropriate length, then lock the nut (or both of them) down snugly. Then get that last other side bolted on.
STEP TWELVE: After that's tightened and the tie bar is fitting properly, you want to make sure that the bar is fitting correctly [SEE PIC tomorrow].
That's where this screw needs to be very snugly tightened down. Get the 8MM hex key piece and place it in the hex screw and get the 14MM socket/ratchet and put it on the other side.
You'll need it to be able to tighten the tie bar down in the position/angle that you want. Tighten until you can't move the bar around. Make sure that the bar won't move even after you jerk it a bit. Once you are satisfied with the tightness of all of the bolts and nuts, you can take the jack stands, lights, and tools out from under the car. Lower it down after double-checking that there's nothing under the car.
TEST DRIVE!


P.S. Don't play any music or have noisy companions in the car the 1st time you drive around after having the tie bar installed. Listen for sounds of binding, etc...
Modified by ke98248 at 12:35 AM 5/27/2007
Modified by ke98248 at 3:15 AM 5/27/2007
THINGS YOU NEED:
2 -- (at least) TWO ton jacks
2 Jack Stands
1 3/8" or 1/2" ratchet
1 - 14MM socket (not a deep socket) (either 3/8" or 1/2" socket end size)
A flashlight OR A lighting set-up of some kind
PB Blaster or KROIL
ANTI-SEIZE paste, like Permatec Anti-Seize
--------------------------------------------------------------------------
(May need, depends on the brand/type of tie bar you get)
Electric or Air Dremel with a grinder attachment
Eye Protection (Plastic Face shield or eye goggles that are impact resistant) / Ear Plugs
10-16 medium size split washers (~$0.09 ea)
2 --HEX NOT FLANGE 14MM by 1.5MM BY 100MM bolts long (~$3.00 ea)
7/8 inch socket (either 3/8" or 1/2" socket end size)
Flat Screwdriver
Vice
Claw Hammer
8MM hex key piece
STEP ONE:
Jack up car on either side of the front of the car, on the jack points.
[Pic up Tomorrow]
STEP TWO:
Place jack stands as supports under the area of your choosing.. I put them directly under the CV axle.
[Pic up Tomorrow]
STEP THREE: Once you've jacked the car up enough and have jack stands in place, get under the car with a 3/8" or 1/2" ratchet with a 14MM socket. Make sure it's NOT a deep socketed one, cause you will have clearance issues, since the oil pan will prevent you from even getting the ratchet in place to loosen/tighten the bolts.
STEP FOUR: There are two bolts that you need to pop out in order to install the front lower tie bar. Make sure that you have handy that Torque wrench because they will needed to be tightened down to 76 FT/LBS (Warning: I won't remind you later on in the tutorial, so don't forget!).
STEP FIVE: Attach the socket to the ratchet and loosen the bolt after spraying a bit of PB Blaster, KROIL, or some kind of penetrating liquid for an optimal experience.
Here's a picture of the bolt (seen with ratchet on it) that you need to loosen. This is the same for the other side, just compare to the right side as pictured.
Here's a wider angle of the area you need to work with:
STEP SIX: Once you've taken both bolts out,
you need to grab your front lower tie bar and get those new HEX 14X1.5X100MM bolts if the Honda Genuine bolts won't tighten properly.. I couldn't use the Honda genuine bolts because of how the tie bar was set-up.. The flange part of the bolt just prevented me from being able to even to get close to tightening them down.. Besides, with the space that the tie bar takes up when the bolt is put through, a longer bolt is a smart choice; that way there is PLENTY of thread to spare. Lube up each bolt with anti-seize paste.
Be aware, though, that the hex bolts that you bought may have a larger diameter head, so you may need a larger socket (I had to use my 7/8's of an inch socket to tighten the bolt down). If two places for the bolts on the tie bar piece(s) aren't big enough, it's time to get that dremel out! Grind away (carefully) any area that prevents the bolt from going through easily. Once you've gotten that accomplished, it's time to get those split washers out!
STEP SEVEN: With the way that theTie Bars that I ordered are made, they prevent the full tightening of the bolt because in the place that the bolt goes, there's almost a small wall on either side of the bolt, necessitating the use of anywhere from 5 to 8 split washers on the bolt to have enough clearance to be able to get the bolt tightened to spec, or at least to a safe amount (that's why you bought the 100MM long bolts). If your tie bar isn't set-up that way, skip this step and the next one.
STEP EIGHT: Grab one split washer and put 45% of it (split end up) [SEE Pic, tomorrow] on a vice grip. (OR buy the correct washers for the bolt, which I didn't do,
). )Tighten the Vice down and then put a screwdriver on the split part of the washer. Get a hammer and tap the screwdriver tip into the washer til it separates enough to get the screwdriver into the washer piece. Once you've done that, make sure the washer is clamped down good enough still, and use the claw portion of the hammer to pry the washer away from itself. Take the washer out and flip it around. Keep doing this this to each side until you can fit the washer OR slide it onto the bolt. Repeat Step 8 until you have enough washers to allow you to tighten the bolt down.STEP NINE: Fit the bolt with the appropriate # of washers unto the tie bar (if you need ed to in the 1st place) and get a friend to help you hold that piece on the car that part of the bolt threaded through (
) that probably moved, making it very hard to get the bolt threaded back on the car. Have them move the part into place so you can get the bolt threaded in. STEP TEN: Tighten the bolt down.
STEP ELEVEN: There will be a NUT or two (one on each side) that is horizontal to the actual bar on the tie bar
that will, after you loosen it, allow you to make the tie bar longer if you need it to be in order to get the tie bar properly attached to your civic. Get it to the appropriate length, then lock the nut (or both of them) down snugly. Then get that last other side bolted on.
STEP TWELVE: After that's tightened and the tie bar is fitting properly, you want to make sure that the bar is fitting correctly [SEE PIC tomorrow].
That's where this screw needs to be very snugly tightened down. Get the 8MM hex key piece and place it in the hex screw and get the 14MM socket/ratchet and put it on the other side.
You'll need it to be able to tighten the tie bar down in the position/angle that you want. Tighten until you can't move the bar around. Make sure that the bar won't move even after you jerk it a bit. Once you are satisfied with the tightness of all of the bolts and nuts, you can take the jack stands, lights, and tools out from under the car. Lower it down after double-checking that there's nothing under the car.
TEST DRIVE!
P.S. Don't play any music or have noisy companions in the car the 1st time you drive around after having the tie bar installed. Listen for sounds of binding, etc...
Modified by ke98248 at 12:35 AM 5/27/2007
Modified by ke98248 at 3:15 AM 5/27/2007
 05-26-2007, 11:26 PM
#2
Honda-Tech Member
nice job, ya know i still dont drive with the raido on, cant stand not being able to hear my car.
05-26-2007, 11:28 PM
#3
Honda-Tech Member
Thread Starter
iTrader: (1)
Join Date: Feb 2007
Location: Snohomish County, WA
Posts: 3,683
Likes: 0
Received 0 Likes
on
0 Posts
I used to do that, but the small noises that my car would sometimes make would drive me nuts occasionally, so I almost always drive with music, unless I'm driving less than a 1/4 mile or just put something new on my car.
05-26-2007, 11:41 PM
#4
HT White Ops
iTrader: (1)

Join Date: Mar 2006
Location: I see what you did there.
Posts: 16,222
Likes: 0
Received 3 Likes
on
3 Posts
Yay, the eBay specials. Those heim joints basically negate any stiffness those bars could ever produce.
<TABLE WIDTH="90%" CELLSPACING=0 CELLPADDING=0 ALIGN=CENTER><TR><TD>Quote, originally posted by Eran »</TD></TR><TR><TD CLASS="quote">I've said it many a time:
I had front and rear ebay lower tie bars once. They each served a unique purpose.
Front lower tie bar: Hit speed bumps.
Rear lower tie bar: Look ugly.</TD></TR></TABLE>
05-26-2007, 11:45 PM
#6
HT White Ops
iTrader: (1)
Join Date: Mar 2006
Location: I see what you did there.
Posts: 16,222
Likes: 0
Received 3 Likes
on
3 Posts
<TABLE WIDTH="90%" CELLSPACING=0 CELLPADDING=0 ALIGN=CENTER><TR><TD>Quote, originally posted by ke98248 »</TD></TR><TR><TD CLASS="quote">Megan Racing, not Egay specials..</TD></TR></TABLE>
Uh huh.
The ones you have look like this?
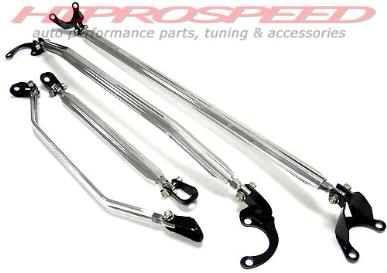
Then they're not Megan racing. And even Megan Racing uses heim joints .... so they're just as worthless.
Megan ones look like this:

You got taken for a ride, sonny.
Uh huh.
The ones you have look like this?
Then they're not Megan racing. And even Megan Racing uses heim joints .... so they're just as worthless.
Megan ones look like this:
You got taken for a ride, sonny.
Trending Topics
05-26-2007, 11:50 PM
#8
HT White Ops
iTrader: (1)
Join Date: Mar 2006
Location: I see what you did there.
Posts: 16,222
Likes: 0
Received 3 Likes
on
3 Posts
<TABLE WIDTH="90%" CELLSPACING=0 CELLPADDING=0 ALIGN=CENTER><TR><TD>Quote, originally posted by ke98248 »</TD></TR><TR><TD CLASS="quote">http://www.kgsengineering.com/....html</TD></TR></TABLE>
You think nobody ever lies on the internet? That's not a Megan bar.
<TABLE WIDTH="90%" CELLSPACING=0 CELLPADDING=0 ALIGN=CENTER><TR><TD>Quote, originally posted by Eran »</TD></TR><TR><TD CLASS="quote">You got taken for a ride, sonny.</TD></TR></TABLE>
You think nobody ever lies on the internet? That's not a Megan bar.
<TABLE WIDTH="90%" CELLSPACING=0 CELLPADDING=0 ALIGN=CENTER><TR><TD>Quote, originally posted by Eran »</TD></TR><TR><TD CLASS="quote">You got taken for a ride, sonny.</TD></TR></TABLE>
05-26-2007, 11:51 PM
#10
HT White Ops
iTrader: (1)
Join Date: Mar 2006
Location: I see what you did there.
Posts: 16,222
Likes: 0
Received 3 Likes
on
3 Posts
<TABLE WIDTH="90%" CELLSPACING=0 CELLPADDING=0 ALIGN=CENTER><TR><TD>Quote, originally posted by ke98248 »</TD></TR><TR><TD CLASS="quote">Oh well, I'm going to get them exchanged.. I've had to return an item with these guys, so it won't be a problem. </TD></TR></TABLE>
So you're going to exchange one shitty bar for another shitty bar that looks prettier?
Oh, good luck returning a part that's been installed already. That's considered a big no-no in e-business.
</TD></TR></TABLE>So you're going to exchange one shitty bar for another shitty bar that looks prettier?
Oh, good luck returning a part that's been installed already. That's considered a big no-no in e-business.
05-26-2007, 11:52 PM
#11
Honda-Tech Member
Thread Starter
iTrader: (1)
Join Date: Feb 2007
Location: Snohomish County, WA
Posts: 3,683
Likes: 0
Received 0 Likes
on
0 Posts
I'm going to get an authentic one, which is what I wanted to begin with. Thanks.
I don't think that they're shitty so thanks anyways for your opinion
I don't think that they're shitty so thanks anyways for your opinion
05-26-2007, 11:54 PM
#12
05-26-2007, 11:55 PM
#14
HT White Ops
iTrader: (1)
Join Date: Mar 2006
Location: I see what you did there.
Posts: 16,222
Likes: 0
Received 3 Likes
on
3 Posts
<TABLE WIDTH="90%" CELLSPACING=0 CELLPADDING=0 ALIGN=CENTER><TR><TD>Quote, originally posted by ke98248 »</TD></TR><TR><TD CLASS="quote">That's what I'm getting next. that company doesn't sell h-braces so i'm gettin that from streetrays.com..</TD></TR></TABLE>
So just return the bar. You can't have both.
So just return the bar. You can't have both.
05-26-2007, 11:59 PM
#15
Honda-Tech Member
Thread Starter
iTrader: (1)
Join Date: Feb 2007
Location: Snohomish County, WA
Posts: 3,683
Likes: 0
Received 0 Likes
on
0 Posts
What kinda suspension setup do you have?
oh well.
Later, I"m ordering an H-Brace from another company, streetrays.com
Capish?
oh well.
Later, I"m ordering an H-Brace from another company, streetrays.com
Capish?
05-27-2007, 12:01 AM
#16
HT White Ops
iTrader: (1)
Join Date: Mar 2006
Location: I see what you did there.
Posts: 16,222
Likes: 0
Received 3 Likes
on
3 Posts
<TABLE WIDTH="90%" CELLSPACING=0 CELLPADDING=0 ALIGN=CENTER><TR><TD>Quote, originally posted by ke98248 »</TD></TR><TR><TD CLASS="quote">What kinda suspension setup do you have?
No **** sherlock. I told you that the company I ordered the tie bars from DOES NOT sell h-braces so I'm exchanging those with real MG ones..
Later, I"m ordering an H-Brace from another company, streetrays.com
Capish?</TD></TR></TABLE>
I understand what you're doing. I just don't understand why. You'd rather spend money on something you're going to have to throw away so you can replace it with a superior part.
Nobody will buy your used Megan front tie bar for more than $10.
As for my suspension setup?
GSR Front strut bar
Tokico Illumina 5-Way Shocks
H&R Sport Springs
ASR Subframe Brace
ST 19mm Rear Swaybar
ST 24mm Front Swaybar
... and a shitty heim-joint rear strut bar that I need to replace, but I keep buying other things.
05-27-2007, 12:07 AM
#17
Honda-Tech Member
Thread Starter
iTrader: (1)
Join Date: Feb 2007
Location: Snohomish County, WA
Posts: 3,683
Likes: 0
Received 0 Likes
on
0 Posts
I guess I'll try to get a refund. I've disputed this with my credit card company just now. I'll see what happens there. Thanks for the advice.
05-27-2007, 12:10 AM
#19
HT White Ops
iTrader: (1)
Join Date: Mar 2006
Location: I see what you did there.
Posts: 16,222
Likes: 0
Received 3 Likes
on
3 Posts
<TABLE WIDTH="90%" CELLSPACING=0 CELLPADDING=0 ALIGN=CENTER><TR><TD>Quote, originally posted by ke98248 »</TD></TR><TR><TD CLASS="quote">What websites did you get the sway bars? How much of a diffy do they make?</TD></TR></TABLE>
They make quite a bit of difference.
I got this setup:
http://store.summitracing.com/...w=sku
They make quite a bit of difference.
I got this setup:
http://store.summitracing.com/...w=sku
05-27-2007, 12:16 AM
#23
Honda-Tech Member
Thread Starter
iTrader: (1)
Join Date: Feb 2007
Location: Snohomish County, WA
Posts: 3,683
Likes: 0
Received 0 Likes
on
0 Posts
Please read up on the last posts, then you'll understand what the hell is goin' on.
Besides, ^^ I'm going to get an H-Brace like Eran suggested.
Modified by ke98248 at 1:47 AM 5/27/2007
Besides, ^^ I'm going to get an H-Brace like Eran suggested.
Modified by ke98248 at 1:47 AM 5/27/2007
05-27-2007, 01:33 AM
#25
Honda-Tech Member
Thread Starter
iTrader: (1)
Join Date: Feb 2007
Location: Snohomish County, WA
Posts: 3,683
Likes: 0
Received 0 Likes
on
0 Posts
haha funny thing is I didn't buy from ebay.. So I'm disputing with my credit card company so I can chargeback the company.

