
DIY - DRL wired to low beam for LED H4 Bulbs. (PIC HEAVY!!!)
 06-17-2016, 05:39 PM
#1
Hysterically Calm
Thread Starter
So I bought these high quality 3500 lumen per bulb 6K color bulbs for my wife's car and mine.
https://www.amazon.com/OPT7-Headligh...eadlight&psc=1
I hooked them up, plugged them into the stock sockets and wham, the Daytime Running Lights (DRL) were just about as bright as the high beams. LED takes very little current to do the same job as Halogens. A little investigation found the issue. The fix I do allows me to easily reverse and go back to stock setup with next to no effort. All components are fully protected with OEM design.
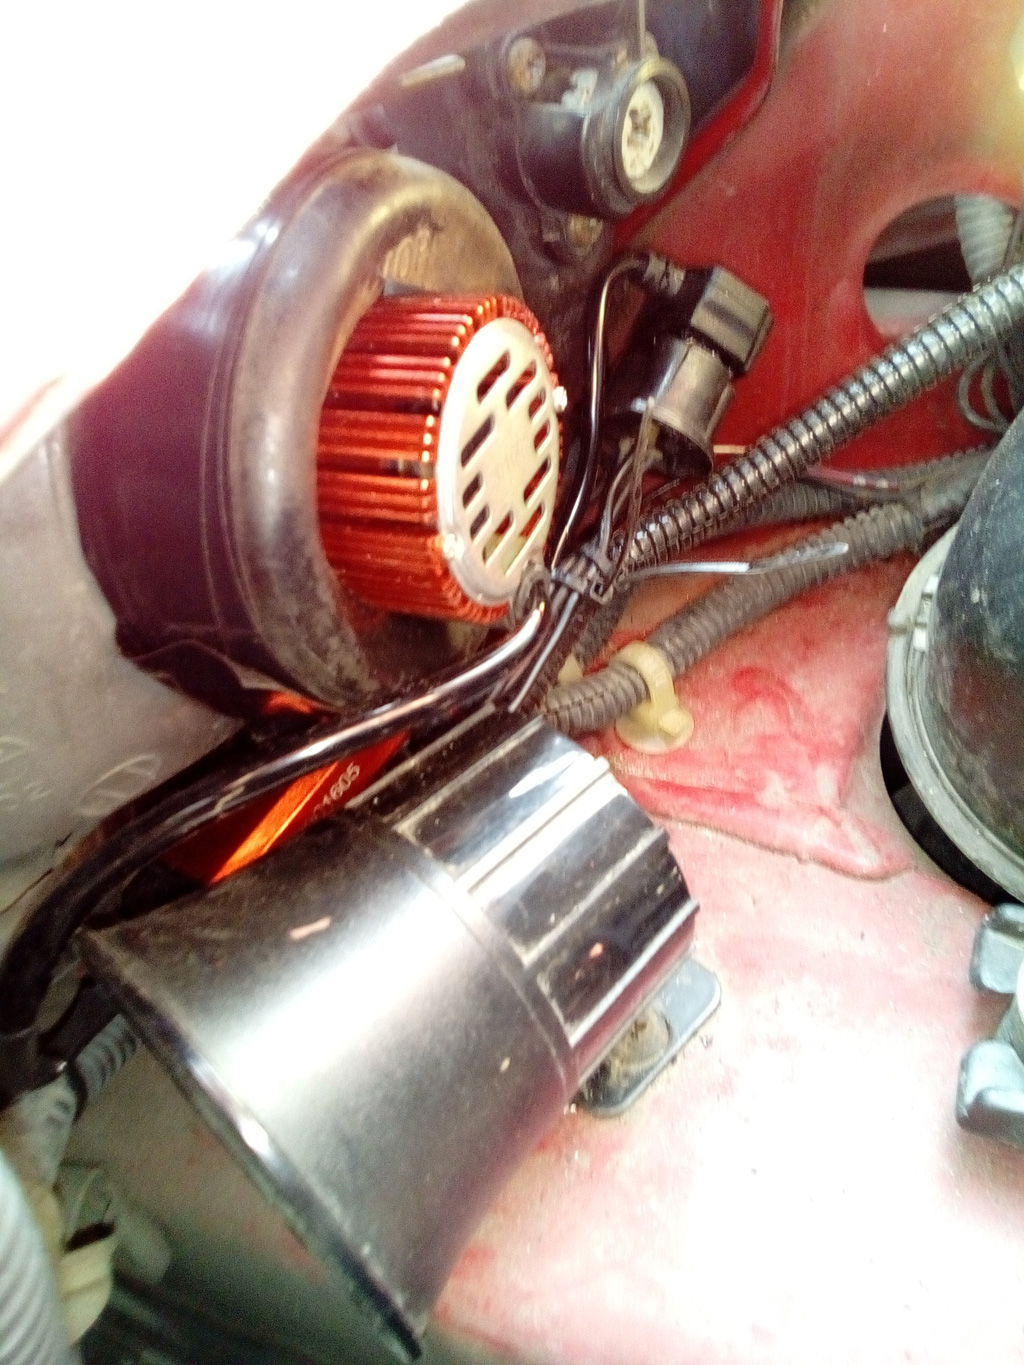
Looking into the ETM for the 93 Civic (wifes car), I learn Honda ran the DRL from power, through a couple of high wattage resistors and ran it into the high beam side of the circuit as you can see below:
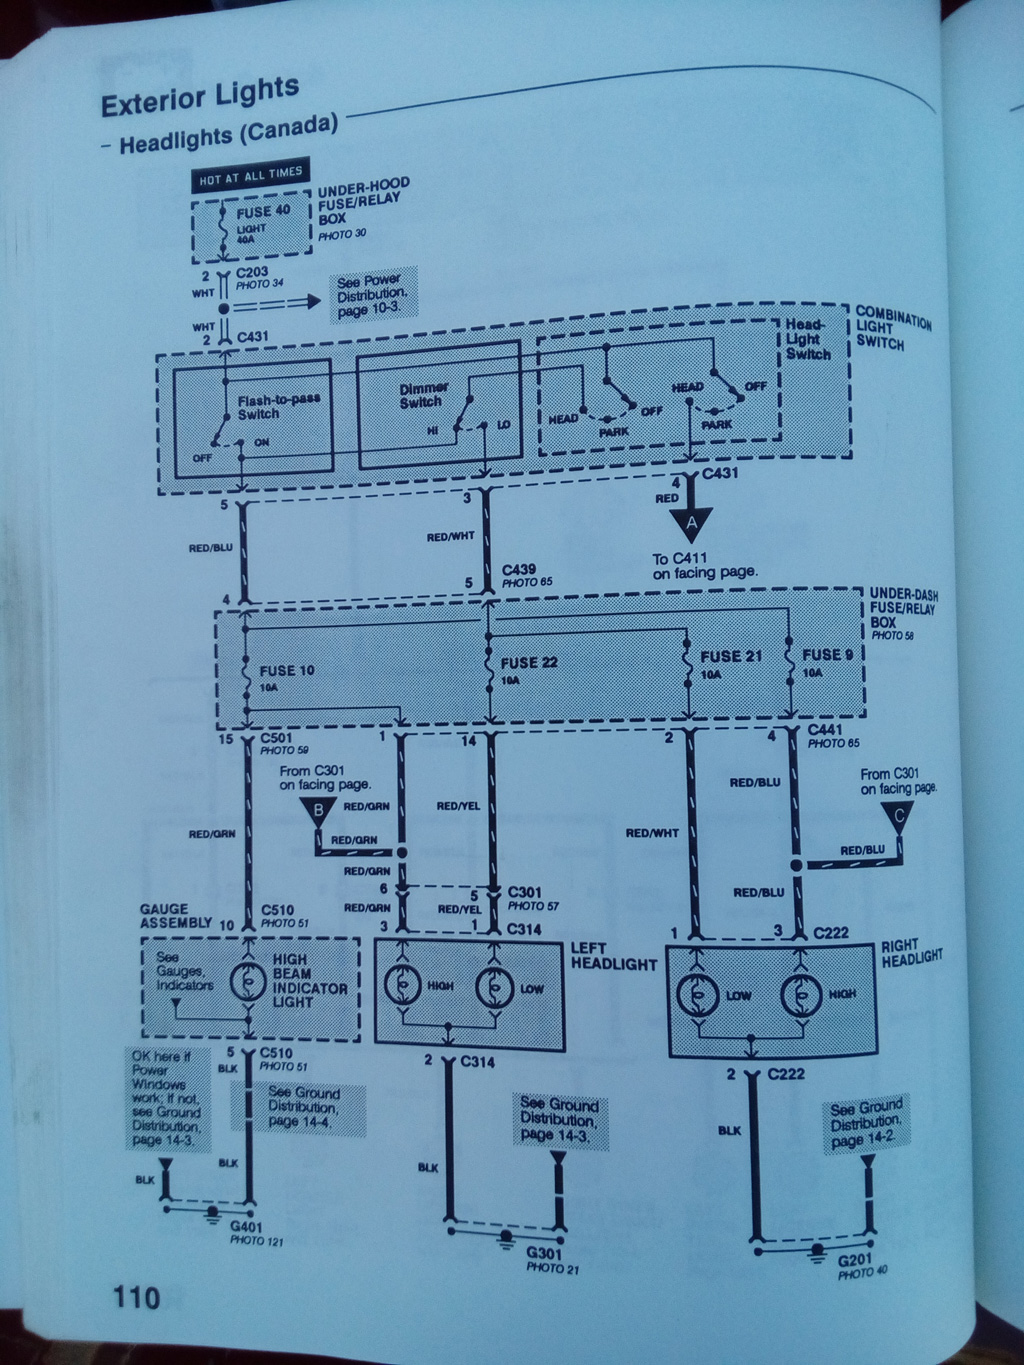
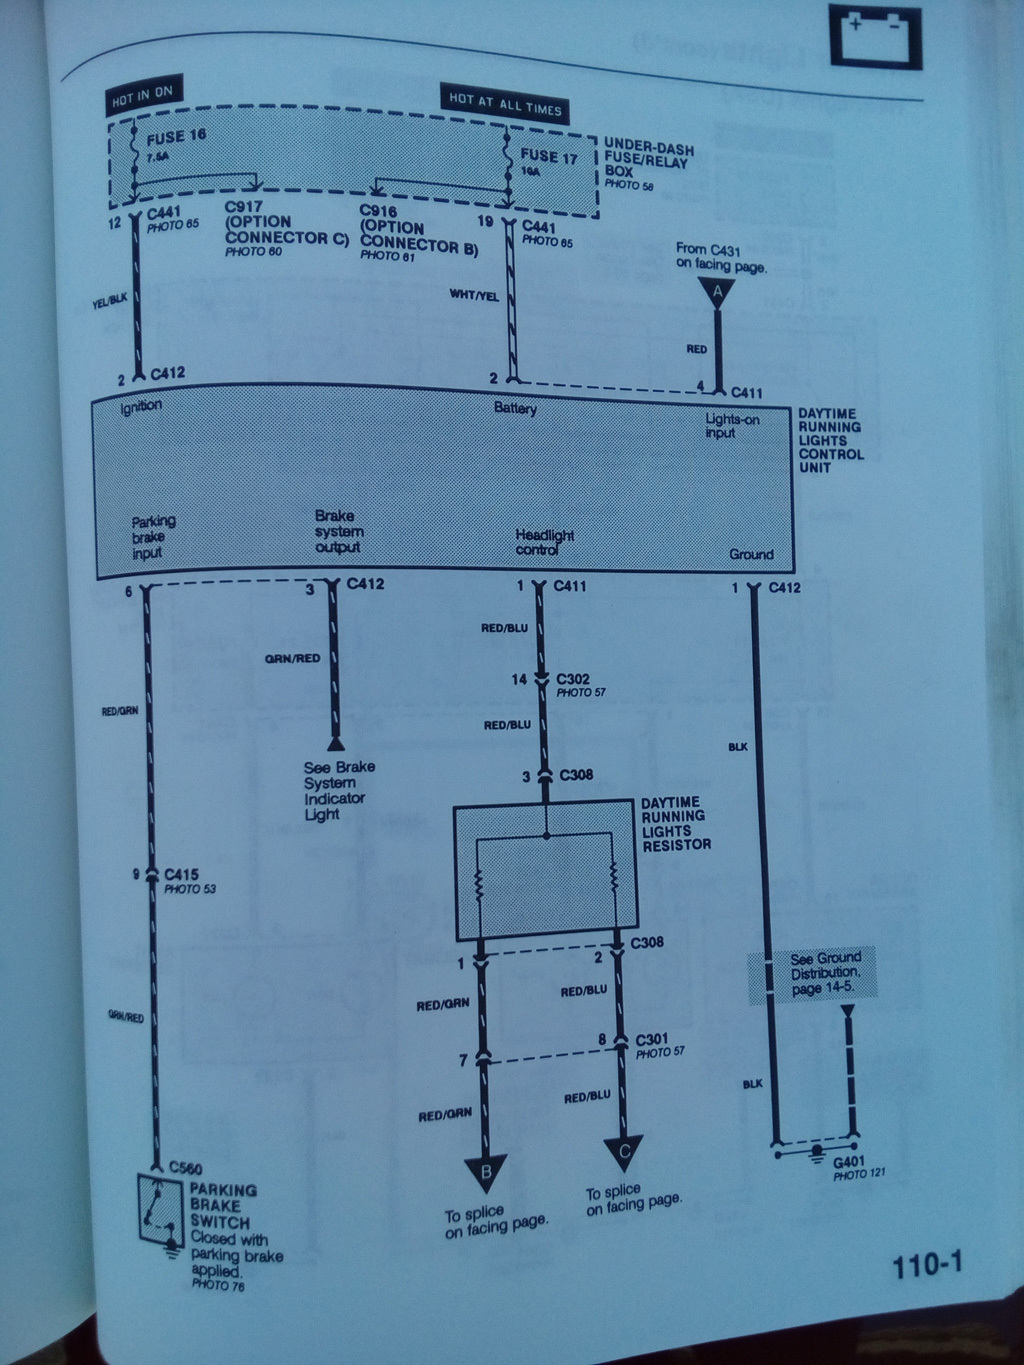
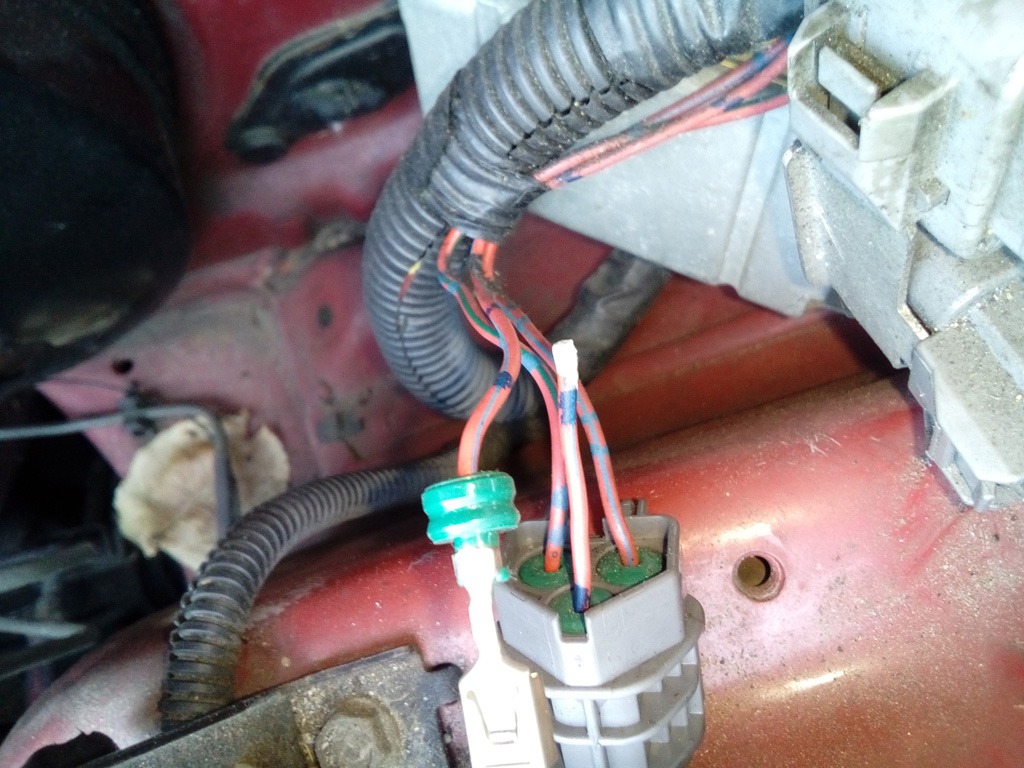
From that we can see we want to tap into the red/blue and the red/green wire from the DRL connector from C308. With a digital multi-meter I was able to determine that the wires are the top two on the connector and the bottom lone wire is the hot lead going into the resistors.
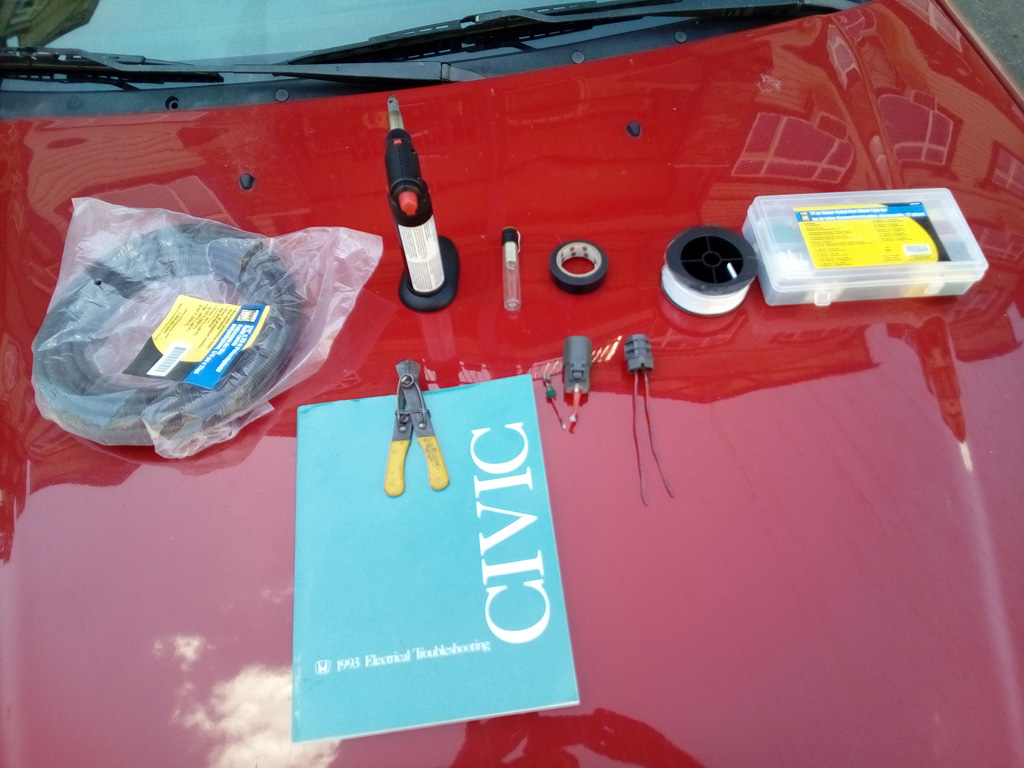
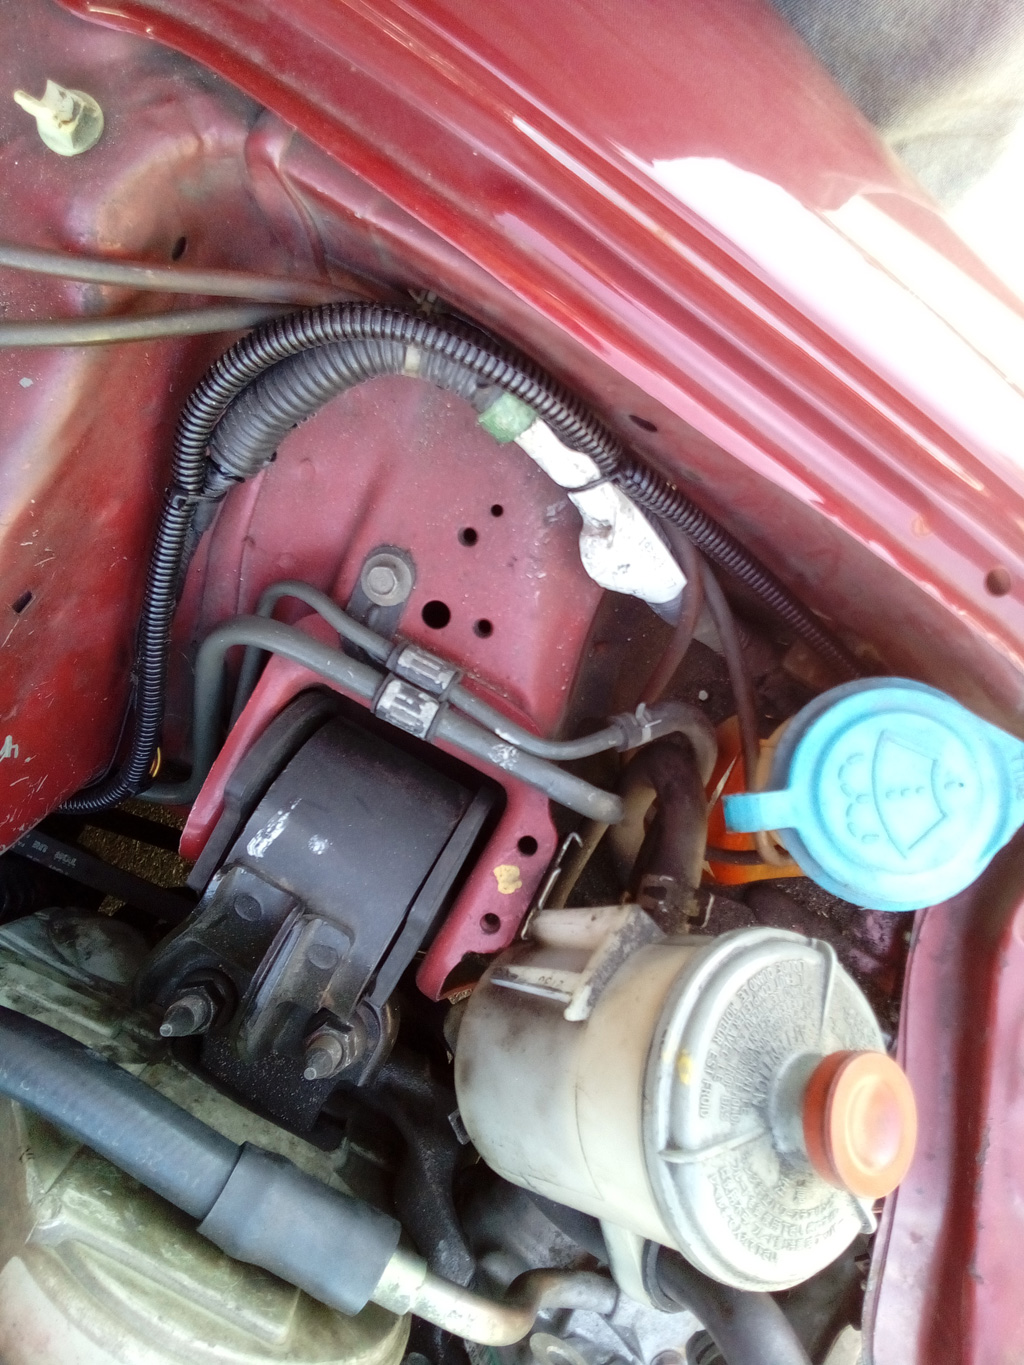
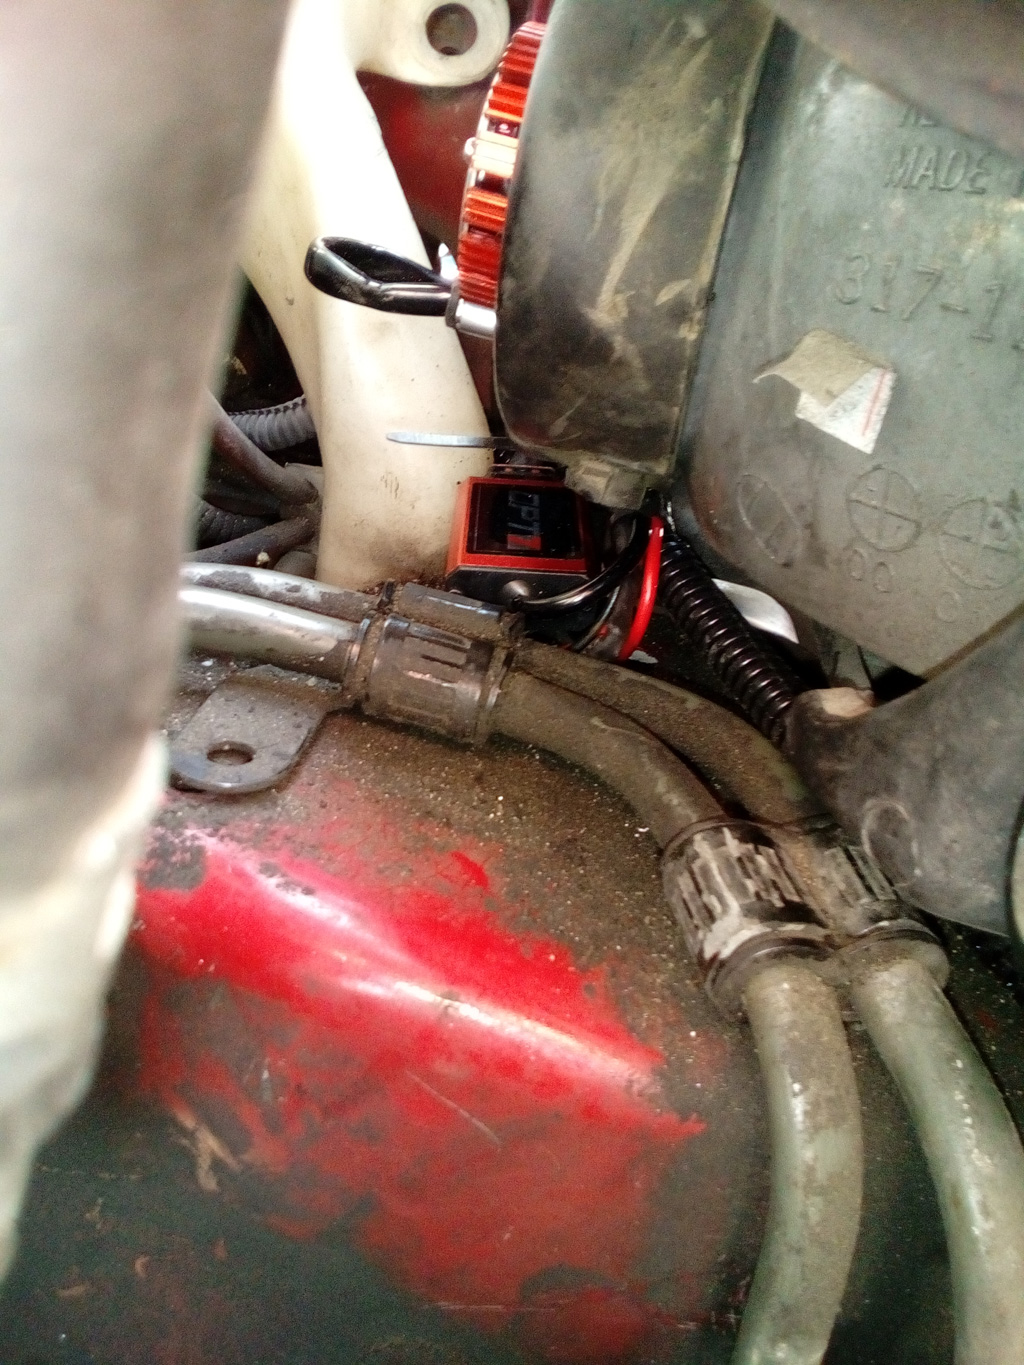
So now here is the main tools required beyond a philips screwdriver and a 10mm socket:
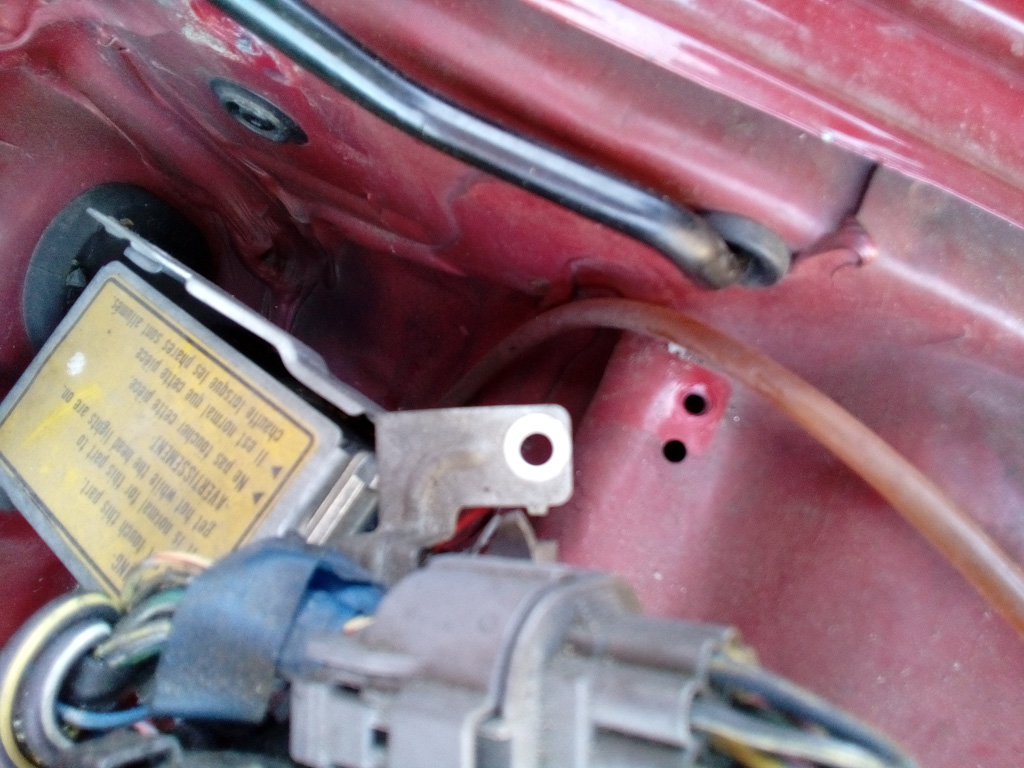
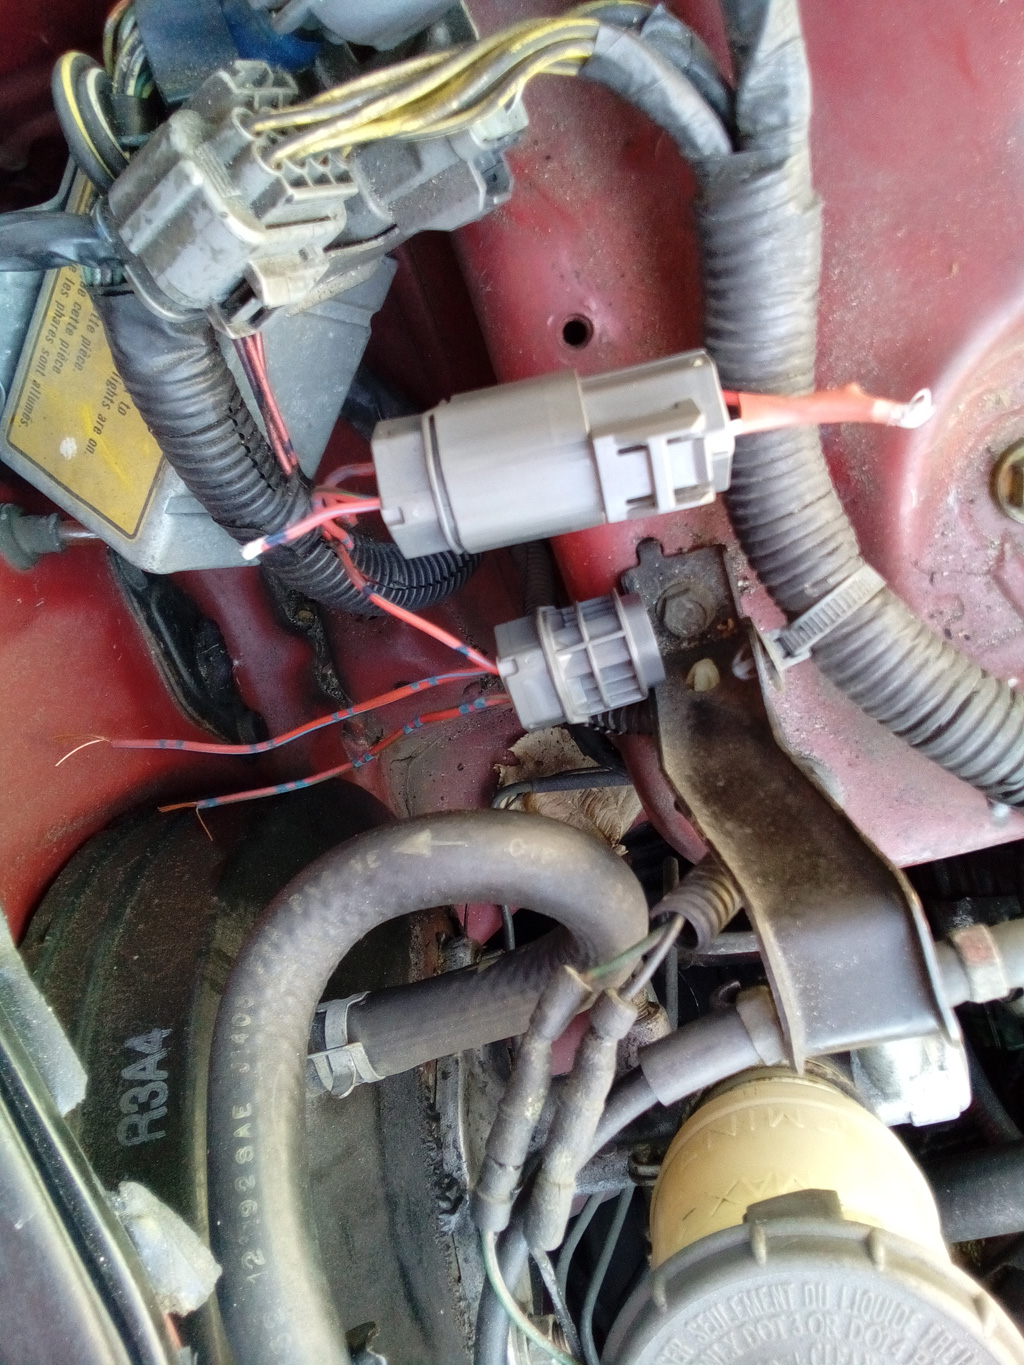
The box with the yellow warning sticker is the DRL resistor box. Connector C308 is the plug attached to that box that has 3 wires. Resistor side is 2 red wires and 1 white wire. The harness side is 2 red/blue wires and 1 red/green wire.
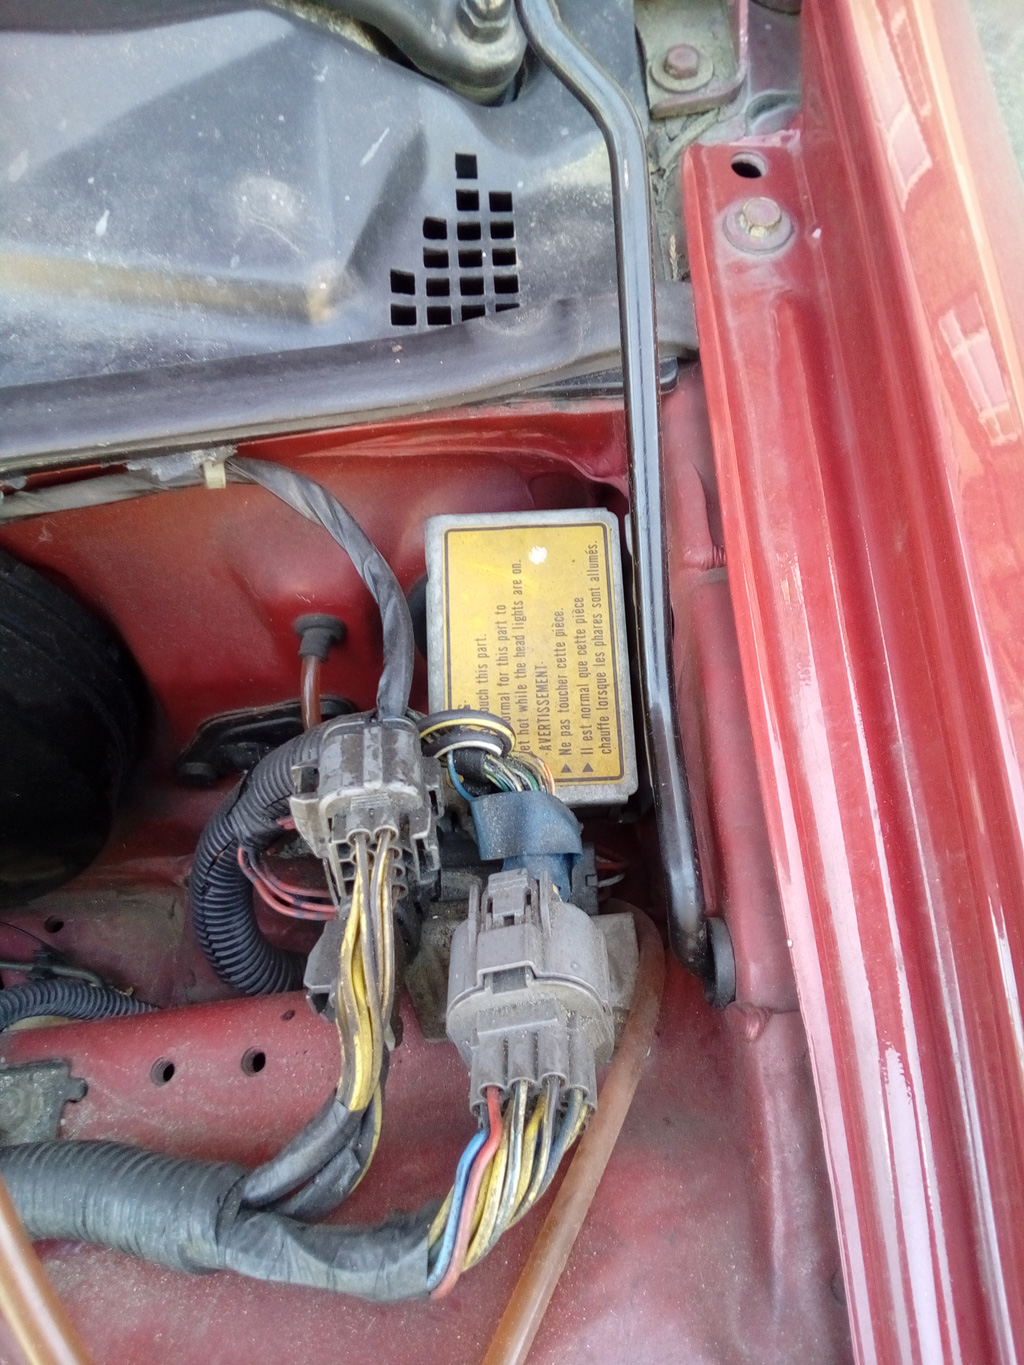
To get to it you undue the 2 10mm bolts to get the junction plugs and the DRL box free.
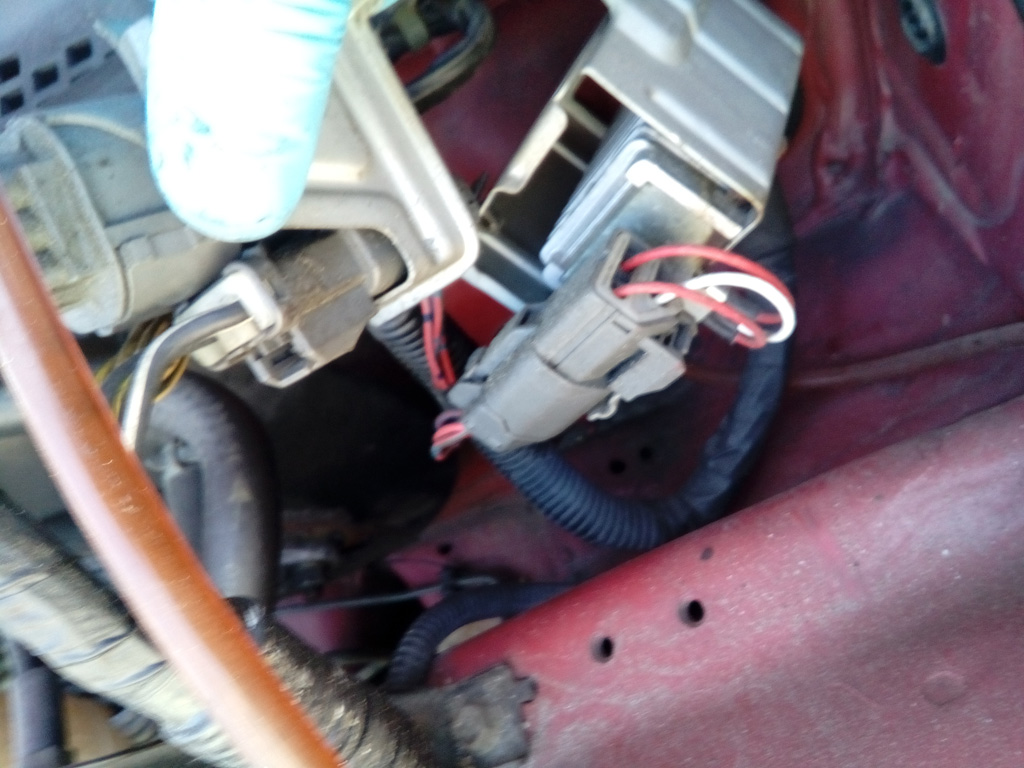
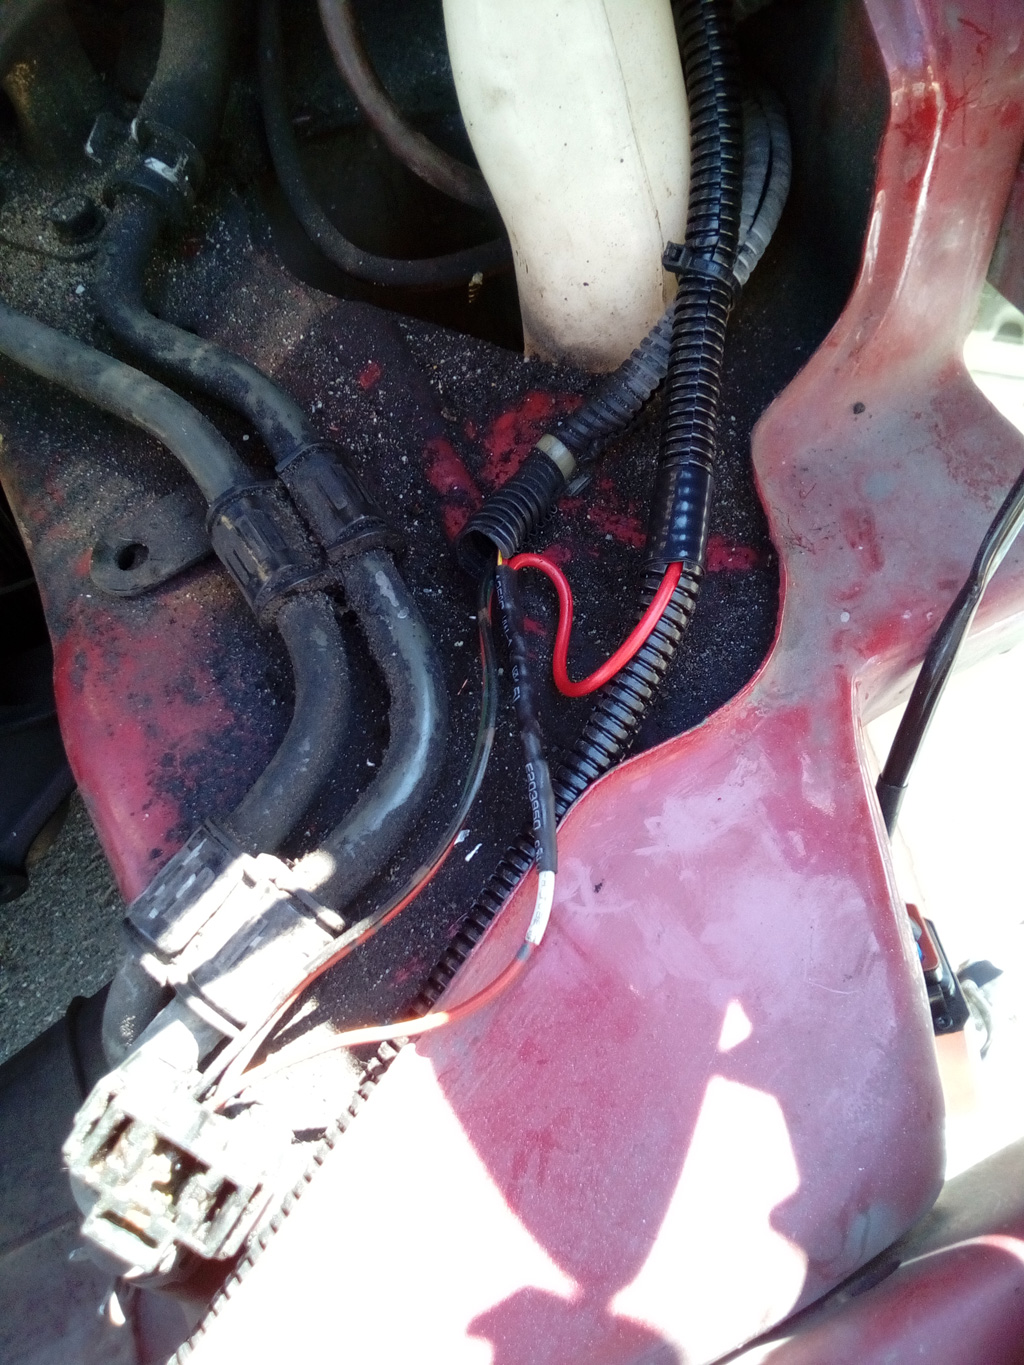
Now, I went to the junk yard and grabbed that whole plug setup from another car for a few bucks. The resistor box side of the purchased plug I cut and sealed up the wires. It's being used strictly to keep the weather out of the stock plug on the harness. These have rubber seals inside them and on the back of the wires.
Once you have access to C308, on the car harness plug you use the smallest jewelers screwdriver to pop out the bottom red/blue wire from the plug and inserted into your plug from the junk yard. And the cut wire from the junk yard plug you put into your stock plug, once again to keep the weather out.
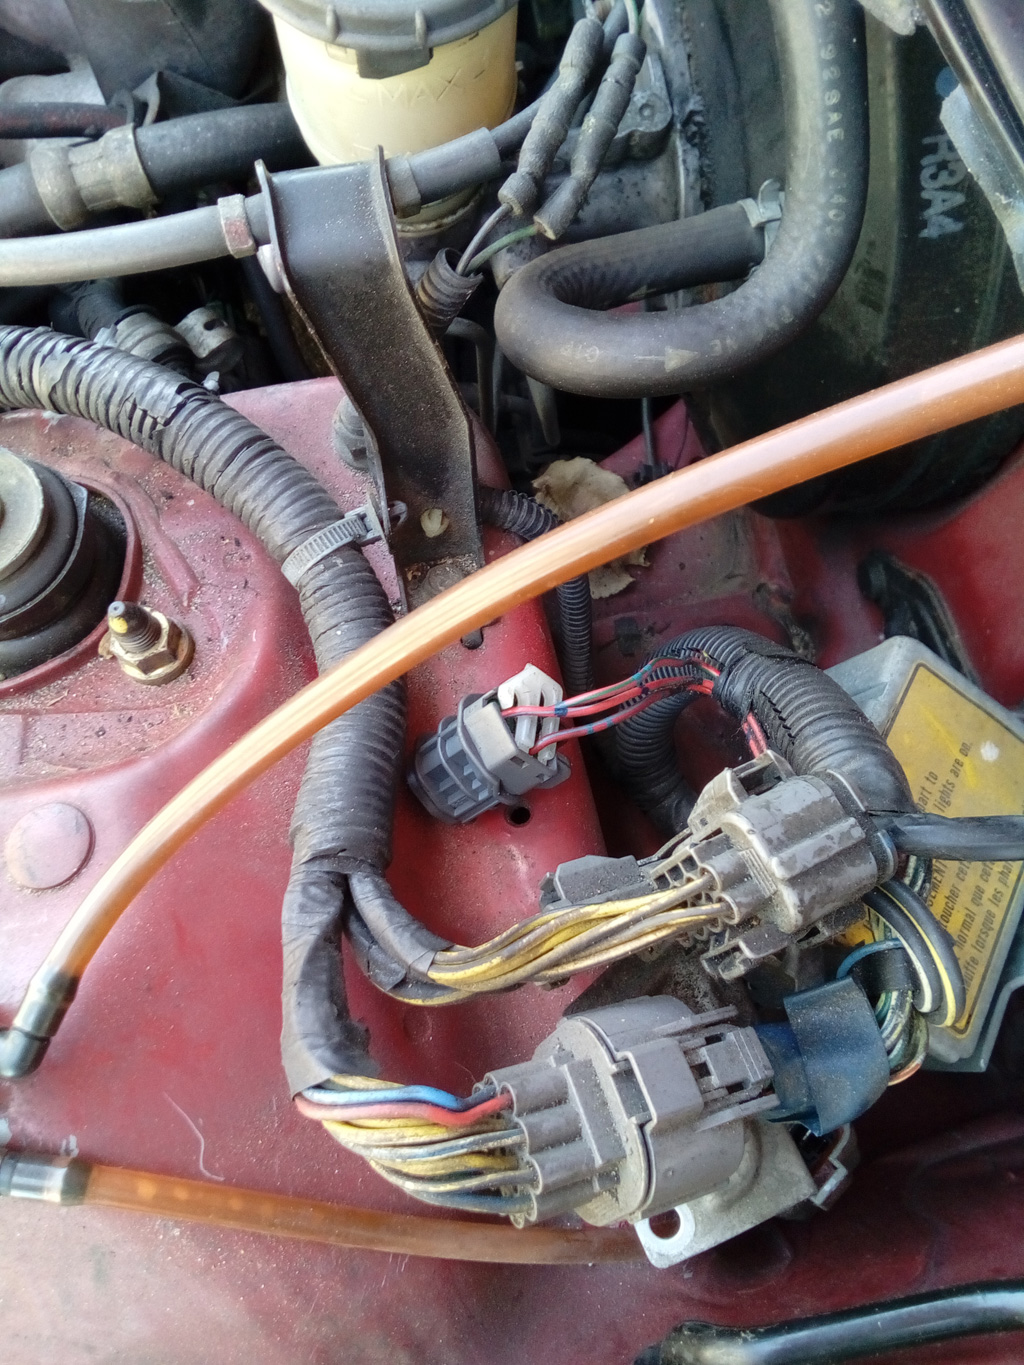

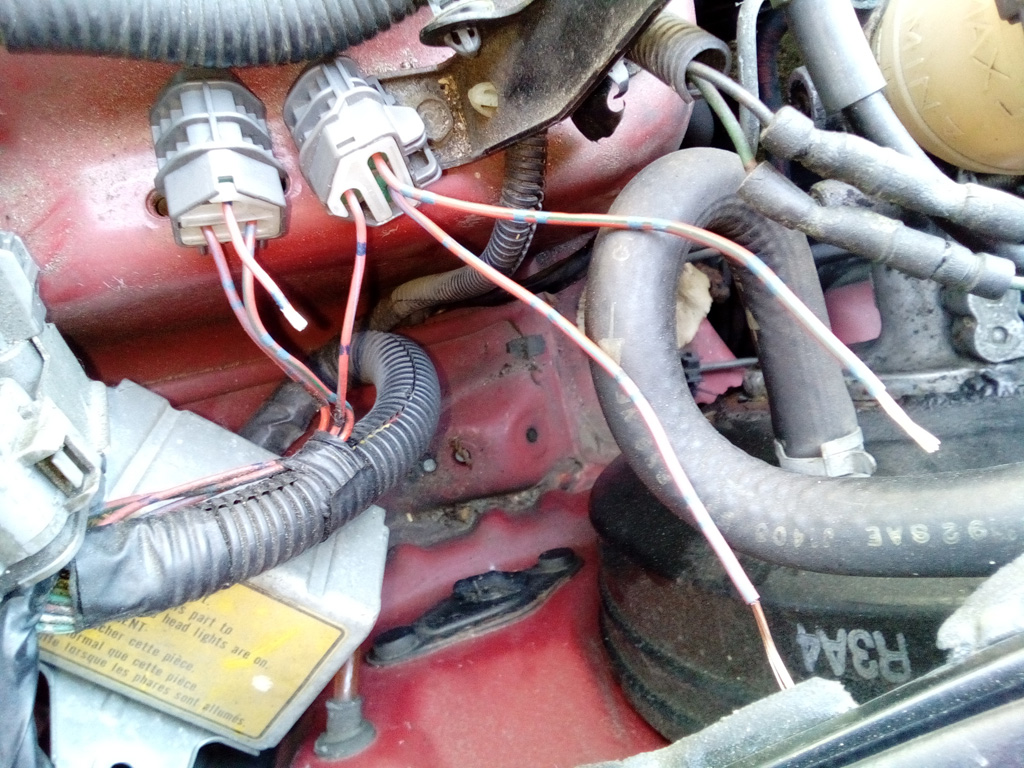
What this does is allow me to switch things around by simply moving one wire on the plug that I plug into the DRL resistor box. The two wires you see above is now going to be run down to the head lights and tie into the low beam side. From the ETM we know this to be the Red/Yellow wire on the drivers side, and the Red/White wire on the Passenger side. I used 18 gauge wire which seemed a touch thicker than the stock wire which I think may be 20 gauge, but 18 gauge worked well. I ended up using red wire and split looming it as you will see for the rest of the install. Bumper had to come off to route the wire.
https://www.amazon.com/OPT7-Headligh...eadlight&psc=1
I hooked them up, plugged them into the stock sockets and wham, the Daytime Running Lights (DRL) were just about as bright as the high beams. LED takes very little current to do the same job as Halogens. A little investigation found the issue. The fix I do allows me to easily reverse and go back to stock setup with next to no effort. All components are fully protected with OEM design.
Looking into the ETM for the 93 Civic (wifes car), I learn Honda ran the DRL from power, through a couple of high wattage resistors and ran it into the high beam side of the circuit as you can see below:
From that we can see we want to tap into the red/blue and the red/green wire from the DRL connector from C308. With a digital multi-meter I was able to determine that the wires are the top two on the connector and the bottom lone wire is the hot lead going into the resistors.
So now here is the main tools required beyond a philips screwdriver and a 10mm socket:
The box with the yellow warning sticker is the DRL resistor box. Connector C308 is the plug attached to that box that has 3 wires. Resistor side is 2 red wires and 1 white wire. The harness side is 2 red/blue wires and 1 red/green wire.
To get to it you undue the 2 10mm bolts to get the junction plugs and the DRL box free.
Now, I went to the junk yard and grabbed that whole plug setup from another car for a few bucks. The resistor box side of the purchased plug I cut and sealed up the wires. It's being used strictly to keep the weather out of the stock plug on the harness. These have rubber seals inside them and on the back of the wires.
Once you have access to C308, on the car harness plug you use the smallest jewelers screwdriver to pop out the bottom red/blue wire from the plug and inserted into your plug from the junk yard. And the cut wire from the junk yard plug you put into your stock plug, once again to keep the weather out.
What this does is allow me to switch things around by simply moving one wire on the plug that I plug into the DRL resistor box. The two wires you see above is now going to be run down to the head lights and tie into the low beam side. From the ETM we know this to be the Red/Yellow wire on the drivers side, and the Red/White wire on the Passenger side. I used 18 gauge wire which seemed a touch thicker than the stock wire which I think may be 20 gauge, but 18 gauge worked well. I ended up using red wire and split looming it as you will see for the rest of the install. Bumper had to come off to route the wire.
Last edited by TomCat39; 06-17-2016 at 11:36 PM.
 06-17-2016, 05:57 PM
#2
Hysterically Calm
Thread Starter
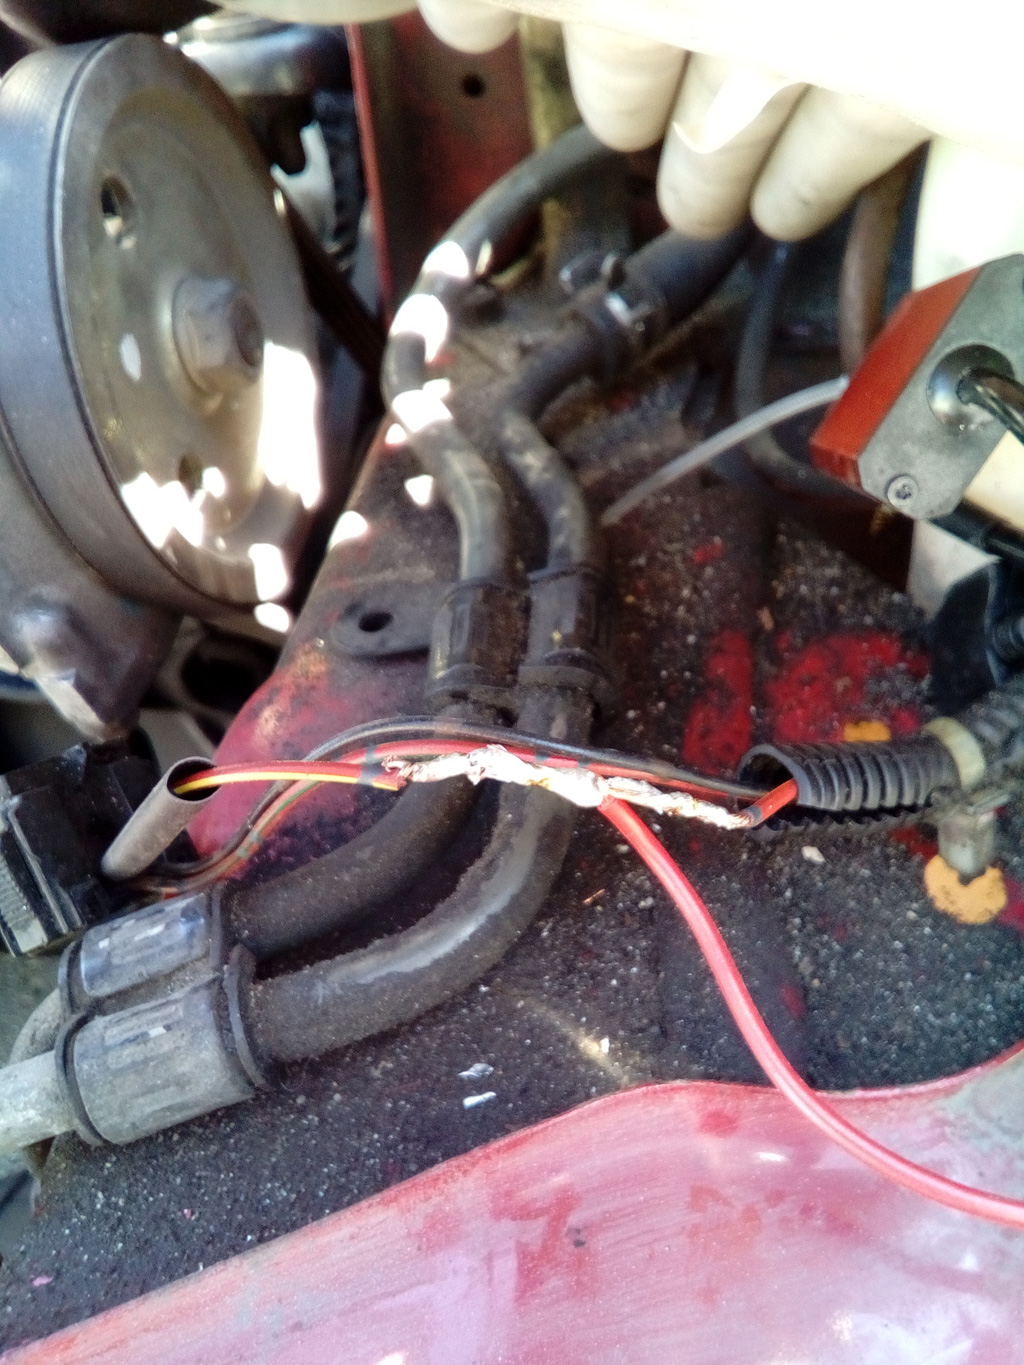
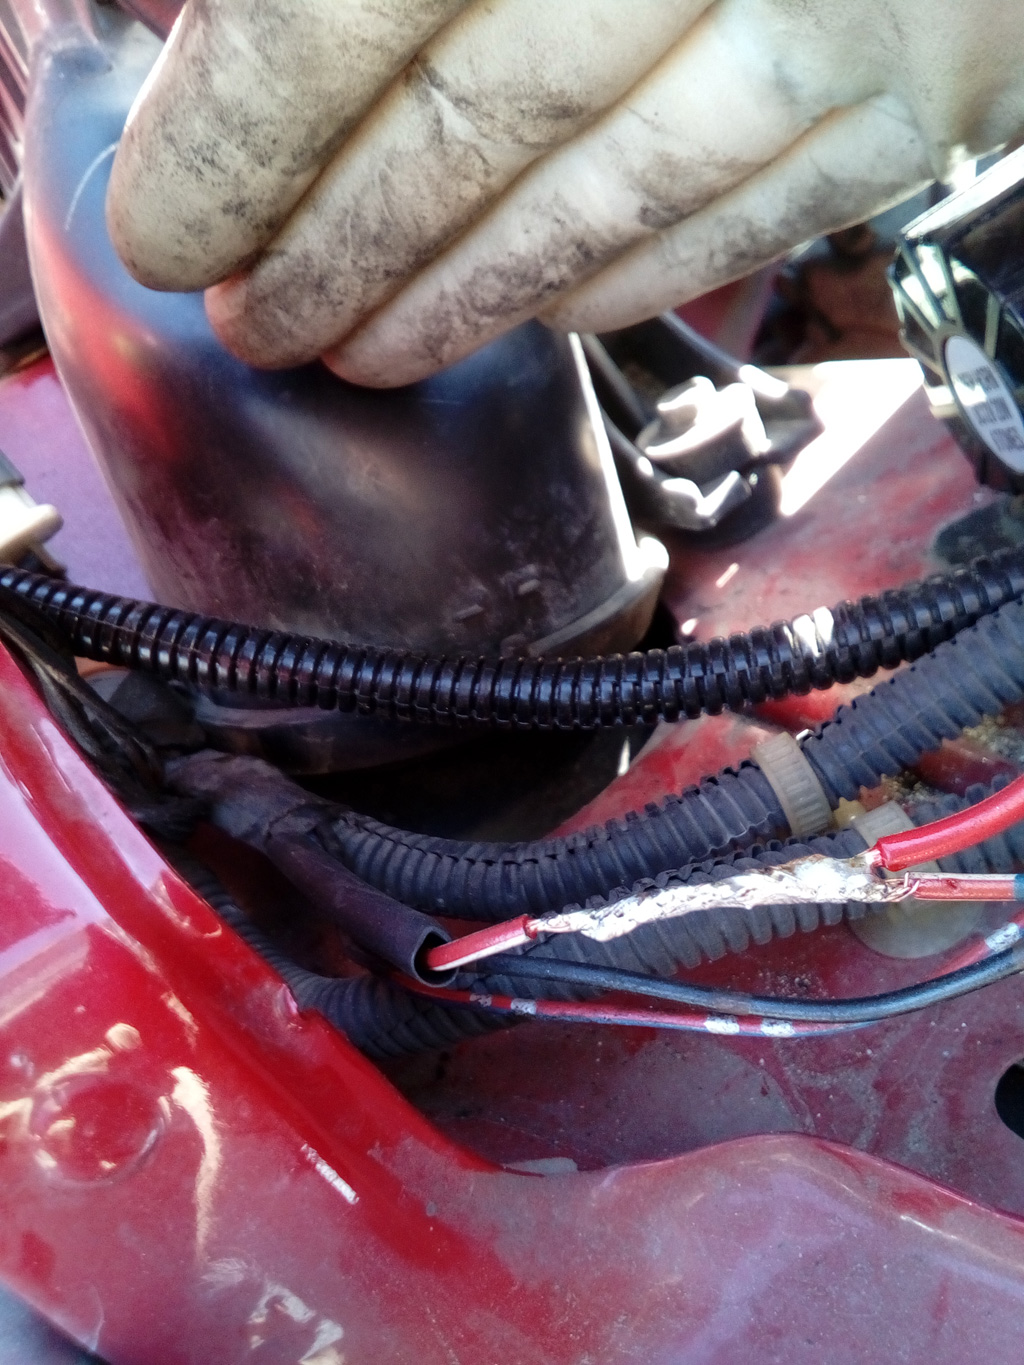
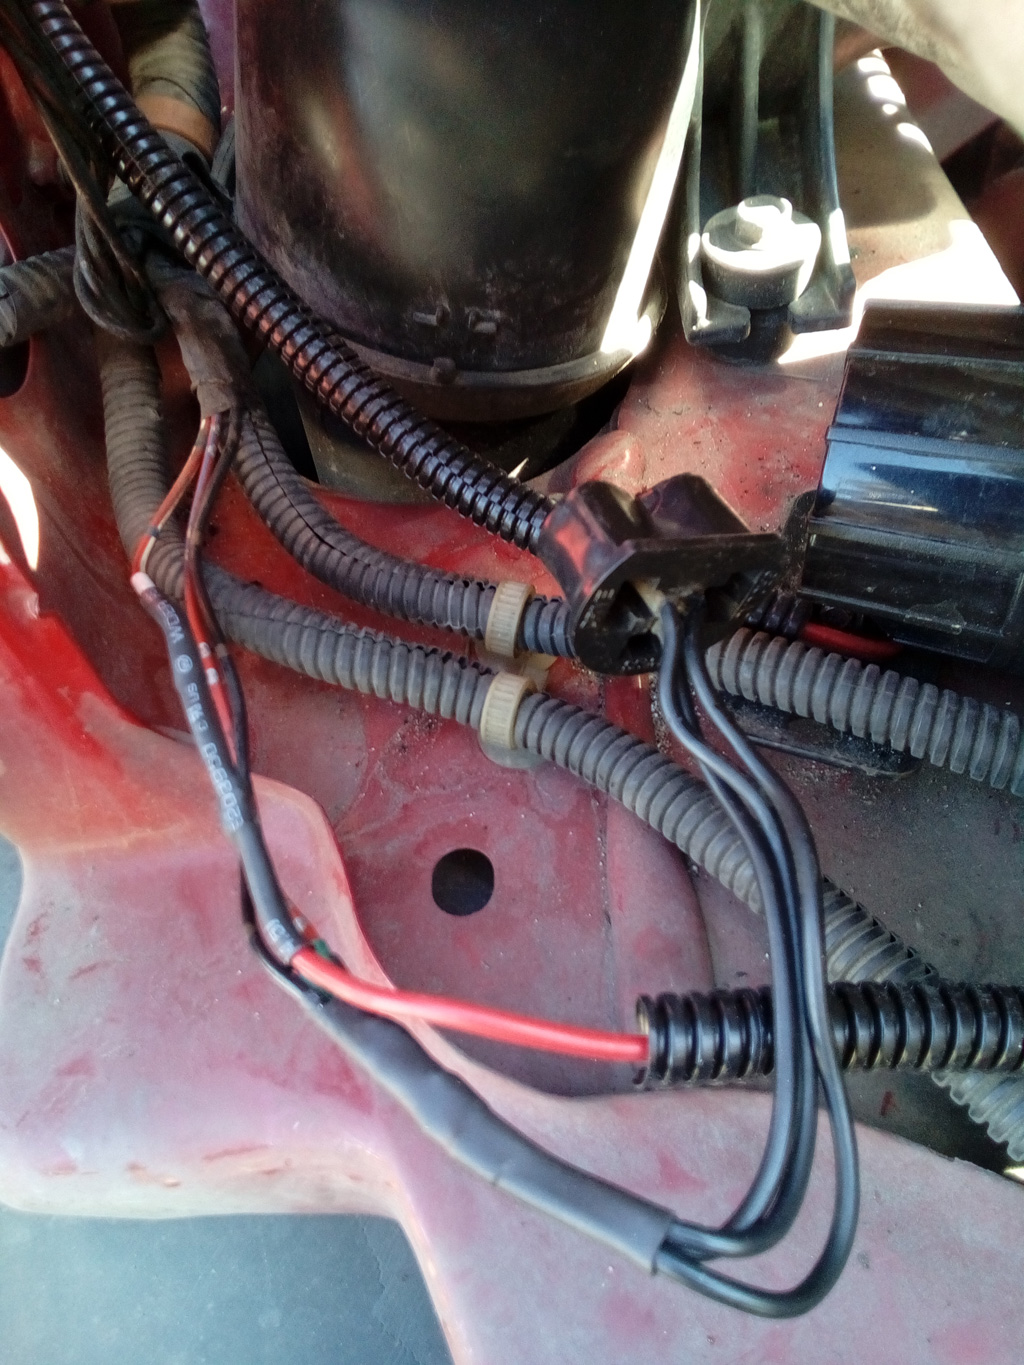
So I plug in in the spare plug onto the stock harness plug and then secure it to the wire harness for long term protection and storage.
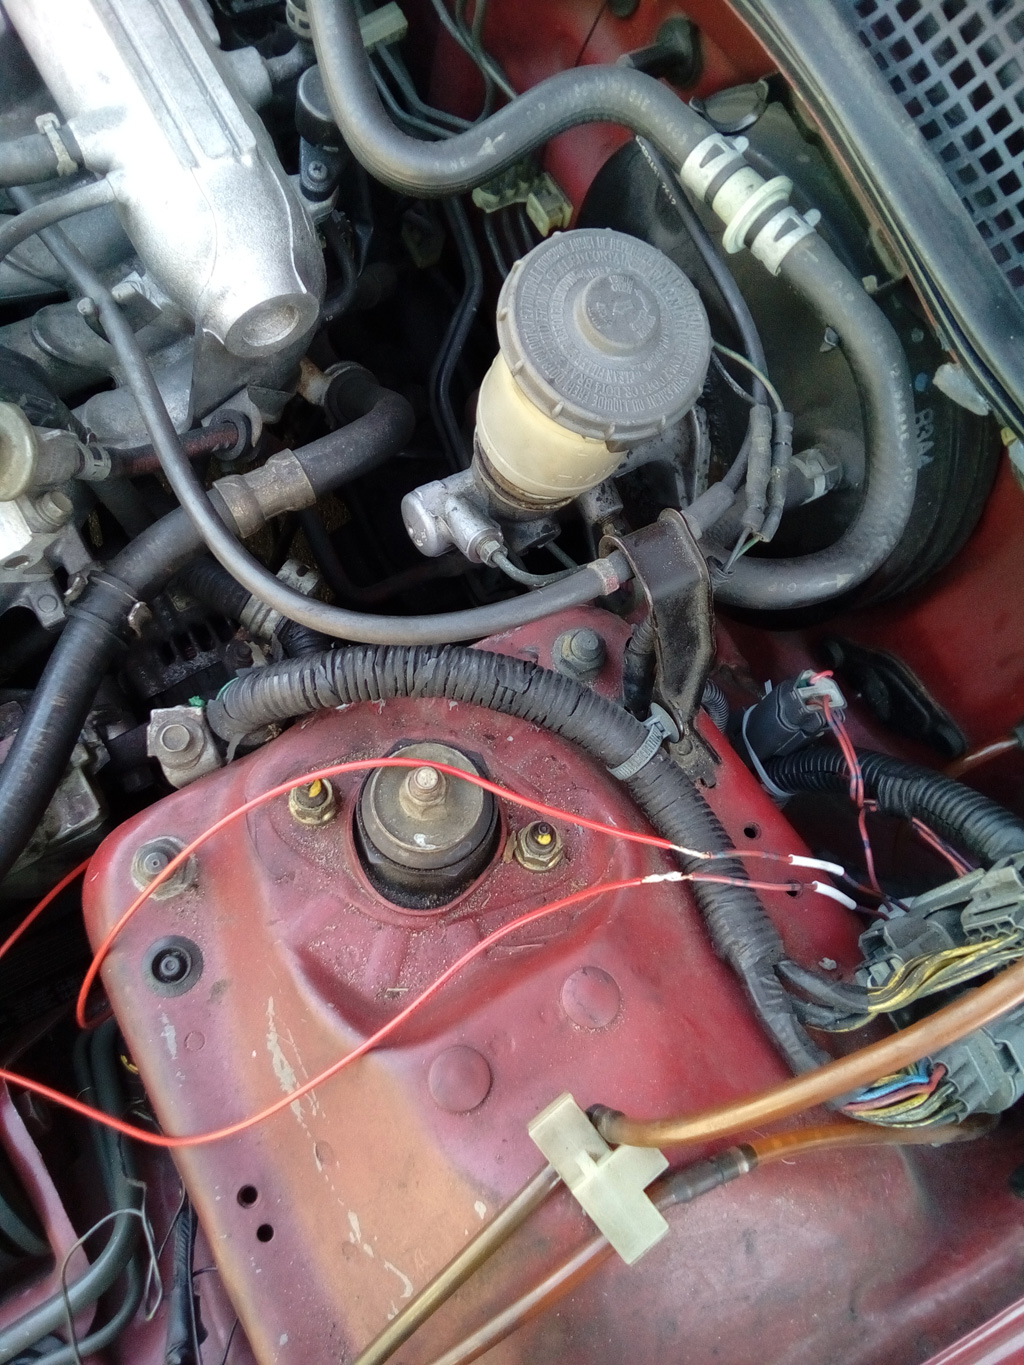
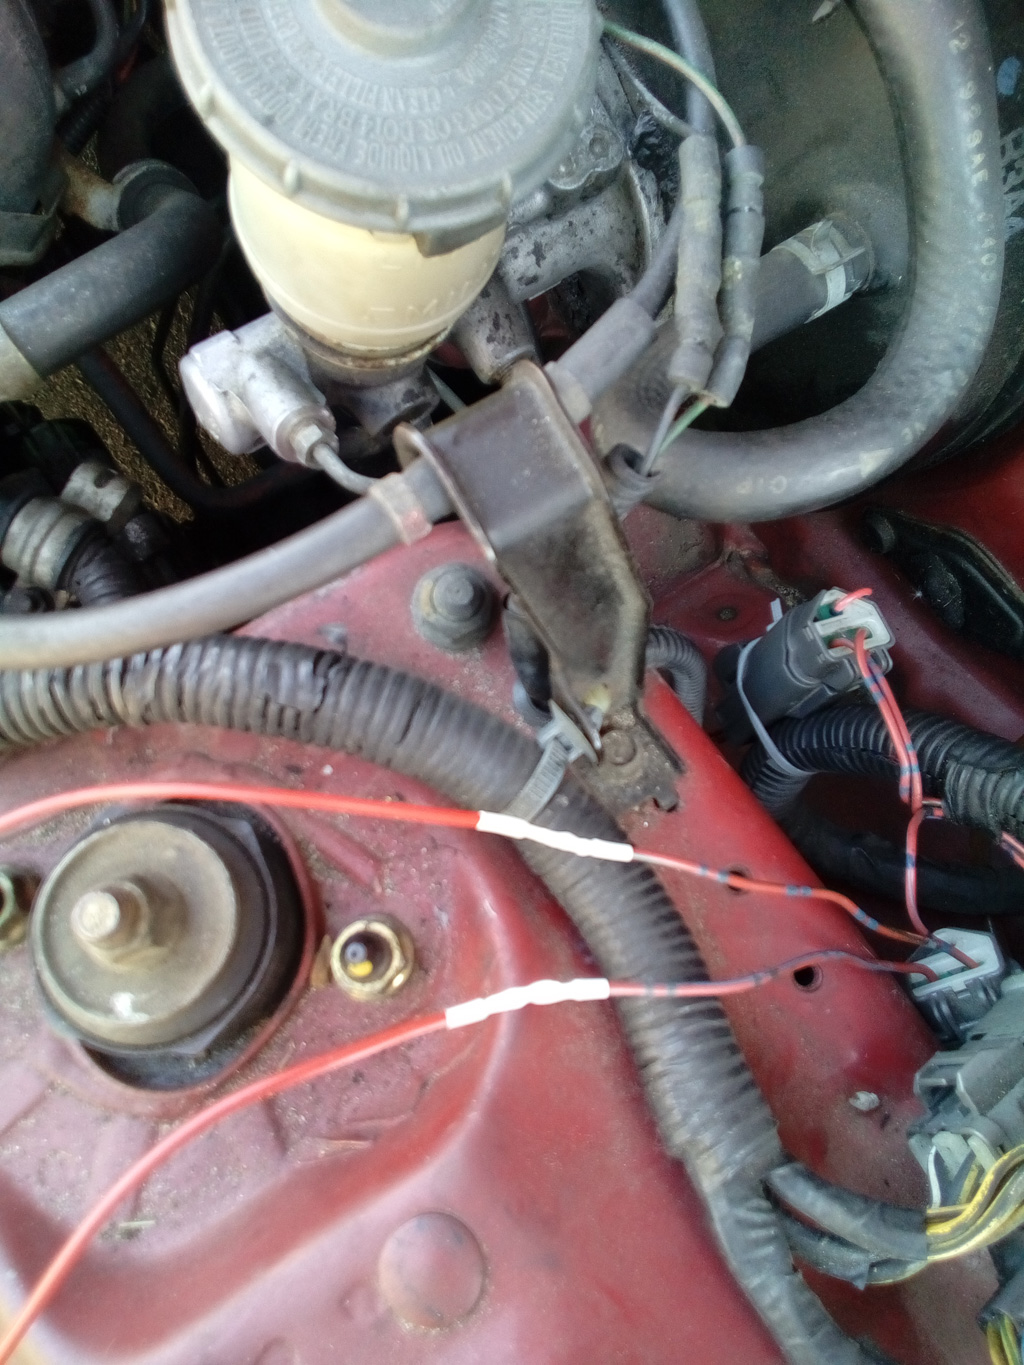
Now I figured out my routing for the wire and started soldering to my two new leads. All my connections are soldered, I am not a fan of clamps or crimping. And I do heat shrink my connections. And to keep it like the stock configuration, you will run the red/green wire to the drivers side and the red/blue to the passenger side.
To make my life easier I pulled out the whole head light lens and here you can see on the driver side, we patch into and then heat shrink the red/yellow wire for the low beam side of the bulb.

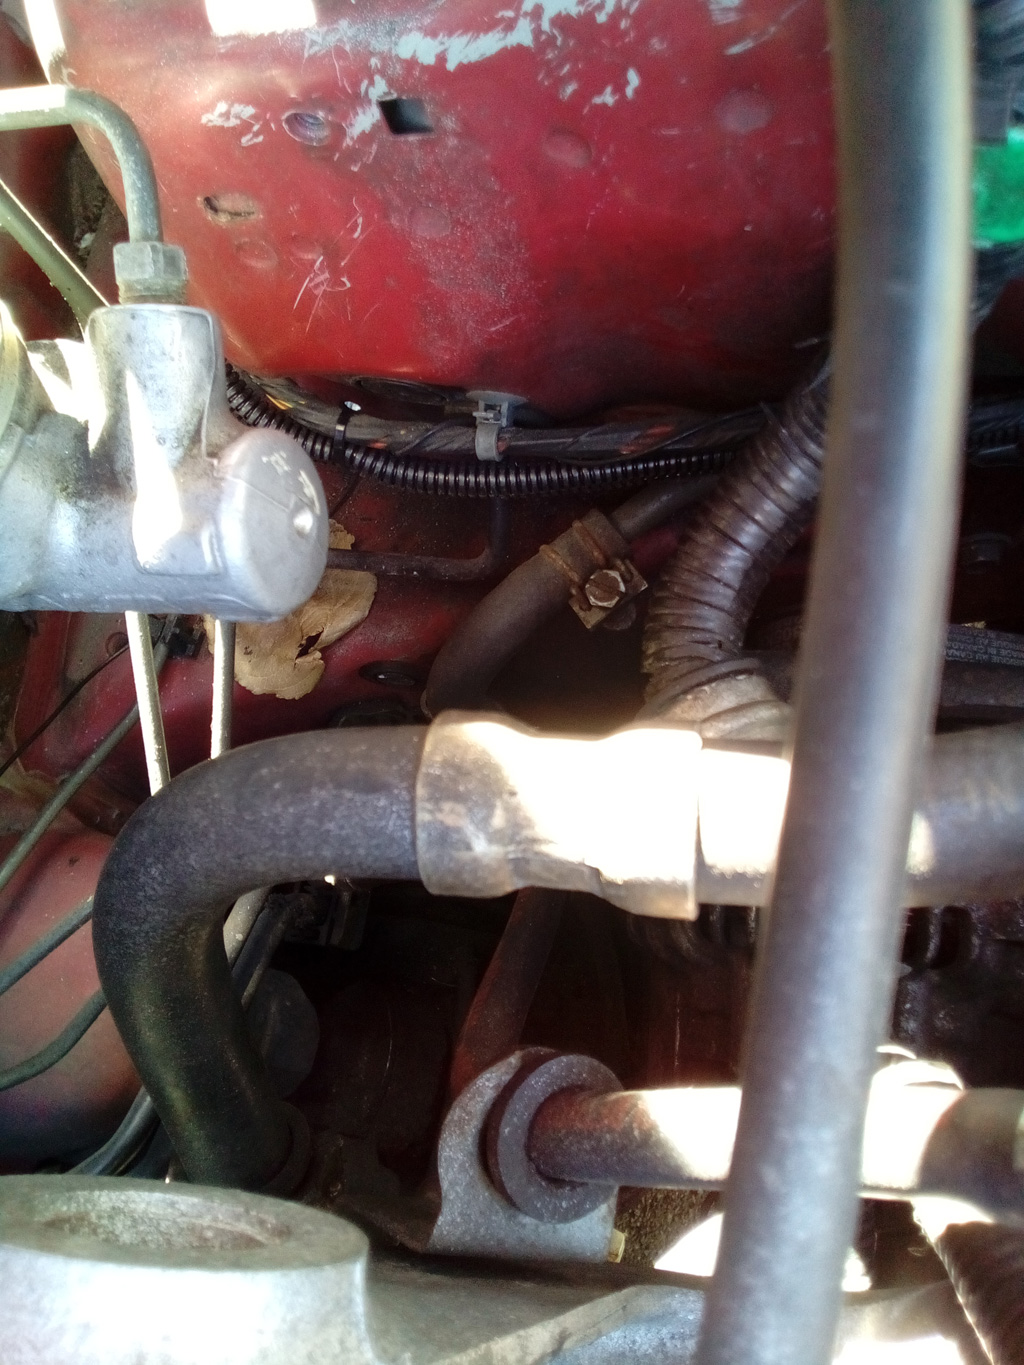
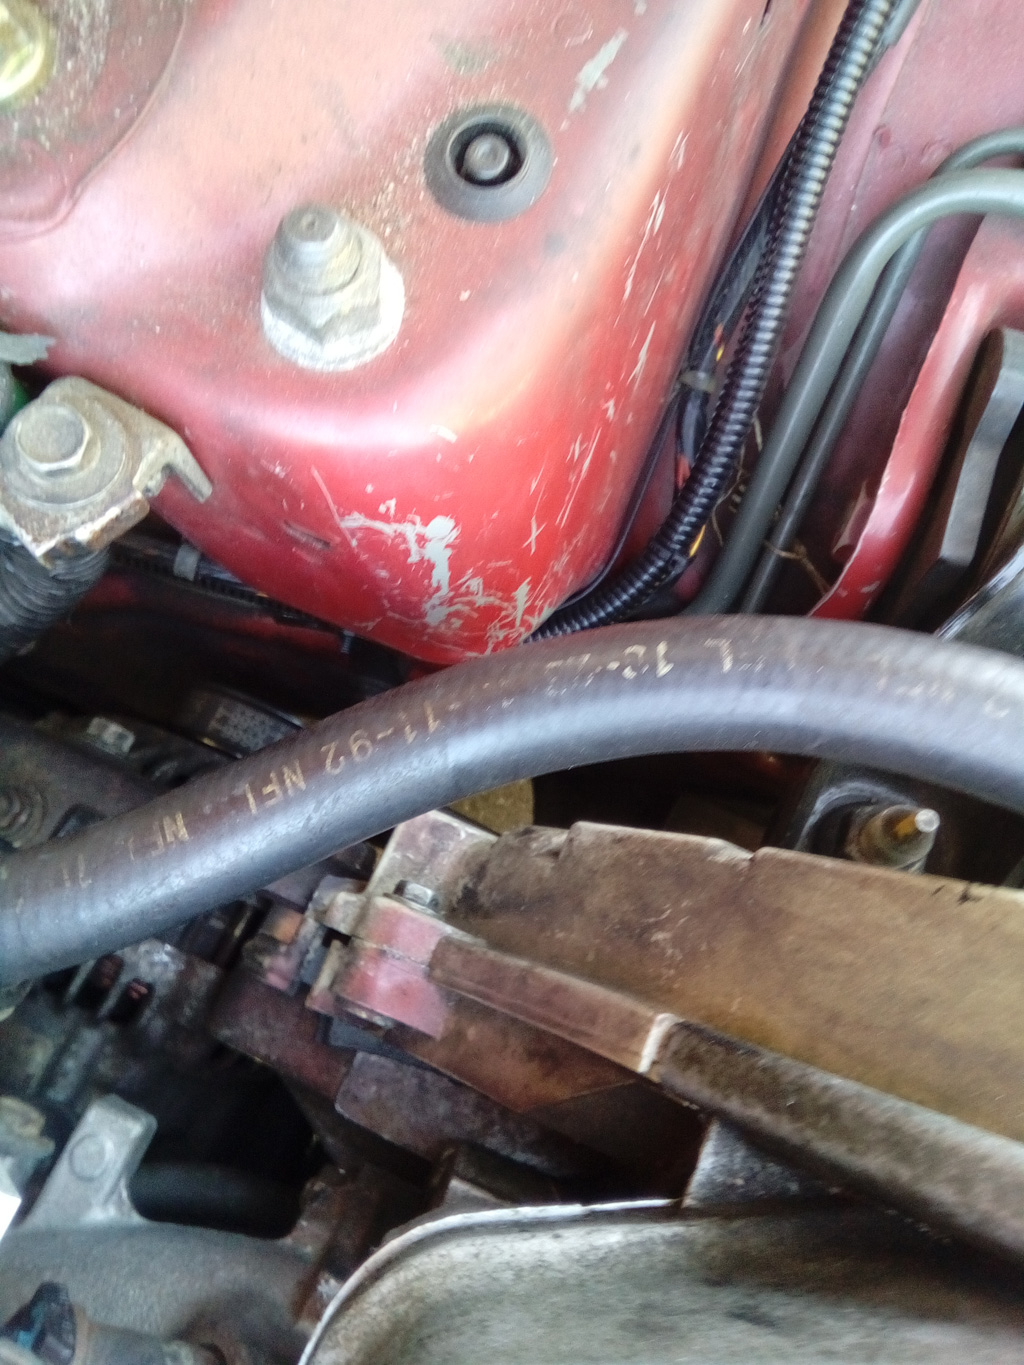
Mind you, I had already at this point split loomed and routed all the wire. I decided to run both wires up the drivers side, then continue the wires to the passenger side through the bumper bar. OEM wire, it is split behind the dash and then one wire runs on the drivers and the other the passenger side. Below you can see the loom and routing in the next handful of pictures.
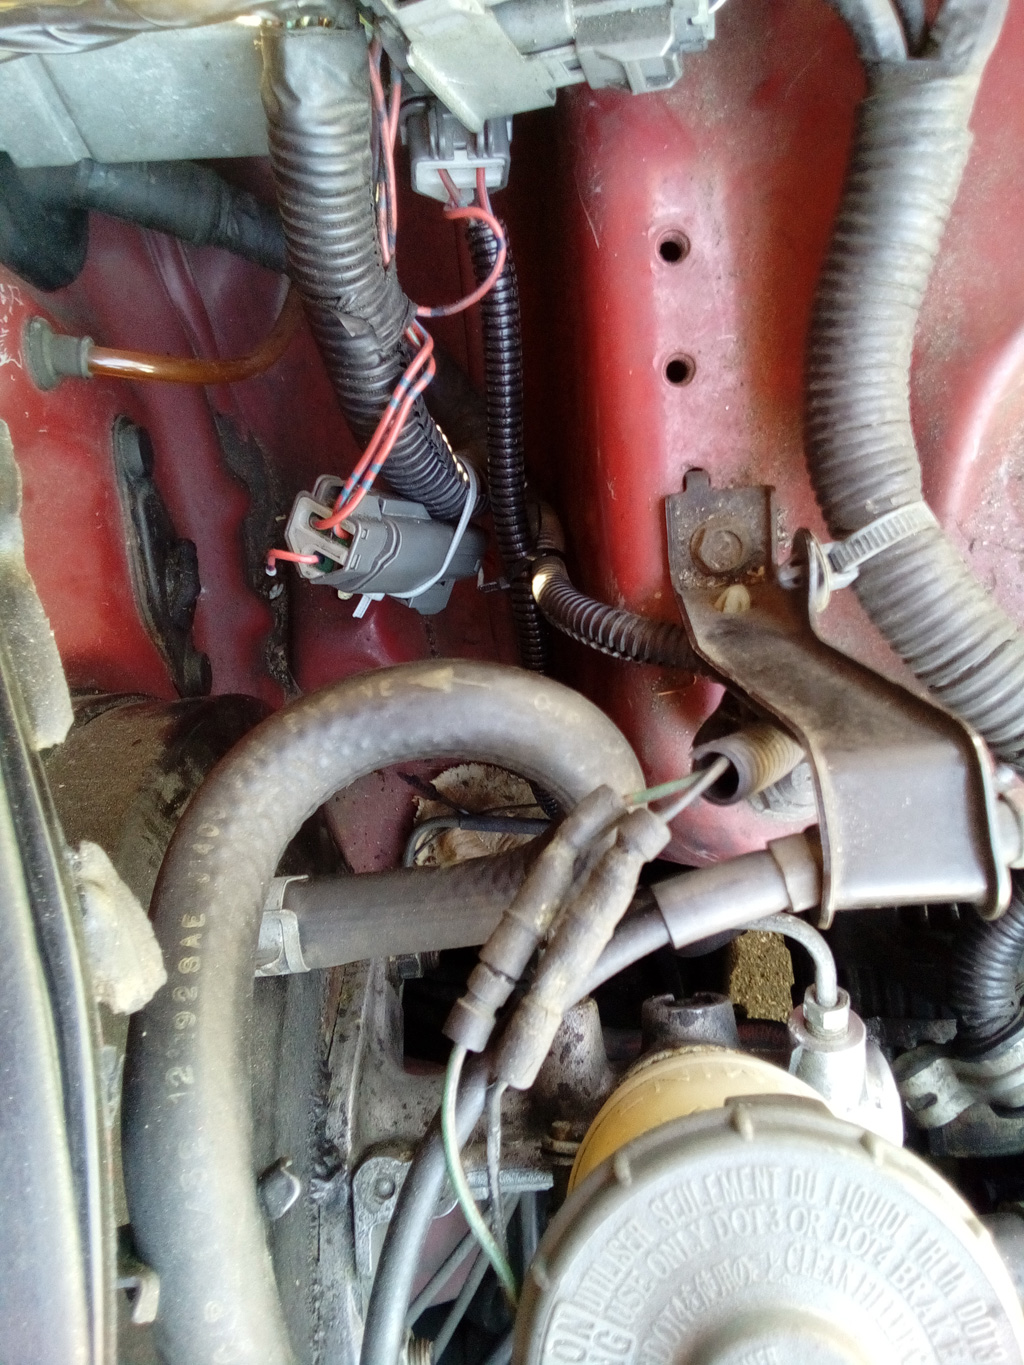

And now we are to the passenger side. We tie into the red/white wire on this side, heat shrink it up and then we can put everything back together (light lenses and bumper put back on and the job is done). Works flawlessly.
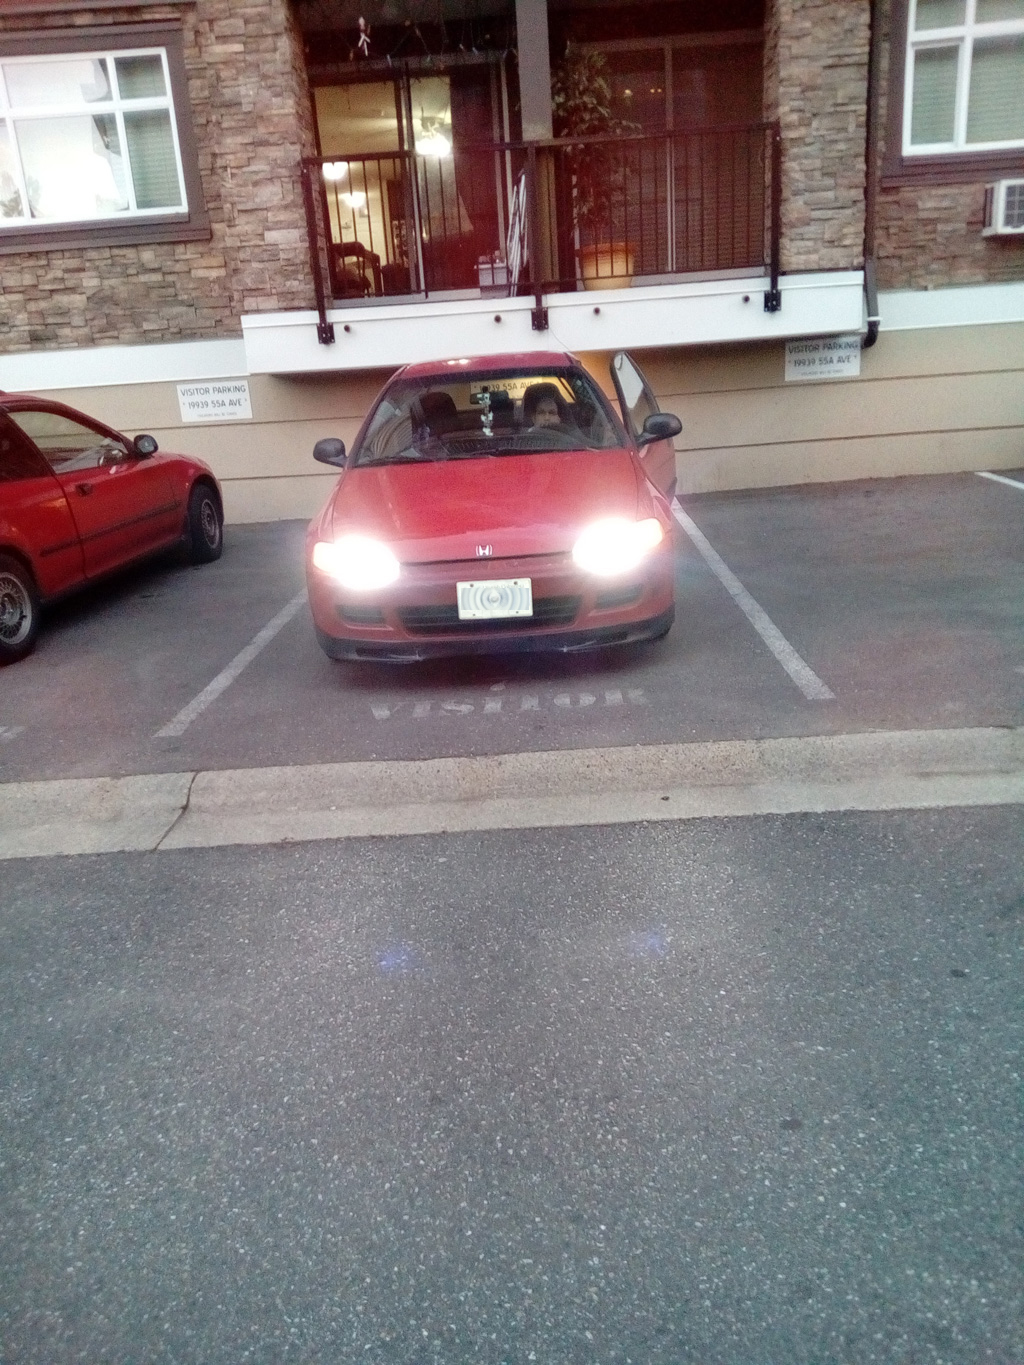
As promised, the finishing photos. The next two show the OPT7 LED bulbs all installed.
Here is the DRL, notice the side (running) lights are not on:
Then lights turned on as noted by the running lights being on too:
And you can see the brights are brighter than both the low beams and the DRL's now:
Now I figured out my routing for the wire and started soldering to my two new leads. All my connections are soldered, I am not a fan of clamps or crimping. And I do heat shrink my connections. And to keep it like the stock configuration, you will run the red/green wire to the drivers side and the red/blue to the passenger side.
To make my life easier I pulled out the whole head light lens and here you can see on the driver side, we patch into and then heat shrink the red/yellow wire for the low beam side of the bulb.
Mind you, I had already at this point split loomed and routed all the wire. I decided to run both wires up the drivers side, then continue the wires to the passenger side through the bumper bar. OEM wire, it is split behind the dash and then one wire runs on the drivers and the other the passenger side. Below you can see the loom and routing in the next handful of pictures.
And now we are to the passenger side. We tie into the red/white wire on this side, heat shrink it up and then we can put everything back together (light lenses and bumper put back on and the job is done). Works flawlessly.
As promised, the finishing photos. The next two show the OPT7 LED bulbs all installed.
Here is the DRL, notice the side (running) lights are not on:
Then lights turned on as noted by the running lights being on too:
And you can see the brights are brighter than both the low beams and the DRL's now:
Last edited by TomCat39; 06-18-2016 at 09:58 AM.
 06-17-2016, 09:11 PM
#5
Hysterically Calm
Thread Starter
Notice, there is no tie in to the low beams, just the low beam wiring itself. Of which run to a connector very high up the firewall on the inside (dashboard cabin side). It's even challenging to unplug the 20 connector plug with the dash removed. It's one of the main harness connectors I just wouldn't bother messing with.
This method allows a person to flip back and forth to which side of the bulb they tie into once completed.
It will also be the method I use to run my daytime running lights to my plasma LED halos once I have my new projection lenses in.
I honestly do not know how to make this mod any simpler.
06-17-2016, 09:18 PM
#7
Hysterically Calm
Thread Starter
 Shoulda seen em before I ran em to the low beam side..... Hahaha.
Trending Topics
06-19-2016, 08:54 PM
#8
Next level would be to get LHD EDM headlamps and run the city lights as DRLs. This would reduce the brightness considerably, back about to previous levels.
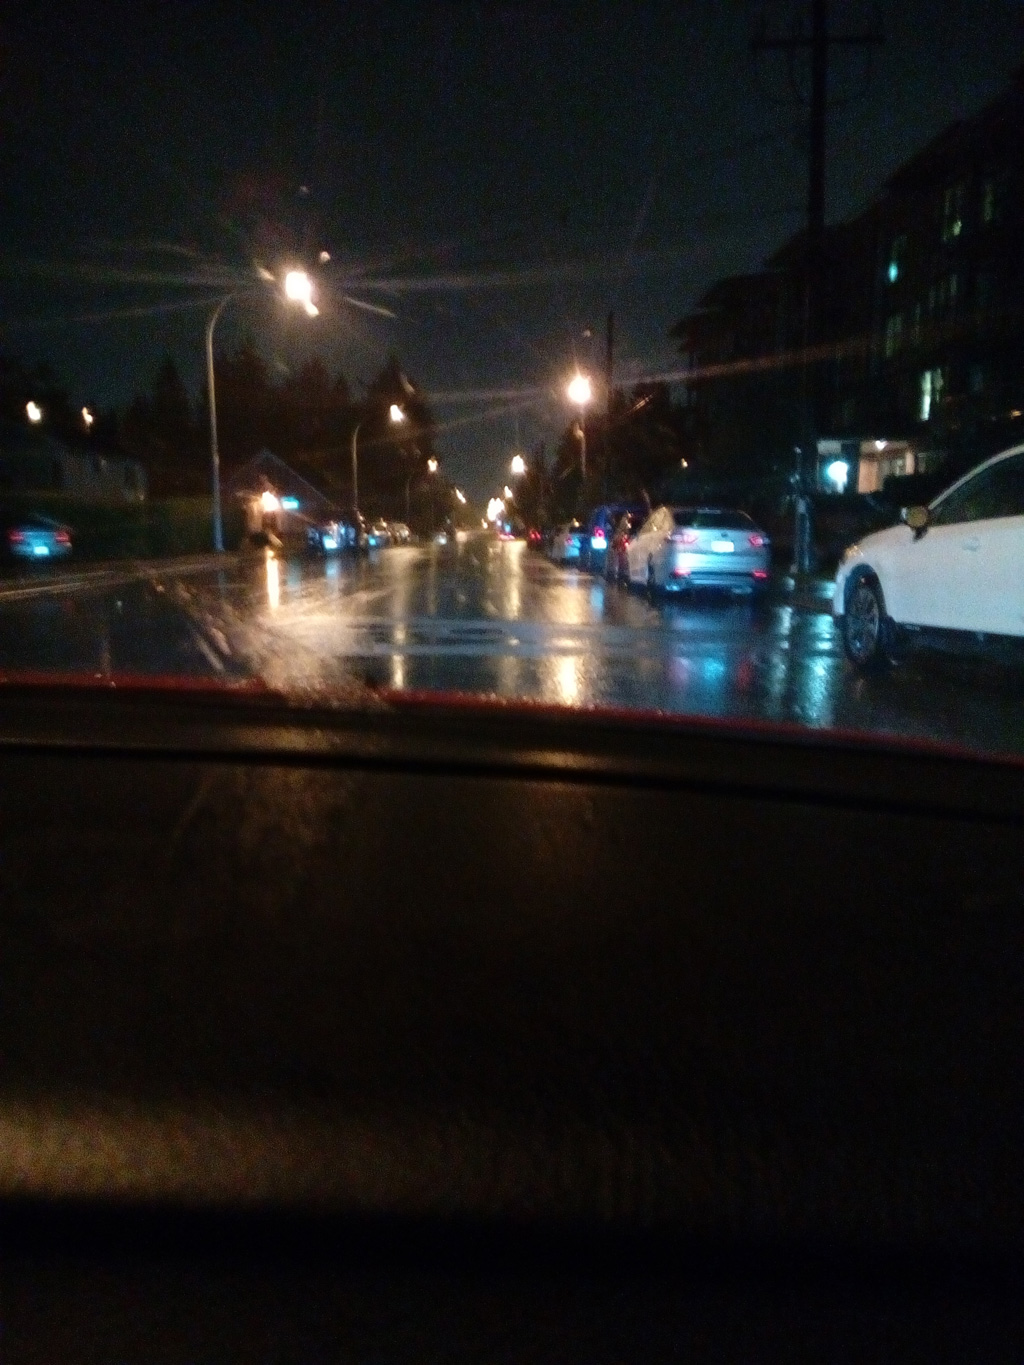
I'm really curious about these LED H4 replacements, since the headlamps on our 5th Gens are pitiful. EDM provide a slight improvement, but still bad. Since you're in SW BC, how is visibility whilst driving at night on wet roads? Can you see better? I find this is the worst condition due to the reduction in the amount of light retro-reflected by the road surface back toward me.
I'm really curious about these LED H4 replacements, since the headlamps on our 5th Gens are pitiful. EDM provide a slight improvement, but still bad. Since you're in SW BC, how is visibility whilst driving at night on wet roads? Can you see better? I find this is the worst condition due to the reduction in the amount of light retro-reflected by the road surface back toward me.
06-20-2016, 05:29 AM
#9
Hysterically Calm
Thread Starter
We did notice these light up the road signs and road markings better at night when dry. Need to see if that backfires and becomes an issue once the road gets wet.
Will let you know.
10-06-2016, 08:51 PM
#10
Hysterically Calm
Thread Starter
Next level would be to get LHD EDM headlamps and run the city lights as DRLs. This would reduce the brightness considerably, back about to previous levels.
I'm really curious about these LED H4 replacements, since the headlamps on our 5th Gens are pitiful. EDM provide a slight improvement, but still bad. Since you're in SW BC, how is visibility whilst driving at night on wet roads? Can you see better? I find this is the worst condition due to the reduction in the amount of light retro-reflected by the road surface back toward me.
I'm really curious about these LED H4 replacements, since the headlamps on our 5th Gens are pitiful. EDM provide a slight improvement, but still bad. Since you're in SW BC, how is visibility whilst driving at night on wet roads? Can you see better? I find this is the worst condition due to the reduction in the amount of light retro-reflected by the road surface back toward me.
Hope the images help. 2 posts of 6 pictures each:
 10-06-2016, 08:52 PM
#11
Hysterically Calm
Thread Starter


 10-06-2016, 09:07 PM
#12
Honda-Tech Member
iTrader: (3)
Join Date: Jul 2003
Location: 808 state
Posts: 486
Likes: 0
Received 0 Likes
on
0 Posts
Looks like bad glare to on coming vehicles. Seems the same as someone putting a pnp hid kit in. Can't beat a proper retrofit.
10-06-2016, 09:18 PM
#13
Hysterically Calm
Thread Starter
As for glare off the road into other drivers, I am doubtful.
Unfortunately I can't speak for being on the receiving end even if I were to hop in my car and face my wife's vehicle as all lights including stock lights bother me. Some more so than others but I don't get relief at all driving at night regardless if it's the yellow or blue lighting. And SUV and Trucks are the worst as their lights are at head level in these cars. I always have to look to the right as cars come up to me so that I have the fastest recovery from the lights of all kinds.
I also should add.... LED or not, Projector or not, retrofit or not, more than anything, the color of the light is the real factor on how blinding it is. As was pointed out to me, the blue based (pure white) light is the most blinding regardless of the lens. Yellow based lights (halogens) are least blinding due to our genetic makeup of our eyes.
But since pure white is the new standard, seeing the road better is helpful since the blinding light is increasingly more present.
Last edited by TomCat39; 10-06-2016 at 09:45 PM.
10-06-2016, 11:46 PM
#14
Honda-Tech Member
iTrader: (3)
Join Date: Jul 2003
Location: 808 state
Posts: 486
Likes: 0
Received 0 Likes
on
0 Posts
Gotcha. Any chance you could do some night shots against a wall? I'm still interested to see the difference.
10-07-2016, 08:48 AM
#15
Hysterically Calm
Thread Starter
10-07-2016, 03:05 PM
#17
Honda-Tech Member
I have led's in my sixth gen. They are ok but are not as strong as halogen and are overpowered by the car driving next to you. Also in low light settings, they are difficult to see with. What I mean is that unless it's pitch dark night outside they have poor visibility compared to halogen. High beams work awesome, but I can't blind people like that. Light beam cutoff is extremely crisp, but like I said their brightness isn't the same intensity as halogen
Your low beam led bulb should have a scatter shield. If it doesn't you are running what is on my car the high beam
The maximum benefit is that they are very low draw on the alternator. The car doesn't dip heavily at idle like it did with halogen when you turn them on.
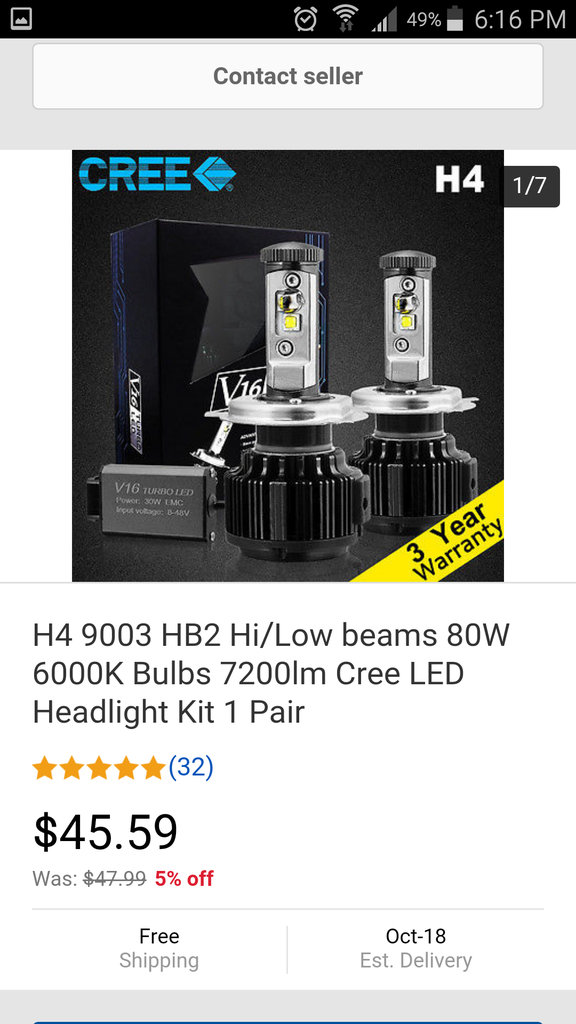
I thought about the opt7 brand, but decided against them since they were too expensive and offered no warranty
I have no complaints with my led headlights. My halogen silverstars were vastly superior however they have a very short life. I didn't want to mess with hid, and I'm not staying halogen, so to me my $45 for them was an adequate price
Your low beam led bulb should have a scatter shield. If it doesn't you are running what is on my car the high beam
The maximum benefit is that they are very low draw on the alternator. The car doesn't dip heavily at idle like it did with halogen when you turn them on.
I thought about the opt7 brand, but decided against them since they were too expensive and offered no warranty
I have no complaints with my led headlights. My halogen silverstars were vastly superior however they have a very short life. I didn't want to mess with hid, and I'm not staying halogen, so to me my $45 for them was an adequate price

Last edited by chrysler kid; 10-07-2016 at 03:25 PM.
10-24-2016, 07:25 PM
#19
Hysterically Calm
Thread Starter
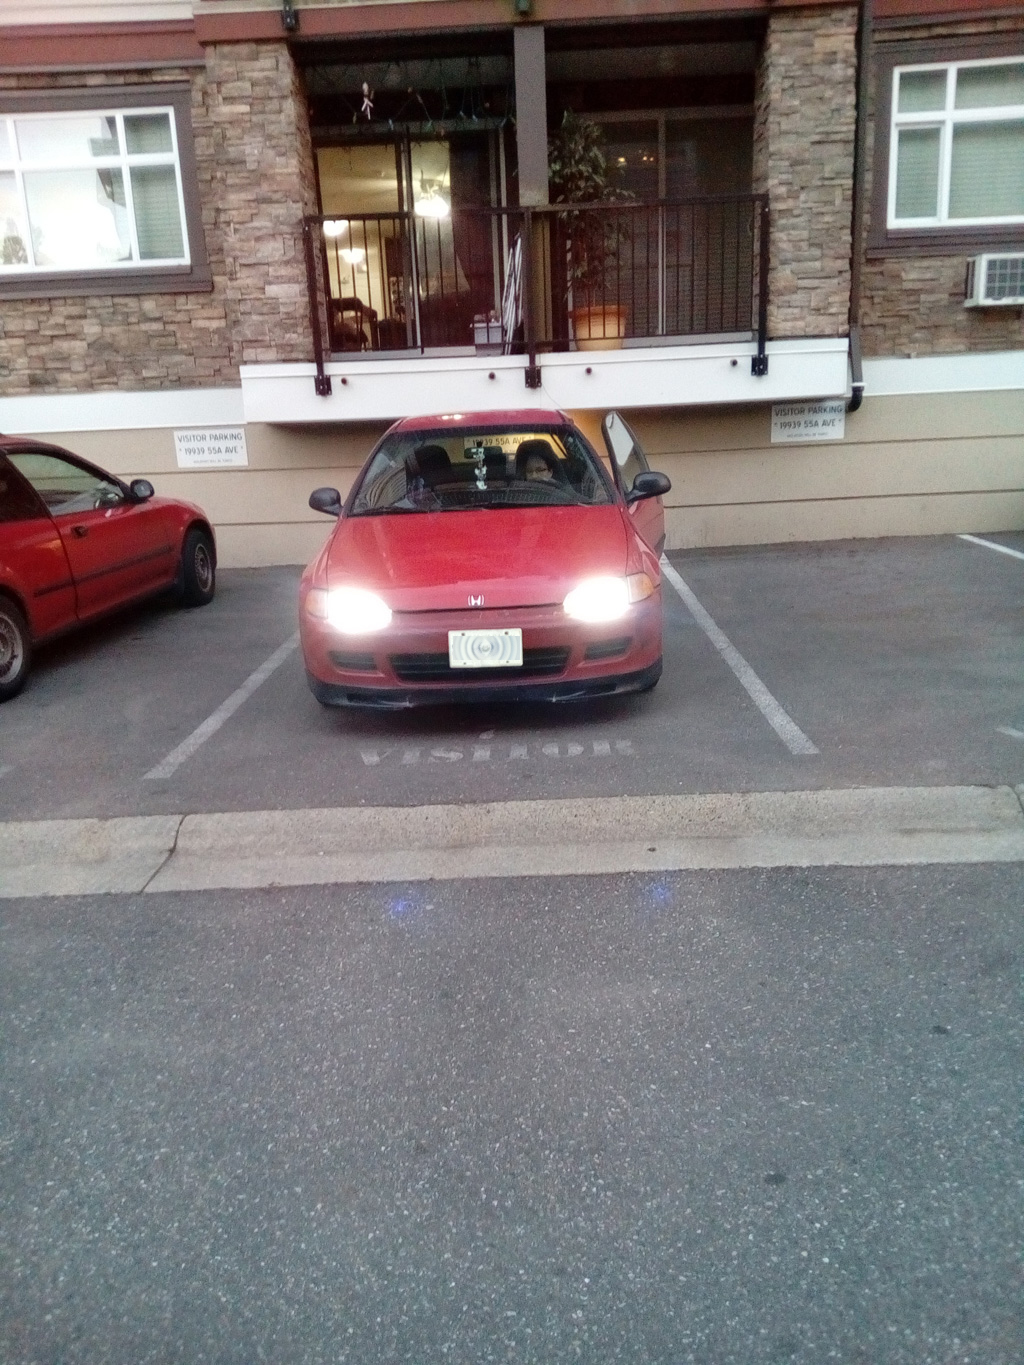
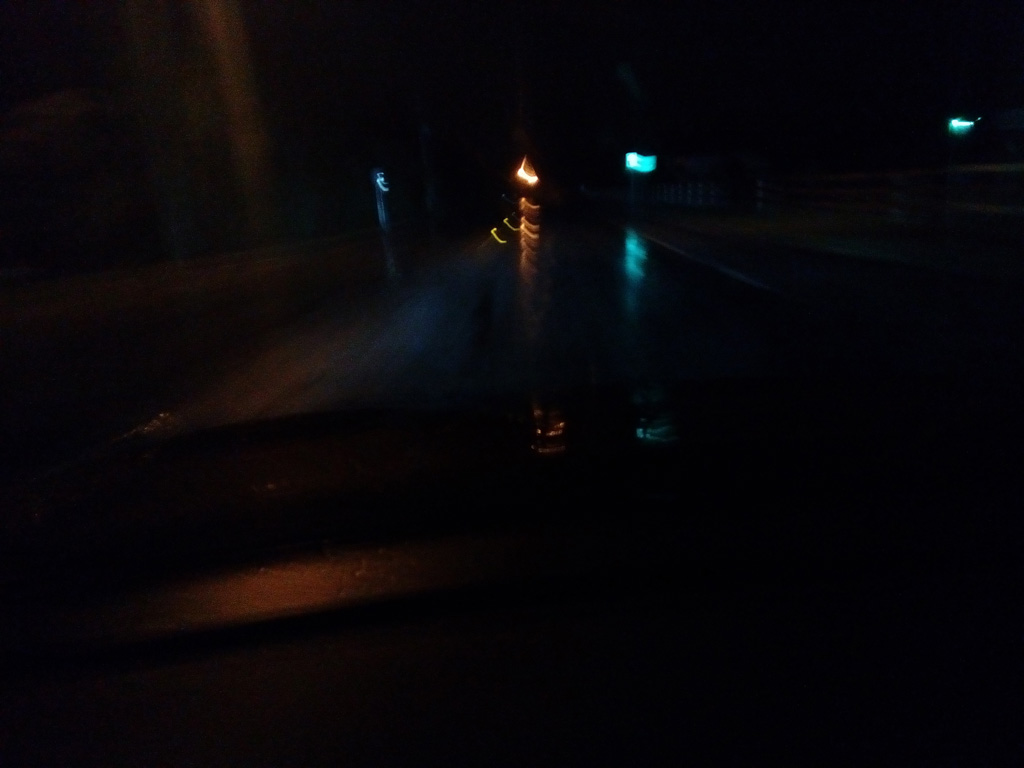
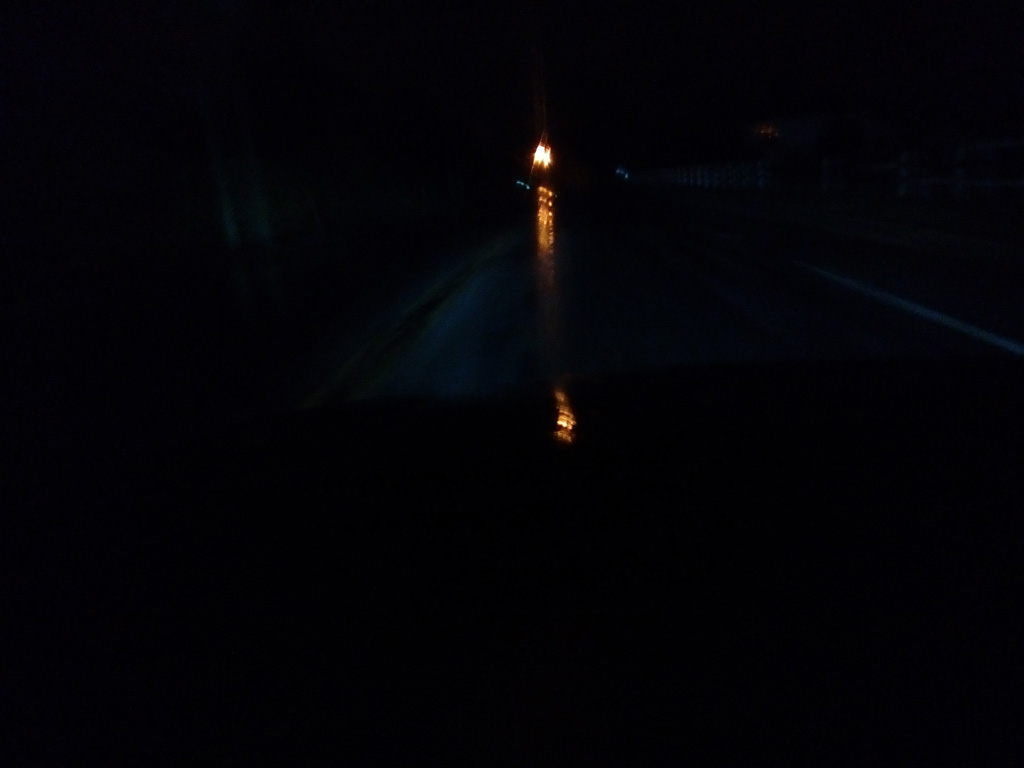
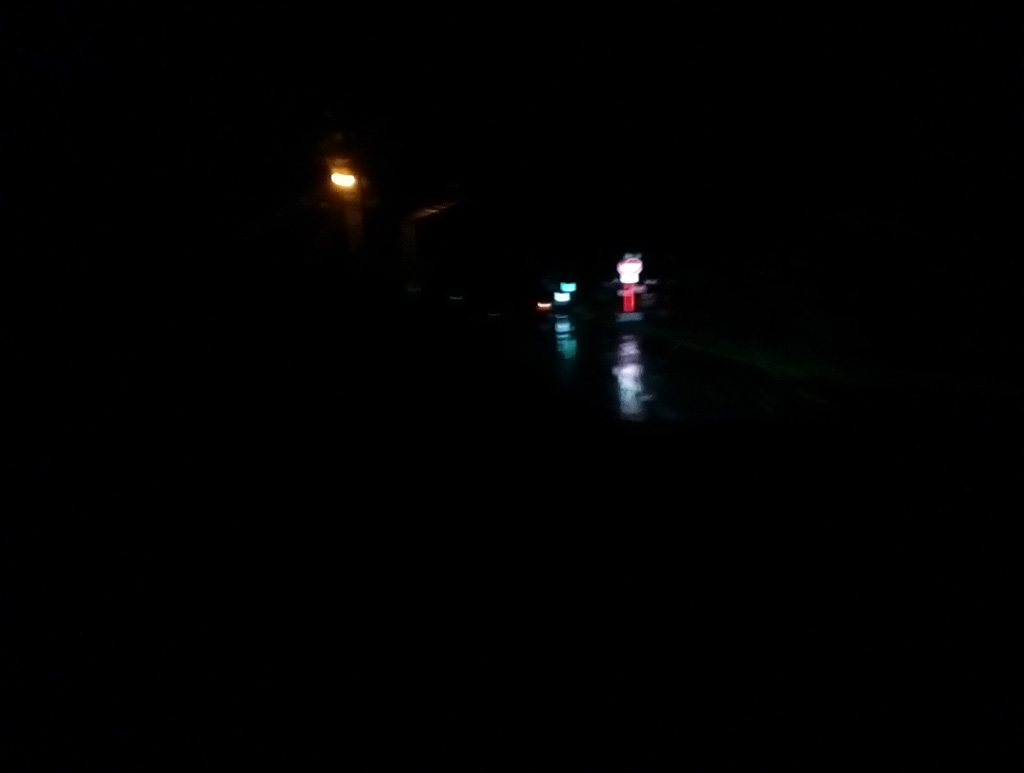
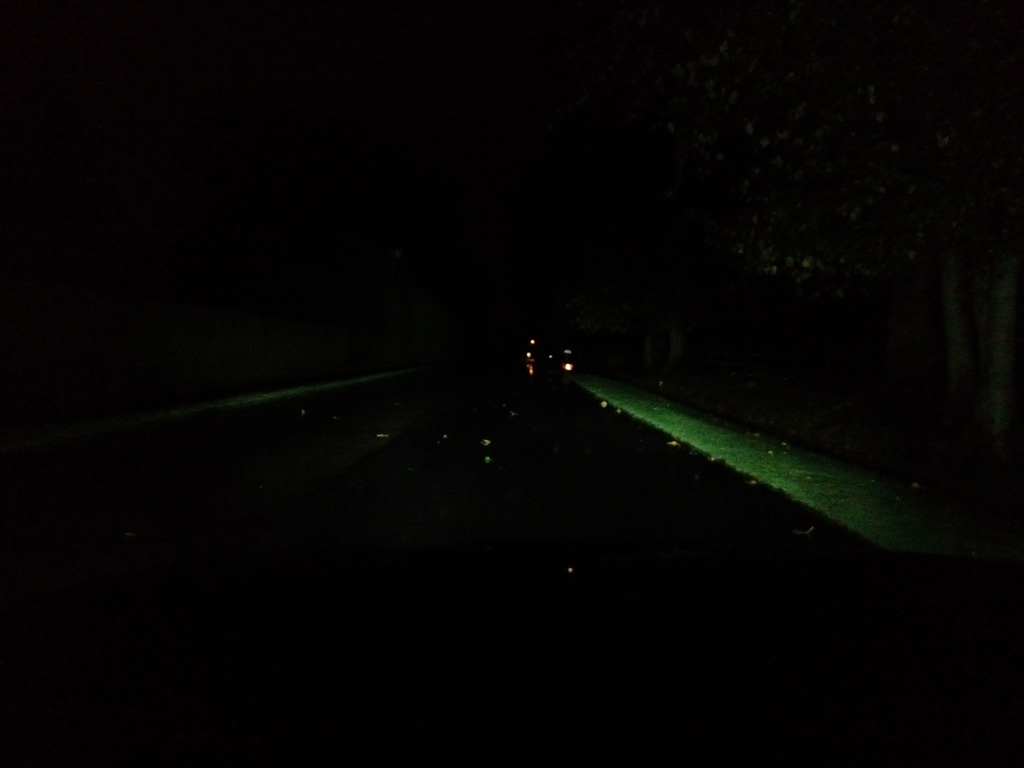
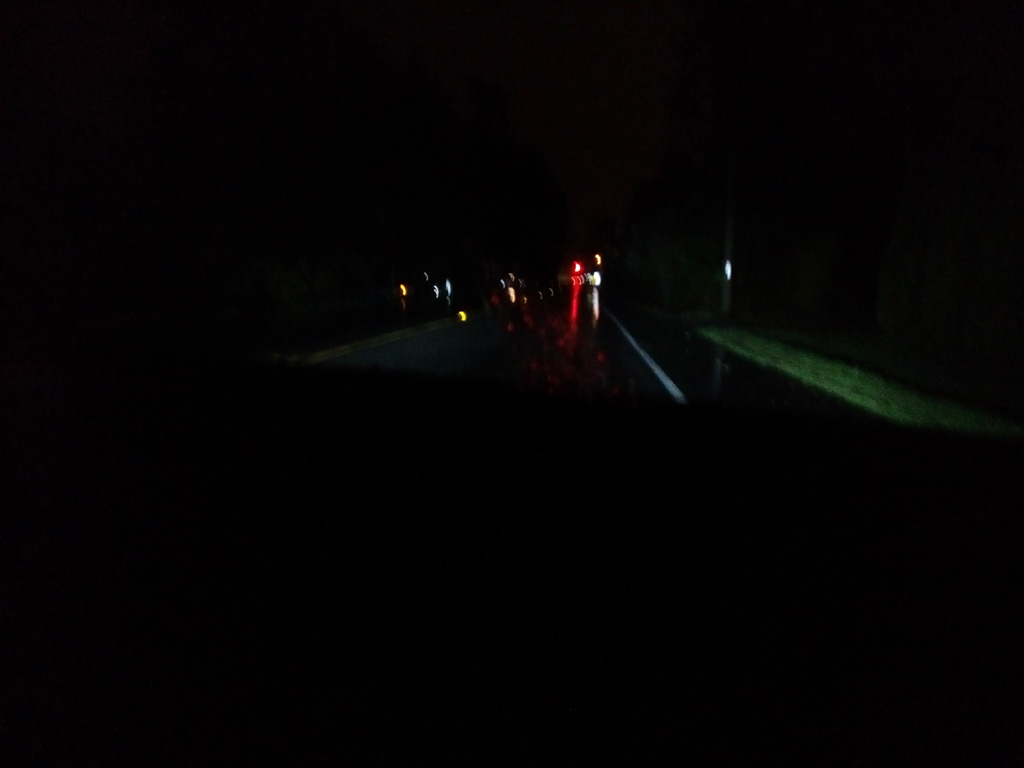
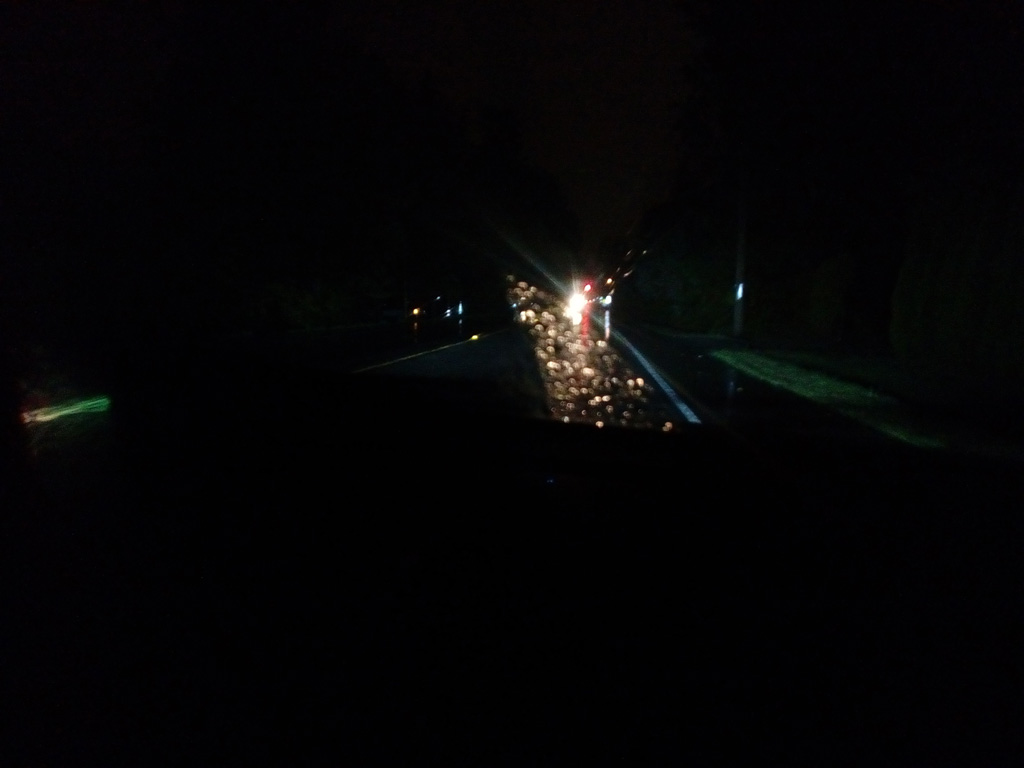
Finally drove my wifes car at night again.
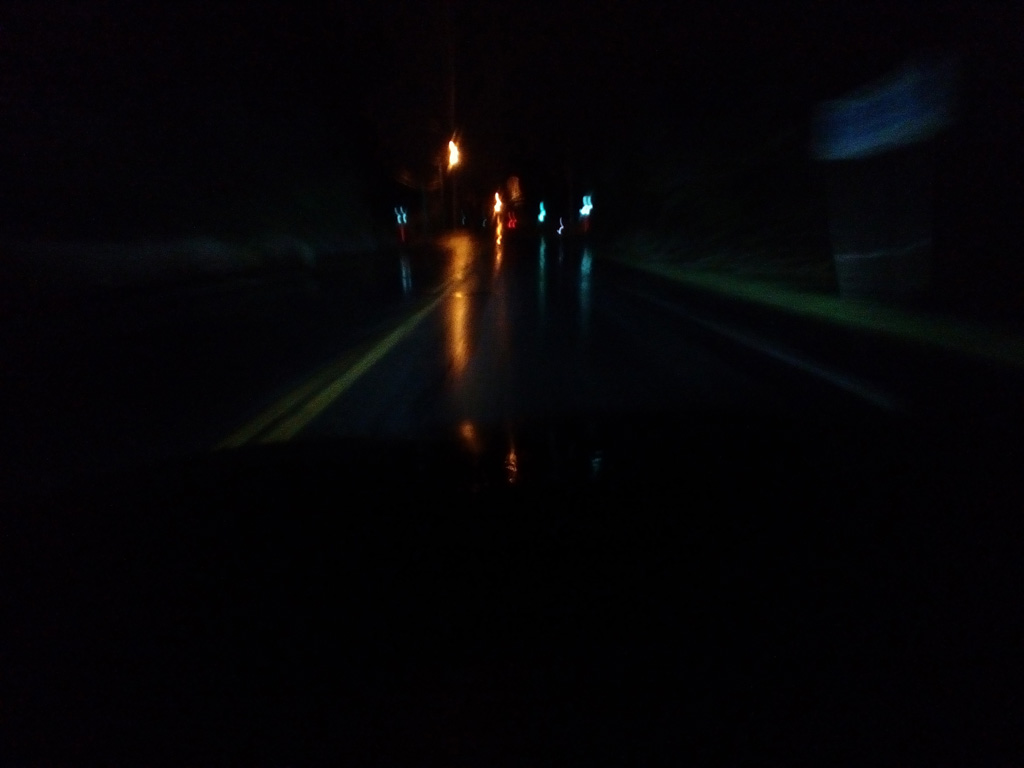
Here is some pics. The distant ones are between 20-30 feet or so.
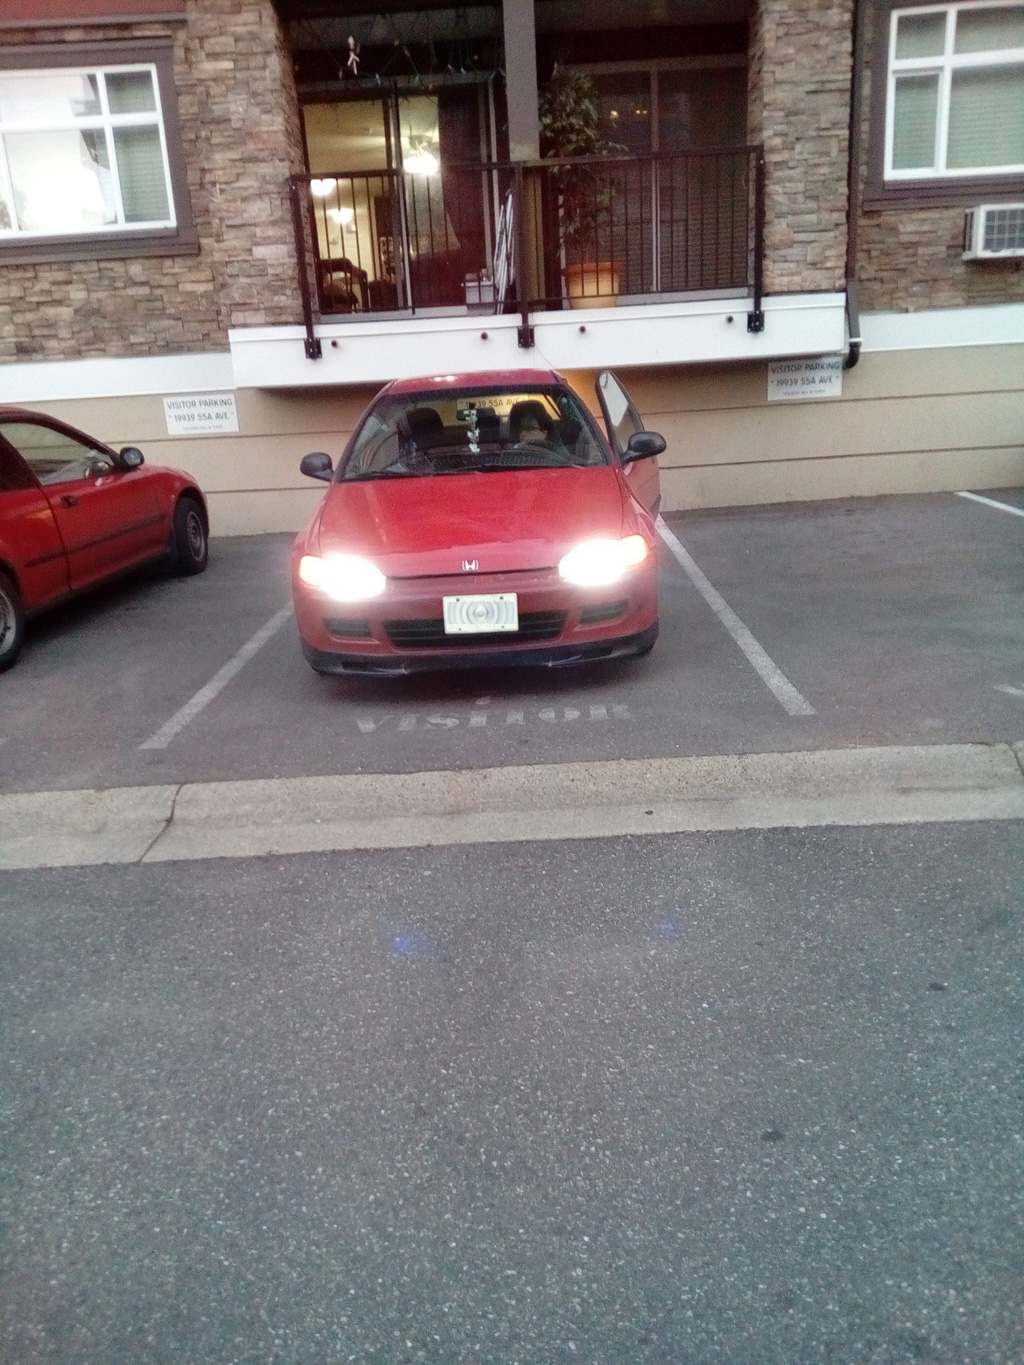
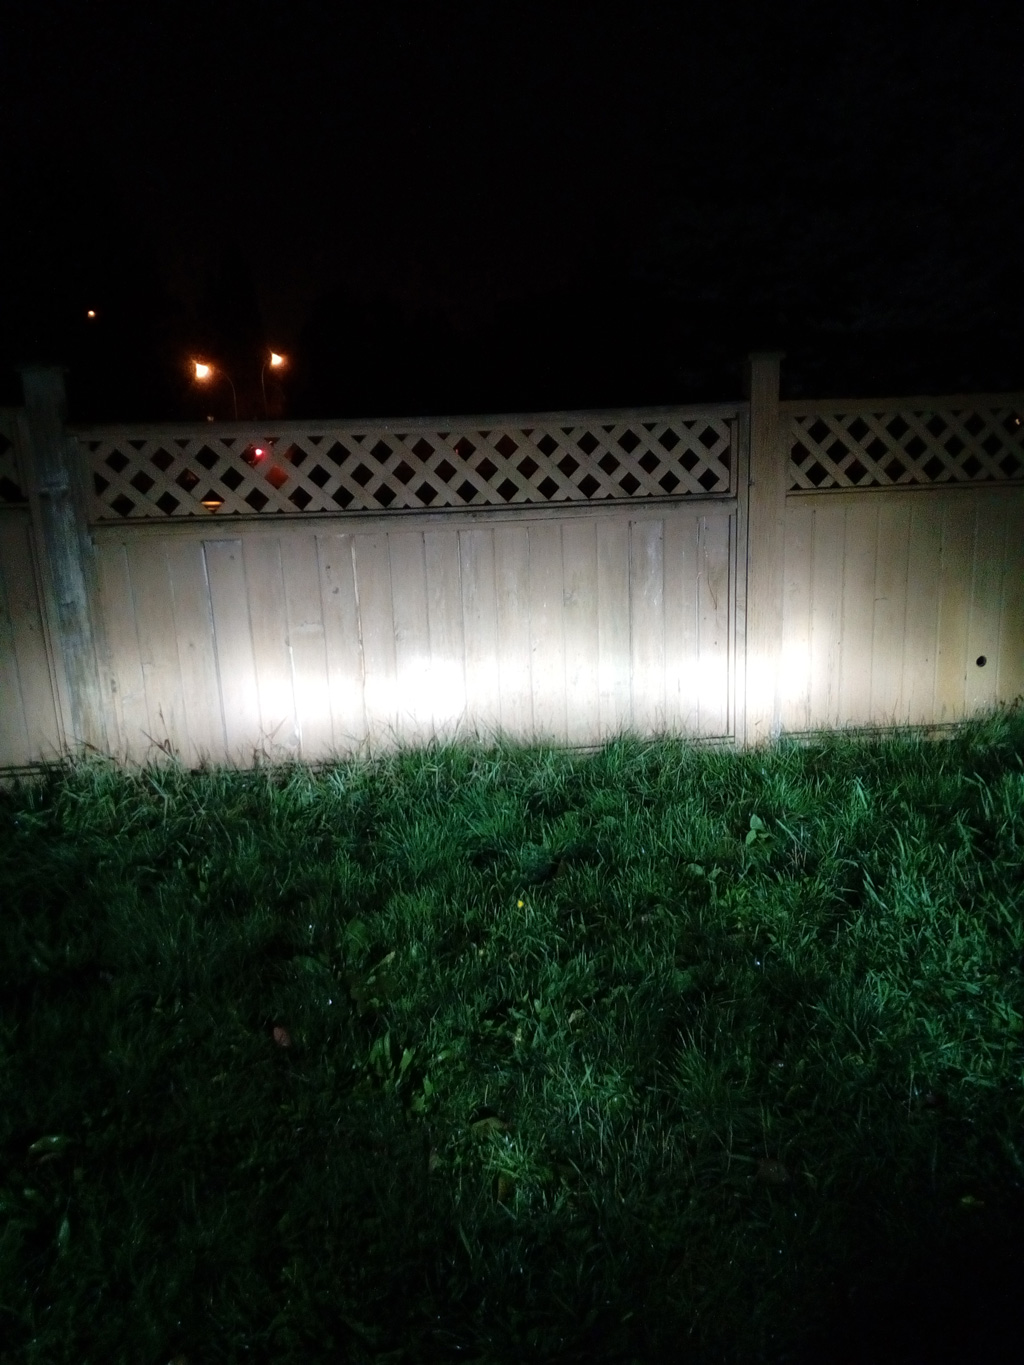
The closer one I noticed the nose pointed up but it shows the strong points of the LED lights.
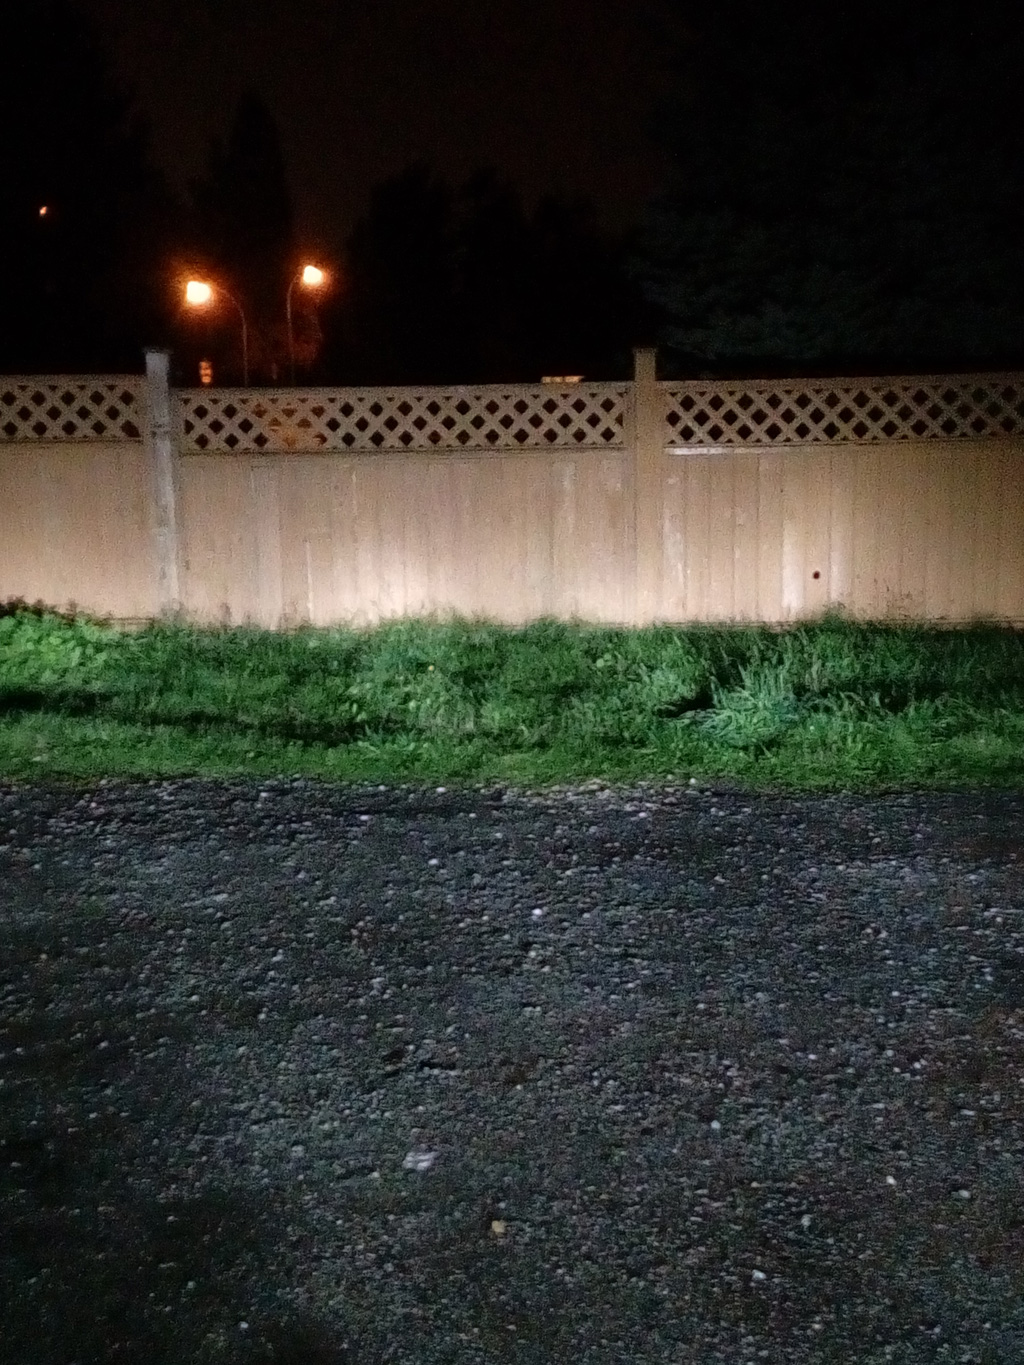
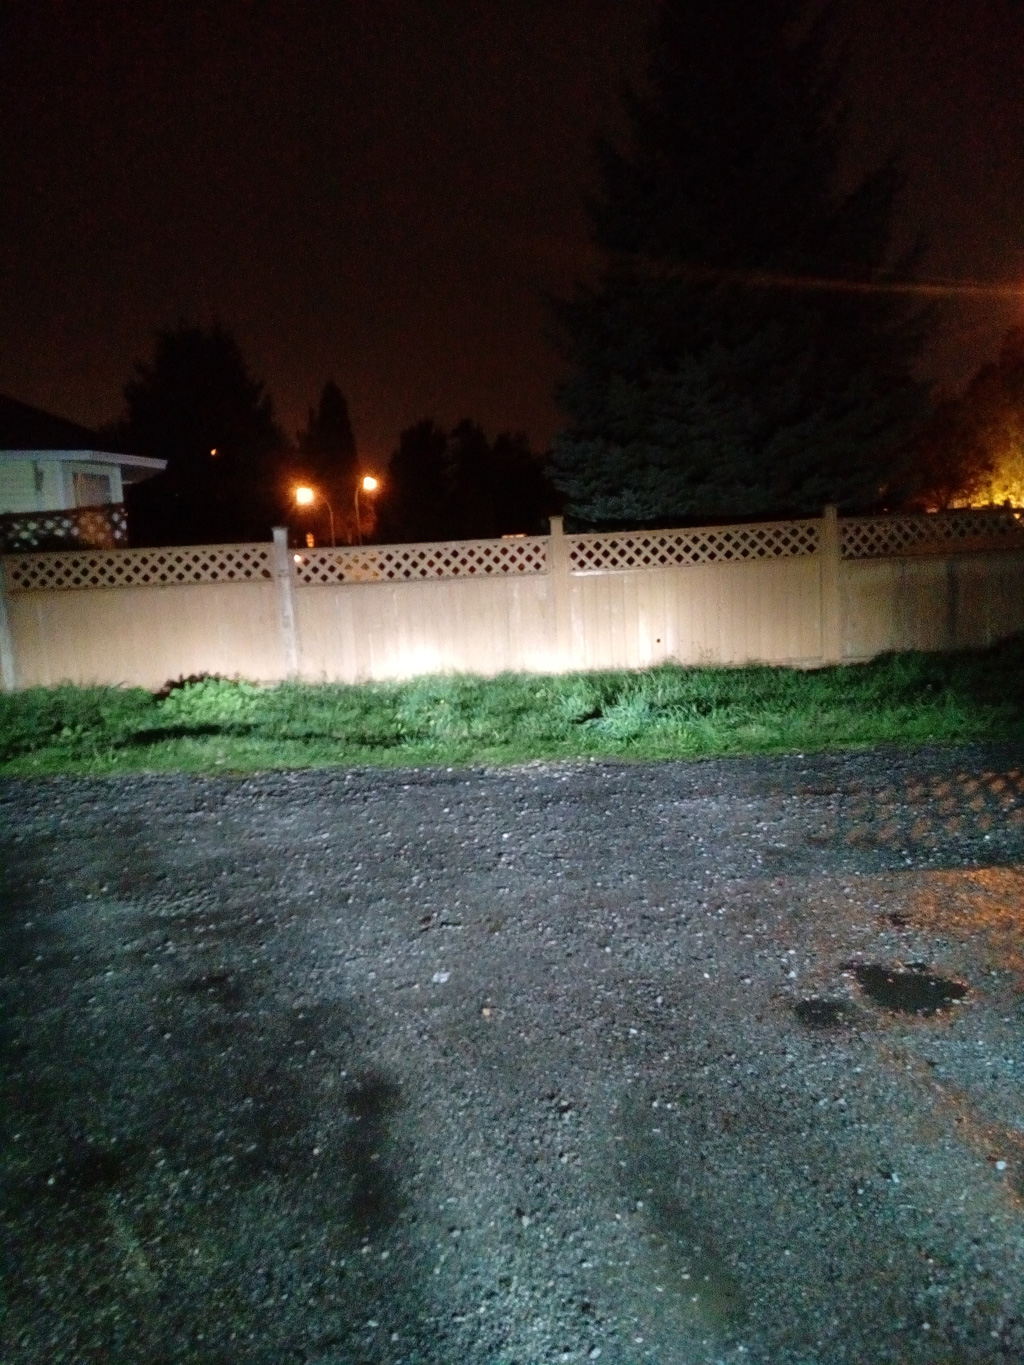
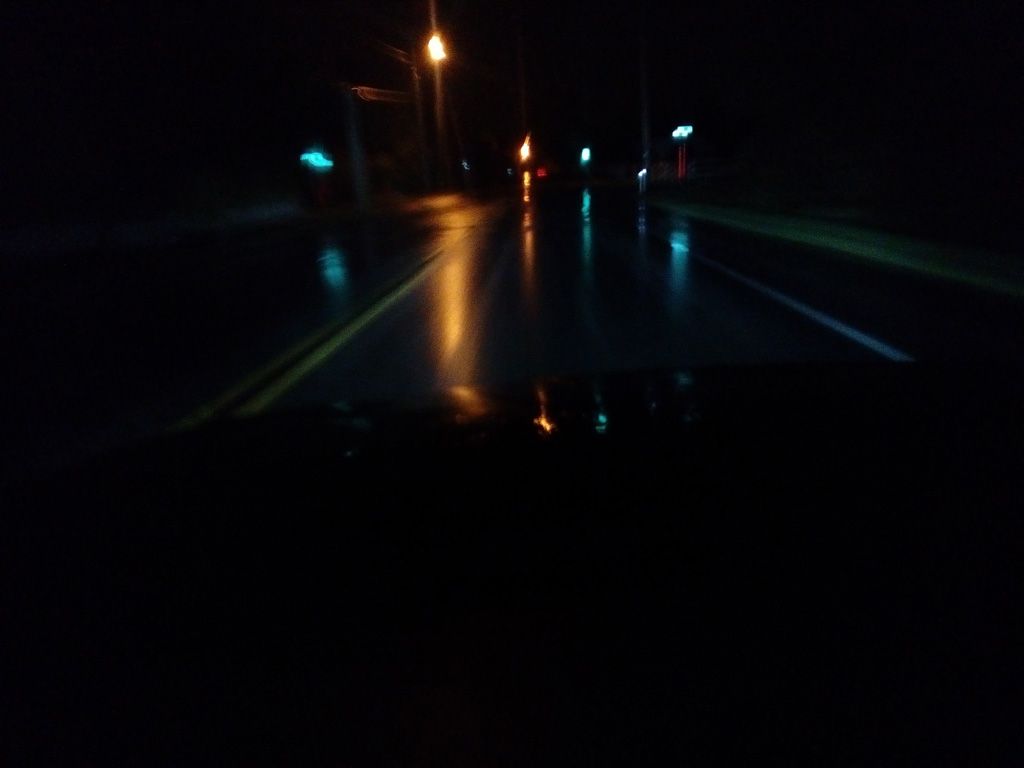
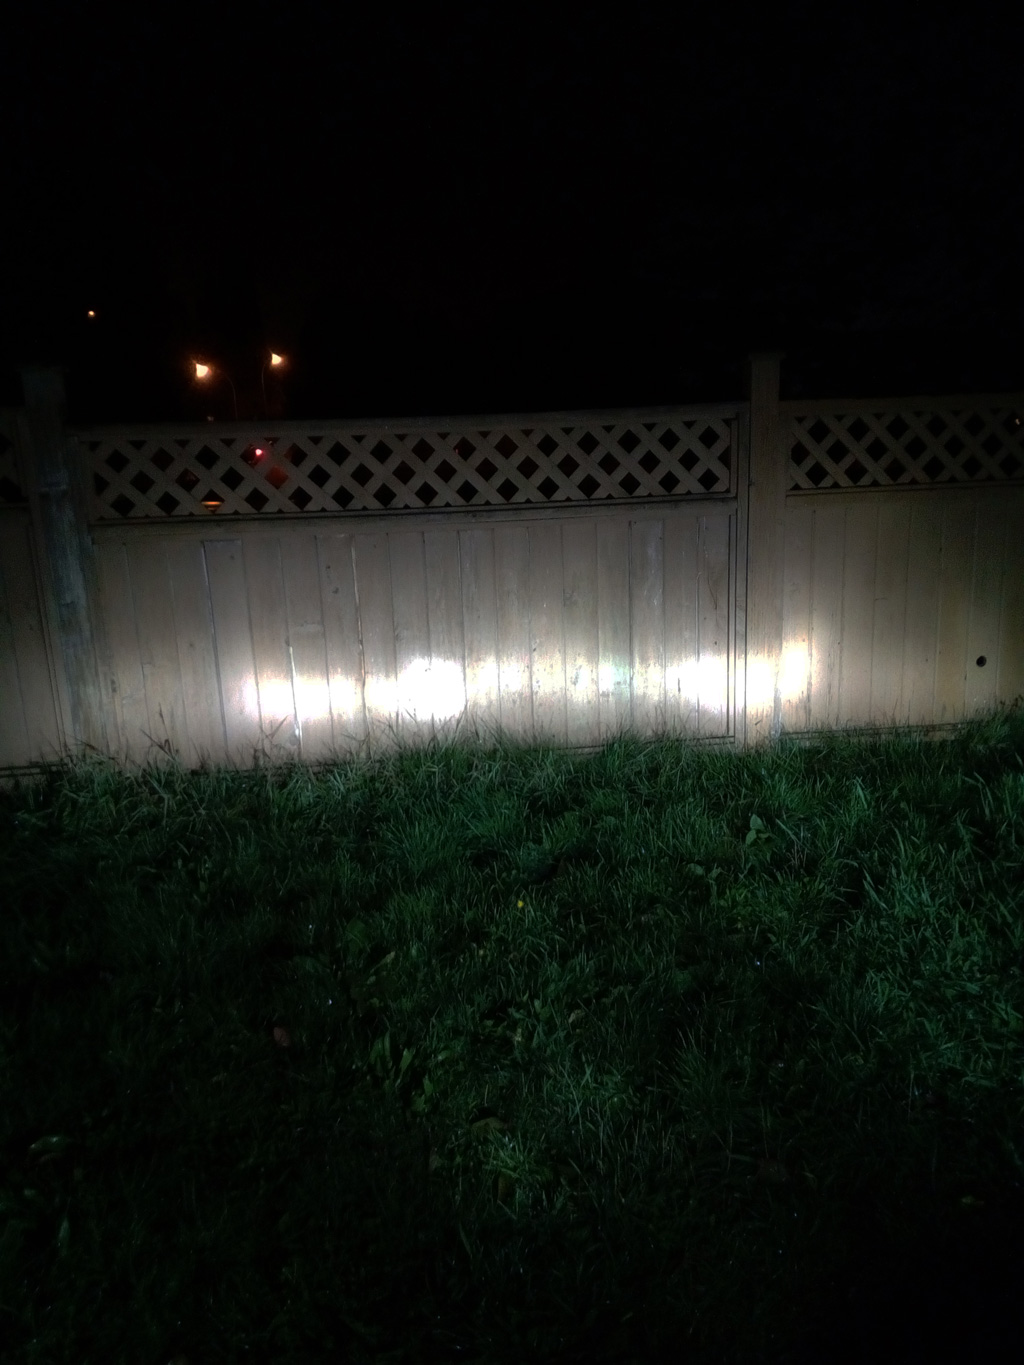
This last one is the previous one but I used photoshop to darken it via brightness/darkness slider. This shows closer the strong and weak parts of the lighting much closer to what I was seeing with my human eyeballs.
Here is some pics. The distant ones are between 20-30 feet or so.
The closer one I noticed the nose pointed up but it shows the strong points of the LED lights.
This last one is the previous one but I used photoshop to darken it via brightness/darkness slider. This shows closer the strong and weak parts of the lighting much closer to what I was seeing with my human eyeballs.
10-25-2016, 10:18 AM
#21
Hysterically Calm
Thread Starter
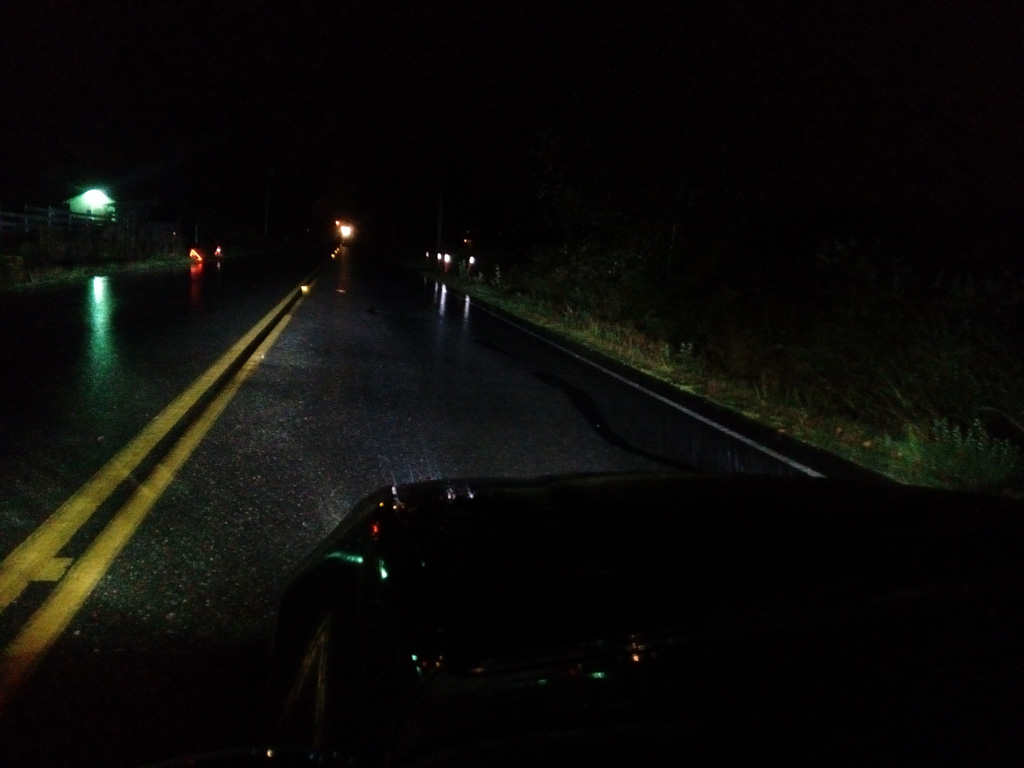
In person, I noticed the ditch very clearly.
I am not sure just how wide it should be though. I found it lights up the ditches and side reflectors on both sides of the car very well.
The extremely intense area that blinds everyone is directed forward, down and to the right as is required by all aiming guides I've found.
 10-25-2016, 01:31 PM
#22
Fish Twig
Join Date: Nov 2005
Location: Still hunting that foo up there
Posts: 15,555
Received 309 Likes
on
285 Posts
You might want to confirm that with the pics in post #10 and #11. You see the trees on the side of the road in the pics.
In person, I noticed the ditch very clearly.
I am not sure just how wide it should be though. I found it lights up the ditches and side reflectors on both sides of the car very well.
The extremely intense area that blinds everyone is directed forward, down and to the right as is required by all aiming guides I've found.
10-25-2016, 03:31 PM
#23
Hysterically Calm
Thread Starter
If you could provide the pics on dark farm roads so I can compare.....
10-25-2016, 06:43 PM
#24
Fish Twig
Join Date: Nov 2005
Location: Still hunting that foo up there
Posts: 15,555
Received 309 Likes
on
285 Posts
Aiight...Imma wait til 12 midnight and ride up 183. Nice weather tonight anyways, hopefully I don't find me a deer.

Thread
Thread Starter
Forum
Replies
Last Post
civictypenos
Honda Civic / Del Sol (1992 - 2000)
22
04-02-2003 03:22 PM
TakaIntegra
Honda / Acura
4
06-22-2002 08:02 PM