
96-98 headlights
 07-05-2004, 10:53 PM
#1
Thread Starter
Join Date: Jun 2004
Location: arroyo grande, ca, us
Posts: 30
Likes: 0
Received 0 Likes
on
0 Posts
sup people...i'm going to attempt to clear the amber out of my oem headlights on my 96 coupe, i tried searching the topic, but i couldn't find anything...so if anyone has any suggestions or advice on going about this it would be great...thanks in advance


 07-05-2004, 11:09 PM
#7
Honda-Tech Member
iTrader: (3)
Join Date: Jul 2003
Location: 808 state
Posts: 486
Likes: 0
Received 0 Likes
on
0 Posts
Heat the headlights up either with a heat gun or in your oven. Take them apart and remove the reflector. Use some silicone and put the headlights back together.
If you search there are detailed write ups on how to do it.
If you search there are detailed write ups on how to do it.
Trending Topics
07-05-2004, 11:19 PM
#9
Don't Trust Anyone
Join Date: Apr 2002
Location: Las Vegas
Posts: 7,224
Likes: 0
Received 0 Likes
on
0 Posts
<TABLE WIDTH="90%" CELLSPACING=0 CELLPADDING=0 ALIGN=CENTER><TR><TD>Quote, originally posted by EM1Guru »</TD></TR><TR><TD CLASS="quote"> </TD></TR></TABLE>

</TD></TR></TABLE>
07-05-2004, 11:23 PM
#10
Honda-Tech Member
Join Date: Mar 2003
Location: Center of, CA
Posts: 559
Likes: 0
Received 0 Likes
on
0 Posts
<TABLE WIDTH="90%" CELLSPACING=0 CELLPADDING=0 ALIGN=CENTER><TR><TD>Quote, originally posted by SHAGGY »</TD></TR><TR><TD CLASS="quote">
</TD></TR></TABLE>
dont be jealous bish.
</TD></TR></TABLE>dont be jealous bish.
 07-05-2004, 11:34 PM
#13
Member
Join Date: Jul 2003
Posts: 5,738
Likes: 0
Received 0 Likes
on
0 Posts
hah replying with a hammer to ur own trend huh? the Amber piece are connected to the clear piece.. so just preheat oven to 250 and stick it in there for 11 min, peal apart, take off amber and put back together
07-06-2004, 10:19 AM
#15
Join Date: Sep 2003
Location: Emo Town, CA, 90804
Posts: 1,826
Likes: 0
Received 0 Likes
on
0 Posts
Here you go man...this is what I used when I did mine 3 years ago. I also painted mine flat black.
http://home.mpinet.net/~t-hero/Headlights.htm
http://home.mpinet.net/~t-hero/Headlights.htm
07-06-2004, 10:43 AM
#16
Thread Starter
Join Date: Jun 2004
Location: arroyo grande, ca, us
Posts: 30
Likes: 0
Received 0 Likes
on
0 Posts
damn thanks man, that is a very informative write up, that's what i was l00kin for...i'm gonna do get on this tomorrow or wednesday, about how long did this take you???
07-06-2004, 10:49 AM
#17
Join Date: Sep 2003
Location: Emo Town, CA, 90804
Posts: 1,826
Likes: 0
Received 0 Likes
on
0 Posts
The first time....maybe two hours (without painting). However, this was before people started doing the oven trick. I've since done it that way several times and it's much faster.
07-06-2004, 10:54 AM
#18
Junior Member
Join Date: Aug 2002
Posts: 721
Likes: 0
Received 0 Likes
on
0 Posts
https://honda-tech.com/zerothread?id=753457
this is what i followed to do my girls car.
took maybe a few hours, mostly letting the paint dry.
this is what i followed to do my girls car.
took maybe a few hours, mostly letting the paint dry.
07-06-2004, 02:02 PM
#19
Member
Join Date: Jul 2003
Posts: 5,738
Likes: 0
Received 0 Likes
on
0 Posts
<TABLE WIDTH="90%" CELLSPACING=0 CELLPADDING=0 ALIGN=CENTER><TR><TD>Quote, originally posted by undertheradar »</TD></TR><TR><TD CLASS="quote">Here you go man...this is what I used when I did mine 3 years ago. I also painted mine flat black.
http://home.mpinet.net/~t-hero/Headlights.htm</TD></TR></TABLE>
holy **** man it took us 11 minutes in a preheated oven at 250degrees to get it open .. and that page is saying use a hairdryer that would take freaking forever
http://home.mpinet.net/~t-hero/Headlights.htm</TD></TR></TABLE>
holy **** man it took us 11 minutes in a preheated oven at 250degrees to get it open .. and that page is saying use a hairdryer that would take freaking forever
07-08-2004, 12:44 PM
#20
Thread Starter
Join Date: Jun 2004
Location: arroyo grande, ca, us
Posts: 30
Likes: 0
Received 0 Likes
on
0 Posts
welp...i cleared my headlights this morning, took me about an hour and a half...only problem i had was...i cracked the chrome trim....couldn't fix it  but oh well, it looks awesome, i didn't paint them...i'm liking the look, i'll snap some pics later on...thanks for everyone's help
but oh well, it looks awesome, i didn't paint them...i'm liking the look, i'll snap some pics later on...thanks for everyone's help
 07-08-2004, 02:01 PM
#22
Member
Join Date: Apr 2004
Location: Mission Viejo, CA, USA
Posts: 1,290
Likes: 0
Received 0 Likes
on
0 Posts
I used a hairdryer..didn't know about the oven trick back then. But this is how you do the whole thing. You need to remove all the bumper clips inside the engine bay, then turn ur wheels and if u look by the wheel well, you'll see 1 screw on each side holding the bumper. After that, you canpull the bumper down without completely removing it. Then there will be I believe 4 bolts holding each headlight housing. Remove those and disconnect blinker bulb and the head light. Then the fixture should come out easily. To take the housing apart, preheat your oven to 250F and leave the housing in there for about 5 min. Get a screw driver and GENTLY pry the housing apart. I say gently because you can crack the housing. To remove the amber parts, there are about 2-3 screws holding them on. I reccomend that you paint the headlight housing as well, preferebly black. Then reassemble everything in reverse order.
Heres my housing:
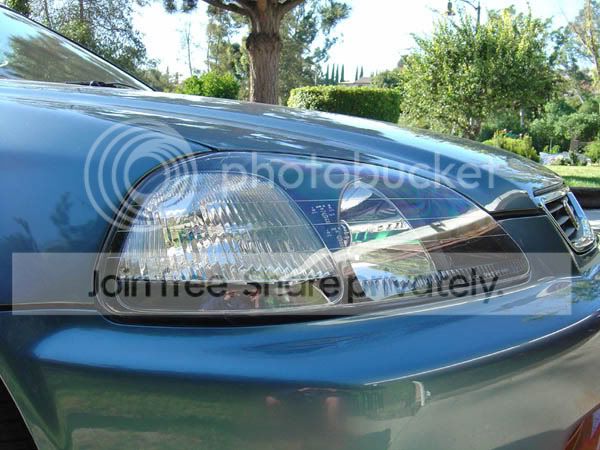
Heres my housing:
07-08-2004, 02:13 PM
#24
Member
Join Date: Apr 2004
Location: Mission Viejo, CA, USA
Posts: 1,290
Likes: 0
Received 0 Likes
on
0 Posts
Ouch..that sucks... Yeah you wanna be really careful with the oven. Leaving it in just a bit too long will ruin ur headlight. I sorta prefer heatgun/hair dryer even though it takes forever haha.
07-08-2004, 02:15 PM
#25
Junior Member
Join Date: Mar 2004
Location: we dont Play in the IA, UsA
Posts: 822
Likes: 0
Received 0 Likes
on
0 Posts
<TABLE WIDTH="90%" CELLSPACING=0 CELLPADDING=0 ALIGN=CENTER><TR><TD>Quote, originally posted by cre18 »</TD></TR><TR><TD CLASS="quote">*beware of and pay attention to the oven*
 </TD></TR></TABLE>
bahahah oven pwn3d j00!
</TD></TR></TABLE>bahahah oven pwn3d j00!