
[DIY] How to remove a B-series cylinder head


 06-28-2012, 11:05 PM
#27
Honda-Tech Member
Thread Starter
I'm not sure what that is. It looks like a straw, but I can't see where it goes or what is coming out of his mouth. It's certainly interesting, and I will use deductive reasoning to solve this equation. I will figure out what is going on in this picture and report back with conclusive evidence. 
09-12-2012, 08:28 PM
#30
Honda-Tech Member
Thread Starter
Thanks guys. Planning a JRSC install how-tow when I come across 5k I don't need for anything more important than 100hp.
Might be a while, don't hold your breath.
Might be a while, don't hold your breath.


 05-21-2013, 12:39 AM
#35
Honda-Tech Member

wanted to just re up and say thanks for this...used it as a guide to take apart a full ls that will now be lsvturbo...
For the head bolts I grabbed a seperate half inch ratchet, 14 mm deep socket and half inch drive extension. with a small section of exhaust pipe around the wrench and the motor pressed up against the wall the headbolts will come with some wrestling.
For the head bolts I grabbed a seperate half inch ratchet, 14 mm deep socket and half inch drive extension. with a small section of exhaust pipe around the wrench and the motor pressed up against the wall the headbolts will come with some wrestling.
12-04-2013, 10:21 PM
#36
Honda-Tech Member
Thread Starter
Bumping this thread for a friend... good luck guys.
All the pics and details seem to make this more complicated than it is. It's really not hard at all, it just takes time.
Good luck everyone.
All the pics and details seem to make this more complicated than it is. It's really not hard at all, it just takes time.
Good luck everyone.
01-04-2014, 02:08 PM
#37
Trial User

Join Date: Jan 2014
Posts: 1
Likes: 0
Received 0 Likes
on
0 Posts
Your post on removing the cylinder head on a honda civic was incredible. I loved the pictures and the details you put with them. You did a fantastic job. I can't wait to see the post on reversing this process with torque specs.
 02-10-2014, 09:18 AM
#40
Honda-Tech Member
Thread Starter
That's because my photobucket unlimited bandwidth expired because I didn't pay the 30 bucks for another year.
Which means if I don't pay 30 bucks/year for the bandwidth, not very many people get to see any of the pictures.
Kinda not my problem I guess.
Which means if I don't pay 30 bucks/year for the bandwidth, not very many people get to see any of the pictures.
Kinda not my problem I guess.
 05-28-2014, 08:47 AM
#42
Honda-Tech Member

Join Date: May 2014
Posts: 9
Likes: 0
Received 0 Likes
on
0 Posts
Thanks for this, there is text but no photos. Is there any way you can make the photos available or at least the one that says don't lose the small metal sleeve and the one that says do not remove this part. Thank you! I am a new member but I'll try to send you a PM to give you my email address. Thanks again!
05-28-2014, 09:14 AM
#43
Honda-Tech Member
Join Date: May 2014
Posts: 9
Likes: 0
Received 0 Likes
on
0 Posts
This may exceed my new member limit on posts but I am going to try it anyway.
I am at the following situation:
1. Where are the small sleeves that are not to be lost, and have I lost them already.
2. Have I removed the part that you say never remove? (The photos of the original post have been blocked.)
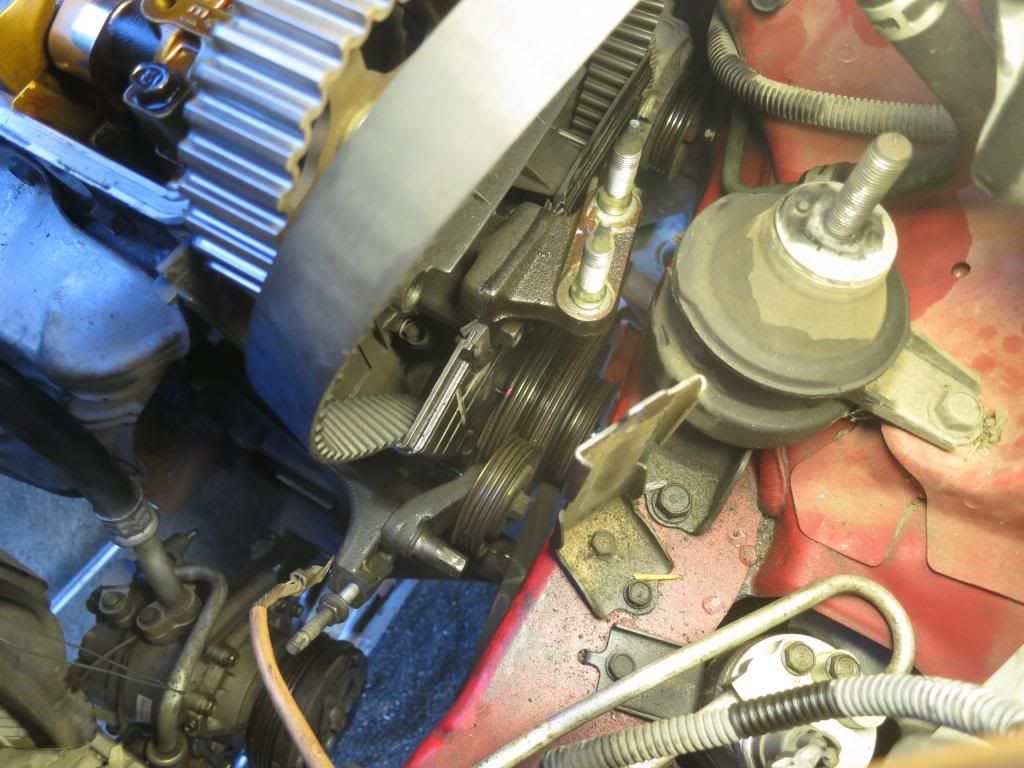
3. The timing belt had less than 7K miles on it when the shade-tree valve job burned up. I wish to keep the timing belt. Can I remove the head without pulling the harmonic balancer?
a. Can I just remove the 2 10mm bolts ?
b. And I assume the bracket needs to come off
c. Any tips in doing this?
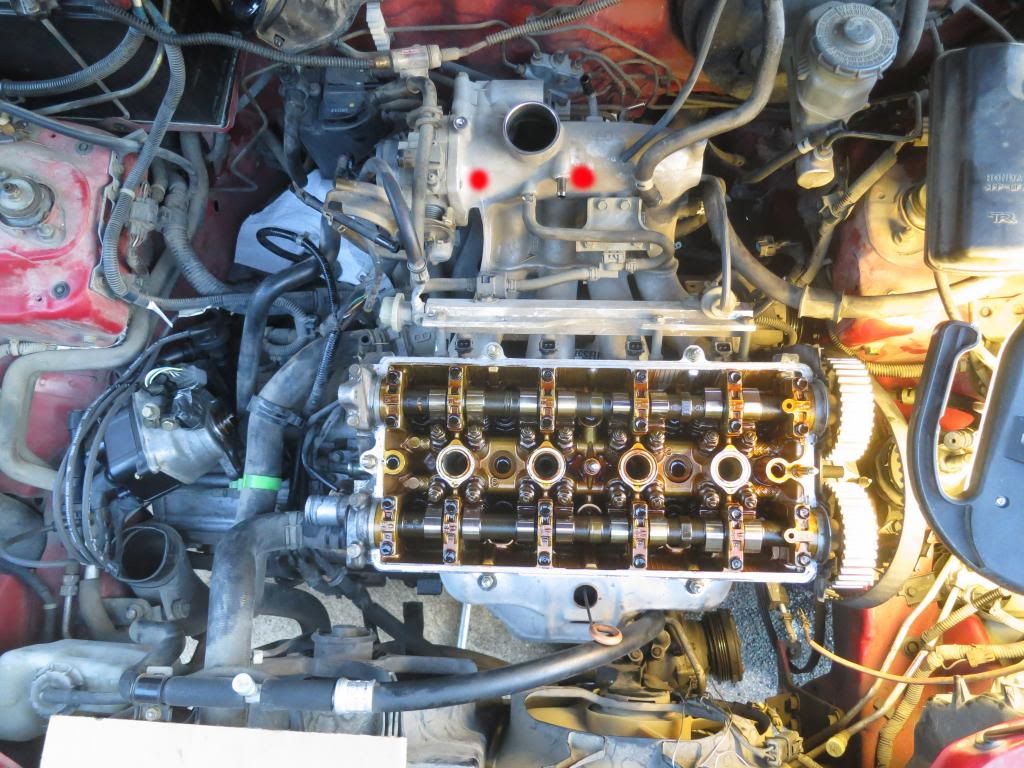
4. How to you reach the bolts underneath the intake manifold assembly which keeps the intake bolted to a metal frame that supports it underneath?
5.Visualize where I am with having removed the top half of the timing belt, attempting to remove the head without pulling the harmonic balancer?
I am at the following situation:
1. Where are the small sleeves that are not to be lost, and have I lost them already.
2. Have I removed the part that you say never remove? (The photos of the original post have been blocked.)
3. The timing belt had less than 7K miles on it when the shade-tree valve job burned up. I wish to keep the timing belt. Can I remove the head without pulling the harmonic balancer?
a. Can I just remove the 2 10mm bolts ?
b. And I assume the bracket needs to come off
c. Any tips in doing this?
4. How to you reach the bolts underneath the intake manifold assembly which keeps the intake bolted to a metal frame that supports it underneath?
5.Visualize where I am with having removed the top half of the timing belt, attempting to remove the head without pulling the harmonic balancer?
Last edited by donphillipe; 05-28-2014 at 10:03 AM.
05-28-2014, 05:06 PM
#44
Honda-Tech Member
Join Date: May 2014
Posts: 9
Likes: 0
Received 0 Likes
on
0 Posts
Well I "forged ahead" without help. All I got was an it's not my fault but no answers to any of my questions.
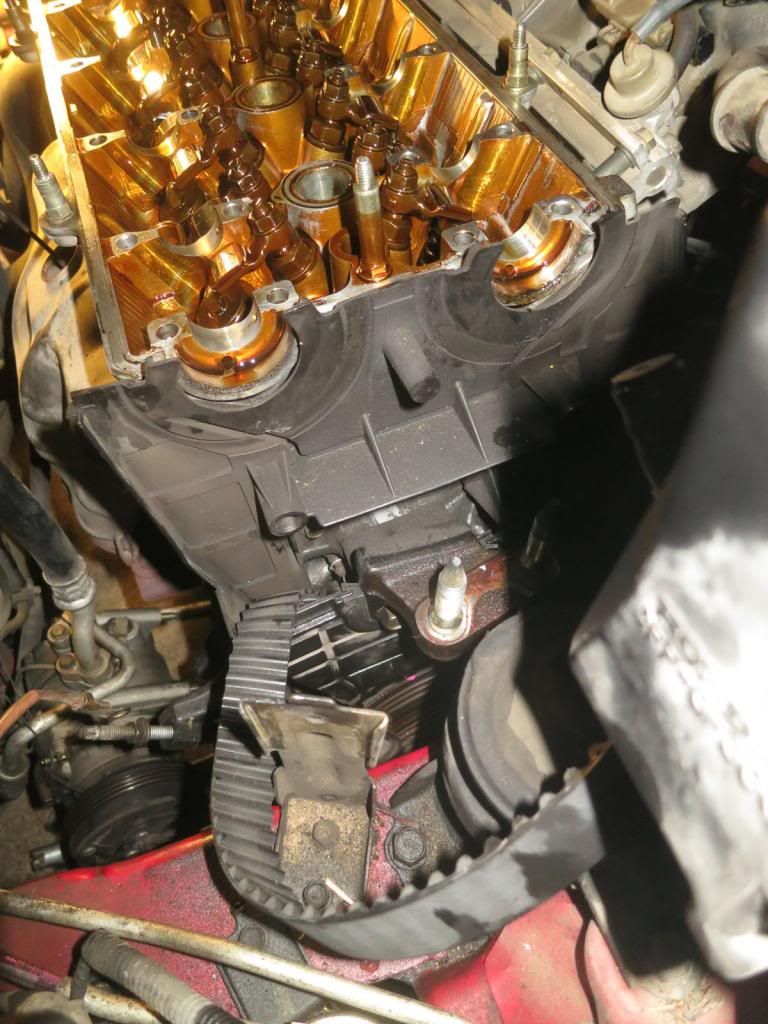
My elderly parents are without transportation so I have to move on. To answer my own questions, yes there is no problem removing the head while the timing belt is laid to the side. Loosen the 14mm nut just above the harmonic balancer 180deg and push in on the belt on the side toward the steering wheel, then lock the bolt back down. The belt then slips off. The large motor mount is connected to the block (I found out too late) and not to the head, so it doesn't have to be removed. (Fun getting this back on.) There are 2 10mm bolts about even with the bottom of the head that must be removed to allow the cover to be left in place while the head slides off. The 2 10mm bolts that hold the intake on to the frame-bracket can be reached using a 12" and a 6" extension from under the vehicle. Looking up under the vehicle (wear safety glasses) it can be seen that there are a couple of brackets that are holding hoses and electrical wires that must be removed that is not explained online or in the SM. Also the IAC valve (SM 9-3) has a hose between the external hose and the electrical connector that I just couldn't get loose, so I removed the IAC valve. Hope the O rings come in the headgasket kit. The bottom of the intake must be examined carefully from underneath and all wires and hoses removed from it before trying to remove the head.
I never could figure out (without photos) what part must not be removed at all costs and what small sleeves there are that are easily lost. Perhaps they are just that - lost already.
I've been told the photos appear here at the first of the month, then the bandwidth runs out. I am hoping that they come back alive in a couple of days while my head is at the machine shop, so I can try to find or discover any bad mistake and correct it (hopefully - unless it is the dreaded area of not removing something that I probably removed :-). Time will tell. Wish me luck!
05-28-2014, 05:34 PM
#45
Before you turn another wrench, you should buy/borrow/download a factory service manual, and give my build thread a look. Also, we expect users to put in a tiny bit of effort before begging for help. You're still on that "tiny bit of effort" step.
05-29-2014, 11:48 AM
#49
Fish Twig
Join Date: Nov 2005
Location: Still hunting that foo up there
Posts: 15,555
Received 309 Likes
on
285 Posts
Yo don't have to remove the intake manifold, just unbolt it from the bracket that it is attached to. If you sit under the car and look up you'll see what I'm talking about. Also yes the head can be removed while the timing belt is sitting there, no need for harmonic balancer to be removed.
05-30-2014, 02:53 PM
#50
Honda-Tech Member
Join Date: May 2014
Posts: 9
Likes: 0
Received 0 Likes
on
0 Posts
Thanks everyone - my subscription got cancelled to this thread for some strange reason and in fact someone msged me as to why I wasn't responding. Sorry about that.
I have to say that having documentation (SM was the first thing I purchased) doesn't always assume that the knowledge passes like magic to the reader. The actual experiences we have in life are our own and no one can really say that a particular amount of time to absorb something is appropriate or not. I got hold of the service manual over 2 weeks ago and have been reading up on the procedure, but nowhere do I see where it says where to crawl and what to remove and don't take this apart or don't loose these little what cha ma callits.
Perhaps I am getting a little old and I don't see things like I used to. I found that there are all kinds of things on the bottom of the intake manifold, wires, hoses, etc that need to removed from it that the SM doesn't even mention, as well as boldly not explaining how to do some things that may be simple to a select few, like removing some of those God-awful snaps holding on the wire harness'. I finally started unbolting the brackets holding the harness snaps because I couldn't get them unsnapped.
I started rebuilding farm tractors with my father when I was 12 and I am well over 60 now so I have seen a few engines in my lifetime. I have never worked on an engine mounted sideways in a vehicle before so it may take me a few tries to get down with the experience. The concept of working on top parts of the engine from lying on the ground working through a small slit while using a 2' long tool was a new one for me but I think I have thus shifted to accommodate. That was my initial problem with the manifold bolts.
So that is the end of the editorial section of this post, responding to a few comments bordering on the "tacky side". Still, if anyone believes the proper amount of time hasn't been spent researching this, well I am about out of excuses at this point.
Anyway - to those who have submitted responses - thank you. As someone who personally supports free online technical guides on other topics, I can only say it's nice to "pay it forward". Just please remember - the creed of the teaching profession, however, is "there is no dumb question".