
A Model Specific DIY Rim Painting
 02-02-2009, 09:09 PM
#1
Honda-Tech Member
Thread Starter
Join Date: Sep 2008
Location: seattle, wa
Posts: 107
Likes: 0
Received 0 Likes
on
0 Posts
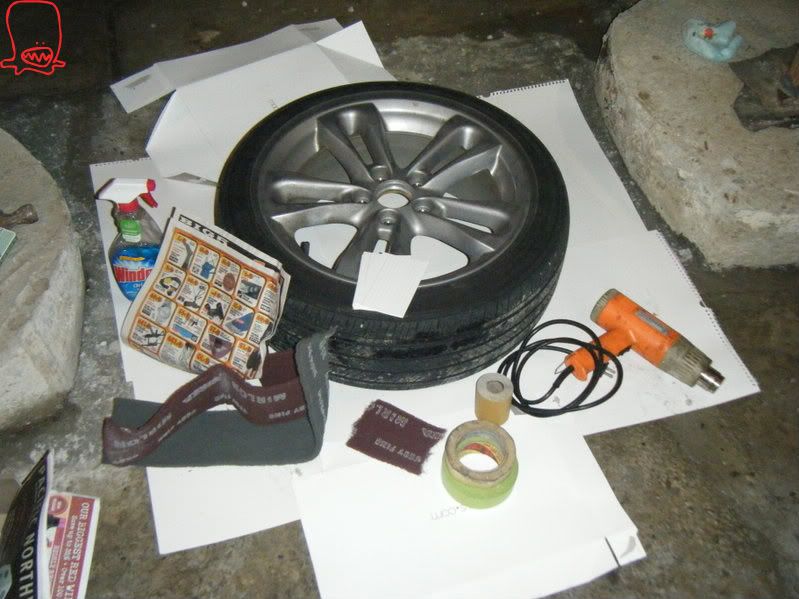
You'll need some materials:
1 Can of spray paint, your choice of color, I choose gunmetal (car spray paint)
1 Can of clear coat, I used krylon
1 Can of Red spray paint Krylon for Plastic (OPTIONAL)
1 Can of primer (OPTIONAL)
Some 3M scotch-brite or fine steel wool
3M blue tape, i think its 1/4 inch (OPTIONAL)
Masking tape
News paper
some 3x5 index cards
heat gun (OPTIONAL)
windex (OPTIONAL)
rubing alcohol (OPTIONAL)
And watever rim your painting
STEP 1
Remove the centercap and sand it down with the scotch-brite, you want to sand all the shiny spots so that the paint will stick. Make sure you sand it down very well and dont forget the inside of the rim (the wheel wall or whatever its called)
STEP 2
Use windex to wipe it down and remove all the dust, or just simply wash it very well. Once its dried, get some news paper and tape and cover up the tire
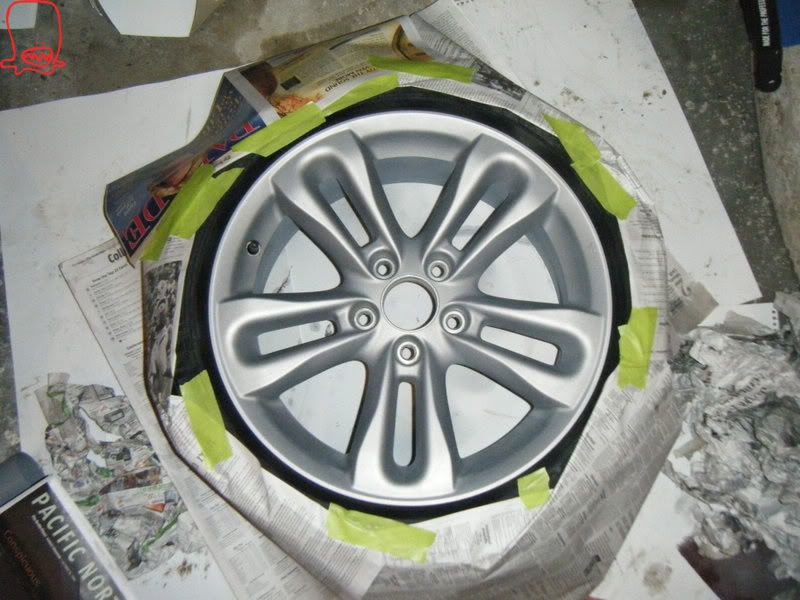
STEP 3
Insert index cards. Dont forget to tape off your valve stem unless you want to paint it. Now before you prime, Wipe it down with rubbing alcohol, that will remove all the oil and grease from your hands. Dont touch the rim after you wiped it down with alcohol, now give it a light coat of primer (a light coat so that the following coats will have something to stick to, too much and it will drip and run everywhere)
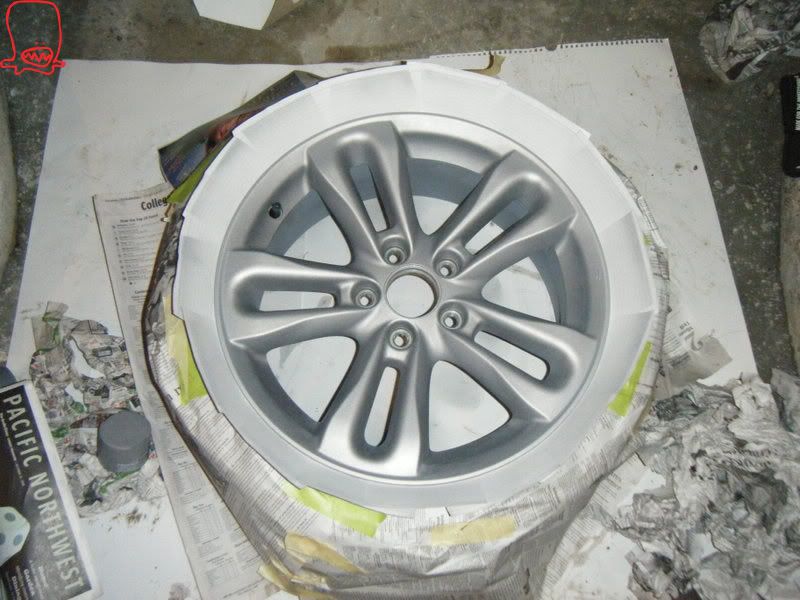
STEP 4
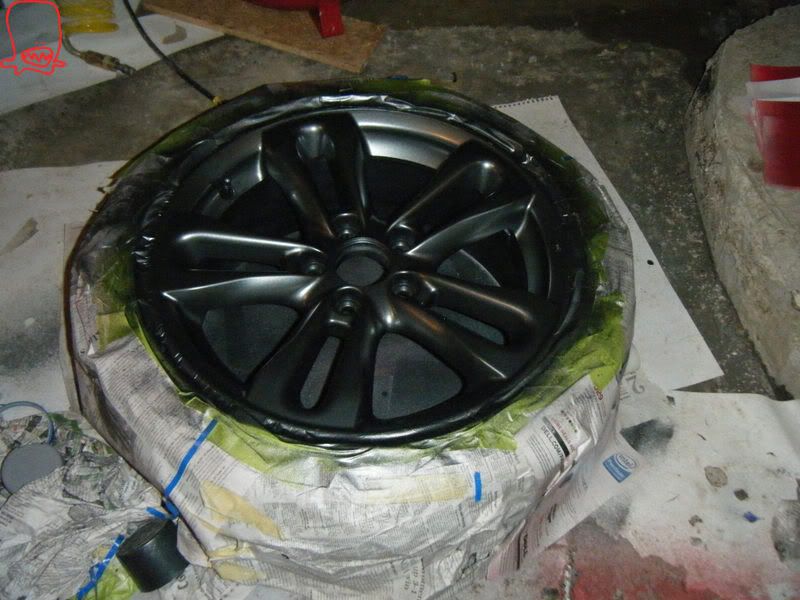
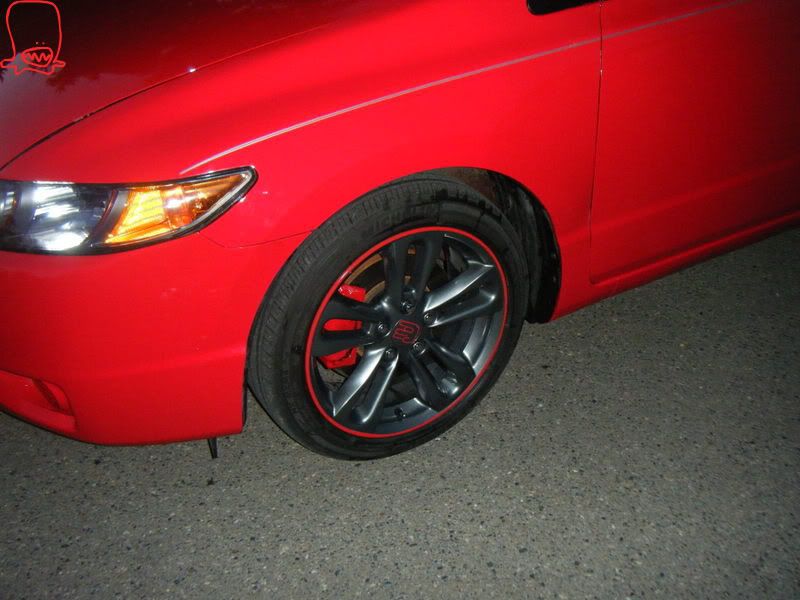
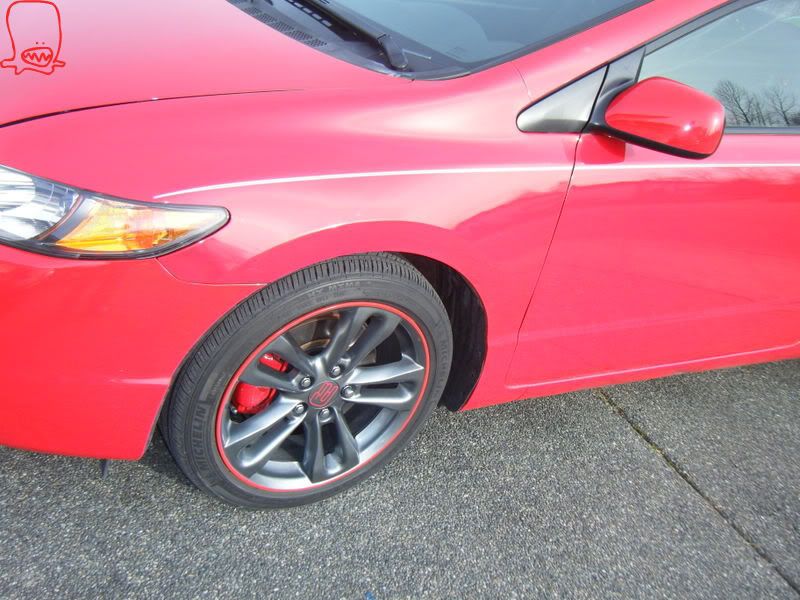
Apply several coats with drying time between each coat. I also painted the inside of the wheel so it would match. After several coats or until you cant see the metal/old paint, it should look like this
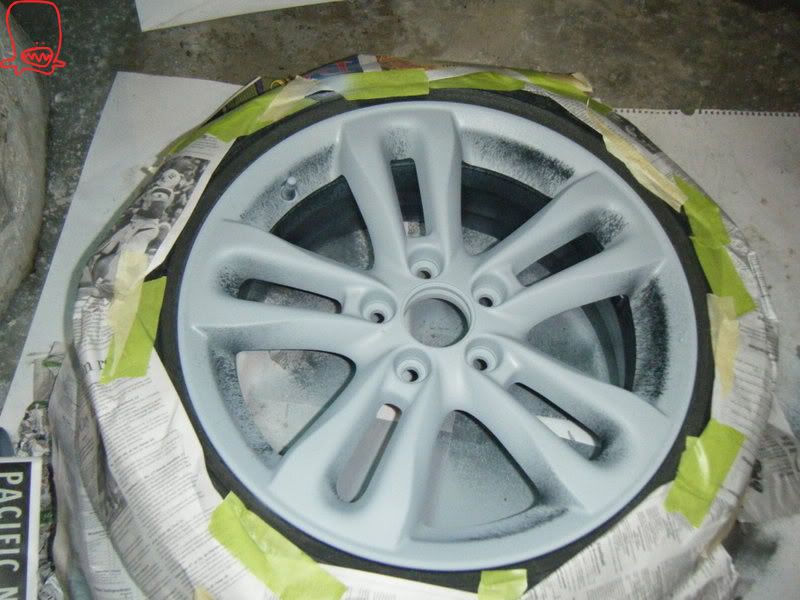
STEP 5
Once the primer is dry, I used the heat gun to make sure it is very dry, I sprayed the outer part of the rim red, I gave it 2-3 coats
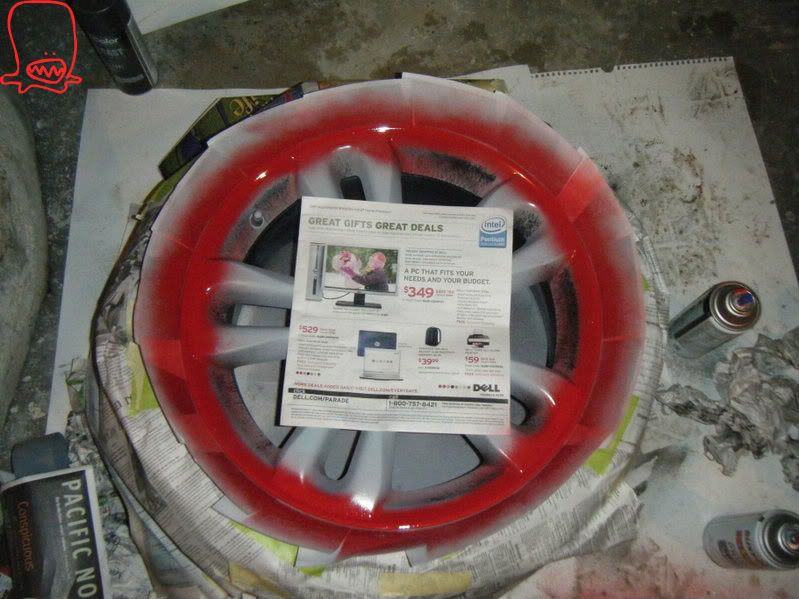
STEP 6
I used the heat gun to make sure it is super dry, i Used the 1/4 tape and masked off the outer edge
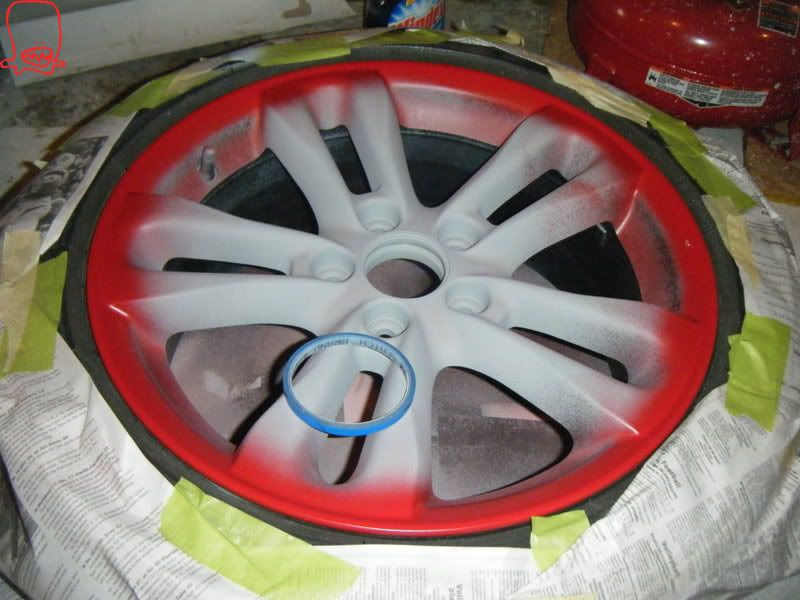
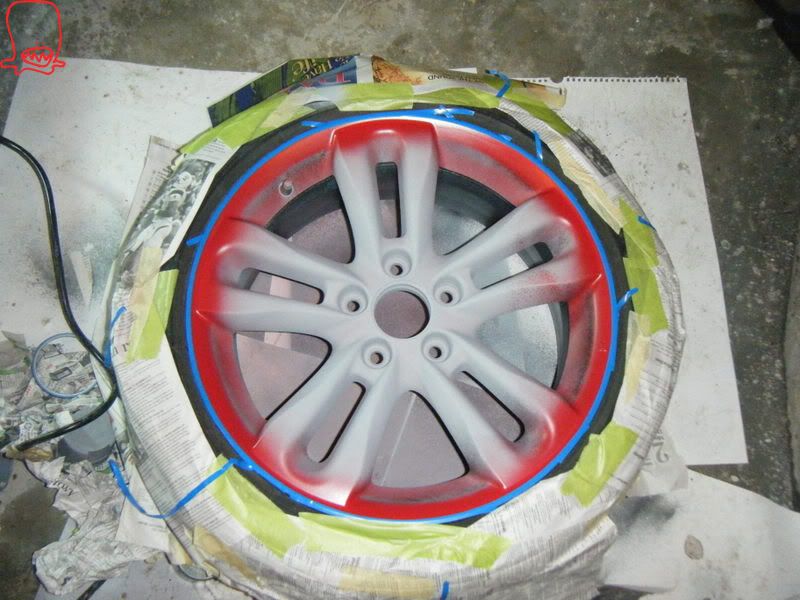
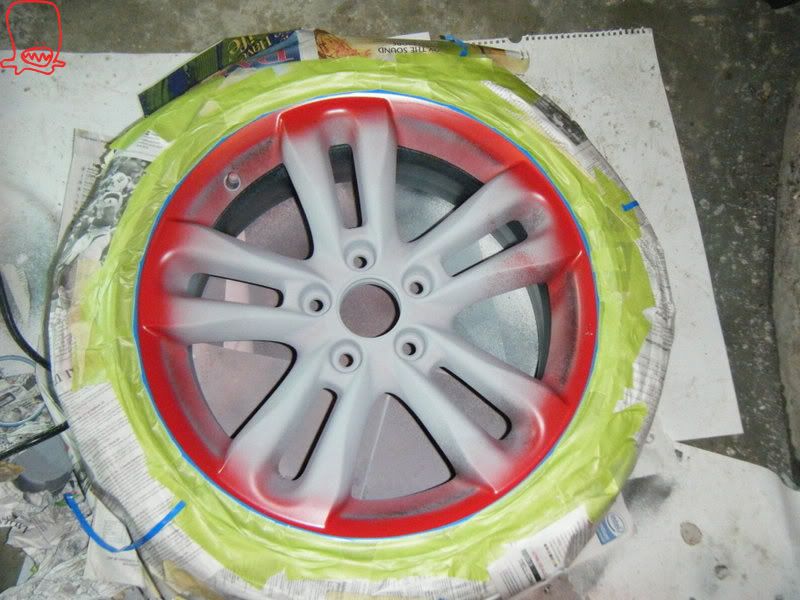
STEP 7
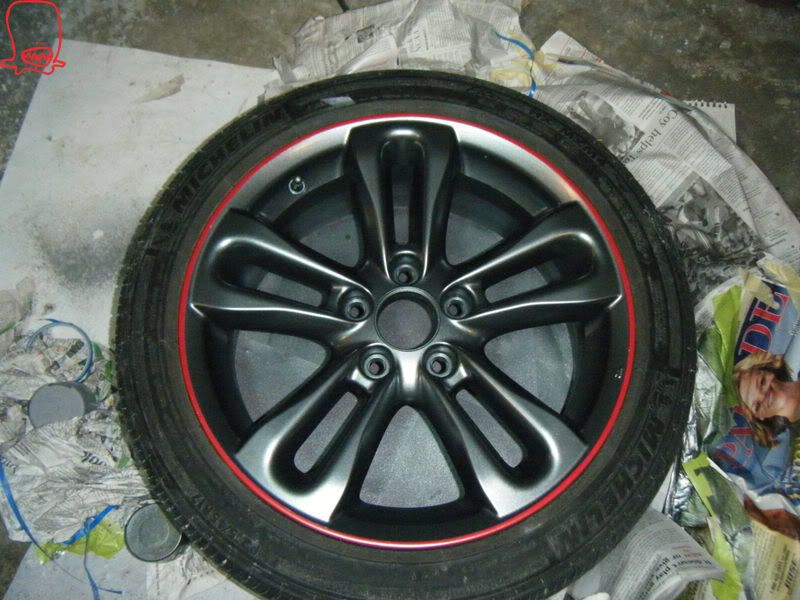
Now use masking tape and tape off the gap from the rubber to the blue tape, It should look like this
STEP 8
Now Hit it with the color, Remember a very light first coat. I gave it about 3-4 coats

STEP 9
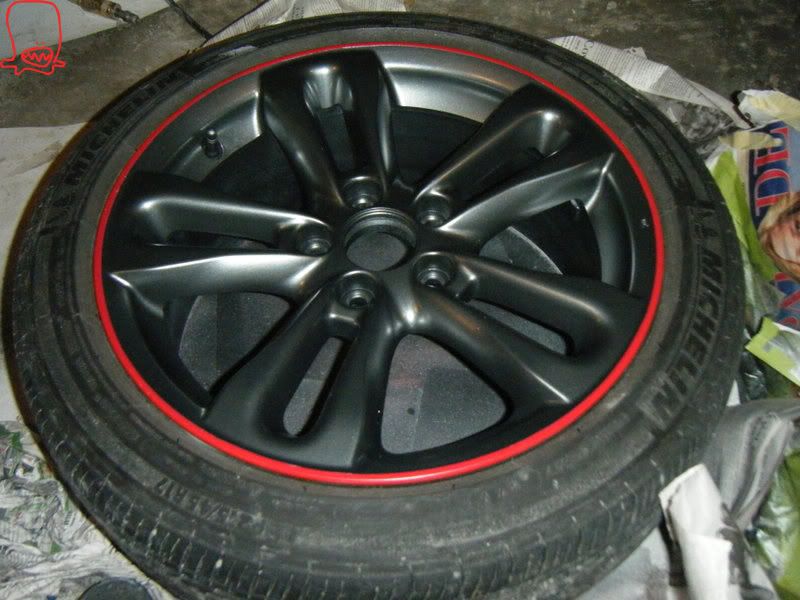
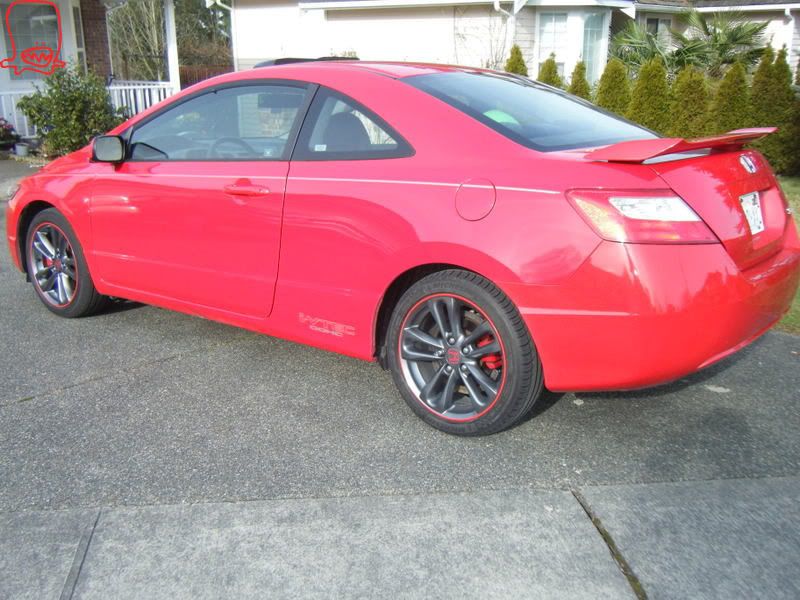
Remove the masking tape and remove the blue tape slowly. Put the index cards back in and hit it with a few coats of clear. Final product should look like this
CENTER HUB CAPS
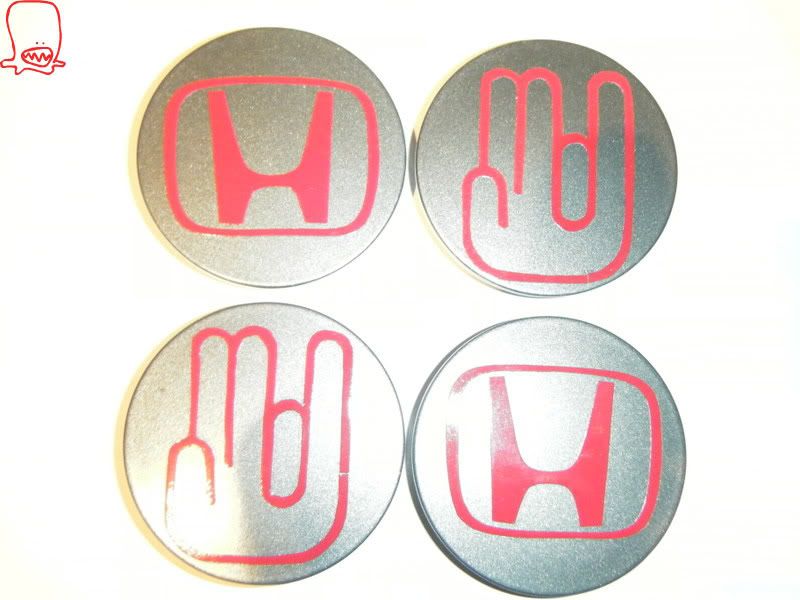
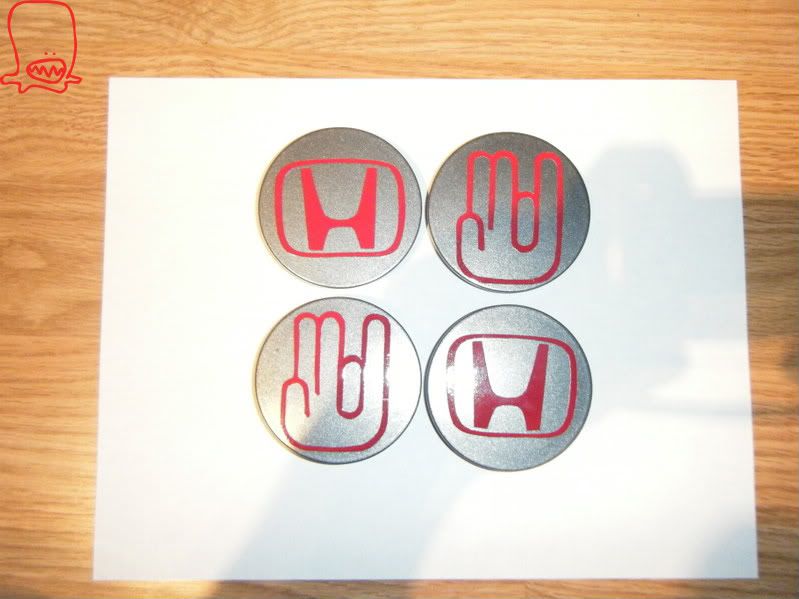
1. Sand down the center hub caps
2. Prime it
3. Paint it
MAKING THE SIGN
I got the vinyl paper from a 'fast sign' shop, I showed them what I was making and they told me it would cost like $15, I asked to buy just the paper and they gave me a feet of they vinyl for free
1. I took the center hub caps and scanned it
2. I cut out the sign and a piece of of vinyl
3. I put the sign on top of the vinyl and cut it out
4. Now I put the sign in the middle of the center hub cap after its painted and dried
5. Couple of clear coats after the sign is put on so the sign wont fly off when I drive


1 Can of spray paint, your choice of color, I choose gunmetal (car spray paint)
1 Can of clear coat, I used krylon
1 Can of Red spray paint Krylon for Plastic (OPTIONAL)
1 Can of primer (OPTIONAL)
Some 3M scotch-brite or fine steel wool
3M blue tape, i think its 1/4 inch (OPTIONAL)
Masking tape
News paper
some 3x5 index cards
heat gun (OPTIONAL)
windex (OPTIONAL)
rubing alcohol (OPTIONAL)
And watever rim your painting
STEP 1
Remove the centercap and sand it down with the scotch-brite, you want to sand all the shiny spots so that the paint will stick. Make sure you sand it down very well and dont forget the inside of the rim (the wheel wall or whatever its called)
STEP 2
Use windex to wipe it down and remove all the dust, or just simply wash it very well. Once its dried, get some news paper and tape and cover up the tire
STEP 3
Insert index cards. Dont forget to tape off your valve stem unless you want to paint it. Now before you prime, Wipe it down with rubbing alcohol, that will remove all the oil and grease from your hands. Dont touch the rim after you wiped it down with alcohol, now give it a light coat of primer (a light coat so that the following coats will have something to stick to, too much and it will drip and run everywhere)
STEP 4
Apply several coats with drying time between each coat. I also painted the inside of the wheel so it would match. After several coats or until you cant see the metal/old paint, it should look like this
STEP 5
Once the primer is dry, I used the heat gun to make sure it is very dry, I sprayed the outer part of the rim red, I gave it 2-3 coats
STEP 6
I used the heat gun to make sure it is super dry, i Used the 1/4 tape and masked off the outer edge
STEP 7
Now use masking tape and tape off the gap from the rubber to the blue tape, It should look like this
STEP 8
Now Hit it with the color, Remember a very light first coat. I gave it about 3-4 coats
STEP 9
Remove the masking tape and remove the blue tape slowly. Put the index cards back in and hit it with a few coats of clear. Final product should look like this
CENTER HUB CAPS
1. Sand down the center hub caps
2. Prime it
3. Paint it
MAKING THE SIGN
I got the vinyl paper from a 'fast sign' shop, I showed them what I was making and they told me it would cost like $15, I asked to buy just the paper and they gave me a feet of they vinyl for free
1. I took the center hub caps and scanned it
2. I cut out the sign and a piece of of vinyl
3. I put the sign on top of the vinyl and cut it out
4. Now I put the sign in the middle of the center hub cap after its painted and dried
5. Couple of clear coats after the sign is put on so the sign wont fly off when I drive
 02-02-2009, 09:37 PM
#2
Brand New
Nice. 
What happened to the diy thread that was tacked to the top of the forum? It had several diy threads that could prevent several how to threads.
What happened to the diy thread that was tacked to the top of the forum? It had several diy threads that could prevent several how to threads.


Thread
Thread Starter
Forum
Replies
Last Post