
DIY: Black Housing Headlights (5th gen)
 04-11-2009, 12:13 PM
#1
Junior Member
Thread Starter
Join Date: Oct 2008
Location: Lethbridge, AB, Canada
Posts: 19
Likes: 0
Received 0 Likes
on
0 Posts
Ok, I had some time on my hands the other day and saw there was already a DIY for this in the FAQ section but it was not very informative. So figured its my turn to contribute to H-T. So I painted my headlights and here is a DIY. A couple notes, be prepared to spend an entire afternoon minimum to do this. Don't rush it!!!
Make sure you have all of the following before you start:
1)Black engine enamal paint (high heat resistance cause it gets hot in the lights!)
2)socket and screwdriver set
3)bottle of silicone (dont HAVE to have this but I re-sealed the headlights after I painted them to ensure they were sealed properly)
4)Thin painters tape (easily manipulated when your taping around the corners in the lights)
5)newspaper
6)an oven
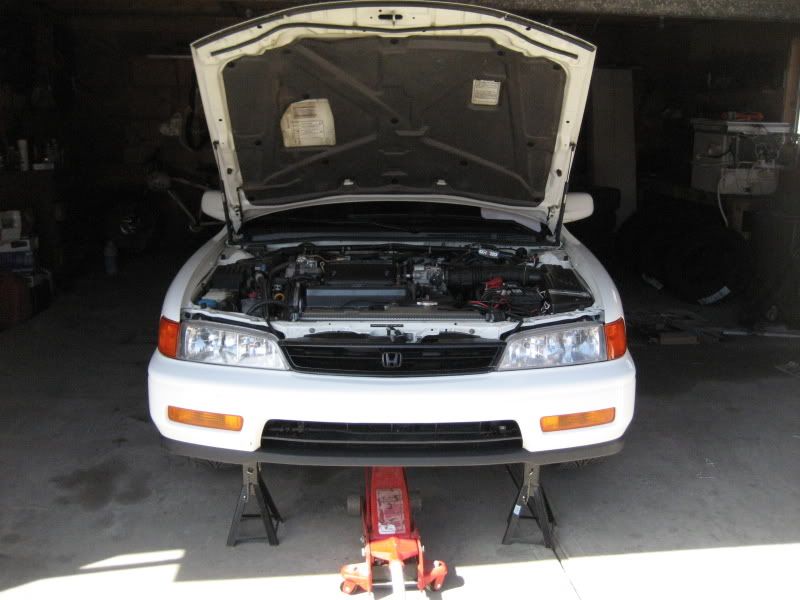
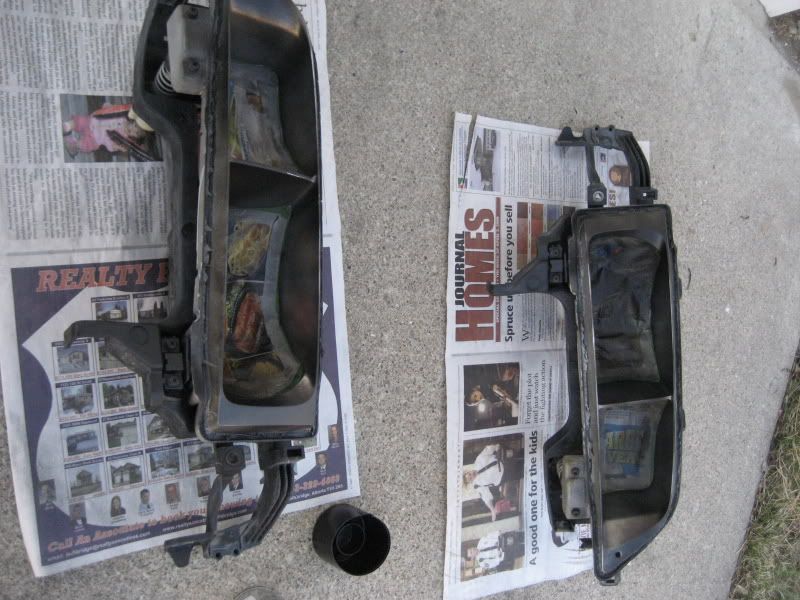
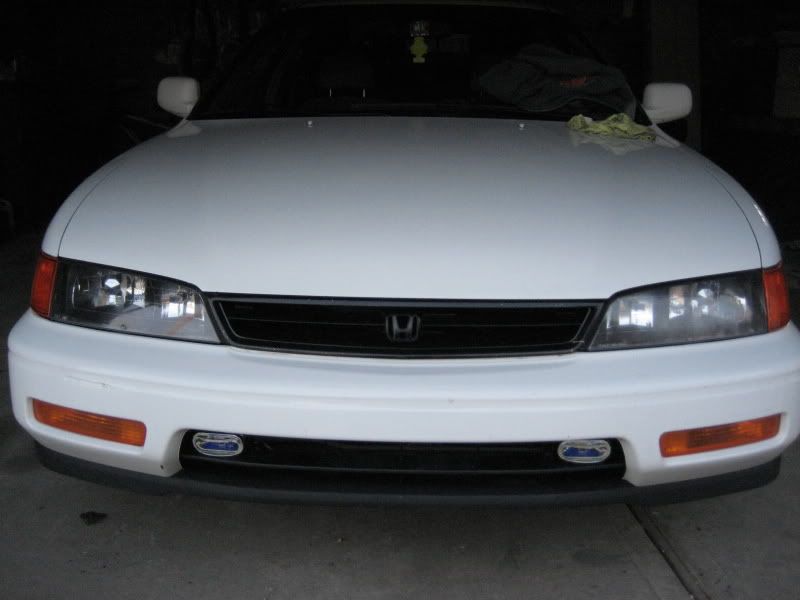
Here is a picture of the car before(chrome lights). I jacked the car up and put it on jack so it would be easier to work on.
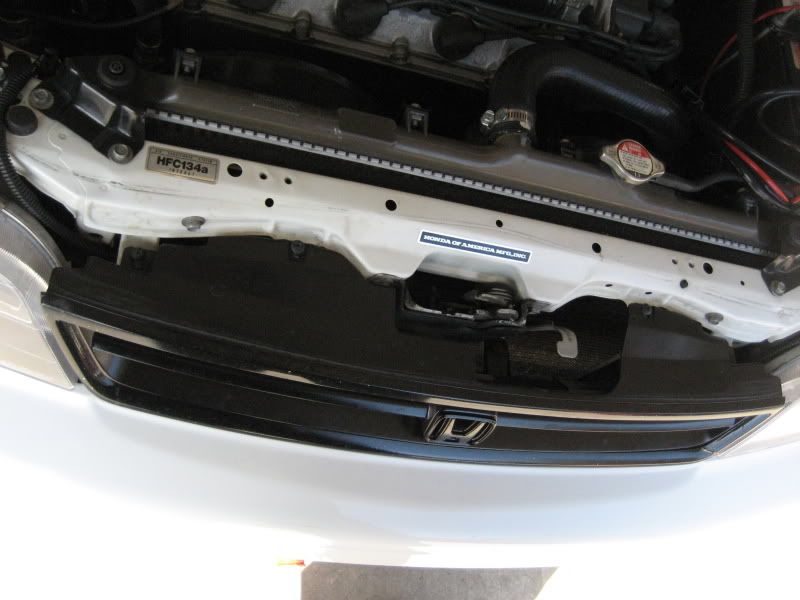
1) Pop the hood and remove the 5 philips screws holding the grille onto the car. There are 4 screws up top and one hidden down below.
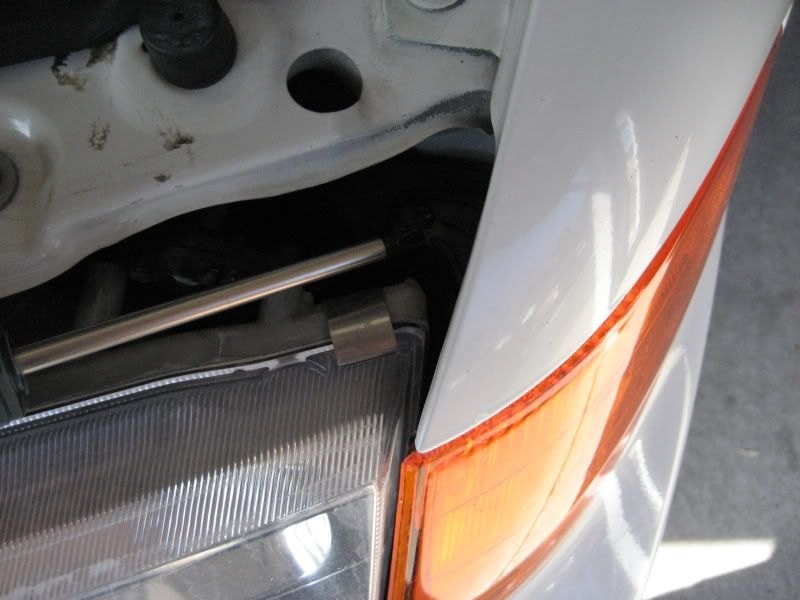
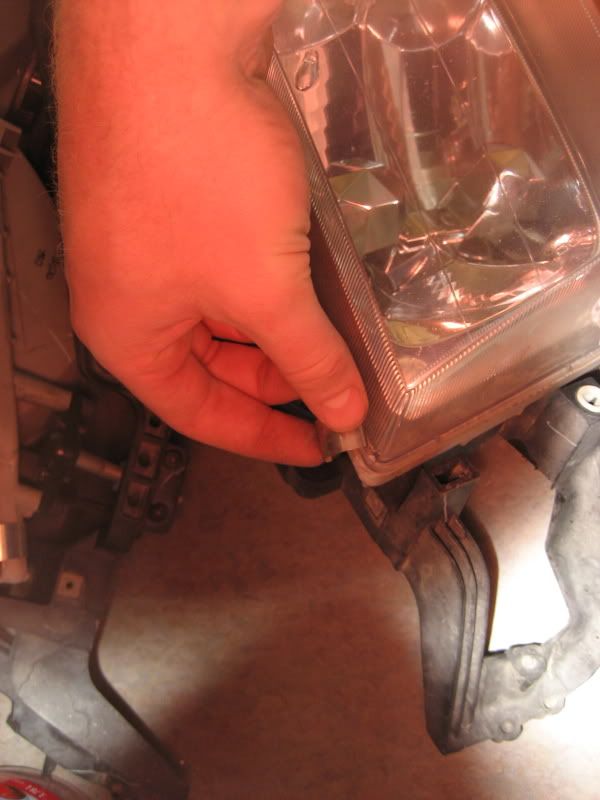
2)Next, remove the corner lights. There is 1 philips screw on the top of the light (as shown in the picture) holding them on. After you remove the screw pry and slide the lights out toward the front of the car. Be careful there are wires connected; twist and pull the bulbs out.
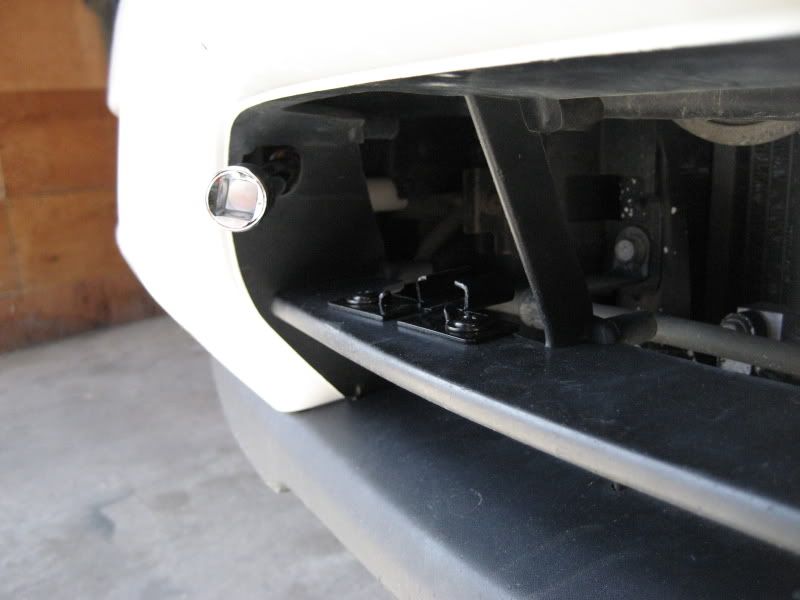
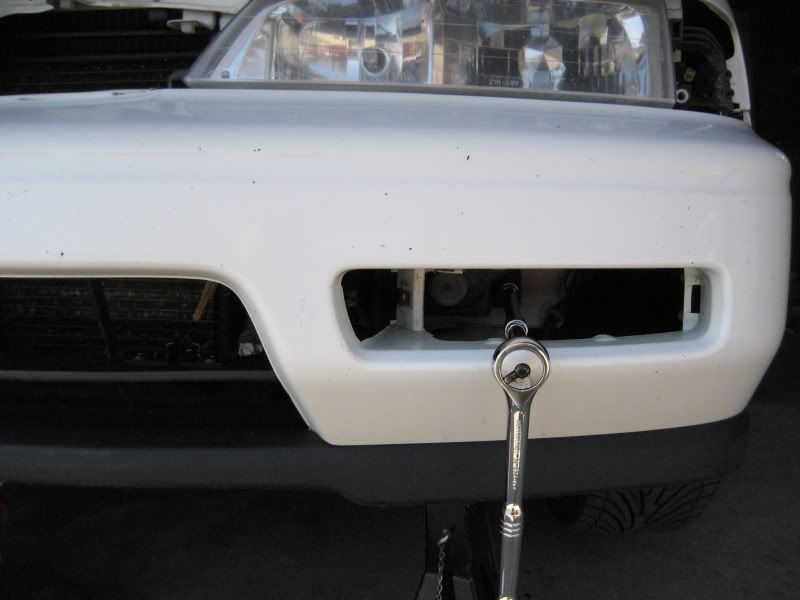
3) Now remove the turn signals. You will need a long screwdriver to reach in the hole shown on the bumper and unscrew the 1 philips screw. The lights should just slide out after the screw is removed.
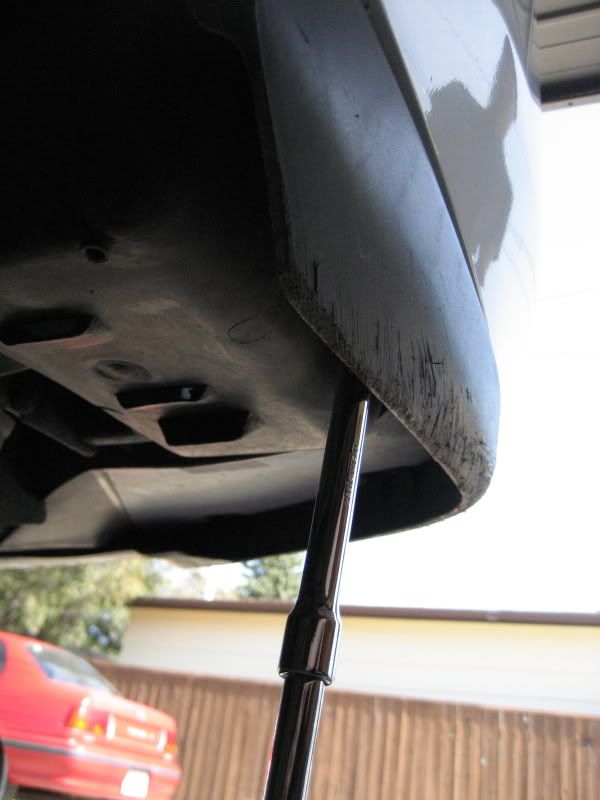
4) unscrew the philips screw that holds the inner fender linings to the bumper. There is one screw on each side AND one 10mm bolt (i think it was 10mm it may have been smaller, whoops) on the top edge of the bumper on each side that need to be removed (sorry forgot to take a picture of removing the 10mm bolt)
5) now with a 12mm extension unscrew the 2 bolts on each side that hold the bumper to the car. note: also make sure the plastic valance underneath is not still connected.
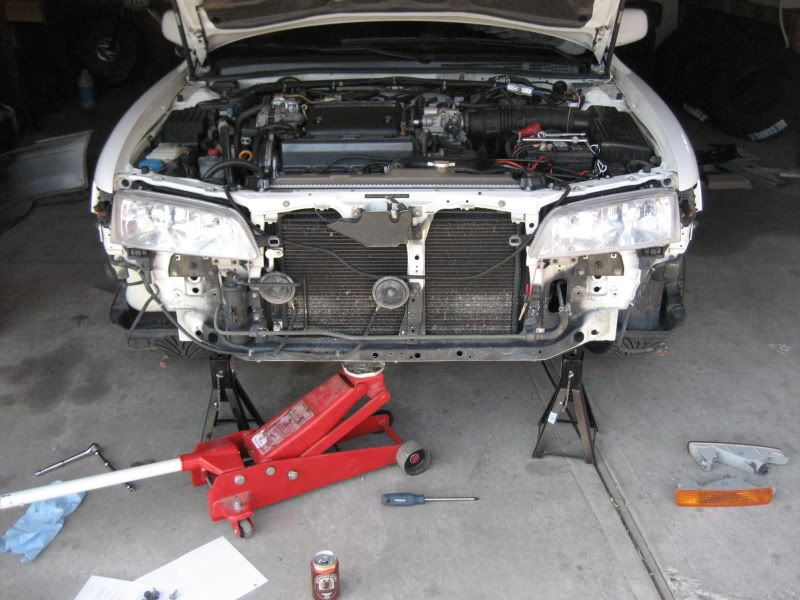
6)Remove the bumper. You will have to lift up in the middle then pull the bumper away. note: make sure the sides of the bumper that wrap around to the side of the car are unhooked and don't catch when your trying to pull the bumper away.

7) There are 5 10mm bolts holding each headlight on. Remove all 5. When your pulling the light away also remove the headlight bulbs from the sockets.
8) Both headlights removed. Preheat the oven to about 250 degrees C.
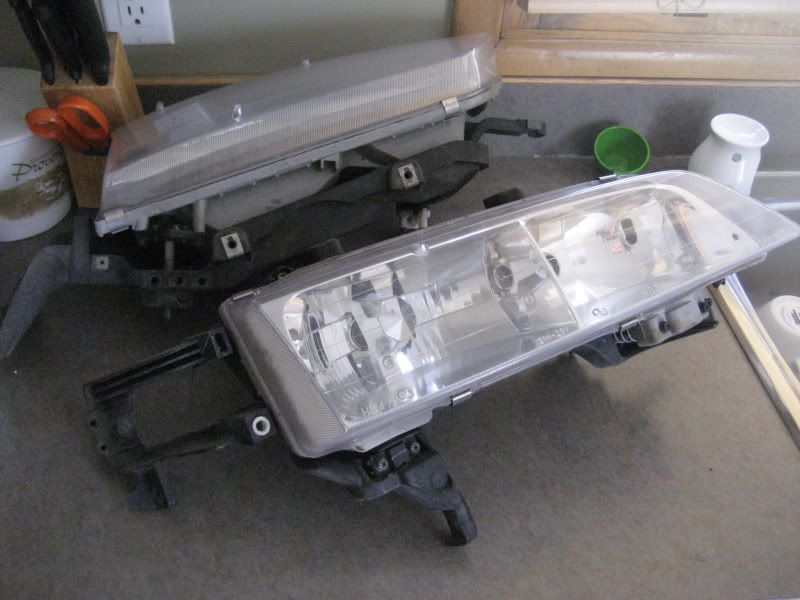
9) Remove the 4 clips on each headlight that clip the lens to the headlight backing.
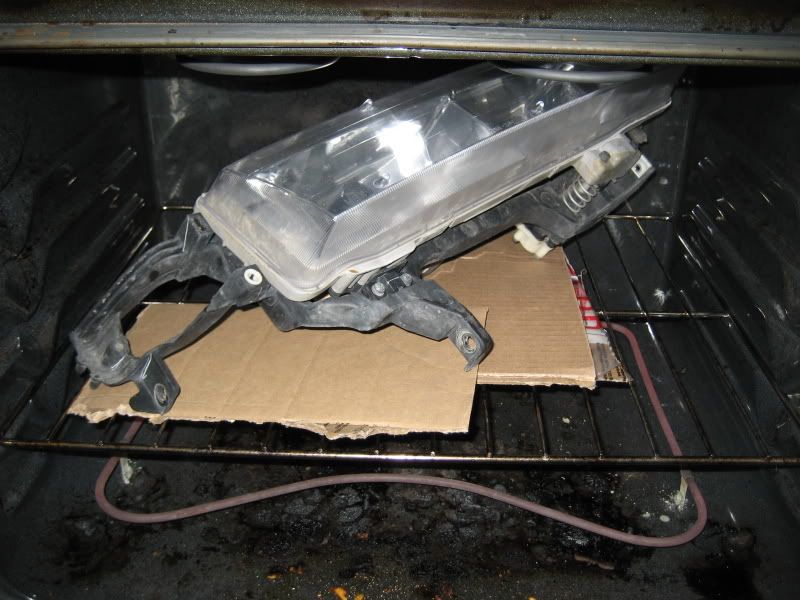
10) The headlights in the oven!!
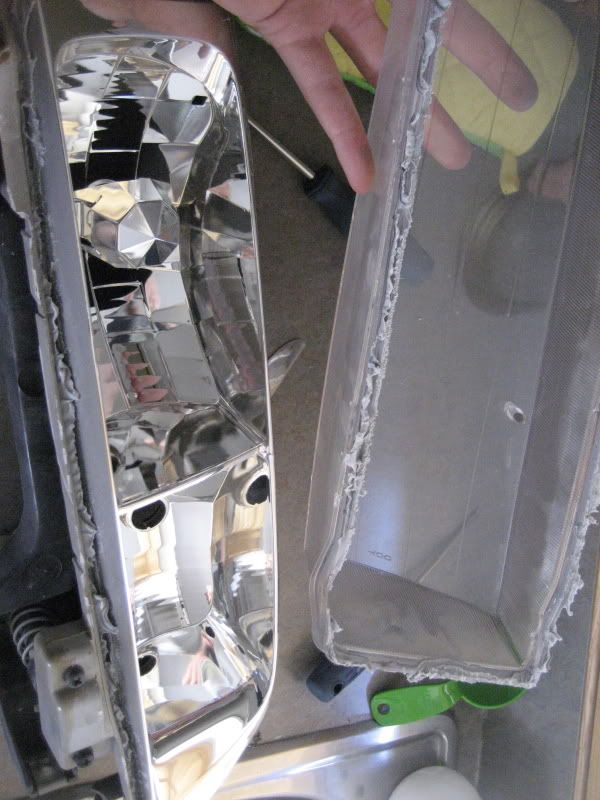
11) This requires some patience. Do this at your own digression and check on the lights every few mins. ( i left them in for about 4 mins) Wear oven mits because the light will be very hot. Start prying the lens away from the headlight backing as the silicone becomes hot and soft. Be very careful not to pry too hard and brake anything, just take your time and keep putting the light back in the oven if you need the silicone to be softer, just dont OVERCOOK them. lol
Just another picture of me prying the lens off....
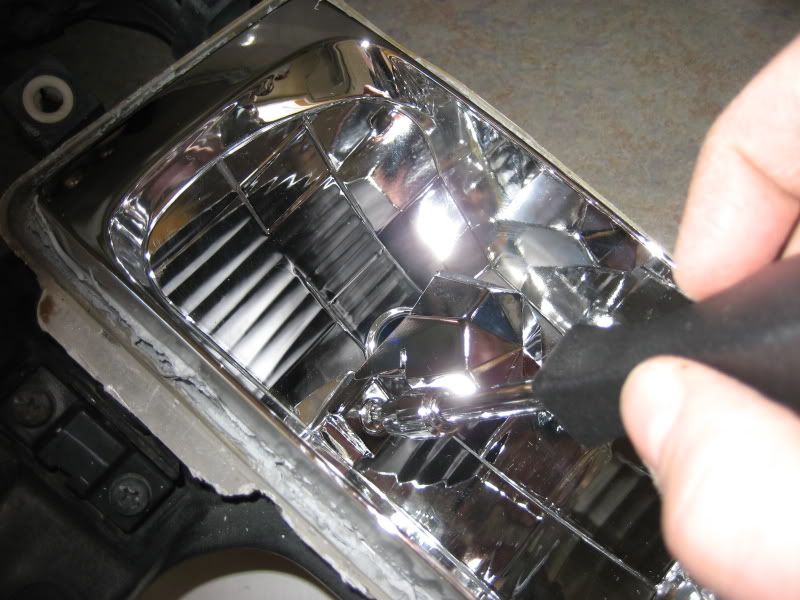
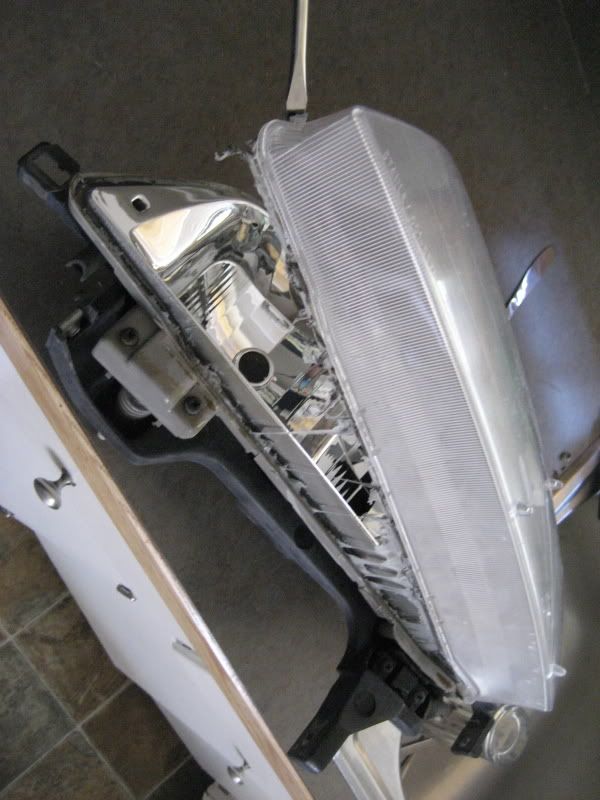
12) Unscrew these and clean the inside of the lens while they are off.
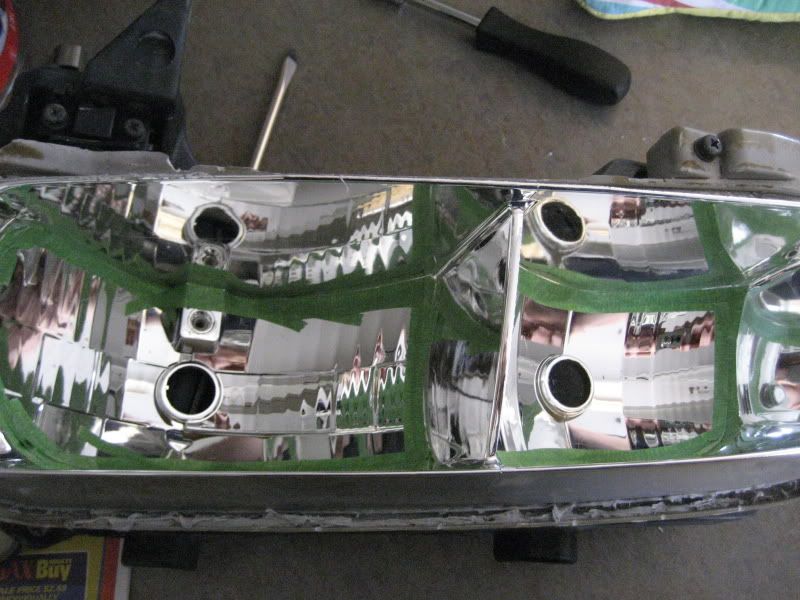
13) This part is tricky, use the green painters tape to tape off the lights.
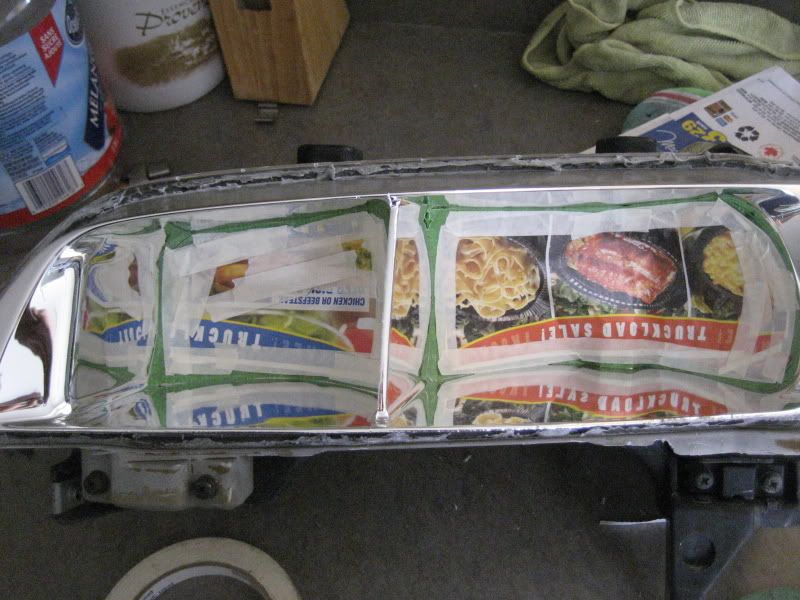
14) All taped off.
15) Now begin painting. I cleaned the inside of the lights and then did a couple coats of a plastic adhesion enhancer before I painted them black. I did 4 light coats of the black and make sure to hit the lights at all angles.

16) All painted!! They look good already!! make sure you give them enough time to dry before you pull the tape off etc...

17) Put the lens back on the headlights (as I said above I applied a little more silicone of my own to make sure they re-seal properly) Put the lights back in the oven at the same temperature (250) and wait until the silicone becomes soft again (I waited about 4 mins). Once it is soft, press the lens back onto the headlight backing. Let them cool and re-install the metal clips.
18) Now work backwards and re-assemble everything just like how you took them off!
19) ALL DONE!!! it looks awesome if you take your time and paint them properly AND you save money instead of buying new JDM lights!
Hope my DIY was informative enough! If your not comfortable with any of this then dont do it. Its not worth screwing your car up.... Let me know if I have left anything out and please leave comments. Sorry if there are any errors or anything. Good luck!
Make sure you have all of the following before you start:
1)Black engine enamal paint (high heat resistance cause it gets hot in the lights!)
2)socket and screwdriver set
3)bottle of silicone (dont HAVE to have this but I re-sealed the headlights after I painted them to ensure they were sealed properly)
4)Thin painters tape (easily manipulated when your taping around the corners in the lights)
5)newspaper
6)an oven
Here is a picture of the car before(chrome lights). I jacked the car up and put it on jack so it would be easier to work on.
1) Pop the hood and remove the 5 philips screws holding the grille onto the car. There are 4 screws up top and one hidden down below.
2)Next, remove the corner lights. There is 1 philips screw on the top of the light (as shown in the picture) holding them on. After you remove the screw pry and slide the lights out toward the front of the car. Be careful there are wires connected; twist and pull the bulbs out.
3) Now remove the turn signals. You will need a long screwdriver to reach in the hole shown on the bumper and unscrew the 1 philips screw. The lights should just slide out after the screw is removed.
4) unscrew the philips screw that holds the inner fender linings to the bumper. There is one screw on each side AND one 10mm bolt (i think it was 10mm it may have been smaller, whoops) on the top edge of the bumper on each side that need to be removed (sorry forgot to take a picture of removing the 10mm bolt)
5) now with a 12mm extension unscrew the 2 bolts on each side that hold the bumper to the car. note: also make sure the plastic valance underneath is not still connected.
6)Remove the bumper. You will have to lift up in the middle then pull the bumper away. note: make sure the sides of the bumper that wrap around to the side of the car are unhooked and don't catch when your trying to pull the bumper away.
7) There are 5 10mm bolts holding each headlight on. Remove all 5. When your pulling the light away also remove the headlight bulbs from the sockets.
8) Both headlights removed. Preheat the oven to about 250 degrees C.
9) Remove the 4 clips on each headlight that clip the lens to the headlight backing.
10) The headlights in the oven!!
11) This requires some patience. Do this at your own digression and check on the lights every few mins. ( i left them in for about 4 mins) Wear oven mits because the light will be very hot. Start prying the lens away from the headlight backing as the silicone becomes hot and soft. Be very careful not to pry too hard and brake anything, just take your time and keep putting the light back in the oven if you need the silicone to be softer, just dont OVERCOOK them. lol
Just another picture of me prying the lens off....
12) Unscrew these and clean the inside of the lens while they are off.
13) This part is tricky, use the green painters tape to tape off the lights.
14) All taped off.
15) Now begin painting. I cleaned the inside of the lights and then did a couple coats of a plastic adhesion enhancer before I painted them black. I did 4 light coats of the black and make sure to hit the lights at all angles.
16) All painted!! They look good already!! make sure you give them enough time to dry before you pull the tape off etc...
17) Put the lens back on the headlights (as I said above I applied a little more silicone of my own to make sure they re-seal properly) Put the lights back in the oven at the same temperature (250) and wait until the silicone becomes soft again (I waited about 4 mins). Once it is soft, press the lens back onto the headlight backing. Let them cool and re-install the metal clips.
18) Now work backwards and re-assemble everything just like how you took them off!
19) ALL DONE!!! it looks awesome if you take your time and paint them properly AND you save money instead of buying new JDM lights!
Hope my DIY was informative enough! If your not comfortable with any of this then dont do it. Its not worth screwing your car up.... Let me know if I have left anything out and please leave comments. Sorry if there are any errors or anything. Good luck!
 04-11-2009, 10:20 PM
#2
Honda-Tech Member

Join Date: Dec 2008
Posts: 138
Likes: 0
Received 0 Likes
on
0 Posts
very very nice! but just a quick note. i think you mean 250 degrees F.. not C because 250 degrees Celsius... would be pretty dang hot.. 482 degrees F to be exact.. I think that would melt your headllghts.
but once again, very informative DIY
but once again, very informative DIY
04-12-2009, 04:05 AM
#4
Honda-Tech Member
Nice writeup with lots of nice clean demo pics. 
I'm still on the fence whether to do black or white housings. Have you noticed any difference in night driving and the spread of your beam?
I Saw the Keith's Red and new it had to be Canadian content. My DIY's sometimes include a background shot of a Canadian or Irish Brew as well.
Cheers
I'm still on the fence whether to do black or white housings. Have you noticed any difference in night driving and the spread of your beam?
I Saw the Keith's Red and new it had to be Canadian content. My DIY's sometimes include a background shot of a Canadian or Irish Brew as well.
Cheers
04-12-2009, 03:04 PM
#7
Junior Member
Thread Starter
Join Date: Oct 2008
Location: Lethbridge, AB, Canada
Posts: 19
Likes: 0
Received 0 Likes
on
0 Posts
Good old Kieths amber!! hahah As far as the cardboard in the oven, your right probly not a great idea but i have cooked frozen pizzas on the cardboard before and had no fires!! lol still a heat gun woudl sure have been nice!
I have a HID headlight conversion so the lights are pretty powerful but I have noticed driving around town that they are a little dimmer... not by a large margin than before though. As you can see i threw on a couple fogs while i had the bumper off to help in those snowy winter highway drives.... thanks for the comments!
I have a HID headlight conversion so the lights are pretty powerful but I have noticed driving around town that they are a little dimmer... not by a large margin than before though. As you can see i threw on a couple fogs while i had the bumper off to help in those snowy winter highway drives.... thanks for the comments!

Thread
Thread Starter
Forum
Replies
Last Post
FUP23
Honda CRX / EF Civic (1988 - 1991)
4
11-03-2001 06:14 AM