1969 S800M Coupe.

 06-04-2013, 10:00 PM
#152
Honda-Tech Member
Thread Starter
06-08-2013, 06:50 PM
#154
Honda-Tech Member
Thread Starter
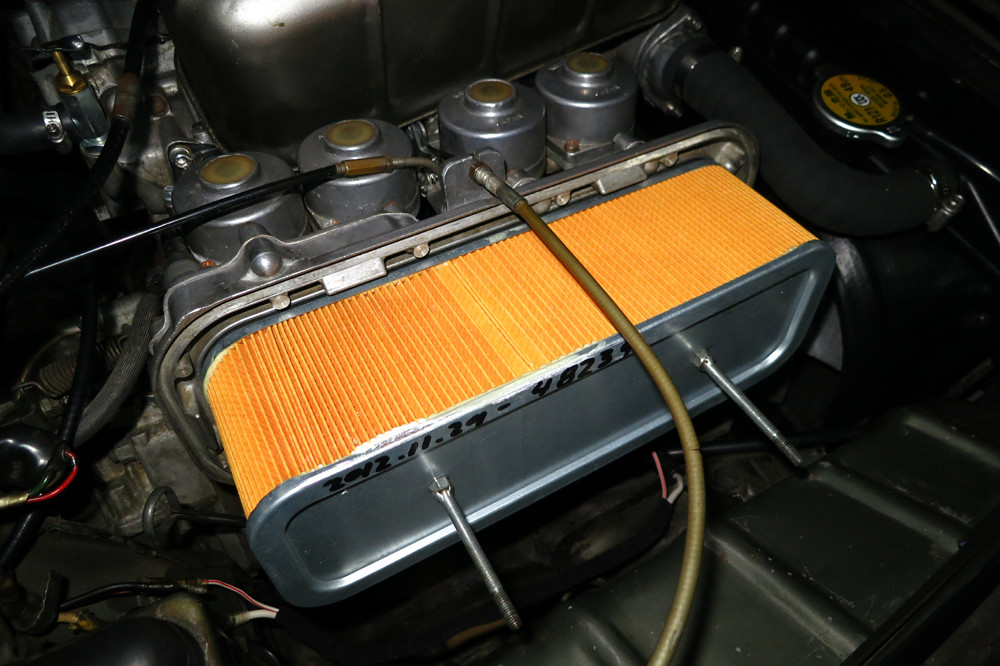
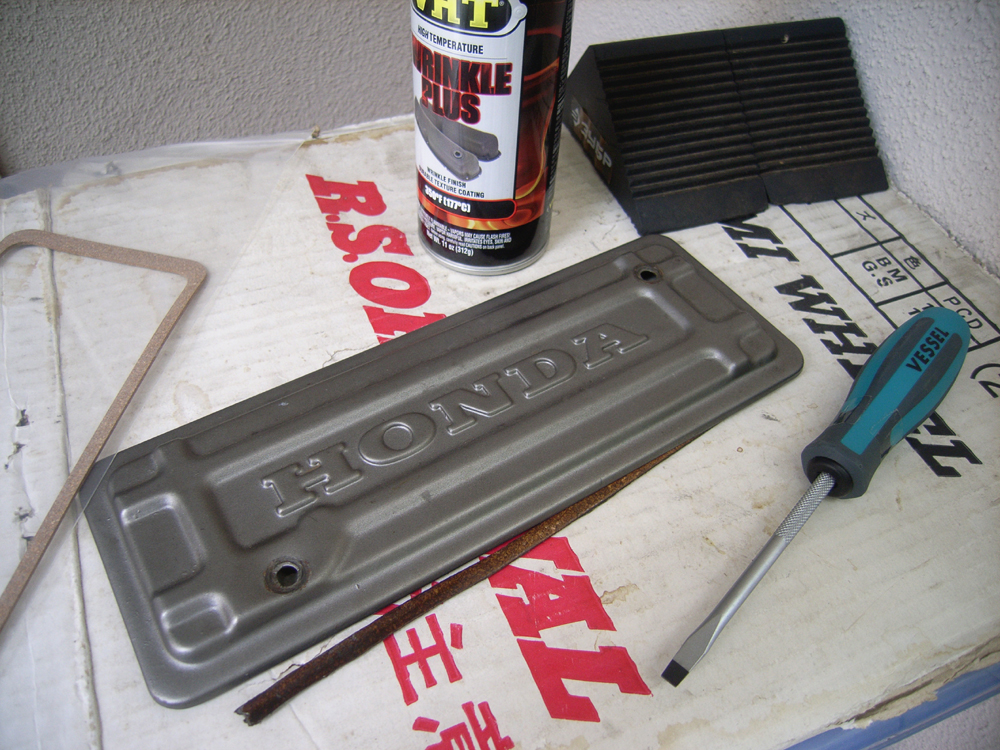
Cam-box cover - flaky seal, body colored paint, bent wing-nut holes equals a quick weekend job - the dark art of wrinkle finish. Some small peen hammer work, warm day, multiple thick coats, heat-gun at the ready... Wish me luck.
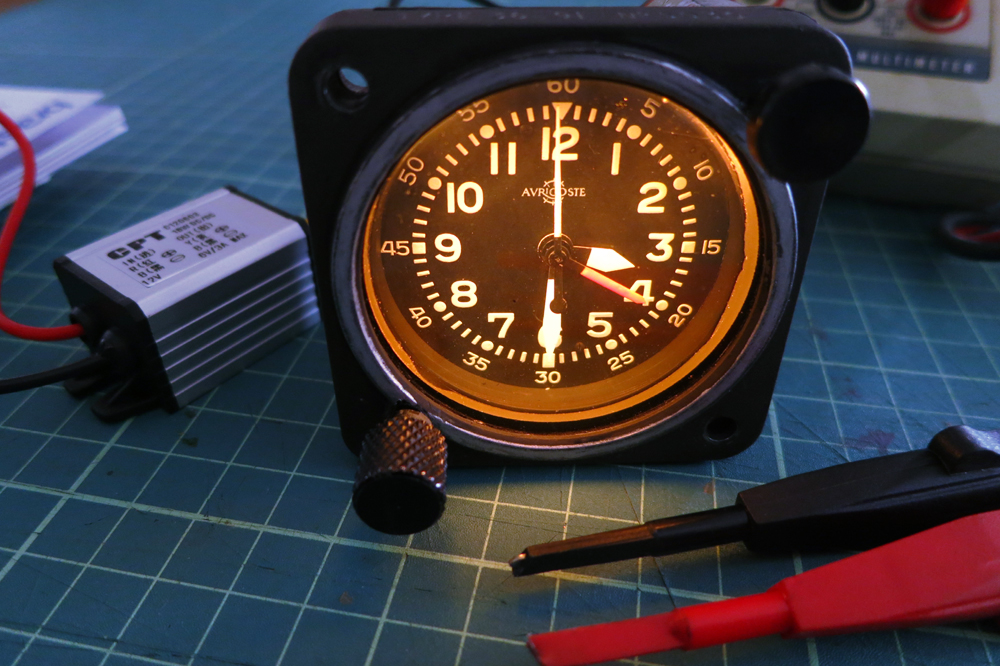
My clock proposal needed a 12V to 6V conversion for the instrument light to work as well, so I looked at building a 12 to 6VDC converter, regulators, drop-resistors, Zener diode circuits, ballast coil resister (as used in VW & Porsche 12V conversions for wiper motors), using a FoMoCo 'instrument regulator' which were designed to allow 1940s instrument circuits to be used all the way up to the 1990s... but then in a rare moment of brilliance thought the Chinese must have something available on eBay - sure enough for 285 yen, including shipping, a 3A capable 12 to 6VDC converter. Amazing. Clock now matches off-white glow of the rest of the instruments at night. I just need to spend ten days making a suitable mount for it. Neko.
My clock proposal needed a 12V to 6V conversion for the instrument light to work as well, so I looked at building a 12 to 6VDC converter, regulators, drop-resistors, Zener diode circuits, ballast coil resister (as used in VW & Porsche 12V conversions for wiper motors), using a FoMoCo 'instrument regulator' which were designed to allow 1940s instrument circuits to be used all the way up to the 1990s... but then in a rare moment of brilliance thought the Chinese must have something available on eBay - sure enough for 285 yen, including shipping, a 3A capable 12 to 6VDC converter. Amazing. Clock now matches off-white glow of the rest of the instruments at night. I just need to spend ten days making a suitable mount for it. Neko.
Last edited by Kuroneko; 06-08-2013 at 10:56 PM. Reason: Update
06-10-2013, 11:38 PM
#155
Honda-Tech Member
Thread Starter
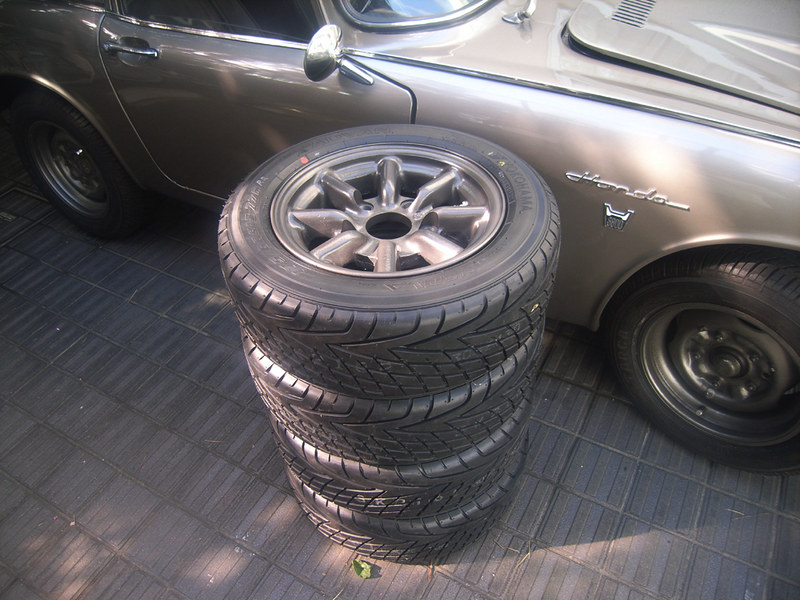
Nothing like a matched set...
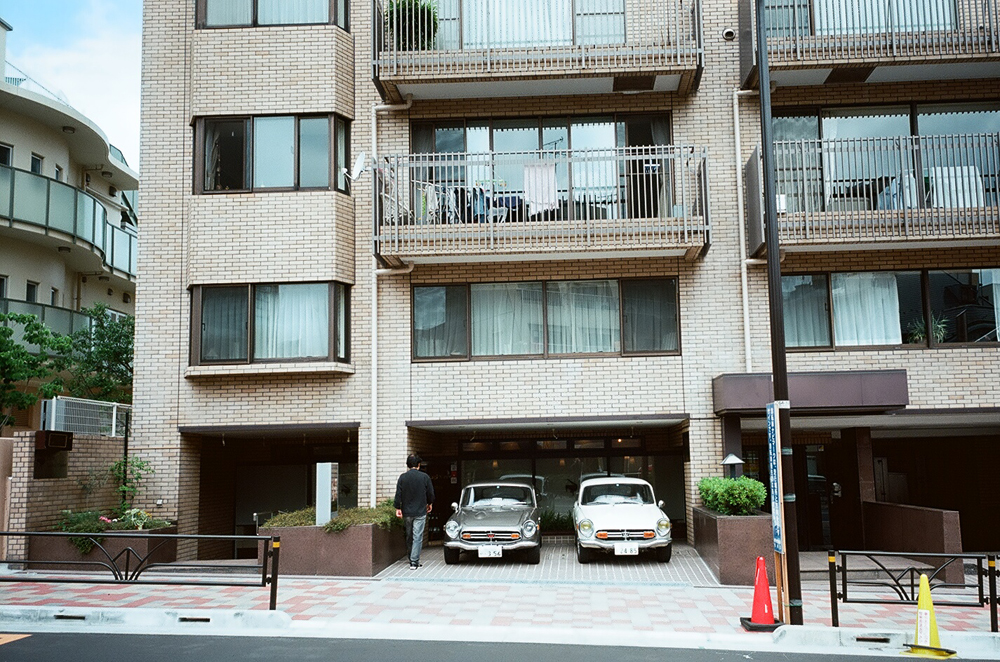

Matching spoked wheels - gray RS Watanabe and silver Minilites fitting well...
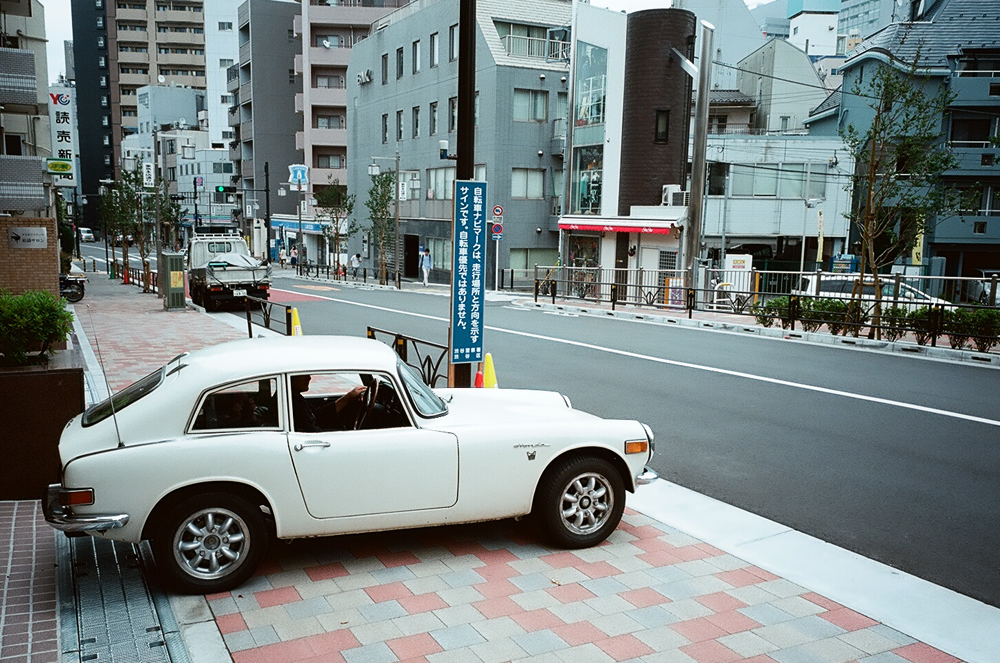

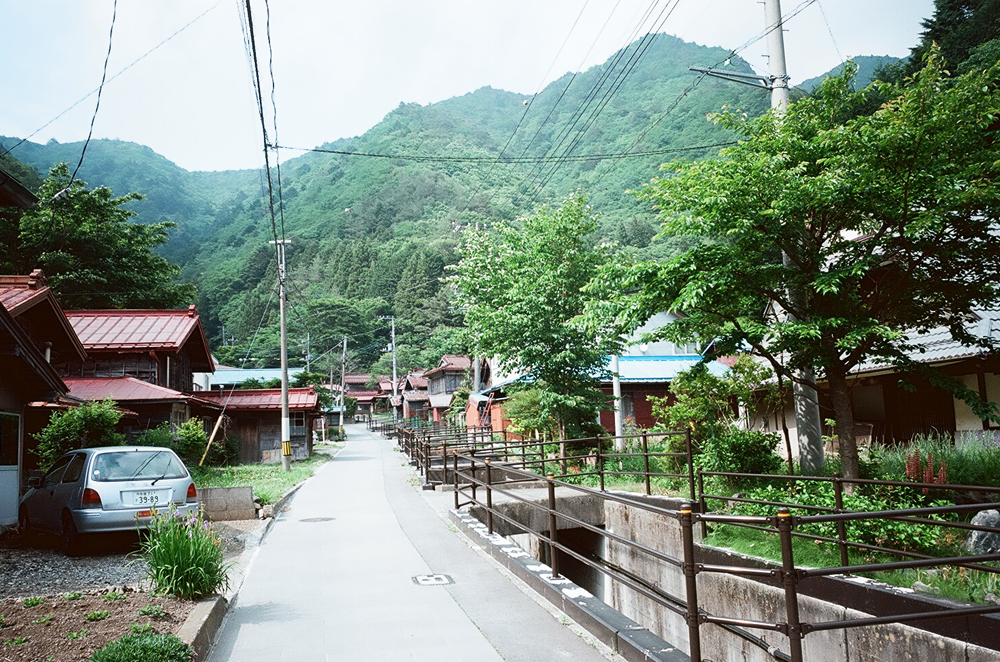
The last one, a lonely drive to work at 04:30. One of the weird things about Japan - no daylight savings! It looks like midday and there's no one - whatsoever - on the streets. Google the book 'Tokyo Nobody' if that's your thing. See ya! Neko.
Matching spoked wheels - gray RS Watanabe and silver Minilites fitting well...
The last one, a lonely drive to work at 04:30. One of the weird things about Japan - no daylight savings! It looks like midday and there's no one - whatsoever - on the streets. Google the book 'Tokyo Nobody' if that's your thing. See ya! Neko.
06-12-2013, 03:36 AM
#156
Honda-Tech Member
Thread Starter
Old:
New:
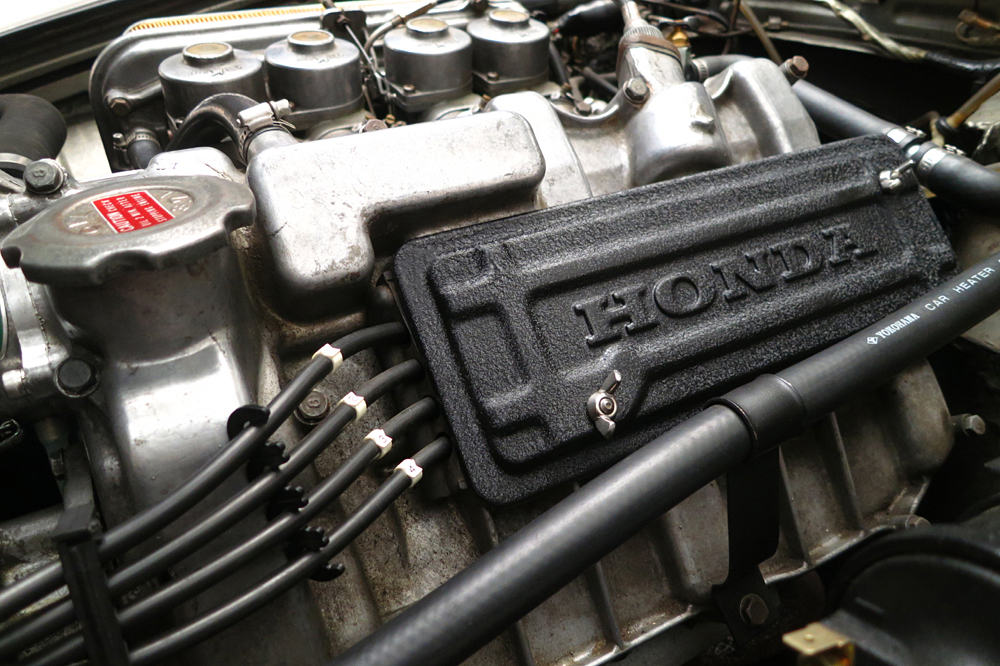
Not that there was anything really wrong with a body colored cam-box cover, but it was kind of like matching your lipstick with your nail-polish. The wrinkle black looks a little more purposeful... Next job - clock mounting aside - is likely the new coil-over installation if I can make a reservation with my local garage to use their lift. Finally fix her too-high ride height (just do not mention 'stance'). Neko.
New:
Not that there was anything really wrong with a body colored cam-box cover, but it was kind of like matching your lipstick with your nail-polish. The wrinkle black looks a little more purposeful... Next job - clock mounting aside - is likely the new coil-over installation if I can make a reservation with my local garage to use their lift. Finally fix her too-high ride height (just do not mention 'stance'). Neko.
 06-18-2013, 08:02 AM
#158
Honda-Tech Member
I thought of your clock project on Sunday when I was at a British car show. On display was a hand-built special with a most unusual dashboard and console. Its display card said that the owner-builder had been a pilot and that he was aiming to re-create the feel of a 1930's Lagonda or Bentley. You can see why your clock came to mind when you look at the pictures https://picasaweb.google.com/1028723...CKvRjIbr1Mjiew.
06-21-2013, 12:34 AM
#159
Honda-Tech Member
Thread Starter
06-22-2013, 07:34 PM
#160
Honda-Tech Member
Thread Starter

So, she said, 'I suppose you need to take it for a test drive now?' Test drive a clock? Sure! Any excuse... Neko.
Last edited by Kuroneko; 06-27-2013 at 01:52 AM.
06-22-2013, 11:18 PM
#161
Honda-Tech Member
Thread Starter
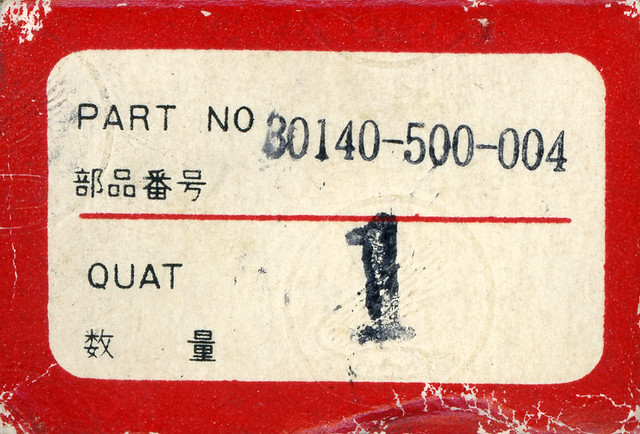
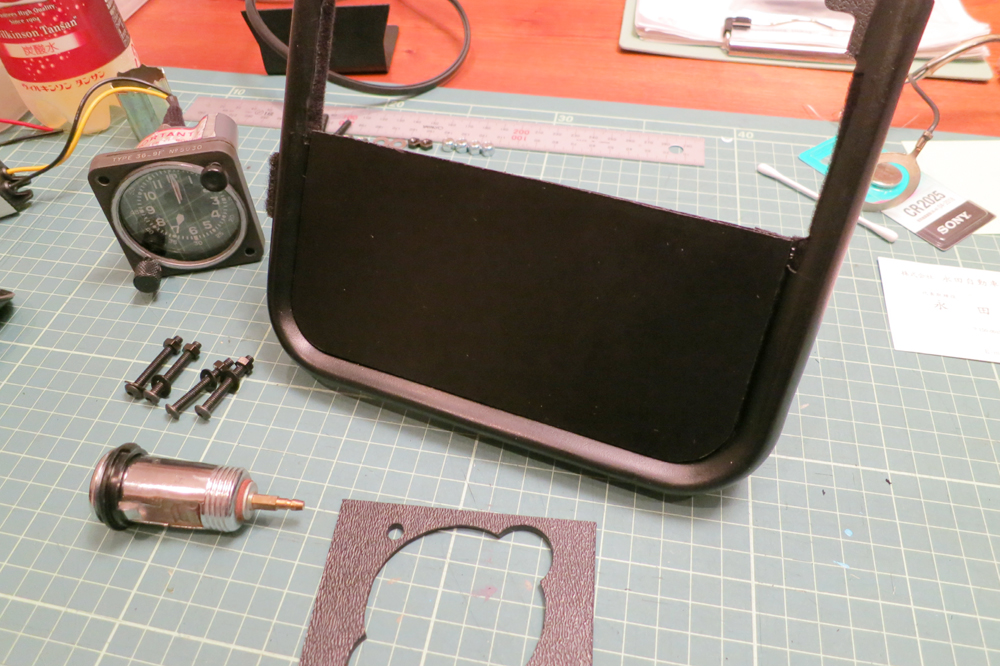
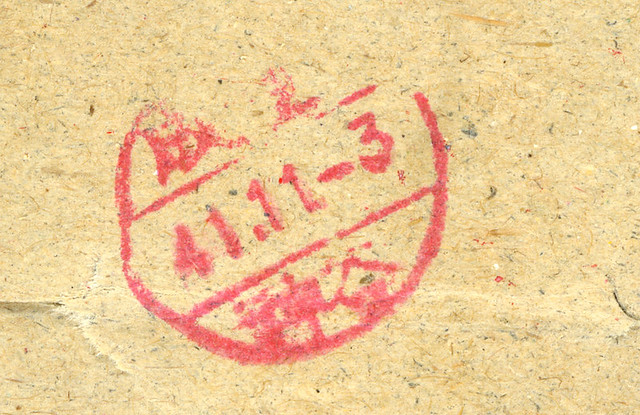
New old stock distributor rotor, which is kind of boring (old one has a chip, but seems to run to 9000+ OK), but the OEM box dated Showa 41 (1966) November 3 is pretty neat. Neko.
 06-23-2013, 04:40 PM
#162
Honda-Tech Member
There's so much more than cars in this thread. Thank you for driving me to look up the Gengo date system, which I'd not heard of before! I have a boxed NOS rotor button for the S600. The box is old enough to carry the first format part number, stamped over top with the later number, but I can't find a date to try out my new knowledge 
06-23-2013, 06:03 PM
#163
Honda-Tech Member
Thread Starter
There's so much more than cars in this thread. Thank you for driving me to look up the Gengo date system, which I'd not heard of before! I have a boxed NOS rotor button for the S600. The box is old enough to carry the first format part number, stamped over top with the later number, but I can't find a date to try out my new knowledge
06-25-2013, 10:51 PM
#164
Honda-Tech Member

Join Date: Jun 2013
Posts: 104
Likes: 0
Received 0 Likes
on
0 Posts
I agree with others, the car images mixed with the Japanese landscape add an extra dimension. Having visited Japan a few times, I can assure all that it is an amazing place to travel to. Add Japan to your bucket list, you will not be disappointed.
06-28-2013, 05:22 AM
#165
Honda-Tech Member
Thread Starter
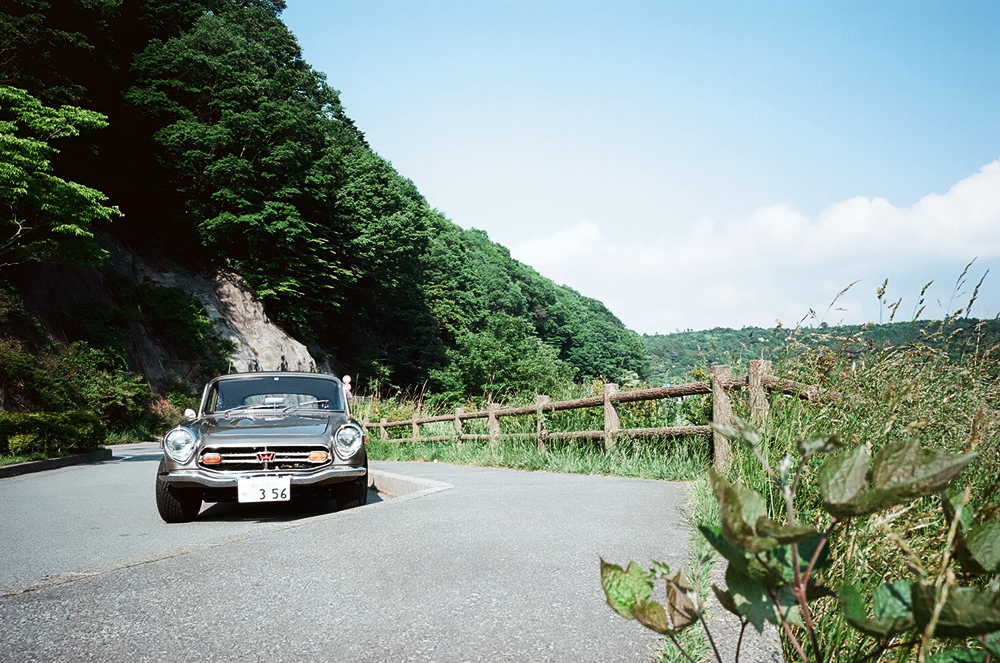
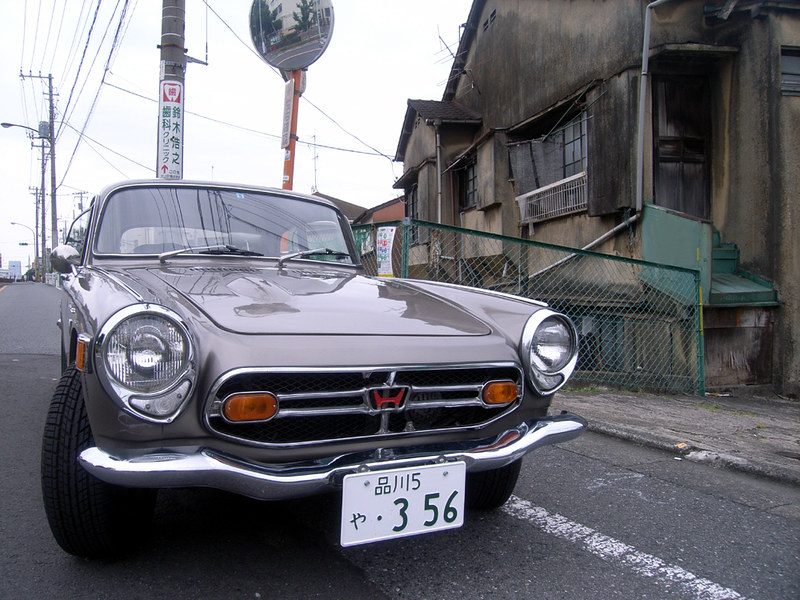
Thanks! Near empty roads, sunny day, lunch off a nice touge, and coffee beside a lake listening to the tink-tink-tink of the exhaust cooling... Perfect day.

07-12-2013, 08:07 PM
#166
Honda-Tech Member
Thread Starter
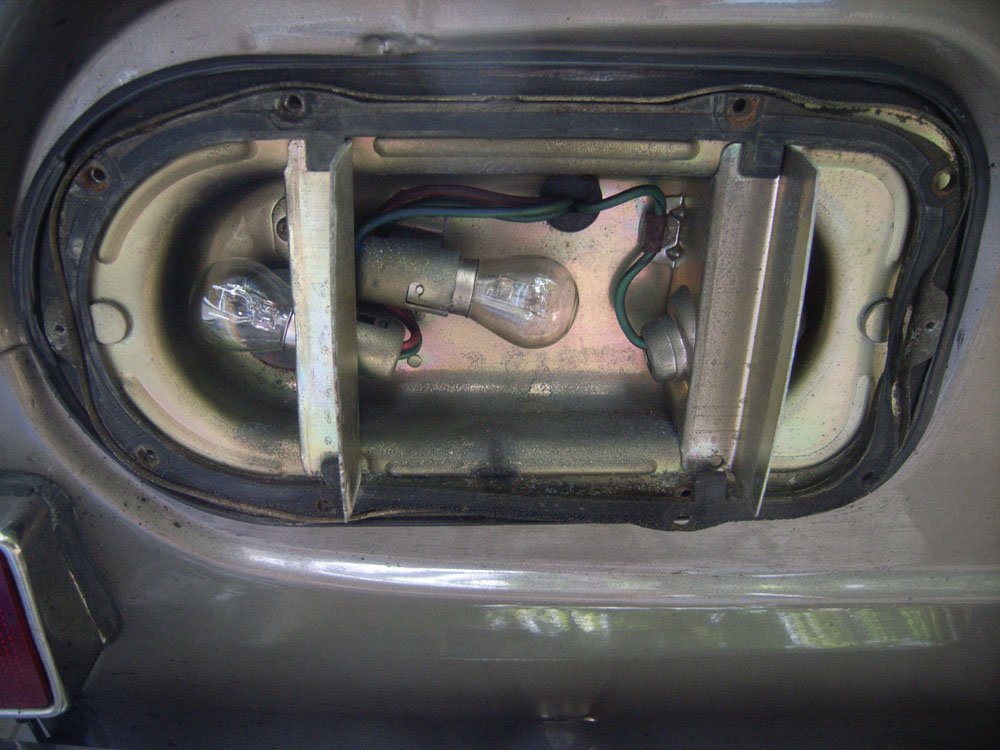
General 40 year old grubbiness, plus one blown stop-lamp equals time to pull apart tail lamps, clean, adjust, and lubricate. Old rusty screws replaced with new stainless, lenses polished with PlastX, and orange bulbs installed behind faded indicator lenses (which usually just glowed off-white).
Original rubber seals came up well with a light toothbrushing and some silicone grease.
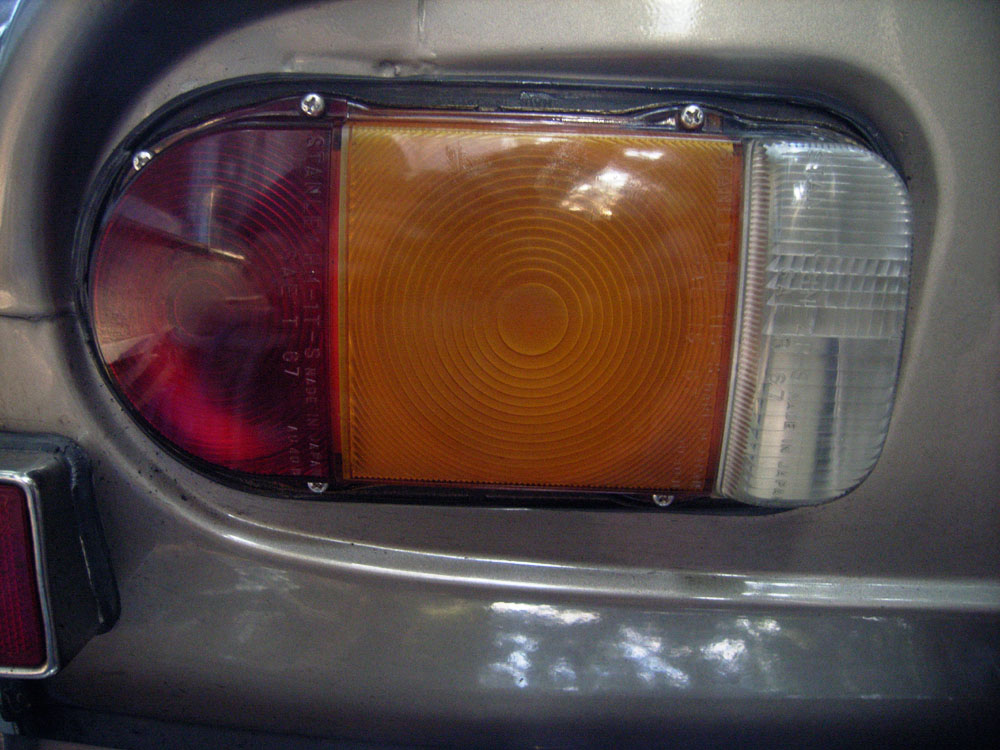
New JIS M3 flatheads secure bezels nicely.

Heavy orange glow with orange lamps behind soft orange lenses.
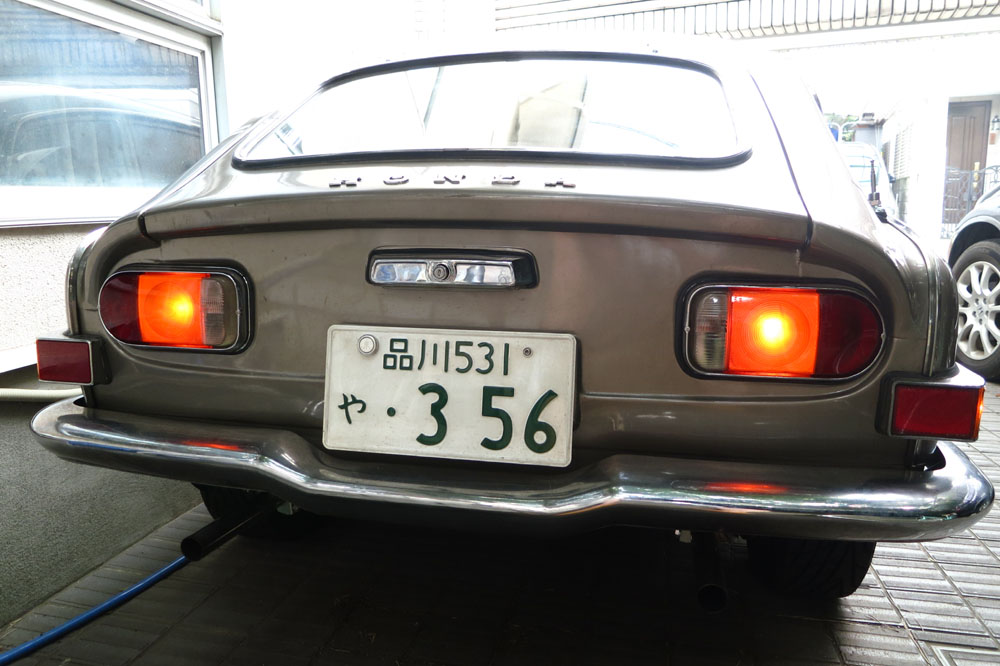
Time for a drive... Neko.


Original rubber seals came up well with a light toothbrushing and some silicone grease.
New JIS M3 flatheads secure bezels nicely.
Heavy orange glow with orange lamps behind soft orange lenses.
Time for a drive... Neko.
Last edited by Kuroneko; 07-13-2013 at 12:25 AM.
07-15-2013, 09:05 PM
#167
Honda-Tech Member

Join Date: Feb 2011
Posts: 4
Likes: 0
Received 0 Likes
on
0 Posts
Neko,
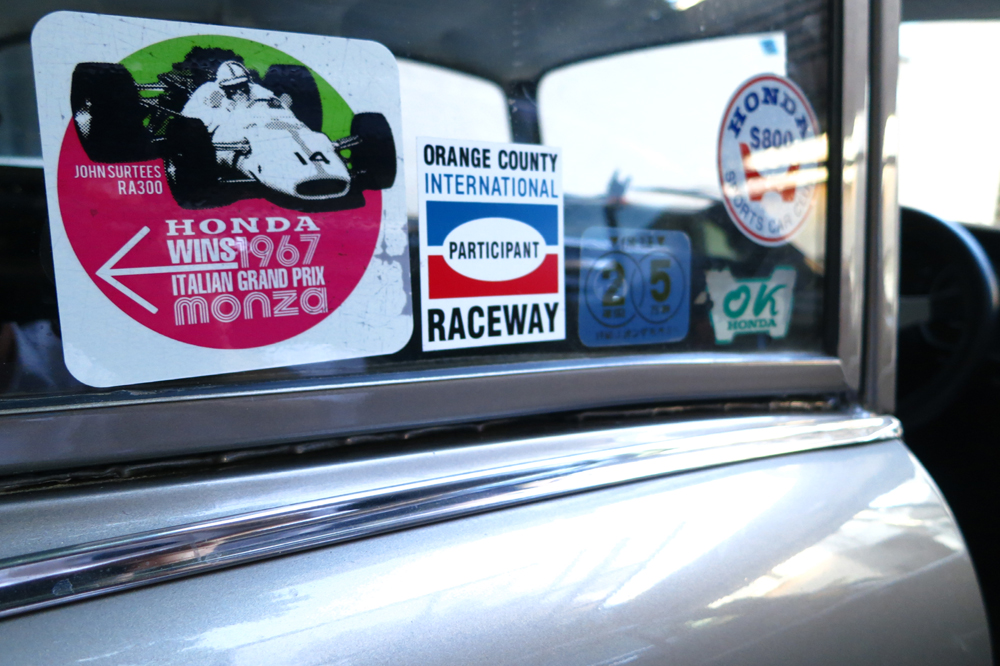
A happy surprise to see an OCIR decal on a car in Japan. I spent many days there as a youngster back in the day.
Do the amber brake lamps cause you any concern? Here in California I am very uneasy running those on my M-type Coupe. I may exchange the wiring with the turn signals so the red lenses light with the brakes and amber with the turn indicators. Or I may install the early set of tail lamps I have in place of the M-type.
As always your S800 is outstanding!
John in Costa Mesa
07-15-2013, 11:57 PM
#168
Honda-Tech Member
Thread Starter
A happy surprise to see an OCIR decal on a car in Japan. I spent many days there as a youngster back in the day.
Do the amber brake lamps cause you any concern? Here in California I am very uneasy running those on my M-type Coupe. I may exchange the wiring with the turn signals so the red lenses light with the brakes and amber with the turn indicators. Or I may install the early set of tail lamps I have in place of the M-type.
As always your S800 is outstanding!
If you look closely you can see the outside red lamp is the dual filament park / stop light already, the single filament is the orange lamp in the middle as the indicator. The bulb holders should be easily swapped accordingly to give appropriate orange for indicator and red for park / stop light?
That is if you have dual filament which you might not, as you may have single filaments in both stop / indicator (middle & orange), and tail light (outer & red) housings? With only two single filament wires, you may need to rewire your brake / indicator circuits, unless there is an unused third wire in your loom?
Assume you have a wiring diagram as my manual list US market but only shows Germany & France, both of which only have three wire tail light sets, not four wire like home / UK / Australia. Neko (ex-Hermosa).
07-22-2013, 01:09 PM
#169
Honda-Tech Member

Join Date: Jun 2011
Posts: 47
Likes: 0
Received 0 Likes
on
0 Posts
Beautiful s800...man i wish those were not so rare in the US. Especially the 800cc coupe.
Love that last pic...would make a great wallpaper. Do you have a link to a bigger image?
Love that last pic...would make a great wallpaper. Do you have a link to a bigger image?
07-26-2013, 06:42 PM
#170
Honda-Tech Member
Thread Starter
08-14-2013, 02:11 AM
#173
Honda-Tech Member
Thread Starter
Previous Work.
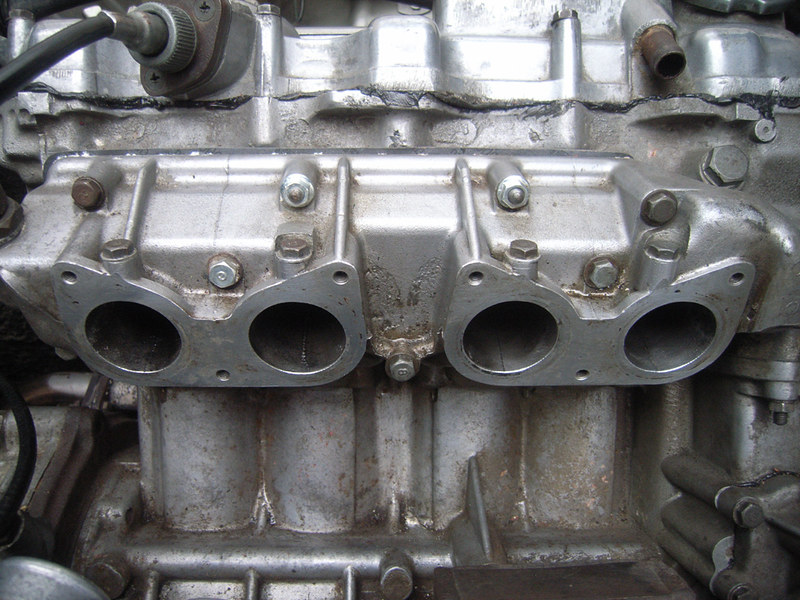
The carburetor rubber mounts appeared original and showed deep cracks, and as the hose clamps were bent and misaligned too, a new set of mounts & clamps were installed. A job that was going to wait, but when I saw some parts on YAJ for cheaper than usual, I grabbed them. Old:

Clean the port faces. Largish I suppose for a mere 800cc, but churning over at 8500+ rpm, I suppose some volume is needed!
New mounts, O-rings, with a smidge of grease.
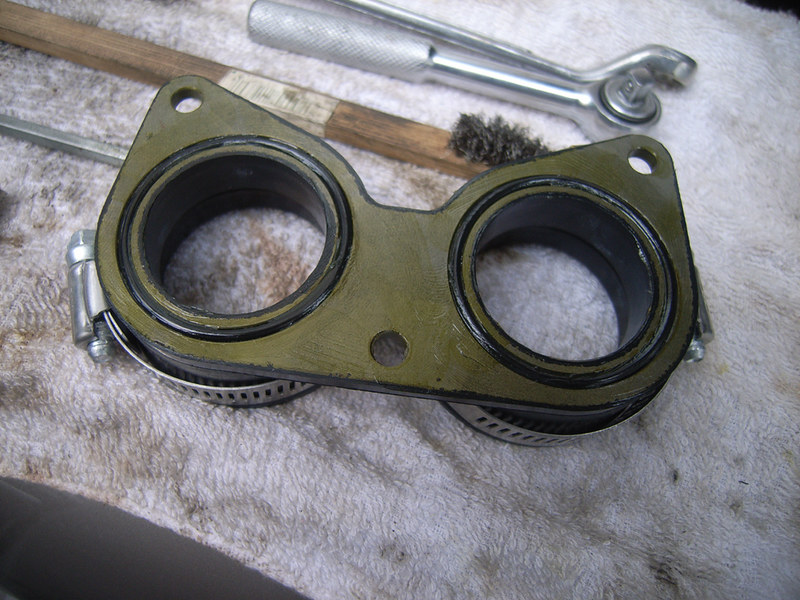
New stainless bolts...
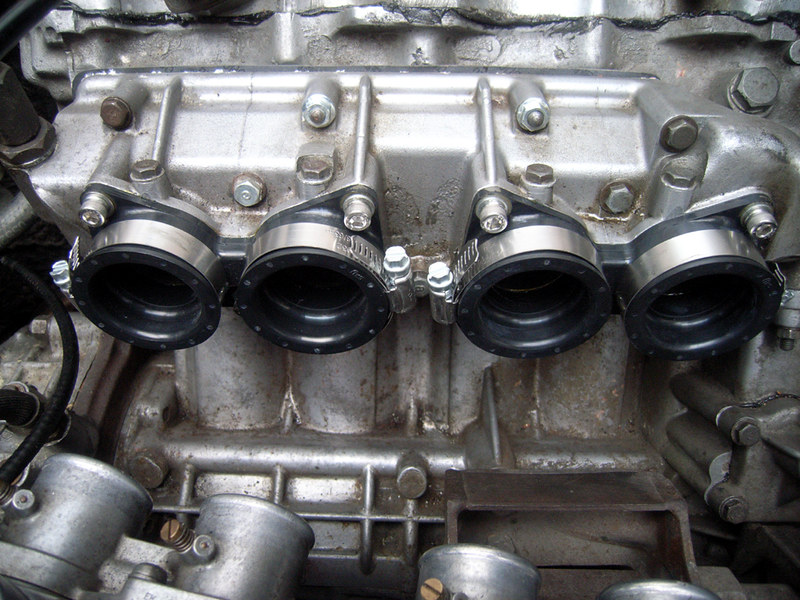
New:
There was some rust in the floors, but it was only surface rust, and in removing the sound deadener was also surprised to see clean, shiny steel under the bitumen sheets too. Before:
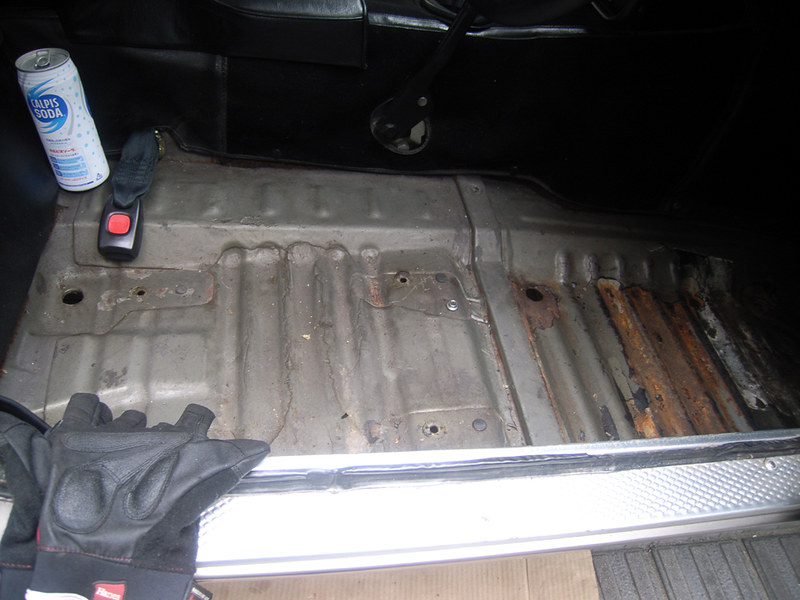
The worst rust found:
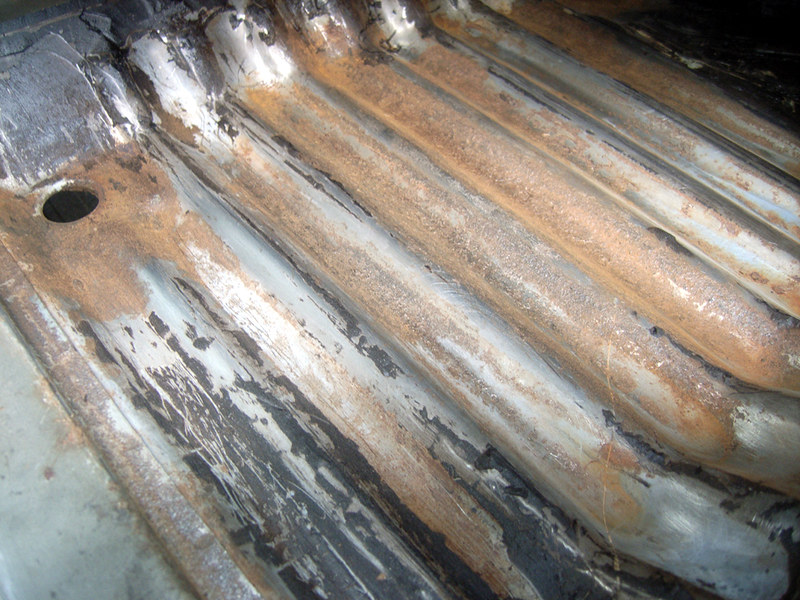
Lightly spotted fresh gray steel under old bitumen covering (with genuine stamped floor rust removing steel brush, and Nissan R32 Skyline inertia rear seat belts):

POR15 pics to follow before seats get reinstalled. I should also make a Dynamat / cotton wadding decision too I suppose. What's the general consensus on Dynamat or similar, as I rather like the thermo properties of it over regular old-style wadding sound deadening?
I also replaced the export-only M-type front indicator lenses, with JDM M-type lenses. A lot more fitting style I think over the chunky US federalized style units. Another job was an oil & filter change, updating to a modern style filter too, as though OEM S800 filters can be sourced they are four times the price of the modern HAMP (Honda After Market Parts for bike) style. But it will take ten or more filter changes to recoup the new filter system cost, but I assume with modern Motul ZDDP 4-stroke bike oil, the modern filter technology (right) is at least a little more efficient over the older style (left). Plus, they're a lot easier to change.
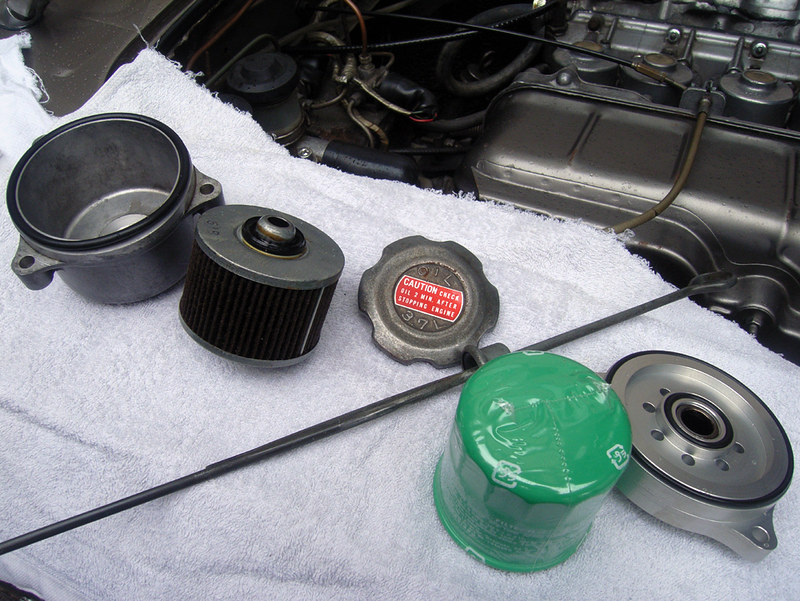
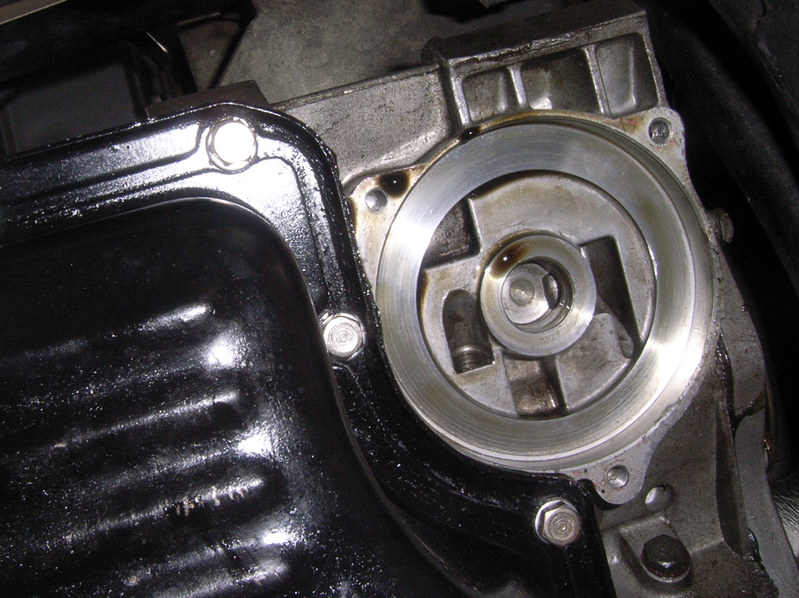
Fitted smoothly, runs up to temp, no leaks:

Step One for New Wheels - fitting & balancing at my local stando. 175/60R13 Yokohama Advan AD05/06 replacing 185/60R13 Spainisch made Targa.
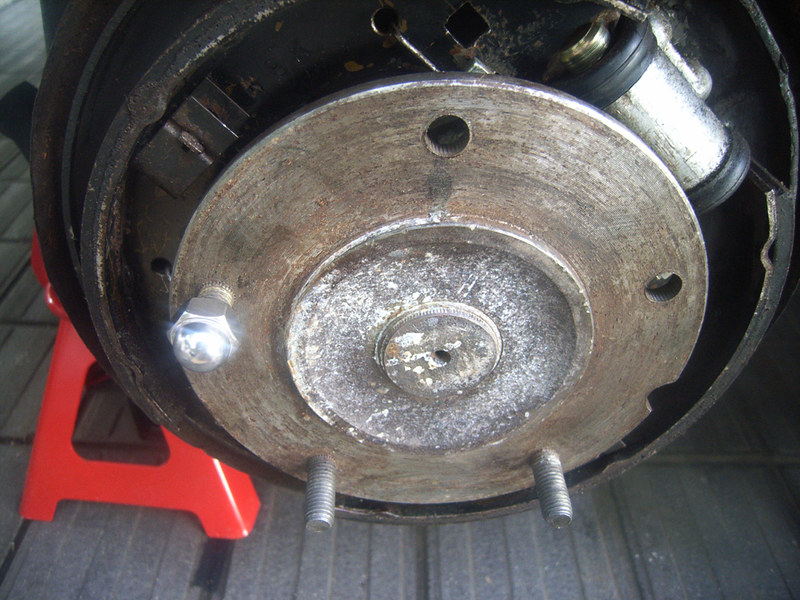
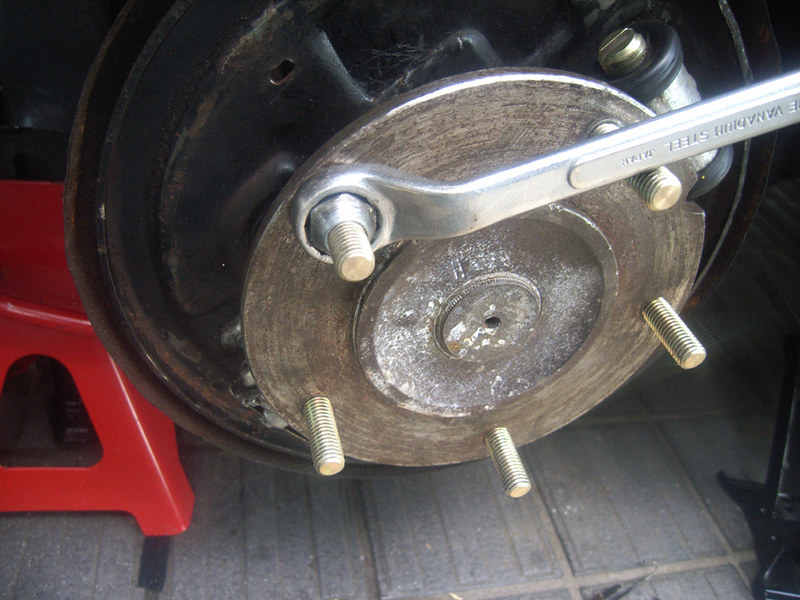
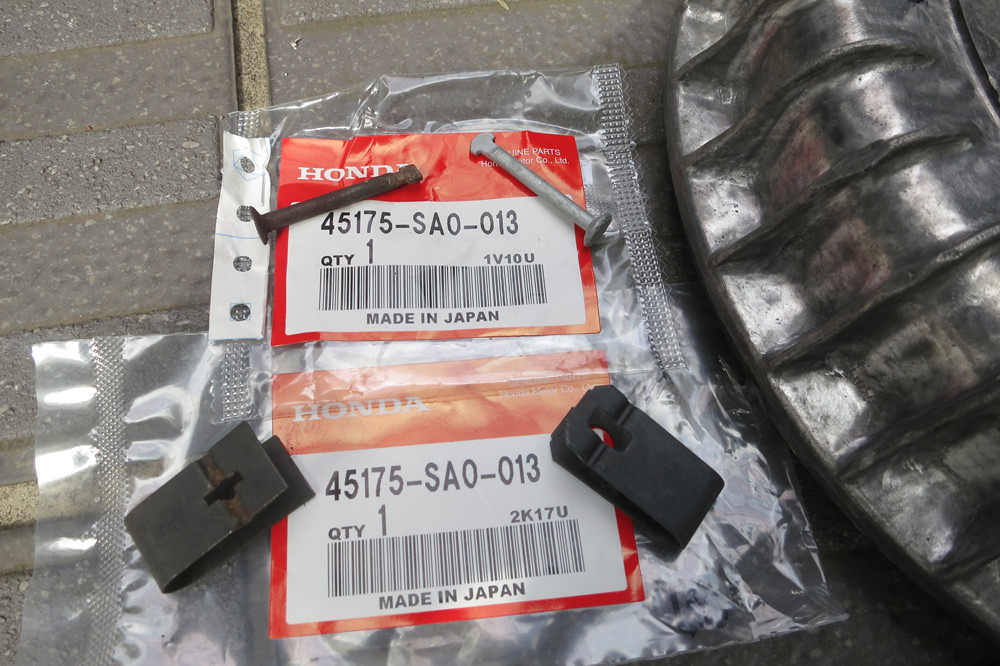
Step Two - replacing original rear short studs, with alloy-length longer (+15mm) studs. Initially, I had thought axle removal and press needed, but a fellow S-hachi driver suggested the method of a lump-hammer, and loosening brake plate to allow the long stud to wriggle in place a lot easier than removing the whole axle. So I capped the old studs and tapped them out easily, removing the shoe hardware the new ones wiggled in, I cleaned the hub splines and using the steel nuts to tighten up, the new ones pulled in flush nicely. Making sure the rear-chamfer cleared the inner hub flange.

Though the man at Watanabe advised the OEM steel nuts were OK for street use on the alumi wheels, as others suggested I am waiting on delivery of some proper M10xP1.5 steel nuts with a 60 degree taper suited for the alumi wheels.
Mmmm, shiny new bits (or rather dull alloy new bits):
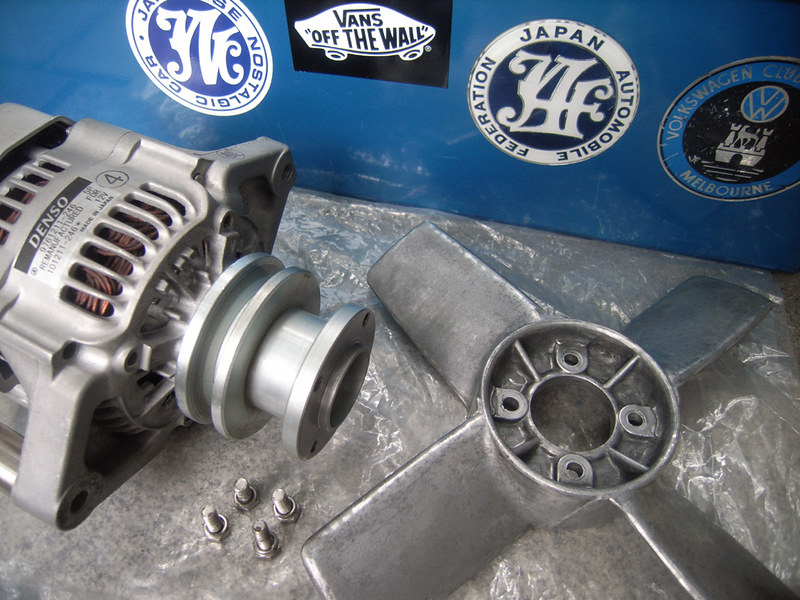
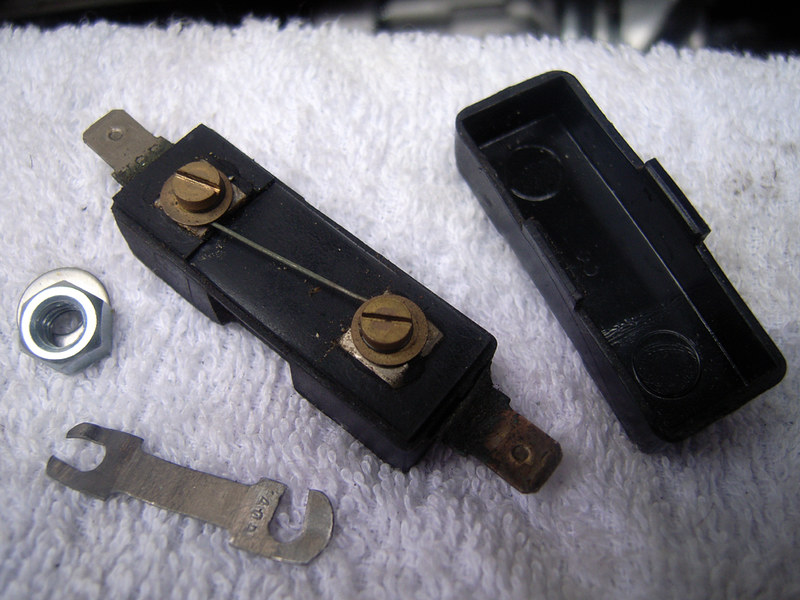
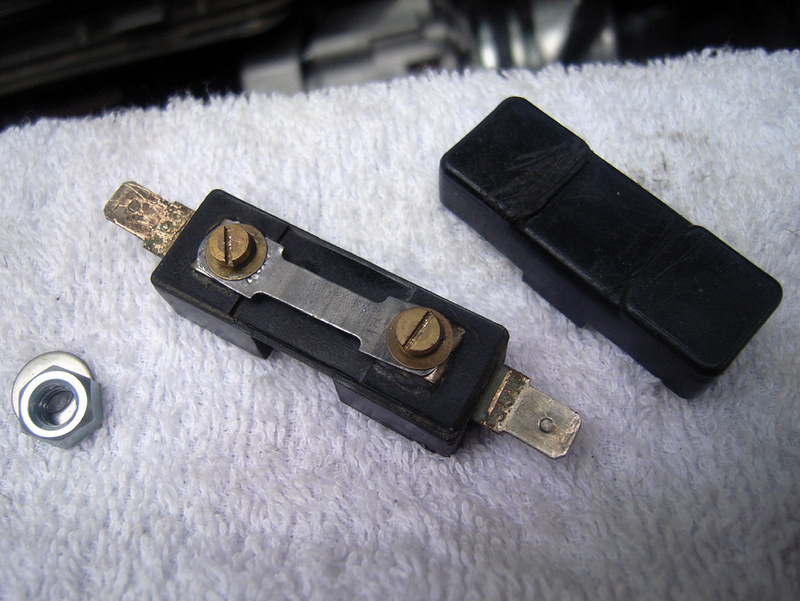
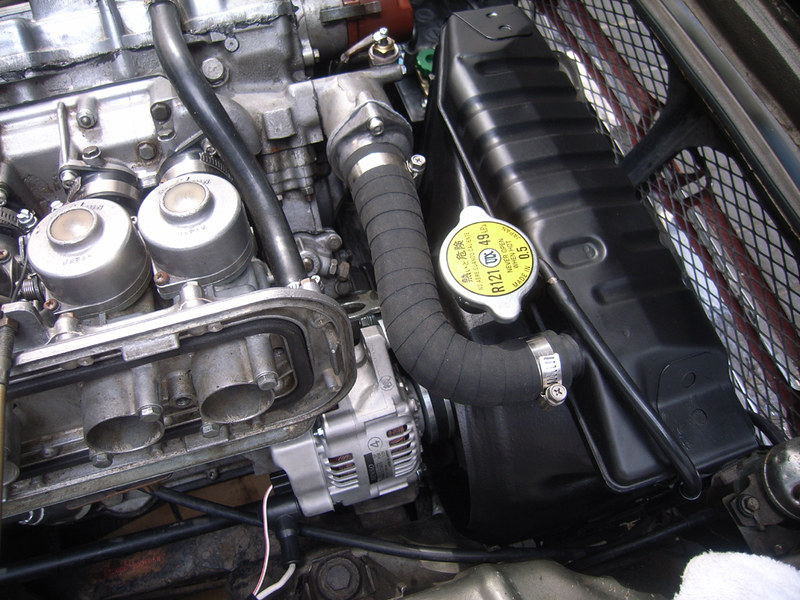
The fan bolted up to the new stand-off spacer just fine. Replaced the old 30A fuse with a 40A, CRC contact cleaner works brilliant, and the new alternator bolted in perfectly. She now charges at idle, with high beam on. Great stuff!

Compared to the old, much better.
After a leak check on new hoses, and stuff, time for a drive... The temp sender is weeping a little, so I will pull it, and use a new washer, and perhaps a smidge of Permatex RTV gasket maker. Ride height still nags, so do those ignition leads...
One rear brake shoe made some heavy grabbing noises, and knowing the locking pins and hold springs were a bit ratty I went to my local Honda shop and purchased a new set, or at least those from a Civic that a fellow S-car driver advised were essentially the same. Total cost 1200 yen.
The new hold springs are substantially thicker, and take at least two or three times the tension to secure the pins.
Since overhauling the rear pistons I also wanted to check for leaks or weeping, so it was good to see all the pistons, cups, and dust covers dry and covered in nothing more than a light coat of brake dust. A quick readjust of shoes and wheels back on for a run to Ginza for lunch. No squeaks, scrapes, or any strange brake noises with a nice hard pedal.
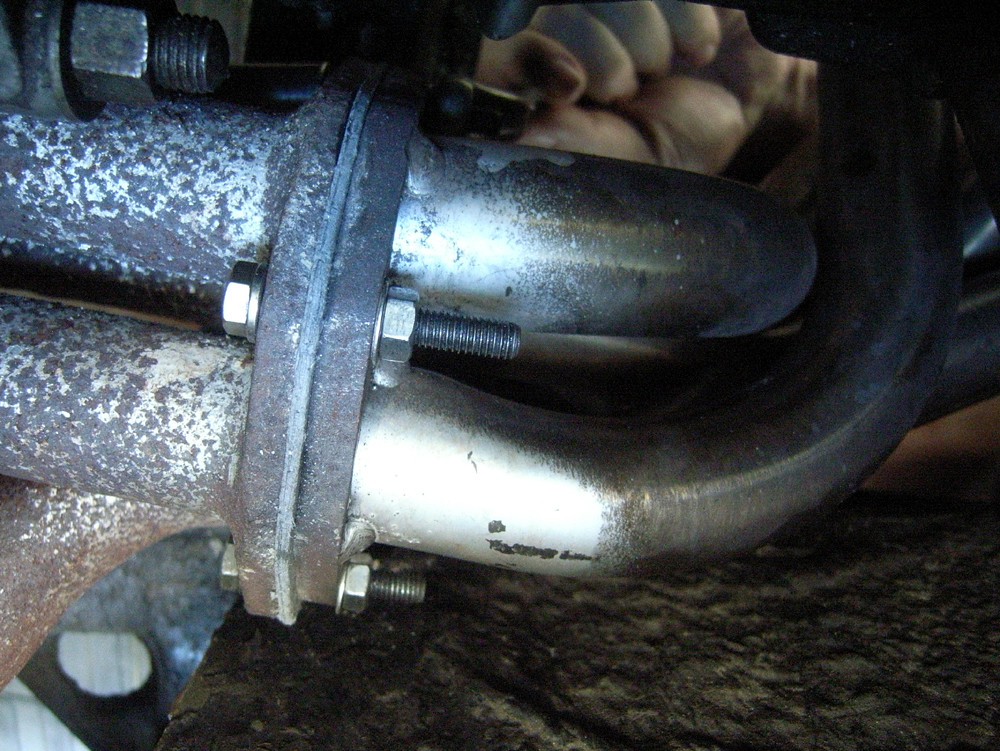
Apart from my lovely passenger complaining of fumes sometimes, the exhaust has been making some severe fluffing noises, especially loud on start-up. Inspection of the few possible places leaks could occur, quickly resolved the main tako from the head to the system inlet gasket.
After removal, you could see both how bad the leaks had been, and temp fix deployed previously with some caulk that had obviously entered the exhaust path, and since blown out on all four pipes.

With an able-fingered assistant we easily removed the old, and contemplating the use of shorter new bolts, realized the long stainless bolts used allowed easy pulling together of the flanges from the distance they naturally sat at when undone.
The new gasket - 2400 yen from Spread Tools - was a perfect fit, tightened up easily, fixed all leaks, and the car now runs smoother at idle, revs out a little better too. I suppose the exhaust tako will need painting or replacing one day.
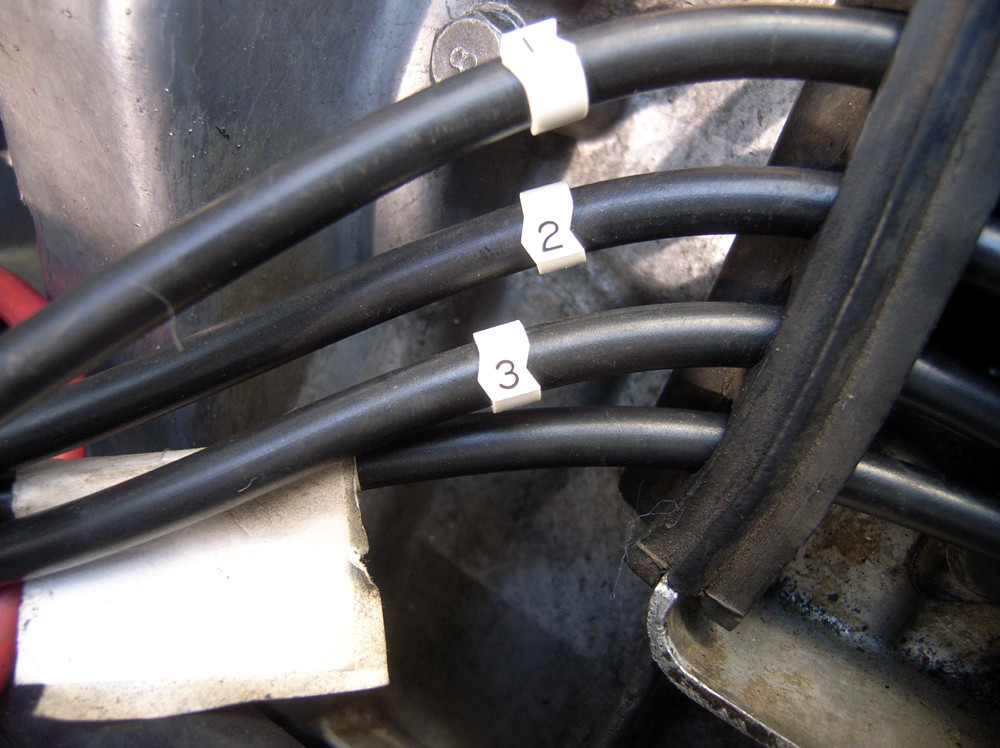
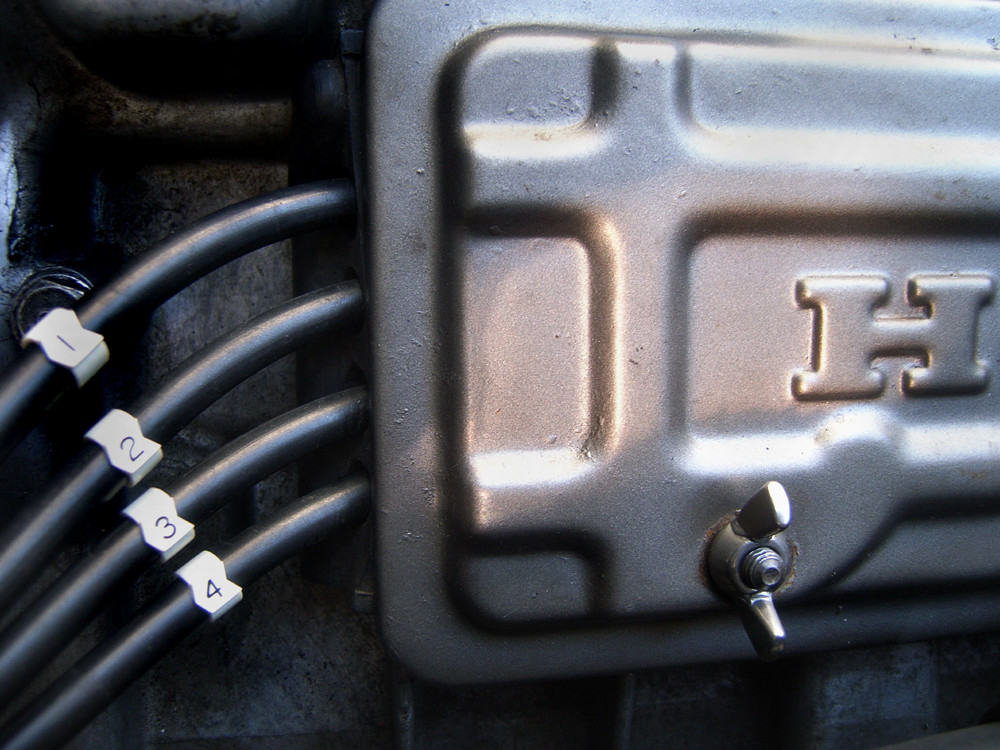
We also replaced the ignition lead labels (paper previously), with 500 yen of clip-on ignition cable numbers.
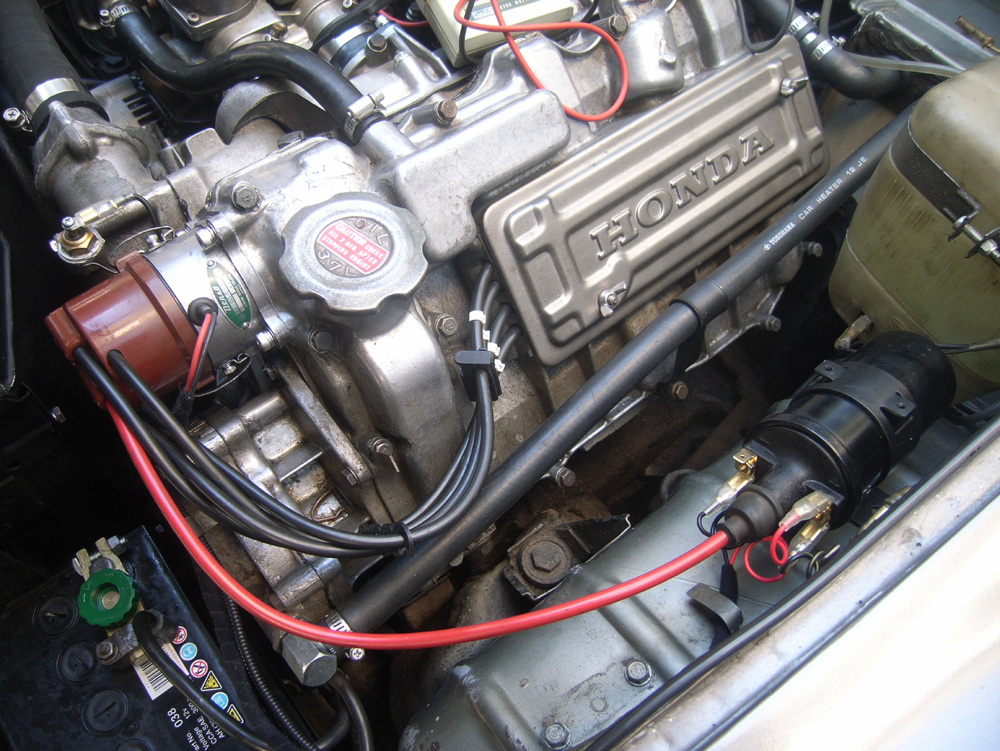
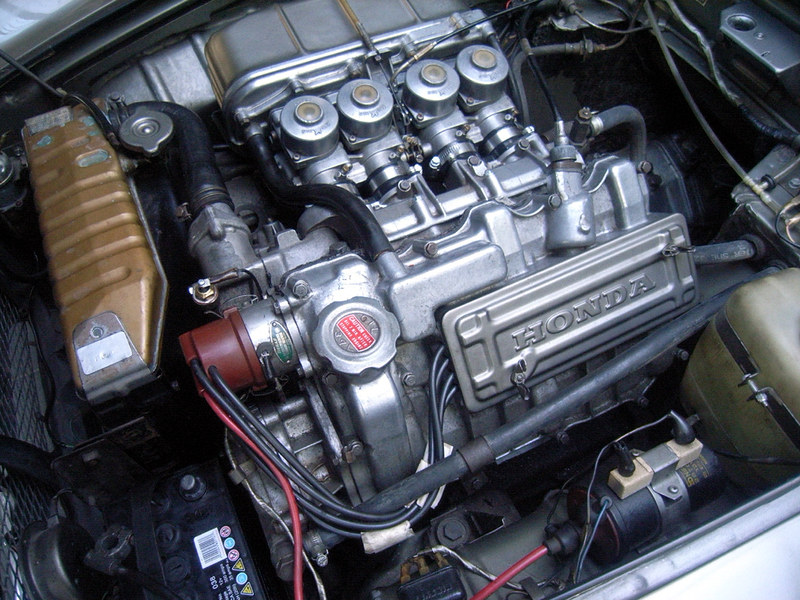
Compared to the photograph on the bottom of page 3, the whole left side of the engine compartment is looking a whole lot tidier. The hot-wire to the points pending replacement with the Pertronix Ignitor next.

In putting the ignition leads back into the distributor cap, for some reason 1-4-3-2 was chosen over 1-2-3-4, resulting in only firing in sequence on two cylinders. It back fired badly for a test drive, before I realized it wasn't going to clear itself, and inspection saw the error of our feeble counting to four. Re-ordering the ignition leads, immediately fixed the problem. What an idiot.
The carburetor rubber mounts appeared original and showed deep cracks, and as the hose clamps were bent and misaligned too, a new set of mounts & clamps were installed. A job that was going to wait, but when I saw some parts on YAJ for cheaper than usual, I grabbed them. Old:
Clean the port faces. Largish I suppose for a mere 800cc, but churning over at 8500+ rpm, I suppose some volume is needed!
New mounts, O-rings, with a smidge of grease.
New stainless bolts...
New:
There was some rust in the floors, but it was only surface rust, and in removing the sound deadener was also surprised to see clean, shiny steel under the bitumen sheets too. Before:
The worst rust found:
Lightly spotted fresh gray steel under old bitumen covering (with genuine stamped floor rust removing steel brush, and Nissan R32 Skyline inertia rear seat belts):
POR15 pics to follow before seats get reinstalled. I should also make a Dynamat / cotton wadding decision too I suppose. What's the general consensus on Dynamat or similar, as I rather like the thermo properties of it over regular old-style wadding sound deadening?
I also replaced the export-only M-type front indicator lenses, with JDM M-type lenses. A lot more fitting style I think over the chunky US federalized style units. Another job was an oil & filter change, updating to a modern style filter too, as though OEM S800 filters can be sourced they are four times the price of the modern HAMP (Honda After Market Parts for bike) style. But it will take ten or more filter changes to recoup the new filter system cost, but I assume with modern Motul ZDDP 4-stroke bike oil, the modern filter technology (right) is at least a little more efficient over the older style (left). Plus, they're a lot easier to change.
Fitted smoothly, runs up to temp, no leaks:
Step One for New Wheels - fitting & balancing at my local stando. 175/60R13 Yokohama Advan AD05/06 replacing 185/60R13 Spainisch made Targa.
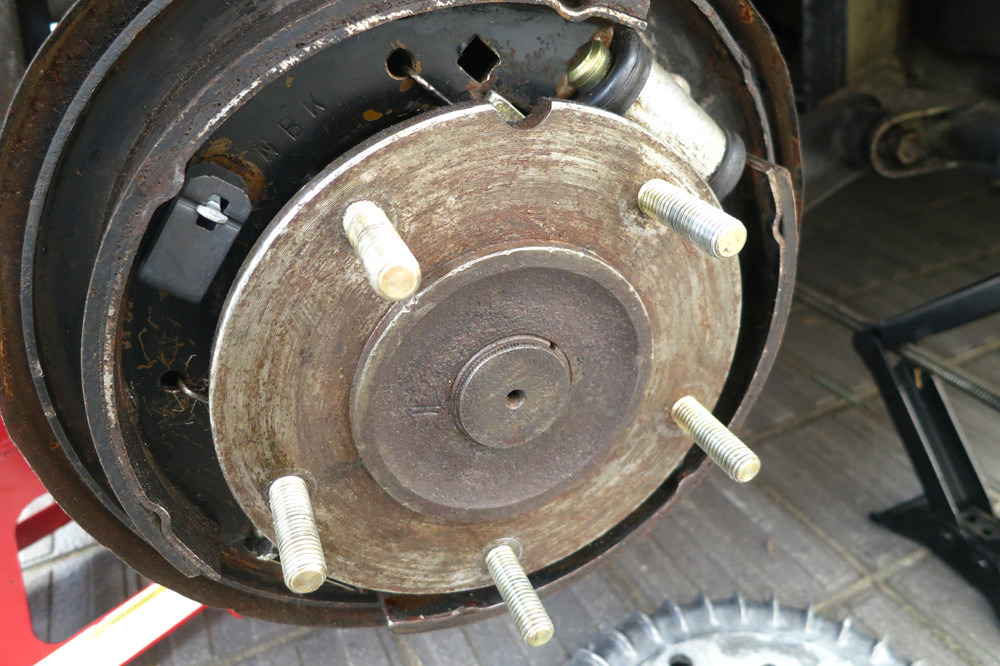
Step Two - replacing original rear short studs, with alloy-length longer (+15mm) studs. Initially, I had thought axle removal and press needed, but a fellow S-hachi driver suggested the method of a lump-hammer, and loosening brake plate to allow the long stud to wriggle in place a lot easier than removing the whole axle. So I capped the old studs and tapped them out easily, removing the shoe hardware the new ones wiggled in, I cleaned the hub splines and using the steel nuts to tighten up, the new ones pulled in flush nicely. Making sure the rear-chamfer cleared the inner hub flange.
Though the man at Watanabe advised the OEM steel nuts were OK for street use on the alumi wheels, as others suggested I am waiting on delivery of some proper M10xP1.5 steel nuts with a 60 degree taper suited for the alumi wheels.
Mmmm, shiny new bits (or rather dull alloy new bits):
The fan bolted up to the new stand-off spacer just fine. Replaced the old 30A fuse with a 40A, CRC contact cleaner works brilliant, and the new alternator bolted in perfectly. She now charges at idle, with high beam on. Great stuff!
Compared to the old, much better.
After a leak check on new hoses, and stuff, time for a drive... The temp sender is weeping a little, so I will pull it, and use a new washer, and perhaps a smidge of Permatex RTV gasket maker. Ride height still nags, so do those ignition leads...
One rear brake shoe made some heavy grabbing noises, and knowing the locking pins and hold springs were a bit ratty I went to my local Honda shop and purchased a new set, or at least those from a Civic that a fellow S-car driver advised were essentially the same. Total cost 1200 yen.
The new hold springs are substantially thicker, and take at least two or three times the tension to secure the pins.
Since overhauling the rear pistons I also wanted to check for leaks or weeping, so it was good to see all the pistons, cups, and dust covers dry and covered in nothing more than a light coat of brake dust. A quick readjust of shoes and wheels back on for a run to Ginza for lunch. No squeaks, scrapes, or any strange brake noises with a nice hard pedal.
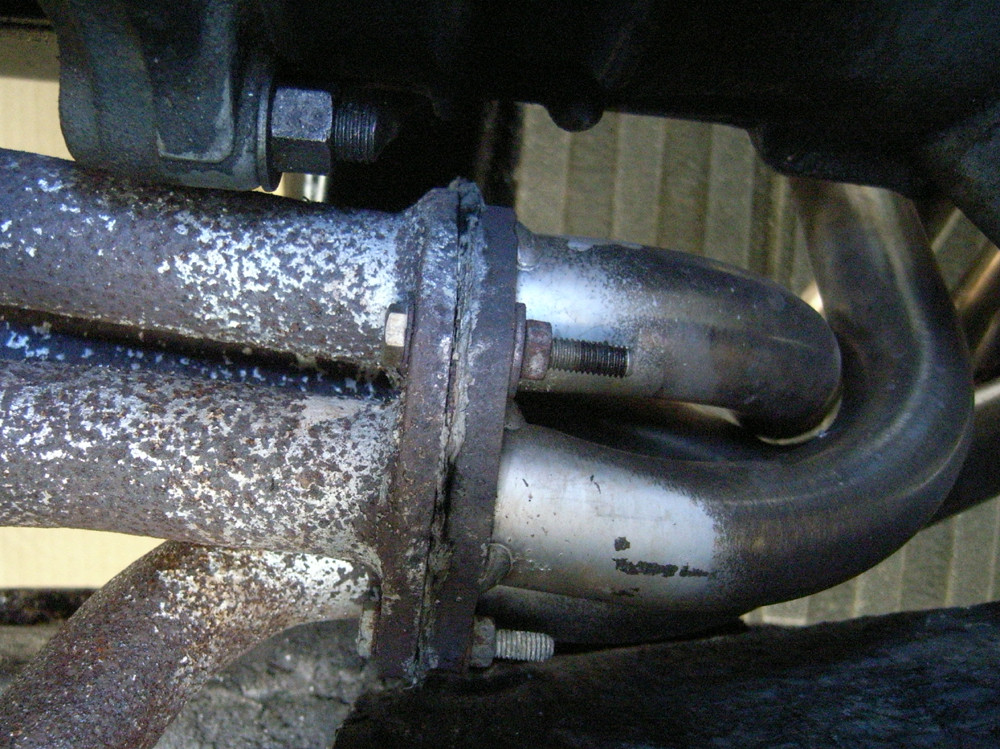
Apart from my lovely passenger complaining of fumes sometimes, the exhaust has been making some severe fluffing noises, especially loud on start-up. Inspection of the few possible places leaks could occur, quickly resolved the main tako from the head to the system inlet gasket.
After removal, you could see both how bad the leaks had been, and temp fix deployed previously with some caulk that had obviously entered the exhaust path, and since blown out on all four pipes.
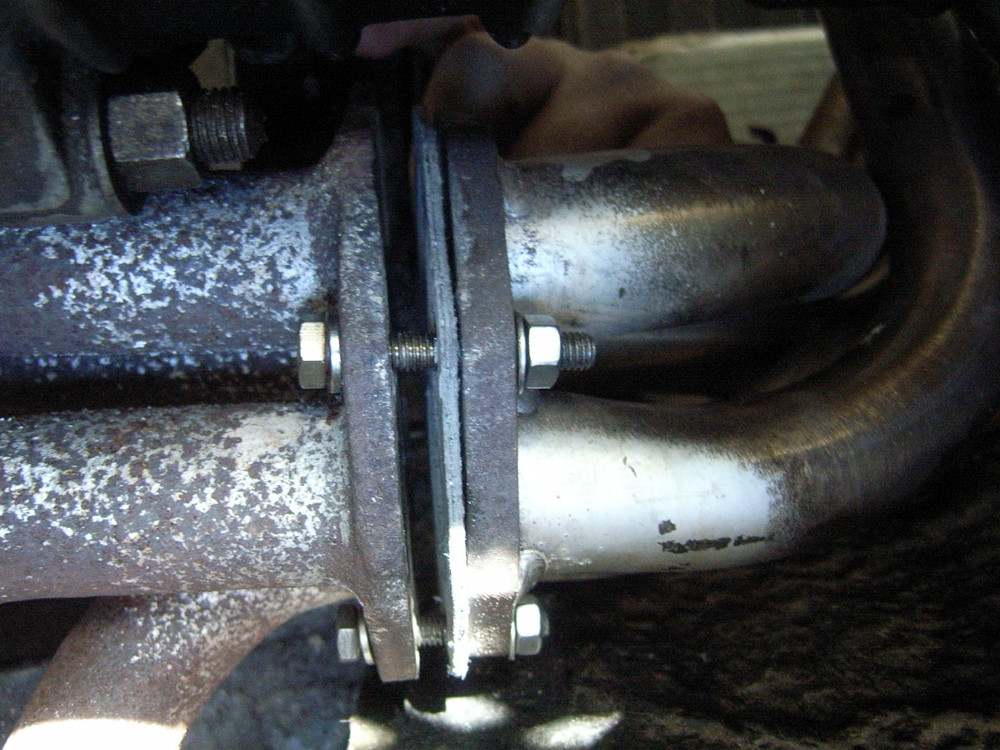
With an able-fingered assistant we easily removed the old, and contemplating the use of shorter new bolts, realized the long stainless bolts used allowed easy pulling together of the flanges from the distance they naturally sat at when undone.
The new gasket - 2400 yen from Spread Tools - was a perfect fit, tightened up easily, fixed all leaks, and the car now runs smoother at idle, revs out a little better too. I suppose the exhaust tako will need painting or replacing one day.
We also replaced the ignition lead labels (paper previously), with 500 yen of clip-on ignition cable numbers.
Compared to the photograph on the bottom of page 3, the whole left side of the engine compartment is looking a whole lot tidier. The hot-wire to the points pending replacement with the Pertronix Ignitor next.
In putting the ignition leads back into the distributor cap, for some reason 1-4-3-2 was chosen over 1-2-3-4, resulting in only firing in sequence on two cylinders. It back fired badly for a test drive, before I realized it wasn't going to clear itself, and inspection saw the error of our feeble counting to four. Re-ordering the ignition leads, immediately fixed the problem. What an idiot.
08-14-2013, 02:12 AM
#174
Honda-Tech Member
Thread Starter
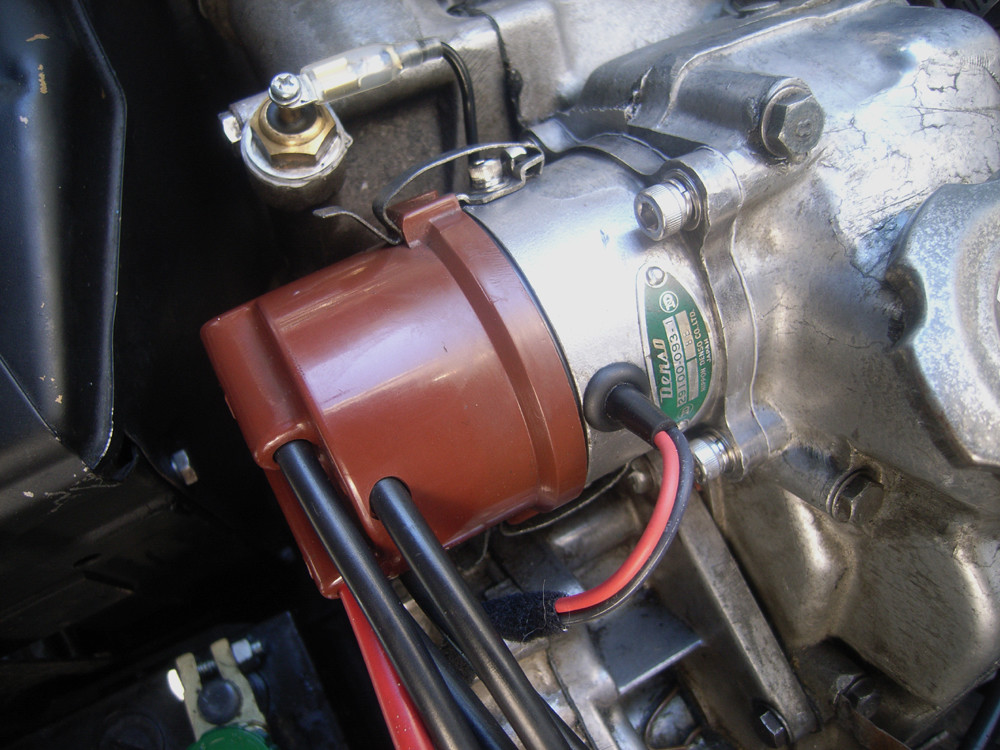
Details of Petronix Ignitor - for Distributor ID 29100-093-1
Make Nippondenso
Distributor # 29100-093-1
Cylinders 4
Ignitor 12V Negative Ground 1647
Ignitor 2 91647

Finished the installation of a Pertronix Ignitor and matching 3 Ohm Pertronix coil. Removed ballast resistor, and the starting relay (shorts ballast resistor for full voltage across old coil on start), and tidied up wiring, including rewiring temp gauge sender. As well as looking a lot tidier, the car now starts much easier hot or cold, settles down to an even idle when cold, revs out much smoother to high rpm, and feels much more stable across the whole range. The Ignitor being just as easy to time statically with a meter or light.
While my old ignition system was fully functional, and was timed right, it still coughed, hesitated sometimes on full throttle, and felt a little hesitant at high rpm. None of that now. A new distributor cap O-ring was also installed which would have removed a little float there, and a new silicon drain hose added to the distributor to replace the old one which snapped off because it had gone brittle.
I did not use a gasket, but again the Permatex RTV, and I am getting better at making a nice bead and a perfect seal:
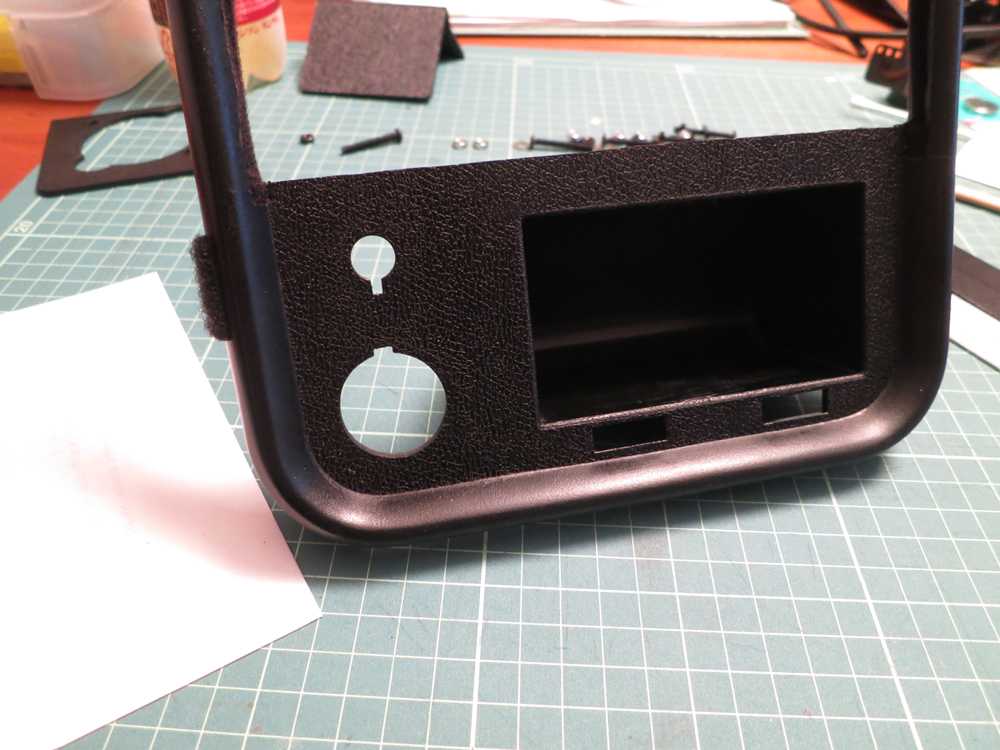
I also got a set of these:
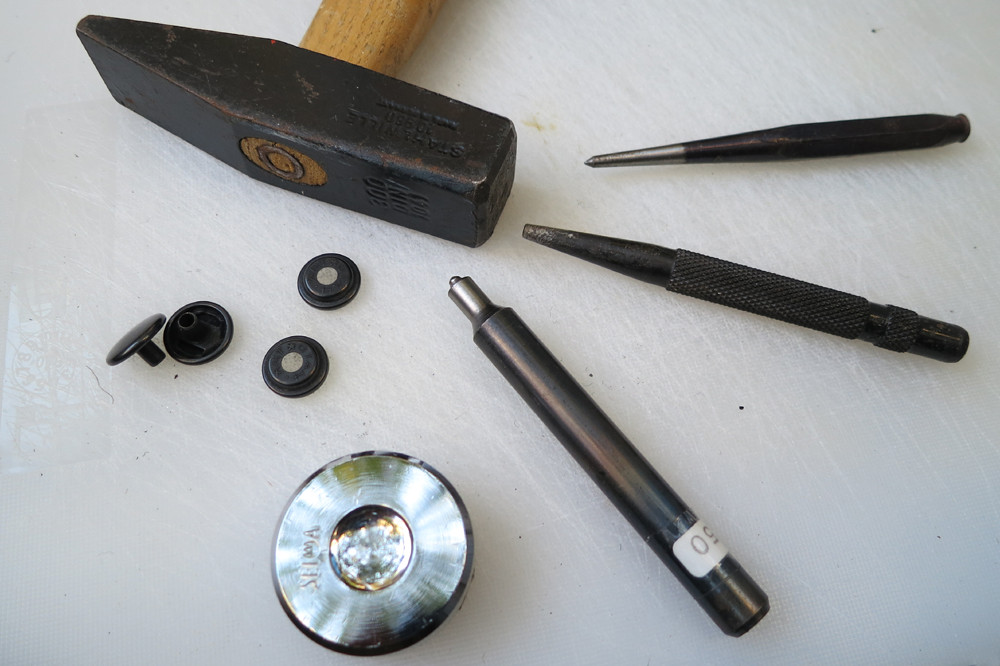
To go with these:
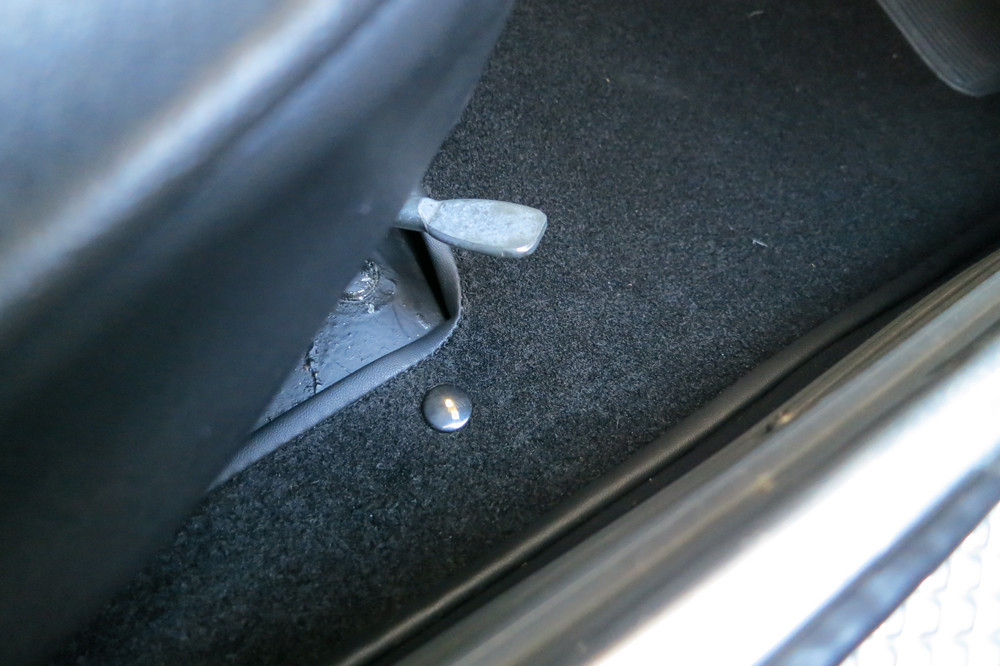
To do this:
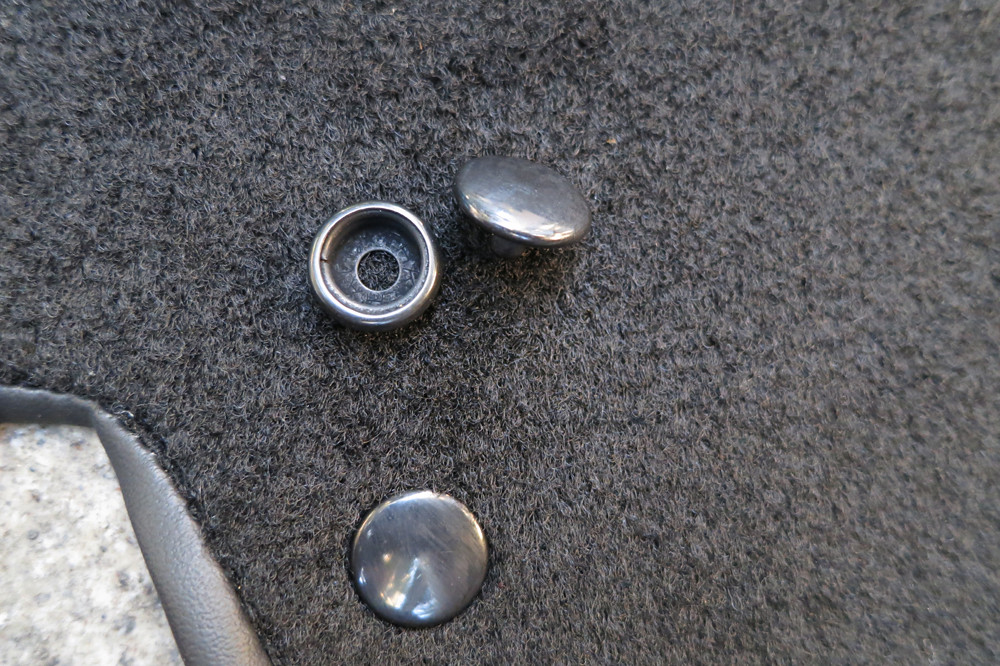
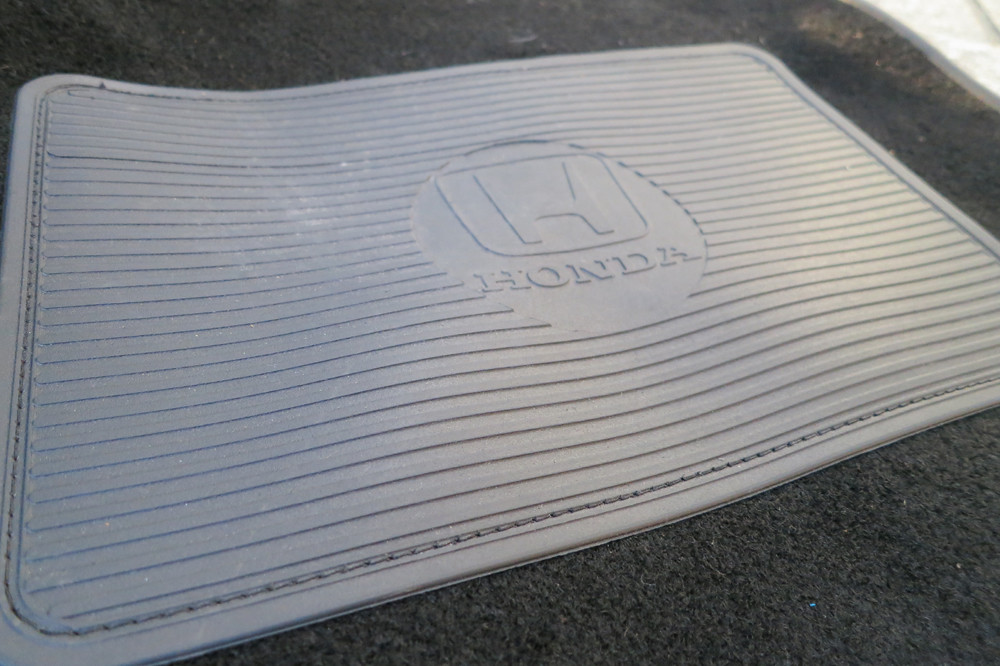
So the new carpets do not float about under your feet any more:
Make Nippondenso
Distributor # 29100-093-1
Cylinders 4
Ignitor 12V Negative Ground 1647
Ignitor 2 91647
Finished the installation of a Pertronix Ignitor and matching 3 Ohm Pertronix coil. Removed ballast resistor, and the starting relay (shorts ballast resistor for full voltage across old coil on start), and tidied up wiring, including rewiring temp gauge sender. As well as looking a lot tidier, the car now starts much easier hot or cold, settles down to an even idle when cold, revs out much smoother to high rpm, and feels much more stable across the whole range. The Ignitor being just as easy to time statically with a meter or light.
While my old ignition system was fully functional, and was timed right, it still coughed, hesitated sometimes on full throttle, and felt a little hesitant at high rpm. None of that now. A new distributor cap O-ring was also installed which would have removed a little float there, and a new silicon drain hose added to the distributor to replace the old one which snapped off because it had gone brittle.
I did not use a gasket, but again the Permatex RTV, and I am getting better at making a nice bead and a perfect seal:
I also got a set of these:
To go with these:
To do this:
So the new carpets do not float about under your feet any more:
08-14-2013, 02:13 AM
#175
Honda-Tech Member
Thread Starter
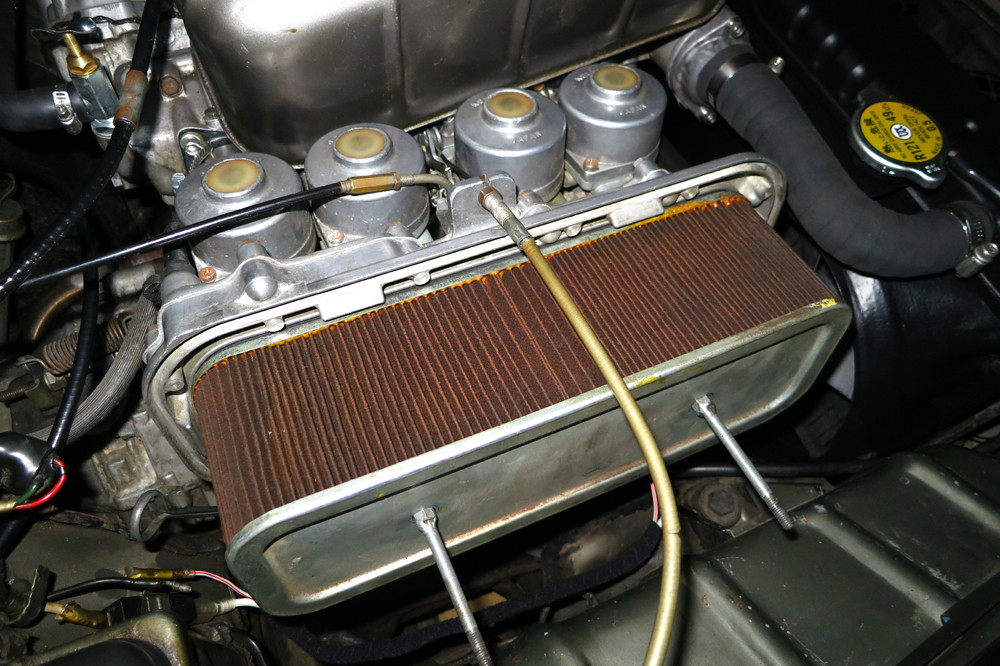
Having washed and rinsed my old filter a few times, I was looking at a new one - over \20,000 in Japan. When you can get them. I was looking at remaking my old filter with new foam, or putting some socks on the intakes, but never seemed to find the right combination of stuff to kludge. Michael Ortmann Autoteileversand have started to remake filters for a remarkable \5500 shipped each. Bargain!
Coupled with the electronic ignition, the S-800 is now running so much smoother... I wonder why.