
---How To: Stealth alarm install in a 1990 CRX-- Theftproof!!!!!
 10-13-2007, 03:33 AM
#1
Honda-Tech Member
Thread Starter
First off, before anyone jumps on my case, this is being done on MY car. Not a customers or fellow employees. I have enough confidence in this install I can show everything. I am doing this to show what a high end installation looks like and accomplishes. This is by NO MEANS a typical install. CC or BB would not do this do to time constraints. However, some smaller specialty shops may do it, and there are a few installers on this site that would do it (myself included).
I beg, PLEASE keep the trash talking off this thread. If you do have anything negative to say, please pm me. I will adress your concerns promptly. Like I said, this is to help others. Thanks in advance for your cooperation.
On with the show:
This is going to be somewhat of a build thread. I am going to do this in small sections to show you how a very solid install is done. Currently I am waiting for the back-up battery and tilt sensor to arrive. I have the alarm and relays, so, I went ahead and prepped the relays. I am waiting for the other pieces before I prep the rest. In this part, I am going to explain what each relay does and how it will work on the car.
First of all, here are the relays prepped:
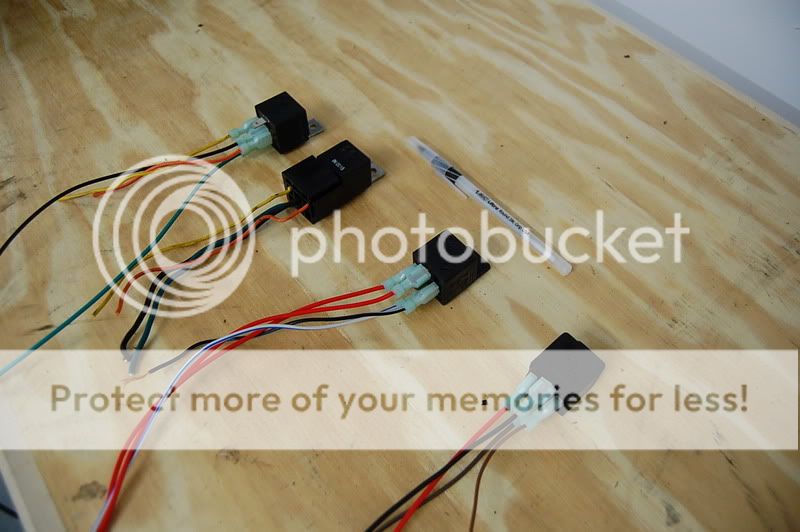
Note the pen in the background for reference.
A relay is necessary for all the functions they will be doing. These are standard 30 amp relays that are available at most shops. A relay is a hig-current switch. The 2 on the left are the "kill" relays. One will disable the ecu (or distributor, have'nt decided yet) while the other will disable the fuel pump. These only "kill" if the alarm is triggered, all other times they let the current flow uninterrupted.
The other 2 relays have other purposes. One will honk the horn when the alarm is triggered, and the other will ccontrol the headlights.
I used a soldering iron to mark each relay. This will help during installtion and if I have to troubleshoot something later on down the road.
Example:
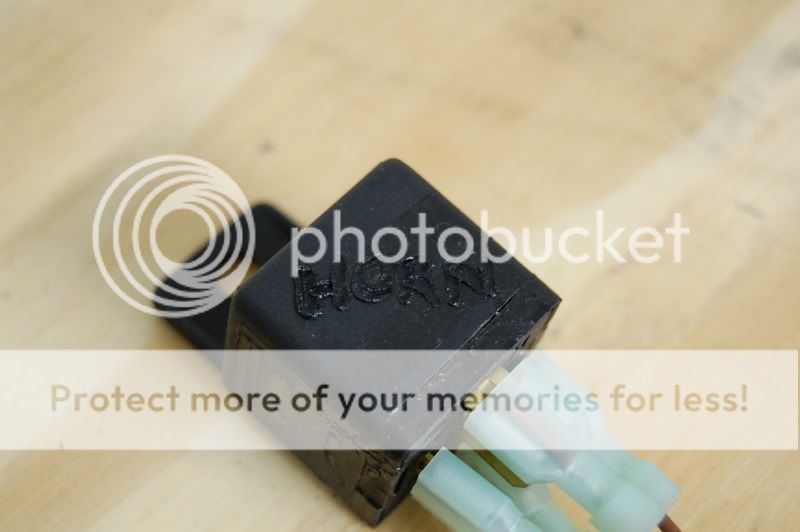
You can do a million things with relays. If it is on a switch, you can control it. They make sunroof modules, window modules, trunk releases, etc. All of these are controlled by relays.
If you ever wondered what an alarm looks like fresh out the box, here's a glimpse:
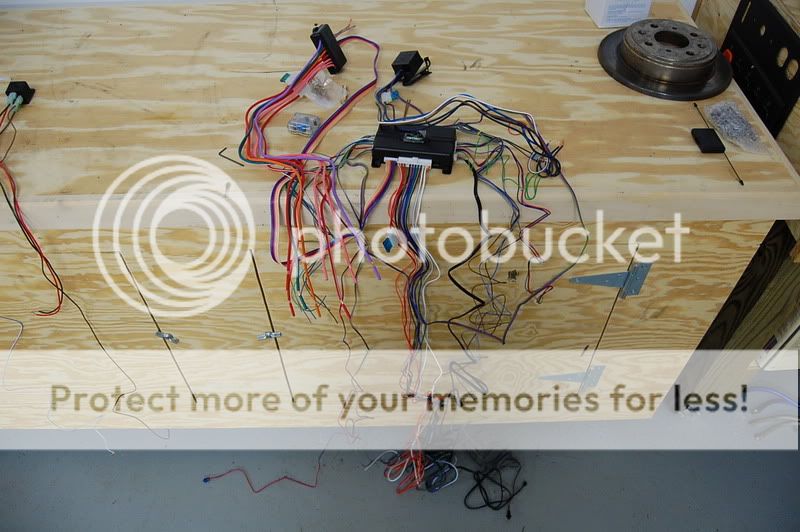
I'll be using about a third of all this wiring, and the rest will be removed and cleaned up.
Like I said, I'm at a standstill right now while awaiting the other parts. Once they arrive (in the next day or 2) this thread will move very quickly. I will be taking several pics and try to explain everything as well as I can.
A quick rundown of what THIS install is going to do:
When the "armed" button is pressed:
-Parking lights will flash once
-Led will come on
-System will arm
-Horn will gently honk (I may not use the Viper siren)
When the "disarm" button is pressed:
-Parking lights flash twice
-Headlights will come on for 30 seconds
-Led will turn off
-Horn will gently honk twice
When the alarm is triggered
-Parking lights flash
-Headlights flash
-Horn honks
-Ecu is disabled
-Fuel pump is disabled
-Starter is disabled
-Keypad is alerted in a one mile range
It basically opens the gates of hell. The only way this will be moved is via towtruck.
To add:
There will be a tilt sensor. If the vehicle is moved more than 3 degrees, the alarm is triggered. This includes towing, jacking up of the car at any side, lifting etc.
There is a backup battery as well. If the battery under the hood is removed or cut, the backup battery will take over and let the alarm continue to protect the vehicle.
There is also a hoodpin, so, once the hood is popped, the alarm is going to trigger.
Since there are soooo many relays and extra parts, this alarm will NOT be under the dash. I will show more of this during the install. Once again, please keep the negativity out of this thread, as it is my personal vehicle and I am willing to show this for others and to help the community.
Stay tuned, as there will be alot of information in this thread.
I've copied and pasted this on several other forums I visit and have recieved many questions regarding alarms. Let me answer some and dispel some myths.
1. All a theif has to do is pop the hood and cut the siren wire to kill the alarm.
Wrong. By cutting the siren, the noise will stop, but the alarm will continue to protect the vehicle. If the siren wire is grounded out, the circuit may be damaged on the brain, but the alarm will continue to function.
2. Taking a car battery to the car and shorting it out will kill the alarm.
Wrong. It would be a HUGE fireworks show, but 99% of the time, the alarm would simply blow a fuse. Along with doing so, the electrical system could be damaged. The computers and modules in the car could be heavily damaged. Doing so could possibly make the vehicle undrivable, and certainly alot more difficult to "hotwire".
3. By knowing what brand alarm is in a car a theif can bypass it.
Wrong. Just think about this.....
4. Alarms are worthless and a kill switch does the same job.
An alarm is only as good as the install. You could have the best alarm made, but if there are poor connections it won't work. Kill switches are good for someone on a budget, but, a $10 kill switch won't alert me a mile away when my hood is popped.
5. Showing this install makes your car an easy target.
Wrong. You may know where everything is on THIS car, and you may even see this car on the street. But, once this install is complete, you will simply not even think about it. There are much easier and more valuable targets.
6. People ignore alarms
True. This is why a 2 way style keypad is being used. I'm using the factory horn because it's louder and more people take notice.
If you have any other questions or if there is ANYTHING else anyone would like to know, please let me know here or via PM. I'll be more than happy to discuss this and help the community out.
Tilt Sensor pics. Here's what it looks like with a quarter for reference:
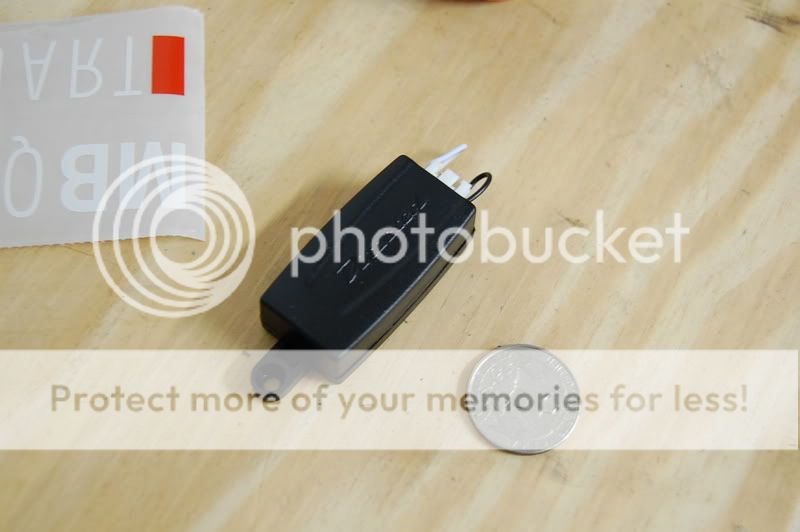
It only has 3 wires to hook up.
-Red goes to constant power.
-orange goes to the "ground when armed" output, most of the time this will be orange on the alarm brain as well.
-blue is the trigger output and sends a ground when the vehicle is moved.
It is reccomended that this be installed flat as can be, like on the floorpan of the car.
There is a black looped wire that lets you select 1 or 3 degrees of sensitivity. Cutting this wire will select 3 degrees.
The white wire loop is the time delay before trigger. 10 second is default and cutting it makes it go to 2 minutes. i think I'll leave it at 10 seconds....lol.
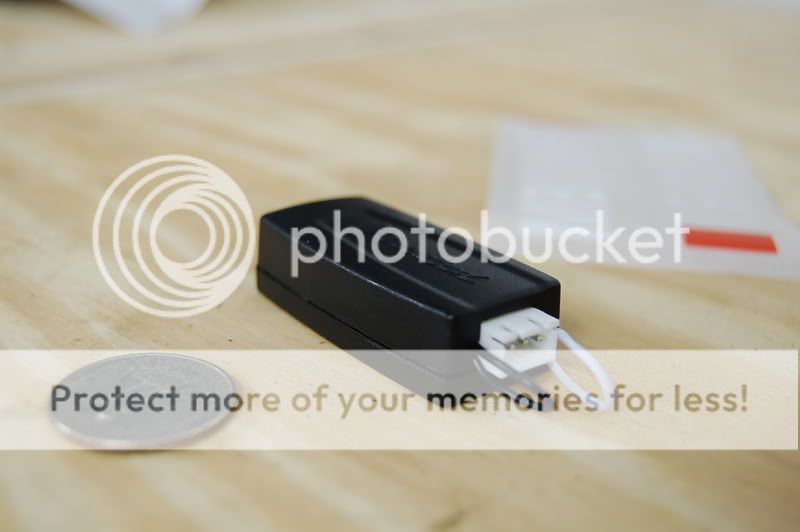
Backup battery pics.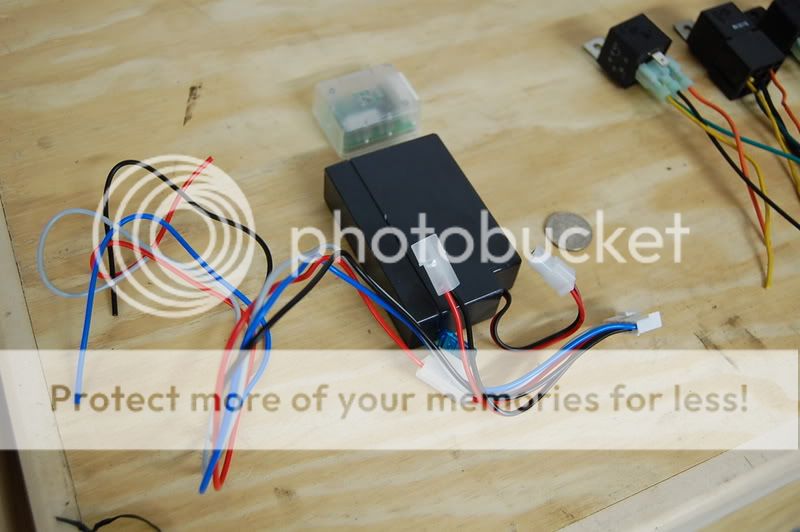
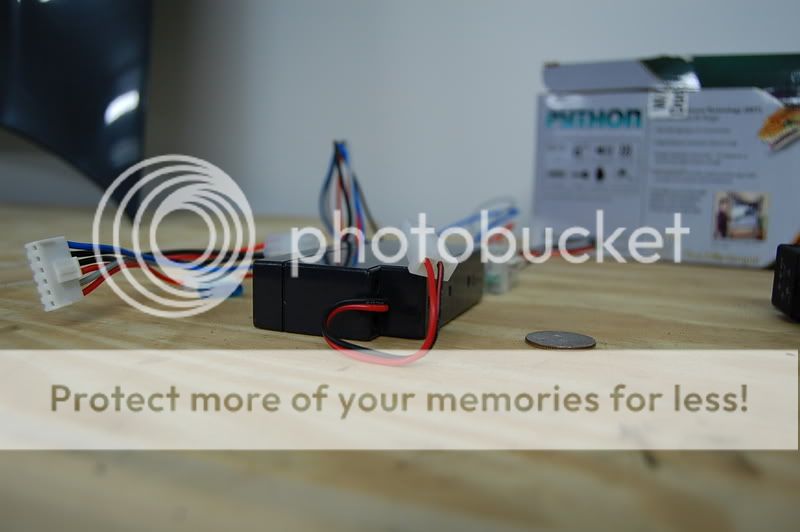
Thats the battery and small module next to a quarter for reference.
It has 4 main wires.
-Red- is the Positive power INPUT. This charges the battery and needs to go to a main power source in the car.
-Black- is the usual ground.
-Blue- goes to the instant trigger on the alarm brain. This will send a negative trigger to the alarm if the main battery is unhooked. This will also trigger the alarm.
-Gray- is the positive OUTPUT. This goes to the main power INPUT on the alarm. It will supply power ONLY to the alarm sytem if the main battery is unhooked.
Tonight I'm pulling the old alarm out. I put it in when I first got the car and did it in a hurry, like, maybe an hours worth of work. I cut my finger pretty bad today at work, that explains the tape.
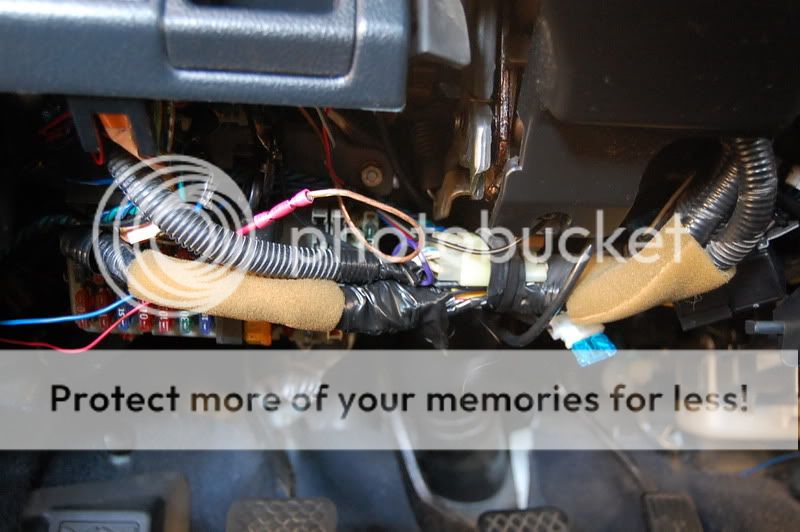
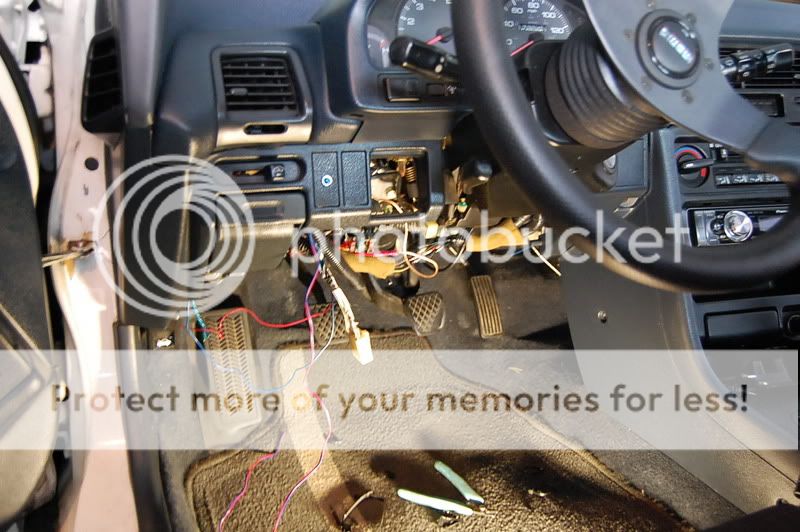
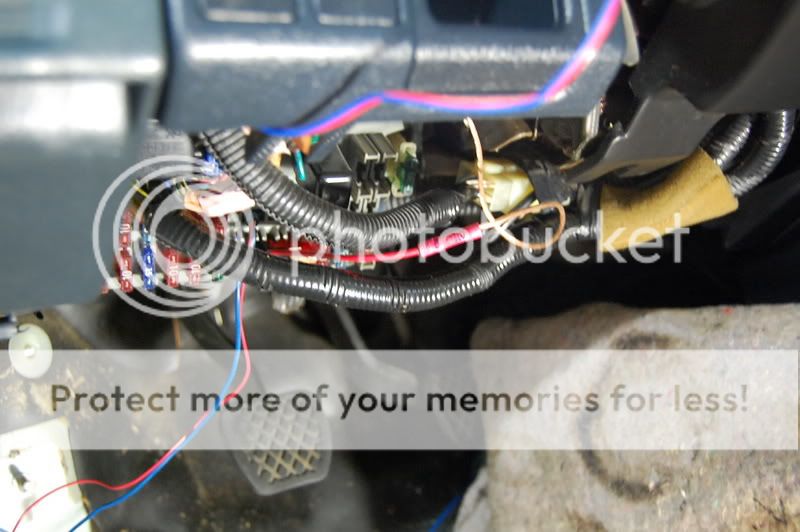
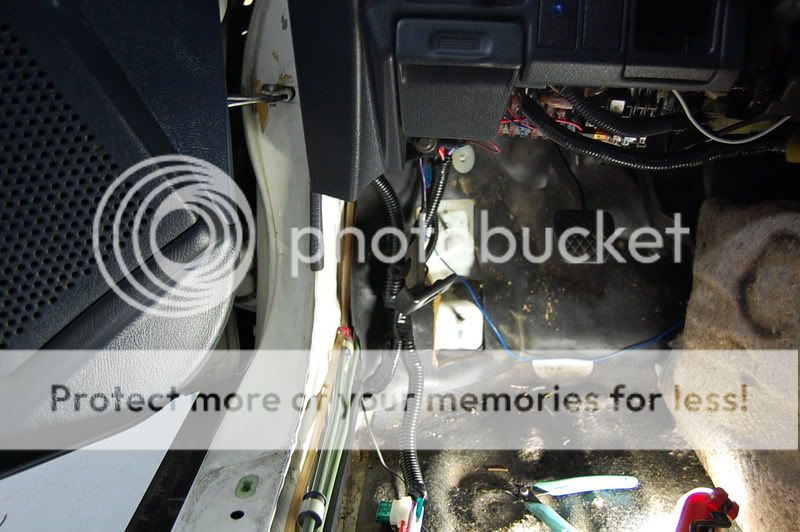
First pic is under the dash. Some of the wires are from the gauge pod on the pillar. I may be removing this as well. Since it's a stock B16, there is'nt much to monitor.
Here is where the old brain sat.
The previous owner had the LED in this knockout panel. I put the current one there and hot glued it in place, so, it looks like I'll be leaving it there. No big deal.

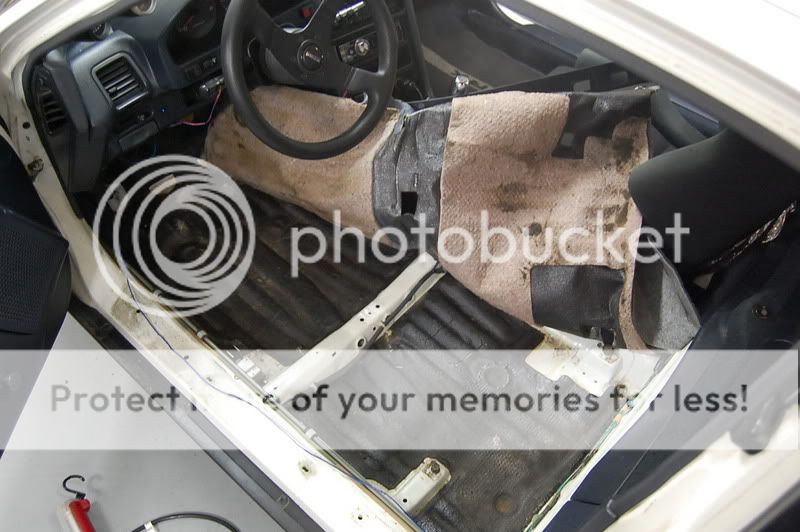
And this is where I'll be spending ALOT of time in the coming days....
I'm going to try and get the new alarm seated in the car tonight and once you folks see it, I think you'll be VERY surprised where this is gonna go.
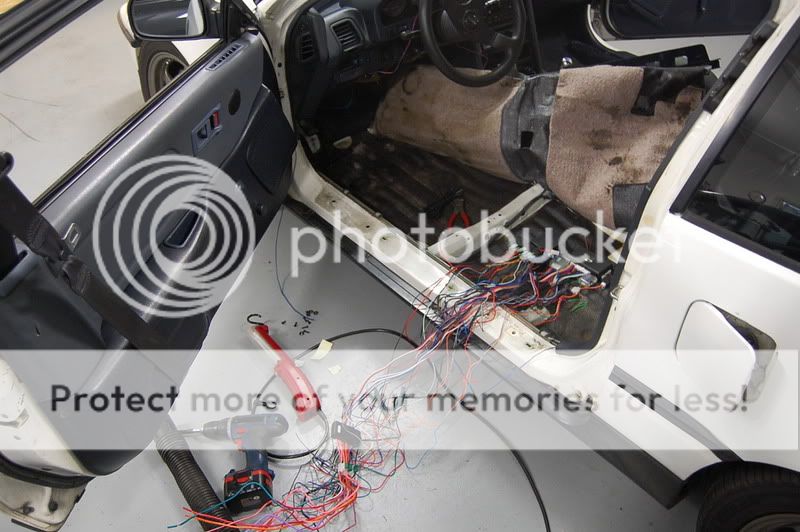
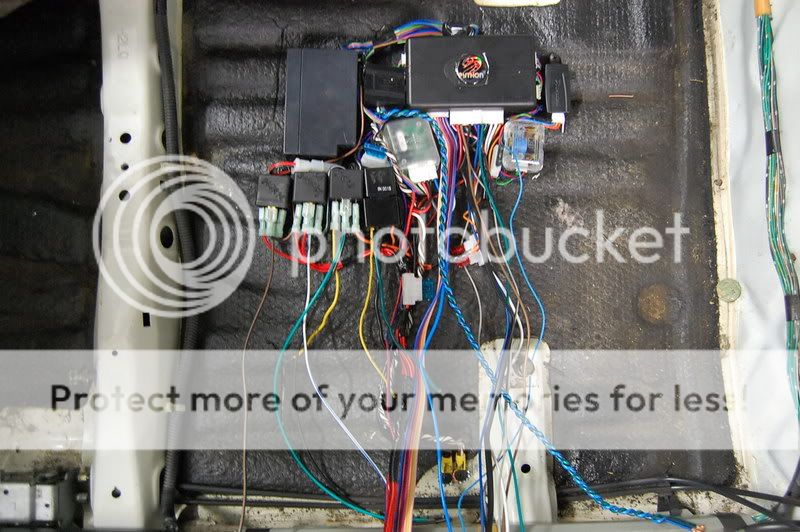
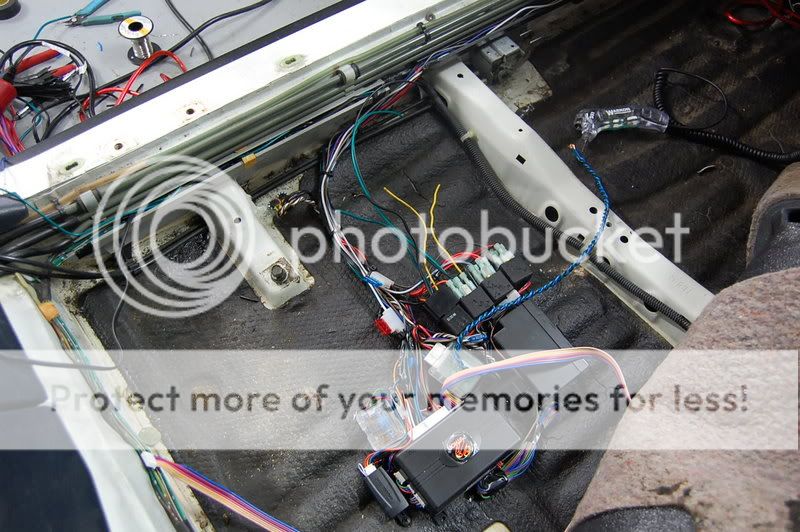
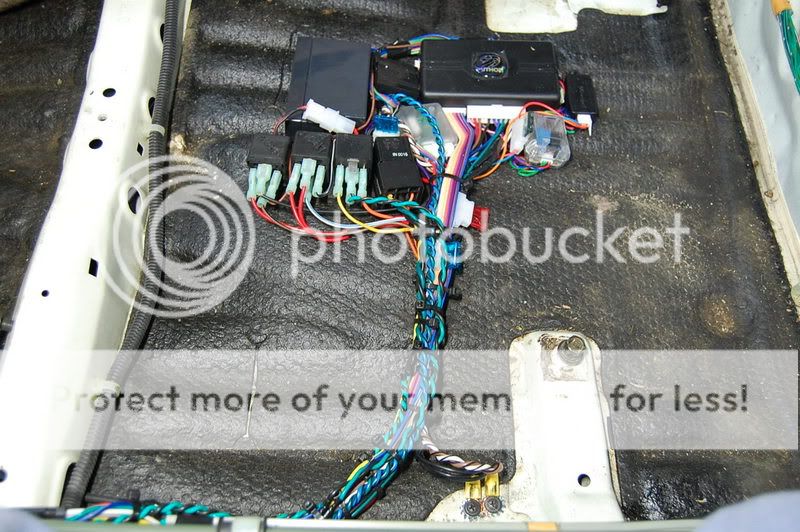
Here is the part alot of folks have been waiting for. I'm putting the alarm under the front seat. As you can see, there are alot of parts to this alarm. It would be a huge bundle and mess to try and put this under ANY dash.
I have Corbeau racing seats in the car. I am not using the sliders so the seats are stationary. With this in mind, even if the theif knew the alarm is under the seat, they would have to pull the bolts out to get to it. On a regular sliding seat, ther may be some access, but they would still have to know the location of the brain.
Like I said, the seat DOES NOT slide, so it's a very effective cover for the alarm.
My finger is really bugging me, and I have to take a break so it can heal. Plus, typing sucks...lol.
On with the last batch of pics for the night...


More tommorow folks.
Tonight's updates:
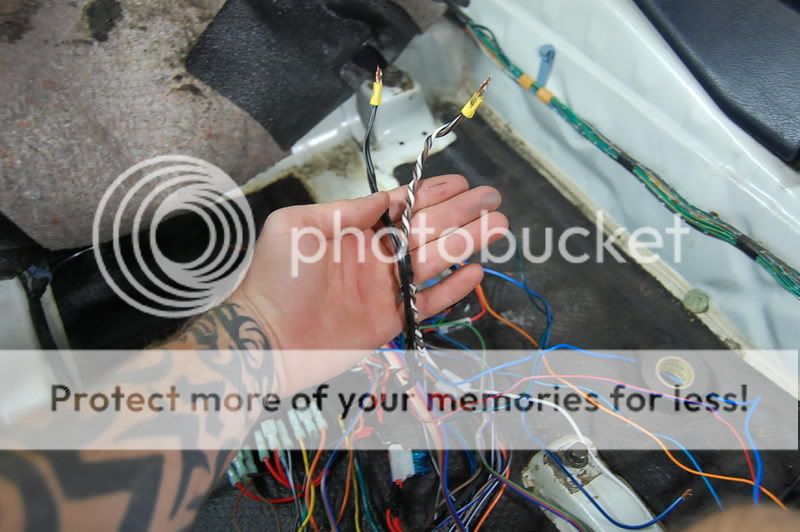
The first thing I did was put the factory harness back to a stock look. I had to reconnect the starter wire and solder that back up. Reloomed the bundle and taped it back up.
Since I'm gonna work with some heavy duty wire, I need a heavy duty soldering iron. I picked this up at Lowe's today. Butane powered and it also can be a torch. Good stuff.

I bundled all the +12 volt wires together and attatched them to 1 8 gauge wire.Since there are so many relays and accesories, I felt this was necessary. This was soldered.

These are all the negative wires. I bundled them together and crimped them as one. The brown and white ones are for the 451M door lock actuator relay. This is a heavy duty relay that powers the door locks.
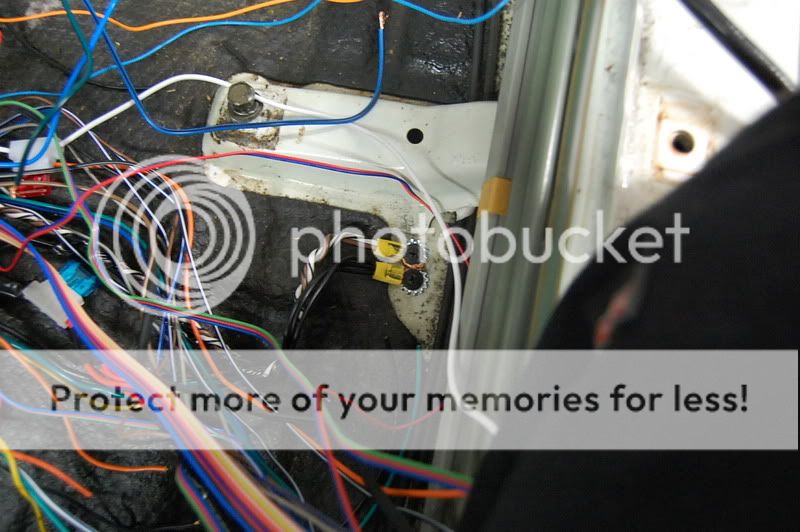
Here is where I removed the paint and used a star washer to secure the grounds.
I made the connections from the relays to the brain, removed unused wires and began to simplify everything. As you can see, it's alot less intimidating now.
I only had about 30 minutes of work in it tonight, so, not much was done. But, I get out of work early tommorow, so there will be some good progress tommorow.
I did some minor work this morning, not much but it is progress.
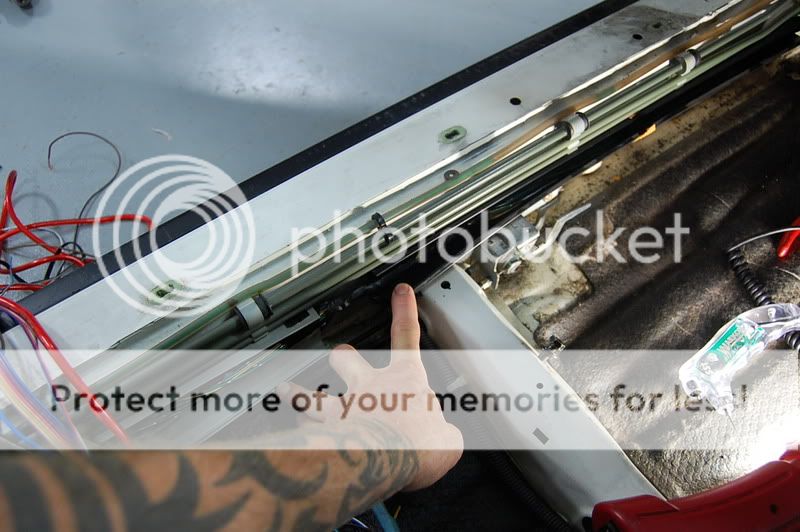
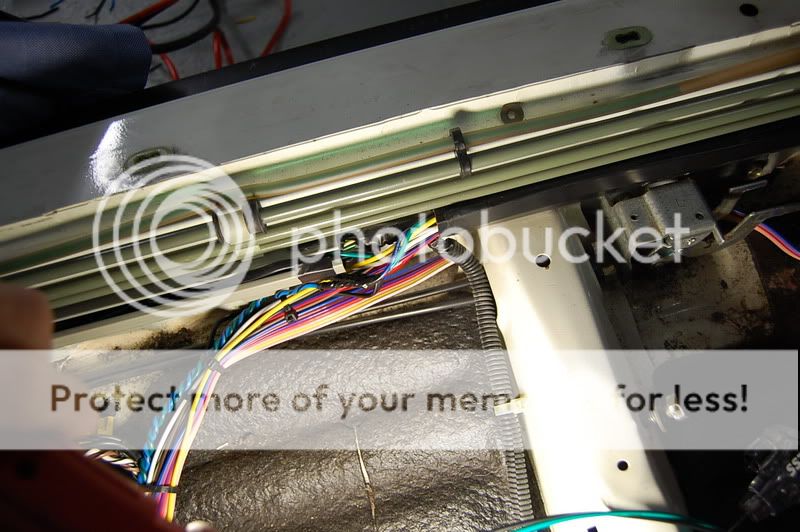
I cracked open the factory wire channels.
Connected more wires at the brain. Mainly just relay/alarm and sensor/alarm to simplify more stuff.
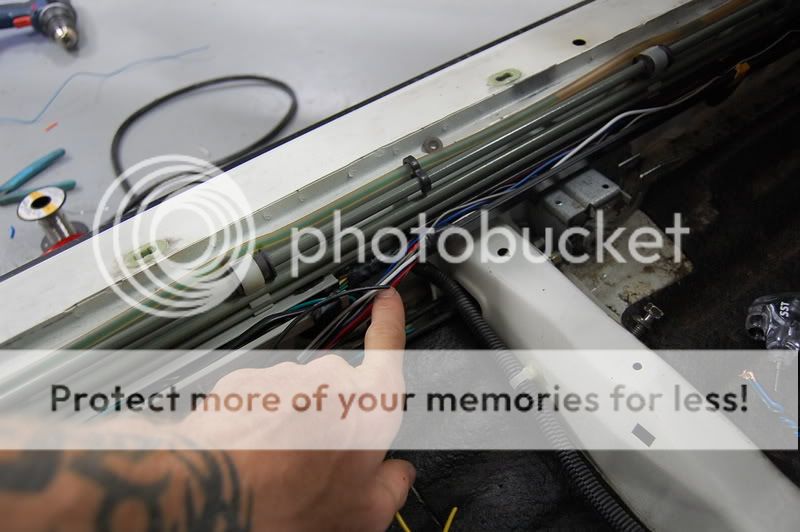
Next I started running the alarm wires through the channels.
Tucked and tied the wires more to make it more "professional" and keep everything tidy.
Wires in the channel.
End of channel.

There have been no major steps taken yet, as I really have'nt tapped into the factory wiring yet. That will be tonight.
Thanks.
Update:
First pic is of me connecting the door lock actuator wires. Nothing too special here. The actuator was done previously, and I'm not pulling that door panel off anytime soon. Sorry.
Second is where I mounted the relay pack for the main power wires. The ribbon cable would not reach had I run it in the channeling, so I simply tucked it under.

This is where the wire is for the hatch sense. Not pictured is where I attatched the parking light wire to the hazard switch in the dash.
Wires taped up neatly, trying to keep it clean.
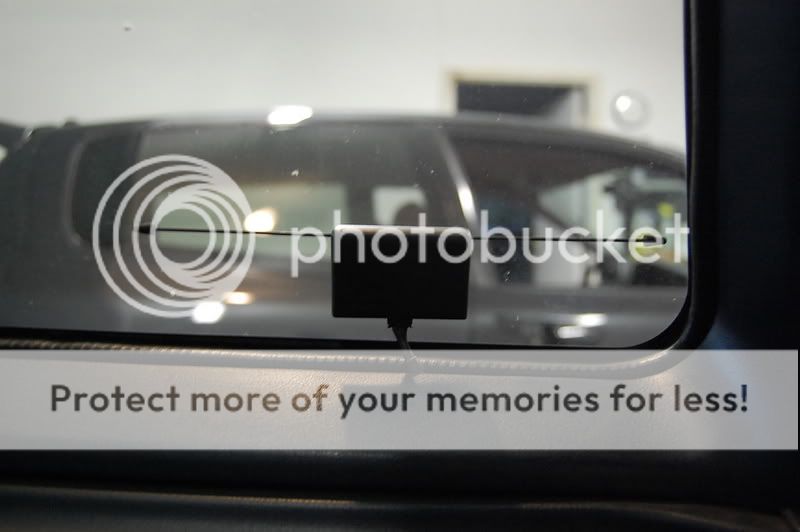
I put the antenna in the rear quarter window. My windsheild is going to be replaced soon and I'll be moving it forward once that is done. In the meantime, it's fine here.
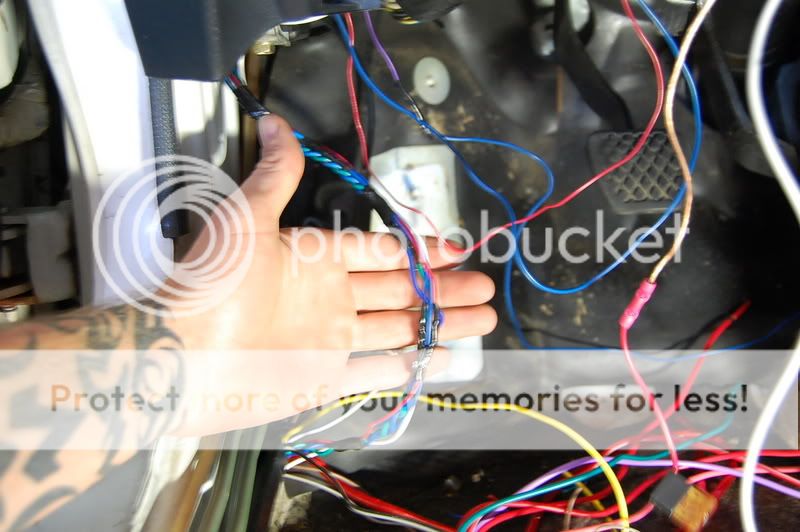
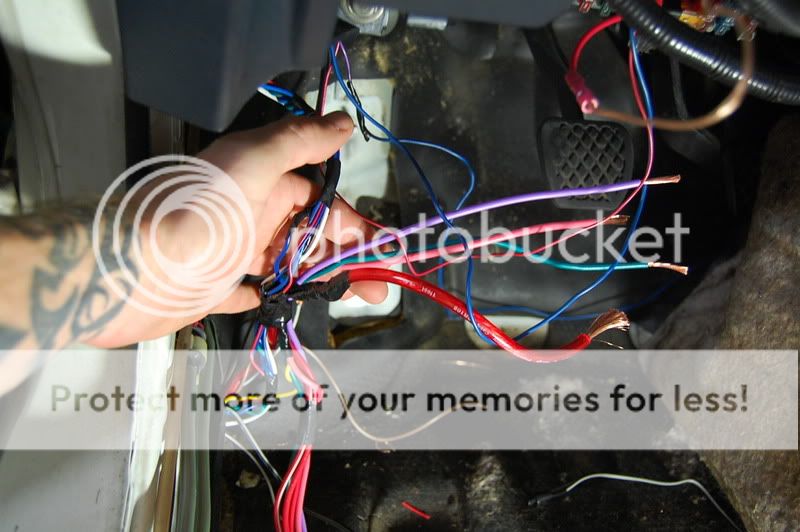
I connected all the power wires into one, and connected the 2 ignition wires together. So, for the main power lines it goes like this:
Red- constant power
Pink- ignition
Green- Key side of the starter
Purple- Starter side of the starter.
I may get some more work done tonight.
Last bit of the night.
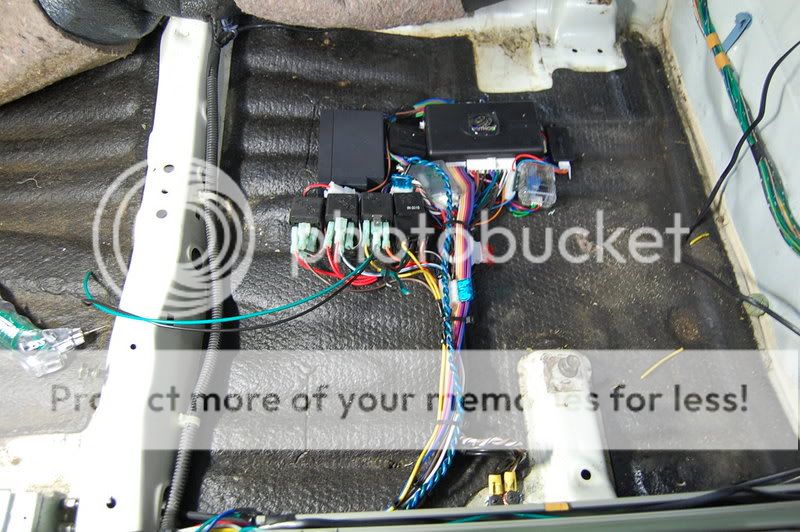
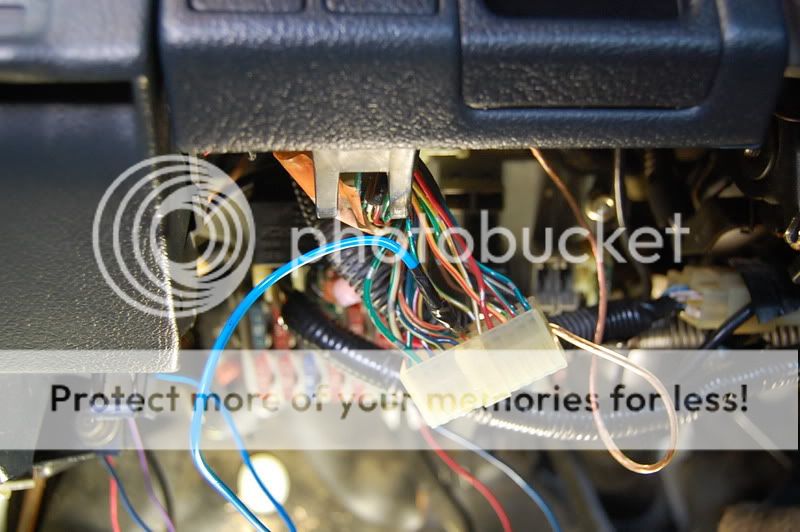
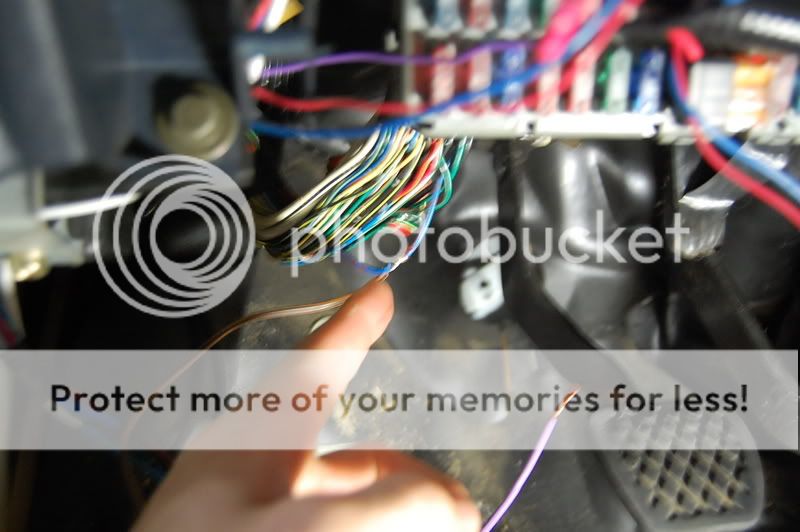
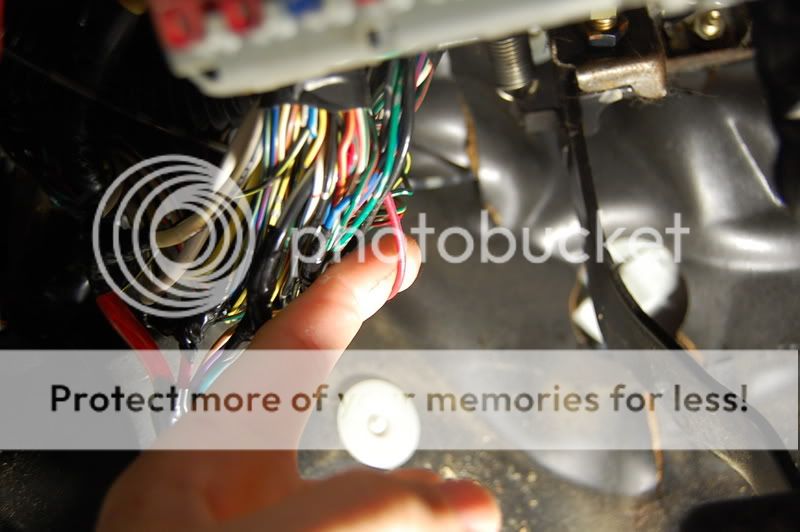
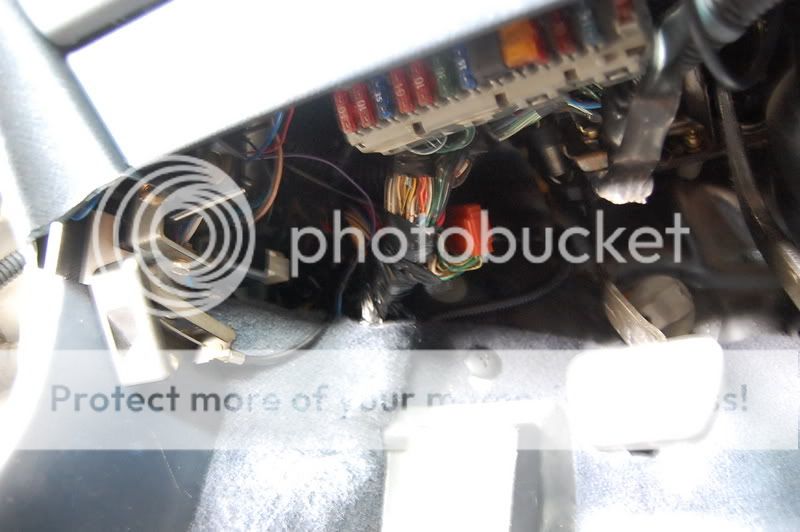
I did all the main wiring behind the fuse panel. This makes it more difficult to see and harder for anyone to reach (including myself).
Here is where the horn wire attatches.
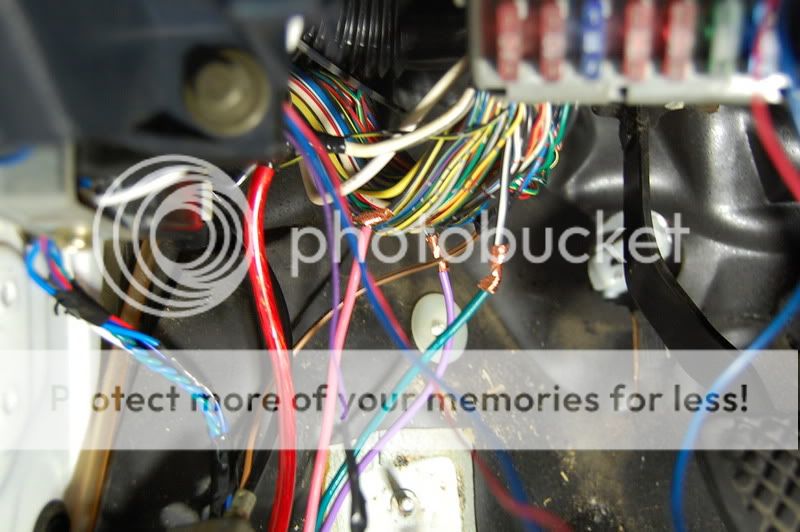
Main power attatched.

Wires exposed, attatched, and soldered and taped.
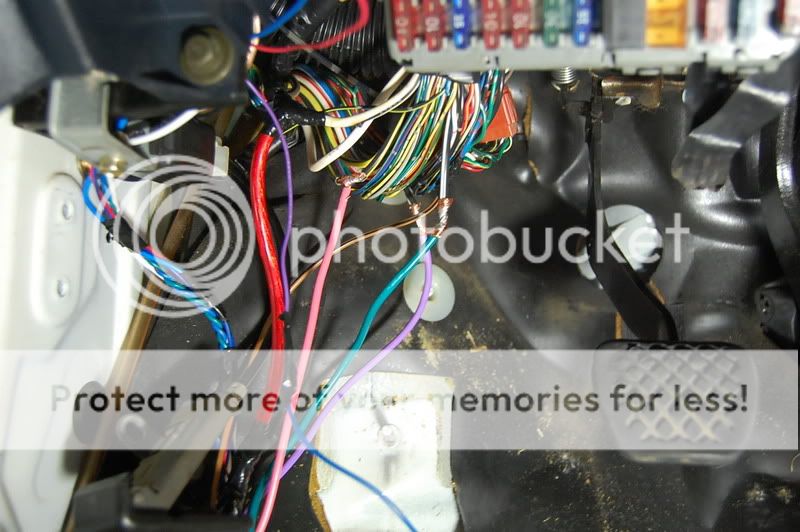

I is tired and my finger is bleeding.....again.
More morning progress.
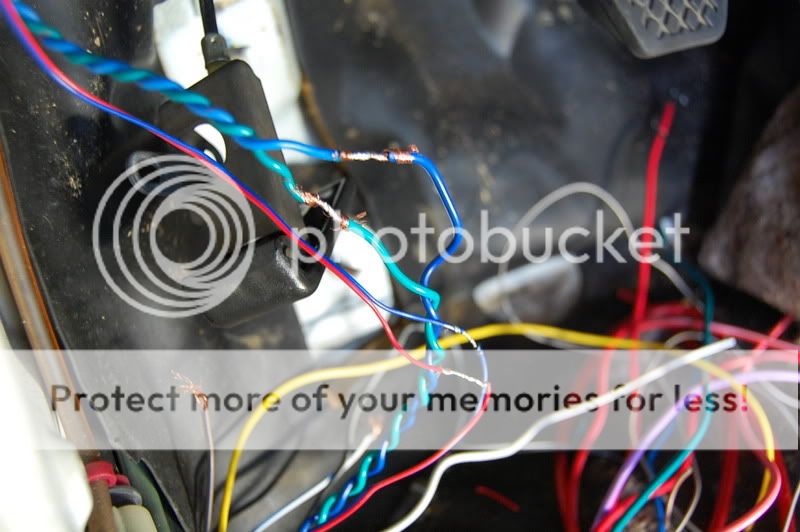
This is where I tapped into for the headlights.
Extending the hoodpin and siren wires.
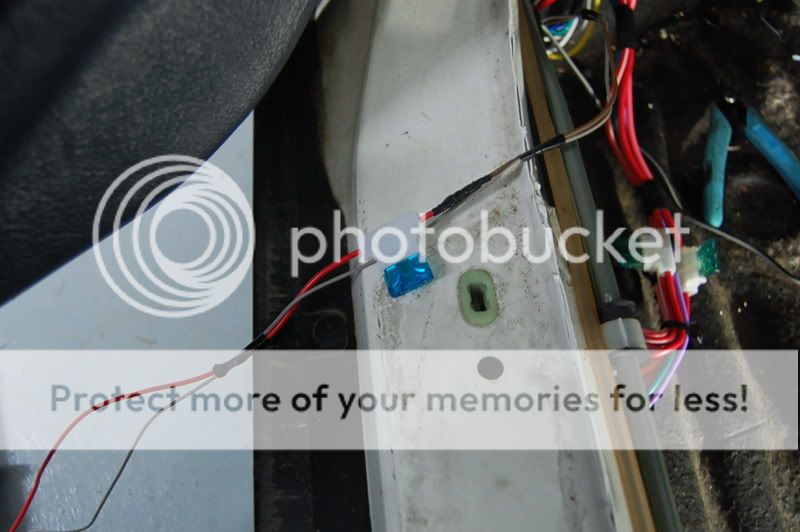
I brought them through the large grommet on the driverside where the rest of the harness comes through.

Loomed and taped.
Another view of looming.
The siren shown is going to be removed and placed elsewhere. There is not much more to be done, but working only 30 minutes at a time, taking pics and writing all this up really adds up.
I miss my car....
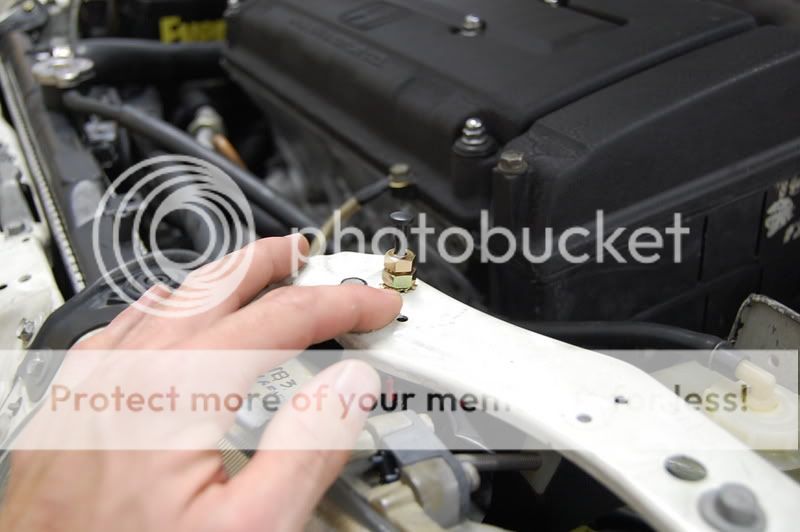
Tonight I mounted the hoodpin. When the hood is popped it sends a negative trigger to the alarm. Make sure the paint is scraped away when this is mounted (I had to scrape some paint away on mine).
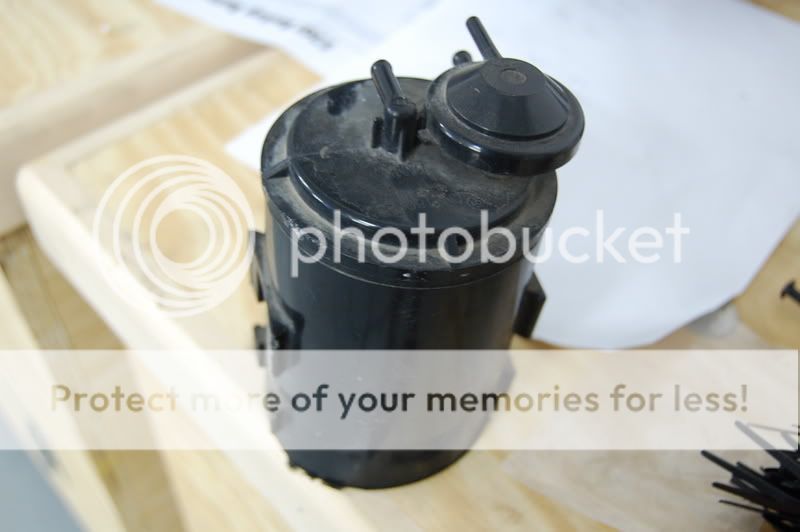
I removed my charcoal canister awhile back. It looked like the perfect place for the siren to go. Aimed down, close to the ground it's nice and loud.
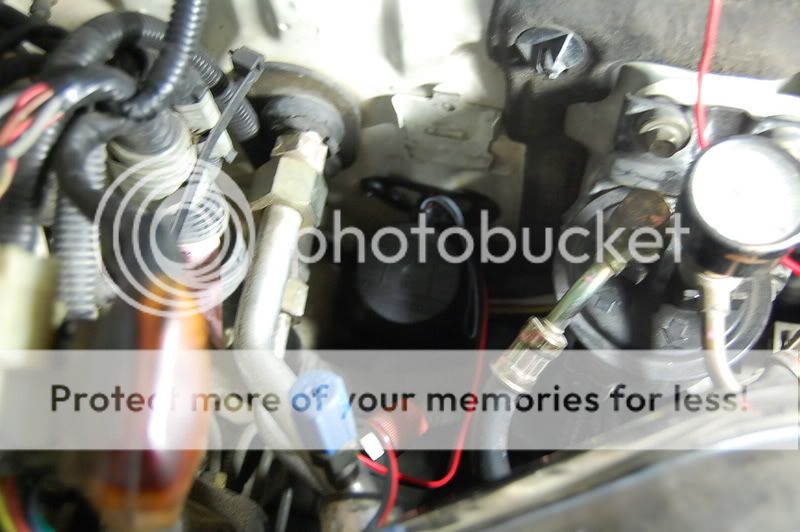
To conceal it, I cut the canister in half and covered the siren back up....

I grounded the siren under the resistor box.

So, all that remains is hooking up the ecu kill relay and the fuel pump relay and putting the car back together. I may get this done tonight, if not, definitly tommorow (as I'm off work).
Thanks again for all the comments.
Final Update:
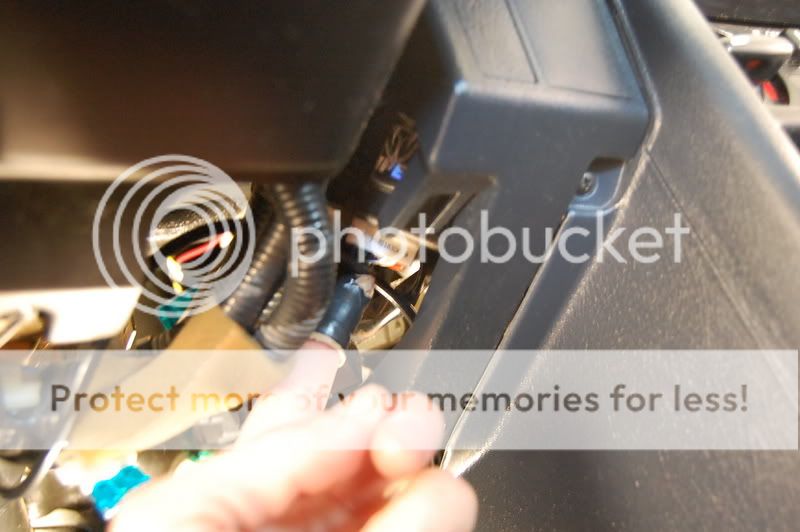
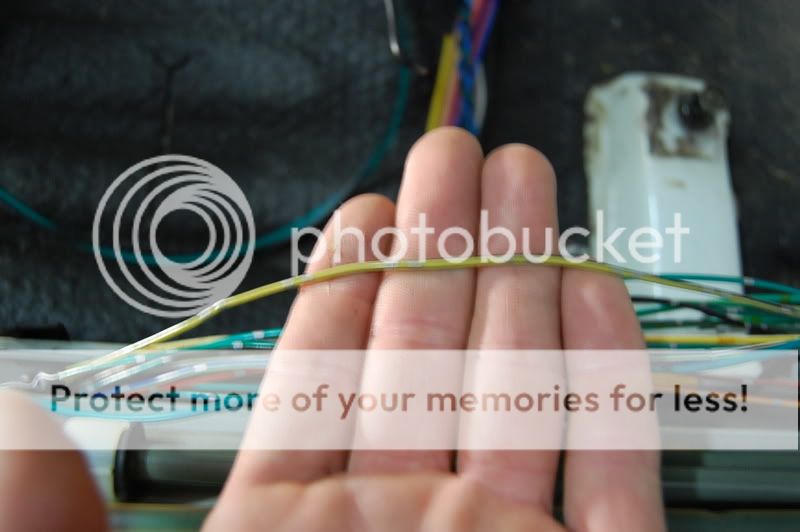
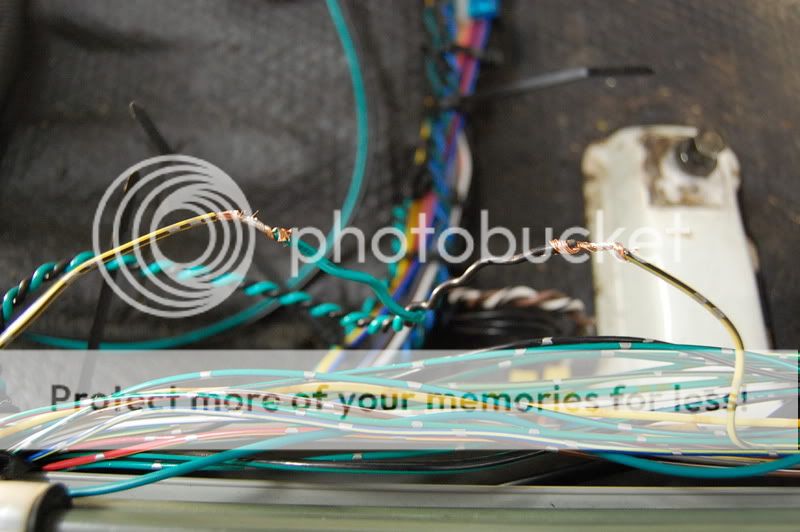
The yellow/black wire is for the fuel pump.
Cut and soldered.
One final last view of the alarm. AT this point I set and tested the shock sensor.
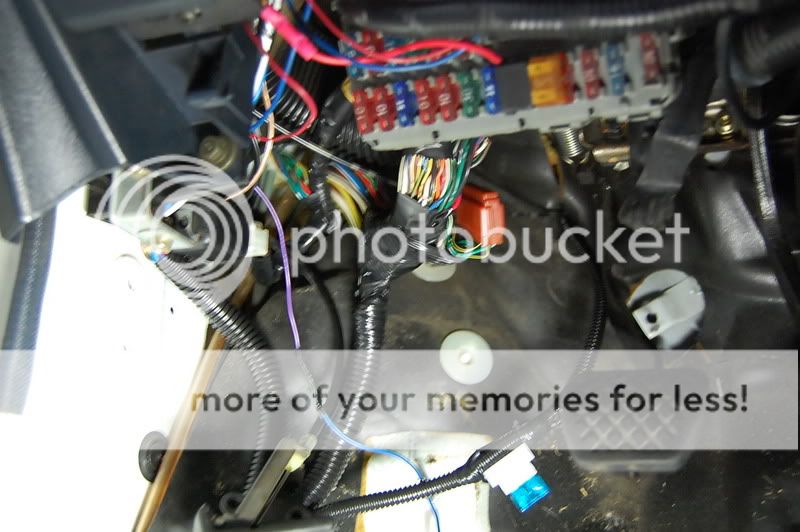
This is where I ran the wires through the firewall for the ecu kill. There are several wires that supply power to the ecu, and putting a kill on all of them would be a pain and messy. I went straight to the fuse box with it.
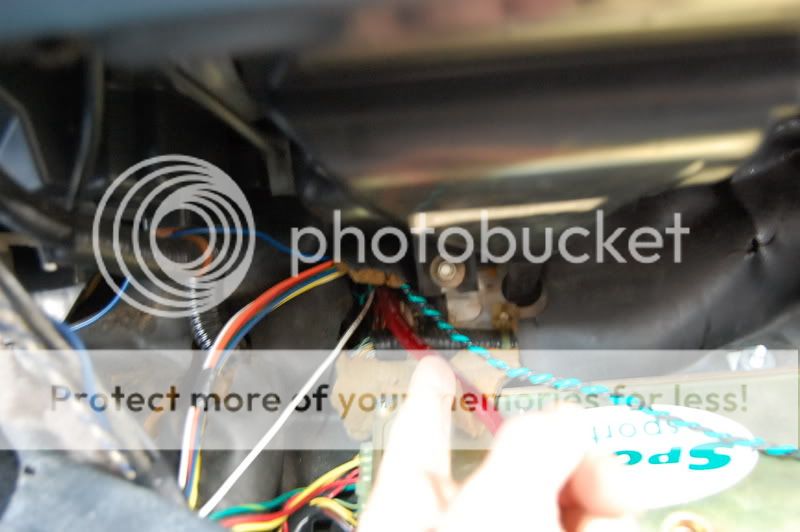

Fuse wire cut and spliced.
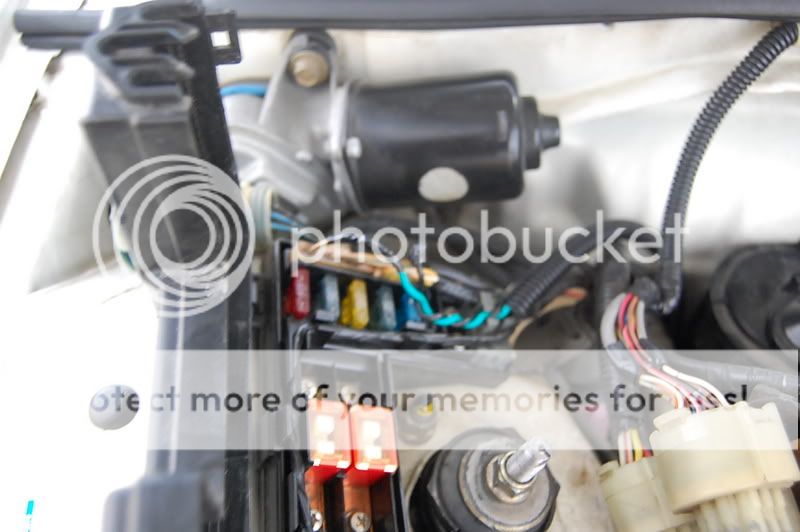
Final under hood shot.

Final under dash shot.
I will post more helpful links and pics later. Thanks!
Here is a small video I made with my daughter's camera. The quality is kind of poor, but you get the idea.

I have the alarm programmed for silent arm and disarm. When you arm it, the parking lights flash and the door locks. When you disarm, the parking lights flash and the door unlocks.
I've been getting a ew more questions about this install regarding pricing. If you were to go into a good quality shop, expect to pay around $750-$900 for this type of install. It is alot of work and is much more labor intensive than a standard install.
My costs:
Python 990 was roughly $300 (could be had for cheaper, but I bought this local for warrnty and I had a huge coupon)
Back up battery was about $30 shipped.
Tilt sensor was also about $30 shipped.
Relays were scavenged from other installers tool-boxes and old alarms customers gave us when uninstalling their old crap.
Basically, I have about $360 in this thing. My labor for myself is...well...free.
I have about 5-6 hours in this. Taking pics, posting updates, answering questions really drags things out. Plus, with my family and work, I could only work on it for about an hour a day.
I beg, PLEASE keep the trash talking off this thread. If you do have anything negative to say, please pm me. I will adress your concerns promptly. Like I said, this is to help others. Thanks in advance for your cooperation.
On with the show:
This is going to be somewhat of a build thread. I am going to do this in small sections to show you how a very solid install is done. Currently I am waiting for the back-up battery and tilt sensor to arrive. I have the alarm and relays, so, I went ahead and prepped the relays. I am waiting for the other pieces before I prep the rest. In this part, I am going to explain what each relay does and how it will work on the car.
First of all, here are the relays prepped:
Note the pen in the background for reference.
A relay is necessary for all the functions they will be doing. These are standard 30 amp relays that are available at most shops. A relay is a hig-current switch. The 2 on the left are the "kill" relays. One will disable the ecu (or distributor, have'nt decided yet) while the other will disable the fuel pump. These only "kill" if the alarm is triggered, all other times they let the current flow uninterrupted.
The other 2 relays have other purposes. One will honk the horn when the alarm is triggered, and the other will ccontrol the headlights.
I used a soldering iron to mark each relay. This will help during installtion and if I have to troubleshoot something later on down the road.
Example:
You can do a million things with relays. If it is on a switch, you can control it. They make sunroof modules, window modules, trunk releases, etc. All of these are controlled by relays.
If you ever wondered what an alarm looks like fresh out the box, here's a glimpse:
I'll be using about a third of all this wiring, and the rest will be removed and cleaned up.
Like I said, I'm at a standstill right now while awaiting the other parts. Once they arrive (in the next day or 2) this thread will move very quickly. I will be taking several pics and try to explain everything as well as I can.
A quick rundown of what THIS install is going to do:
When the "armed" button is pressed:
-Parking lights will flash once
-Led will come on
-System will arm
-Horn will gently honk (I may not use the Viper siren)
When the "disarm" button is pressed:
-Parking lights flash twice
-Headlights will come on for 30 seconds
-Led will turn off
-Horn will gently honk twice
When the alarm is triggered
-Parking lights flash
-Headlights flash
-Horn honks
-Ecu is disabled
-Fuel pump is disabled
-Starter is disabled
-Keypad is alerted in a one mile range
It basically opens the gates of hell. The only way this will be moved is via towtruck.
To add:
There will be a tilt sensor. If the vehicle is moved more than 3 degrees, the alarm is triggered. This includes towing, jacking up of the car at any side, lifting etc.
There is a backup battery as well. If the battery under the hood is removed or cut, the backup battery will take over and let the alarm continue to protect the vehicle.
There is also a hoodpin, so, once the hood is popped, the alarm is going to trigger.
Since there are soooo many relays and extra parts, this alarm will NOT be under the dash. I will show more of this during the install. Once again, please keep the negativity out of this thread, as it is my personal vehicle and I am willing to show this for others and to help the community.
Stay tuned, as there will be alot of information in this thread.
I've copied and pasted this on several other forums I visit and have recieved many questions regarding alarms. Let me answer some and dispel some myths.
1. All a theif has to do is pop the hood and cut the siren wire to kill the alarm.
Wrong. By cutting the siren, the noise will stop, but the alarm will continue to protect the vehicle. If the siren wire is grounded out, the circuit may be damaged on the brain, but the alarm will continue to function.
2. Taking a car battery to the car and shorting it out will kill the alarm.
Wrong. It would be a HUGE fireworks show, but 99% of the time, the alarm would simply blow a fuse. Along with doing so, the electrical system could be damaged. The computers and modules in the car could be heavily damaged. Doing so could possibly make the vehicle undrivable, and certainly alot more difficult to "hotwire".
3. By knowing what brand alarm is in a car a theif can bypass it.
Wrong. Just think about this.....
4. Alarms are worthless and a kill switch does the same job.
An alarm is only as good as the install. You could have the best alarm made, but if there are poor connections it won't work. Kill switches are good for someone on a budget, but, a $10 kill switch won't alert me a mile away when my hood is popped.
5. Showing this install makes your car an easy target.
Wrong. You may know where everything is on THIS car, and you may even see this car on the street. But, once this install is complete, you will simply not even think about it. There are much easier and more valuable targets.
6. People ignore alarms
True. This is why a 2 way style keypad is being used. I'm using the factory horn because it's louder and more people take notice.
If you have any other questions or if there is ANYTHING else anyone would like to know, please let me know here or via PM. I'll be more than happy to discuss this and help the community out.
Tilt Sensor pics. Here's what it looks like with a quarter for reference:
It only has 3 wires to hook up.
-Red goes to constant power.
-orange goes to the "ground when armed" output, most of the time this will be orange on the alarm brain as well.
-blue is the trigger output and sends a ground when the vehicle is moved.
It is reccomended that this be installed flat as can be, like on the floorpan of the car.
There is a black looped wire that lets you select 1 or 3 degrees of sensitivity. Cutting this wire will select 3 degrees.
The white wire loop is the time delay before trigger. 10 second is default and cutting it makes it go to 2 minutes. i think I'll leave it at 10 seconds....lol.
Backup battery pics.
Thats the battery and small module next to a quarter for reference.
It has 4 main wires.
-Red- is the Positive power INPUT. This charges the battery and needs to go to a main power source in the car.
-Black- is the usual ground.
-Blue- goes to the instant trigger on the alarm brain. This will send a negative trigger to the alarm if the main battery is unhooked. This will also trigger the alarm.
-Gray- is the positive OUTPUT. This goes to the main power INPUT on the alarm. It will supply power ONLY to the alarm sytem if the main battery is unhooked.
Tonight I'm pulling the old alarm out. I put it in when I first got the car and did it in a hurry, like, maybe an hours worth of work. I cut my finger pretty bad today at work, that explains the tape.
First pic is under the dash. Some of the wires are from the gauge pod on the pillar. I may be removing this as well. Since it's a stock B16, there is'nt much to monitor.
Here is where the old brain sat.
The previous owner had the LED in this knockout panel. I put the current one there and hot glued it in place, so, it looks like I'll be leaving it there. No big deal.
And this is where I'll be spending ALOT of time in the coming days....
I'm going to try and get the new alarm seated in the car tonight and once you folks see it, I think you'll be VERY surprised where this is gonna go.
Here is the part alot of folks have been waiting for. I'm putting the alarm under the front seat. As you can see, there are alot of parts to this alarm. It would be a huge bundle and mess to try and put this under ANY dash.
I have Corbeau racing seats in the car. I am not using the sliders so the seats are stationary. With this in mind, even if the theif knew the alarm is under the seat, they would have to pull the bolts out to get to it. On a regular sliding seat, ther may be some access, but they would still have to know the location of the brain.
Like I said, the seat DOES NOT slide, so it's a very effective cover for the alarm.
My finger is really bugging me, and I have to take a break so it can heal. Plus, typing sucks...lol.
On with the last batch of pics for the night...
More tommorow folks.
Tonight's updates:
The first thing I did was put the factory harness back to a stock look. I had to reconnect the starter wire and solder that back up. Reloomed the bundle and taped it back up.
Since I'm gonna work with some heavy duty wire, I need a heavy duty soldering iron. I picked this up at Lowe's today. Butane powered and it also can be a torch. Good stuff.
I bundled all the +12 volt wires together and attatched them to 1 8 gauge wire.Since there are so many relays and accesories, I felt this was necessary. This was soldered.
These are all the negative wires. I bundled them together and crimped them as one. The brown and white ones are for the 451M door lock actuator relay. This is a heavy duty relay that powers the door locks.
Here is where I removed the paint and used a star washer to secure the grounds.
I made the connections from the relays to the brain, removed unused wires and began to simplify everything. As you can see, it's alot less intimidating now.
I only had about 30 minutes of work in it tonight, so, not much was done. But, I get out of work early tommorow, so there will be some good progress tommorow.
I did some minor work this morning, not much but it is progress.
I cracked open the factory wire channels.
Connected more wires at the brain. Mainly just relay/alarm and sensor/alarm to simplify more stuff.
Next I started running the alarm wires through the channels.
Tucked and tied the wires more to make it more "professional" and keep everything tidy.
Wires in the channel.
End of channel.
There have been no major steps taken yet, as I really have'nt tapped into the factory wiring yet. That will be tonight.
Thanks.
Update:
First pic is of me connecting the door lock actuator wires. Nothing too special here. The actuator was done previously, and I'm not pulling that door panel off anytime soon. Sorry.
Second is where I mounted the relay pack for the main power wires. The ribbon cable would not reach had I run it in the channeling, so I simply tucked it under.
This is where the wire is for the hatch sense. Not pictured is where I attatched the parking light wire to the hazard switch in the dash.
Wires taped up neatly, trying to keep it clean.
I put the antenna in the rear quarter window. My windsheild is going to be replaced soon and I'll be moving it forward once that is done. In the meantime, it's fine here.
I connected all the power wires into one, and connected the 2 ignition wires together. So, for the main power lines it goes like this:
Red- constant power
Pink- ignition
Green- Key side of the starter
Purple- Starter side of the starter.
I may get some more work done tonight.
Last bit of the night.
I did all the main wiring behind the fuse panel. This makes it more difficult to see and harder for anyone to reach (including myself).
Here is where the horn wire attatches.
Main power attatched.
Wires exposed, attatched, and soldered and taped.
I is tired and my finger is bleeding.....again.
More morning progress.
This is where I tapped into for the headlights.
Extending the hoodpin and siren wires.
I brought them through the large grommet on the driverside where the rest of the harness comes through.
Loomed and taped.
Another view of looming.
The siren shown is going to be removed and placed elsewhere. There is not much more to be done, but working only 30 minutes at a time, taking pics and writing all this up really adds up.
I miss my car....
Tonight I mounted the hoodpin. When the hood is popped it sends a negative trigger to the alarm. Make sure the paint is scraped away when this is mounted (I had to scrape some paint away on mine).
I removed my charcoal canister awhile back. It looked like the perfect place for the siren to go. Aimed down, close to the ground it's nice and loud.
To conceal it, I cut the canister in half and covered the siren back up....
I grounded the siren under the resistor box.
So, all that remains is hooking up the ecu kill relay and the fuel pump relay and putting the car back together. I may get this done tonight, if not, definitly tommorow (as I'm off work).
Thanks again for all the comments.
Final Update:
The yellow/black wire is for the fuel pump.
Cut and soldered.
One final last view of the alarm. AT this point I set and tested the shock sensor.
This is where I ran the wires through the firewall for the ecu kill. There are several wires that supply power to the ecu, and putting a kill on all of them would be a pain and messy. I went straight to the fuse box with it.
Fuse wire cut and spliced.
Final under hood shot.
Final under dash shot.
I will post more helpful links and pics later. Thanks!
Here is a small video I made with my daughter's camera. The quality is kind of poor, but you get the idea.
I have the alarm programmed for silent arm and disarm. When you arm it, the parking lights flash and the door locks. When you disarm, the parking lights flash and the door unlocks.
I've been getting a ew more questions about this install regarding pricing. If you were to go into a good quality shop, expect to pay around $750-$900 for this type of install. It is alot of work and is much more labor intensive than a standard install.
My costs:
Python 990 was roughly $300 (could be had for cheaper, but I bought this local for warrnty and I had a huge coupon)
Back up battery was about $30 shipped.
Tilt sensor was also about $30 shipped.
Relays were scavenged from other installers tool-boxes and old alarms customers gave us when uninstalling their old crap.
Basically, I have about $360 in this thing. My labor for myself is...well...free.
I have about 5-6 hours in this. Taking pics, posting updates, answering questions really drags things out. Plus, with my family and work, I could only work on it for about an hour a day.
Last edited by VegaS10; 05-18-2014 at 07:46 AM.
 10-13-2007, 09:07 AM
#4
Honda-Tech Member
Join Date: Jun 2002
Location: Pittsburgh, Pa, USA
Posts: 1,538
Likes: 0
Received 0 Likes
on
0 Posts
Wow Alan....Bravo!!! Thats how its done.
And I thought I was the only one who needed a "project" since I was'nt attending
dB Drag Finals in Indy lol. Here's the start of mine.

The under seat trick is a good one. I have also done roofs,rear side panels,behind radios...etc. The "issue" is that customers want stuff yesterday and don't understand what can be accomplished if time was alloted to do it like the 'good old days'
PS anyone out there want to hook me up with a DEI 689M module? I work at BB and that product is "hands off" for us to get-and I'm a Viper dealer . I want to put a Viper 5900 in my crx and want to do it the right way. Help a fellow installer out.
Modified by audioroach at 12:27 PM 10/13/2007
And I thought I was the only one who needed a "project" since I was'nt attending
dB Drag Finals in Indy lol. Here's the start of mine.
The under seat trick is a good one. I have also done roofs,rear side panels,behind radios...etc. The "issue" is that customers want stuff yesterday and don't understand what can be accomplished if time was alloted to do it like the 'good old days'
PS anyone out there want to hook me up with a DEI 689M module? I work at BB and that product is "hands off" for us to get-and I'm a Viper dealer
. I want to put a Viper 5900 in my crx and want to do it the right way. Help a fellow installer out.Modified by audioroach at 12:27 PM 10/13/2007
10-16-2007, 11:34 AM
#7
Honda-Tech Member
Join Date: Oct 2003
Location: Around the Block, mn, 55124
Posts: 764
Likes: 0
Received 0 Likes
on
0 Posts
Very nice... I like the idea of under the seat... So you made your own relay pack for the Manual... Ever dealt with the 689M by dei? Ever dealt with a prox under the seat like that being responsive...
Trending Topics
10-16-2007, 11:58 AM
#8
Honda-Tech Member
Thread Starter
<TABLE WIDTH="90%" CELLSPACING=0 CELLPADDING=0 ALIGN=CENTER><TR><TD>Quote, originally posted by J�s91Teg »</TD></TR><TR><TD CLASS="quote">Very nice... I like the idea of under the seat... So you made your own relay pack for the Manual... Ever dealt with the 689M by dei? Ever dealt with a prox under the seat like that being responsive... </TD></TR></TABLE>
Those relays are for the headlights, fuel pump kill, ecu kill, and horn honk. I did'nt use the remote start function for this car due to others driving this car on occasion. If I was the sole driver, then yes, I would have used the remote start capabilities.
I have never put a proximity sensor under a seat like this, so, I'm unsure of it's effectiveness.
10-17-2007, 06:07 AM
#10
Honda-Tech Member
Join Date: Aug 2006
Location: Avoiding Rust, IL, USA
Posts: 425
Likes: 0
Received 0 Likes
on
0 Posts
damn i wish i have money so i can get you to install me an alarm in my hatch. looks really nice, are you also doing this to you hatch as well?
10-18-2007, 02:58 PM
#12
Honda-Tech Member
Join Date: Oct 2007
Posts: 28
Likes: 0
Received 0 Likes
on
0 Posts
Hey, i'm getting an alarm installed in my car this weekend by a mom n pop shop near my house.... whats the chance that they'll make the pretty wire looms like stealth installs though, if theyre doing $350 for viper5002,DEI520T,and DEI513T for my package? is that even a good deal for 350? thanks for the help 
Peace
Peace
10-19-2007, 01:07 AM
#13
Honda-Tech Member
iTrader: (1)
Join Date: Oct 2005
Location: 99 probs but a stolen car aint 1, ca, cerritos/fullerton
Posts: 9,716
Likes: 0
Received 3 Likes
on
3 Posts
<TABLE WIDTH="90%" CELLSPACING=0 CELLPADDING=0 ALIGN=CENTER><TR><TD>Quote, originally posted by dookie11 »</TD></TR><TR><TD CLASS="quote">Hey, i'm getting an alarm installed in my car this weekend by a mom n pop shop near my house.... whats the chance that they'll make the pretty wire looms like stealth installs though, if theyre doing $350 for viper5002,DEI520T,and DEI513T for my package? is that even a good deal for 350? thanks for the help
Peace</TD></TR></TABLE>
Not trying to bust your bubble. But more then likely you will be getting a regular install that not going to do any good. Did you even ask to see what kind of work they do? pics? what kind of effective kill switches? you better ask now because once its done. There is a chance that you will not recieve any money back once its done.
10-19-2007, 01:08 AM
#14
Honda-Tech Member
iTrader: (1)
Join Date: Oct 2005
Location: 99 probs but a stolen car aint 1, ca, cerritos/fullerton
Posts: 9,716
Likes: 0
Received 3 Likes
on
3 Posts
Op, nice job by the way. I will pm you later about a couple of tips  I don't want to highjack your thread.
I don't want to highjack your thread.
10-19-2007, 09:45 AM
#15
Honda-Tech Member
Join Date: Jun 2002
Location: Pittsburgh, Pa, USA
Posts: 1,538
Likes: 0
Received 0 Likes
on
0 Posts
<TABLE WIDTH="90%" CELLSPACING=0 CELLPADDING=0 ALIGN=CENTER><TR><TD>Quote, originally posted by wrx-killer-Sti-eater »</TD></TR><TR><TD CLASS="quote">Op, nice job by the way. I will pm you later about a couple of tips I don't want to highjack your thread.</TD></TR></TABLE>
Hey share the love
I don't want to highjack your thread.</TD></TR></TABLE>Hey share the love
10-21-2007, 09:20 PM
#17
Honda-Tech Member
Join Date: Jun 2002
Location: Pittsburgh, Pa, USA
Posts: 1,538
Likes: 0
Received 0 Likes
on
0 Posts
<TABLE WIDTH="90%" CELLSPACING=0 CELLPADDING=0 ALIGN=CENTER><TR><TD>Quote, originally posted by styldaccordngly »</TD></TR><TR><TD CLASS="quote">AudioRoach, you serious about the 689m? i have 5 instock..</TD></TR></TABLE>
PM Sent
PM Sent
10-23-2007, 11:26 AM
#18
Honda-Tech Member
Join Date: Jan 2006
Location: Mile high city, Colorado
Posts: 3
Likes: 0
Received 0 Likes
on
0 Posts
Hmmm that motor/header/tranny combo looks familiar... where did you get the B16? and did it come with a GSR tranny? and was the spark plug cover painted to match the valve cover like that? I hope you bought it from a friend, who bought it from a guy he knows. if so, i can probably tell you all you need to know about it, last maintainence, etc, done b4 it was sold. one last thing, did it come with a lightened flywheel and newer clutch? if so thats hilarious, that i found a pic of a motor I built up and sold. lemme know, im curious as to the power it makes now.
10-23-2007, 12:25 PM
#19
Honda-Tech Member
Thread Starter
<TABLE WIDTH="90%" CELLSPACING=0 CELLPADDING=0 ALIGN=CENTER><TR><TD>Quote, originally posted by wreckyou »</TD></TR><TR><TD CLASS="quote">Hmmm that motor/header/tranny combo looks familiar... where did you get the B16? and did it come with a GSR tranny? and was the spark plug cover painted to match the valve cover like that? I hope you bought it from a friend, who bought it from a guy he knows. if so, i can probably tell you all you need to know about it, last maintainence, etc, done b4 it was sold. one last thing, did it come with a lightened flywheel and newer clutch? if so thats hilarious, that i found a pic of a motor I built up and sold. lemme know, im curious as to the power it makes now.</TD></TR></TABLE>
I bought the vehicle with the swap already completed. I simply had to rewire it because the previous owner had no clue how to wire the O2 sensors. I also have the reciepts from when and where the swap was purchased. I repainted the valve cover and simply painted the spark plug cover flat black. I also had to replace the header because the eBay one that was on it was scraped up and did not fit (was too long). I have reciepts for that as well.
I wish it was a GSR tranny, as the current B16 one in it now is grinding.
 11-02-2007, 11:32 AM
#23
Junior Member
Join Date: Mar 2002
Location: Snake Mountain,, Eternia
Posts: 875
Likes: 0
Received 0 Likes
on
0 Posts
Did you work it so the headlights come on when it is disarmed? Does that require a relay and such? I have a buddy going to install an alarm and I want that. Also, how do I get your video to work?
11-03-2007, 05:06 PM
#24
Honda-Tech Member
Thread Starter
<TABLE WIDTH="90%" CELLSPACING=0 CELLPADDING=0 ALIGN=CENTER><TR><TD>Quote, originally posted by Skeletor »</TD></TR><TR><TD CLASS="quote">Did you work it so the headlights come on when it is disarmed? Does that require a relay and such? I have a buddy going to install an alarm and I want that. Also, how do I get your video to work?</TD></TR></TABLE>
I used a relay hooked up to the "dome light supervision" output wire of the alarm. Normally it only controls the dome lights, but, I made it work the headlights.
When the alarm is triggered the headlights flash. When the alarm is disarmed the headlights come on and turn back off 30 seconds later. Really cool for dark parking lots late at night.
I'm unsure how to make the video work...just imagine alot of noise and lights flashing...lol.
11-06-2007, 04:52 PM
#25
Junior Member
Join Date: Mar 2002
Location: Snake Mountain,, Eternia
Posts: 875
Likes: 0
Received 0 Likes
on
0 Posts
So the dome light supervision makes the lights flash? Also, is there another output for the dome light? I'd like to have it come on with the lights on disarm. Also doesn't the 990 come with a horn output? Why did you have to use a relay for that? Or did the relay hook into the 990s horn output?