
SozeHuck's Sozemobile Build. 93 EG DX Hatch
 10-09-2013, 05:39 PM
#1
Honda-Tech Member
Thread Starter
Join Date: Feb 2013
Location: Vansterdam, BC
Posts: 139
Likes: 0
Received 0 Likes
on
0 Posts
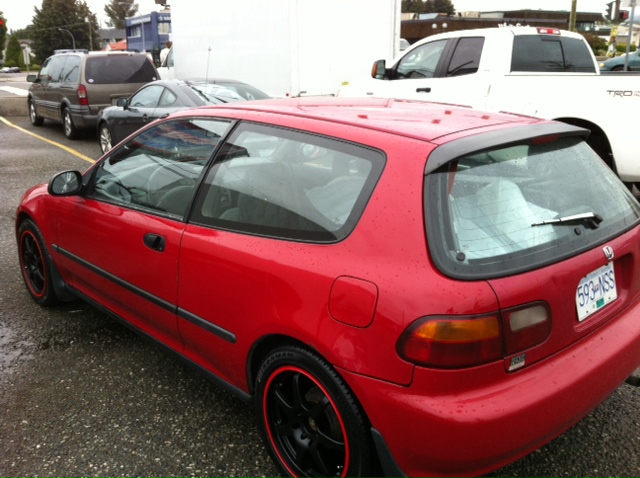
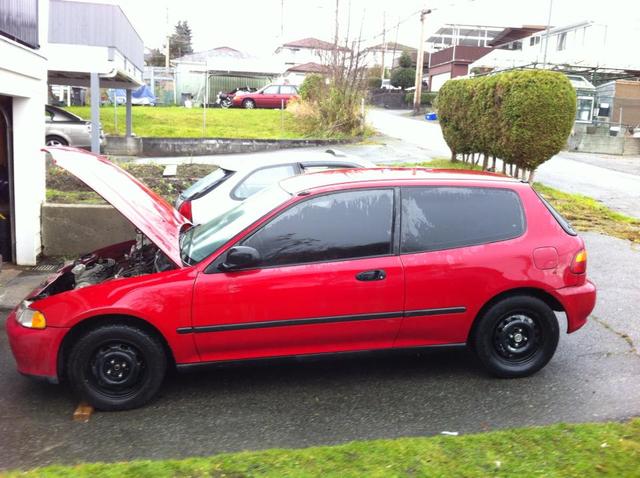
The Fresh Purchase shot. From the good side lol 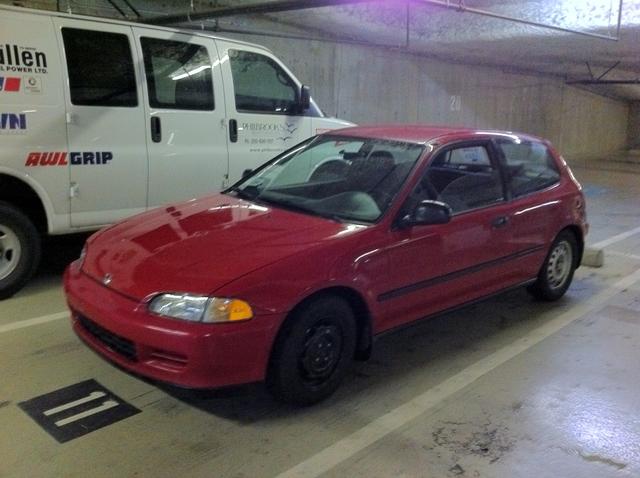
BE WARNED! THIS WILL BE A GRATUITOUS AND SELF INDULGENT BUILD BLOG Very wordy, and likely long winded, with questionable mechanics skills. Not to mention early Documentation was pretty minimal yo. [/B] Yes there will be pictures, I take a lot now but didn’t at the beginning
The Car:
After going carless for 10 years since my last Honda (an 89 Prelude Si) and missing it every time I see one, I finally got back onto the road and into the market for a car. I needed something I could afford as a daily driver, and something that would require some work if it was to fit my budget at the time. I wanted one built in the late 80's, early 90's, as those models seemed to drive for endless miles with proper maintenance. Plus I just like them.
Preludes were out, because I wanted a yearly insurance lower than a sports car would cost. I always liked civics so a civic became the goal. Initially I wanted an EF hatch, at the time I didn't really find one I wanted/could afford in the shape I wanted or miles, but eventually my very limited money had to go into something as I had a show to do in a mountain town 6 hours from me and needed transportation to get there. Besides, what better way than to choose something outside my desired 'parameters'.:duh:
How outside said parameters? WAY OUTSIDE. A really awful '93 EG DX hatch came up on Craigslist. And I mean awful.... Like I'm talking VICIOUS.
This car had sat for at least a year, Warning bells should have rung loud at that point but I dived in anyhow.
I bought the EG missing a right signal marker, it had an Orange fender on the passenger side, previous accident damage from passenger side fender hit, (all appear fixed EXCEPT for the engine cradle being bent about a half inch on the passenger side I learned of a couple days after purchase D’OH), a little quarter panel/rear fender cancer, drivers side fender scrape, some hood dents, 2 dents in the trunk and a ding in the rear bumper (along with some other relatively minor scuffs/scrapes). Wipers didn't work great at first, due to sitting so long. The interior was missing the rear privacy cover, spare tire bolt and cap, no deck, broken e-brake/console and a Head unit that wasn't even wired in. Odometer read 290,000 km's when I bought it LOL so pretty much brand new
This car must have had mold issues due to sitting as the previous owner had appeared to have cleaned the interior with INTENSE amounts of Vinegar. Like, I mean you wouldn't believe it. Seats were shot and torn anyhow, but oh man... so awful. Douchemobile.
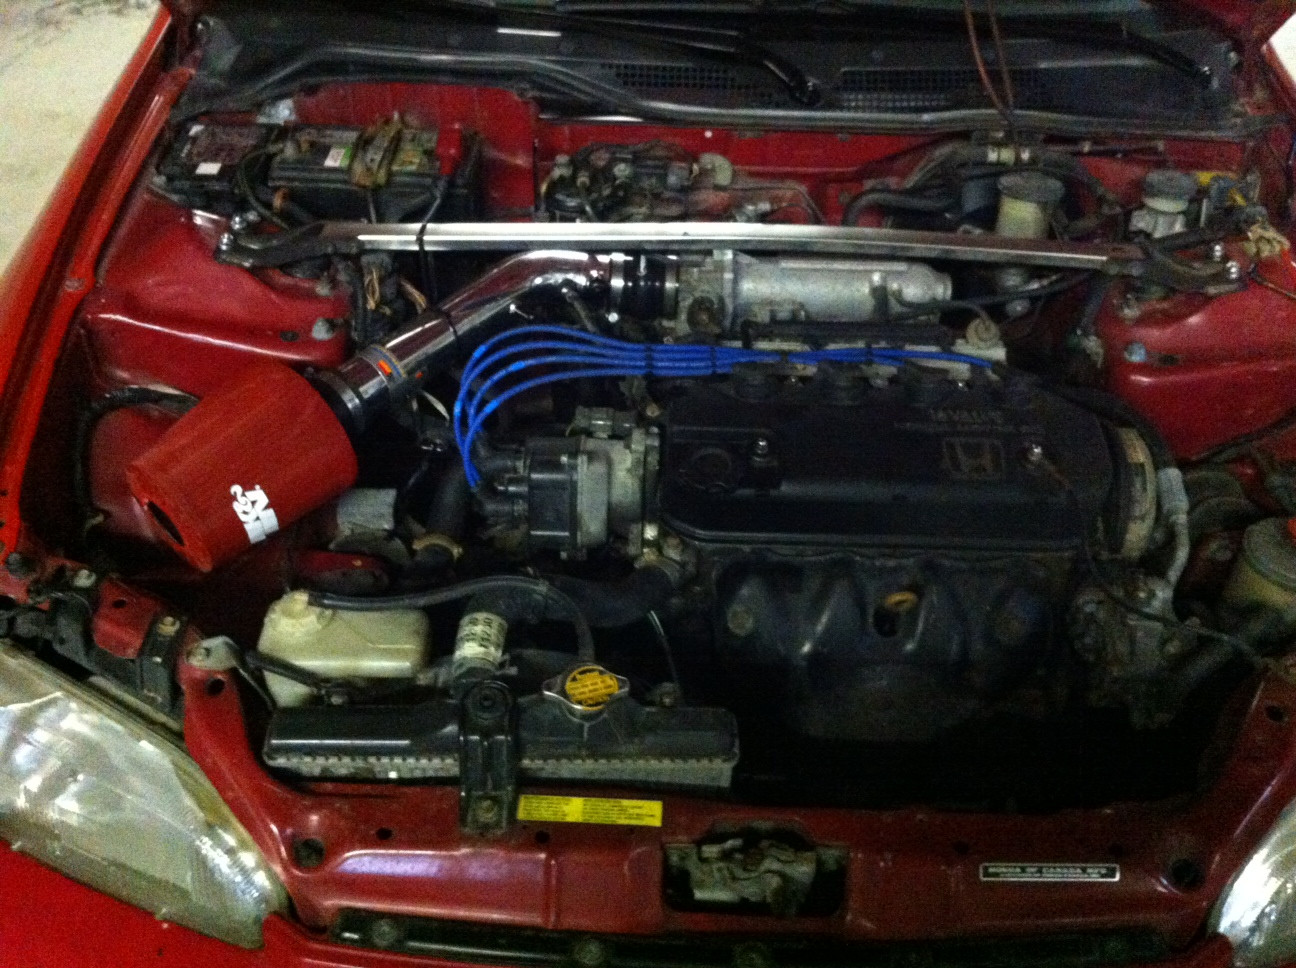
The Engine:
-Previous D15B2 swap with unknown exact mileage (timing belt was marked indicating last Waterpump/timing belt last change at 180,000kms)
-Reciepts for recent distributor rotor and cap (who knows tho)
Drivetrain/transmission:
-no noticeable grinds, however it sounds like a 20+ year old transmission with many miles and limited ISB bearing life left LOL
-right axle was replaced with a used one, reciepts present (since then boot has shown a tear and axle is going to be replaced soon, still some grease in the boot...for now)
-new front passenger side wheel bearing replaced (reciepts present)
Suspension:
-no reciepts, however the seller claimed shocks/struts were replaced along the way with OEM (though KYB is much more likely) but aftermarket lowering springs for a 1.5" drop (unconfirmed) however the alignment shop said the suspension was shot, and it really felt like it for the first month on the road.
-Passenger side front lower control arm replaced with Used OEM stock
-Passenger side rear upper control arm bushings WORN
-Upon alignment inspection, not so much to my surprise I find out the Engine cradle is bent 1/2" , Toe was out an inch when i got it!!!!! Luckily my Uncle is a mechanic adjusted the toe for me. Unfortunately caster is out until replacement
Brakes:
-Stock all around. Discs/drums
Body:
-Standard Honda Cancer
-Passenger fender had been replaced, no reciepts
Wheels:
-Mismatched pair of steelies, 2 black & 2 silver (with chrome OEM centercaps...only 2 tho) both 14"
-2 brand new winter tires on the front, 65-75% tread on rear All Seasons (Seeing as I was about to drive in winter on Mountain roads... this was a big part of the reason I got this car
The Original Plan
-Replace original seats with ANYTHING, but preferably something that fits my tiny girlfriend a little better, gross stock seats hurt her lower back within 30 mins of driving (Recaros were the dream)
-Find an armrest and some bloody cup holders so I don’t bloody crash
-New Plugs/wires/fuel filter/K&N filter/all fluids changed/timing belt and water pump/thermostat
-eventually a new cradle
-Some decent wheels
After replacing New Plugs/wires/fuel filter/K&N filter, I go to do thermostat and the threads are partially stripped on one of the housing bolts, I swore alot and found a bolt with slightly more length and it was back in business.
Next up I had my local mechanic buddy replace my waterpump & timing belt, good bloody thing because the water pump was toast, he also replaced cam seal/crank seal. I'm glad he was on the end of the giant breaker bar he needed to crack that crankbolt and not me lol.
Interior work:
I was originally looking for a set of JDM recaros, had the money, couldn't find a nice set for under $1300 (just my luck 2 came up two months later for 900$), my roadtrip was coming up so I had to go another route as my stock seats also hurt my gf's back as she is so short.
I found a single passenger side cloth seat from a DA 90-93 Integra LS and it was pretty much mint for $50, so I studied up on a seatpan swap and got to work.
Seatpan swap was not a very fun job on this Vinegar Scented Passenger seat in the EG... if you haven't done a seatpan swap... a couple hints, prepare for a lot of rust and a hate on for hog rings. I hate them. BLOODY HOG RINGS ARE THE WORST! did I mention I hate them. PS buy a set of hog ring pliers for putting them back on.
After removing the seatpan from the civic and the integra seats and comparing them, It was apparent that the integra seat bottom foam did not go as deep into the seatpan as the stock civic foam (3 springs hold it off the bottom of the seatpan, so it is helpful to get some foam cut to fill the gap otherwise it feels a little 'sinky).
The Integra Passenger seat had a hex key bolt with a stripped head... I had to drill this SON OF A ... out without drilling into the seat frame foam... which ofcourse i gave er a minor jab as she cleared the bolt. Lucky for me it was at the very bottom of the foam and cannot be seen or felt.
The Hardest part of the seatpan swap BESIDES hog rings & the vinyl clip of the upholstery covering (at the bottom of the upright frame)... was attaching the final seatpan bolt highest on upright frame. Oh, BE CAREFUL!!! the vinyl part of the upholstery is fragile, pull too hard, prepare to do some sewing.
The upholstery cover is clipped together at the bottom of the upright seat, this must be undone and then the upholstery cover CAREFULLY pulled back from the foam about 4-6"'s, then the foam should be carefully cut with a sharp knife to expose the bolts for Re & Re. Once its bolted down... carefully pull the fabric back into the correct position (sqeezing the foam helps), you will likely fight and struggle for awhile to get the damn clip at the bottom of the upholstery covering on the upright frame. Goodluck ... it really sucks.
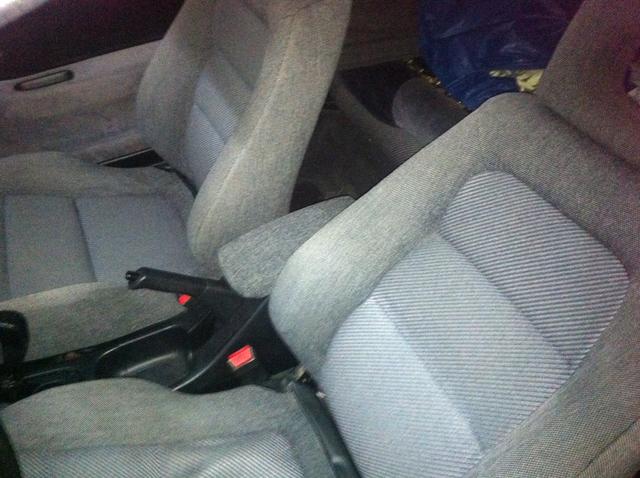
In the end it fit my girl perfectly and looked really good… On one side lol
After my trip, I searched high and low for matching drivers seat, rear bench and uprights but in the meantime I found some 96 DC (2Door) rear seats, installed temporarily until I could find a suitable replacement. Although the bench "fit" there were some pretty unsightly gaps (the 4 door bench fits MUCH BETTER).
Eventually I found another 90-93 Integra LS passenger seat, Drivers seat and rear bench.... but the fabric on all was VERY dirty and stained, I honestly didn't know if it could be cleaned so it was a risk.
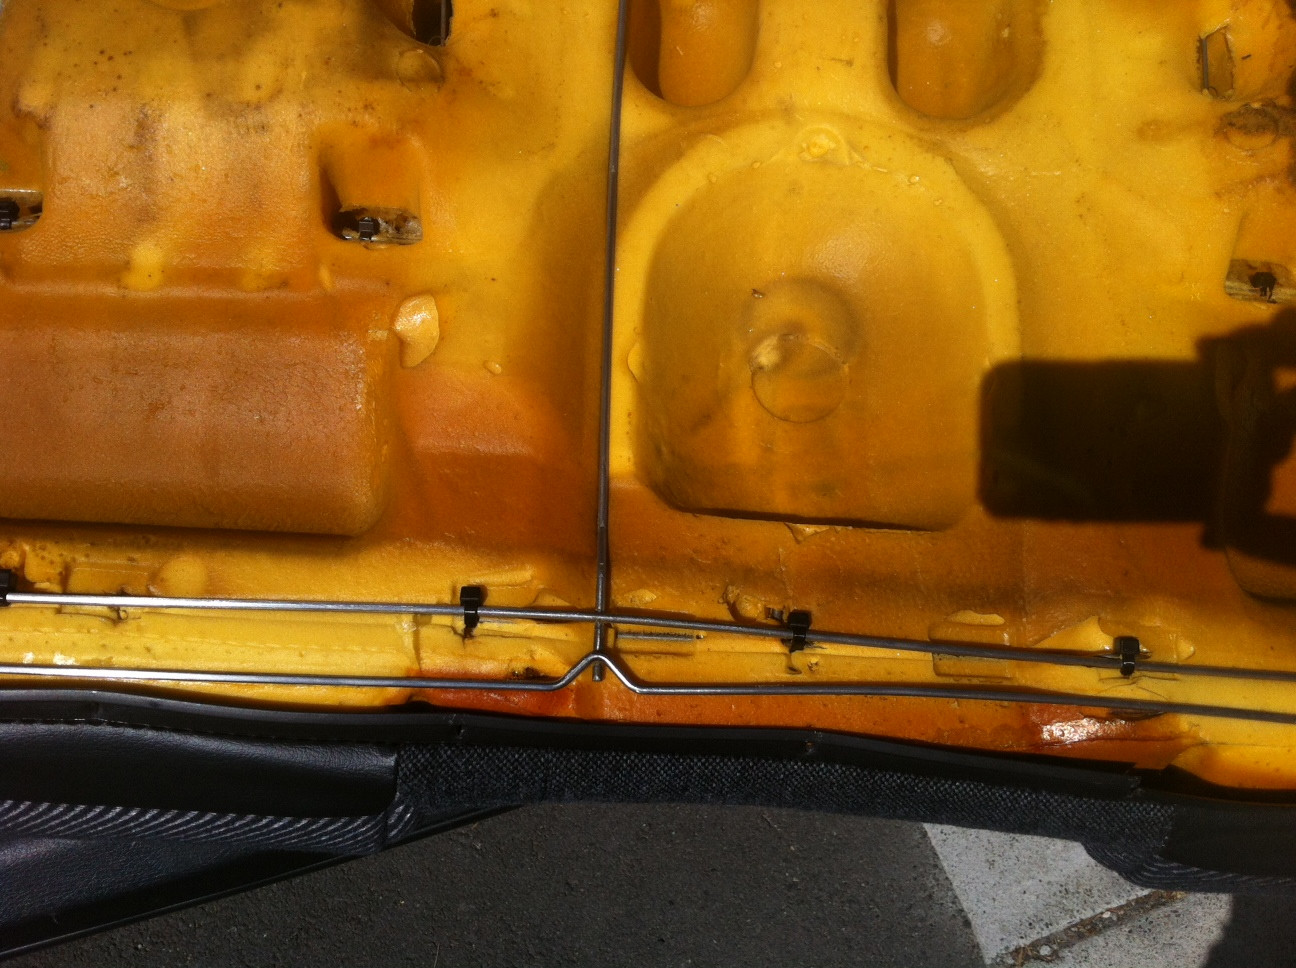
The first step after removing rails/pan/bolts was to start removing hog rings from the thin metal rods in the upholstery covering that are attached by the hog rings to the thin rods embedded in seat cushion foam. I used needle nose and sidecutters... but it is VERY frustrating and easy to pull out the metal rods embedded in the foam, be careful or risk pooching your seat (ie fabric won't sit tight over the cushion).
After the fabric is removed I then ran a bathtub with warm-hot water and used about 4 scoops of oxi clean, washed it by hand, rinsed, repeated process 3 times until it looked almost new!
For the drivers upright frame restore and passenger side cushion/upholstery to drivers upright frame swap... I first sanded the upright frame and seatpan, then used rust convertor, resanded lightly. The foam had to be carefully cut where it should fit over the lumbar support as the passenger foam had no lumbar support.
Also it is important to note which order the spacers/bushings are removed from the side with the hex bolt so that there is no play between the upright frame and rails.
I used zap straps wherever possible throughout reassembly, making sure to use flush cuts where possible so I don’t gouge my hand reaching under the seat for inevitable change collection.
The End result was pretty good! lighting and my picture quality taking sucks but ...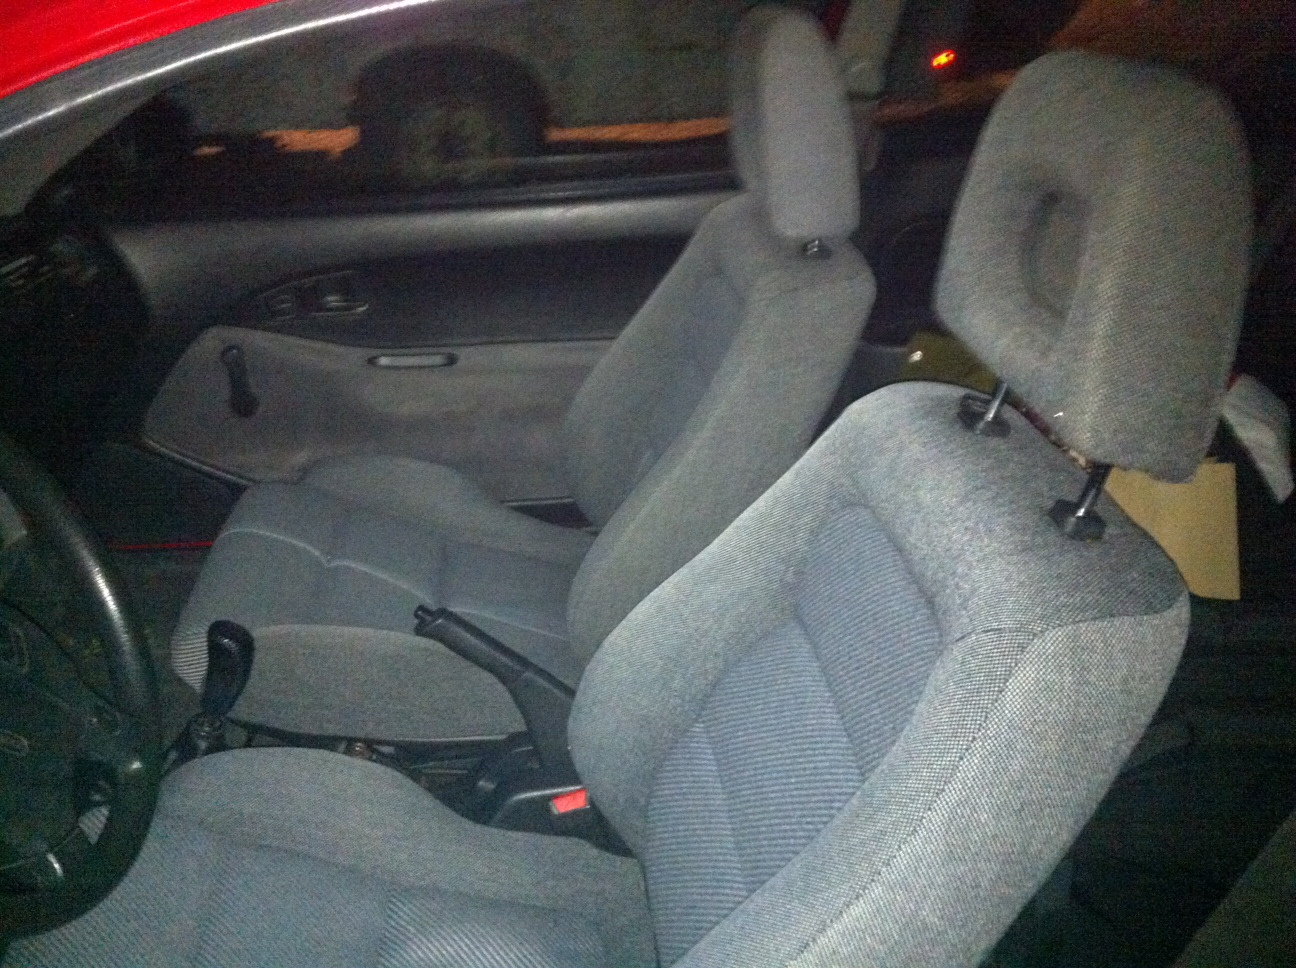
The Rear Bench to match the front seats came next and after removing the fabric and foam from the OEM civic rear bench frame
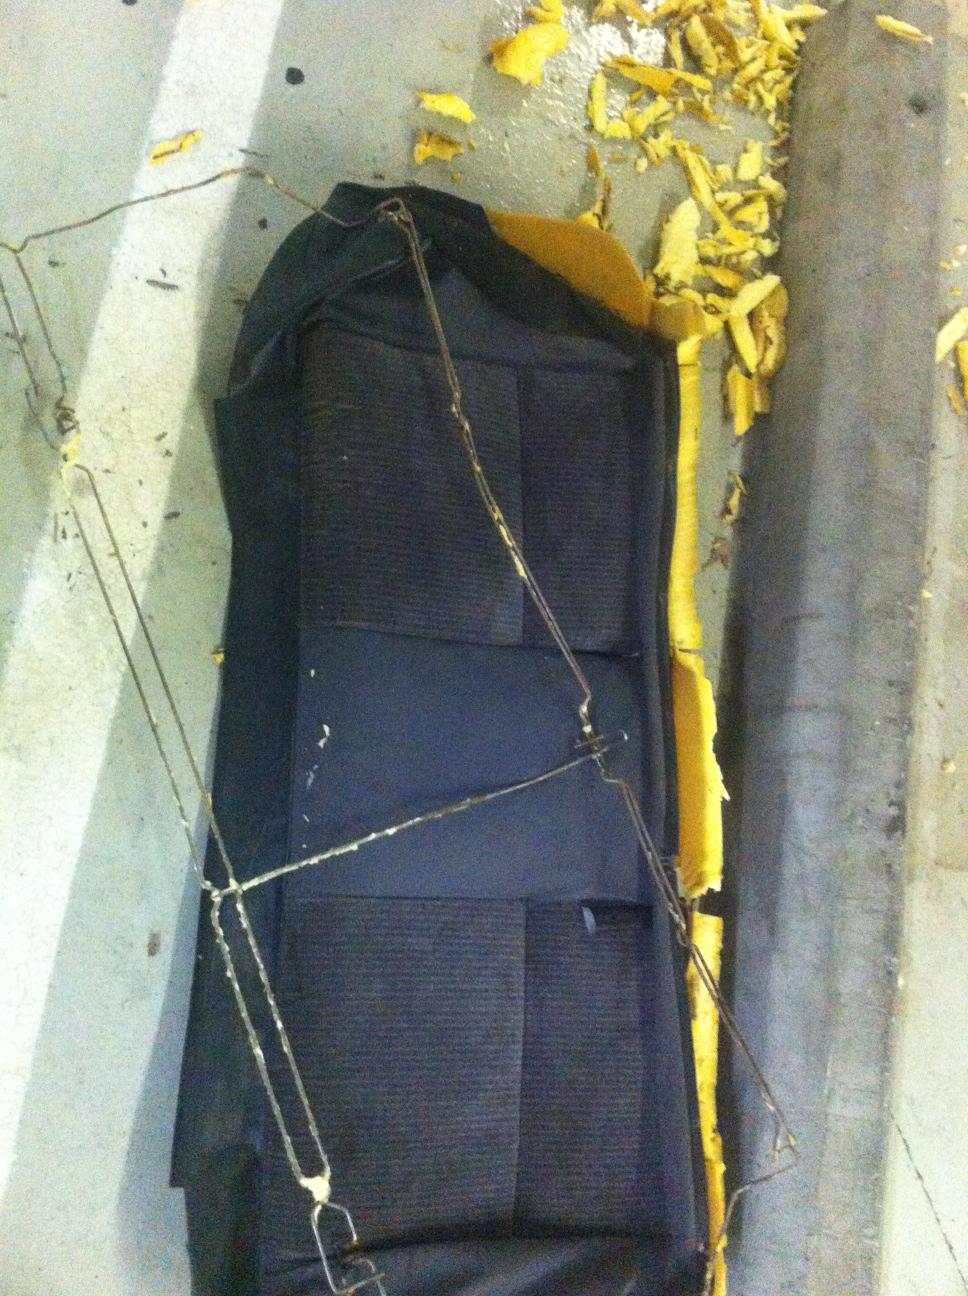
I sanded it down and removed fabric from the DA Integra LS rear bench and oxycleaned the fabric the same as the front seats, then reattached using as many zap straps as possible. I then zap strapped the OEM civic rear bench frame to the Integra LS rear bench frame so the bench would bolt (1 bolt lol) in.
Was pretty happy with the results.
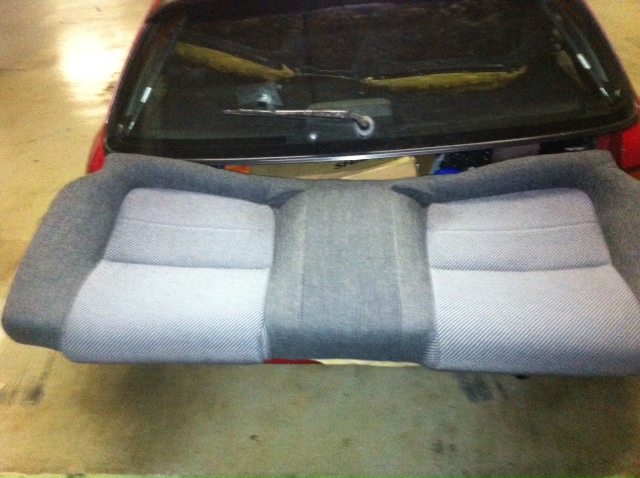
Unfortunately the uprights wouldn't fit as they are 3" too wide for the EG so currently I am trying to find the time to modify. But as its pretty low priority, GSR uprights remain.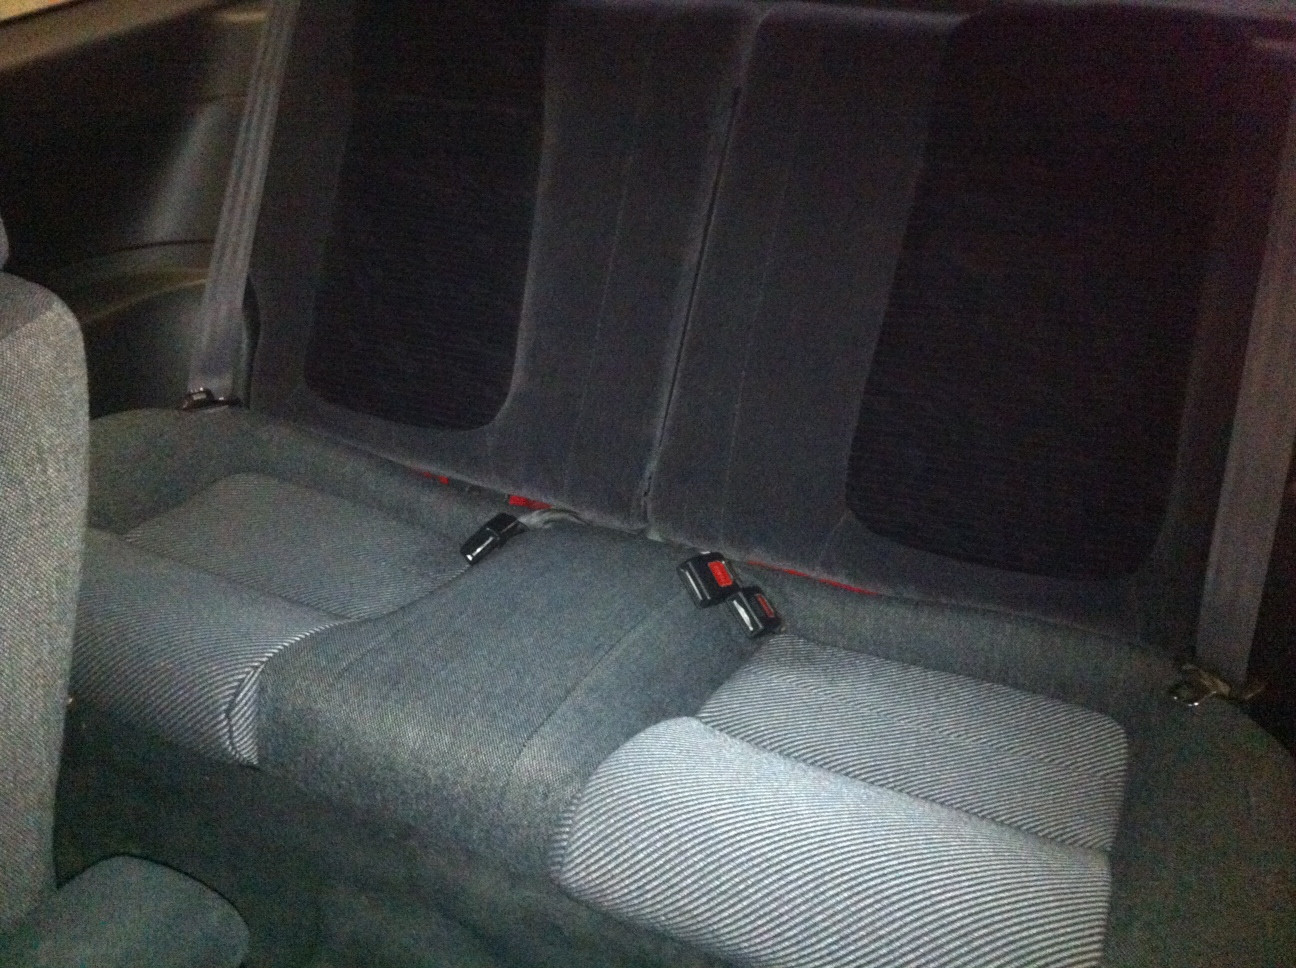 the gaps visible were closed by adding a couple small foam shims in the right place
So it was about this time I started getting the itch to improve this beast. It escalated. and escalated.
I got tired of struggling up the coquihala, desperate to shift the powerband I hunted down a K&N typhoon short ram intake and cobbled together the missing collar and drycharger filter wrap. Sure enough it got me an extra 10km/hr on the hills in 4th gear (bloody long gearing D series tranny) and that was enough to make it less painful. I also got tired of body roll and laughable or not, I grabbed an ITR front strut bar. WHAT A DIFFERENCE! keep in mind, this car had no sway bars at all. Doubt it would be noticed if sway bars were present but it made a huge difference with this car.
At this point I also replaced the plugs/wires with new NGK blue,and changed the fuel filter, put in a couple of nitehawk headlight bulbs.
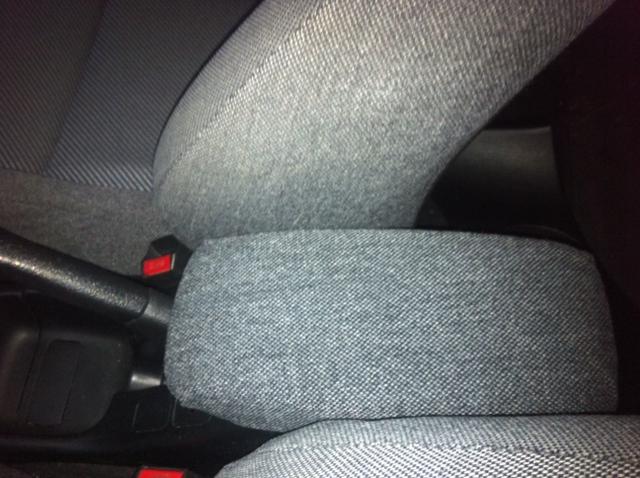
Next I was desperate for cupholders and an armrest as my cupholders were broken and no armrest present... picked up a 94-01 Integra armrest/center console. Yes I'm aware it doesn't fit the stock audio console, so some fabrication is due. The materials/tools and plan is set, alas the priority isn't, so it remains as is to this day... until November.
At this point I started researching, and researching.... and researching....
NEW PLAN!
-4 wheel disc swap
-suspension rebuild
-cooling upgrades
-body work
-coil overs
-engine swap
I acquired a full 96 Spec JDM ITR 4 x 114.3 swap including 40/40 prop valve, rear trailing arms, calipers, e-brake cables and front knuckles. AND then...the madness took over.
Since then I collected parts for 6 months as my budget allowed for the suspension rebuild
-Enkei 7 spoke 16" wheels with curb damage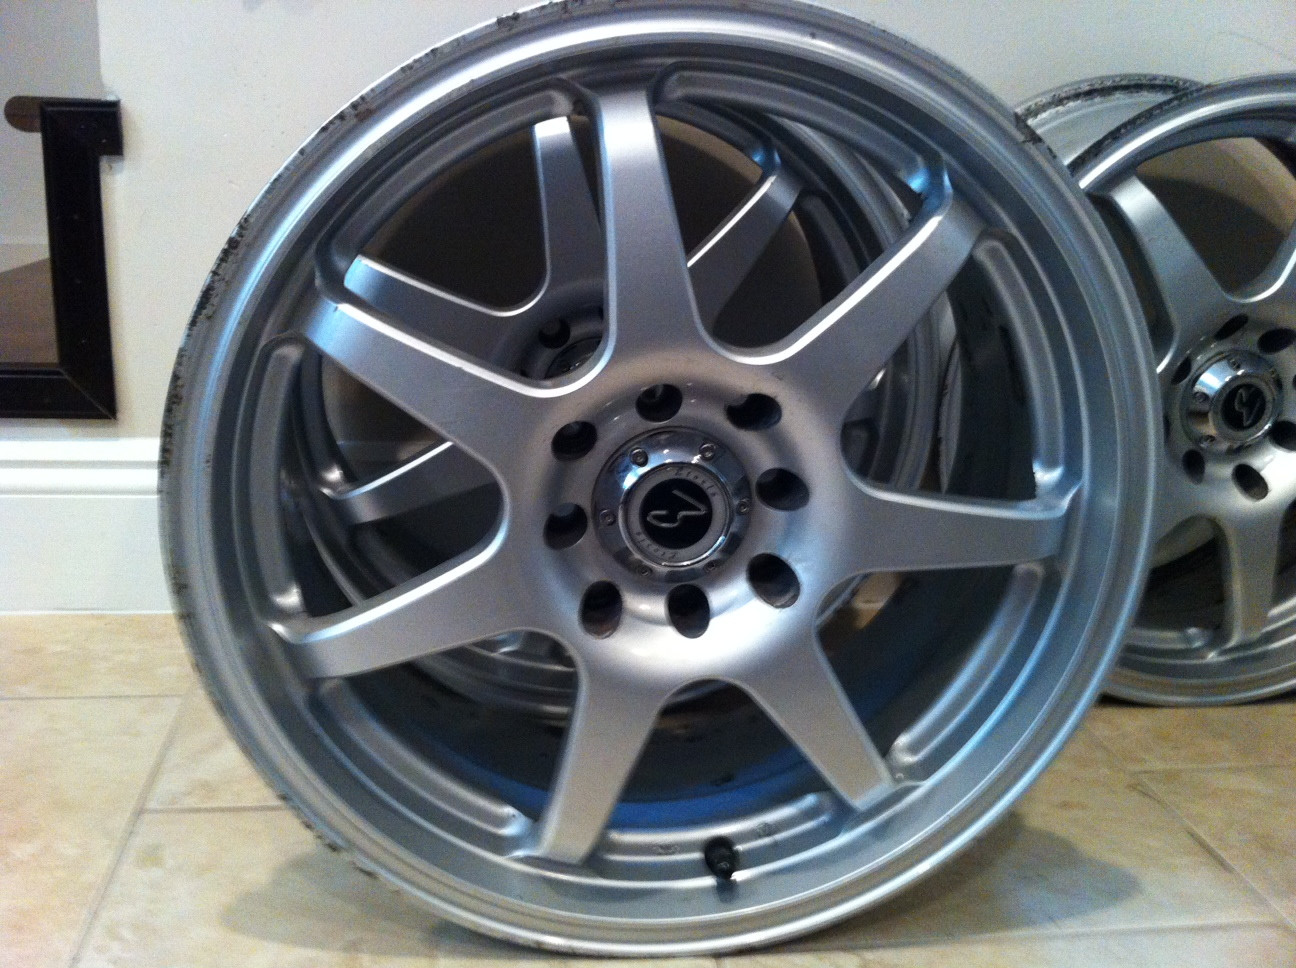 , I had them refinished by Shinez to my preference
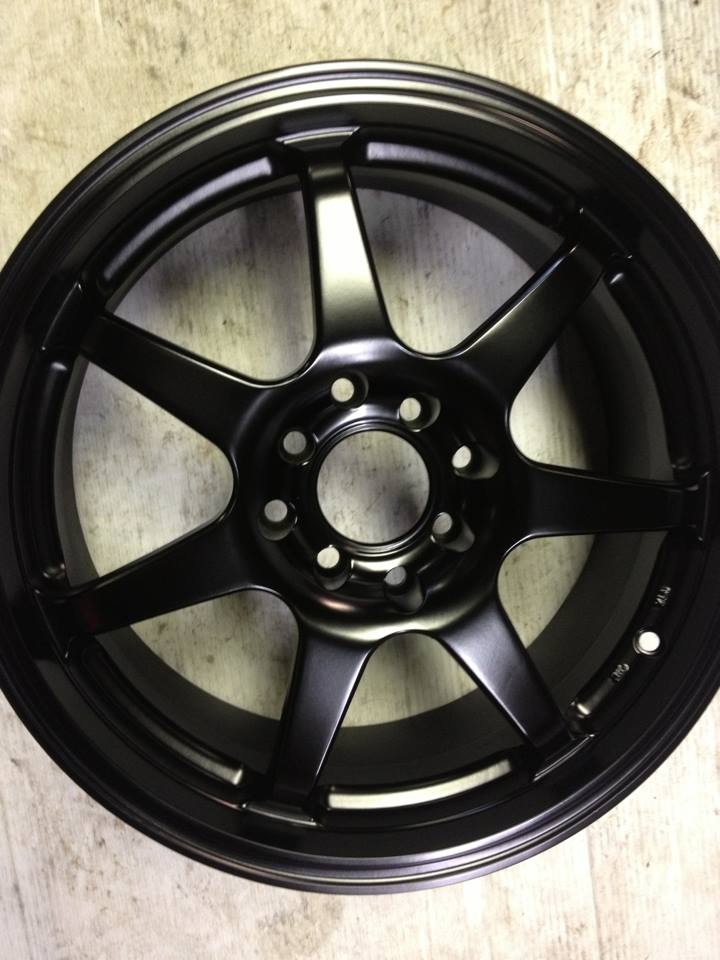

Almost forgot.... new rubber acquired, Hercules Ironman iMove 205 45 16 Z rated shoes, so far they've been great! If your not familiar with these tires the are actually made by one of Coopers Companies. Solid deal for sure.
-GSR 1" power booster and master cylinder
-DC2 OEM 22mm sway bar/endlinks/bushings/bracket
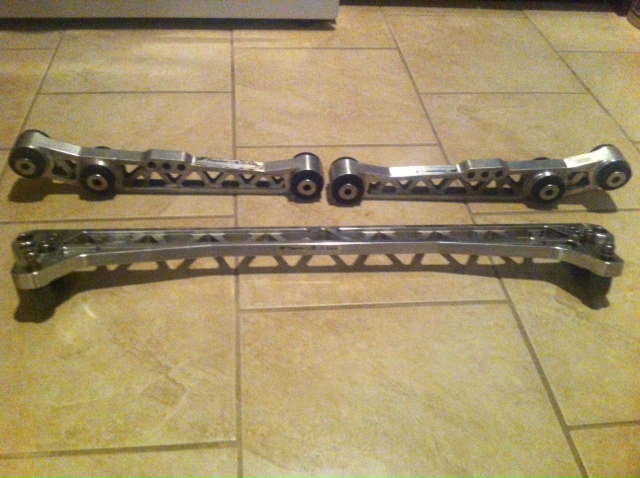
-Function 7 rear lower Control arms and subframe brace
-98 Spec JDM ITR rear sway bar and bushings
-Si CV axles
-Raybestos Carbon ceramic front brake pads
-Hawk HPS rear brake pads
-Pending acquisition of GSR Power steering rack and front subframe
-until I have the money for AMR coilovers I picked up a set of cheap replacements KYB gr2's with H&R sport springs
Still need to pick up my stainless steel brake lines and Function 7 Front lower control arms.... and then its on like donkey kong!
Second week of Oct 2013 the ITR swap will be going to a local machine shop for Rotor turning, Rear trailing arm bushings and Bearing replacement as required. Getting excited.
Over the summer of 2013, I replaced several items due to failure....
-Main relay
-distributor rebuild... ingiter, Ignition coil, dizzy cap
-Alternator
Just recently acquired Grey carpet to replace my stinky Black carpet.
I will be doing audio install the same time as the center console and carpet replacement.
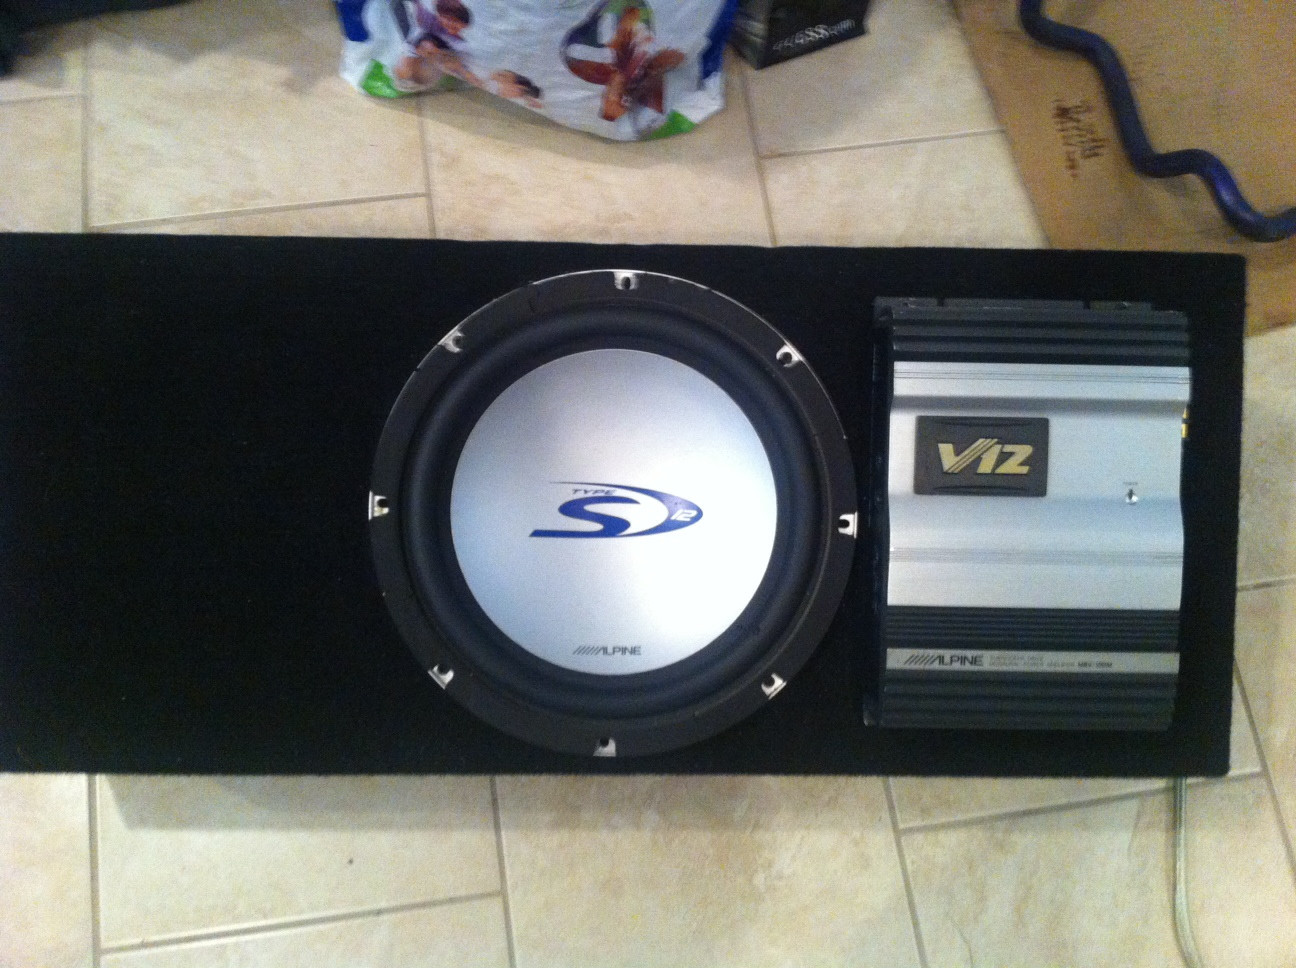
Moar Bass yo. Just picked up a 12" Alpine type S and Alpine V12 amp
will be picking up my el cheapo 7" lcd dvd deck this week (oct 12) yeeee hah
I retrofitted a Cabin Air Filter as well using Deschlong's guide using an 98-01 Integra Evap. Was pretty easy, just remember to disconnect the damn fittings on the engine bay side of the firewall of the Integra to remove it LOL and don't forget all gaskets and grommets and their orientation. without the gasket for the firewall it will whistle....
Side by side, teg on the left
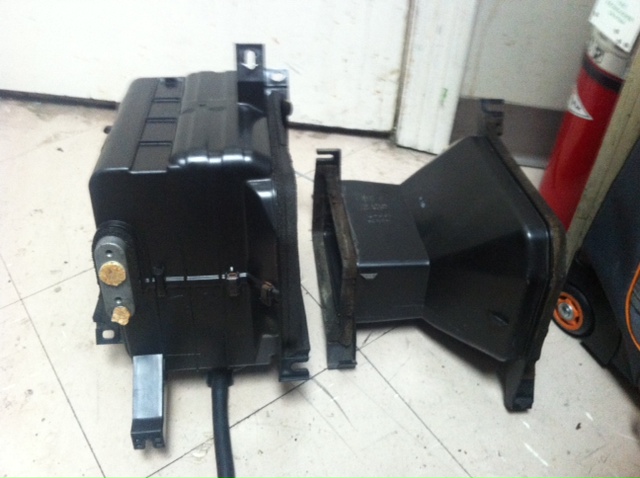
Empty slot for Cabin air filter and frame/seal (about $30 at Honda)
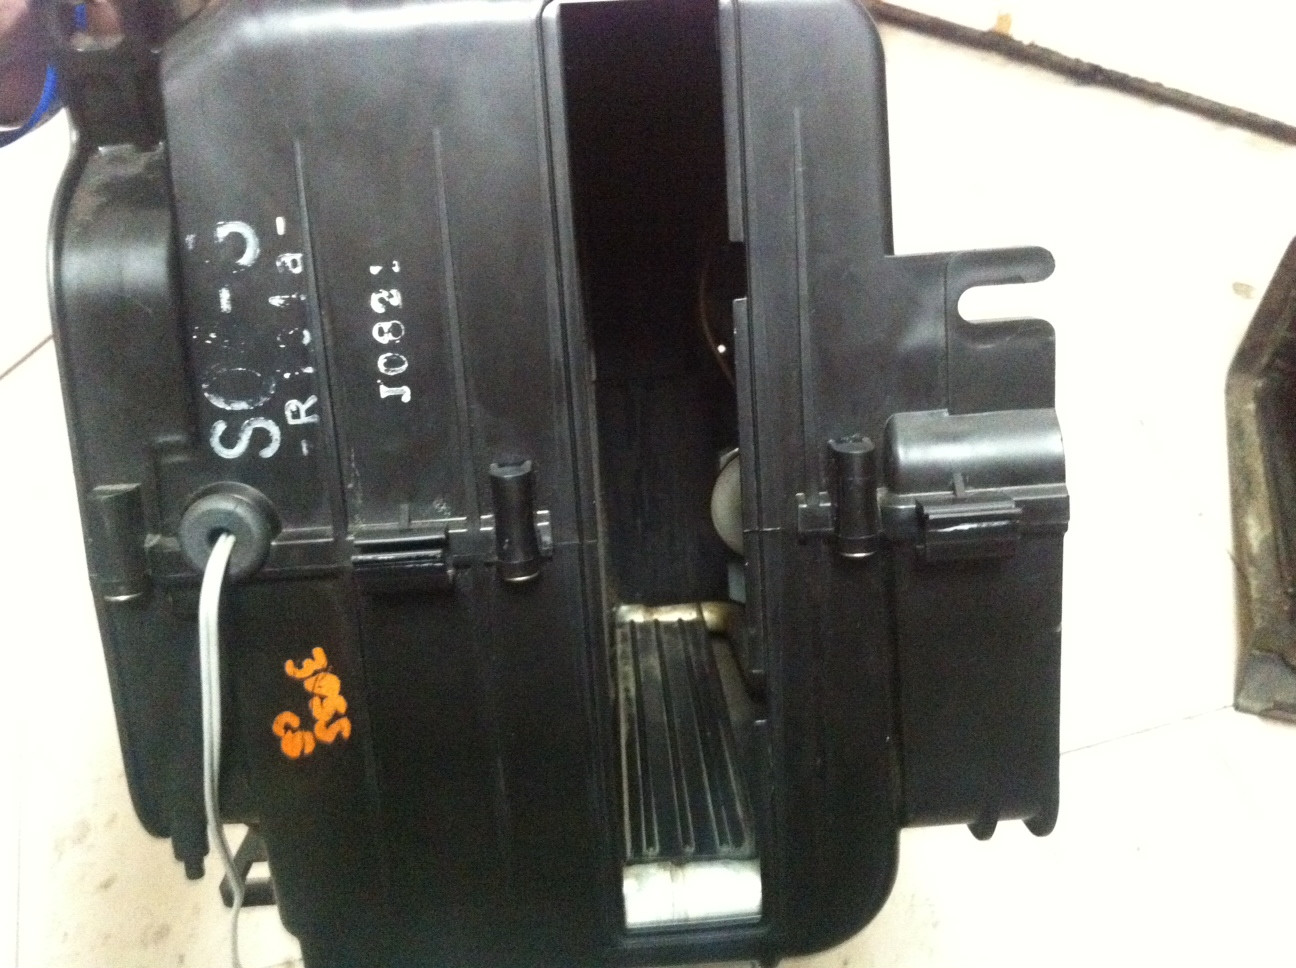
Pretty easy, remove glove box and get it in there. Don't buy the damn Fram cabin air filters, they fit like crap.
I also have everything to do the retrofit from 94-01 integra Lights on door chime, alas it hasn't been a priority.
I also recently replaced my orange fender with a close match, still milano red at least. from this
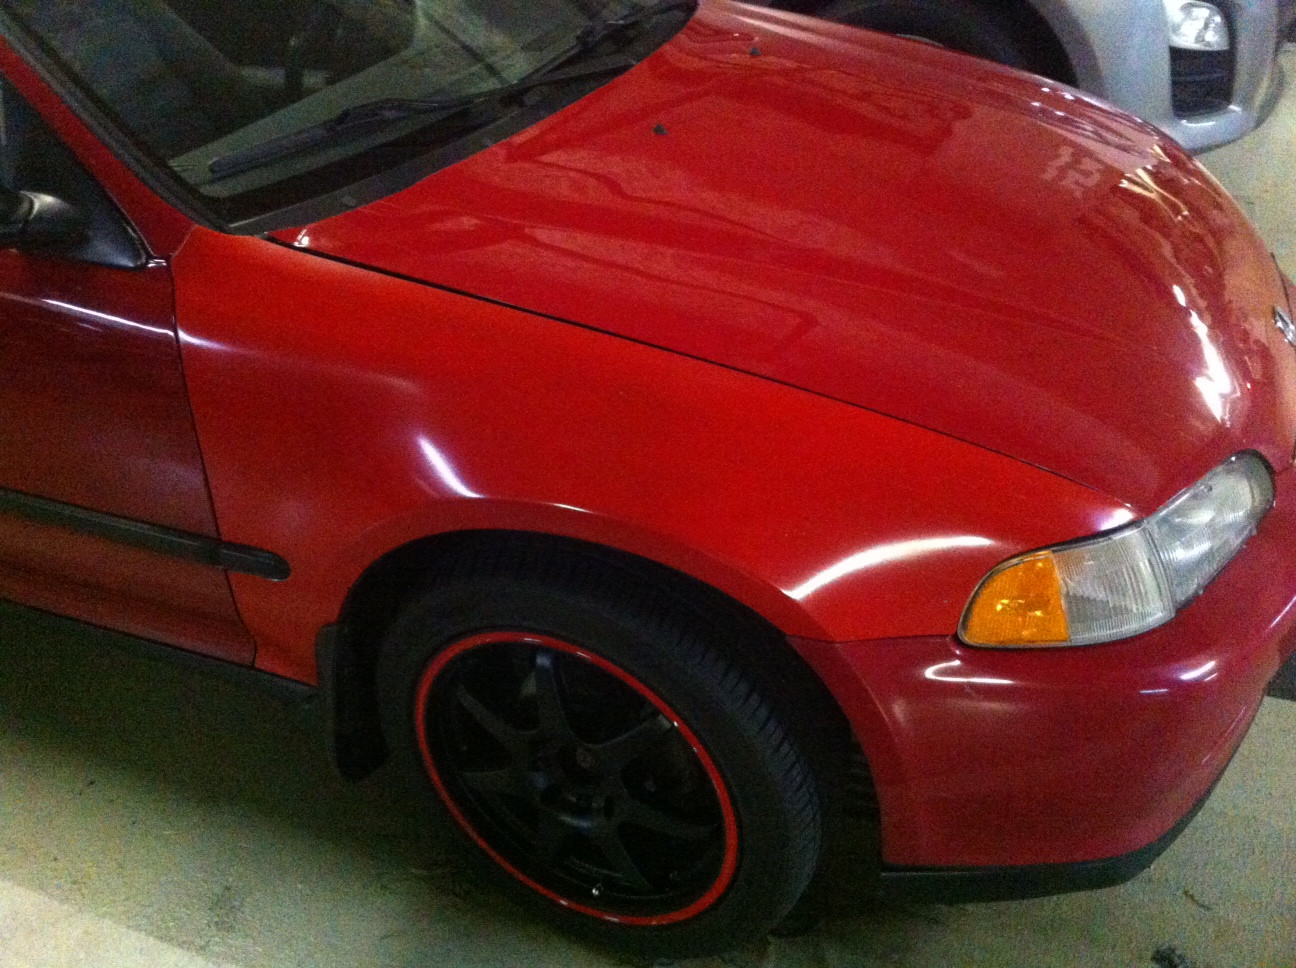 to this
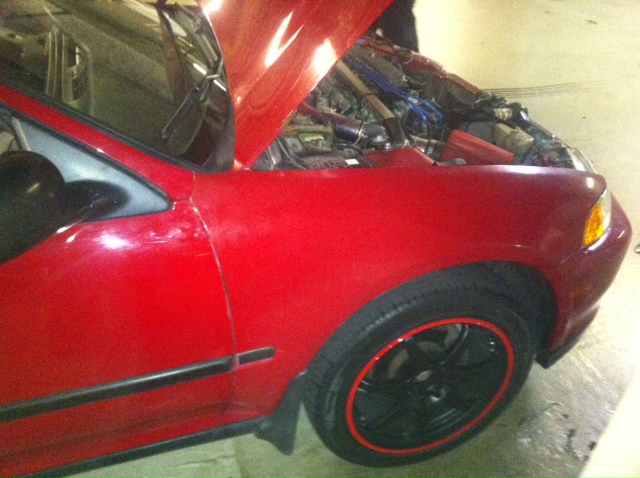
greasy fender shot that need some cut polish but at least its red. Still have to drill the holes to put my OEM moulding back on it.
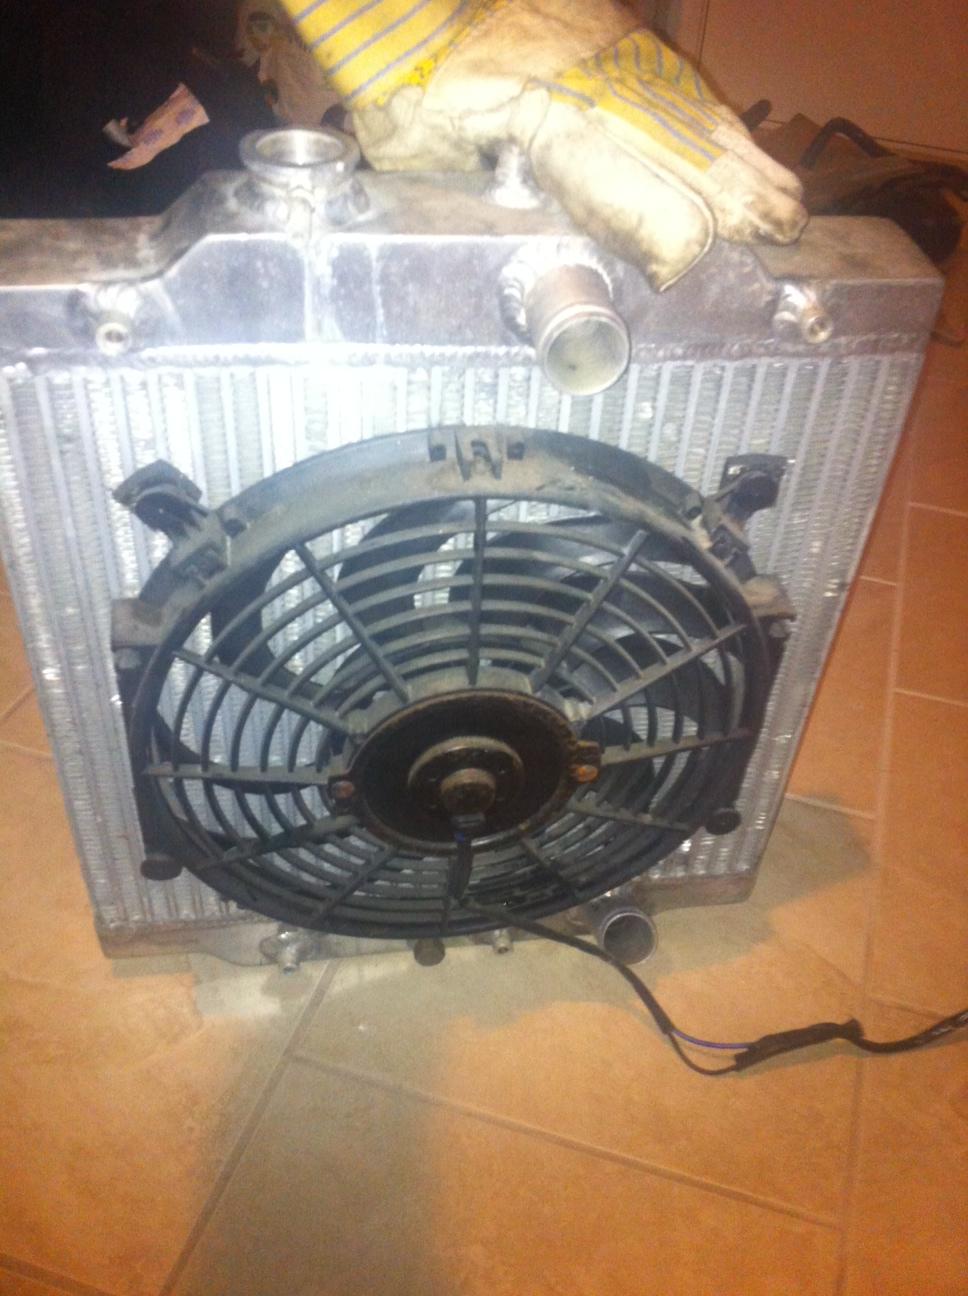
As well I just acquired a new 2.5" Aluminum rad and 12" slim fan ! BAD ****!
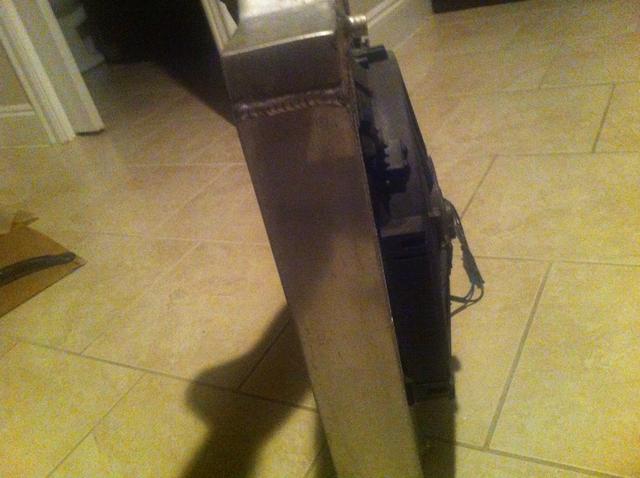
As soon as I get over this bloody cold, its going in.
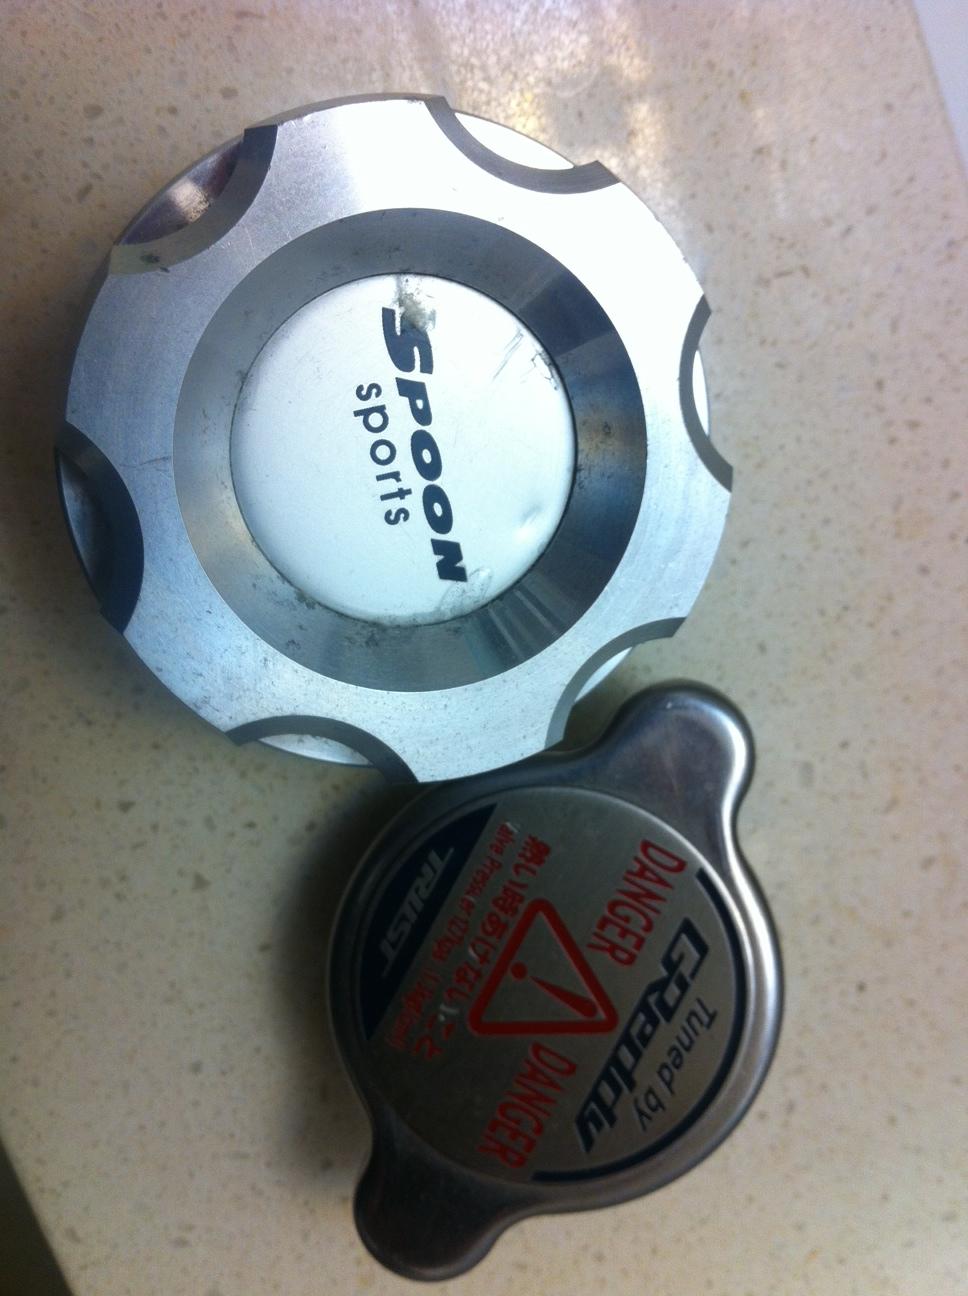
Got the Greddy rad cap with this rad, and a Spoon oil cap to stop the brutal leak from my crappy old OEM one.
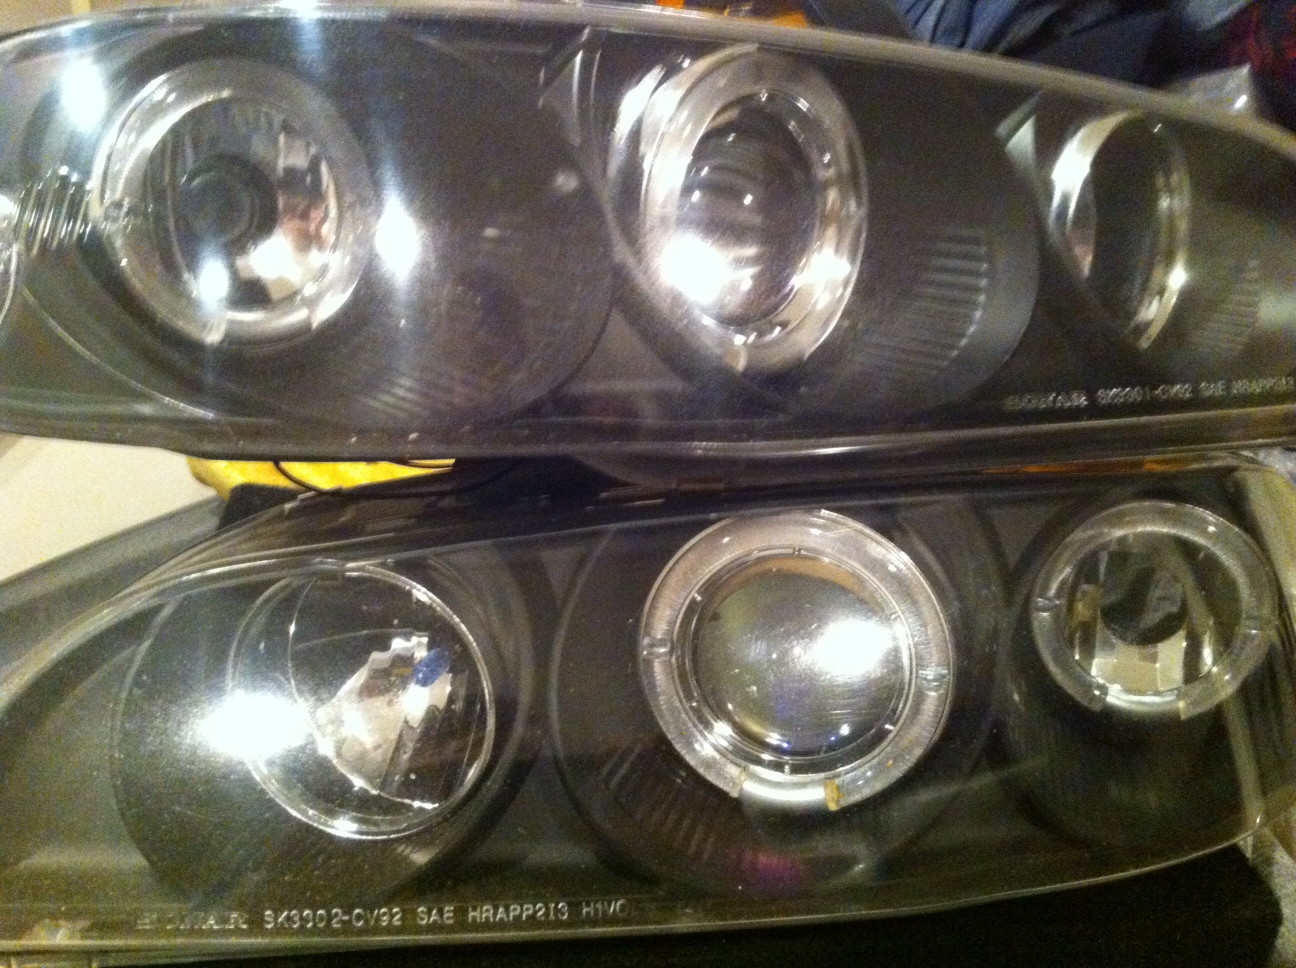
Also picked up some used Sonar Halo Projector headlights, and me, being a dummy I trusted the seller just because he owned a shop, turns out there was one projector that was doing the floppy chicken.
On purchase:
I baked them in the oven at 215 degrees faranheit for 7 minutes on some parchment paper to seperate the casing, then noticed the upper angle adjustment screw had a plastic cap that fit into the projector housing that was melted and not even attached, I'm guessing HID's or too high wattage bulb is the culprit. So I cut the melted part that fit into the projector housing and use hella epoxy to permanently attach the plastic piece, allowing upper adjustment angle screw to be adjusted still.
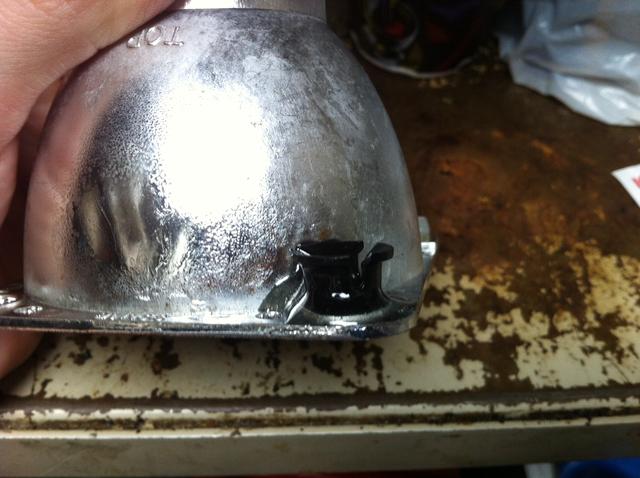
Sure enough the other headlight had same issue starting to happen but wasn't completely melted yet, I was able to reattach and epoxy it without any cutting.
I figured since they are apart anyhow, might as well try to do a full headlight restore and try to eliminate some pitting, scratches and yellowing. After wetsanding for 3 hours before polishing.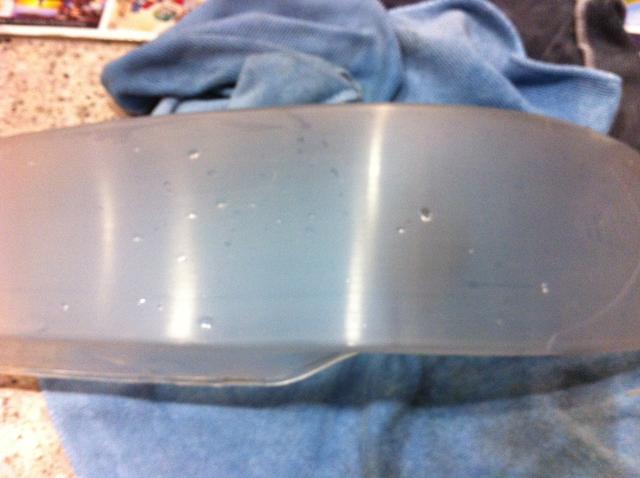
not that my picture is good enough to see the difference but here is unrestored versus wetsanded

lol maybe I'll use a better camera for the Polished finish. Lens 1 turned out pretty good, Lens 2 yet to go. After I finish, I will be baking it again and then masking and sealing with RTV gasket.
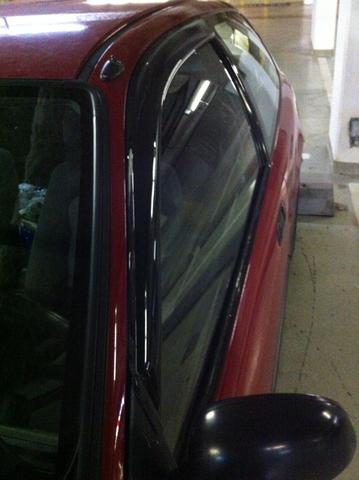
Also was gifted some door visors so after this got cleaned up they will be going on after a restore with the headlight restore kit I bought.
BE WARNED! THIS WILL BE A GRATUITOUS AND SELF INDULGENT BUILD BLOG Very wordy, and likely long winded, with questionable mechanics skills. Not to mention early Documentation was pretty minimal yo. [/B] Yes there will be pictures, I take a lot now but didn’t at the beginning
The Car:
After going carless for 10 years since my last Honda (an 89 Prelude Si) and missing it every time I see one, I finally got back onto the road and into the market for a car. I needed something I could afford as a daily driver, and something that would require some work if it was to fit my budget at the time. I wanted one built in the late 80's, early 90's, as those models seemed to drive for endless miles with proper maintenance. Plus I just like them.
Preludes were out, because I wanted a yearly insurance lower than a sports car would cost. I always liked civics so a civic became the goal. Initially I wanted an EF hatch, at the time I didn't really find one I wanted/could afford in the shape I wanted or miles, but eventually my very limited money had to go into something as I had a show to do in a mountain town 6 hours from me and needed transportation to get there. Besides, what better way than to choose something outside my desired 'parameters'.:duh:
How outside said parameters? WAY OUTSIDE. A really awful '93 EG DX hatch came up on Craigslist. And I mean awful.... Like I'm talking VICIOUS.
This car had sat for at least a year, Warning bells should have rung loud at that point but I dived in anyhow.
I bought the EG missing a right signal marker, it had an Orange fender on the passenger side, previous accident damage from passenger side fender hit, (all appear fixed EXCEPT for the engine cradle being bent about a half inch on the passenger side I learned of a couple days after purchase D’OH), a little quarter panel/rear fender cancer, drivers side fender scrape, some hood dents, 2 dents in the trunk and a ding in the rear bumper (along with some other relatively minor scuffs/scrapes). Wipers didn't work great at first, due to sitting so long. The interior was missing the rear privacy cover, spare tire bolt and cap, no deck, broken e-brake/console and a Head unit that wasn't even wired in. Odometer read 290,000 km's when I bought it LOL so pretty much brand new
This car must have had mold issues due to sitting as the previous owner had appeared to have cleaned the interior with INTENSE amounts of Vinegar. Like, I mean you wouldn't believe it. Seats were shot and torn anyhow, but oh man... so awful. Douchemobile.
The Engine:
-Previous D15B2 swap with unknown exact mileage (timing belt was marked indicating last Waterpump/timing belt last change at 180,000kms)
-Reciepts for recent distributor rotor and cap (who knows tho)
Drivetrain/transmission:
-no noticeable grinds, however it sounds like a 20+ year old transmission with many miles and limited ISB bearing life left LOL
-right axle was replaced with a used one, reciepts present (since then boot has shown a tear and axle is going to be replaced soon, still some grease in the boot...for now)
-new front passenger side wheel bearing replaced (reciepts present)
Suspension:
-no reciepts, however the seller claimed shocks/struts were replaced along the way with OEM (though KYB is much more likely) but aftermarket lowering springs for a 1.5" drop (unconfirmed) however the alignment shop said the suspension was shot, and it really felt like it for the first month on the road.
-Passenger side front lower control arm replaced with Used OEM stock
-Passenger side rear upper control arm bushings WORN
-Upon alignment inspection, not so much to my surprise I find out the Engine cradle is bent 1/2" , Toe was out an inch when i got it!!!!! Luckily my Uncle is a mechanic adjusted the toe for me. Unfortunately caster is out until replacement
Brakes:
-Stock all around. Discs/drums
Body:
-Standard Honda Cancer
-Passenger fender had been replaced, no reciepts
Wheels:
-Mismatched pair of steelies, 2 black & 2 silver (with chrome OEM centercaps...only 2 tho) both 14"
-2 brand new winter tires on the front, 65-75% tread on rear All Seasons (Seeing as I was about to drive in winter on Mountain roads... this was a big part of the reason I got this car
The Original Plan
-Replace original seats with ANYTHING, but preferably something that fits my tiny girlfriend a little better, gross stock seats hurt her lower back within 30 mins of driving (Recaros were the dream)
-Find an armrest and some bloody cup holders so I don’t bloody crash
-New Plugs/wires/fuel filter/K&N filter/all fluids changed/timing belt and water pump/thermostat
-eventually a new cradle
-Some decent wheels
After replacing New Plugs/wires/fuel filter/K&N filter, I go to do thermostat and the threads are partially stripped on one of the housing bolts, I swore alot and found a bolt with slightly more length and it was back in business.
Next up I had my local mechanic buddy replace my waterpump & timing belt, good bloody thing because the water pump was toast, he also replaced cam seal/crank seal. I'm glad he was on the end of the giant breaker bar he needed to crack that crankbolt and not me lol.
Interior work:
I was originally looking for a set of JDM recaros, had the money, couldn't find a nice set for under $1300 (just my luck 2 came up two months later for 900$), my roadtrip was coming up so I had to go another route as my stock seats also hurt my gf's back as she is so short.
I found a single passenger side cloth seat from a DA 90-93 Integra LS and it was pretty much mint for $50, so I studied up on a seatpan swap and got to work.
Seatpan swap was not a very fun job on this Vinegar Scented Passenger seat in the EG... if you haven't done a seatpan swap... a couple hints, prepare for a lot of rust and a hate on for hog rings. I hate them. BLOODY HOG RINGS ARE THE WORST! did I mention I hate them. PS buy a set of hog ring pliers for putting them back on.
After removing the seatpan from the civic and the integra seats and comparing them, It was apparent that the integra seat bottom foam did not go as deep into the seatpan as the stock civic foam (3 springs hold it off the bottom of the seatpan, so it is helpful to get some foam cut to fill the gap otherwise it feels a little 'sinky).
The Integra Passenger seat had a hex key bolt with a stripped head... I had to drill this SON OF A ... out without drilling into the seat frame foam... which ofcourse i gave er a minor jab as she cleared the bolt. Lucky for me it was at the very bottom of the foam and cannot be seen or felt.
The Hardest part of the seatpan swap BESIDES hog rings & the vinyl clip of the upholstery covering (at the bottom of the upright frame)... was attaching the final seatpan bolt highest on upright frame. Oh, BE CAREFUL!!! the vinyl part of the upholstery is fragile, pull too hard, prepare to do some sewing.
The upholstery cover is clipped together at the bottom of the upright seat, this must be undone and then the upholstery cover CAREFULLY pulled back from the foam about 4-6"'s, then the foam should be carefully cut with a sharp knife to expose the bolts for Re & Re. Once its bolted down... carefully pull the fabric back into the correct position (sqeezing the foam helps), you will likely fight and struggle for awhile to get the damn clip at the bottom of the upholstery covering on the upright frame. Goodluck ... it really sucks.
In the end it fit my girl perfectly and looked really good… On one side lol
After my trip, I searched high and low for matching drivers seat, rear bench and uprights but in the meantime I found some 96 DC (2Door) rear seats, installed temporarily until I could find a suitable replacement. Although the bench "fit" there were some pretty unsightly gaps (the 4 door bench fits MUCH BETTER).
Eventually I found another 90-93 Integra LS passenger seat, Drivers seat and rear bench.... but the fabric on all was VERY dirty and stained, I honestly didn't know if it could be cleaned so it was a risk.
The first step after removing rails/pan/bolts was to start removing hog rings from the thin metal rods in the upholstery covering that are attached by the hog rings to the thin rods embedded in seat cushion foam. I used needle nose and sidecutters... but it is VERY frustrating and easy to pull out the metal rods embedded in the foam, be careful or risk pooching your seat (ie fabric won't sit tight over the cushion).
After the fabric is removed I then ran a bathtub with warm-hot water and used about 4 scoops of oxi clean, washed it by hand, rinsed, repeated process 3 times until it looked almost new!
For the drivers upright frame restore and passenger side cushion/upholstery to drivers upright frame swap... I first sanded the upright frame and seatpan, then used rust convertor, resanded lightly. The foam had to be carefully cut where it should fit over the lumbar support as the passenger foam had no lumbar support.
Also it is important to note which order the spacers/bushings are removed from the side with the hex bolt so that there is no play between the upright frame and rails.
I used zap straps wherever possible throughout reassembly, making sure to use flush cuts where possible so I don’t gouge my hand reaching under the seat for inevitable change collection.
The End result was pretty good! lighting and my picture quality taking sucks but ...
The Rear Bench to match the front seats came next and after removing the fabric and foam from the OEM civic rear bench frame
I sanded it down and removed fabric from the DA Integra LS rear bench and oxycleaned the fabric the same as the front seats, then reattached using as many zap straps as possible. I then zap strapped the OEM civic rear bench frame to the Integra LS rear bench frame so the bench would bolt (1 bolt lol) in.
Was pretty happy with the results.
Unfortunately the uprights wouldn't fit as they are 3" too wide for the EG so currently I am trying to find the time to modify. But as its pretty low priority, GSR uprights remain.
the gaps visible were closed by adding a couple small foam shims in the right place So it was about this time I started getting the itch to improve this beast. It escalated. and escalated.
I got tired of struggling up the coquihala, desperate to shift the powerband I hunted down a K&N typhoon short ram intake and cobbled together the missing collar and drycharger filter wrap. Sure enough it got me an extra 10km/hr on the hills in 4th gear (bloody long gearing D series tranny) and that was enough to make it less painful. I also got tired of body roll and laughable or not, I grabbed an ITR front strut bar. WHAT A DIFFERENCE! keep in mind, this car had no sway bars at all. Doubt it would be noticed if sway bars were present but it made a huge difference with this car.
At this point I also replaced the plugs/wires with new NGK blue,and changed the fuel filter, put in a couple of nitehawk headlight bulbs.
Next I was desperate for cupholders and an armrest as my cupholders were broken and no armrest present... picked up a 94-01 Integra armrest/center console. Yes I'm aware it doesn't fit the stock audio console, so some fabrication is due. The materials/tools and plan is set, alas the priority isn't, so it remains as is to this day... until November.
At this point I started researching, and researching.... and researching....
NEW PLAN!
-4 wheel disc swap
-suspension rebuild
-cooling upgrades
-body work
-coil overs
-engine swap
I acquired a full 96 Spec JDM ITR 4 x 114.3 swap including 40/40 prop valve, rear trailing arms, calipers, e-brake cables and front knuckles. AND then...the madness took over.
Since then I collected parts for 6 months as my budget allowed for the suspension rebuild
-Enkei 7 spoke 16" wheels with curb damage
, I had them refinished by Shinez to my preference Almost forgot.... new rubber acquired, Hercules Ironman iMove 205 45 16 Z rated shoes, so far they've been great! If your not familiar with these tires the are actually made by one of Coopers Companies. Solid deal for sure.
-GSR 1" power booster and master cylinder
-DC2 OEM 22mm sway bar/endlinks/bushings/bracket
-Function 7 rear lower Control arms and subframe brace
-98 Spec JDM ITR rear sway bar and bushings
-Si CV axles
-Raybestos Carbon ceramic front brake pads
-Hawk HPS rear brake pads
-Pending acquisition of GSR Power steering rack and front subframe
-until I have the money for AMR coilovers I picked up a set of cheap replacements KYB gr2's with H&R sport springs
Still need to pick up my stainless steel brake lines and Function 7 Front lower control arms.... and then its on like donkey kong!
Second week of Oct 2013 the ITR swap will be going to a local machine shop for Rotor turning, Rear trailing arm bushings and Bearing replacement as required. Getting excited.
Over the summer of 2013, I replaced several items due to failure....
-Main relay
-distributor rebuild... ingiter, Ignition coil, dizzy cap
-Alternator
Just recently acquired Grey carpet to replace my stinky Black carpet.
I will be doing audio install the same time as the center console and carpet replacement.
Moar Bass yo. Just picked up a 12" Alpine type S and Alpine V12 amp
will be picking up my el cheapo 7" lcd dvd deck this week (oct 12) yeeee hah
I retrofitted a Cabin Air Filter as well using Deschlong's guide using an 98-01 Integra Evap. Was pretty easy, just remember to disconnect the damn fittings on the engine bay side of the firewall of the Integra to remove it LOL and don't forget all gaskets and grommets and their orientation. without the gasket for the firewall it will whistle....
Side by side, teg on the left
Empty slot for Cabin air filter and frame/seal (about $30 at Honda)
Pretty easy, remove glove box and get it in there. Don't buy the damn Fram cabin air filters, they fit like crap.
I also have everything to do the retrofit from 94-01 integra Lights on door chime, alas it hasn't been a priority.
I also recently replaced my orange fender with a close match, still milano red at least. from this
to this greasy fender shot that need some cut polish but at least its red. Still have to drill the holes to put my OEM moulding back on it.
As well I just acquired a new 2.5" Aluminum rad and 12" slim fan ! BAD ****!
As soon as I get over this bloody cold, its going in.
Got the Greddy rad cap with this rad, and a Spoon oil cap to stop the brutal leak from my crappy old OEM one.
Also picked up some used Sonar Halo Projector headlights, and me, being a dummy I trusted the seller just because he owned a shop, turns out there was one projector that was doing the floppy chicken.
On purchase:
I baked them in the oven at 215 degrees faranheit for 7 minutes on some parchment paper to seperate the casing, then noticed the upper angle adjustment screw had a plastic cap that fit into the projector housing that was melted and not even attached, I'm guessing HID's or too high wattage bulb is the culprit. So I cut the melted part that fit into the projector housing and use hella epoxy to permanently attach the plastic piece, allowing upper adjustment angle screw to be adjusted still.
Sure enough the other headlight had same issue starting to happen but wasn't completely melted yet, I was able to reattach and epoxy it without any cutting.
I figured since they are apart anyhow, might as well try to do a full headlight restore and try to eliminate some pitting, scratches and yellowing. After wetsanding for 3 hours before polishing.
not that my picture is good enough to see the difference but here is unrestored versus wetsanded
lol maybe I'll use a better camera for the Polished finish. Lens 1 turned out pretty good, Lens 2 yet to go. After I finish, I will be baking it again and then masking and sealing with RTV gasket.
Also was gifted some door visors so after this got cleaned up they will be going on after a restore with the headlight restore kit I bought.
Last edited by SozeHuck; 12-01-2013 at 04:56 PM.

 [IMG]http://i.imgur
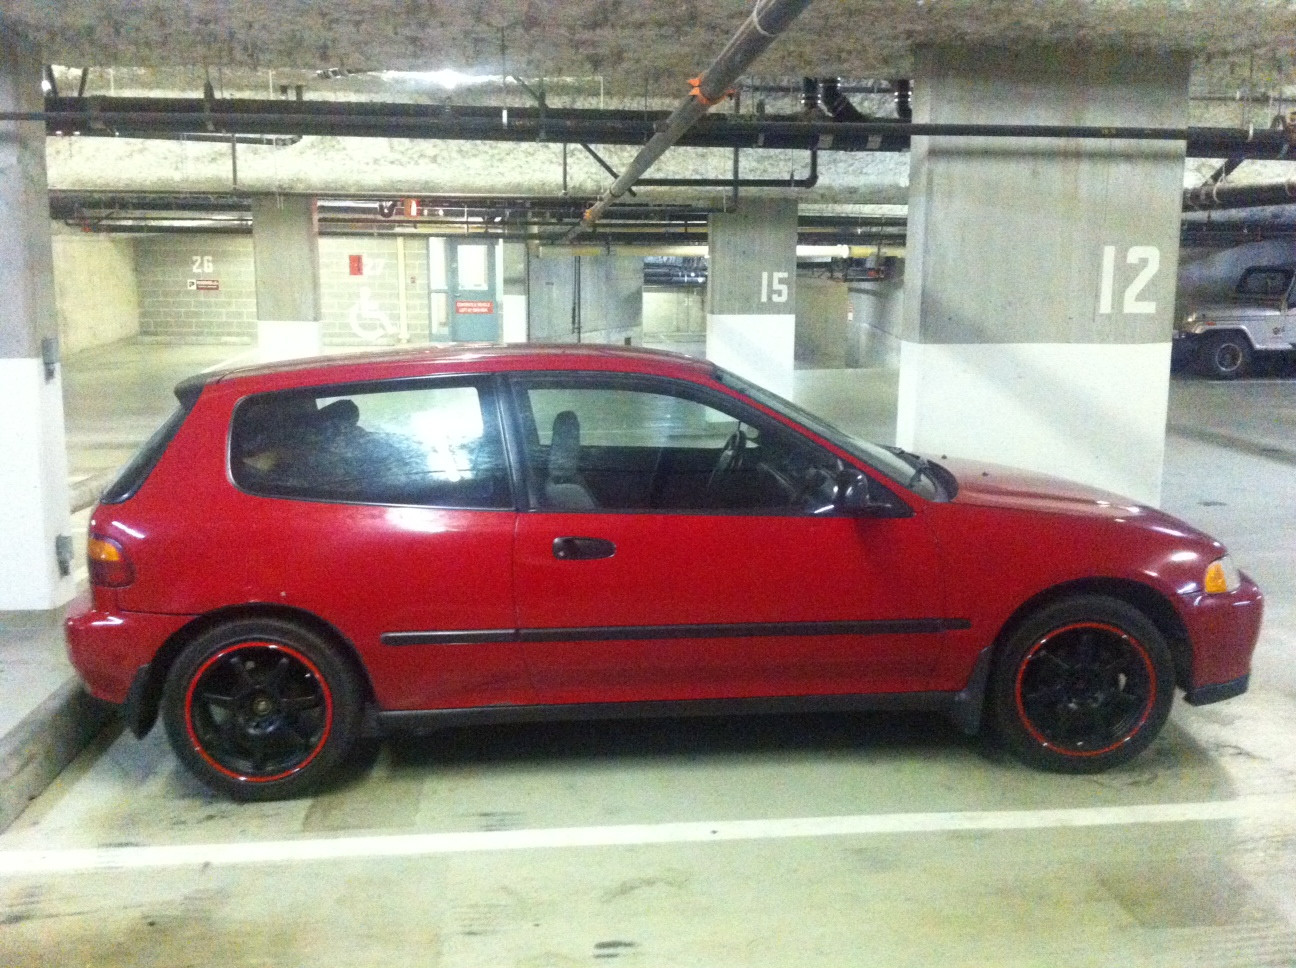 .com/vzBFOtm.jpg[/IMG]
 10-21-2013, 12:40 PM
#5
Honda-Tech Member
Join Date: Jul 2011
Location: Canada, Ontario
Posts: 424
Likes: 0
Received 0 Likes
on
0 Posts
Looks like you have an well thought out plan in front of you. Well done work so far, I was going to do that wheel scheme to my voxx wheels before I got my hands on some GN+
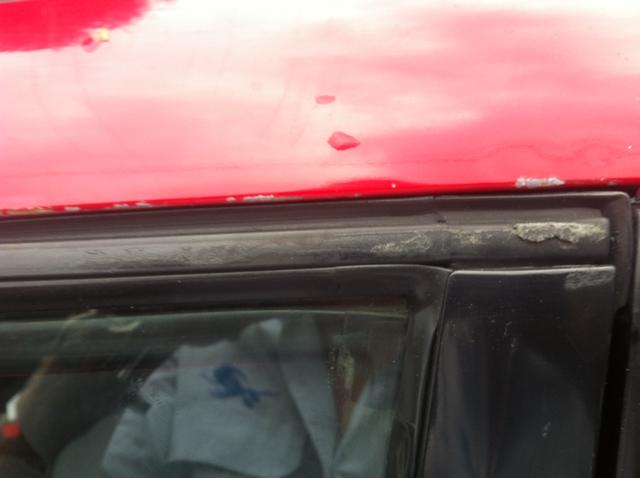
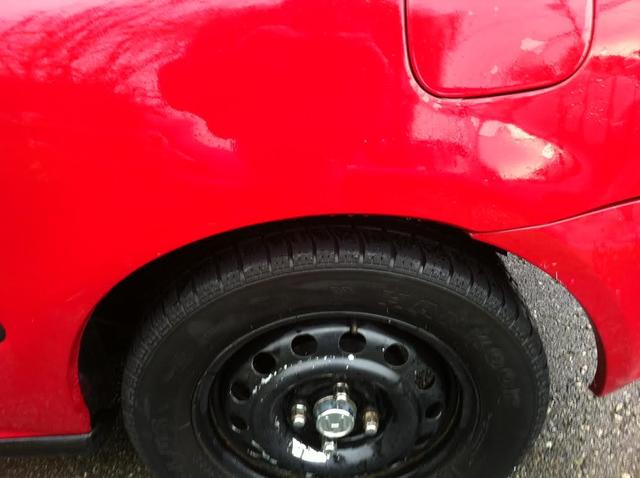
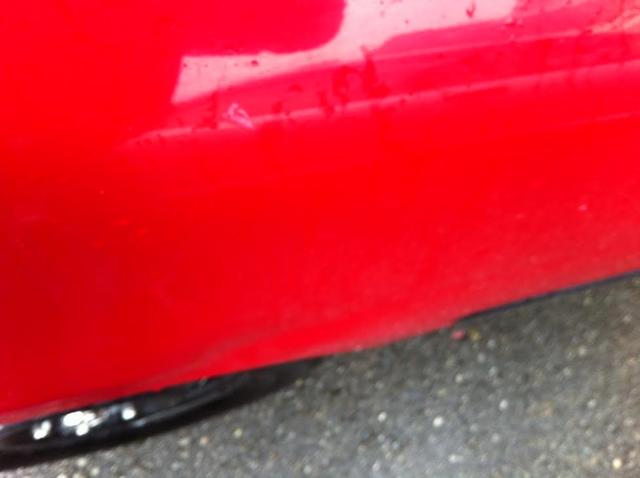
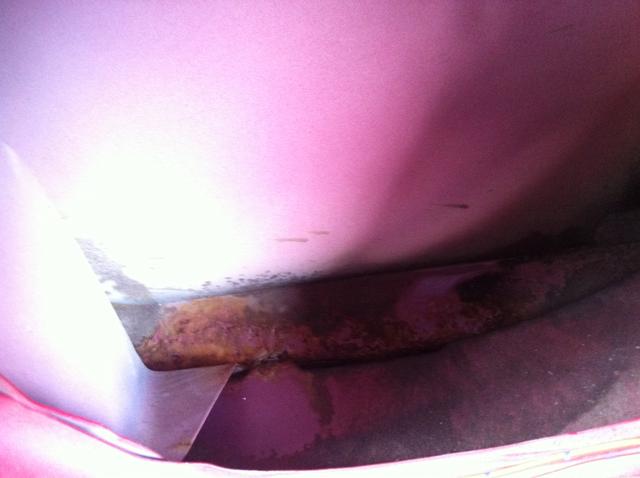
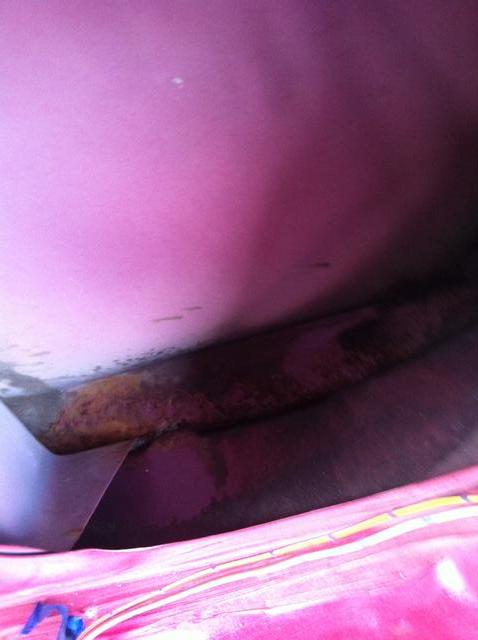
Is that rust starting on the quarters? Or is that just my eye and a low-res picture?
If it is rust you should get on that right away before it spreads, especially if it sees more winters. Rust will spread and will not stop until you cut it out. You only have a little from what I can see but you should pull back you inner wheel well covers and give it a look just for precautionary reasons. If you need any help let me know I have an identical car but the Si model
10-21-2013, 07:00 PM
#7
Honda-Tech Member
Thread Starter
Join Date: Feb 2013
Location: Vansterdam, BC
Posts: 139
Likes: 0
Received 0 Likes
on
0 Posts
lol Thanks man! definitely a mention for you! Cabin air filter saved my life on forestry roads this summer. Hopefully I have time to do the lights on chime retro soon.
Thanks man, been trying to stick to the plan as much as possible, its taken longer to do so, but will be worth it in the end.
GN+ is deadly! I originally wanted Enkei Klamps but alas they don't make em in the size I needed/bolt pattern.
Appreciate the Knowledge. Indeed that is rust you see, rear quarters and fenders. Very aware of the ticking rust bomb. The plan is to cut out and weld in new panels hopefully next month at my buddies shop on Vancouver Island, but only after the 4 lug ITR swap/suspension rebuild/rack swap goes in (supposed to happen this weekend if all goes well). I haven't welded in 13 years lol and only ever arc welding so it should be interesting. I'll be practicing on a couple panels for 2 days and then getting it done over 2 days... I HOPE...lol not going to rush it but this is my only car and I need it for work so it can't be laid up for weeks. If I only get one side done at a time... so be it.
Thanks man.
So am I hahaha
Looks like you have an well thought out plan in front of you. Well done work so far, I was going to do that wheel scheme to my voxx wheels before I got my hands on some GN+
Is that rust starting on the quarters? Or is that just my eye and a low-res picture?
If it is rust you should get on that right away before it spreads, especially if it sees more winters. Rust will spread and will not stop until you cut it out. You only have a little from what I can see but you should pull back you inner wheel well covers and give it a look just for precautionary reasons. If you need any help let me know I have an identical car but the Si model
GN+ is deadly! I originally wanted Enkei Klamps but alas they don't make em in the size I needed/bolt pattern.
Appreciate the Knowledge. Indeed that is rust you see, rear quarters and fenders. Very aware of the ticking rust bomb. The plan is to cut out and weld in new panels hopefully next month at my buddies shop on Vancouver Island, but only after the 4 lug ITR swap/suspension rebuild/rack swap goes in (supposed to happen this weekend if all goes well). I haven't welded in 13 years lol and only ever arc welding so it should be interesting. I'll be practicing on a couple panels for 2 days and then getting it done over 2 days... I HOPE...lol not going to rush it but this is my only car and I need it for work so it can't be laid up for weeks. If I only get one side done at a time... so be it.
Thanks man.
So am I hahaha
Trending Topics
10-21-2013, 08:08 PM
#8
Honda-Tech Member
Thread Starter
Join Date: Feb 2013
Location: Vansterdam, BC
Posts: 139
Likes: 0
Received 0 Likes
on
0 Posts
Onto updates!
So lessons learned from attempted projector headlight restore and fix....
A) Never buy them used
B) If you buy them used, your a sucker, strip the useable parts and smash the rest.
C) Epoxy used to fix a hard piece of plastic intended to flex and pivot will end in COMPLETE FAILURE. Epic fail. Shatters the moment any flex or tension from the angle adjustment bolts.
D)Headlight restore kits are great for window visors, but mediocre on headlights with heavier pitting/oxidation as the sanding pads wear out way before the job is done. Buffer and some plastic polish, and a few sheets of 1000,1500,2000 grit worked way better
Oh well at least the visors turned out ok, Non-OEM stock but at least I can crack my window in the rain and not get soaked.
Painted the GSR 1" Brake Booster after some extensive sanding.
This bad boy has a like-new OEM Master Cylinder with only 1200kms on it!
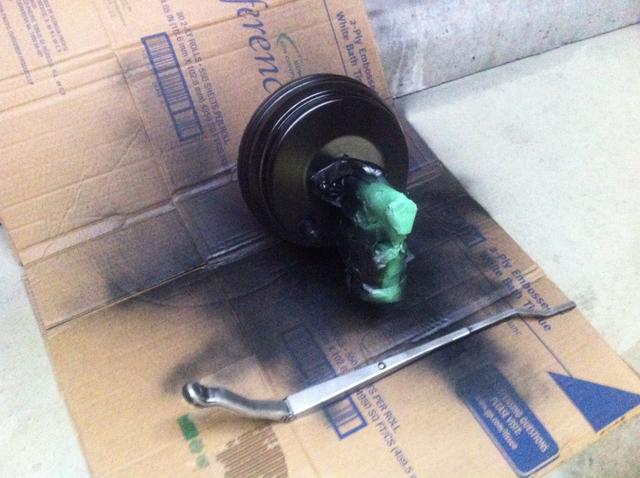
Also did a wiper arm paint refresh at the same time.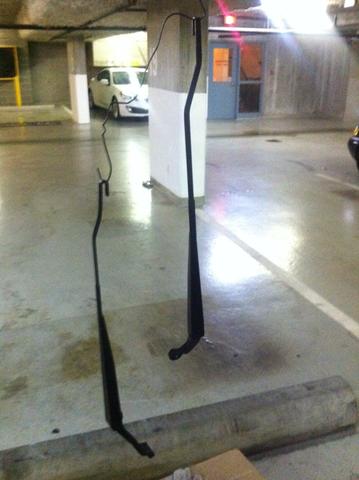
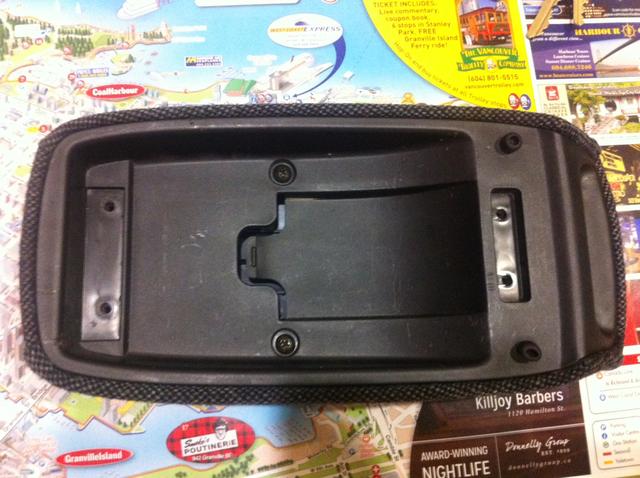
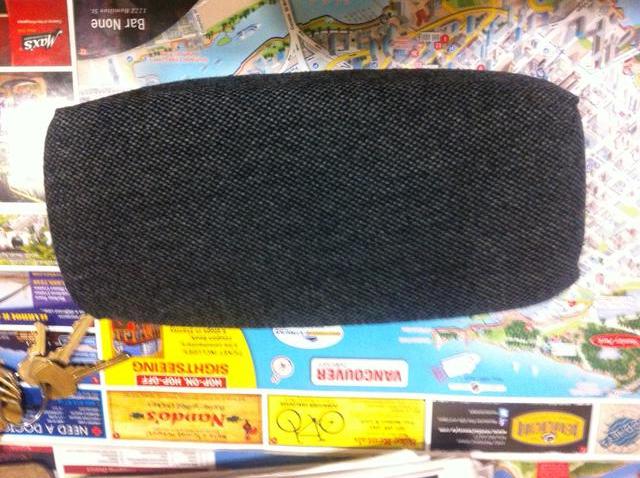
Next up was to reupholster the GSR armrest with the same fabric as my DA seats, I used DA integra recessed rear interior panel fabric for the armrest. I removed the old fabric carefully and pulled the stitching on the 2 seams left and right of the rear of the armrest.
I used that as my template with the intention of using spray on glue I had to affix it to the foam covered armrest top and glue the seams rather than stitch them. I used a good even coating over the entire bottom of the cloth with several passes, waited a minute for it to get a little tacky, then started from the back first, then back side seams, then along the middle to the front of the armrest, the front sides, then the sides back to front. Make sure you don't hesitate, just get it on there even, smooth and tight on the seams. There is no do over, the glue will pull the foam off of the armrest.
Tonite I failed at the headlight reassembly, because the fix... didn't stay fixed. Anyone ever replaced those little plastic caps that cover the inside housing angle adjustment bolt... this plastic menace is what the projector housing rests against. This piece is intended to pivot on the screw head as the 2 main Outside housing angle adjustment bolts apply pressure. Neither silcone nor epoxy is the answer for this issue. I am quickly preparing to junk these fellas after removing a couple pieces I want to hoard lol
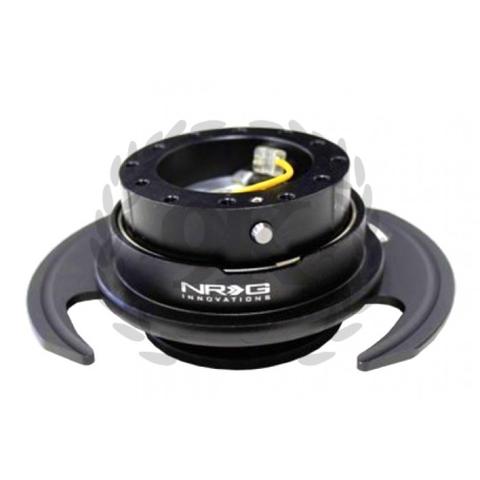
OH well. I still want projectors, but now they wait, purchasing an NRG quick release 3.0 hub, hub lock and a fancy black and red leather wheel. As I park in dodgy areas on the regular without choice, I want some measure of deterrence, I consider it a nice Eff You to thieves... enjoy your good luck with no wheel and hub lock. I mean a flatbed or a towtruck and I'm pooched anyhow but it should help deter a few crackheads.
I also plan on a fuel cut-off switch. I know it won't stop a determined thief but should slow them down enough that I have a better chance of issuing a more ... personal, physical method of Automotive theft deterent defense of property
This guy arriving soonish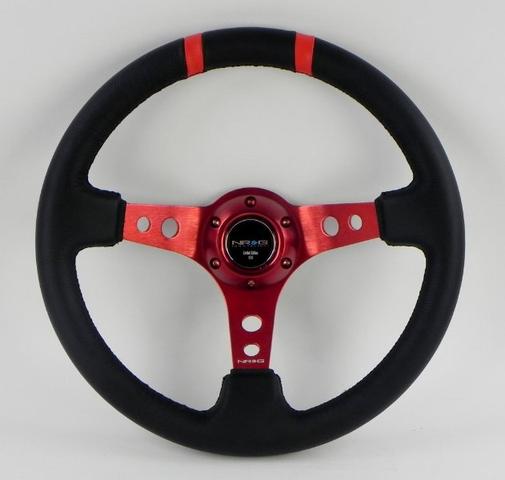
This thursday should be the big 4x114.3 swap and suspension rebuild/GSR rack&subframe swap... it will be minus the front function 7's as I need the axles swapped before I can drive the 8 hours to Vancouver WA to pick them up... oh well. All in due time. The DX front LCA's have the sway bar mount point so I'm solid on that point. Very excited.
Alas, I had a front tire slashed 2 days ago... well, punctured/stabbed in the sidewall so I'm apparently also grabbing a new tire tomorrow. Rolling 1 Janky steelie with a Winter tire on a 14" wheel.
Team Janky Wheel! fml. Who slashes tires these days anyhow? that'll teach me for not being in eyesight of er on the east side. At least it was only one.
So lessons learned from attempted projector headlight restore and fix....
A) Never buy them used
B) If you buy them used, your a sucker, strip the useable parts and smash the rest.
C) Epoxy used to fix a hard piece of plastic intended to flex and pivot will end in COMPLETE FAILURE. Epic fail. Shatters the moment any flex or tension from the angle adjustment bolts.
D)Headlight restore kits are great for window visors, but mediocre on headlights with heavier pitting/oxidation as the sanding pads wear out way before the job is done. Buffer and some plastic polish, and a few sheets of 1000,1500,2000 grit worked way better
Oh well at least the visors turned out ok, Non-OEM stock but at least I can crack my window in the rain and not get soaked.
Painted the GSR 1" Brake Booster after some extensive sanding.
This bad boy has a like-new OEM Master Cylinder with only 1200kms on it!
Also did a wiper arm paint refresh at the same time.
Next up was to reupholster the GSR armrest with the same fabric as my DA seats, I used DA integra recessed rear interior panel fabric for the armrest. I removed the old fabric carefully and pulled the stitching on the 2 seams left and right of the rear of the armrest.
I used that as my template with the intention of using spray on glue I had to affix it to the foam covered armrest top and glue the seams rather than stitch them. I used a good even coating over the entire bottom of the cloth with several passes, waited a minute for it to get a little tacky, then started from the back first, then back side seams, then along the middle to the front of the armrest, the front sides, then the sides back to front. Make sure you don't hesitate, just get it on there even, smooth and tight on the seams. There is no do over, the glue will pull the foam off of the armrest.
Tonite I failed at the headlight reassembly, because the fix... didn't stay fixed. Anyone ever replaced those little plastic caps that cover the inside housing angle adjustment bolt... this plastic menace is what the projector housing rests against. This piece is intended to pivot on the screw head as the 2 main Outside housing angle adjustment bolts apply pressure. Neither silcone nor epoxy is the answer for this issue. I am quickly preparing to junk these fellas after removing a couple pieces I want to hoard lol
OH well. I still want projectors, but now they wait, purchasing an NRG quick release 3.0 hub, hub lock and a fancy black and red leather wheel. As I park in dodgy areas on the regular without choice, I want some measure of deterrence, I consider it a nice Eff You to thieves... enjoy your good luck with no wheel and hub lock. I mean a flatbed or a towtruck and I'm pooched anyhow but it should help deter a few crackheads.
I also plan on a fuel cut-off switch. I know it won't stop a determined thief but should slow them down enough that I have a better chance of issuing a more ... personal, physical method of Automotive theft deterent defense of property
This guy arriving soonish
This thursday should be the big 4x114.3 swap and suspension rebuild/GSR rack&subframe swap... it will be minus the front function 7's as I need the axles swapped before I can drive the 8 hours to Vancouver WA to pick them up... oh well. All in due time. The DX front LCA's have the sway bar mount point so I'm solid on that point. Very excited.
Alas, I had a front tire slashed 2 days ago... well, punctured/stabbed in the sidewall so I'm apparently also grabbing a new tire tomorrow. Rolling 1 Janky steelie with a Winter tire on a 14" wheel.
Team Janky Wheel! fml. Who slashes tires these days anyhow? that'll teach me for not being in eyesight of er on the east side. At least it was only one.
Last edited by SozeHuck; 11-24-2013 at 04:32 PM.
10-22-2013, 03:53 AM
#9
Honda-Tech Member
Join Date: Jul 2011
Location: Canada, Ontario
Posts: 424
Likes: 0
Received 0 Likes
on
0 Posts
Sorry about the bad luck. If you have any questions about rust work just ask, I'm in the middle of restoring my entire rear end of my civic. These 92-95 hatchbacks are becoming really rare where I'm from its either the rust that kills them, or idiot drivers.
Wish you luck! I'll chime in from time to time. Take care.
Wish you luck! I'll chime in from time to time. Take care.
10-22-2013, 05:40 PM
#10
Honda-Tech Member
Thread Starter
Join Date: Feb 2013
Location: Vansterdam, BC
Posts: 139
Likes: 0
Received 0 Likes
on
0 Posts
Yeah it happens lol oh well. Thanks! I've been following your build actually, will def need some help, if all goes well, rust work starts in november.
10-25-2013, 07:51 PM
#12
Honda-Tech Member
Thread Starter
Join Date: Feb 2013
Location: Vansterdam, BC
Posts: 139
Likes: 0
Received 0 Likes
on
0 Posts
Thanks man... Long ways to go but it is starting to come together.
Big updates time!
Ok so some big things are happening this weekend....
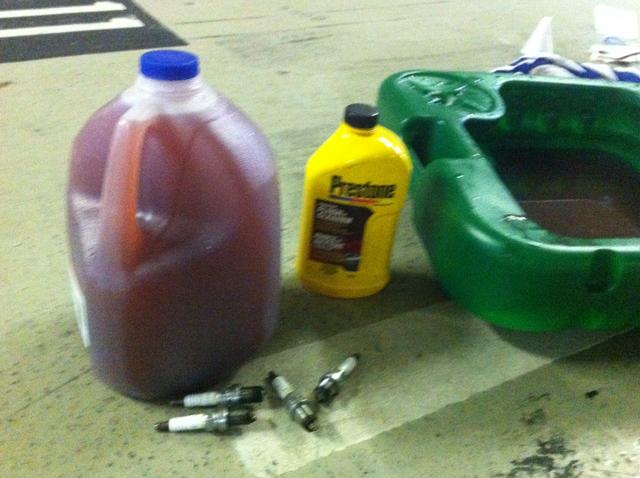
This week I got to work flushing my coolant in prep for the 2.5" aluminum rad & slim fan, flushed it 5 times then put distilled water and Prestone 2 in 1 coolant flush, ran it until I drained it today (3 days later).
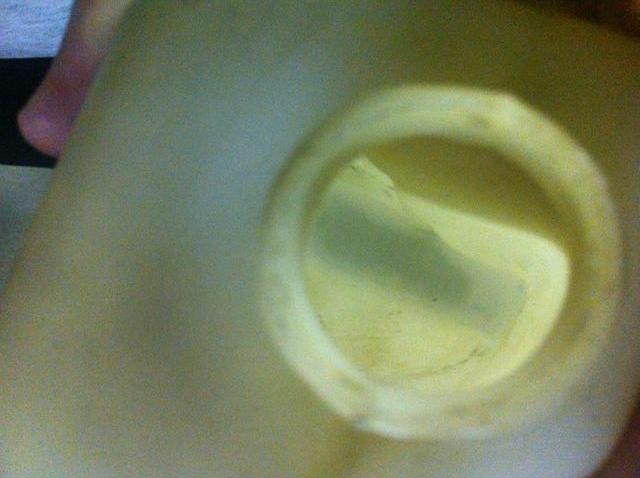
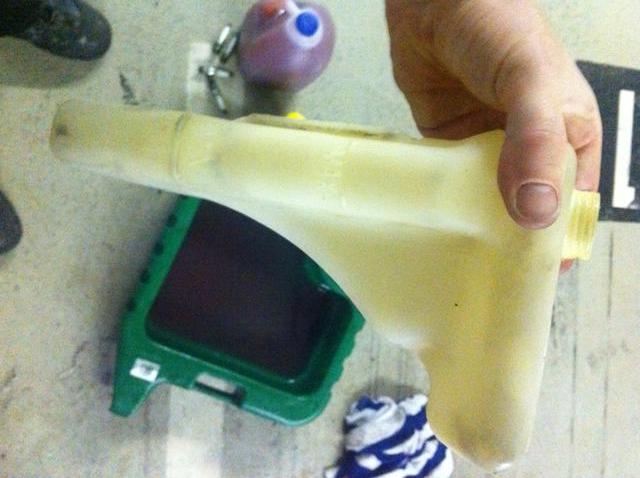
I was .... inspired by a different forums thread on overflow tank clean and weird brush contraption.
The Coolant overflow was coated in an 1/8' or so of greeny-black residue contamination so I made one of these
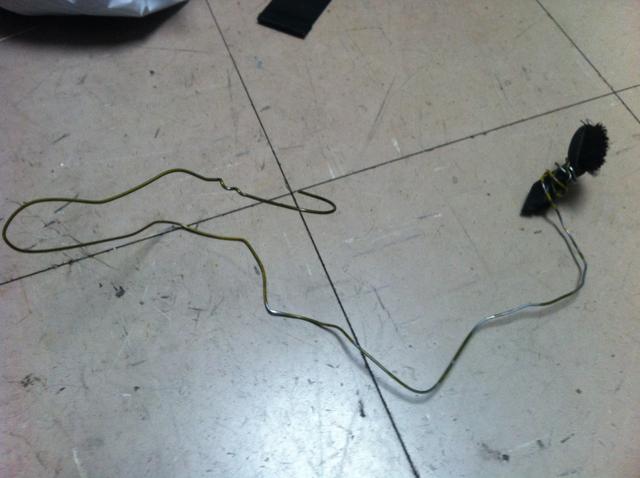
After it looked like this. pretty damn clean.
Plugs were due for a change as well.
Next I got to the 96 spec JDM ITR 4x 114.3 disc swap & Front LCA's then began sanding.
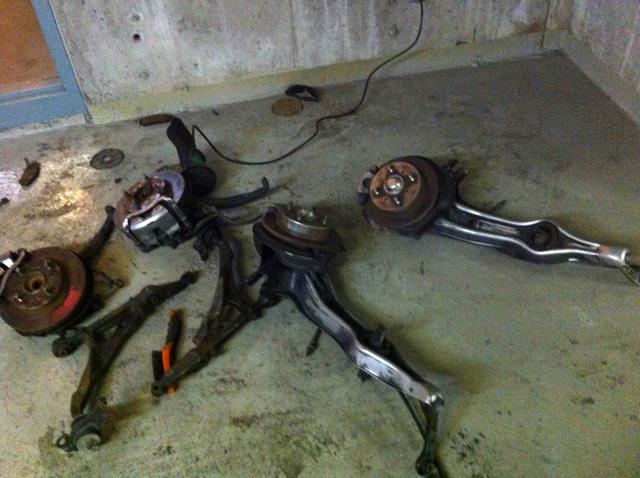
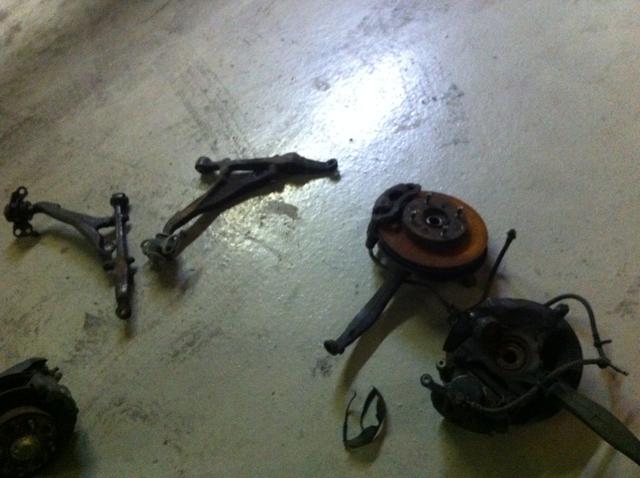
After some sanding.

After ALOT of sanding
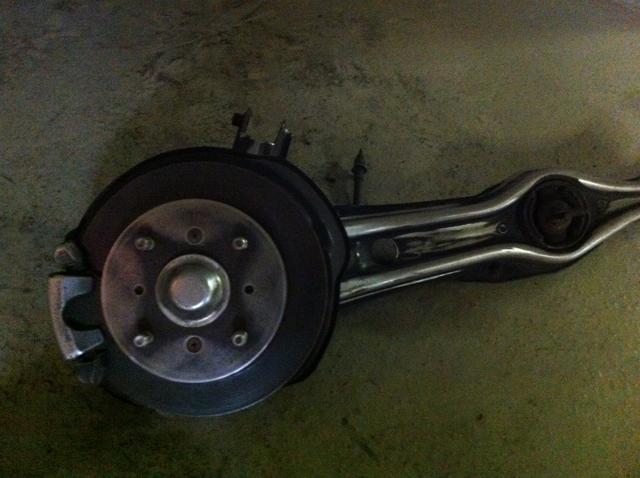
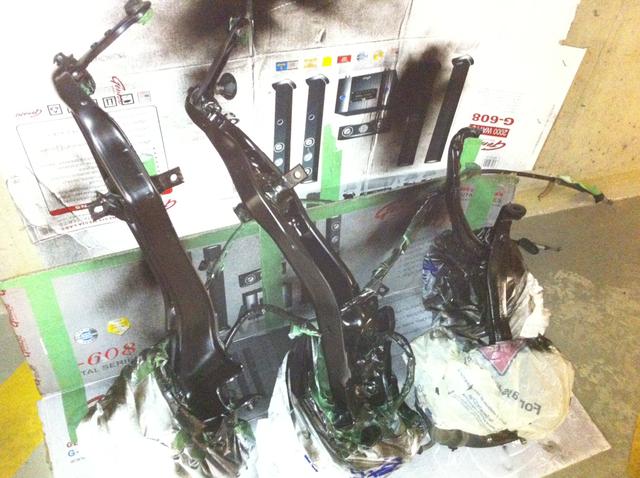
Little more sanding then ready to paint
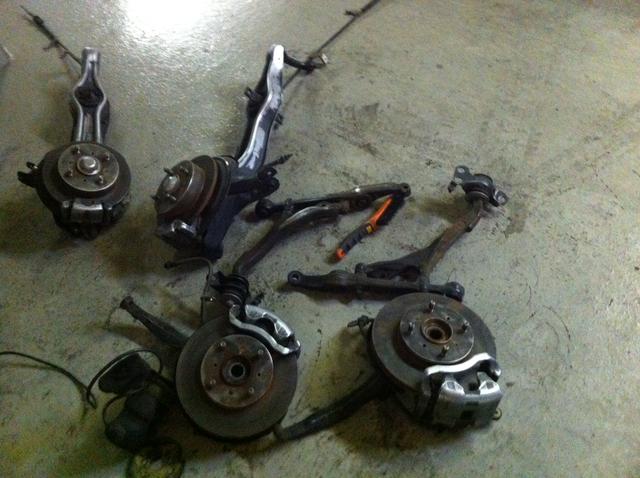
after 5 coats.
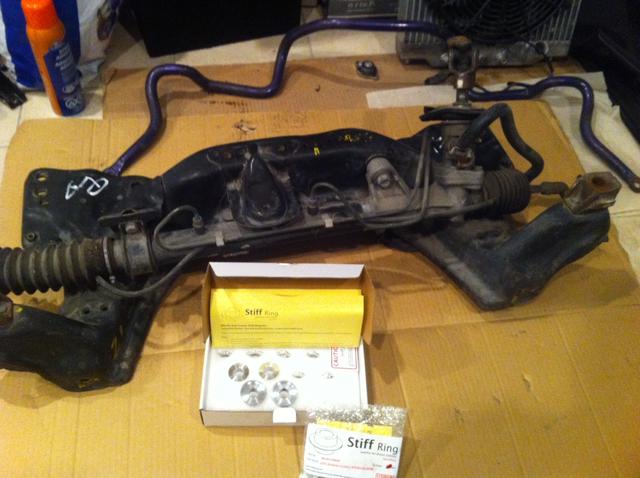
Picked up my 96 GSR power steering rack/Subframe and Stiff Ring subframe stiff collar kit for the front and rear. Theres a sneaky DC2 front sway bar in the shot, also the aluminum radiator.
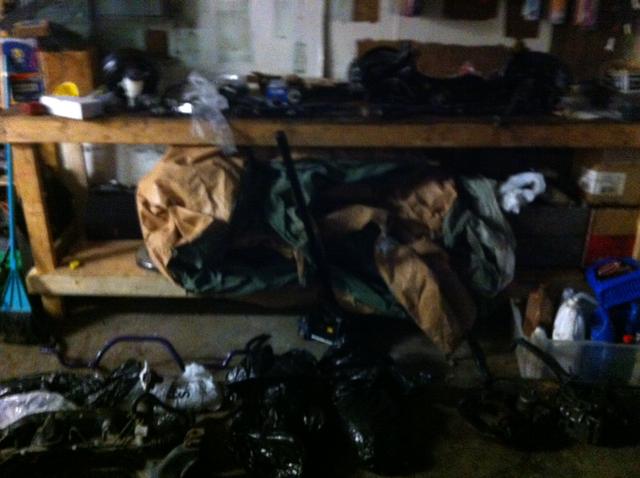
Dropped off Everything at Cam's Shop. lol so many pieces. Terrible pic... I never thought to remove the Ultra high tech moving apparatus.... Garbage bags... Note to self: no one but me will know what is in that bunch of gargbage bags in the blurry photos.
So, after some good luck and some pondering... I decided today to take up a fellow Honda heads offer, Ditching the KYB GR2's and tomorrow I am purchasing a very lightly used set of Intrax RS coilovers! In case you aren't familiar... googletown googlevich google-shire, Nikolai GoogleEye
oh alright.... http://en.intraxracing.nl/producten/rs/
Anyhow, it goes in this weekend and I should have it back wednesday with the following installed.
-96 Spec JDM ITR 4x 114.3 complete disc swap with all new bushings and bearings/rear hub.
-96 Cdm GSR front subframe & power steering rack
-Stiff Ring subframe collar kit front and rear
-DC2 Front LCA's with new bushings
-OEM DC2 22mm front sway bar and new Energy suspension end links and bushings
-Raybestos Carbon Ceramic front pads
-Hawk HPS rear pads
-Function 7 Rear LCA's and Subframe brace.
-OEM JDM 98 Spec ITR rear sway bar
-1" 99 GSR OEM power booster and master cylinder
-Stainless steel lines
-95 Si CV axles with 150k on em
-Full set of Intrax RSA coilovers with top hats 10k front/8k rear
-2.5" Aluminum rad with 12" slim fan
OMG I can't wait. All these months lurking, planning, researching, cursing, laughing... finally going in.
Big updates time!
Ok so some big things are happening this weekend....
This week I got to work flushing my coolant in prep for the 2.5" aluminum rad & slim fan, flushed it 5 times then put distilled water and Prestone 2 in 1 coolant flush, ran it until I drained it today (3 days later).
I was .... inspired by a different forums thread on overflow tank clean and weird brush contraption.
The Coolant overflow was coated in an 1/8' or so of greeny-black residue contamination so I made one of these
After it looked like this. pretty damn clean.
Plugs were due for a change as well.
Next I got to the 96 spec JDM ITR 4x 114.3 disc swap & Front LCA's then began sanding.
After some sanding.
After ALOT of sanding
Little more sanding then ready to paint
after 5 coats.
Picked up my 96 GSR power steering rack/Subframe and Stiff Ring subframe stiff collar kit for the front and rear. Theres a sneaky DC2 front sway bar in the shot, also the aluminum radiator.
Dropped off Everything at Cam's Shop. lol so many pieces. Terrible pic... I never thought to remove the Ultra high tech moving apparatus.... Garbage bags... Note to self: no one but me will know what is in that bunch of gargbage bags in the blurry photos.
So, after some good luck and some pondering... I decided today to take up a fellow Honda heads offer, Ditching the KYB GR2's and tomorrow I am purchasing a very lightly used set of Intrax RS coilovers! In case you aren't familiar... googletown googlevich google-shire, Nikolai GoogleEye
oh alright.... http://en.intraxracing.nl/producten/rs/
Anyhow, it goes in this weekend and I should have it back wednesday with the following installed.
-96 Spec JDM ITR 4x 114.3 complete disc swap with all new bushings and bearings/rear hub.
-96 Cdm GSR front subframe & power steering rack
-Stiff Ring subframe collar kit front and rear
-DC2 Front LCA's with new bushings
-OEM DC2 22mm front sway bar and new Energy suspension end links and bushings
-Raybestos Carbon Ceramic front pads
-Hawk HPS rear pads
-Function 7 Rear LCA's and Subframe brace.
-OEM JDM 98 Spec ITR rear sway bar
-1" 99 GSR OEM power booster and master cylinder
-Stainless steel lines
-95 Si CV axles with 150k on em
-Full set of Intrax RSA coilovers with top hats 10k front/8k rear
-2.5" Aluminum rad with 12" slim fan
OMG I can't wait. All these months lurking, planning, researching, cursing, laughing... finally going in.
Last edited by SozeHuck; 02-23-2014 at 05:32 PM.
10-26-2013, 03:23 PM
#13
Honda-Tech Member
Thread Starter
Join Date: Feb 2013
Location: Vansterdam, BC
Posts: 139
Likes: 0
Received 0 Likes
on
0 Posts
So last nite I put in the new rad and I failed to consider the need for a larger rad hose clamp, luckily I had a couple with me at work when I did it. Very simple install after that.
The Old Heat vs The New Hotness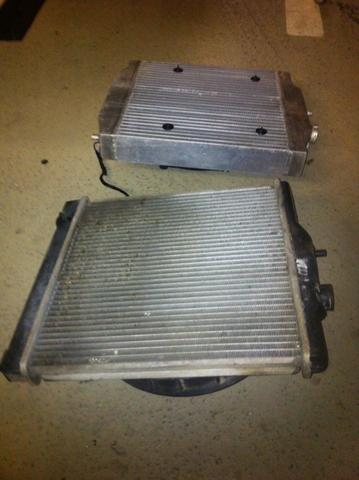
Time to clean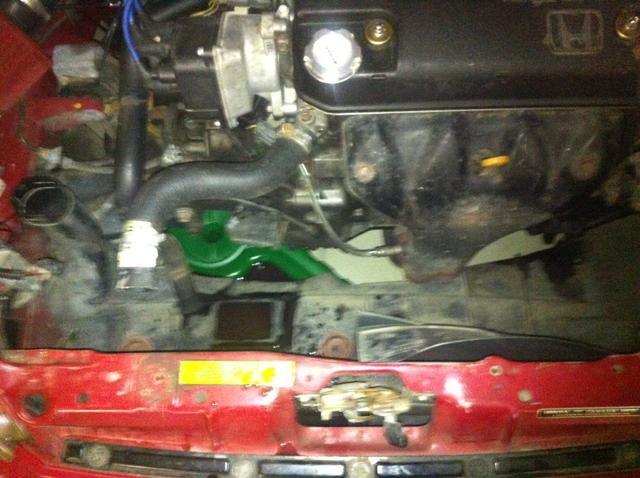
Hood barely closes currently lol but it closes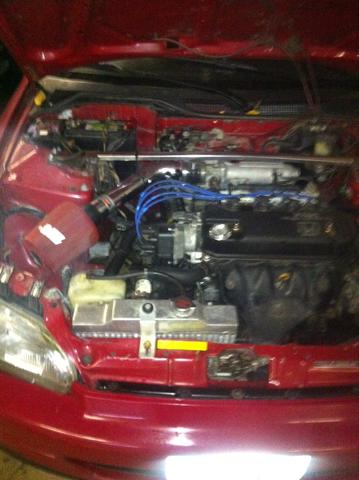
Just about to go pick up my Intrax Coilovers!!! pics to follow.
The Old Heat vs The New Hotness
Time to clean
Hood barely closes currently lol but it closes
Just about to go pick up my Intrax Coilovers!!! pics to follow.
10-27-2013, 12:08 PM
#14
Honda-Tech Member
Thread Starter
Join Date: Feb 2013
Location: Vansterdam, BC
Posts: 139
Likes: 0
Received 0 Likes
on
0 Posts
Lightly used set of Intrax RS coilovers going in with the big job this weekend! 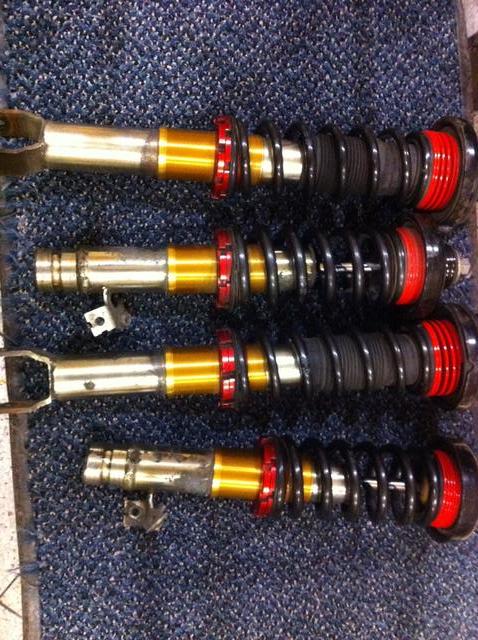
OH MAN. Can't wait. Wasn't supposed to happen until spring and this also means the AMR's are no longer happening... INTRAX in lol I'm stoked.
Also means, engine swap can happen by april/may now!!!
OH MAN. Can't wait. Wasn't supposed to happen until spring and this also means the AMR's are no longer happening... INTRAX in lol I'm stoked.
Also means, engine swap can happen by april/may now!!!
11-03-2013, 08:02 PM
#16
Honda-Tech Member
Thread Starter
Join Date: Feb 2013
Location: Vansterdam, BC
Posts: 139
Likes: 0
Received 0 Likes
on
0 Posts
Well, some tragic/good news. I was on a roadtrip this weekend as the suspension rebuild got postponed until November 9th, The internal seal on my waterpump that was replaced 30k ago back in March, decided its time to fail. Its still driving at this point, but is leaking out of the waterpump weep holes, I noticed when I got to my destination I found about a half litre of coolant leaking. Lucky me.
As mentioned earlier I have spent 500$ already this year on it, thats what a rebuilt/remanned D15B7 or D15B2 goes for out here. I am unwilling to spend anymore on it, so difficult decisions are being made.
It appears that I will be removing all my upgrades and swapping into a new shell, selling the old shell, the idea being, obtain a cleaner shell, with less damage and rust, hopefully Rust free, with a useable engine. If the engine is no good, the new shell will get another d series until I can afford the engine I want. I'm doing this because I expected to have all winter to save for the engine swap and find the right deal, so I figured it would be smarter to find a cleaner shell now than do the suspension rebuild on a car that needs extensive rust repair and an engine. I was actually looking forward to the rust repair job believe it or not, but this option is smarter. I feel like my dog just died. I had really hoped to save this trusty rusty dx from the junkyard, but it wasn't to be. At some point we must ask ourselves... at what cost.
Well, I'm glad the parts didn't go in or I'd be kicking my self in the ****.
Options....
-Rust free CX Milano red running D15b7 250,000km's with nice wheels and new rubber (both of which I don't really need)
-Rust free Trim Unconfirmed yet, dead engine, most interior complete, comes with 4 front seats for some reason? Rolling Shell.
-Rust Repaired (panels welded in proper) all body work done, primered but needs paint, Foam injected and reinforced for an intended K swap, non rolling shell (not a huge issue as I have a GSR subframe and rack and the ITR 4 lug swap and axles) no interior except for dash/center console/cluster/steering wheel.
-Rust free Captiva Blue with unknown trim, apparently 180,000 km's, running engine.
Seeing the milano red one tomorrow, claims no rust, and no rust repair, I'll believe it when i see it, maybe. Can't fool my rust detection, its off the charts
after owning this thing.
Sad day but in the long run the right decision. Either way, I have a bunch of money in pieces sitting in my buddies shop and its bloody well going in something EG. Fml. If I go with a running shell then then all pieces from the rebuild will still go in on the 9th. if not... could be an extra month
 Obviously the primered shell is the best choice but REALLY stretching finances to get going for my daily driver... tough choices.
Last edited by SozeHuck; 11-03-2013 at 08:35 PM.
11-14-2013, 08:13 PM
#17
Honda-Tech Member
Thread Starter
Join Date: Feb 2013
Location: Vansterdam, BC
Posts: 139
Likes: 0
Received 0 Likes
on
0 Posts
Ok so a HUGE change.
At this point I have just purchased a 1995 CX rolling shell with 260k on it for $500. no rust, however, there is a dent in the rear quarter panel that will need fixing immediately as soon as its on the road as I don't want rust to start there (no cracked paint but I will not be taking chances). This car has sat for the last 5 years, but seeing as I am replacing the engine and suspension, I'm not worried about it.
This car has the interior essentially stripped, but dash is complete.
Engine is shot and will be replacing with another freshly rebuilt/remanned D15b7 done by a local semi-retired Honda Mechanic (turns out he's also a retired Air force Captain).
I paid 679$ for the engine, it comes with a 3 month warranty on all parts and labor. cams and crank have been polished, new rings all seals etc etc.
I wanted to do a B18C1 or H22 swap however, its just not the engine swap I can afford now, so that will have to be at a later date or another build.
Its not the engine I want, its the engine I can afford. and for this build, its a good choice. I need reliability right now. Daily driven. ALOT. I put on VERY heavy mileage.
Front bumper on this car is cracked but other than the small ding in rear quarter and the bumper, not terrible shape. I will be swapping the interior of my current EG Sozemobile 1.0 into the EG Sozemobile 2.0. Yep thats a technical term.
I'm Going to do the lights-on-chime retrofit by @Deschlong finally, as its the perfect time and using my 98 teg evap for the Cabin air filter retrofit too.
Rear wiper will be replaced.
GSR subframe is still going in as this cars manual rack is shot. I will not add power steering ... yet but will be running a closed loop on the teg rack.
So regardless of the changes of shell, the suspension rebuild/upgrade and 96 spec ITR disc swap will be still going through. It goes to the shop this weekend!!! Hopefully running by the end of next week. Pics to follow as I took THE WORST blurry iphone picks of this dusty beast.
Last edited by SozeHuck; 11-24-2013 at 04:25 PM.
11-18-2013, 03:20 PM
#18
Honda-Tech Member
Thread Starter
Join Date: Feb 2013
Location: Vansterdam, BC
Posts: 139
Likes: 0
Received 0 Likes
on
0 Posts
New Shell Pics! Today it went to the shop for the transformation. Heres a shot before it went in.
Drivers rear quarter
Slightly Dented passenger rear quarter
Drivers rear quarter
Slightly Dented passenger rear quarter
11-24-2013, 04:06 PM
#19
Honda-Tech Member
Thread Starter
Join Date: Feb 2013
Location: Vansterdam, BC
Posts: 139
Likes: 0
Received 0 Likes
on
0 Posts
So, Motor pull is delayed until wednesday which is my next day off work so thats perfect, after we get that bish out of there we are going to pick up the new stock D as well.
Today was the day to pull all the crap out of the car, including 4 front seats for some reason lol All in pretty rough shape and exceptionally dirty. After some cleaning its starting to look like a car almost.
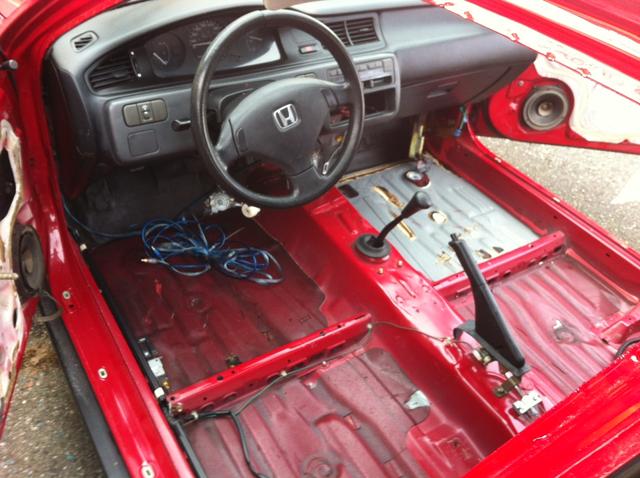
Well the ignition lock cylinder is all facked from what was clearly previously stolen or attempted stolen vehicle.
Yes thats it dangling below the wheel.
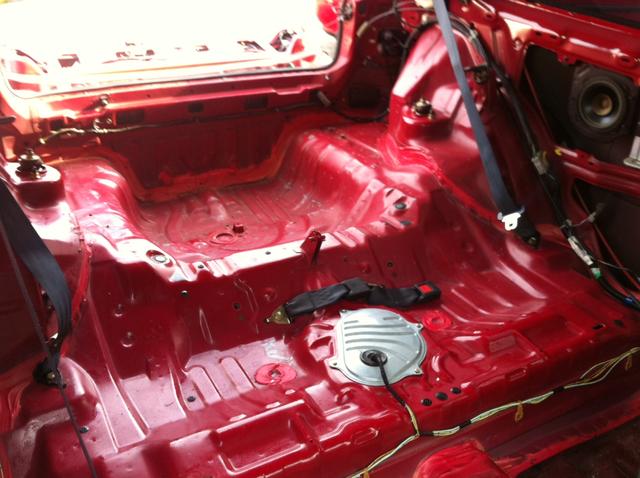
The floor boards are in fairly good shape, although it has some very minor surface rust spots under the rear bench on the passenger side.
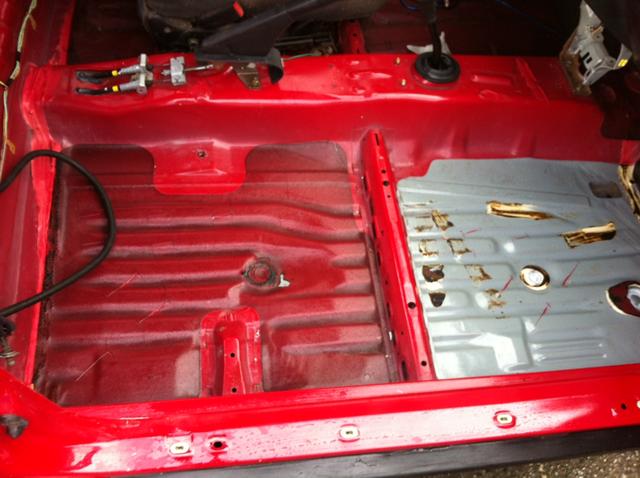
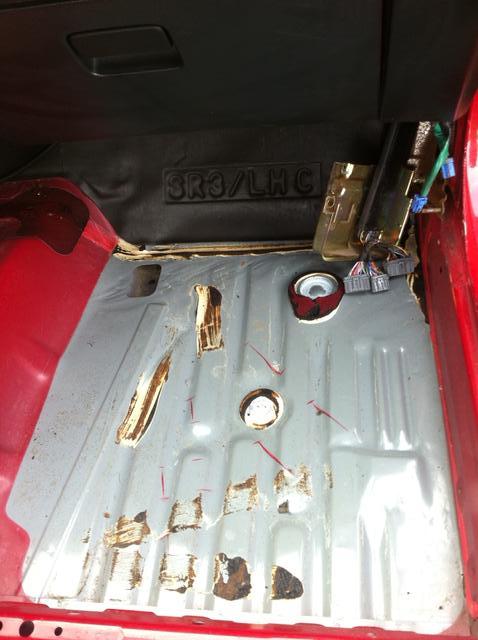
Passenger side has had the matting pulled up. Will be replacing that prior to laying the carpet.
Apparently this car doesn't include an ECU. sweet.
Yeah some pretty abundant rust in there on both sides at the sideskirts of the rear quarters. Not cool. Will need to be addressed pronto.
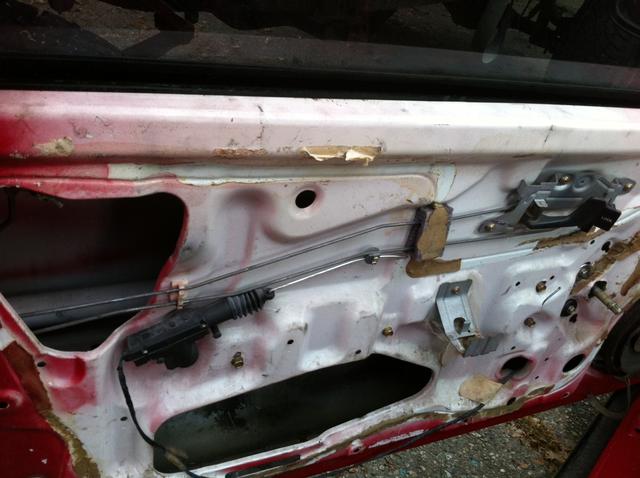
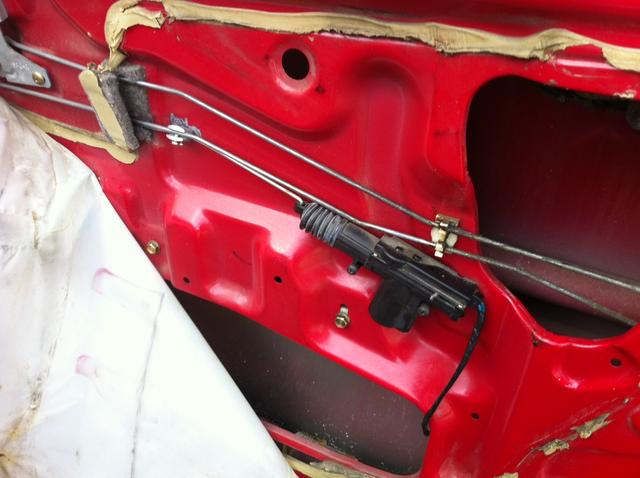
Power Locks was a nice bonus. Hopefully they will function.
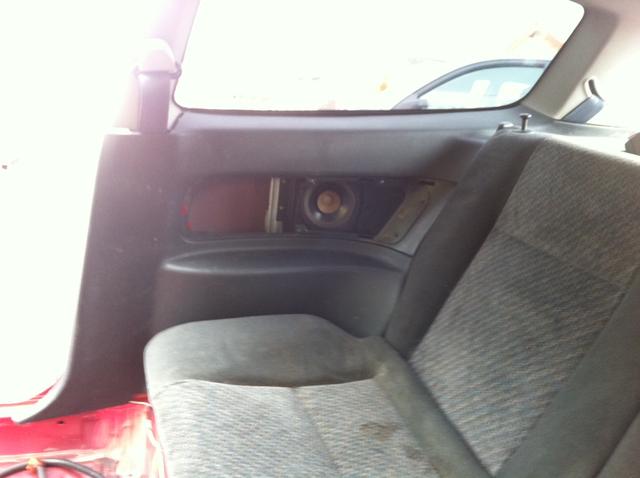
Si Rear speaker brackets, Speaker cover trim pieces are in good shape too. I had previously bought a set already so this set is gonna be up for grabs/trade, will include the brackets and covers.
Speakers are toast tho obviously. Would trade plus cash for an EG si cluster. Bonus dollars for a EDM cluster.
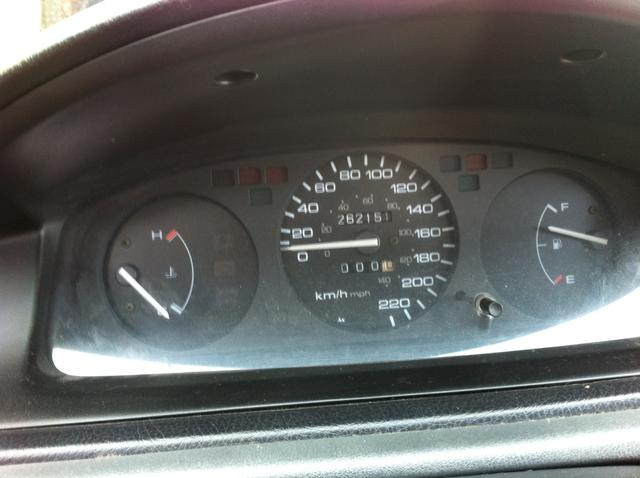
60k Less km's than my poor but more rusty sozemobile 1.0.
LONG LIVE SOZEMOBILE version 2.0!
ECU isn't there but OEM rad is, I will be swappping the aluminum rad out of my car before the new engine gets fired up. I will have to get the waterpump in the Sozemobile 1.0 replaced before doing this as the larger rad has been saving my bacon with losing fluids, plus its getting too cold here to be running straight water and I wouldn't feel right knowingly driving around with coolant leaking everywhere. not cool man, not cool.
This week will see the Sozemobile 1.0 returning to bone stock as well in prep for a sale, not likely I had many "mods" lol
-short ram off, stock air box on
-ITR strut bar off
-GSR center console out, stock armrest delete/ebrake cover and OEM audio console and shifter cover back in.
I will also be pulling all interior in prep for headliner swap, the new shell's is ripped at the back due to all the damn junk in the car when I bought it. Unless I find a better headliner, Sozemobile 1.0 headliner it is. Never done a headliner before.
Retrofit of the lights on chime and a rear hatch light will also be done this week.
Can't wait to pull that engine wednesday and see whats what.
Today was the day to pull all the crap out of the car, including 4 front seats for some reason lol All in pretty rough shape and exceptionally dirty. After some cleaning its starting to look like a car almost.
Well the ignition lock cylinder is all facked from what was clearly previously stolen or attempted stolen vehicle.
Yes thats it dangling below the wheel.
The floor boards are in fairly good shape, although it has some very minor surface rust spots under the rear bench on the passenger side.
Passenger side has had the matting pulled up. Will be replacing that prior to laying the carpet.
Apparently this car doesn't include an ECU. sweet.
Yeah some pretty abundant rust in there on both sides at the sideskirts of the rear quarters. Not cool. Will need to be addressed pronto.
Power Locks was a nice bonus. Hopefully they will function.
Si Rear speaker brackets, Speaker cover trim pieces are in good shape too. I had previously bought a set already so this set is gonna be up for grabs/trade, will include the brackets and covers.
Speakers are toast tho obviously. Would trade plus cash for an EG si cluster. Bonus dollars for a EDM cluster.
60k Less km's than my poor but more rusty sozemobile 1.0.
LONG LIVE SOZEMOBILE version 2.0!
ECU isn't there but OEM rad is, I will be swappping the aluminum rad out of my car before the new engine gets fired up. I will have to get the waterpump in the Sozemobile 1.0 replaced before doing this as the larger rad has been saving my bacon with losing fluids, plus its getting too cold here to be running straight water and I wouldn't feel right knowingly driving around with coolant leaking everywhere. not cool man, not cool.
This week will see the Sozemobile 1.0 returning to bone stock as well in prep for a sale, not likely I had many "mods" lol
-short ram off, stock air box on
-ITR strut bar off
-GSR center console out, stock armrest delete/ebrake cover and OEM audio console and shifter cover back in.
I will also be pulling all interior in prep for headliner swap, the new shell's is ripped at the back due to all the damn junk in the car when I bought it. Unless I find a better headliner, Sozemobile 1.0 headliner it is. Never done a headliner before.
Retrofit of the lights on chime and a rear hatch light will also be done this week.
Can't wait to pull that engine wednesday and see whats what.
 11-25-2013, 06:56 PM
#21
Honda-Tech Member
Thread Starter
Join Date: Feb 2013
Location: Vansterdam, BC
Posts: 139
Likes: 0
Received 0 Likes
on
0 Posts
Well seeing as I am to be pulling the dash as well as the headliner, I figured what better time to swap cluster and retrofit a few things.
I wanted a EDM Vti amber lit cluster but it will have to wait, I just made a solid deal for a JDM white faced gauge cluster, cheaper than an EDM when you figure in shipping cost so moar JDM it is. This cluster has the low fuel light indicator and I spent today pulling ebrake Red/green wiring and cluster connector for the retrofit. Now to acquire the fuel sender this week
Will be using @Deschlong 's DIY
https://honda-tech.com/forums/showth...1#post49325897
Finally picked up an ECU for the shell today, found a coupe at the wreckers with very little visible wear, 80k on it only! and looks it. Hopefully ECU is good. Also had to pick up all the relays as shell is missing most of the fuses and all relays... what the fudge. lol
Also found another DA with the same seat as mine with a near mint- but dirty seat. I may take it and redo it to replace the bottom cushion on my drivers seat as the side bolter is in better shape, gonna have to think about it though because that job is a REALLY big PITA
11-25-2013, 09:42 PM
#22
Honda-Tech Member
Thread Starter
Join Date: Feb 2013
Location: Vansterdam, BC
Posts: 139
Likes: 0
Received 0 Likes
on
0 Posts
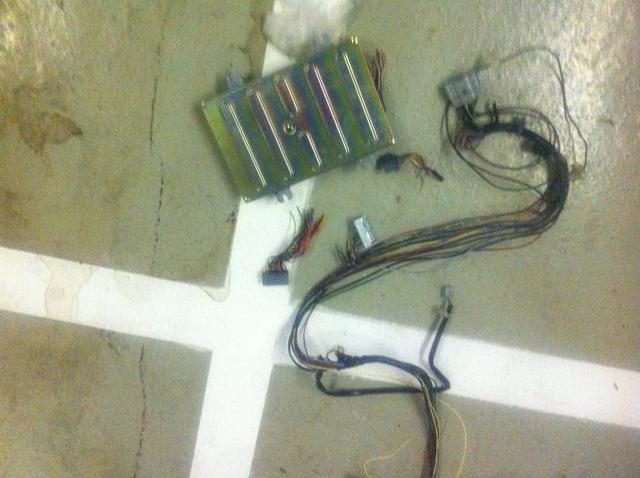
Well that should be enough red green wire to reach the new fuel sender, gonna pull some more tomorrow just in case, I want to keep the wiring clean and OEM color matched for the install. connectors in the photo are for some spare pins etc. Stock CX ECU in the blurry photo as well. Looks like I will also be retrofitting the Door Open indicator as well, again thanks to @Deschlong
Pulled the rails and seatpan of one of the spare EG seats I got with the car, anyone needs em let me know. Freesies style. Perfect if you want to do a seatpan swap from a set of seats like mine or say S2000 or some such. I will be using the cushion, which is in pretty good shape, to fill the gap under the da seat cushion as the EG pan is deeper and has no springs like the DA seatpan has.
11-26-2013, 05:42 PM
#23
Honda-Tech Member
Thread Starter
Join Date: Feb 2013
Location: Vansterdam, BC
Posts: 139
Likes: 0
Received 0 Likes
on
0 Posts
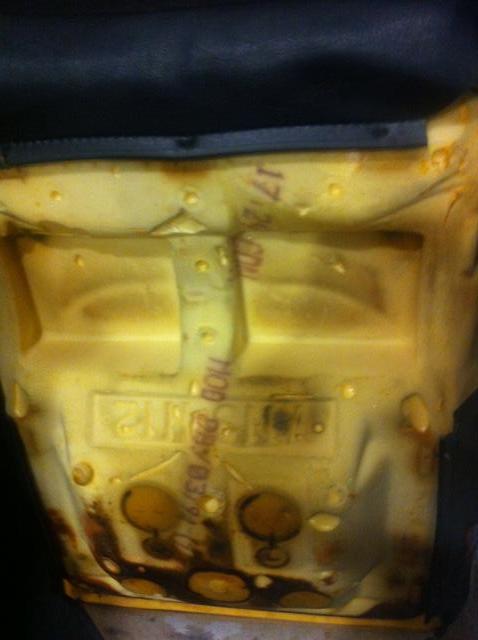
Well I decided after it has sat 5 years and everything is apart.... all new fuel system.
ordered this guy today from rockauto.com
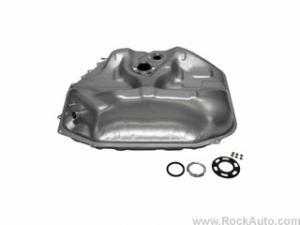
Also the sender from Realhondaparts.com
37800-S04-305 79.00 plus shipping vs Northwest Honda in Bellingham at 139$
And I'm picking up a very lightly used Walboro 255 with a new filter too BAM! Gonna likely run all new lines as well. Do er right.
Scratch that... got walboro 255 new in box for $60. yippee
Anyone ever bought after market power window regulators made by Dorman? thinking of picking it up as this car already has a bad regulator on drivers side
ordered this guy today from rockauto.com
Also the sender from Realhondaparts.com
37800-S04-305 79.00 plus shipping vs Northwest Honda in Bellingham at 139$
And I'm picking up a very lightly used Walboro 255 with a new filter too BAM! Gonna likely run all new lines as well. Do er right.
Scratch that... got walboro 255 new in box for $60. yippee
Anyone ever bought after market power window regulators made by Dorman? thinking of picking it up as this car already has a bad regulator on drivers side
Last edited by SozeHuck; 11-26-2013 at 07:38 PM. Reason: Update.
11-26-2013, 09:53 PM
#24
Honda-Tech Member
Thread Starter
Join Date: Feb 2013
Location: Vansterdam, BC
Posts: 139
Likes: 0
Received 0 Likes
on
0 Posts
Well... I kinda ordered this today too.
Choice was buy new upper ball joints, press in bushings in Front Upper control arm...this week or.... newsies. MOOG Part # RK90448 {#51450SR3023} R-Series; Complete Arm w/Ball Joint for like $39 each and like $14 shipped to WA.... new is pretty cheap so it happened.
Choice was buy new upper ball joints, press in bushings in Front Upper control arm...this week or.... newsies. MOOG Part # RK90448 {#51450SR3023} R-Series; Complete Arm w/Ball Joint for like $39 each and like $14 shipped to WA.... new is pretty cheap so it happened.
11-30-2013, 02:39 PM
#25
Honda-Tech Member
Thread Starter
Join Date: Feb 2013
Location: Vansterdam, BC
Posts: 139
Likes: 0
Received 0 Likes
on
0 Posts
So I am waiting eagerly for the new fuel tank and sender to arrive. I kinda also ordered some moog r series upper control arms with balljoints, I also ordered some more moog stuff, Lower ball joints and rear trailing arm bushing. Finally picked up my Walboro for $60 BNIB.
I went to pick up my JDM cluster, apparently it DID NOT come with pigtails or connectors or even any bulbs for that matter, plus a previous owner installed a led into the cluster and did a crappy job.... End result... didn't buy it. Looks like I'm gonna bite the bullet and order an EDM Vti one this week.
And a heater hose blew on the DX yesterday. good times. Nothing like fixing it in the rain in the dark on the side of the road after riding the bus to get an 'OK' fitting piece from Lordco. BTW canucks, Lordco DOES NOT carry any pre-bent heater hoses. kinks yo. worst.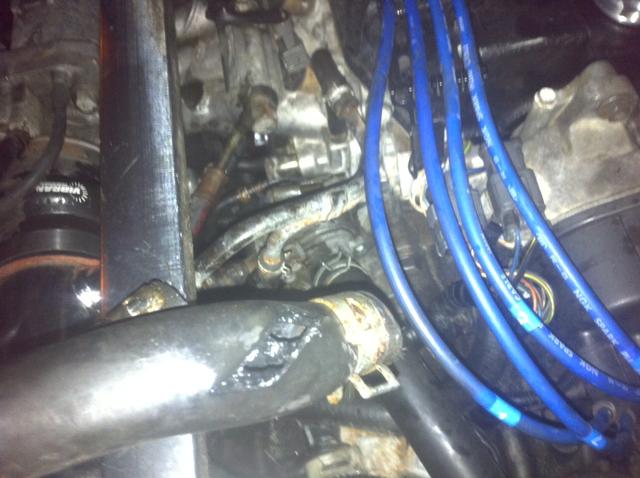