
prjct92eh2's 92 Civic CX Hatch Weekend Warrior Build
 07-15-2010, 05:14 AM
#26
Honda-Tech Member
Thread Starter
Next installment!
How to paint an engine bay:
1. Get car back on ground and roll out of garage
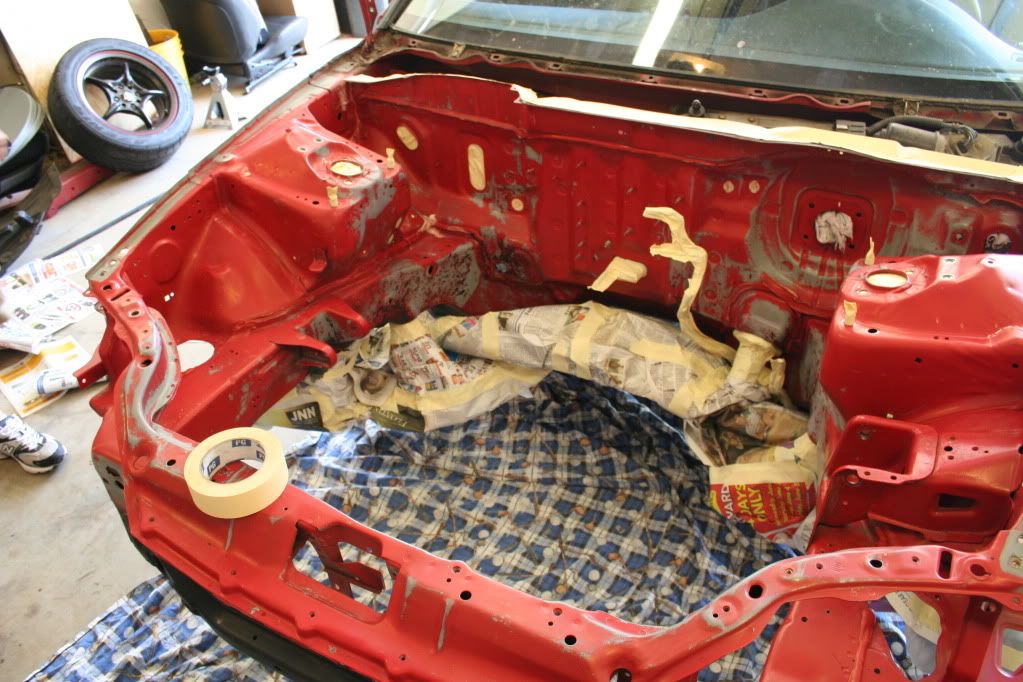
2.Tape up firewall and strut tower holes (bonus crotch shot!)
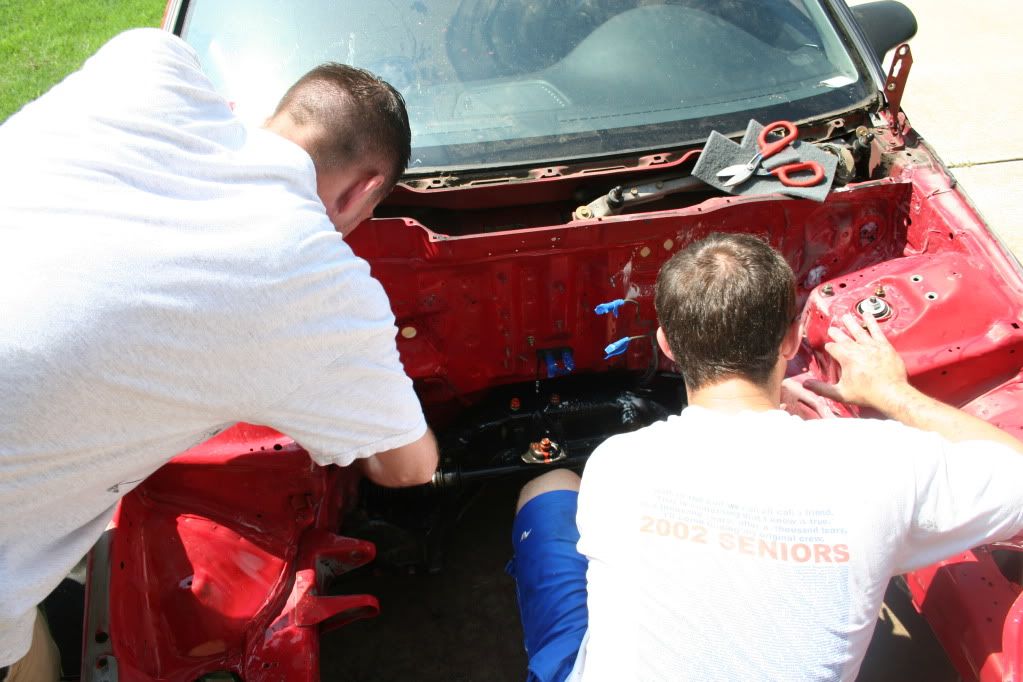
3.Get some help
4. Soak in simple green and then hit with comet/gray scotch brite
5. Enlist Jon (THE GUY) the masking off master
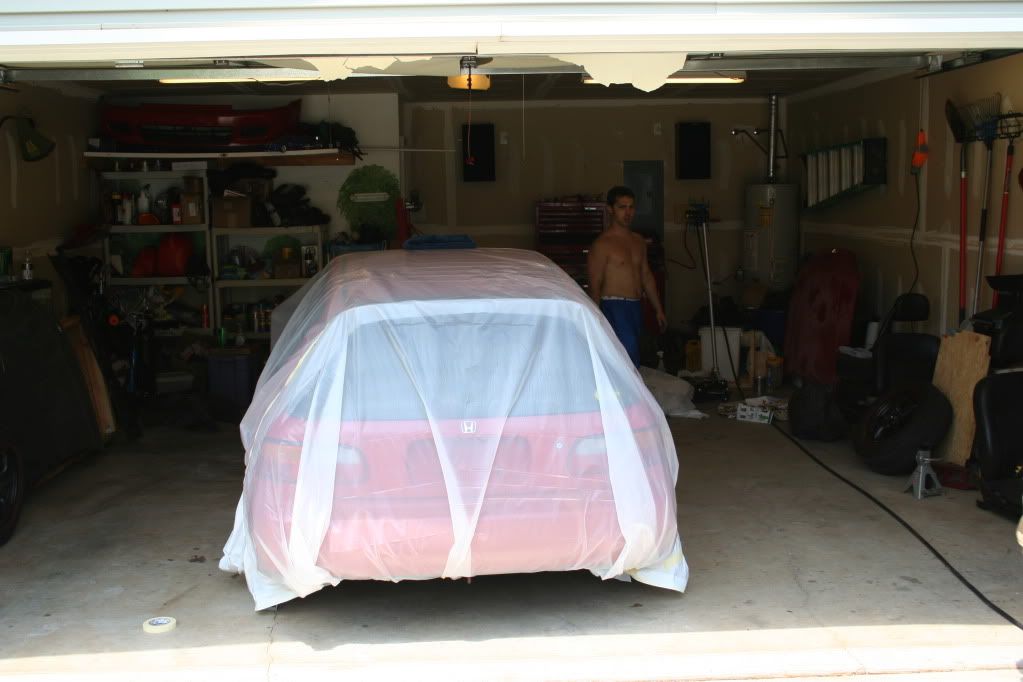
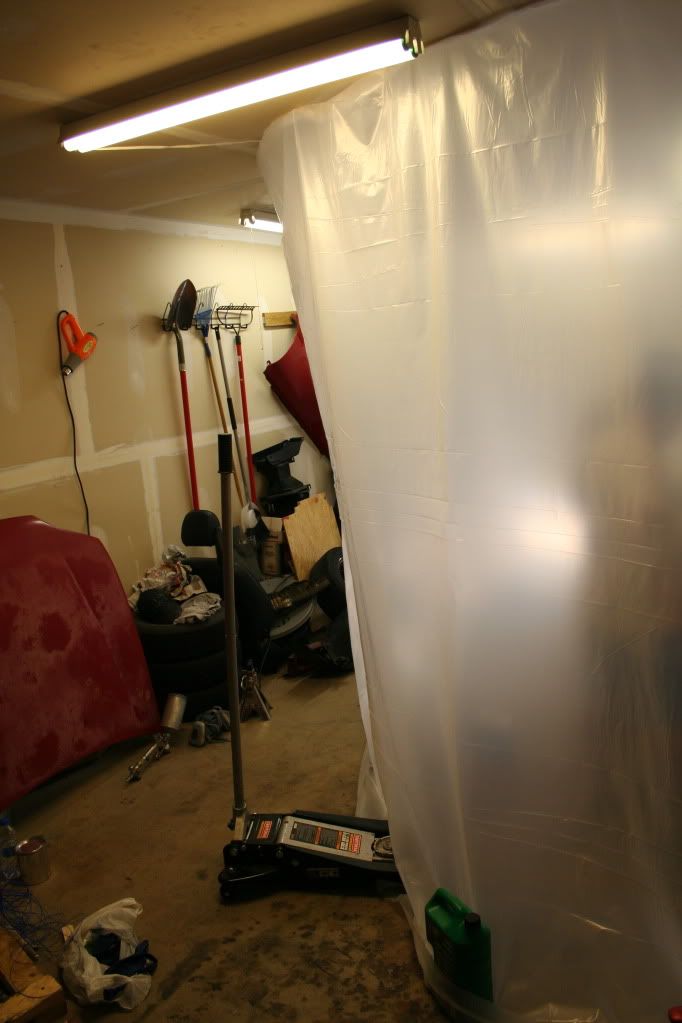
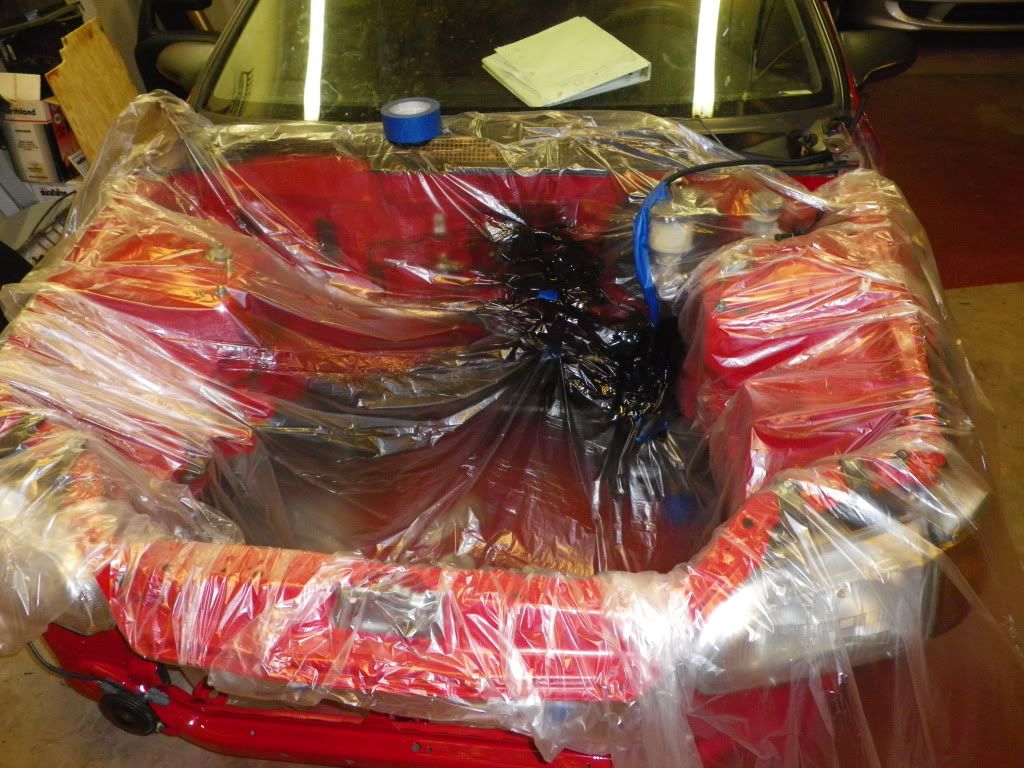
6. Spray off with air and bring back in garage. Wrap overspray preventing tarp diaper. Sexy beast in the background!
7. Hang tarp from ceiling for makeshift paint booth/sauna. Make sure to forget tarp on the ground (see fuel rail pics above).
8. Prime potential bleed through areas, wipe with rubbing alcohol and tack rag
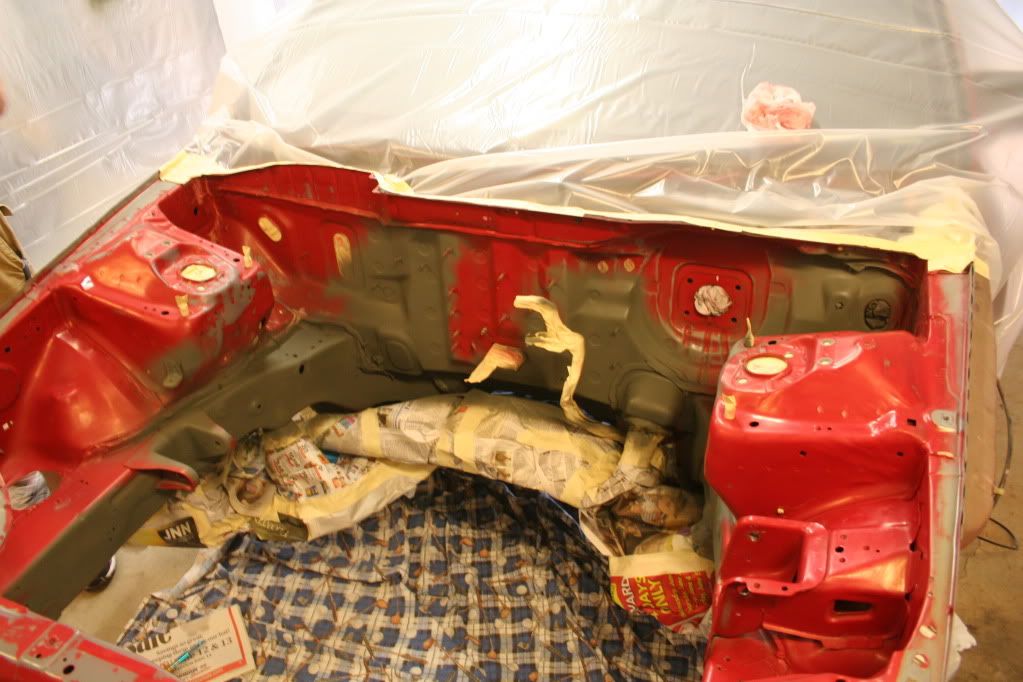
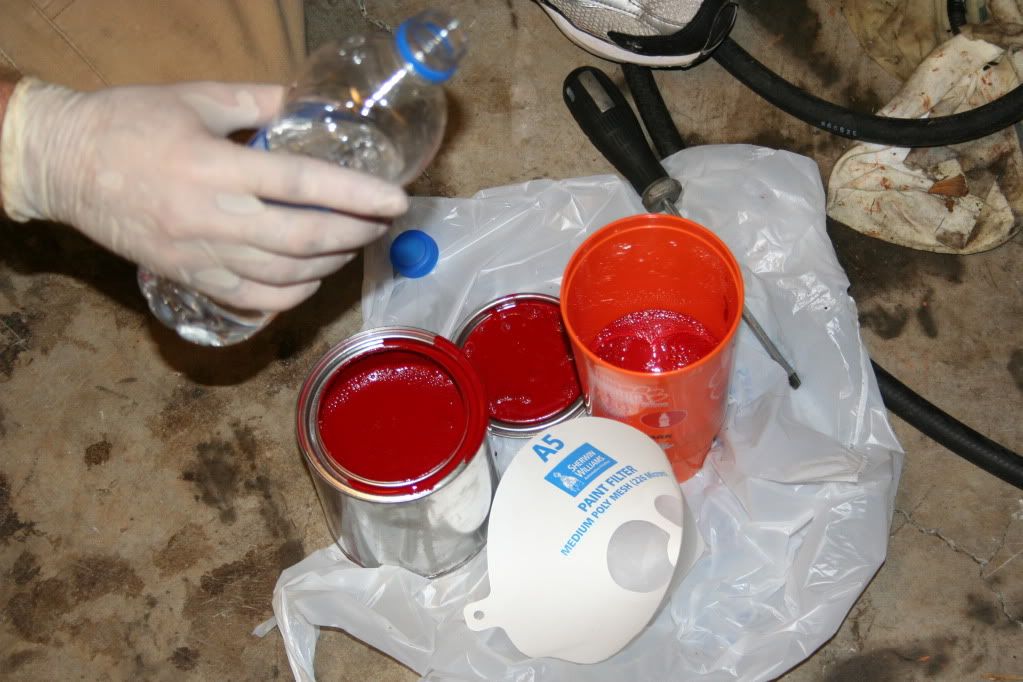
9. Mix paint/hardener
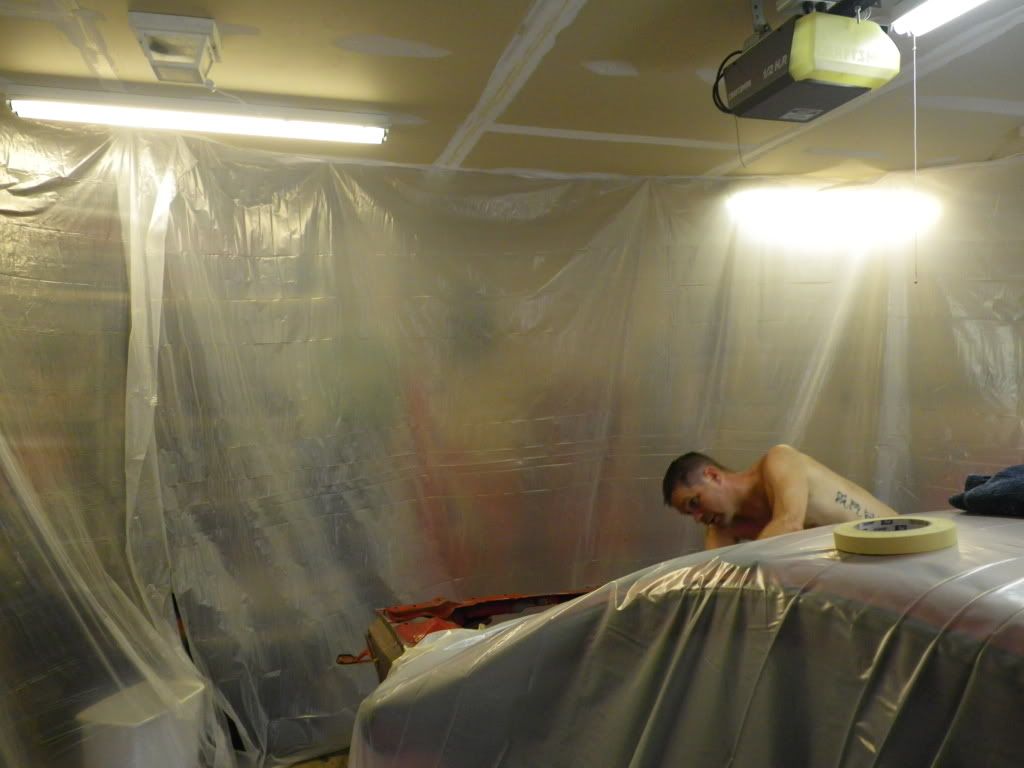
10. Spray!
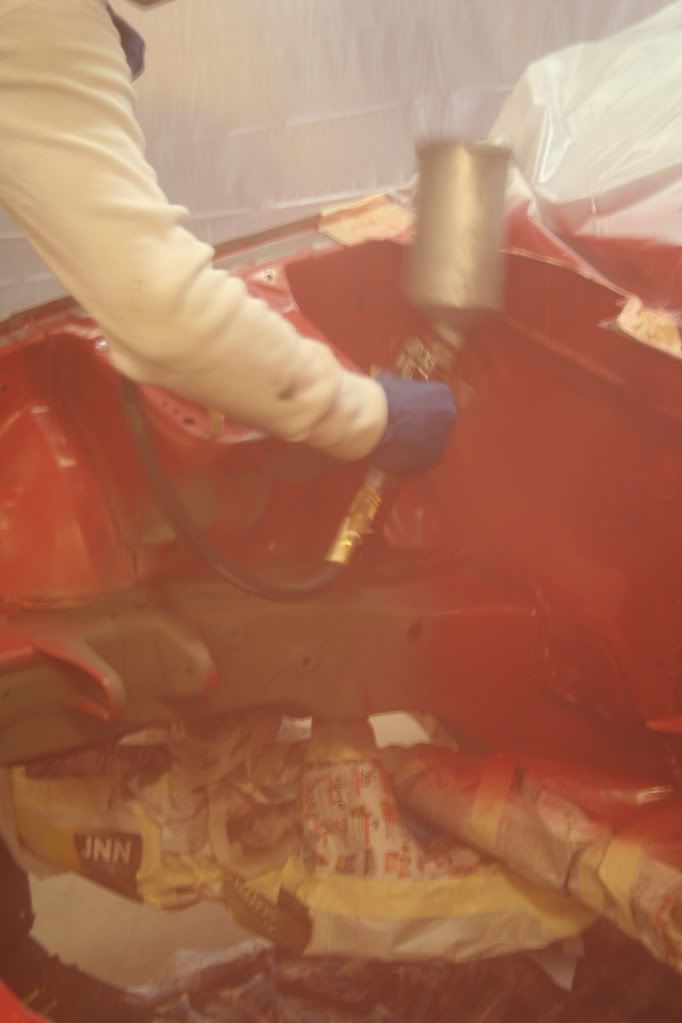
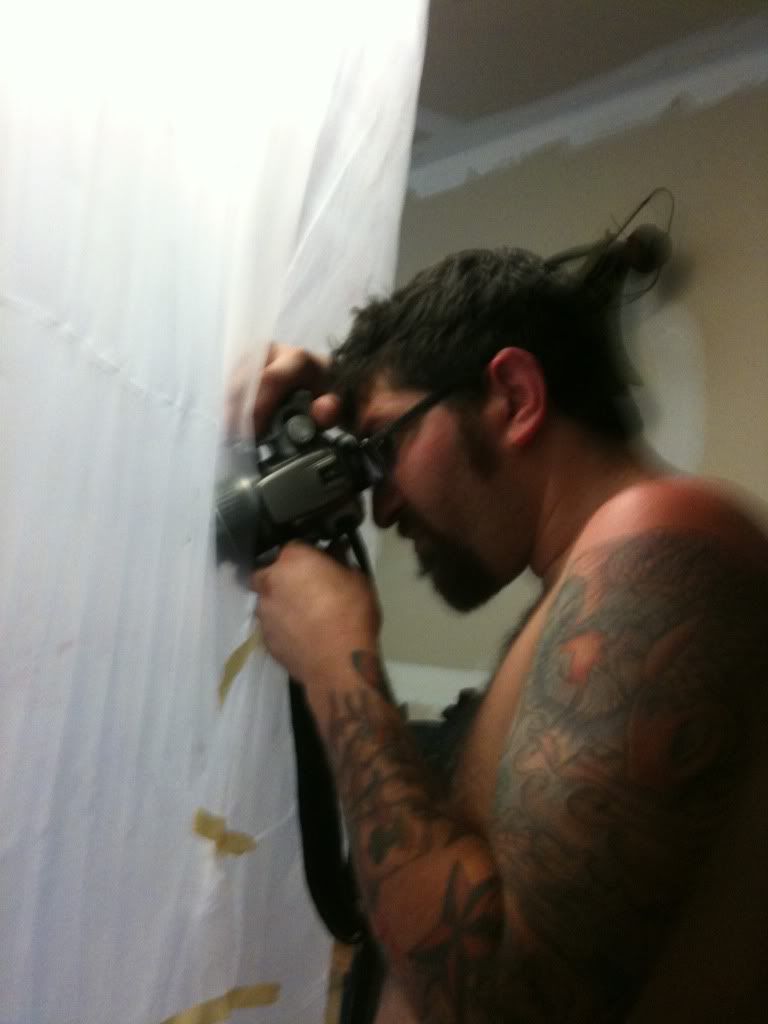
11. Get high trying to take pics of said spraying (THE GUY)
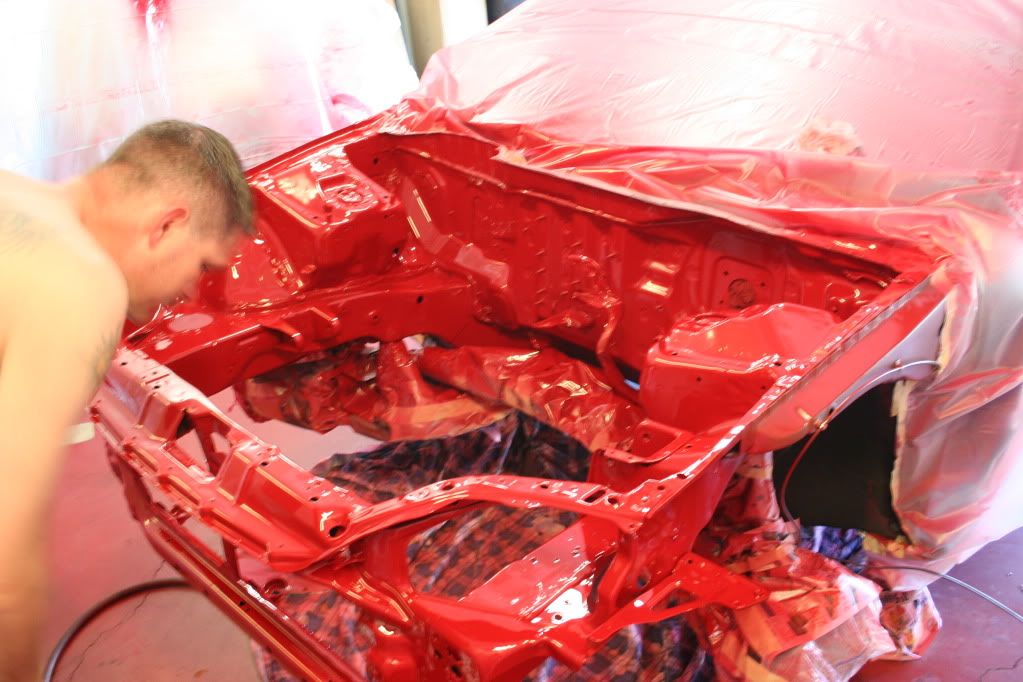
12. Inspect and let dry
13. ....
14. Profit!
Thanks to Jon (THEGUY) for all the help. If anybody in SC needs anything painted let me know. The woman's uncle did the painting. He is pretty fairly priced (i.e. quoted a friend $75 to spray front bumper, $300 to spray whole car if prep work was done).
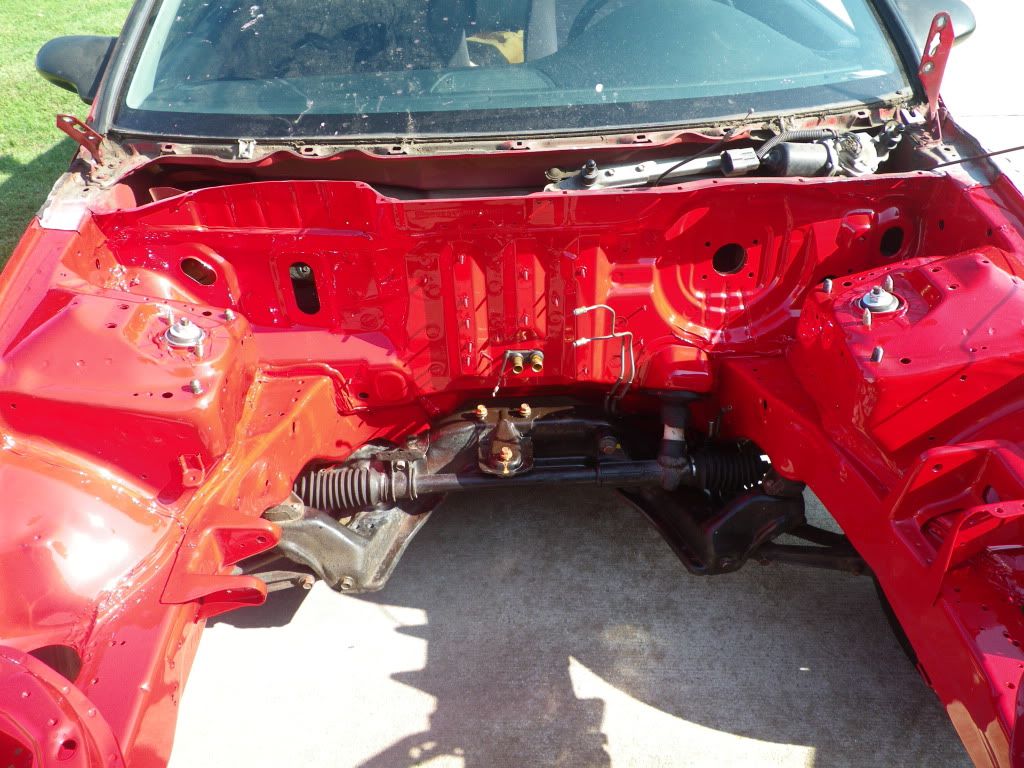
I painted the hard lines black and put the brake stuff back in. Should be the only stuff on the firewall. I had to order another prop valve because the one I had was off a DA or EF and wouldn't bolt up on my car. Also, dont be a retard like me and struggle to get the booster in only to have _Justus point out the linkage was hitting the pedal in the cabin.
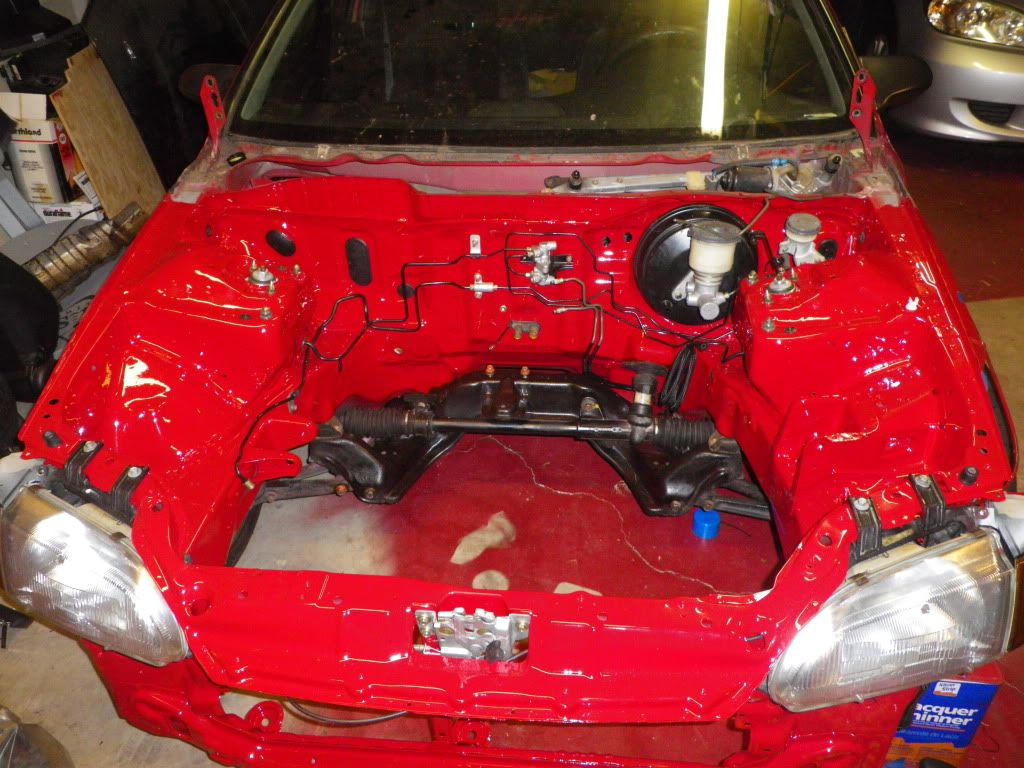
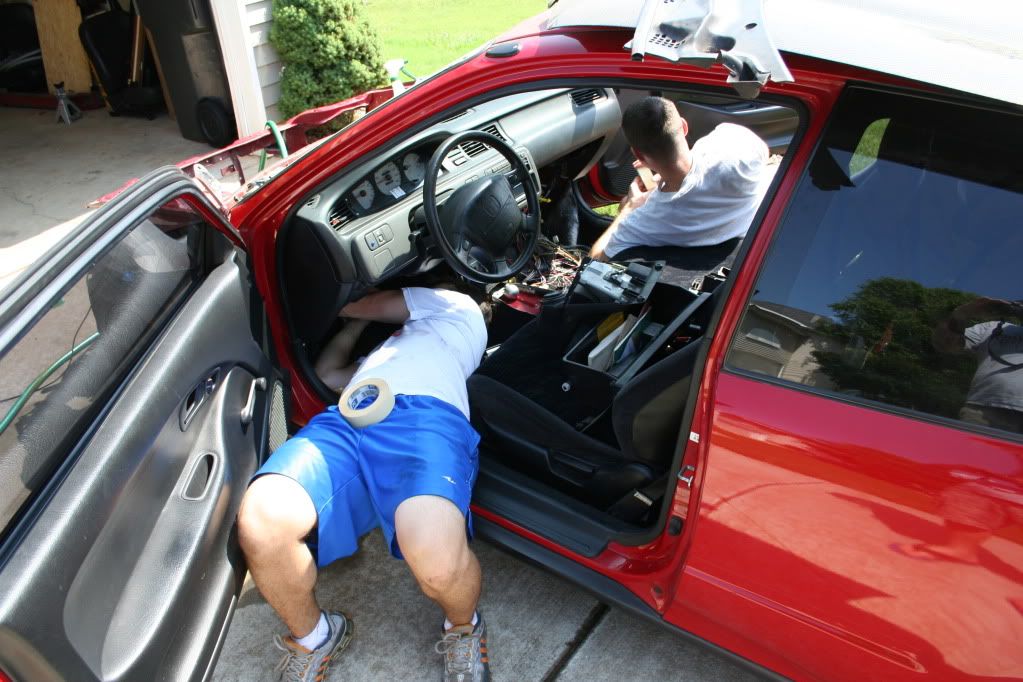
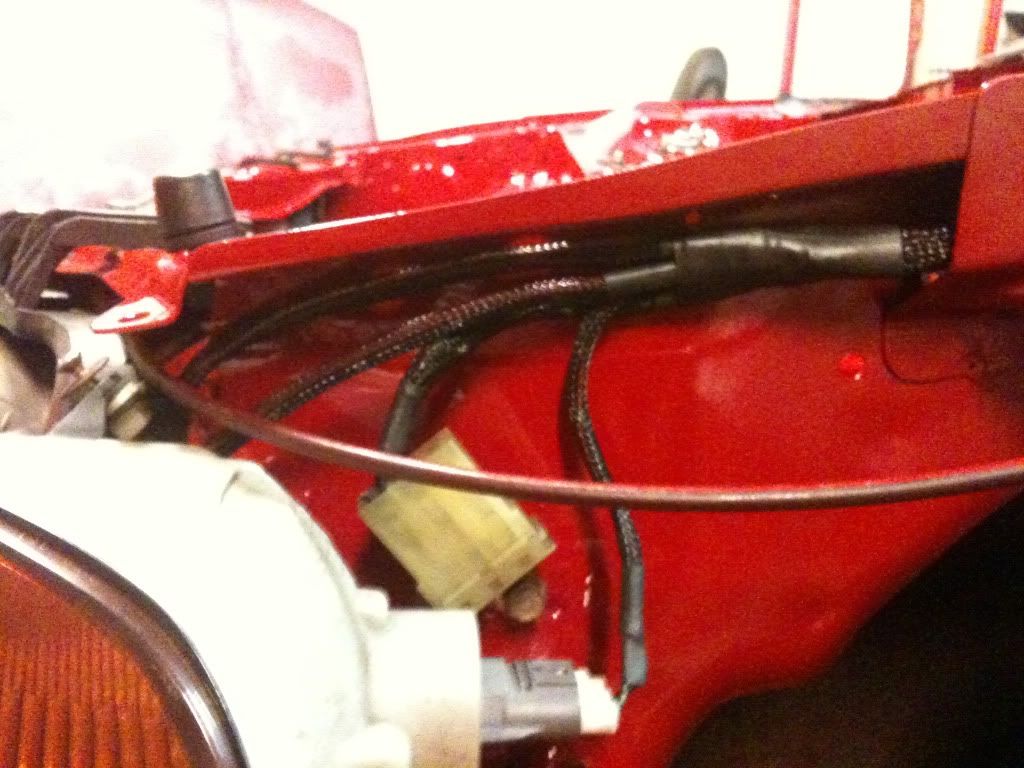
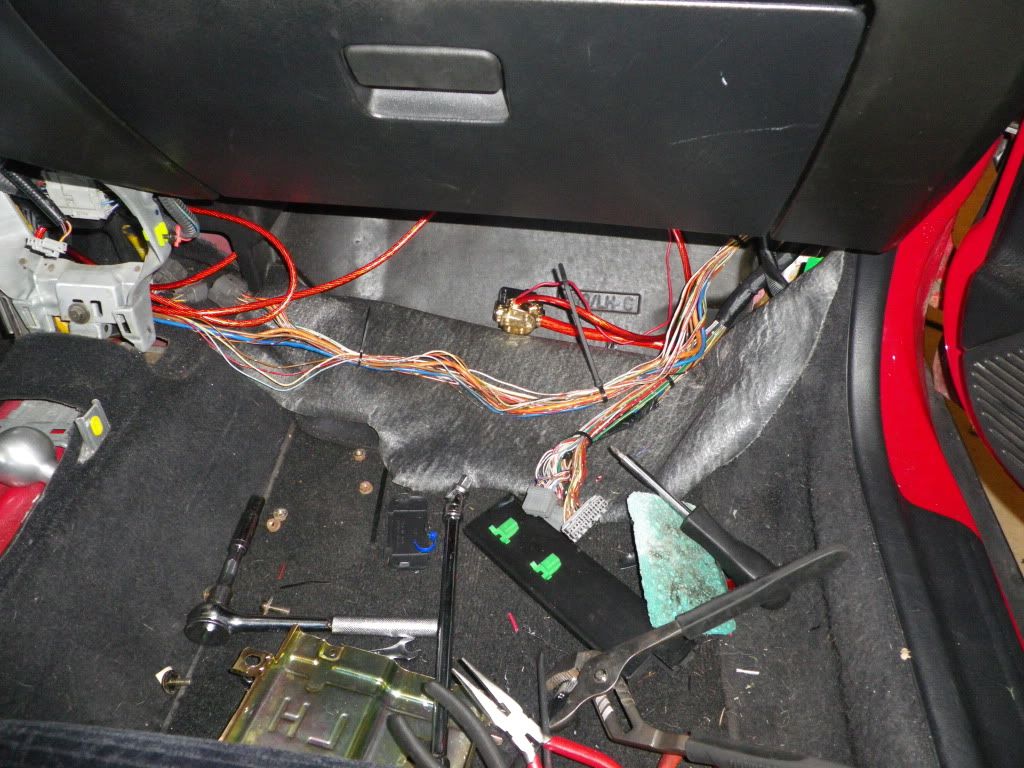
Now for wire tucking!
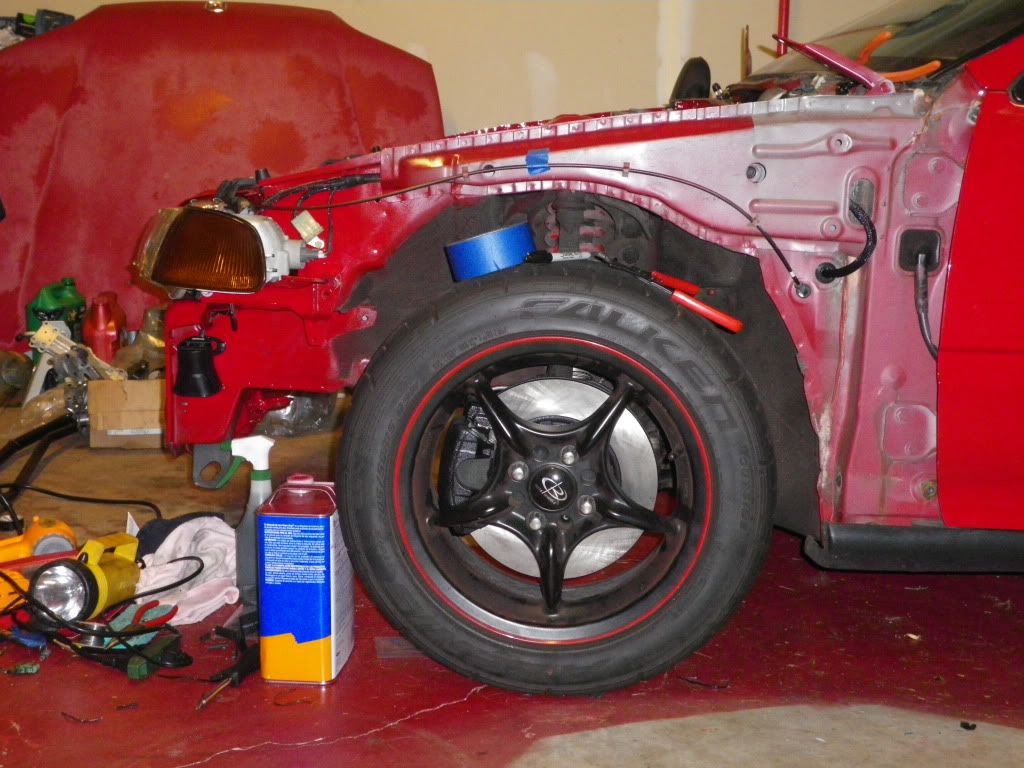
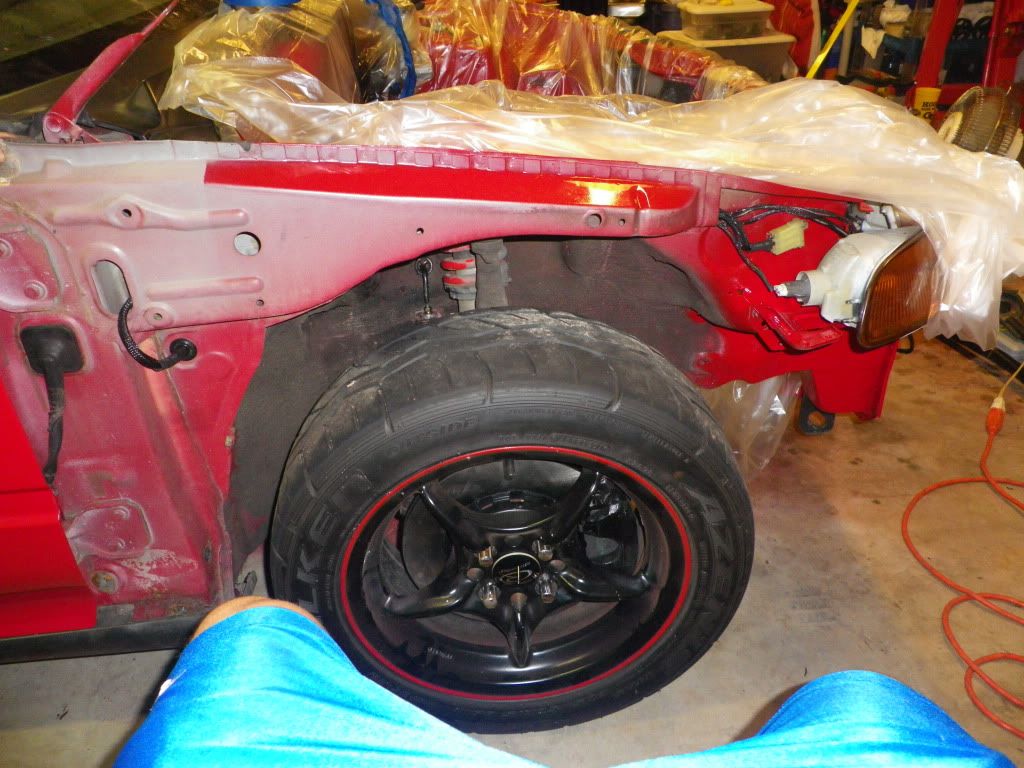
I decided to use braided sleeving and heat shrink on the chassis harness. This will give me some practice for when i do the engine harness and, well, it just looks damn good, even if its covered by the fenders. For the drivers side you can unclip the harness from the car, which make it much easier to work with.
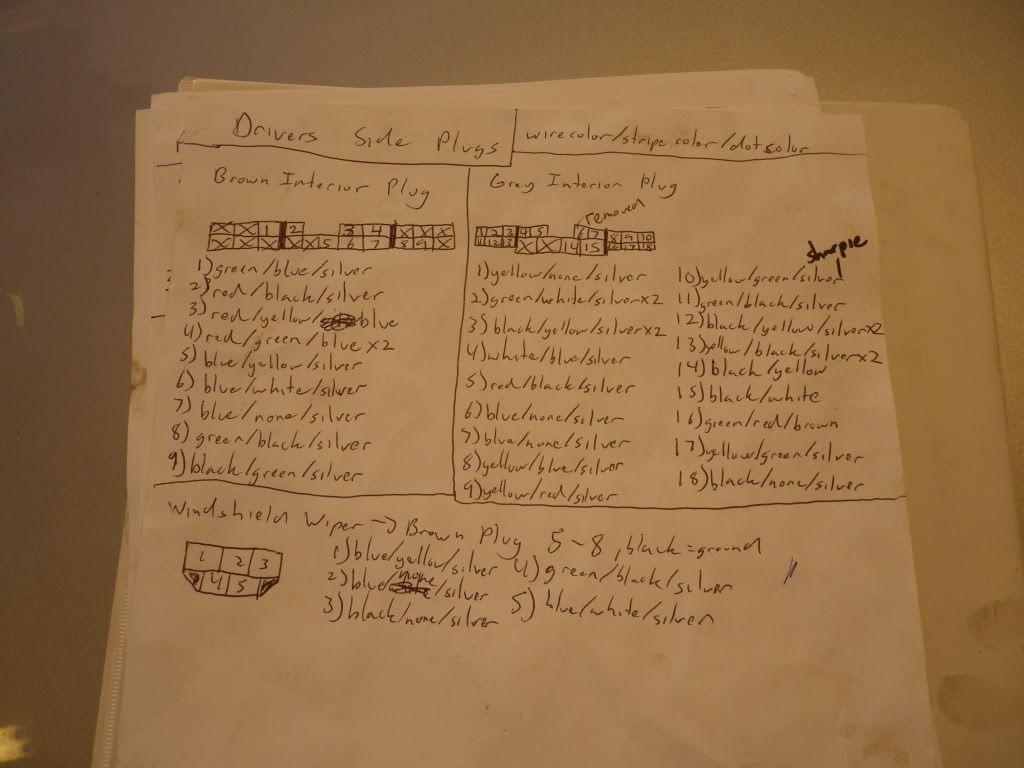
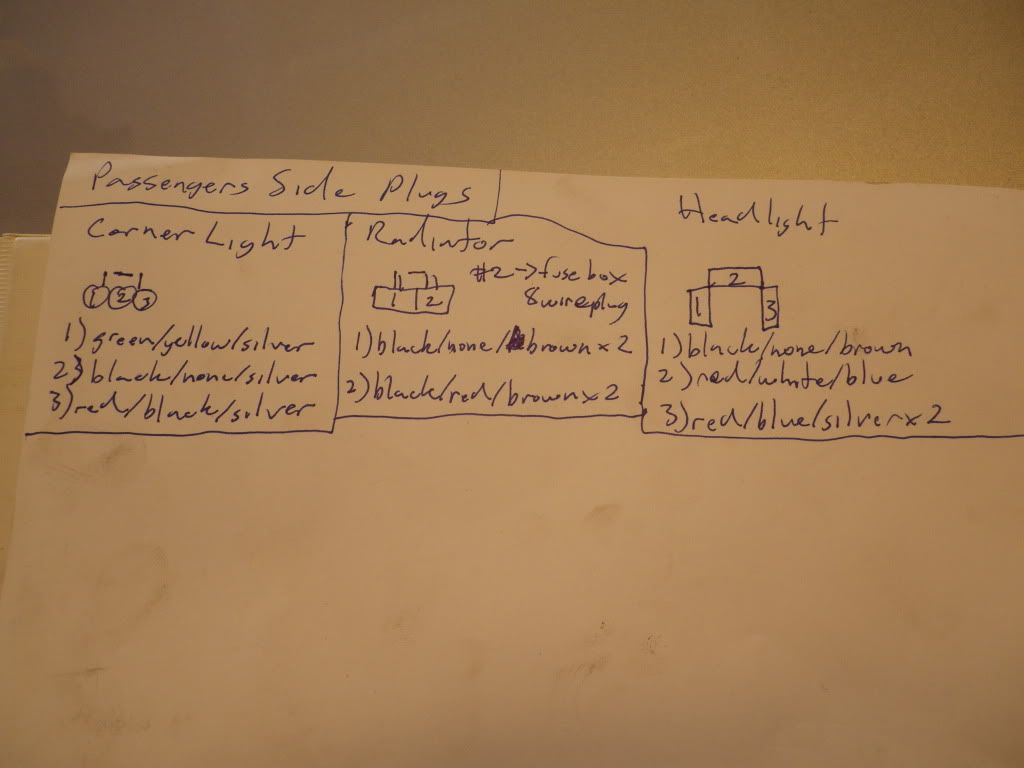
First I depinned the interior plugs. This is how I kept track of what goes where.
You start with the smallest wire bundles (front of car) and work your way back to the main plug. Here's the first one I did. Actually, its the second. The first i melted with the heat gun trying to shrink the heatshrink haha.

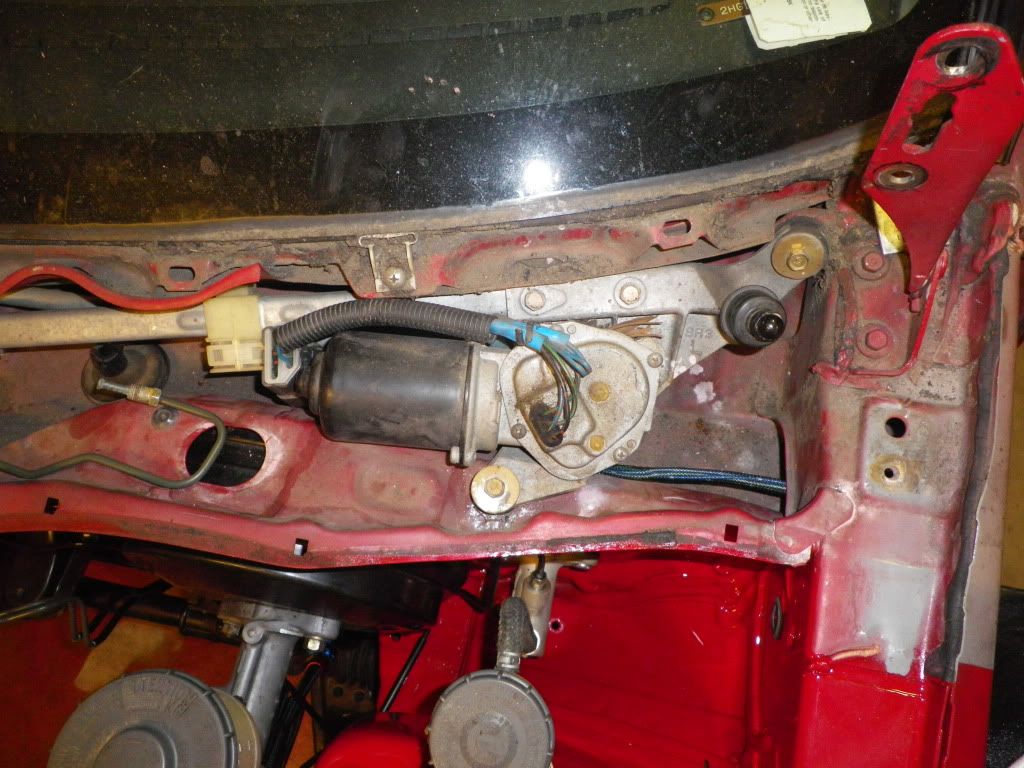
The wiper motor wires were a bit difficult. Had to figure out the trick on where to run them and then had to cut the ground wire and re-solder it before sleeving the main bundle of wires going back in the car.
And like magic drivers side is done.
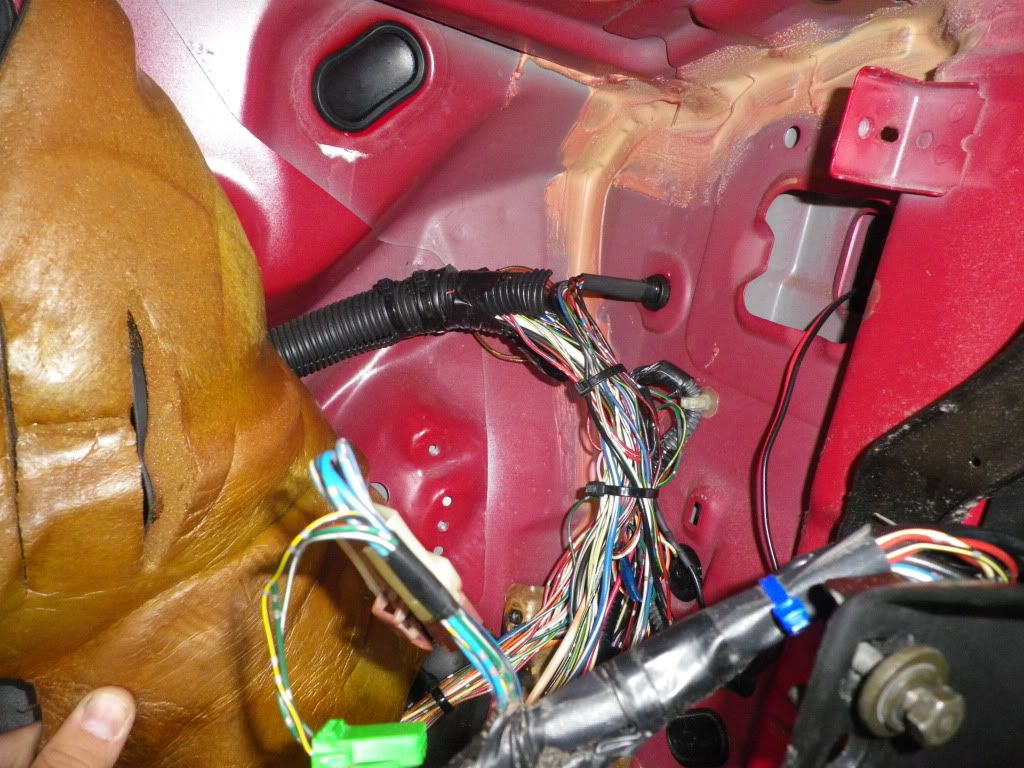
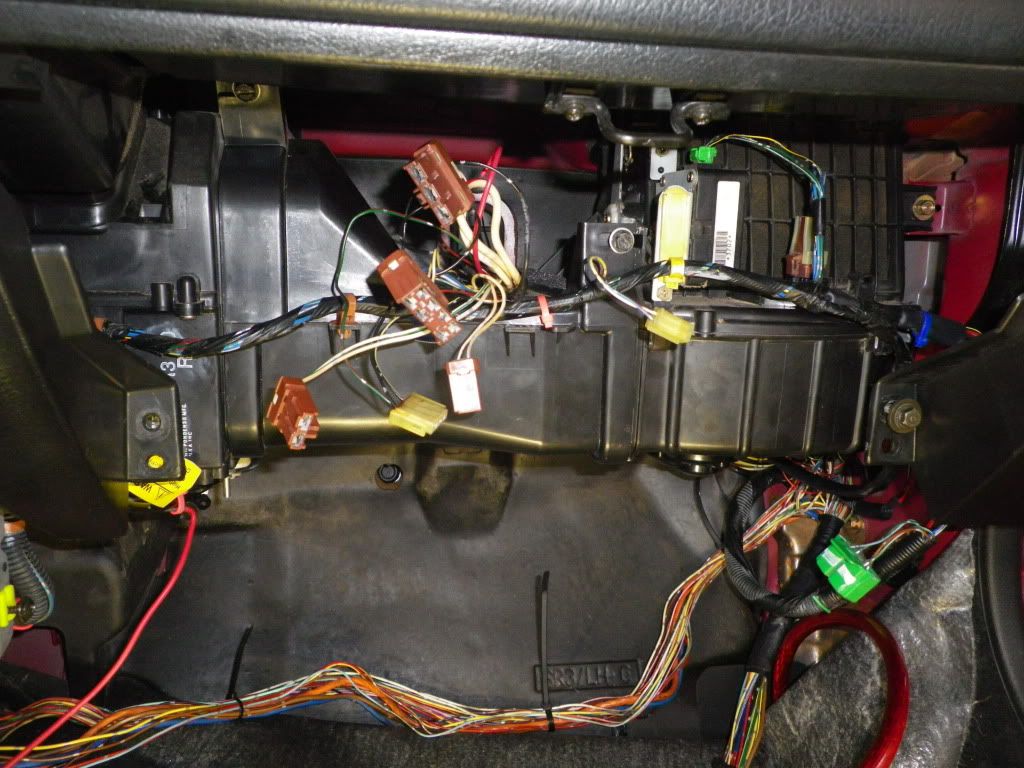
Passenger side was a little more difficult. Since i didn't take the dash out i had to cut all the wires that would run outside the car. No big deal, just more soldering. Also had to extend 3 wires going from outside to the fuse box.
Here it is coming back into the cabin
And done.
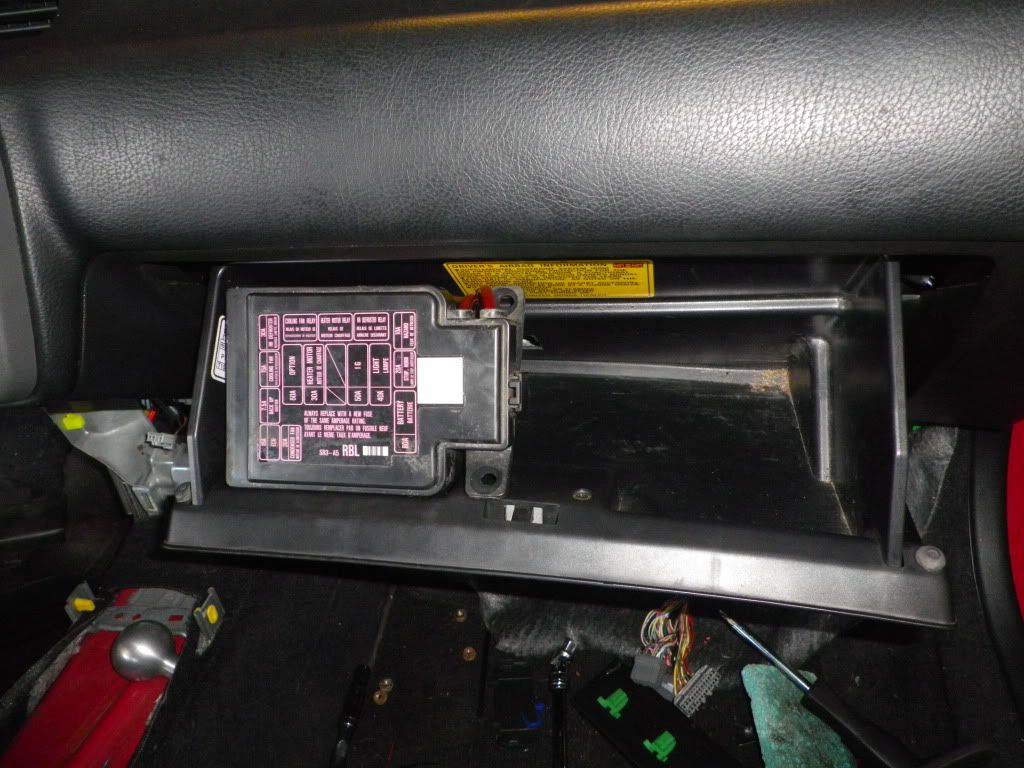
I'm running the fuse box in the glove box. Since this isn't my daily i don't need all the storage there and i still want it easy to get to. None of the wires needed extending except for the 3 running outside the cabin. It took some trimming
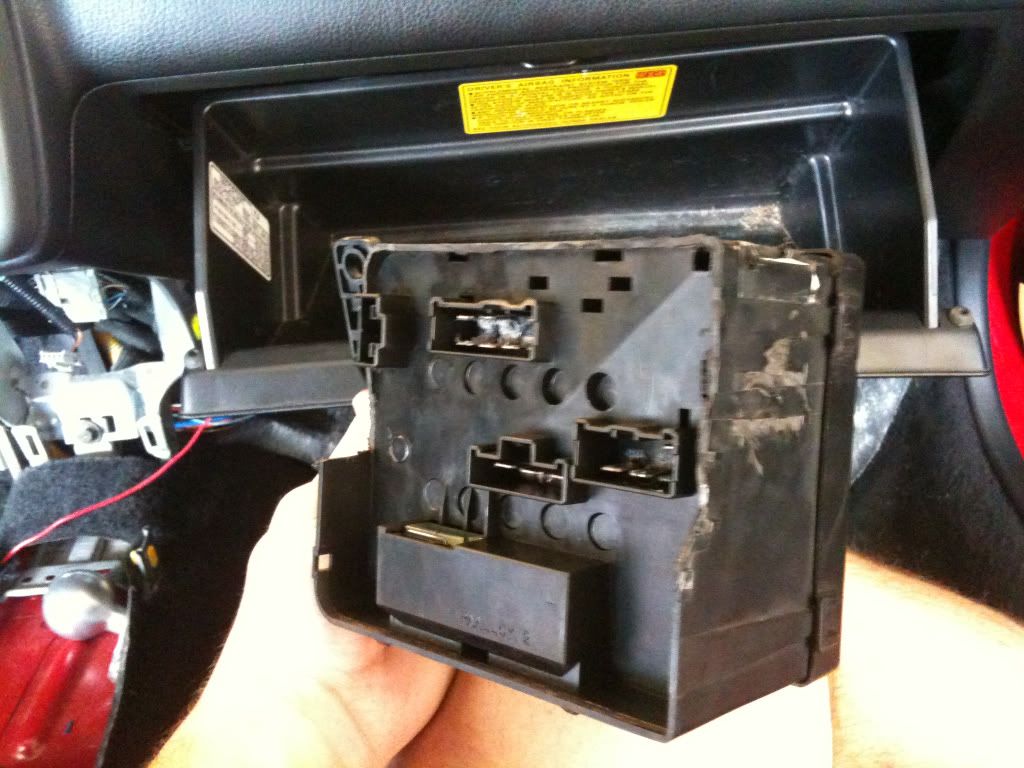
Here the plugs running up behind the A/C delete duct
It fits nicely.
I also relocated my battery to the spare tire well. Here you can see the 2 gauge wire running from it to the distribution block. From there an 8 gauge goes to the fuse box and a 4 gauge will go to the starter. You can also see the ECU wires running along the floor towards the center of the car where the will be coming from the engine.
Distribution
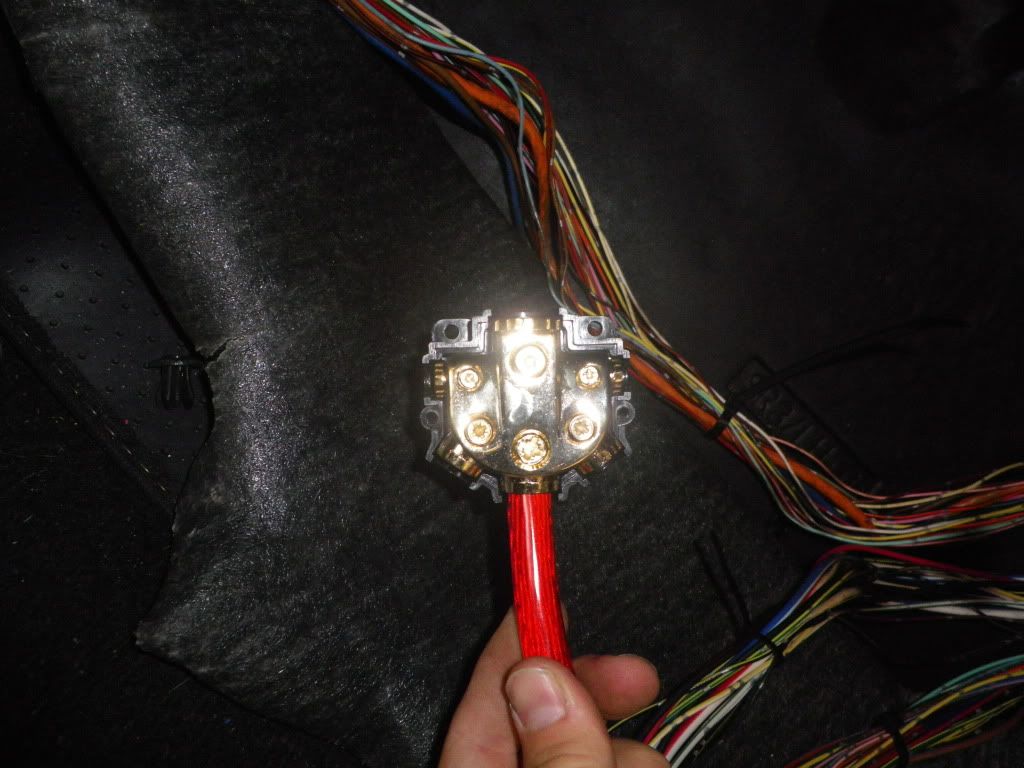
ECU wires and power from battery
I'll have to get some pictures of the battery in the back.
That's all for now! Almost caught up.

Next installment: engine is back! more work.
 07-16-2010, 01:55 PM
#31
Not to be confused with "THE MAN"
Very nice progression on the thread Jimbo, anytime you need the hand you know I'm down.*
I'm too big to try to get into a bay to tape.

*Exceptions include but not limited to: drunkeness-lost in the woods-lost in the city-asleep-already at your house drunk with you
I'm too big to try to get into a bay to tape.
*Exceptions include but not limited to: drunkeness-lost in the woods-lost in the city-asleep-already at your house drunk with you
07-16-2010, 03:15 PM
#33
Honda-Tech Member
Thread Starter
Thanks for the compliments everybody! I'm in Nashville for IA so there probably won't be any updates over the weekend. I was originally hoping to get the car done by now, but obviously I have a bit more to do now than I planned on.
I might. Anything in particular you are looking for? Ask away if you got any questions.
I might. Anything in particular you are looking for? Ask away if you got any questions.
07-16-2010, 03:42 PM
#34
Honda-Tech Member
Join Date: Jul 2008
Location: T.
Posts: 113
Likes: 0
Received 0 Likes
on
0 Posts
awesome build bro!
that pisses me off with the bullshit ur going through
even though you spent all this time and money
it will be worth it in the long run!!!
that pisses me off with the bullshit ur going through
even though you spent all this time and money
it will be worth it in the long run!!!
07-16-2010, 04:38 PM
#35
Honda-Tech Member
great work! its coming along nicely. even with the small set backs, it looks like youve made great progress.
 07-19-2010, 07:47 AM
#40
Honda-Tech Member
Thread Starter
Thanks to the new people joining the thread! IA was a blast. I can't wait to get this thing out there next year.
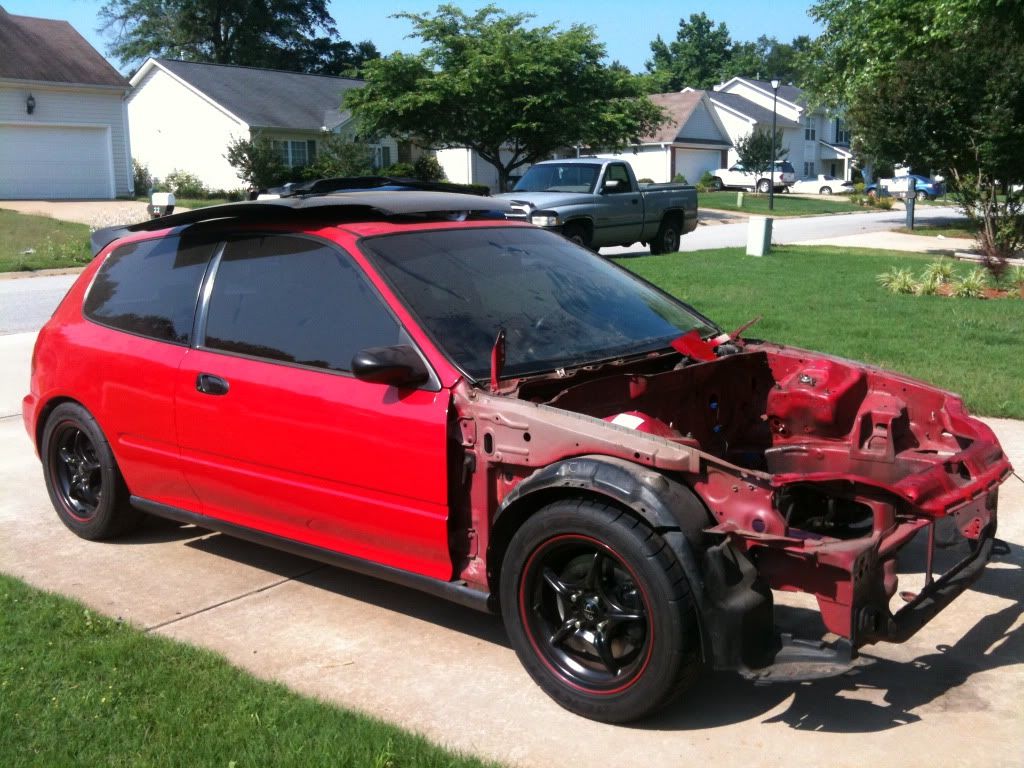
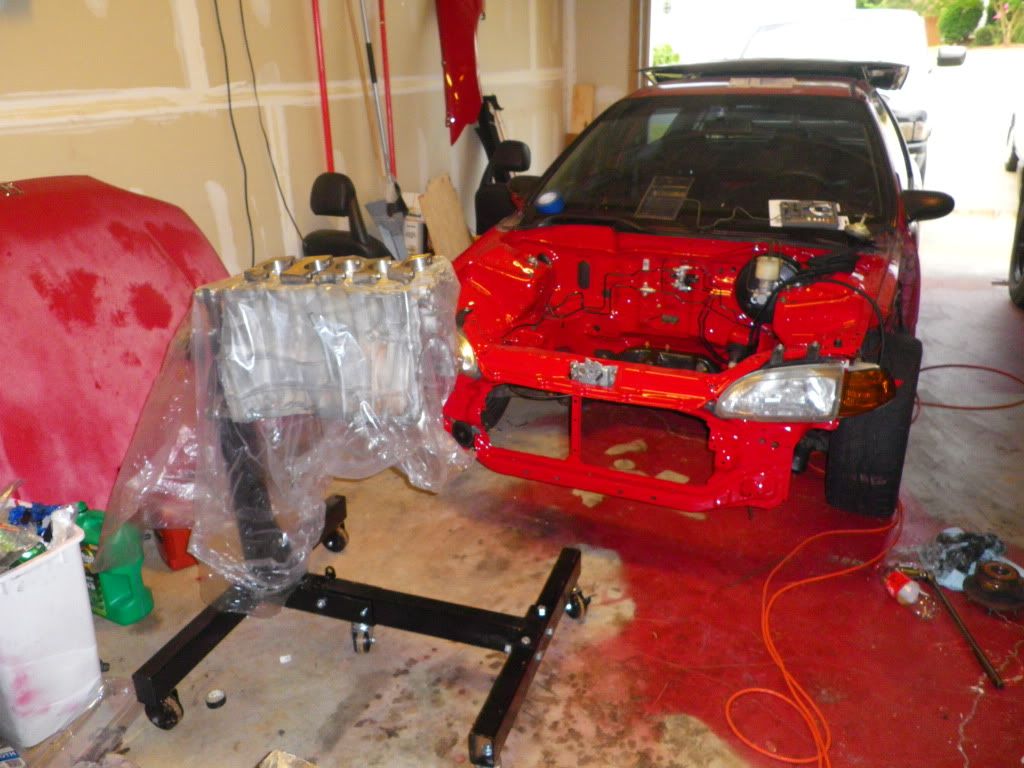
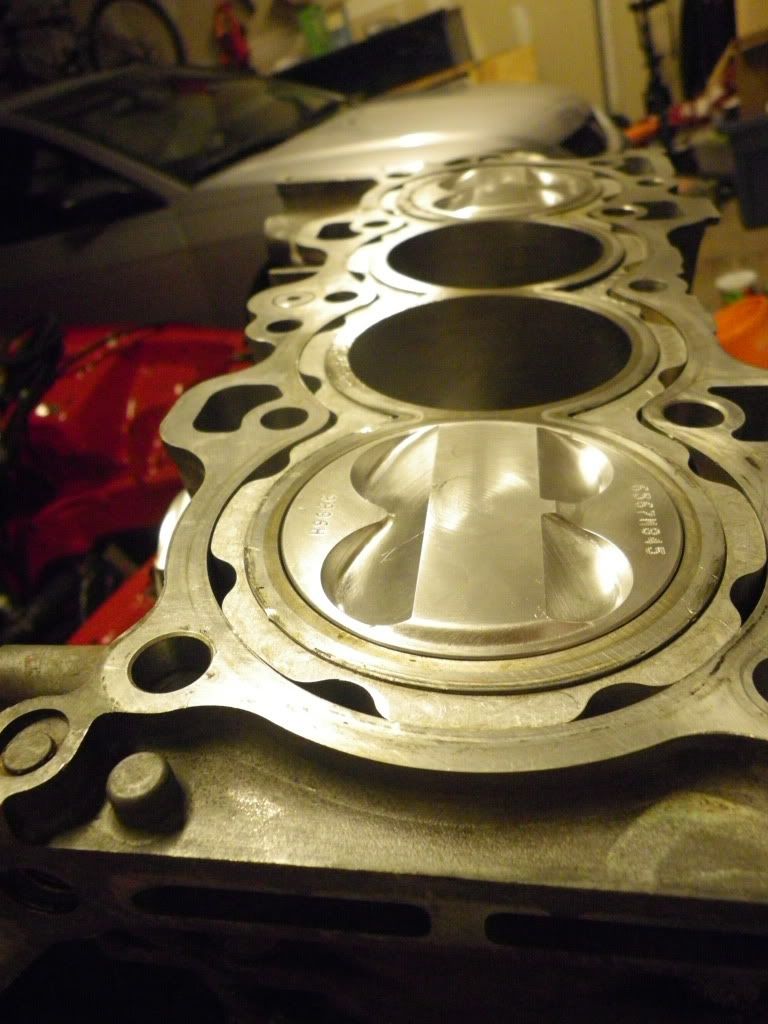
And the engine is back!
Here it is coming back from the machine shop
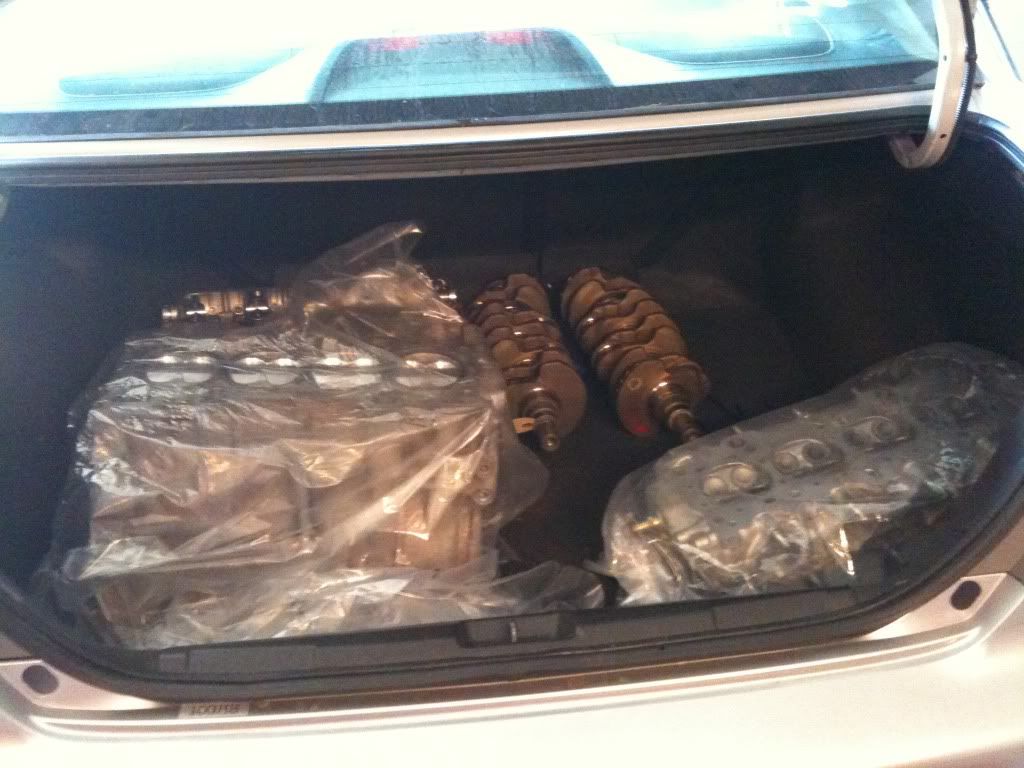
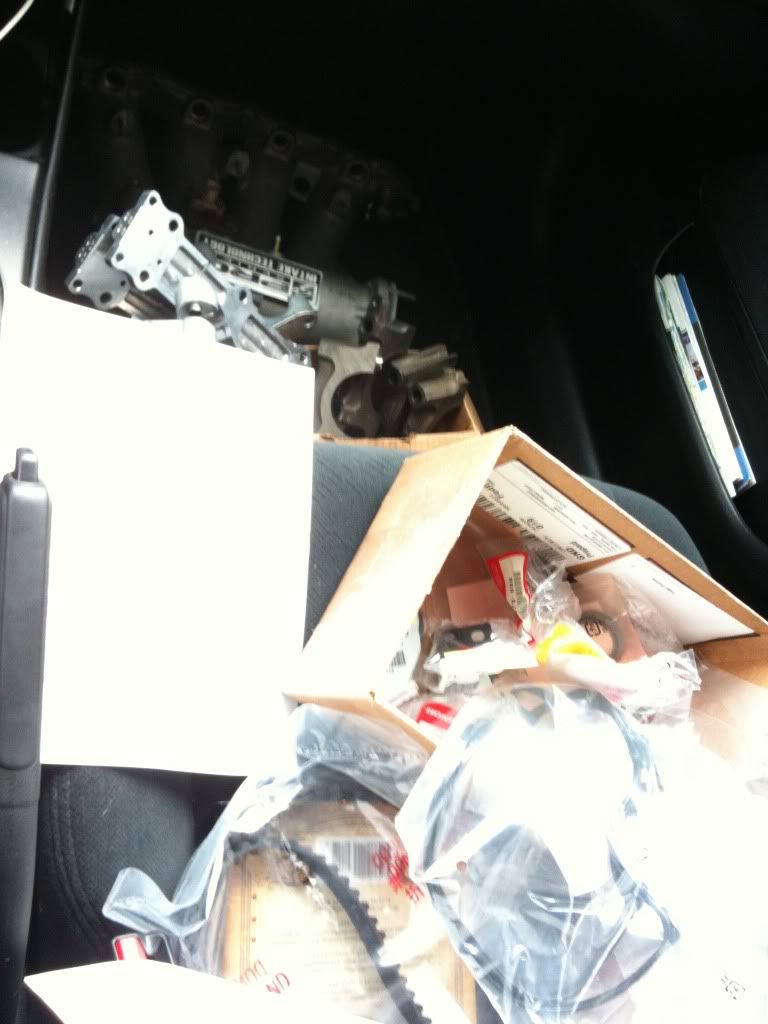
Also picked up a bunch of stuff from Honda the same day. Gaskets, timing belt, engine bay plugs, etc.

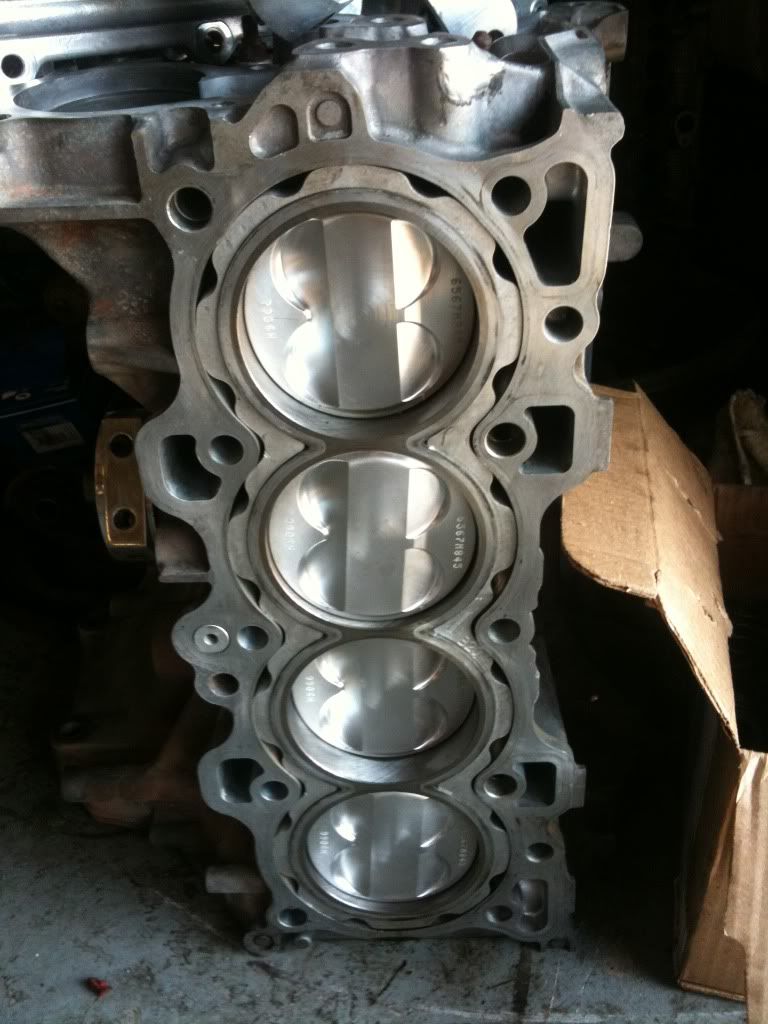
I had the shop gap the rings and put the pistons in since i don't have a good tool to file rings nor a ring compressor
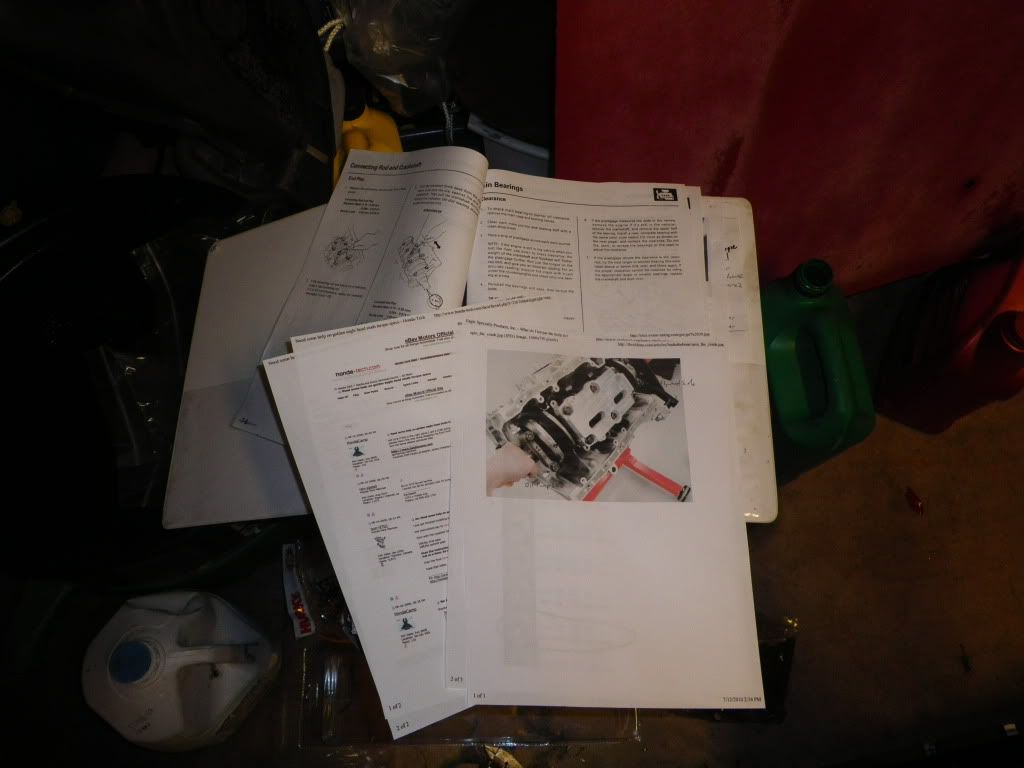
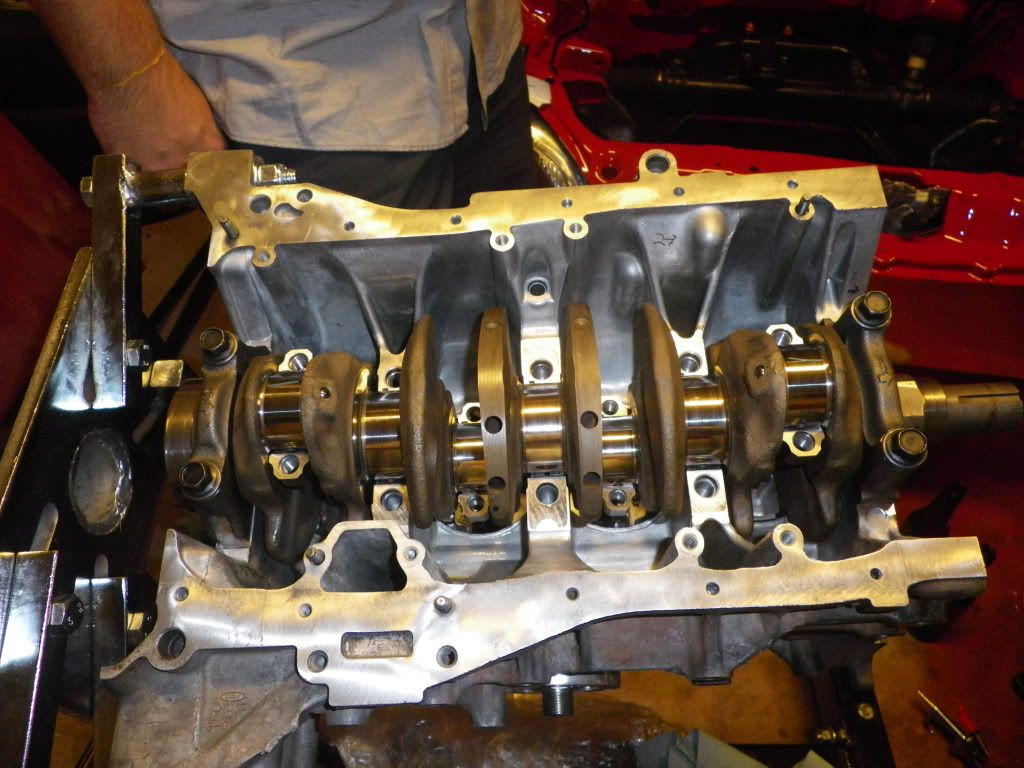
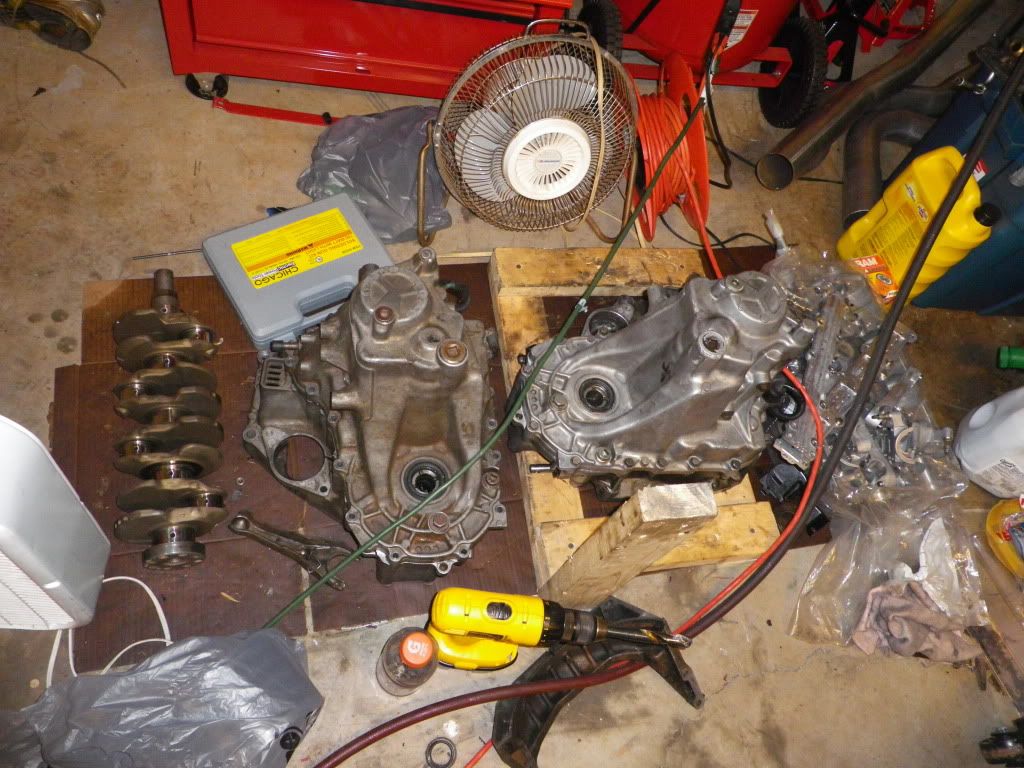
This past week I got the block up on the engine stand and Justus and I checked clearances and got the crank in and rods bolted to it.
Ready to be worked
Reference materials
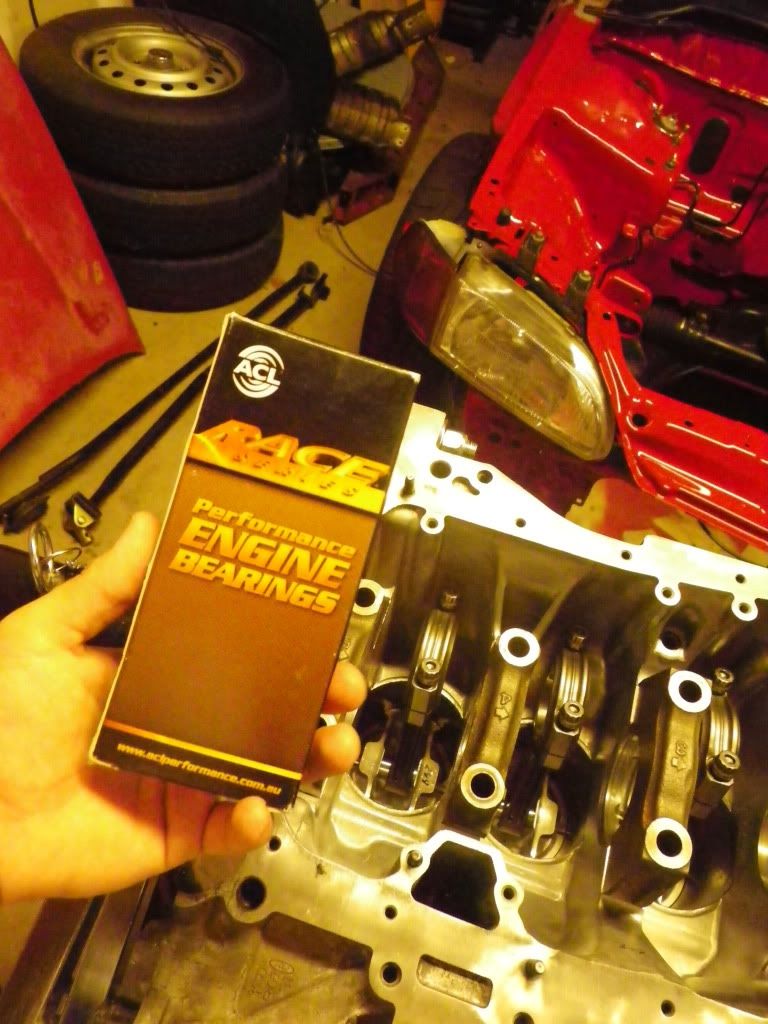
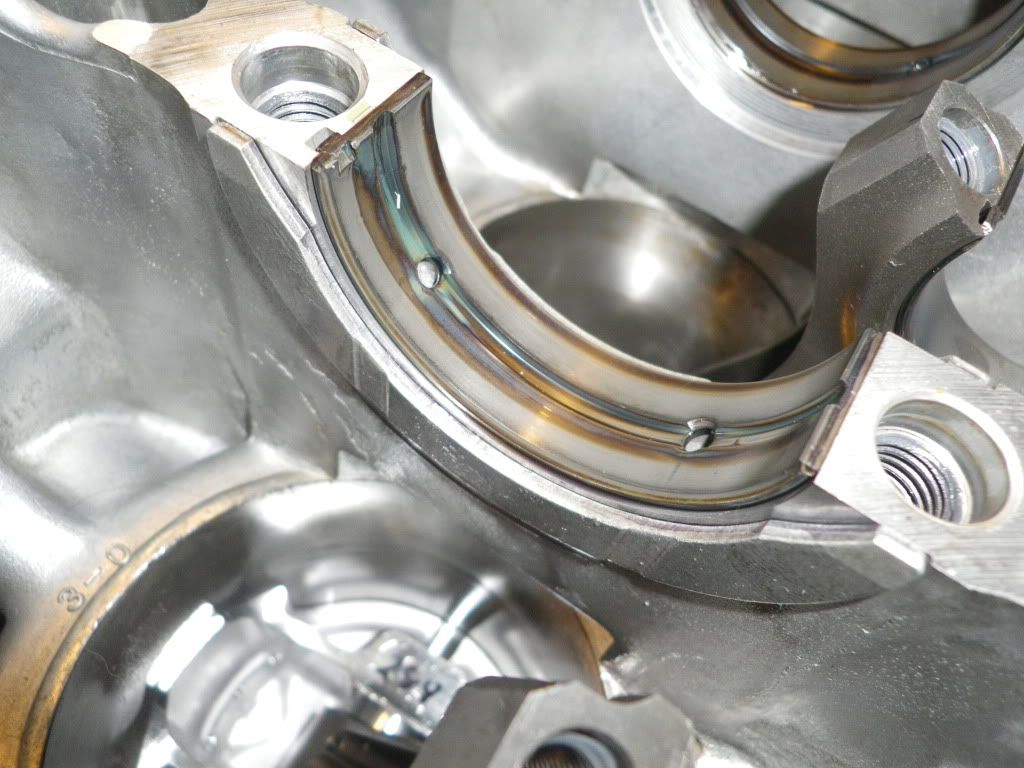
Bearings. Fyi, remember to put assembly lube or oil UNDER these. I forgot to and had to pull them all back out
If this is you're first engine build, like me, you forget which main cap goes where. Took me forever to look it up, but here it is
Weight number from being balanced

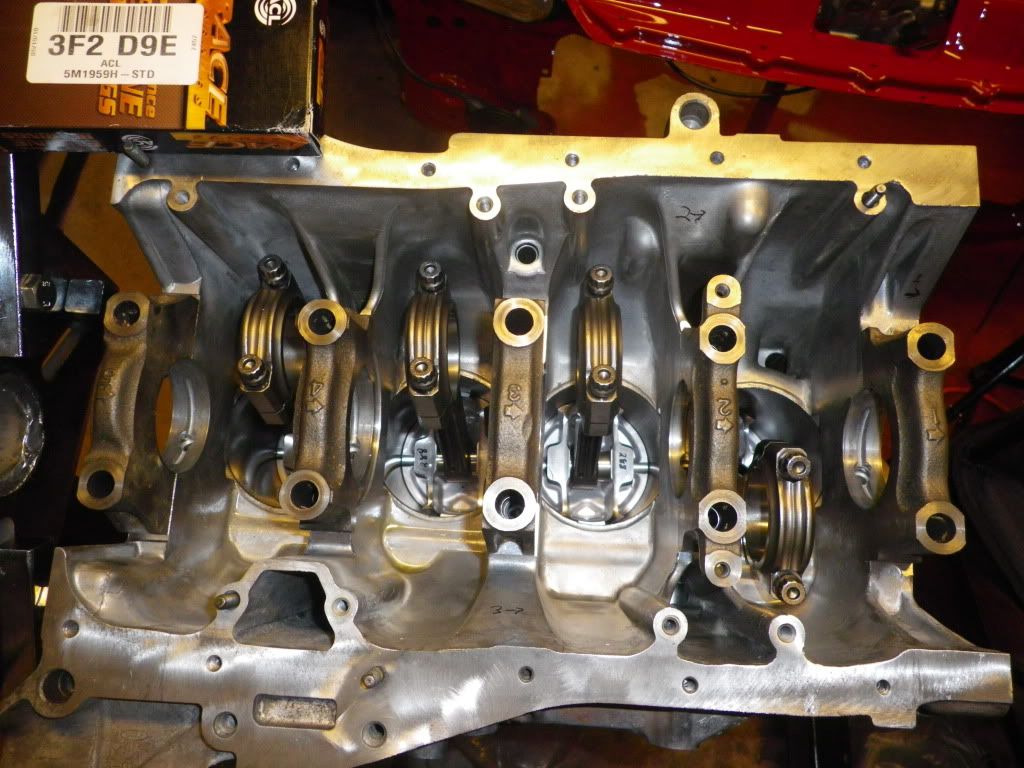
Here the crank is in with the #1 and #5 main caps snugged down to keep the crank from spinning while checking rod bearing clearances
Plastigage
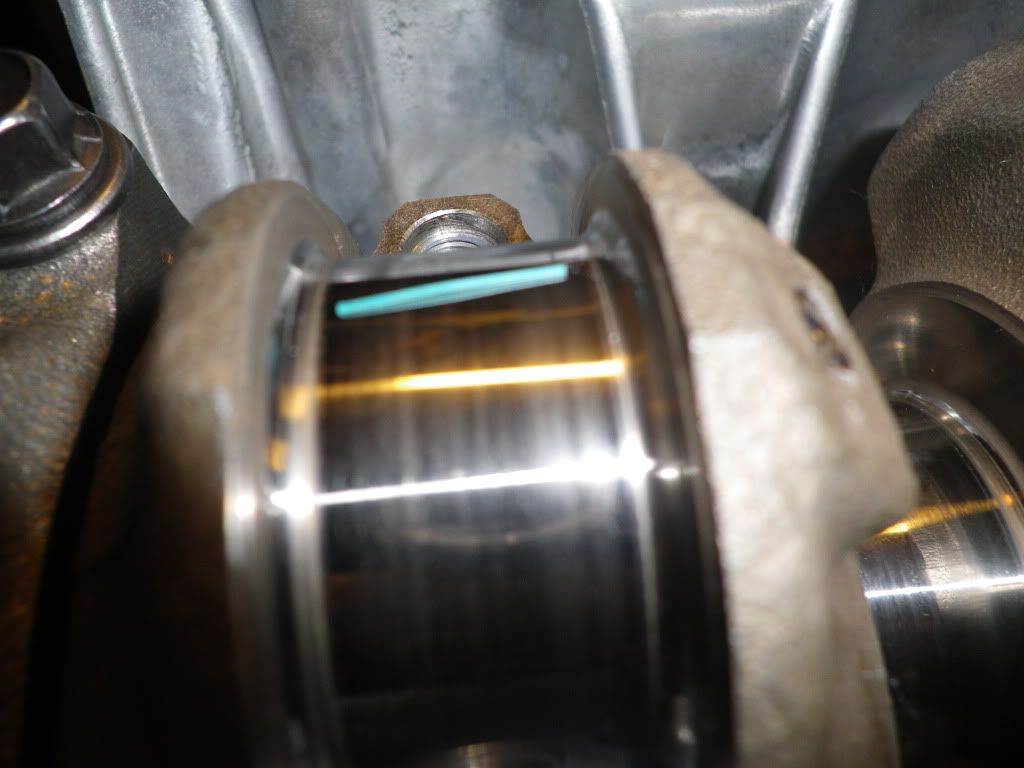
Repeat for other two rods and then for the mains. Forgot pics of squished plastigage, but everything checked out good. Take everything back apart, clean up plastigage with credit card and apply assembly lube.
Here are the thrust bearings in.
Was pumped to get this thing together and forgot to take pics of the rest
Here it is all together
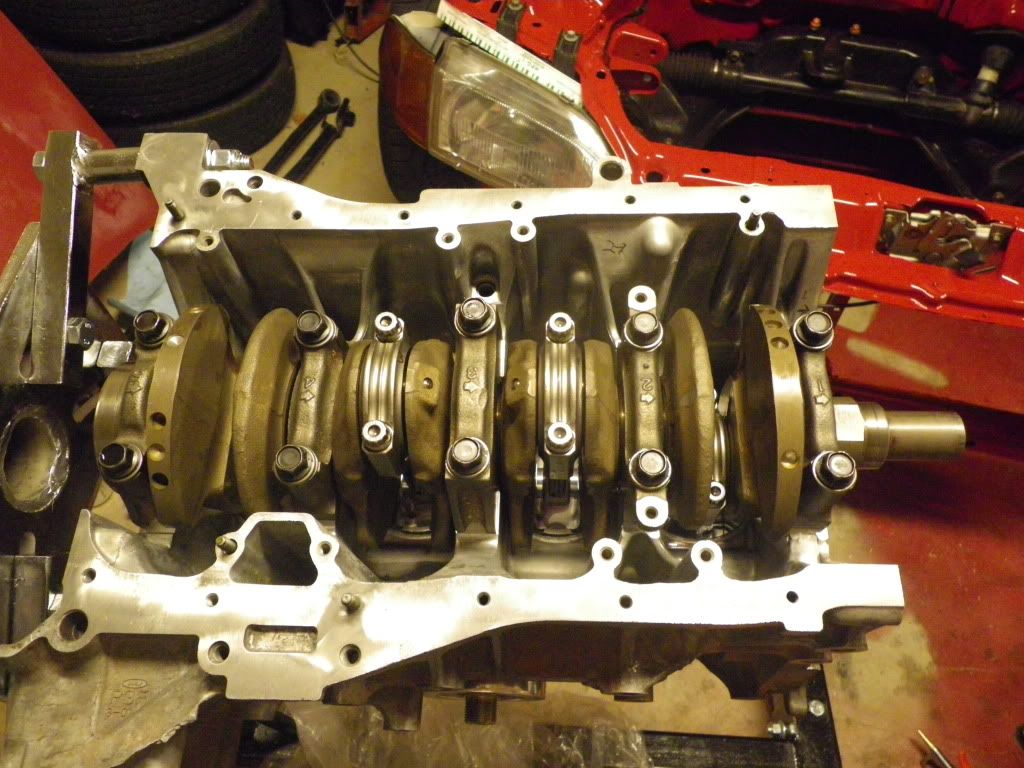
w00t! Still have to put the rear main seal and oil pump in, but the hard part is done.
I also tackled the transmission a week or so before that. I needed to install the LSD and put in the ITR/Kaaz gears. I took my sweet time over 2 days since this was my first transmission experience. This tutorial helped A LOT. I cleaned it up and put it in a nice, printable word document. If you would like it PM me with your e-mail address.
First I pulled the stock GSR gear racks and differential out. I rented a gear puller to get the speedo gear off and put it on the LSD. I then GENTLY got the diff bearings off with some careful two sided prying. Luckily these were the sealed bearings and not the conical ones. (picture taking fail once again)
Luckily the ITR/Kaaz gears came complete assembled on the countershaft and mainshaft and had the same final drive. I did tear down the mainshaft, however, to make sure it was assembled right. Basically I unstacked the stock GSR parts and the new parts right next to each other.
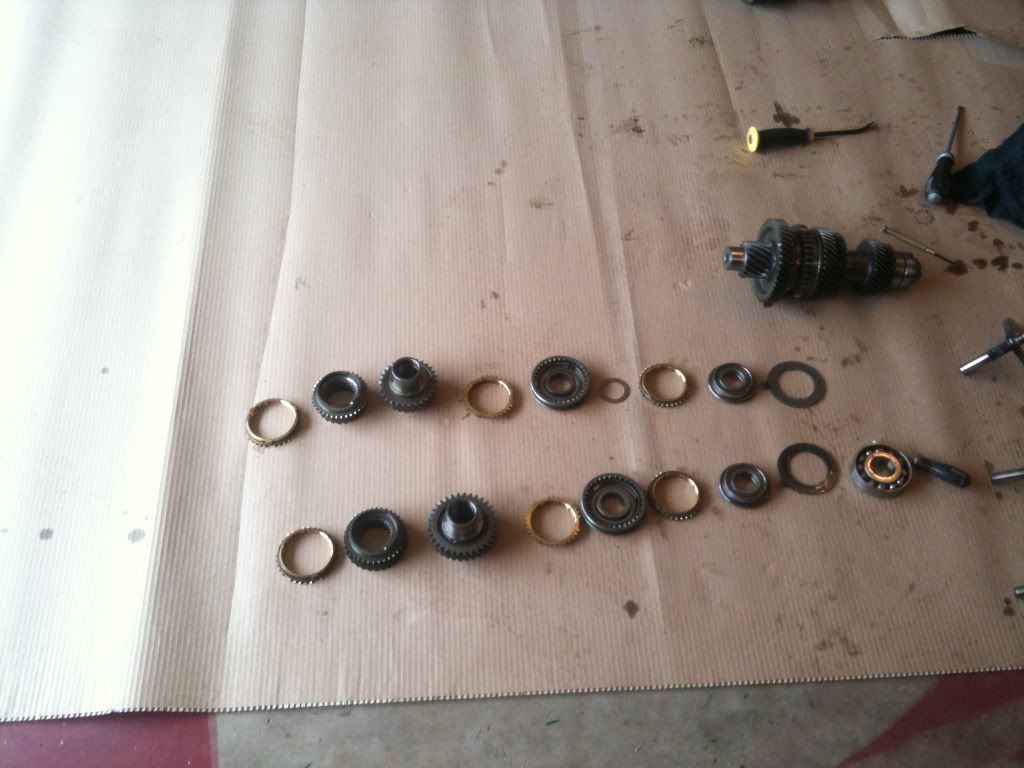
Carnage

Good thing I did this, because there was a shim on there that wasn't supposed to be. I cleaned up everything as I re-assembled the main shaft and then put the new goodies back in the GSR case.
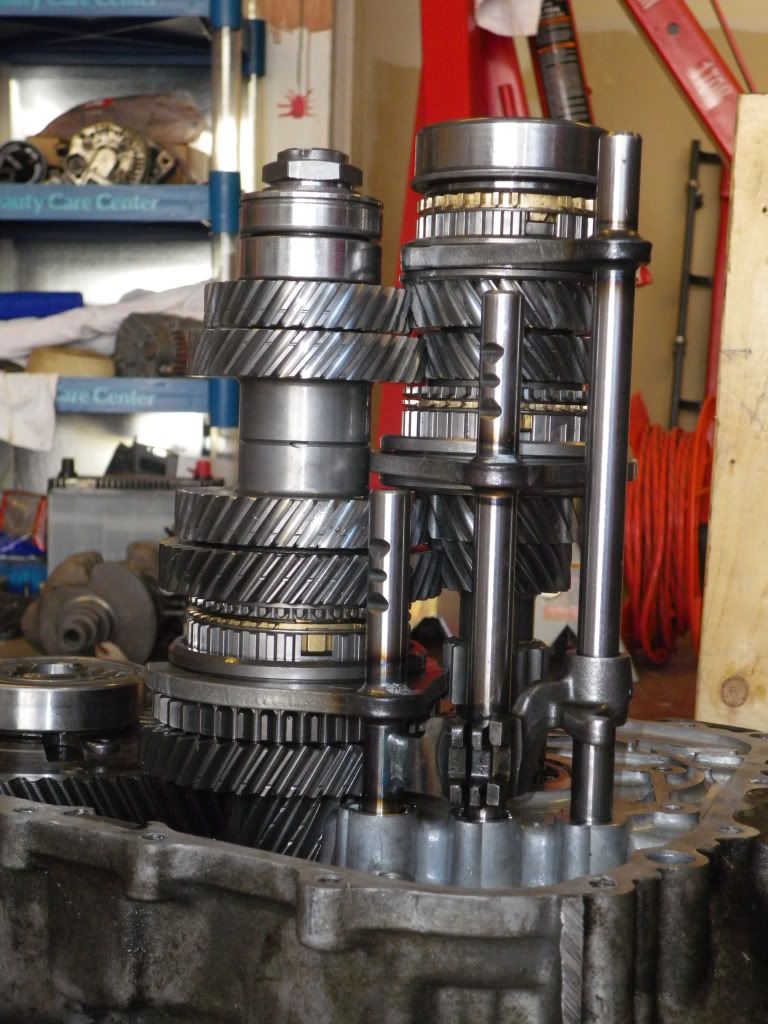
Here it is the complete tranny and the spare case with stock GSR gear set inside of it
The tranny and engine will be getting cleaned up and more than likely painted once the engine is fully assembled. Anybody have any secret cleaners they found best to cut through the grime on them?
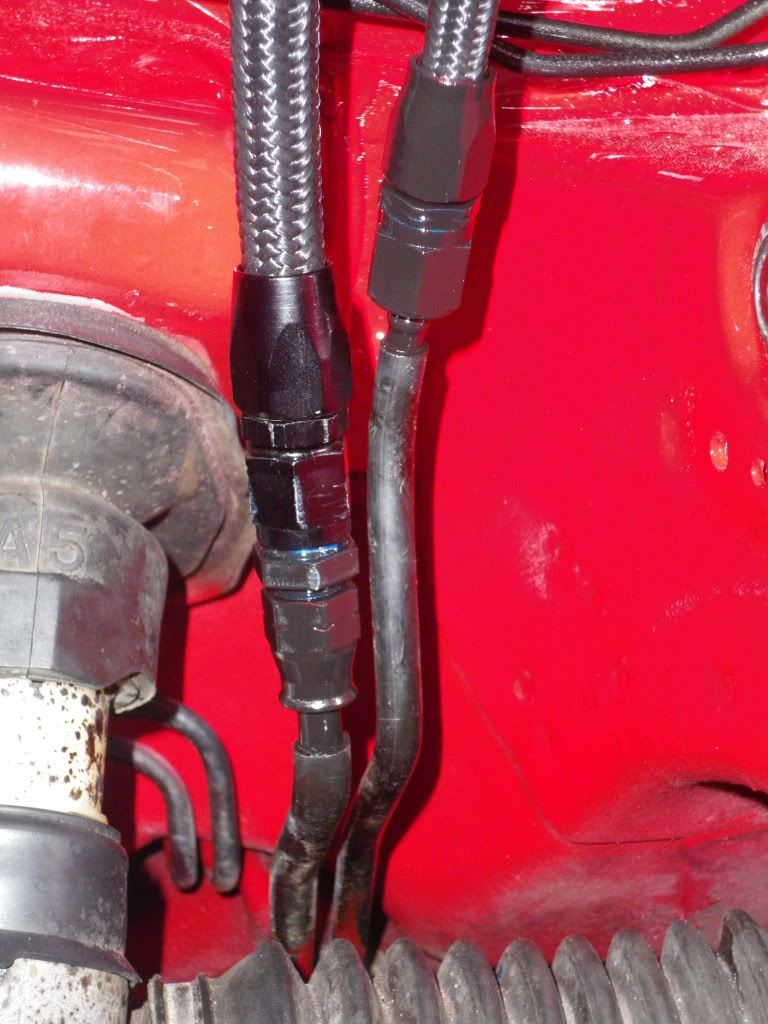
Also took care of some small things. My hard line adapter for the fuel system only came in blue/red. If you can't tell, I'm going with a red/black theme. Will you be able to see them where they are? Probably not. Would it bug the hell out of me? Definitely. Took care of that along with the rear brake hard lines.
Also bent my lines to bench bleed my master cylinder. How-to found here
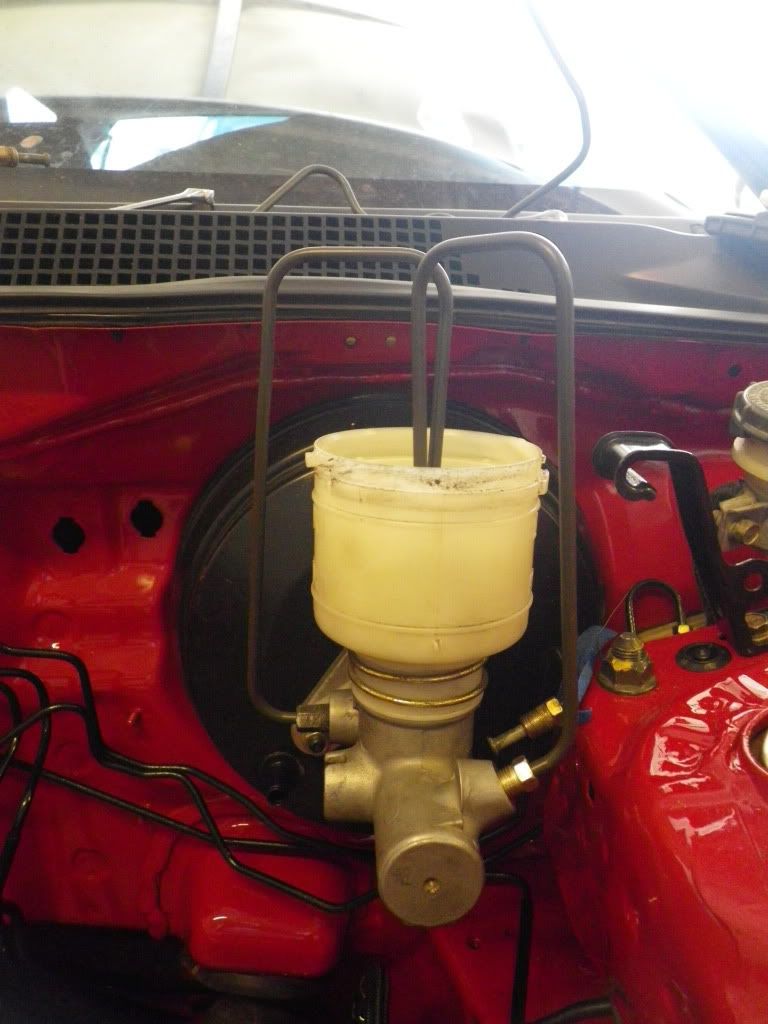
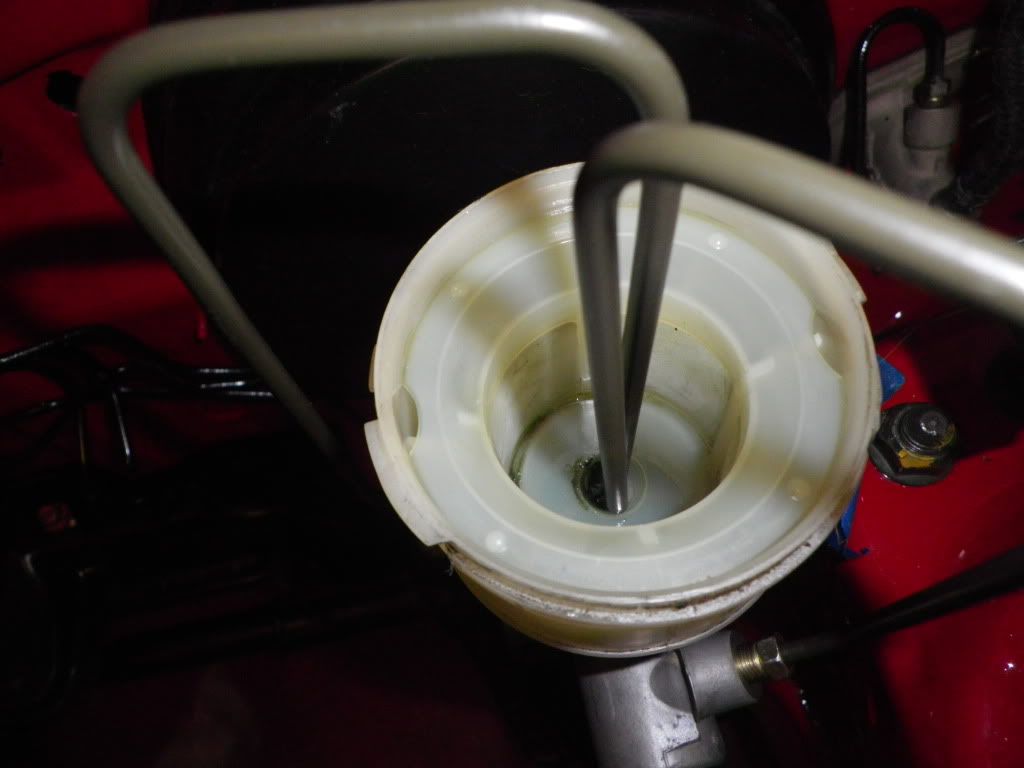
Btw, if you get a 1" master cylinder, try to get one from a 98+. 94-97 have a 12X1.0 fitting. This means you have to cut and flare this new fitting onto your hard line. I still have to do this before i can bleed the whole system.
Good news! You are now 99.9% caught up on the build. From now on all updates will be recent happenings. My goal is to have this thing on the road in the next two months (aka before college football season).
And the engine is back!
Here it is coming back from the machine shop
Also picked up a bunch of stuff from Honda the same day. Gaskets, timing belt, engine bay plugs, etc.
I had the shop gap the rings and put the pistons in since i don't have a good tool to file rings nor a ring compressor
This past week I got the block up on the engine stand and Justus and I checked clearances and got the crank in and rods bolted to it.
Ready to be worked
Reference materials
Bearings. Fyi, remember to put assembly lube or oil UNDER these. I forgot to and had to pull them all back out
If this is you're first engine build, like me, you forget which main cap goes where. Took me forever to look it up, but here it is
Weight number from being balanced
Here the crank is in with the #1 and #5 main caps snugged down to keep the crank from spinning while checking rod bearing clearances
Plastigage
Repeat for other two rods and then for the mains. Forgot pics of squished plastigage, but everything checked out good. Take everything back apart, clean up plastigage with credit card and apply assembly lube.
Here are the thrust bearings in.
Was pumped to get this thing together and forgot to take pics of the rest
Here it is all together
w00t! Still have to put the rear main seal and oil pump in, but the hard part is done.
I also tackled the transmission a week or so before that. I needed to install the LSD and put in the ITR/Kaaz gears. I took my sweet time over 2 days since this was my first transmission experience. This tutorial helped A LOT. I cleaned it up and put it in a nice, printable word document. If you would like it PM me with your e-mail address.
First I pulled the stock GSR gear racks and differential out. I rented a gear puller to get the speedo gear off and put it on the LSD. I then GENTLY got the diff bearings off with some careful two sided prying. Luckily these were the sealed bearings and not the conical ones. (picture taking fail once again)
Luckily the ITR/Kaaz gears came complete assembled on the countershaft and mainshaft and had the same final drive. I did tear down the mainshaft, however, to make sure it was assembled right. Basically I unstacked the stock GSR parts and the new parts right next to each other.
Carnage
Good thing I did this, because there was a shim on there that wasn't supposed to be. I cleaned up everything as I re-assembled the main shaft and then put the new goodies back in the GSR case.
Here it is the complete tranny and the spare case with stock GSR gear set inside of it
The tranny and engine will be getting cleaned up and more than likely painted once the engine is fully assembled. Anybody have any secret cleaners they found best to cut through the grime on them?
Also took care of some small things. My hard line adapter for the fuel system only came in blue/red. If you can't tell, I'm going with a red/black theme. Will you be able to see them where they are? Probably not. Would it bug the hell out of me? Definitely. Took care of that along with the rear brake hard lines.
Also bent my lines to bench bleed my master cylinder. How-to found here
Btw, if you get a 1" master cylinder, try to get one from a 98+. 94-97 have a 12X1.0 fitting. This means you have to cut and flare this new fitting onto your hard line. I still have to do this before i can bleed the whole system.
Good news! You are now 99.9% caught up on the build. From now on all updates will be recent happenings. My goal is to have this thing on the road in the next two months (aka before college football season).
07-19-2010, 03:49 PM
#41
Honda-Tech Member
Join Date: Mar 2009
Location: oaxaca, oax
Posts: 7,845
Likes: 0
Received 0 Likes
on
0 Posts
nice build !!! i was wondering if you could give me the part number for the A/C delte tray , thanks
07-20-2010, 05:04 AM
#45
Not to be confused with "THE MAN"
Coming along well, I saw the bottom end nice and wrapped up when i came to get my mail the other day. Lookin good.
07-21-2010, 05:49 AM
#47
Honda-Tech Member
Thread Starter
Time for updates!
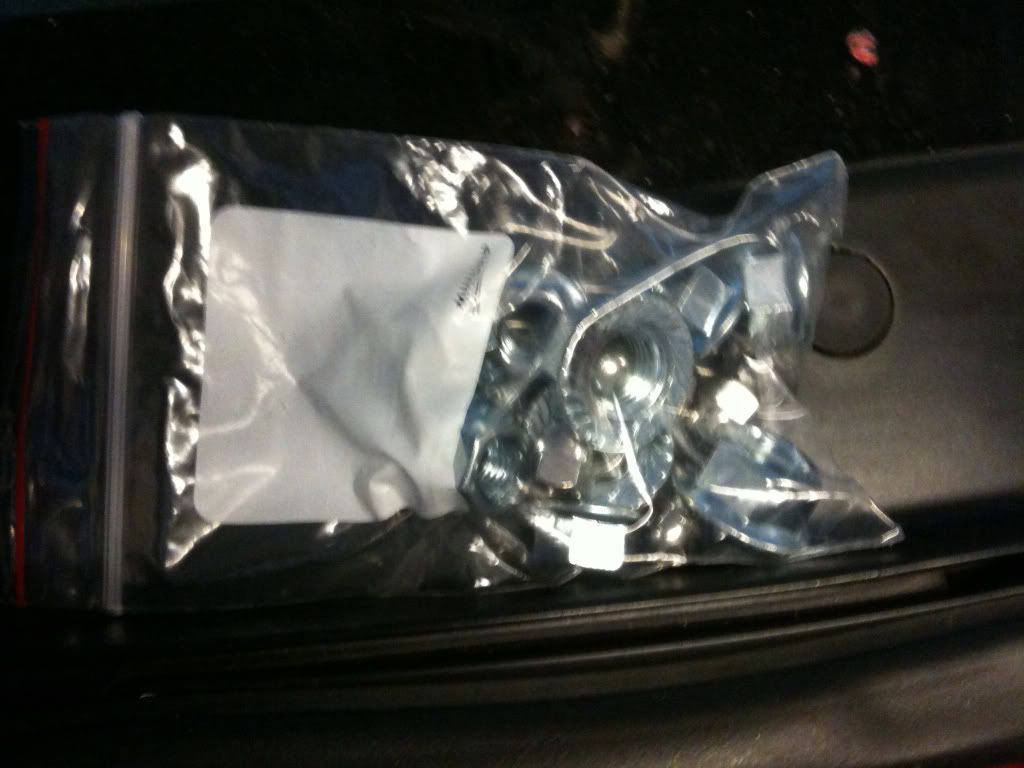
First, I picked up some nice, shiny.....nuts I am missing a upper control arm nut in the engine bay and had planned on making a trip to Ace Hardware to pick up miscellaneous bolts. Both for dress up and to replace missing ones since they have a nice selection of metric stainless hardware. But DownstarInc had a booth at Import Alliance and was having a 50% promotion. So I picked up my 4 UCA bolts, 8 of the smaller strut mount sized nuts and 8 stainless valve cover nuts for $13.....not a bad deal at all. I haven't put them on yet, but here is a crappy picture for your enjoyment
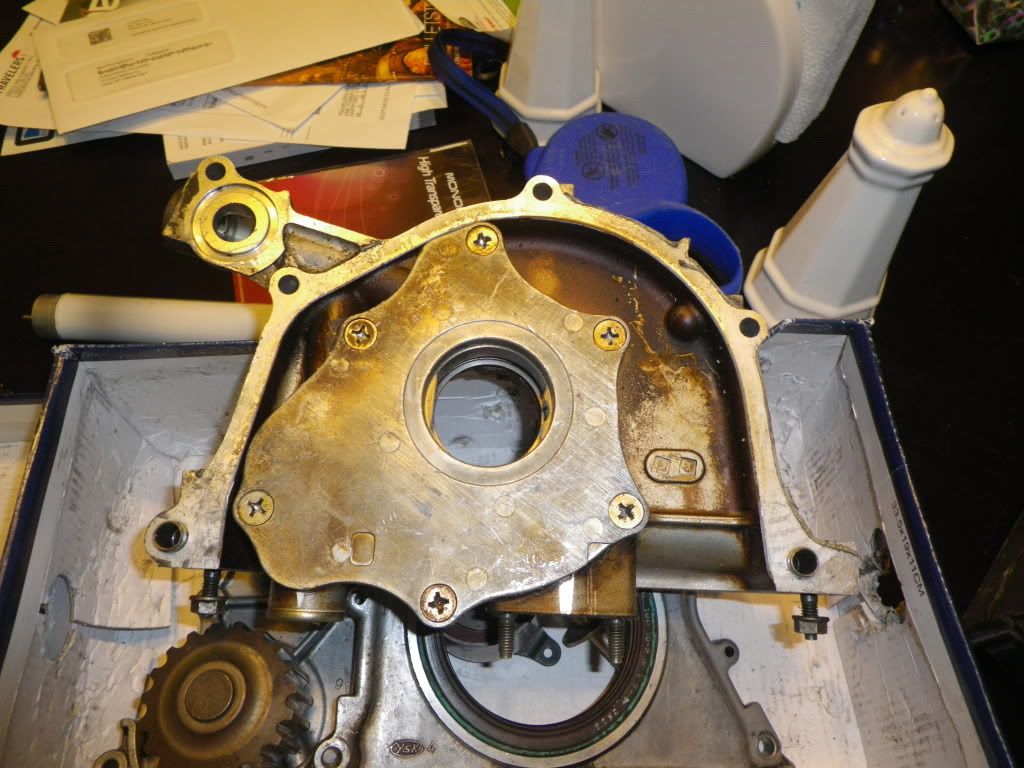
Last night I spent an hour working on the block. Here is the rear main seal getting put in its housing
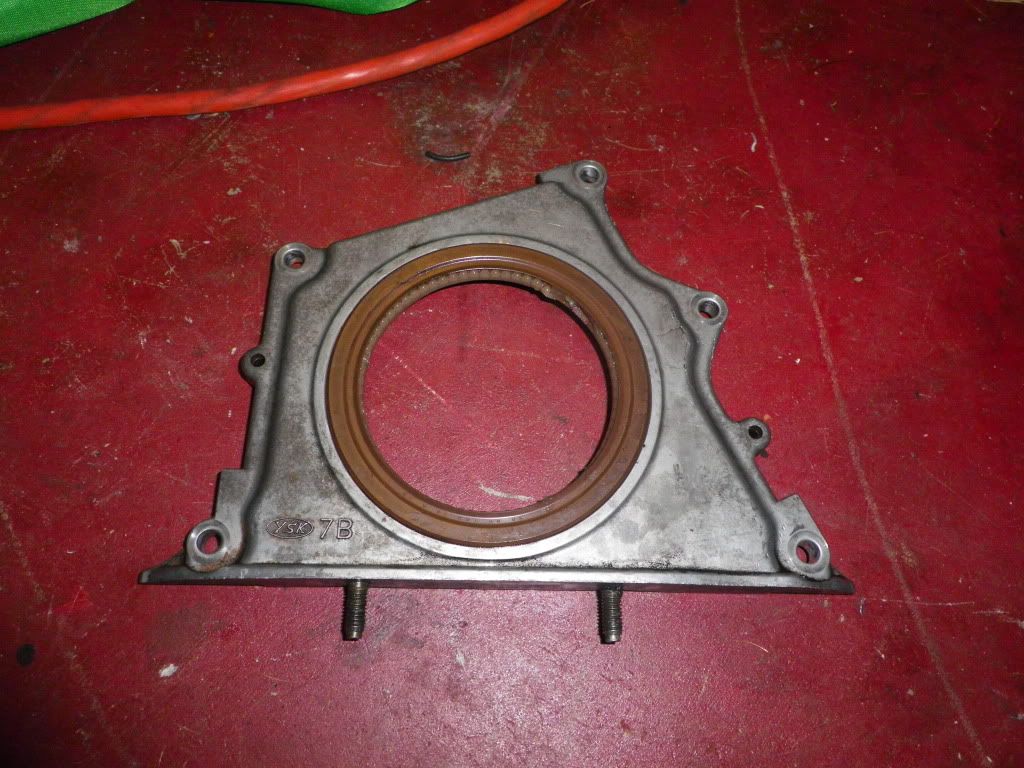
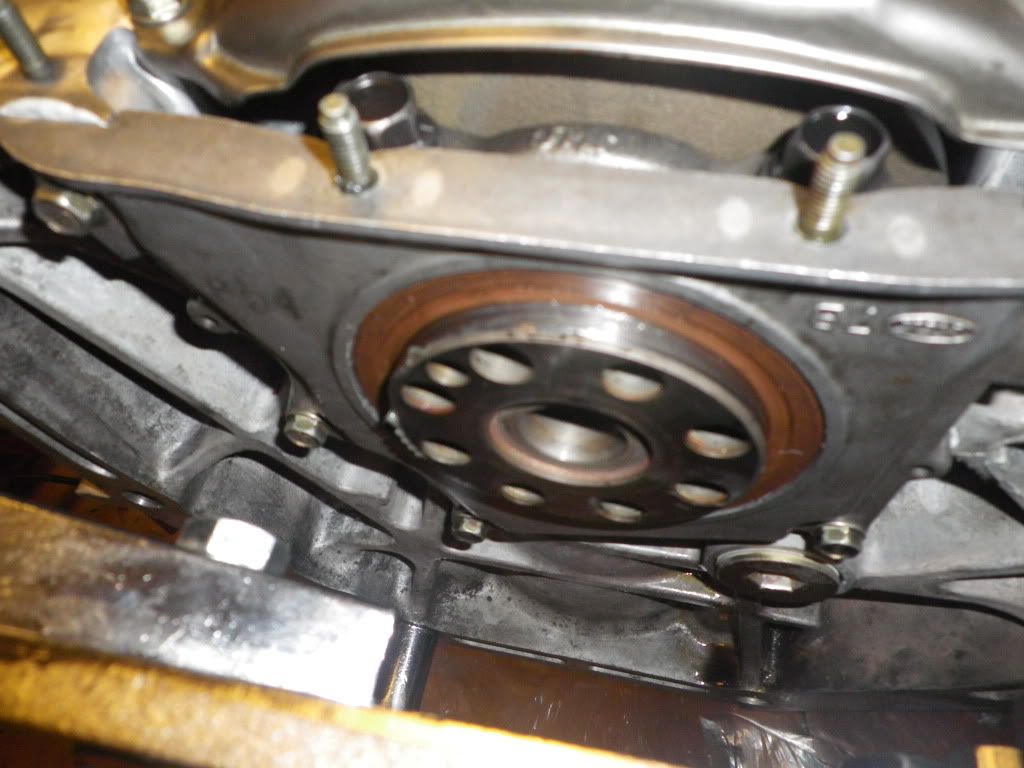
Since I don't have a driver seal like the manual says to use, I gently started it by hand then lightly tapped in a circle with a big punch, checking to make sure it was going in evenly, until it was where I wanted it. I recommend measuring how far in the old one id before you remove it, but since i forgot to do this I eyeballed it. Here it is installed
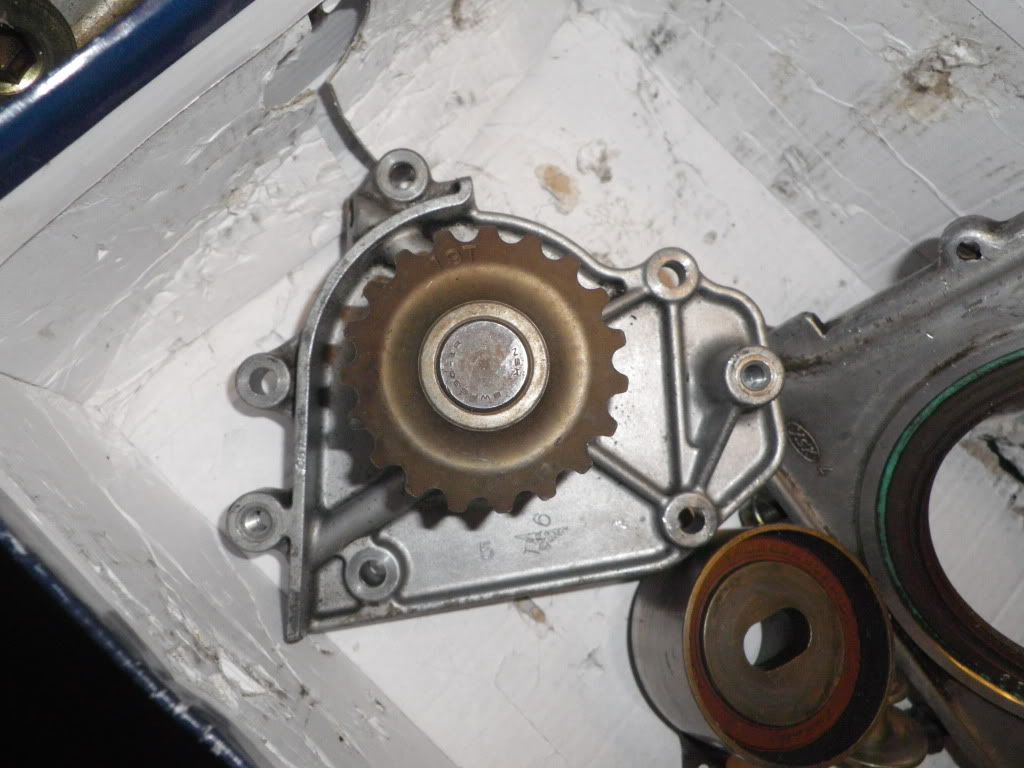
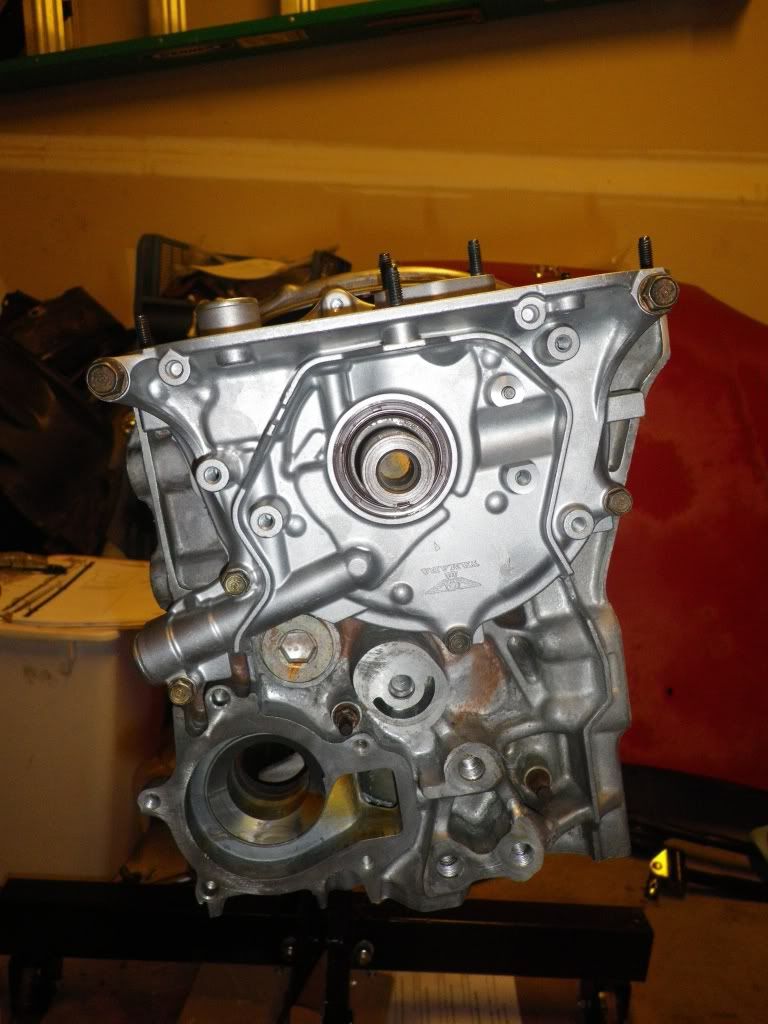
Then I moved on to the oil pump. Put the O-ring in, wiped oil on the crank seal, wiped down the seal surfaces and applied Honda Bond
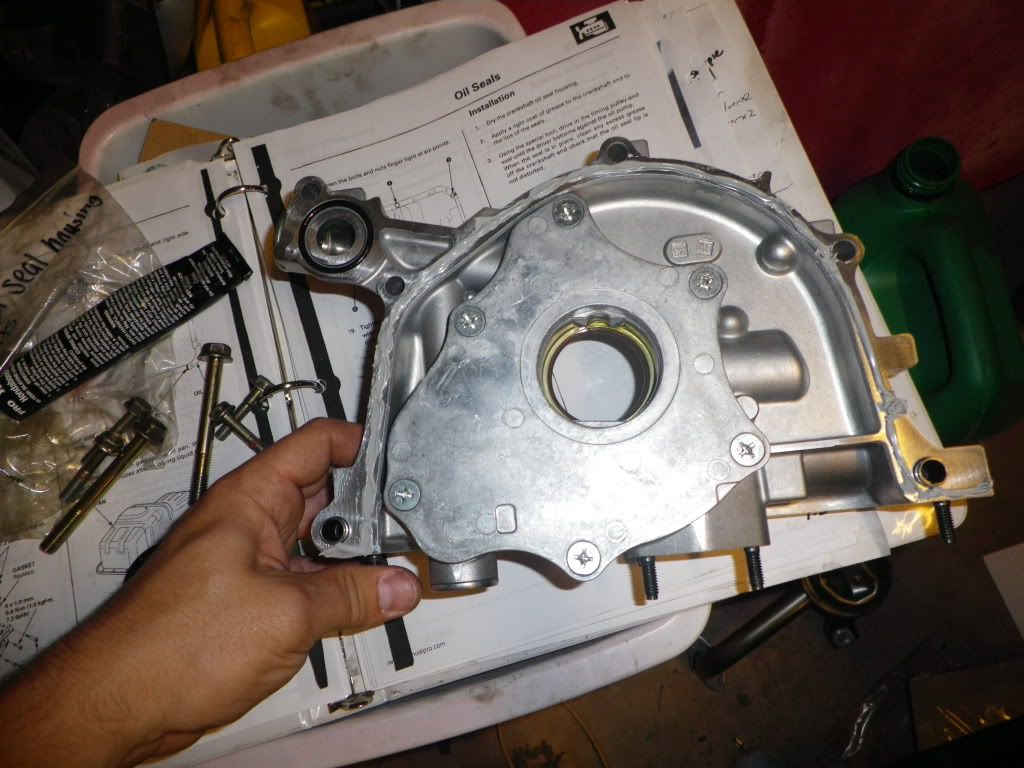
Then bolted it up
Put the pickup on
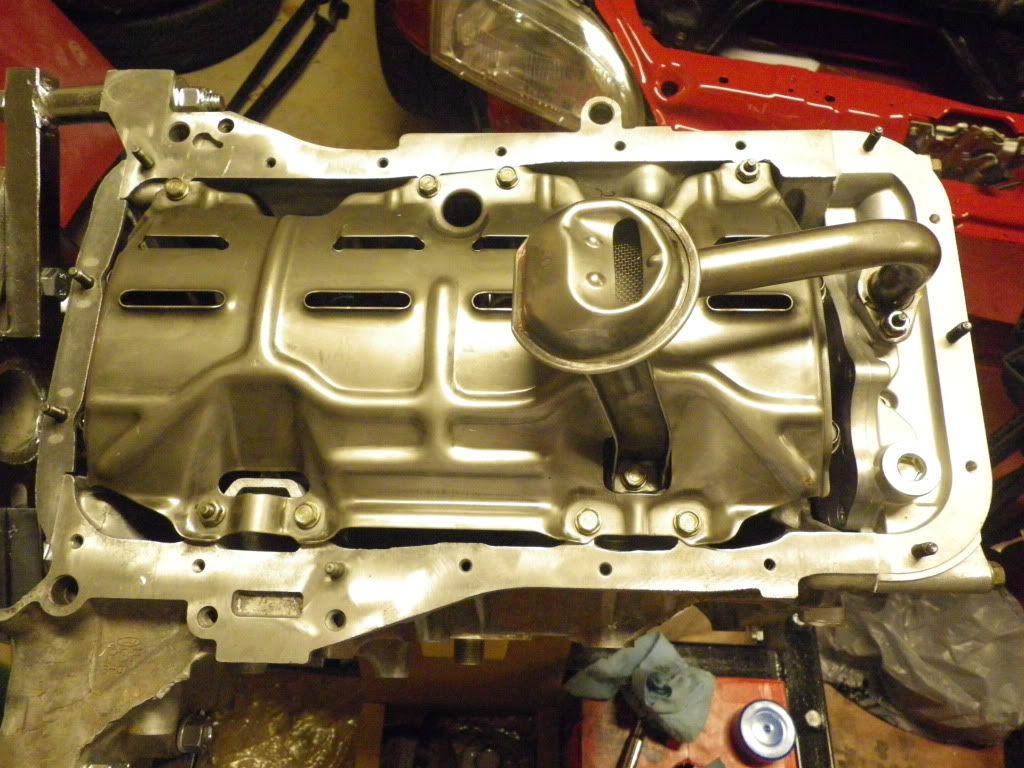
Hopefully tonight I will get the oil pan on, headstuds in and head tapped for the oil plug. Slow and steady wins the race!
First, I picked up some nice, shiny.....nuts
I am missing a upper control arm nut in the engine bay and had planned on making a trip to Ace Hardware to pick up miscellaneous bolts. Both for dress up and to replace missing ones since they have a nice selection of metric stainless hardware. But DownstarInc had a booth at Import Alliance and was having a 50% promotion. So I picked up my 4 UCA bolts, 8 of the smaller strut mount sized nuts and 8 stainless valve cover nuts for $13.....not a bad deal at all. I haven't put them on yet, but here is a crappy picture for your enjoymentLast night I spent an hour working on the block. Here is the rear main seal getting put in its housing
Since I don't have a driver seal like the manual says to use, I gently started it by hand then lightly tapped in a circle with a big punch, checking to make sure it was going in evenly, until it was where I wanted it. I recommend measuring how far in the old one id before you remove it, but since i forgot to do this I eyeballed it. Here it is installed
Then I moved on to the oil pump. Put the O-ring in, wiped oil on the crank seal, wiped down the seal surfaces and applied Honda Bond
Then bolted it up
Put the pickup on
Hopefully tonight I will get the oil pan on, headstuds in and head tapped for the oil plug. Slow and steady wins the race!

