
Emilio's 1999 Ek Hatch Build (LOTS of progress photos, always updating!)
 09-27-2012, 07:50 PM
#1
Honda-Tech Member
Thread Starter
Join Date: Aug 2009
Location: Kingston, Ontario, Canada
Posts: 122
Likes: 0
Received 0 Likes
on
0 Posts
Ok so I will start off by saying this thread has been compiled over the last four years from different forums and sources I have posted on. I'm not sure why I have never posted on here as I am constantly lurking around and sometimes posting my photography sets. Most of the information relating to events or anything else I might have been talking about at the time is obviously irrelevant now. There are some dates at the beginning to give you an idea of how long I have been working on this thing with good friend Victor Practicante and many many others.
I will try my best to keep this thread up to date with this seasons transformation as she will be going through a ton of changes for years to come!
A little about myself:
I am the owner and sole photographer behind TWOLITREmedia, and have been a car enthusiast since I was 15. Ever since then I have been haphazardly going through project cars (mainly DA integras previous to the hatch) trying to land on something I was super content with and I think I have arrived....
Please check out my work at www.TWOLITREmedia.com or at www.flickr.com/photos/twolitremedia.
Like my Facebook page at: www.facebook.com/twolitremedia
Thanks guys!
Table of Contents:
Page 1:
- Intro to B20bomber and how it all started.....
- First days of the EK as well as pictures of when my roomate had it.
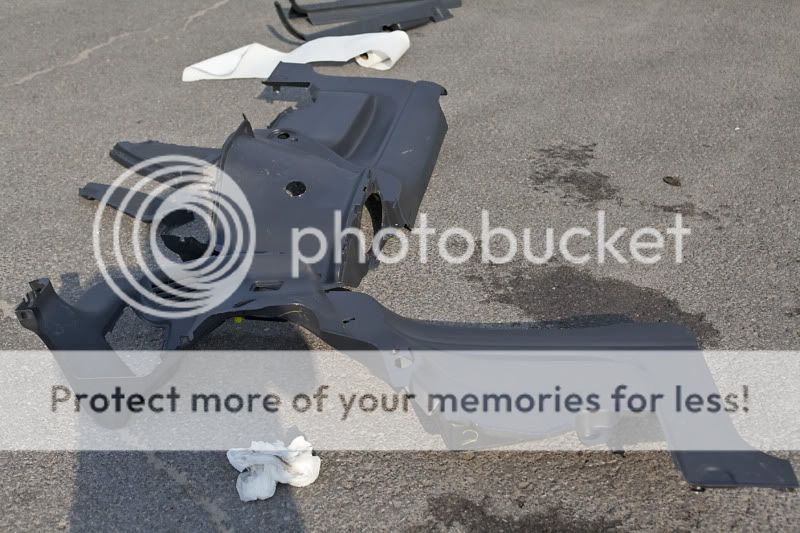
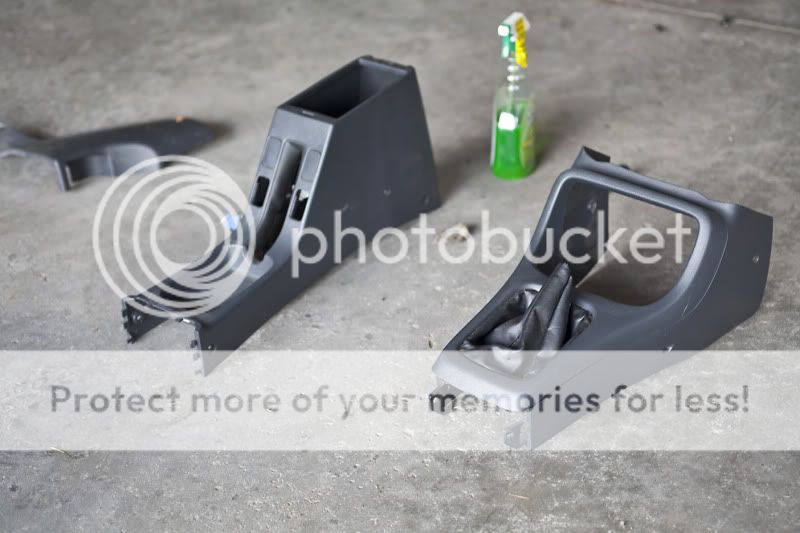
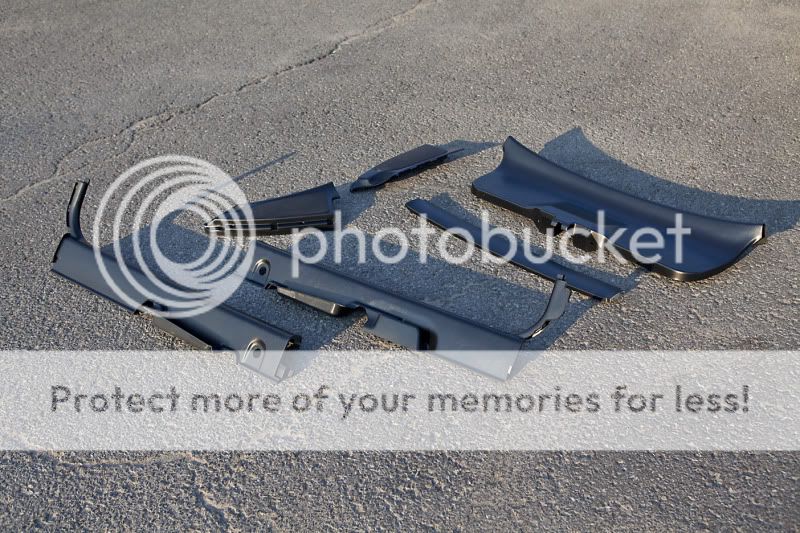
- Interior/Exterior teardown
- Interior Clean-up / prep-work
- Engine bay clean-up / prep-work
- Motor removal
- Before and afters
- SSR's refinished
- Small update, with some new pictures
- Future plans unveiled
- Photochop of future exterior plans provided by Zee (Similar to what it will look like, besides the colour of black and a few other minor things.)
- Full valve cover build up, shaving, and painting process.
- B16 teardown
- Some interior parts installed
- Exterior test fitment w/ refinished SSR's.
- Dash and heatercore removed completely.
- Under wiper cowel wire tuck completed
- Front end mocked up and mounted
- Front end GSR break conversion installed and completed
- Fuse box removed, wires all pulled through to cockpit.
- All wires soldered and heatwrapped
- Final harness in wire tuck complete
- Mock fitment of fuse box in glove box
- CTR Mats added.
- Engine bay clean up
- Engine bay fully prepped/painted
- Engine bay touch up painting (Brake lines, master cylinder...etc.etc)
- Fresh B20B has arrived!
- Re-assembling heatercore/dash in.
- Setting up glovebox for fusebox tuck
- Tranny has arrived
- Tranny clean-up/de-greasing
- Towing car to 2Low's shop to put in work!
- Completed GSR 4-disc brake conversion
- Re-welded damaged tranny-side motor mount
- Motor/Tranny painted + other parts
- Motor is in the car!
- Ready to move on too getting her started.
- Final Product as of Summer 2011
2012
- Pulled motor / re-stripped all paint
- Re-shaved the majority of the holes left in the bay, and re-sprayed.
- Re-loomed all engine harness
- New b16 w/ cams swapped in as well as b16tranny
- Stainless inline braided fuel system, full AN fittings.
- S2000 cluster installed
- Picked up a set of RPF1s in 15" +33 w/ fresh RE11s mounted. Custom powder coated purple/pink/metallic.
- Black Sable suede wrapped headliner and all interior pillers.
- Painted all interior panels black (Looks AWESOME! Krylon works great when used properly)
- BWR subframe Brace + Sknk2 LCAs + Sustech 20mm Swaybar + Energy D Brackets
- R888s mounted onto the old SSRs now dedicated track wheels
- Extended studs
- Lots more!
__________________________________________________ _______
Intro:
So in 2007 I had my DA stolen from me after putting everything I had into that car, doing it all myself so I would just like to start off by saying **** everyone and anyone who knows someone who ***** with other peoples cars and hasn't killed them yet. This has been my third DA and because of this I have decided to move away from this chassis, and into the world of Post 93' Hondas.... a realm I never thought I would venture to.
Now that I have that out of the way, here is my 1999 Honda Civic build that I have started earlier this season. I have already put quite a lot of man hours into it from what it started out as and have some pretty specific plans for where I hope to see it go in the next year or so. Anyways I will keep as frequent build updates as I can, keep in mind I live in Ottawa and the car is situated in my parents garage in Kingston so I have to do the commute weekly whenever I can. Hope you enjoy it, please feel free to leave your positive or negative feedback here! Any suggestions would be appreciated and considered aswell. Thanks! I apologize now.....I'm a picture *****, just tell yourself "at least their formatted nicely :lol: ".
This is my DA from about six years ago in its prime prior to the theft of course:

(On the way to visit all my old friends in Long Island, New York. August 2007)

(On the way to visit all my old friends in Long Island, New York. August 2007)

(Quick photo shoot with the crew in Ottawa/Gatineu region, and no I don't know how to spell Gatineu. September 2007)

R.I.P beloved DA, i'll come back to the platform eventually. September 2007
__________________________________________________ _____________
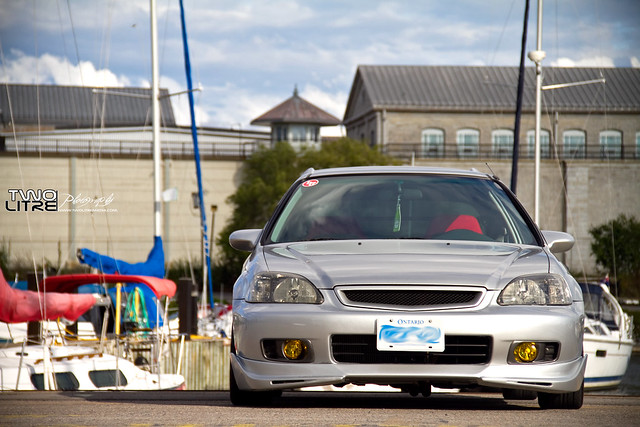
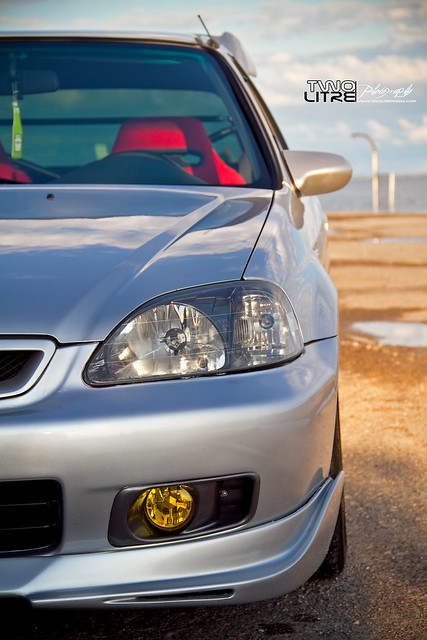
The 1999 Civic EK9 Wannabe Build, here we go:

(This is how the car looked in its prime when my roommate owned it. This was about middle of 2007 summer.)

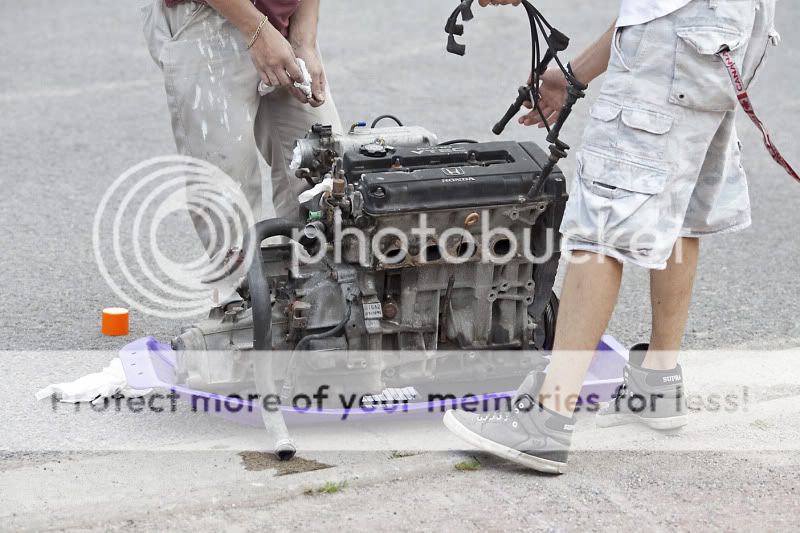
(First night in my garage after towing it in the middle of the winter from Napanee. Blown B16a1 chillen waiting to be pulled. Clean-up of engine bay was much needed at this point. May 9th, 2008)

(Lookin' rough.....eeesh, SSRs not lookin so ballin' as of yet. May 9th, 2008)


(Much love was needed in the interior side of things at the beggining. Im a clean freak, and this was not flying with me. May 9th, 2008)

(The good ol' 4 spoke three peice SSRs, one of the originators in JDM wheels. Im sure almost half this forum of the people who live in Ottawa have owned THIS EXACT set of wheels and possibly got them stolen with your car haha, they were quite the little ****** so I hear. Refurbishing in the works. May 9th, 2008)

(Couple of friends helping with puttin' in some work to the project. neilscivic on the left, 2Low on the right. Heart, out. May 9th, 2008)

(At the end of the first night, it was clear there was work to be done...... May 9th, 2008)
__________________________________________________ ___________

(Beginning of day 2. May 10th, 2008)

(Slight improvement on day 1's disaster, still not up to par. May 10th, 2008)

(Fenders removed for the wire tuck to begin. May 10th, 2008)

(Does my *** look phat in this lip? May 10th, 2008)

(Some of the parts removed over the weekend visit to the parent's place. Productive start to my build I would say. May 10th, 2008)
__________________________________________________ ___________

(Beginning of day 3. July 12th, 2008)

(Replaced the shisty wal-mart tach with a AutoMeter I had kicking around, atleast until SiR or CTR cluster is aquired which is ASAP. July 12th, 2008)

(A little bit of wingless action for ya, looks so bubbly. July 12th, 2008)

(Pre de-greasing. July 12th, 2008)

(Post de-greasing. July 12th, 2008)

(Call me cheap, but when you see the finish product after the carpet spray, I may sway your decision. Paint wears our halfway through the season? Redo it, brand new ;-). July 12th, 2008)


(Chipping out the useless tar and insulation, beggining the real clean up. July 12th, 2008)

(Wire tuck started. July 12th, 2008)

(Wire tuck started. July 12th, 2008)

(The end to a productive day 3. July 12th, 2008)
______________________________________________

(Early start to day 4, engine clean-up/sanding/repaint. July 20th, 2008)

(The essential tools for the day. July 20th, 2008)

(All the vital parts tapped up, and/or moved out of the way....ready for some aerosol. July 20th, 2008)

(First coat of high gloss black. Not too shabby. July 20th, 2008)

(4 coats of high gloss black, and 10 of clear, shes done! I would say quite the DIY imrpovement for now. July 20th, 2008)

(Front shot of repainted rad-support / ream bar. July 20th, 2008)

(OoOoOooo shiny. July 20th, 2008)

(End of day 4, more and more stuff missing. July 20th, 2008)
__________________________________________________ ____________

(First thing day 5, finishing the mining work in the back. All big chunks are gone. July 28th, 2008)

(Gasoline starting to be applied to the sides. July 28th, 2008)

(A litre or two later in gasoline, the somewhat finished product prior to spray. Juy 28th, 2008)

Interior first coat fully spray, my JDM ITR wheel chillin'. July 28th, 2008)

(CTR wing back from paint booth for colour matching, no more two tone. July 28th, 2008)

(Test fitment for the colour matching of the skirts and rear CTR lip. Almost perfect, may need a little bit of a remix we'll see. July 28th, 2008)
(Hatch put back on for an overall view of the progress. Angled profile view. July 28th, 2008)

(Profile view of the test fitment. All I can think when I see this....ok needs more dumpage. Anyone else share the same view? July 28th, 2008)

(I don't claim to be a CTR, or a baller, I just look close to one. Resprayed housing for JDM clean-ness, test fitted on. July 28th, 2008)

(Suspension / brake removal beginning for the new GSR 4-disc brake conversion to be slotted in, along with some fully adjustable coils. July 28th, 2008)

(End of day 5, finally getting to actually see some changes. At this point the SSRs have been sent away for refinishing and the mouldings, rear license plate holder, and mirrors have been sent for colour matching. July 28th, 2008)
__________________________________________________ ________________
 [/URL]
(First thing day 6, start pulling suspension and brakes. August 3rd, 2008)
 [/URL]
(Neuspeed 1.7" drop all around. If you are willing to come pick up anywhere in the Ottawa area and are interested please PM me, I will definitely be giving these away for a more than reasonable price because like I said I have opted for fully adjustable coil-overs. These retail at 279.99, im looking for around 130$ obo. Only used for 50% of last season! August 3rd, 2008)

Beginning primer stage for hatch area. August 3rd, 2008)

(Full rear sprayed in that primer goodness. August 3rd, 2008)

(Better add another coat just to make sure shes mint and I don't have to do it again till next season. What a difference in my opinion with only 16$ and two cans. August 3rd, 2008)

(First coat of gloss black drying in the back. Getting there.... August 3rd, 2008)


(Got bored while waiting for stuff to dry, figured I would add a little...... whats the word......firetruck? to the fuel pump cover until the CF one........so shiny :eek: August 3rd, 2008)
So with that being the last day I have worked on my car, I leave you with some before and afters below. Hope you have all enjoyed the build up to this point, and like I said I apologize for the massive amount of pictures but I am thorough as hell with everything else, why not be the same when it comes to something that means this much to me. Anyways like I said thank you for stopping by and look for tons more happening within the next month or so, next step is the engine build. As of right now I am torn between my boost envy for a sleeved b20 block with about 20 psi running through it, or a fully built cr-vtec which is think is the option i'm leaning towards due to the fact that I want this car to see some seriouse track time and reliability and power band issues come into play with a heavily boosted set-up. Thanks goes out to anyone who has helped me up to this point with ANY of my builds, including all my friends around Ottawa who helped me through last October when my car got stolen, I don't need to read off names you all know who you are and it was greatly appreciated during probably the hardest time in my life to this point, thanks again!
Let the comments begin! :D
Before and Afters -
Interior:
__________________________________________________ __________________________________
The Bay:
__________________________________________________ __________________________________
The exterior:

__________________________________________________ __________________________________
The Wheels:


I will try my best to keep this thread up to date with this seasons transformation as she will be going through a ton of changes for years to come!
A little about myself:
I am the owner and sole photographer behind TWOLITREmedia, and have been a car enthusiast since I was 15. Ever since then I have been haphazardly going through project cars (mainly DA integras previous to the hatch) trying to land on something I was super content with and I think I have arrived....
Please check out my work at www.TWOLITREmedia.com or at www.flickr.com/photos/twolitremedia.
Like my Facebook page at: www.facebook.com/twolitremedia
Thanks guys!
Table of Contents:
Page 1:
- Intro to B20bomber and how it all started.....
- First days of the EK as well as pictures of when my roomate had it.
- Interior/Exterior teardown
- Interior Clean-up / prep-work
- Engine bay clean-up / prep-work
- Motor removal
- Before and afters
- SSR's refinished
- Small update, with some new pictures
- Future plans unveiled
- Photochop of future exterior plans provided by Zee (Similar to what it will look like, besides the colour of black and a few other minor things.)
- Full valve cover build up, shaving, and painting process.
- B16 teardown
- Some interior parts installed
- Exterior test fitment w/ refinished SSR's.
- Dash and heatercore removed completely.
- Under wiper cowel wire tuck completed
- Front end mocked up and mounted
- Front end GSR break conversion installed and completed
- Fuse box removed, wires all pulled through to cockpit.
- All wires soldered and heatwrapped
- Final harness in wire tuck complete
- Mock fitment of fuse box in glove box
- CTR Mats added.
- Engine bay clean up
- Engine bay fully prepped/painted
- Engine bay touch up painting (Brake lines, master cylinder...etc.etc)
- Fresh B20B has arrived!
- Re-assembling heatercore/dash in.
- Setting up glovebox for fusebox tuck
- Tranny has arrived
- Tranny clean-up/de-greasing
- Towing car to 2Low's shop to put in work!
- Completed GSR 4-disc brake conversion
- Re-welded damaged tranny-side motor mount
- Motor/Tranny painted + other parts
- Motor is in the car!
- Ready to move on too getting her started.
- Final Product as of Summer 2011
2012
- Pulled motor / re-stripped all paint
- Re-shaved the majority of the holes left in the bay, and re-sprayed.
- Re-loomed all engine harness
- New b16 w/ cams swapped in as well as b16tranny
- Stainless inline braided fuel system, full AN fittings.
- S2000 cluster installed
- Picked up a set of RPF1s in 15" +33 w/ fresh RE11s mounted. Custom powder coated purple/pink/metallic.
- Black Sable suede wrapped headliner and all interior pillers.
- Painted all interior panels black (Looks AWESOME! Krylon works great when used properly)
- BWR subframe Brace + Sknk2 LCAs + Sustech 20mm Swaybar + Energy D Brackets
- R888s mounted onto the old SSRs now dedicated track wheels
- Extended studs
- Lots more!
__________________________________________________ _______
Intro:
So in 2007 I had my DA stolen from me after putting everything I had into that car, doing it all myself so I would just like to start off by saying **** everyone and anyone who knows someone who ***** with other peoples cars and hasn't killed them yet. This has been my third DA and because of this I have decided to move away from this chassis, and into the world of Post 93' Hondas.... a realm I never thought I would venture to.
Now that I have that out of the way, here is my 1999 Honda Civic build that I have started earlier this season. I have already put quite a lot of man hours into it from what it started out as and have some pretty specific plans for where I hope to see it go in the next year or so. Anyways I will keep as frequent build updates as I can, keep in mind I live in Ottawa and the car is situated in my parents garage in Kingston so I have to do the commute weekly whenever I can. Hope you enjoy it, please feel free to leave your positive or negative feedback here! Any suggestions would be appreciated and considered aswell. Thanks! I apologize now.....I'm a picture *****, just tell yourself "at least their formatted nicely :lol: ".
This is my DA from about six years ago in its prime prior to the theft of course:
(On the way to visit all my old friends in Long Island, New York. August 2007)
(On the way to visit all my old friends in Long Island, New York. August 2007)
(Quick photo shoot with the crew in Ottawa/Gatineu region, and no I don't know how to spell Gatineu. September 2007)
R.I.P beloved DA, i'll come back to the platform eventually. September 2007
__________________________________________________ _____________
The 1999 Civic EK9 Wannabe Build, here we go:
(This is how the car looked in its prime when my roommate owned it. This was about middle of 2007 summer.)
(First night in my garage after towing it in the middle of the winter from Napanee. Blown B16a1 chillen waiting to be pulled. Clean-up of engine bay was much needed at this point. May 9th, 2008)
(Lookin' rough.....eeesh, SSRs not lookin so ballin' as of yet. May 9th, 2008)
(Much love was needed in the interior side of things at the beggining. Im a clean freak, and this was not flying with me. May 9th, 2008)
(The good ol' 4 spoke three peice SSRs, one of the originators in JDM wheels. Im sure almost half this forum of the people who live in Ottawa have owned THIS EXACT set of wheels and possibly got them stolen with your car haha, they were quite the little ****** so I hear. Refurbishing in the works. May 9th, 2008)
(Couple of friends helping with puttin' in some work to the project. neilscivic on the left, 2Low on the right. Heart, out. May 9th, 2008)
(At the end of the first night, it was clear there was work to be done...... May 9th, 2008)
__________________________________________________ ___________
(Beginning of day 2. May 10th, 2008)
(Slight improvement on day 1's disaster, still not up to par. May 10th, 2008)
(Fenders removed for the wire tuck to begin. May 10th, 2008)
(Does my *** look phat in this lip? May 10th, 2008)
(Some of the parts removed over the weekend visit to the parent's place. Productive start to my build I would say. May 10th, 2008)
__________________________________________________ ___________
(Beginning of day 3. July 12th, 2008)
(Replaced the shisty wal-mart tach with a AutoMeter I had kicking around, atleast until SiR or CTR cluster is aquired which is ASAP. July 12th, 2008)
(A little bit of wingless action for ya, looks so bubbly. July 12th, 2008)
(Pre de-greasing. July 12th, 2008)
(Post de-greasing. July 12th, 2008)
(Call me cheap, but when you see the finish product after the carpet spray, I may sway your decision. Paint wears our halfway through the season? Redo it, brand new ;-). July 12th, 2008)
(Chipping out the useless tar and insulation, beggining the real clean up. July 12th, 2008)
(Wire tuck started. July 12th, 2008)
(Wire tuck started. July 12th, 2008)
(The end to a productive day 3. July 12th, 2008)
______________________________________________
(Early start to day 4, engine clean-up/sanding/repaint. July 20th, 2008)
(The essential tools for the day. July 20th, 2008)
(All the vital parts tapped up, and/or moved out of the way....ready for some aerosol. July 20th, 2008)
(First coat of high gloss black. Not too shabby. July 20th, 2008)
(4 coats of high gloss black, and 10 of clear, shes done! I would say quite the DIY imrpovement for now. July 20th, 2008)
(Front shot of repainted rad-support / ream bar. July 20th, 2008)
(OoOoOooo shiny. July 20th, 2008)
(End of day 4, more and more stuff missing. July 20th, 2008)
__________________________________________________ ____________
(First thing day 5, finishing the mining work in the back. All big chunks are gone. July 28th, 2008)
(Gasoline starting to be applied to the sides. July 28th, 2008)
(A litre or two later in gasoline, the somewhat finished product prior to spray. Juy 28th, 2008)
Interior first coat fully spray, my JDM ITR wheel chillin'. July 28th, 2008)
(CTR wing back from paint booth for colour matching, no more two tone. July 28th, 2008)
(Test fitment for the colour matching of the skirts and rear CTR lip. Almost perfect, may need a little bit of a remix we'll see. July 28th, 2008)
(Hatch put back on for an overall view of the progress. Angled profile view. July 28th, 2008)
(Profile view of the test fitment. All I can think when I see this....ok needs more dumpage. Anyone else share the same view? July 28th, 2008)
(I don't claim to be a CTR, or a baller, I just look close to one. Resprayed housing for JDM clean-ness, test fitted on. July 28th, 2008)
(Suspension / brake removal beginning for the new GSR 4-disc brake conversion to be slotted in, along with some fully adjustable coils. July 28th, 2008)
(End of day 5, finally getting to actually see some changes. At this point the SSRs have been sent away for refinishing and the mouldings, rear license plate holder, and mirrors have been sent for colour matching. July 28th, 2008)
__________________________________________________ ________________
[/URL](First thing day 6, start pulling suspension and brakes. August 3rd, 2008)
[/URL](Neuspeed 1.7" drop all around. If you are willing to come pick up anywhere in the Ottawa area and are interested please PM me, I will definitely be giving these away for a more than reasonable price because like I said I have opted for fully adjustable coil-overs. These retail at 279.99, im looking for around 130$ obo. Only used for 50% of last season! August 3rd, 2008)
Beginning primer stage for hatch area. August 3rd, 2008)
(Full rear sprayed in that primer goodness. August 3rd, 2008)
(Better add another coat just to make sure shes mint and I don't have to do it again till next season. What a difference in my opinion with only 16$ and two cans. August 3rd, 2008)
(First coat of gloss black drying in the back. Getting there.... August 3rd, 2008)
(Got bored while waiting for stuff to dry, figured I would add a little...... whats the word......firetruck? to the fuel pump cover until the CF one........so shiny :eek: August 3rd, 2008)
So with that being the last day I have worked on my car, I leave you with some before and afters below. Hope you have all enjoyed the build up to this point, and like I said I apologize for the massive amount of pictures but I am thorough as hell with everything else, why not be the same when it comes to something that means this much to me. Anyways like I said thank you for stopping by and look for tons more happening within the next month or so, next step is the engine build. As of right now I am torn between my boost envy for a sleeved b20 block with about 20 psi running through it, or a fully built cr-vtec which is think is the option i'm leaning towards due to the fact that I want this car to see some seriouse track time and reliability and power band issues come into play with a heavily boosted set-up. Thanks goes out to anyone who has helped me up to this point with ANY of my builds, including all my friends around Ottawa who helped me through last October when my car got stolen, I don't need to read off names you all know who you are and it was greatly appreciated during probably the hardest time in my life to this point, thanks again!
Let the comments begin! :D
Before and Afters -
Interior:
__________________________________________________ __________________________________
The Bay:
__________________________________________________ __________________________________
The exterior:
__________________________________________________ __________________________________
The Wheels:
Last edited by TWOLITREmedia; 09-27-2012 at 08:09 PM.
 09-27-2012, 07:51 PM
#2
Honda-Tech Member
Thread Starter
Join Date: Aug 2009
Location: Kingston, Ontario, Canada
Posts: 122
Likes: 0
Received 0 Likes
on
0 Posts
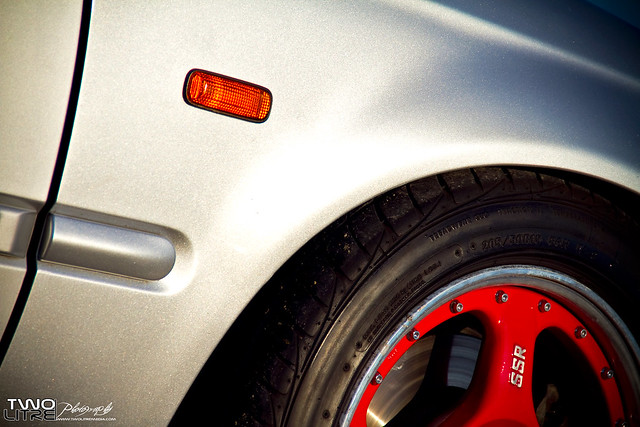
So here they are, the pictures of the freshly refinished SSRs looking how they should :D
How they started:
How they look now:


Big thanks goes to 2Low and Spike over at StreetlineConcepts for the tight work. Thanks guys! And Veeesstor, you know you love this car as much as i do so must i tell you what to place in or around your mouth? lol. Anyways hope you like them, more build pics to come soon!
...
Ok so here are some updated pics of the project as it sits right now before the major surgery begins. The motor is the B16 I will be fully building the head from, yes I know it looks rough right now but it will be fresh after my plans are done with it. The lips and skirts are all just test fitted right now hence the slight sag on the CTR rear, and I'm borrowing my sisters summer rims from her civic until summer when the SSR's go back on.


Thanks for looking guys, check back soon for the updates!
...
Ok so I know this is nothing major for an update as of now, but I'm just about done my VC job. By no means is this the final product but pretty damn close to it.
Heres the whole process from the beginning:


Commencing the shave:

Shaved cleaner than a Brazilian wax:


In between waiting for paint to dry I decided to take my garage from this:

To This:

Look what I found while cleaning., a Curtis surround sound reciever and a LiteOn DVD R + RW player/writer! Now I can rip off Rogers cable movies again :O

Where I stand now, shaved, prepped, and ready for paint!

Heres the VC going what was supposed to originally be faux "chrome":


Then I decided I didn't like where I was going with that idea so I sanded the chrome down with 1500 grit and it reacted strangely. There must have been some wierd compound in the paint that doesnt do well for sanding but in the end it worked out kind of neat. I sprayed red chrome paint over the chrome in THICK layers in a dark garage and didnt notice the major runs down the side until after, but I loved the red and the top was mint (Still no clear coat):


So then I looked at the red and was like im not going to leave it like this with the drips. Went out and bought some high gloss black and sanded once again the red down with 1500 grit. I liked the whole marble effect that the red had over the chrome creating almost black marble in the red so I wanted to keep some of the red fading in, this is how it turned out:
(No clear coat at first)

(With about six coats of clear coat.)


So there it is, the product of about 6 hours worth of labor with the shave and like eight aerosol cans later its somewhat complete. Will be adding the "bling" to the VC before entering it into this months contest. Let me know what you think.
PS Dont mind the shittyness around the oil cap that will be cleaned up. I had to use sticky tack to mask of some of that and there is still residue.
...
Here we go guys, update time!
Here is where we last left off.....

______________________________________________
Stock Brakes

Prepped Front End


Removing suspension

Letting breaks bleed

Look ma, no breaks! (I am now just waiting on new upper control arms to put on the GSR arms because my upper balljoint is shot and I would prefer to not re-use it. As soon as I recieve those I will be doing the rear discs in the same day and putting her back down on some fullbody adjustable coilovers)

The GSR difference


Passenger side gonzo

C-Pillar Bar and Interior Panels Installed


Painted Stock Oil-Cap (Until I get the anodized one I want....basically I was bored :lol

Final Product of the valve cover before the CF spark plug cover and Anodized cap.

B16 Head Teardown


Just for fun, neilscivic test fitted his newly aquired Memory Fabs from RDub into the EK


______________________________________________
B16A Teardown & Exterior Test Fitment (SSR's are back!)
Block /w Cluth removed

Up onto the engine stand she goes

Clutch condition

There was still coolant in the cylinders that need to come out.


Oil Pan Removed


Exposed crankshaft

Pistons and hardware removed, numbered, and place on the work bench for later

Here is my B16 head as well as my GSR head that I picked up not too long ago taken apart /w hardware organized beside them. :eek: :eek: :eek: :eek: What a cluster **** lol.....and before anyone asks, NO I did not paint the GSR head red, it was the previous owner :O

Basically with everything said and done there were two things wrong with the B16 bottom end after the dissecting process.
1. Rod bearing was absolutely non existent in Piston/Rod #3. We found shards of metal all over the place in the oil, more than likely making up what used to be #3 rod bearing. So not so bad, quick replacement.....righttttt
2. Now of course since the bearing was gone, for as long as my roomate tried to dog the car along after the problem occurred and the bearing spun, the rod was rotating on nothing but metal to metal contact with the crankshaft (Even though the rod bearings are still metal sleeves) This created so much heat and friction that all of the "chrome" coating off of the crankshaft section that would normally have the sleeve bearing around it. Apparently I will need to get the crankshaft over to a machine shop to re-"chrome" those sections before replacing any rod bearings.
All in all I will more than likely go with the decision to just scrap the block and sell off any parts that anyone needs because the pistons are still good, as well as a couple of other things. I will be buying a fresh B20 block, then building the B16 head that came off the spun block, and installing the S2S2s.
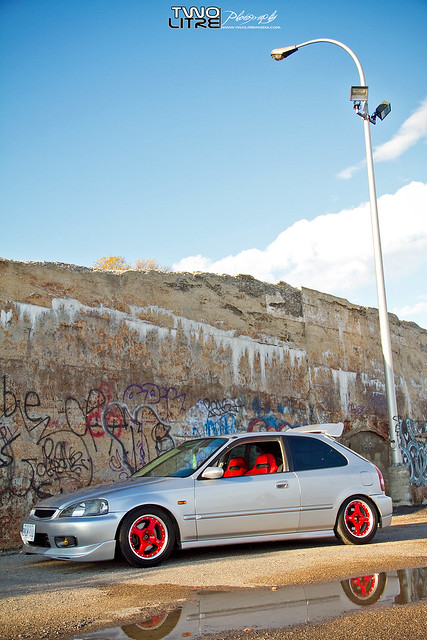
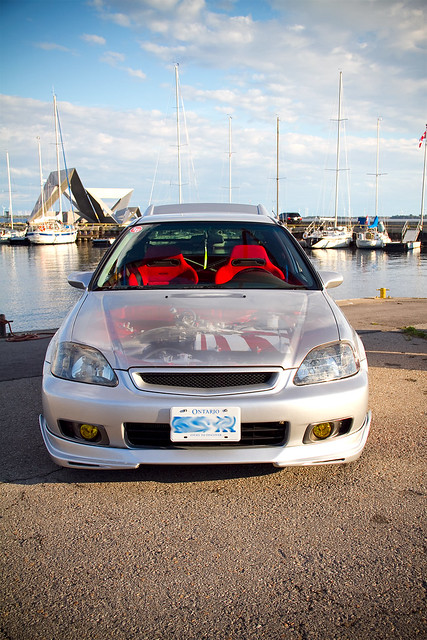
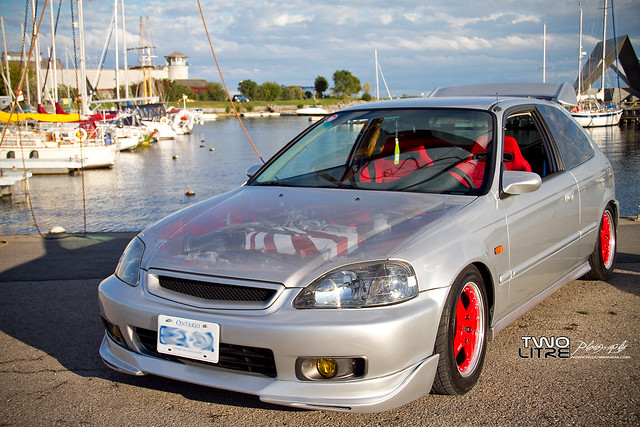
Current Exterior:


...
Alright so I know I have been slacking off a little bit but it has been a busy *** month that's for sure. Here is about 2 or 3 days of work on the wire tuck and brakes as well as a peek at a couple of other goodies. Coming soon is full hard line brake tuck as well as full shave and completing the battery & fuse box tuck. Drive train is planned out for hopefully the end of next week, at latest early the week after.
Enjoy.
Brakes placed in

Some of the wiring mess at the beginning

Outside of the fender mocked for soldering

Everything in the tuck getting properly soldered and heat wrapped.

Random pic I took when I was getting bored, lol.

Thats a good start to the nest reduction

Everything getting loomed as well

Nice and toiiiiiit

Tucking the second part of the harness under the cowel


Re-used the stock rubber but flipped it for function on the inside

A buddy of mine gave me this for my birthday to see if I could make it work for myself, may need some major adjustment, but if it doesn't work it will be for sale!

The garage mess afterwards

....and POOF, gone.....oh yeh and look, front wheels on!

Random pic of the SSR's with the GSR's behind them.

Picked up a VAFC for once the swap is done and ready for a full tune.

My ITR wheel needs some love :O

End of the night, good progress made. Oh yeh theres the new bumper I picked up from Eric when I was in TO last. with the "JUN" lip mounted and the mess that is a GSR and B16 head behined it, with the block just floating.

PART 2:
Fuse box tuck commences, the box is removed.

We needed to undo the wiring that was done on the passenger side to be able to pass the harness back through the firewall due to the fact that the fuse box tuck was a last minute change!

Dash still looking somewhat together.

Scary

How they started:
How they look now:
Big thanks goes to 2Low and Spike over at StreetlineConcepts for the tight work. Thanks guys! And Veeesstor, you know you love this car as much as i do so must i tell you what to place in or around your mouth? lol. Anyways hope you like them, more build pics to come soon!
...
Ok so here are some updated pics of the project as it sits right now before the major surgery begins. The motor is the B16 I will be fully building the head from, yes I know it looks rough right now but it will be fresh after my plans are done with it. The lips and skirts are all just test fitted right now hence the slight sag on the CTR rear, and I'm borrowing my sisters summer rims from her civic until summer when the SSR's go back on.
Thanks for looking guys, check back soon for the updates!
...
Ok so I know this is nothing major for an update as of now, but I'm just about done my VC job. By no means is this the final product but pretty damn close to it.
Heres the whole process from the beginning:
Commencing the shave:
Shaved cleaner than a Brazilian wax:
In between waiting for paint to dry I decided to take my garage from this:
To This:
Look what I found while cleaning., a Curtis surround sound reciever and a LiteOn DVD R + RW player/writer! Now I can rip off Rogers cable movies again :O
Where I stand now, shaved, prepped, and ready for paint!
Heres the VC going what was supposed to originally be faux "chrome":
Then I decided I didn't like where I was going with that idea so I sanded the chrome down with 1500 grit and it reacted strangely. There must have been some wierd compound in the paint that doesnt do well for sanding but in the end it worked out kind of neat. I sprayed red chrome paint over the chrome in THICK layers in a dark garage and didnt notice the major runs down the side until after, but I loved the red and the top was mint (Still no clear coat):
So then I looked at the red and was like im not going to leave it like this with the drips. Went out and bought some high gloss black and sanded once again the red down with 1500 grit. I liked the whole marble effect that the red had over the chrome creating almost black marble in the red so I wanted to keep some of the red fading in, this is how it turned out:
(No clear coat at first)

(With about six coats of clear coat.)
So there it is, the product of about 6 hours worth of labor with the shave and like eight aerosol cans later its somewhat complete. Will be adding the "bling" to the VC before entering it into this months contest. Let me know what you think.
PS Dont mind the shittyness around the oil cap that will be cleaned up. I had to use sticky tack to mask of some of that and there is still residue.
...
Here we go guys, update time!
Here is where we last left off.....
______________________________________________
Stock Brakes
Prepped Front End
Removing suspension
Letting breaks bleed
Look ma, no breaks! (I am now just waiting on new upper control arms to put on the GSR arms because my upper balljoint is shot and I would prefer to not re-use it. As soon as I recieve those I will be doing the rear discs in the same day and putting her back down on some fullbody adjustable coilovers)
The GSR difference
Passenger side gonzo
C-Pillar Bar and Interior Panels Installed
Painted Stock Oil-Cap (Until I get the anodized one I want....basically I was bored :lol
Final Product of the valve cover before the CF spark plug cover and Anodized cap.
B16 Head Teardown
Just for fun, neilscivic test fitted his newly aquired Memory Fabs from RDub into the EK
______________________________________________
B16A Teardown & Exterior Test Fitment (SSR's are back!)
Block /w Cluth removed
Up onto the engine stand she goes
Clutch condition
There was still coolant in the cylinders that need to come out.
Oil Pan Removed
Exposed crankshaft
Pistons and hardware removed, numbered, and place on the work bench for later
Here is my B16 head as well as my GSR head that I picked up not too long ago taken apart /w hardware organized beside them. :eek: :eek: :eek: :eek: What a cluster **** lol.....and before anyone asks, NO I did not paint the GSR head red, it was the previous owner :O
Basically with everything said and done there were two things wrong with the B16 bottom end after the dissecting process.
1. Rod bearing was absolutely non existent in Piston/Rod #3. We found shards of metal all over the place in the oil, more than likely making up what used to be #3 rod bearing. So not so bad, quick replacement.....righttttt
2. Now of course since the bearing was gone, for as long as my roomate tried to dog the car along after the problem occurred and the bearing spun, the rod was rotating on nothing but metal to metal contact with the crankshaft (Even though the rod bearings are still metal sleeves) This created so much heat and friction that all of the "chrome" coating off of the crankshaft section that would normally have the sleeve bearing around it. Apparently I will need to get the crankshaft over to a machine shop to re-"chrome" those sections before replacing any rod bearings.
All in all I will more than likely go with the decision to just scrap the block and sell off any parts that anyone needs because the pistons are still good, as well as a couple of other things. I will be buying a fresh B20 block, then building the B16 head that came off the spun block, and installing the S2S2s.
Current Exterior:
...
Alright so I know I have been slacking off a little bit but it has been a busy *** month that's for sure. Here is about 2 or 3 days of work on the wire tuck and brakes as well as a peek at a couple of other goodies. Coming soon is full hard line brake tuck as well as full shave and completing the battery & fuse box tuck. Drive train is planned out for hopefully the end of next week, at latest early the week after.
Enjoy.
Brakes placed in
Some of the wiring mess at the beginning
Outside of the fender mocked for soldering
Everything in the tuck getting properly soldered and heat wrapped.
Random pic I took when I was getting bored, lol.
Thats a good start to the nest reduction
Everything getting loomed as well
Nice and toiiiiiit
Tucking the second part of the harness under the cowel
Re-used the stock rubber but flipped it for function on the inside
A buddy of mine gave me this for my birthday to see if I could make it work for myself, may need some major adjustment, but if it doesn't work it will be for sale!
The garage mess afterwards
....and POOF, gone.....oh yeh and look, front wheels on!
Random pic of the SSR's with the GSR's behind them.
Picked up a VAFC for once the swap is done and ready for a full tune.
My ITR wheel needs some love :O
End of the night, good progress made. Oh yeh theres the new bumper I picked up from Eric when I was in TO last. with the "JUN" lip mounted and the mess that is a GSR and B16 head behined it, with the block just floating.
PART 2:
Fuse box tuck commences, the box is removed.
We needed to undo the wiring that was done on the passenger side to be able to pass the harness back through the firewall due to the fact that the fuse box tuck was a last minute change!
Dash still looking somewhat together.
Scary
09-27-2012, 07:51 PM
#3
Honda-Tech Member
Thread Starter
Join Date: Aug 2009
Location: Kingston, Ontario, Canada
Posts: 122
Likes: 0
Received 0 Likes
on
0 Posts
Ahhhhh ****, she's out after many mystery bolts in random areas


There it is, no dash

But wait, couldn't be that easy could it......heater core out


First you see it

Now you don't

There it is folks, all that work for the wiring harness for the fusebox to come out there instead of in the engine bay, lol. The box will be relocated to my glove box (Fit's mint, and only takes up about half of it) I will be drilling a hole big enough to fit the plugs through the glove box in the back.

Bumper test fitted /w zipties for now. From all angles, still needs some adjustment but the more I see that lip on there I like it so I definately think I will be keeping that for a while then maybe changing over the winter.


And of course......:D


FTMFW. Overall very pleased with the progress being made, still a long road to go though that's all I know. LOTSSSSS more updates to come soon, I'll try and keep up with the uploading.
There it is, no dash
But wait, couldn't be that easy could it......heater core out
First you see it
Now you don't
There it is folks, all that work for the wiring harness for the fusebox to come out there instead of in the engine bay, lol. The box will be relocated to my glove box (Fit's mint, and only takes up about half of it) I will be drilling a hole big enough to fit the plugs through the glove box in the back.
Bumper test fitted /w zipties for now. From all angles, still needs some adjustment but the more I see that lip on there I like it so I definately think I will be keeping that for a while then maybe changing over the winter.
And of course......:D
FTMFW. Overall very pleased with the progress being made, still a long road to go though that's all I know. LOTSSSSS more updates to come soon, I'll try and keep up with the uploading.
09-27-2012, 07:52 PM
#4
Honda-Tech Member
Thread Starter
Join Date: Aug 2009
Location: Kingston, Ontario, Canada
Posts: 122
Likes: 0
Received 0 Likes
on
0 Posts
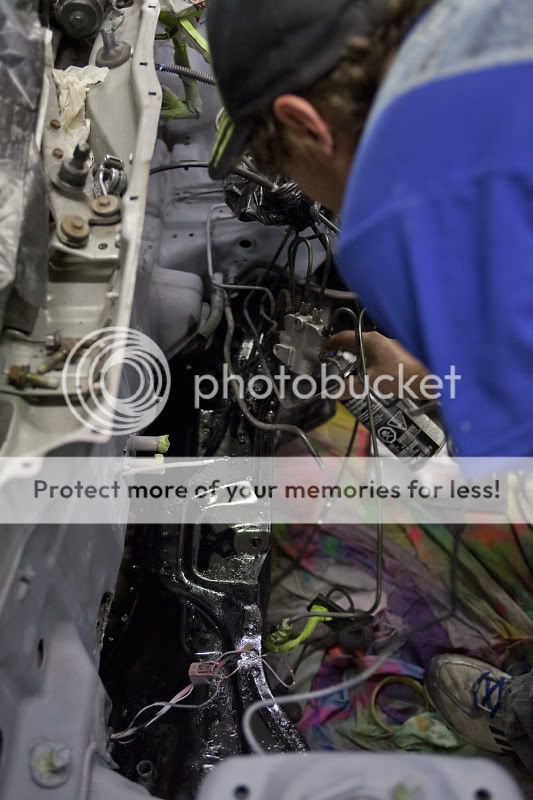
Alright so here is a quick update of some things that have been getting done on the EK. All connections on the wire tuck have officially been soldered and heat wrapped, as well as all harness sections have been wire loomed as well.
Here we go, much more too come within the next week! Thanks for looking as usual.
The last major harness connection in the tuck:
The plug

The mess in need of cleaning.

The nightmare on the other side of the fender under glove box area.

All connections soldered and heatwrapped/taped as well.

Starting the loom

Done and done

Newest addition to the interior JDM "bling", big thanks to ma nikka Neilscivic for picking me up a 5-peice set of CTR mats for my birthday!!!


Mock of the fuse panel fitment in the glovebox before she gets thrown back in.


.....like I said, more updates to come this weekend garunteed! Muahahahahaaaa

End of the night clean-up, car finally on all four wheels for once.

.....stay tuned.[/QUOTE]
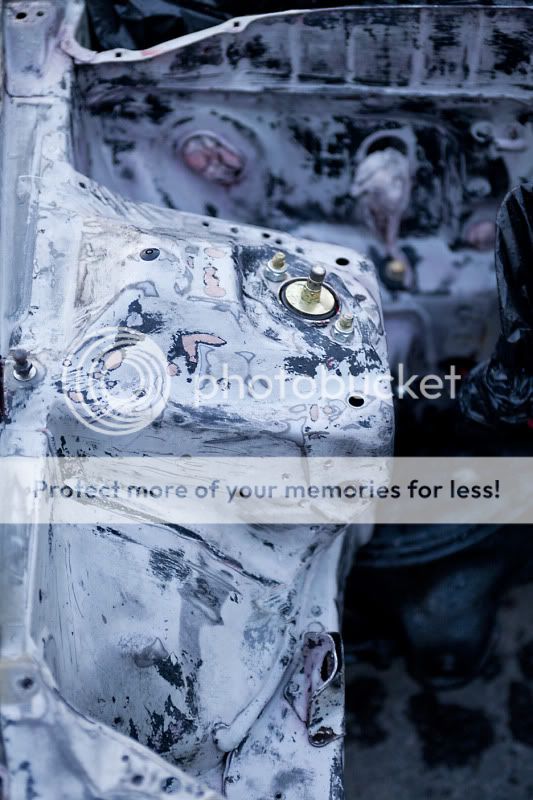
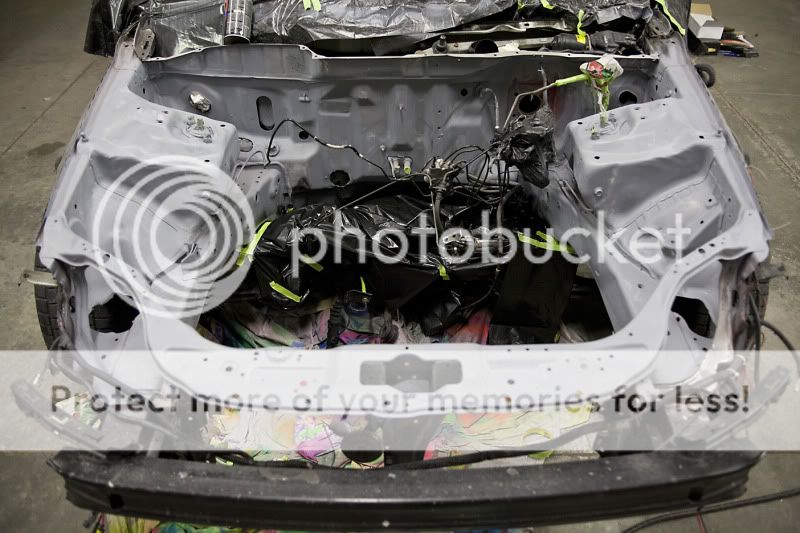
Heres another quick updated of what I have been up to with the EK. The bay was stripped down fully and re-painted. I'll let the pictures do the rest of the talking, hope you like!
Final part of firewall strip down.


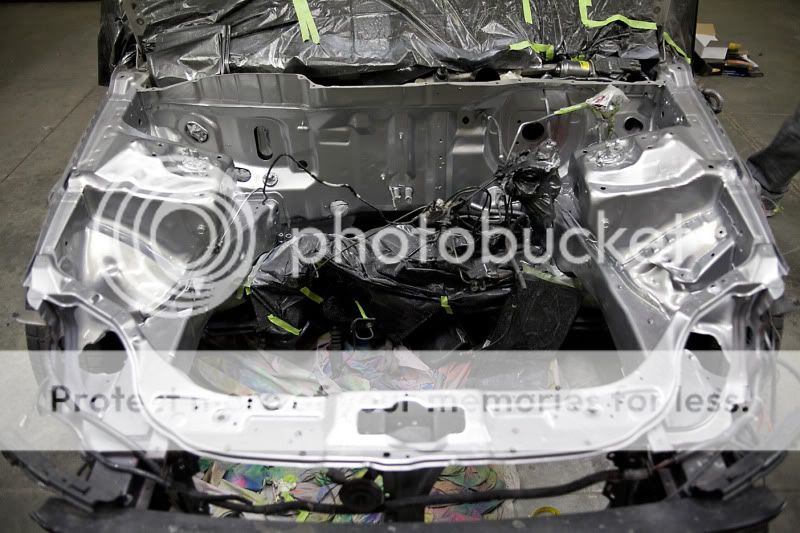
Done

Scuffed all the clear coat off the old paint


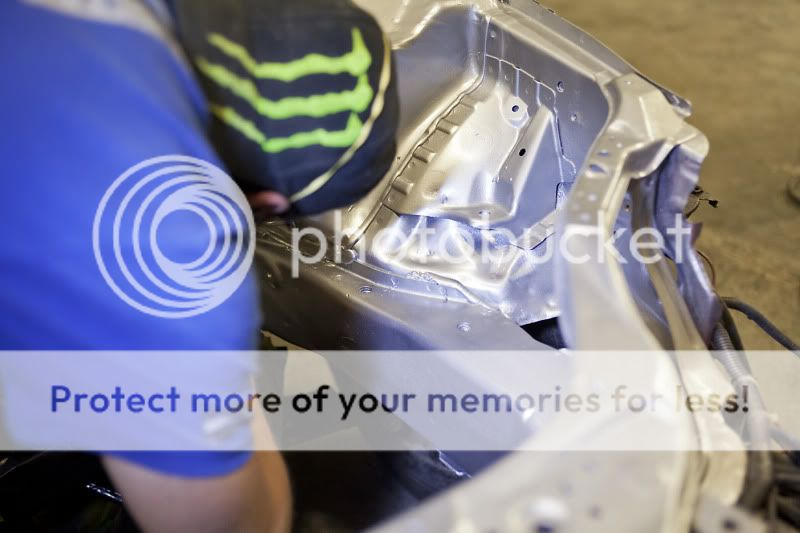
Filling some unsightly holes in the bay to clean it up a bit, definately didn't do a full shave due to time restraints but much better then it was!


Ready to go for some primer


First coat of primer


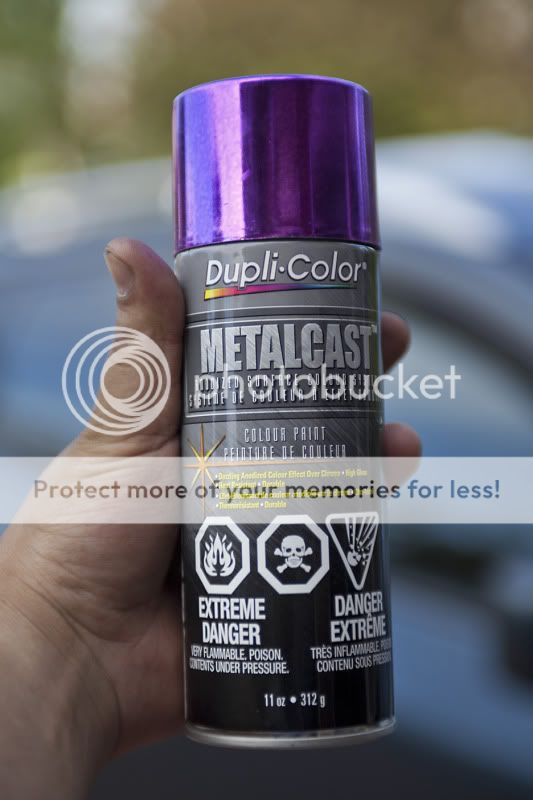
Base activator coat for the metalcast paint


Then BLAMMMMMMM, I call it baller firetruck. First coat of chrome red metalcast


Couple coats later, too dark to get any decent pics yet.


This is today, went outside first thing in the morning to see the final product. :eek: :eek: :eek: :eek: :eek: Weeehoooooo


.....
Alright quick update here guys, much more too come soon. Motor/tranny should be here within the next 5 days!
Painting brake lines for the time being until the line tuck happens in the winter.


Scuffing the master cylinder.

Threw some clear coat on.......wwoooooo000000oooooooo, so purddy.

Rusty clutch reservoir before the makeover, the finished version will be in the next update.

Charcoal canister and motor mount freshened up.

Brake booster after the cleanup

Master cylyndar painted and clear coated, Nisin sticker removed, cleaned and put back on afterwards.

About 30 newly soldered connections due to last minute wire tuck changes. Already loomed and placed back, more with next update.

What I will leave you with for the next day or so, even though it is already farther then this, im just too lazy to take more pics until more gets done.

....
Okie here we go guys, more major updates!
First and foremost, the motor has arrive finally! Low K JDM B20B brought to me from Montreal by my nikka neilscivic.


The last little bit of wiring to be done under the dash


Taking apart heater core to remove condenser so it doesn't poke out of the firewall (For sale!)

There she is, it's been cleaned up since then, still works awesome!

Heater-core mounted

Dash is on and bolted!

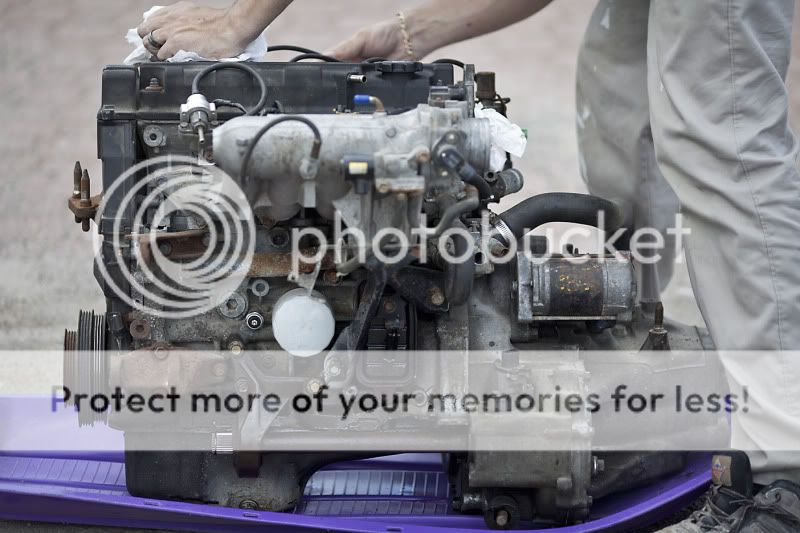
Motor strip down for all unnecessary parts (All for sale and all mint, PM me!)


Heat shield and AC pump removed.


Power steering pump and manifold removed.


Oh look, the final missing link! Made to 2.75 hour drive to Toronto to pick up my Hydraulic LS Tranny out of a 94 Integra with 120ish Km. This will be replaced over the winter with something a bit more interesting.


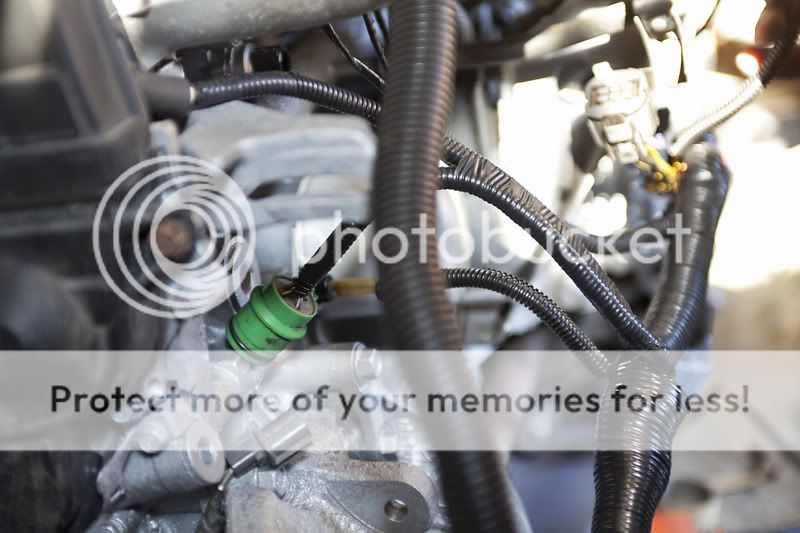
A little visitor stopped by in the garage.....and died :'(

Cutting a hole for the fuse box wires


There we go.

Dash closes, and all fuse box plugs are in no problem!


Everything is basically done under the dash now, and steering rack is back in!


The mess at the end of the night that I left for my mom to wake up to at 5am the next morning with her car parked in a different bay then usual. :lol:
More updates probably tomorrow, pictures already taken. Plans for the week include painting the motor/trans, finish prepping everything for the swap, tow the car to 2low's garage for the motor dropping as well as finishing the rear breaks by putting the GSR's on finally and we should be started up by Monday. At that point I just need to buy new axles which will be Tuesday of next week, and headlights which hopefully will be even sooner then that. She won't be the prettiest thing necessarily at HT6 but my mission is to hopefully just make it there but we'll see.
.....
Here we go, much more too come within the next week! Thanks for looking as usual.
The last major harness connection in the tuck:
The plug
The mess in need of cleaning.
The nightmare on the other side of the fender under glove box area.
All connections soldered and heatwrapped/taped as well.
Starting the loom
Done and done
Newest addition to the interior JDM "bling", big thanks to ma nikka Neilscivic for picking me up a 5-peice set of CTR mats for my birthday!!!
Mock of the fuse panel fitment in the glovebox before she gets thrown back in.
.....like I said, more updates to come this weekend garunteed! Muahahahahaaaa
End of the night clean-up, car finally on all four wheels for once.
.....stay tuned.[/QUOTE]
Heres another quick updated of what I have been up to with the EK. The bay was stripped down fully and re-painted. I'll let the pictures do the rest of the talking, hope you like!
Final part of firewall strip down.
Done
Scuffed all the clear coat off the old paint
Filling some unsightly holes in the bay to clean it up a bit, definately didn't do a full shave due to time restraints but much better then it was!
Ready to go for some primer
First coat of primer
Base activator coat for the metalcast paint
Then BLAMMMMMMM, I call it baller firetruck. First coat of chrome red metalcast
Couple coats later, too dark to get any decent pics yet.
This is today, went outside first thing in the morning to see the final product. :eek: :eek: :eek: :eek: :eek: Weeehoooooo
.....
Alright quick update here guys, much more too come soon. Motor/tranny should be here within the next 5 days!
Painting brake lines for the time being until the line tuck happens in the winter.
Scuffing the master cylinder.
Threw some clear coat on.......wwoooooo000000oooooooo, so purddy.
Rusty clutch reservoir before the makeover, the finished version will be in the next update.
Charcoal canister and motor mount freshened up.
Brake booster after the cleanup
Master cylyndar painted and clear coated, Nisin sticker removed, cleaned and put back on afterwards.
About 30 newly soldered connections due to last minute wire tuck changes. Already loomed and placed back, more with next update.
What I will leave you with for the next day or so, even though it is already farther then this, im just too lazy to take more pics until more gets done.
....
Okie here we go guys, more major updates!
First and foremost, the motor has arrive finally! Low K JDM B20B brought to me from Montreal by my nikka neilscivic.
The last little bit of wiring to be done under the dash
Taking apart heater core to remove condenser so it doesn't poke out of the firewall (For sale!)
There she is, it's been cleaned up since then, still works awesome!
Heater-core mounted
Dash is on and bolted!
Motor strip down for all unnecessary parts (All for sale and all mint, PM me!)
Heat shield and AC pump removed.
Power steering pump and manifold removed.
Oh look, the final missing link! Made to 2.75 hour drive to Toronto to pick up my Hydraulic LS Tranny out of a 94 Integra with 120ish Km. This will be replaced over the winter with something a bit more interesting.
A little visitor stopped by in the garage.....and died :'(
Cutting a hole for the fuse box wires
There we go.
Dash closes, and all fuse box plugs are in no problem!
Everything is basically done under the dash now, and steering rack is back in!
The mess at the end of the night that I left for my mom to wake up to at 5am the next morning with her car parked in a different bay then usual. :lol:
More updates probably tomorrow, pictures already taken. Plans for the week include painting the motor/trans, finish prepping everything for the swap, tow the car to 2low's garage for the motor dropping as well as finishing the rear breaks by putting the GSR's on finally and we should be started up by Monday. At that point I just need to buy new axles which will be Tuesday of next week, and headlights which hopefully will be even sooner then that. She won't be the prettiest thing necessarily at HT6 but my mission is to hopefully just make it there but we'll see.
.....
09-27-2012, 07:53 PM
#5
Honda-Tech Member
Thread Starter
Join Date: Aug 2009
Location: Kingston, Ontario, Canada
Posts: 122
Likes: 0
Received 0 Likes
on
0 Posts
Alright so as promised here is the beggining of the slew of updates that will happen this weekend. Cleaning the transmission, and trailoring the EK to my buddies shop so we can put it on a hoist and get some real work done.
Dirty B18LS tranny


The solution ;-)

The final product before paint


Better shot of the almost complete dash (Yes I know I need to get rid of the hideous Autometer tach, I will be picking up an SiR soon hopefully.

The next day it was time for her to take her first roadtrip. Well sorta.....
Her chariot awaits

Motor, rear disc breaks and tranny loaded into the bed of the truck and strapped down for the ride.

She's on and strapped in


Wave by to yo0ur normal hardparked position

On the way

She has arrived to her temp home for the long weekend

Lined up for the hoist

Up we go and there she sits for the night

....
Now this was just yesterday the 31st, we have already installed the rear discs today after I got off work. The update for that with all the pics will be up later tonight, they look sick!
Alright so I got impatient and just edited and uploaded all the work done from today. Disc break conversion to Integra GSR brakes COMPLETE! All left to do is just get my custom made sections of Russell's lines and fittings and too bleed the system once the brake booster is bolted back in tommorow. This looked like a daunting task to begin with but once we worked through breaking FIVE bolts right off the bat, the torch played our best friend and ended up with a final product that was complete and ready to roll.
Look out for tommorow's updates! More good stuff to come, enjoy!
Ewwwwwwww, time to go with these shitty drums.


LITERALLY what made this brake swap work smoothly as possible, proper torch FTW!

Already with the heat needed

Out after a couple of broken bolts and a stubborn bushing


Like I said, we had a stubborn bushing, no worries though we have another set of dogbones!

Grabbing the other one from the old brakes.

Out with the old

In with the NEW!

All bolts in place

Definately broke the majority of the bolts on the driver side brakes, heat was needed for pretty much everything as seen here

and here on the new disc brake, there were already two broken bolts in the new arms so we had to remove those before anything.

Our jimmy rig method to raise the brake arm in order to bolt in the upper trailing arms more easily

Bolts in

Now the other side.

BLAMMMMMM, done

Final product in the back

Second brake done and wheel mounted!

Ahhhhh, much better. Still a small rotor but there will be something done about that over the winter.

Passing through the e-brake cables and adjusting tightness

Done and adjusted properly

Yessir, all done for the day!

I never want to see these again.......

Like I said guys look out for tommorow's updates, big tings poppin'!
Huge thanks goes out to Victor (AKA 2Low, the guy you see in a lot of the pictures, NONE of this would be possible without him and his great knowledge of well.....everything with Hondas.)
^^^ Dis nikka!
Ok so ImageShack decided to stop being gay and I got a chance to upload all the progress from today. Probably the most important day thus far, dropping the motor, finally.
Had to roll it to the shop next door to 2low's for some welding work.


Remember that crack in my mount tab that I asked about in the tech section not too long ago? Well now it was time to deal with it.


Stay away from the lightttttt.

The weld, we wanted to put as much metal in that gap as possible, no pretty work here.


Literally looks like nothing was even there.

Remember the cleaning? Time to put it to use.


Then I realized how much the sub frame bothered me that it was oversprayed red on top of the black from the last colour of the bay so we decided to take care of it.


Block needed a little bit of degreasing


Ready for paint


Mount looked like ****, so I sprayed it lol.

Resurfaced flywheel

Clutch alignment

LS tranny paired with the B20

We ended up deciding instead of scratching the paint like usual dropping it in from the top, that with the use of the hoist we could just drop the car down on to the motor which is exactly what we did.

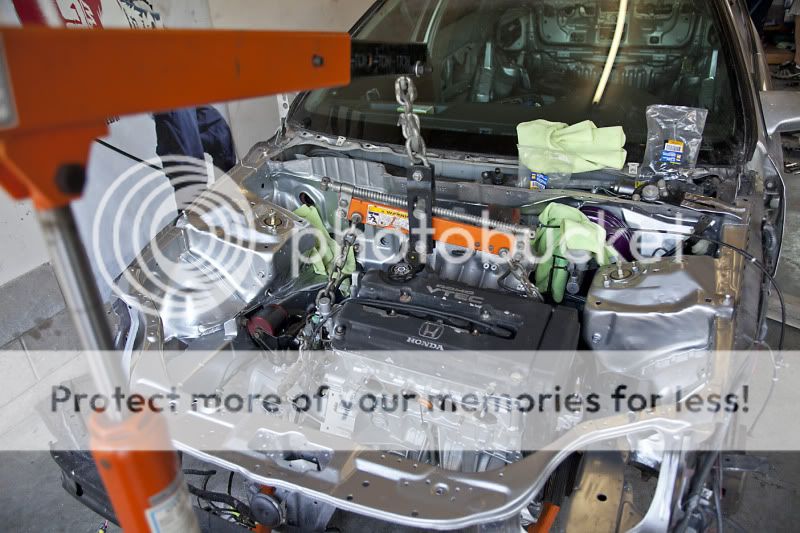
Motor installed, now time to get some wiring done this week.

Once again her chariot arrives to go back home after a productive weekend


Almost there

And back to the familiar crescent, we'll see what we can do in the next couple of days but it might end up being tight for HT!

Thanks again to 2Low for the use of his shop, hoist, bathroom, and superior knowledge of this ****.
Dirty B18LS tranny
The solution ;-)
The final product before paint
Better shot of the almost complete dash (Yes I know I need to get rid of the hideous Autometer tach, I will be picking up an SiR soon hopefully.
The next day it was time for her to take her first roadtrip. Well sorta.....
Her chariot awaits
Motor, rear disc breaks and tranny loaded into the bed of the truck and strapped down for the ride.
She's on and strapped in
Wave by to yo0ur normal hardparked position
On the way
She has arrived to her temp home for the long weekend
Lined up for the hoist
Up we go and there she sits for the night
....
Now this was just yesterday the 31st, we have already installed the rear discs today after I got off work. The update for that with all the pics will be up later tonight, they look sick!
Alright so I got impatient and just edited and uploaded all the work done from today. Disc break conversion to Integra GSR brakes COMPLETE! All left to do is just get my custom made sections of Russell's lines and fittings and too bleed the system once the brake booster is bolted back in tommorow. This looked like a daunting task to begin with but once we worked through breaking FIVE bolts right off the bat, the torch played our best friend and ended up with a final product that was complete and ready to roll.
Look out for tommorow's updates! More good stuff to come, enjoy!
Ewwwwwwww, time to go with these shitty drums.
LITERALLY what made this brake swap work smoothly as possible, proper torch FTW!
Already with the heat needed
Out after a couple of broken bolts and a stubborn bushing
Like I said, we had a stubborn bushing, no worries though we have another set of dogbones!
Grabbing the other one from the old brakes.
Out with the old
In with the NEW!
All bolts in place
Definately broke the majority of the bolts on the driver side brakes, heat was needed for pretty much everything as seen here
and here on the new disc brake, there were already two broken bolts in the new arms so we had to remove those before anything.
Our jimmy rig method to raise the brake arm in order to bolt in the upper trailing arms more easily
Bolts in
Now the other side.
BLAMMMMMM, done
Final product in the back
Second brake done and wheel mounted!
Ahhhhh, much better. Still a small rotor but there will be something done about that over the winter.
Passing through the e-brake cables and adjusting tightness
Done and adjusted properly
Yessir, all done for the day!
I never want to see these again.......
Like I said guys look out for tommorow's updates, big tings poppin'!
Huge thanks goes out to Victor (AKA 2Low, the guy you see in a lot of the pictures, NONE of this would be possible without him and his great knowledge of well.....everything with Hondas.)
^^^ Dis nikka!
Ok so ImageShack decided to stop being gay and I got a chance to upload all the progress from today. Probably the most important day thus far, dropping the motor, finally.
Had to roll it to the shop next door to 2low's for some welding work.
Remember that crack in my mount tab that I asked about in the tech section not too long ago? Well now it was time to deal with it.
Stay away from the lightttttt.
The weld, we wanted to put as much metal in that gap as possible, no pretty work here.
Literally looks like nothing was even there.
Remember the cleaning? Time to put it to use.
Then I realized how much the sub frame bothered me that it was oversprayed red on top of the black from the last colour of the bay so we decided to take care of it.
Block needed a little bit of degreasing
Ready for paint
Mount looked like ****, so I sprayed it lol.
Resurfaced flywheel
Clutch alignment
LS tranny paired with the B20
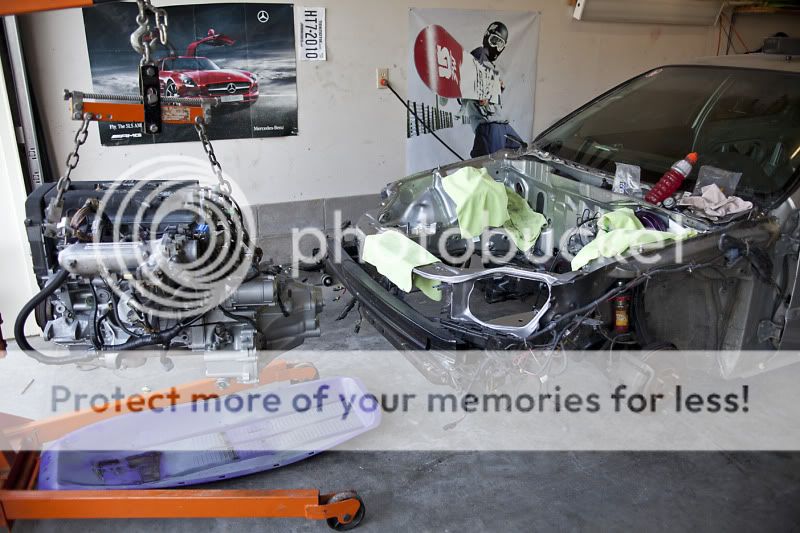
We ended up deciding instead of scratching the paint like usual dropping it in from the top, that with the use of the hoist we could just drop the car down on to the motor which is exactly what we did.
Motor installed, now time to get some wiring done this week.
Once again her chariot arrives to go back home after a productive weekend
Almost there
And back to the familiar crescent, we'll see what we can do in the next couple of days but it might end up being tight for HT!
Thanks again to 2Low for the use of his shop, hoist, bathroom, and superior knowledge of this ****.
09-27-2012, 07:53 PM
#6
Honda-Tech Member
Thread Starter
Join Date: Aug 2009
Location: Kingston, Ontario, Canada
Posts: 122
Likes: 0
Received 0 Likes
on
0 Posts
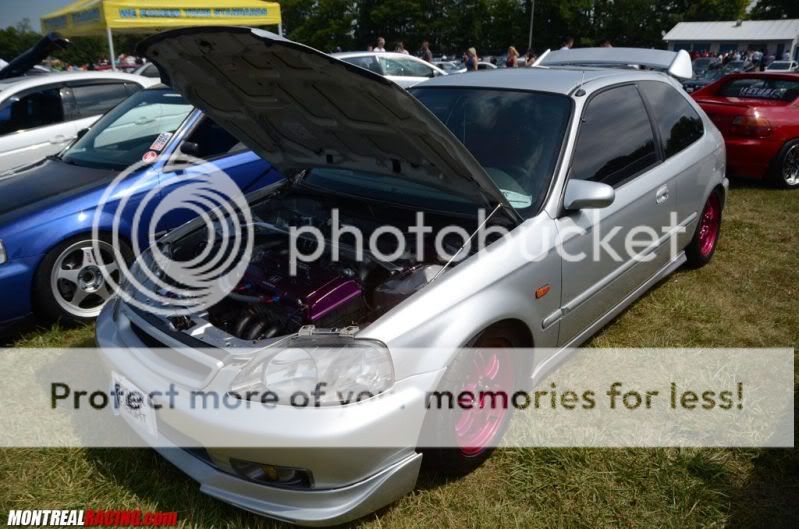
Alright so after alllllllllllllllllllllllllllllllllllllllll that crazyness, this is how she sat as of last year.....Big changes to come, and I will make sure I will actually keep this up to date once again!
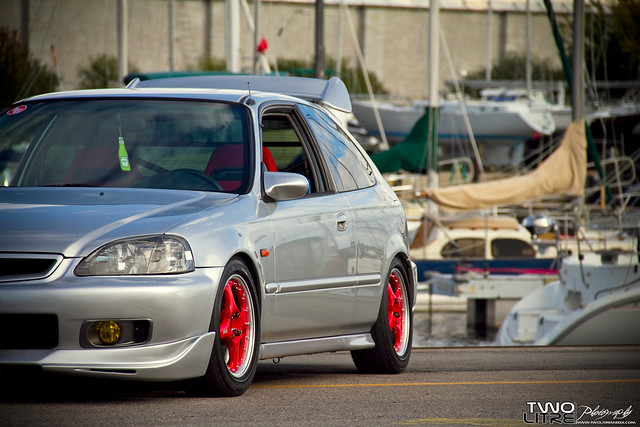
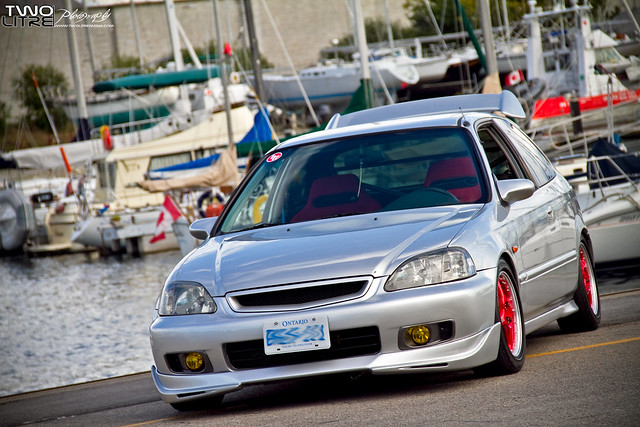
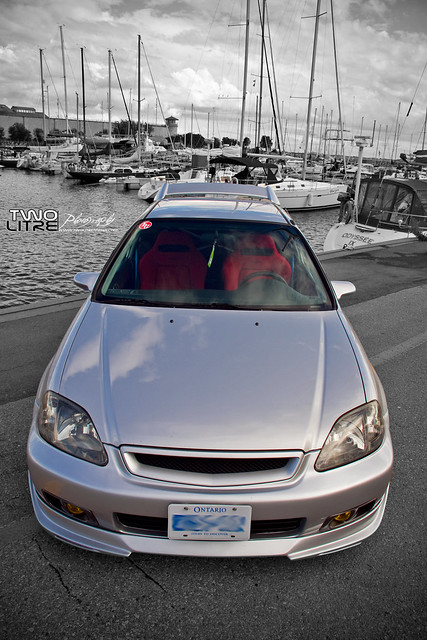
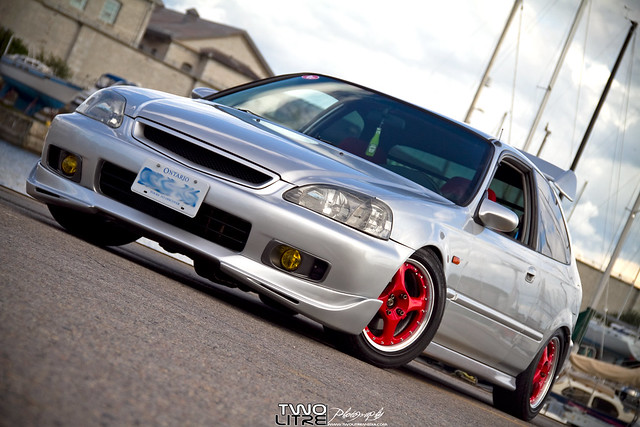


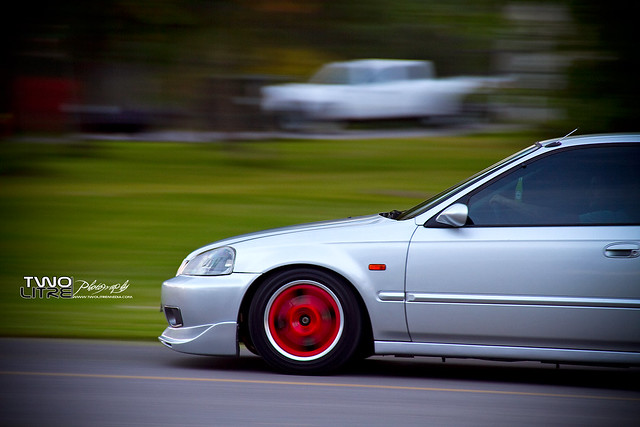
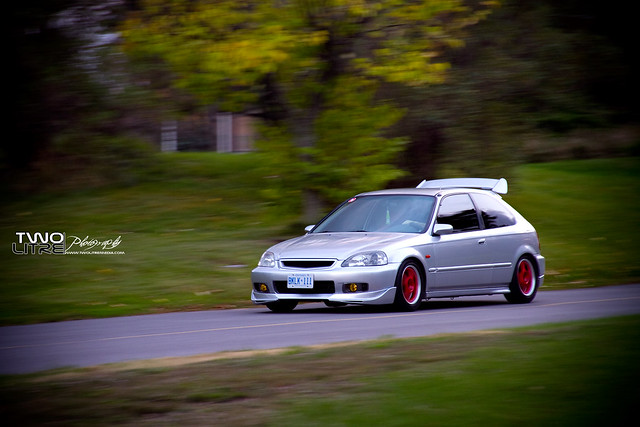
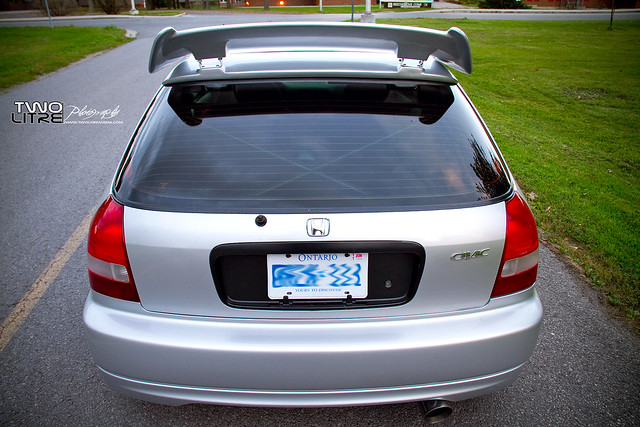
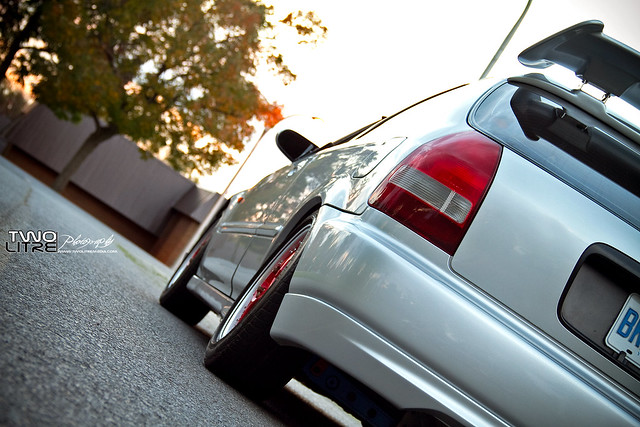

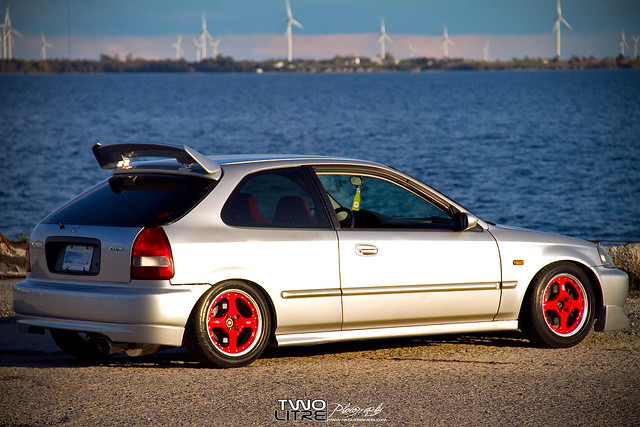
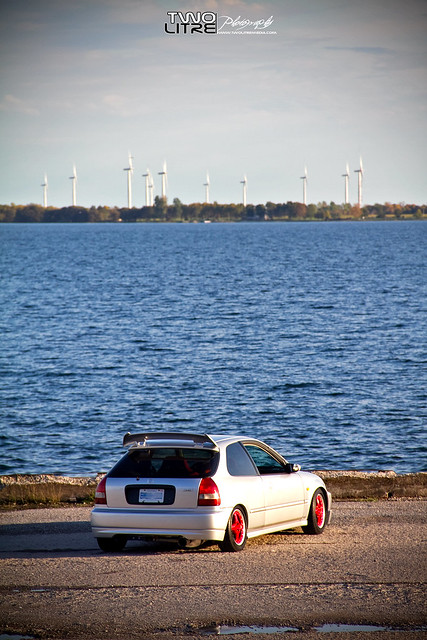


Stay tuned for updates of the CURRENT PROGRESS as of June 23rd, 2012!
Stay tuned for updates of the CURRENT PROGRESS as of June 23rd, 2012!
09-27-2012, 07:56 PM
#7
Honda-Tech Member
Thread Starter
Join Date: Aug 2009
Location: Kingston, Ontario, Canada
Posts: 122
Likes: 0
Received 0 Likes
on
0 Posts
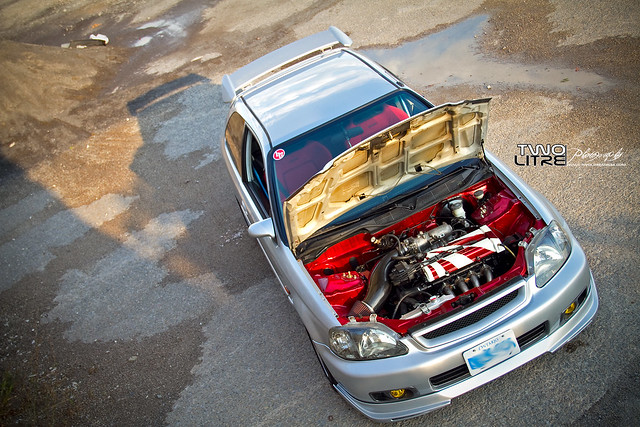
HERE WE GO! Part 2 of my EK's life :-)
After last season without a single change it was time this year to re-vamp this thing completely! New power train, new engine bay set-up, re-done interior, new wheels, etc etc! I wanted to see if I could manage some fresh paint this season but it just wasn't in the budget at all. I will try to keep putting in little blurbs about whats happeninig in the photos.
I still have a bunch of stuff to add after this as Victor and I were so busy trying to get everything buttoned up for Honda Tech I barely had time to pick up the camera.
That reminds me, before I post ANY photos I need to send out my thank yous as without these people this car would never be where it is today. First and foremost, Victor Praticante or 2Low on the boards. Without this guy I don't even know if I would have built ANY of my cars to be honest. He is the definition of a jack of all trades, master of most! There were many times in this build that I had my doubts that Victor would be able to prevail over certain wiring tasks, or mechanicle challenges posed by my vehicle but of course, every time it got done.
Next thank you would be to all my other friends who every turned a wrench or laid a hand on this vehicle including but not limited to.....Marc Dunlop, Josh Roy, Brendan Perry, Tmack, Neil Shamssuzzoha, Corbin, Cole, Adam, and MANY more but those are some of the mains helping hands involved in all of this. Some more then others for sure, but none the less all important!
Ok here we go, on to the photos!
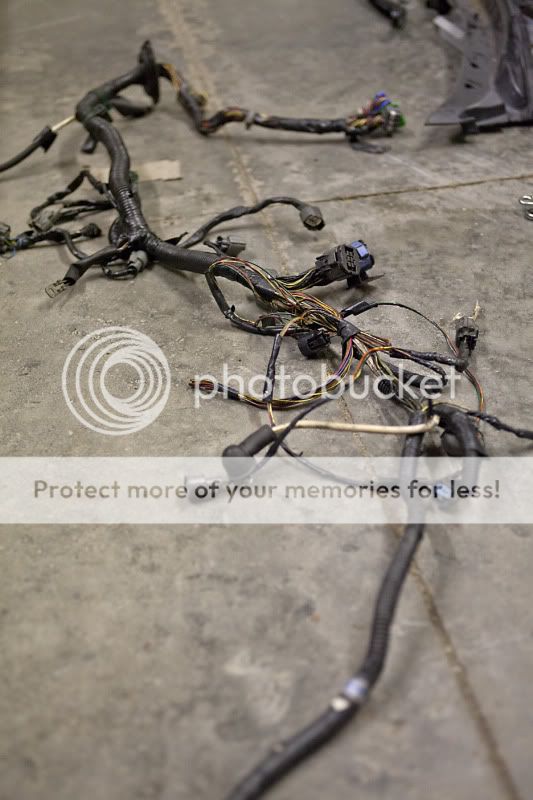
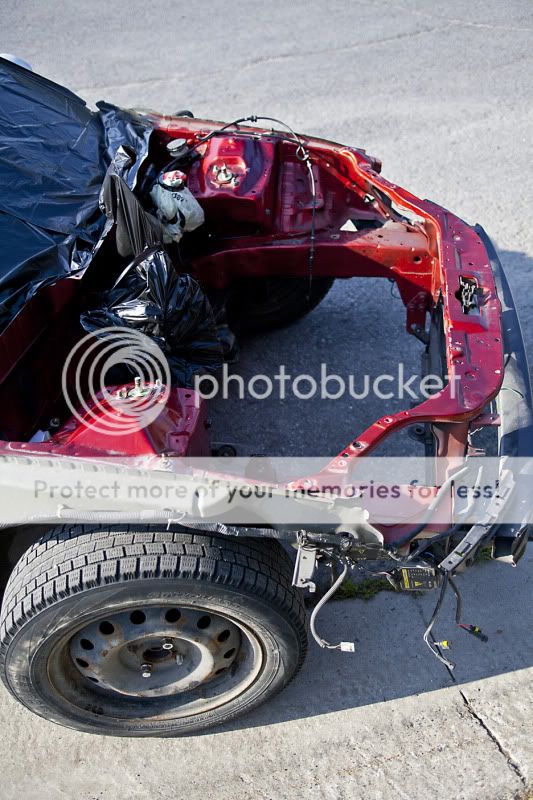
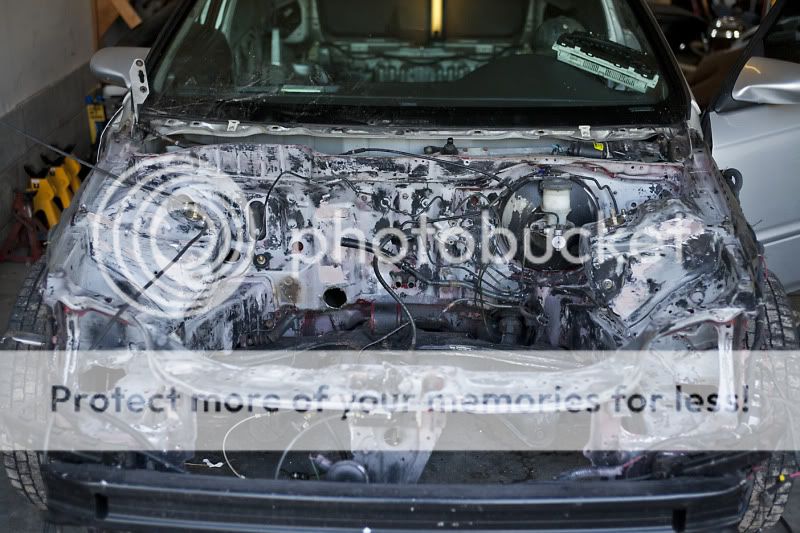
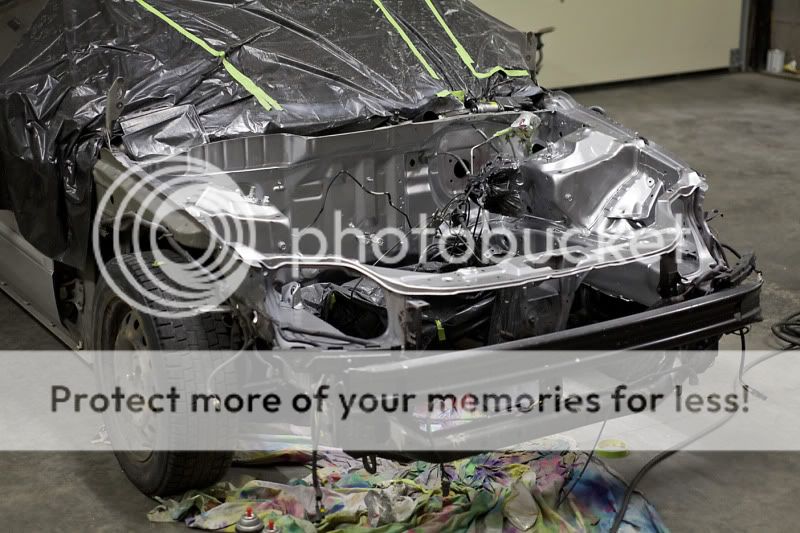
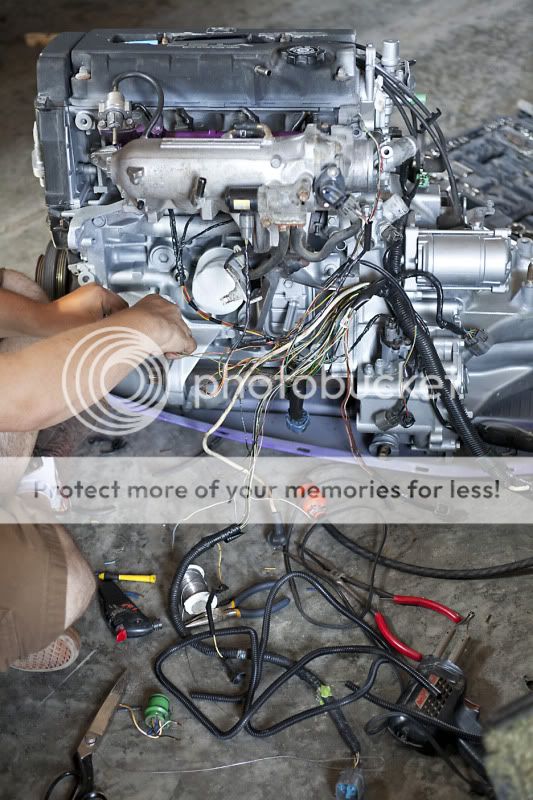
First things first, the motor was pulled a few months previous to all of this work your about to see as I had purchased another EK hatch with a mildly built B16, so I swapped my old B20 into the new hatch, and sold it with tranny and all! Here is a shot of the old wiring harness before we cleaned her up
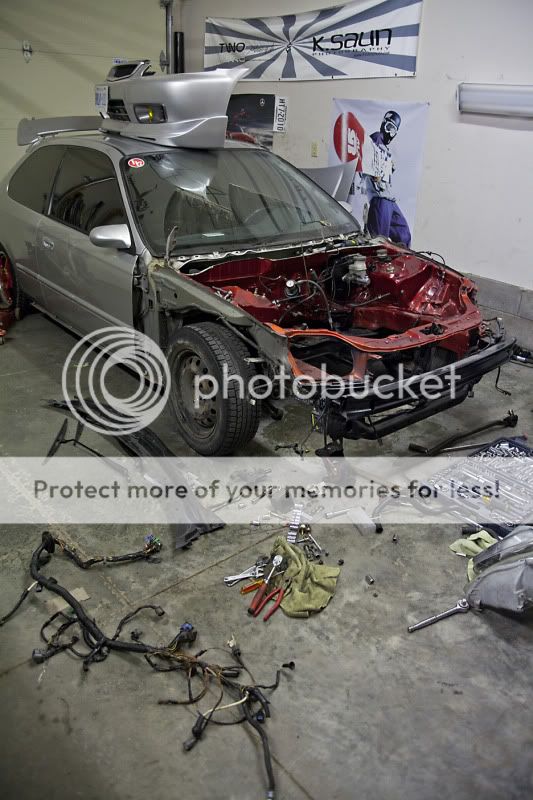
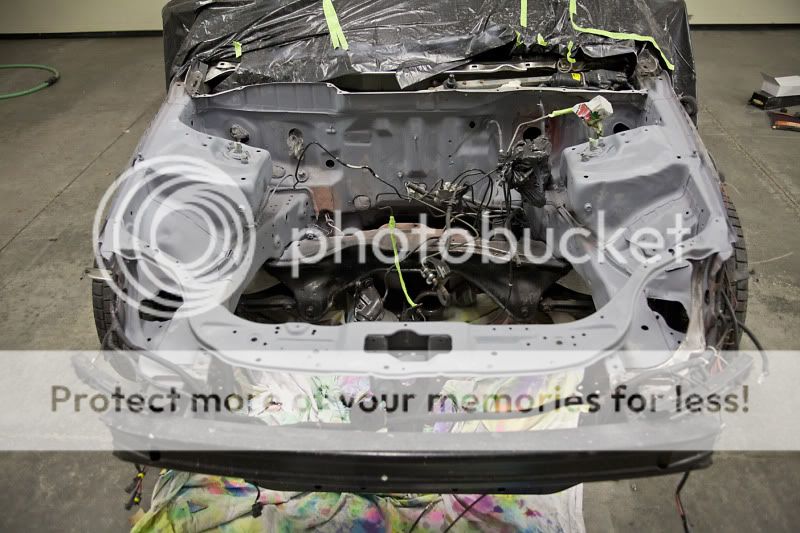
The old Bay
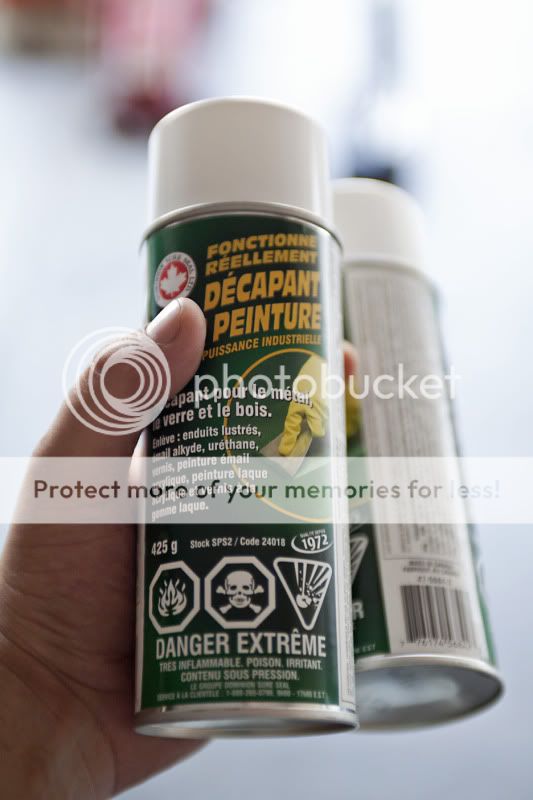
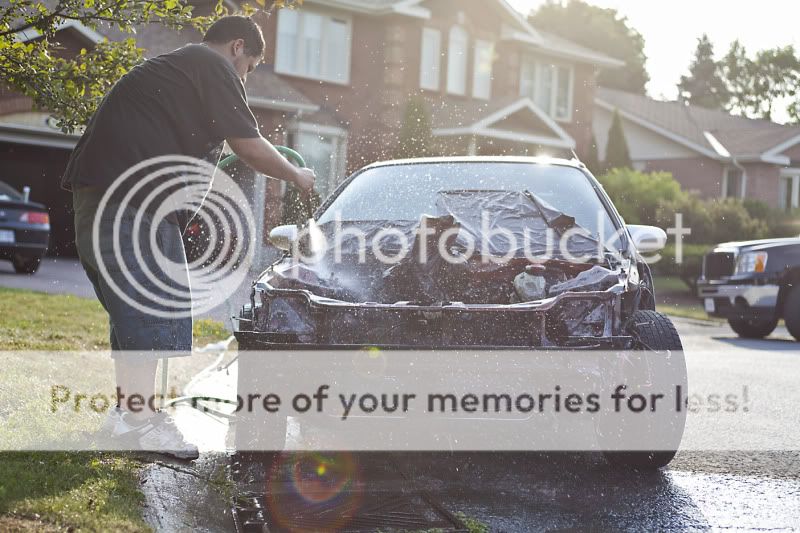
My best friend for two days of stripping paint!
Here we go :-)
My skin was on fire from the stripper being rinsed off and landing on me!! Be safe while using this stuff, I'm an idiot.

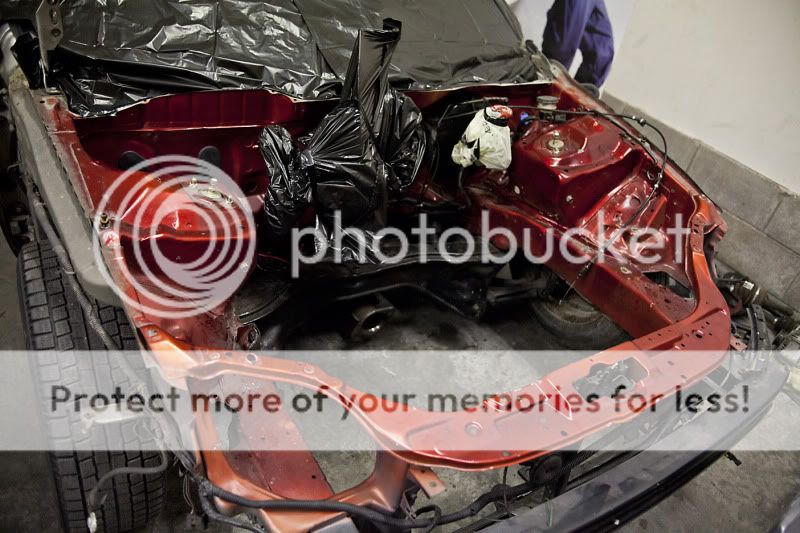
Getting there.....
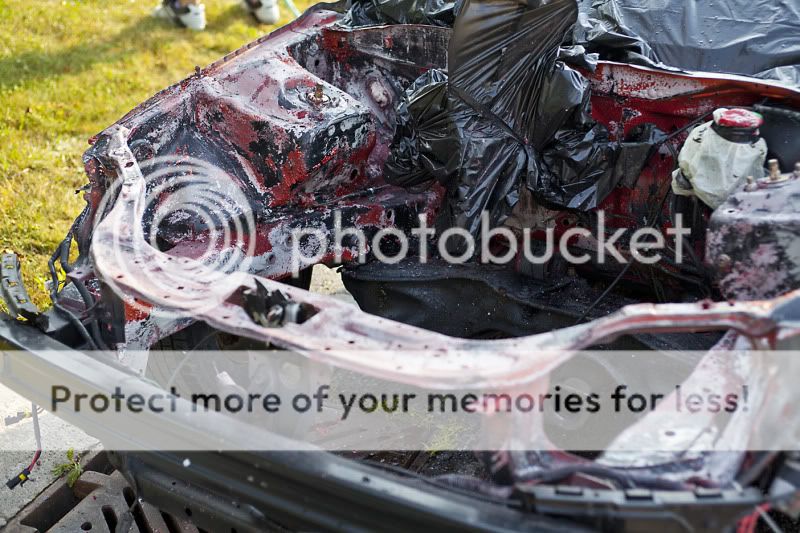
Cool photo the girlfriend took during the process!
Ewwww, so much paint!
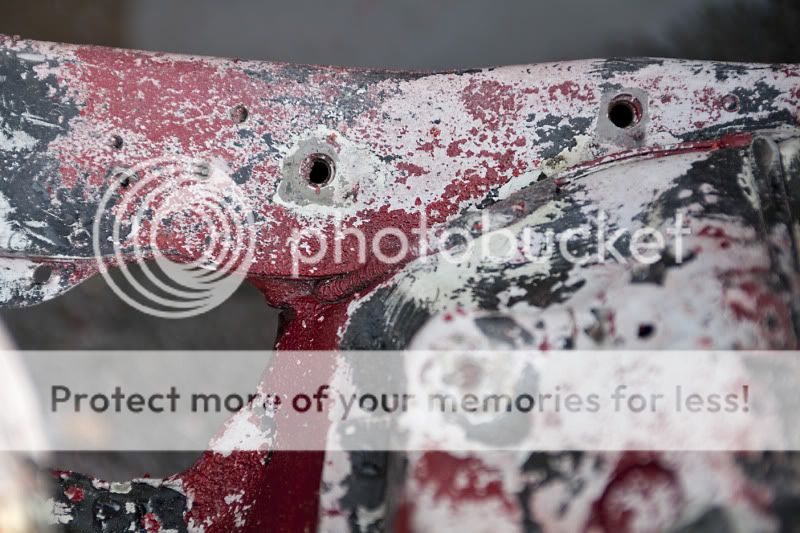
As clean as she gets before sanding/prep.

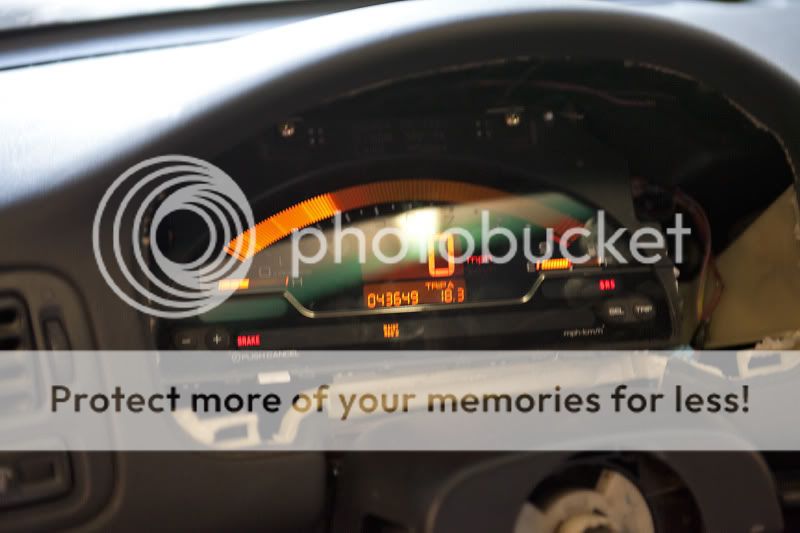
Back in the bat cave..... Victor begins wiring the daunting task of the AP1 Honda S2000 digital cluster!
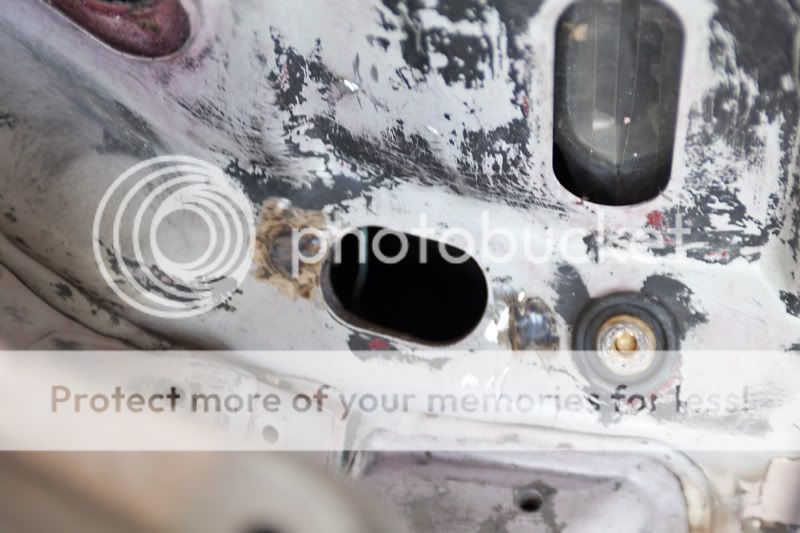
Meanwhile, I had some fun with the grinder in the bay taking out unneccesery brackets and studs.
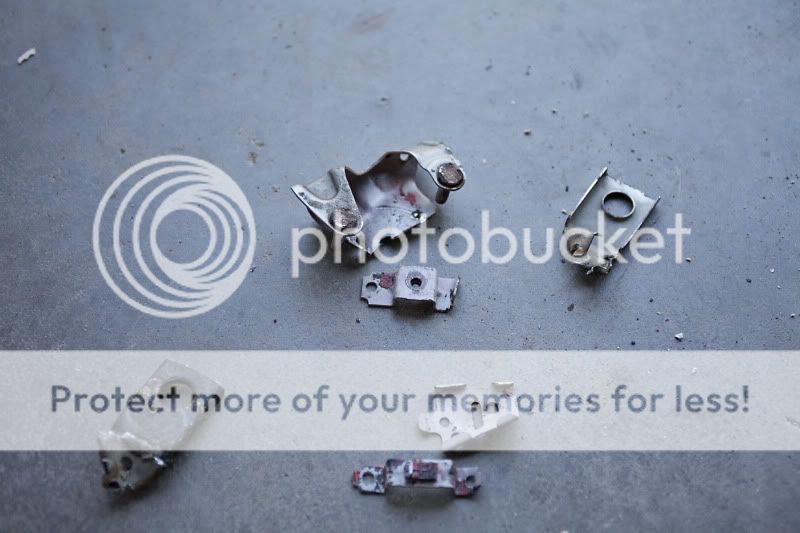
Wtf, already?!?!
The key supplies that day!

Some non-existant studs :-)
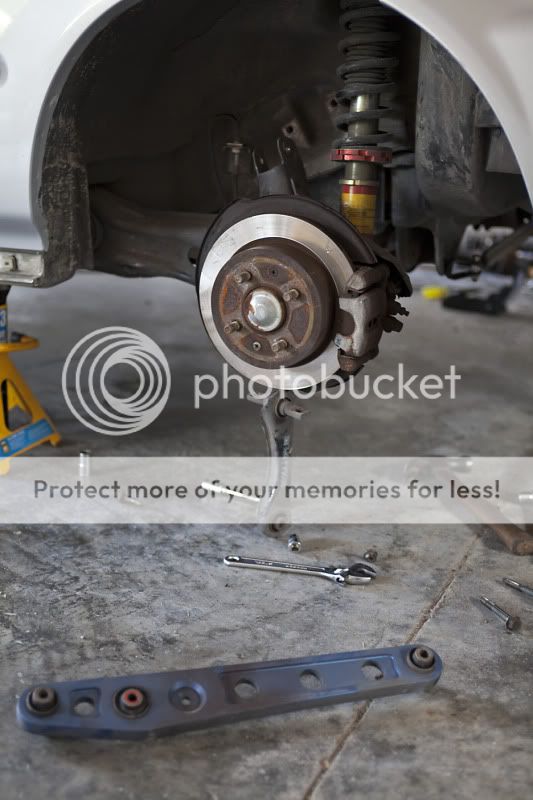
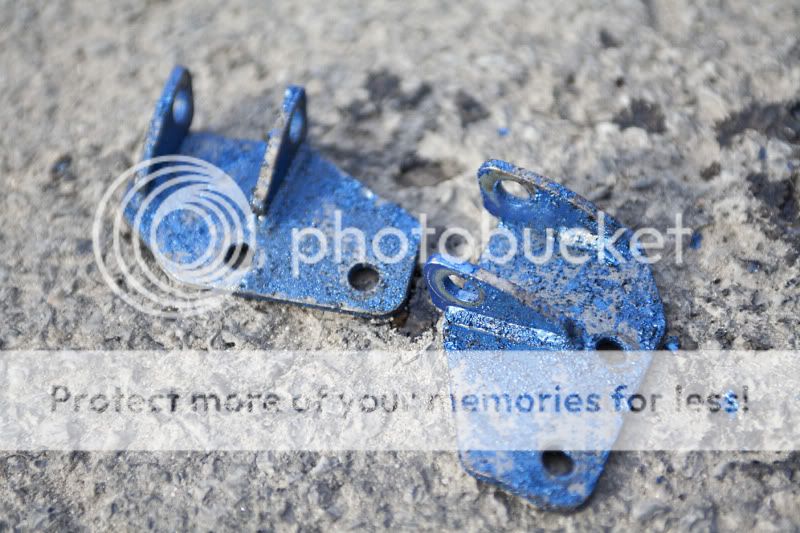
Removed rear suspension to make way for the new parts ;-) Old blox LCAs and no name tie bar gone.
Making things pretty.....
Metal Cast ground coat ready on the booster.....(This booster will eventually be deleted entire by a Wilwood Manual Brake set up)

Stripped the old ratty paint on my Cusco strut bar mounts.
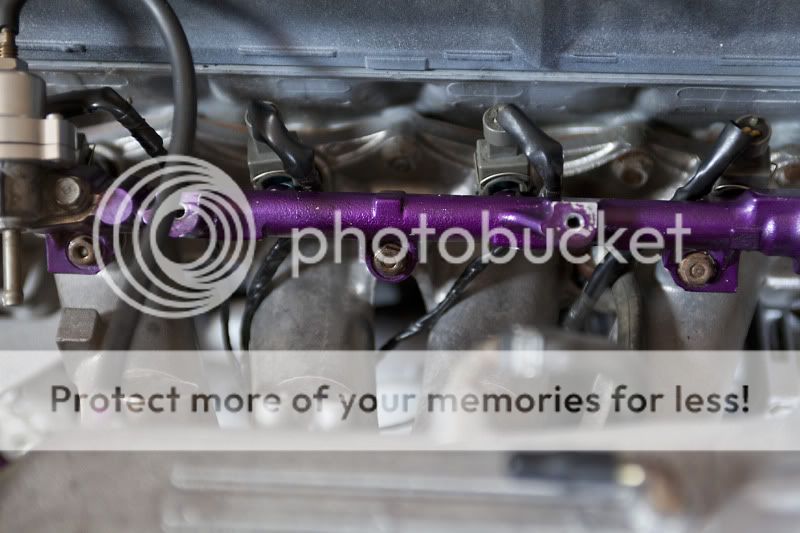
Yes, purple....
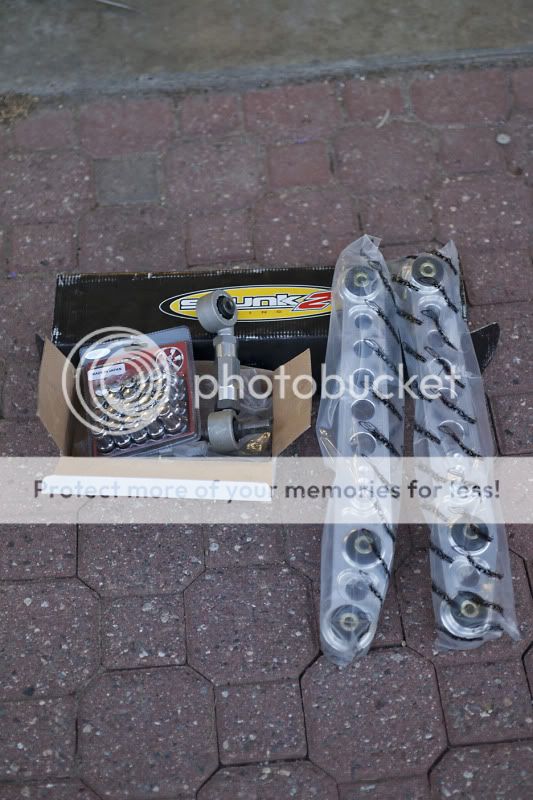
Overnight parts from......Ottawa (Thanks Brendan for grabbing this **** for us!) Skunk2 LCAS, Jasma Rear Camber, new lugs. Also grabbed Josh's old BWR sub frame brace which is not pictured here.
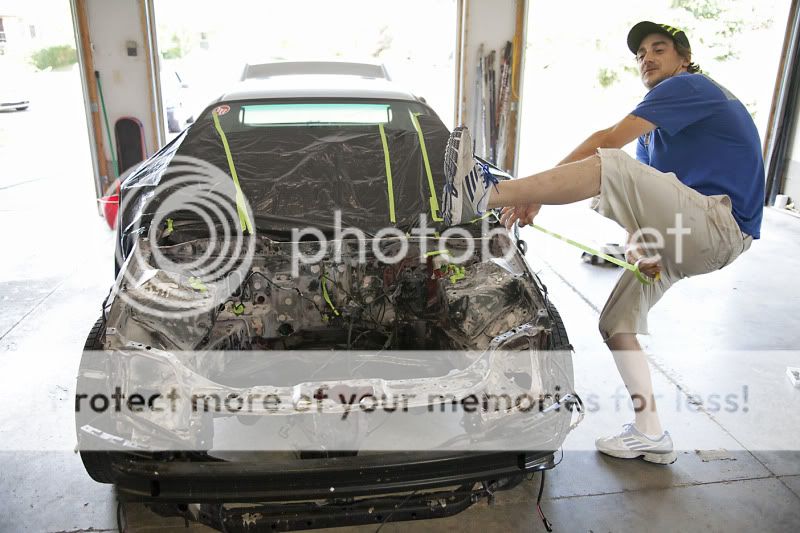
Marc Dunlop being a goofball while prepping the bay..
First coat of primer..
Wet sand that ****!

Spraying the SubFrame fresh black...
Ready for paint!
Laying it on....all rattle can here.
Looking FRESH!
After last season without a single change it was time this year to re-vamp this thing completely! New power train, new engine bay set-up, re-done interior, new wheels, etc etc! I wanted to see if I could manage some fresh paint this season but it just wasn't in the budget at all. I will try to keep putting in little blurbs about whats happeninig in the photos.
I still have a bunch of stuff to add after this as Victor and I were so busy trying to get everything buttoned up for Honda Tech I barely had time to pick up the camera.
That reminds me, before I post ANY photos I need to send out my thank yous as without these people this car would never be where it is today. First and foremost, Victor Praticante or 2Low on the boards. Without this guy I don't even know if I would have built ANY of my cars to be honest. He is the definition of a jack of all trades, master of most! There were many times in this build that I had my doubts that Victor would be able to prevail over certain wiring tasks, or mechanicle challenges posed by my vehicle but of course, every time it got done.
Next thank you would be to all my other friends who every turned a wrench or laid a hand on this vehicle including but not limited to.....Marc Dunlop, Josh Roy, Brendan Perry, Tmack, Neil Shamssuzzoha, Corbin, Cole, Adam, and MANY more but those are some of the mains helping hands involved in all of this. Some more then others for sure, but none the less all important!
Ok here we go, on to the photos!
First things first, the motor was pulled a few months previous to all of this work your about to see as I had purchased another EK hatch with a mildly built B16, so I swapped my old B20 into the new hatch, and sold it with tranny and all! Here is a shot of the old wiring harness before we cleaned her up
The old Bay
My best friend for two days of stripping paint!
Here we go :-)
My skin was on fire from the stripper being rinsed off and landing on me!! Be safe while using this stuff, I'm an idiot.
Getting there.....
Cool photo the girlfriend took during the process!
Ewwww, so much paint!
As clean as she gets before sanding/prep.
Back in the bat cave..... Victor begins wiring the daunting task of the AP1 Honda S2000 digital cluster!
Meanwhile, I had some fun with the grinder in the bay taking out unneccesery brackets and studs.
Wtf, already?!?!
The key supplies that day!
Some non-existant studs :-)
Removed rear suspension to make way for the new parts ;-) Old blox LCAs and no name tie bar gone.
Making things pretty.....
Metal Cast ground coat ready on the booster.....(This booster will eventually be deleted entire by a Wilwood Manual Brake set up)
Stripped the old ratty paint on my Cusco strut bar mounts.
Yes, purple....
Overnight parts from......Ottawa (Thanks Brendan for grabbing this **** for us!) Skunk2 LCAS, Jasma Rear Camber, new lugs. Also grabbed Josh's old BWR sub frame brace which is not pictured here.
Marc Dunlop being a goofball while prepping the bay..
First coat of primer..
Wet sand that ****!
Spraying the SubFrame fresh black...
Ready for paint!
Laying it on....all rattle can here.
Looking FRESH!
Trending Topics
09-27-2012, 07:56 PM
#8
Honda-Tech Member
Thread Starter
Join Date: Aug 2009
Location: Kingston, Ontario, Canada
Posts: 122
Likes: 0
Received 0 Likes
on
0 Posts
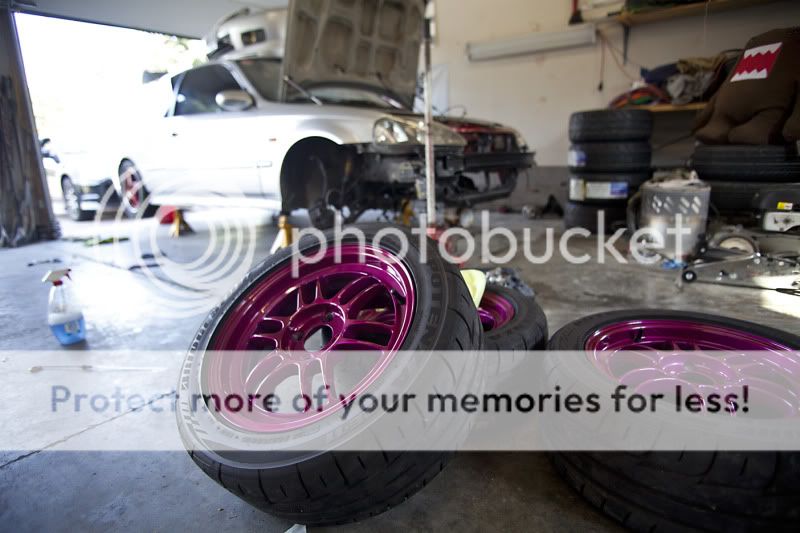
An exciting purchase that ended up dictating a lot of the colour scheme of my build for the season. Considered re-powder coating these bad boys, but honestly the colour has grown on me now. Hate it or love it, no matter to me.
Enkie RPF1 +35 et /w brand new RE11's mounted all the way around. Got a stupid deal on these, and drove to Montreal to pick them up.
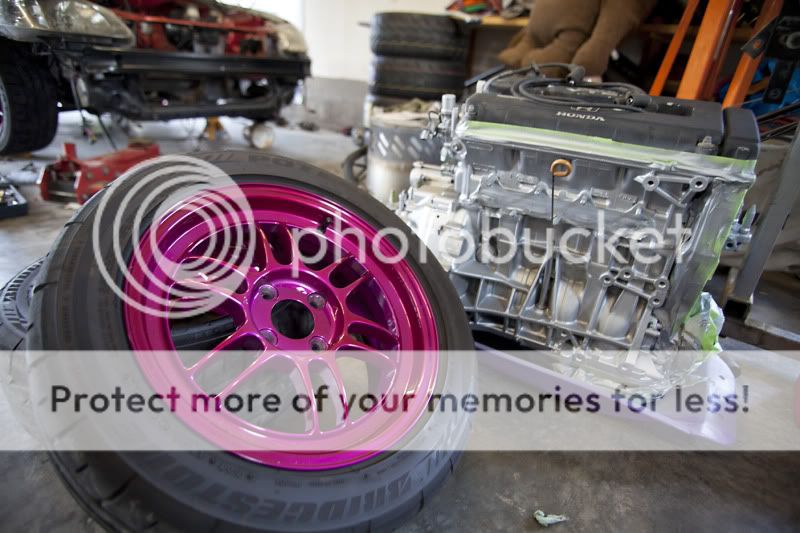
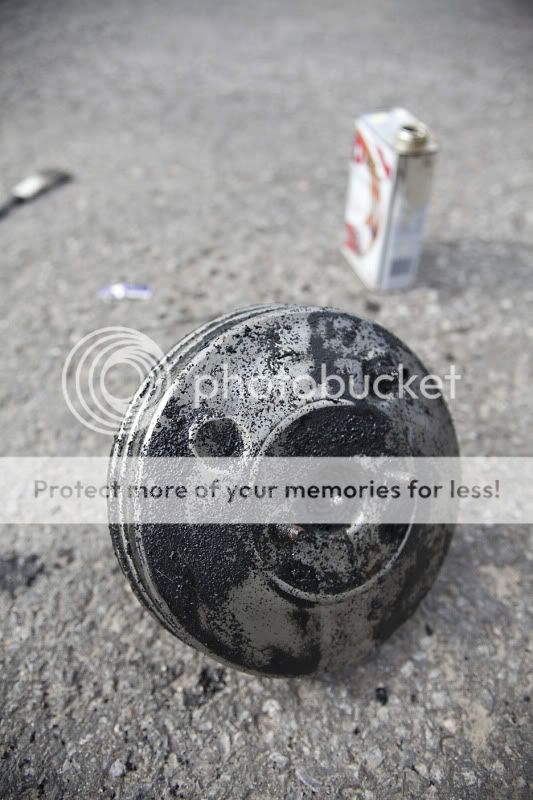
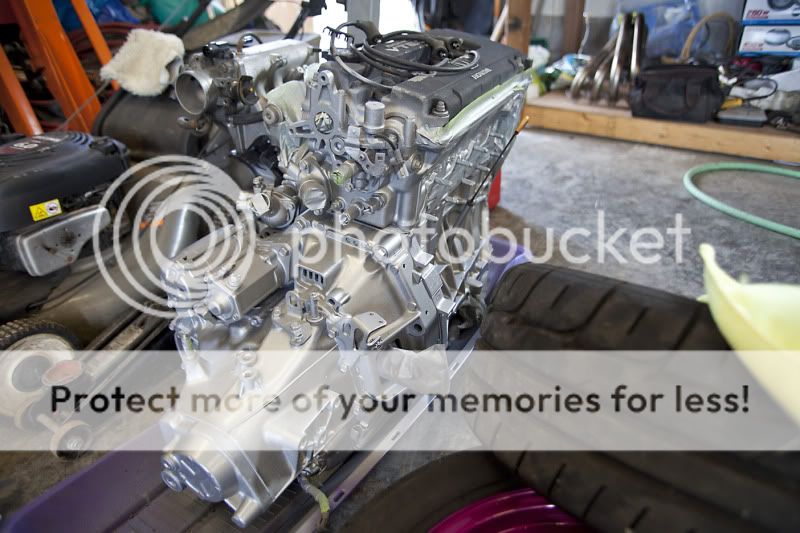
Alright, on to the block clean-up.
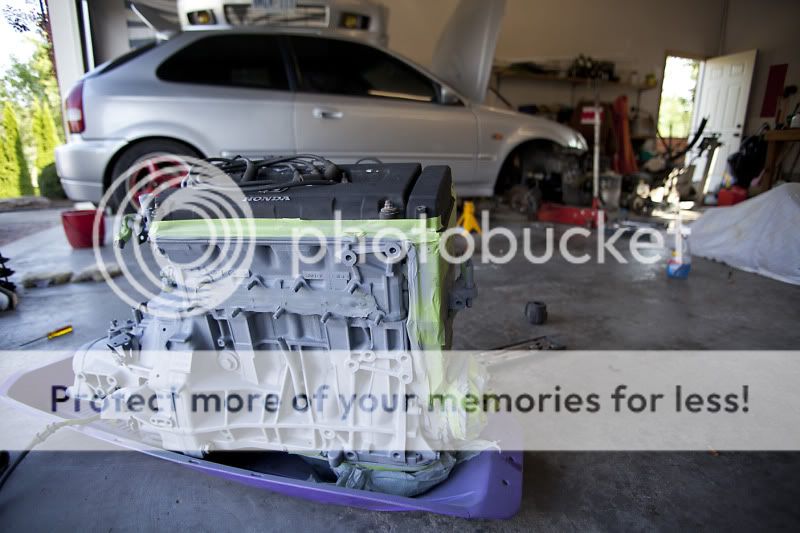
All done, cast iron "look".
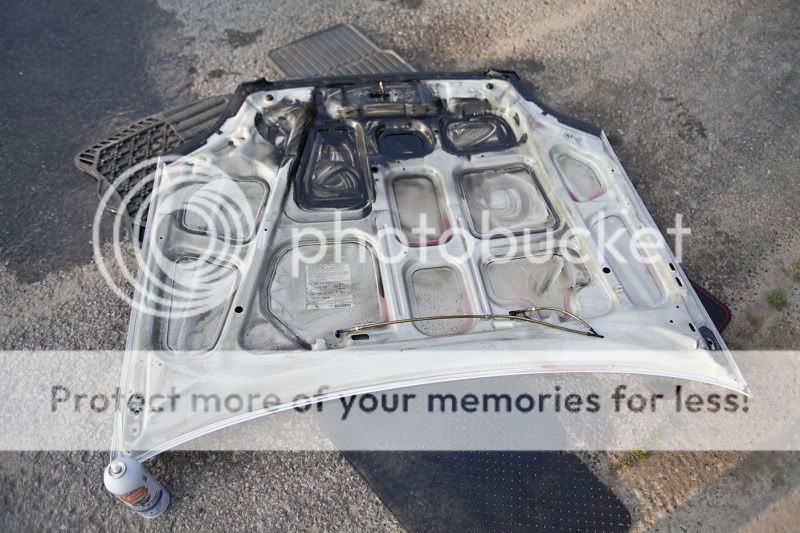
I wish I had taken a before shot of this hood......holy **** was it ever dirty.
Here is one from last season lol....
http://www.flickr.com/photos/twolitremedia/5037472575/http://www.flickr.com/photos/twolitremedia/5037472575/ by http://www.flickr.com/people/twolitremedia/, on Flickr
I have to find the photos I took when Victor and I did the headliner, but I also decided to wrap A pillars in suede as well to match with the headliner. Looks great!
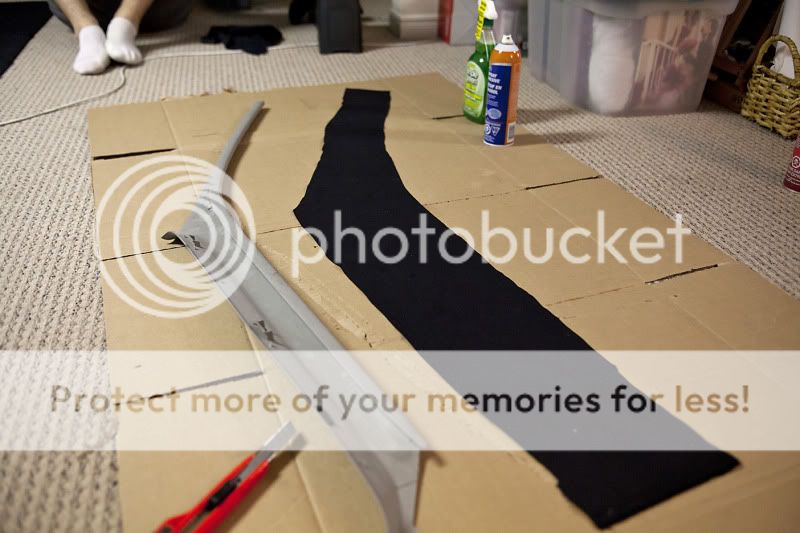
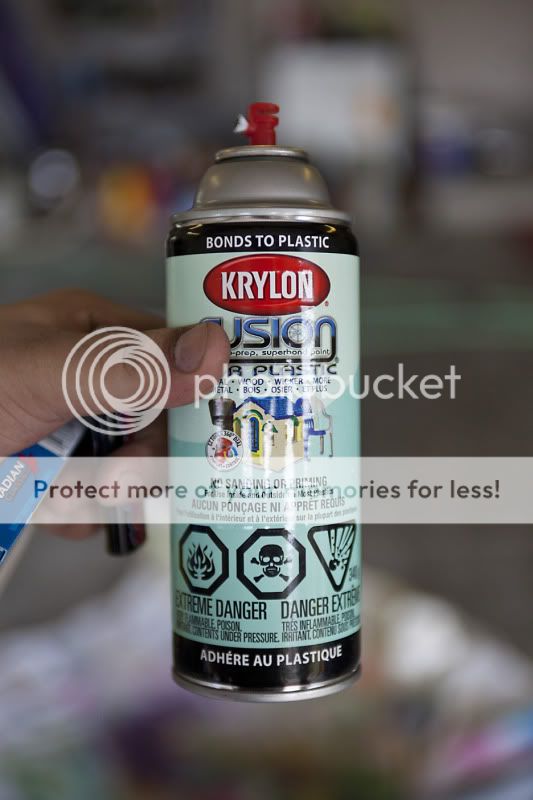
With the suede in place, I knew something had to be done with all the dark grey stock civic panels, and apparently Krylon had the answer to my needs. I never thought this stuff would work as well, and look as good as it did but whatever works :-) Just prep with simple green paint prep, and spray liberally!
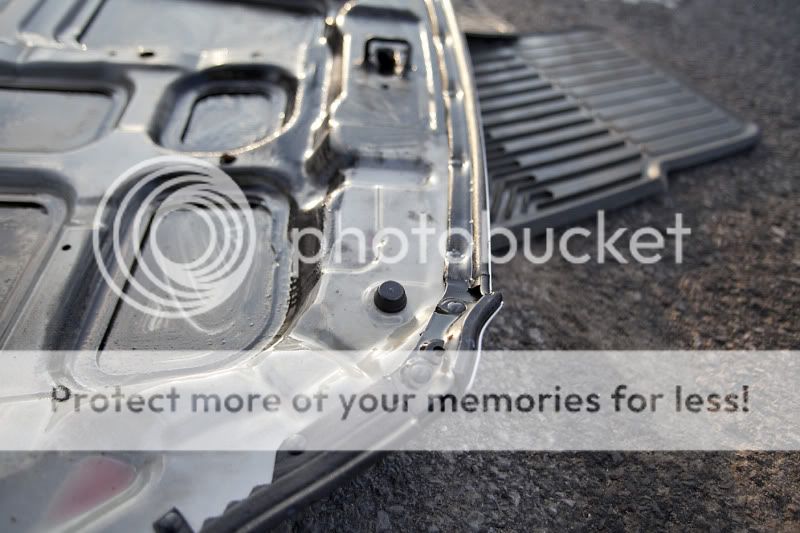
Before
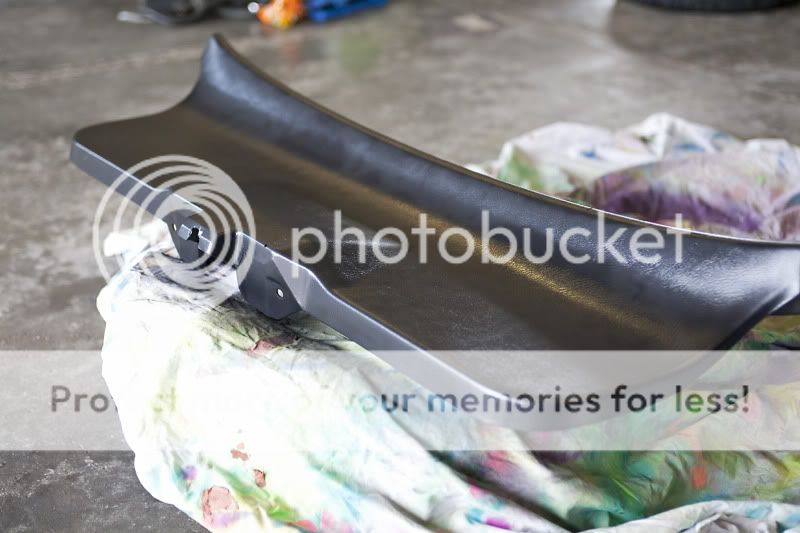
After:

This will get wrapped with the suede type r replica cover I have for it, thanks Keith!
Ok on to more good stuff.....
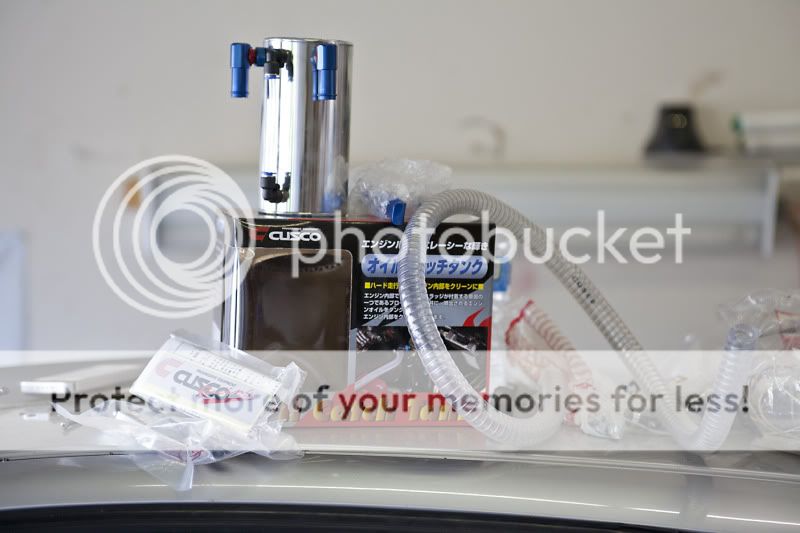
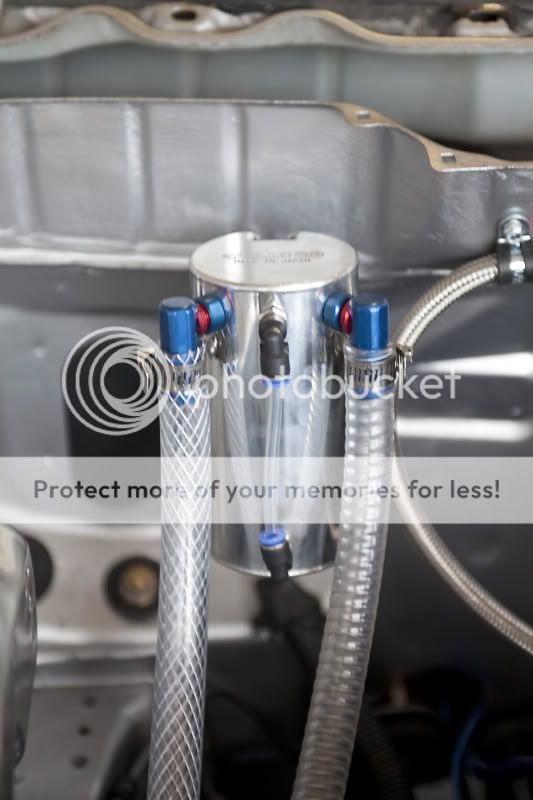
Picked up a brand new Cusco catch can set-up from Cole at Auto Add Ons!
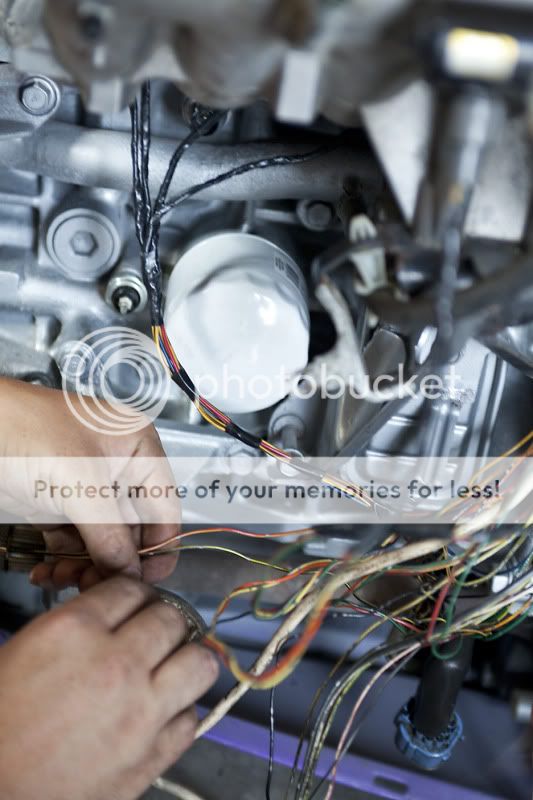
Let's clean up this **** show....Josh Roy and Victor present ;-) Thanks dooooods.
Fuel rail....
Spider webs becoming organized slowly
Clean.
With the crank case vent on the back of the block plugged and all the wire looming done, it was time to drop the heart back in.
Went smoothly, minimal scratching to paint in the bay.
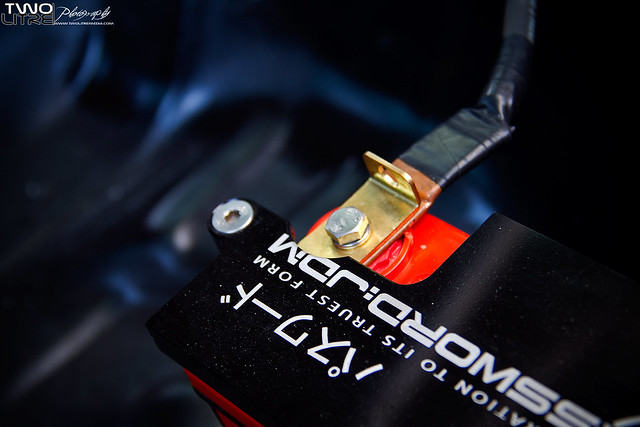
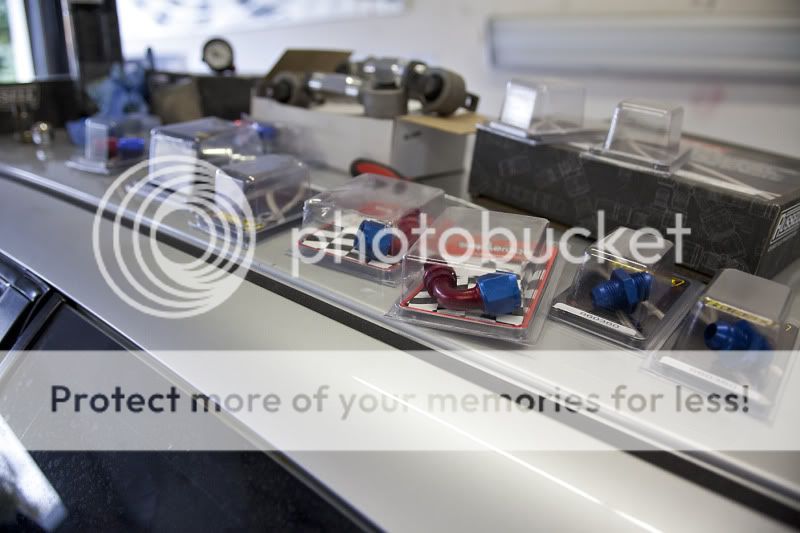
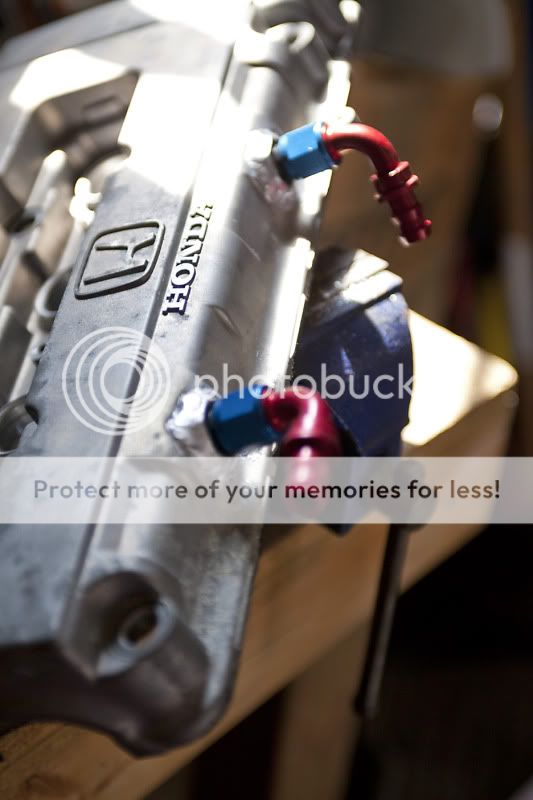
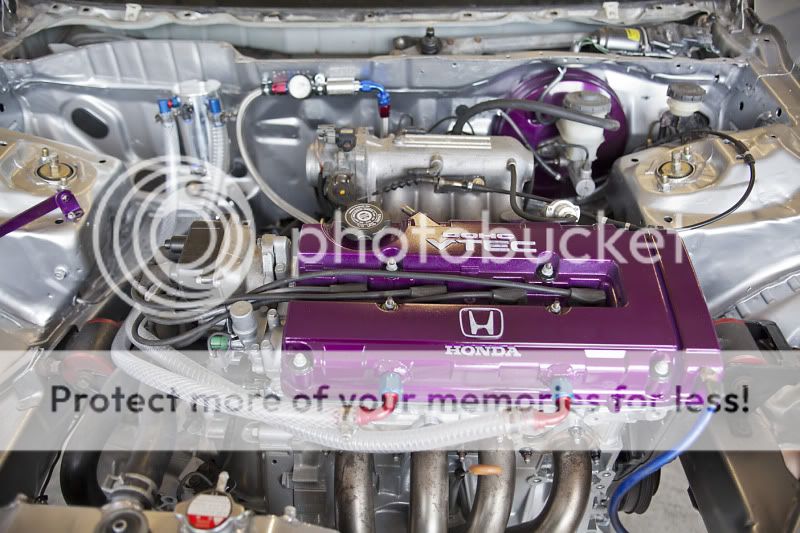
The ever controversial AN fitting order.....all in!
Pulled the VC off to begin repaint.
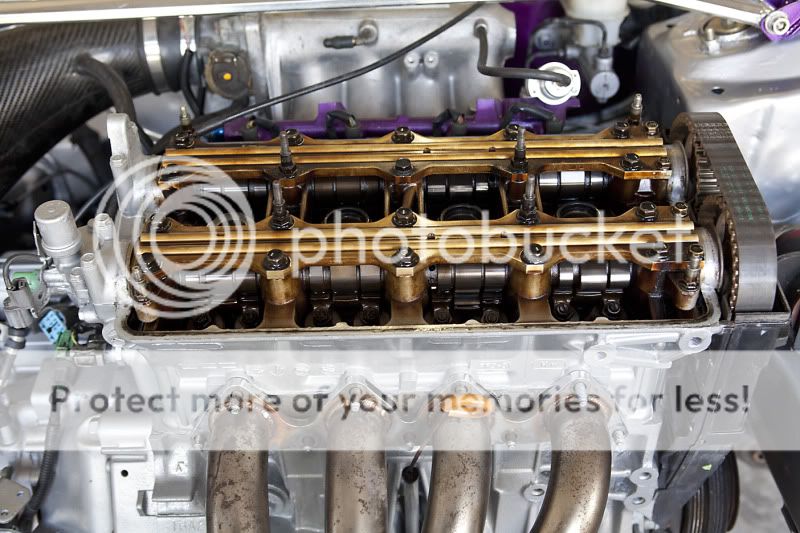
Crusty stock VC paint.
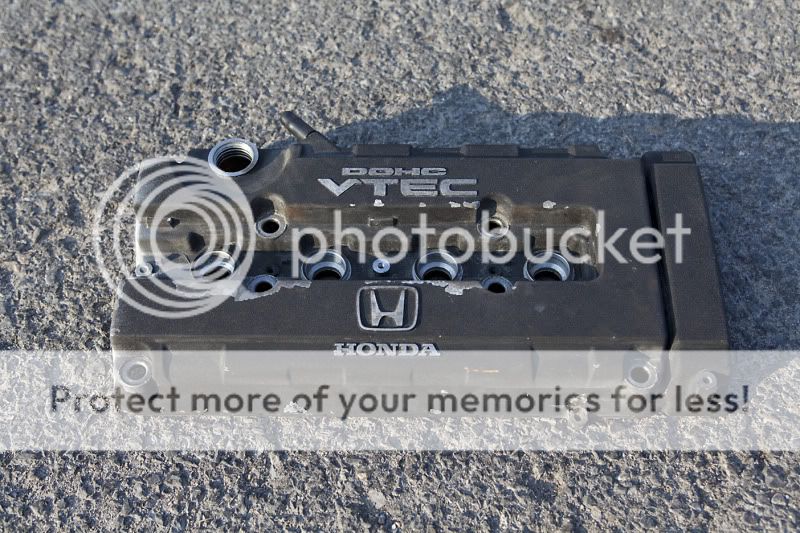
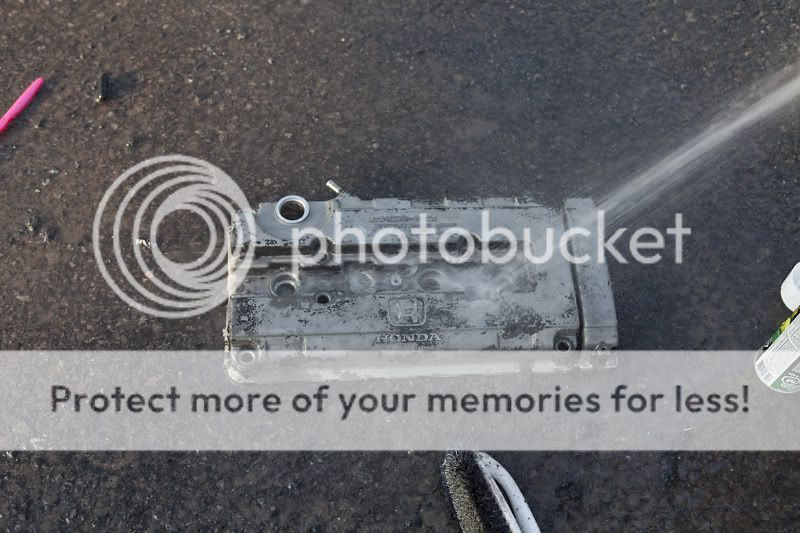
Used the same stripper as before to remove all the OEM paint....
Needed to drill the front of the VC for crank case ventilation leading to -10 lines to the catch can. This needed to be done asap as I needed to have the AN bungs tig'd to the VC before paint.
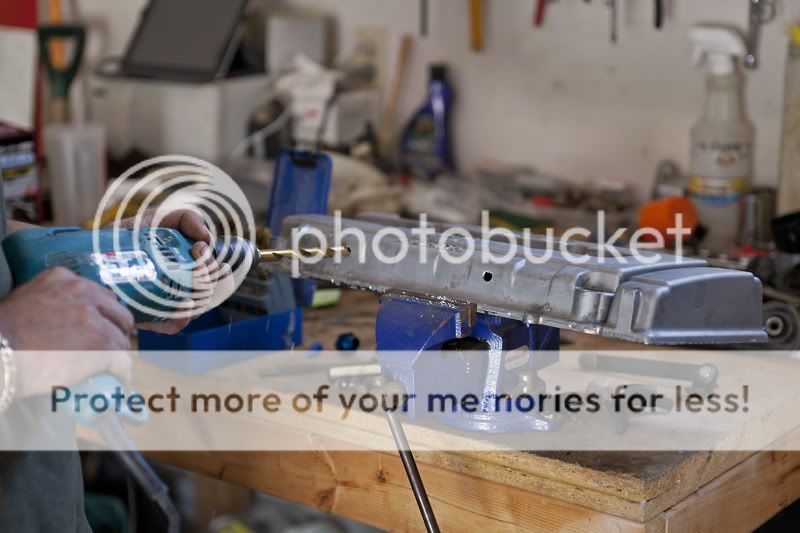
Woot woot, mad "props" to The Prop Shop on what I believe is McKay Street here in town. These guys have come in clutch for me in many tig welding needed type of situations, they're always willing to help!
Paint....here we go. Had to go a different route as no one did Neo Chrome in town sadly :-(

Primer
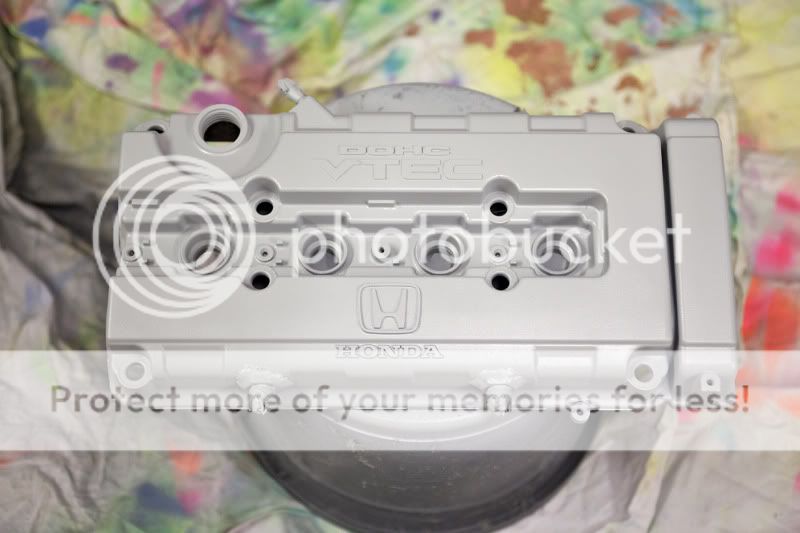
Base Coat Activator
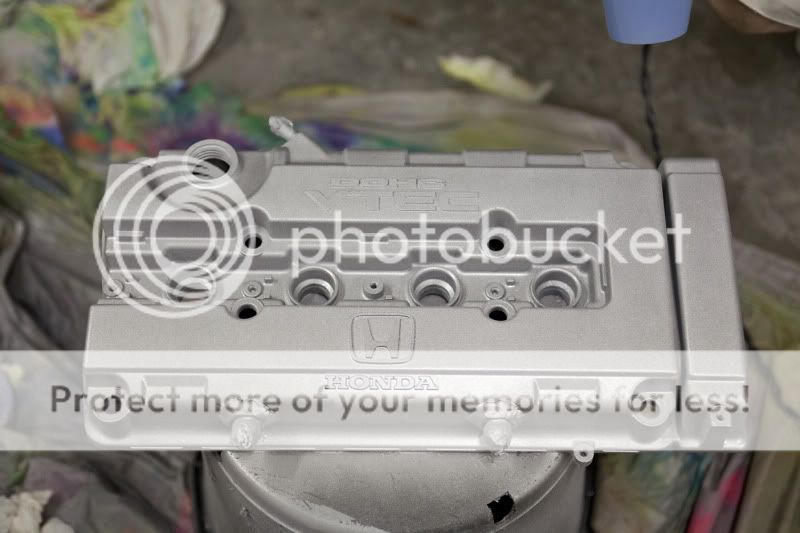
Dust Coat
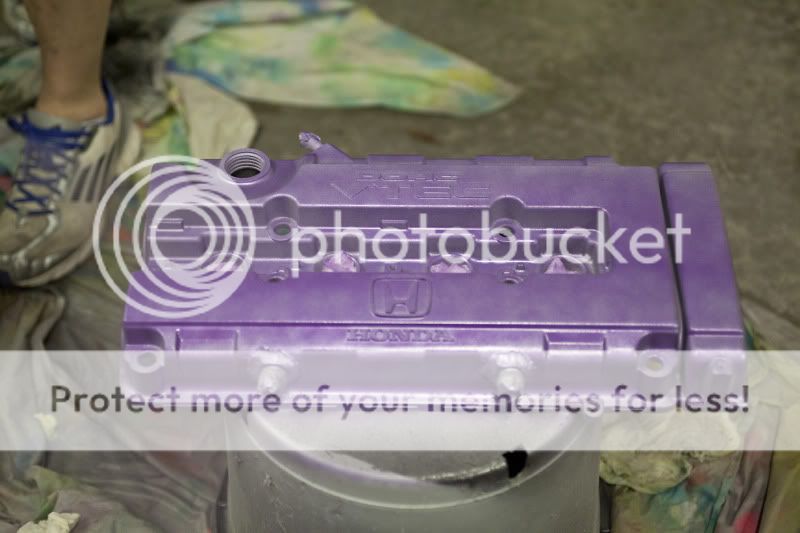
Heavy Coat
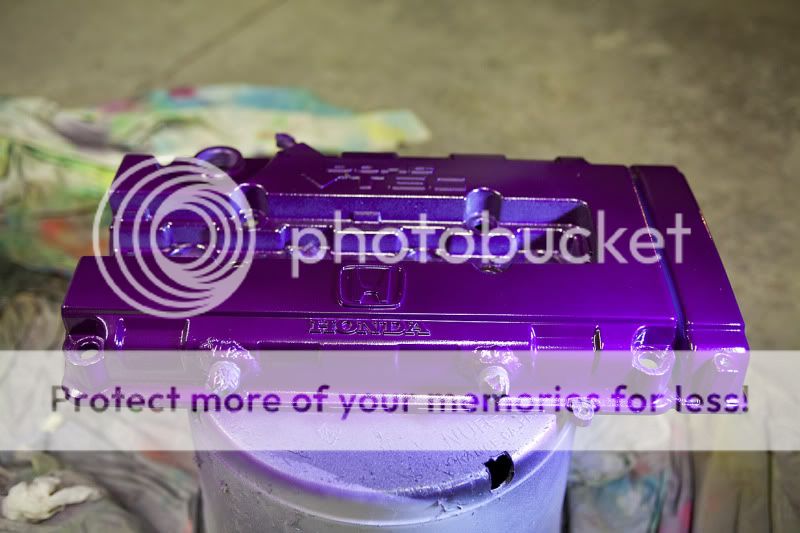
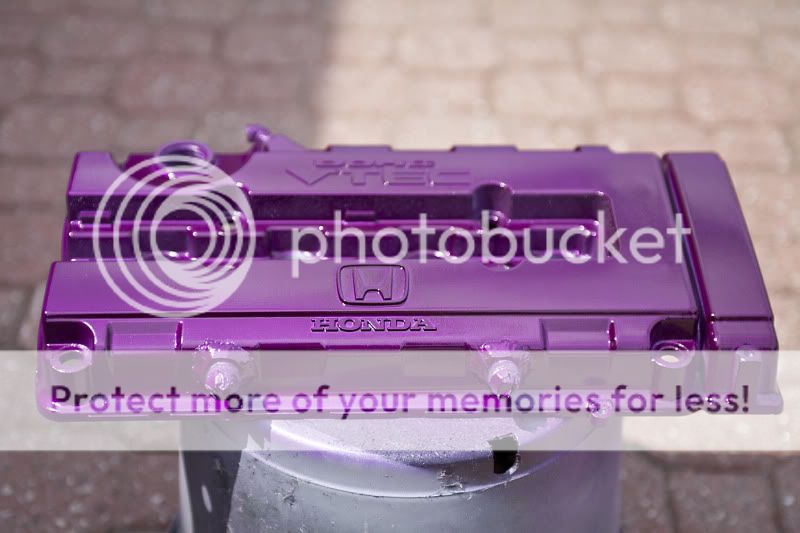
Clear coat and dried.
New VC gasket from Honda...
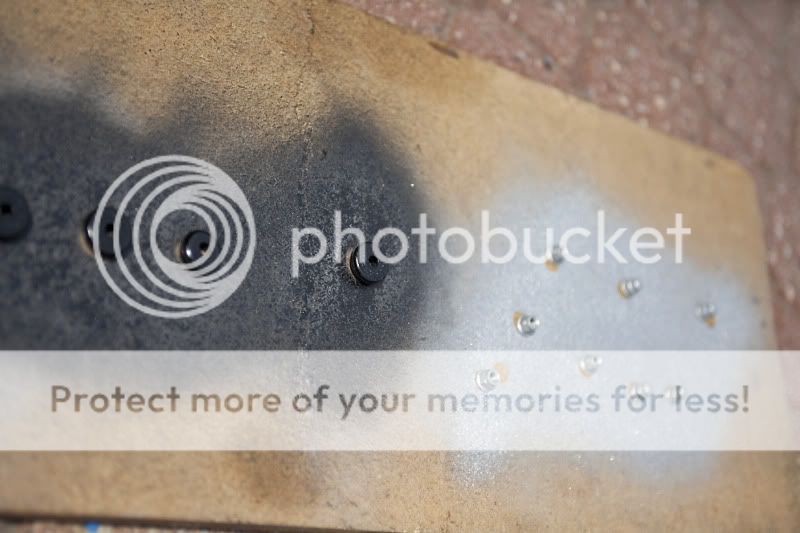
Repainted all the hardware for the VC
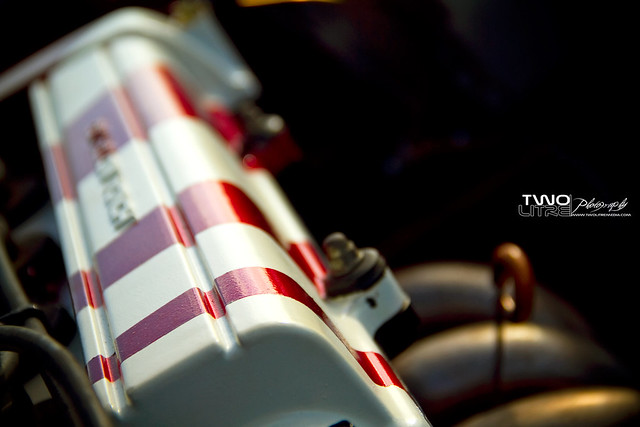
Ok so a LOT of photos have been skipped, and misplaced to get to this point and I will add them as I find them but here is was the semi-finished product ended up looking like without the Cusco strut bar installed
This is what the re-assembly day looked like in my garage a day prior to Honda Tech 8....
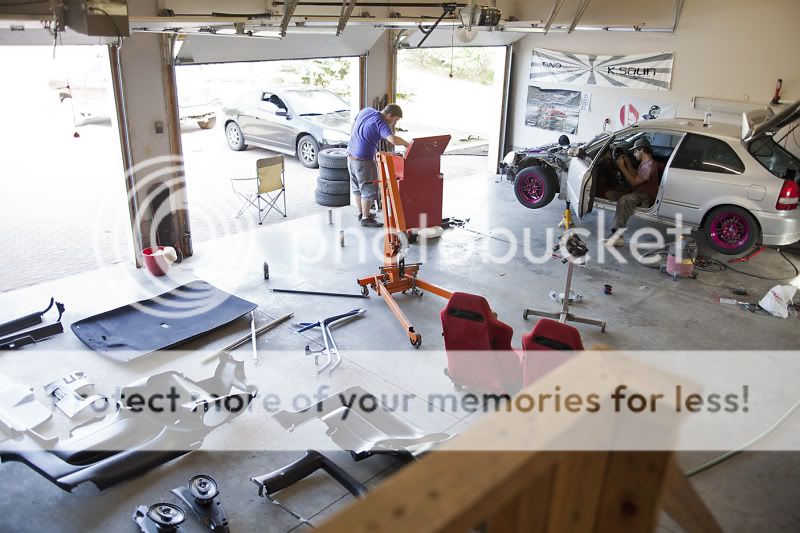
The night before....

The is a LOT more photos to come.....stay tuned. Including full blown photo shoot soon!
Enkie RPF1 +35 et /w brand new RE11's mounted all the way around. Got a stupid deal on these, and drove to Montreal to pick them up.
Alright, on to the block clean-up.
All done, cast iron "look".
I wish I had taken a before shot of this hood......holy **** was it ever dirty.
Here is one from last season lol....
http://www.flickr.com/photos/twolitremedia/5037472575/http://www.flickr.com/photos/twolitremedia/5037472575/ by http://www.flickr.com/people/twolitremedia/, on Flickr
I have to find the photos I took when Victor and I did the headliner, but I also decided to wrap A pillars in suede as well to match with the headliner. Looks great!
With the suede in place, I knew something had to be done with all the dark grey stock civic panels, and apparently Krylon had the answer to my needs. I never thought this stuff would work as well, and look as good as it did but whatever works :-) Just prep with simple green paint prep, and spray liberally!
Before
After:
This will get wrapped with the suede type r replica cover I have for it, thanks Keith!
Ok on to more good stuff.....
Picked up a brand new Cusco catch can set-up from Cole at Auto Add Ons!
Let's clean up this **** show....Josh Roy and Victor present ;-) Thanks dooooods.
Fuel rail....
Spider webs becoming organized slowly
Clean.
With the crank case vent on the back of the block plugged and all the wire looming done, it was time to drop the heart back in.
Went smoothly, minimal scratching to paint in the bay.
The ever controversial AN fitting order.....all in!
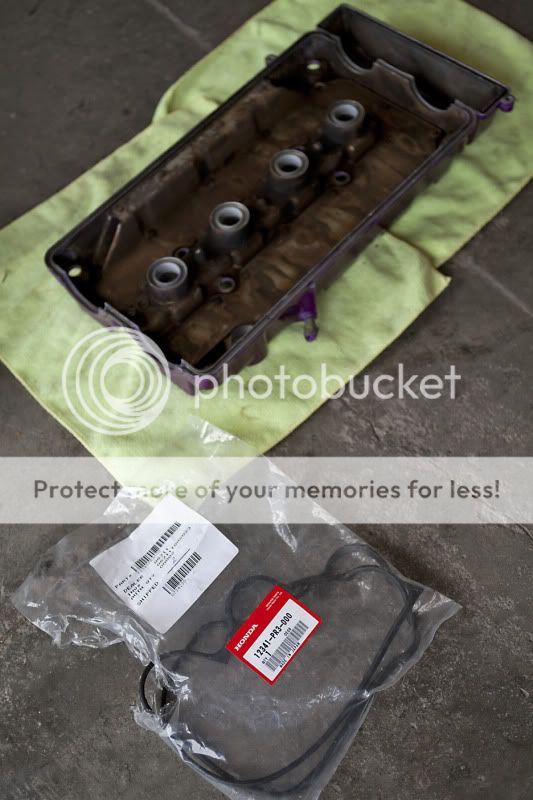
Pulled the VC off to begin repaint.
Crusty stock VC paint.
Used the same stripper as before to remove all the OEM paint....
Needed to drill the front of the VC for crank case ventilation leading to -10 lines to the catch can. This needed to be done asap as I needed to have the AN bungs tig'd to the VC before paint.
Woot woot, mad "props" to The Prop Shop on what I believe is McKay Street here in town. These guys have come in clutch for me in many tig welding needed type of situations, they're always willing to help!
Paint....here we go. Had to go a different route as no one did Neo Chrome in town sadly :-(
Primer
Base Coat Activator
Dust Coat
Heavy Coat
Clear coat and dried.
New VC gasket from Honda...
Repainted all the hardware for the VC
Ok so a LOT of photos have been skipped, and misplaced to get to this point and I will add them as I find them but here is was the semi-finished product ended up looking like without the Cusco strut bar installed
This is what the re-assembly day looked like in my garage a day prior to Honda Tech 8....
The night before....
The is a LOT more photos to come.....stay tuned. Including full blown photo shoot soon!
 09-27-2012, 07:57 PM
#10
Honda-Tech Member
Thread Starter
Join Date: Aug 2009
Location: Kingston, Ontario, Canada
Posts: 122
Likes: 0
Received 0 Likes
on
0 Posts
Still have to figure this shittyness out :-( Kept me from being able to track on the 20th and 24th this week.
http://www.flickr.com/photos/twolitremedia/7841757810/http://www.flickr.com/photos/twolitremedia/7841757810/ by http://www.flickr.com/people/twolitremedia/, on Flickr
http://www.flickr.com/photos/twolitremedia/7841757810/http://www.flickr.com/photos/twolitremedia/7841757810/ by http://www.flickr.com/people/twolitremedia/, on Flickr
09-27-2012, 07:58 PM
#11
Honda-Tech Member
Thread Starter
Join Date: Aug 2009
Location: Kingston, Ontario, Canada
Posts: 122
Likes: 0
Received 0 Likes
on
0 Posts
All done. Just step drilled, then cracked it off. Wish I would have done the old SSRs this way instead of mangling them haha
http://www.flickr.com/photos/twolitremedia/7859999126/http://www.flickr.com/photos/twolitremedia/7859999126/ by http://www.flickr.com/people/twolitremedia/, on Flickr
http://www.flickr.com/photos/twolitremedia/7859996560/http://www.flickr.com/photos/twolitremedia/7859996560/ by http://www.flickr.com/people/twolitremedia/, on Flickr
http://www.flickr.com/photos/twolitremedia/7859993886/http://www.flickr.com/photos/twolitremedia/7859993886/ by http://www.flickr.com/people/twolitremedia/, on Flickr
Two tiny little nicks, barely visible though. Basically no damage was done which is nice, what's seen in this photo is metal shavings still left on the wheel.
http://www.flickr.com/photos/twolitremedia/7859991034/http://www.flickr.com/photos/twolitremedia/7859991034/ by http://www.flickr.com/people/twolitremedia/, on Flickr
http://www.flickr.com/photos/twolitremedia/7860031332/http://www.flickr.com/photos/twolitremedia/7860031332/ by http://www.flickr.com/people/twolitremedia/, on Flickr
09-27-2012, 07:58 PM
#12
Honda-Tech Member
Thread Starter
Join Date: Aug 2009
Location: Kingston, Ontario, Canada
Posts: 122
Likes: 0
Received 0 Likes
on
0 Posts
Recent progress....
New Studs! Thanks Josh (Jr.)
http://www.flickr.com/photos/twolitremedia/7890568746/http://www.flickr.com/photos/twolitremedia/7890568746/ by http://www.flickr.com/people/twolitremedia/, on Flickr
Old Studs :-(
http://www.flickr.com/photos/twolitremedia/7890558602/http://www.flickr.com/photos/twolitremedia/7890558602/ by http://www.flickr.com/people/twolitremedia/, on Flickr
Pressing out the Hub
http://www.flickr.com/photos/twolitremedia/7890562910/http://www.flickr.com/photos/twolitremedia/7890562910/ by http://www.flickr.com/people/twolitremedia/, on Flickr
Bearing still looks good and spins smooth
http://www.flickr.com/photos/twolitremedia/7890560788/http://www.flickr.com/photos/twolitremedia/7890560788/ by http://www.flickr.com/people/twolitremedia/, on Flickr
Good old Portuguese hammer work
http://www.flickr.com/photos/twolitremedia/7890556818/http://www.flickr.com/photos/twolitremedia/7890556818/ by http://www.flickr.com/people/twolitremedia/, on Flickr
New studs in...
http://www.flickr.com/photos/twolitremedia/7890565976/http://www.flickr.com/photos/twolitremedia/7890565976/ by http://www.flickr.com/people/twolitremedia/, on Flickr
New studs in, hub pressed back together
http://www.flickr.com/photos/twolitremedia/7890555054/http://www.flickr.com/photos/twolitremedia/7890555054/ by http://www.flickr.com/people/twolitremedia/, on Flickr
Oooooo look, torque bar.....
http://www.flickr.com/photos/twolitremedia/7890553452/http://www.flickr.com/photos/twolitremedia/7890553452/ by http://www.flickr.com/people/twolitremedia/, on Flickr
NR-G Extended Lugs for my now extended studs. These lugs are also aluminum, but the diameter of the lug is consistent all th way through, and the thickness is a significant improvement over the r40s.
http://www.flickr.com/photos/twolitremedia/7890547800/http://www.flickr.com/photos/twolitremedia/7890547800/ by http://www.flickr.com/people/twolitremedia/, on Flickr
The studs with no lugs, with wheel. They're not extreme, good for up to 15mm spacers, which I won't need to be running any ideally anyways....
http://www.flickr.com/photos/twolitremedia/7890545960/http://www.flickr.com/photos/twolitremedia/7890545960/ by http://www.flickr.com/people/twolitremedia/, on Flickr
Onto the next task...mounting the R888s. Tried doing these on a traditional machine thinking it wouldnt be an issue but ran into problems so Victor rand them over to Kal tire for mounting and balancing. Once the car is e-tested, registered, and re-tuned I'm ready for the next track day now that I can take my wheels off (no broken lug), and have the track rims set up.
http://www.flickr.com/photos/twolitremedia/7890543380/http://www.flickr.com/photos/twolitremedia/7890543380/ by http://www.flickr.com/people/twolitremedia/, on Flickr
http://www.flickr.com/photos/twolitremedia/7890541004/http://www.flickr.com/photos/twolitremedia/7890541004/ by http://www.flickr.com/people/twolitremedia/, on Flickr
http://www.flickr.com/photos/twolitremedia/7890538852/http://www.flickr.com/photos/twolitremedia/7890538852/ by http://www.flickr.com/people/twolitremedia/, on Flickr
http://www.flickr.com/photos/twolitremedia/7890536258/http://www.flickr.com/photos/twolitremedia/7890536258/ by http://www.flickr.com/people/twolitremedia/, on Flickr
Here's the biggest issue of all......one of those has two attatched to each other :-(
http://www.flickr.com/photos/twolitremedia/7890738076/http://www.flickr.com/photos/twolitremedia/7890738076/ by http://www.flickr.com/people/twolitremedia/, on Flickr
Big gigantic thanks goes out to Victor for helping me out with all of this stuff and taking time out of his busy *** days.
09-27-2012, 07:59 PM
#13
Honda-Tech Member
Thread Starter
Join Date: Aug 2009
Location: Kingston, Ontario, Canada
Posts: 122
Likes: 0
Received 0 Likes
on
0 Posts
To help with e-test......new cap, rotor, plugs and wires, needed this anyways.
http://www.flickr.com/photos/twolitremedia/7896682200/http://www.flickr.com/photos/twolitremedia/7896682200/ by http://www.flickr.com/people/twolitremedia/, on Flickr
http://www.flickr.com/photos/twolitremedia/7896680188/http://www.flickr.com/photos/twolitremedia/7896680188/ by http://www.flickr.com/people/twolitremedia/, on Flickr
http://www.flickr.com/photos/twolitremedia/7896677404/http://www.flickr.com/photos/twolitremedia/7896677404/ by http://www.flickr.com/people/twolitremedia/, on Flickr
http://www.flickr.com/photos/twolitremedia/7896674674/http://www.flickr.com/photos/twolitremedia/7896674674/ by http://www.flickr.com/people/twolitremedia/, on Flickr
http://www.flickr.com/photos/twolitremedia/7896672550/http://www.flickr.com/photos/twolitremedia/7896672550/ by http://www.flickr.com/people/twolitremedia/, on Flickr
http://www.flickr.com/photos/twolitremedia/7896669872/http://www.flickr.com/photos/twolitremedia/7896669872/ by http://www.flickr.com/people/twolitremedia/, on Flickr
09-27-2012, 08:01 PM
#14
Honda-Tech Member
Thread Starter
Join Date: Aug 2009
Location: Kingston, Ontario, Canada
Posts: 122
Likes: 0
Received 0 Likes
on
0 Posts
So finally got her e-tested so I am good for two years which is nice as I plan on boosting the **** out of her this winter. Lots of aero and power changes coming for the off season, keep an eye out for my full blow set of my car before I put her away for the winter!
Here are some of the most recent photos of how she sits at the moment....
http://www.flickr.com/photos/twolitremedia/7771001258/http://www.flickr.com/photos/twolitremedia/7771001258/ by http://www.flickr.com/people/twolitremedia/, on Flickr
http://www.flickr.com/photos/twolitremedia/7770998416/http://www.flickr.com/photos/twolitremedia/7770998416/ by http://www.flickr.com/people/twolitremedia/, on Flickr
http://www.flickr.com/photos/twolitremedia/7662597360/http://www.flickr.com/photos/twolitremedia/7662597360/ by http://www.flickr.com/people/twolitremedia/, on Flickr
http://www.flickr.com/photos/twolitremedia/7662575102/http://www.flickr.com/photos/twolitremedia/7662575102/ by http://www.flickr.com/people/twolitremedia/, on Flickr
09-27-2012, 10:05 PM
#15
Honda-Tech Member

Join Date: Jan 2011
Posts: 230
Likes: 0
Received 0 Likes
on
0 Posts
Thats one sick *** hatch! I just picked up my first hatch and I'm hoping I can get it to look something like yours! Nice build bro!

 09-28-2012, 07:04 AM
#18
Honda-Tech Member
Thread Starter
Join Date: Aug 2009
Location: Kingston, Ontario, Canada
Posts: 122
Likes: 0
Received 0 Likes
on
0 Posts
If by chin you mean lip, it's a full urethane JUNII. Honestly other than this toy car my buddy gave me (cause it looked freakishly like my hatch), I have only ever seen one other hatch with it. It's surely a hate it or love it peice, but I think it's one of the things that sets my car atleast a little bit apart from the millions of nice EKs out there.
Thanks man, gunna be a busy winter :-)
Last edited by TWOLITREmedia; 09-29-2012 at 03:27 PM.
09-29-2012, 03:46 PM
#23
Honda-Tech Member
Thread Starter
Join Date: Aug 2009
Location: Kingston, Ontario, Canada
Posts: 122
Likes: 0
Received 0 Likes
on
0 Posts
Thanks!
10-08-2012, 04:28 PM
#24
Honda-Tech Member
Thread Starter
Join Date: Aug 2009
Location: Kingston, Ontario, Canada
Posts: 122
Likes: 0
Received 0 Likes
on
0 Posts
Couple shots from a random impromptu shoot of my civic I did, trying to make use of some of these fall colours. More to come for this set before the seasons done.
http://www.flickr.com/photos/twolitremedia/8068960343/http://www.flickr.com/photos/twolitremedia/8068960343/ by http://www.flickr.com/people/twolitremedia/, on Flickr
http://www.flickr.com/photos/twolitremedia/8068961076/http://www.flickr.com/photos/twolitremedia/8068961076/ by http://www.flickr.com/people/twolitremedia/, on Flickr
03-12-2013, 09:50 PM
#25
Honda-Tech Member
Thread Starter
Join Date: Aug 2009
Location: Kingston, Ontario, Canada
Posts: 122
Likes: 0
Received 0 Likes
on
0 Posts
Well lot's of updates on my build, just been so busy with life to actually throw it up here! Lot's pf surprises and changes still ahead before spring :-)
Put both sets of tires inside for the winter and she's officially ready for her long nap.
http://www.flickr.com/photos/twolitremedia/8192920905/http://www.flickr.com/photos/twolitremedia/8192920905/ by http://www.flickr.com/people/twolitremedia/, on Flickr
Big huge gigantic thanks to Josh for picking this beast up for me in Toronto. Turbo and wastegate are in this week....than the fab work begins.
http://www.flickr.com/photos/twolitremedia/8194000800/http://www.flickr.com/photos/twolitremedia/8194000800/ by http://www.flickr.com/people/twolitremedia/, on Flickr
ALRIGHT! So finally after a month and a half or so of payment issues trying to send money a various number of ways to my turbo shop in Quebec I am using, finally we found a way that worked quickly and easily for both sides....
Taddaaaaa....I can't wait to get this build under way.
My brand new Garret GT2871R /w Tial Polished compressor side and all my vband clamps. Also pictured is my Tial MSV wastegate because once I went with the Tial hotside I lost the internal gate from the Garrett OEM setup.
Over all I am super happy with my purchase, and the fabrication on the manifold begins next week! Lots of other stuff going on with the car slowly but surely. Even with the delay in getting the turbo a month or so I think I will still be out earlier than any season before for sure.
Stay tuned for more soon...
http://www.flickr.com/photos/twolitremedia/8410711304/http://www.flickr.com/photos/twolitremedia/8410711304/ by http://www.flickr.com/people/twolitremedia/, on Flickr
http://www.flickr.com/photos/twolitremedia/8410712028/http://www.flickr.com/photos/twolitremedia/8410712028/ by http://www.flickr.com/people/twolitremedia/, on Flickr
Got a free upgrade to the TO4E housing on the Garrett unit as he had it in stock from a customer who flaked and it would have cost the same to order in another one with the difference...bonus!
http://www.flickr.com/photos/twolitremedia/8410712816/http://www.flickr.com/photos/twolitremedia/8410712816/ by http://www.flickr.com/people/twolitremedia/, on Flickr
http://www.flickr.com/photos/twolitremedia/8410713380/http://www.flickr.com/photos/twolitremedia/8410713380/ by http://www.flickr.com/people/twolitremedia/, on Flickr
Goals for the summer after tune is about 350whp. We'll see what happens after engine build is done