
92 Acura Legend Built, Boosted... wait what?
 11-21-2013, 05:20 PM
#1
Honda-Tech Member
Thread Starter
Join Date: Nov 2003
Location: Pittsburgh,PA
Posts: 74
Likes: 0
Received 0 Likes
on
0 Posts
I'm going on vacation in a few hours and got time to kill, figured I'd share my build up. 1992 Acura Legend Sedan Turbo
(Please bare with me I'm going to post the updates and type everything up tonight)
Teaser:

Here goes with my first build on hondatech... hopefully it gets a thumbs up and follows all your rules.
The car is a 1992 Acura Legend "L" Sedan that is Phantom Grey Pearl exterior and Tan (Type-F) interior, that had the original 128k 3.2 V6 (Type 1) with 4 speed automatic transmission.
This is how the car looked back in August 2005 when I first bought it and gave it a wash. The car had a SRI intake with a rusted filter on it when I got it. So a quick wash and minor tune up it looked like this.


It only lasted a month before being in college and I wanted to "mod" it, now this was 2005 so mods were VERY limited. But I added clear bumper lenses, clear corners, made my own grill to get rid of the chrome surround, also made the SRI into a CAI and removed the fog cover and put mesh for better flow, and upgraded from the y-pipe back with a custom 2.5" exhaust

VIDEO of the exhaust>>>
Next up I wanted to jazz up the interior since the leather was mint and the rest wasnt. So I dyed the carpets jet black with RIT dye and SEM paint, rewrapped the speaker grills to black, and upgraded the fake wood switches to real wood, also made a 3rd brake light cover that lights up LEGEND when the brakes were applied.


oh and I cant forget I went spray paint happy..
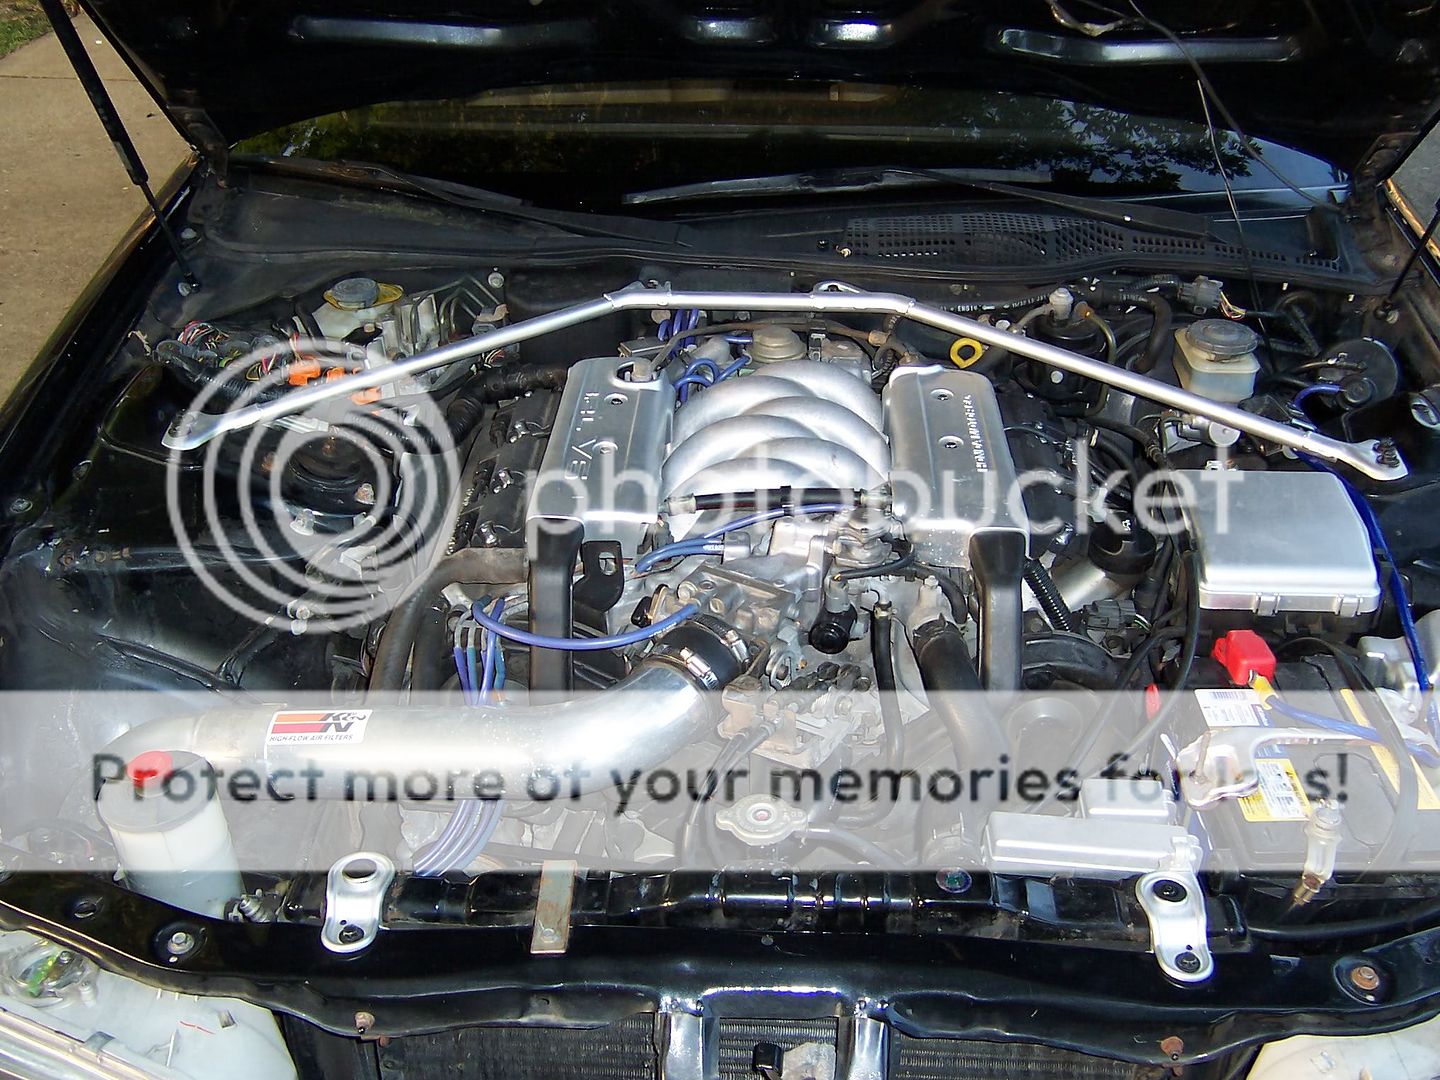
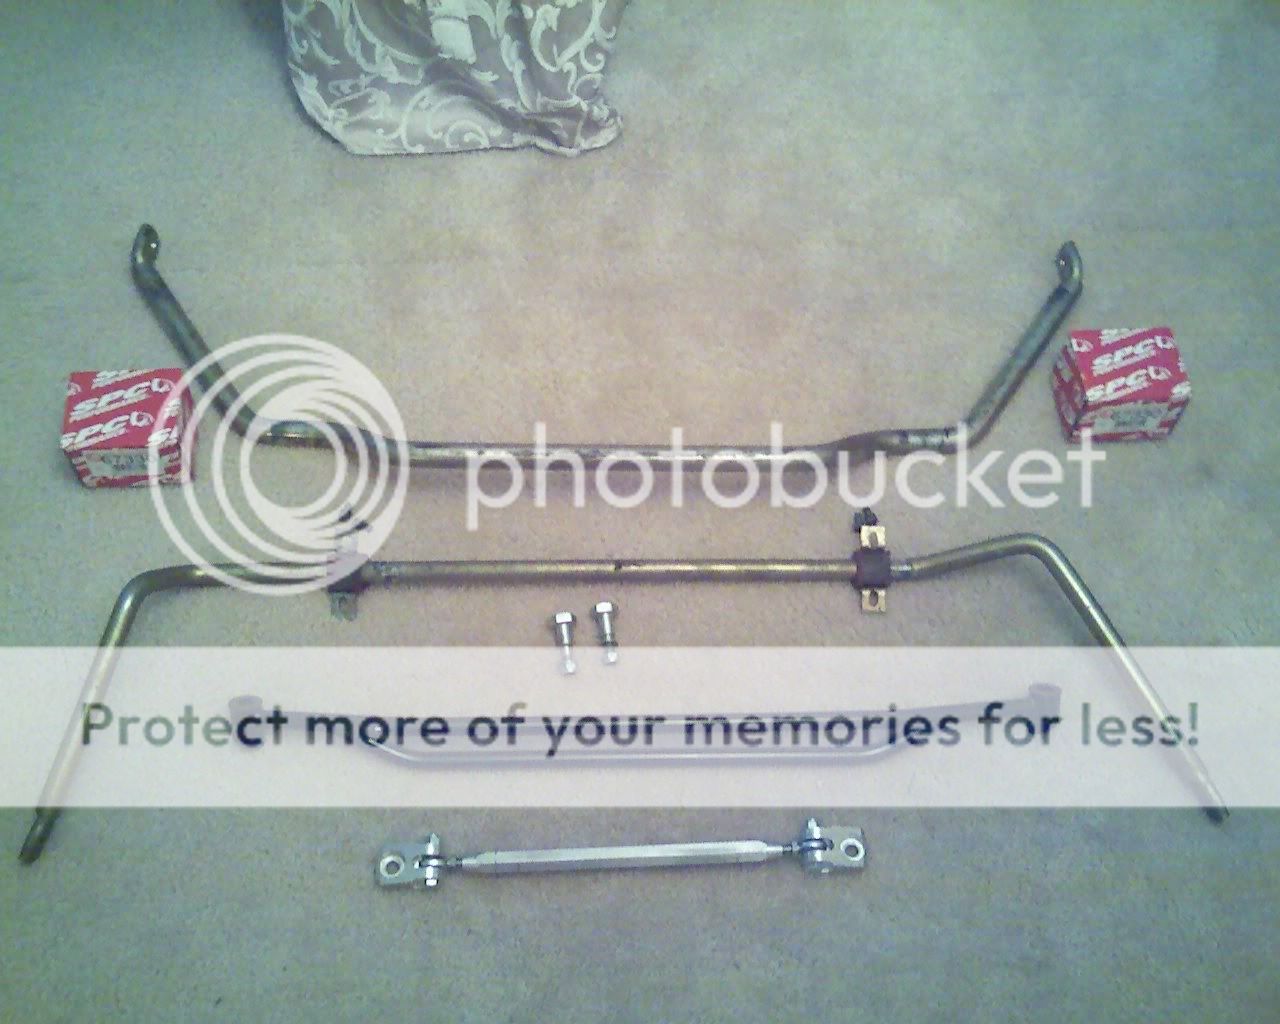
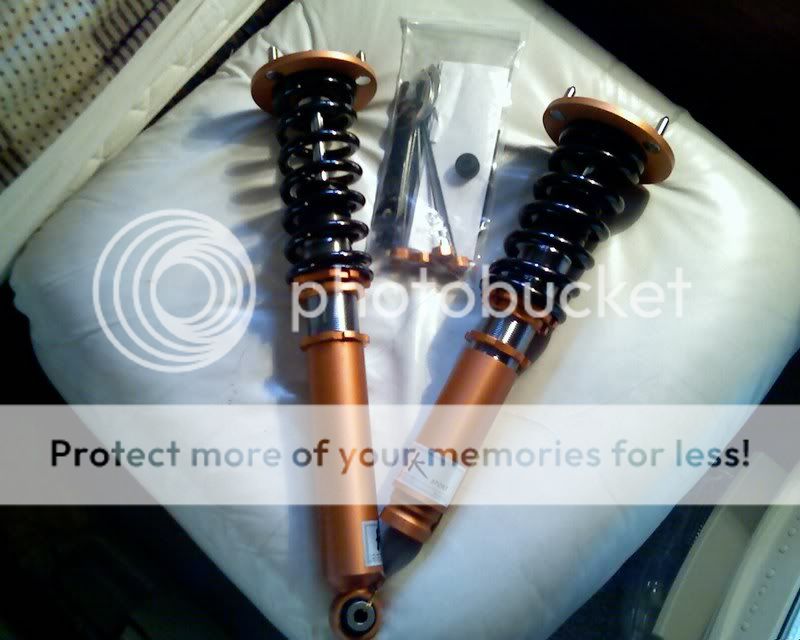
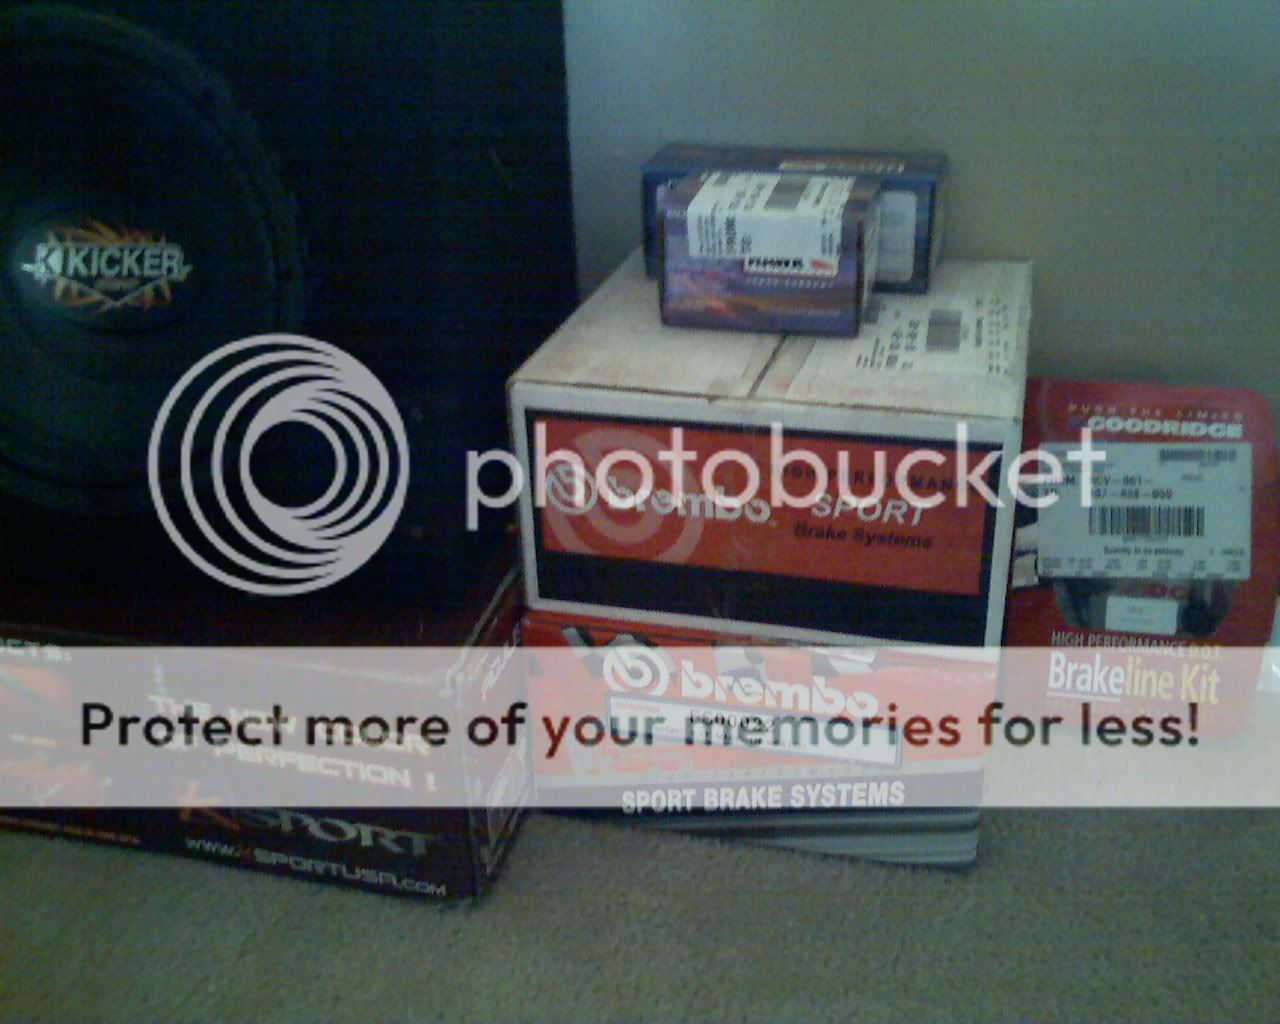
Now it looked good but it needed to get rid of the OEM feel and get sportier. Someone on the forum had contacted Ksport and had a prototype coilovers made, so I was on a waiting list for the first set available. Once they came in I added all of the following. New OEM Calipers on all 4 corners, with type 2 Dual piston upgrade up front they were all painted red, Brembo Slotted rotors (4) and HAWK HPS street pads (4), Goodridge Stainless Steel brake lines (4), new OEM master cylinder, and flushed all the old fluid and made it all high temp DOT 4 fluid. That wasn't enough so I needed to tackle the suspension and installed the Ksport Coilovers, ADDCO Front and Rear Sway bars (custom rear bolts), SPC Extreme Upper Front balljoints, MLS Front strut bar, and FUT's rear tie bars (short and long versions). Now the car handled like it was on rails and stopped on a dime!


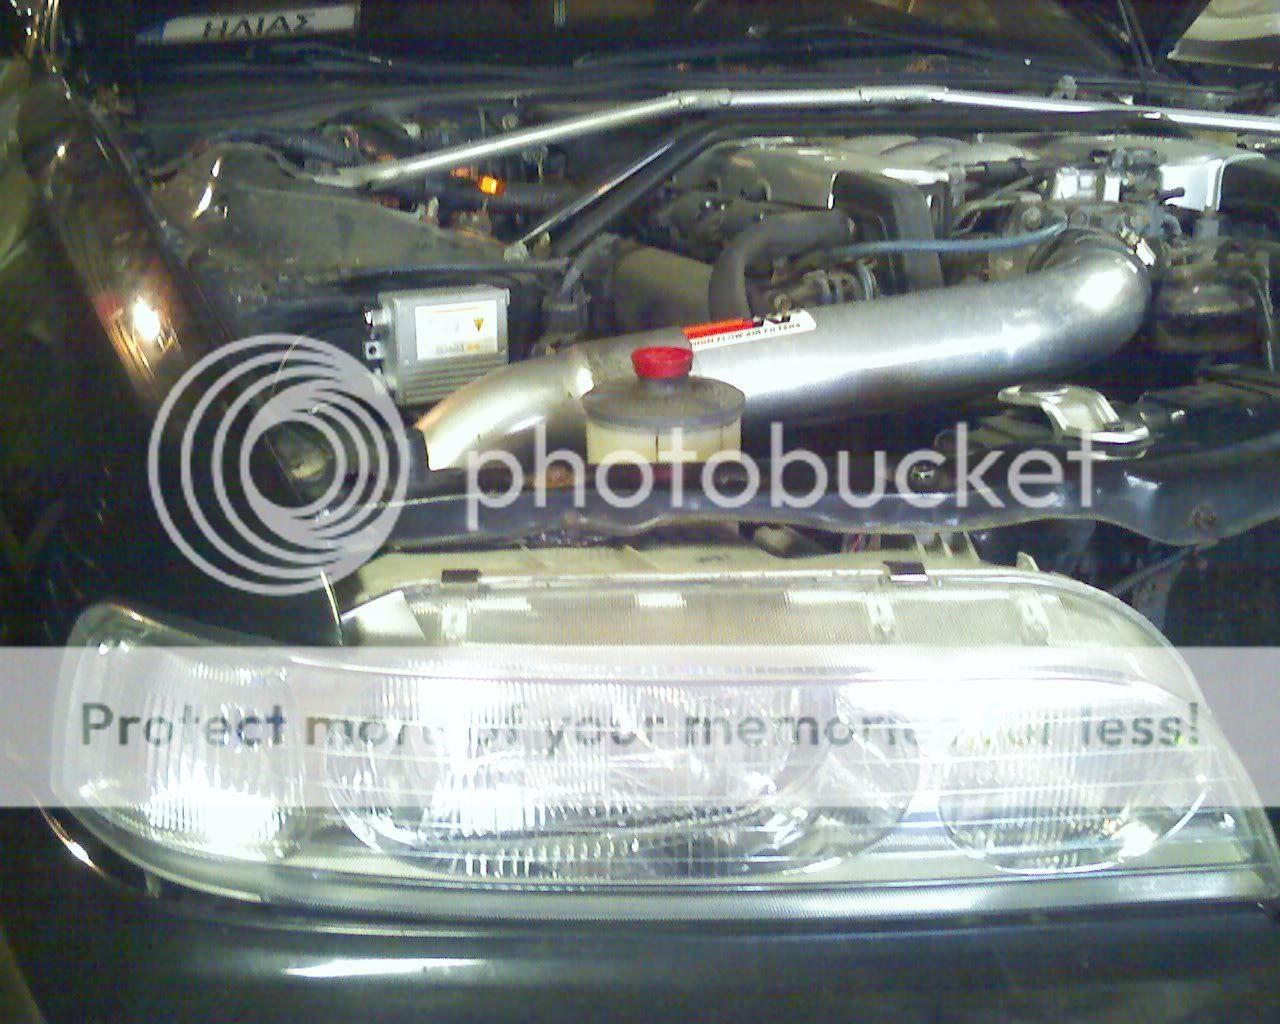
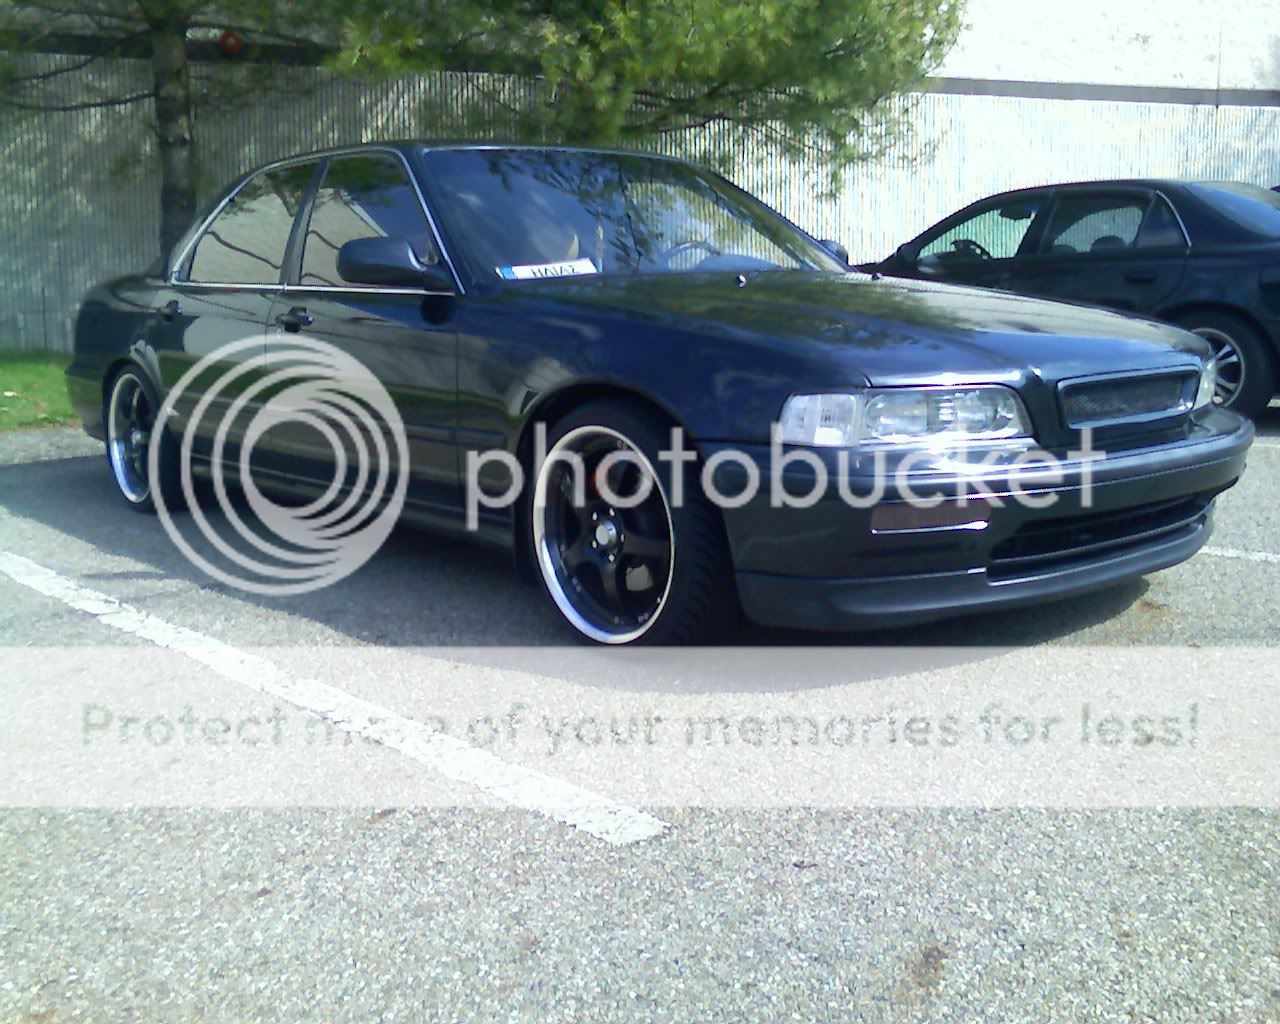
With the car having the stance, and handling well, it was missing just a few more things... wheels/tires/tint and JDM's with functioning BI-xenon HIDs! For wheels I wanted a discontinued set, they were Akuza Intimidators 18x7.5 randomly one day a set popped up on CL so I grabbed those, added 5% tint all around and got a set of MINT JDM headlights from ebay and retrofitted some H4H HID's into them oops I can't forget JDM clear side marker lights!
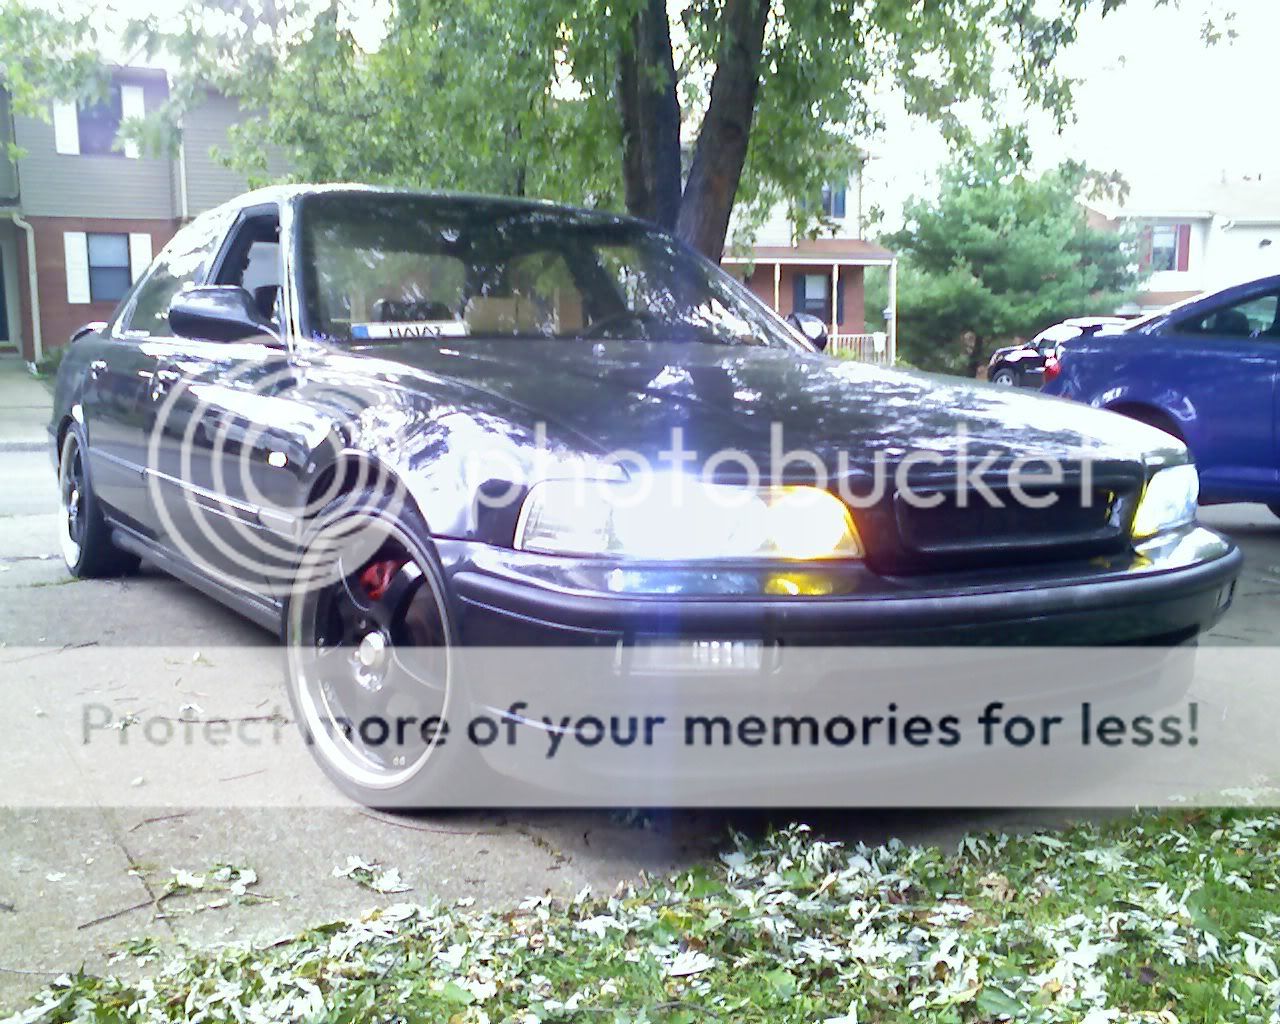
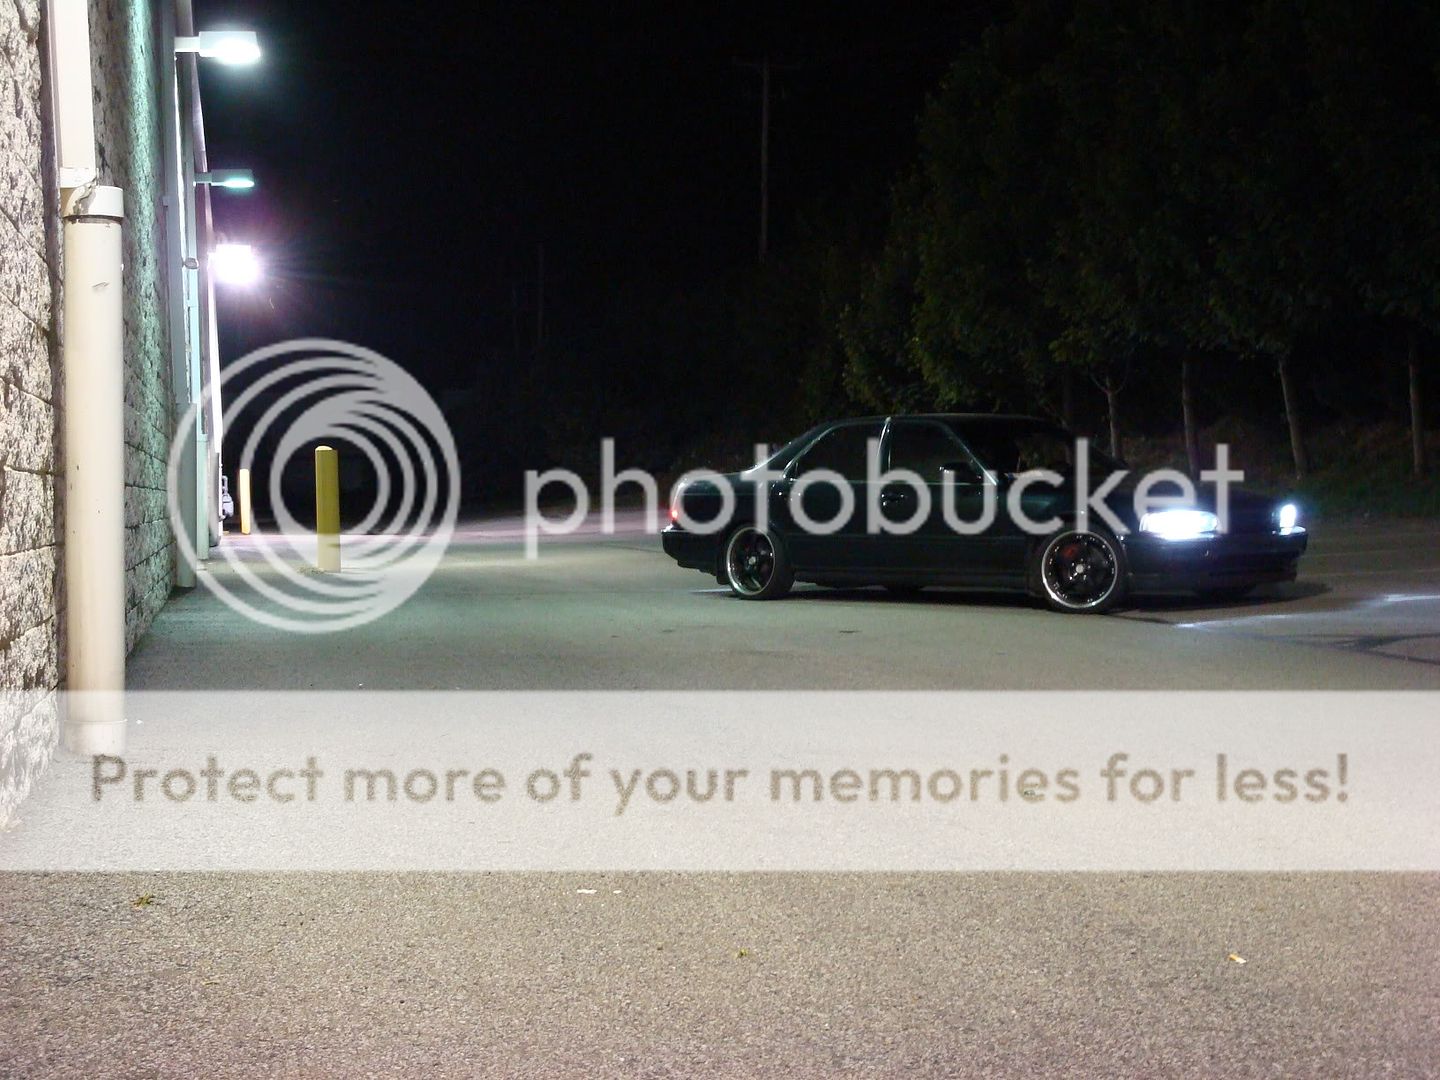
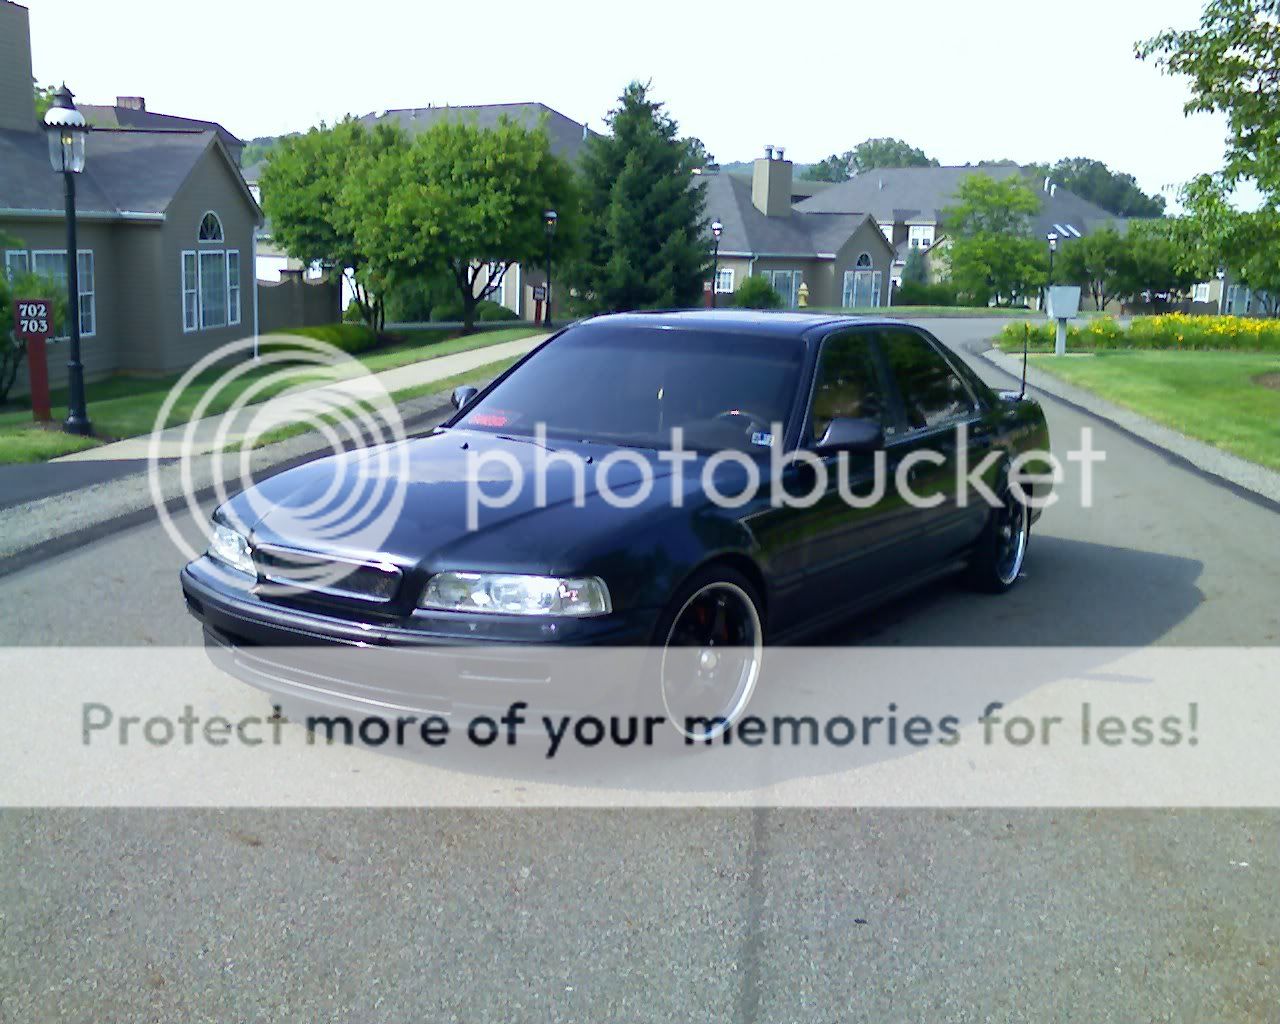
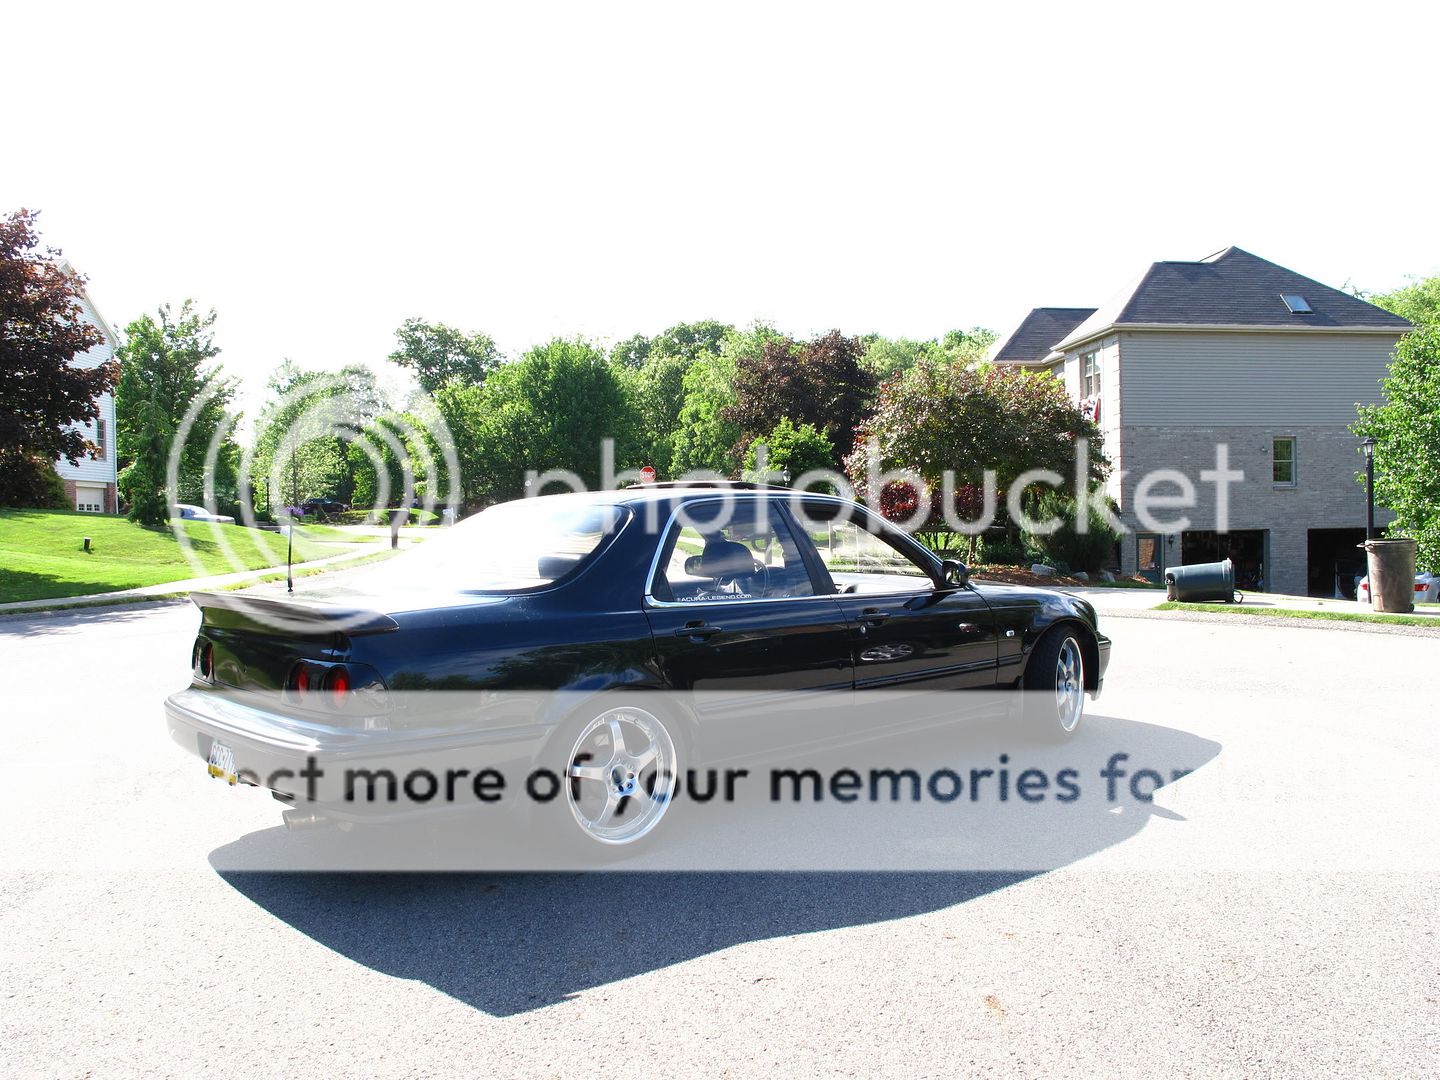
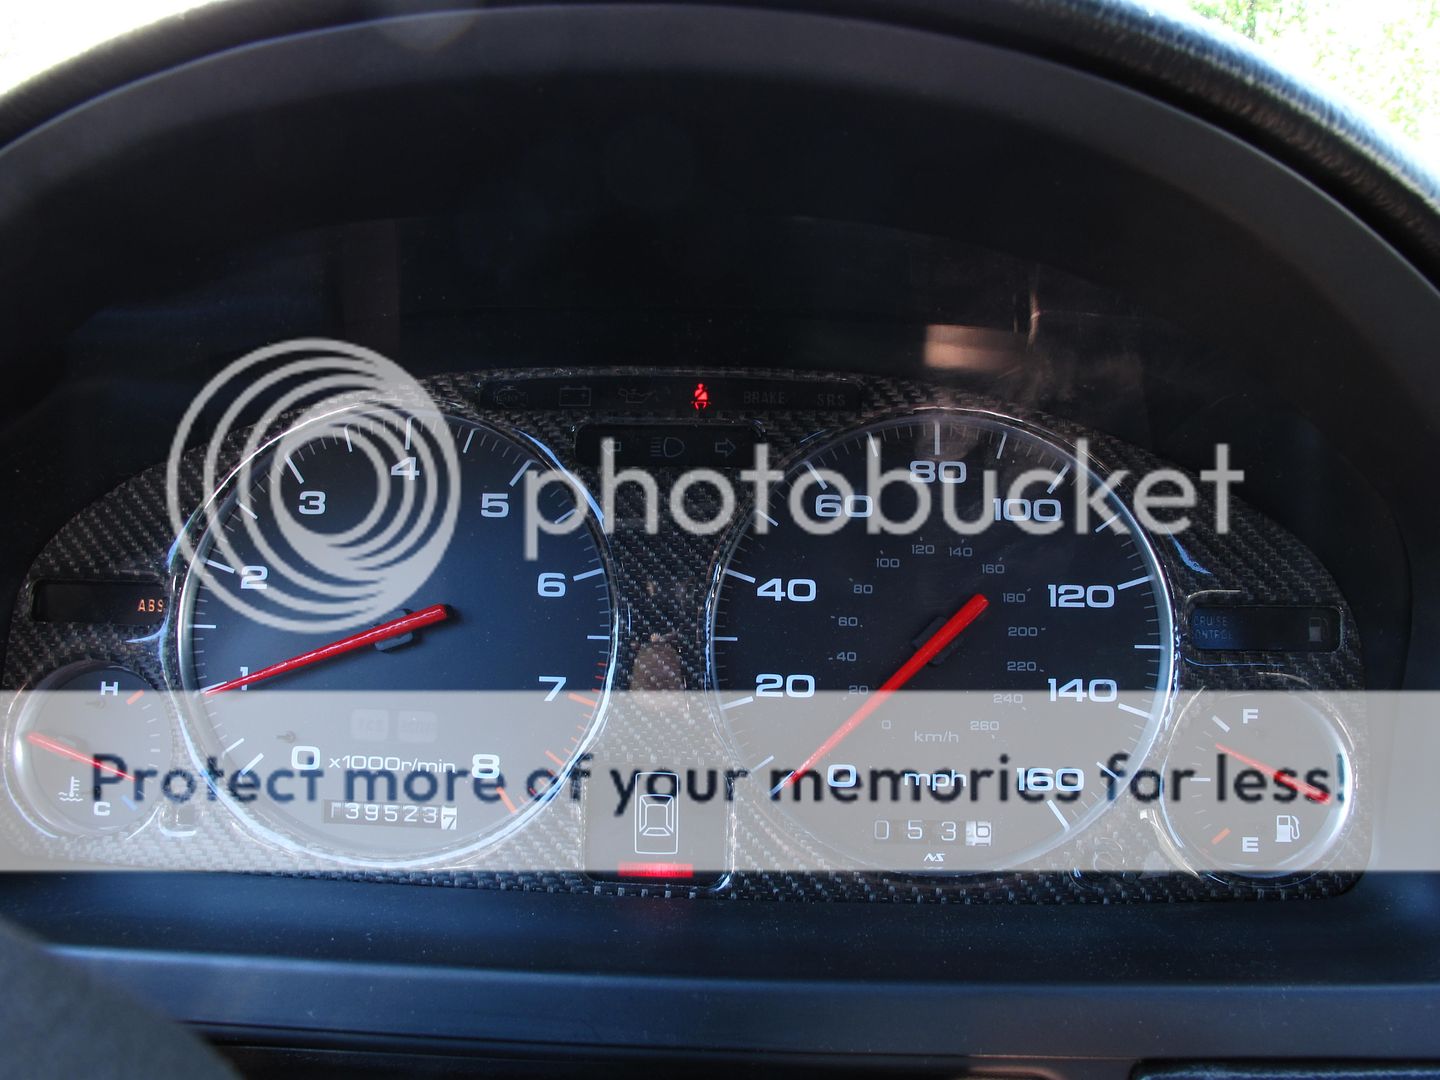
The car pretty much stayed like this for the next 2 years while I saved and gathered parts for my engine swap. I did subtle things at the time like powder coated the wheels, make a PnP set of R32 skyline tail lights, sunroof tilt mod, added a JDM Explodz Carbon Fiber wing and did a BADASS gauge cluster setup and did the first full LED interior in a legend (wrote the DIY), and had a HUGE HUGE HUGE stereo and A/V build, but I'll excuse those pics/info unless someone really wants me to post them. So here's how it looked when it went in for the engine swap and the last time she was on the road.
with a buddies WRX with STI swap JDM S202 clone
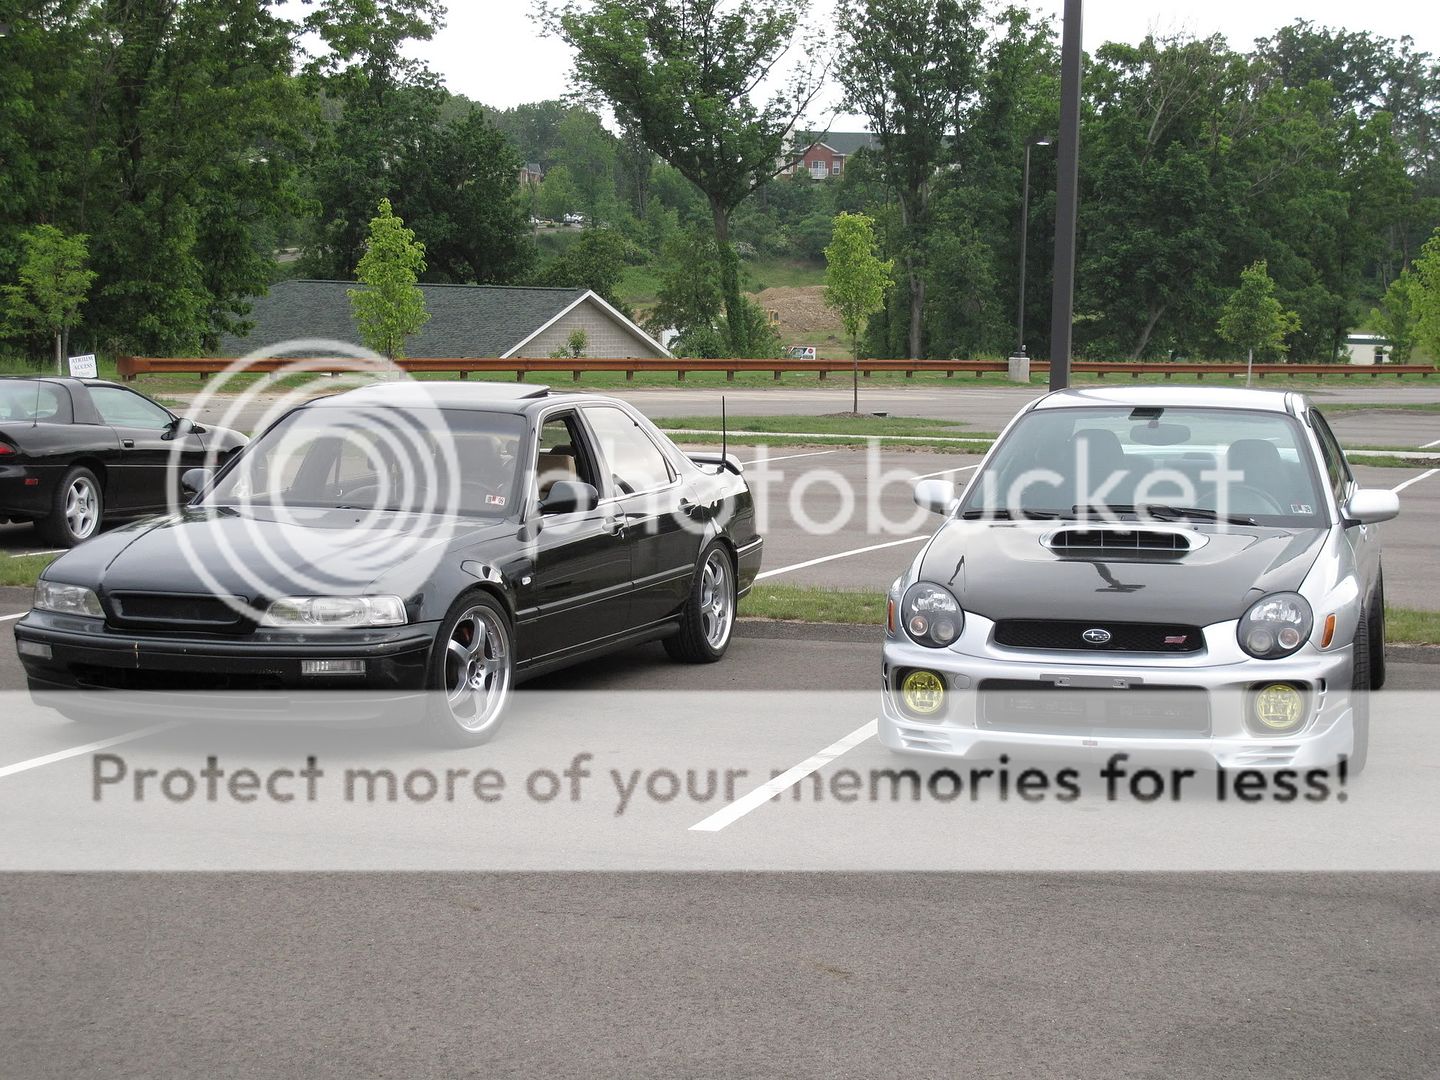
September 2009
(Please bare with me I'm going to post the updates and type everything up tonight)
Teaser:
Here goes with my first build on hondatech... hopefully it gets a thumbs up and follows all your rules.
The car is a 1992 Acura Legend "L" Sedan that is Phantom Grey Pearl exterior and Tan (Type-F) interior, that had the original 128k 3.2 V6 (Type 1) with 4 speed automatic transmission.
This is how the car looked back in August 2005 when I first bought it and gave it a wash. The car had a SRI intake with a rusted filter on it when I got it. So a quick wash and minor tune up it looked like this.
It only lasted a month before being in college and I wanted to "mod" it, now this was 2005 so mods were VERY limited. But I added clear bumper lenses, clear corners, made my own grill to get rid of the chrome surround, also made the SRI into a CAI and removed the fog cover and put mesh for better flow, and upgraded from the y-pipe back with a custom 2.5" exhaust
VIDEO of the exhaust>>>
Next up I wanted to jazz up the interior since the leather was mint and the rest wasnt. So I dyed the carpets jet black with RIT dye and SEM paint, rewrapped the speaker grills to black, and upgraded the fake wood switches to real wood, also made a 3rd brake light cover that lights up LEGEND when the brakes were applied.
oh and I cant forget I went spray paint happy..
Now it looked good but it needed to get rid of the OEM feel and get sportier. Someone on the forum had contacted Ksport and had a prototype coilovers made, so I was on a waiting list for the first set available. Once they came in I added all of the following. New OEM Calipers on all 4 corners, with type 2 Dual piston upgrade up front they were all painted red, Brembo Slotted rotors (4) and HAWK HPS street pads (4), Goodridge Stainless Steel brake lines (4), new OEM master cylinder, and flushed all the old fluid and made it all high temp DOT 4 fluid. That wasn't enough so I needed to tackle the suspension and installed the Ksport Coilovers, ADDCO Front and Rear Sway bars (custom rear bolts), SPC Extreme Upper Front balljoints, MLS Front strut bar, and FUT's rear tie bars (short and long versions). Now the car handled like it was on rails and stopped on a dime!
With the car having the stance, and handling well, it was missing just a few more things... wheels/tires/tint and JDM's with functioning BI-xenon HIDs! For wheels I wanted a discontinued set, they were Akuza Intimidators 18x7.5 randomly one day a set popped up on CL so I grabbed those, added 5% tint all around and got a set of MINT JDM headlights from ebay and retrofitted some H4H HID's into them oops I can't forget JDM clear side marker lights!
The car pretty much stayed like this for the next 2 years while I saved and gathered parts for my engine swap. I did subtle things at the time like powder coated the wheels, make a PnP set of R32 skyline tail lights, sunroof tilt mod, added a JDM Explodz Carbon Fiber wing and did a BADASS gauge cluster setup and did the first full LED interior in a legend (wrote the DIY), and had a HUGE HUGE HUGE stereo and A/V build, but I'll excuse those pics/info unless someone really wants me to post them. So here's how it looked when it went in for the engine swap and the last time she was on the road.
with a buddies WRX with STI swap JDM S202 clone
September 2009
Last edited by biggie2005; 11-21-2013 at 09:02 PM.
 11-21-2013, 05:21 PM
#2
Honda-Tech Member
Thread Starter
Join Date: Nov 2003
Location: Pittsburgh,PA
Posts: 74
Likes: 0
Received 0 Likes
on
0 Posts
With me itching for more of a powerful car I started planning a swap. At the time a type 2 swap was the "big deal" which is just the sportier stock legend, but some members took it a step further and put a 3.5 from the Acura RL into their cars. There was one perticular person who did what was called a "true hybrid" swap which was putting a 3.5 block with the type 2 heads and cutting a welding the intake manifold to fit. I like to "go big or go home" I knew that was exactly what I wanted.
So I went to the local junkyard and found a running 2002 RL with 59k on the clock and got that, also on craigslist a person was parting out a 6 speed manual type 2 coupe. I made him a offer on all the swap parts and they were mine. Searching for good heads was becoming a problem but a member had a set complete with cams so I scored those aswell with that, there was the basic components I needed. I had everything I needed to do a 'standard' 3.5 swap with 3.2 heads and 6MT swap. Now a build isn't a build unless you go out, well atleast to me that's how I feel. In the beginning I never figured I would turbo the car and no one had a successful boost of any kind and the HP record was 300whp with nitrous. I figured that would be where I wanted to be, 250whp and 300whp on nitrous.
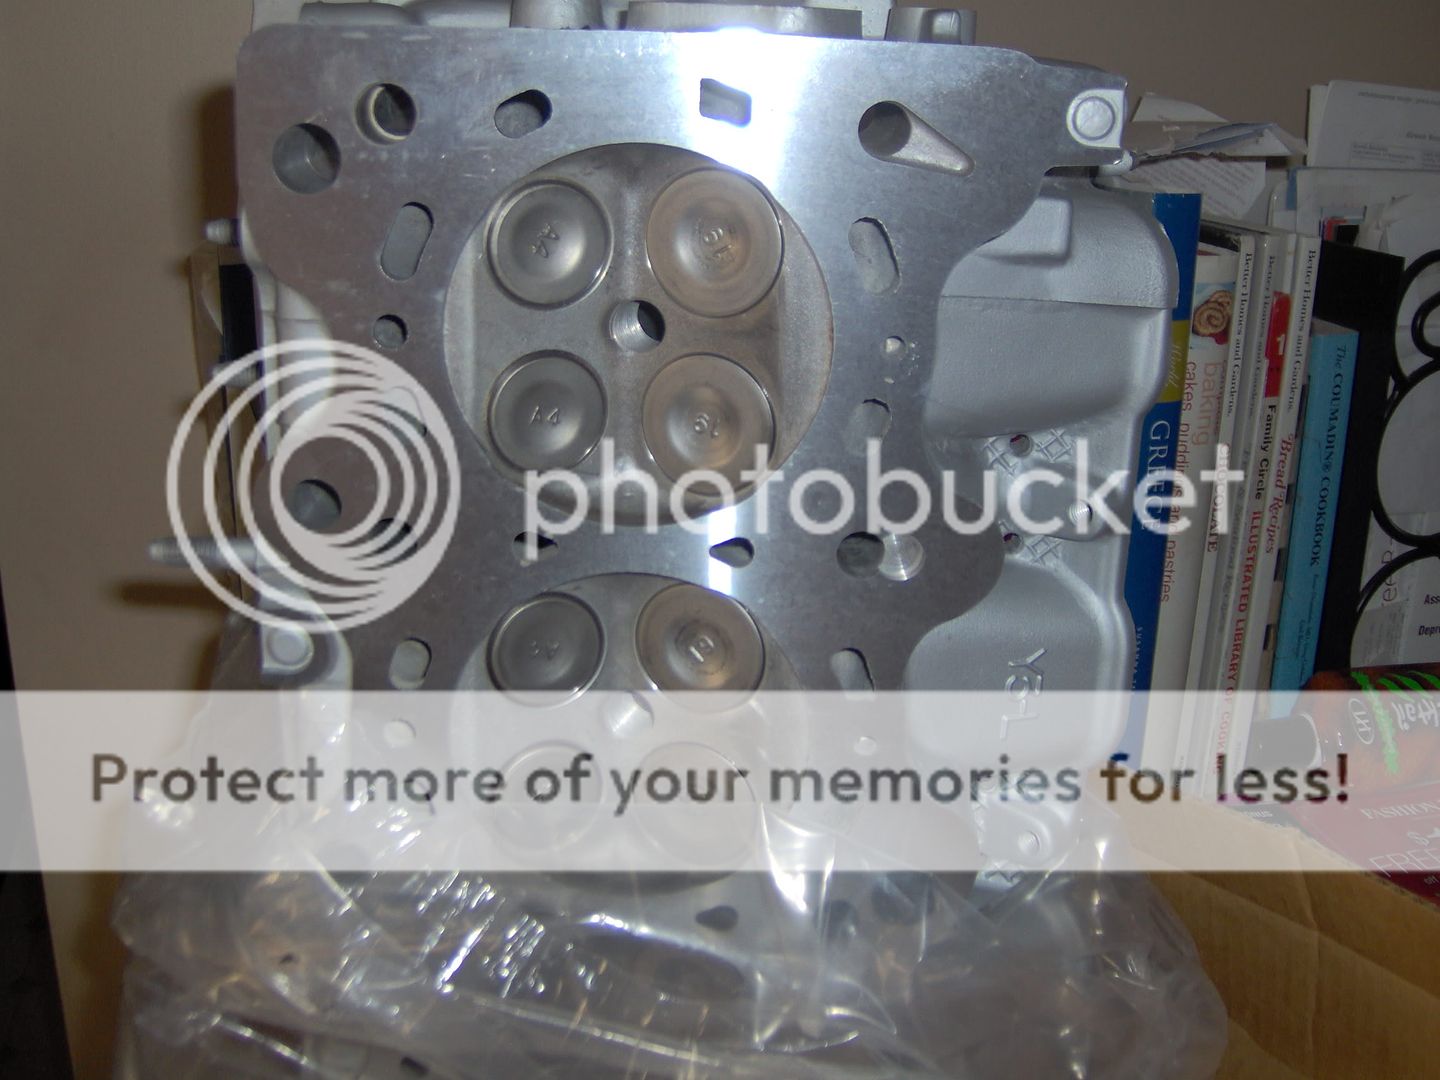
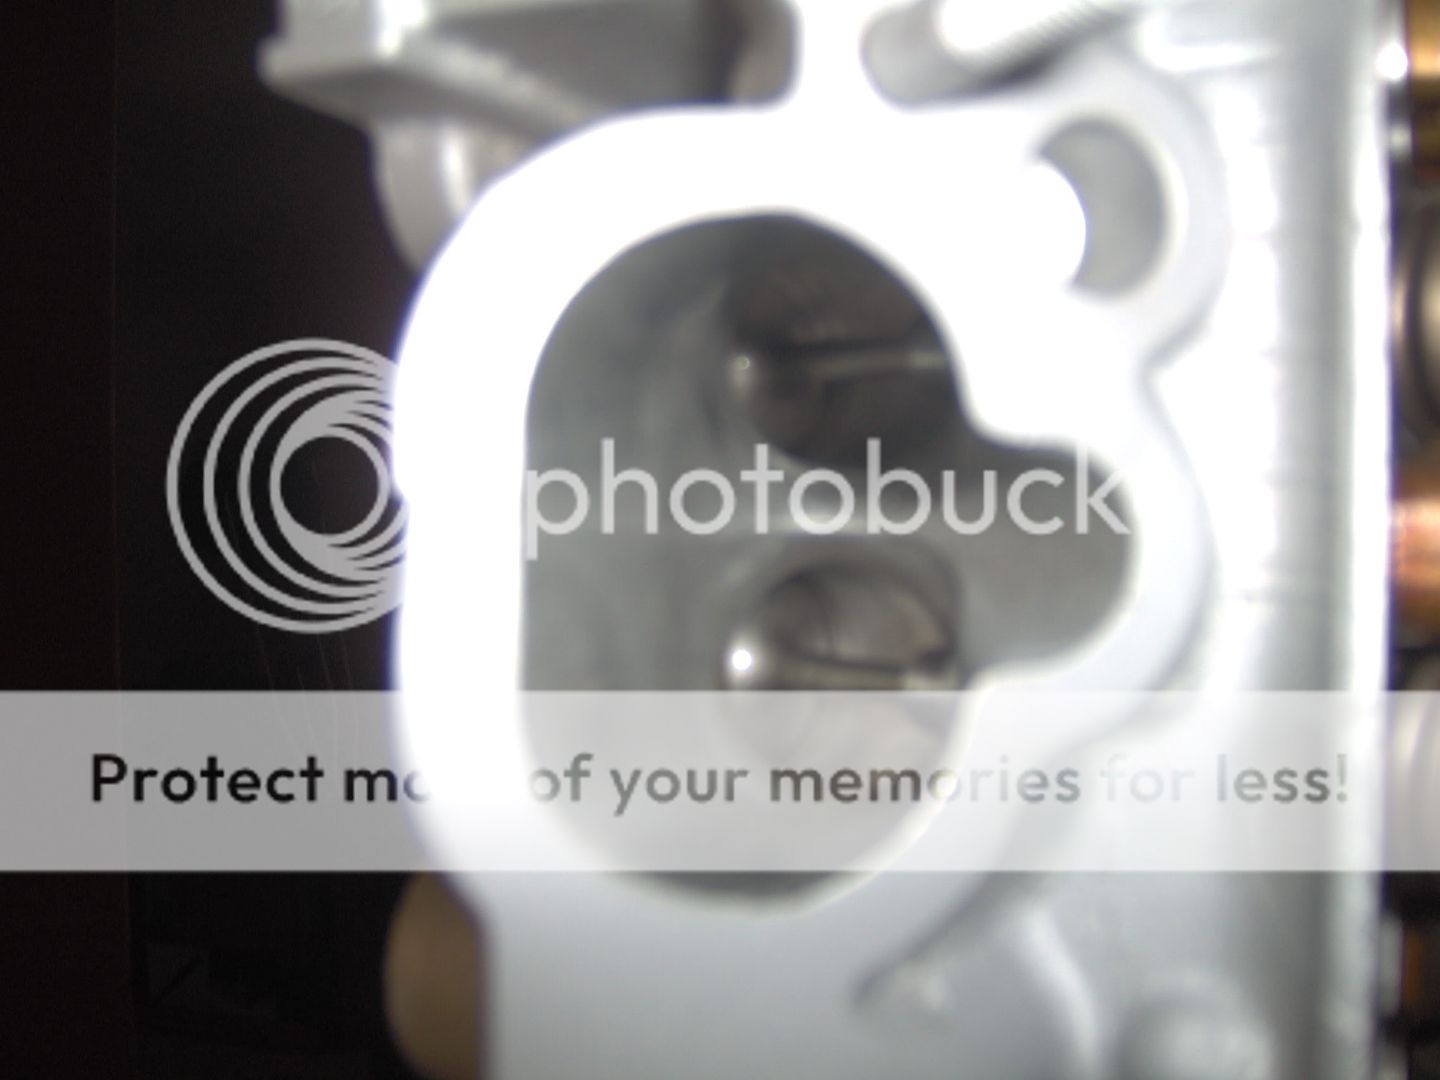
I first started with the heads, they had some mileage on them but I was unsure if they were safe and still good. So I sent them to the machine shop for the following. Hot tanking, pressure checking, once they said they were good and ok for use. The heads were decked (help bump compression), the valves got a 3 angle valve job aswell as back cut for more flow, Comp Cam chevy valve springs, ported and polished, new valve stem seals and pressure cooker (this is what I call it, basically it pops open to tell if you cook the heads or not). This is how they looked when I got them back.
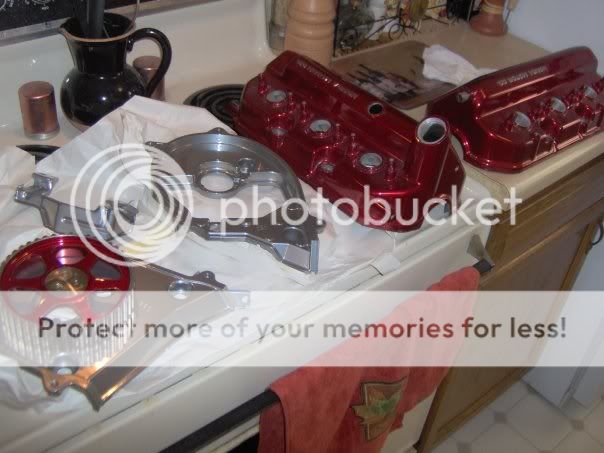
Next was the engine, I had a theme of colors on how this car will look when its done so first I powdercoated parts (dumb move!)
The engine I wanted it to be in TIP top shape, so new timing belt/waterpump, headgaskets etc to make sure even at 59k it would be "0" when I started it up.
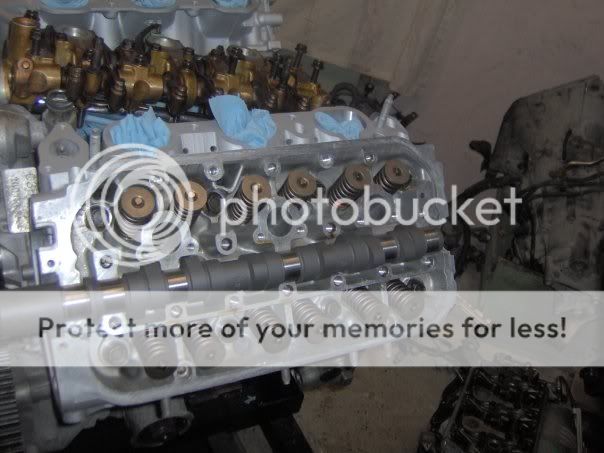
I got the heads on and started to add some Web Racing regrind cams, luckly at the same time 2 members were starting turbo builds and the one guy started a group buy and had 3.5 light weight crank pullies made, they matched perfectly with my Labrat accessory pullies.
For some reason in 2008 OBX started making headers for legends, no idea why, but you better believe I got a set!
Another member on the forum was figuring out a way to incorporate a RHD s2000 steering rack into legends, well he did it and then I wanted it. So I found one in Australia had it shipped. The reason for doing this mod is to remove the power steering system and go electric. For weight savings and less drain on the engine, but more on this later.
Next the transmission I had ordered a Spec stage 2 clutch and a 5speed flywheel that was lightened. When running a 5speed clutch/fly vs the stock 6 speed you reduce weight and it grips harder. The transmission I had painted chrome once I cracked it open to make sure there was no issues with shifting. The manual transmission differential got a true LSD from hondaman23 with 7 springs (second ever built).
LSD:
So now I was ready to assemble and get it ready to swap.
Well all but that pesky intake manifold, I had talked to companies about widening it and no one wanted to touch it so I was in a pickle and ended up staying like that for about a year before I just said "F it" and figured by the time I put the engine in the car I'll have found one or someone else would start producing them.
So I went to the local junkyard and found a running 2002 RL with 59k on the clock and got that, also on craigslist a person was parting out a 6 speed manual type 2 coupe. I made him a offer on all the swap parts and they were mine. Searching for good heads was becoming a problem but a member had a set complete with cams so I scored those aswell with that, there was the basic components I needed. I had everything I needed to do a 'standard' 3.5 swap with 3.2 heads and 6MT swap. Now a build isn't a build unless you go out, well atleast to me that's how I feel. In the beginning I never figured I would turbo the car and no one had a successful boost of any kind and the HP record was 300whp with nitrous. I figured that would be where I wanted to be, 250whp and 300whp on nitrous.
I first started with the heads, they had some mileage on them but I was unsure if they were safe and still good. So I sent them to the machine shop for the following. Hot tanking, pressure checking, once they said they were good and ok for use. The heads were decked (help bump compression), the valves got a 3 angle valve job aswell as back cut for more flow, Comp Cam chevy valve springs, ported and polished, new valve stem seals and pressure cooker (this is what I call it, basically it pops open to tell if you cook the heads or not). This is how they looked when I got them back.
Next was the engine, I had a theme of colors on how this car will look when its done so first I powdercoated parts (dumb move!)
The engine I wanted it to be in TIP top shape, so new timing belt/waterpump, headgaskets etc to make sure even at 59k it would be "0" when I started it up.
I got the heads on and started to add some Web Racing regrind cams, luckly at the same time 2 members were starting turbo builds and the one guy started a group buy and had 3.5 light weight crank pullies made, they matched perfectly with my Labrat accessory pullies.
For some reason in 2008 OBX started making headers for legends, no idea why, but you better believe I got a set!
Another member on the forum was figuring out a way to incorporate a RHD s2000 steering rack into legends, well he did it and then I wanted it. So I found one in Australia had it shipped. The reason for doing this mod is to remove the power steering system and go electric. For weight savings and less drain on the engine, but more on this later.
Next the transmission I had ordered a Spec stage 2 clutch and a 5speed flywheel that was lightened. When running a 5speed clutch/fly vs the stock 6 speed you reduce weight and it grips harder. The transmission I had painted chrome once I cracked it open to make sure there was no issues with shifting. The manual transmission differential got a true LSD from hondaman23 with 7 springs (second ever built).
LSD:
So now I was ready to assemble and get it ready to swap.
Well all but that pesky intake manifold, I had talked to companies about widening it and no one wanted to touch it so I was in a pickle and ended up staying like that for about a year before I just said "F it" and figured by the time I put the engine in the car I'll have found one or someone else would start producing them.
Last edited by biggie2005; 11-21-2013 at 08:15 PM.
11-21-2013, 05:22 PM
#3
Honda-Tech Member
Thread Starter
Join Date: Nov 2003
Location: Pittsburgh,PA
Posts: 74
Likes: 0
Received 0 Likes
on
0 Posts
Time for the swap! August 2010
Now let it be known, I didn't have many tools, nor do I have a garage so I had bought a tent and did the swap on gravel. Yes that's how I really did it, no BS worse conditions but oh well I wanted it done. So after a trip to harbor freight for a ton of tools and pep boys to buy a tent, this is where It started.

I knew trying to do a subframe drop on just gravel was going to be a BAD idea, so I hit up lowes and made a fake floor that would help me out. The tarps were to prevent moisture from coming up and rusting the body, the plywood sheets were to help roll the jacks around and I used patio stones and game informer magazines to make the crane stay level. Yes I know dangerous, but it worked!
How I pulled the car in and the last time I took it around the block looking just like this, yes thats me on the engine.

Next step get her up in the air, cut the exhaust off and strip the front.

Funny story, the black guy pictured, I listed a partout post on craigslist and he wanted the steering rack. So I told him I'd give him the rack if he helped me drop it (I worked mostly solo on this entire build).

and shes out!!


Since it was late and I didn't have good light the next day I checked the bay over, to see if I had any rust repairs etc. The rad support was rusted out on the bottom, as well as I discovered the car was in a accident at some point (no thanks for carfax!)


Then it came time to cut the rad support off and weld in a good one I removed from my parts car. Also at this time I decided to sand down the whole bay and figured might as well start tucking and making the bay look nice. POR 15 is what I choose to coat the entire bay with multiple layers.
Video removal of the old rad support>>>
Welding in:

Painting"

Paint on the driver side fender:

Passenger side tucked and cleaned up with new A/C lines and everything either powder coated or painted

I started making a video blog of the rebuild of the car, it explains more of what I did in detail for those who are curious
The driver side, tucking that was alot harder being theres 3 fuse boxes on that side. 2 of them I relocated under the dash, I was going to move the last one there, but because of its size I decided to move it closer to the firewall. The whole front end was rewired with new wires and built to handle more voltage for things like HID's, horns etc etc.
Video week 2
Where the fuse box ended up:

ALL the wires for that fuse box, shortened and soldered and heatshrunk

Shot of the wiring and where it was ran under the fender, also multiple HID ballasts.

Week 3 video
Before reinstalling the engine, I wanted to have as many bushings as possible to be poly urethane, sadly NO one makes anything like that for legends. So I took it into my own hands. I started with filling the transmission mount with 60a poly also did the front subframe anchor mounts, and made a mold kit for the subframe bushings like this.

So now I had almost all my bushings poly urethane. It didnt stop there, I added new MOOG lower balljoints, and sway bar end links. Anything and everything that could be replaced with new was, any parts were also painted/powder coated. I wanted to make sure this build wasn't half assed and will last awhile.
Week 5 video
How the engine currently looked, I had the engine covers wrapped in real carbon fiber and picked up some 780cc injectors because I was debating boost at this point. I had ditched the headers because I was going to run OEM manifolds for the time being till a new set that gained more power came out (at the time they were being built but never mass produced)

I had a custom clutch built by ACT clutch and flywheel I didn't get any pics but this is the video of it, due to how badly it was packaged I actually sold this off and used another clutch but that is a post for later.
Week 6.5 video
Wa-la! The engine is now back in the engine bay for the first time

So at this point, the car has a new A/C system, engine back in the car with everything new from starter/alternator, etc etc The wiring was almost complete so I wanted to make some other things happen. I did a JDM headlight retrofit with FXR projectors, powder coated and rebuilt the brake calipers and rebuilt the ksports. So she was getting a good treatment at this point. So I did a proper battery relocation to the trunk with KnuKonceptz wiring, and started a fuel system portion of this build.
The new fuel system consisted of a bosche 044 "sumped" with a 8AN feed line to custom fuel rails by ATP turbo. The fuel system was all 8an with a aeromotive FPR. Video of how this looked like is here >>
Fuel rail 8an Line vs Stock line

This is a week 8 video so you can see where I'm leaving this, because its late and I'm tired of typing haha
update: 11/27/2013
With the engine bay looking well "tucked" and by tucked I mean missing parts.. this is how clean it looked

After getting a plan on how I wanted to make the turbo system work and what I wanted to do, I added a 3" CXracing core that was 27x13x3
(pretty sure thats the right size) with 3" in and out. The problem here was getting it to fit behind the bumper, one legend guy was turbo'd with a large core and he didn't and couldn't run a bumper because of the size... well I wanted a clean stock look and that wasn't a option. So I did mine to look like this >>


Basically cut the bumper support, and grinded a little bit of the bumper out so it fit like a glove. Also added a Hayden Transmission cooler (oem manual tranny legends have coolers so I needed to run one). Scored what at the time was "good" KOYORAD 53mm core radiator from a 94-97 honda accord (way later found out it was bad), figured out how to make brackets for that, aswell as started the process of going from auto to manual.
Pic of the koyo rad and where it sat and how much room it gave me (pre fans)

I did have the fuel rails figured out but honestly I changed them all later to something else so I'll skip that for now. My legend is a bit of a nightmare when it comes to wiring, mainly because of all the electronics the car has for alot of AUX options like remote start, auto up/down for all the windows, sensors, and moving fuse boxes. To give you a idea, this is "cleaned up" where I installed the clutch pedal.


So once the hole was cut, and proper spacing was added I had a new OEM master cylinder installed, with a SS braided clutch line that deletes the factory damper that ran to the new oem slave cylinder. there was some wiring that needed done to make the clutch switch etc work but luckly a forum member started making PnP wiring kits so i just plugged in where it was needed and thats it. On to week 9 of the rebuild!
Now to the bad part of the build.. personal health issues. Long story short, I fractured 5 discs in my lower back (L1-L5) which is still damaged to this day and taking FOREVER to slowly heal. So it really hindered my progress and any work being done on the car because I couldn't lay on the ground or stay bent over and work on something.
I did what I could with friends help, and at this point I noticed some issues with bushings I had made, and the easiest way to change those bushings is to pull the engine.. so out it went and I replaced the bushings with a new solid poly unit (rare from austrailia) and then put the subframe back in and had the steering column cut and had a knuckle welded on so that the s2000 steering rack would work right (rack still needed brackets and wiring). So with that the build took a hiatus, I did do a few things over the next period of a year, but tried multiple things to get my back healed and nothing worked I lost motivation and fell into some depression.
But I begged and pleaded with a good friend of mine to help me finish it and to get it on the road, he agreed and it was at the point of this is the "last time i'm pulling the engine, and it will run" point. So on august 9th, 2012 I got a flat bed, tossed it up on the tow truck and drove it the 50 miles to my buddies house. Heres some pics of that:
Final time in the tent

showing "that low life"

Loaded up

At my buddies house

Later that night I did a solo engine pull, and within 45 mins I had that sucker out and on the ground again, dont mind the funny posing it was just to be funny.

Now why is the engine out you ask? Because this is where its going to get GOOD, and alot of sexy sexy pics.
Now let it be known, I didn't have many tools, nor do I have a garage so I had bought a tent and did the swap on gravel. Yes that's how I really did it, no BS worse conditions but oh well I wanted it done. So after a trip to harbor freight for a ton of tools and pep boys to buy a tent, this is where It started.
I knew trying to do a subframe drop on just gravel was going to be a BAD idea, so I hit up lowes and made a fake floor that would help me out. The tarps were to prevent moisture from coming up and rusting the body, the plywood sheets were to help roll the jacks around and I used patio stones and game informer magazines to make the crane stay level. Yes I know dangerous, but it worked!
How I pulled the car in and the last time I took it around the block looking just like this, yes thats me on the engine.
Next step get her up in the air, cut the exhaust off and strip the front.
Funny story, the black guy pictured, I listed a partout post on craigslist and he wanted the steering rack. So I told him I'd give him the rack if he helped me drop it (I worked mostly solo on this entire build).
and shes out!!
Since it was late and I didn't have good light the next day I checked the bay over, to see if I had any rust repairs etc. The rad support was rusted out on the bottom, as well as I discovered the car was in a accident at some point (no thanks for carfax!)
Then it came time to cut the rad support off and weld in a good one I removed from my parts car. Also at this time I decided to sand down the whole bay and figured might as well start tucking and making the bay look nice. POR 15 is what I choose to coat the entire bay with multiple layers.
Video removal of the old rad support>>>
Welding in:
Painting"
Paint on the driver side fender:
Passenger side tucked and cleaned up with new A/C lines and everything either powder coated or painted
I started making a video blog of the rebuild of the car, it explains more of what I did in detail for those who are curious
The driver side, tucking that was alot harder being theres 3 fuse boxes on that side. 2 of them I relocated under the dash, I was going to move the last one there, but because of its size I decided to move it closer to the firewall. The whole front end was rewired with new wires and built to handle more voltage for things like HID's, horns etc etc.
Video week 2
Where the fuse box ended up:
ALL the wires for that fuse box, shortened and soldered and heatshrunk
Shot of the wiring and where it was ran under the fender, also multiple HID ballasts.
Week 3 video
Before reinstalling the engine, I wanted to have as many bushings as possible to be poly urethane, sadly NO one makes anything like that for legends. So I took it into my own hands. I started with filling the transmission mount with 60a poly also did the front subframe anchor mounts, and made a mold kit for the subframe bushings like this.
So now I had almost all my bushings poly urethane. It didnt stop there, I added new MOOG lower balljoints, and sway bar end links. Anything and everything that could be replaced with new was, any parts were also painted/powder coated. I wanted to make sure this build wasn't half assed and will last awhile.
Week 5 video
How the engine currently looked, I had the engine covers wrapped in real carbon fiber and picked up some 780cc injectors because I was debating boost at this point. I had ditched the headers because I was going to run OEM manifolds for the time being till a new set that gained more power came out (at the time they were being built but never mass produced)
I had a custom clutch built by ACT clutch and flywheel I didn't get any pics but this is the video of it, due to how badly it was packaged I actually sold this off and used another clutch but that is a post for later.
Week 6.5 video
Wa-la! The engine is now back in the engine bay for the first time
So at this point, the car has a new A/C system, engine back in the car with everything new from starter/alternator, etc etc The wiring was almost complete so I wanted to make some other things happen. I did a JDM headlight retrofit with FXR projectors, powder coated and rebuilt the brake calipers and rebuilt the ksports. So she was getting a good treatment at this point. So I did a proper battery relocation to the trunk with KnuKonceptz wiring, and started a fuel system portion of this build.
The new fuel system consisted of a bosche 044 "sumped" with a 8AN feed line to custom fuel rails by ATP turbo. The fuel system was all 8an with a aeromotive FPR. Video of how this looked like is here >>
Fuel rail 8an Line vs Stock line
This is a week 8 video so you can see where I'm leaving this, because its late and I'm tired of typing haha
update: 11/27/2013
With the engine bay looking well "tucked" and by tucked I mean missing parts.. this is how clean it looked
After getting a plan on how I wanted to make the turbo system work and what I wanted to do, I added a 3" CXracing core that was 27x13x3
(pretty sure thats the right size) with 3" in and out. The problem here was getting it to fit behind the bumper, one legend guy was turbo'd with a large core and he didn't and couldn't run a bumper because of the size... well I wanted a clean stock look and that wasn't a option. So I did mine to look like this >>
Basically cut the bumper support, and grinded a little bit of the bumper out so it fit like a glove. Also added a Hayden Transmission cooler (oem manual tranny legends have coolers so I needed to run one). Scored what at the time was "good" KOYORAD 53mm core radiator from a 94-97 honda accord (way later found out it was bad), figured out how to make brackets for that, aswell as started the process of going from auto to manual.
Pic of the koyo rad and where it sat and how much room it gave me (pre fans)
I did have the fuel rails figured out but honestly I changed them all later to something else so I'll skip that for now. My legend is a bit of a nightmare when it comes to wiring, mainly because of all the electronics the car has for alot of AUX options like remote start, auto up/down for all the windows, sensors, and moving fuse boxes. To give you a idea, this is "cleaned up" where I installed the clutch pedal.
So once the hole was cut, and proper spacing was added I had a new OEM master cylinder installed, with a SS braided clutch line that deletes the factory damper that ran to the new oem slave cylinder. there was some wiring that needed done to make the clutch switch etc work but luckly a forum member started making PnP wiring kits so i just plugged in where it was needed and thats it. On to week 9 of the rebuild!
Now to the bad part of the build.. personal health issues. Long story short, I fractured 5 discs in my lower back (L1-L5) which is still damaged to this day and taking FOREVER to slowly heal. So it really hindered my progress and any work being done on the car because I couldn't lay on the ground or stay bent over and work on something.
I did what I could with friends help, and at this point I noticed some issues with bushings I had made, and the easiest way to change those bushings is to pull the engine.. so out it went and I replaced the bushings with a new solid poly unit (rare from austrailia) and then put the subframe back in and had the steering column cut and had a knuckle welded on so that the s2000 steering rack would work right (rack still needed brackets and wiring). So with that the build took a hiatus, I did do a few things over the next period of a year, but tried multiple things to get my back healed and nothing worked I lost motivation and fell into some depression.
But I begged and pleaded with a good friend of mine to help me finish it and to get it on the road, he agreed and it was at the point of this is the "last time i'm pulling the engine, and it will run" point. So on august 9th, 2012 I got a flat bed, tossed it up on the tow truck and drove it the 50 miles to my buddies house. Heres some pics of that:
Final time in the tent
showing "that low life"
Loaded up
At my buddies house
Later that night I did a solo engine pull, and within 45 mins I had that sucker out and on the ground again, dont mind the funny posing it was just to be funny.
Now why is the engine out you ask? Because this is where its going to get GOOD, and alot of sexy sexy pics.
Last edited by biggie2005; 11-27-2013 at 07:51 PM.
11-21-2013, 05:22 PM
#4
Honda-Tech Member
Thread Starter
Join Date: Nov 2003
Location: Pittsburgh,PA
Posts: 74
Likes: 0
Received 0 Likes
on
0 Posts
So as you see the engines out, now the question is why? Because of fab work? because I'm just nuts and like changing engines? Well a forum member who had a yellow turbo legend (if you google or youtube him his name is Dv8). Well he basically made me a offer for some parts, since I was going to be buying those parts anyways I saved myself the downtime and gained a built engine without a 6 month build time.
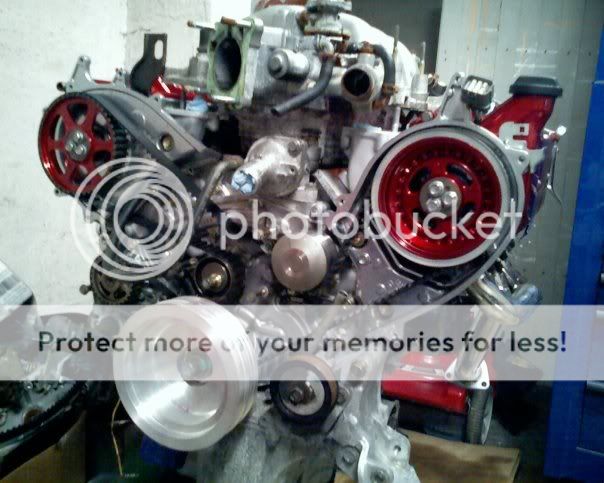
The "built" motor as it arrived with the following parts
CP Pistons 9:1 Ratio
Pauter I beam rods
Type 2 Legend heads with mild port work
Type 2 springs and cams
Custom Type 2 intake manifold modified with a box plenum
KMS Big bore throttle body
ID1000's
PCV Catch Can System
Fuel rails and AN line
Custom Clutch Masters 850 Series twin disc clutch and flywheel
So not a bad deal if you know the legend world at all, because this roughly is going to run you around 10k in just a motor built up like this with these parts. Well once I got the engine I inspected it and it was NOT up to par, and in the videos below you'll see some minor stuff but as we worked on things.. we found more issues.
Engine Arriving and upwrapping!!!!
Inspecting the engine and checking wiring and for broken parts...
So to recap
all sensors and wires had sliced wires and required a new engine harness (luckily I had a spare and I cut/splice to modify), the AN fittings in the valve covers were poorly installed with JB weld and broken free, the fuel AN fittings were the same way and JB welded, this made us want to rip into the engine and see what really might be a issue. Luckly the other stuff was minor to us and was fixed with no issues like heilcoil exhaust manifold studs etc.
Engines out, comparing both facing each other to see the work I did.
First thing I did was sell the fuel rails he provided and used mine, why? because we welded bungs to my lines and made it look CLEAN and we knew for sure it would never leak.


Next we tackled the PCV system, luckly the lines he provided we just reversed them and made a bracket for the catch can which was mounted to the engine on the passenger side, once we had a idea where that was sitting we took the valve covers and welded the bungs on to them, so that made sure again, no leaks and issues.


with the engine in and some of the smaller things ironed out, the next chore was to get the steering rack welded in to make sure that I could turn it and not just make it go straight.
Knuckle to Column weld

The black bracket was welded on before, and now this is my buddy Pat cutting off the OEM s2000 mounts

I found it funny u cut the mounts off and it shows H like Honda

Pat tacking the brackets in place

Video of him tacking
How the tacks looked

Finished product


Now the rack was welded in and little bits and what not, so time for the radiator brackets to be welded and to weld in the intercooler brackets.
Intercooler mounting


Radiator brackets

Next we placed a nice sizable order for alot of schedule 40 stainless, and some 3" aluminum piping and 3" exhaust stainless.
Shocking that this is almost all the metal you need to make a legend turbo kit

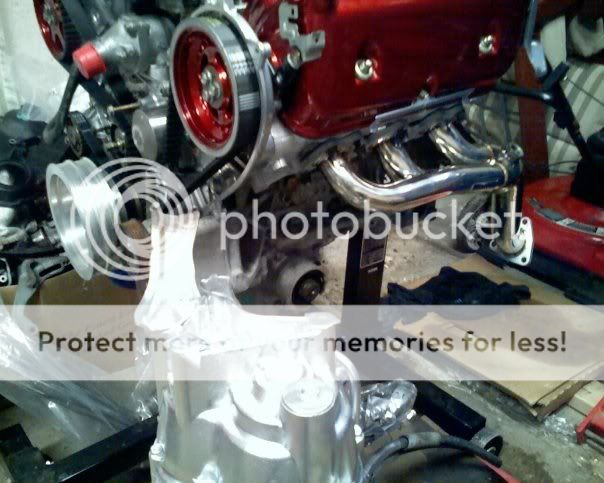
I told pat I didn't want a log manifold or anything like that, I wanted to do a tubular manifold for what we were doing. I already had steel flanges from years ago so, some testing and fitting started...
Driver side manifold... lets just say both manifolds are TIGHT fitting


Passenger side manifold...


Mocking up on the spare engine seeing how wide it fits and how it looks...


Vban everything!

Since the last fuel setup we worried the pump was going to hit, we ordered a Surge tank that houses 2 bosche 044 pumps in tank. its mounted by the steering rack on the fire wall. Now each pump feeds 3 injectors.


More to come! I'll post after thanksgiving unless I'm turkey hungover
The "built" motor as it arrived with the following parts
CP Pistons 9:1 Ratio
Pauter I beam rods
Type 2 Legend heads with mild port work
Type 2 springs and cams
Custom Type 2 intake manifold modified with a box plenum
KMS Big bore throttle body
ID1000's
PCV Catch Can System
Fuel rails and AN line
Custom Clutch Masters 850 Series twin disc clutch and flywheel
So not a bad deal if you know the legend world at all, because this roughly is going to run you around 10k in just a motor built up like this with these parts. Well once I got the engine I inspected it and it was NOT up to par, and in the videos below you'll see some minor stuff but as we worked on things.. we found more issues.
Engine Arriving and upwrapping!!!!
Inspecting the engine and checking wiring and for broken parts...
So to recap
all sensors and wires had sliced wires and required a new engine harness (luckily I had a spare and I cut/splice to modify), the AN fittings in the valve covers were poorly installed with JB weld and broken free, the fuel AN fittings were the same way and JB welded, this made us want to rip into the engine and see what really might be a issue. Luckly the other stuff was minor to us and was fixed with no issues like heilcoil exhaust manifold studs etc.
Engines out, comparing both facing each other to see the work I did.
First thing I did was sell the fuel rails he provided and used mine, why? because we welded bungs to my lines and made it look CLEAN and we knew for sure it would never leak.
Next we tackled the PCV system, luckly the lines he provided we just reversed them and made a bracket for the catch can which was mounted to the engine on the passenger side, once we had a idea where that was sitting we took the valve covers and welded the bungs on to them, so that made sure again, no leaks and issues.
with the engine in and some of the smaller things ironed out, the next chore was to get the steering rack welded in to make sure that I could turn it and not just make it go straight.
Knuckle to Column weld
The black bracket was welded on before, and now this is my buddy Pat cutting off the OEM s2000 mounts
I found it funny u cut the mounts off and it shows H like Honda
Pat tacking the brackets in place
Video of him tacking
How the tacks looked
Finished product
Now the rack was welded in and little bits and what not, so time for the radiator brackets to be welded and to weld in the intercooler brackets.
Intercooler mounting
Radiator brackets
Next we placed a nice sizable order for alot of schedule 40 stainless, and some 3" aluminum piping and 3" exhaust stainless.
Shocking that this is almost all the metal you need to make a legend turbo kit
I told pat I didn't want a log manifold or anything like that, I wanted to do a tubular manifold for what we were doing. I already had steel flanges from years ago so, some testing and fitting started...
Driver side manifold... lets just say both manifolds are TIGHT fitting
Passenger side manifold...
Mocking up on the spare engine seeing how wide it fits and how it looks...
Vban everything!
Since the last fuel setup we worried the pump was going to hit, we ordered a Surge tank that houses 2 bosche 044 pumps in tank. its mounted by the steering rack on the fire wall. Now each pump feeds 3 injectors.
More to come! I'll post after thanksgiving unless I'm turkey hungover
Last edited by biggie2005; 11-27-2013 at 09:09 PM.


Trending Topics
11-28-2013, 03:34 PM
#14
Honda-Tech Member
Thread Starter
Join Date: Nov 2003
Location: Pittsburgh,PA
Posts: 74
Likes: 0
Received 0 Likes
on
0 Posts
Thanks guys
V8killaz do u mean the stitching/snake skin look? Yeah he did that a lot lol then he got tired of it cause that schedule 40 took I think 4 passes per cut ha
The car has ran and dynoed it's on stage 2 of this build but we will get to that later
V8killaz do u mean the stitching/snake skin look? Yeah he did that a lot lol then he got tired of it cause that schedule 40 took I think 4 passes per cut ha
The car has ran and dynoed it's on stage 2 of this build but we will get to that later

 07-20-2016, 07:58 PM
#20
Honda-Tech Member
Thread Starter
Join Date: Nov 2003
Location: Pittsburgh,PA
Posts: 74
Likes: 0
Received 0 Likes
on
0 Posts
well crap... I guess its a good time to revisit this and bump it... the car has changed ALOT just since this thread, making big power, new setups, just overall totally different car.
Sucks alot of the pics are dead I'll try to revive them. I should add the car is up, running, and well... having fun
Sucks alot of the pics are dead I'll try to revive them. I should add the car is up, running, and well... having fun
09-16-2021, 07:54 PM
#21

well crap... I guess its a good time to revisit this and bump it... the car has changed ALOT just since this thread, making big power, new setups, just overall totally different car.
Sucks alot of the pics are dead I'll try to revive them. I should add the car is up, running, and well... having fun
Sucks alot of the pics are dead I'll try to revive them. I should add the car is up, running, and well... having fun


Thread
Thread Starter
Forum
Replies
Last Post
CW-ITR-329
Acura Integra Type-R
9
03-03-2002 08:14 PM