
01-0041's ED7 Rebuild - USDM to US/JDM Dribble…
 04-19-2009, 08:33 PM
#26
Honda-Tech Member
Thread Starter
Join Date: May 2002
Location: Not Here, WA
Posts: 697
Likes: 0
Received 0 Likes
on
0 Posts
March 19, 2009
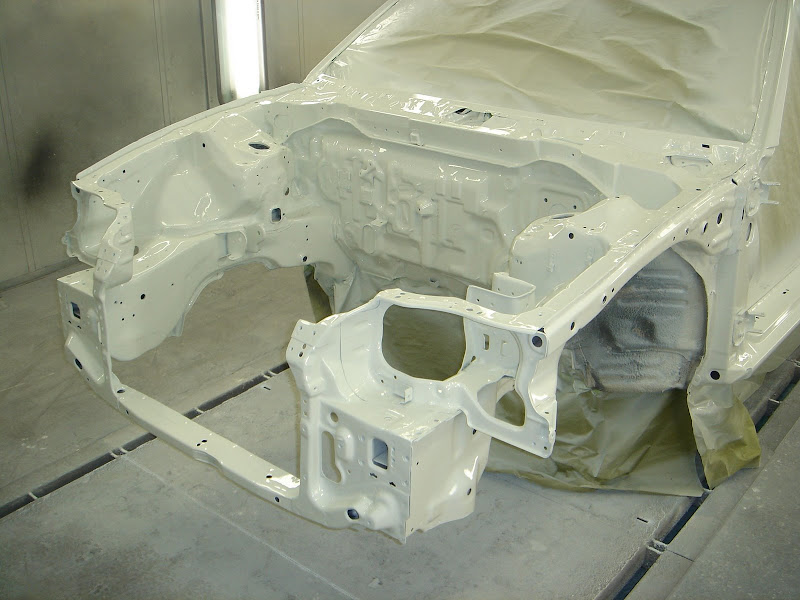
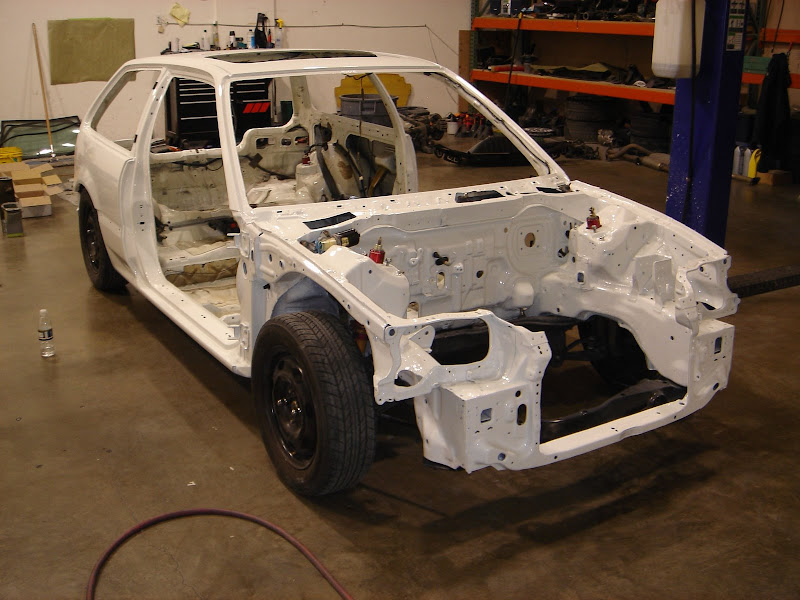
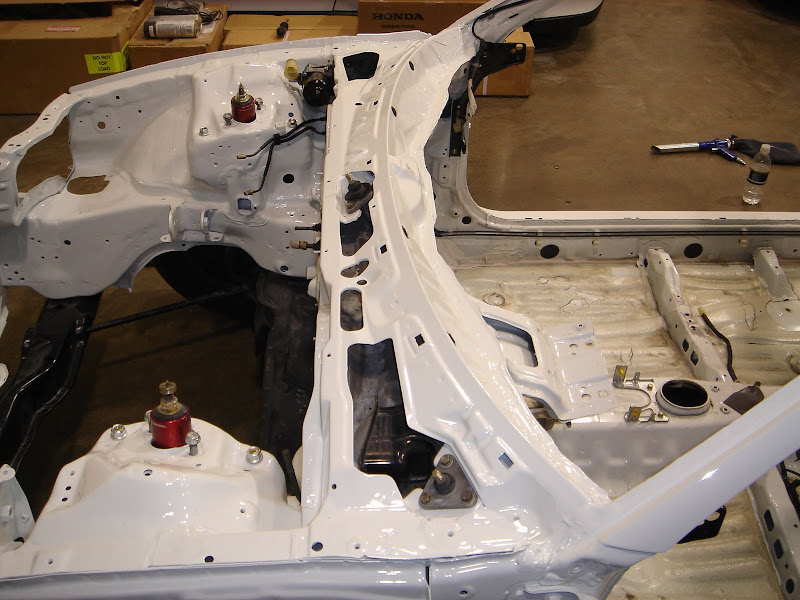
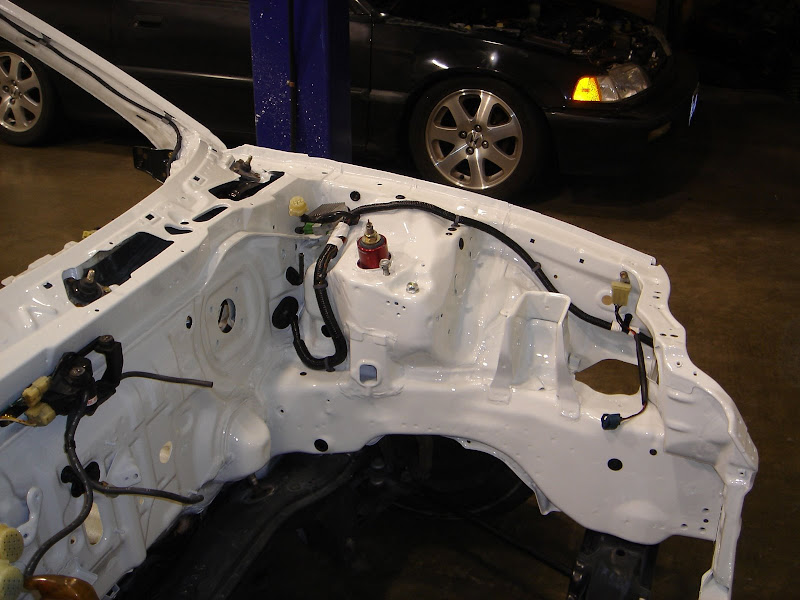
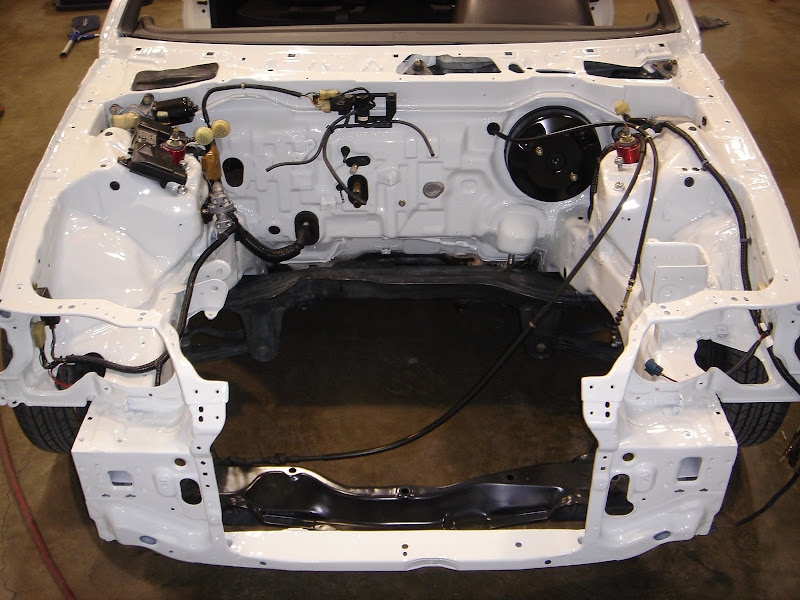
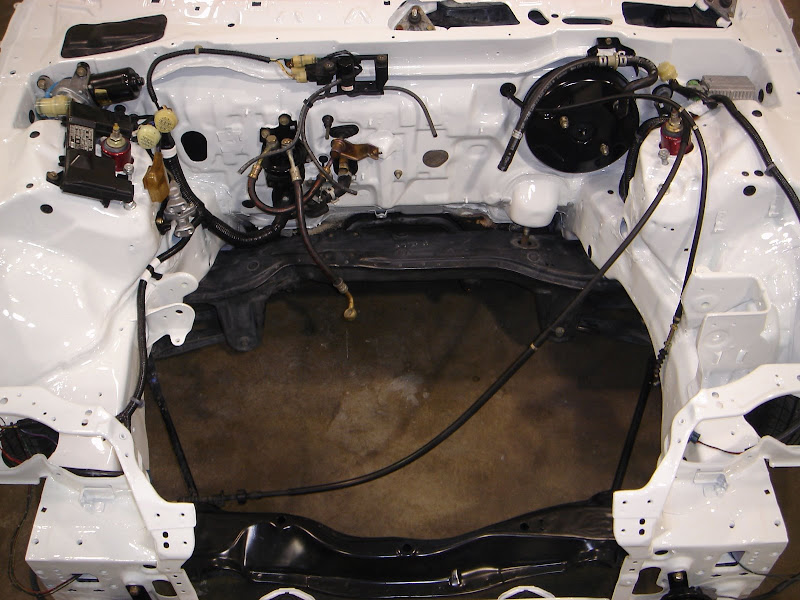
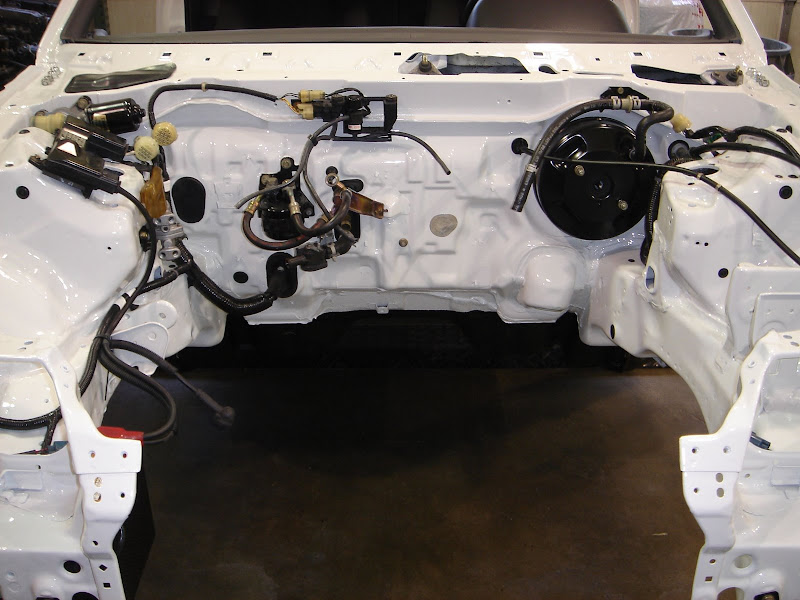
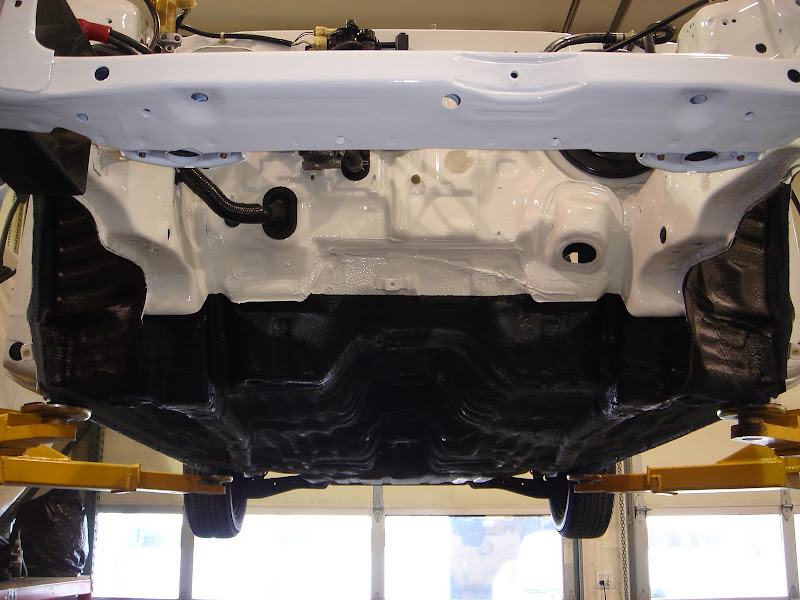
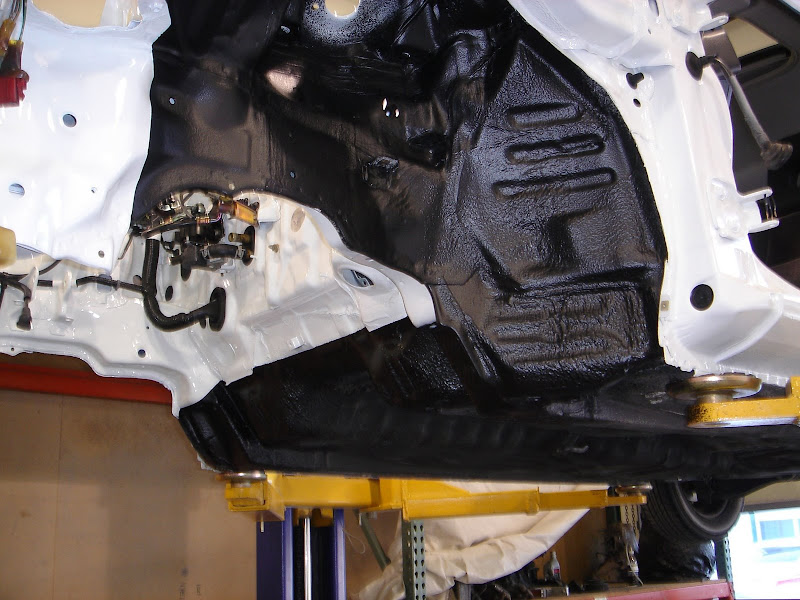
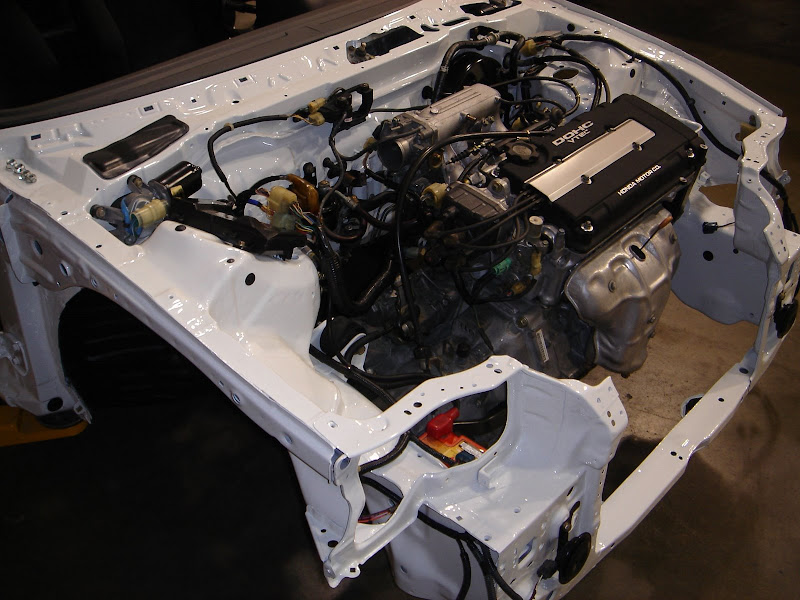
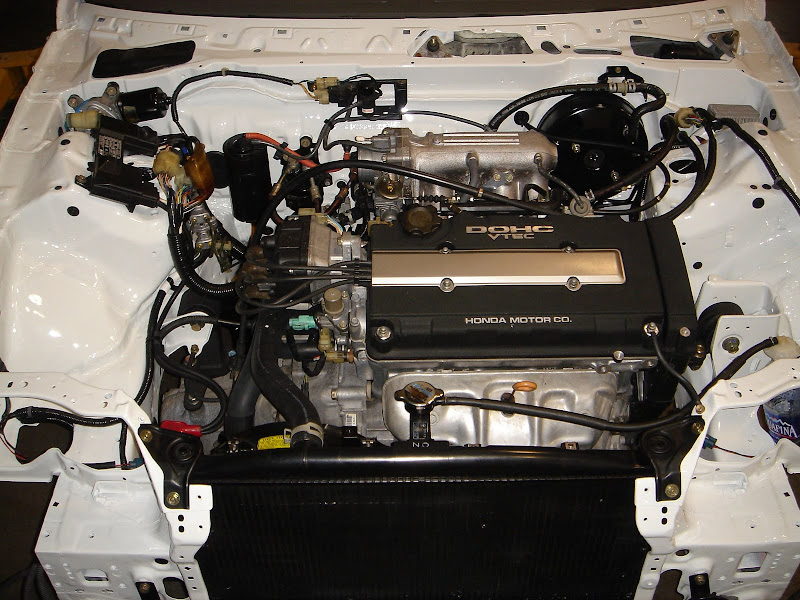
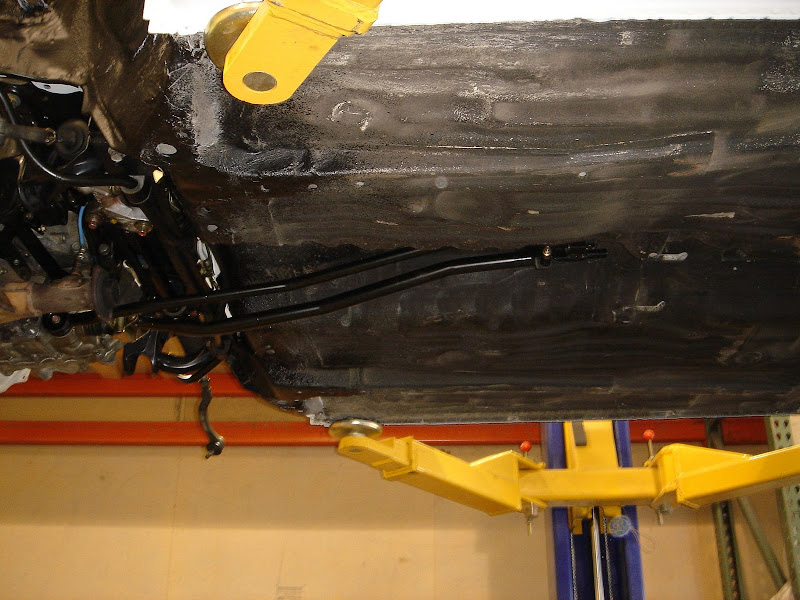
Well, the car is still waiting to be painted. So, I thought I’d take a picture of the sub frame assembly… ;-)
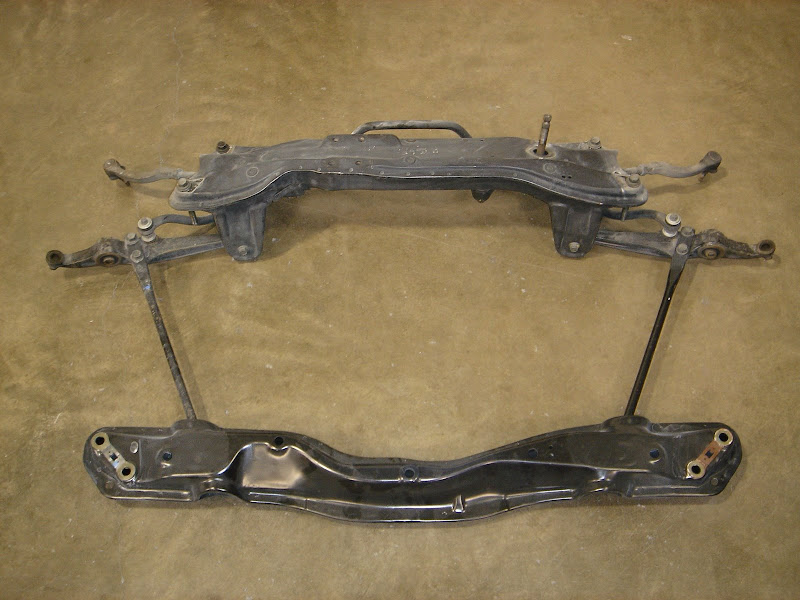
This thing needs some help. I’ll start cleaning and painting it tomorrow. I thought this was a neat picture because most of the components are intact and it makes things quicker.
I was just kidding about “the car is still waiting to be painted” I took the above picture after the car was painted, but who cares?
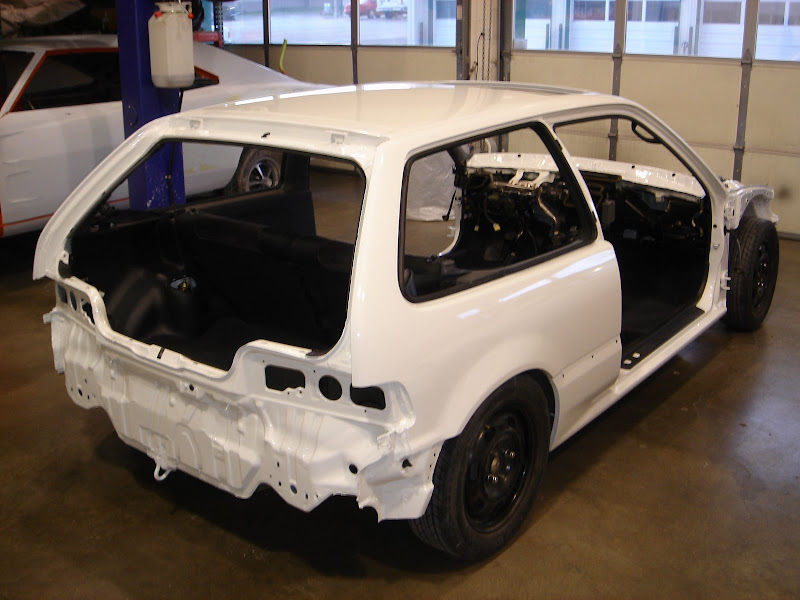
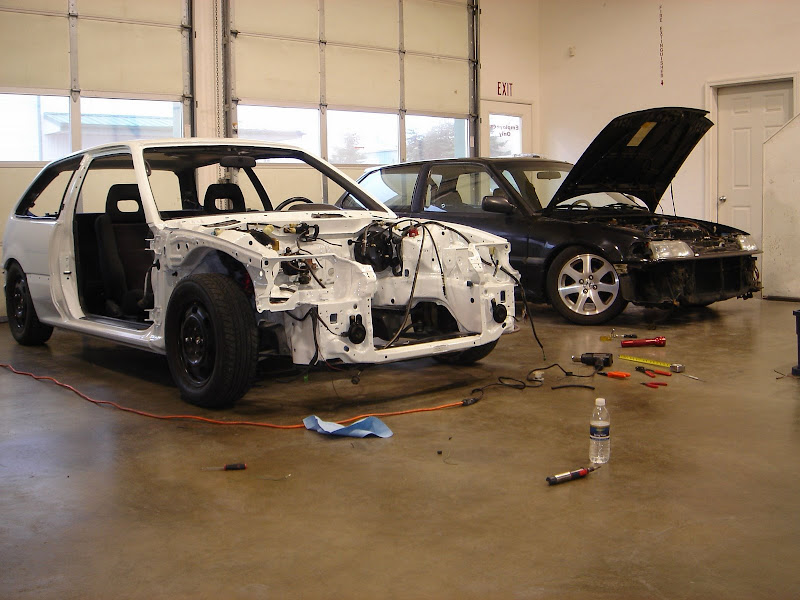
Here is what most of you that have been looking want to see anyway…
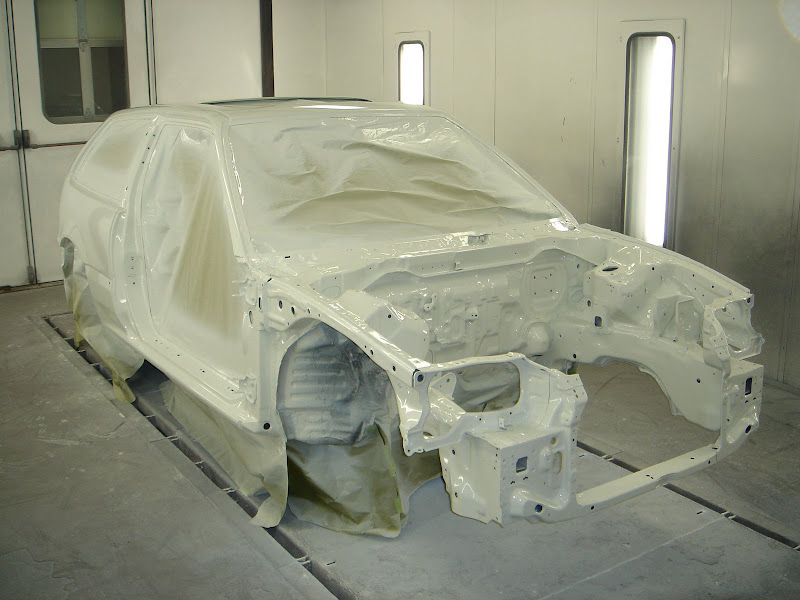
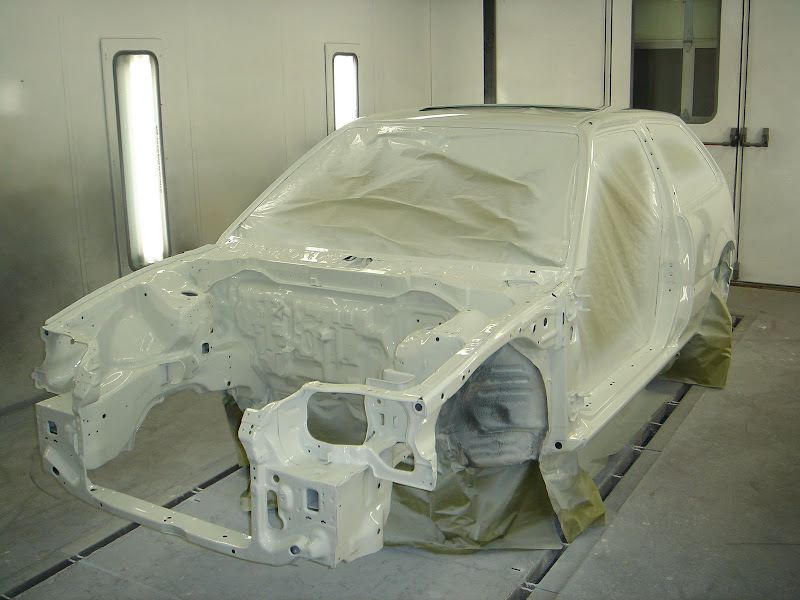
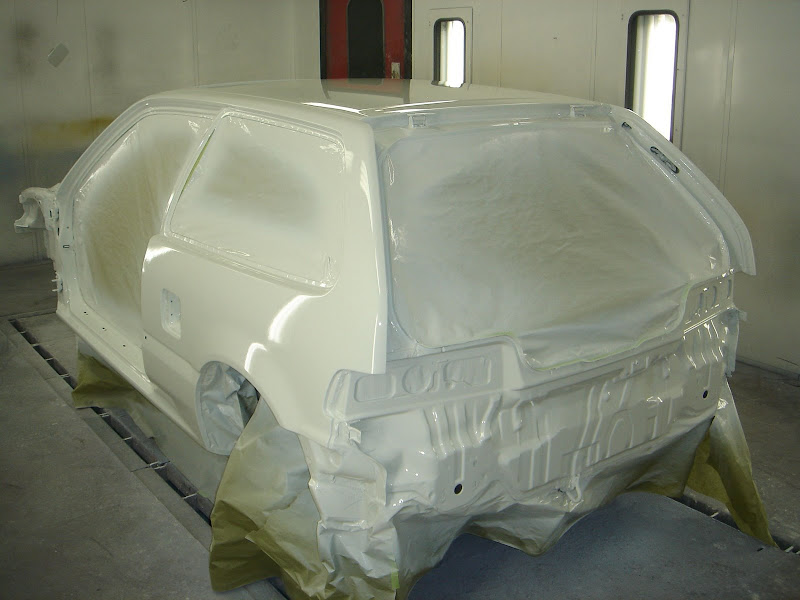
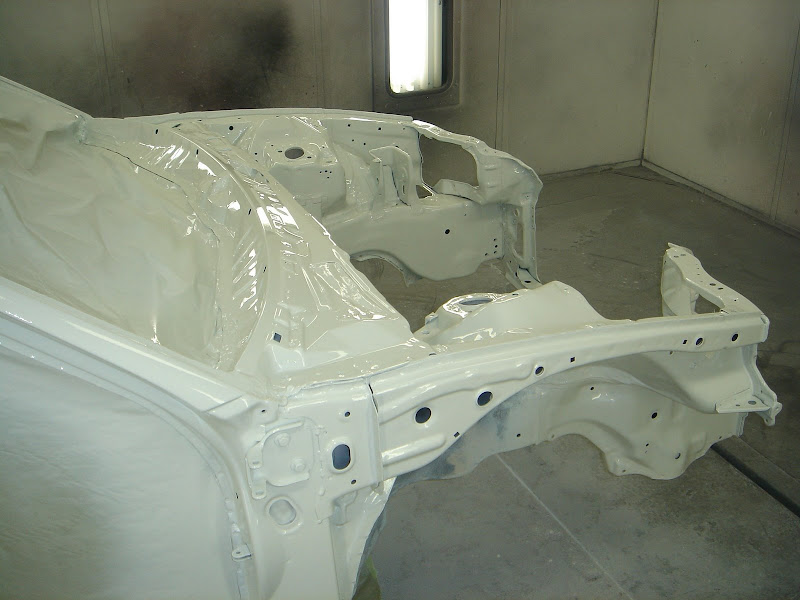
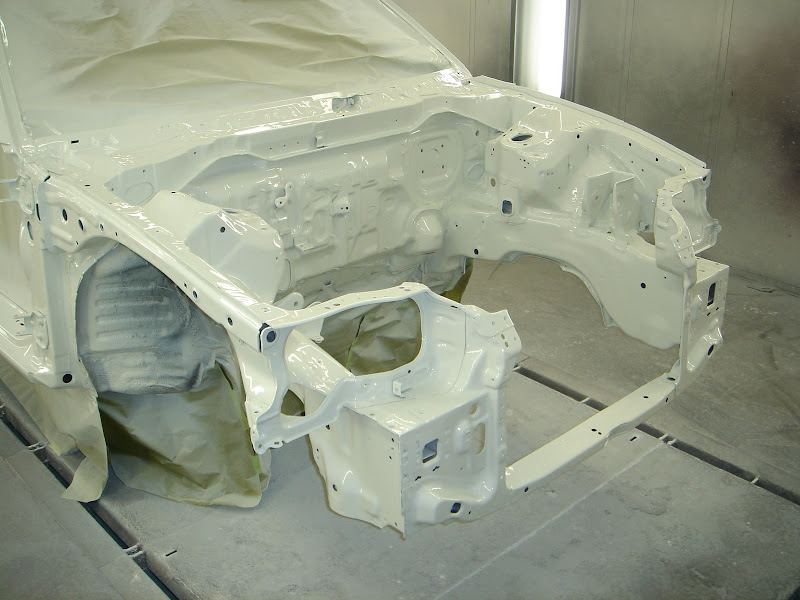
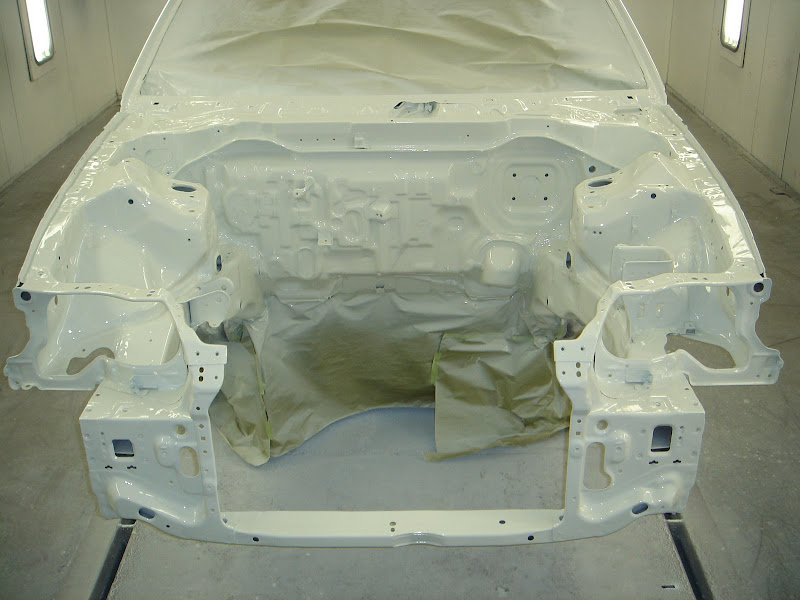
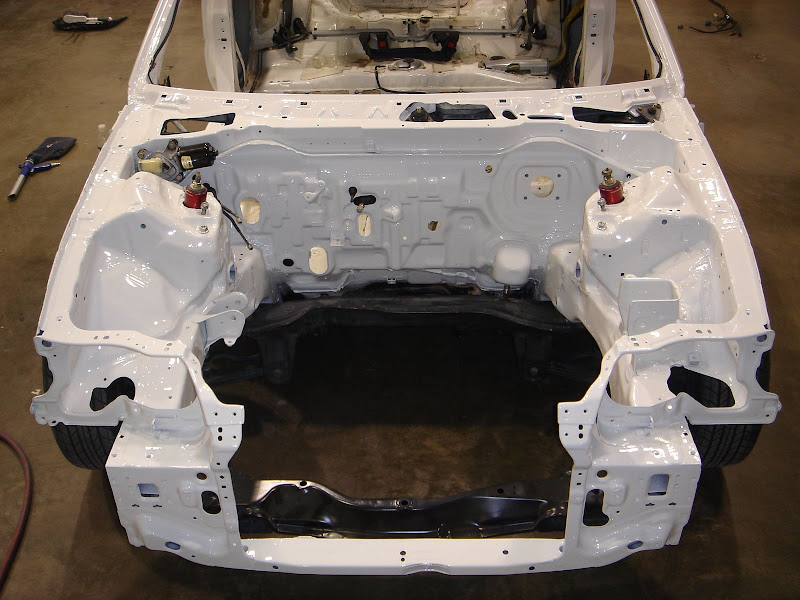
The pictures were taken while the car was baking. Ben finished the paint work about half an hour before coming to get me +/-. I think it turned out great!
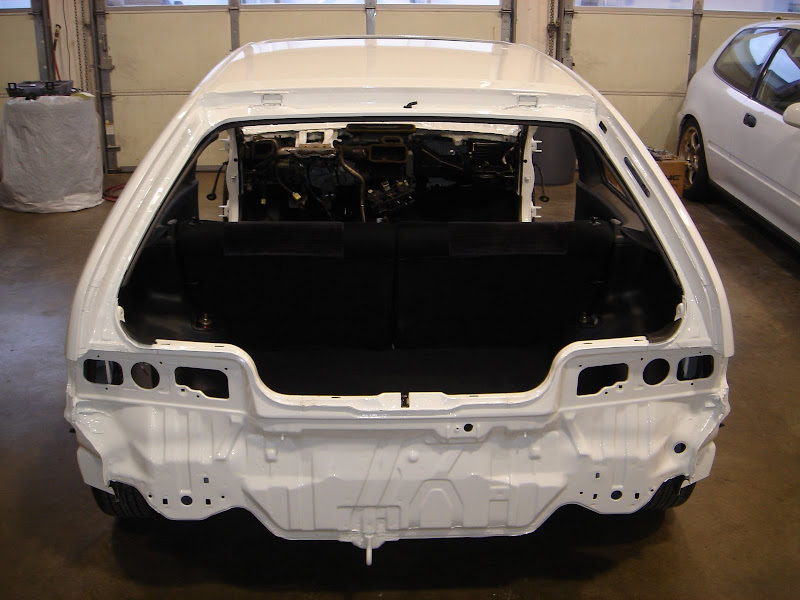
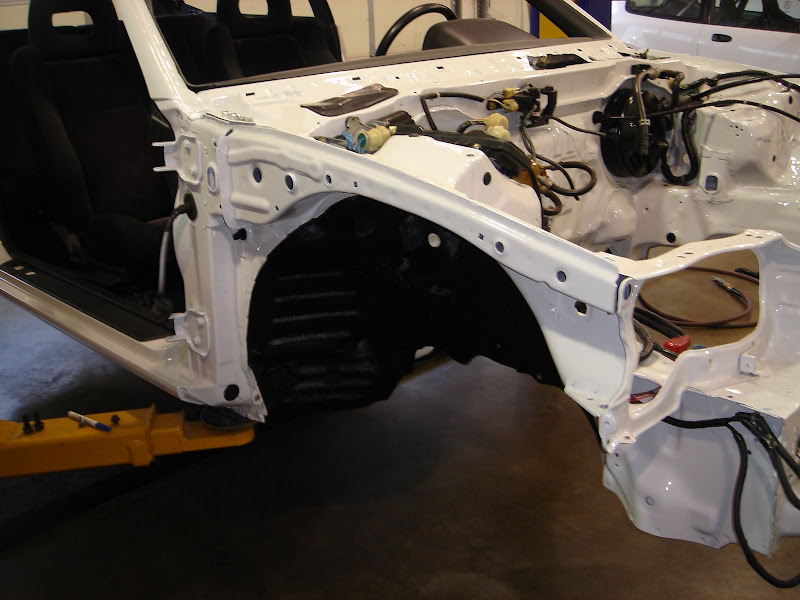
Here are a few of the engine bay…
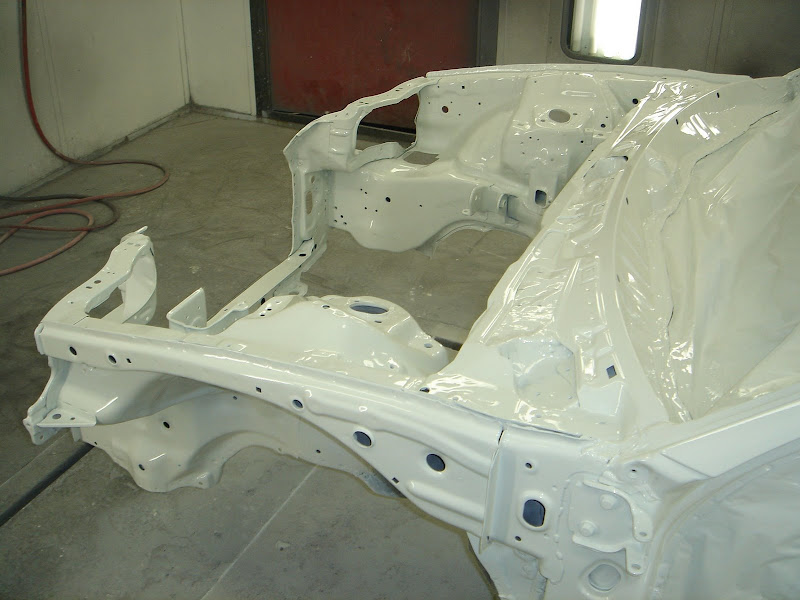
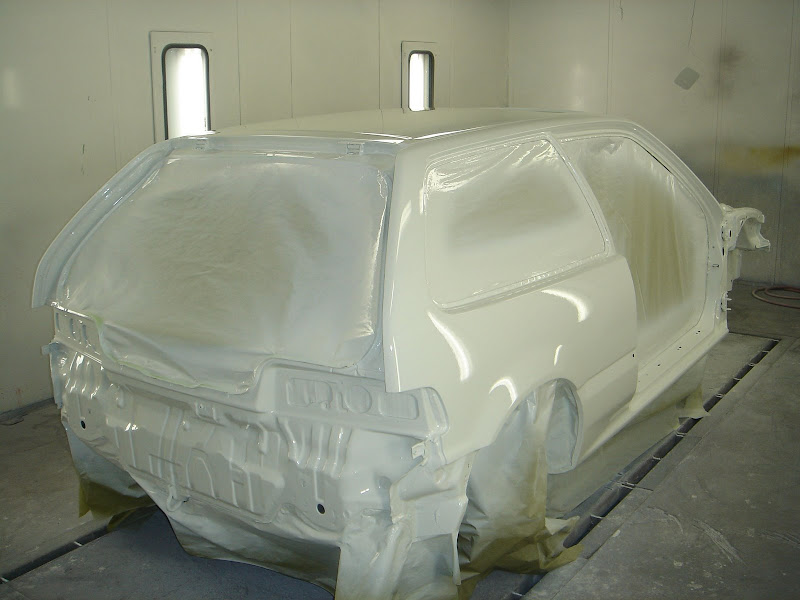
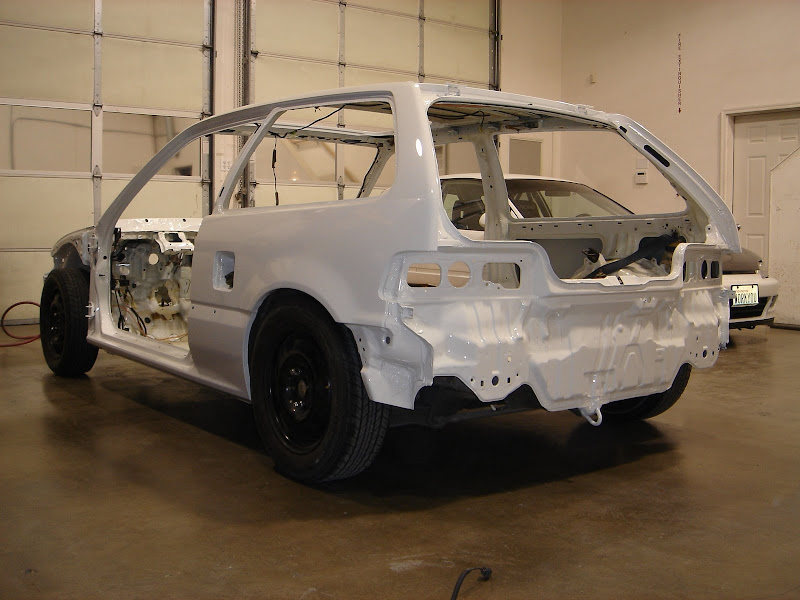
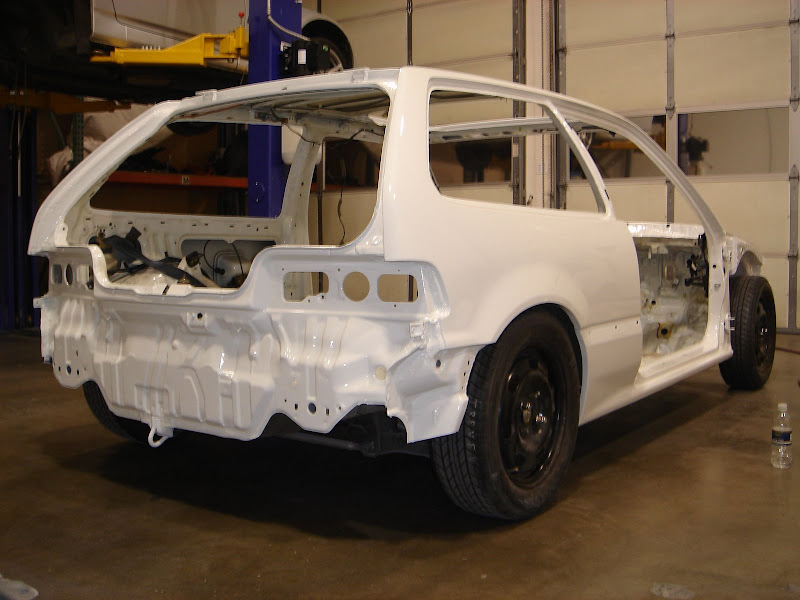
…and now closer a closer look at the rear of the car.
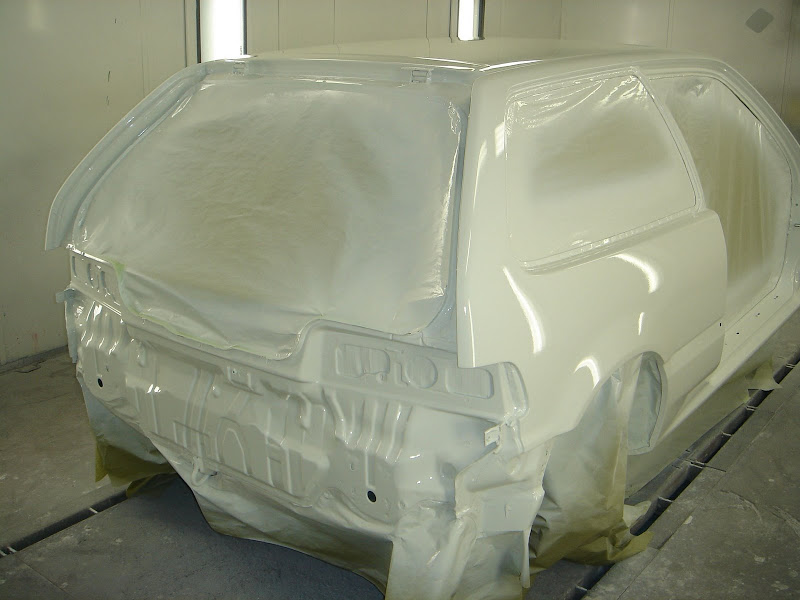
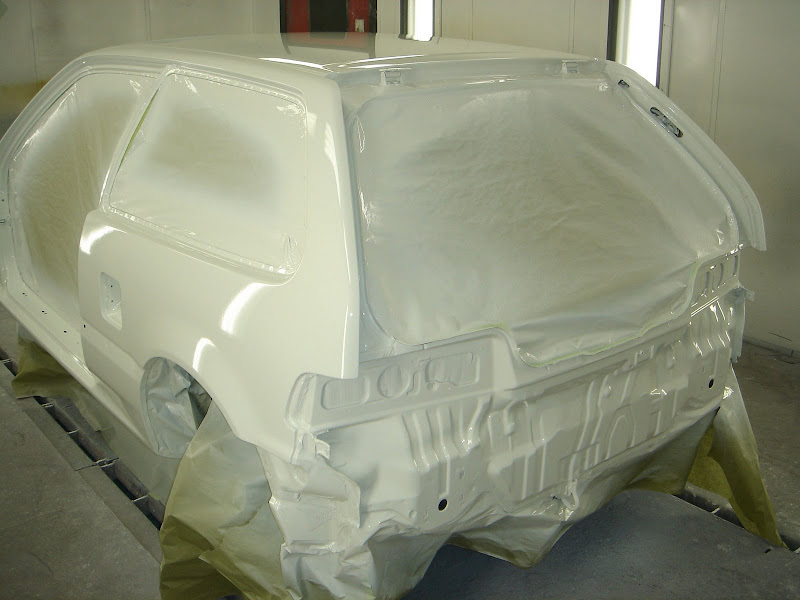
Closing thoughts for this update! The guys and 20•20 Motorsports are great! It’s nice having friends you can count on. Thank you!
Well, the car is still waiting to be painted. So, I thought I’d take a picture of the sub frame assembly… ;-)
This thing needs some help. I’ll start cleaning and painting it tomorrow. I thought this was a neat picture because most of the components are intact and it makes things quicker.
I was just kidding about “the car is still waiting to be painted” I took the above picture after the car was painted, but who cares?
Here is what most of you that have been looking want to see anyway…
The pictures were taken while the car was baking. Ben finished the paint work about half an hour before coming to get me +/-. I think it turned out great!
Here are a few of the engine bay…
…and now closer a closer look at the rear of the car.
Closing thoughts for this update! The guys and 20•20 Motorsports are great! It’s nice having friends you can count on. Thank you!
 04-19-2009, 08:34 PM
#27
Honda-Tech Member
Thread Starter
Join Date: May 2002
Location: Not Here, WA
Posts: 697
Likes: 0
Received 0 Likes
on
0 Posts
March 19, 2009
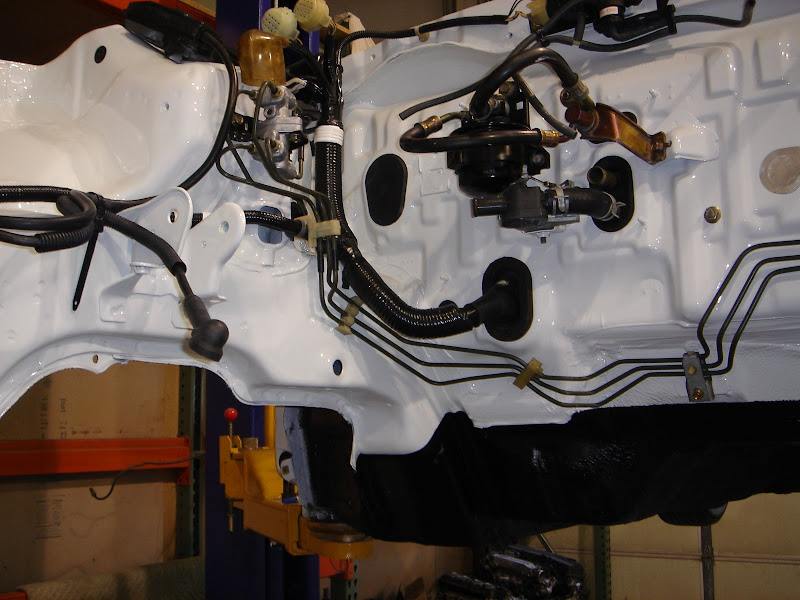
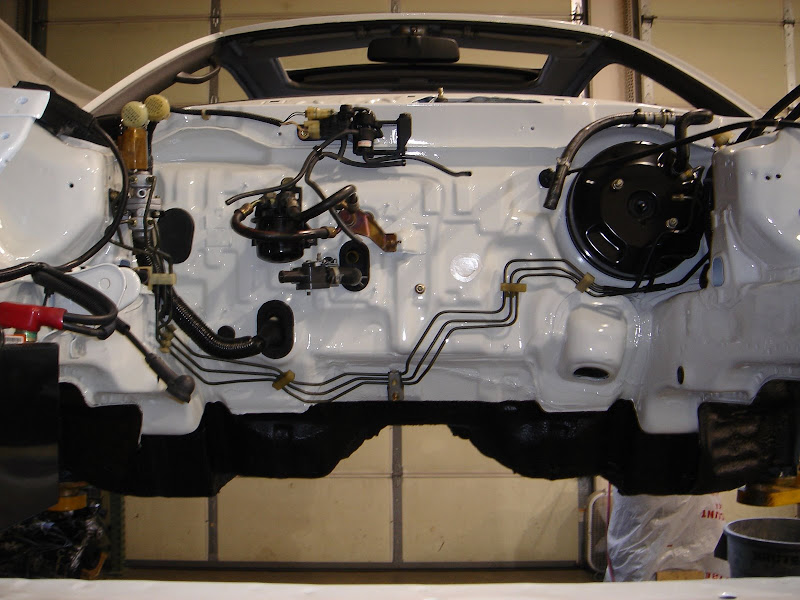
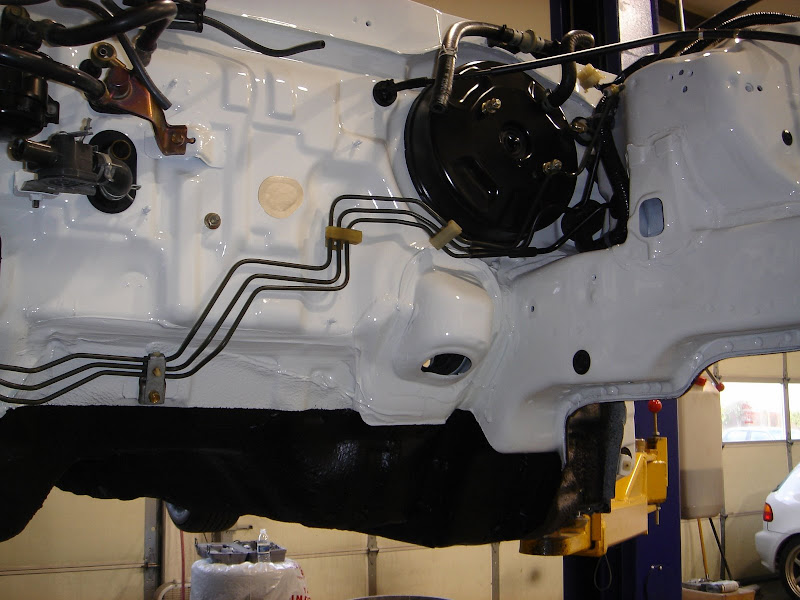
…today was fairly productive.
I gave the paint a few extra hours to harden before I started doing much. I was able to assemble/reinstall most of what was left in the car i.e. brake lines, fuel lines, clip up the A-Pillar wiring, etc…
Here are a few pictures.

Here’s what I’ll be working with tomorrow.

We’ll see how far I get.
…today was fairly productive.
I gave the paint a few extra hours to harden before I started doing much. I was able to assemble/reinstall most of what was left in the car i.e. brake lines, fuel lines, clip up the A-Pillar wiring, etc…
Here are a few pictures.
Here’s what I’ll be working with tomorrow.
We’ll see how far I get.
04-19-2009, 08:34 PM
#28
Honda-Tech Member
Thread Starter
Join Date: May 2002
Location: Not Here, WA
Posts: 697
Likes: 0
Received 0 Likes
on
0 Posts
March 20, 2009
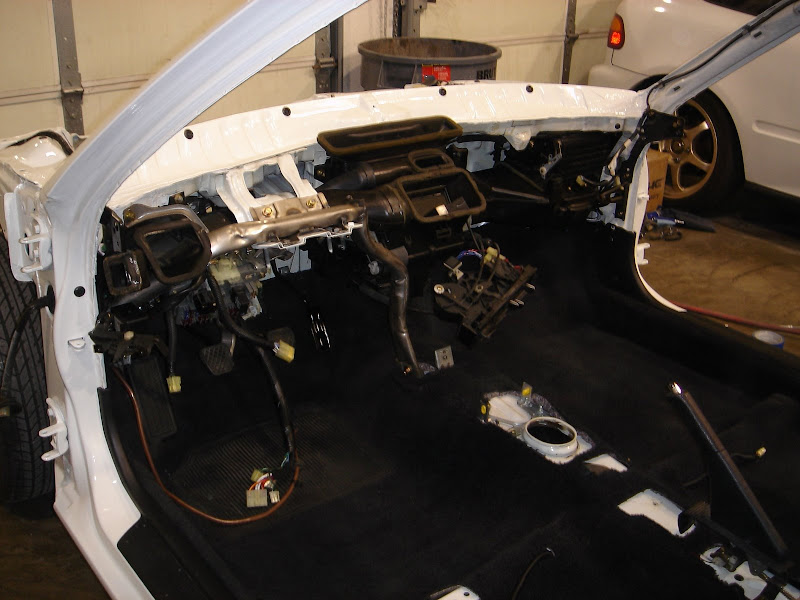
I made some progress today just not as much as I had planned…
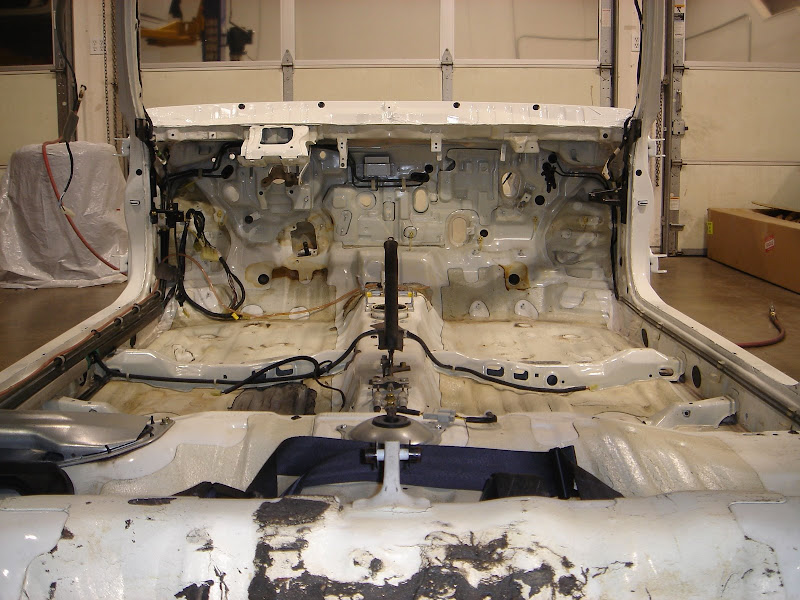
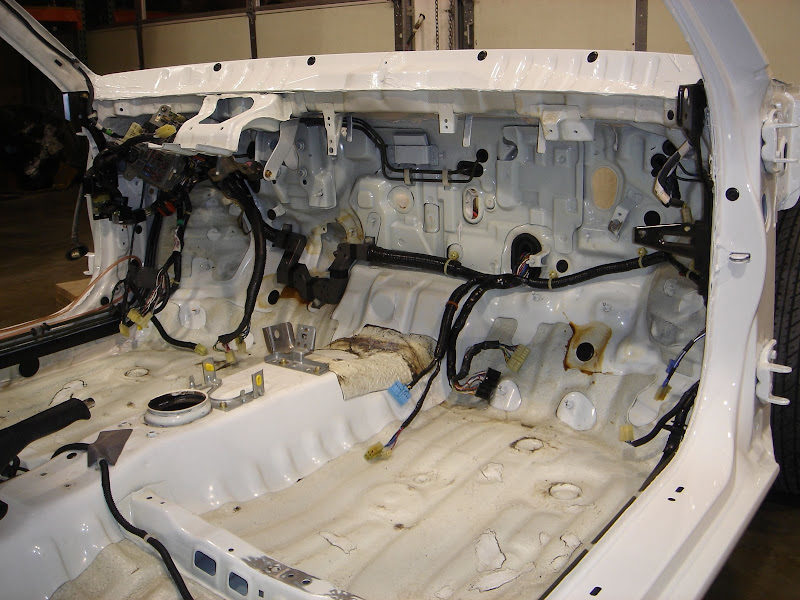
…spent the morning using Simple Green on the inside of the shell. I’d say it looks pretty good. You might say I’m a bit upset that the sound deadening came up on the driver’s side, but on the plus side who doesn’t like working on a clean car?

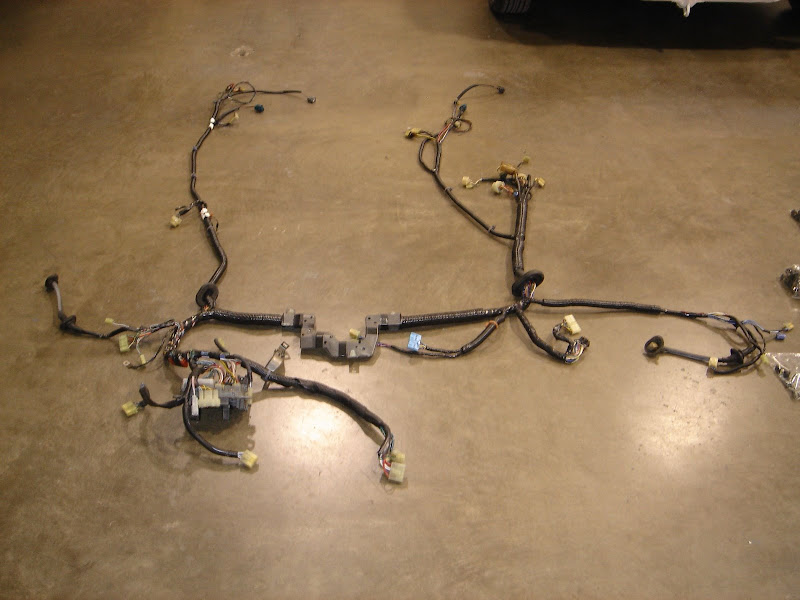
I started installing the cabin harness and a few other items.
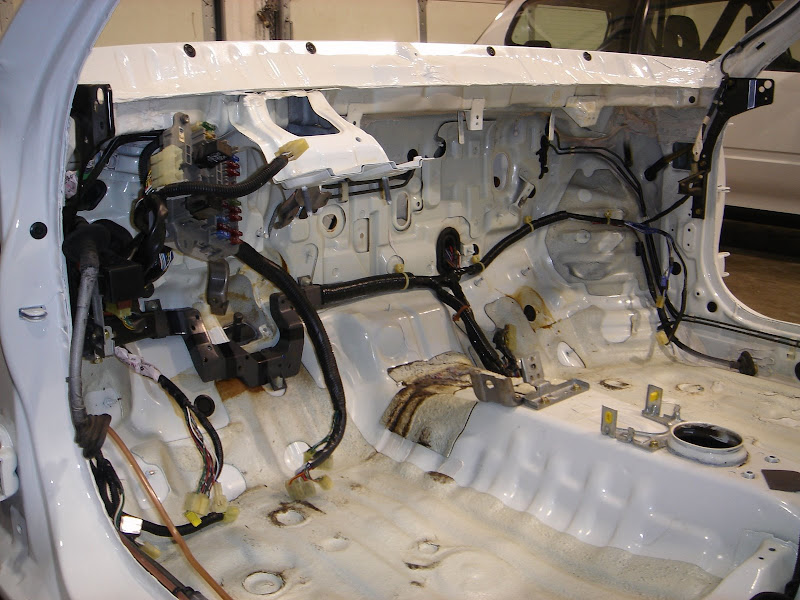
Some pictures of the engine bay.

I made some progress today just not as much as I had planned…
…spent the morning using Simple Green on the inside of the shell. I’d say it looks pretty good. You might say I’m a bit upset that the sound deadening came up on the driver’s side, but on the plus side who doesn’t like working on a clean car?
I started installing the cabin harness and a few other items.
Some pictures of the engine bay.
04-19-2009, 08:34 PM
#29
Honda-Tech Member
Thread Starter
Join Date: May 2002
Location: Not Here, WA
Posts: 697
Likes: 0
Received 0 Likes
on
0 Posts
March 22, 2009
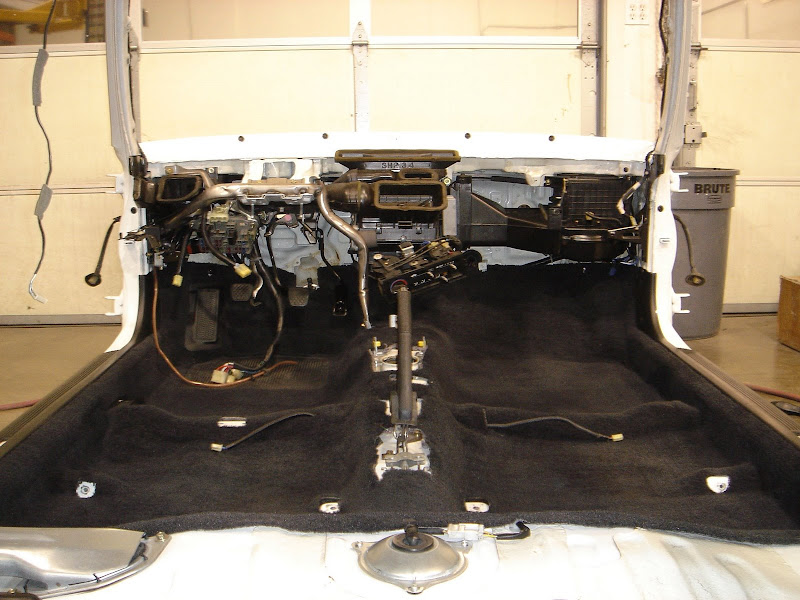
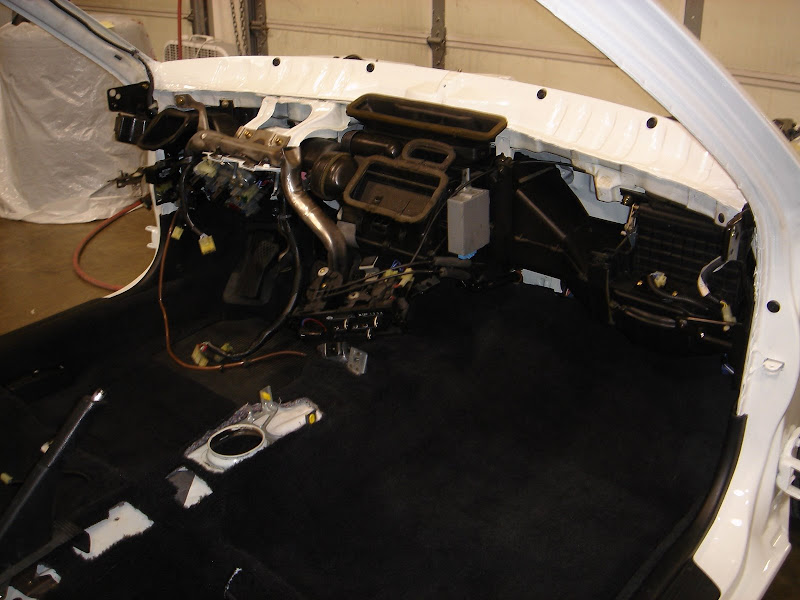
I feel I made some decent progress today.
Items installed:
Cabin harness
Pedal assembly
Heater / ventilation system
Carpet
Sunroof
Headliner
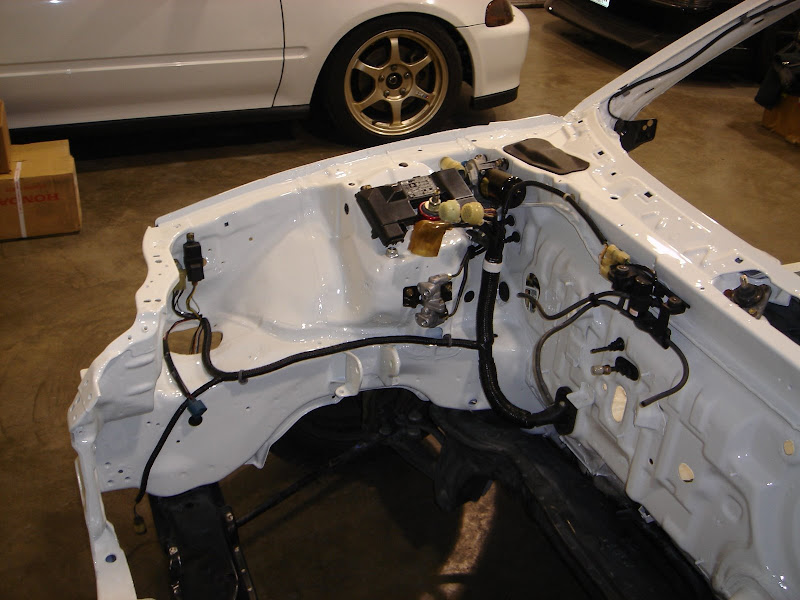
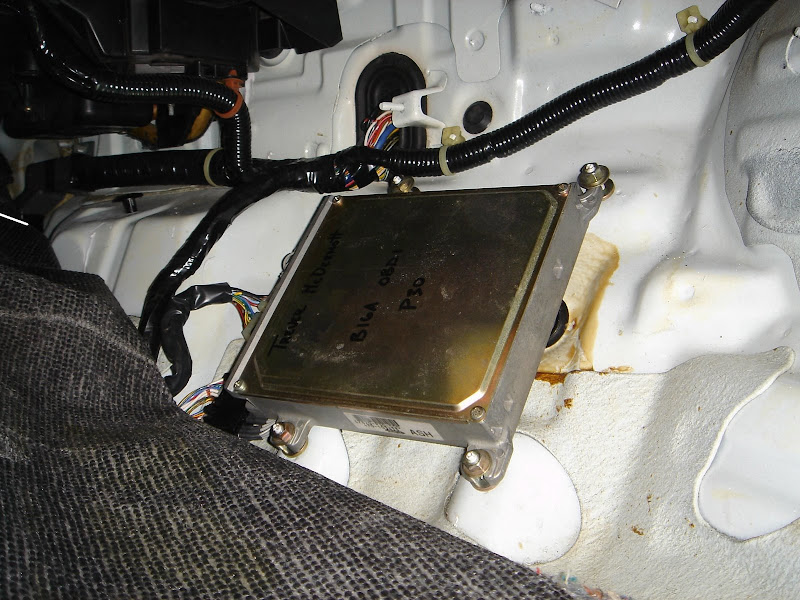
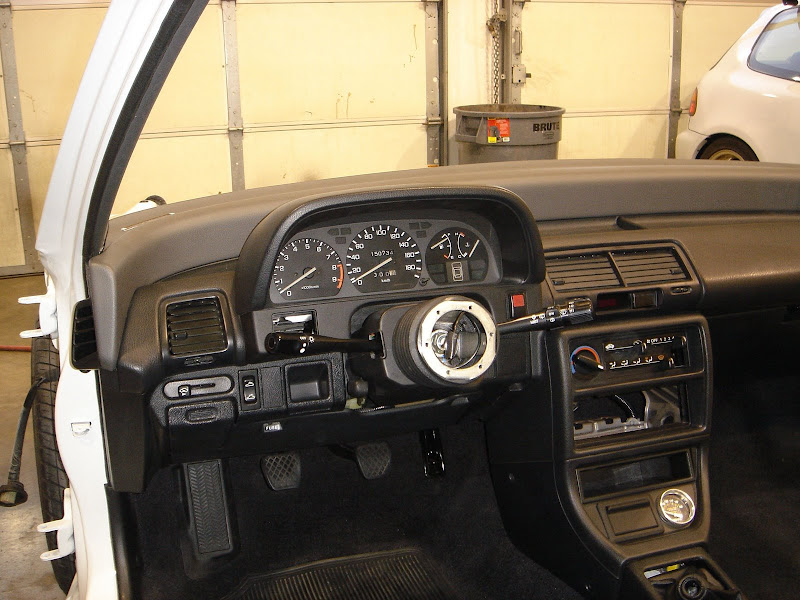
Kind of a bad picture, but what I hope you notice is the way the ECU is mounted. Hear from time to time that the OBD1 ECUs don’t fit blah blah blah…
Well What I’d like to say is they do. I might retake this picture tomorrow, but this should do. In the picture you’ll notice my JDM P30 - ahh looks stock I like it - mounted where the factory ECU would go.

What I could and couldn’t do to mount the ECU.
Could:
Added two 6mm ID x 20mm OD x 1.5mm on all four posts
Bent the two lower studs about 1mm each away from one another
Test fit ECU
Used the factory hardware for mounting the lower portion of the ECU
Added two additional washers on the upper studs 6mm ID x 22mm OD x 1mm the used the factory hardware.
Couldn’t:
I wasn’t able to use the factory cover for the ECU as the ECU is barely in the way
Once the ECU fit I created an “S” in the jumper harness and tucked a portion of it under the ECU. It’s nice of the factory to provide stand offs for us!
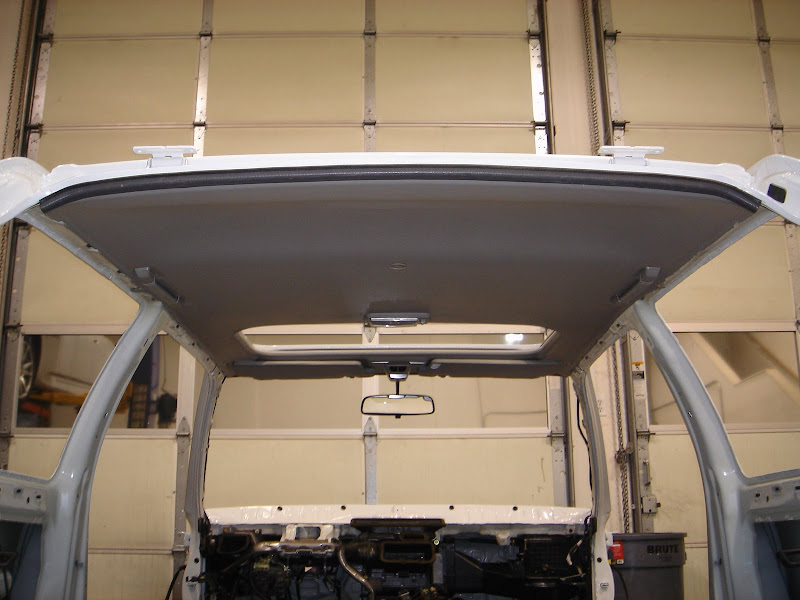
Last picture for the day is my minty sunroof and headliner. I didn’t relies how dirty all of this stuff really was until I started cleaning it
I had to fix a bit of rust and reseal the cable grommets, but all should be good now…
I feel I made some decent progress today.
Items installed:
Cabin harness
Pedal assembly
Heater / ventilation system
Carpet
Sunroof
Headliner
Kind of a bad picture, but what I hope you notice is the way the ECU is mounted. Hear from time to time that the OBD1 ECUs don’t fit blah blah blah…
Well What I’d like to say is they do. I might retake this picture tomorrow, but this should do. In the picture you’ll notice my JDM P30 - ahh looks stock I like it - mounted where the factory ECU would go.
What I could and couldn’t do to mount the ECU.
Could:
Added two 6mm ID x 20mm OD x 1.5mm on all four posts
Bent the two lower studs about 1mm each away from one another
Test fit ECU
Used the factory hardware for mounting the lower portion of the ECU
Added two additional washers on the upper studs 6mm ID x 22mm OD x 1mm the used the factory hardware.
Couldn’t:
I wasn’t able to use the factory cover for the ECU as the ECU is barely in the way
Once the ECU fit I created an “S” in the jumper harness and tucked a portion of it under the ECU. It’s nice of the factory to provide stand offs for us!
Last picture for the day is my minty sunroof and headliner. I didn’t relies how dirty all of this stuff really was until I started cleaning it
I had to fix a bit of rust and reseal the cable grommets, but all should be good now…
04-19-2009, 08:35 PM
#30
Honda-Tech Member
Thread Starter
Join Date: May 2002
Location: Not Here, WA
Posts: 697
Likes: 0
Received 0 Likes
on
0 Posts
March 22, 2009
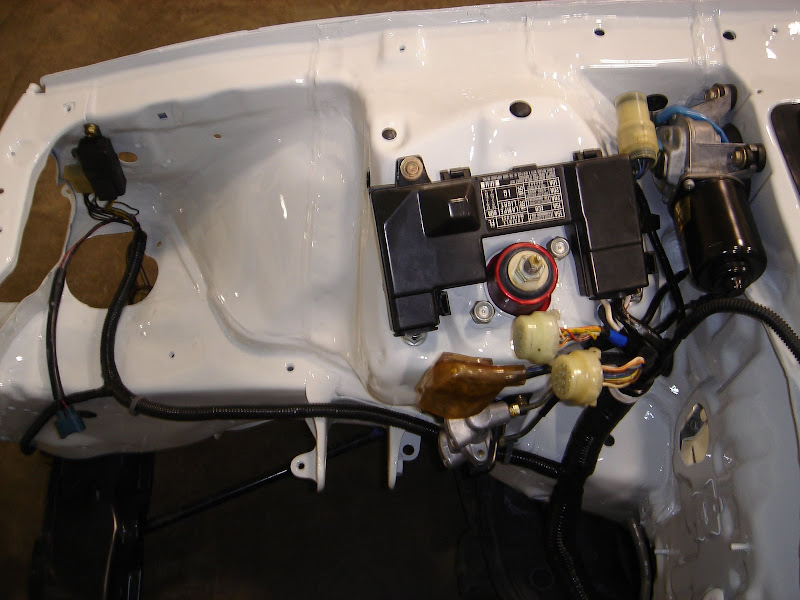
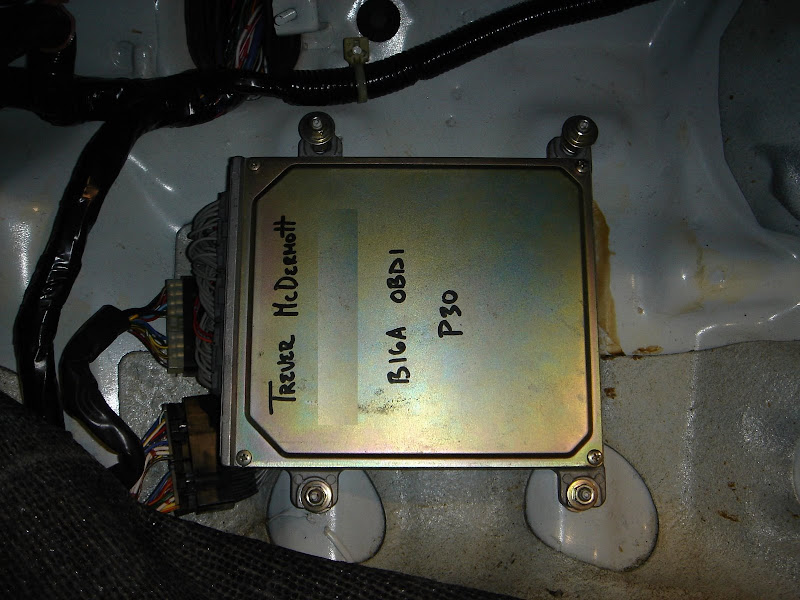
Here are a couple follow up pictures of my ECU mounting.
I finished install in the interior, but as I’m looking at the picture below I need to make sure the rear most clip is in on the right side A-Pillar.
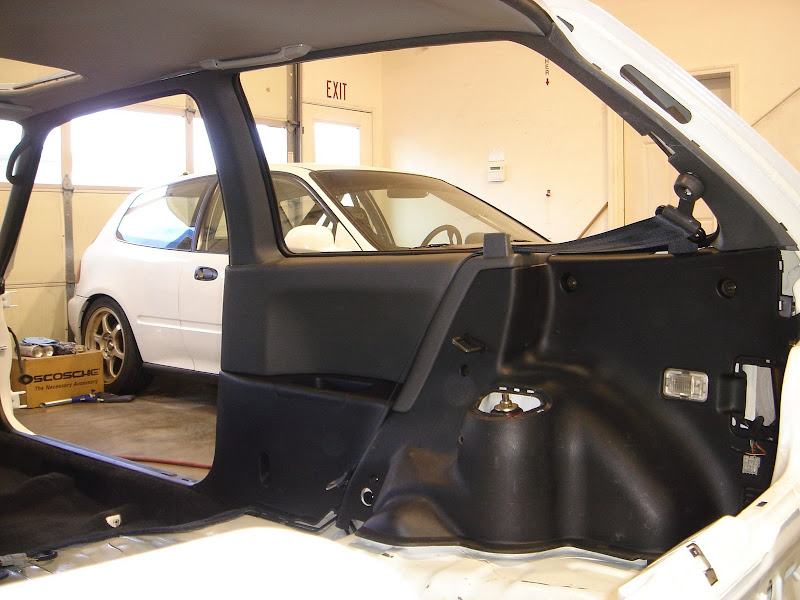
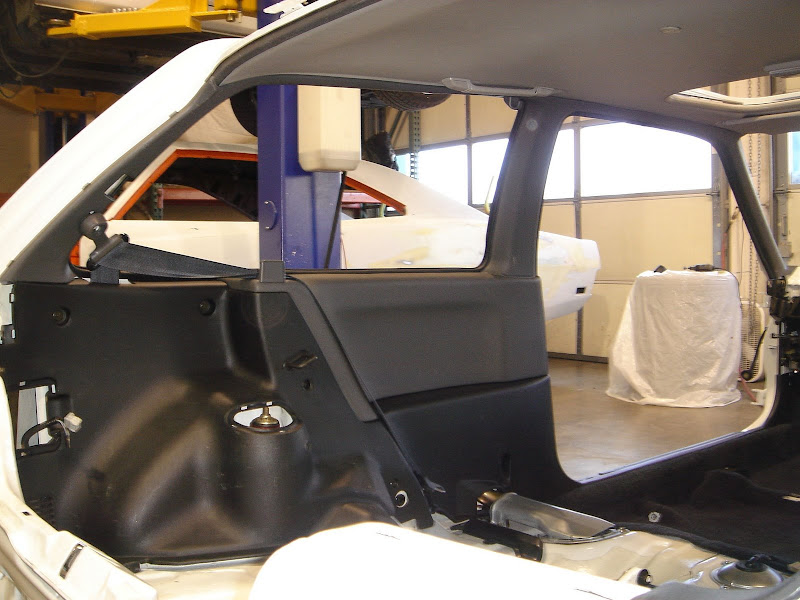
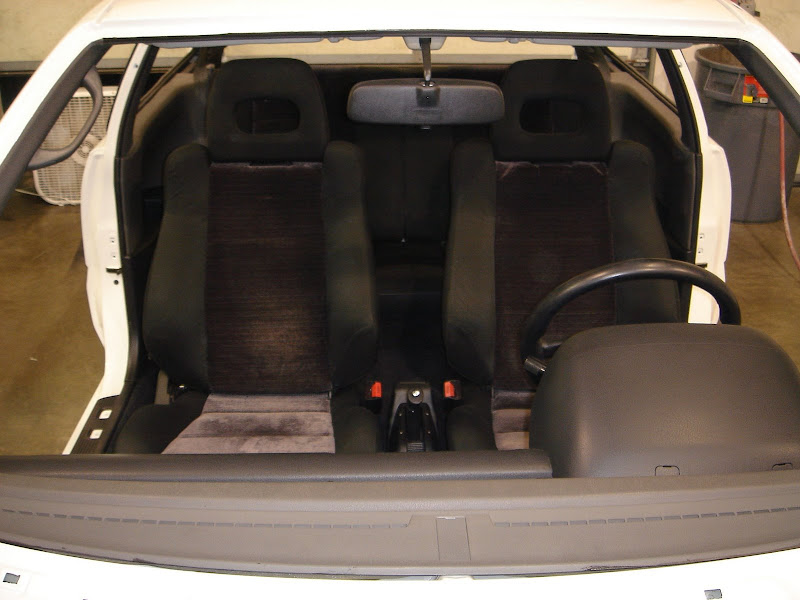
I spent a few hours cleaning and installing the rear window seals so they’re clean and fit better - just a note to people installing or reinstalling the rear window seals. There are tabs on the rear panels that need to be under the seal to help keep the panels in place. Take your time as it will yield a better result.
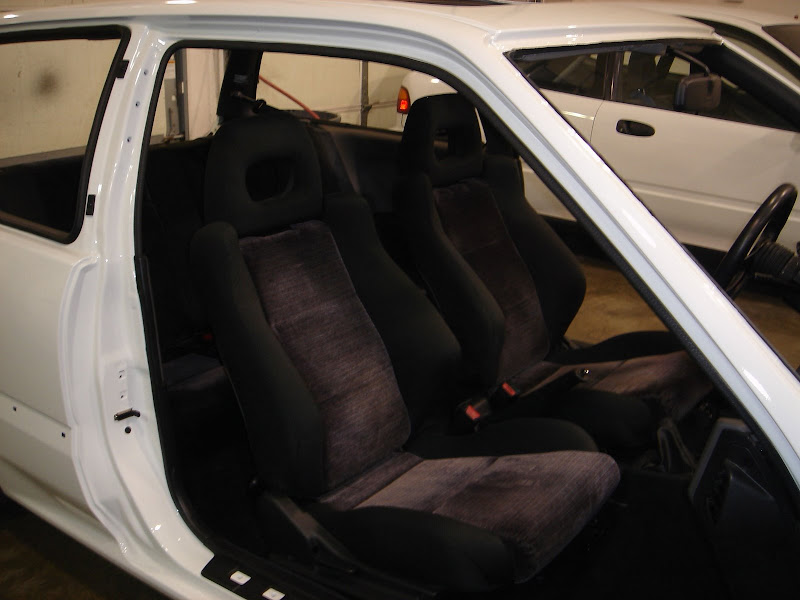
Rear seats - man I love this car all I have to do to is clean and install - not that is was dirty to begin with, but dust is everywhere!
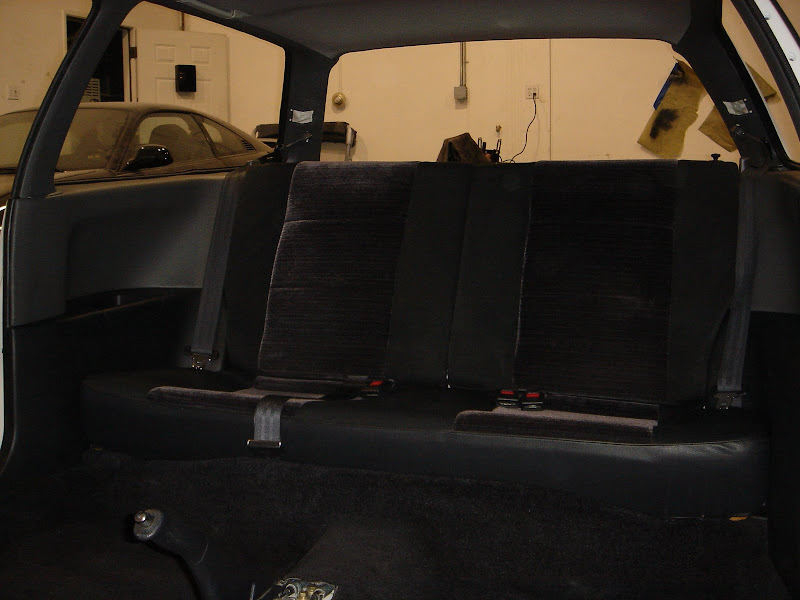

Just a few full shots…

I hope to have the dash in tomorrow, but to do that I’m going to need to do the following:
Redo brake booster
Install clutch cable
Install throttle cable
Create a plug or block off plate for the speedometer cable
Most of the above is just easier with the dash out!!!!
Here are a couple follow up pictures of my ECU mounting.
I finished install in the interior, but as I’m looking at the picture below I need to make sure the rear most clip is in on the right side A-Pillar.
I spent a few hours cleaning and installing the rear window seals so they’re clean and fit better - just a note to people installing or reinstalling the rear window seals. There are tabs on the rear panels that need to be under the seal to help keep the panels in place. Take your time as it will yield a better result.
Rear seats - man I love this car all I have to do to is clean and install - not that is was dirty to begin with, but dust is everywhere!
Just a few full shots…
I hope to have the dash in tomorrow, but to do that I’m going to need to do the following:
Redo brake booster
Install clutch cable
Install throttle cable
Create a plug or block off plate for the speedometer cable
Most of the above is just easier with the dash out!!!!
04-19-2009, 08:35 PM
#31
Honda-Tech Member
Thread Starter
Join Date: May 2002
Location: Not Here, WA
Posts: 697
Likes: 0
Received 0 Likes
on
0 Posts
March 23, 2009
Quick update…
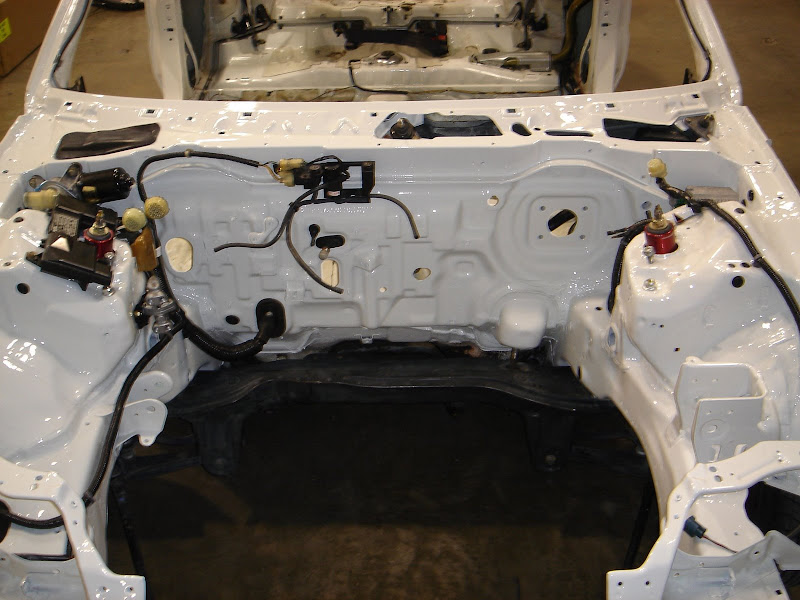
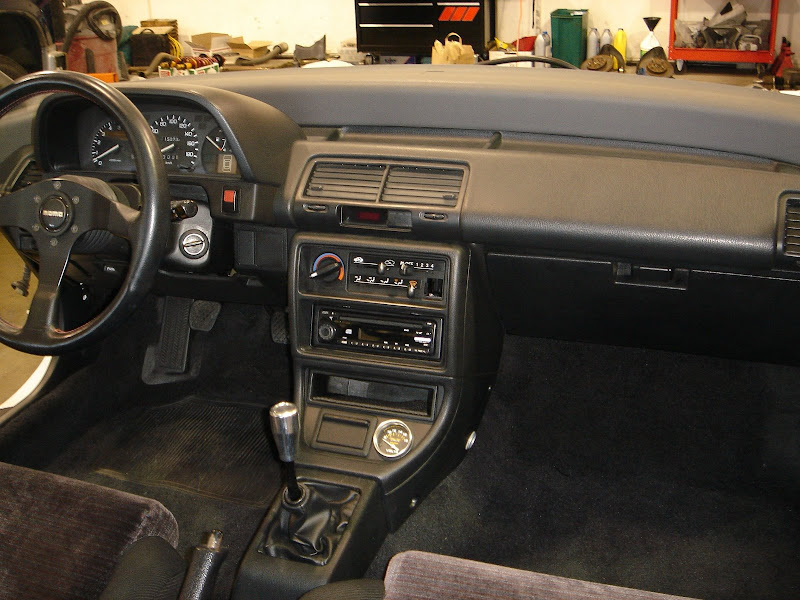
Dash is done and installed along with most of the interior. I’m undecided if I’m going to install a stereo or not.
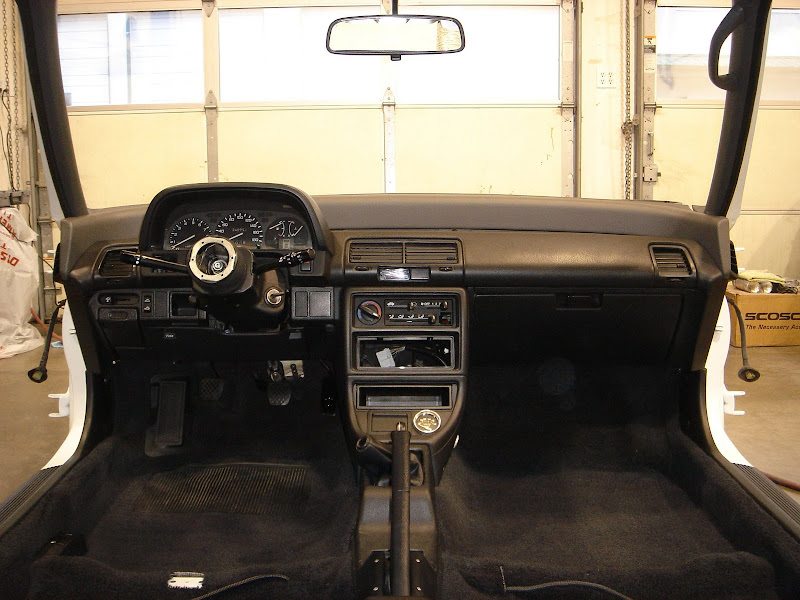
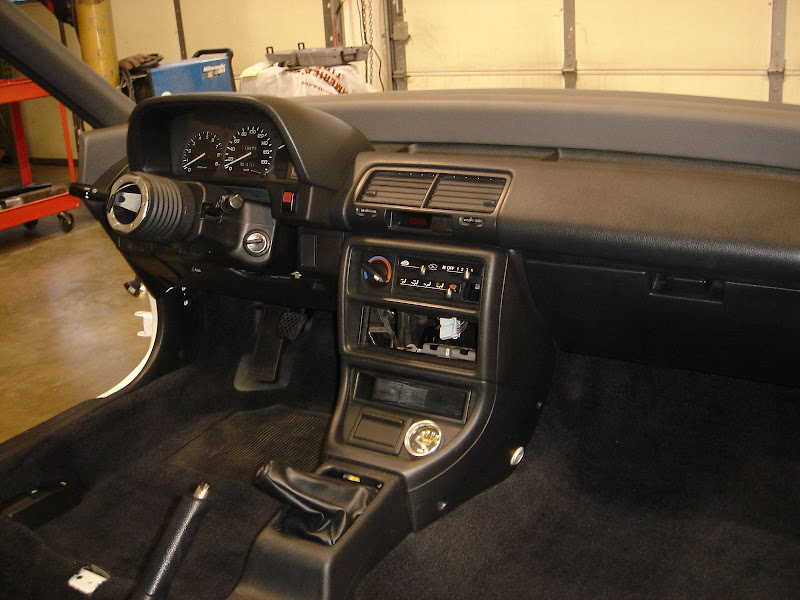
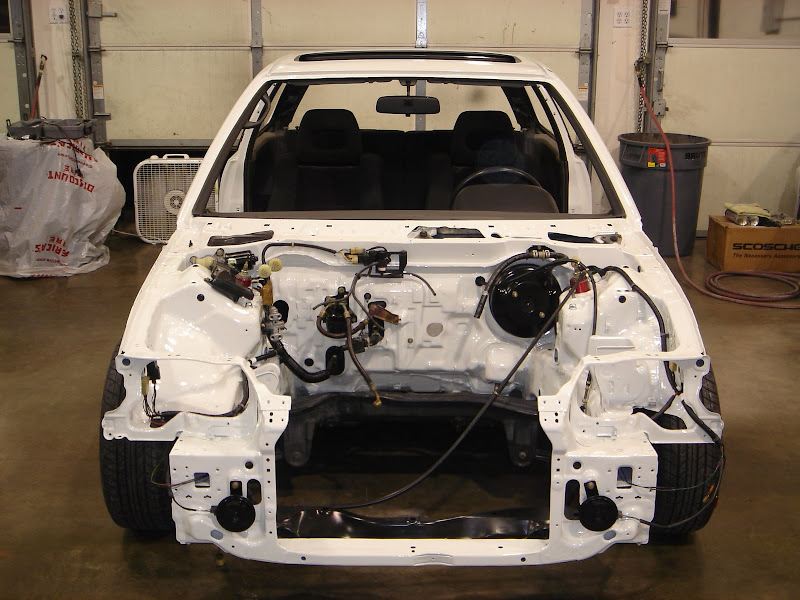
Just a quick shot of the engine bay. Once I get the car back on the rack I’ll remove the suspension and get it ready for paint.
Quick update…
Dash is done and installed along with most of the interior. I’m undecided if I’m going to install a stereo or not.
Just a quick shot of the engine bay. Once I get the car back on the rack I’ll remove the suspension and get it ready for paint.
04-19-2009, 08:35 PM
#32
Honda-Tech Member
Thread Starter
Join Date: May 2002
Location: Not Here, WA
Posts: 697
Likes: 0
Received 0 Likes
on
0 Posts
March 24, 2009
Not much progress today even though I got a lot done.
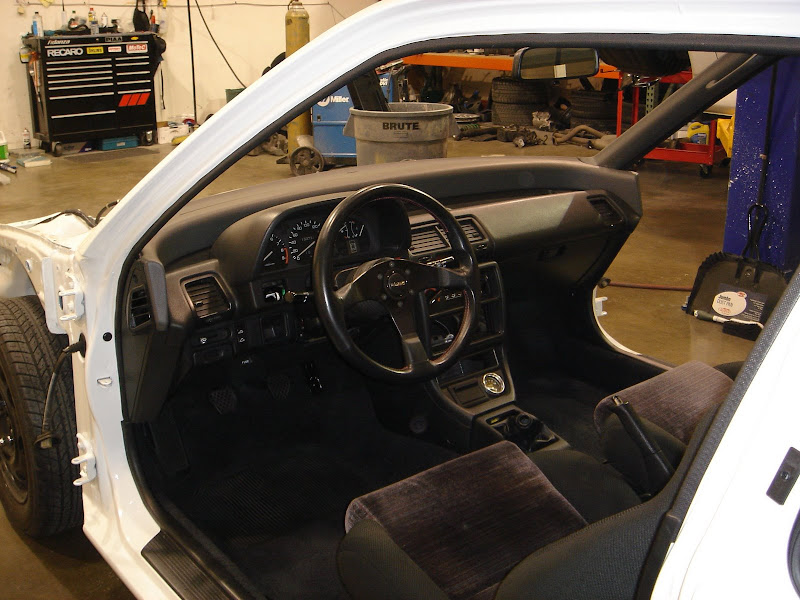
I’m a big Recaro guy as I’ve been using the same style seat for almost ten years, but unfortunately I sold my last spare SPG a couple years ago and haven’t picked up my new one yet. So, since my daily driver’s seat is in the black ’90 I transferred the black ’90 driver’s seat tracks to the white ‘90’s seat. I guess until I have the ability to finish the project the stock seat will do for the project car. :-(
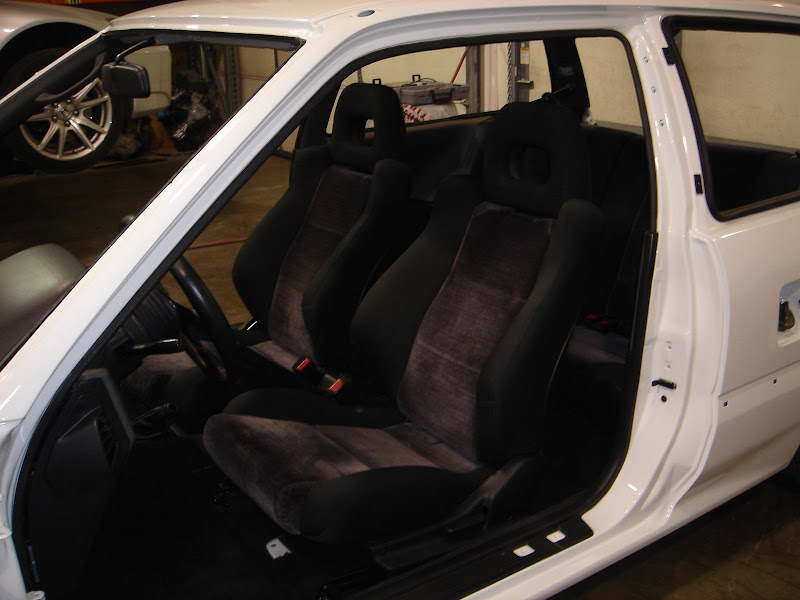
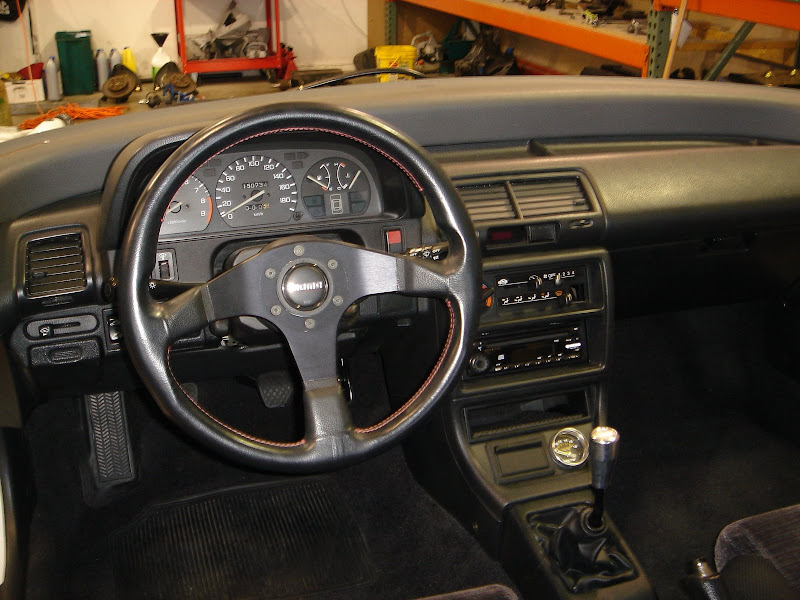
Now that the seats are in and fairly clean I thought I’d install the steering wheel as it makes it a bit easier to move the car around. I decided to use the MOMO Tuner verses the MOMO Sport that was in the car. The Tuner fits the stock interior a little bit better as it has red stitch, but it’s not too much.
I was able to make some headway in the engine bay today. I seem to be running out of things to do until I undercoat the wheel wells and lower engine bay.
Not much progress today even though I got a lot done.
I’m a big Recaro guy as I’ve been using the same style seat for almost ten years, but unfortunately I sold my last spare SPG a couple years ago and haven’t picked up my new one yet. So, since my daily driver’s seat is in the black ’90 I transferred the black ’90 driver’s seat tracks to the white ‘90’s seat. I guess until I have the ability to finish the project the stock seat will do for the project car. :-(
Now that the seats are in and fairly clean I thought I’d install the steering wheel as it makes it a bit easier to move the car around. I decided to use the MOMO Tuner verses the MOMO Sport that was in the car. The Tuner fits the stock interior a little bit better as it has red stitch, but it’s not too much.
I was able to make some headway in the engine bay today. I seem to be running out of things to do until I undercoat the wheel wells and lower engine bay.
04-19-2009, 08:36 PM
#33
Honda-Tech Member
Thread Starter
Join Date: May 2002
Location: Not Here, WA
Posts: 697
Likes: 0
Received 0 Likes
on
0 Posts
March 27, 2009
Not much of an update, but here it is…
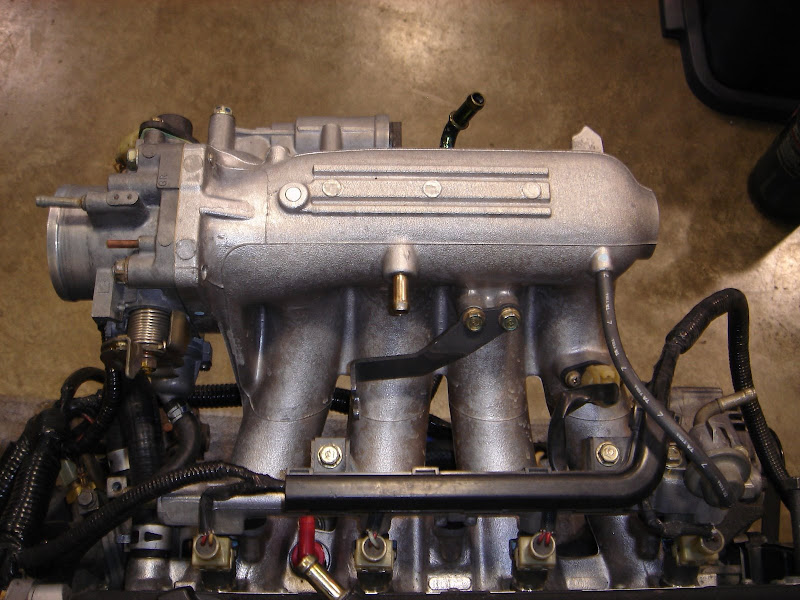
I was able to finish my conversion from OBD2 to OBD1 on my manifold with the help of my friend Adam. I post pictures tomorrow.
With the completion of the manifold and the addition of a coolant plug I was able to install the new lower PCV hose and then the manifold.
With the addition of the lower PCV hose I also received my new A/C plug for the firewall.
Not much of an update, but here it is…
I was able to finish my conversion from OBD2 to OBD1 on my manifold with the help of my friend Adam. I post pictures tomorrow.
With the completion of the manifold and the addition of a coolant plug I was able to install the new lower PCV hose and then the manifold.
With the addition of the lower PCV hose I also received my new A/C plug for the firewall.
04-19-2009, 08:36 PM
#34
Honda-Tech Member
Thread Starter
Join Date: May 2002
Location: Not Here, WA
Posts: 697
Likes: 0
Received 0 Likes
on
0 Posts
March 28, 2009
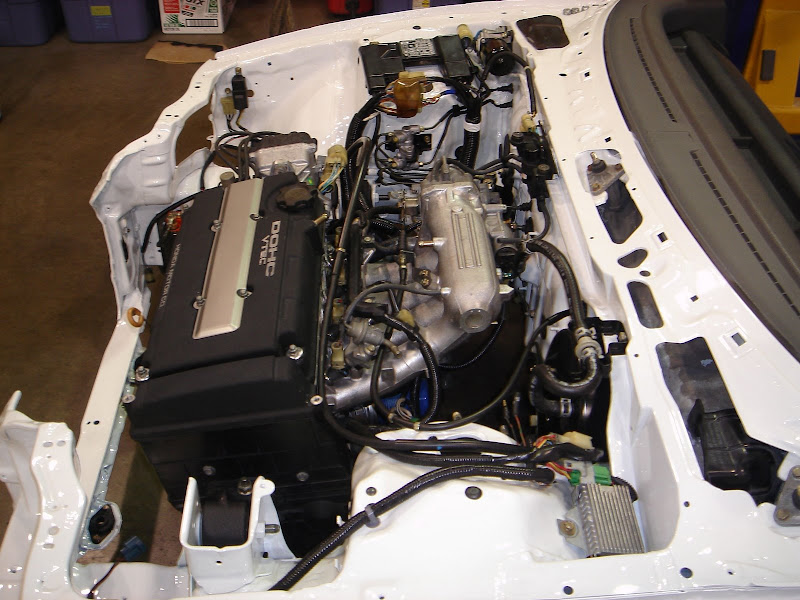
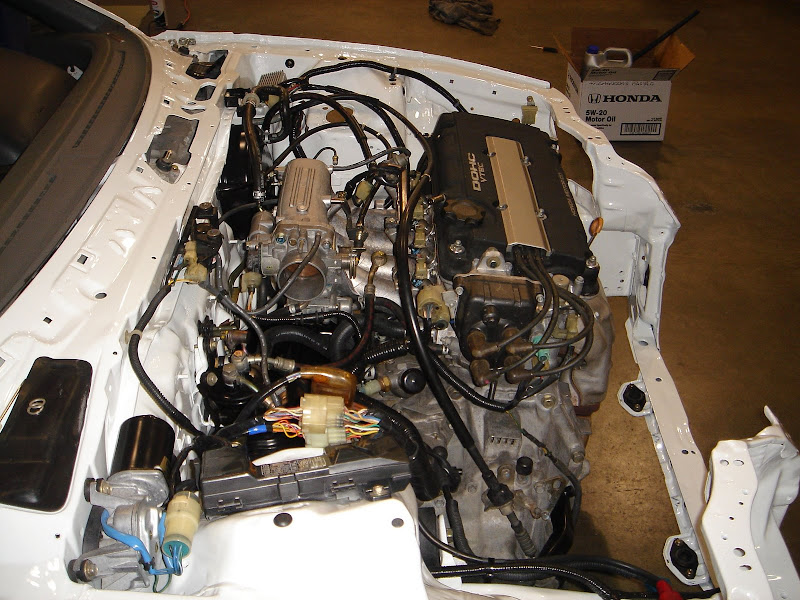
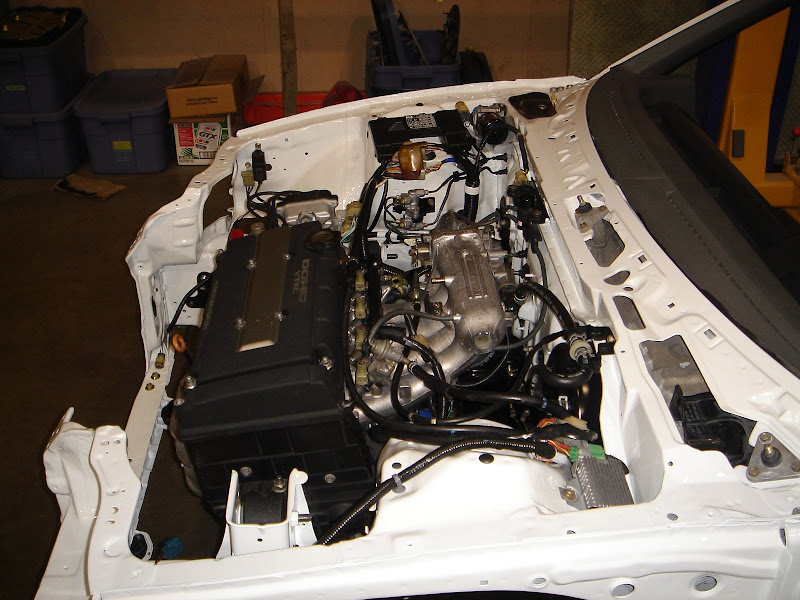
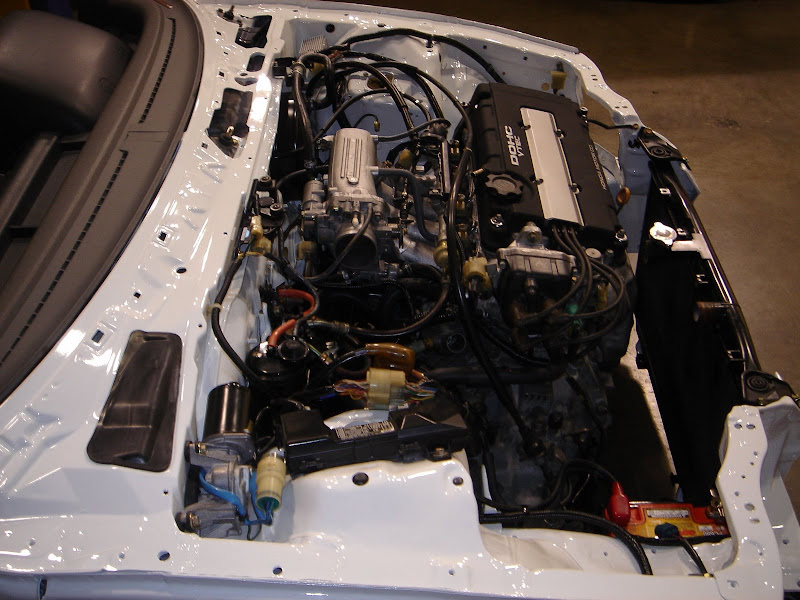
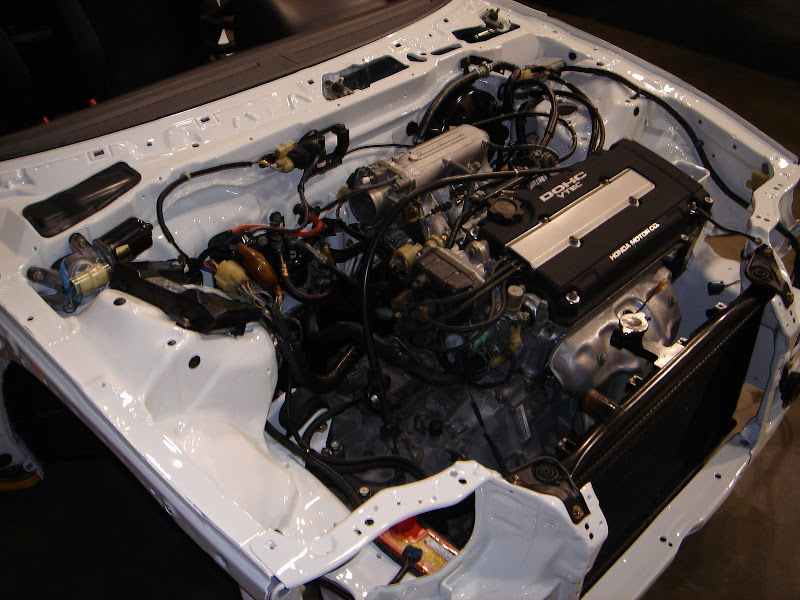
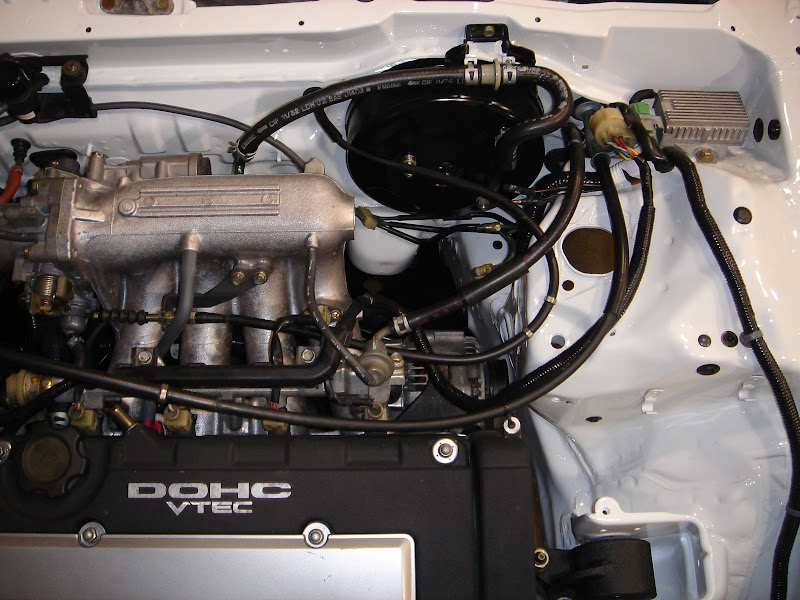
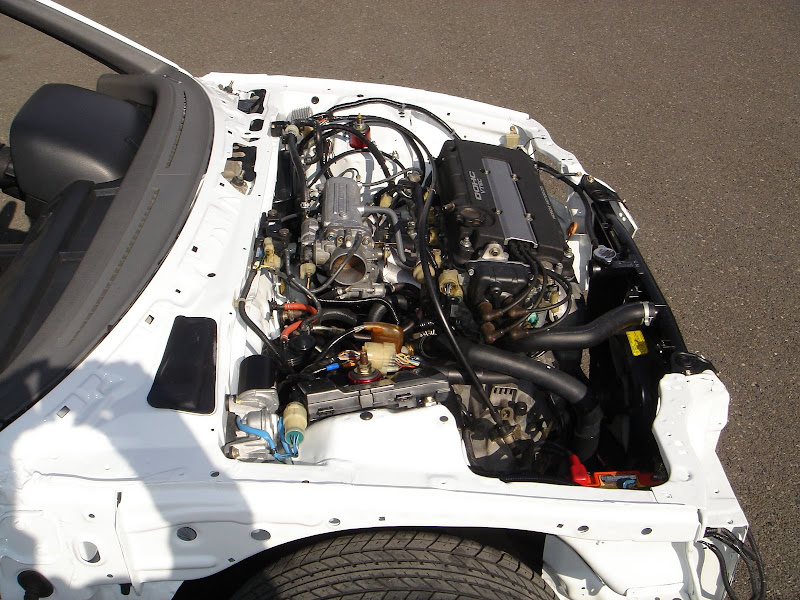
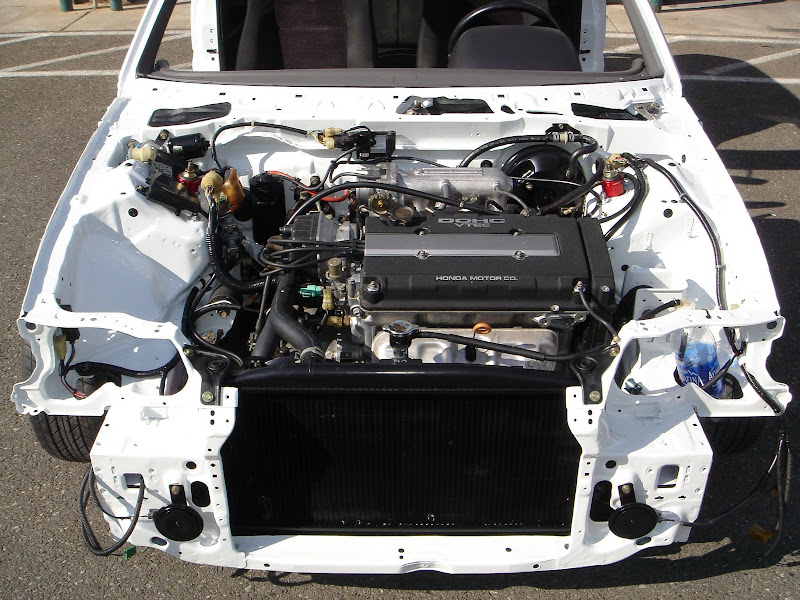
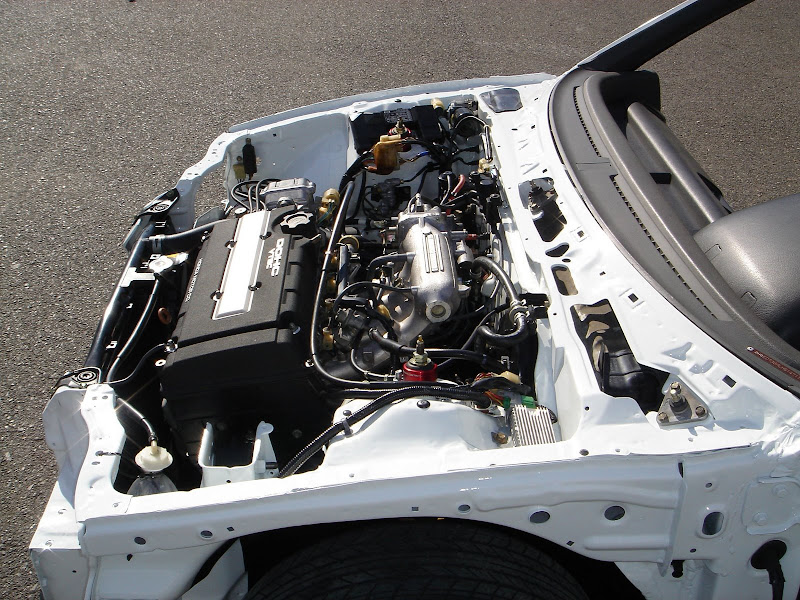
Update…
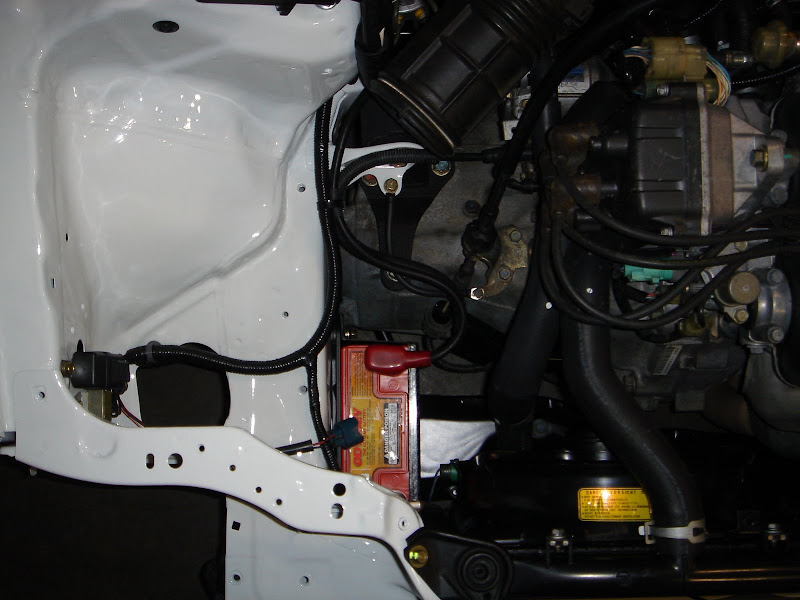
I’ve been thinking about what to do with my battery so I now have two options. I could go with the factory location or relocate it.
I had the factory one media blasted and powder coated or I could use the Password:JDM battery relocator kit…
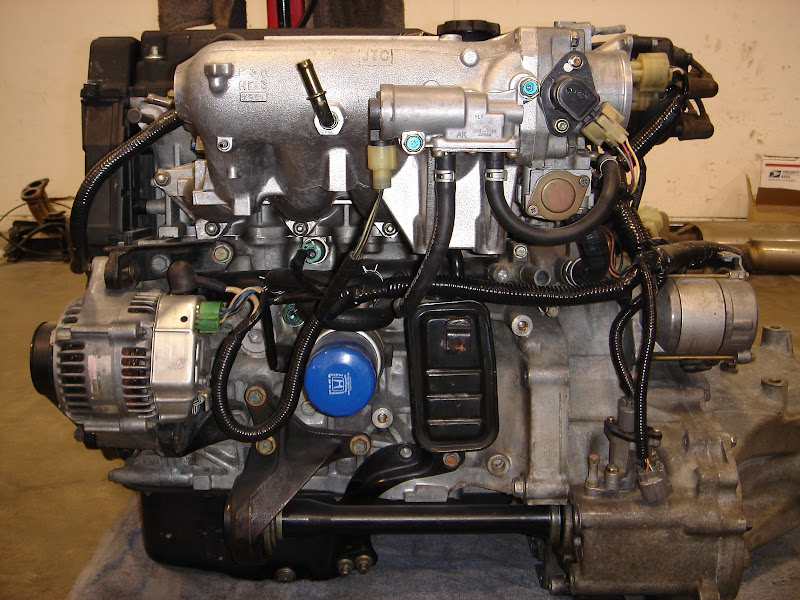
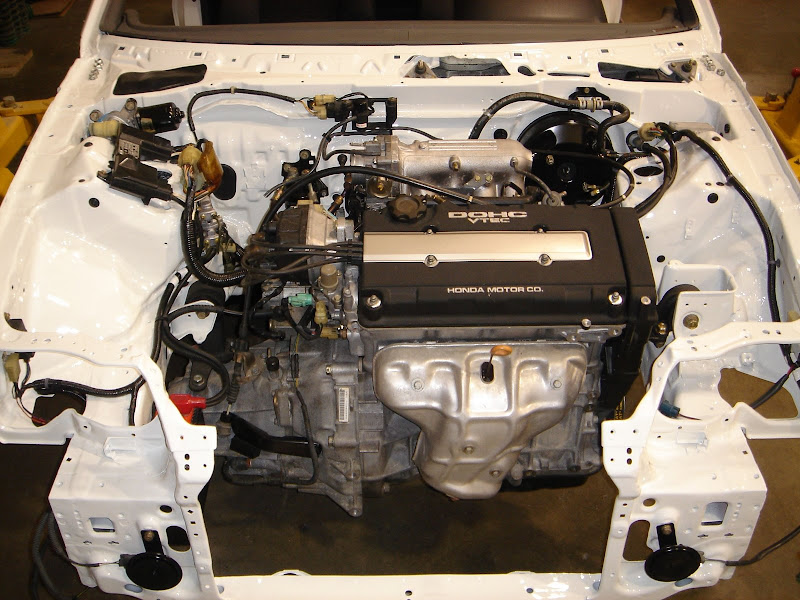
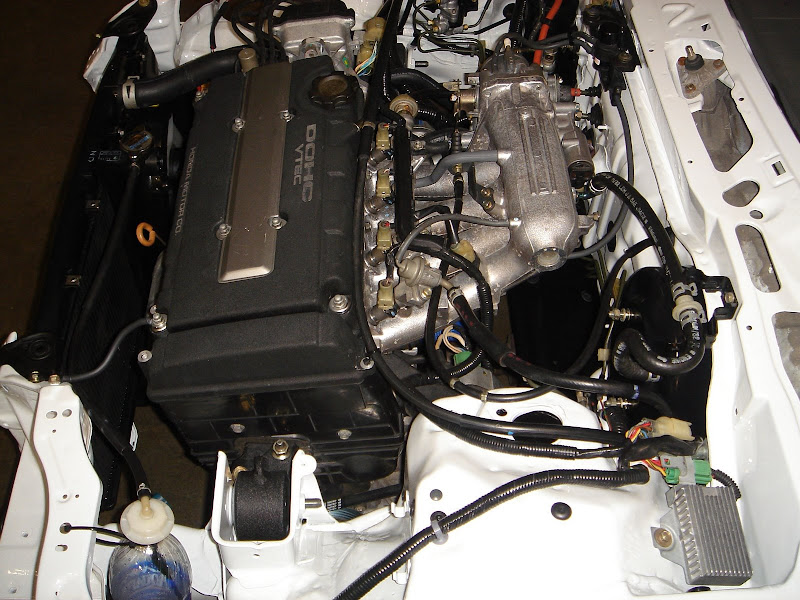
Here are a few shots of the semi complete engine.
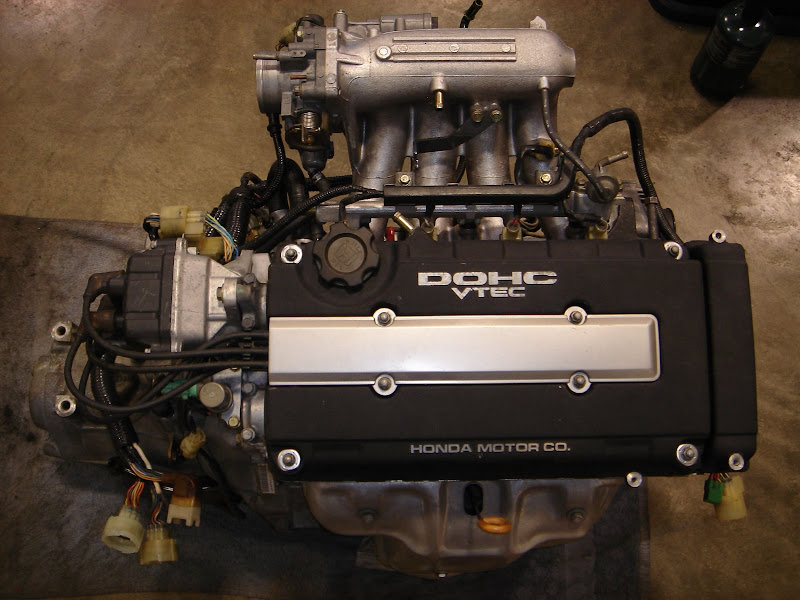
Notice the plug in the intake manifold?
One more plug…
Update…
I’ve been thinking about what to do with my battery so I now have two options. I could go with the factory location or relocate it.
I had the factory one media blasted and powder coated or I could use the Password:JDM battery relocator kit…
Here are a few shots of the semi complete engine.
Notice the plug in the intake manifold?
One more plug…
04-19-2009, 08:36 PM
#35
Honda-Tech Member
Thread Starter
Join Date: May 2002
Location: Not Here, WA
Posts: 697
Likes: 0
Received 0 Likes
on
0 Posts
March 30, 2009
Not much to update.
I do have to say it’s nice having two ED’s.
I was getting a bit fed up that the harness wasn’t done so I did some work on it today. The frustrating part of the day was I didn’t have any of my wiring with me so I wasn’t able to finish the corner lights.
I used my black ’90 for measuring wire length and while I had the bumper off it did just a bit of work to the car. I might install the OE lip from the white ’90 on the black ’90 tomorrow - I just need to paint it first as it’s currently white.
04-19-2009, 08:36 PM
#36
Honda-Tech Member
Thread Starter
Join Date: May 2002
Location: Not Here, WA
Posts: 697
Likes: 0
Received 0 Likes
on
0 Posts
March 31, 2009
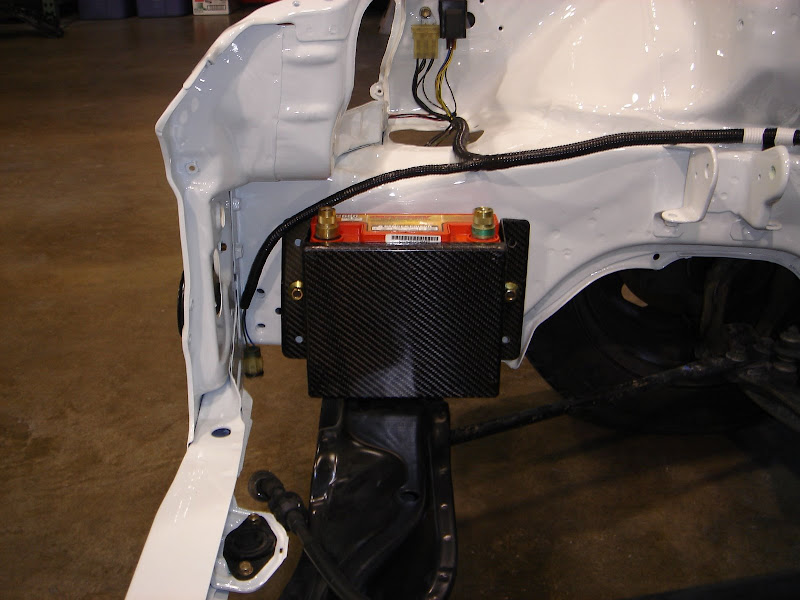
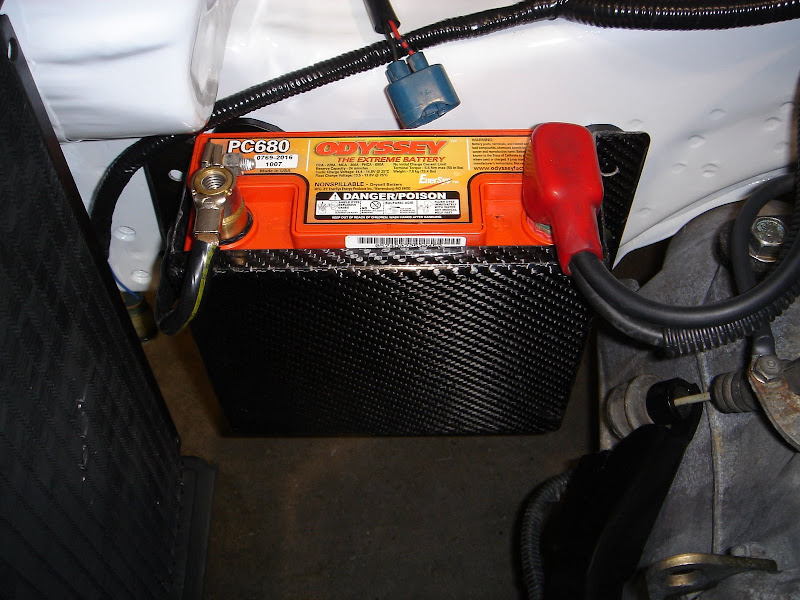
Just a follow up to from last night…
I finished the power side of the battery.
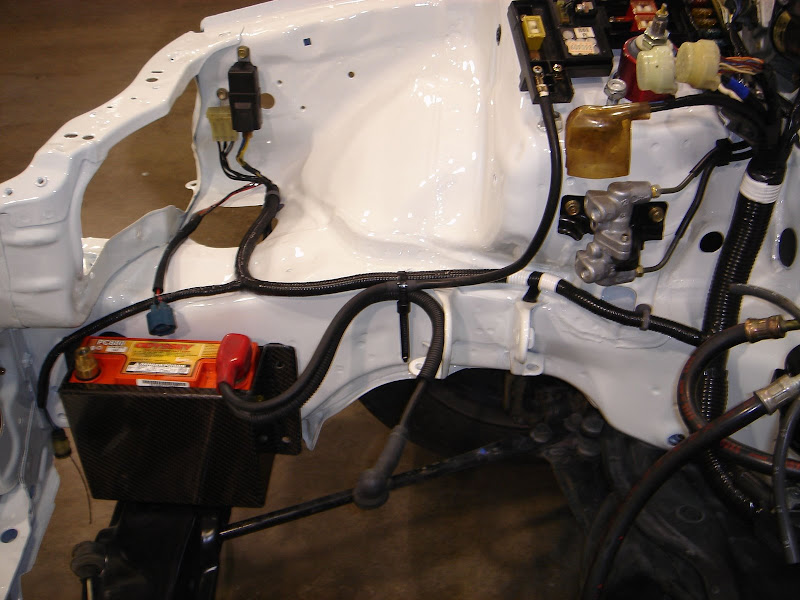
I’ll need to verify the length is correct when the engine is in the car, but the measurements I took yesterday it should be good.
Just a follow up to from last night…
I finished the power side of the battery.
I’ll need to verify the length is correct when the engine is in the car, but the measurements I took yesterday it should be good.
04-19-2009, 08:37 PM
#37
Honda-Tech Member
Thread Starter
Join Date: May 2002
Location: Not Here, WA
Posts: 697
Likes: 0
Received 0 Likes
on
0 Posts
March 31, 2009
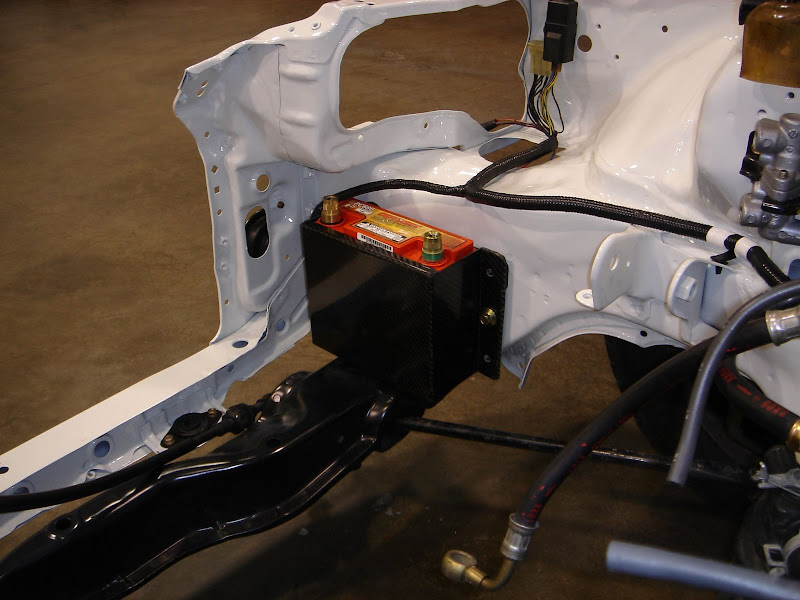
Finished the first iteration of the battery…
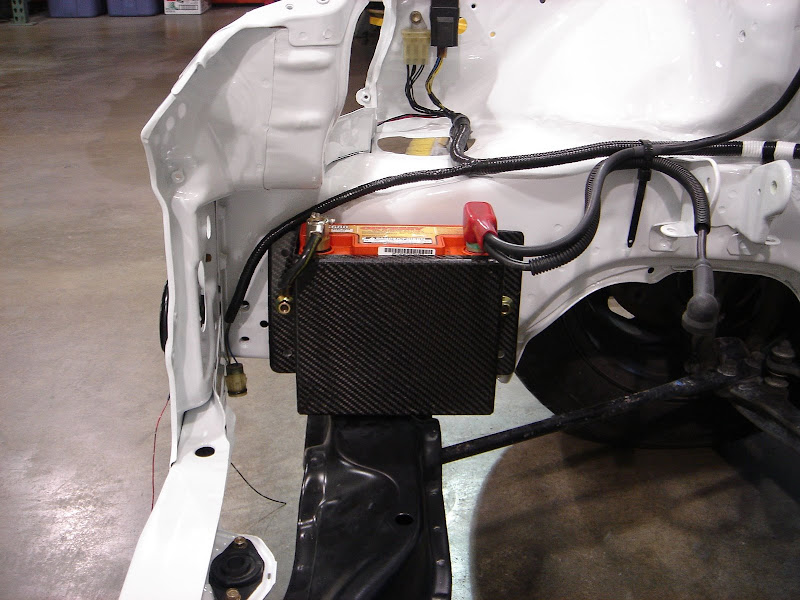
Now that the battery is close to being done I had the opportunity to test a few things and validate some of my electrical work.
Finished the first iteration of the battery…
Now that the battery is close to being done I had the opportunity to test a few things and validate some of my electrical work.
04-19-2009, 08:37 PM
#38
Honda-Tech Member
Thread Starter
Join Date: May 2002
Location: Not Here, WA
Posts: 697
Likes: 0
Received 0 Likes
on
0 Posts
April 2, 2009
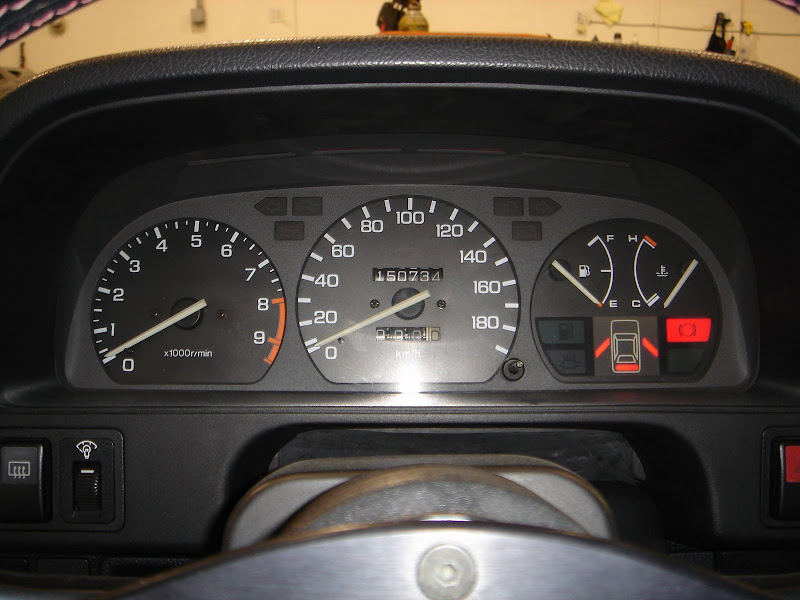
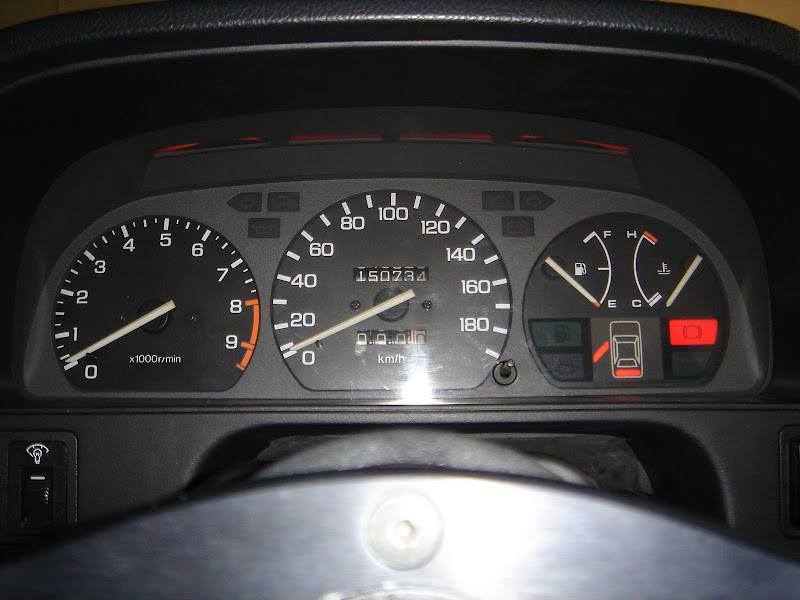
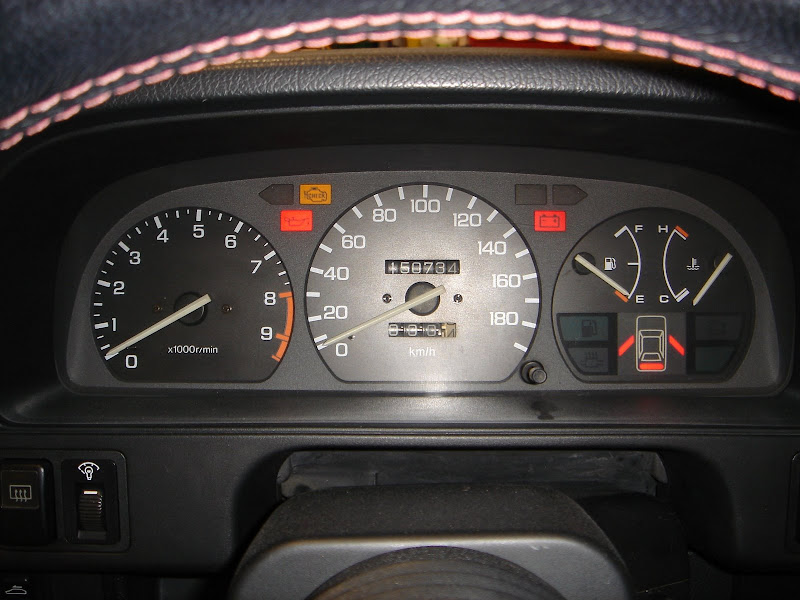
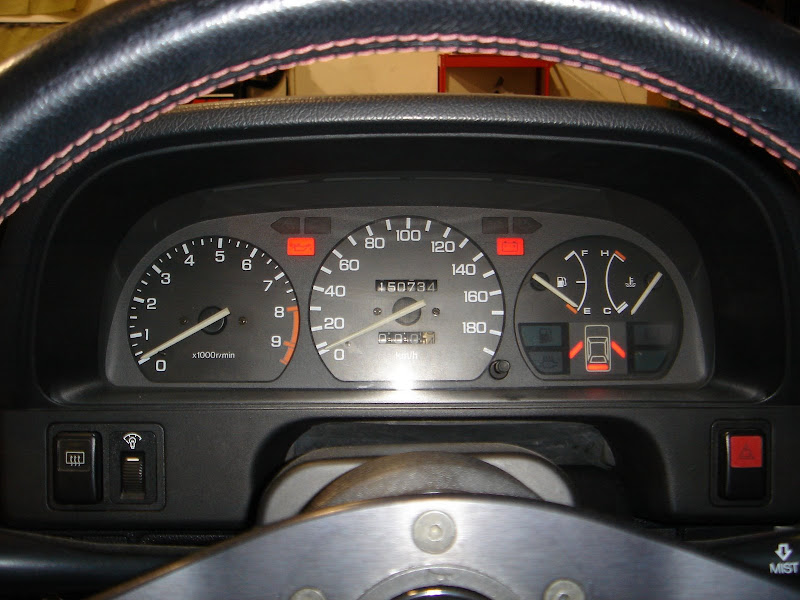
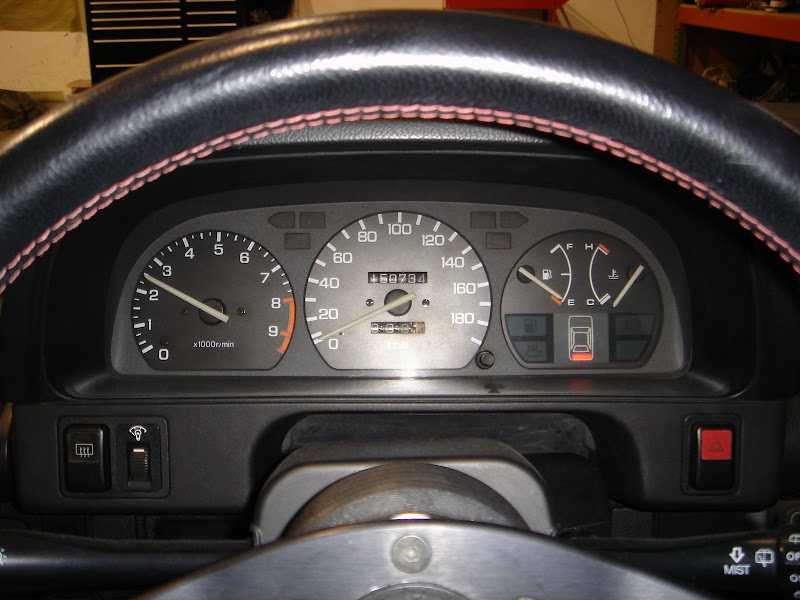
A few pictures of the cluster…
I spent most of the day chasing bad bulbs and verifying what I could on the cluster.
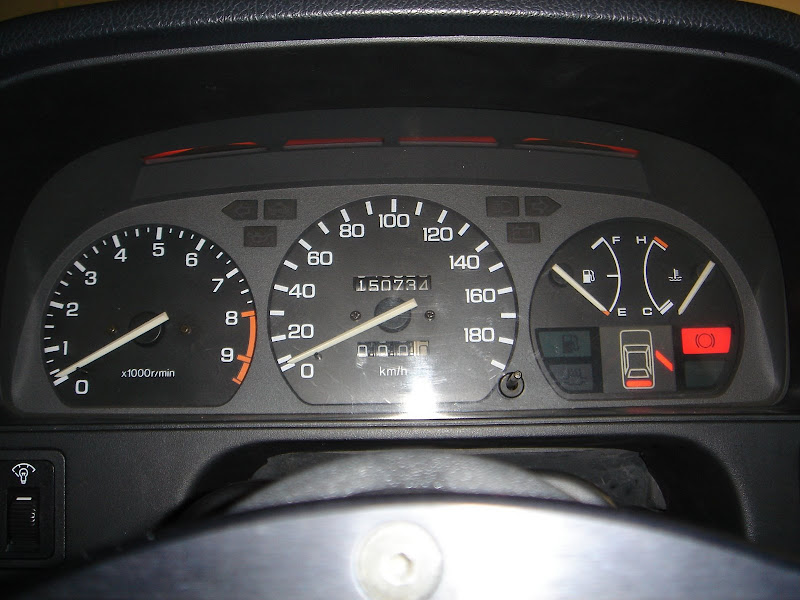
A few pictures of the cluster…
I spent most of the day chasing bad bulbs and verifying what I could on the cluster.

 04-19-2009, 08:37 PM
#40
Honda-Tech Member
Thread Starter
Join Date: May 2002
Location: Not Here, WA
Posts: 697
Likes: 0
Received 0 Likes
on
0 Posts
April 8, 2009
Ok, now that the under coating is done I had the ability to install the hardlines then move to the heart of the car.

This part sucked a$$. I didn’t want to scratch anything this soon in the project so it took some time to get it right the first time. I’m glad I did a test fit long before paint!!!!
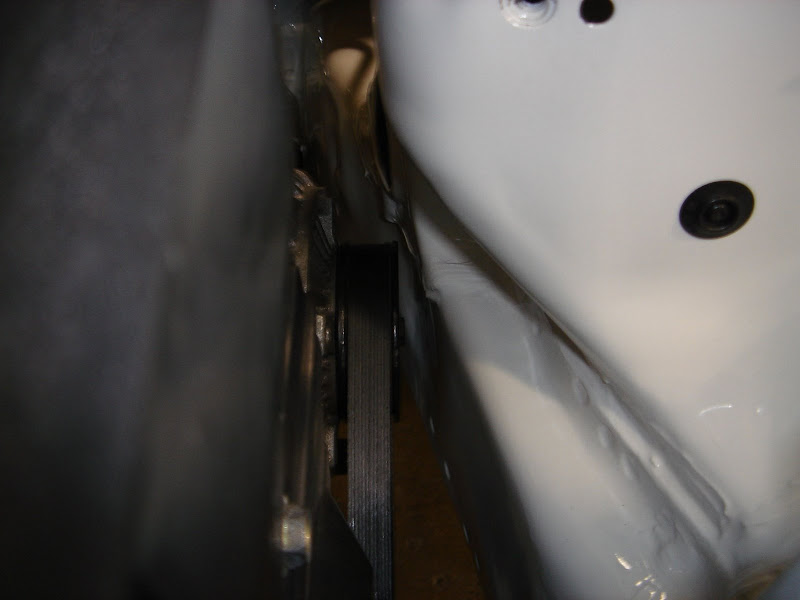
Here’s another shot of the alternator pulley.
Ok, now that the under coating is done I had the ability to install the hardlines then move to the heart of the car.
This part sucked a$$. I didn’t want to scratch anything this soon in the project so it took some time to get it right the first time. I’m glad I did a test fit long before paint!!!!
Here’s another shot of the alternator pulley.
04-19-2009, 08:38 PM
#41
Honda-Tech Member
Thread Starter
Join Date: May 2002
Location: Not Here, WA
Posts: 697
Likes: 0
Received 0 Likes
on
0 Posts
April 9, 2009
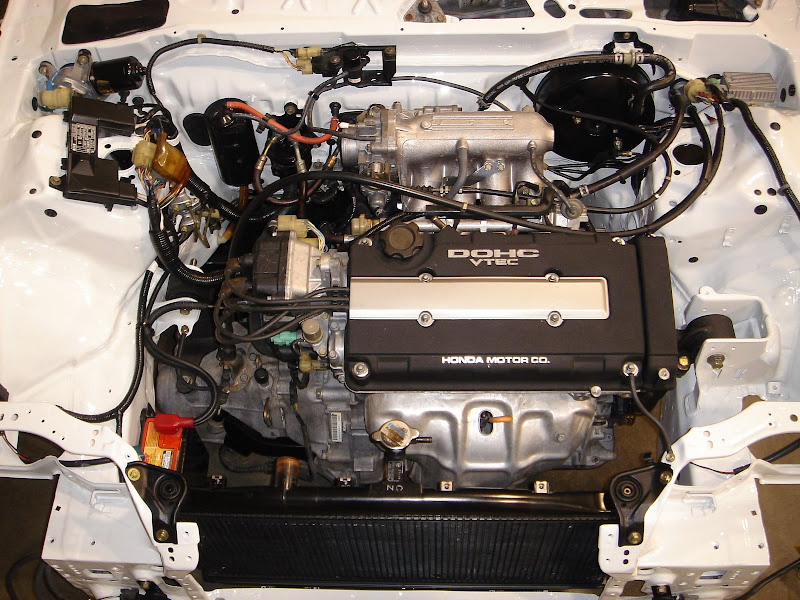
Update for the day…
I was able to get most of the engine ready for its first start in the ’90. All I have left to do is:
- trouble shoot the “check engine lamp”
- install upper and lower radiator hoses
- change plug on JDM coolant fan to USDM
- buy fuel
…a few pictures from yesterday.

Here are some pictures of today’s progress.

I know what some of you are thinking: why didn’t you clean the transmission or engine. Well the engine is clean and the transmission cases went through the hot tank twice.
I cleaned and mounted the radiator plus installed a bunch of little things…

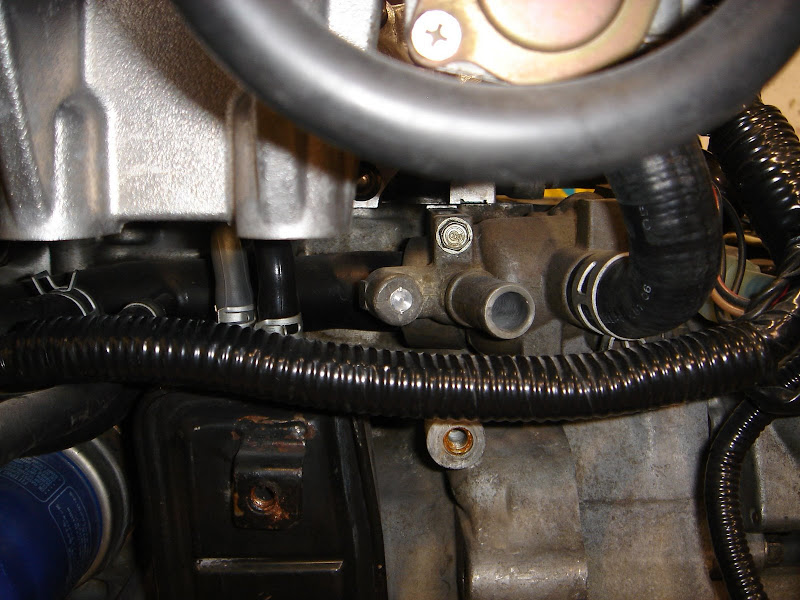
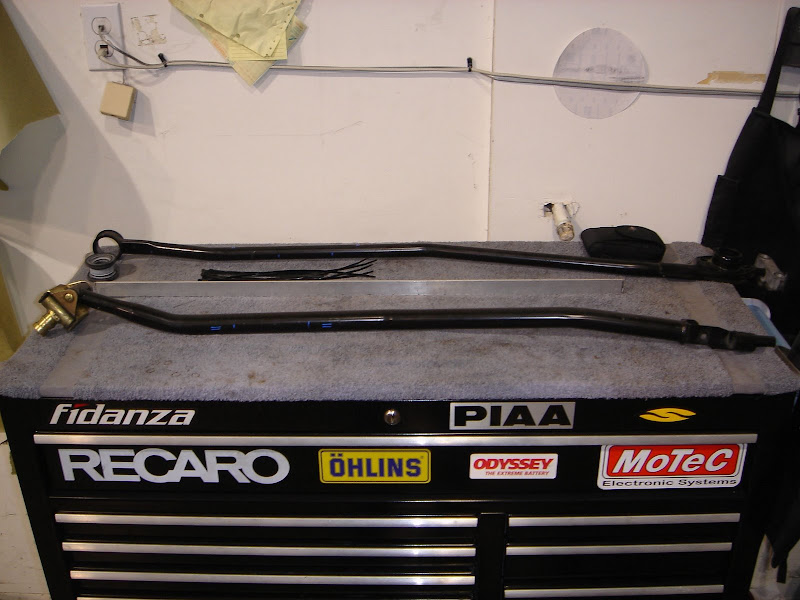
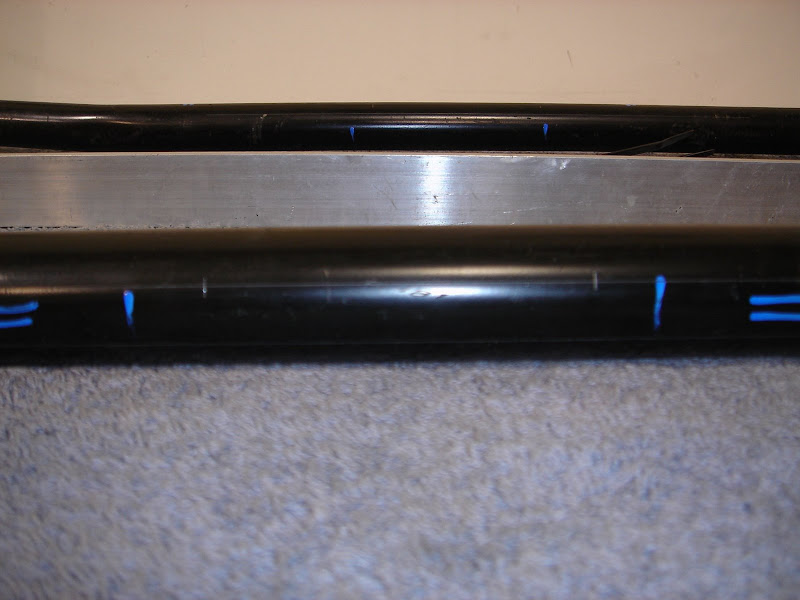
Here’s another shot of the finished battery assembly with ground and power cables.
The below is more to show the ground cables I made today…
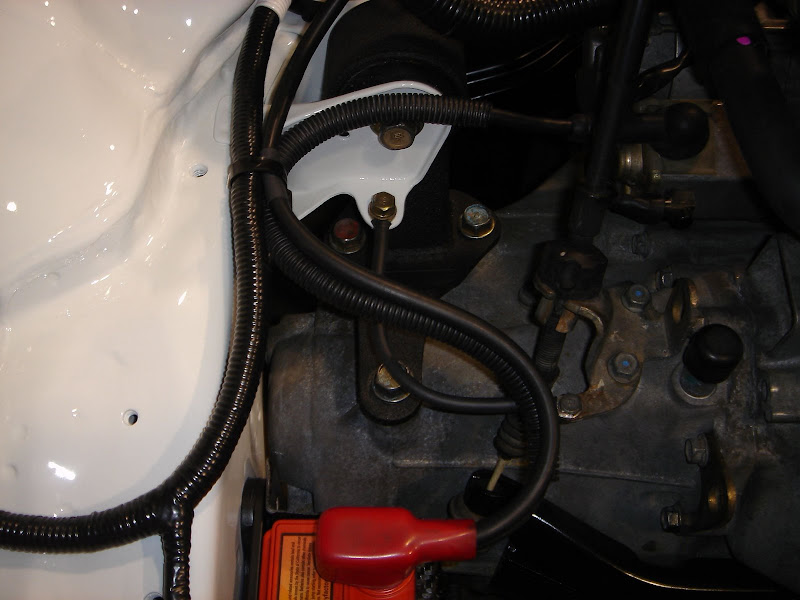
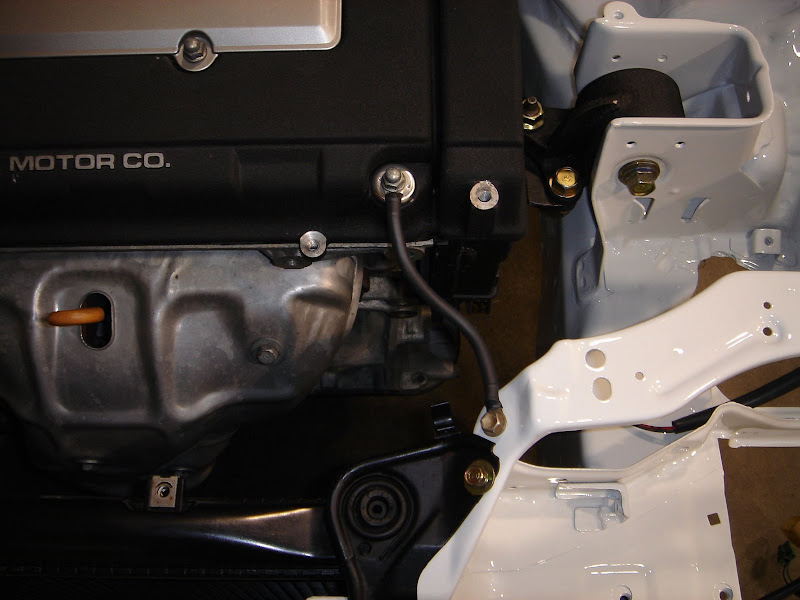
…and lastly a couple close up shots.
And now the final picture for the day.
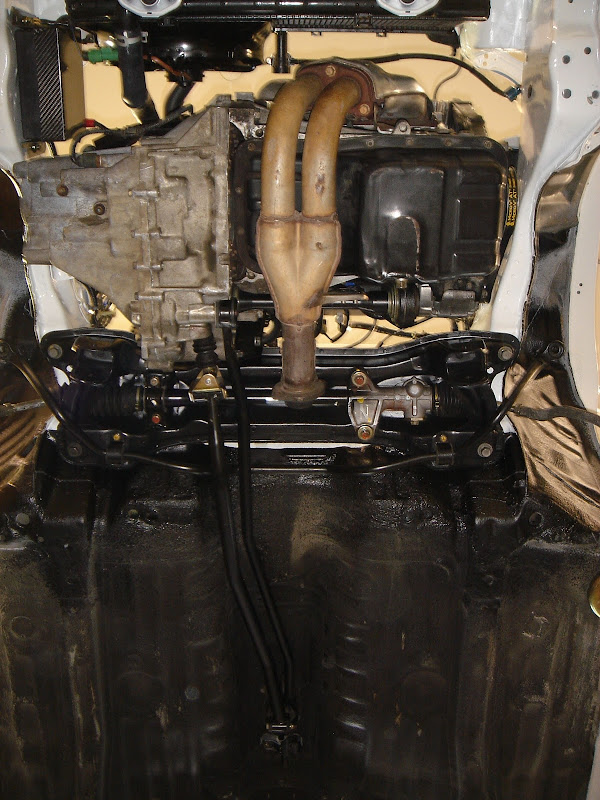
As most of you know there are a lot of things that don’t get mentioned when building a car. Here are a few things I did today that the pictures show but don’t reveal.
- installed upper heater hose
- installed correct drivers side transmission seal - Acura sent me the wrong one
- prepped and painted rear subframe
- installed grommets and rear mount after paint was dry
- installed intake manifold brace
- installed rear mount before installing the subframe
- changed out drain plugs for my spare set of Spoon Sports magnetic drain plugs
- changed filter and added oil
That was just some of the stuff behind and under the engine…
- trimmed and fit vacuum lines, brake booster line, and fuel return line
- installed front heater hose
- installed charcoal canister - I don’t know if I’m going to keep it
- trimmed carbon cover for battery - hit transmission
As we all know there’s a lot of stuff that goes into something like this and man I just don’t know when to stop.
There’s a certain car I wish I could have seen in person as a webzine said not in these exact words, but you’ll get the point “there will never be a better EF”. I know mine doesn’t come close, but it would be fun to compare when it’s finished.
Update for the day…
I was able to get most of the engine ready for its first start in the ’90. All I have left to do is:
- trouble shoot the “check engine lamp”
- install upper and lower radiator hoses
- change plug on JDM coolant fan to USDM
- buy fuel
…a few pictures from yesterday.
Here are some pictures of today’s progress.
I know what some of you are thinking: why didn’t you clean the transmission or engine. Well the engine is clean and the transmission cases went through the hot tank twice.
I cleaned and mounted the radiator plus installed a bunch of little things…
Here’s another shot of the finished battery assembly with ground and power cables.
The below is more to show the ground cables I made today…
…and lastly a couple close up shots.
And now the final picture for the day.
As most of you know there are a lot of things that don’t get mentioned when building a car. Here are a few things I did today that the pictures show but don’t reveal.
- installed upper heater hose
- installed correct drivers side transmission seal - Acura sent me the wrong one
- prepped and painted rear subframe
- installed grommets and rear mount after paint was dry
- installed intake manifold brace
- installed rear mount before installing the subframe
- changed out drain plugs for my spare set of Spoon Sports magnetic drain plugs
- changed filter and added oil
That was just some of the stuff behind and under the engine…
- trimmed and fit vacuum lines, brake booster line, and fuel return line
- installed front heater hose
- installed charcoal canister - I don’t know if I’m going to keep it
- trimmed carbon cover for battery - hit transmission
As we all know there’s a lot of stuff that goes into something like this and man I just don’t know when to stop.
There’s a certain car I wish I could have seen in person as a webzine said not in these exact words, but you’ll get the point “there will never be a better EF”. I know mine doesn’t come close, but it would be fun to compare when it’s finished.
04-19-2009, 08:38 PM
#42
Honda-Tech Member
Thread Starter
Join Date: May 2002
Location: Not Here, WA
Posts: 697
Likes: 0
Received 0 Likes
on
0 Posts
April 11, 2009
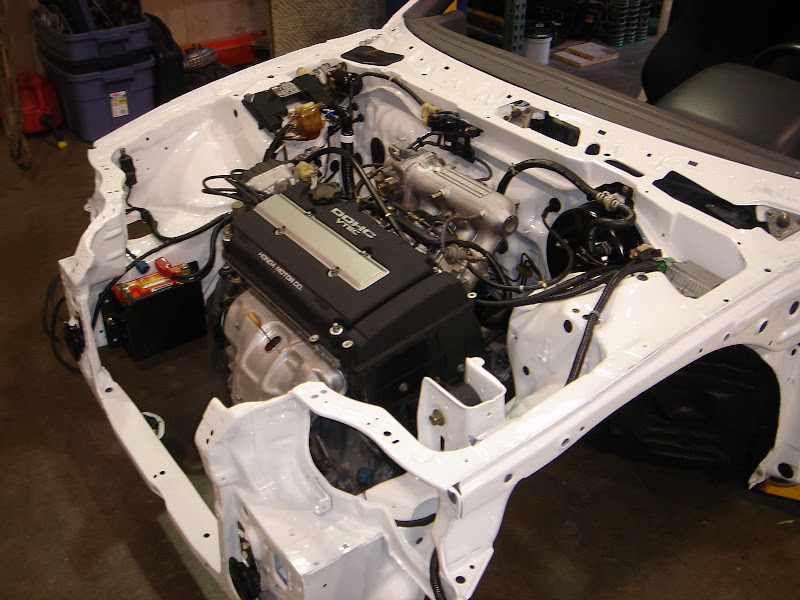
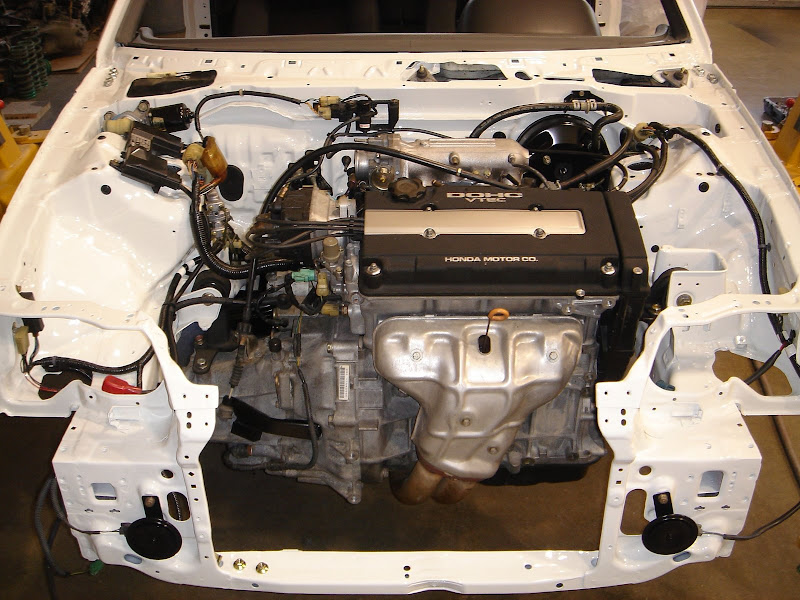
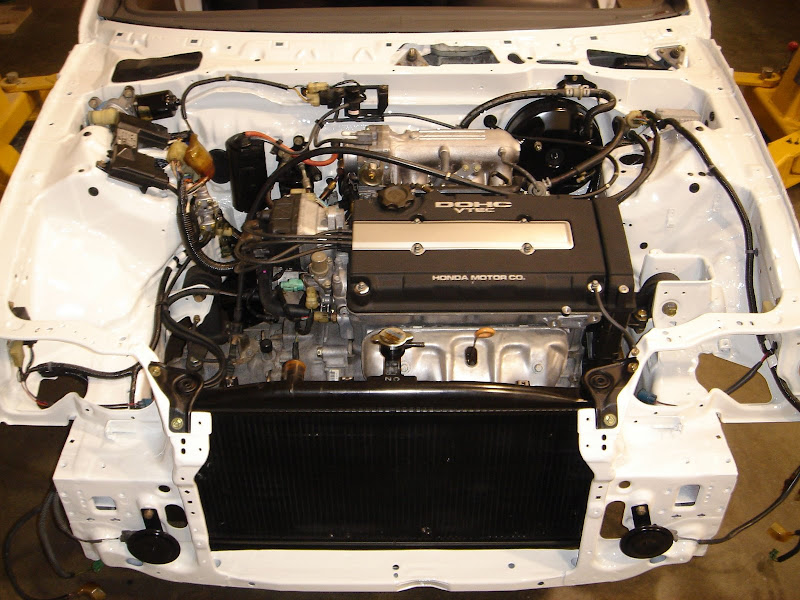
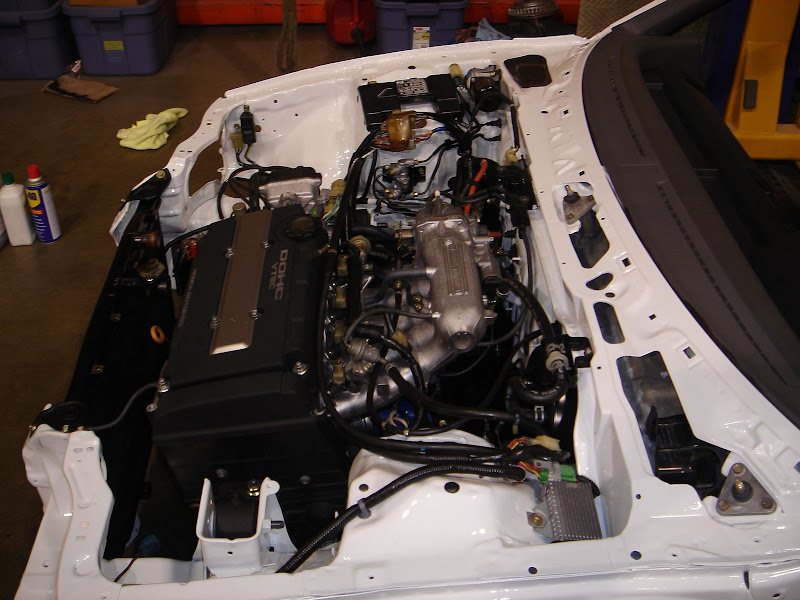
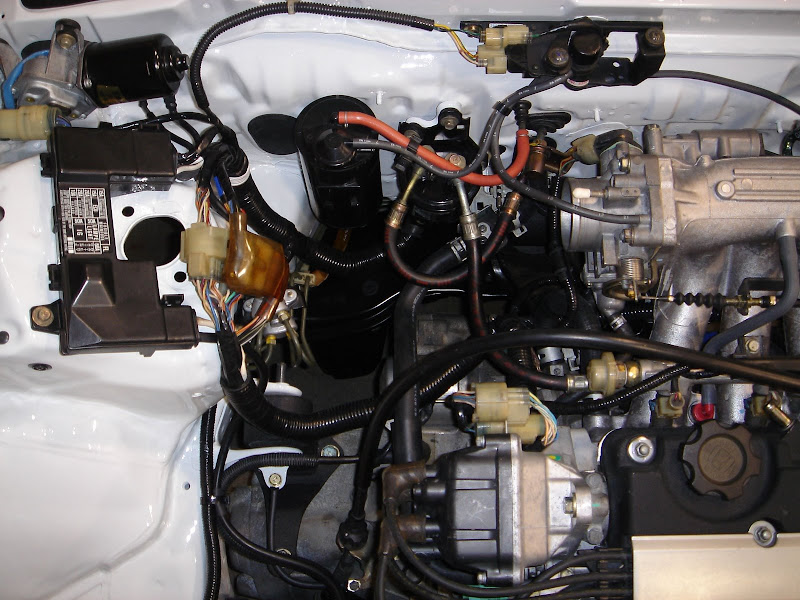
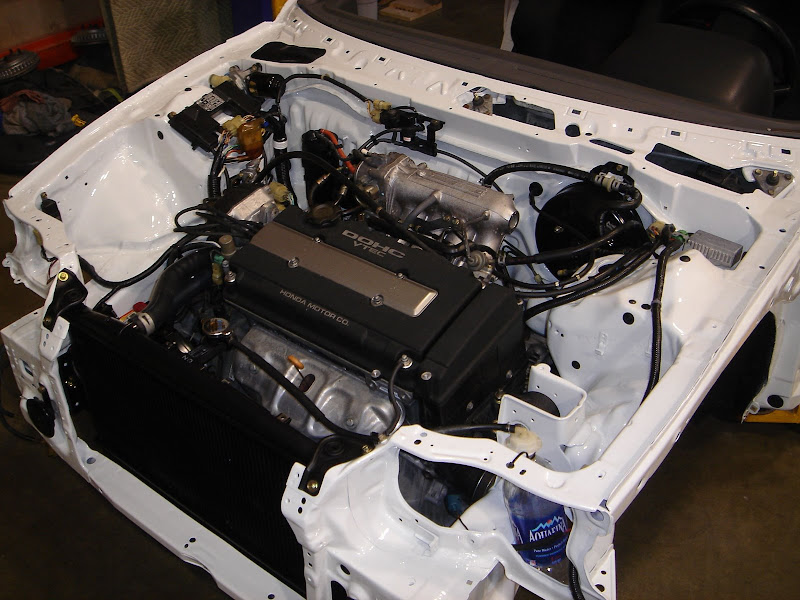
The car runs…
Turns out my check engine light issue wasn’t an issue at all. It seems I read my pin location wrong. I had four wires 180 deg out, but other than that everything seems to check out.
Here are a few shots of the engine after initial startup.
I hope you all like the reserve tank. ;-)
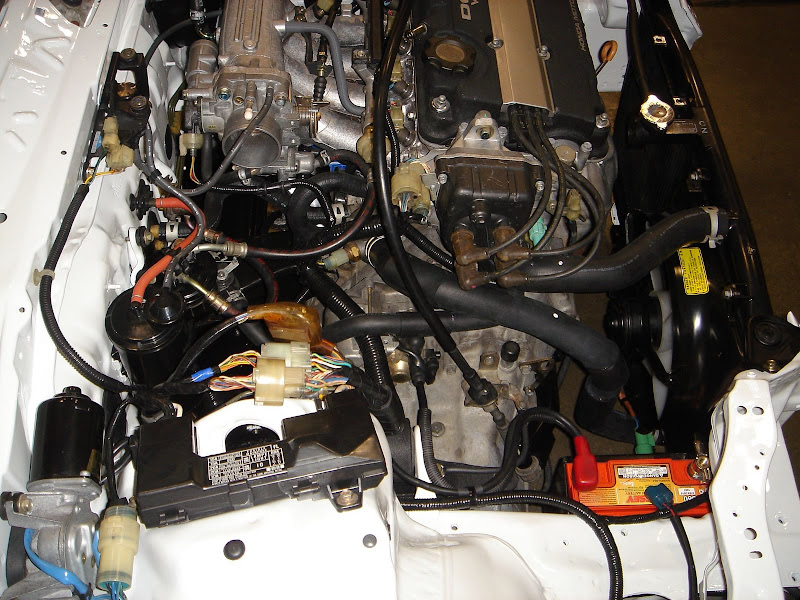
Turns out while filling up the radiator it started leaking… I guess I’ll be fixing it for now. :-(
I guess on the plus side I know everything works.
I started working on the shift linkage…
The car runs…
Turns out my check engine light issue wasn’t an issue at all. It seems I read my pin location wrong. I had four wires 180 deg out, but other than that everything seems to check out.
Here are a few shots of the engine after initial startup.
I hope you all like the reserve tank. ;-)
Turns out while filling up the radiator it started leaking… I guess I’ll be fixing it for now. :-(
I guess on the plus side I know everything works.
I started working on the shift linkage…
Last edited by 01-0041; 04-19-2009 at 08:54 PM. Reason: edit
04-19-2009, 08:38 PM
#43
Honda-Tech Member
Thread Starter
Join Date: May 2002
Location: Not Here, WA
Posts: 697
Likes: 0
Received 0 Likes
on
0 Posts
April 13, 2009
Let’s see…
I received my shift linkage last night. Eric did an awesome job as usual! Thank you!!!!
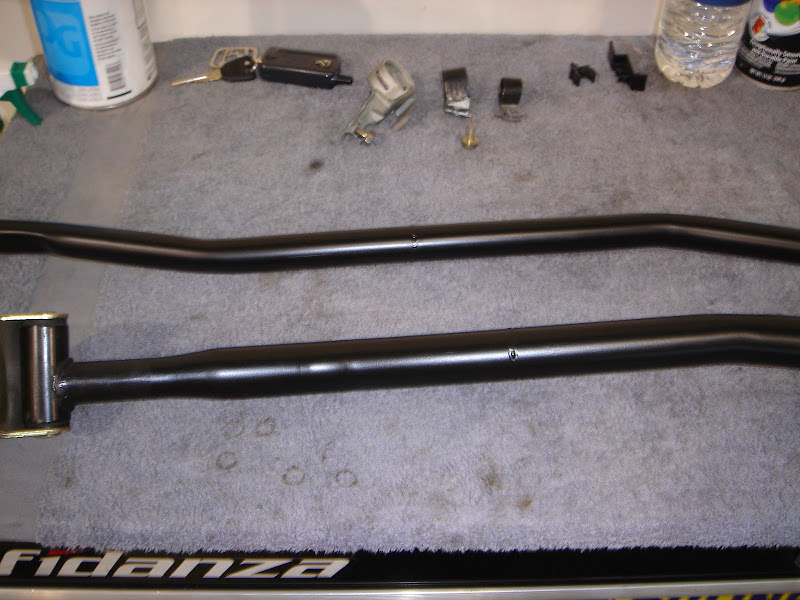
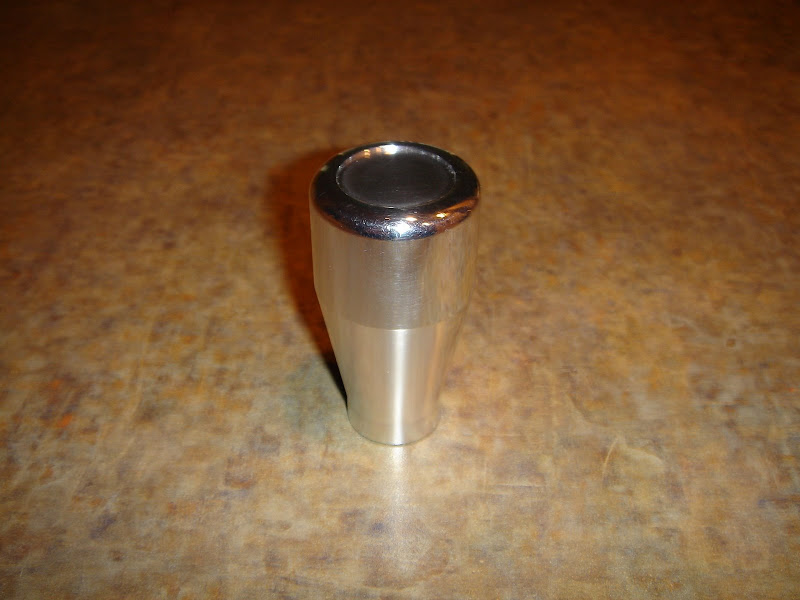
This is more of a fun shot. I’d have to say in my opinion this is the best shift **** ever. Some of you will know what it is…
Once I had the steering rack and sway bar installed I could install the shift linkage.

[img]http://lh6.ggpht.com/_MDj61SXbZz4/SeQEgFh18MI/AAAAAAAAB0Q/rG--tiJb_fo/s800/DSC01987.JPG" /></a>

Random pictures of parts installed…
Moving up top I was able to install the radio harness adaptor I made last night for the factory harness. Once that was done I was able to install the center console and shift ****.
Let’s see…
I received my shift linkage last night. Eric did an awesome job as usual! Thank you!!!!
This is more of a fun shot. I’d have to say in my opinion this is the best shift **** ever. Some of you will know what it is…
Once I had the steering rack and sway bar installed I could install the shift linkage.
[img]http://lh6.ggpht.com/_MDj61SXbZz4/SeQEgFh18MI/AAAAAAAAB0Q/rG--tiJb_fo/s800/DSC01987.JPG" /></a>
Random pictures of parts installed…
Moving up top I was able to install the radio harness adaptor I made last night for the factory harness. Once that was done I was able to install the center console and shift ****.
04-19-2009, 08:38 PM
#44
Honda-Tech Member
Thread Starter
Join Date: May 2002
Location: Not Here, WA
Posts: 697
Likes: 0
Received 0 Likes
on
0 Posts
April 14, 2009
Update for today….
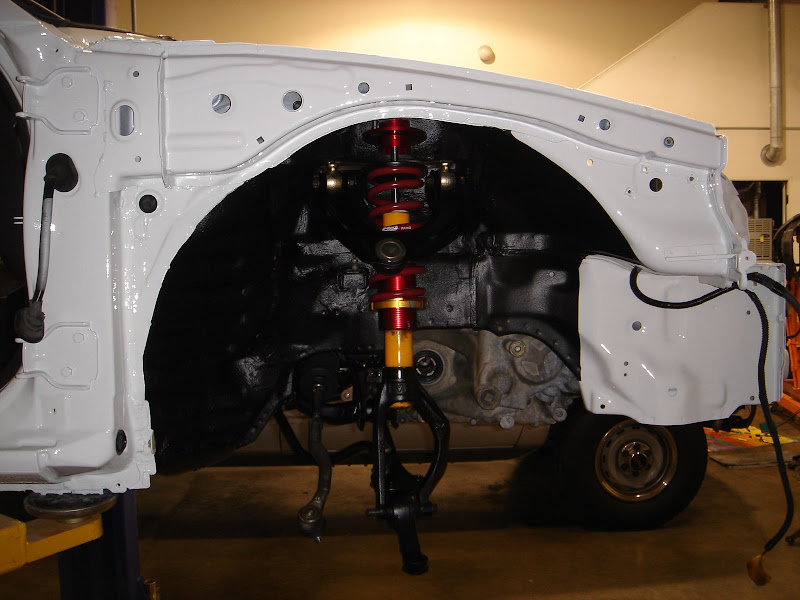
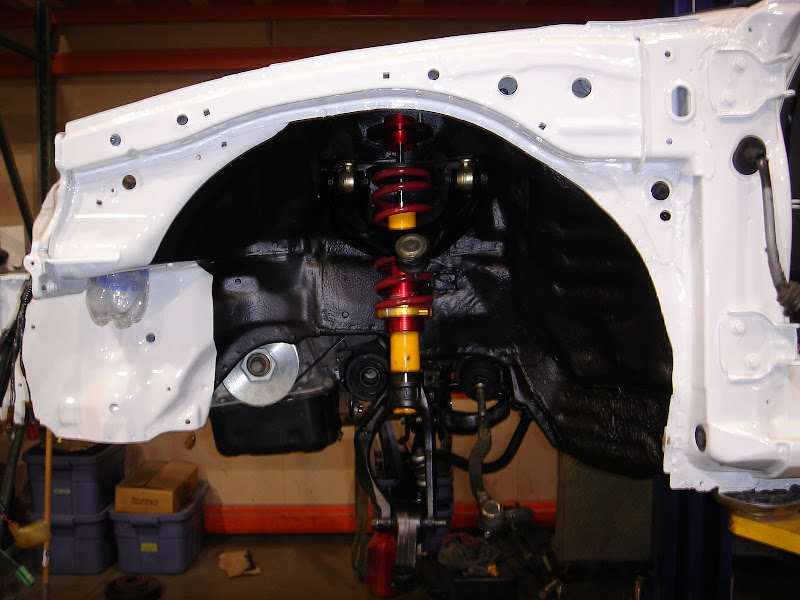
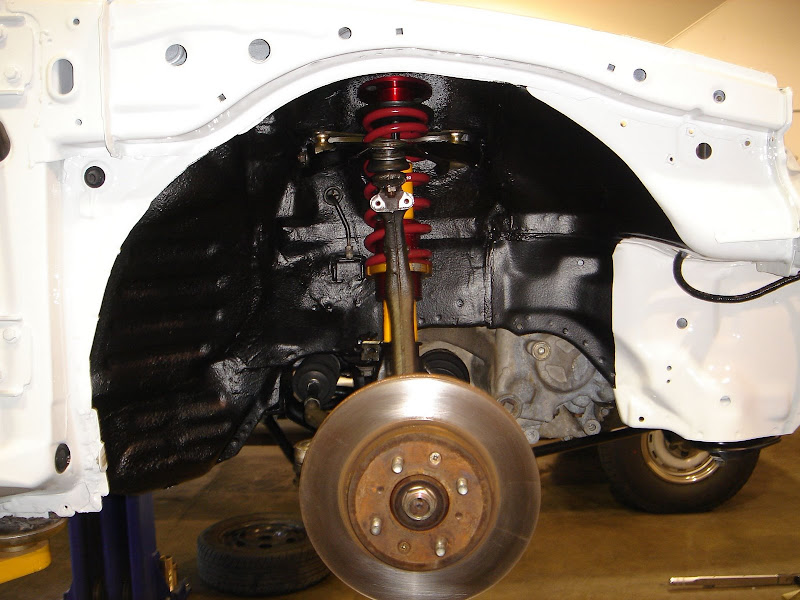
I installed the remaining bits of suspension. I didn’t do much with the knuckles because they’re being traded for DAs. I did install the rotors I’m going to use just for fun.

Once everything was on and torqued down I filled the transmission and let the car warm up a bit and ran it through the gears to get the fluid moving…
I had my first drive in the car today - I wanted to check the clutch engagement and verify if the wheel was on center or not. It’s not so I need to move it one spline to the right. :-(
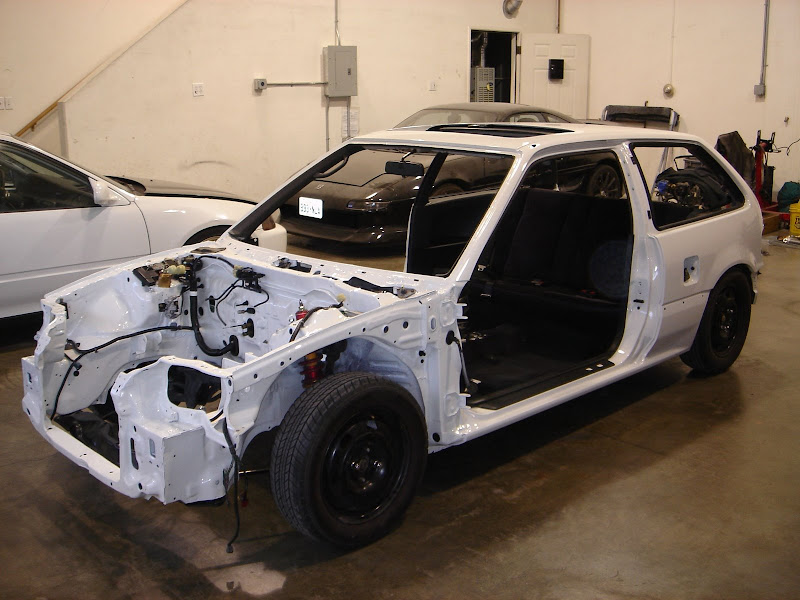
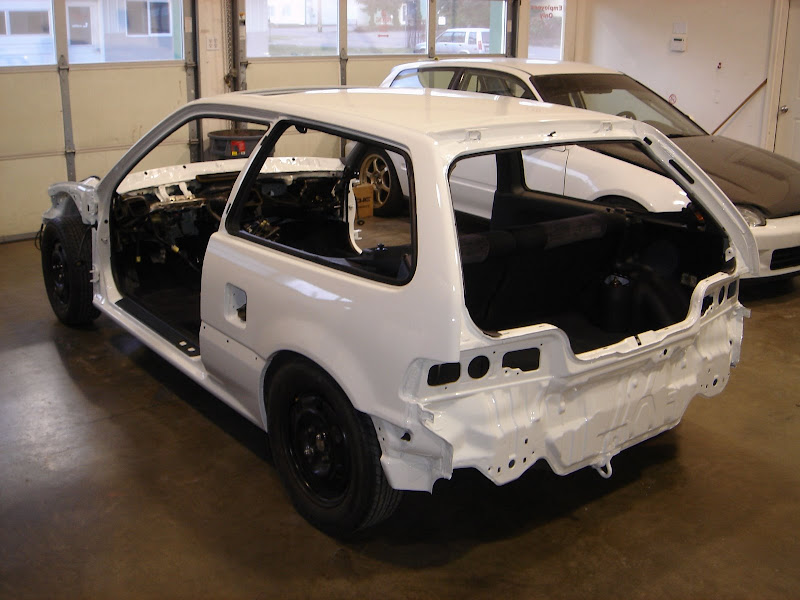
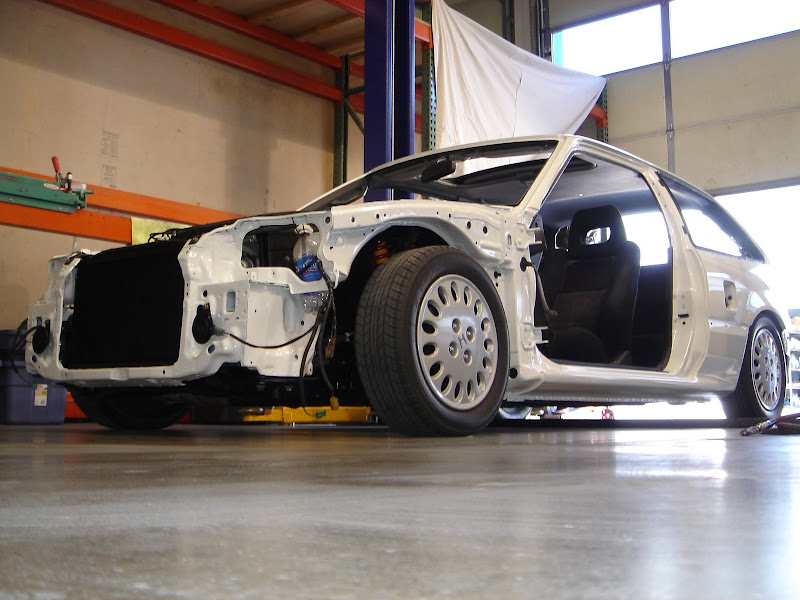
Since it was a nice day out I thought I should take a few pictures of where I’m at on the project.
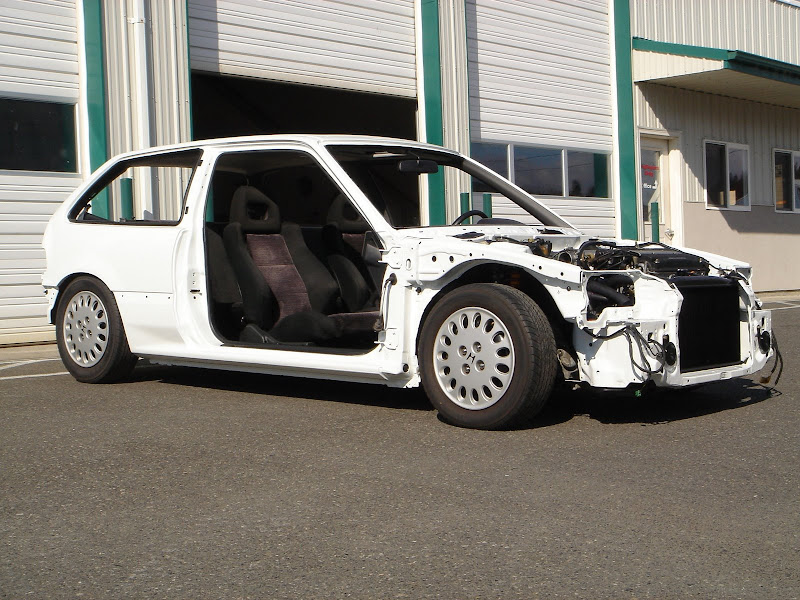

More of a fun shot before I put it back up in the air…
Update for today….
I installed the remaining bits of suspension. I didn’t do much with the knuckles because they’re being traded for DAs. I did install the rotors I’m going to use just for fun.
Once everything was on and torqued down I filled the transmission and let the car warm up a bit and ran it through the gears to get the fluid moving…
I had my first drive in the car today - I wanted to check the clutch engagement and verify if the wheel was on center or not. It’s not so I need to move it one spline to the right. :-(
Since it was a nice day out I thought I should take a few pictures of where I’m at on the project.
More of a fun shot before I put it back up in the air…
04-19-2009, 08:39 PM
#45
Honda-Tech Member
Thread Starter
Join Date: May 2002
Location: Not Here, WA
Posts: 697
Likes: 0
Received 0 Likes
on
0 Posts
April 15, 2009
…progress.
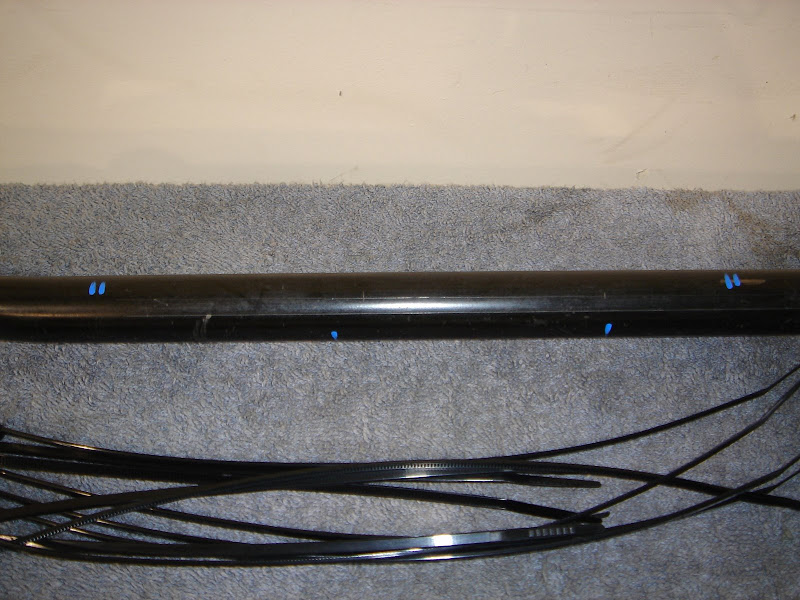
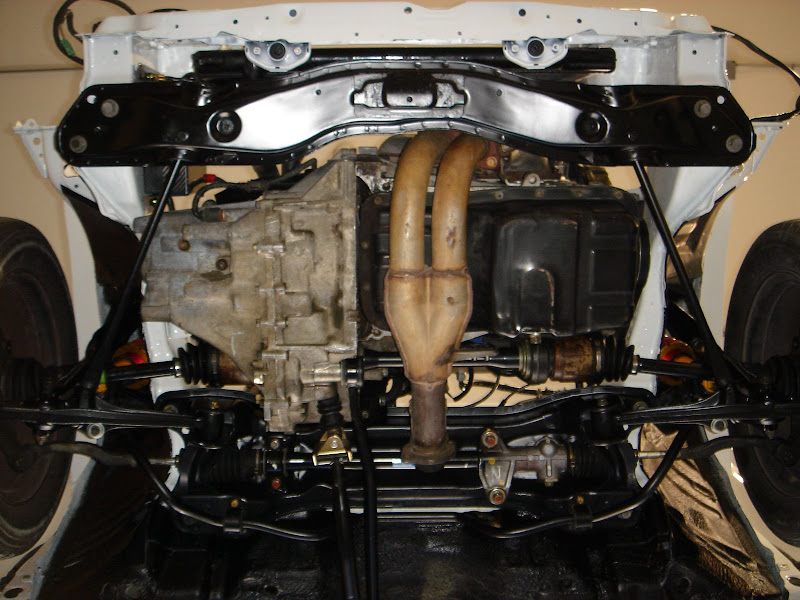
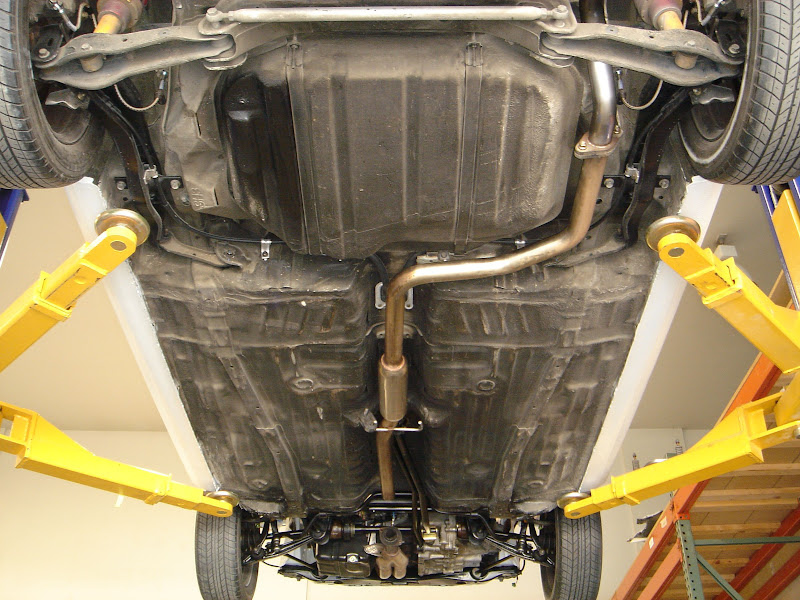
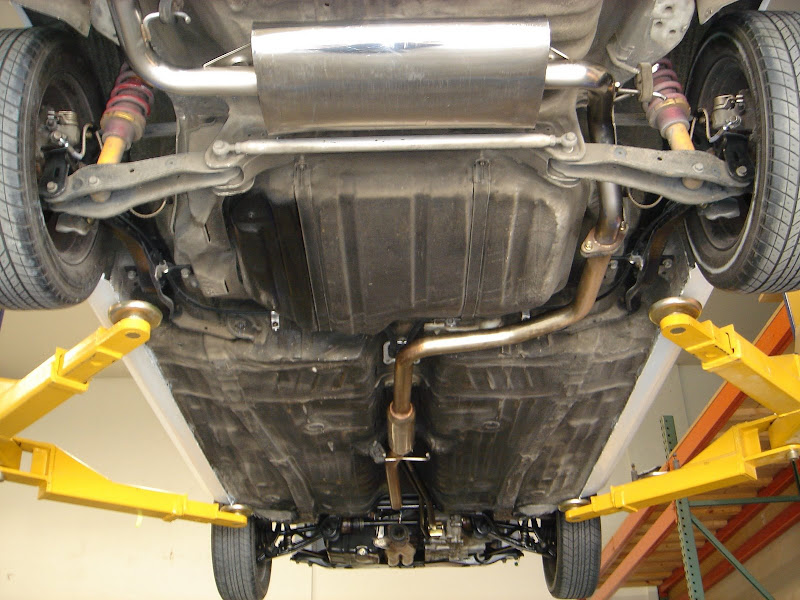
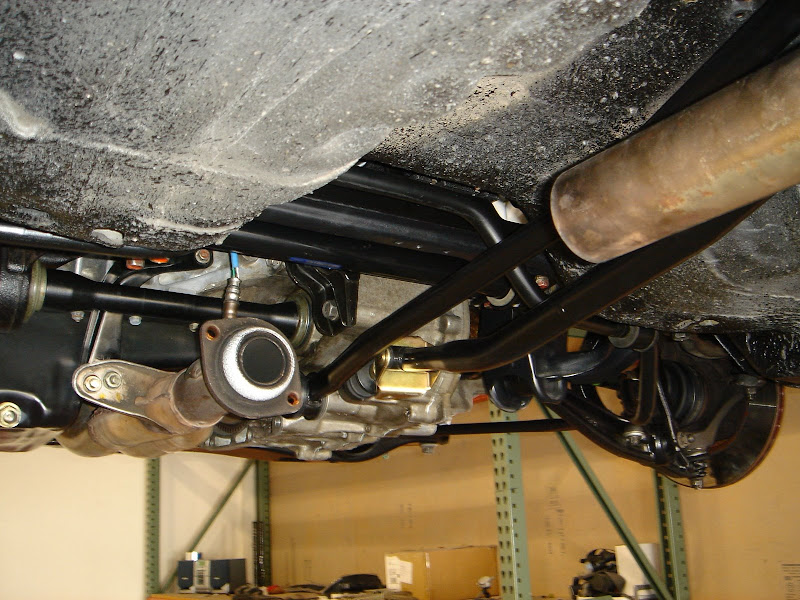
I started on the exhaust today. I spent most of the morning cleaning the shop and the rear section of the exhaust.
The car had a DC Sports system on it when I bought the car. I like the way it looks and sounds plus Jared redid the tip to except an AP1 S2000 tip - lower profile.
When DC fabricated the exhaust - either intentionally or not - it hangs down in the rear… Since I’ll be adding to it now is a great time to remove the two bolt flange at the rear and replace it with a v band clamp.
A few pictures of what I’m dealing with at the front of the exhaust…
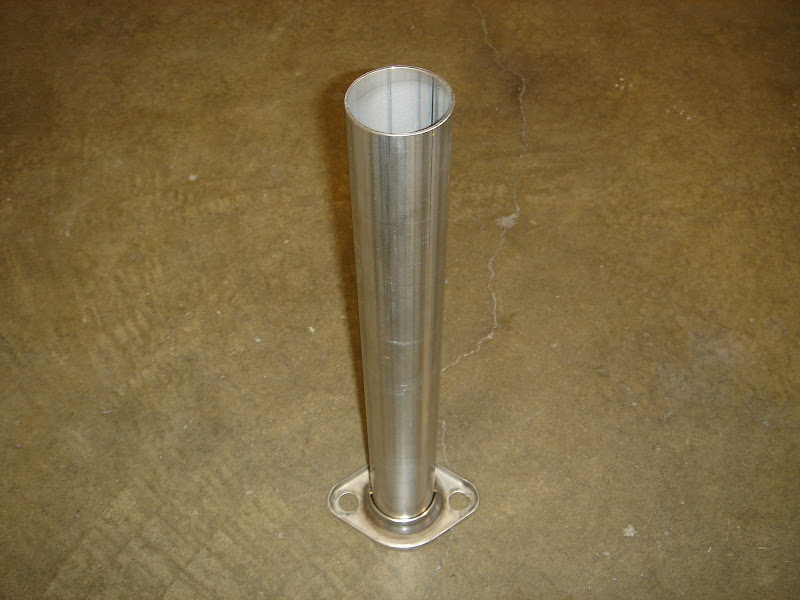
Since the catalytic converter doesn’t fit and I don’t want to buy a test pipe I wend a head and cut the flex joint off of the converter. A few nice things happened with this setup. It’s all two inch tubing so I can duplicate what the factory did by sliding the tube into the flex joint and have Eric weld around the edge where they meet.
Now I need to order the tubing and the v band clamp!
…progress.
I started on the exhaust today. I spent most of the morning cleaning the shop and the rear section of the exhaust.
The car had a DC Sports system on it when I bought the car. I like the way it looks and sounds plus Jared redid the tip to except an AP1 S2000 tip - lower profile.
When DC fabricated the exhaust - either intentionally or not - it hangs down in the rear… Since I’ll be adding to it now is a great time to remove the two bolt flange at the rear and replace it with a v band clamp.
A few pictures of what I’m dealing with at the front of the exhaust…
Since the catalytic converter doesn’t fit and I don’t want to buy a test pipe I wend a head and cut the flex joint off of the converter. A few nice things happened with this setup. It’s all two inch tubing so I can duplicate what the factory did by sliding the tube into the flex joint and have Eric weld around the edge where they meet.
Now I need to order the tubing and the v band clamp!
04-19-2009, 08:39 PM
#46
Honda-Tech Member
Thread Starter
Join Date: May 2002
Location: Not Here, WA
Posts: 697
Likes: 0
Received 0 Likes
on
0 Posts
April 18, 2009
Not much progress…
I installed the front brake lines since I found a way to use the CRX rear lines.
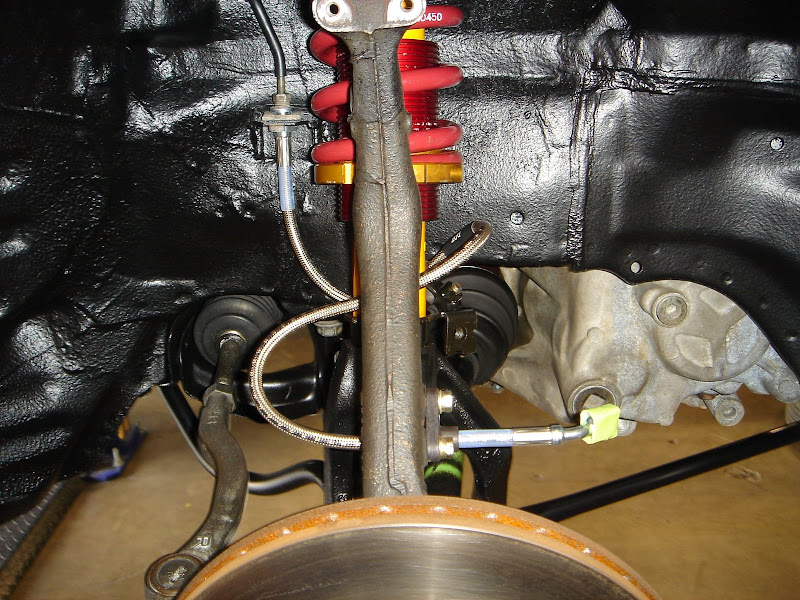
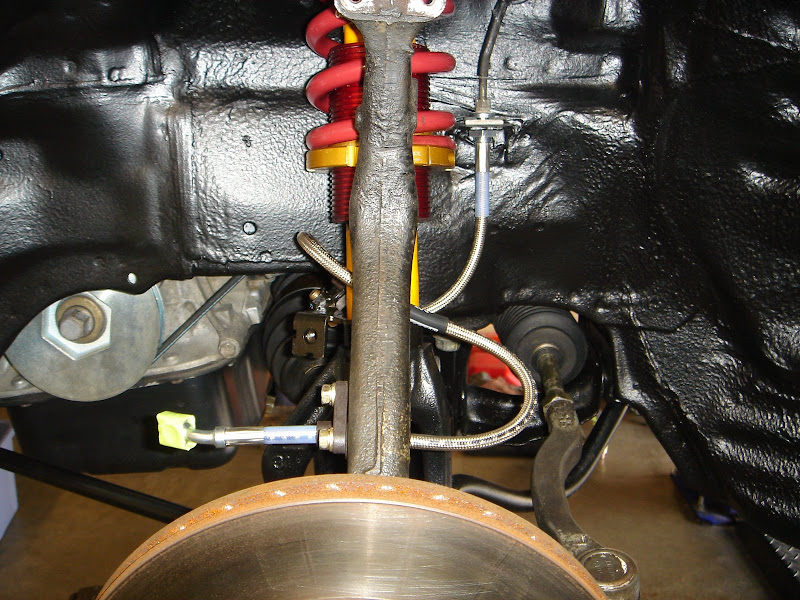
I know I’ve covered this, but you should buy brake lines for the calipers you’re using not the trailing arms…
Reason: Calipers may mount the same but over the years Honda and NISSIN have changed the way they mount the brake line banjo on the caliper. On the CRX the banjo is vertical and facing the ground - requiring a longer brake line - whereas the ’92 up Civic and ’94 up Integra banjo is horizontal and facing the front of the vehicle - requiring a shorter brake line.
Here’s what I have:
’93 DA trailing arms
’93 DA hubs
’93 DA trailing arm bushings - new
’94 Si w/ABS rotors - same as Integra and standard Si
’94 Si w/ABS calipers - same style as above, but different finish
’90 CRX stainless steel brake lines
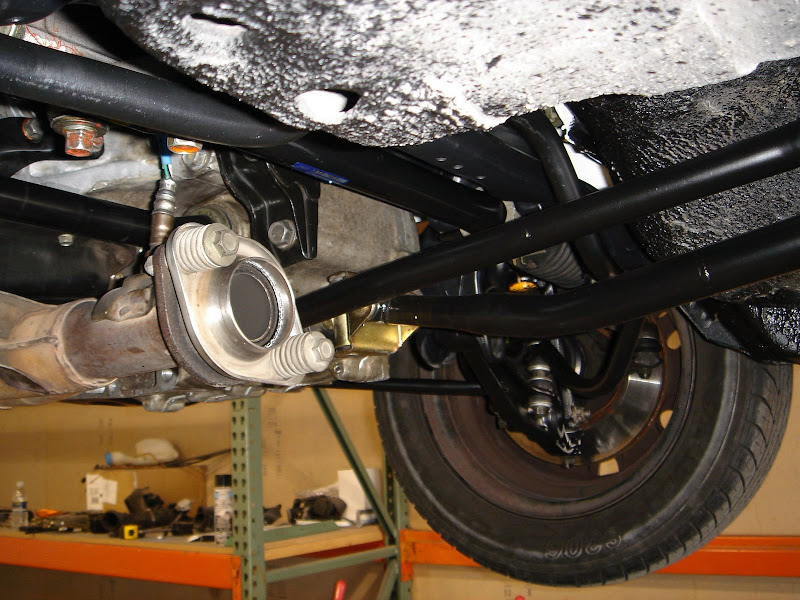
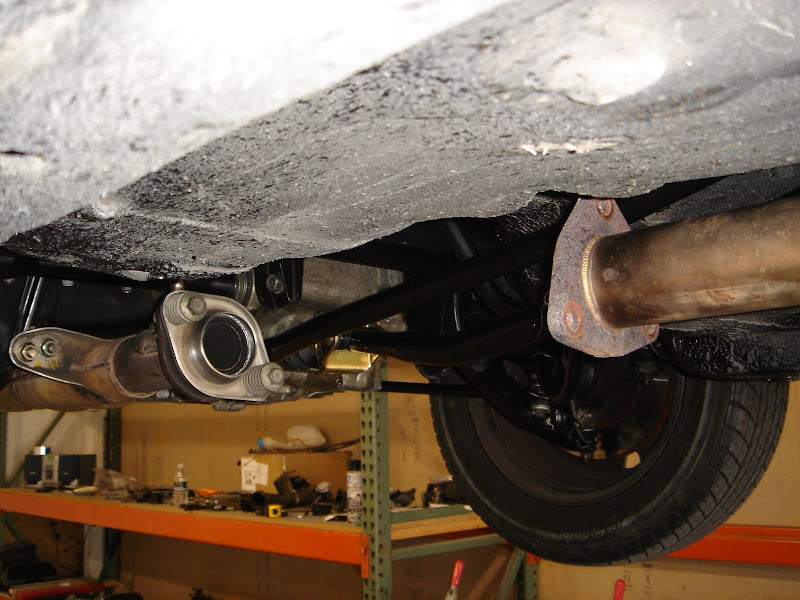
In the below picture you can see the brake lines - this picture was more for the exhaust than the brake lines they just happen to be in the shot.
I haven’t cleaned the rear suspension yet… ;-)
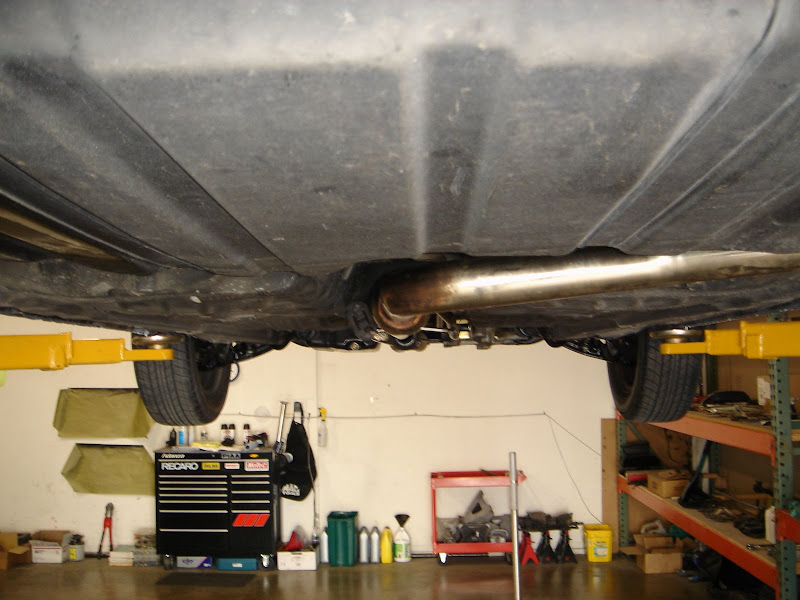
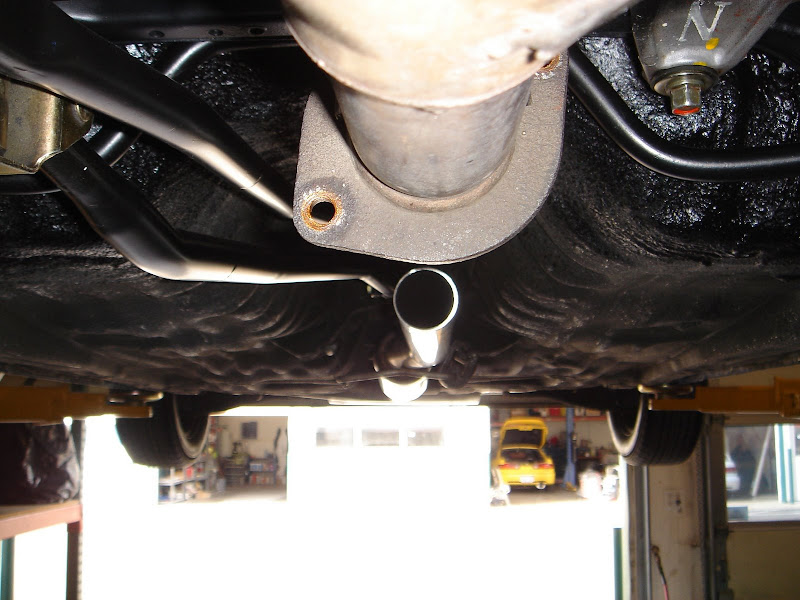
Here are a couple shots of my converter replacement…

Not much progress…
I installed the front brake lines since I found a way to use the CRX rear lines.
I know I’ve covered this, but you should buy brake lines for the calipers you’re using not the trailing arms…
Reason: Calipers may mount the same but over the years Honda and NISSIN have changed the way they mount the brake line banjo on the caliper. On the CRX the banjo is vertical and facing the ground - requiring a longer brake line - whereas the ’92 up Civic and ’94 up Integra banjo is horizontal and facing the front of the vehicle - requiring a shorter brake line.
Here’s what I have:
’93 DA trailing arms
’93 DA hubs
’93 DA trailing arm bushings - new
’94 Si w/ABS rotors - same as Integra and standard Si
’94 Si w/ABS calipers - same style as above, but different finish
’90 CRX stainless steel brake lines
In the below picture you can see the brake lines - this picture was more for the exhaust than the brake lines they just happen to be in the shot.
I haven’t cleaned the rear suspension yet… ;-)
Here are a couple shots of my converter replacement…
04-19-2009, 08:39 PM
#47
Honda-Tech Member
Thread Starter
Join Date: May 2002
Location: Not Here, WA
Posts: 697
Likes: 0
Received 0 Likes
on
0 Posts
April 19, 2009
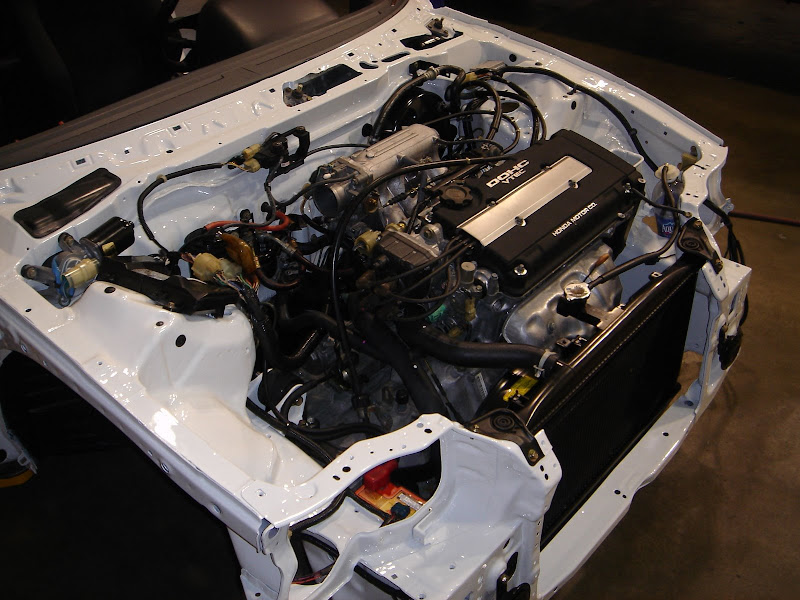
I’m noticing a trend here - unproductiveness.
On a positive note; I’m still finding parts to use from my stash…
Kind of a random thought, but I might use the stock intake arm from the ’94 and just pick up an air filter. I test fit the arm and it’s a perfect fit. The most important feature is it cost me nothing and all I need to do is pick up a $40 K&N air filter. ;-)
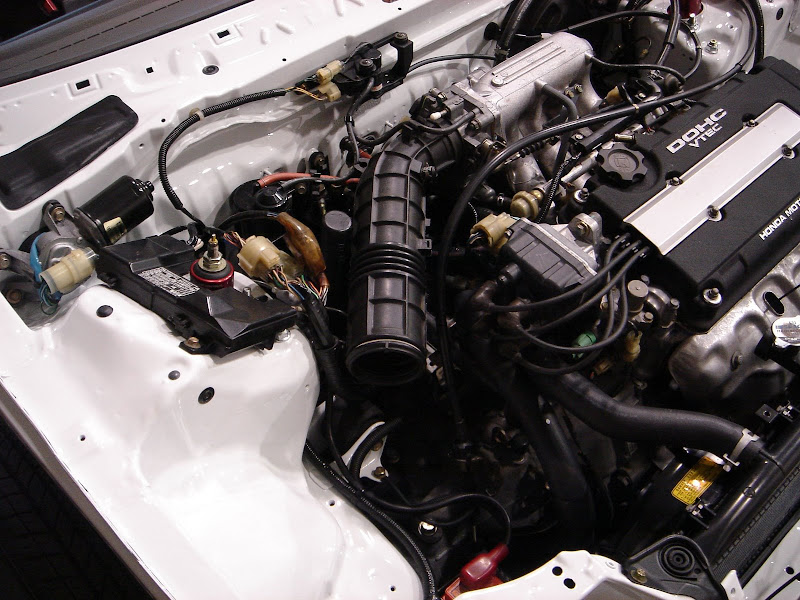
I took this picture more for filter sizing, but after looking at the car and the picture I don’t think there will be any issues!
I’m noticing a trend here - unproductiveness.
On a positive note; I’m still finding parts to use from my stash…
Kind of a random thought, but I might use the stock intake arm from the ’94 and just pick up an air filter. I test fit the arm and it’s a perfect fit. The most important feature is it cost me nothing and all I need to do is pick up a $40 K&N air filter. ;-)
I took this picture more for filter sizing, but after looking at the car and the picture I don’t think there will be any issues!
04-19-2009, 08:56 PM
#49
Honda-Tech Member
Thread Starter
Join Date: May 2002
Location: Not Here, WA
Posts: 697
Likes: 0
Received 0 Likes
on
0 Posts
There you have it.
My whole built up to today.
I hope you enjoyed looking at it. I'll keep posting as I make progress…
My whole built up to today.
I hope you enjoyed looking at it. I'll keep posting as I make progress…
