
HOW TO: B16 intake manifold on a B20 w/ pics!!!
 03-08-2012, 10:10 PM
#1
Honda-Tech Member
Thread Starter

Join Date: Jun 2011
Posts: 256
Likes: 0
Received 0 Likes
on
0 Posts
If anyone was wondering at how to put a b16 intake manifold onto a b20, heres how to do it.
First things first: Find yourself a b16 intake manifold.
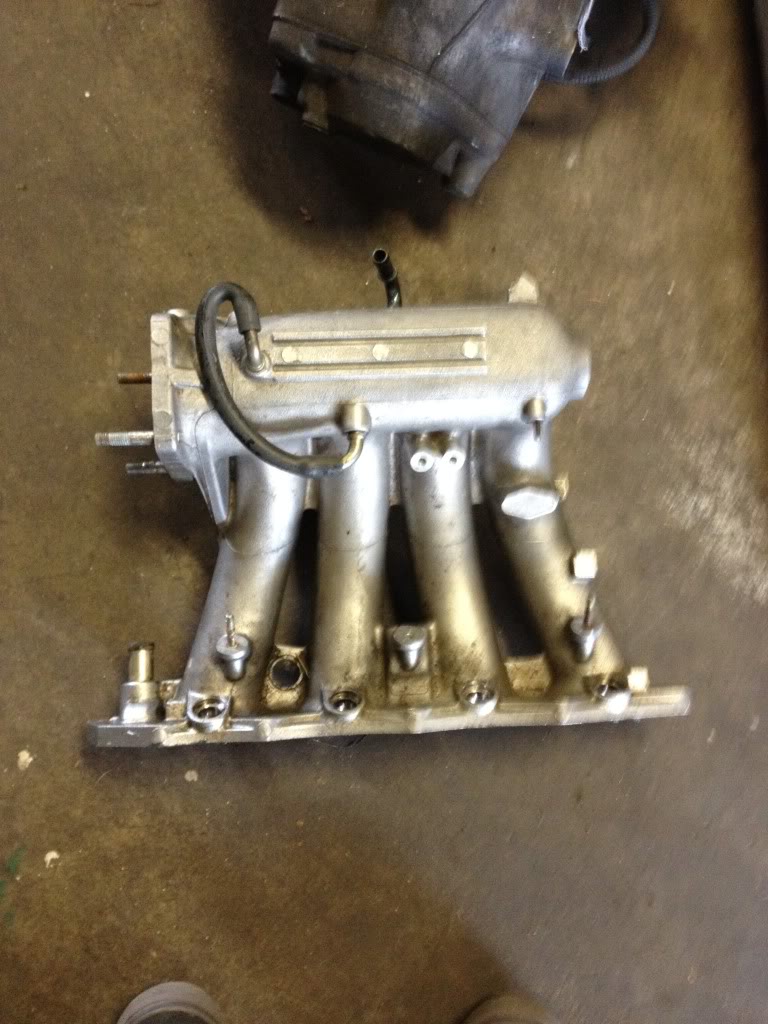
found this locally for 30 bucks.
Secondly: You will need to take off that giant giraffe intake manifold that comes on the b20. this is simple, look for the bolts and brackets that hold it on, and then remove them.
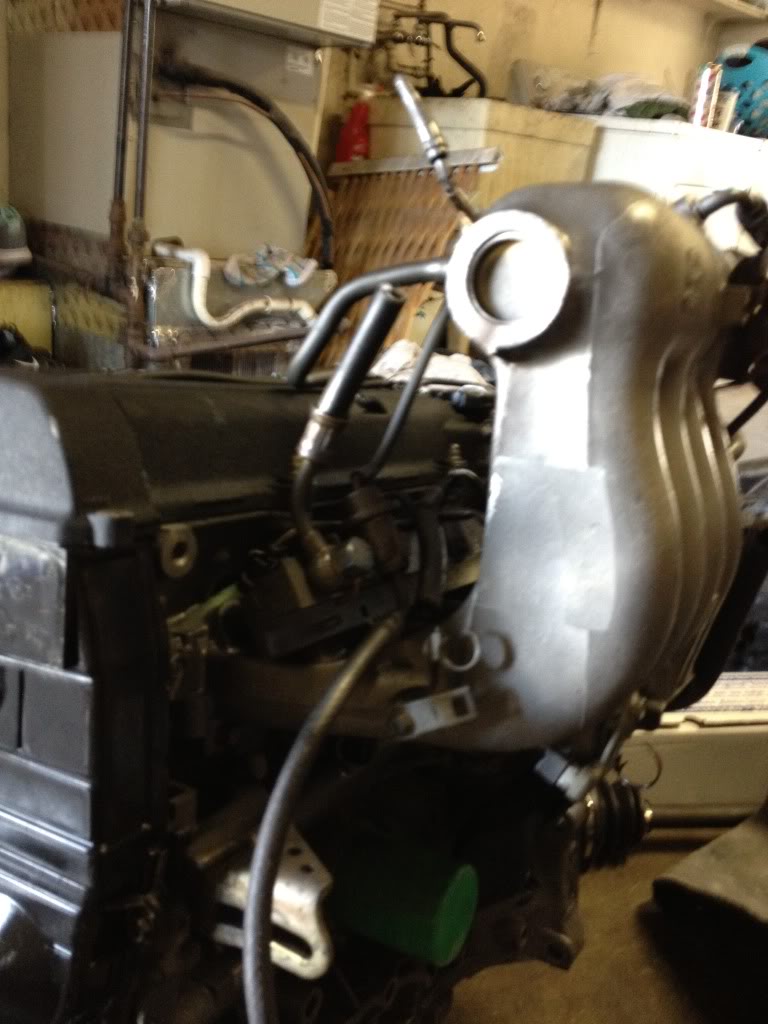
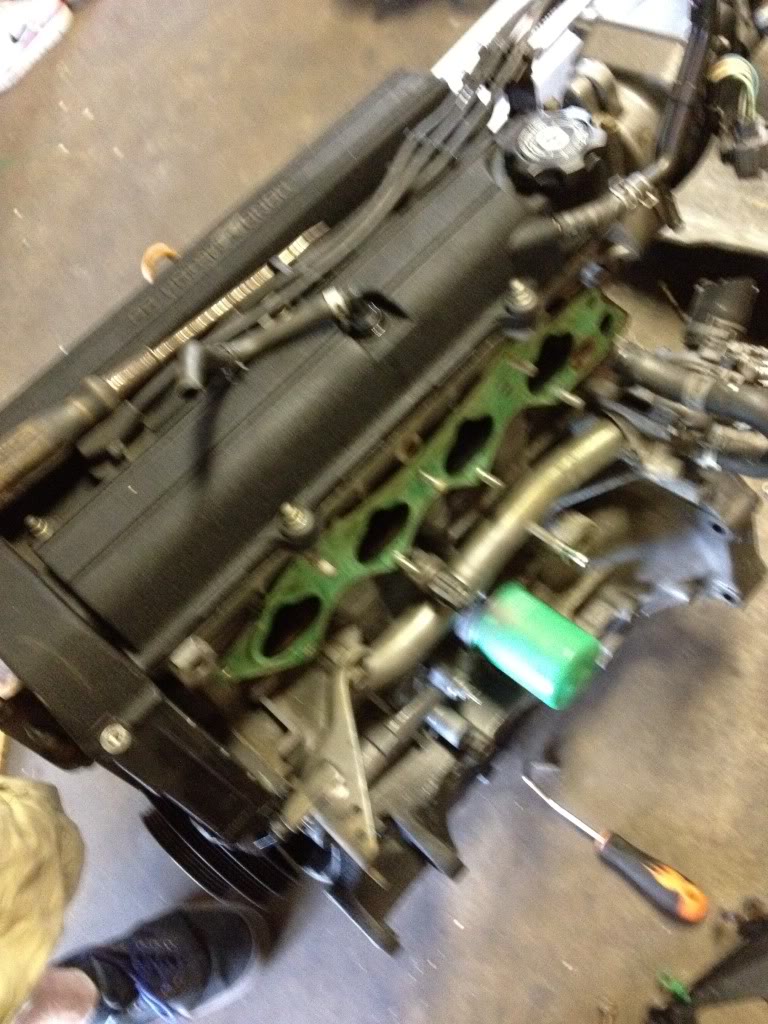
pic of the stock b20 intake manifold, effin massive!
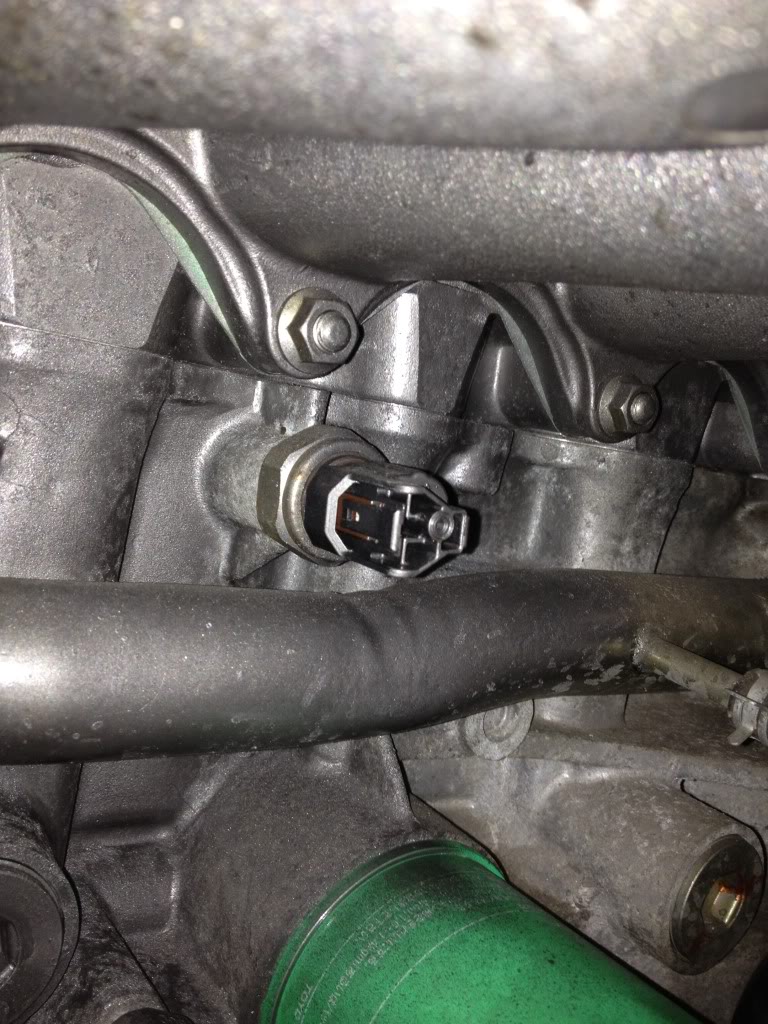
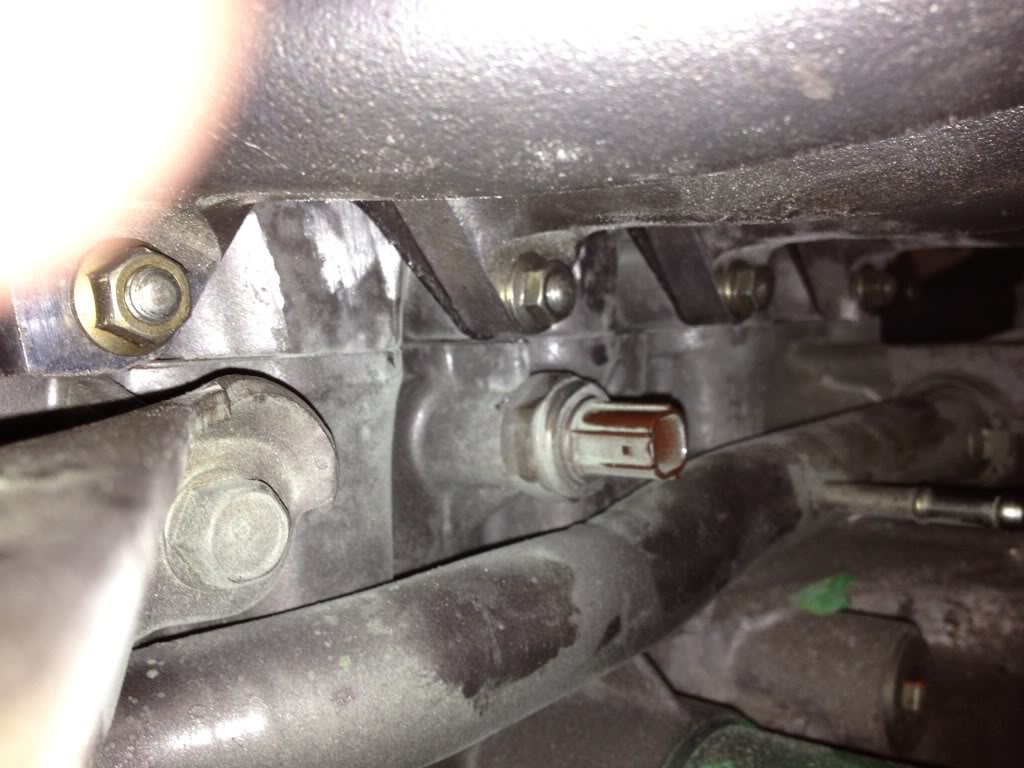
Heres a pic of the knock sensor plug that will only be found on a high compression b20 for reference.
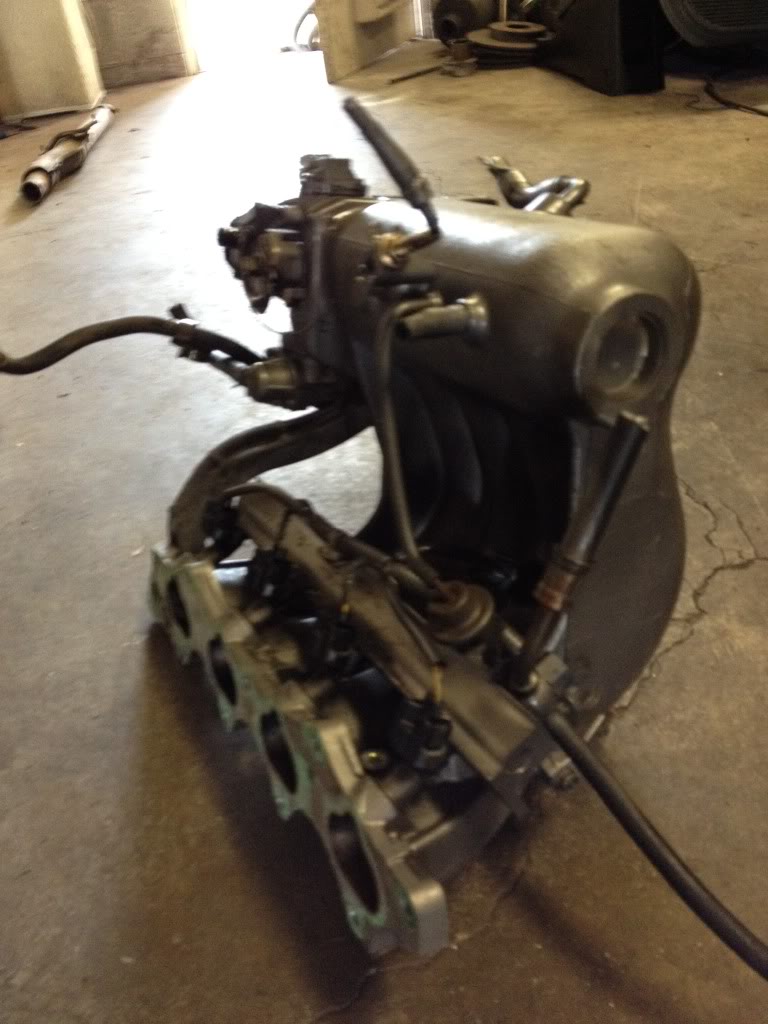
B20 intake manifold has been removed you can use the throttlebody off of it along with other things like injectors and map sensor and so on. I couldn't use this fuel rail because it was from a rhd car and the fuel feed was on the wrong side.
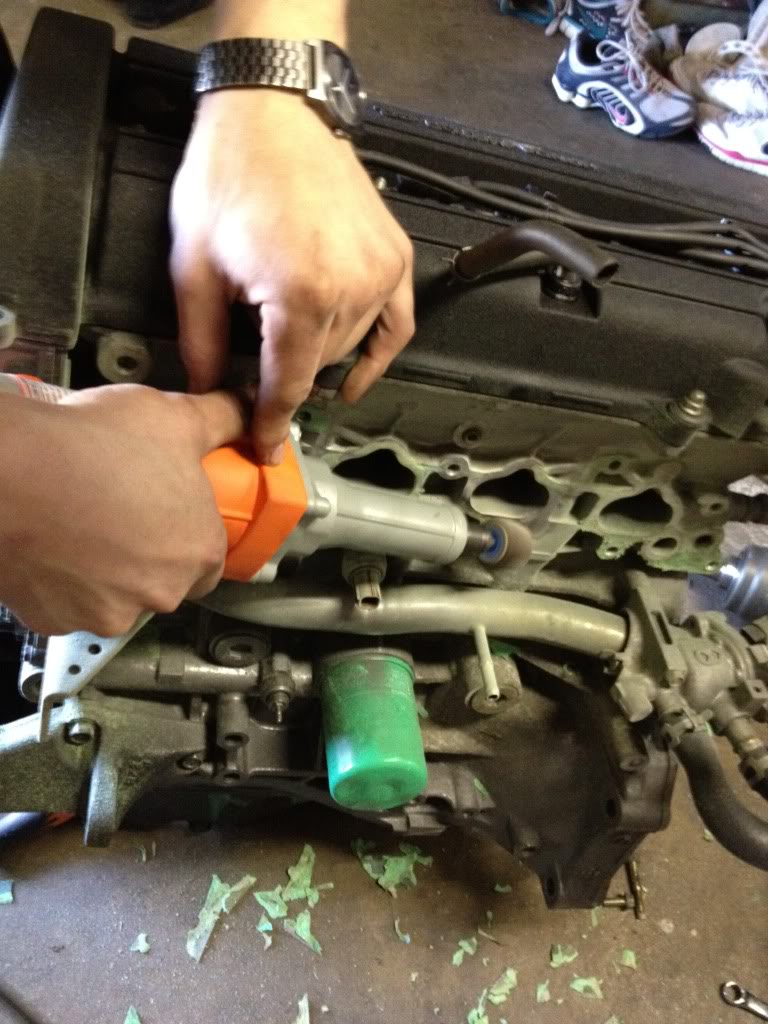
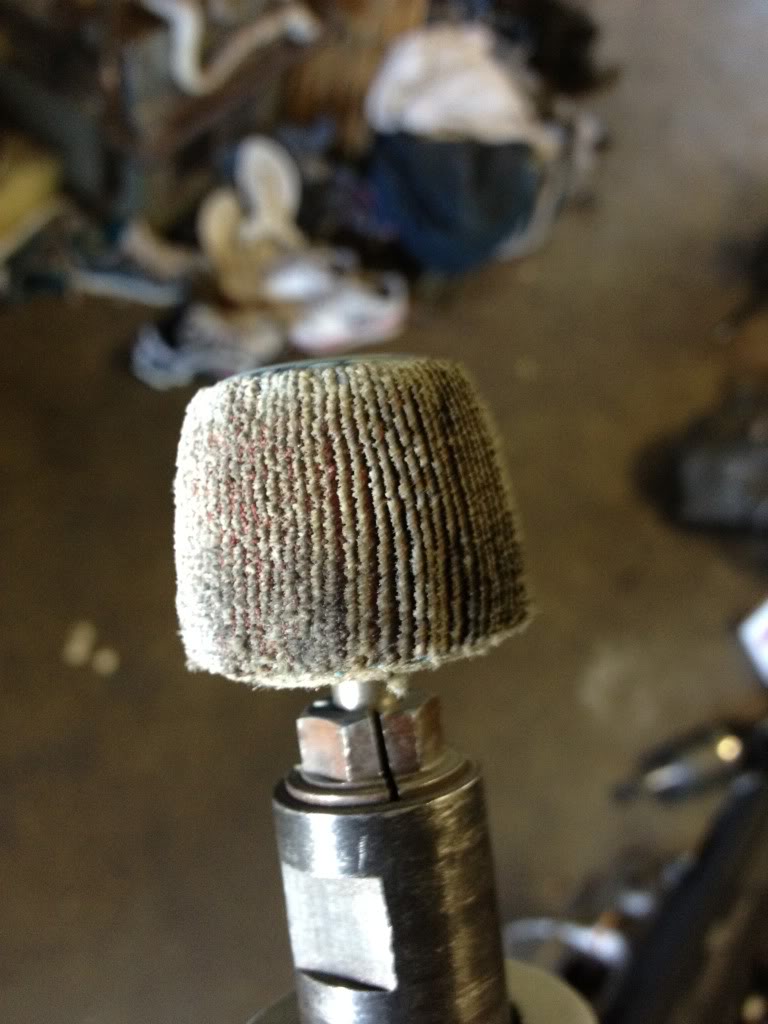
Next step is to begin removing the old gasket from the head of the motor. This is BY FAR the worst step in the process. There are two ways to do this, one: razor blade, time consuming, but a lot harder to mess up. And two: a dremel with a flapper wheel, which is much faster, but you have to be careful as if you take off too much the head will have to take a trip to the local machine shop!
Razor blade, hands still hurt from this...
Dremel for the win!!
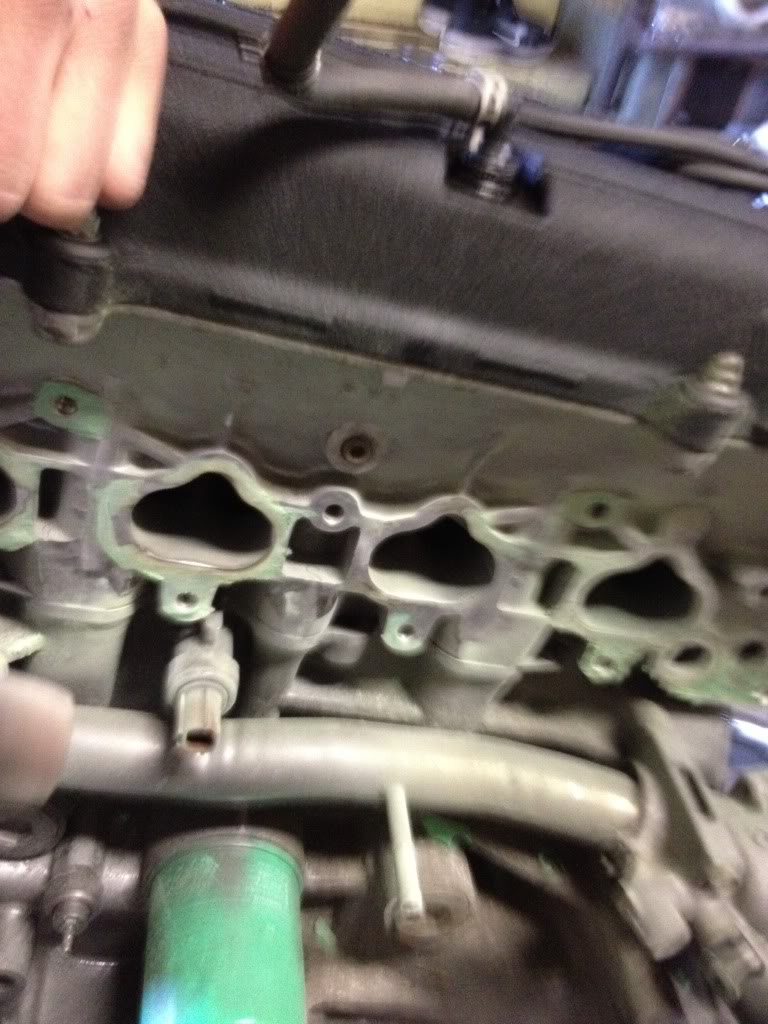
Almost all the way cleaned off
This is the attachment I used on the end of the dremel
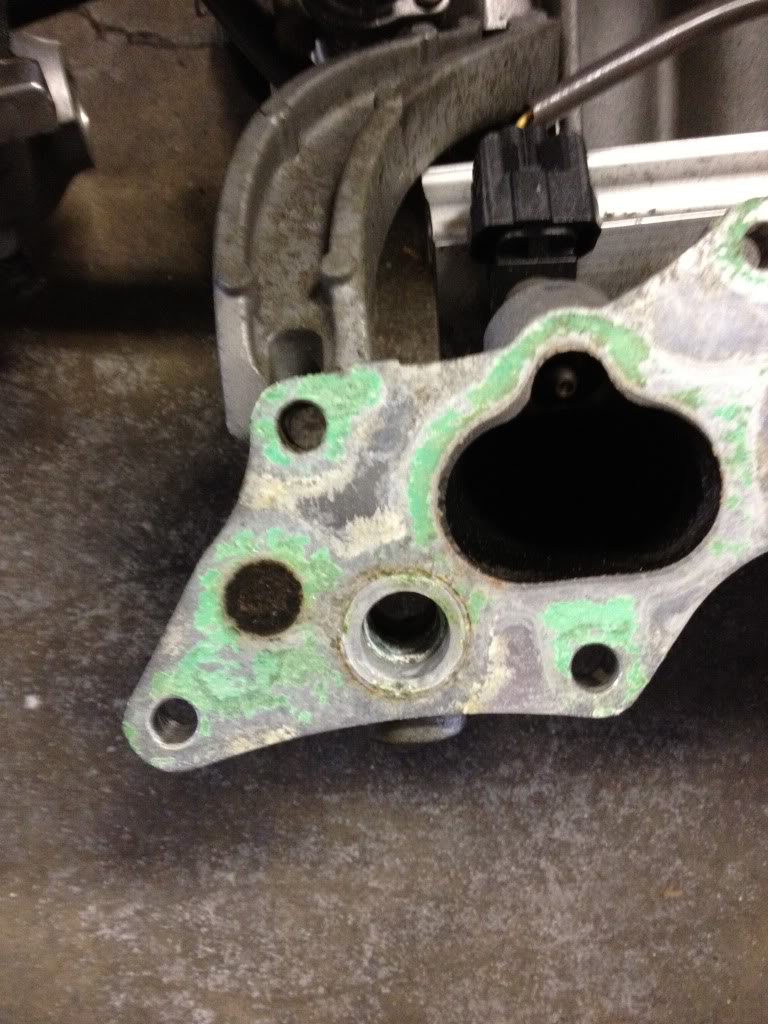
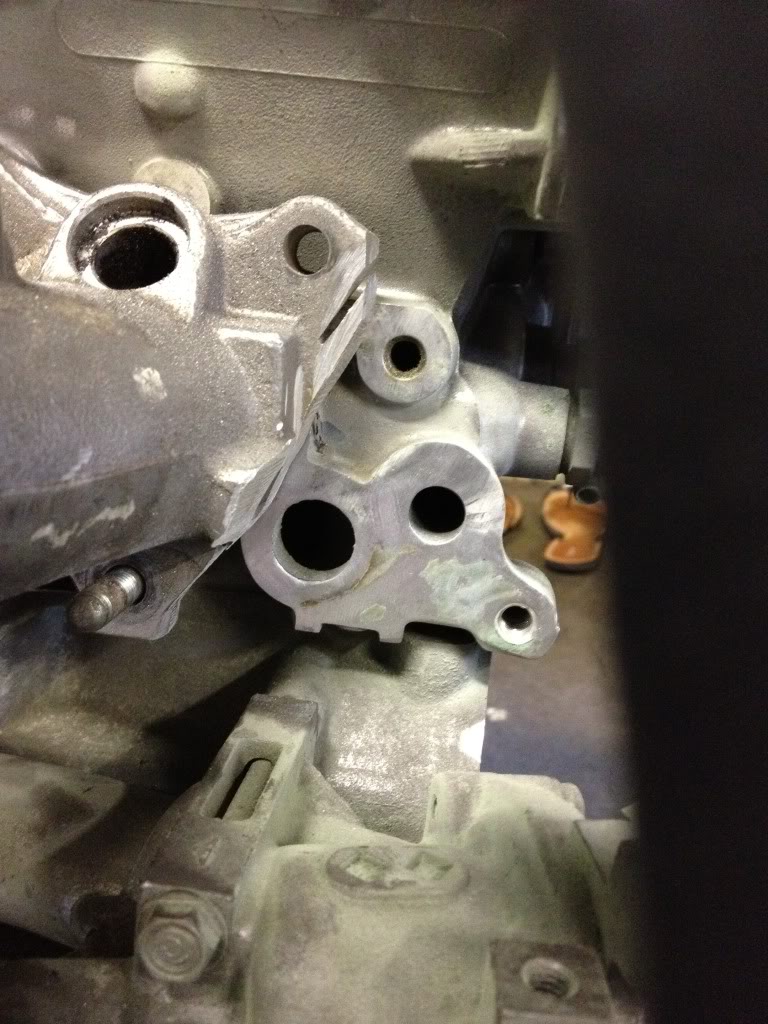
The next pictures will be comparing the port right by the thermostat on the intake manifold, some coolant line, and yes you need it, but the b16 one differs from the b20 one.
Reference pic of b20
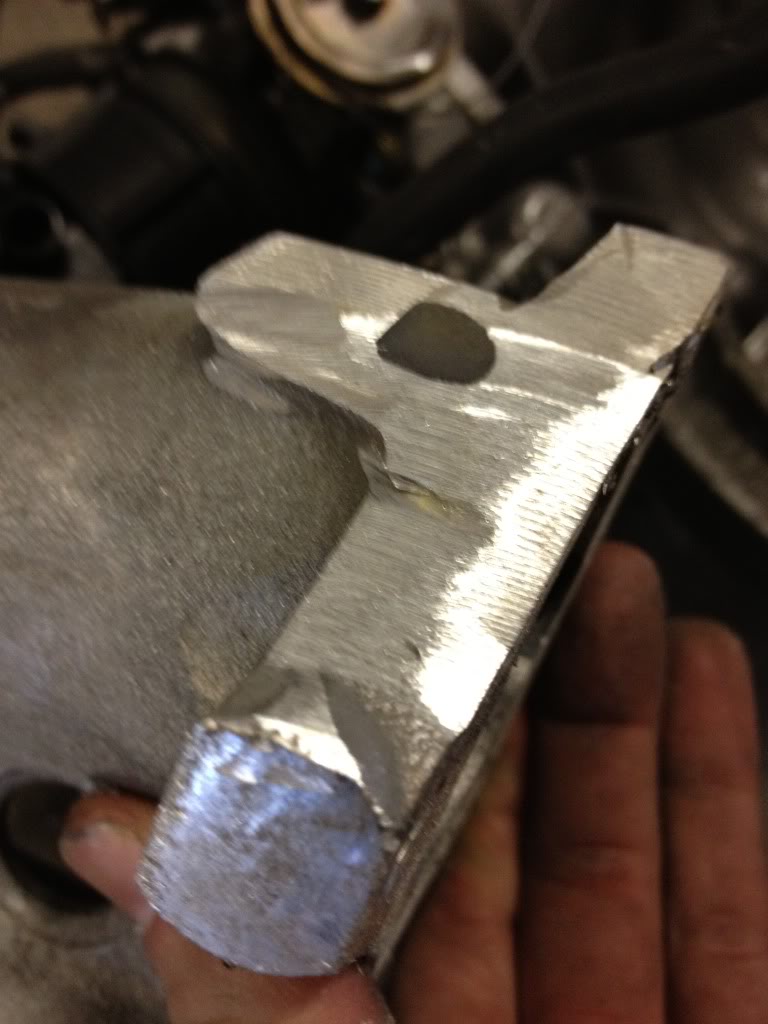
Roughly what you need to shave/cut to make the b16 manifold fit
This is the main problem people run into when trying to make these intake manifolds fit, you have to shave off that coolant port on the b16 intake manifold, and then go to a connectors store and purchase a 3/4" barbed push male to male fitting. and you have to shave off A LOT. this is also not a fun part as it is super awkward to chop off. you need to make it able to clear the port and then some because the new fitting needs to also be able to fit in there with the intake manifold on.
Another pic of the shaving. I used a cutting wheel. which I hate using cuz its hard to make it pretty, at least for me that is, but it really is the best way to get that extra piece off.
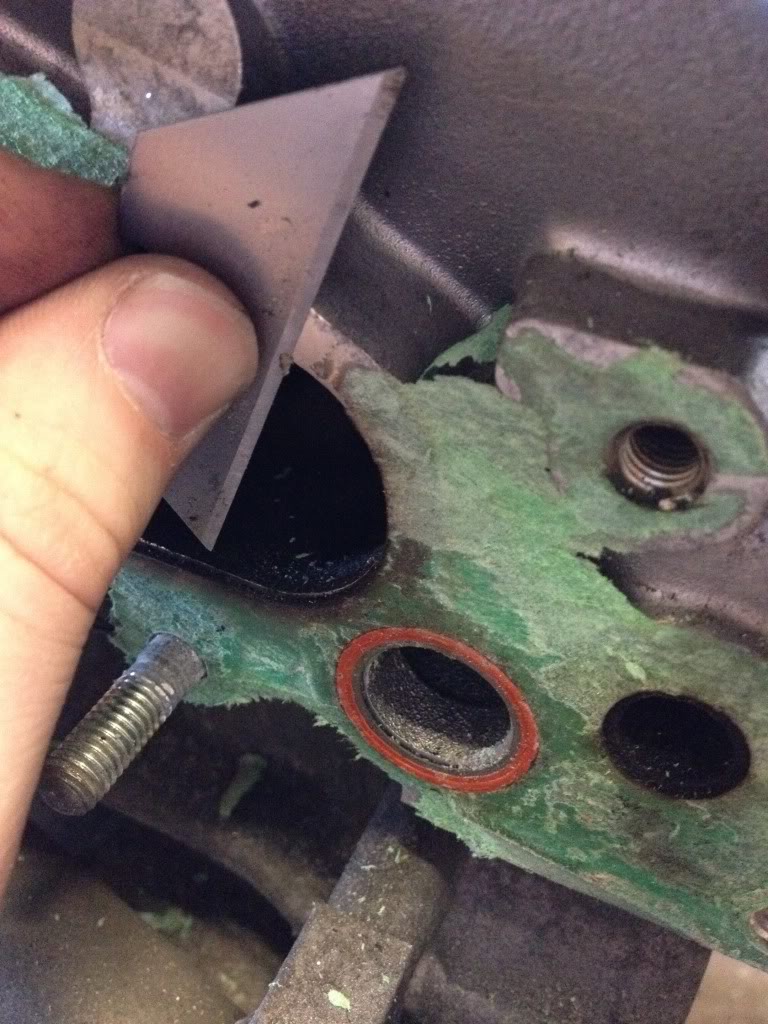
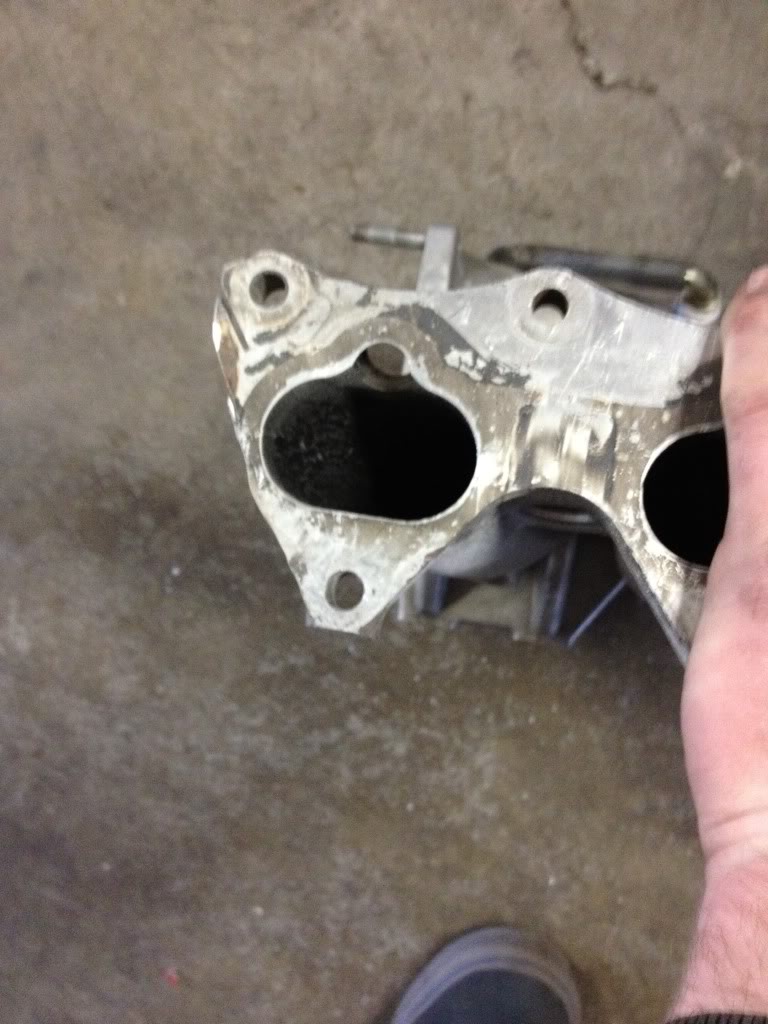
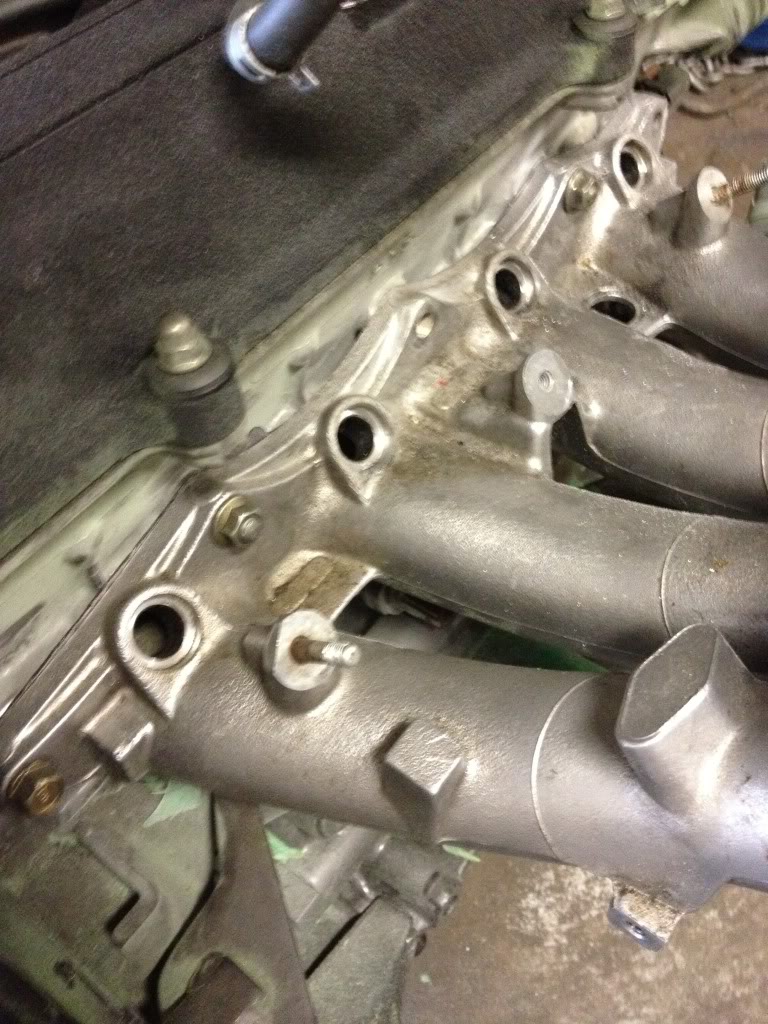
Here is another reference pic of the port I am talking about. this would normally be covered up by the intake manifold and would have a place to put a coolant line. This is close to how much room you will need to make this work.
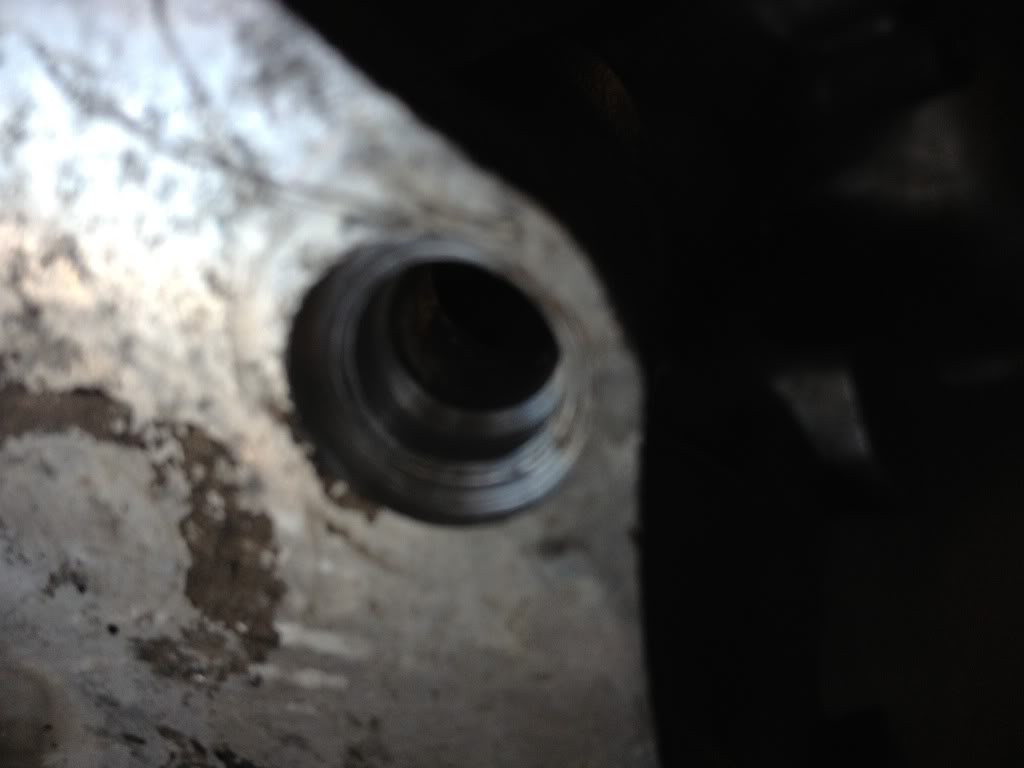
The next main issue with making this manifold fit is an alan head bolt that hangs out right where the middle stud on top would go if it was a b16 motor. basically this is super simple to fix, you just get a step bit and drill the hole out a little bigger, this is also one of the two bolts that will not be replaced when putting the intake manifold back on, because well, there is no bolt hole for this one!
Reference pics:
Alan head
Hole that needs to be drilled out, just a little bit, only enough to clear the bolt.
Now you're almost done!
go buy yourself a b20 or ls intake manifold gasket, doesnt really matter which, and slap that on there MAKE SURE YOU CLEAN BOTH THE HEAD AND INTAKE MANIFOLD OF PREVIOUS GASKET OR YOU RISK CRACKING YOUR INTAKE MANIFOLD!!! It can also lead to vacuum leaks and what not.
Top of it should look like this, Not all bolt holes are filled, but thats how its gotta be if you want this on your motor.
Here's the bottom, you are missing one on bottom too because you chopped it off as it would be on the other side of that coolant port.
And there you have it! b16 intake manifold on a b20. This is the second time I've done this and I know it works and it makes much better power than using an ls manifold, and they are usually the same price! i think they also look much nicer in the engine bay.
Hopefully some other guys try this out as its a much cheaper replacement than buying a skunk2 mani or whatever other manifold you wanna run.
First things first: Find yourself a b16 intake manifold.
found this locally for 30 bucks.
Secondly: You will need to take off that giant giraffe intake manifold that comes on the b20. this is simple, look for the bolts and brackets that hold it on, and then remove them.
pic of the stock b20 intake manifold, effin massive!
Heres a pic of the knock sensor plug that will only be found on a high compression b20 for reference.
B20 intake manifold has been removed you can use the throttlebody off of it along with other things like injectors and map sensor and so on. I couldn't use this fuel rail because it was from a rhd car and the fuel feed was on the wrong side.
Next step is to begin removing the old gasket from the head of the motor. This is BY FAR the worst step in the process. There are two ways to do this, one: razor blade, time consuming, but a lot harder to mess up. And two: a dremel with a flapper wheel, which is much faster, but you have to be careful as if you take off too much the head will have to take a trip to the local machine shop!
Razor blade, hands still hurt from this...
Dremel for the win!!
Almost all the way cleaned off
This is the attachment I used on the end of the dremel
The next pictures will be comparing the port right by the thermostat on the intake manifold, some coolant line, and yes you need it, but the b16 one differs from the b20 one.
Reference pic of b20
Roughly what you need to shave/cut to make the b16 manifold fit
This is the main problem people run into when trying to make these intake manifolds fit, you have to shave off that coolant port on the b16 intake manifold, and then go to a connectors store and purchase a 3/4" barbed push male to male fitting. and you have to shave off A LOT. this is also not a fun part as it is super awkward to chop off. you need to make it able to clear the port and then some because the new fitting needs to also be able to fit in there with the intake manifold on.
Another pic of the shaving. I used a cutting wheel. which I hate using cuz its hard to make it pretty, at least for me that is, but it really is the best way to get that extra piece off.
Here is another reference pic of the port I am talking about. this would normally be covered up by the intake manifold and would have a place to put a coolant line. This is close to how much room you will need to make this work.
The next main issue with making this manifold fit is an alan head bolt that hangs out right where the middle stud on top would go if it was a b16 motor. basically this is super simple to fix, you just get a step bit and drill the hole out a little bigger, this is also one of the two bolts that will not be replaced when putting the intake manifold back on, because well, there is no bolt hole for this one!
Reference pics:
Alan head
Hole that needs to be drilled out, just a little bit, only enough to clear the bolt.
Now you're almost done!
go buy yourself a b20 or ls intake manifold gasket, doesnt really matter which, and slap that on there MAKE SURE YOU CLEAN BOTH THE HEAD AND INTAKE MANIFOLD OF PREVIOUS GASKET OR YOU RISK CRACKING YOUR INTAKE MANIFOLD!!! It can also lead to vacuum leaks and what not.
Top of it should look like this, Not all bolt holes are filled, but thats how its gotta be if you want this on your motor.
Here's the bottom, you are missing one on bottom too because you chopped it off as it would be on the other side of that coolant port.
And there you have it! b16 intake manifold on a b20. This is the second time I've done this and I know it works and it makes much better power than using an ls manifold, and they are usually the same price! i think they also look much nicer in the engine bay.
Hopefully some other guys try this out as its a much cheaper replacement than buying a skunk2 mani or whatever other manifold you wanna run.
 03-08-2012, 10:15 PM
#2
Honda-Tech Member
Thread Starter
Join Date: Jun 2011
Posts: 256
Likes: 0
Received 0 Likes
on
0 Posts
***QUICK EDIT***
I will post pics of the coolant port fitment sometime tomorrow as I didnt get a chance to make it to the connector shop before they closed.
I will post pics of the coolant port fitment sometime tomorrow as I didnt get a chance to make it to the connector shop before they closed.
03-09-2012, 07:13 AM
#3
DO IT ON ALL FOURS
I just wanted to inform you or anyone that reads this to NOT use a sanding disc/wheel/flapper to remove gaskets. This can easily cause dips in the surface and lead to air/coolant leaks. They make gasket removers for die grinders and such but they are expensive and don't last long. The best alternative is to use a solvent and a razor blade. They do make holders for them as well - that or Man up!
03-09-2012, 08:07 AM
#4
Honda-Tech Member
use a scuff disc on a angle die grinder works better then using a sanding disc.takes material off but wont hurt the aluminum.
03-09-2012, 08:44 AM
#5
Honda-Tech Member

Join Date: Oct 2001
Location: Vernon, BC, Canada
Posts: 525
Likes: 0
Received 0 Likes
on
0 Posts
Do you have dyno tests to show this? Reason being is I made 143whp and 138tq on a bone stock B20z with stock exhaust manifold with an LS manifold and a larger throttle body. I realize the B16 runners likely flow better, but not really how much better if we're talking about running NA on a stock engine.
03-09-2012, 08:57 AM
#6
Honda-Tech Member
Thread Starter
Join Date: Jun 2011
Posts: 256
Likes: 0
Received 0 Likes
on
0 Posts
I had a b20 with crower 403's and a bunch of porting a while back and there was a considerable difference in the powerband. I'm a cheap *** so I never dyno'd it but with all the mods it made about 180wheel na non vtec. ran 12.7 @ 106 in the 1/4mi in a 1700lb crx with an ls trans
03-13-2012, 11:14 PM
#7
Honda-Tech Member
Thread Starter
Join Date: Jun 2011
Posts: 256
Likes: 0
Received 0 Likes
on
0 Posts
****UPDATE*****
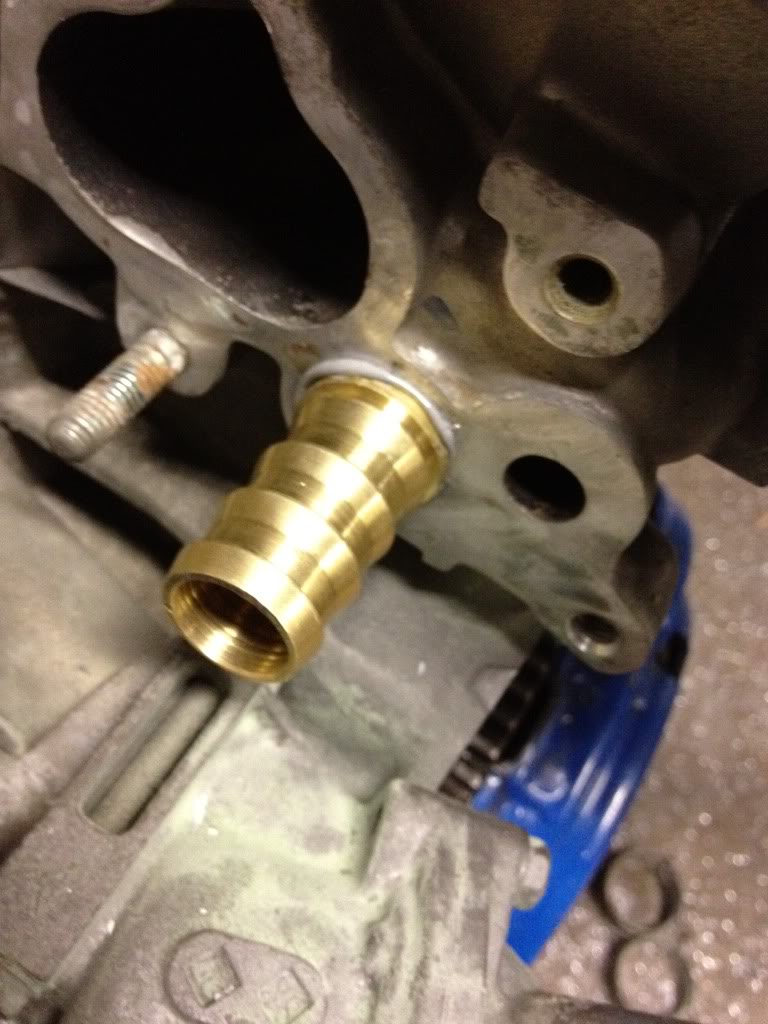
Finally got around to buying that fitting, I bought the 3/4" one, but later realized this was too big, I would recommend 5/8" if you plan on doing it.
This is what is should look like. I used some JB weld on it to help it seal better, make sure you let it dry before you start movin it around n what not.
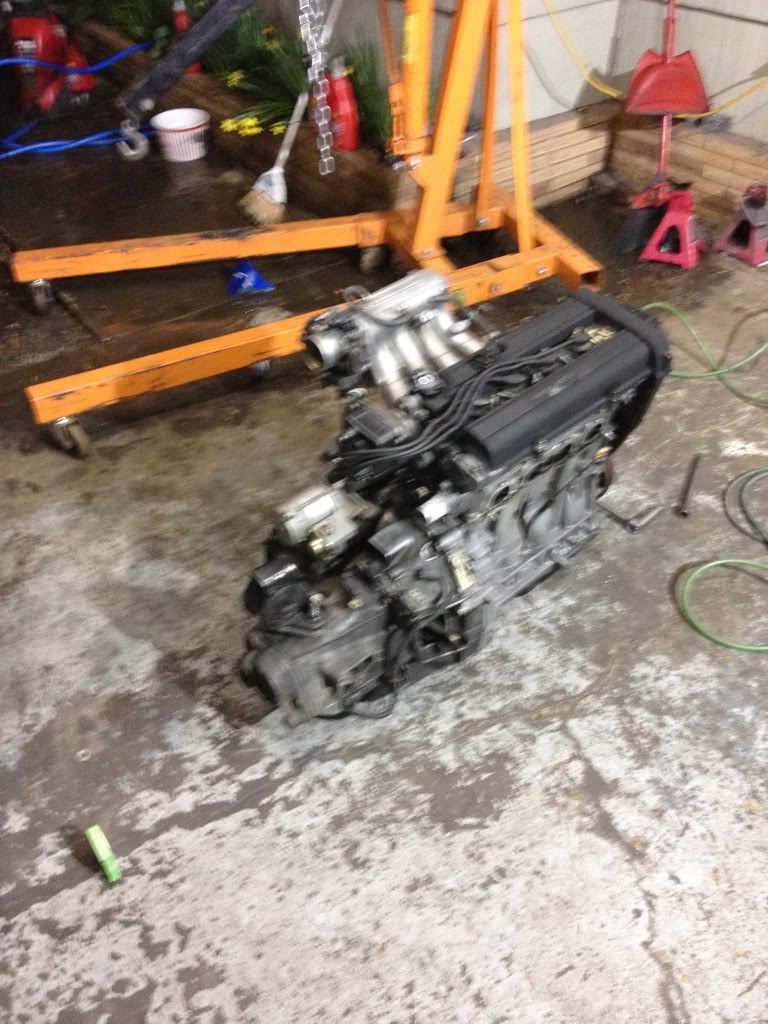
Swap is in the car, with no vacuum or coolant leaks (EVEN WITH THE USE OF A DREMEL) for all the haters who apparently don't know how to be careful with a dremel.e
Finally got around to buying that fitting, I bought the 3/4" one, but later realized this was too big, I would recommend 5/8" if you plan on doing it.
This is what is should look like. I used some JB weld on it to help it seal better, make sure you let it dry before you start movin it around n what not.
Swap is in the car, with no vacuum or coolant leaks (EVEN WITH THE USE OF A DREMEL) for all the haters who apparently don't know how to be careful with a dremel.e
Trending Topics
03-14-2012, 01:58 AM
#8
Honda-Tech Member
Join Date: Jul 2004
Location: nothing is real unless it is observed
Posts: 5,957
Likes: 0
Received 0 Likes
on
0 Posts
A better approach to the fitting is using a pipe tap and threading the fitting in rather than just using epoxy. But your write up I essentially the same way I have gone about this in the past.
03-14-2012, 10:12 PM
#9
Honda-Tech Member
Thread Starter
Join Date: Jun 2011
Posts: 256
Likes: 0
Received 0 Likes
on
0 Posts
I would agree that it would be better to tap it, but I just use a double sided barbed fitting and the brass and aluminum are both soft enough that i have never had issues with it. This is also A TON quicker and easier, but as you stated, leaves more possibility for problems. Luckily it worked out great!
Thanks for the positive feedback also!
Thanks for the positive feedback also!
03-15-2012, 05:44 AM
#10
glad your all into your B20 build..
All of us who have a B20 (including me) has swapped to some sort of intake. Usually just the LS/B16 type. But i didnt think there needed to be another write up about it. This is common knowledge with B20 swaps (or a quick search) just as a flywheel/clutch will be needed as well.
All of us who have a B20 (including me) has swapped to some sort of intake. Usually just the LS/B16 type. But i didnt think there needed to be another write up about it. This is common knowledge with B20 swaps (or a quick search) just as a flywheel/clutch will be needed as well.
03-15-2012, 11:05 AM
#11

Ghetto as hell. Why not just buy one of the many ITR style aftermarket intake manifolds. Or just use a Ls mani and port it out a bit.
The following users liked this post:
03-15-2012, 11:08 AM
#12
Also the hole next to the coolant nipple you had to JB wield in place, is a exhaust port for an EGR system that was never on B18 or B20 that I have seen anyways. It will need to get plugged or you will have a nice big exhaust leak and it will be pretty loud.
03-15-2012, 11:40 AM
#13
Honda-Tech Member
Thread Starter
Join Date: Jun 2011
Posts: 256
Likes: 0
Received 0 Likes
on
0 Posts
Oh man thank you! I totally forgot to explain that, I use a bolt and weld a washer to a 12mm bolt and screw it into the farthest bolt hole for the intake manifold on the right, the one that i chopped off, then jb weld on the bolt that goes in the egr and tighten the 12 with the washer on it, this way its jb welded and there is pressure on it from the washer that is bolted to the head now.
make sure you block it off though! thank you for the correction i totally forgot about that.
03-16-2012, 01:31 AM
#14
Honda-Tech Member
because they aren't the same thing and the itr style manifolds kill your low end big time. been there done that. b16 is best for a street car. Ill put them on ghetto or not cause they work better.
03-16-2012, 01:32 AM
#15
Honda-Tech Member
also wtf is porting a ls manifold going to accomplish.... it still has long skinny spaghetti dick runners and a smaller plenum.
03-16-2012, 06:03 AM
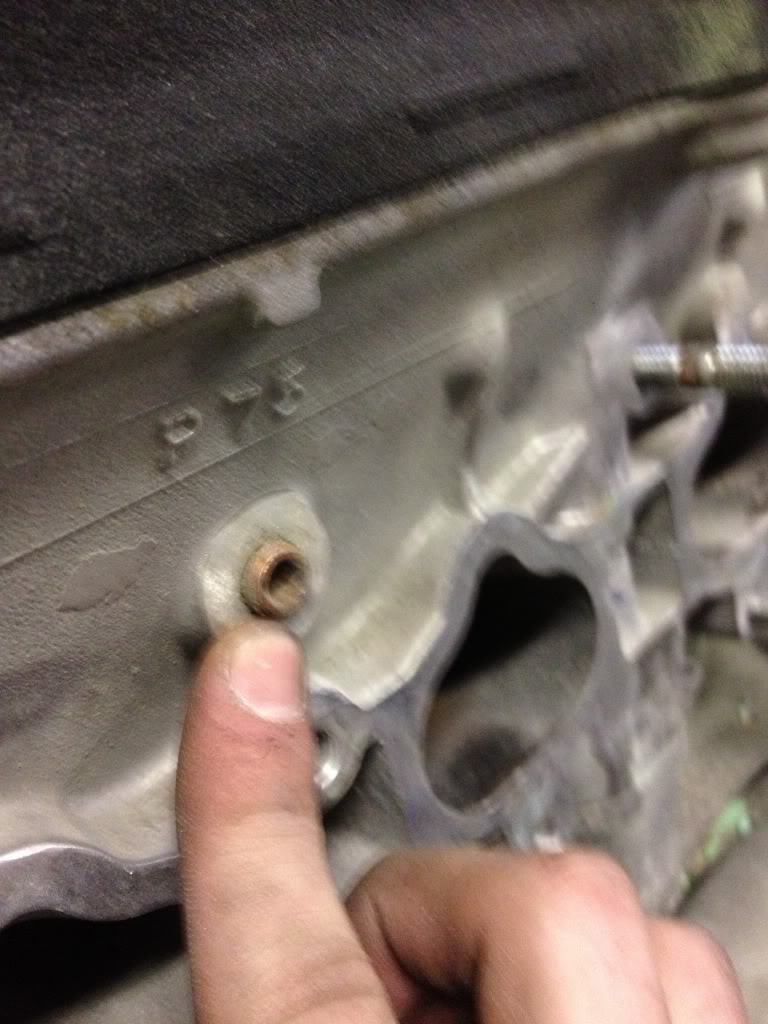
#16
Mmm well I would rather get the most out of the P75 intake mani than do a hack install job like this. You could also have the flange from the B16 intake wielded to the P75. The nice thing about the P75 intake is it make good low end TQ. I lost some low end TQ when I did the B16 head swap and used the B16 intake, not much but the loss was still there. That aside the B20 makes so much low end TQ that putting a ITR style intake on it would not hurt the low end much at all.
03-16-2012, 03:57 PM
#18
Honda-Tech Member
your not going to get crap out of a p75 intake mani. dude I know ls and b20 motors like the back of my hand. Iv been there and done that, tried lots of different setups and Ill say this "hack job" runs the best. by far. biggest gains accrossed the whole powerband with a b16 intake mani. but what would I know..
03-16-2012, 06:30 PM
#19
I know the B16 intake mani is a good stock mani. I run one on my LS Vtec because I did not want to loose low end. I also ran a LS mani on my B18B1 because of the good low end it has, I lost 3 lbft across the board due the the shorter runner B16 intake but its better for a street cat then a Skunk2 or even a ITR IMO. The stock LS intake mani was for sure not a weak point in the setup. A much better and cleaner solution to B16 mani swap would be to use the B20 or LS intake flange and have it TIG wielded onto the B16 intake to make a bolt on swap and a super clean look.
03-16-2012, 06:41 PM
#20
Honda-Tech Member
theres no sense in arguing with you. you don't even understand that a sk2 is just a itr with a badge on it. why have it tig welded which would prob end up looking all funky and end up costing $100 or more when this already works. also the port alignment is slightly different angle from a ls to a b16 so a welded flange is going to screw up the runners either way. your argument is that this is jank or ghetto is invalid with me. it works and you won't even really notice it once its it the bay.
03-16-2012, 07:06 PM
#21
03-16-2012, 07:13 PM
#22
theres no sense in arguing with you. you don't even understand that a sk2 is just a itr with a badge on it. why have it tig welded which would prob end up looking all funky and end up costing $100 or more when this already works. also the port alignment is slightly different angle from a ls to a b16 so a welded flange is going to screw up the runners either way. your argument is that this is jank or ghetto is invalid with me. it works and you won't even really notice it once its it the bay.
03-16-2012, 07:42 PM
#25
Do you have dyno tests to show this? Reason being is I made 143whp and 138tq on a bone stock B20z with stock exhaust manifold with an LS manifold and a larger throttle body. I realize the B16 runners likely flow better, but not really how much better if we're talking about running NA on a stock engine.
Last edited by nealnanoHX; 05-29-2013 at 05:57 PM.