
Fuel Return DIY
 03-04-2011, 02:06 PM
#1
DC5/EP3 MOD :)
Thread Starter
stock RSX fuel system uses a single fuel line to the stock fuel rail, it pressurizes this rail to stock fuel pressure of 43-47PSI. It has an un-adjustable FPR in the stock fuel cage in the tank.
When you add boost to any engine, you need to be able to increase fuel pressure to match what the intake manifold/supercharger manifold is seeing. For example, if you put 15PSI into an engine, the stock fuel system is pushing fuel at 43psi. So the engine side of the fuel injector is seeing 15psi, so now you're down to 28psi on the fuel rail. 43-15=28psi. The less fuel pressure provided to the injector, means the injector needs to stay open longer to provide the needed fuel to the engine. More boost = larger fuel requirement. You can start to see the problem here.
your injectors will run a much higher duty when in boost with the stock fuel system. Even with an upgraded pump you won't get around this.
when you add a return line and a 'full fuel system' you provide much more fuel to the fuel rail at all times, also the fuel pressure regular will increase fuel pressure at 1:1 rate. You run a boost line from the intake manifold into the fuel pressure regulator and as intake pressure rises, the outlet hole in the FPR gets smaller, thus making the fuel trying to escape become more pressurized. Any excess fuel that the pump is pumping from the tank returns back into the tank to make the trip again.
I hope this better explains it for everyone.
So today even though I’m busted up from surgery I decided I would finally finish my fuel system. I had pretty much been done and just awaiting some new parts from Hybrid Racing.
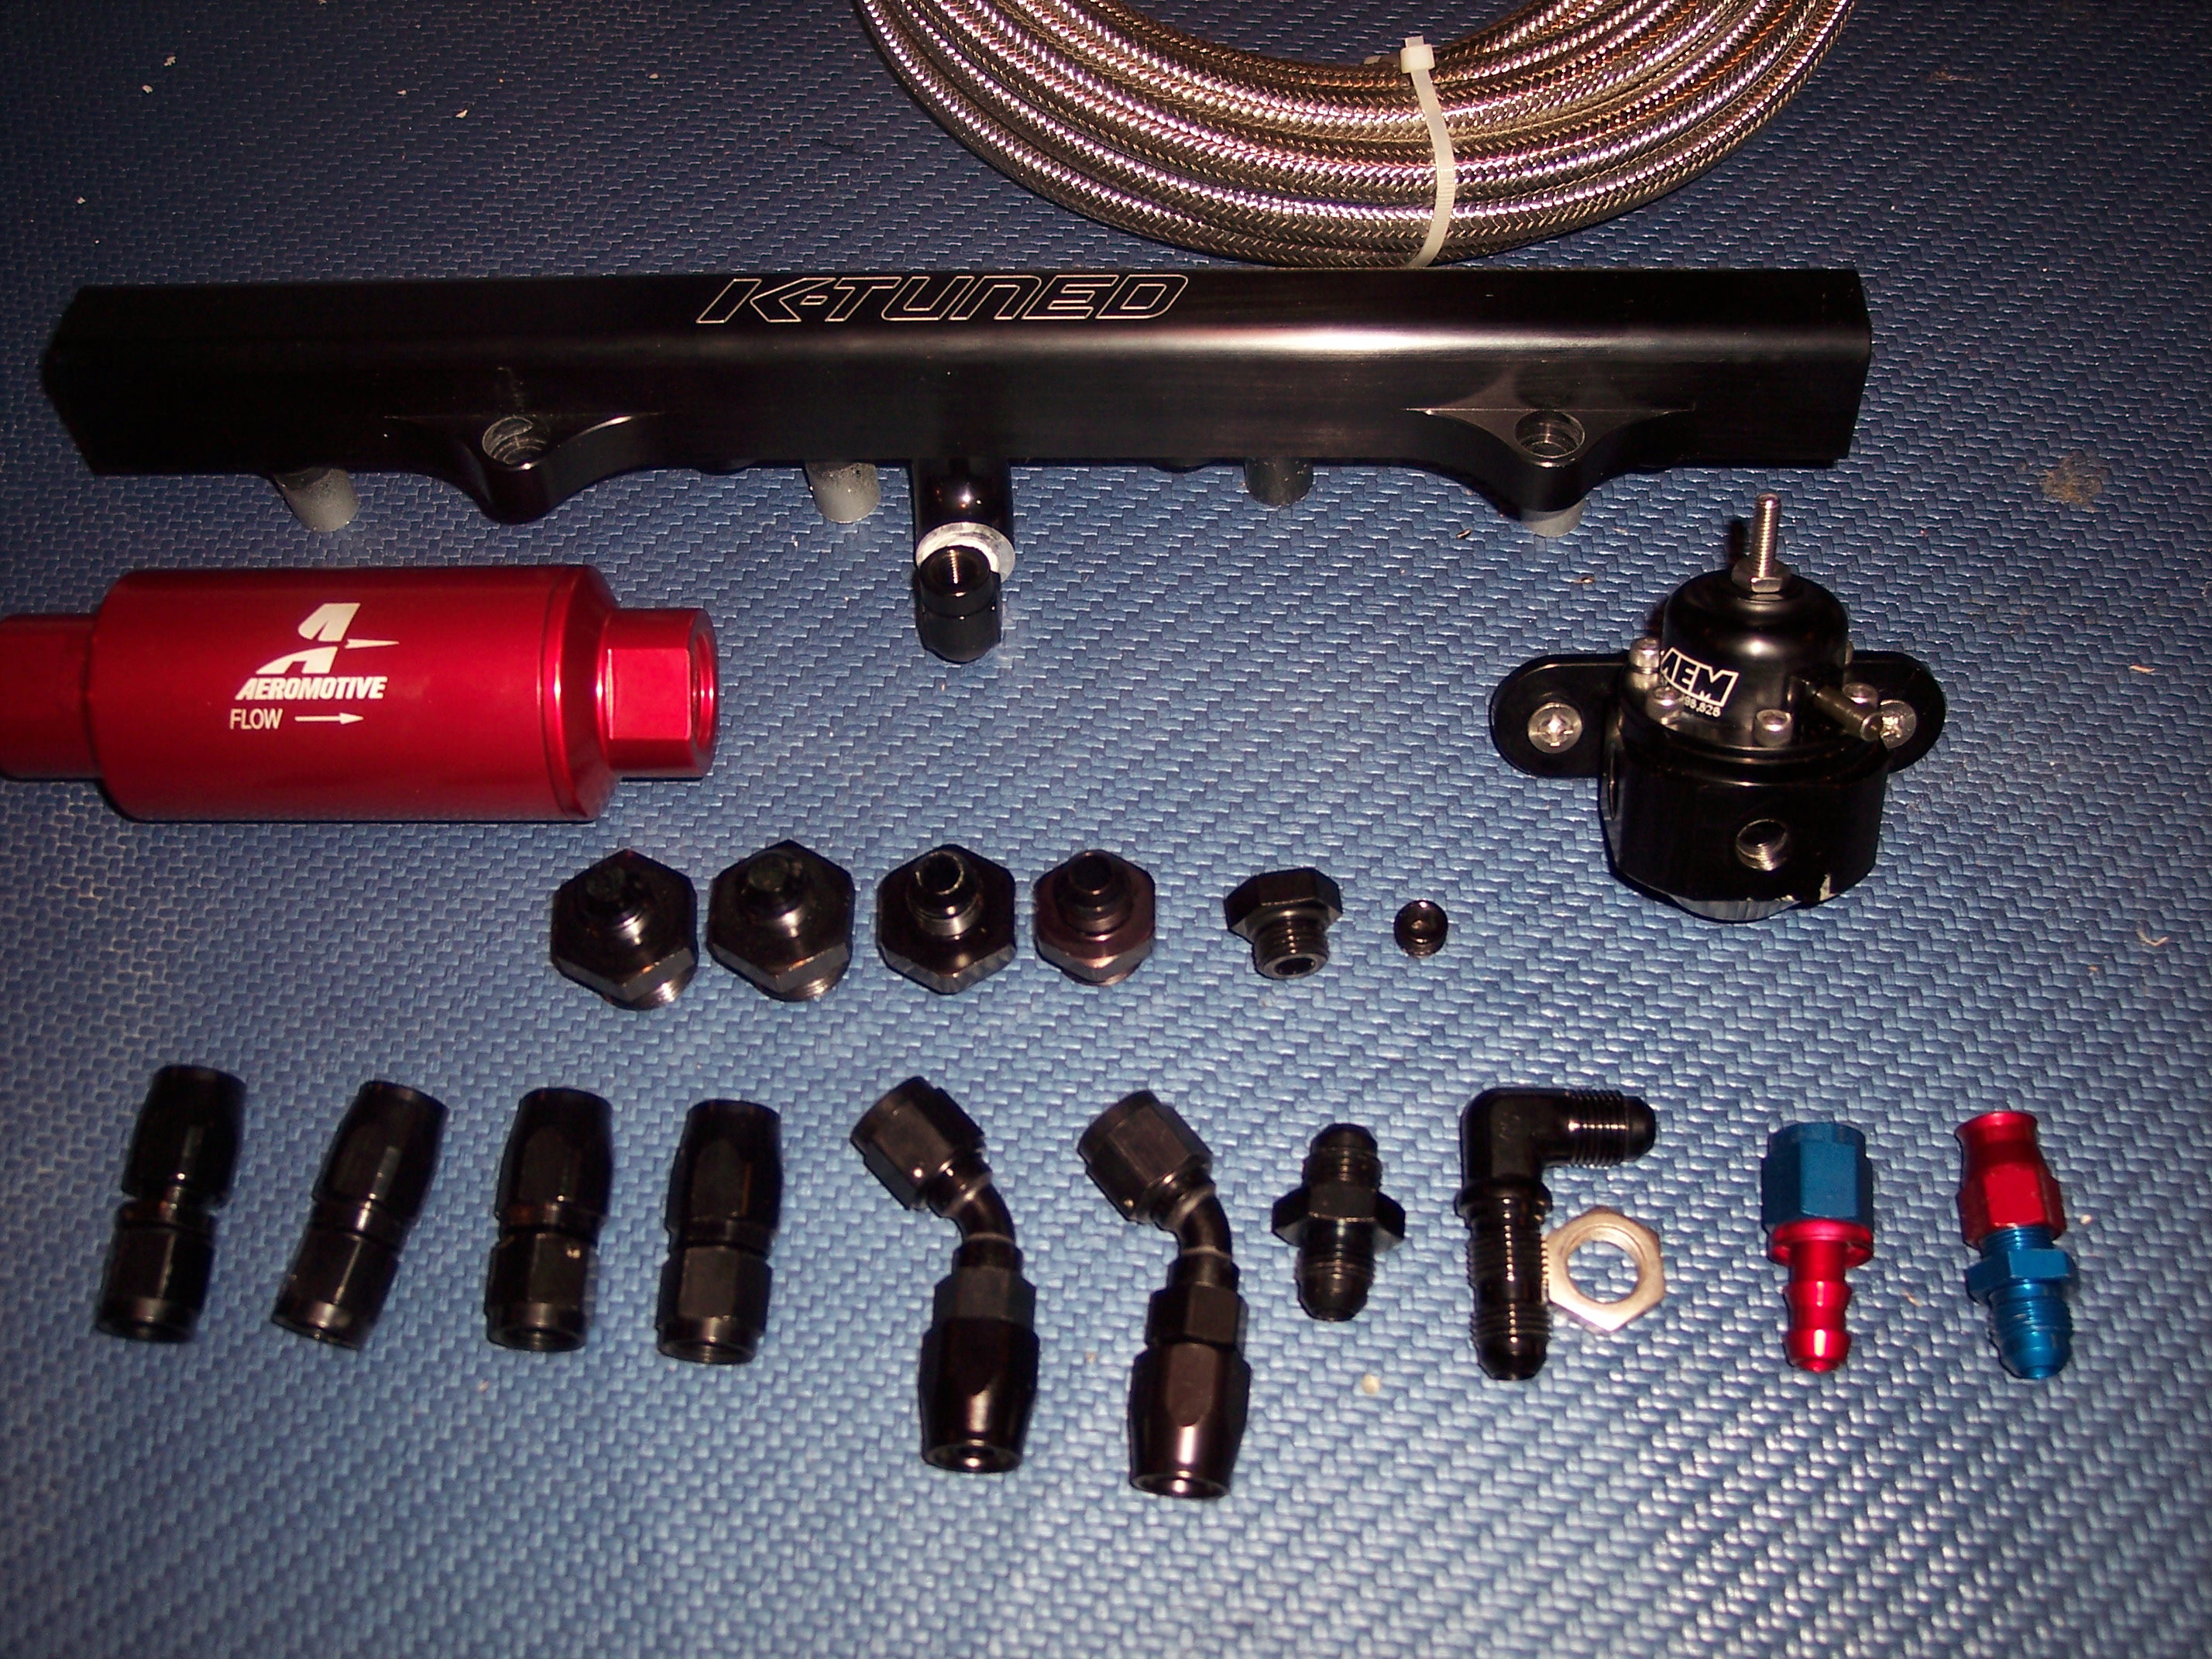
There are a lot of parts involved in doing a full fuel system with return line. This process is not cheap. I’ve seen people spend up to $1k in just their fuel setup. I believe I spent almost $600 myself. Here are some of the parts.. I know I’ll be missing some misc…
After Market Fuel Rail
Fuel Pressure Gauge
Fuel Pressure Regulator
Inline Fuel Filter
Aftermarket Fuel Pump
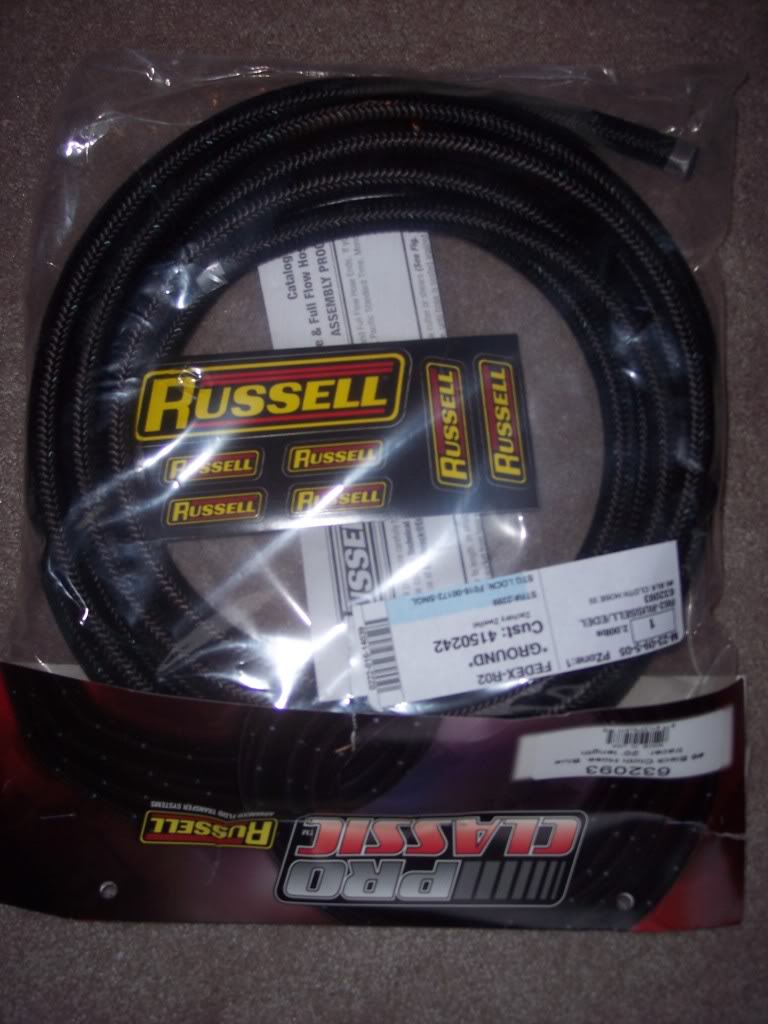
20ft -6an Fuel Line
3/8” and 5/16” submersible fuel hose
lots of AN fittings (I’ll explain all I used in the DIY steps)
Hose clamps
Zip Ties
So lets get started…. The first thing you need to do is install your new fuel pump. I already have a DIY on installing a pump without a return. So start with this DIY to take out the pump and modify the cage
https://honda-tech.com/forums/showth...=diy+fuel+pump
Now lets start the new process!
So I started my new fuel setup today.
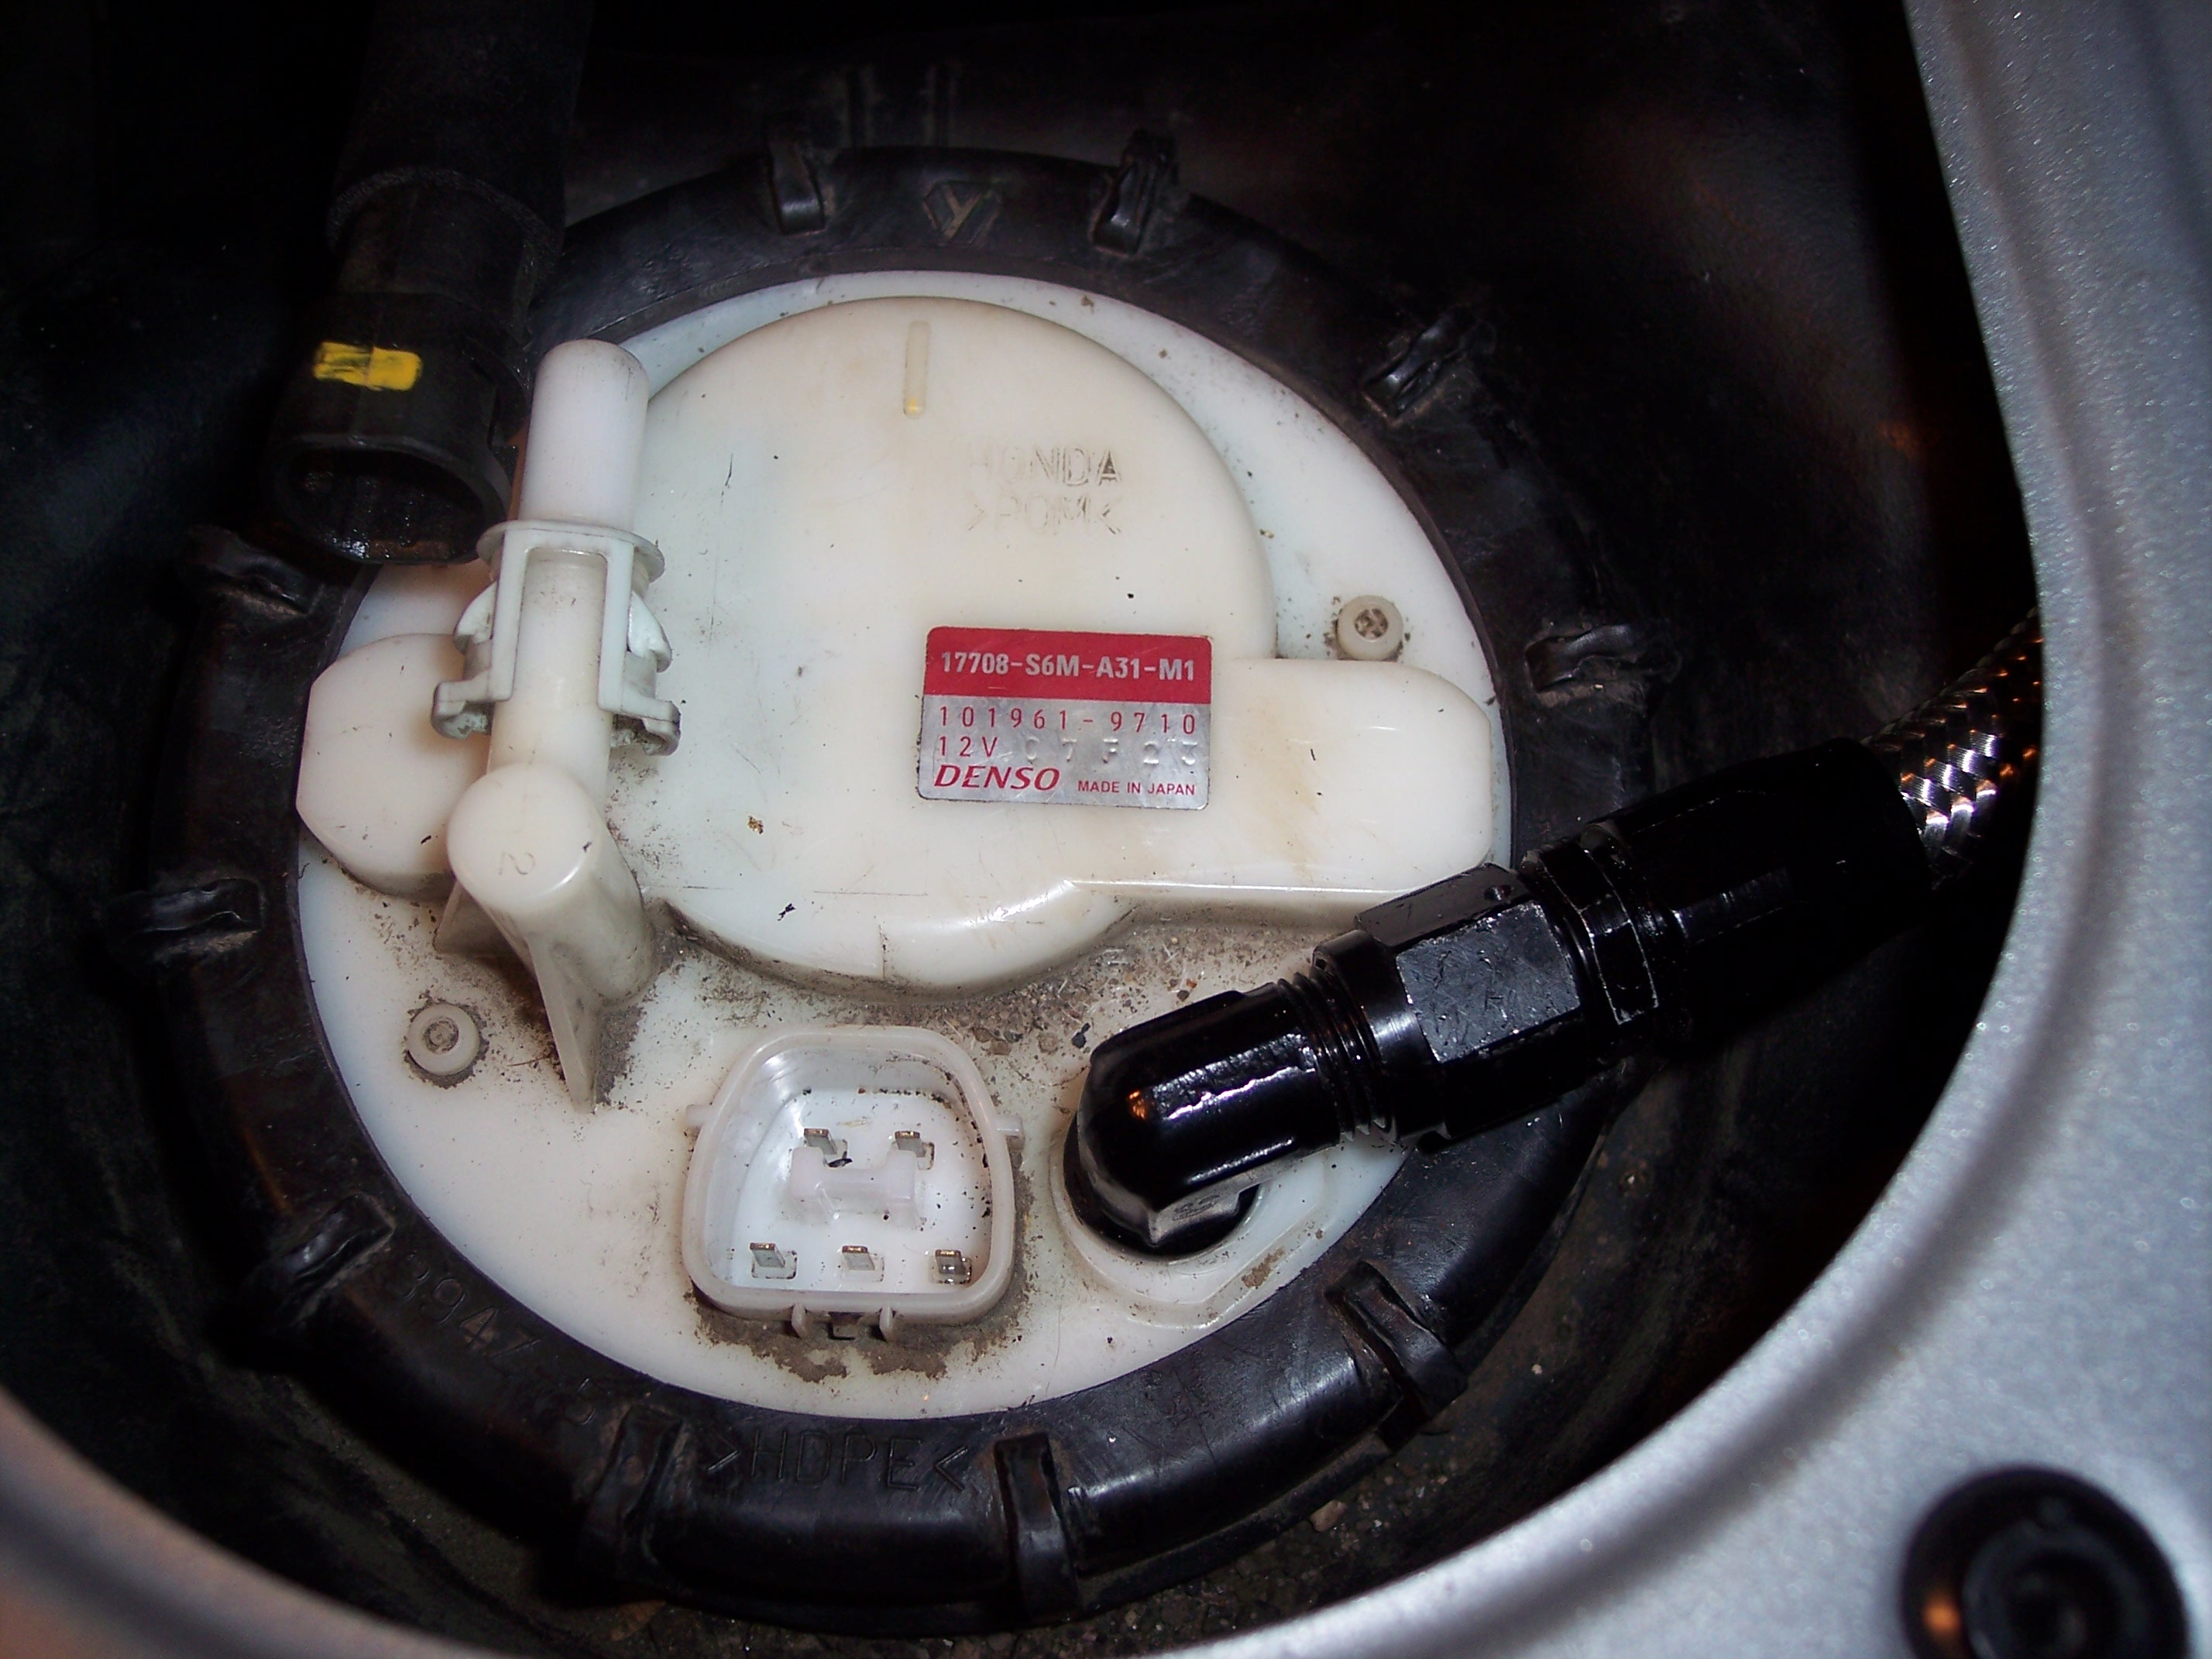
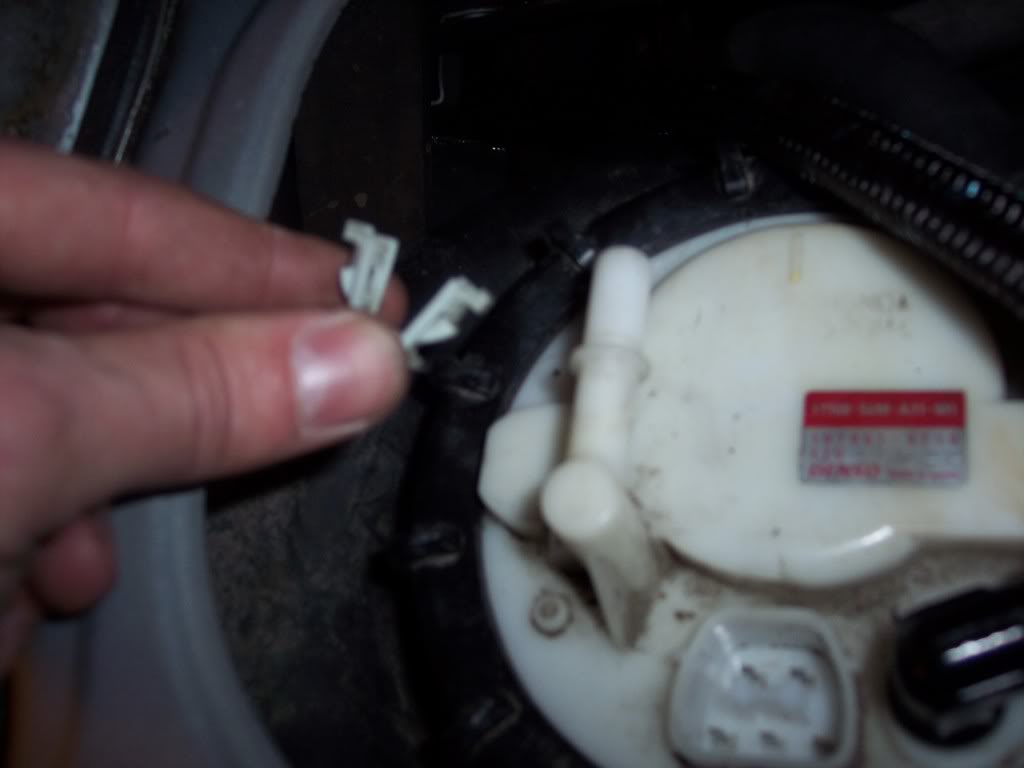
Basically I pulled the pump back out. I already had a 255lb pump installed. But now I'm adding a new feed and return setup. So first I dismantled the fuel pump assembly
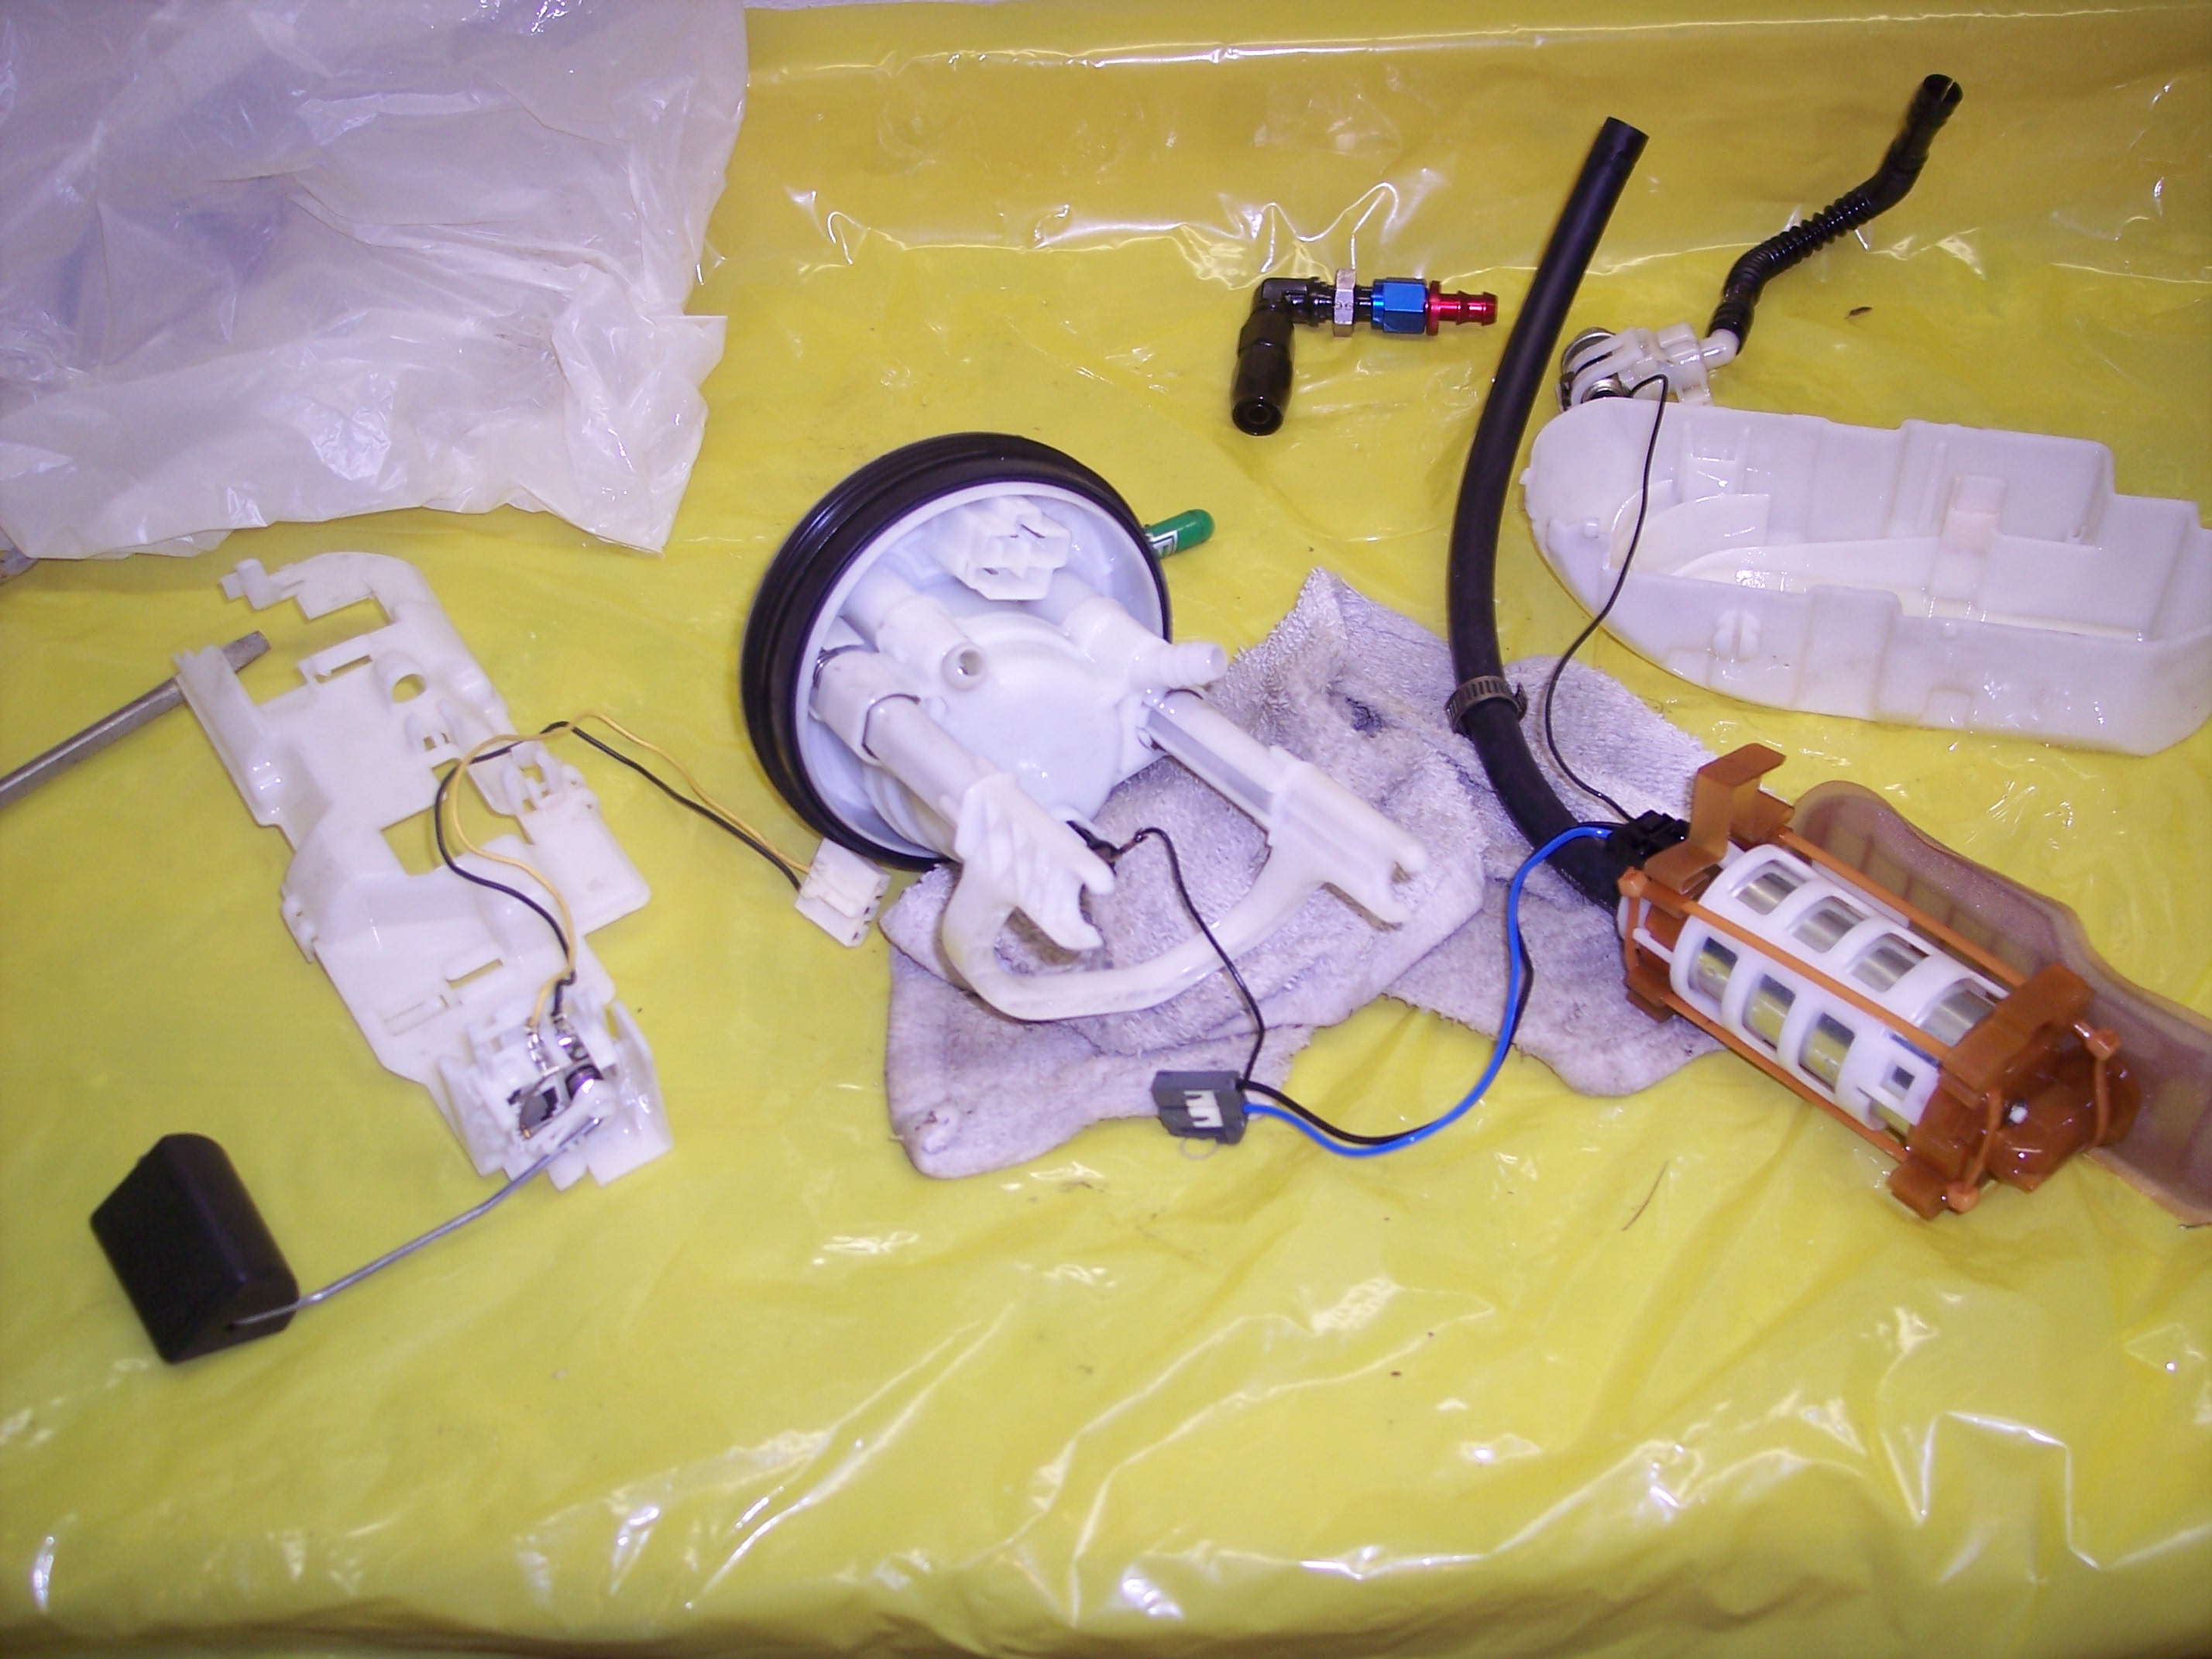
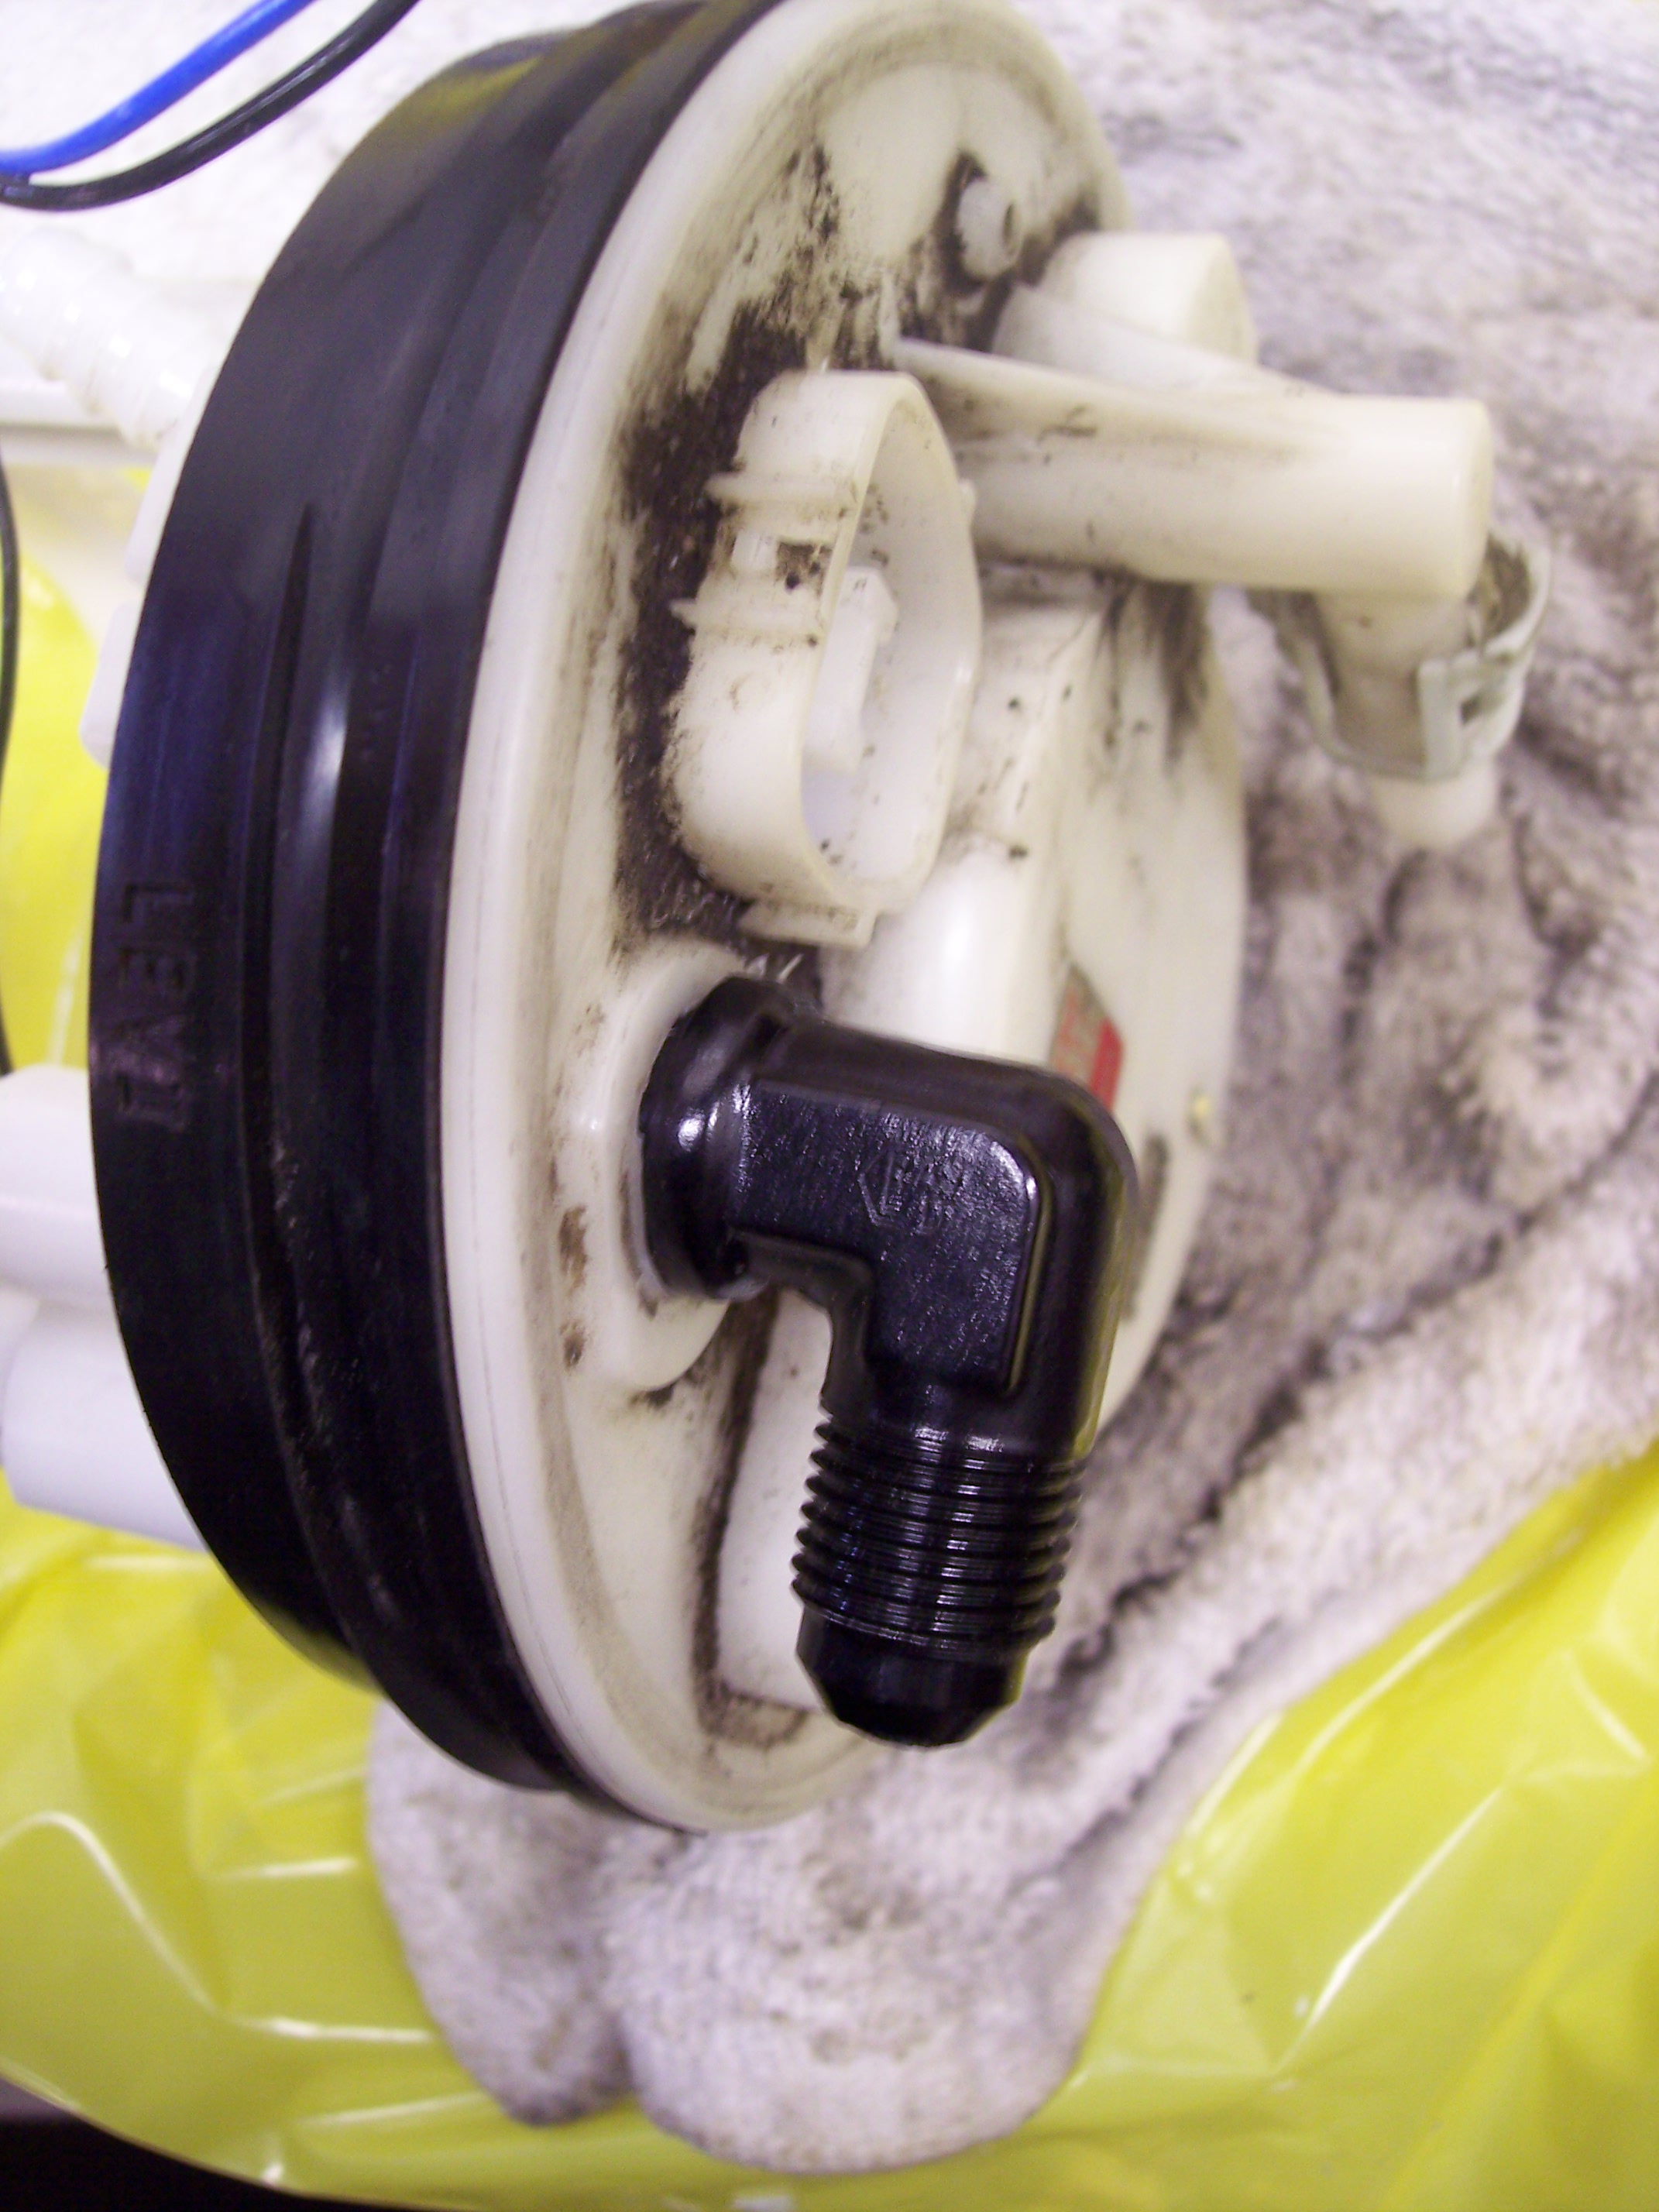
Then I went and place the nut on the bottom where I will be drilling. You will need this nut. You will also need a 90* male to male 6an fitting to go through the pump. Also I used a 6an to 3/8” barb fitting inside the pump. You can see the fittings in the picture above.
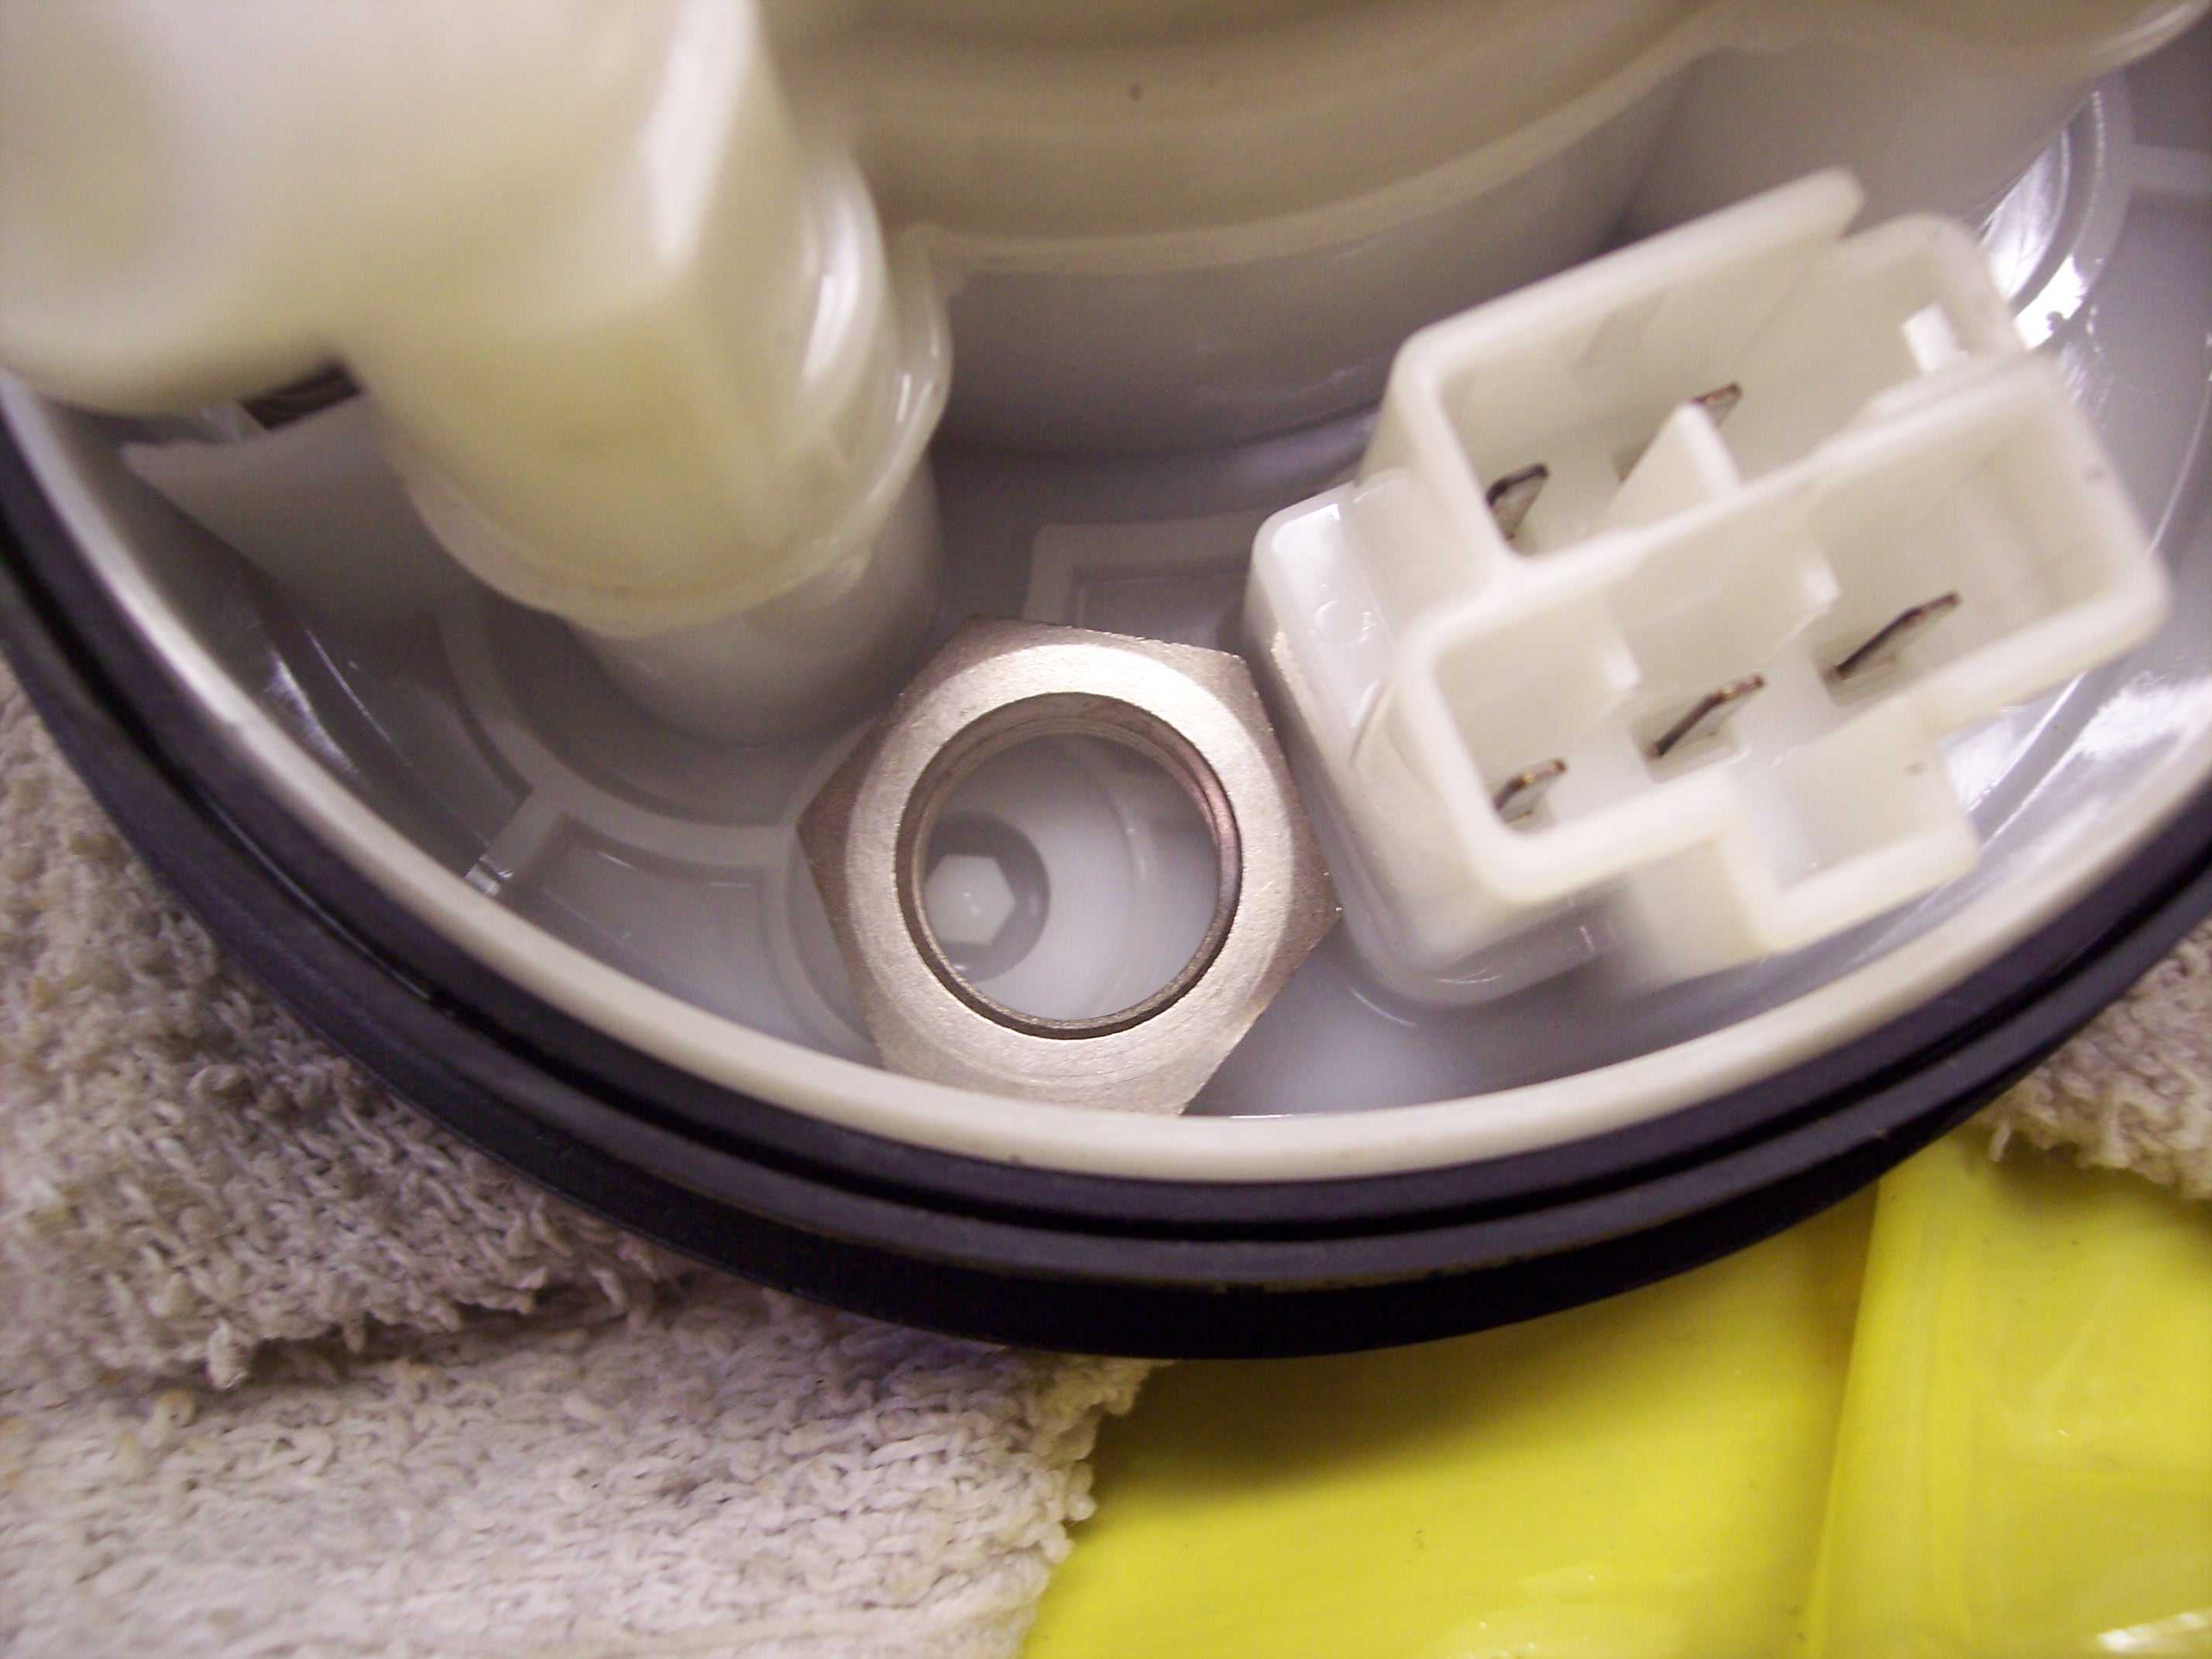
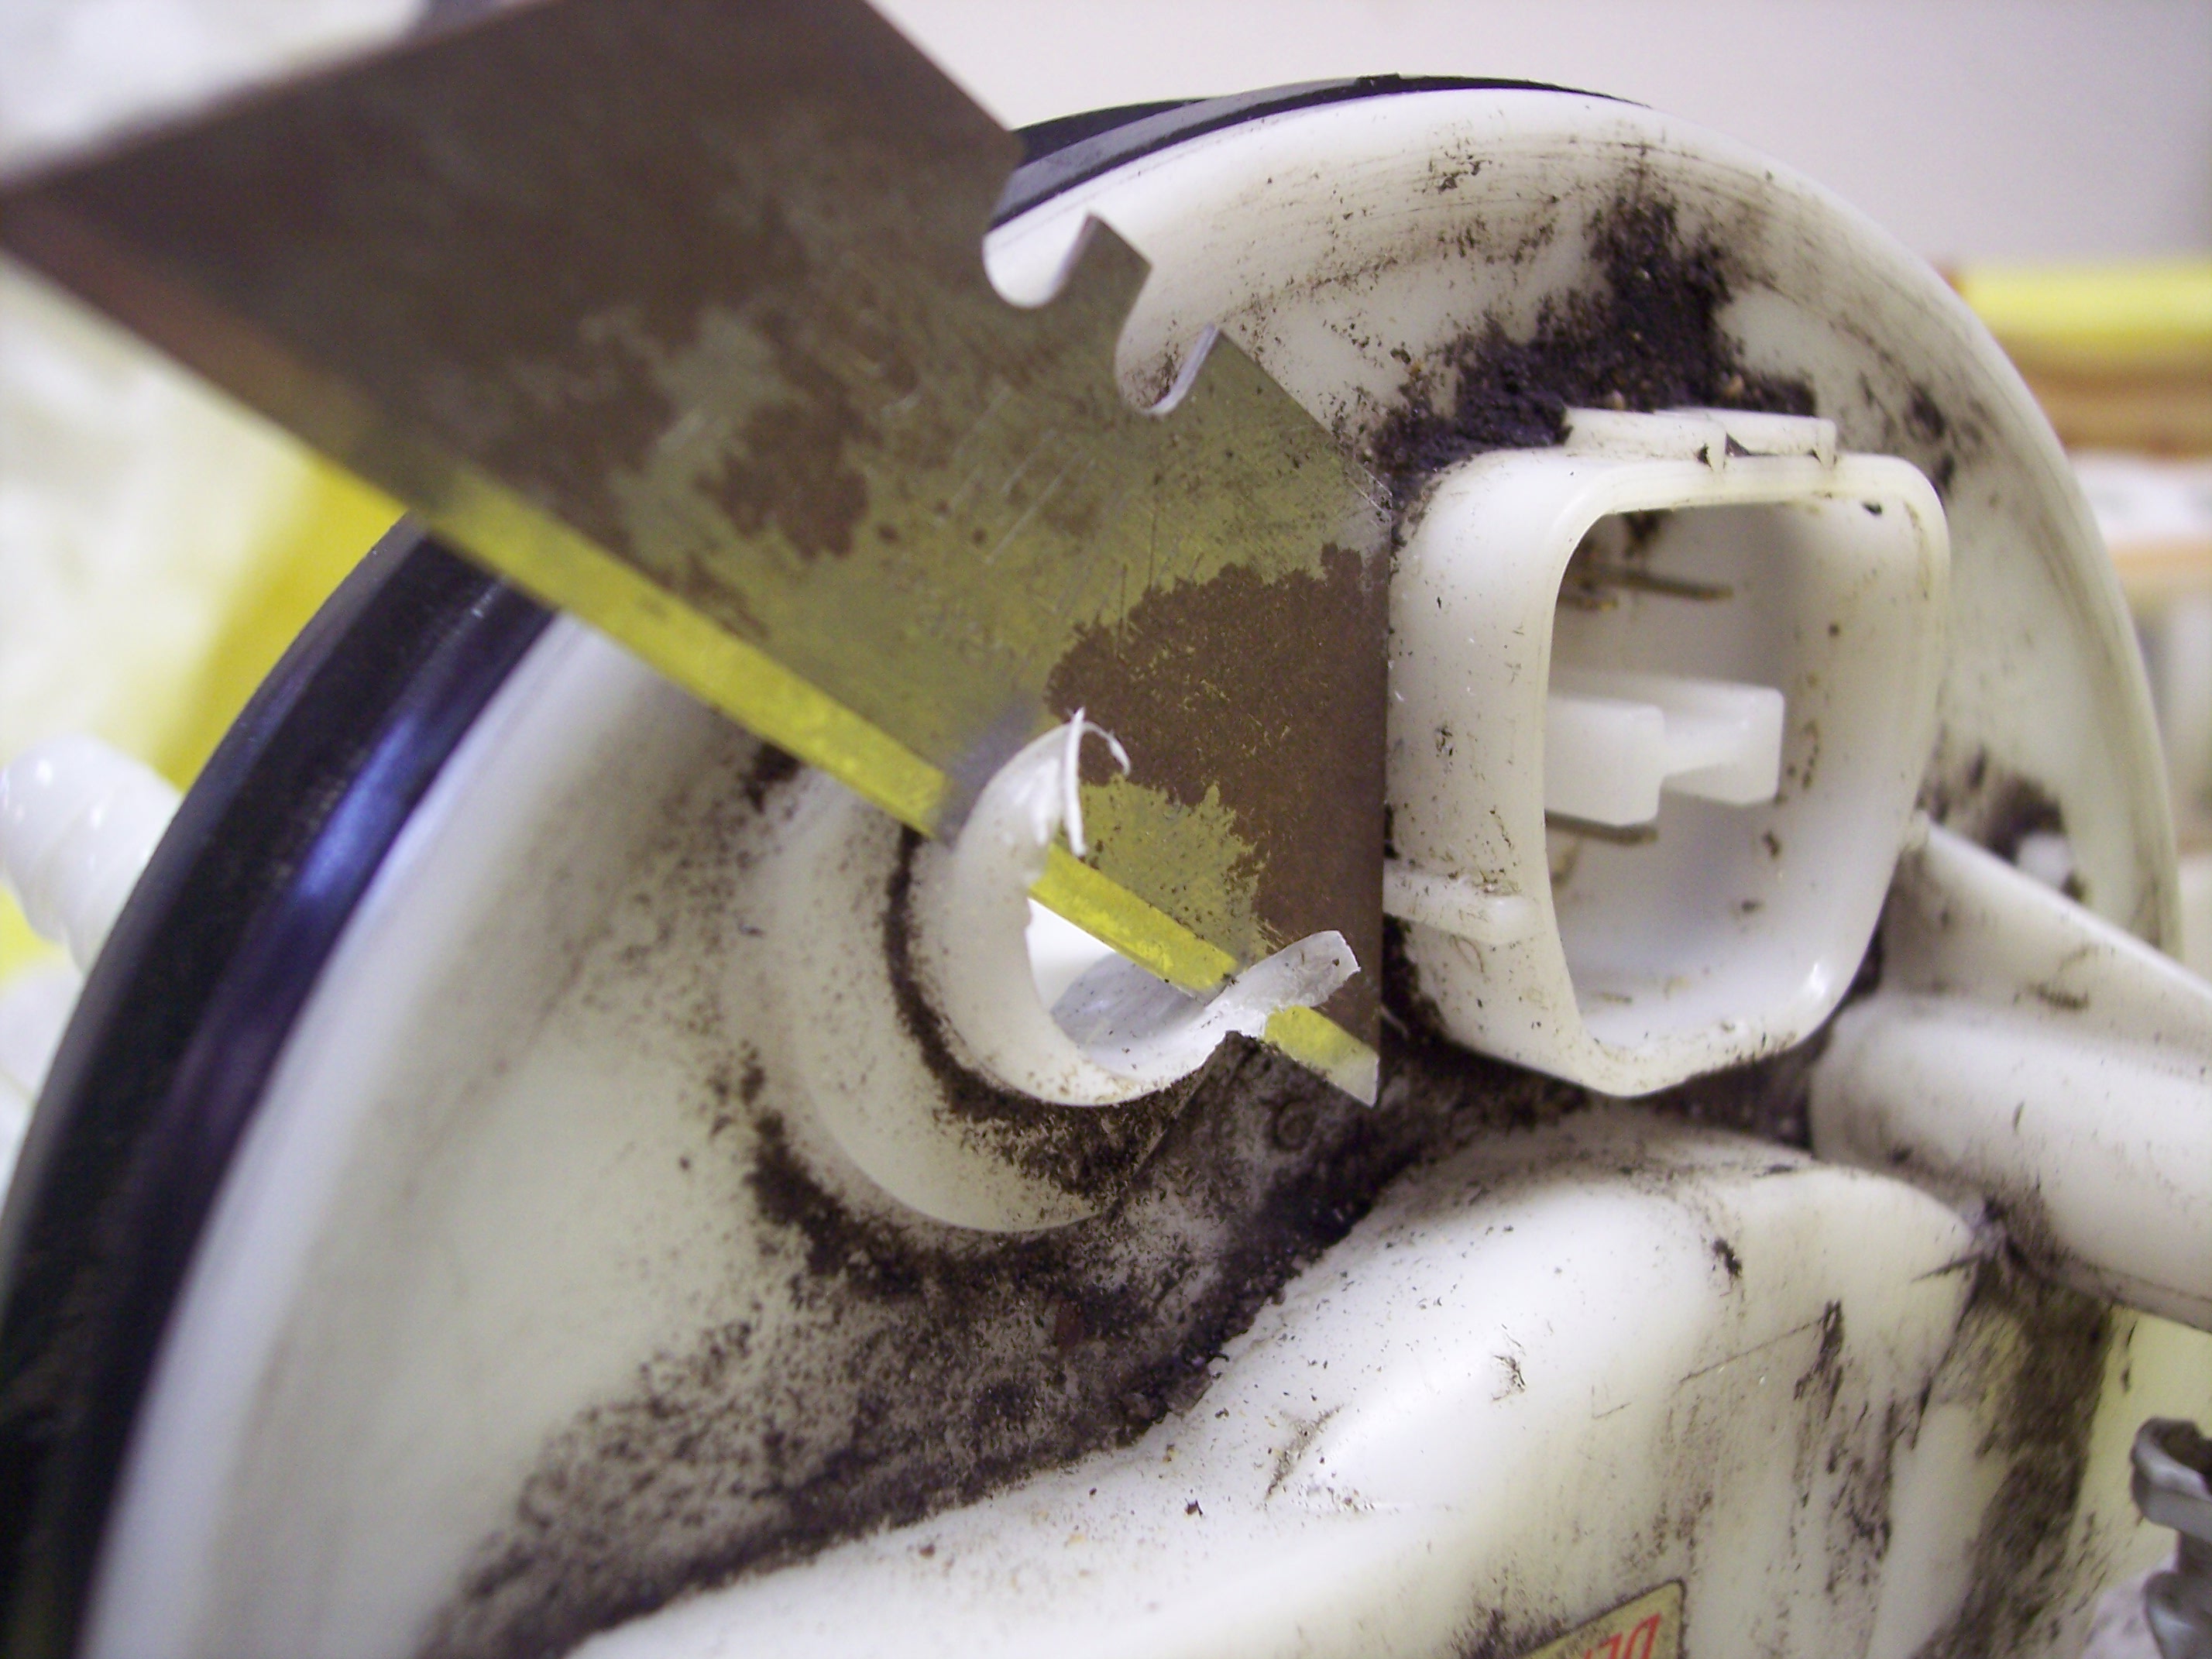
Then I drilled out the hole. I used a blade to clean up the burrs and etc
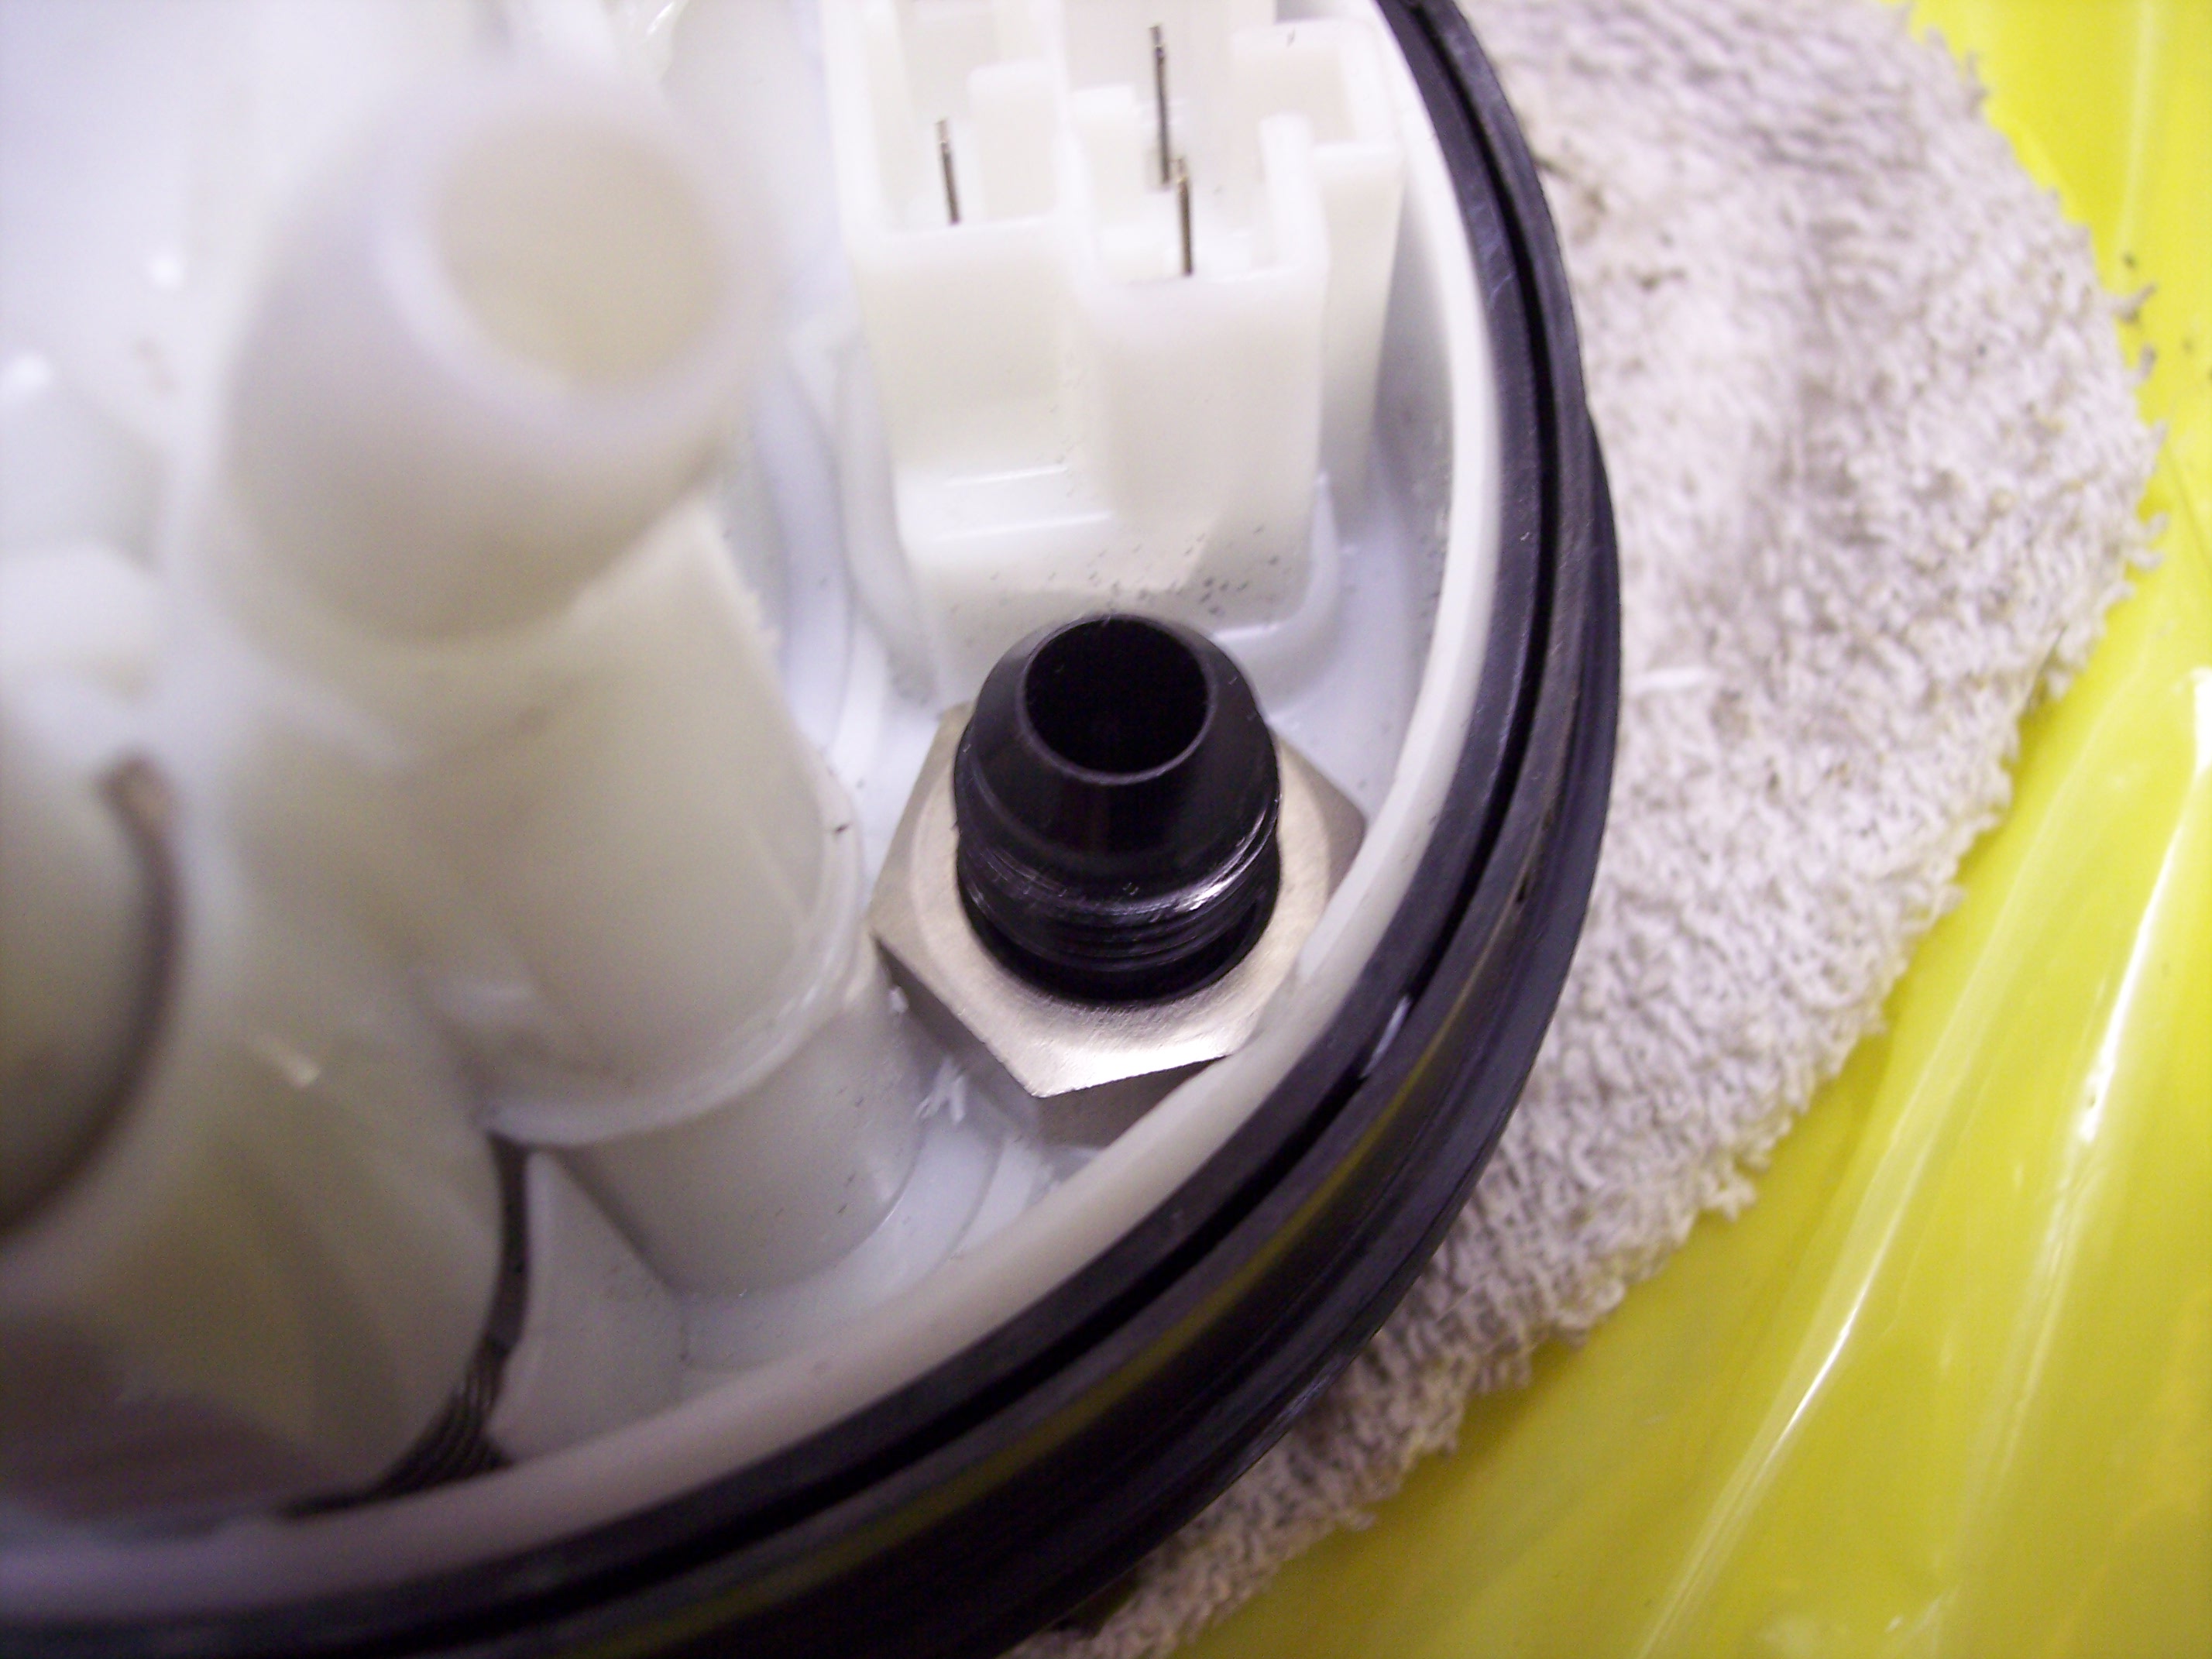
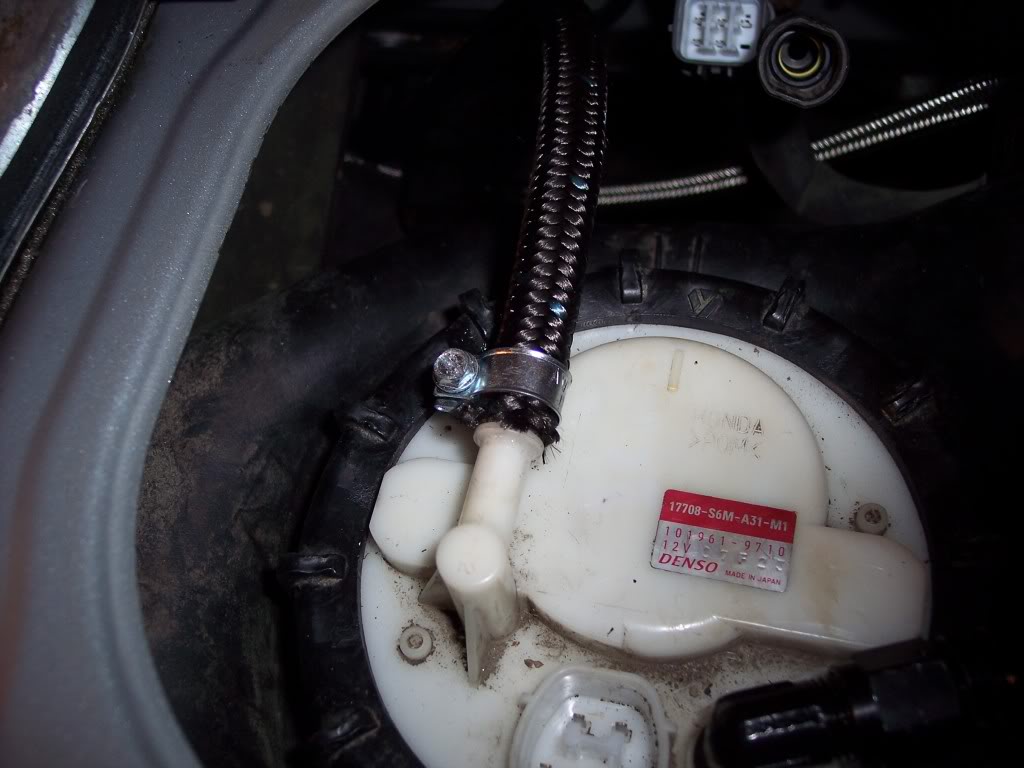
Now I placed my new fitting threw the hole
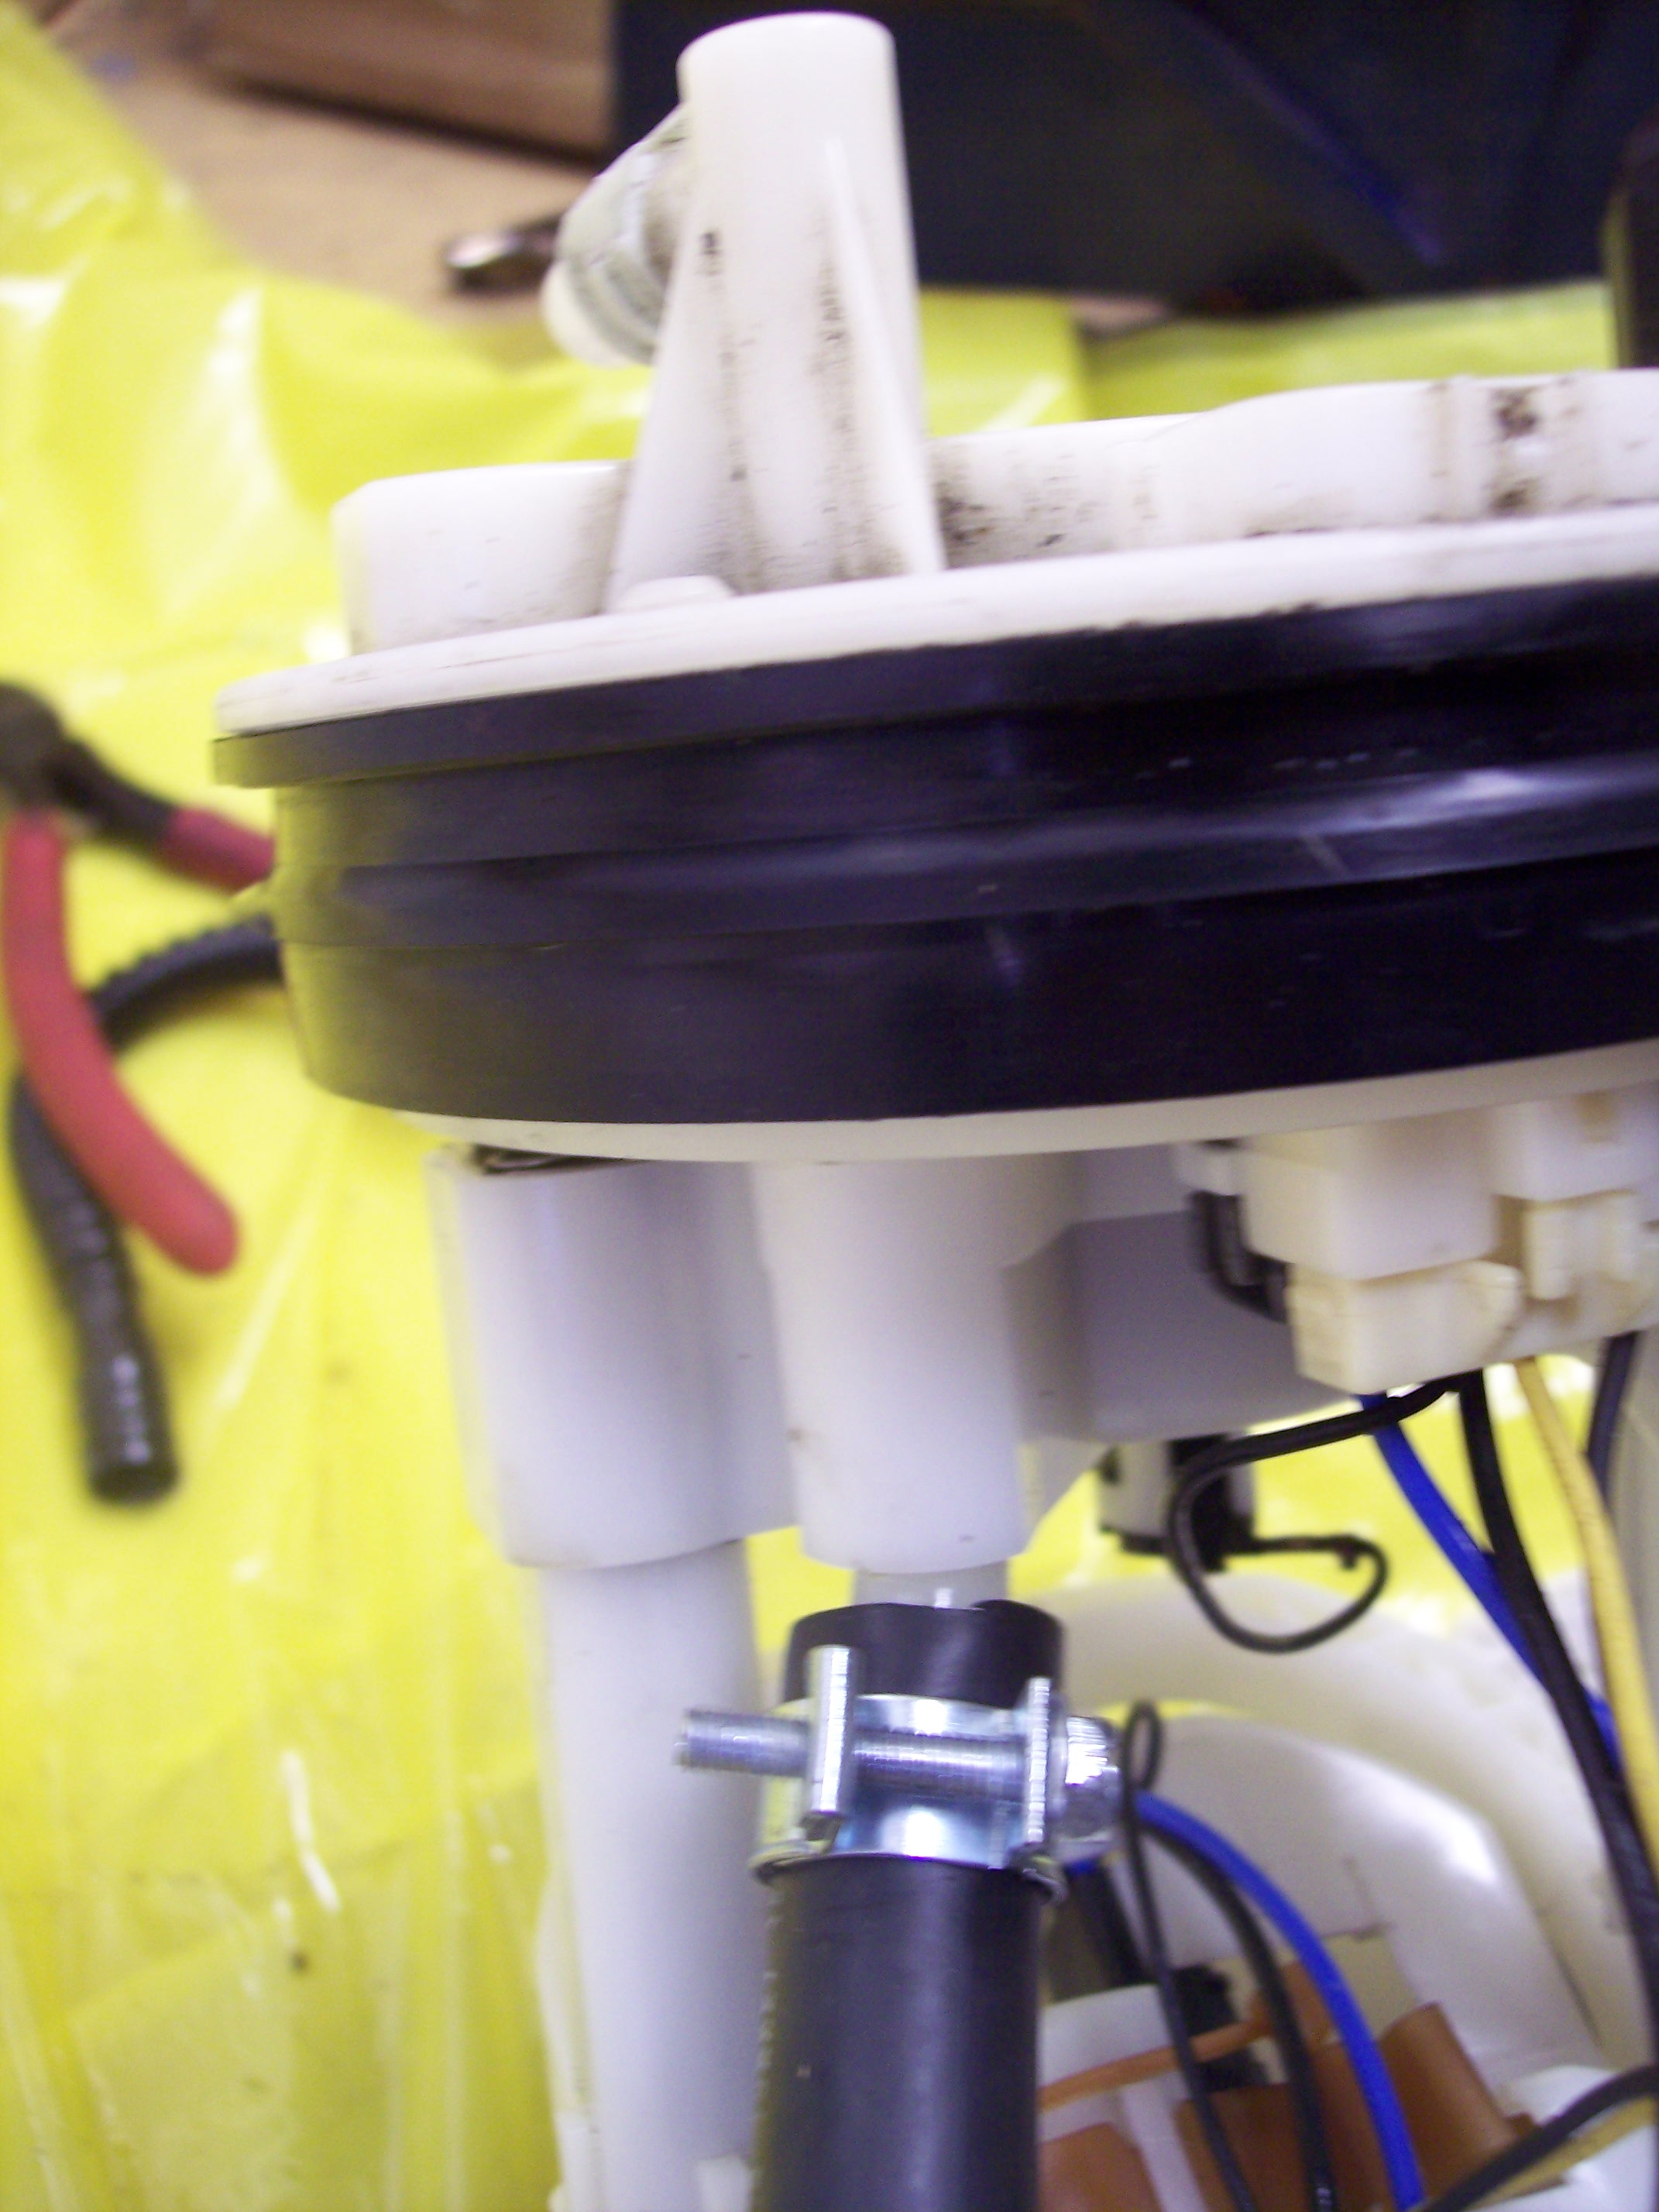
Now I attach the barb connector and redo the hoses. I use the stock feed nipple as the return and connected the hose from the feed nipple to the return on the cage. Then route the pump to the new added barb fitting you drilled in.
And put the pump back in the tank. Now to start the lines....
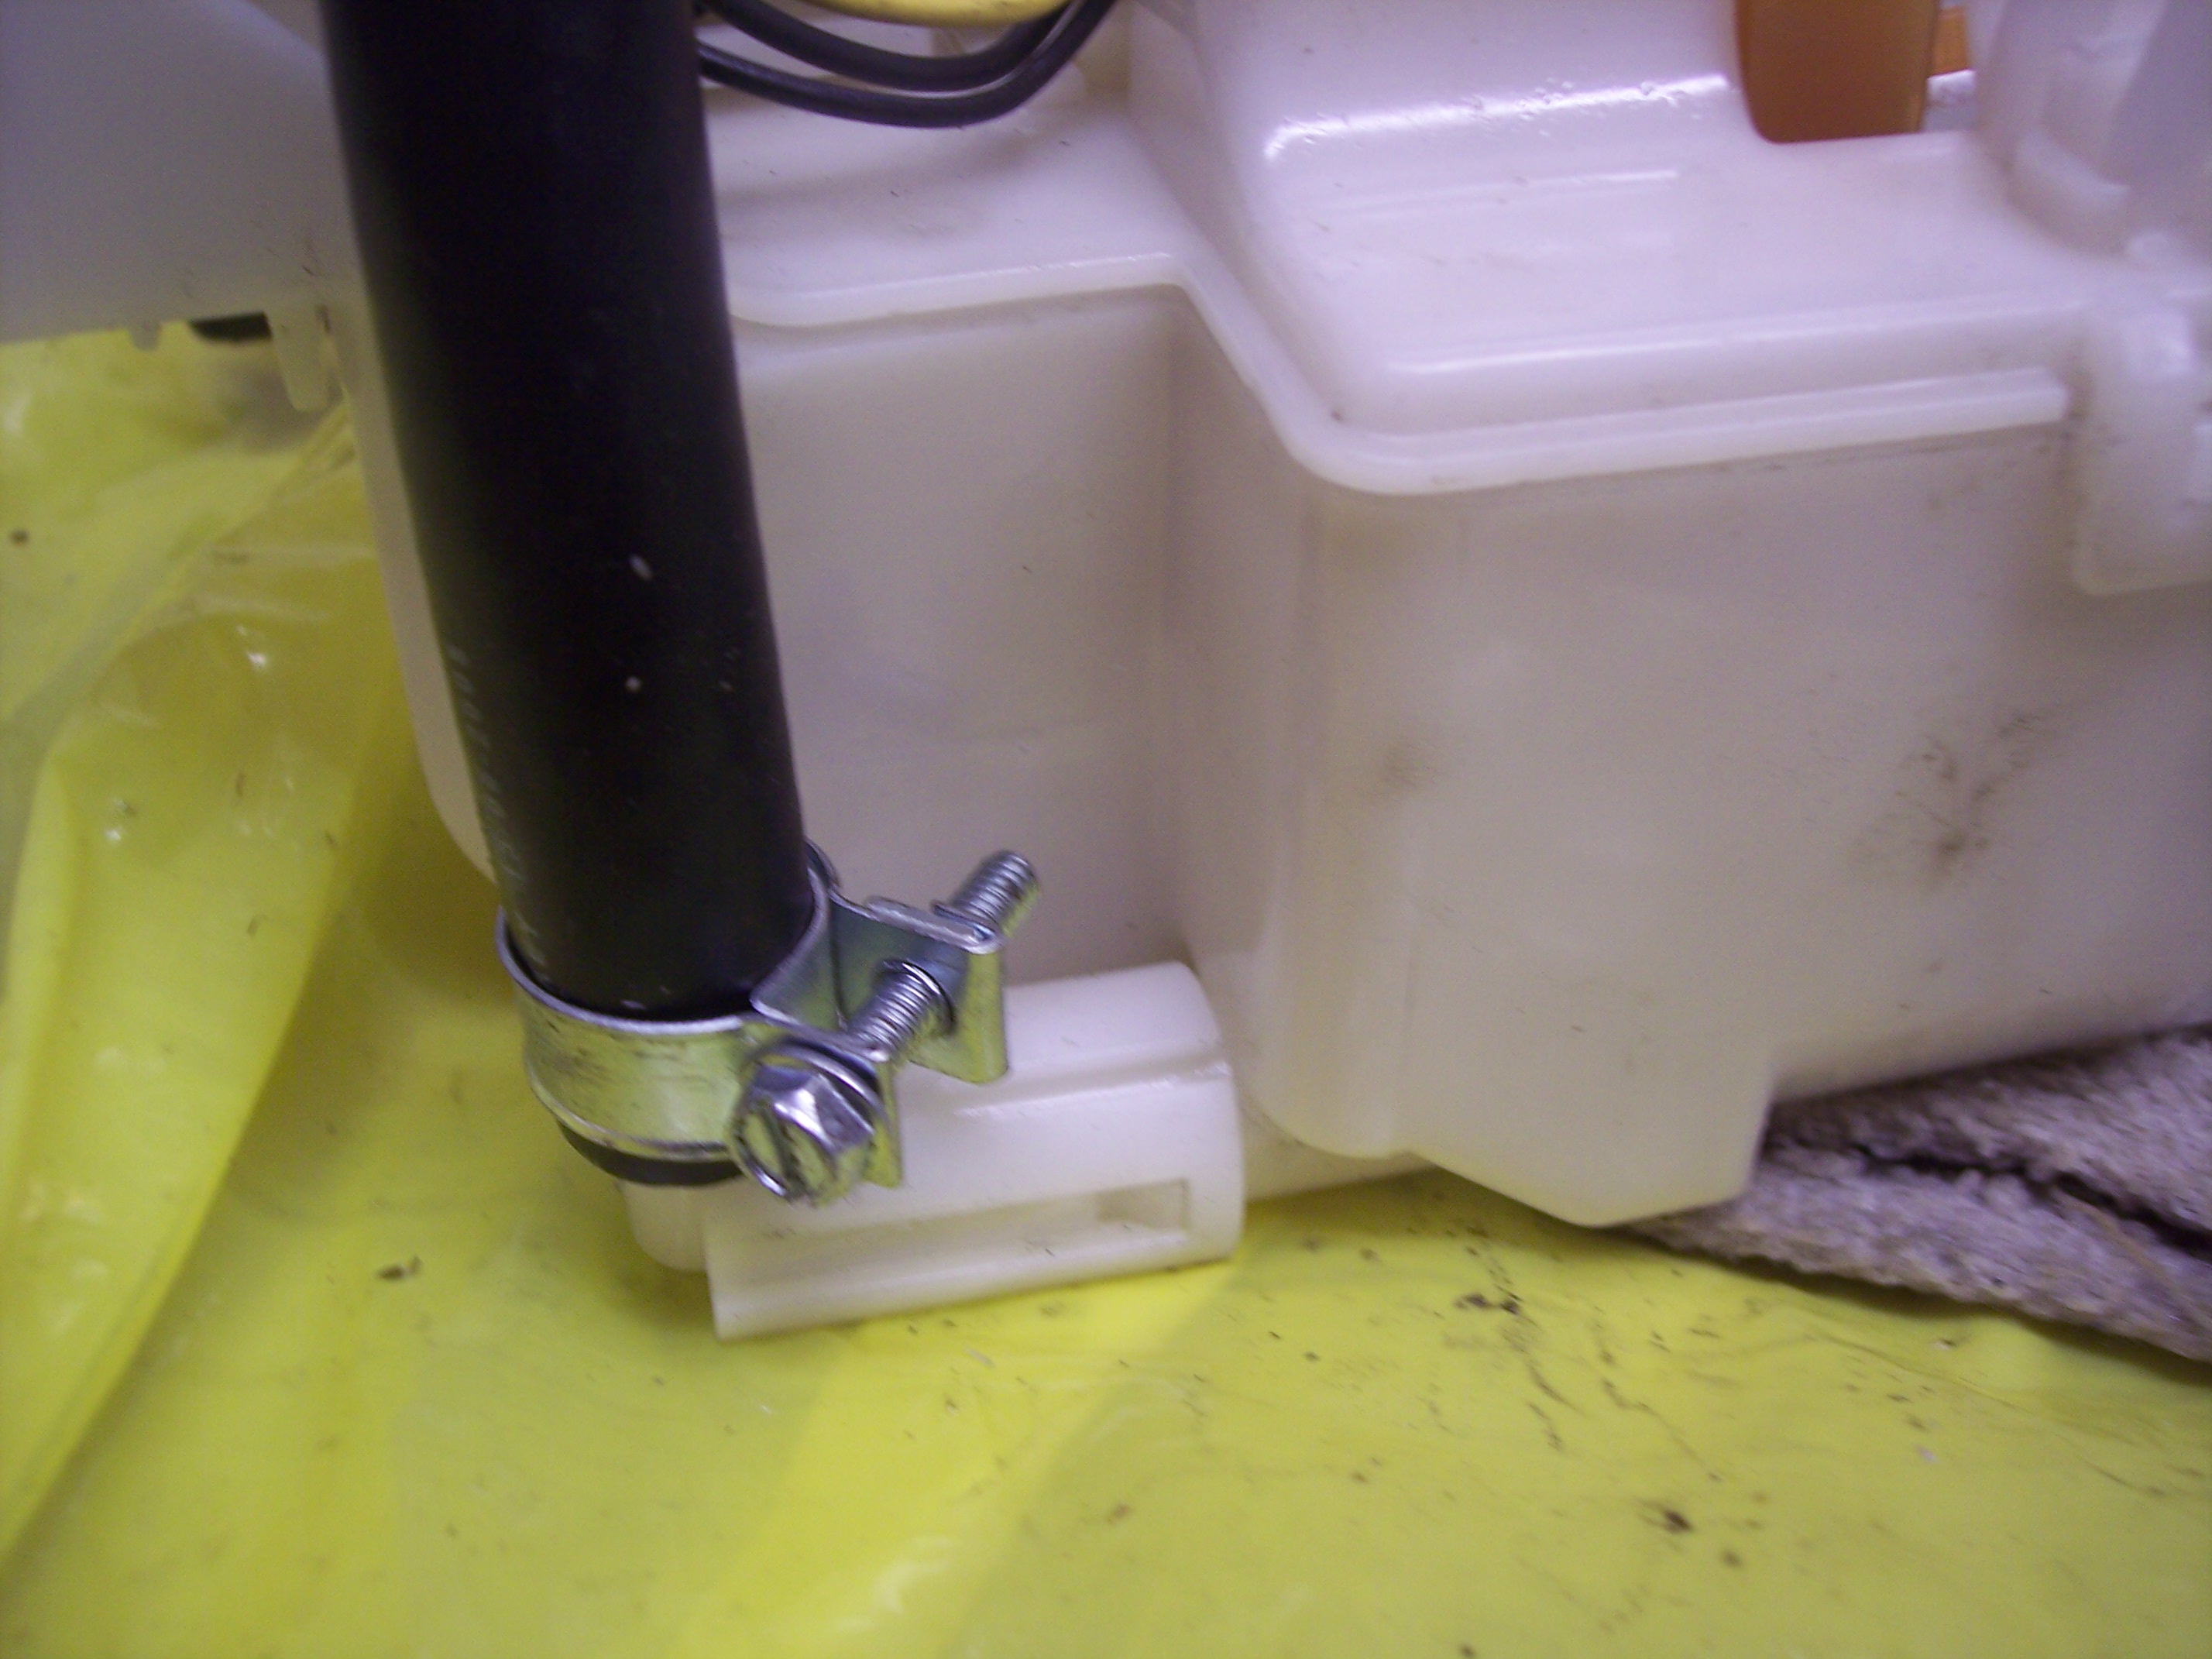
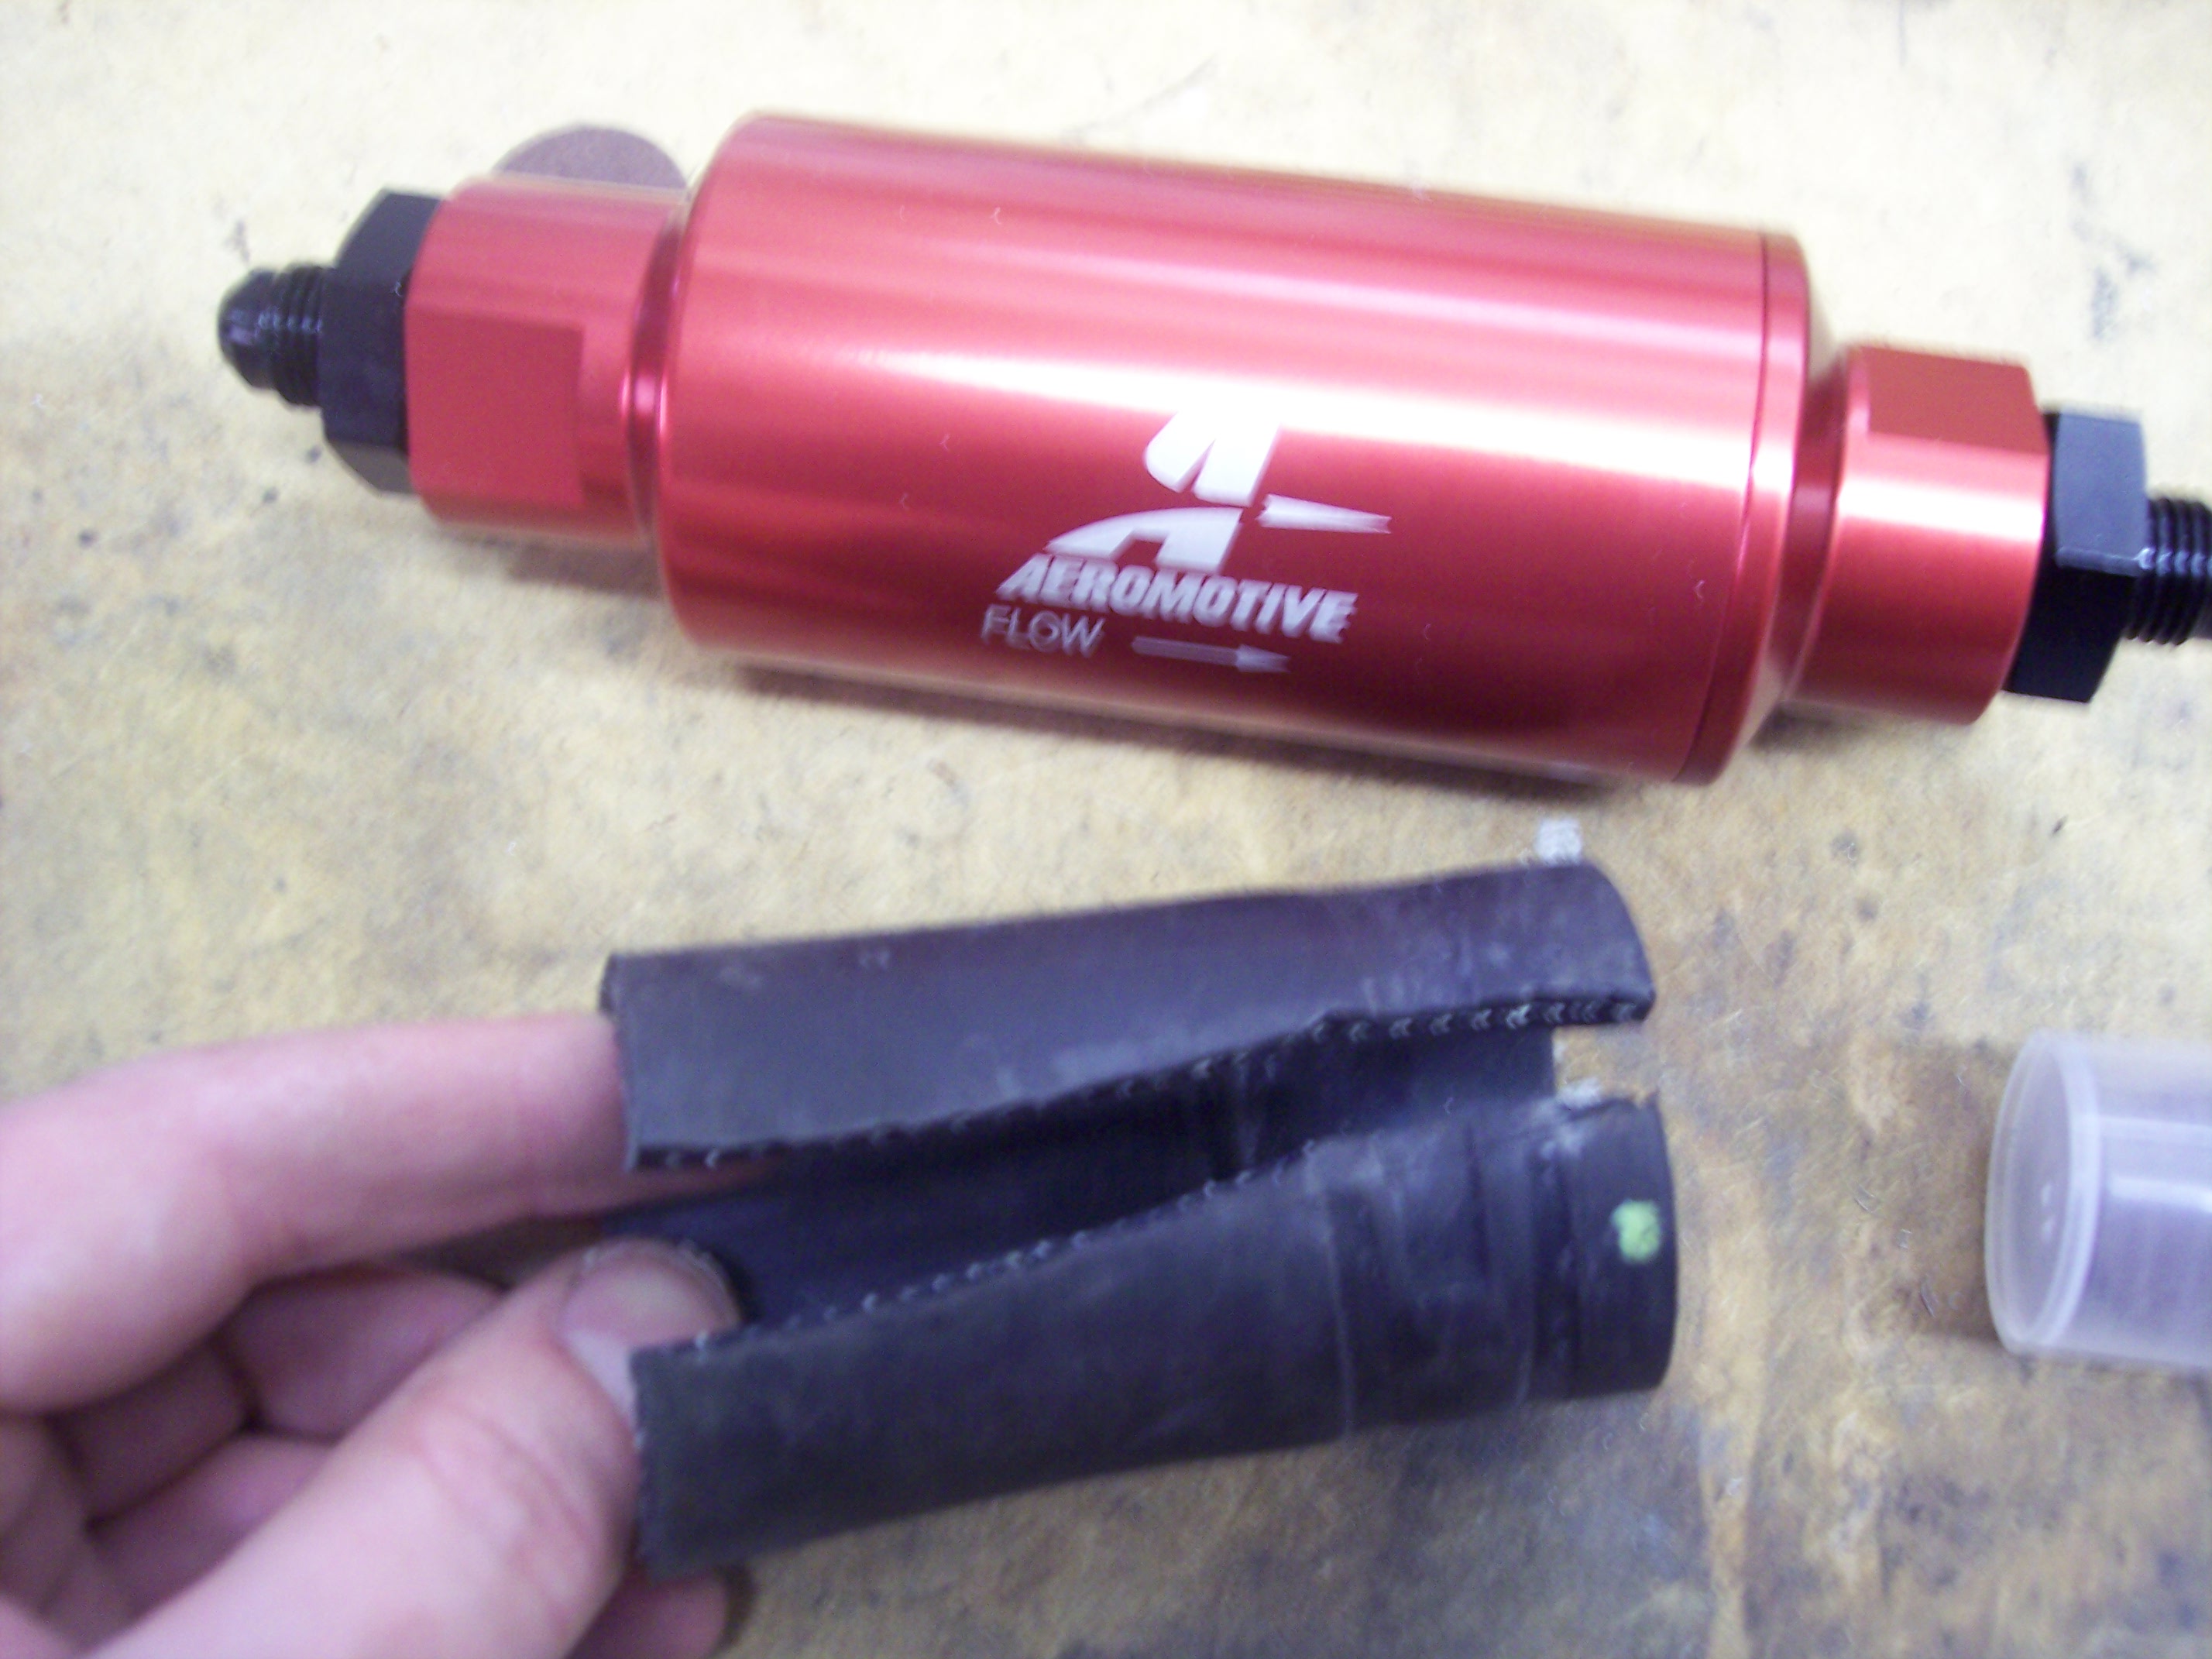
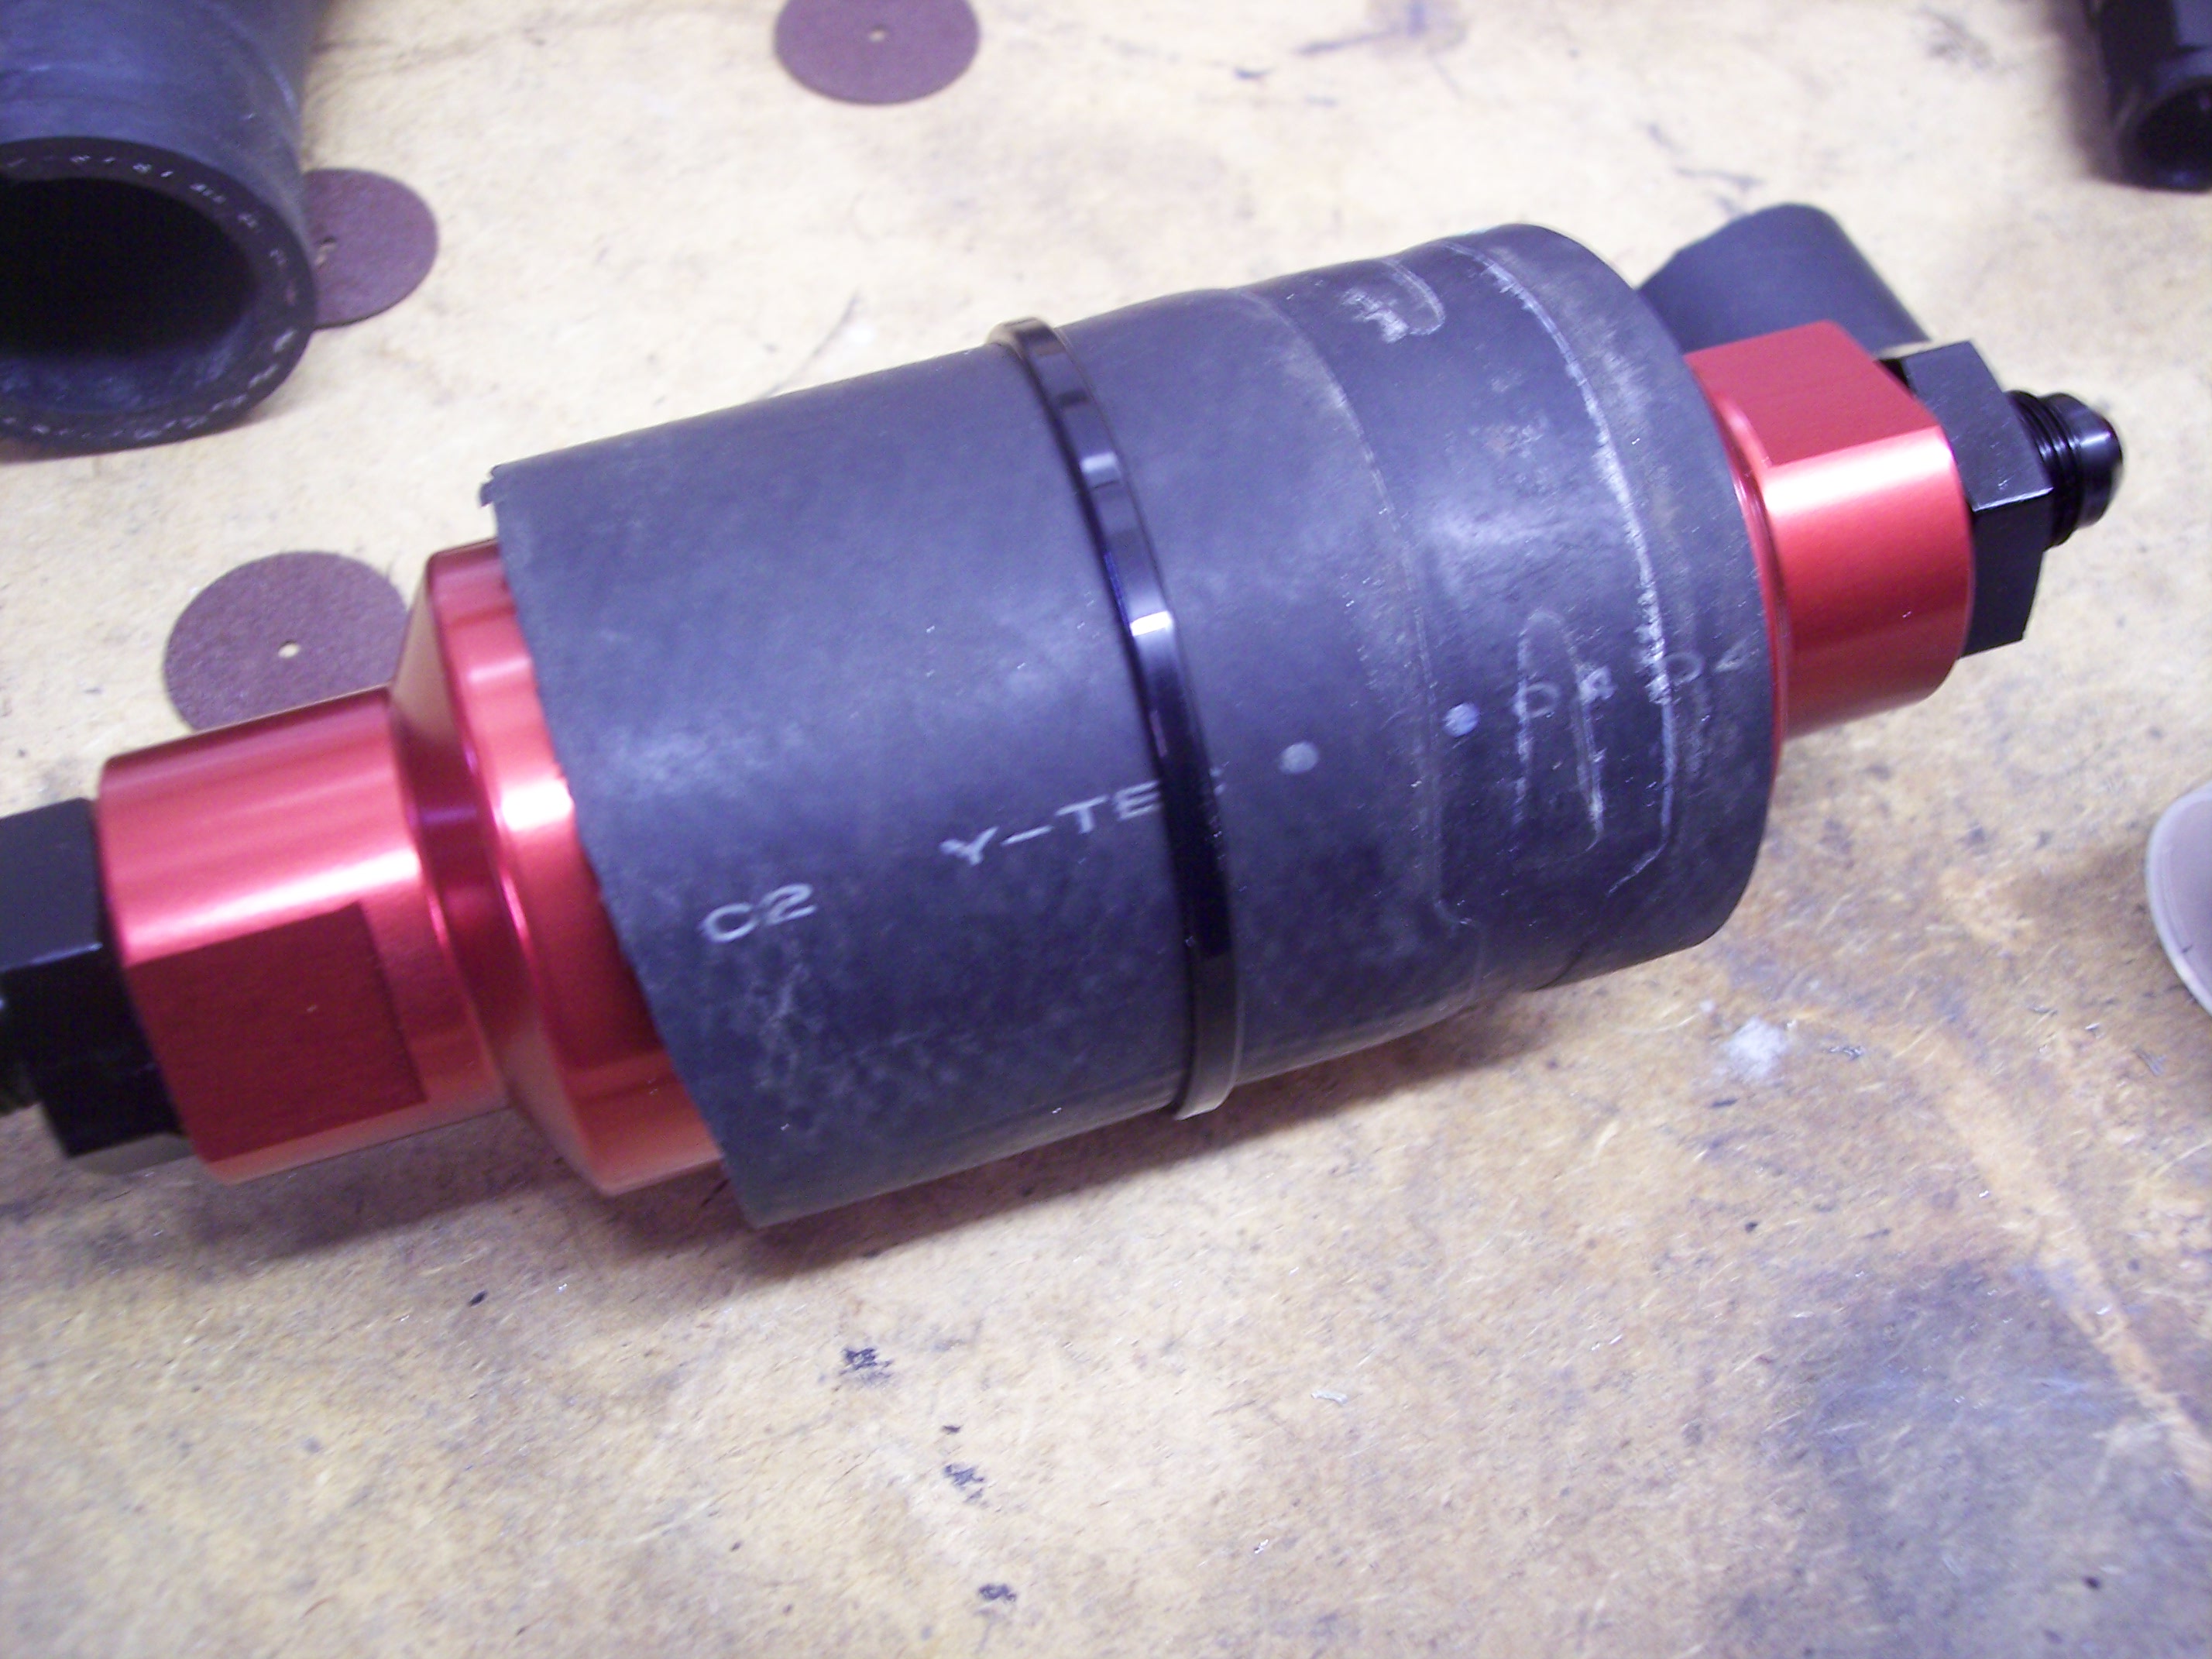
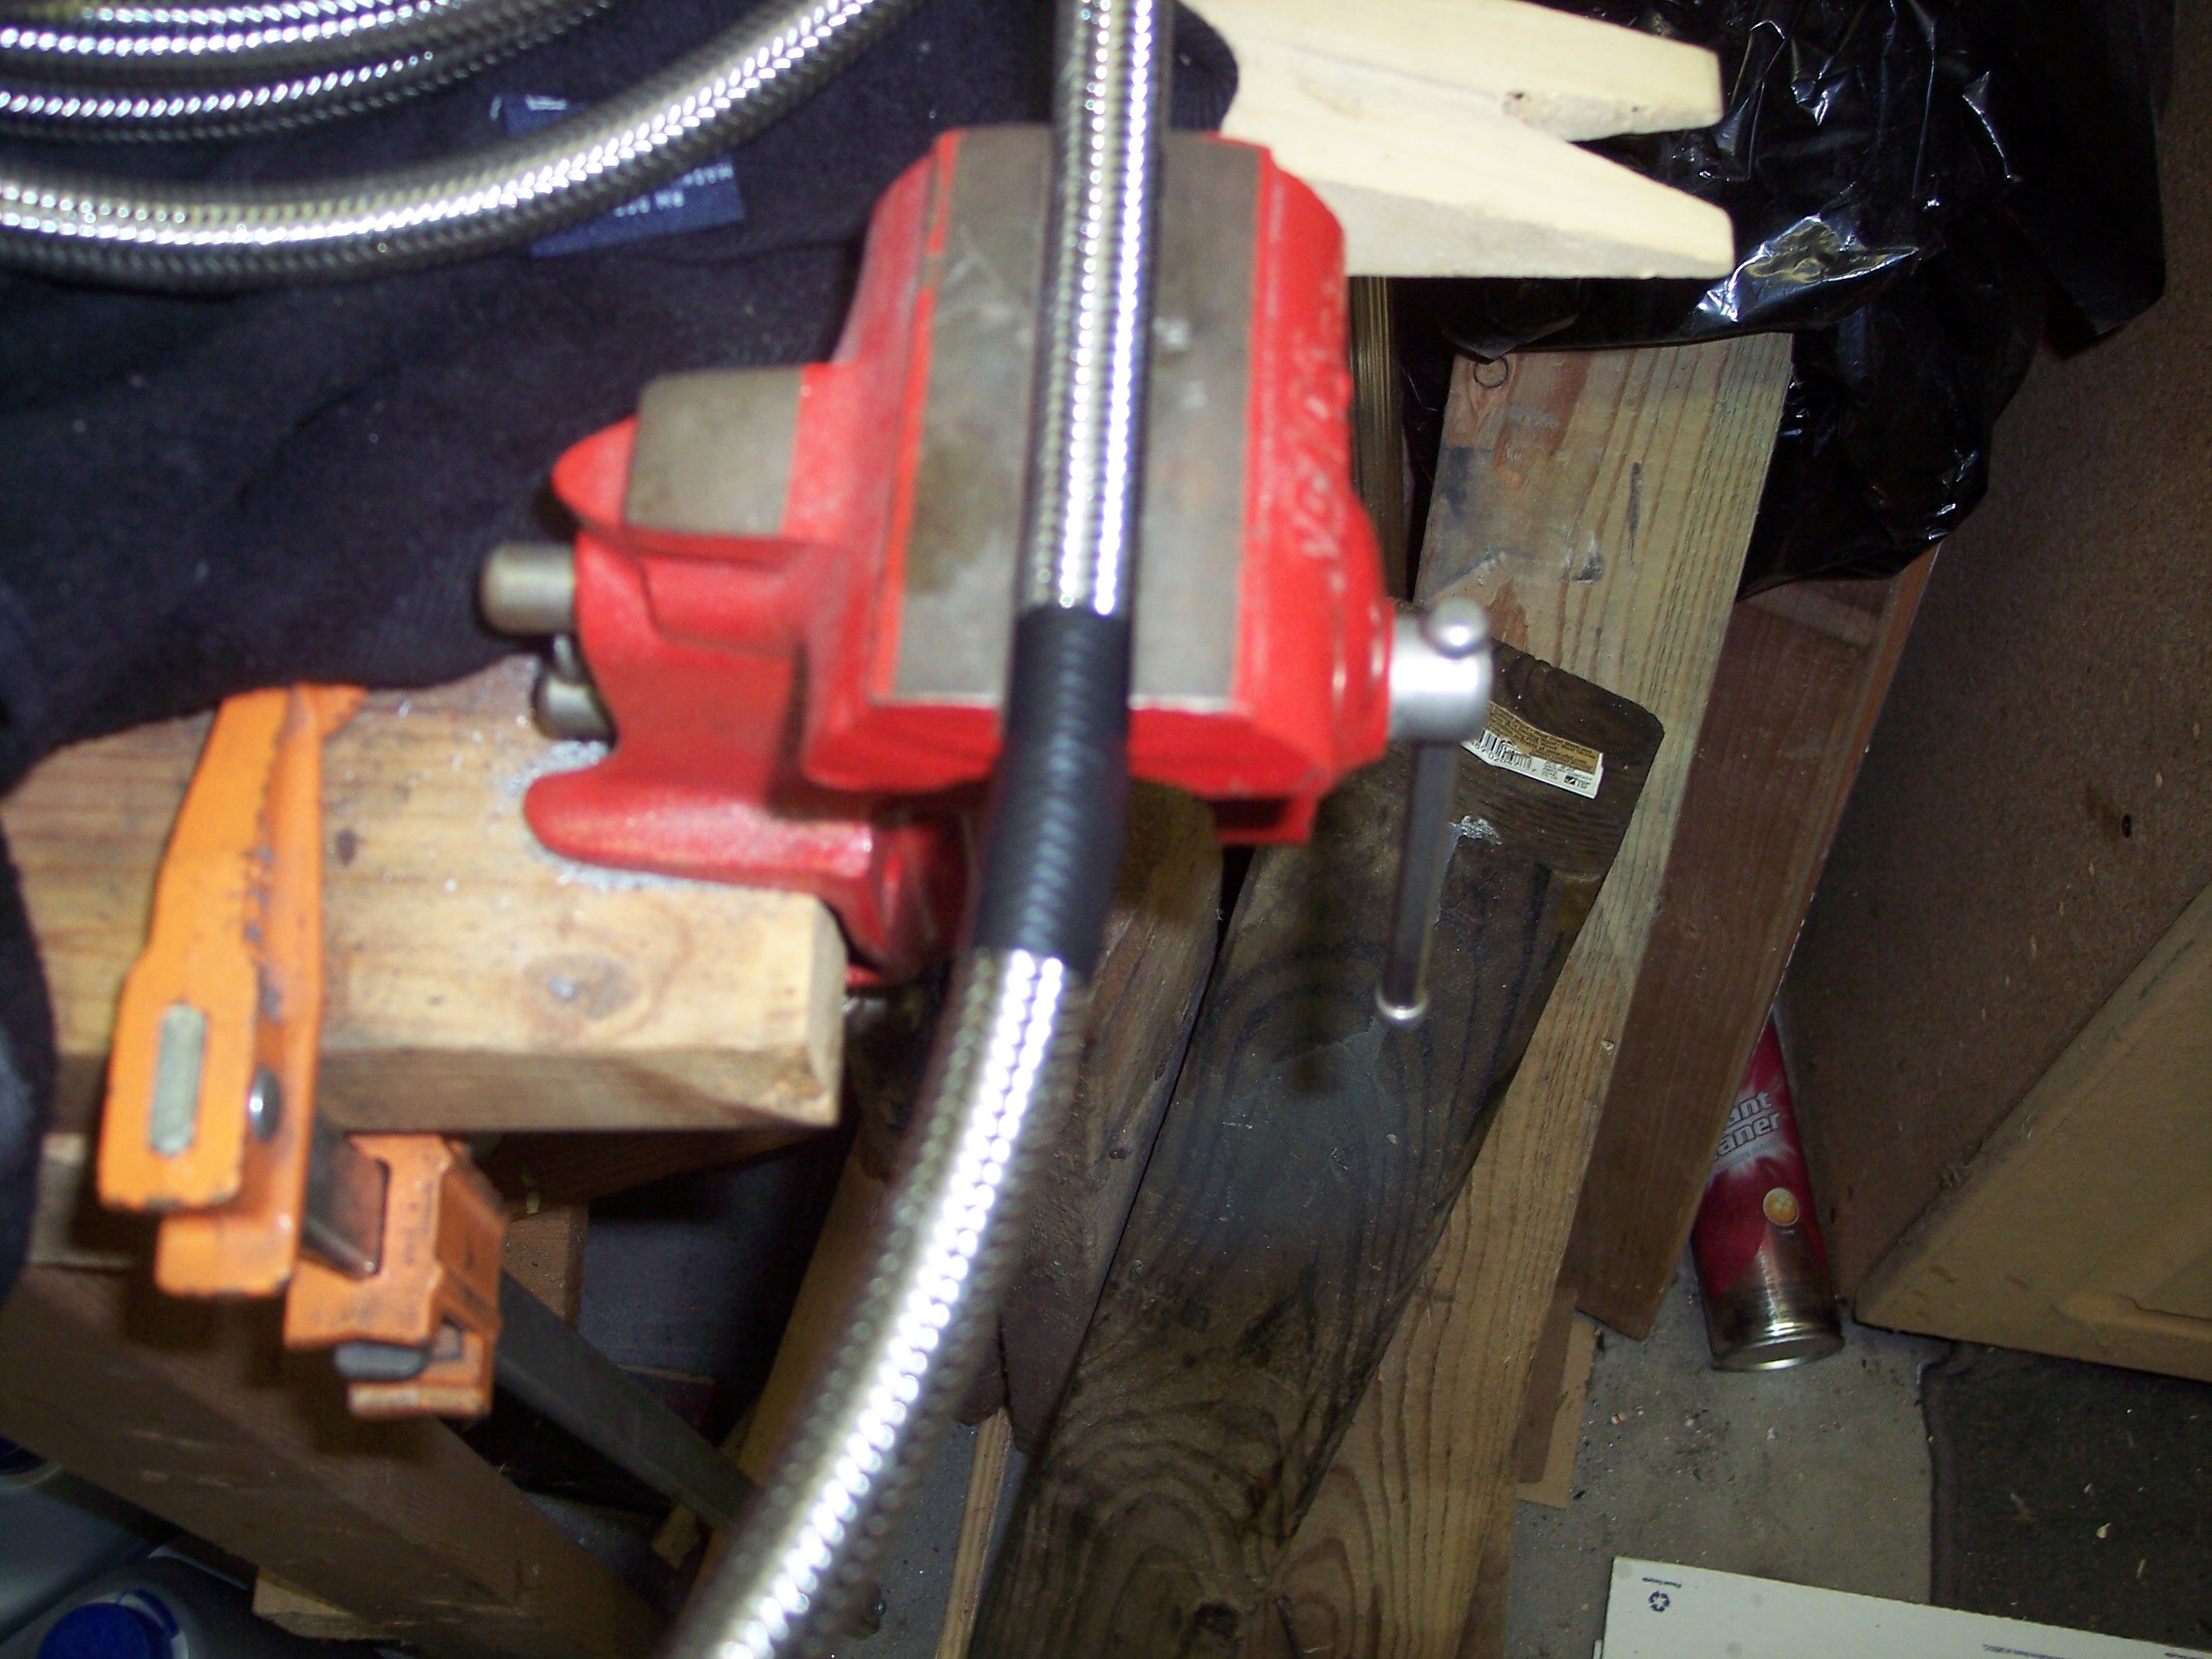
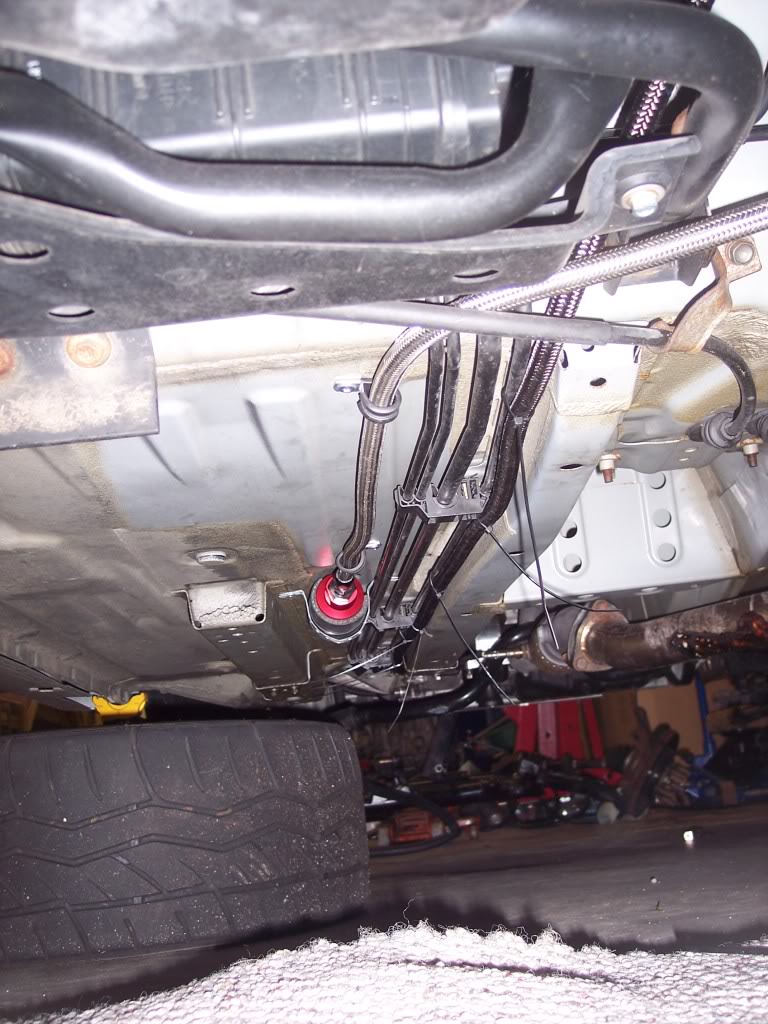
First thing I did was mount my inline fuel filter. First I wanted to wrap it in hose so it doesn't vibrate
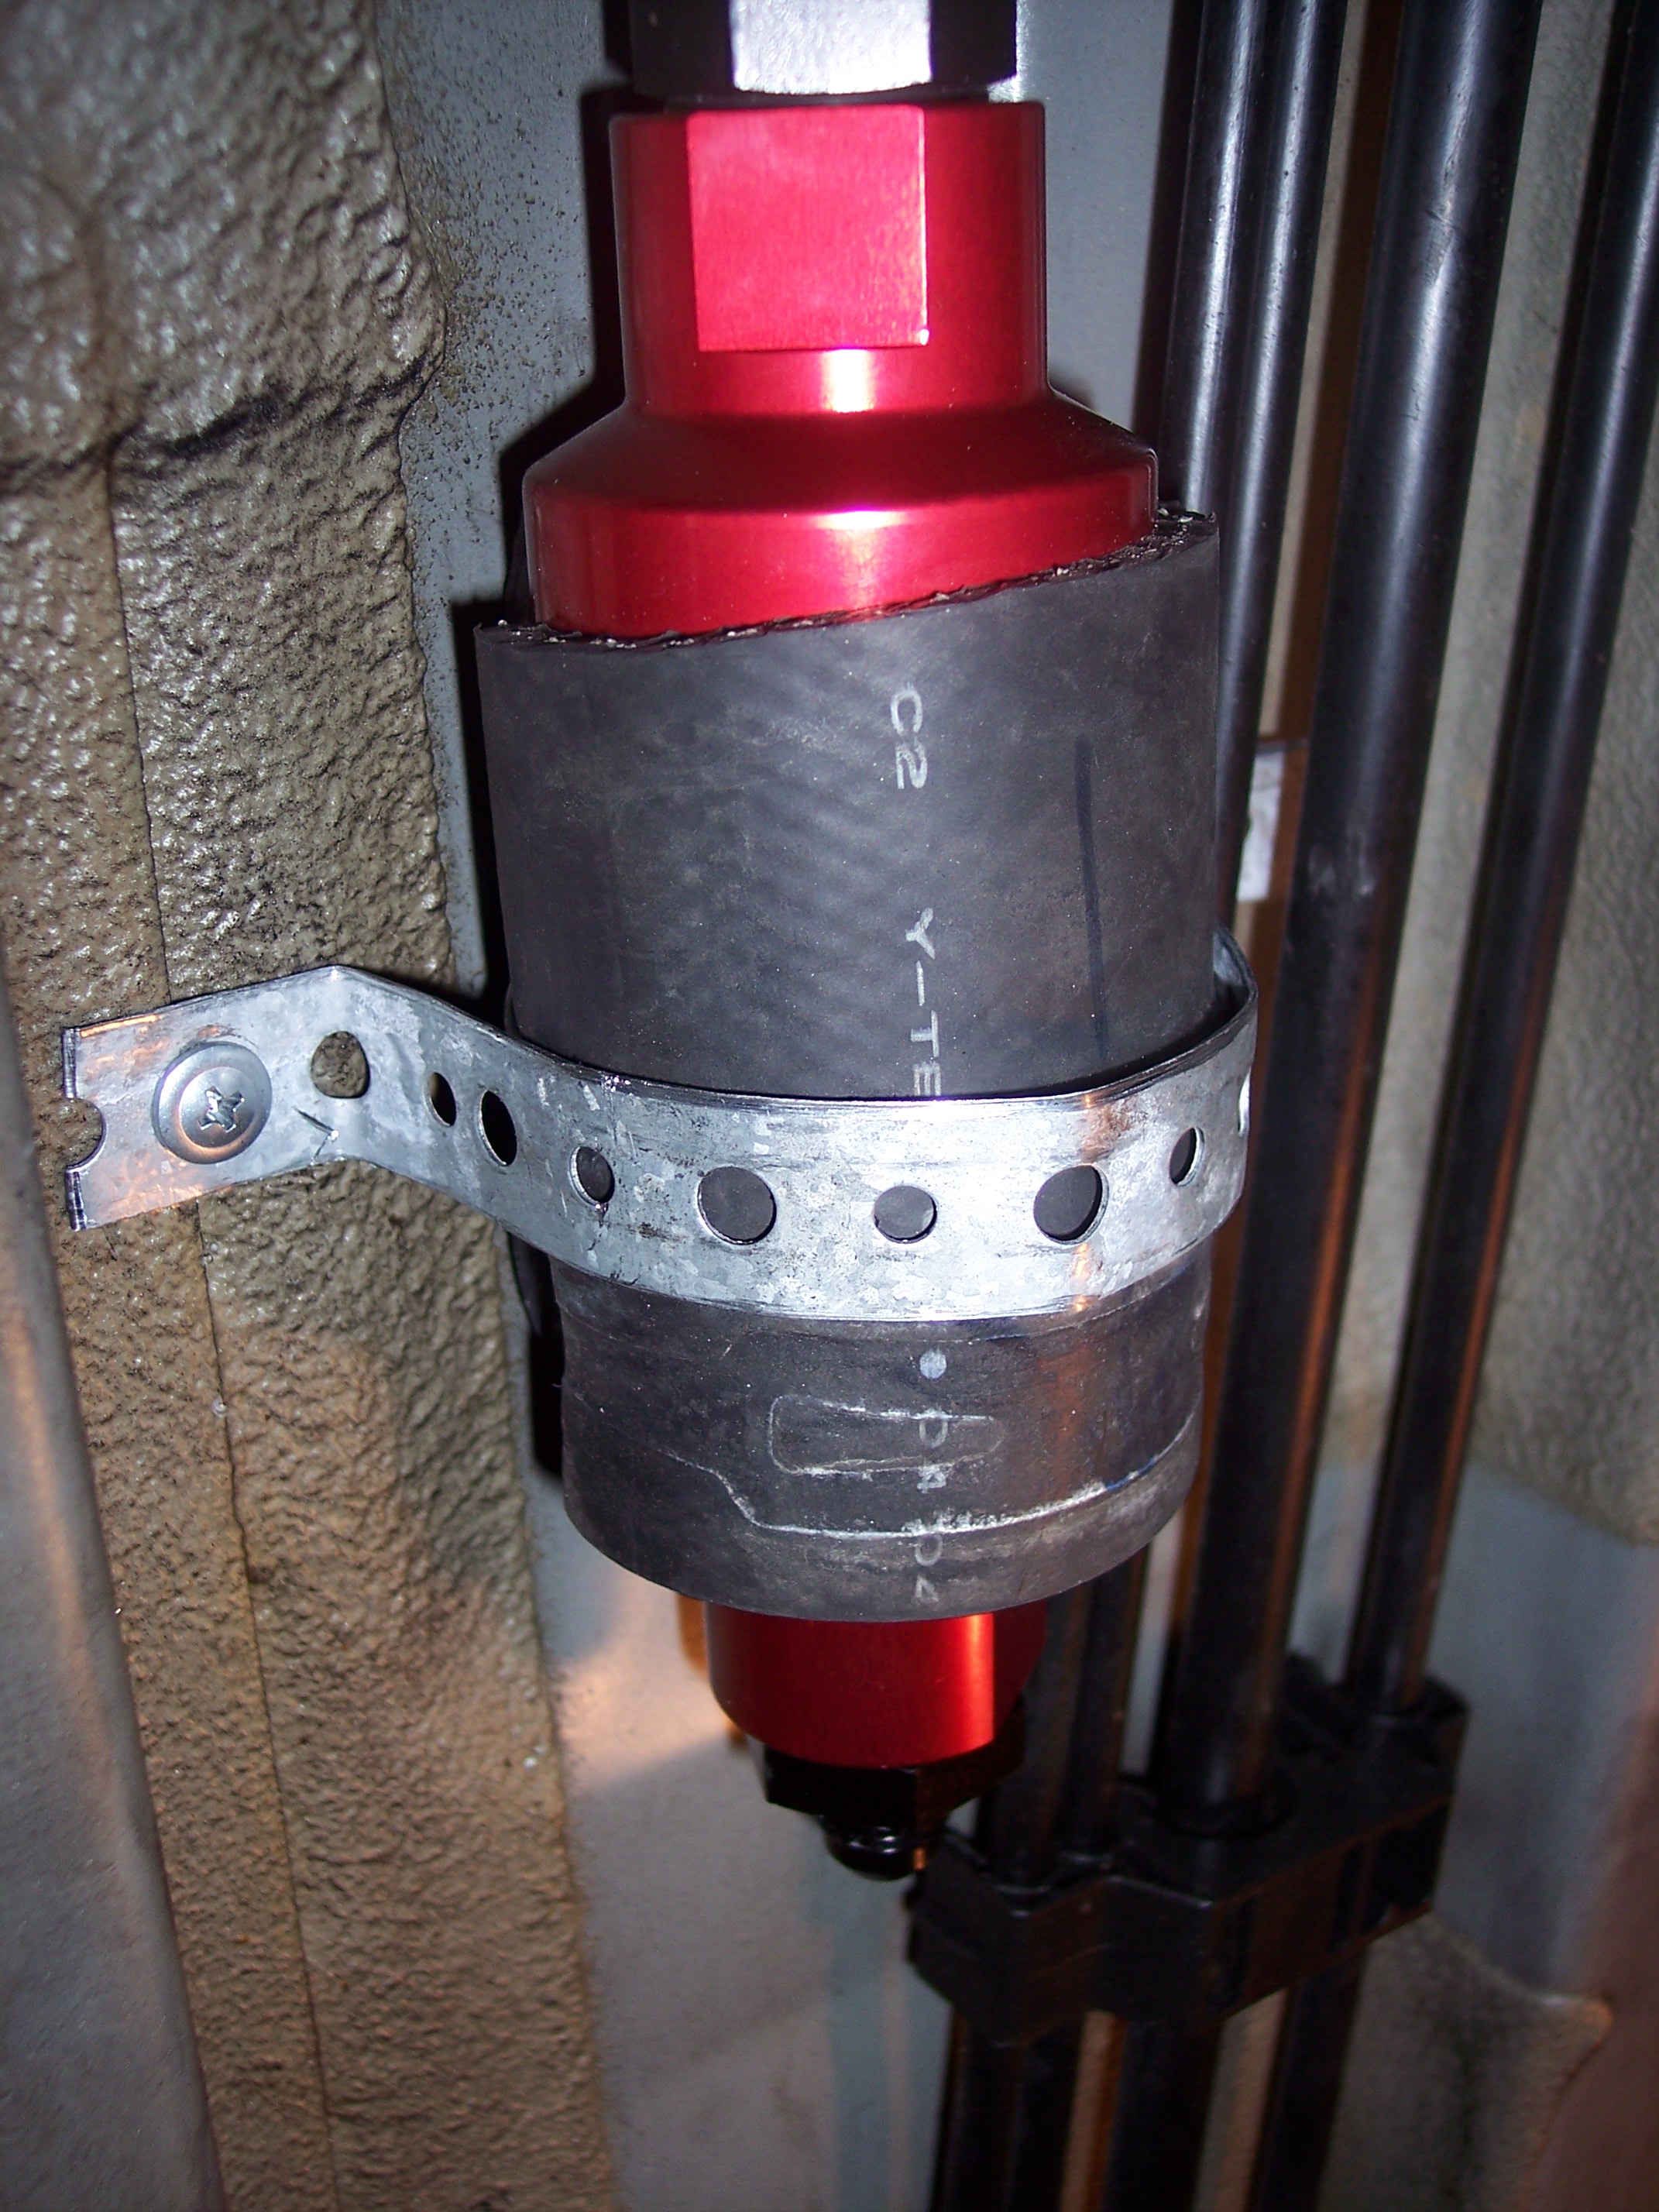
The using wire I mount it under the car where I wanted it
Now start by putting your line from the pump. Here is the first straight -6an fitting used. Run the hose down to under the car to the fuel filter.
When you add boost to any engine, you need to be able to increase fuel pressure to match what the intake manifold/supercharger manifold is seeing. For example, if you put 15PSI into an engine, the stock fuel system is pushing fuel at 43psi. So the engine side of the fuel injector is seeing 15psi, so now you're down to 28psi on the fuel rail. 43-15=28psi. The less fuel pressure provided to the injector, means the injector needs to stay open longer to provide the needed fuel to the engine. More boost = larger fuel requirement. You can start to see the problem here.
your injectors will run a much higher duty when in boost with the stock fuel system. Even with an upgraded pump you won't get around this.
when you add a return line and a 'full fuel system' you provide much more fuel to the fuel rail at all times, also the fuel pressure regular will increase fuel pressure at 1:1 rate. You run a boost line from the intake manifold into the fuel pressure regulator and as intake pressure rises, the outlet hole in the FPR gets smaller, thus making the fuel trying to escape become more pressurized. Any excess fuel that the pump is pumping from the tank returns back into the tank to make the trip again.
I hope this better explains it for everyone.
So today even though I’m busted up from surgery I decided I would finally finish my fuel system. I had pretty much been done and just awaiting some new parts from Hybrid Racing.
There are a lot of parts involved in doing a full fuel system with return line. This process is not cheap. I’ve seen people spend up to $1k in just their fuel setup. I believe I spent almost $600 myself. Here are some of the parts.. I know I’ll be missing some misc…
After Market Fuel Rail
Fuel Pressure Gauge
Fuel Pressure Regulator
Inline Fuel Filter
Aftermarket Fuel Pump
20ft -6an Fuel Line
3/8” and 5/16” submersible fuel hose
lots of AN fittings (I’ll explain all I used in the DIY steps)
Hose clamps
Zip Ties
So lets get started…. The first thing you need to do is install your new fuel pump. I already have a DIY on installing a pump without a return. So start with this DIY to take out the pump and modify the cage
https://honda-tech.com/forums/showth...=diy+fuel+pump
Now lets start the new process!
So I started my new fuel setup today.
Basically I pulled the pump back out. I already had a 255lb pump installed. But now I'm adding a new feed and return setup. So first I dismantled the fuel pump assembly
Then I went and place the nut on the bottom where I will be drilling. You will need this nut. You will also need a 90* male to male 6an fitting to go through the pump. Also I used a 6an to 3/8” barb fitting inside the pump. You can see the fittings in the picture above.
Then I drilled out the hole. I used a blade to clean up the burrs and etc
Now I placed my new fitting threw the hole
Now I attach the barb connector and redo the hoses. I use the stock feed nipple as the return and connected the hose from the feed nipple to the return on the cage. Then route the pump to the new added barb fitting you drilled in.
And put the pump back in the tank. Now to start the lines....
First thing I did was mount my inline fuel filter. First I wanted to wrap it in hose so it doesn't vibrate
The using wire I mount it under the car where I wanted it
Now start by putting your line from the pump. Here is the first straight -6an fitting used. Run the hose down to under the car to the fuel filter.
Last edited by Type-Spaz; 03-05-2011 at 11:27 AM.
 03-05-2011, 05:38 AM
#2
Honda-Tech Member
Join Date: Sep 2003
Location: Toronto, Canada but from Montreal
Posts: 8,117
Likes: 0
Received 1 Like
on
1 Post
Posted it up and let me know and I will sticky it... if you decide to create a new thread let me know and I'll delete this one and sticky the new!
Good job bud!!!
Good job bud!!!
03-05-2011, 11:17 AM
#3
DC5/EP3 MOD :)
Thread Starter
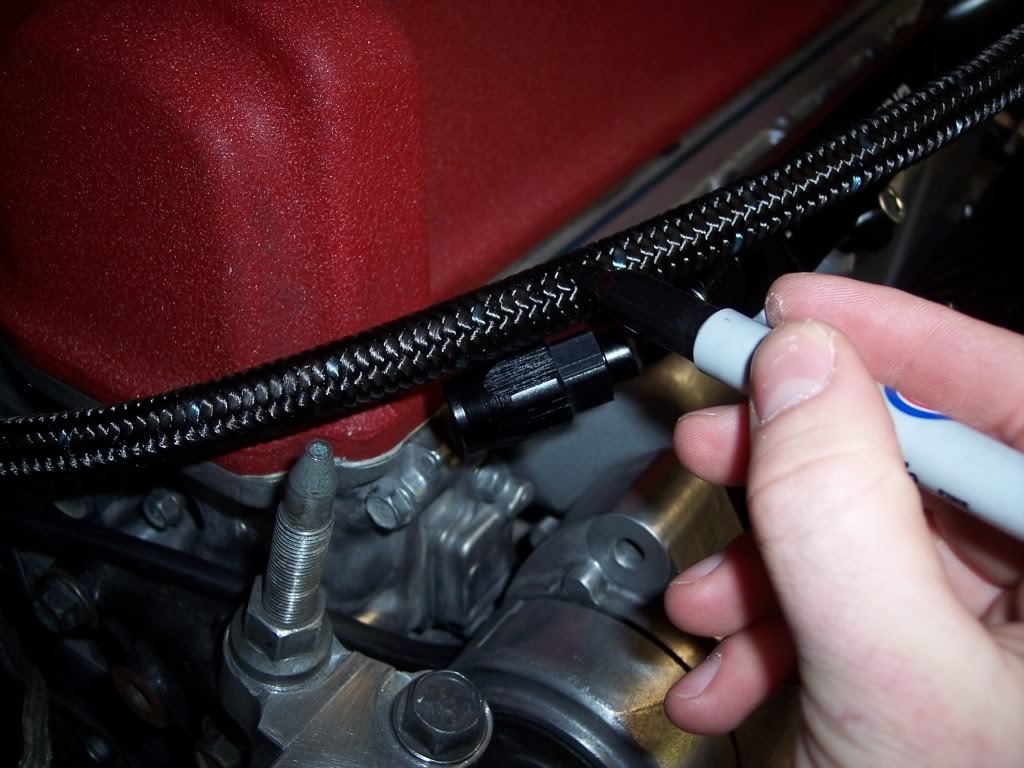
and make a marking where to cut the hose to the fuel filter. Then make a cut
Now put your other end on
and now put your first half of the fuel line up and tighten it down. You will need -10an to -6an adapters if you use the same aeromotive fuel filter.
Then using the hose clamp I secured the hose down.
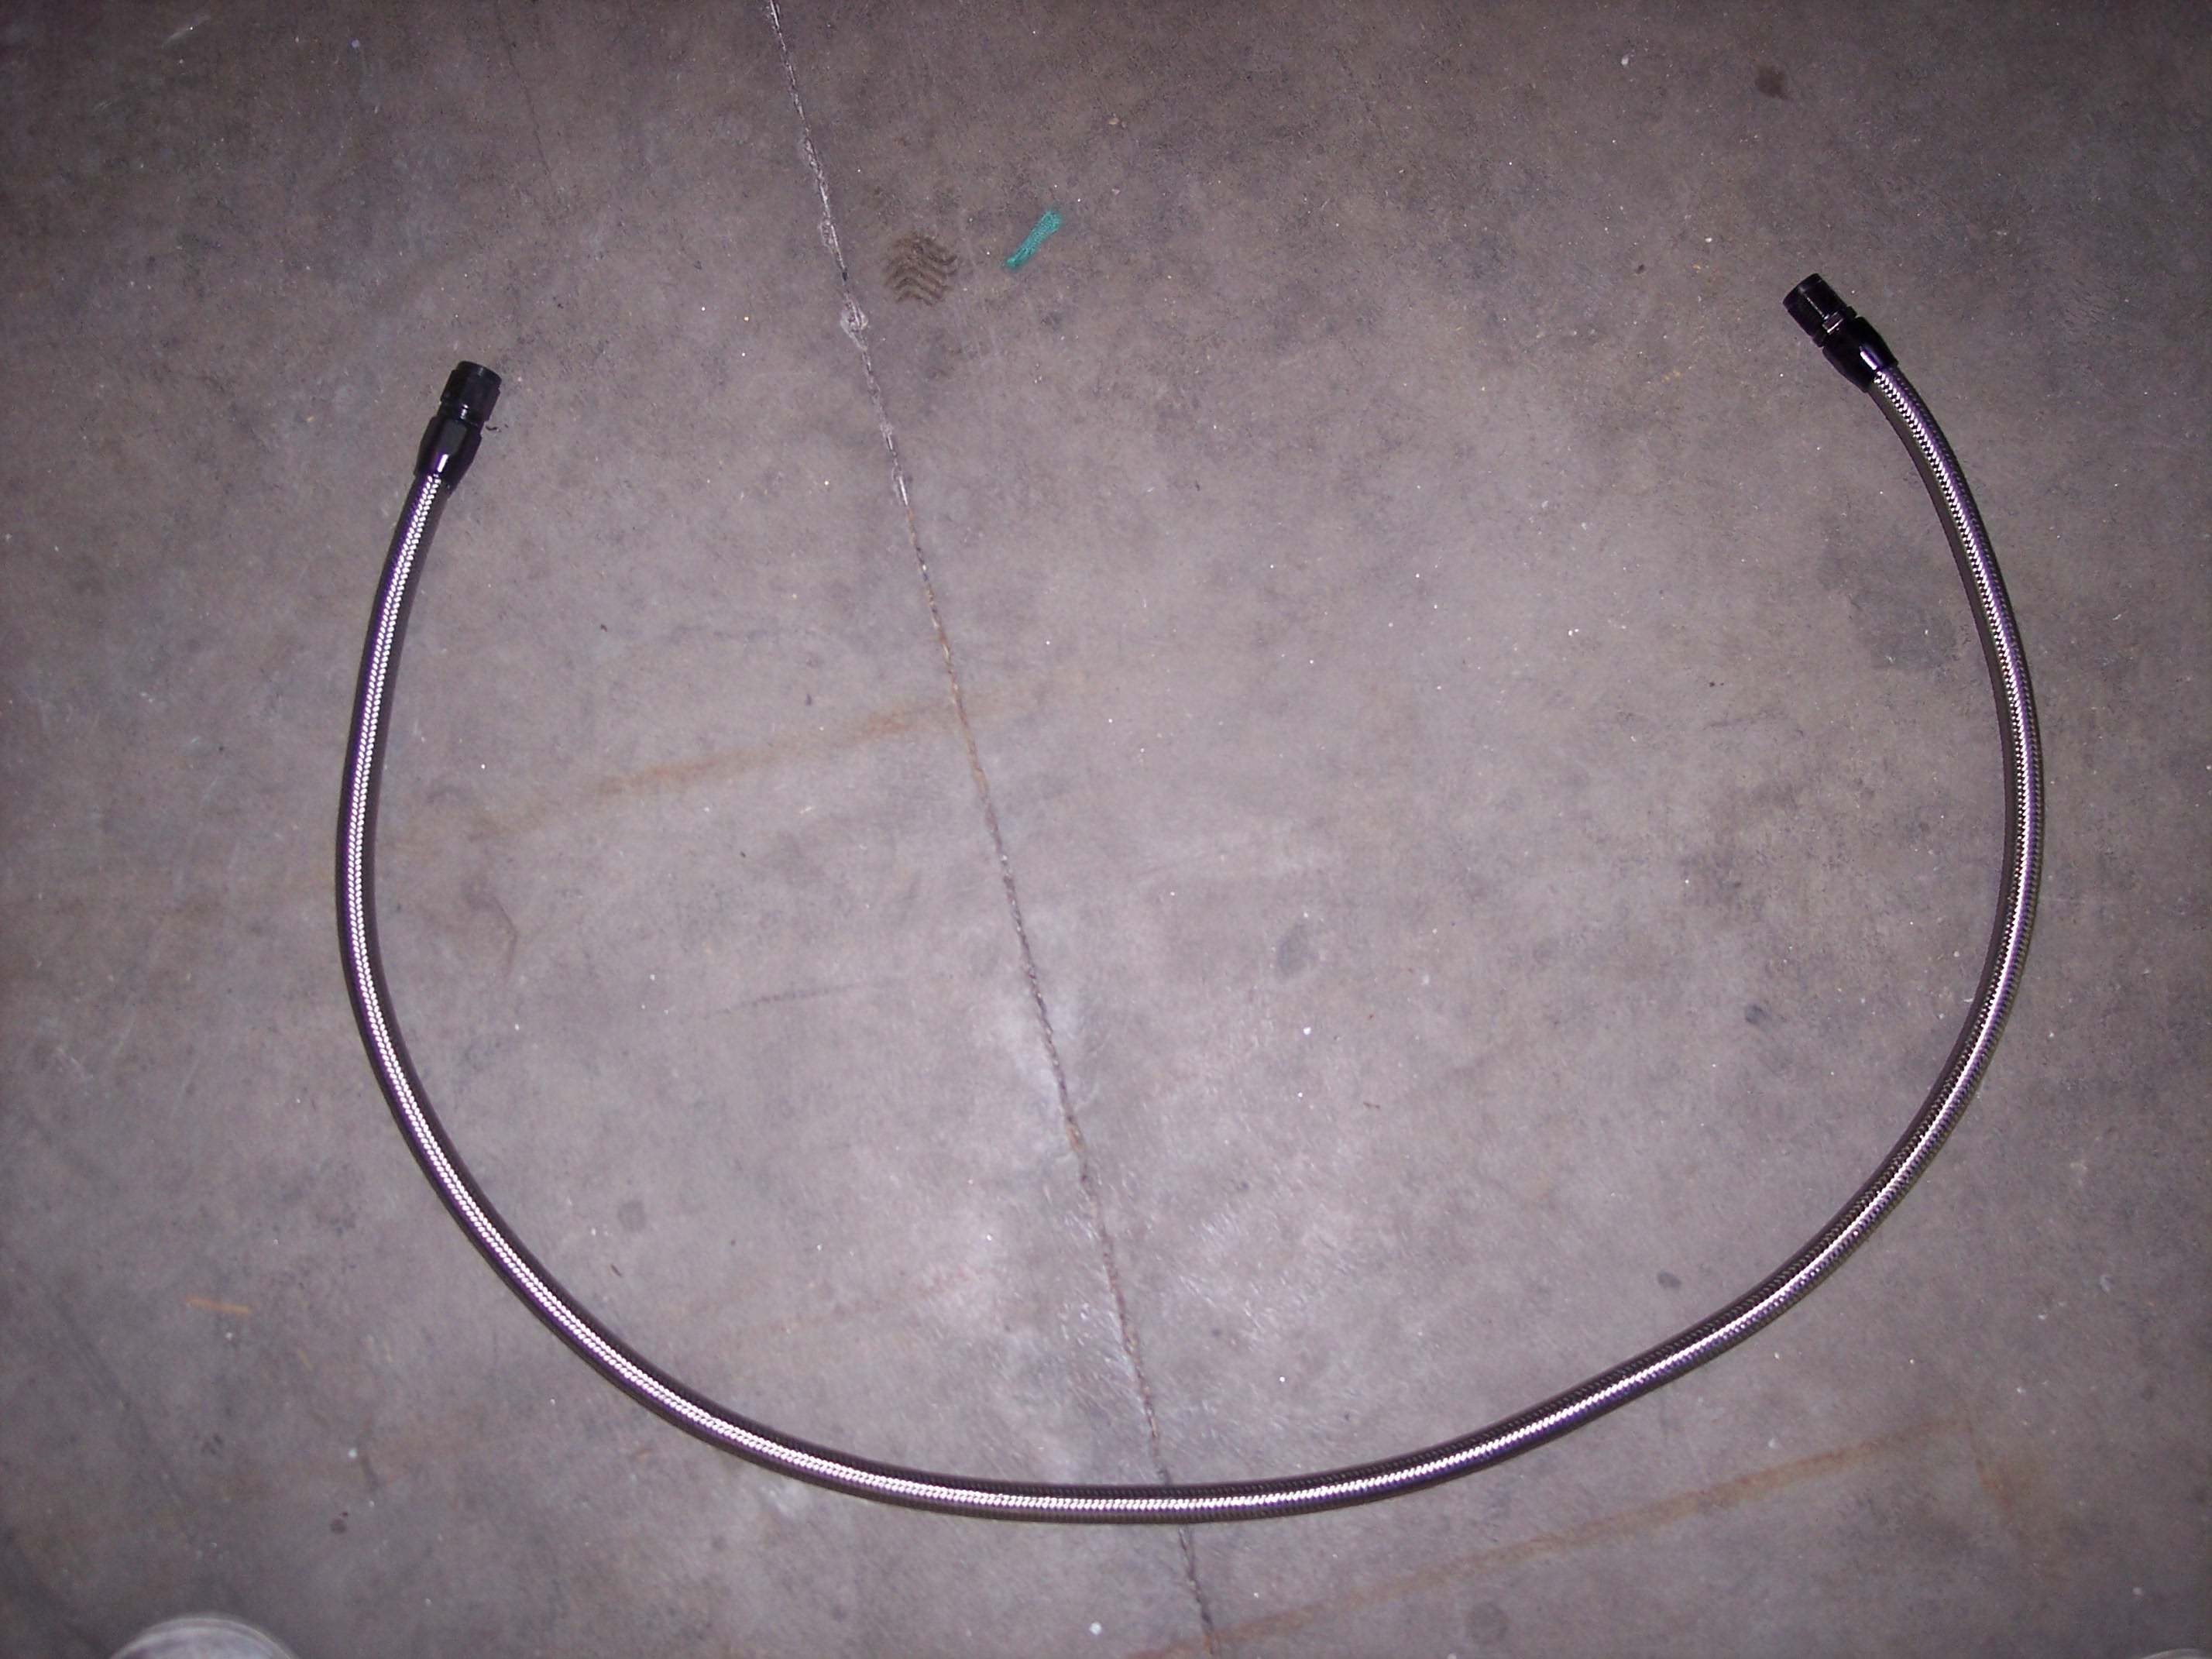
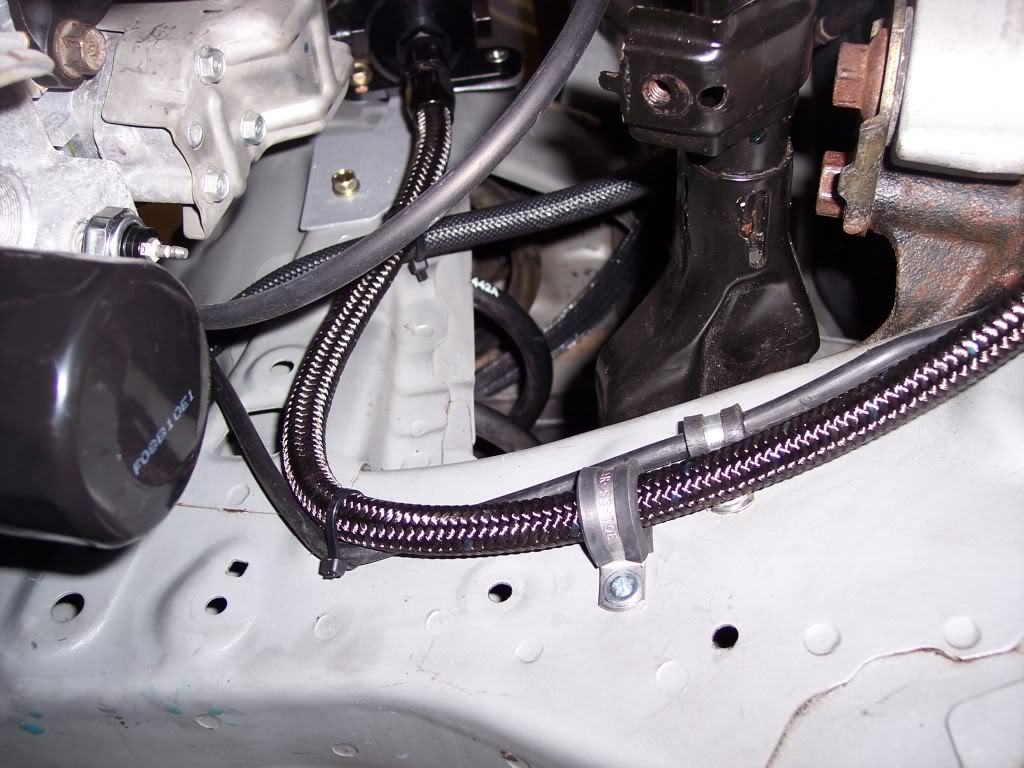
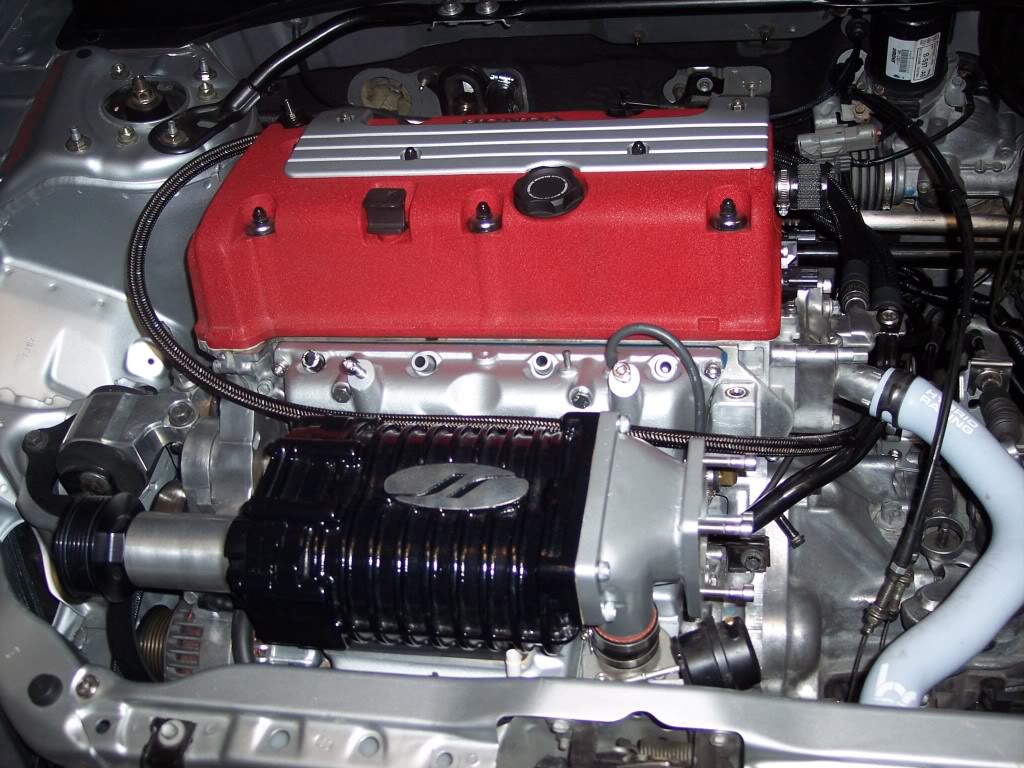
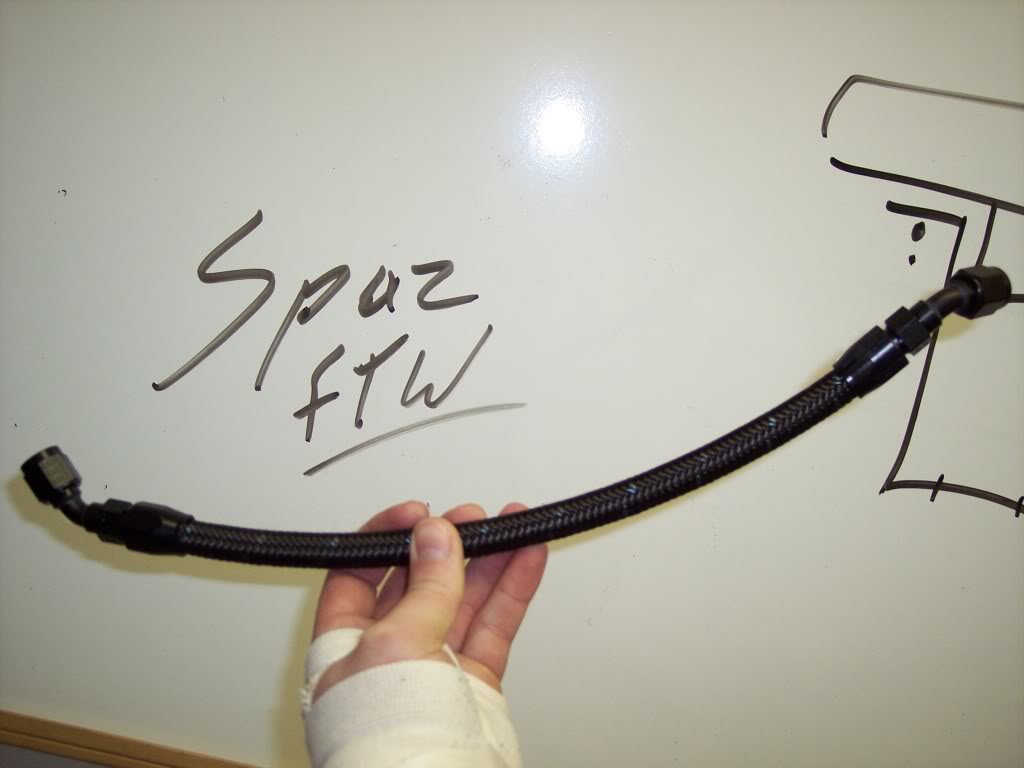
I decided to stop using stainless braided hose and bought russells black braided hose.
I started with the longest distance. So I began by adding a straight -6an fitting on the hose

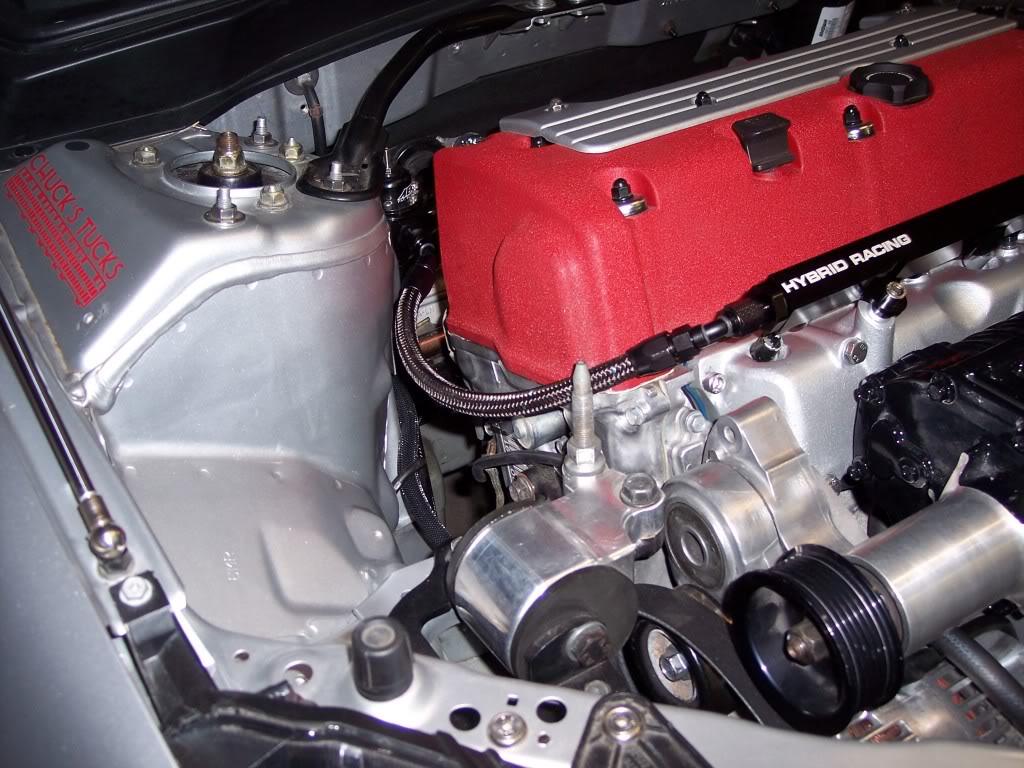
and then connected it to my FPR. If you want to put your FPR where I did here is my FPR bracket DIY
https://honda-tech.com/forums/acura-rsx-dc5-honda-civic-ep3-32/custom-bracket-fuel-pressure-regulator-2900020/
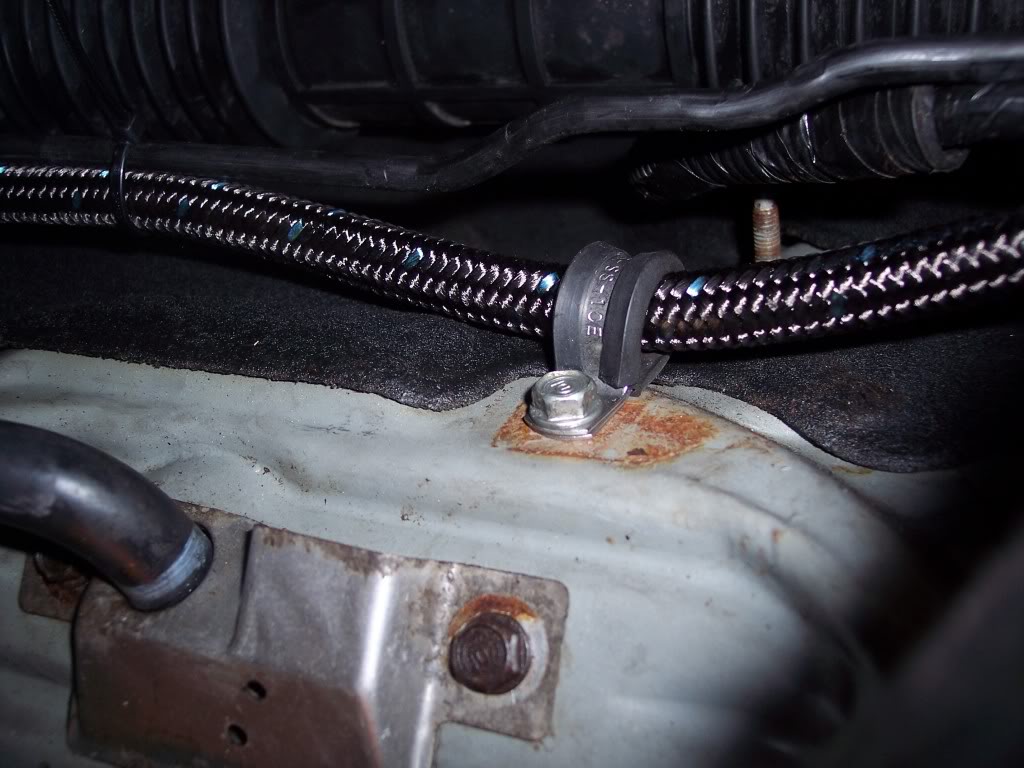
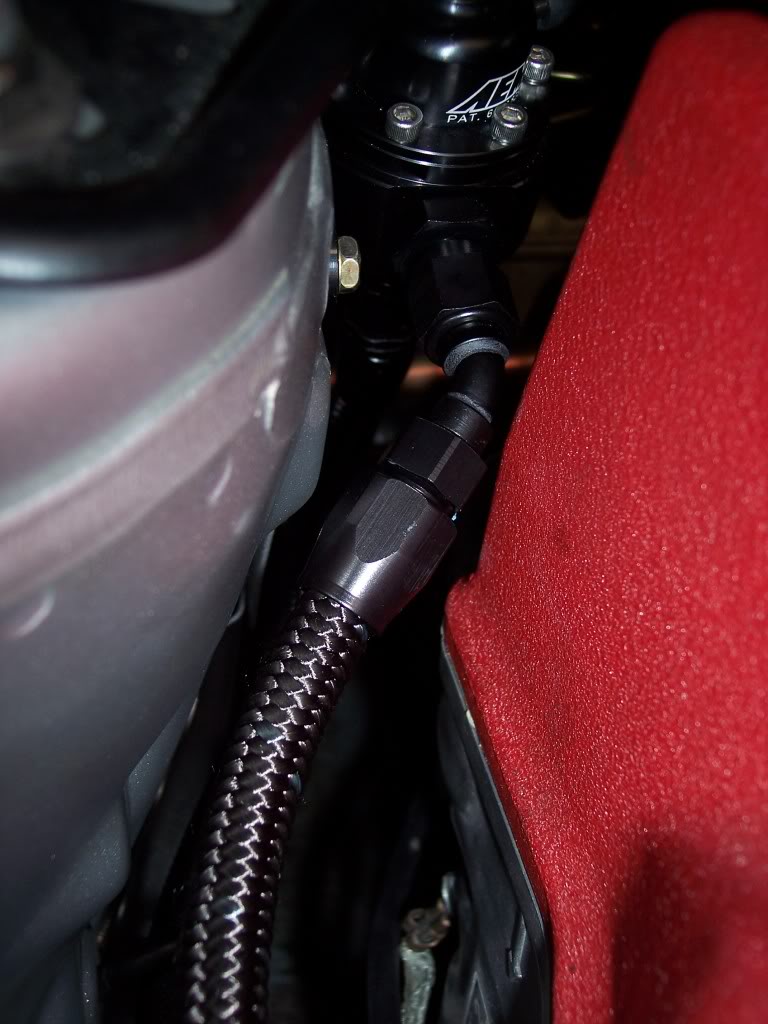
So anyways, connect another straight -6an fitting to the hose and start from the bottom of the FPR which is the return

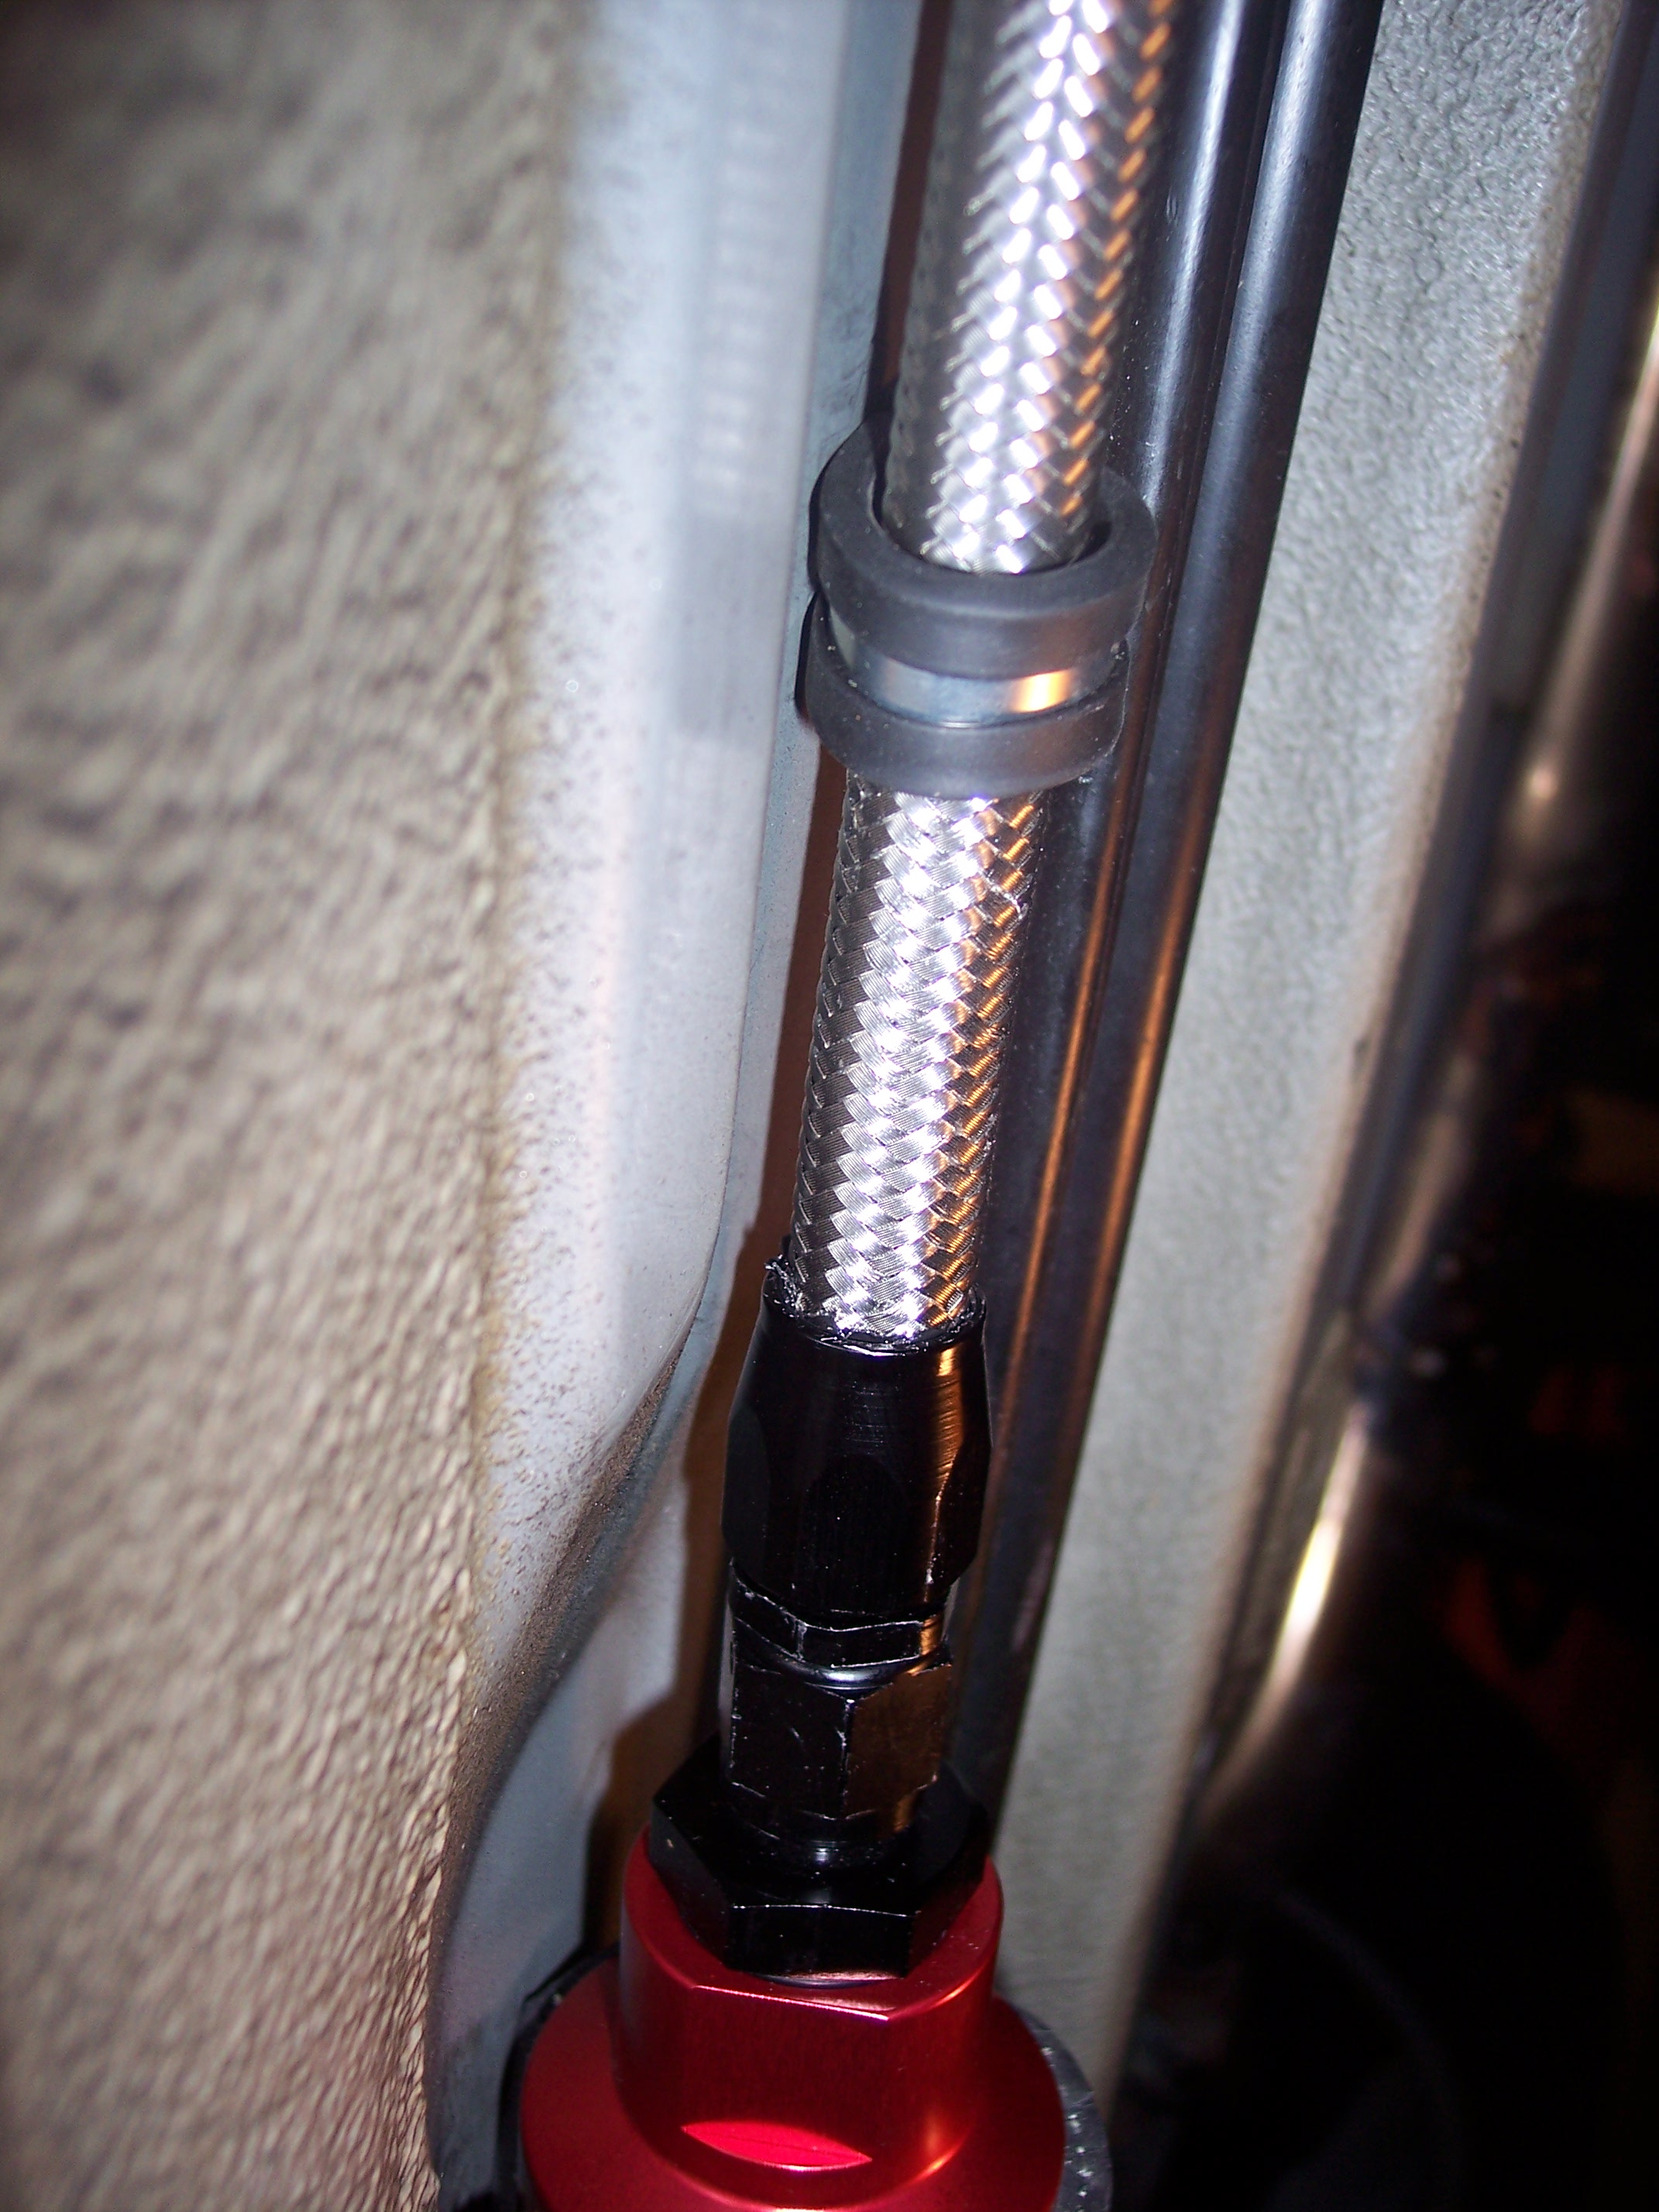
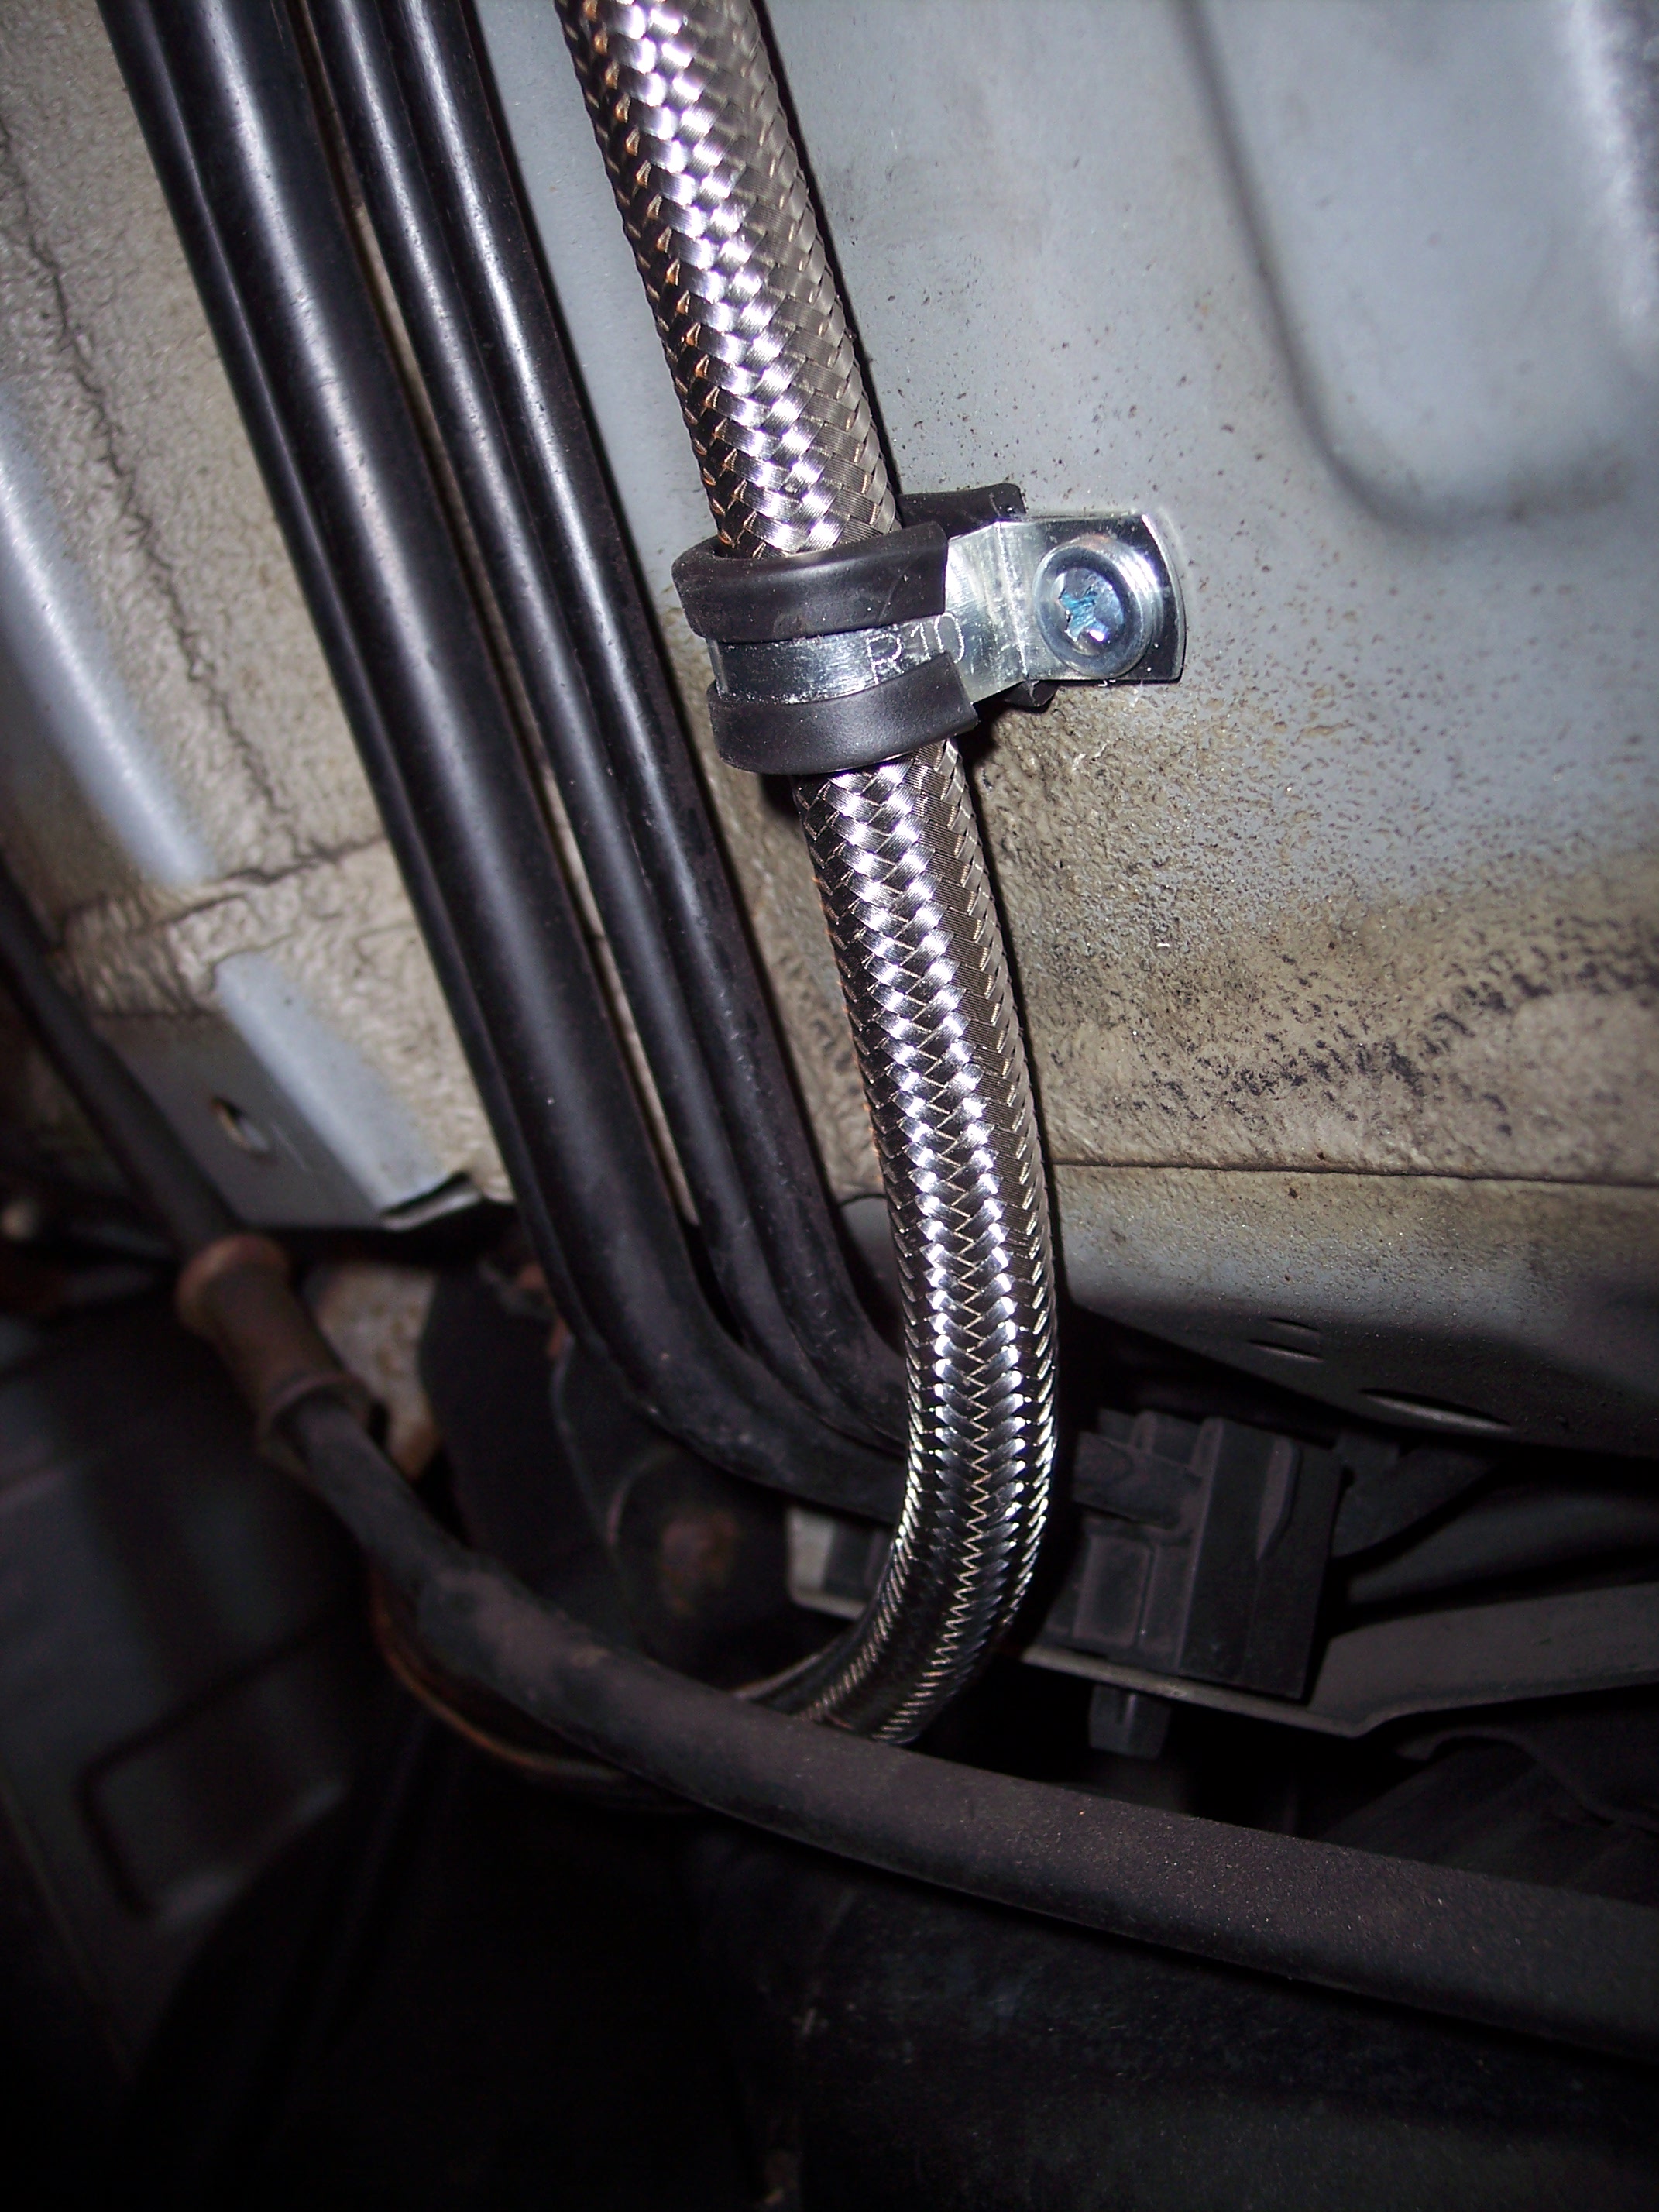
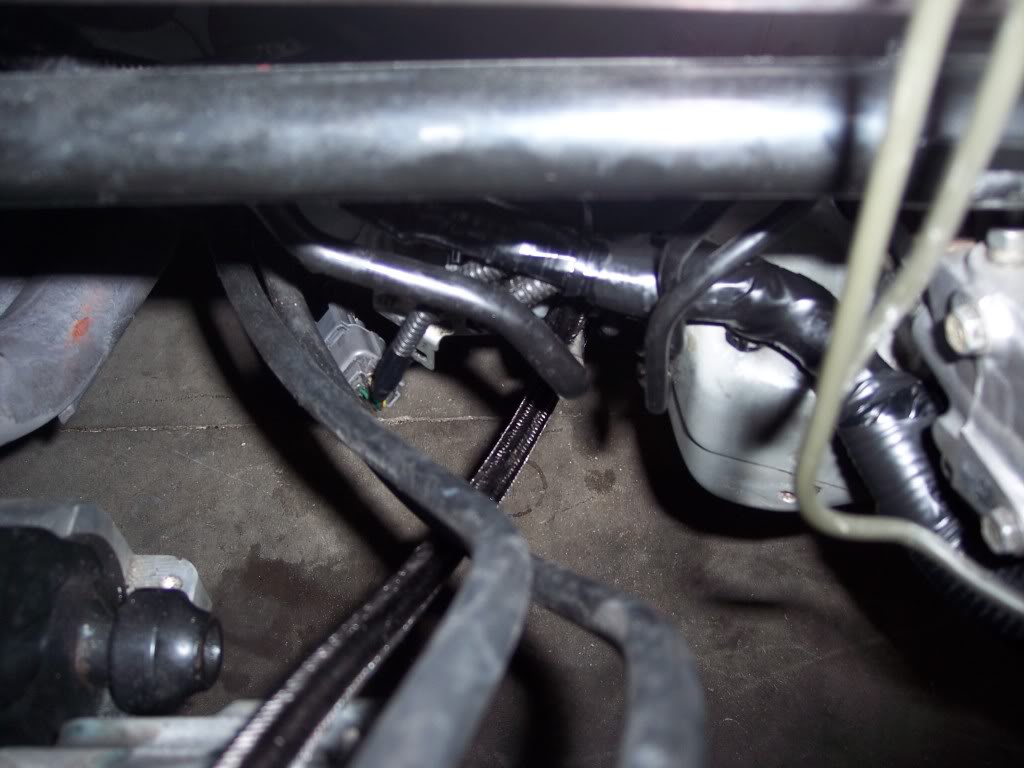
Then used clamps and started routing it down and around the header back over to the passenger side
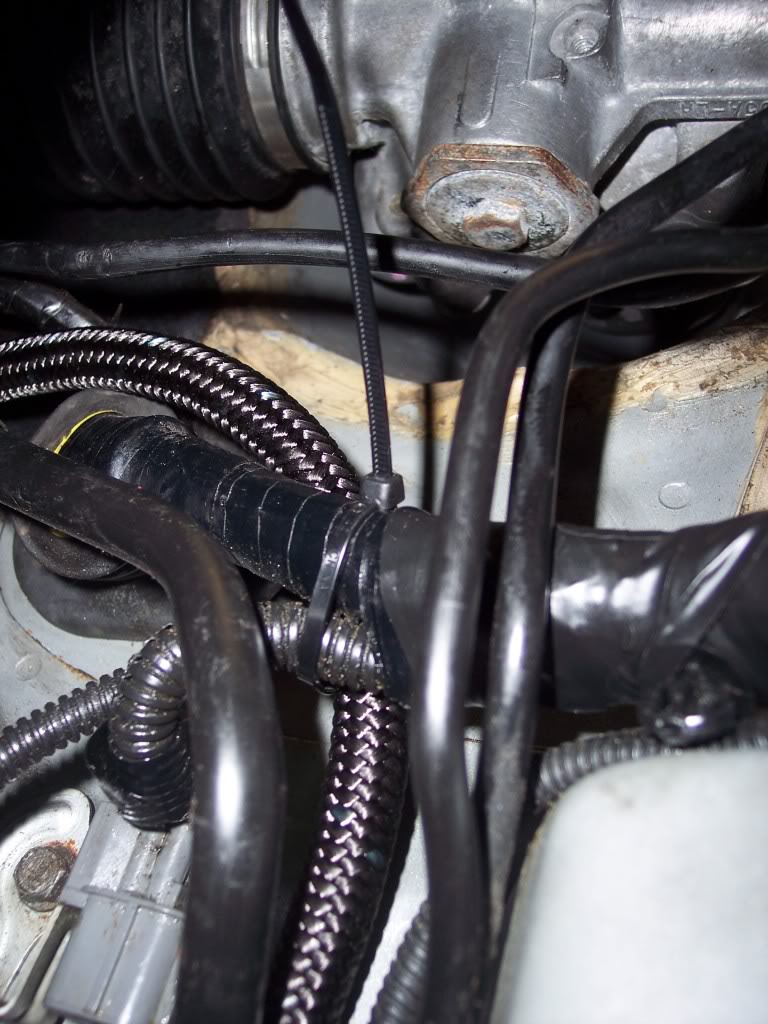
and wrapped it behind some of the wiring harness. I also zip tied the fuel line every chance I could just *** added protection
Now put your other end on
and now put your first half of the fuel line up and tighten it down. You will need -10an to -6an adapters if you use the same aeromotive fuel filter.
Then using the hose clamp I secured the hose down.
I decided to stop using stainless braided hose and bought russells black braided hose.
I started with the longest distance. So I began by adding a straight -6an fitting on the hose
and then connected it to my FPR. If you want to put your FPR where I did here is my FPR bracket DIY
https://honda-tech.com/forums/acura-rsx-dc5-honda-civic-ep3-32/custom-bracket-fuel-pressure-regulator-2900020/
So anyways, connect another straight -6an fitting to the hose and start from the bottom of the FPR which is the return
Then used clamps and started routing it down and around the header back over to the passenger side
and wrapped it behind some of the wiring harness. I also zip tied the fuel line every chance I could just *** added protection
03-05-2011, 11:17 AM
#4
DC5/EP3 MOD :)
Thread Starter
Then I cut the stock feed line back where you can't see it and zip tied the return line to it all the way down the frame...
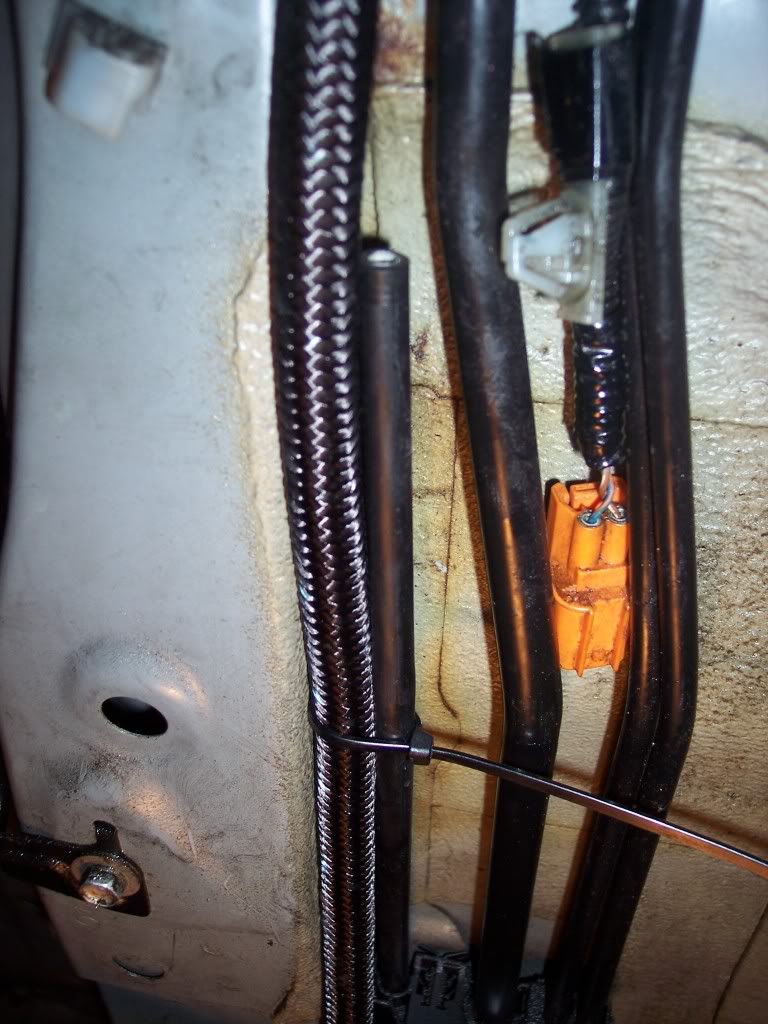
Then put the hose through up to the pump and measured and cut where needed

You also need to remove the quick release clip
I then clamped it down to the stock feed output. It fit extremely tight and I could barely get it on so I have faith.... also this is the return so it has a lot less pressure.
then I attached another AN fitting and started from where I had left off at the fuel filter
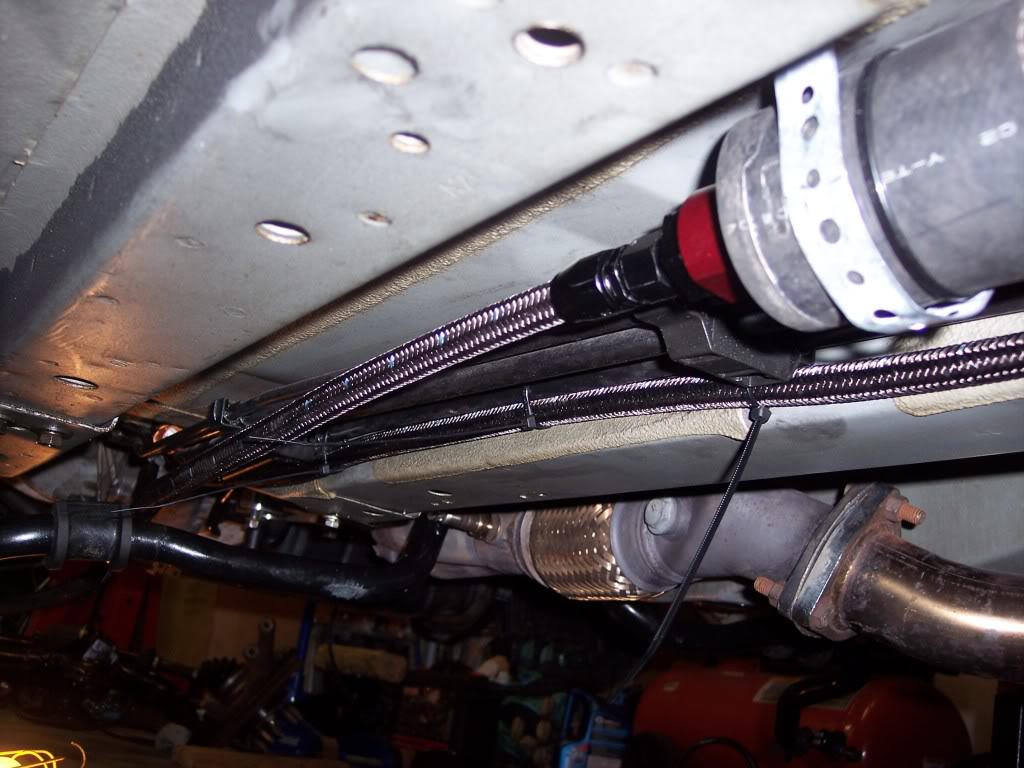
I then brought it up towards the transmission and moved it up towards the rail.
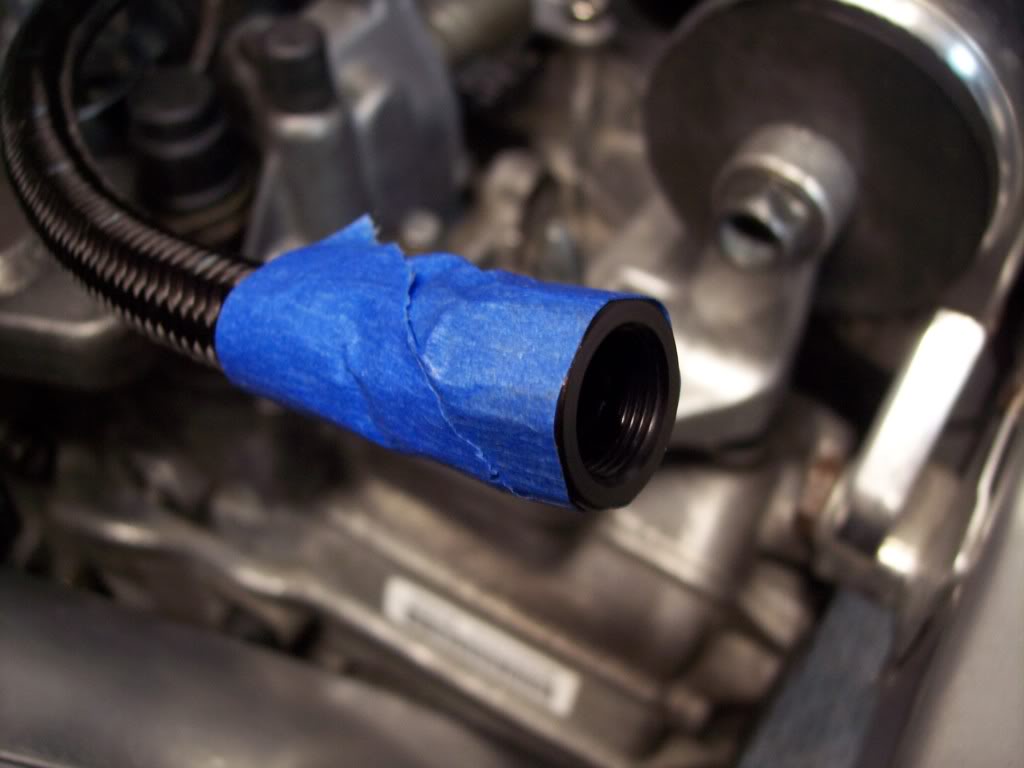
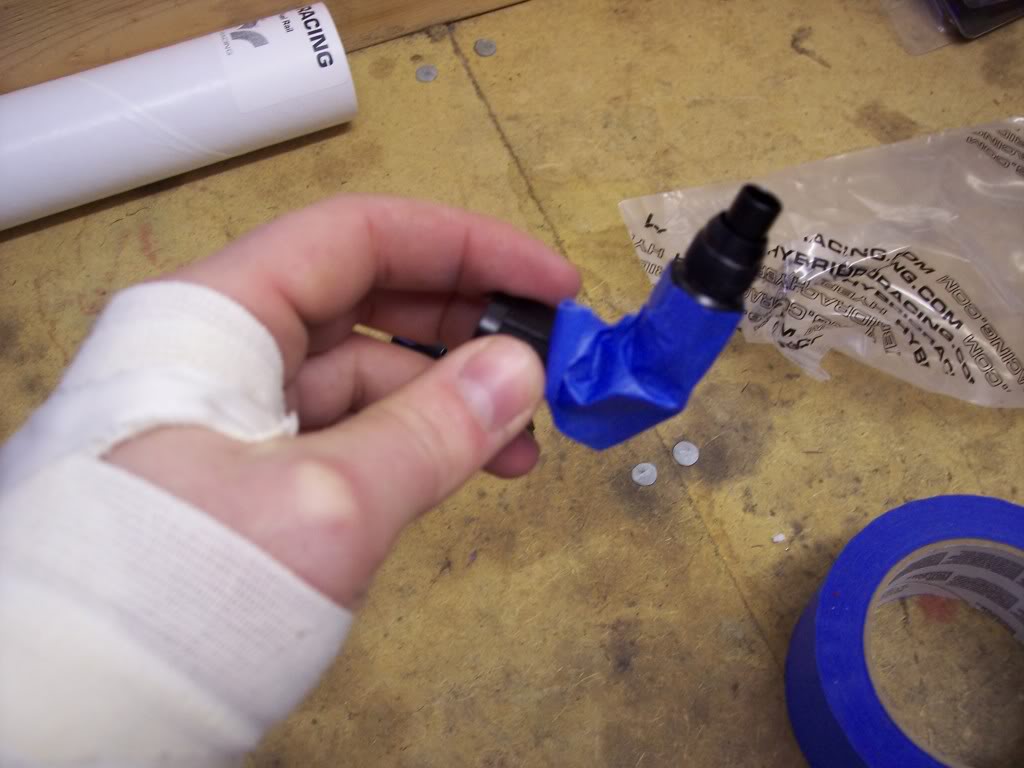
Now I put the rail on and fittings so I can mark where to cut the line. Now I make my mark on the hose and cut.

Because this is going to be seen I don’t want to scratch the fittings. So I blue tapped them
Then put the hose through up to the pump and measured and cut where needed
You also need to remove the quick release clip
I then clamped it down to the stock feed output. It fit extremely tight and I could barely get it on so I have faith.... also this is the return so it has a lot less pressure.
then I attached another AN fitting and started from where I had left off at the fuel filter
I then brought it up towards the transmission and moved it up towards the rail.
Now I put the rail on and fittings so I can mark where to cut the line. Now I make my mark on the hose and cut.
Because this is going to be seen I don’t want to scratch the fittings. So I blue tapped them
03-05-2011, 11:18 AM
#5
DC5/EP3 MOD :)
Thread Starter
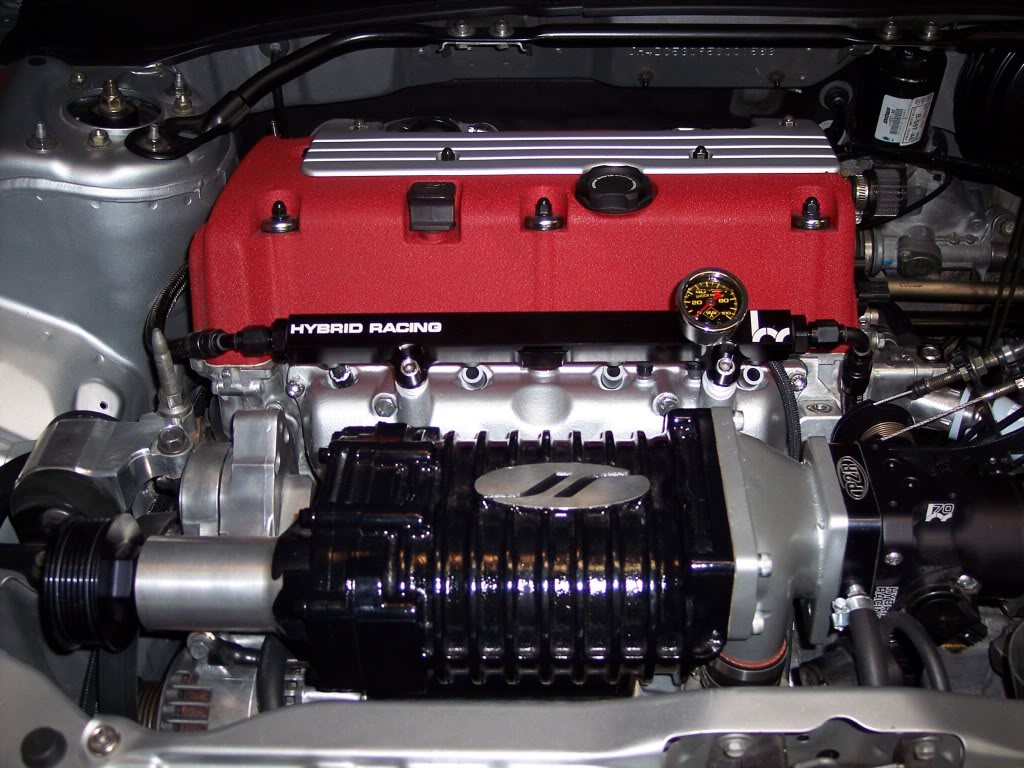
Now I attach the line to the first side of the rail.
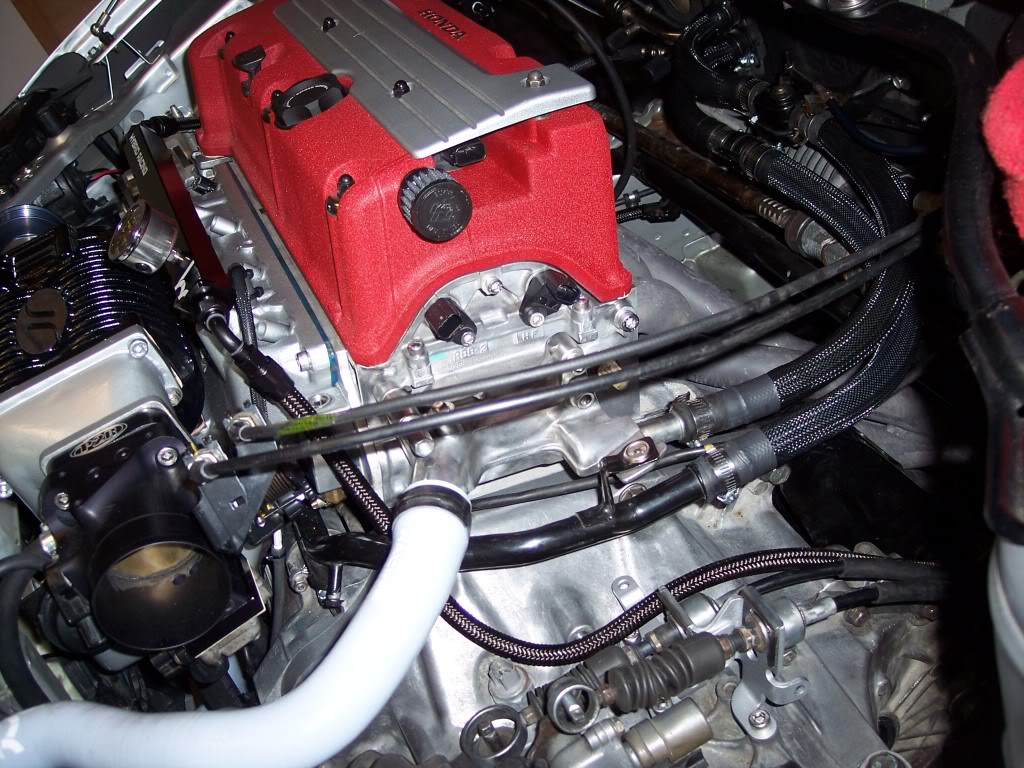
and now I attach the FPR fitting and measure up the next cut
cut and add the fitting… almost done!
attach the line
BAM!!! Now you are done!
here is a small diagram
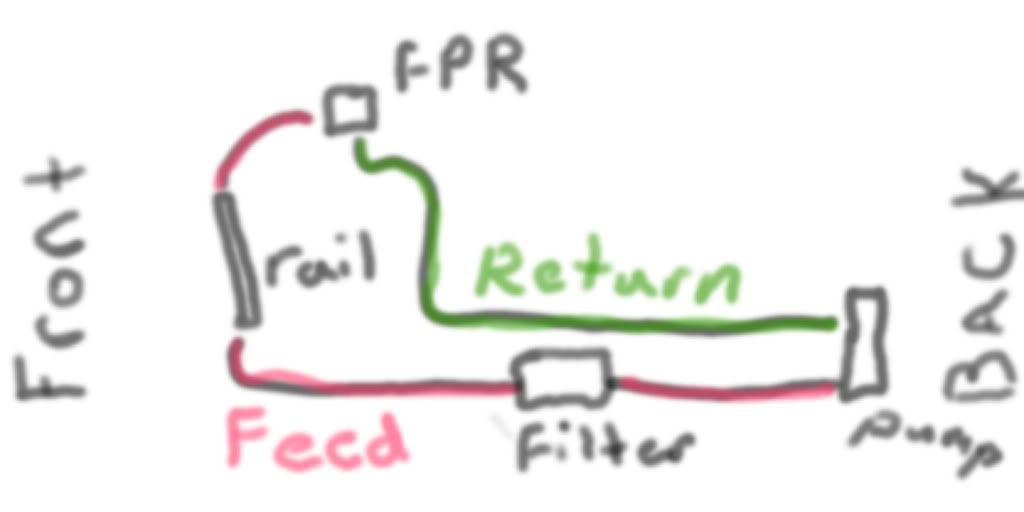
**I probably missed some things and I’ll edit the thread if needed**
and now I attach the FPR fitting and measure up the next cut
cut and add the fitting… almost done!
attach the line
BAM!!! Now you are done!
here is a small diagram
**I probably missed some things and I’ll edit the thread if needed**

Trending Topics
03-26-2011, 10:37 AM
#8
Trial User

Join Date: Mar 2011
Posts: 2
Likes: 0
Received 0 Likes
on
0 Posts
Hey i had a shop do my return and it looks pretty similar. Im having a problem that the installer wont fix. Do you have any idea what would cause my car to sputter and lean out when im below 3/8 of a tank? it also seems like the pump is alot louder when low. if i have a full tank i dont have this issue. any idea what he did wrong? please help!
 11-16-2011, 04:59 PM
#11
Honda-Tech Member

Join Date: Feb 2011
Posts: 2
Likes: 0
Received 0 Likes
on
0 Posts
HOWEVER!!!! The stock return is NOT large enough for higher fuel flow rates as the return fuel nozzle is literally only big enough to snugly fit a straw from an aerosol can (the little red ones that go in paint cans and stuff like WD40). All of the fuel that your fuel pump puts out (excempt what is used by the engine) must be returned to the tank through this tiny outlet. When you install a fuel pump that attempts to push more fuel than this tiny outlet can handle your fuel pressure spikes uncontrollably, corresponding with the amount of fuel requested by your engine. In other words your tune will be all over the place and the more fuel that your engine uses, the lower the fuel pressure will be. 2 Major problems with this. 1) Your injectors may break or fail to open under the increased pressure. 2) Your injectors require more voltage when your fuel pressure increases, thus leaving you in a sad situation if you find your battery a little low on startup. Even if you have enough power to crank your car you might not have enough to open your injectors.
Last edited by taohawaii; 11-16-2011 at 05:32 PM.
11-10-2015, 11:25 AM
#12
Trial User

Join Date: Nov 2015
Posts: 1
Likes: 0
Received 0 Likes
on
0 Posts
This is spot on as this is exactly what I am experiencing with mine , fuel pressure starts off fine then under load it just goes and the car starts spluttering does this mean I need to get tuned???

 02-09-2019, 11:47 PM
#17
Trial User

Join Date: Feb 2019
Posts: 2
Likes: 0
Received 0 Likes
on
0 Posts
Hey i had a shop do my return and it looks pretty similar. Im having a problem that the installer wont fix. Do you have any idea what would cause my car to sputter and lean out when im below 3/8 of a tank? it also seems like the pump is alot louder when low. if i have a full tank i dont have this issue. any idea what he did wrong? please help!
02-09-2019, 11:51 PM
#18
Trial User
Join Date: Feb 2019
Posts: 2
Likes: 0
Received 0 Likes
on
0 Posts
Yea I have a problem on my rsx after I ran my return lines its starts to sputter then when i give it gas it shuts off.but the first time I installed it it was fine but the next day came and when i tried to start it up it started to studded and when I gave it gas the car shuts off ...and when i started it uo and looked at the fpr the psi was bellow 10 psi how come

Thread
Thread Starter
Forum
Replies
Last Post