
Fuel Pump Instal DIY
 04-06-2010, 06:31 PM
#1
DC5/EP3 MOD :)
Thread Starter
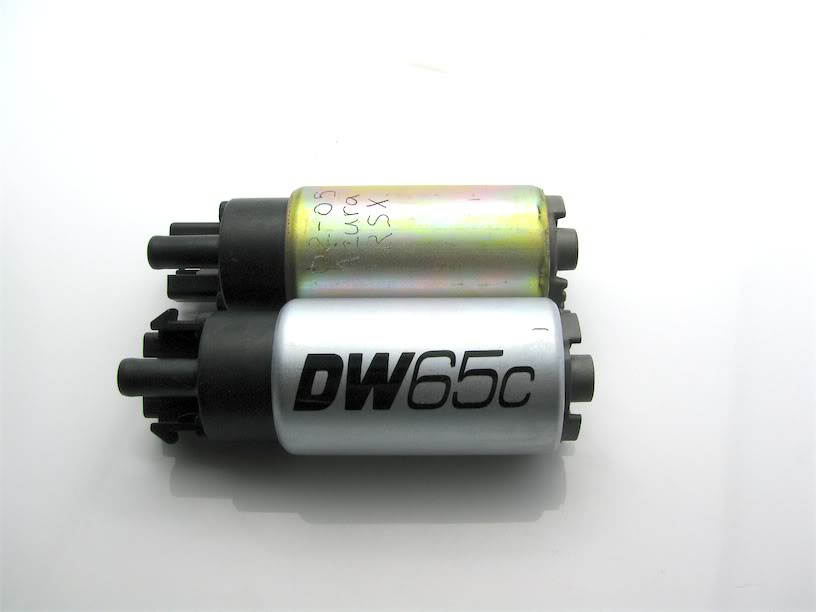
So I just finished installing my Walbro 255lb fuel pump in the RSX and instal time was just under an hour and it is very easy.
Tools Needed:
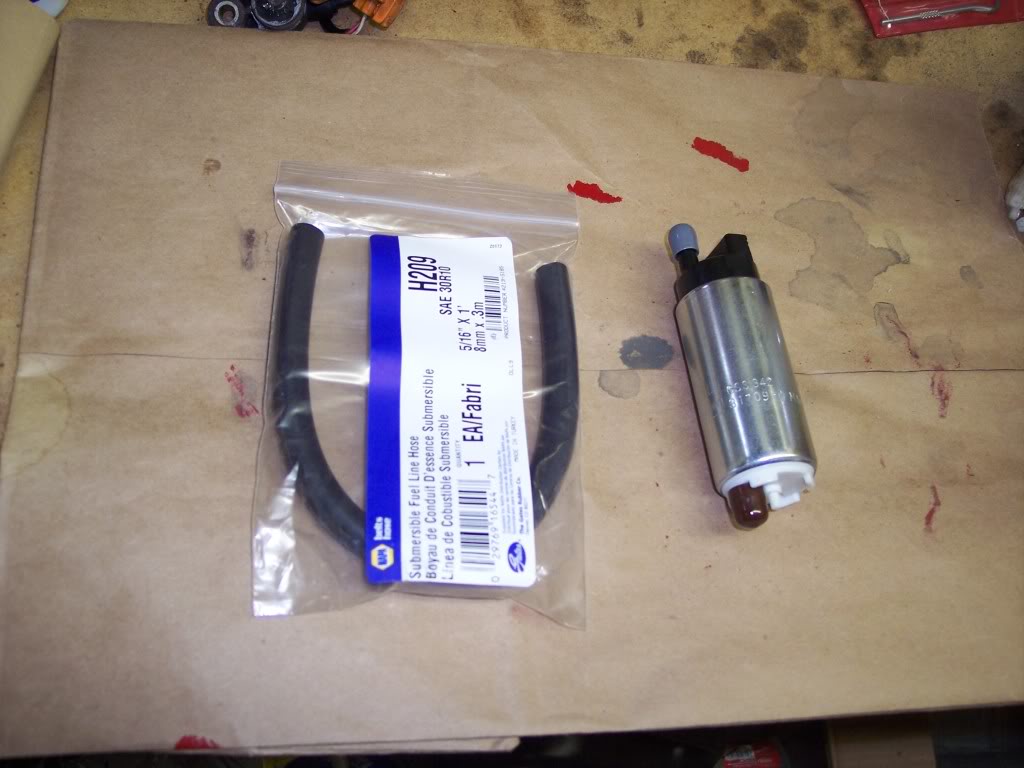
New Fuel Pump
Phillips/Flat screw drive
10,12,14 Sockets (for back seat removal)
1/2" drive extension
Hammer
5/16" Submersible Fuel hose
2 hose clamps
Knife/cutters
zip ties
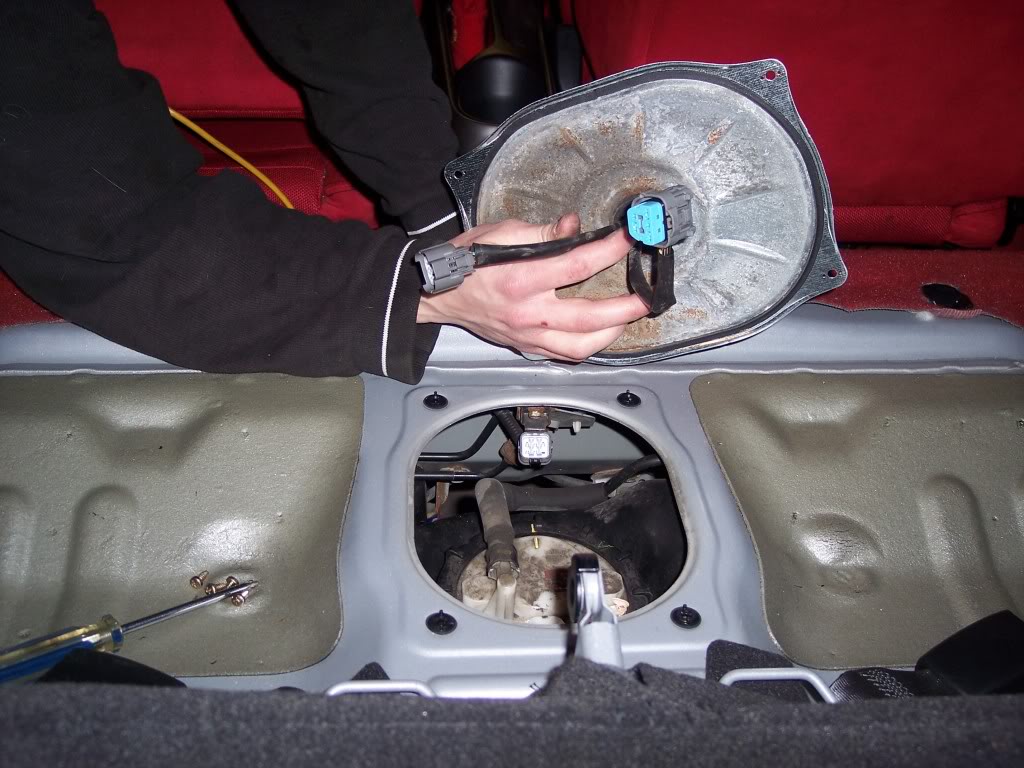
First thing after taking your back seats out you'll see the fuel pump cover plate. There are 4 gold philips screws you will need to remove.

After lifting up the plate you will have to disconnect the two wire loom clips.
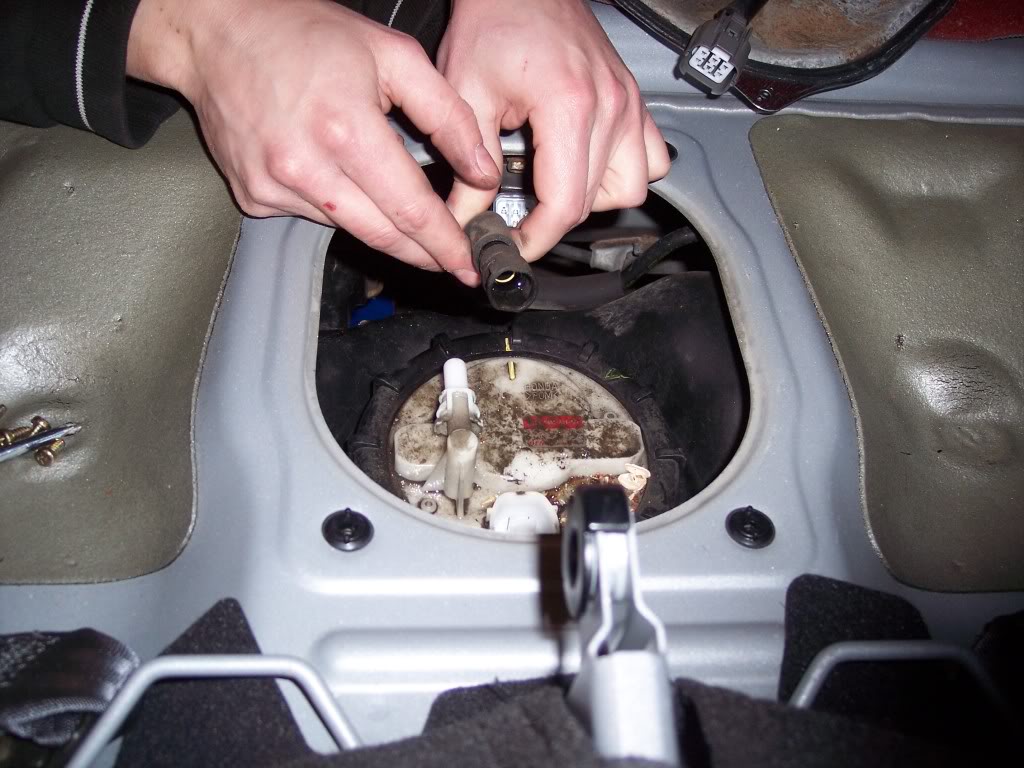
From there you will probably need a towel... but my cars been sitting forever and disconnect the fuel line. Just squeeze the tabs and pull back on the line
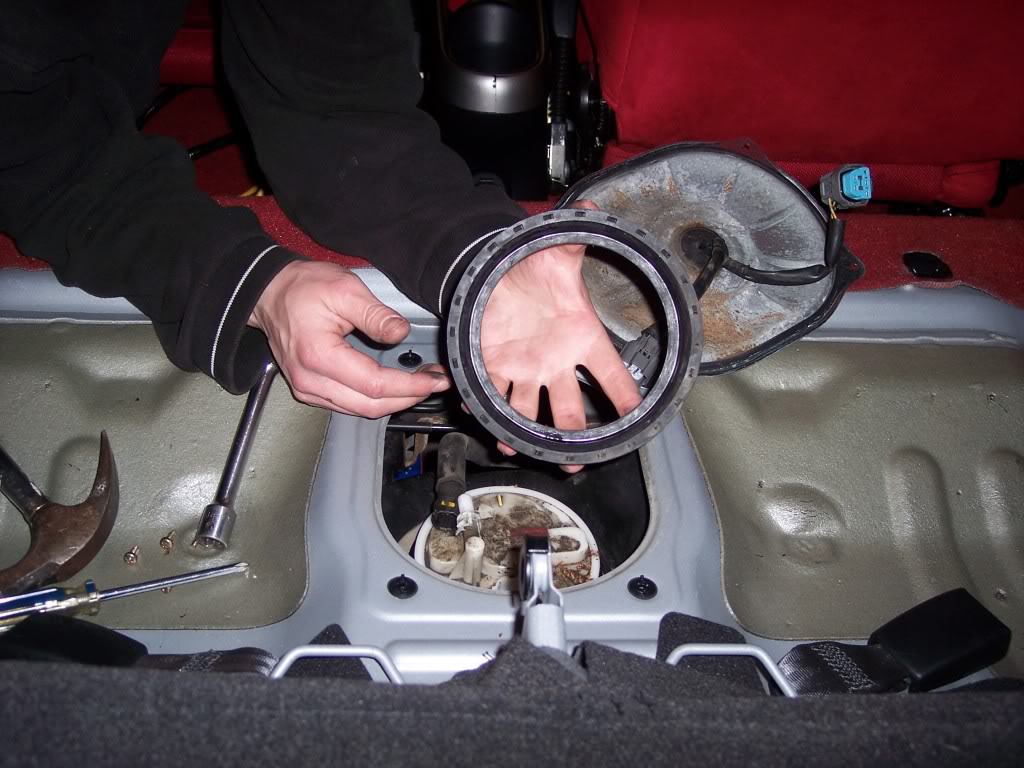
Here is where the extension and the hammer come in to play. You will need to pound off the lock ring. Placing the extension on the ring hit it to start loosing it up. It is on there tight. But remember it's still lefty loosey righty tighty. So go to the left!

Here is the ring taken off
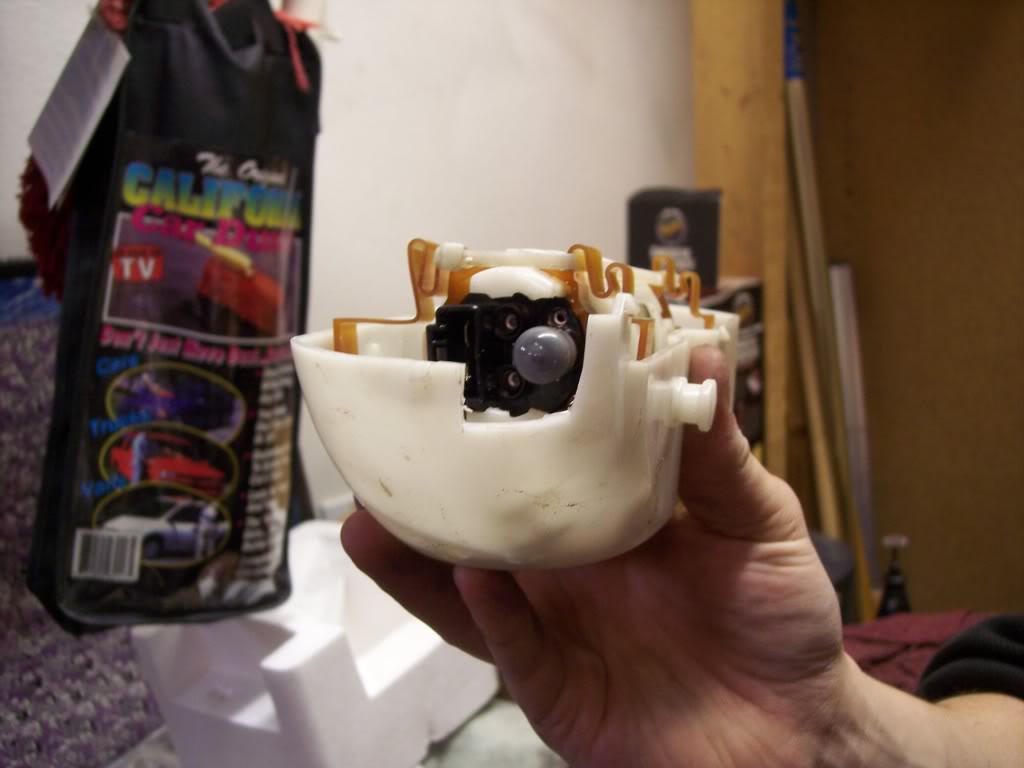
Now you will need a plastic bag or a towel handy... something to put the fuel pump on once you've pulled it out. Maneuver it out of the gas tank and be very careful of the fuel sending unit plunger!
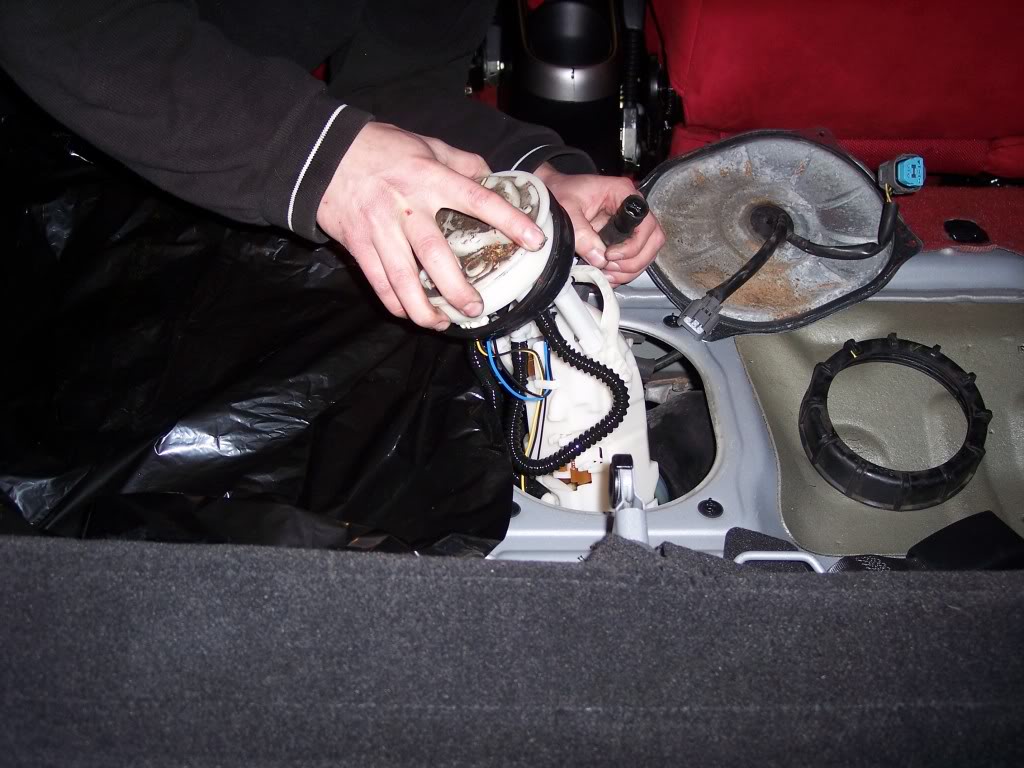
the plunger

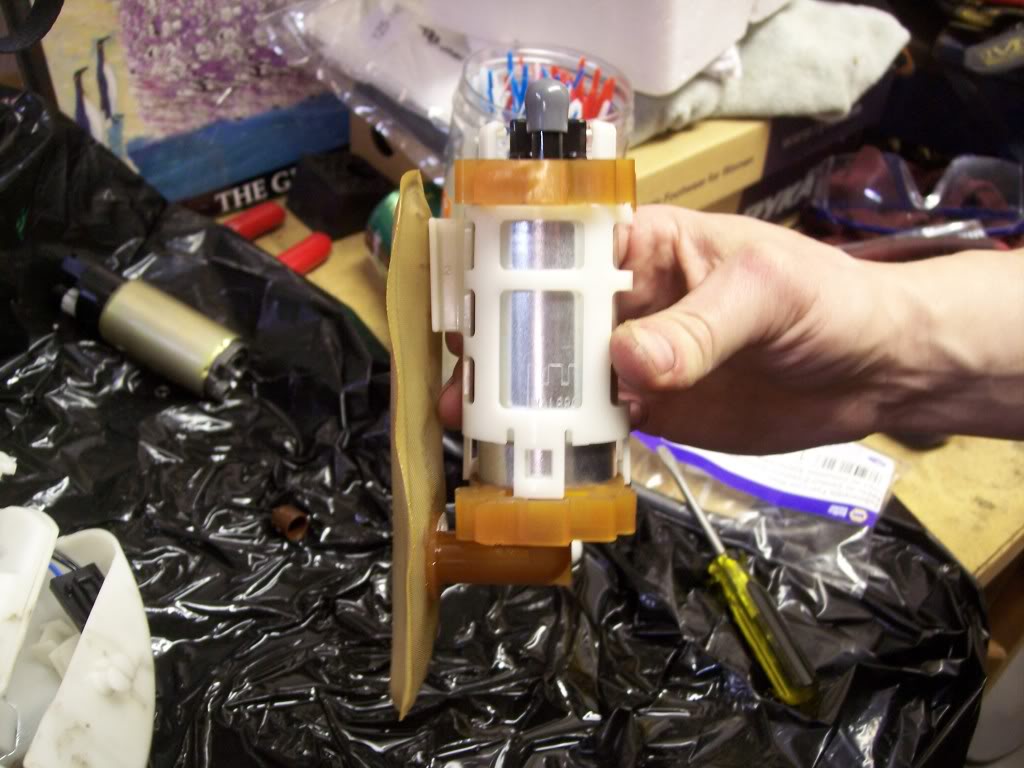
Now take the pump to a work bench and we'll begin dissembling.
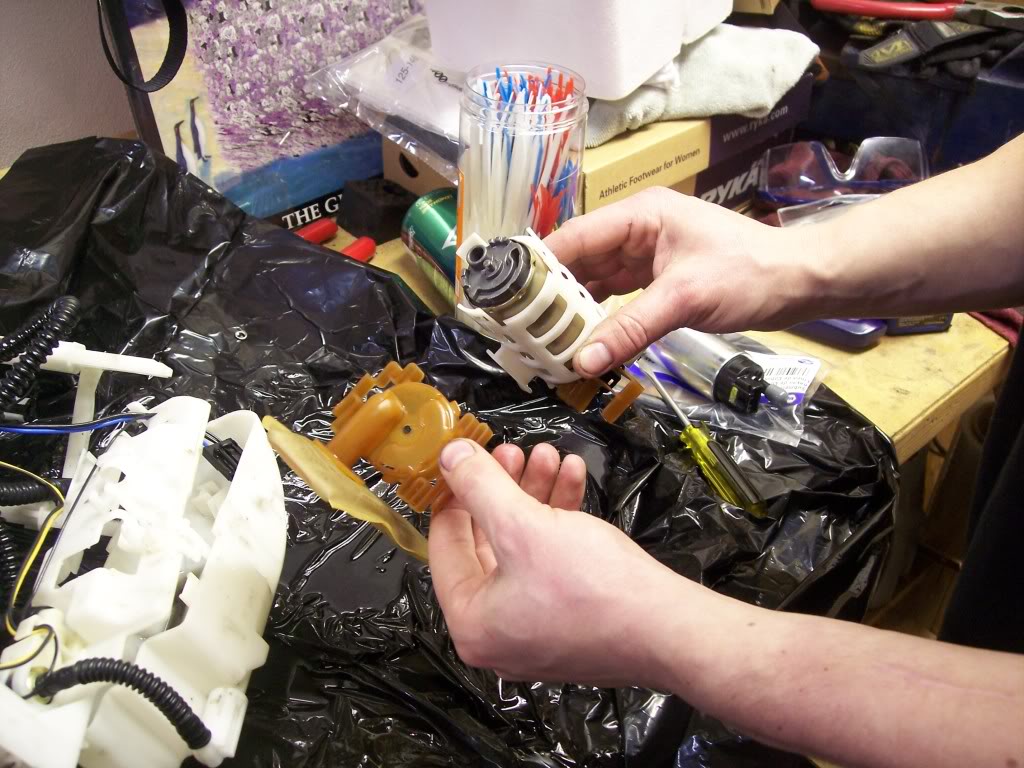
First thing is to separate the tower arms.
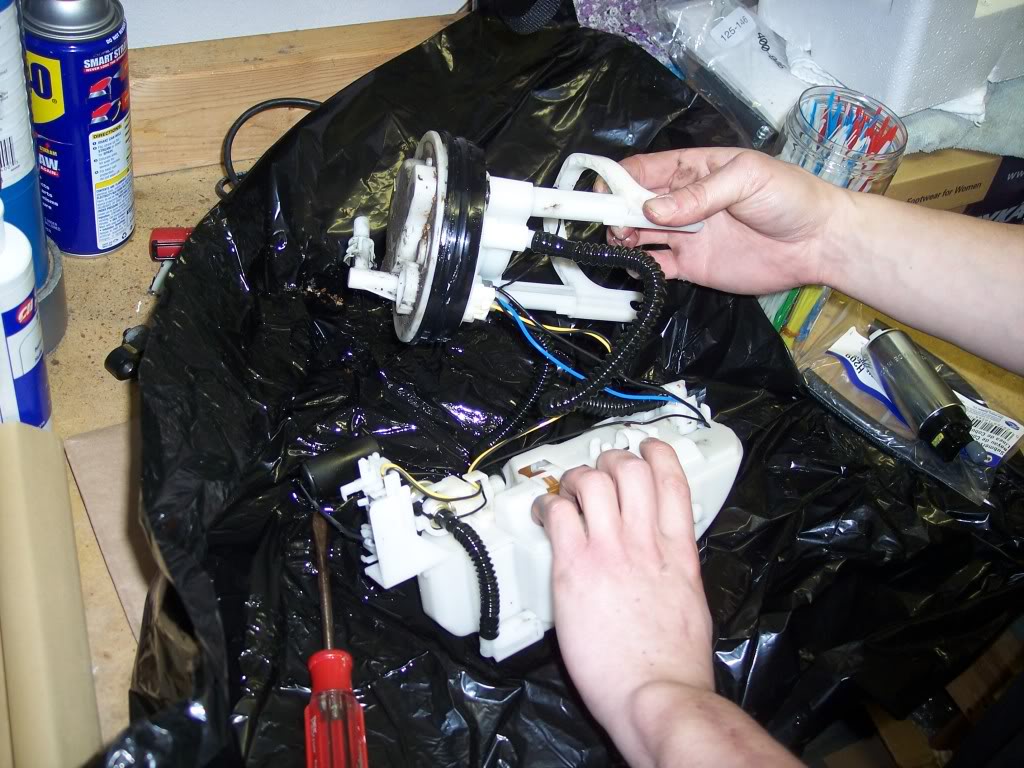
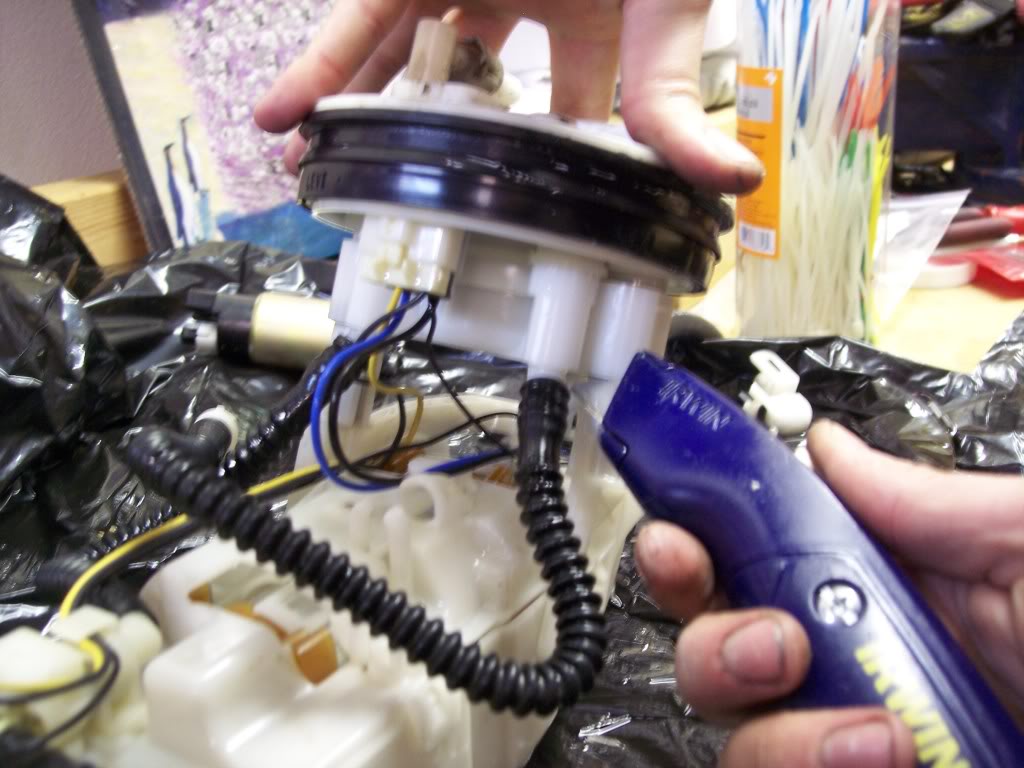
Then using a flat head screwdriver pop apart the tabs holding the top of the pump housing on. You'll also want to disconnect the fuel hose from the top of the pump and from the return.
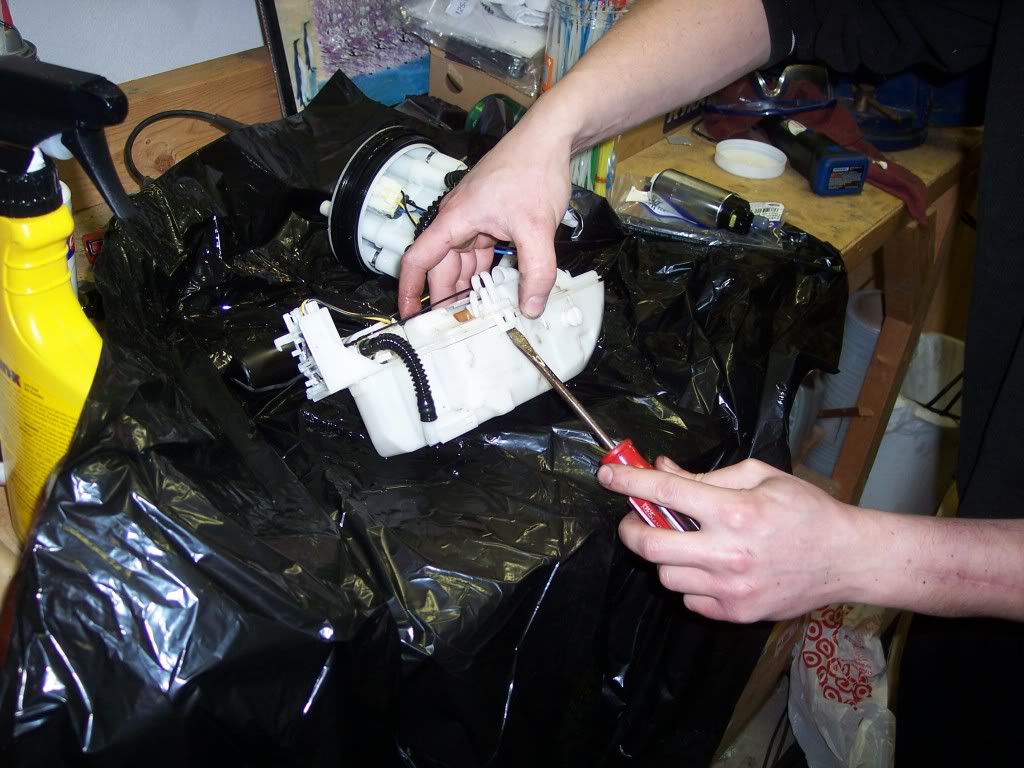
Now you can pull out the actual pump

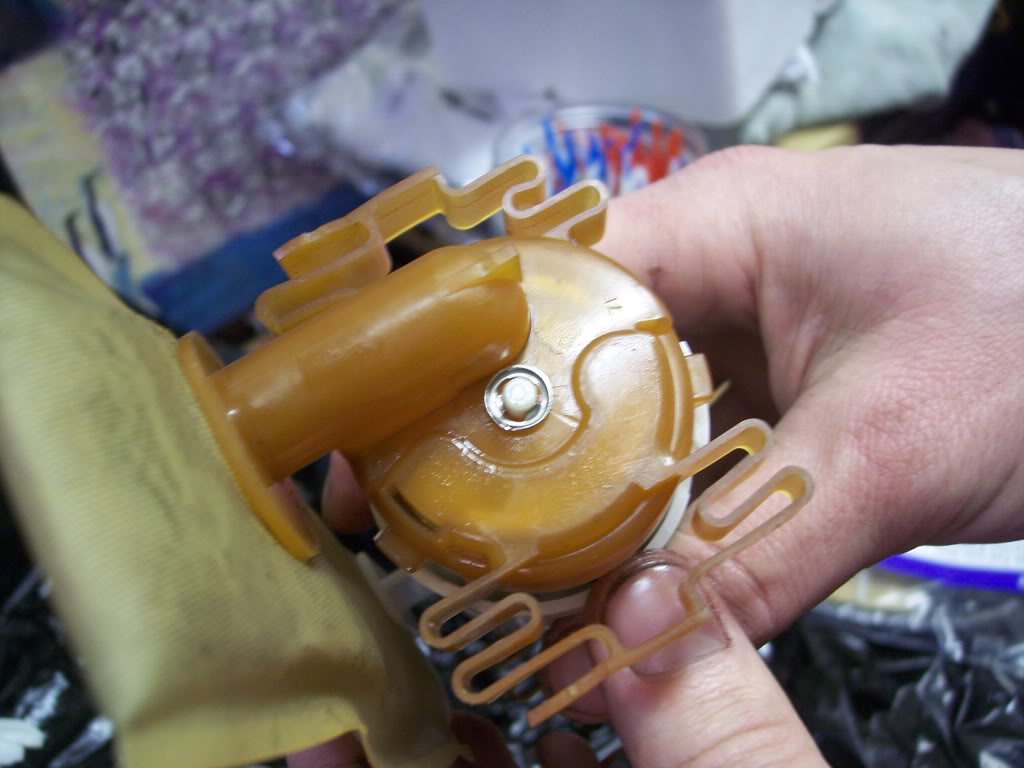
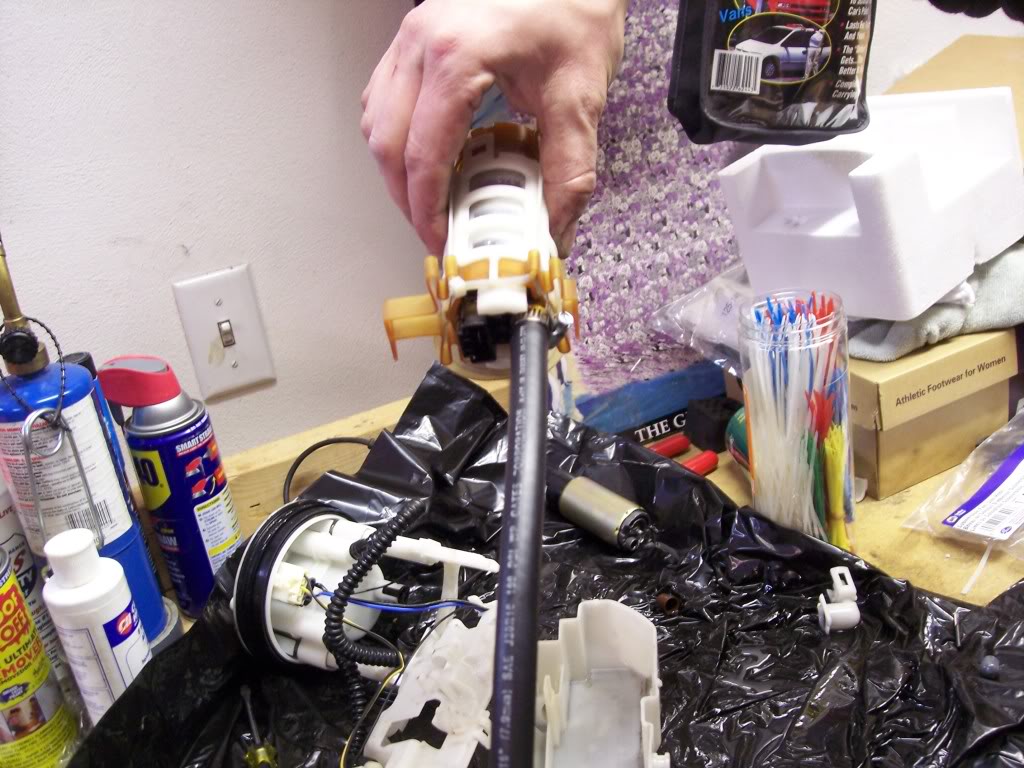
To start, remove the bottom lock ring on the fuel strainer. DO NOT DAMAGE THIS because we will be re-using it!
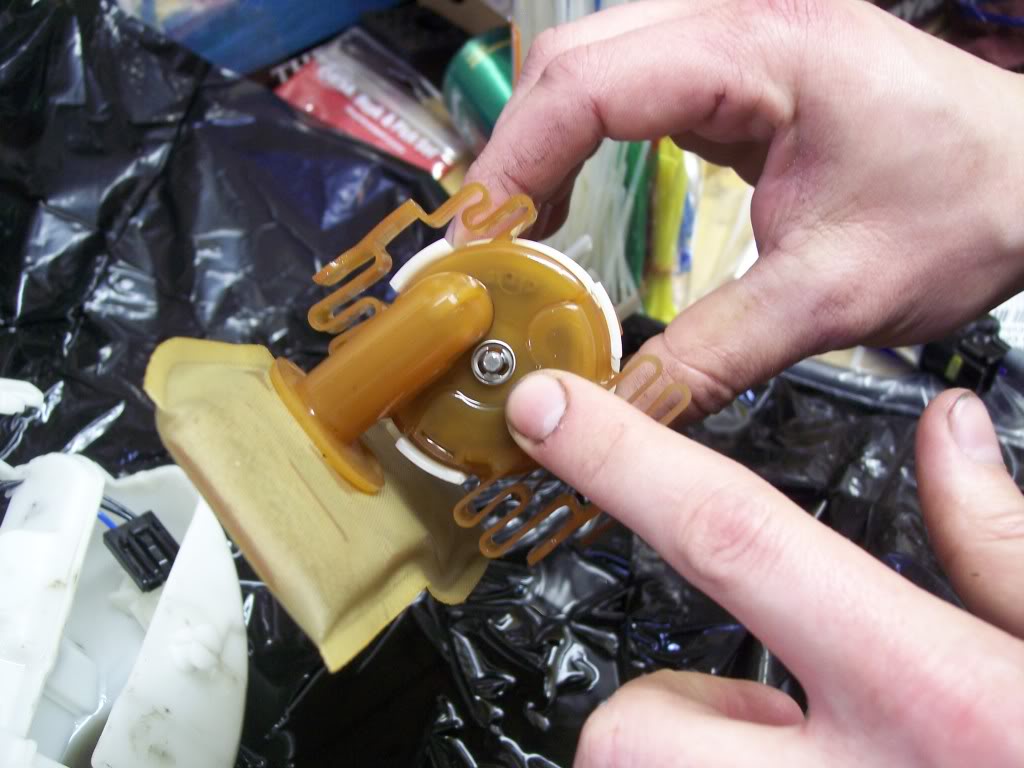
Now pull the strainer off
Now pull the pump out of the cage
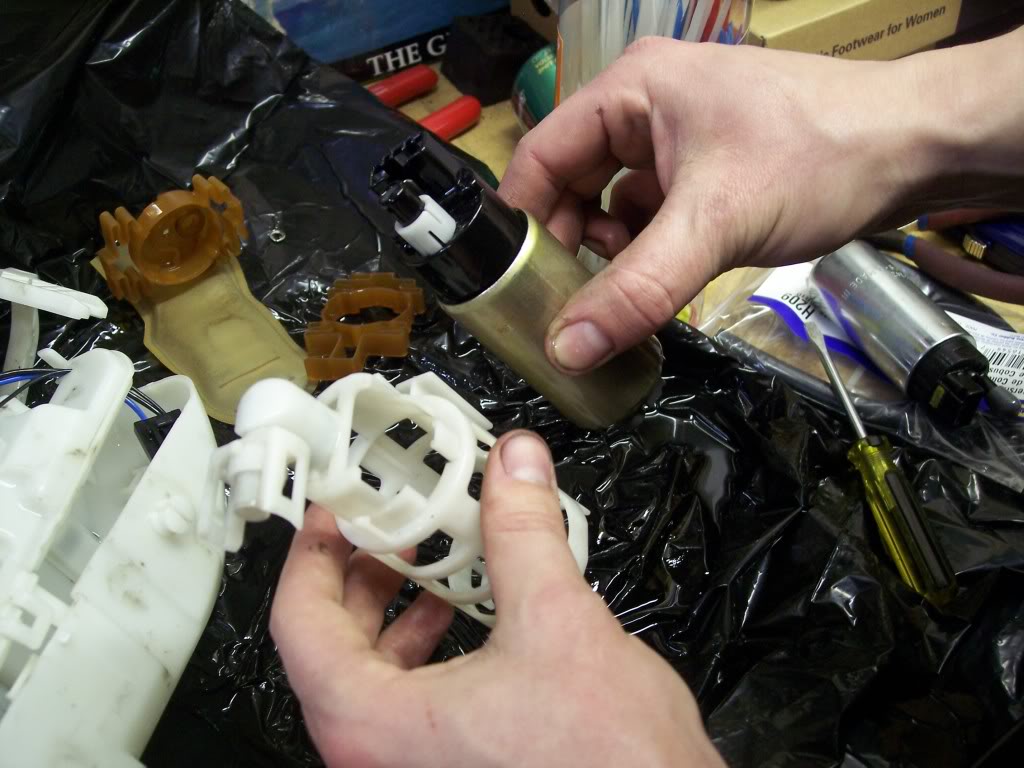
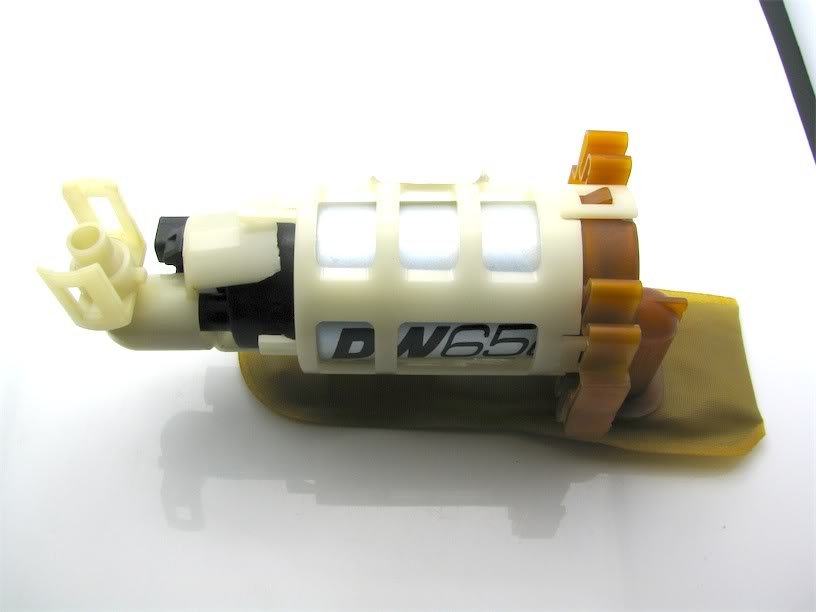
Use the knife or cutters as I did and remove the head from the cage as it will not be needed for the new pump.

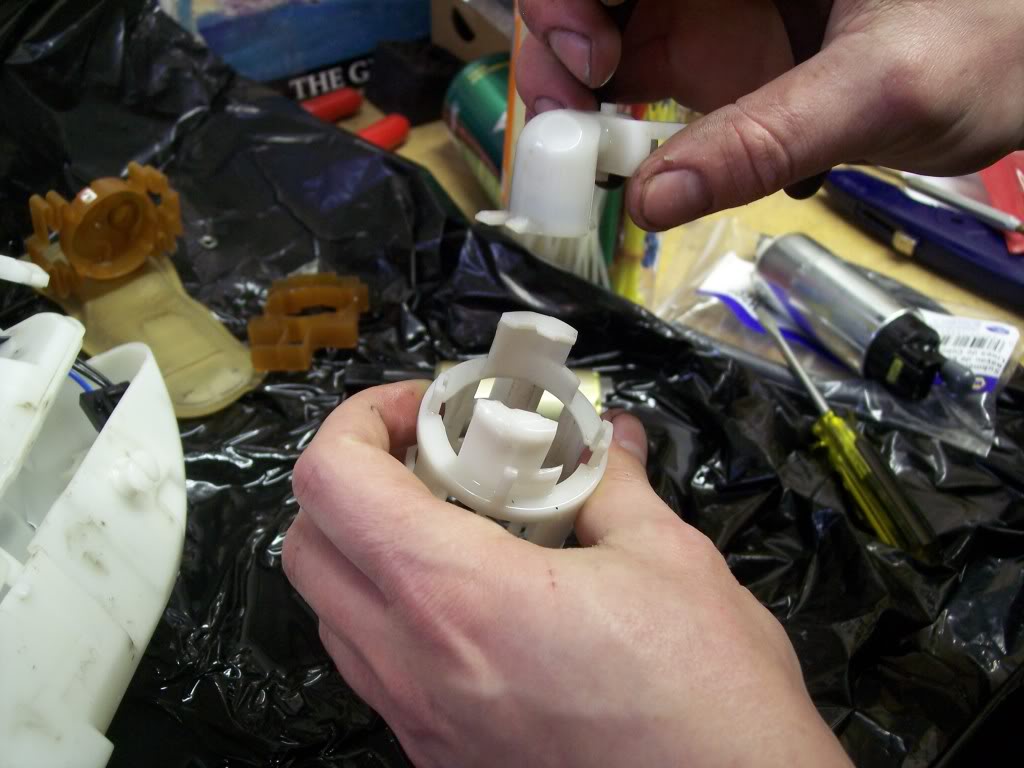
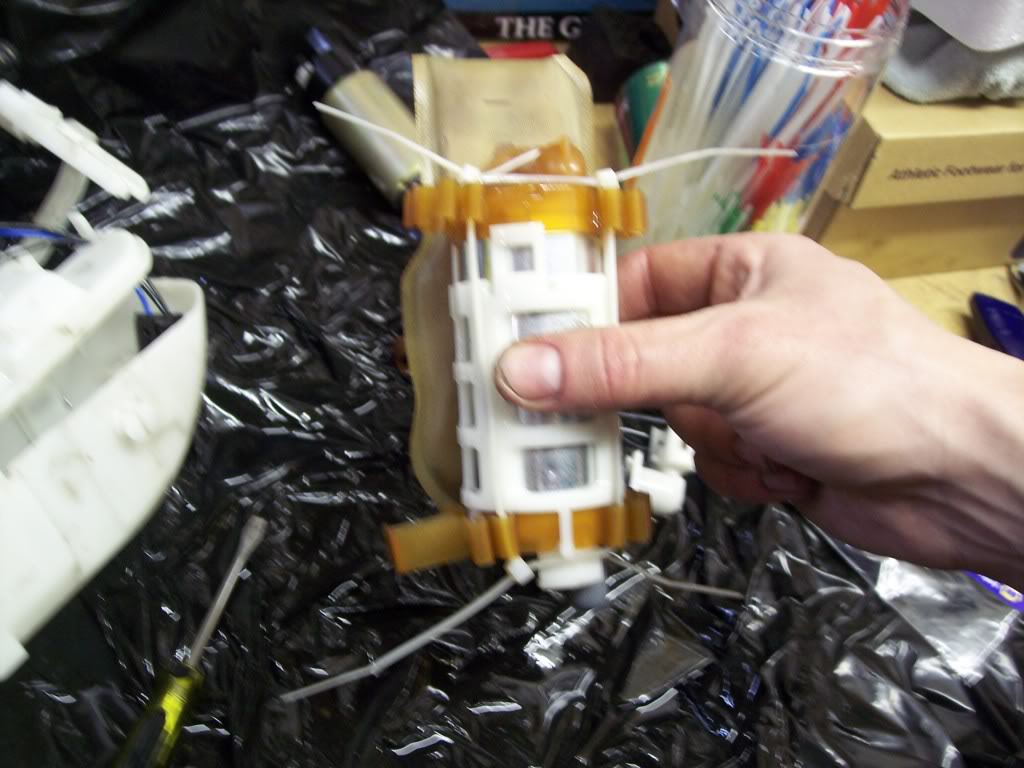
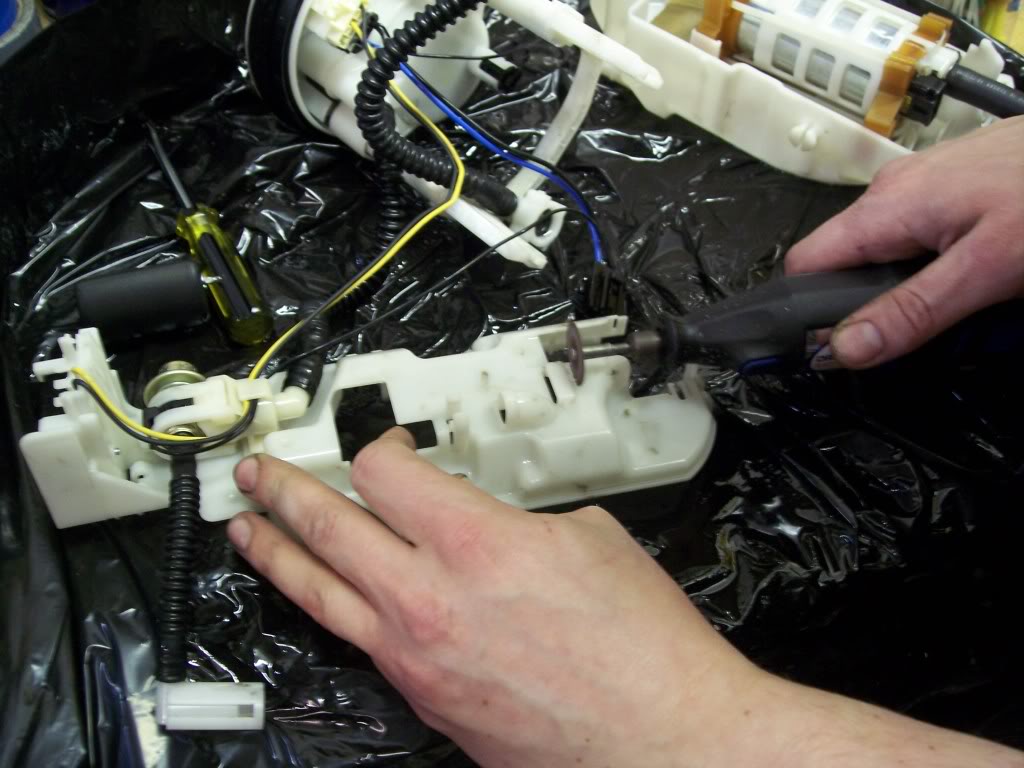
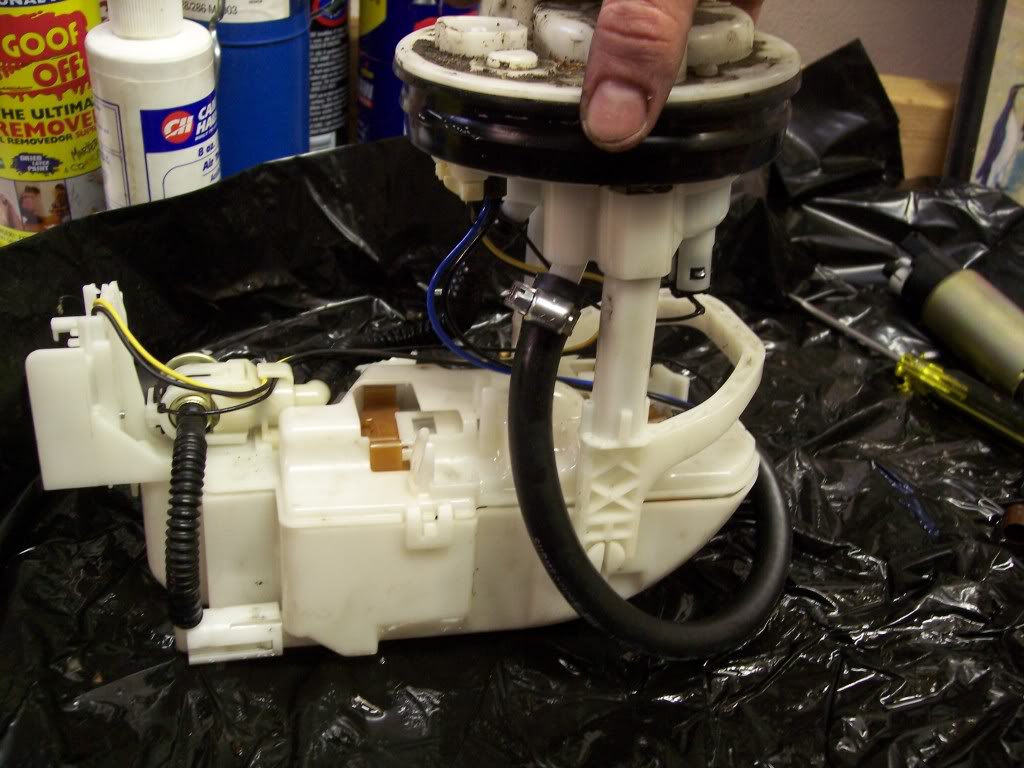
Now place the fuel pump back into the cage. Dont worry it will be to long for the fuel cage but we will make it work.
Now add the top and bottom portions of the cage. Don't forget to reinstall the bottom clip ring
Here you can see the cage doesn't snap back together...

This is where zip ties come in play! Zip tie the two sections together to keep them as one since the new fuel pump is longer than the original.
Now time to modify the cage. We need to cut an opening to let the new fuel hose come out. So place the pump inside the cage and mark the area where the hose will extend out and cut. I used a dremel because it's quick clean and easy.

Now clamp on the new fuel hose. I made mine at the pump he man tight.
Next we will have to modify the top of the housing cage. Because the pump is longer the housing will not shut. So place the pump in and mark off the area that needs to be cut. Then cut it out.
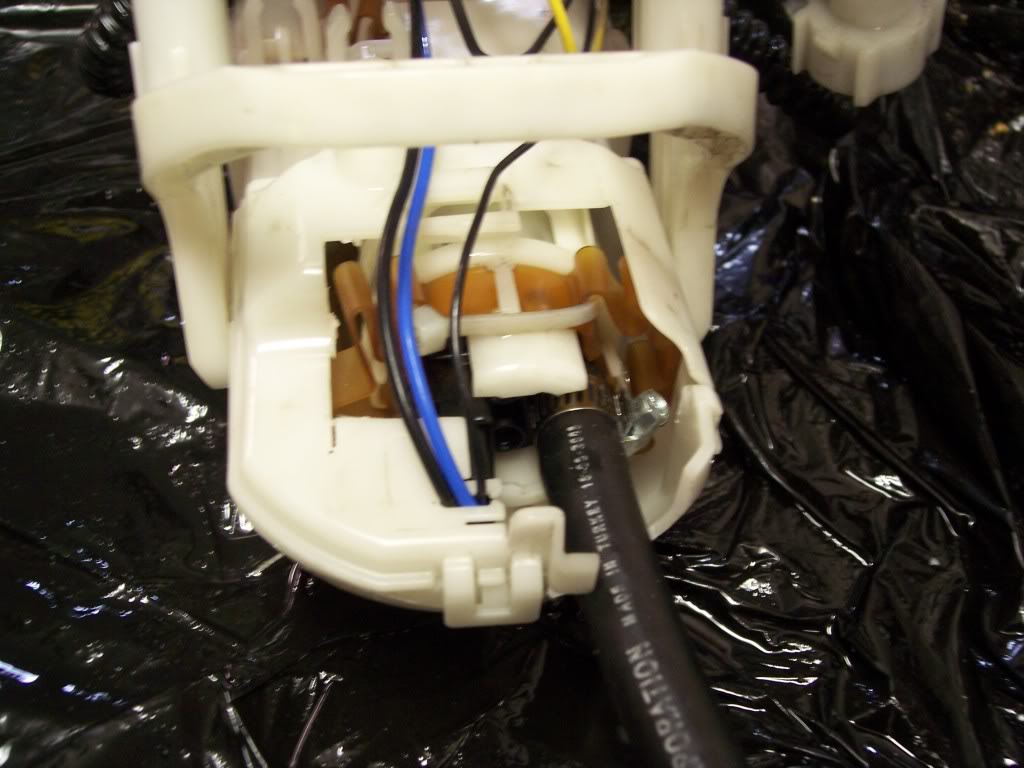
Now we will cut the old hose off from the top as we will not be needing it.
Put the cage back together and clamp down the new hose. Remember not to tighten this side of the hose down as tight because it is going on plastic!!
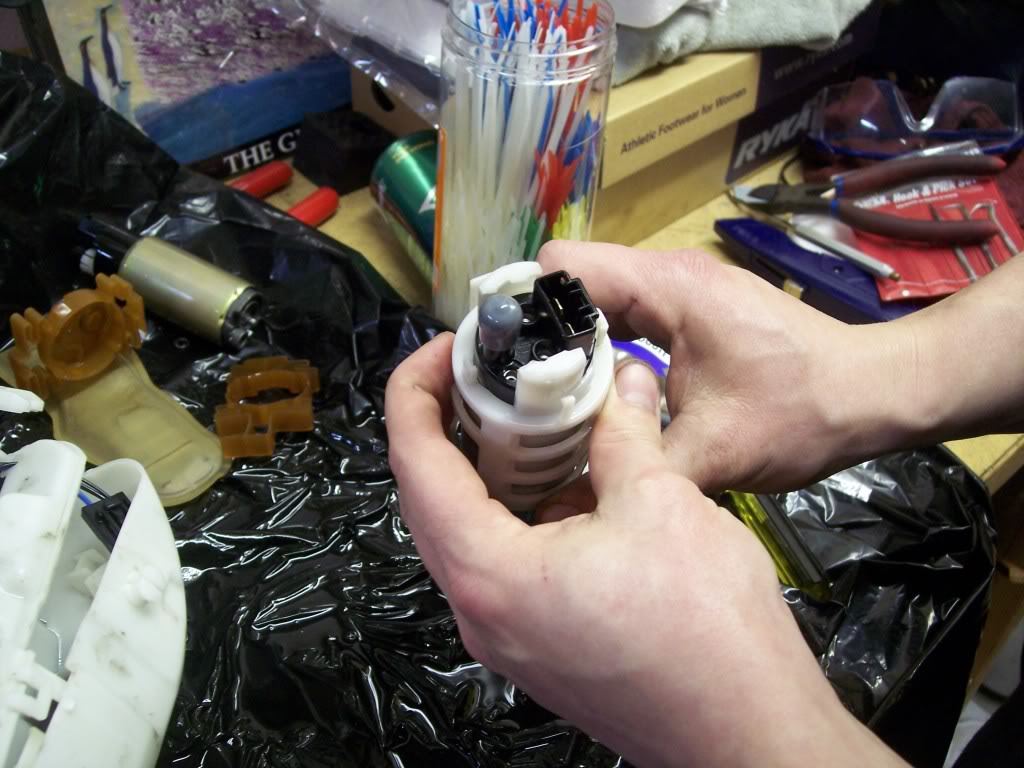
Now reinstall the fuel pump into the tank!
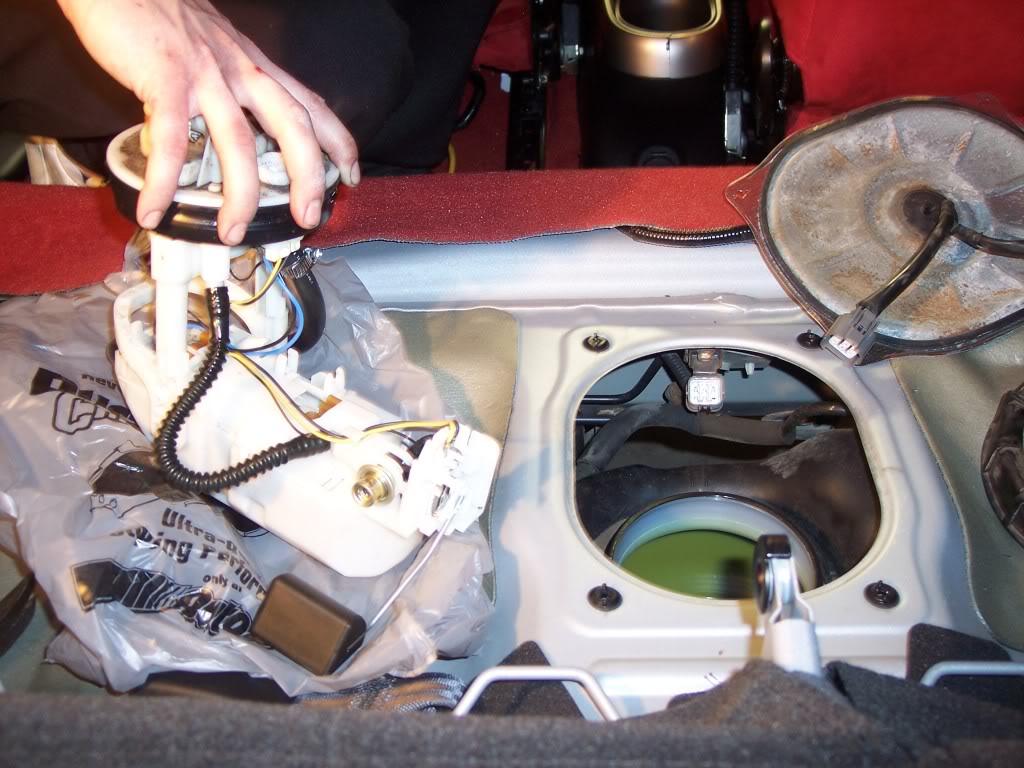
and you're all done!! Simple as that!
Tools Needed:
New Fuel Pump
Phillips/Flat screw drive
10,12,14 Sockets (for back seat removal)
1/2" drive extension
Hammer
5/16" Submersible Fuel hose
2 hose clamps
Knife/cutters
zip ties
First thing after taking your back seats out you'll see the fuel pump cover plate. There are 4 gold philips screws you will need to remove.
After lifting up the plate you will have to disconnect the two wire loom clips.
From there you will probably need a towel... but my cars been sitting forever and disconnect the fuel line. Just squeeze the tabs and pull back on the line
Here is where the extension and the hammer come in to play. You will need to pound off the lock ring. Placing the extension on the ring hit it to start loosing it up. It is on there tight. But remember it's still lefty loosey righty tighty. So go to the left!
Here is the ring taken off
Now you will need a plastic bag or a towel handy... something to put the fuel pump on once you've pulled it out. Maneuver it out of the gas tank and be very careful of the fuel sending unit plunger!
the plunger
Now take the pump to a work bench and we'll begin dissembling.
First thing is to separate the tower arms.
Then using a flat head screwdriver pop apart the tabs holding the top of the pump housing on. You'll also want to disconnect the fuel hose from the top of the pump and from the return.
Now you can pull out the actual pump
To start, remove the bottom lock ring on the fuel strainer. DO NOT DAMAGE THIS because we will be re-using it!
Now pull the strainer off
Now pull the pump out of the cage
Use the knife or cutters as I did and remove the head from the cage as it will not be needed for the new pump.
Now place the fuel pump back into the cage. Dont worry it will be to long for the fuel cage but we will make it work.
Now add the top and bottom portions of the cage. Don't forget to reinstall the bottom clip ring
Here you can see the cage doesn't snap back together...
This is where zip ties come in play! Zip tie the two sections together to keep them as one since the new fuel pump is longer than the original.
Now time to modify the cage. We need to cut an opening to let the new fuel hose come out. So place the pump inside the cage and mark the area where the hose will extend out and cut. I used a dremel because it's quick clean and easy.
Now clamp on the new fuel hose. I made mine at the pump he man tight.
Next we will have to modify the top of the housing cage. Because the pump is longer the housing will not shut. So place the pump in and mark off the area that needs to be cut. Then cut it out.
Now we will cut the old hose off from the top as we will not be needing it.
Put the cage back together and clamp down the new hose. Remember not to tighten this side of the hose down as tight because it is going on plastic!!
Now reinstall the fuel pump into the tank!
and you're all done!! Simple as that!

 04-07-2010, 06:35 AM
#3
Honda-Tech Member
Join Date: Jan 2003
Location: East Peoria, IL, United States
Posts: 524
Likes: 0
Received 0 Likes
on
0 Posts
wow. changing the fuel pump in my ej8 was freaking easy compared to this. Interesting that the pump lays horizontal.
Nice write up though.
Nice write up though.
04-07-2010, 08:39 AM
#4
DC5/EP3 MOD :)
Thread Starter
I tried to be as thorough as possible on this DIY since I had questions while researching it.
05-05-2010, 03:10 PM
#5
Honda-Tech Member
Join Date: Jun 2007
Location: Tx, USA
Posts: 280
Likes: 0
Received 0 Likes
on
0 Posts
That fkn huge cap that you screw on top of the fuel pump was a Homo to put back on!!!!AAAGAGGHHHH. because the upper pump housing plastic skirt would not stay in the tank entrance. I was so pissed like

but got it done though, lolz. It's noticably louder, but not bad at all...Good write up. Everything was easy bro. Next up is KPRO, Then Dropping the 24a2 Catch you on CRSX or K20a
but got it done though, lolz. It's noticably louder, but not bad at all...Good write up. Everything was easy bro. Next up is KPRO, Then Dropping the 24a2
Catch you on CRSX or K20a
05-06-2010, 03:54 AM
#7
B*a*n*n*e*d

Join Date: Apr 2010
Posts: 13
Likes: 0
Received 0 Likes
on
0 Posts
Nice Thread, it i have never tried this up, but i m sure after seen your post it would be a bit easy for me at get it replace it any time, i would like to know, that have you learn from so where else, or you done that with the help of user manual,
Trending Topics
08-08-2011, 02:26 PM
#9
Honda-Tech Member
Join Date: Aug 2004
Posts: 44
Likes: 0
Received 0 Likes
on
0 Posts
Awesome DIY....
I would imagine this would be the same for the EP3? Driving down today the road I hit a bump and the car went dead! I can't hear the fuel pump hum anymore when I turn the key so after I diagnose it with my multimeter I am more than likely gonna have to do this
Anything else I might need?
Thanks again for the great write up

 02-02-2013, 04:22 PM
#13
Honda-Tech Member

Join Date: Dec 2012
Posts: 2
Likes: 0
Received 0 Likes
on
0 Posts
Yes everybody you're welcome, I know, bumped a practically dead thread. I was wanting to ask if you changed the tab on the quick connect fuel line, the tab retainer that's on the male end. The manual said it should be replaced so I held off on looking in tank to making sure all my hoses were still connected good on my deatschwerk 265. I think either it's bad...or I don't know. But I'm replacing it w another 265 none the less.


Thread
Thread Starter
Forum
Replies
Last Post