
1994 NSX #41

 08-27-2017, 05:13 PM
#77

I'm glad you enjoy it!
The pedal feels much better and doesn't sink anymore with the new MC but the problem I tend to have with fresh calipers is that there are tons of little places for air to get trapped that will just take time to work their way out. I had the same problem with the new calipers on the Integra, I would just keep bleeding and bleeding and each time I thought I was done I'd get a few more tiny bubbles. Rather than run through a ton of brake fluid trying to get it all out at first I'm just driving the car for a while then will go back and bleed the brakes again in a week or so to get rid of the tiny amount of air still in there.
The pedal feels much better and doesn't sink anymore with the new MC but the problem I tend to have with fresh calipers is that there are tons of little places for air to get trapped that will just take time to work their way out. I had the same problem with the new calipers on the Integra, I would just keep bleeding and bleeding and each time I thought I was done I'd get a few more tiny bubbles. Rather than run through a ton of brake fluid trying to get it all out at first I'm just driving the car for a while then will go back and bleed the brakes again in a week or so to get rid of the tiny amount of air still in there.
Last edited by MotorMouth93; 08-27-2017 at 11:01 PM.
09-06-2017, 10:44 PM
#78
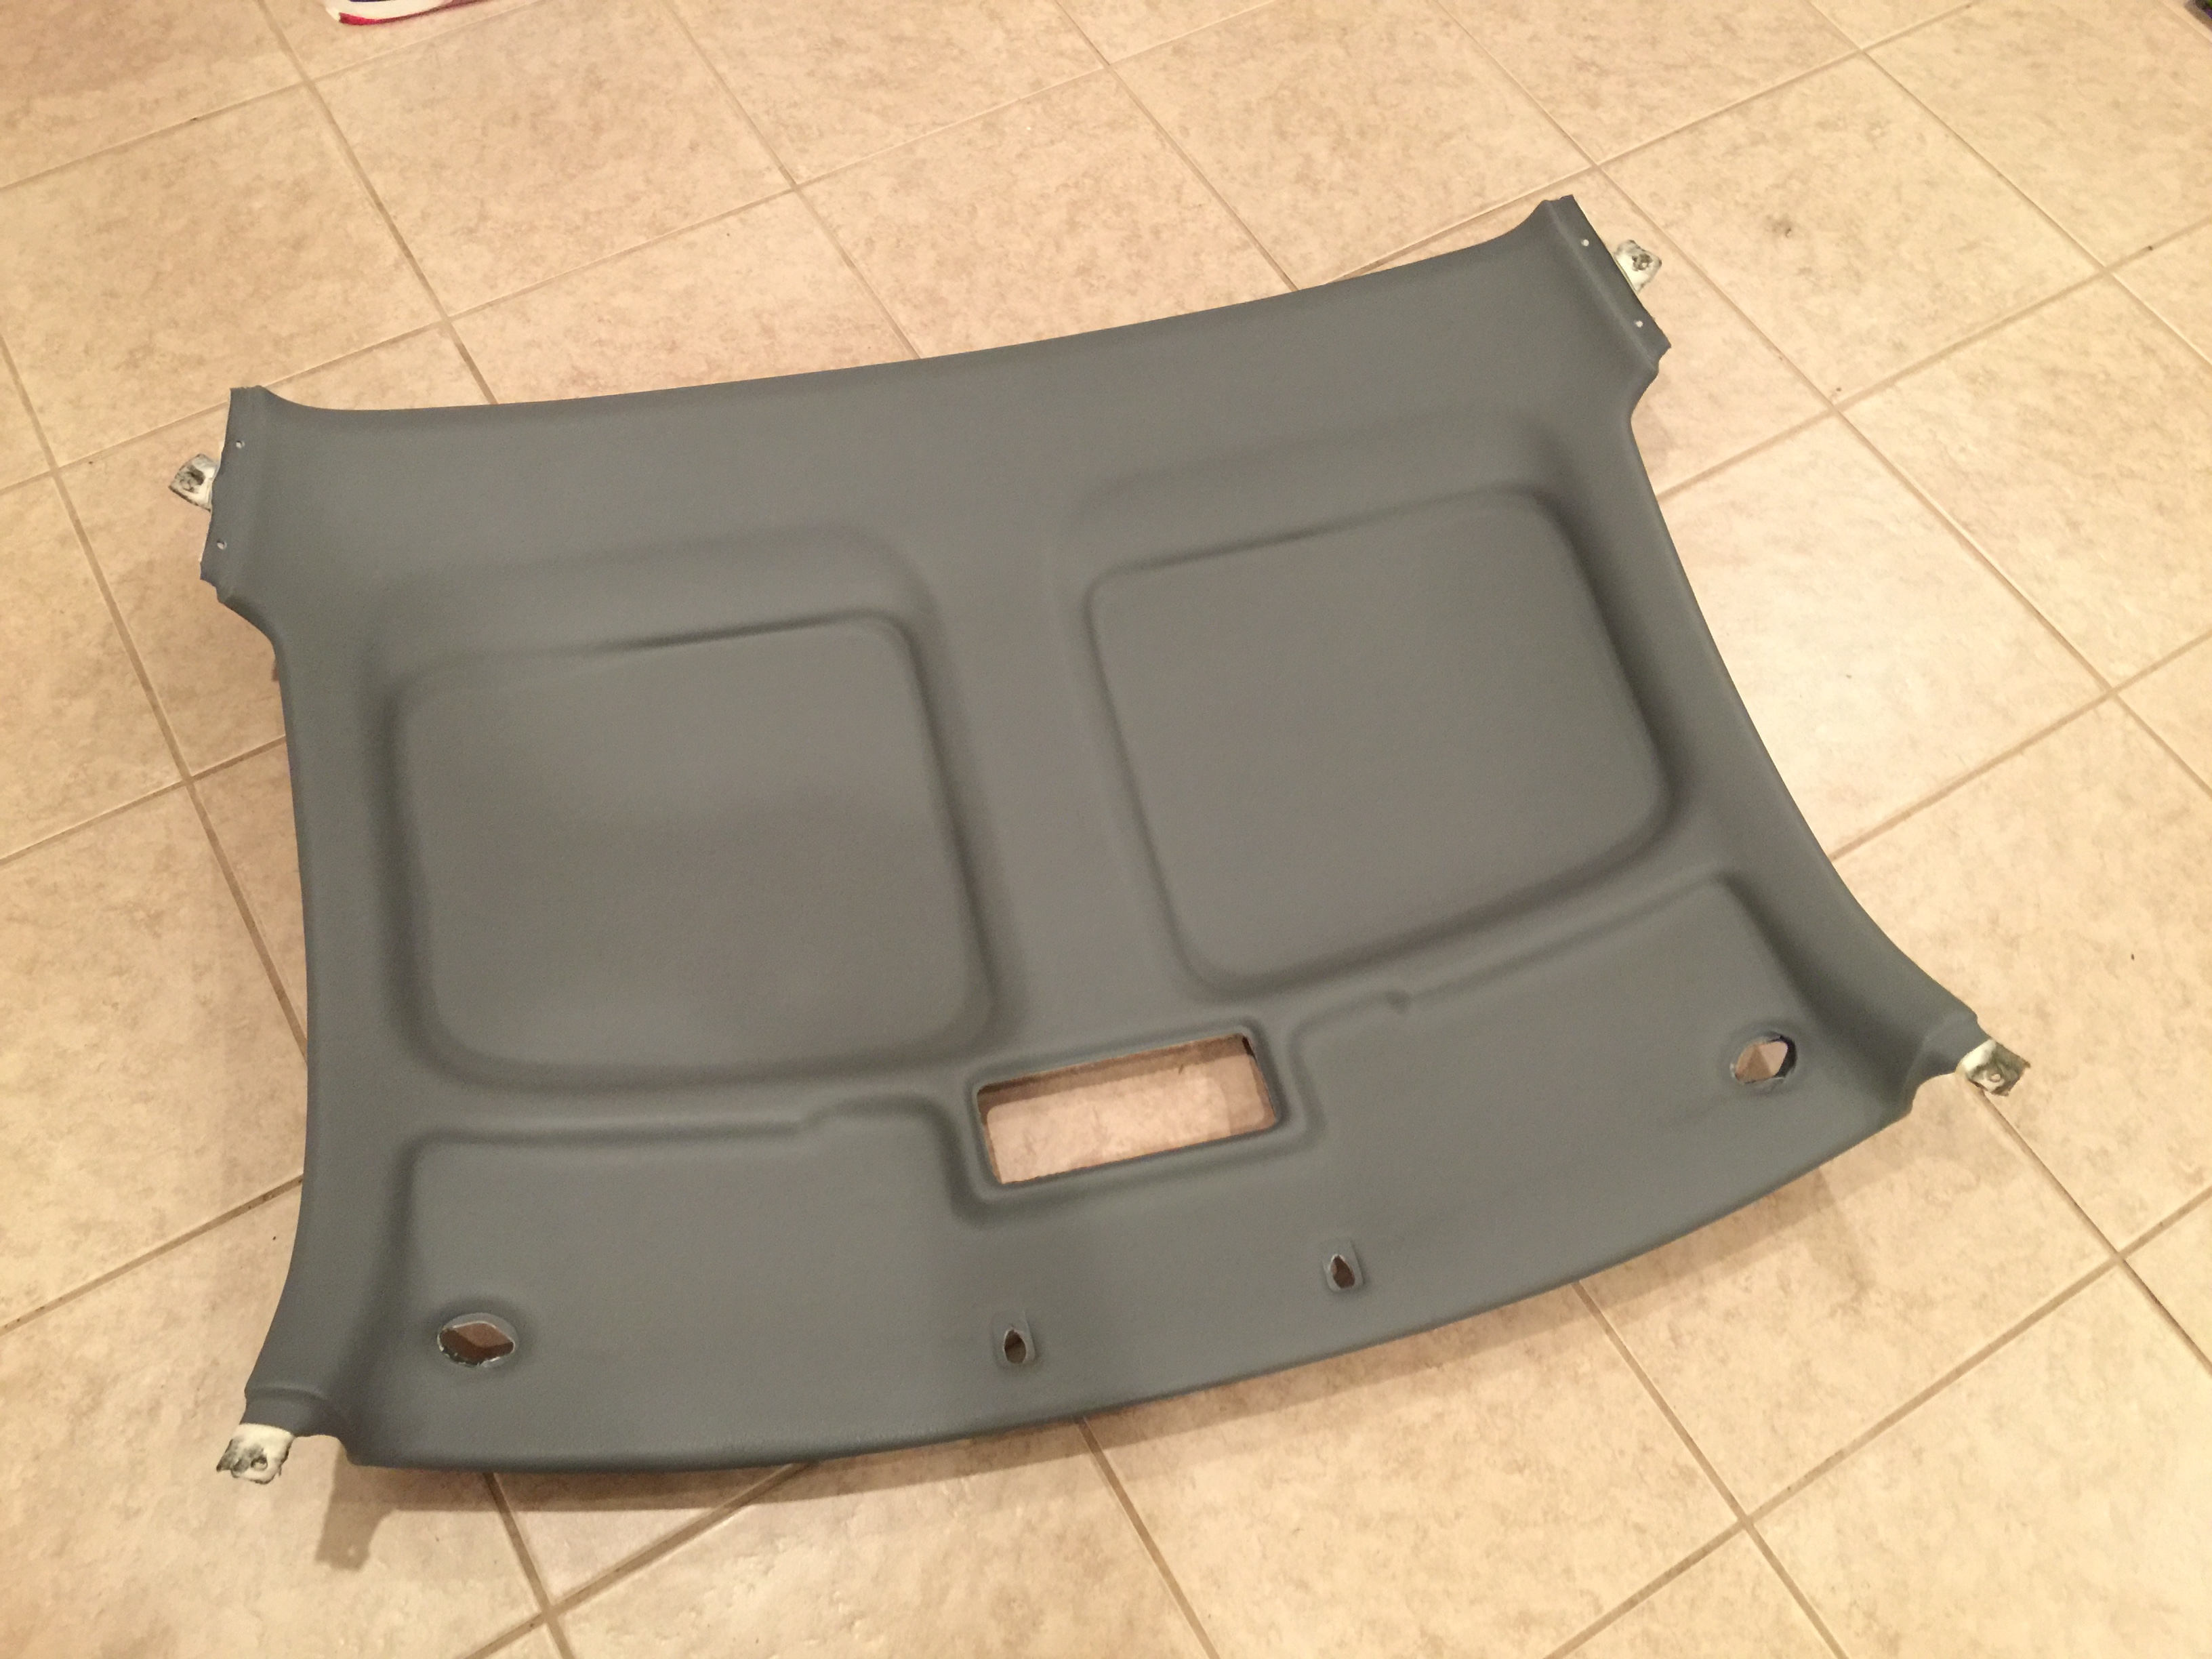
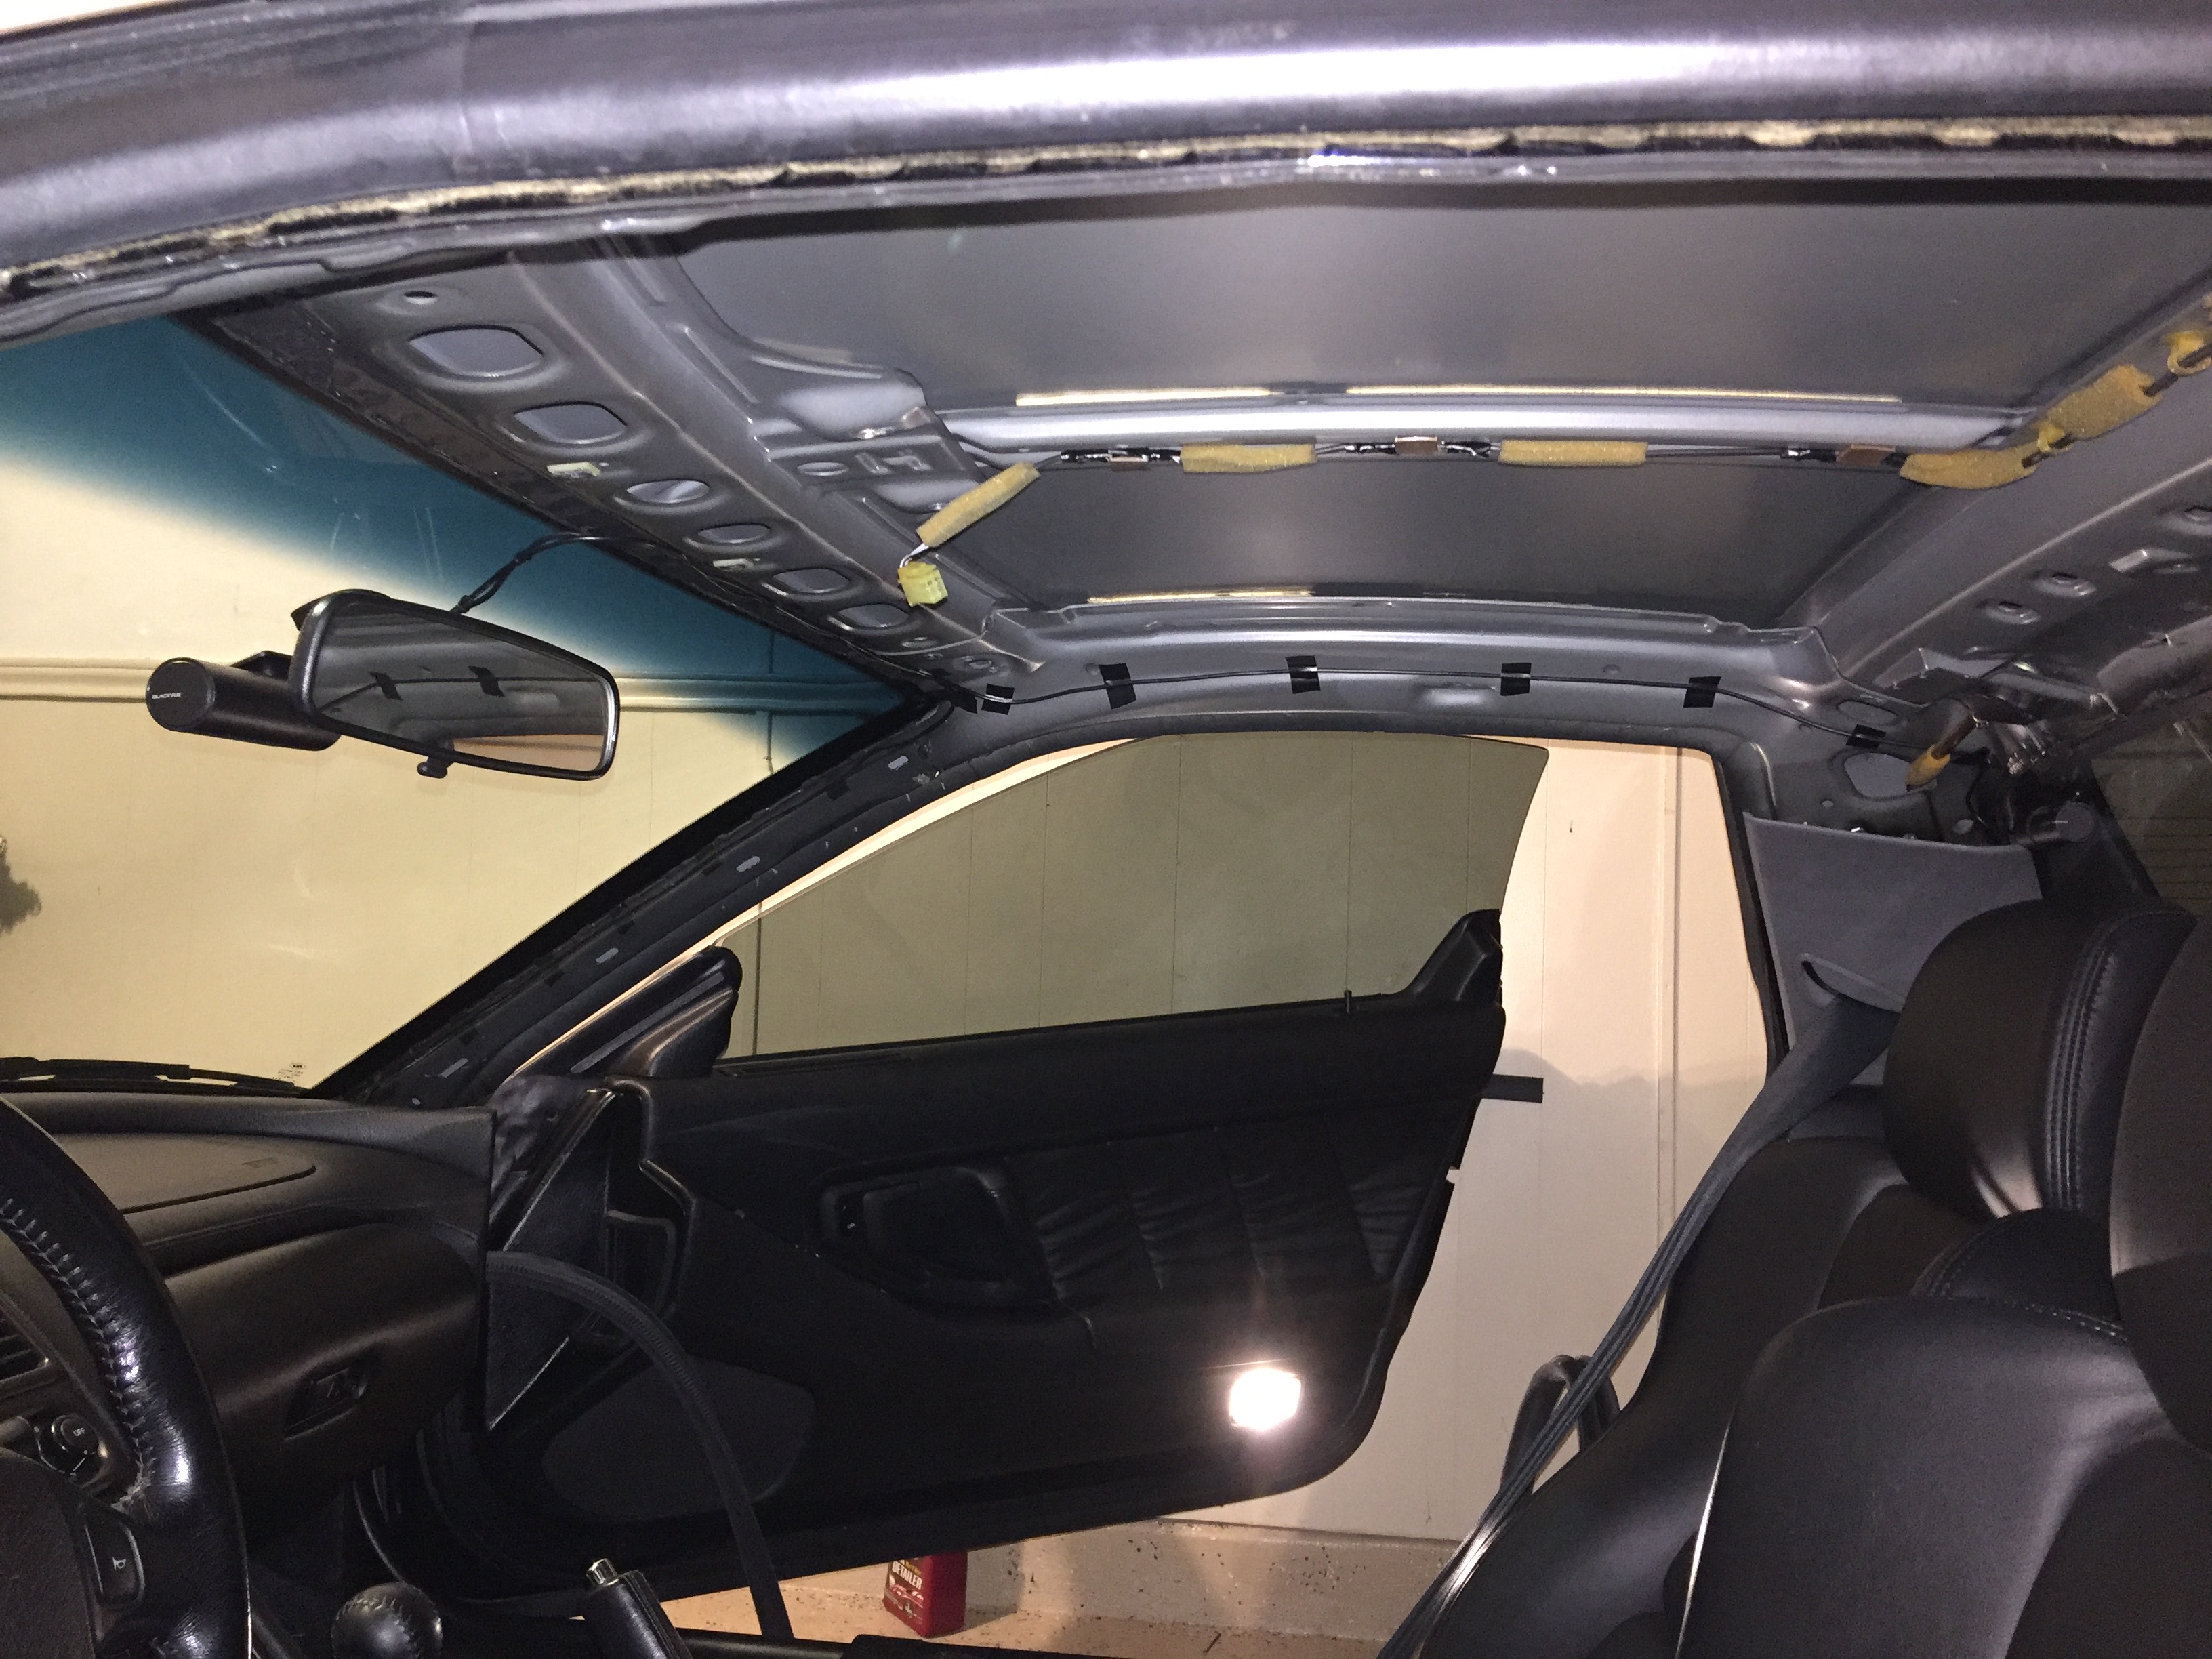
A few weeks ago I settled on the Blackvue DR470-2CH dash cam for this car, reasons being because it's capacitor based so works well in high heat like we have in Texas, fairly no frills and elegantly designed, and it has 2 separate cameras to record both in front of the car and behind the car. The downside to this is that an extra wire to connect to the rear camera has to be hidden, but since I was planning on removing the headliner to do the install I wasn't too worried.
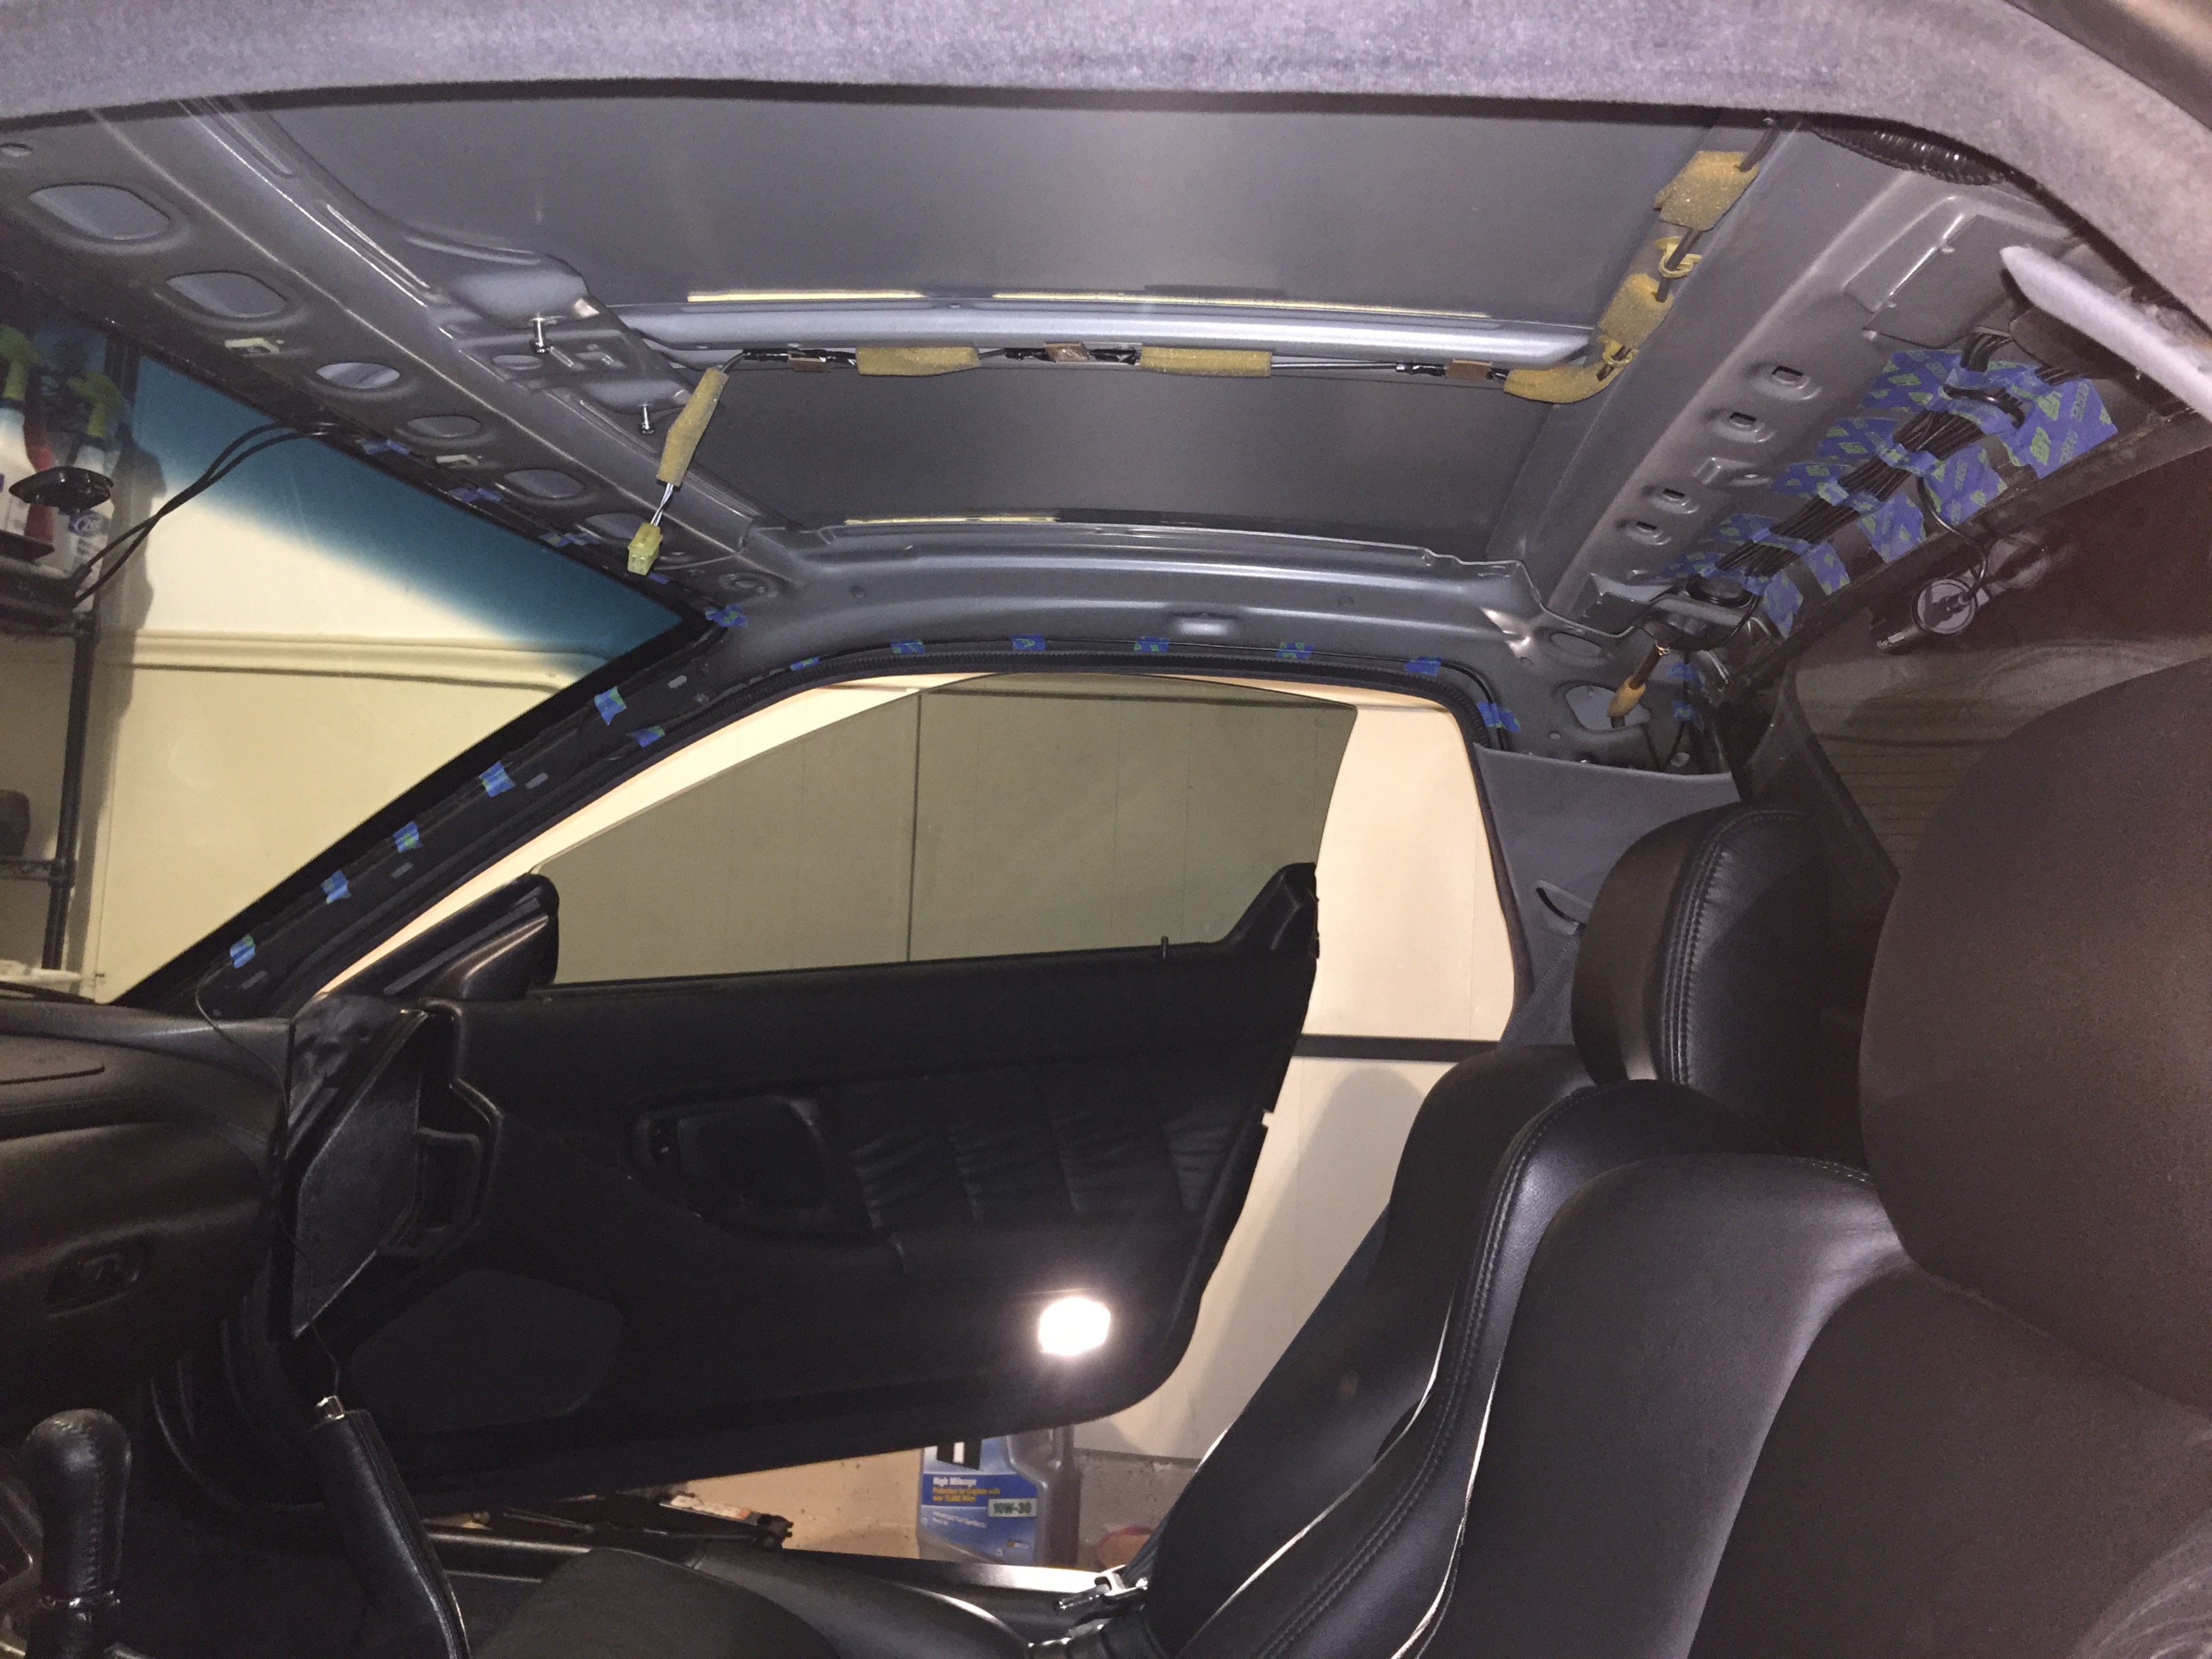
Taking the headliner out according to the manual is an insanely long and brutal process that requires removing the seats and most of the interior panels, however I was able to do it just by pulling back the weather stripping, removing the A pillar covers, and popping out the top clips of the B-pillar covers and bending them back enough to get the headliner out. Nothing broke and it ended up being a fairly quick and easy process.
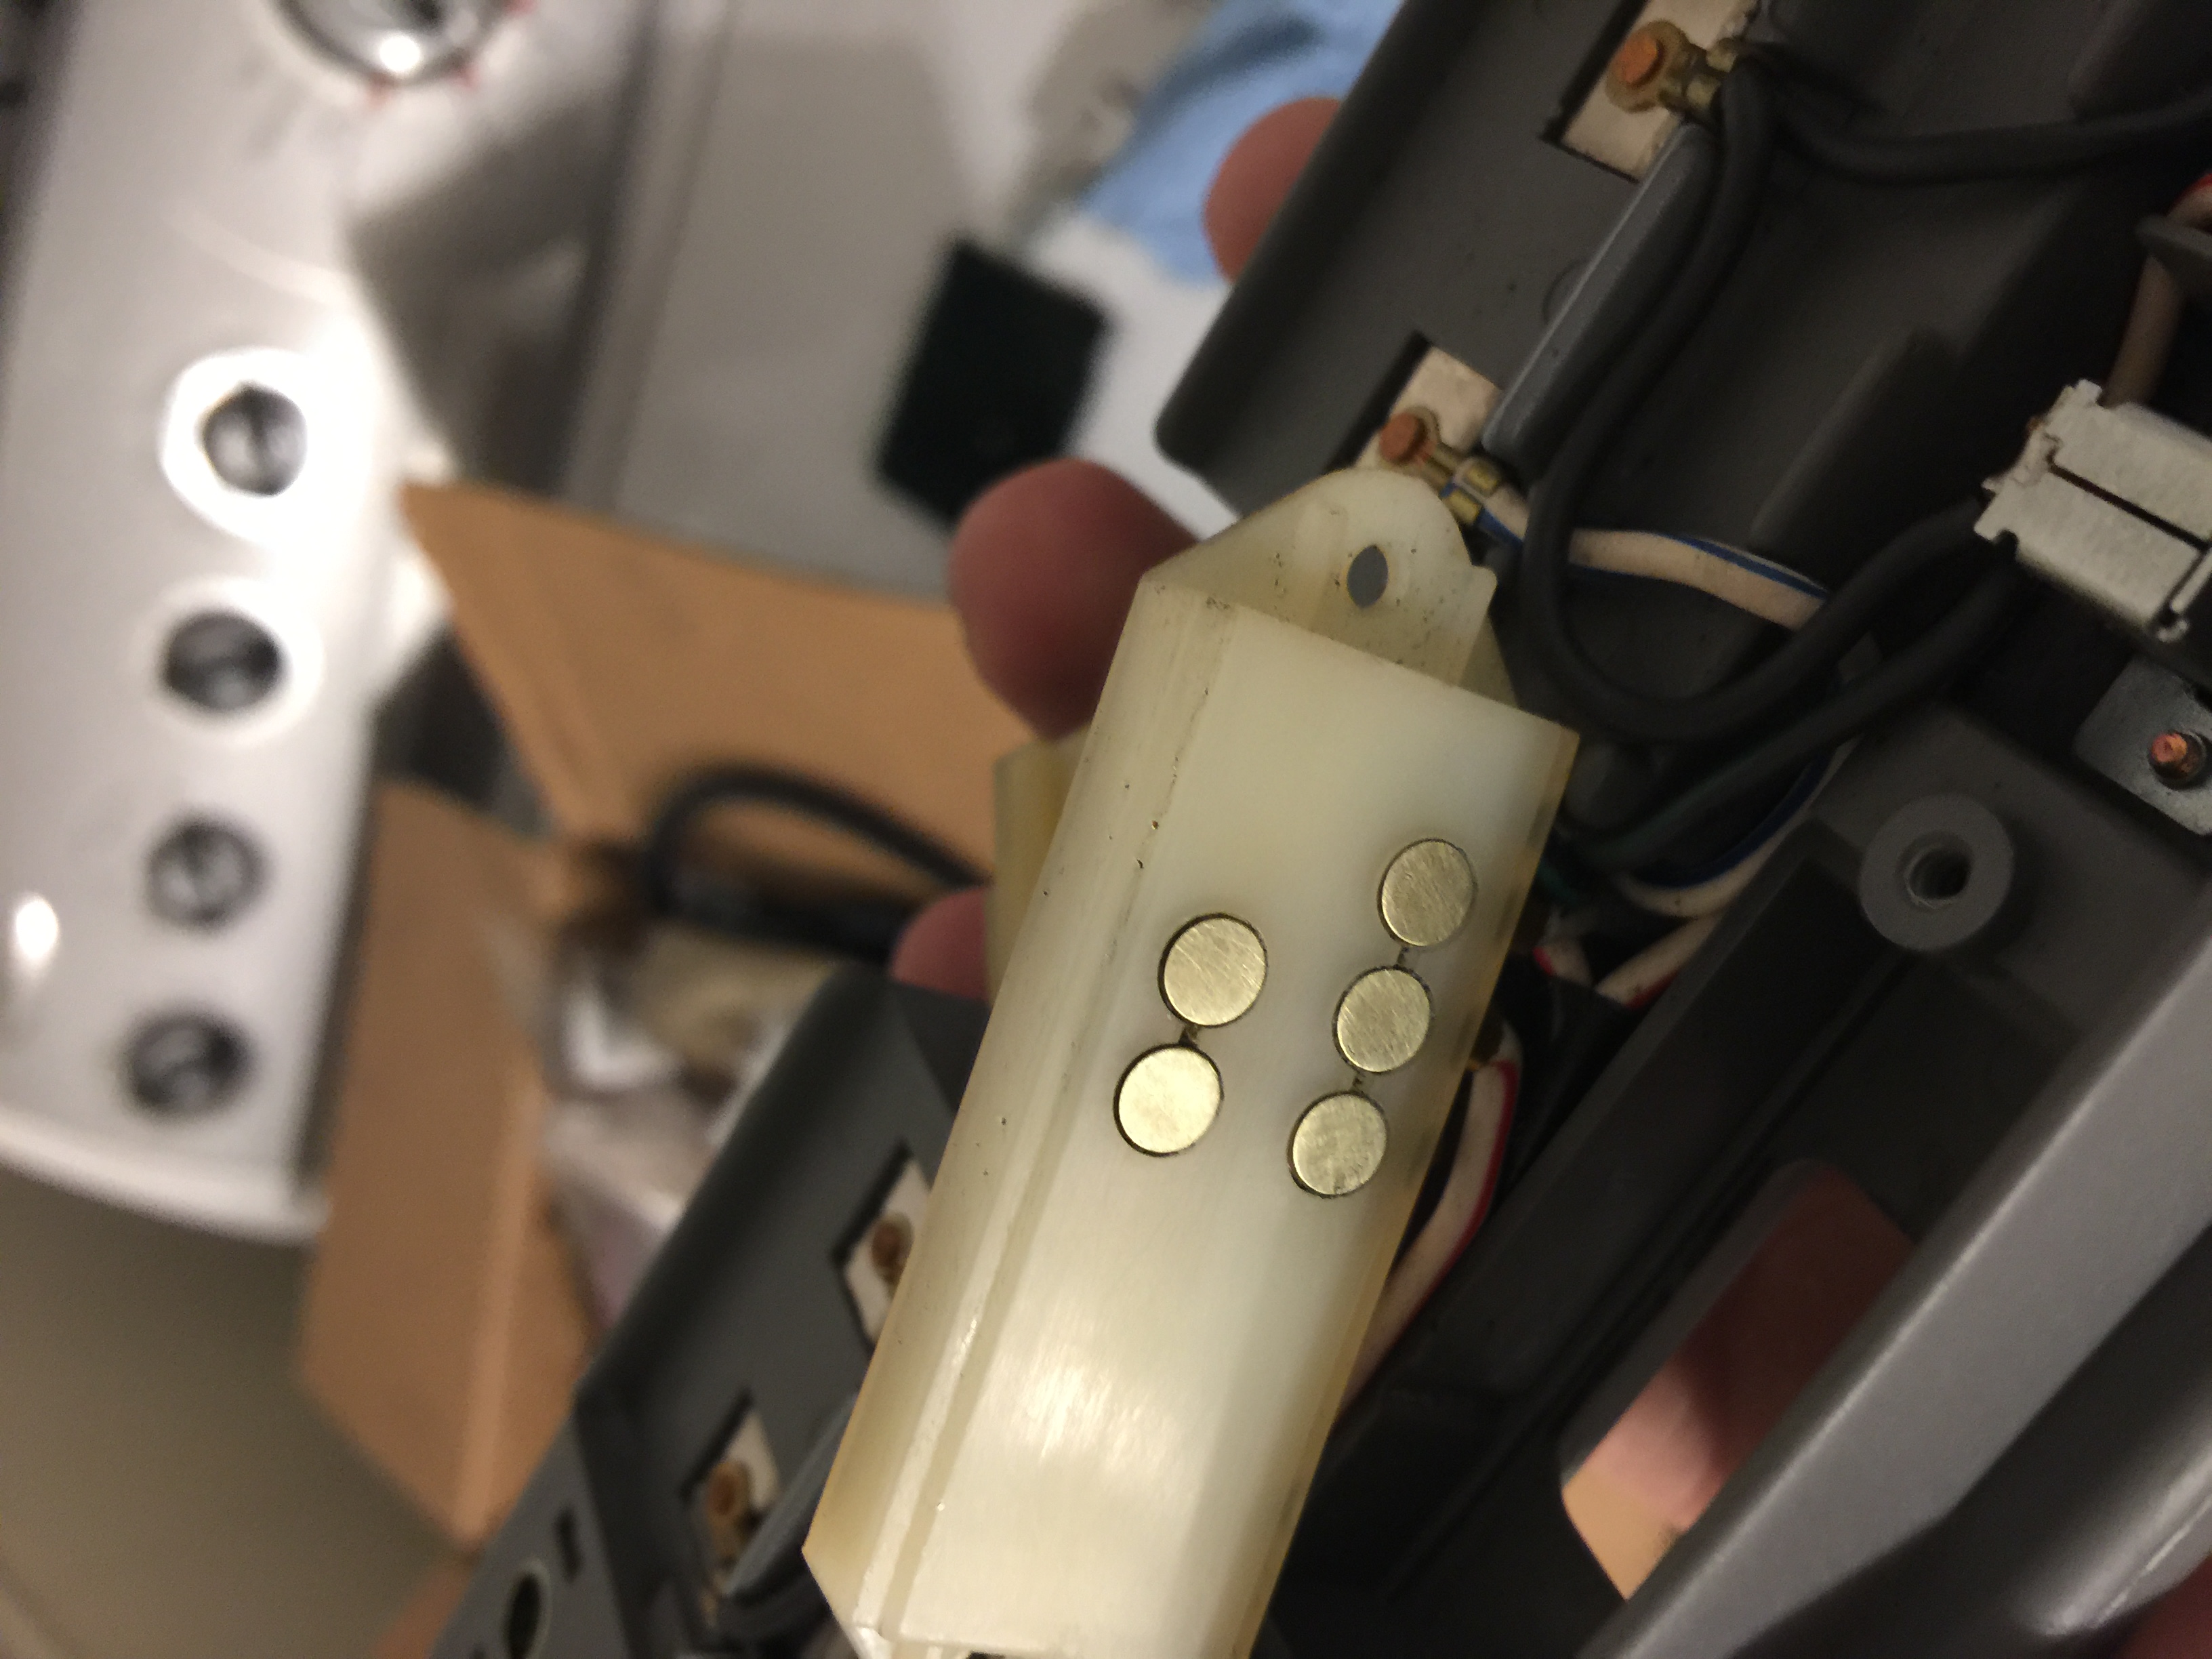
With the headliner out I had access to the guts of the dome light assembly, and since the main 3-position switch had gotten pretty finicky I took it apart and found the contacts heavily corroded. Getting to the switch guts is simple, just remove the two screws holding the top part down and pull it back as shown.
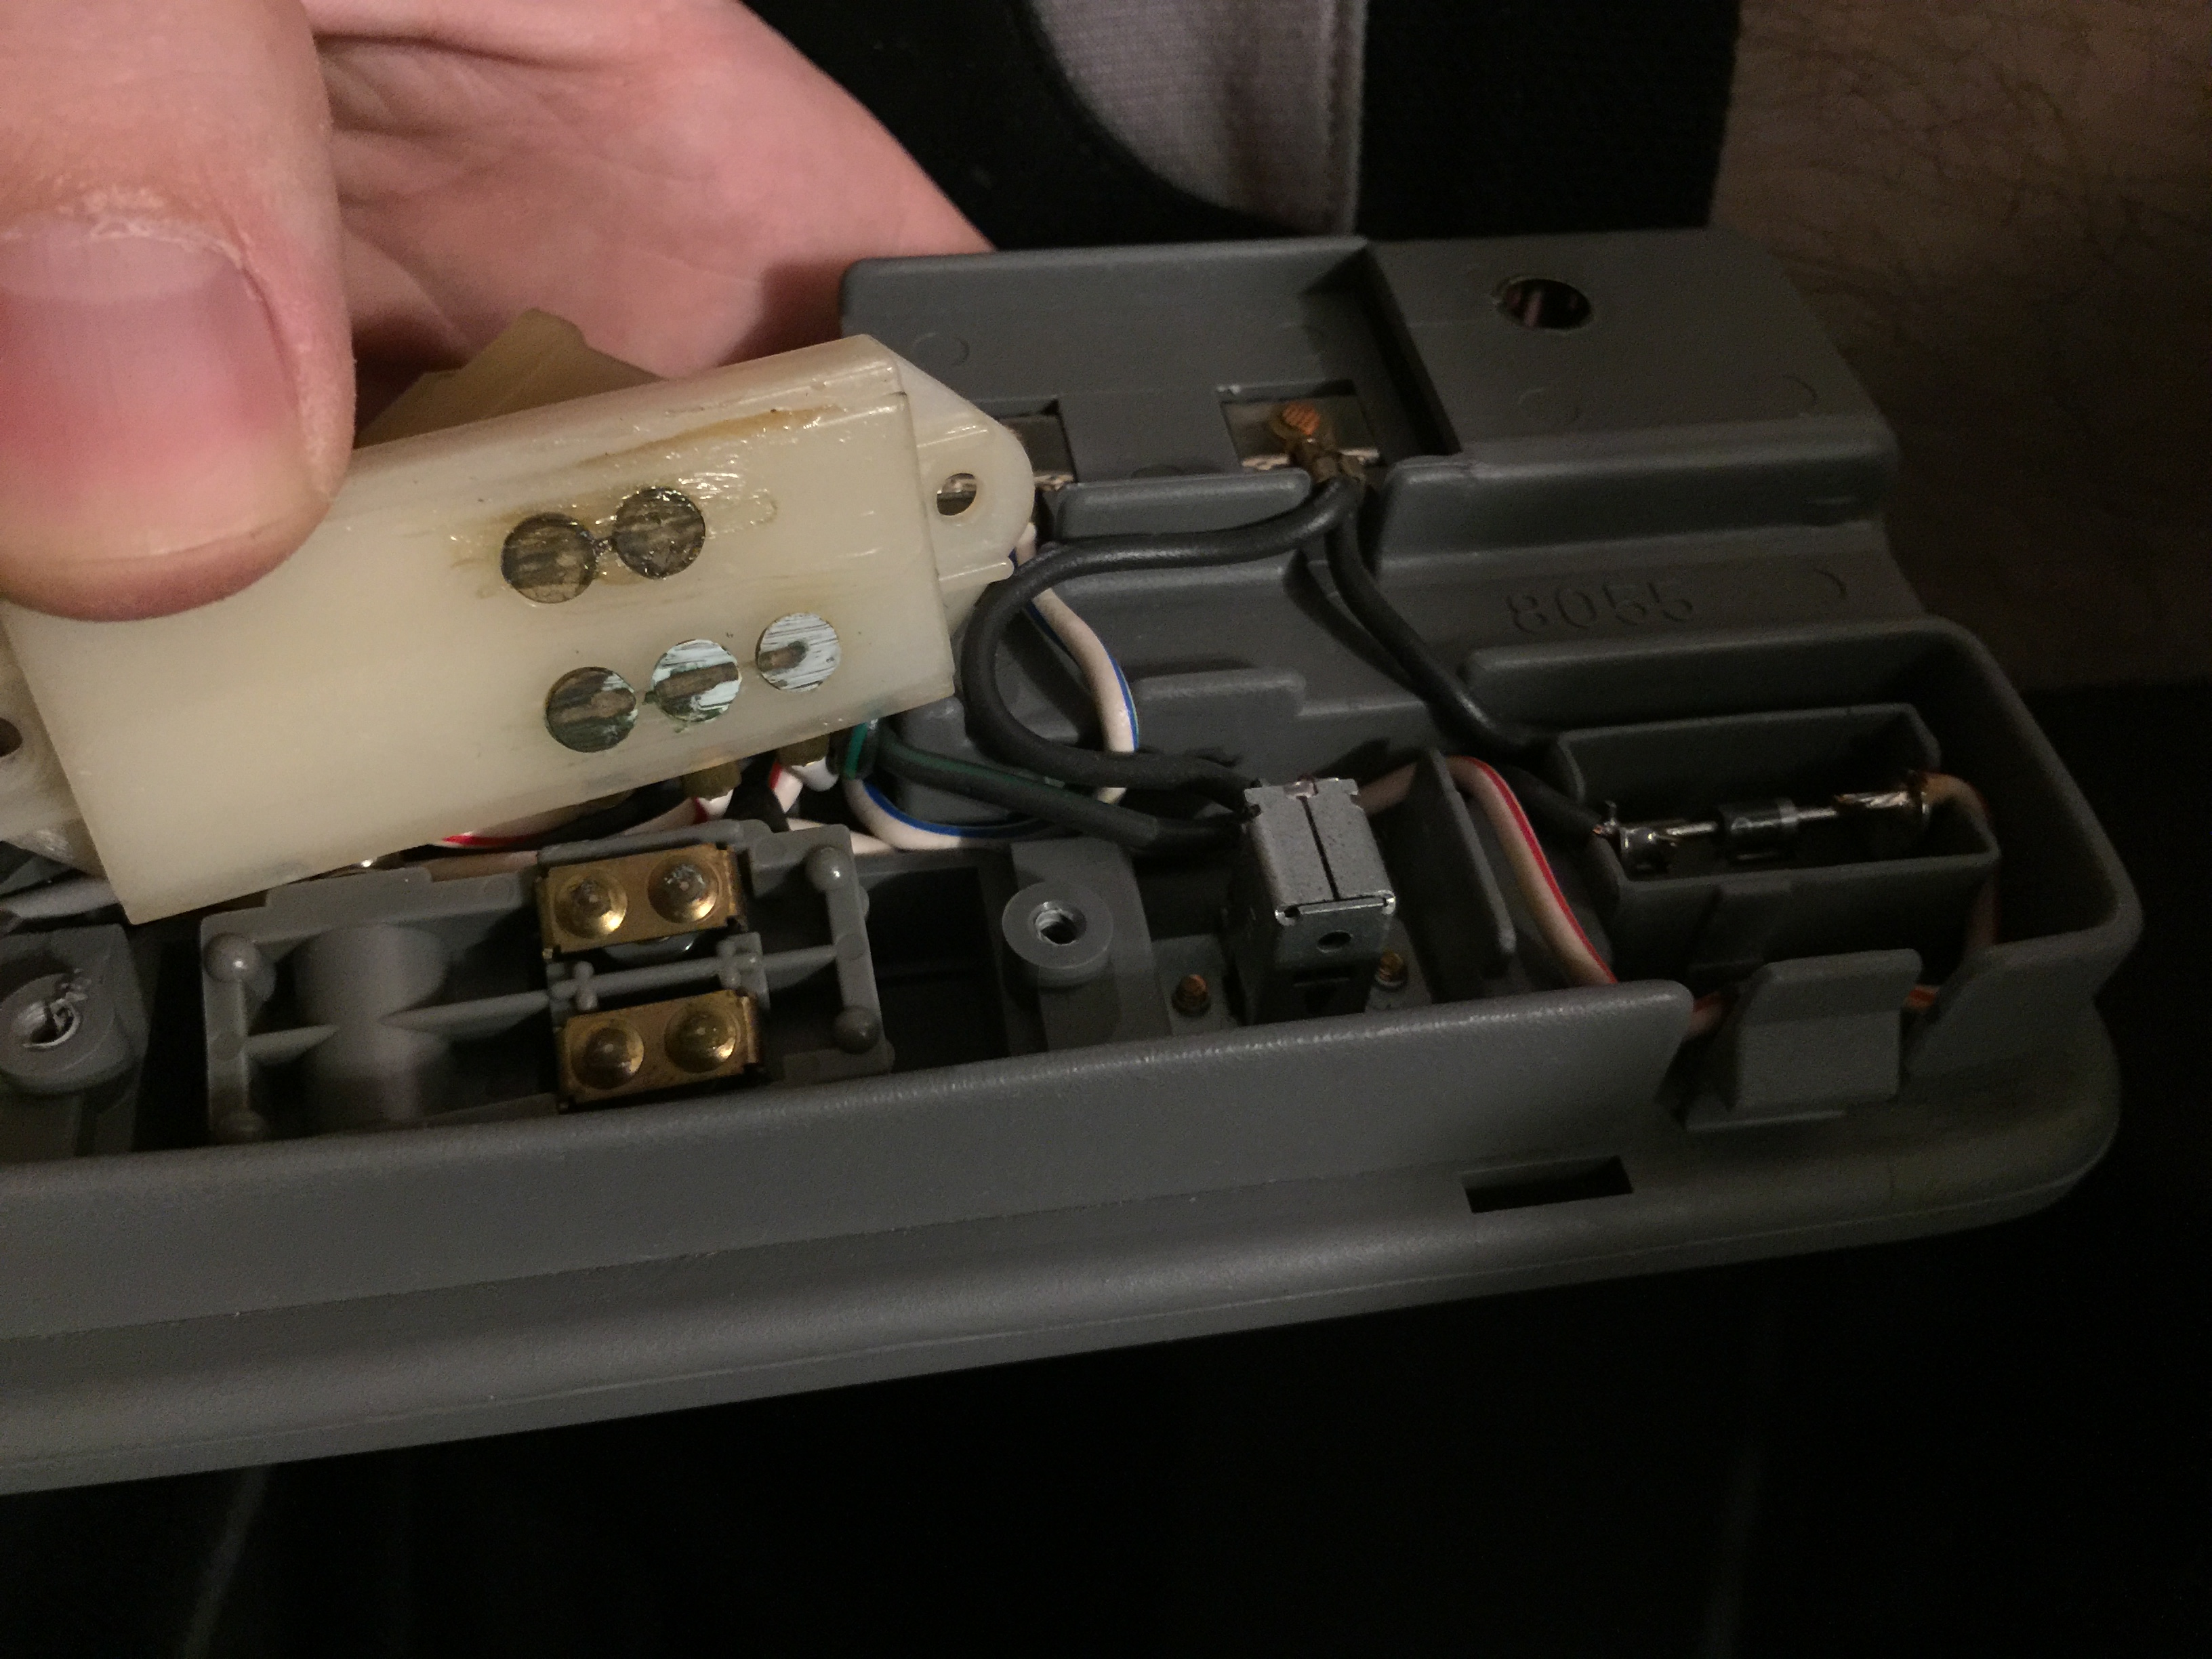
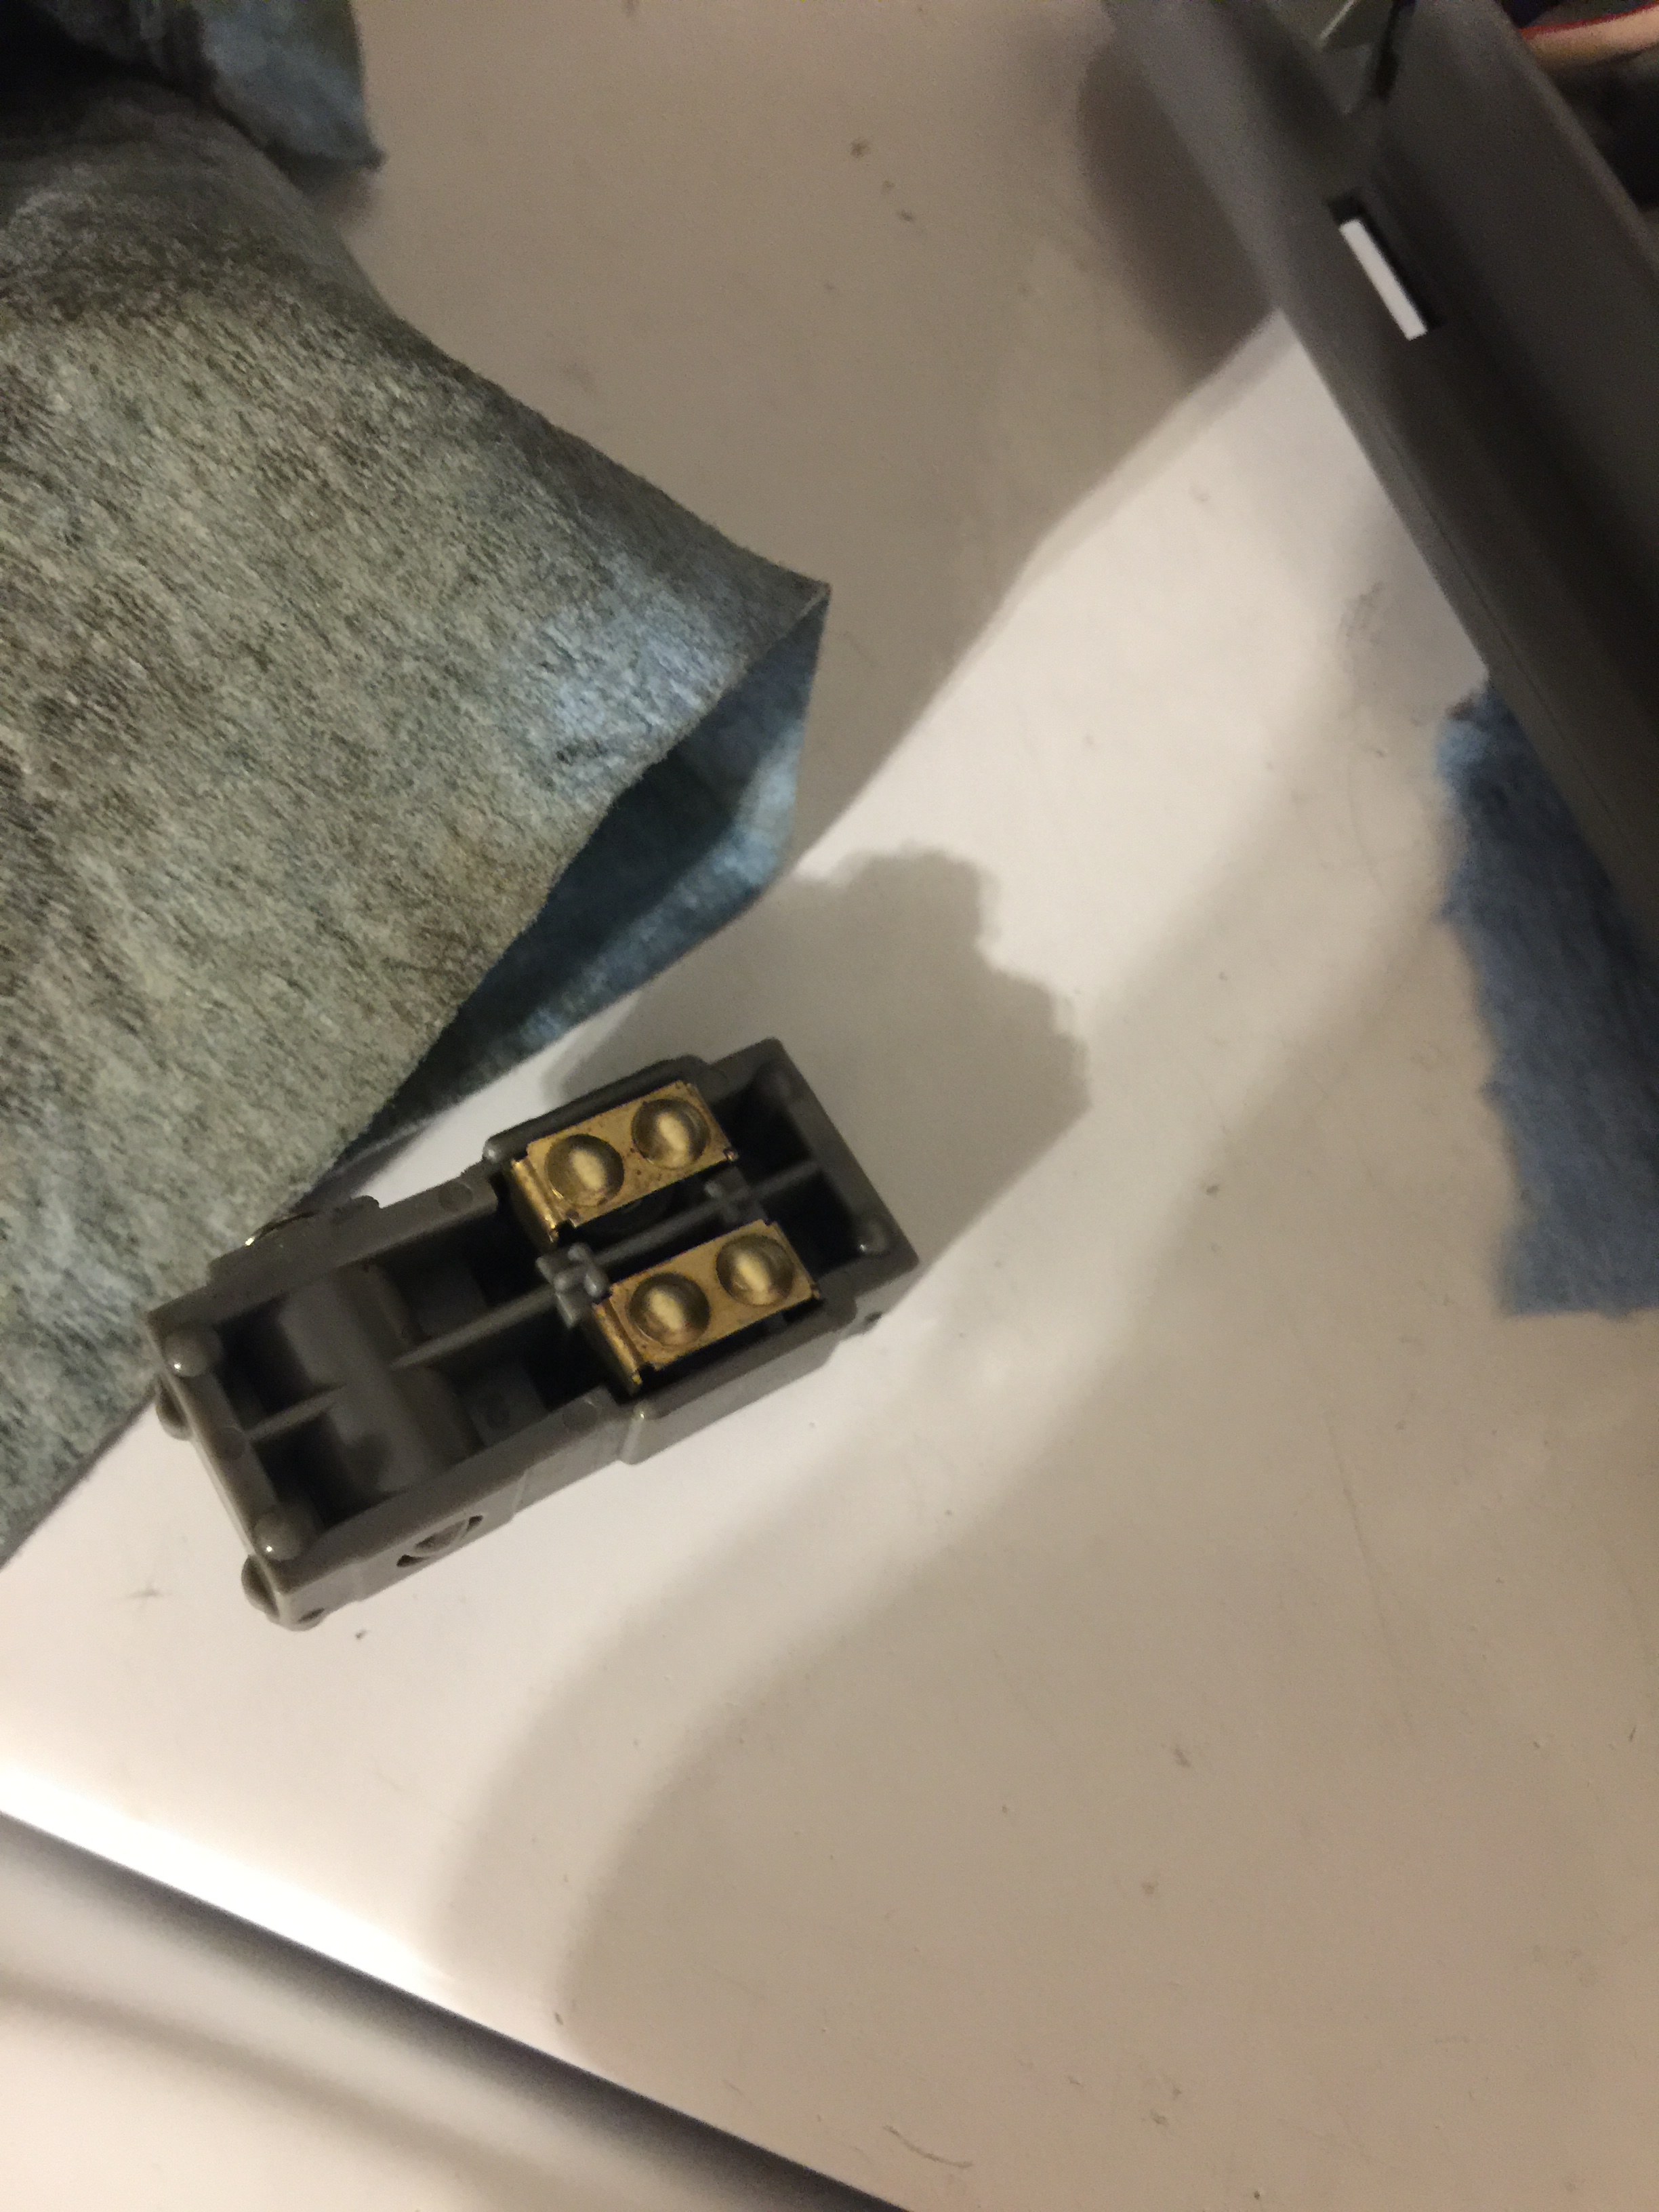
Scrubbing them off with a green scotch bright pad worked very well. Same for the contacts on the slider portion. After cleaning everything up I liberally applied dielectric grease to all the contacts to slow down future corrosion and reassembled, the switch works flawlessly now. Not that interesting but it might help someone in the future so here it is.
Anyways, with the headliner pulled down I was able to easily route the cables for the dash cam setup using small bits of paint safe tape to secure the wire.. The cable to connect the front to the rear was about 20 feet long, and since it's a RG174 coaxial cable with proprietary connectors there isn't really a way to shorten it without seriously degrading signal quality so I just coiled it up in the back, it's a bit messy but given the circumstances I'm not sure what else I could have done about it.
With the headliner out, I took the opportunity to really get it clean. It had a bunch of small markings from almost 25 years of use, so letting it soak in a 5:1 dilution of Optimum Power Clean (amazing general purpose detailing cleaner BTW) for a minute or so then wiping down with a microfiber cloth made it look almost new. There's a few corners in the skin that are pulling away a bit but it's not really noticeable with the liner in the car and definitely not worth several hundred dollars to fix. I also replaced the plastic clips that hold it up for good measure.
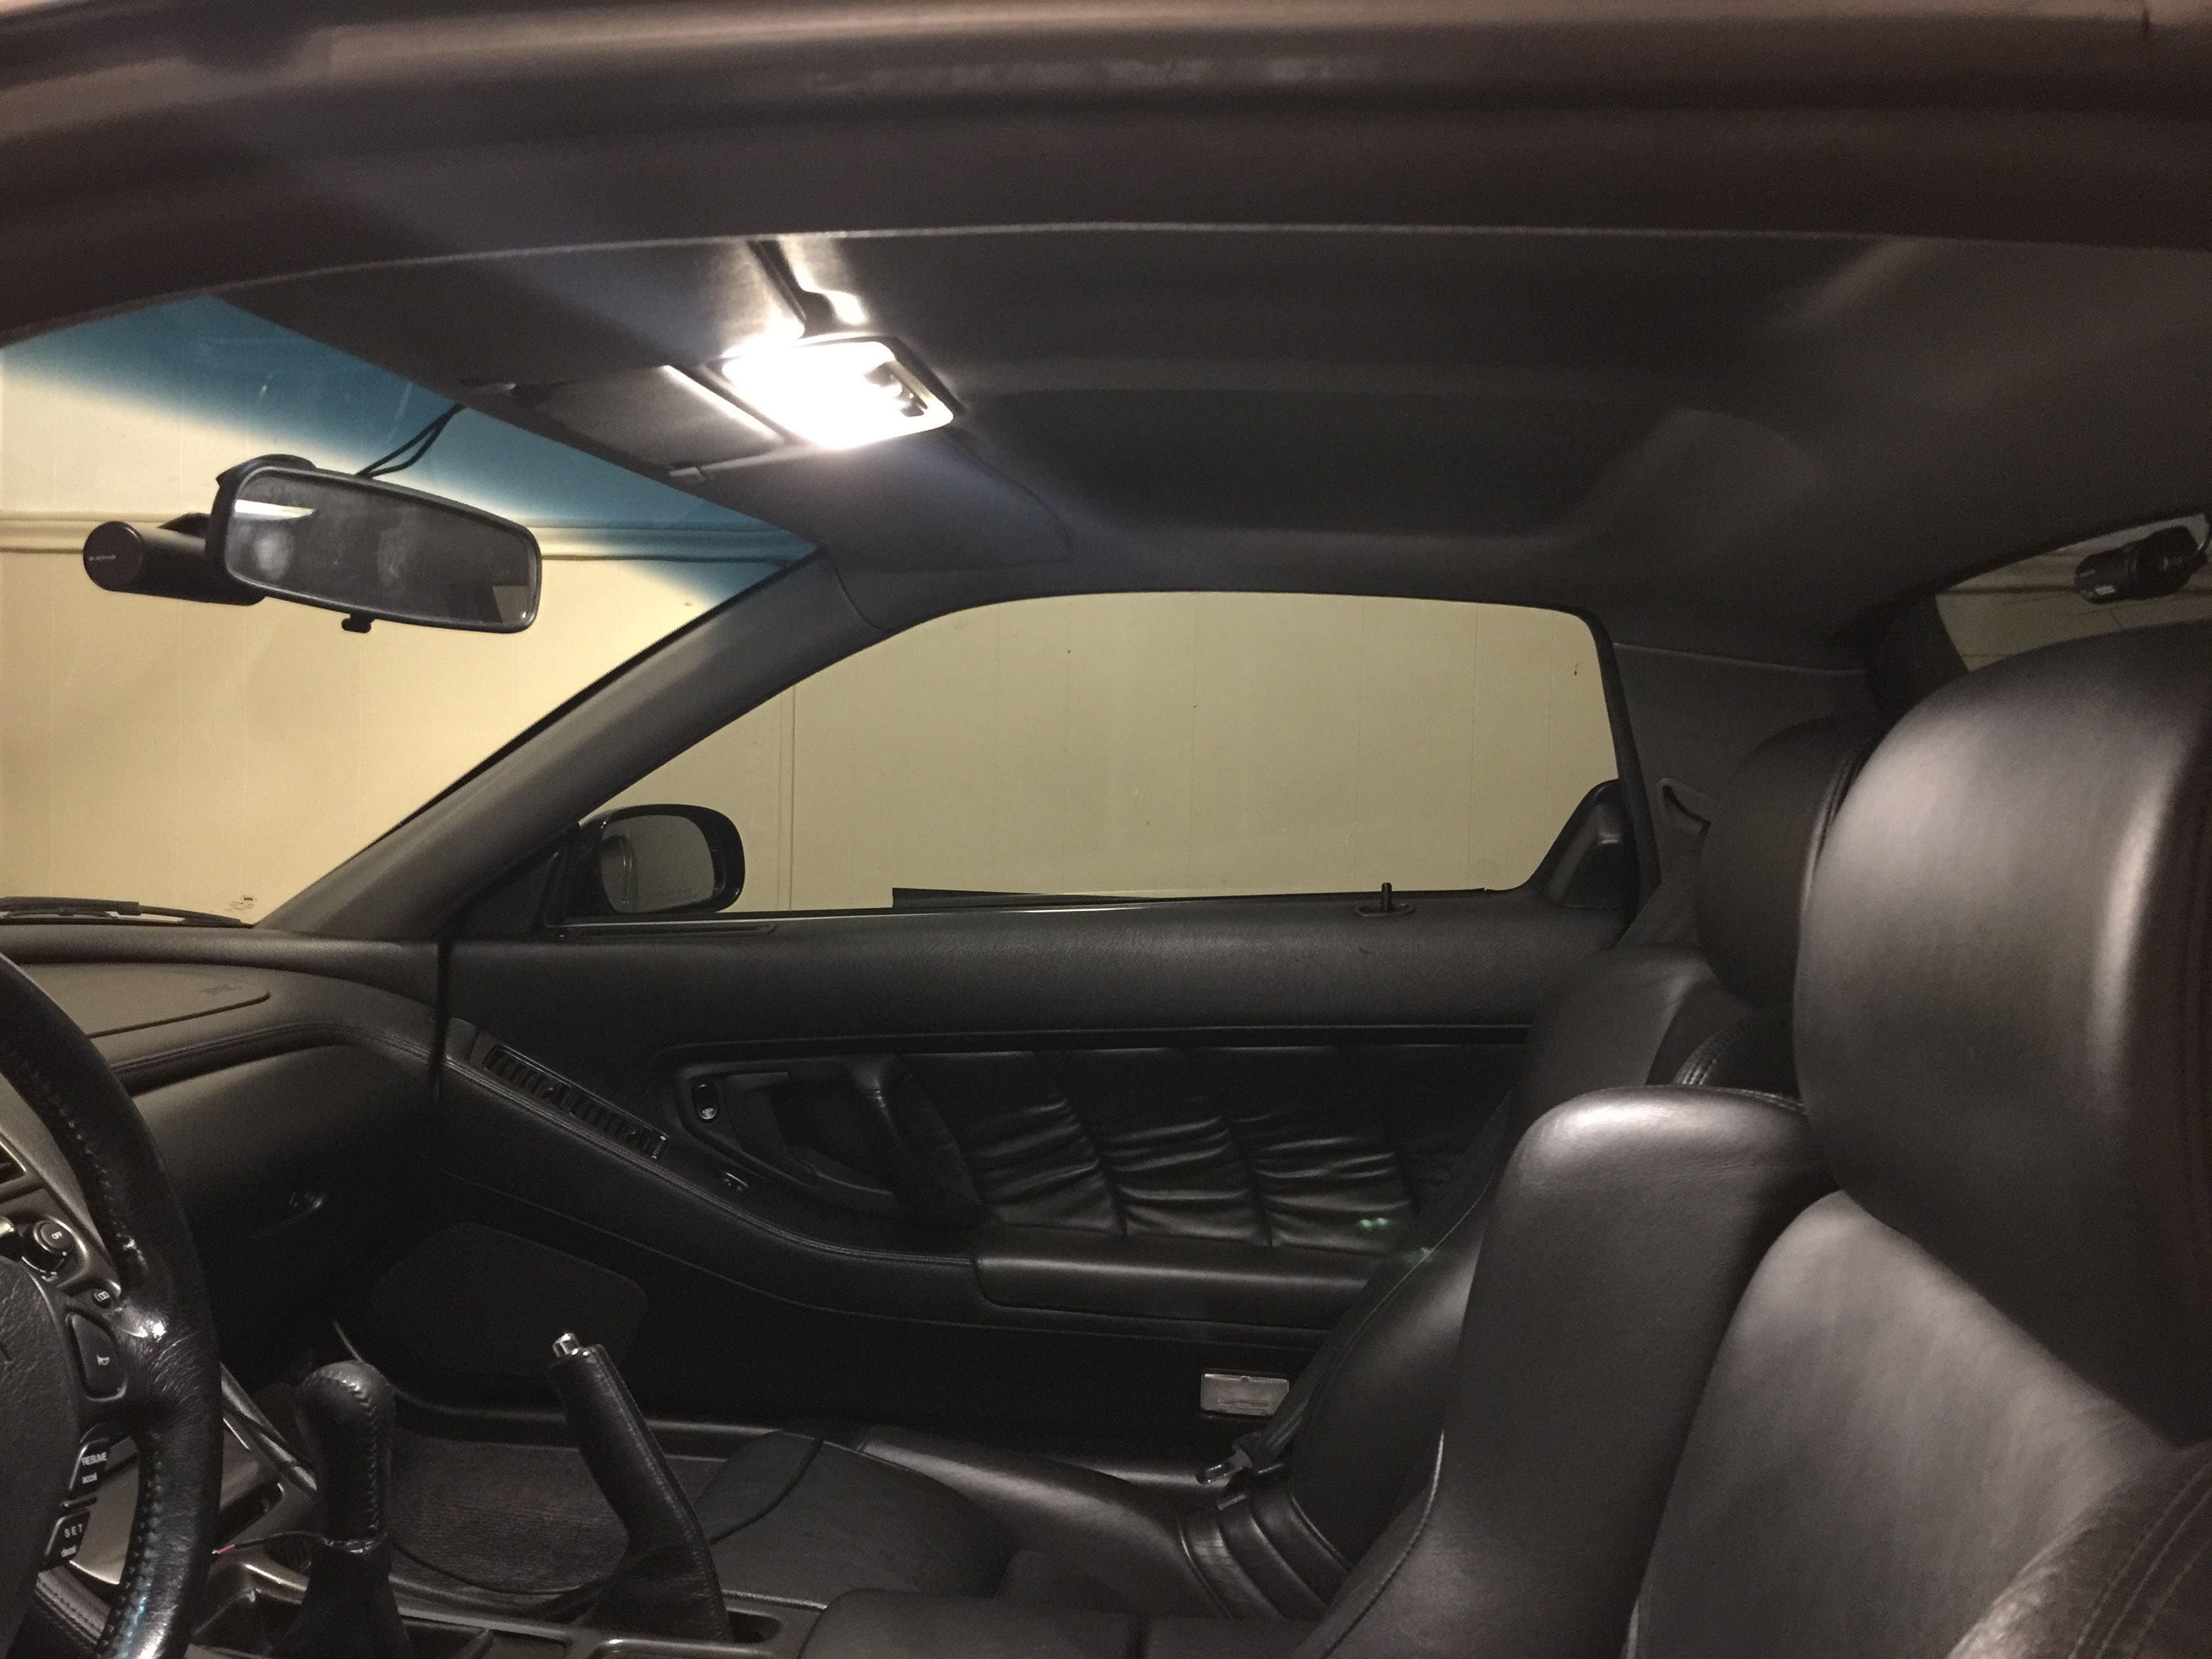
Everything reassembled, the mirror completely hides the front dash cam from the drivers seat view and the rear camera is just a blurb in the rear mirror, overall a pretty clean install if I do say so myself. It's still powered by the cigarette lighter though, so when I remove the center console plastics to refinish them I'll hardwire it into the accessory power circuit for a completely invisible install.
Also, I changed the oil last weekend since I'm coming up on 5000 miles since the last change, I have a Blackstone Labs kit so I took a sample to have analyzed, should be interesting to see the results.
And a bit of bad news, when I went to drive the car after putting the interior back together I found that the clutch master cylinder had run dry and was barely working, apparently it developed a leak recently so I guess I get to replace that too....
Taking the headliner out according to the manual is an insanely long and brutal process that requires removing the seats and most of the interior panels, however I was able to do it just by pulling back the weather stripping, removing the A pillar covers, and popping out the top clips of the B-pillar covers and bending them back enough to get the headliner out. Nothing broke and it ended up being a fairly quick and easy process.
With the headliner out I had access to the guts of the dome light assembly, and since the main 3-position switch had gotten pretty finicky I took it apart and found the contacts heavily corroded. Getting to the switch guts is simple, just remove the two screws holding the top part down and pull it back as shown.
Scrubbing them off with a green scotch bright pad worked very well. Same for the contacts on the slider portion. After cleaning everything up I liberally applied dielectric grease to all the contacts to slow down future corrosion and reassembled, the switch works flawlessly now. Not that interesting but it might help someone in the future so here it is.
Anyways, with the headliner pulled down I was able to easily route the cables for the dash cam setup using small bits of paint safe tape to secure the wire.. The cable to connect the front to the rear was about 20 feet long, and since it's a RG174 coaxial cable with proprietary connectors there isn't really a way to shorten it without seriously degrading signal quality so I just coiled it up in the back, it's a bit messy but given the circumstances I'm not sure what else I could have done about it.
With the headliner out, I took the opportunity to really get it clean. It had a bunch of small markings from almost 25 years of use, so letting it soak in a 5:1 dilution of Optimum Power Clean (amazing general purpose detailing cleaner BTW) for a minute or so then wiping down with a microfiber cloth made it look almost new. There's a few corners in the skin that are pulling away a bit but it's not really noticeable with the liner in the car and definitely not worth several hundred dollars to fix. I also replaced the plastic clips that hold it up for good measure.
Everything reassembled, the mirror completely hides the front dash cam from the drivers seat view and the rear camera is just a blurb in the rear mirror, overall a pretty clean install if I do say so myself. It's still powered by the cigarette lighter though, so when I remove the center console plastics to refinish them I'll hardwire it into the accessory power circuit for a completely invisible install.
Also, I changed the oil last weekend since I'm coming up on 5000 miles since the last change, I have a Blackstone Labs kit so I took a sample to have analyzed, should be interesting to see the results.
And a bit of bad news, when I went to drive the car after putting the interior back together I found that the clutch master cylinder had run dry and was barely working, apparently it developed a leak recently so I guess I get to replace that too....
09-12-2017, 08:41 AM
#79
Another minor update, I picked up the Cedar Ridge Fabrication heavy duty timing belt shield for $60 with the sale they had going, and since I had some powder left over from my brake calipers I bead blasted it and powder coated it black.
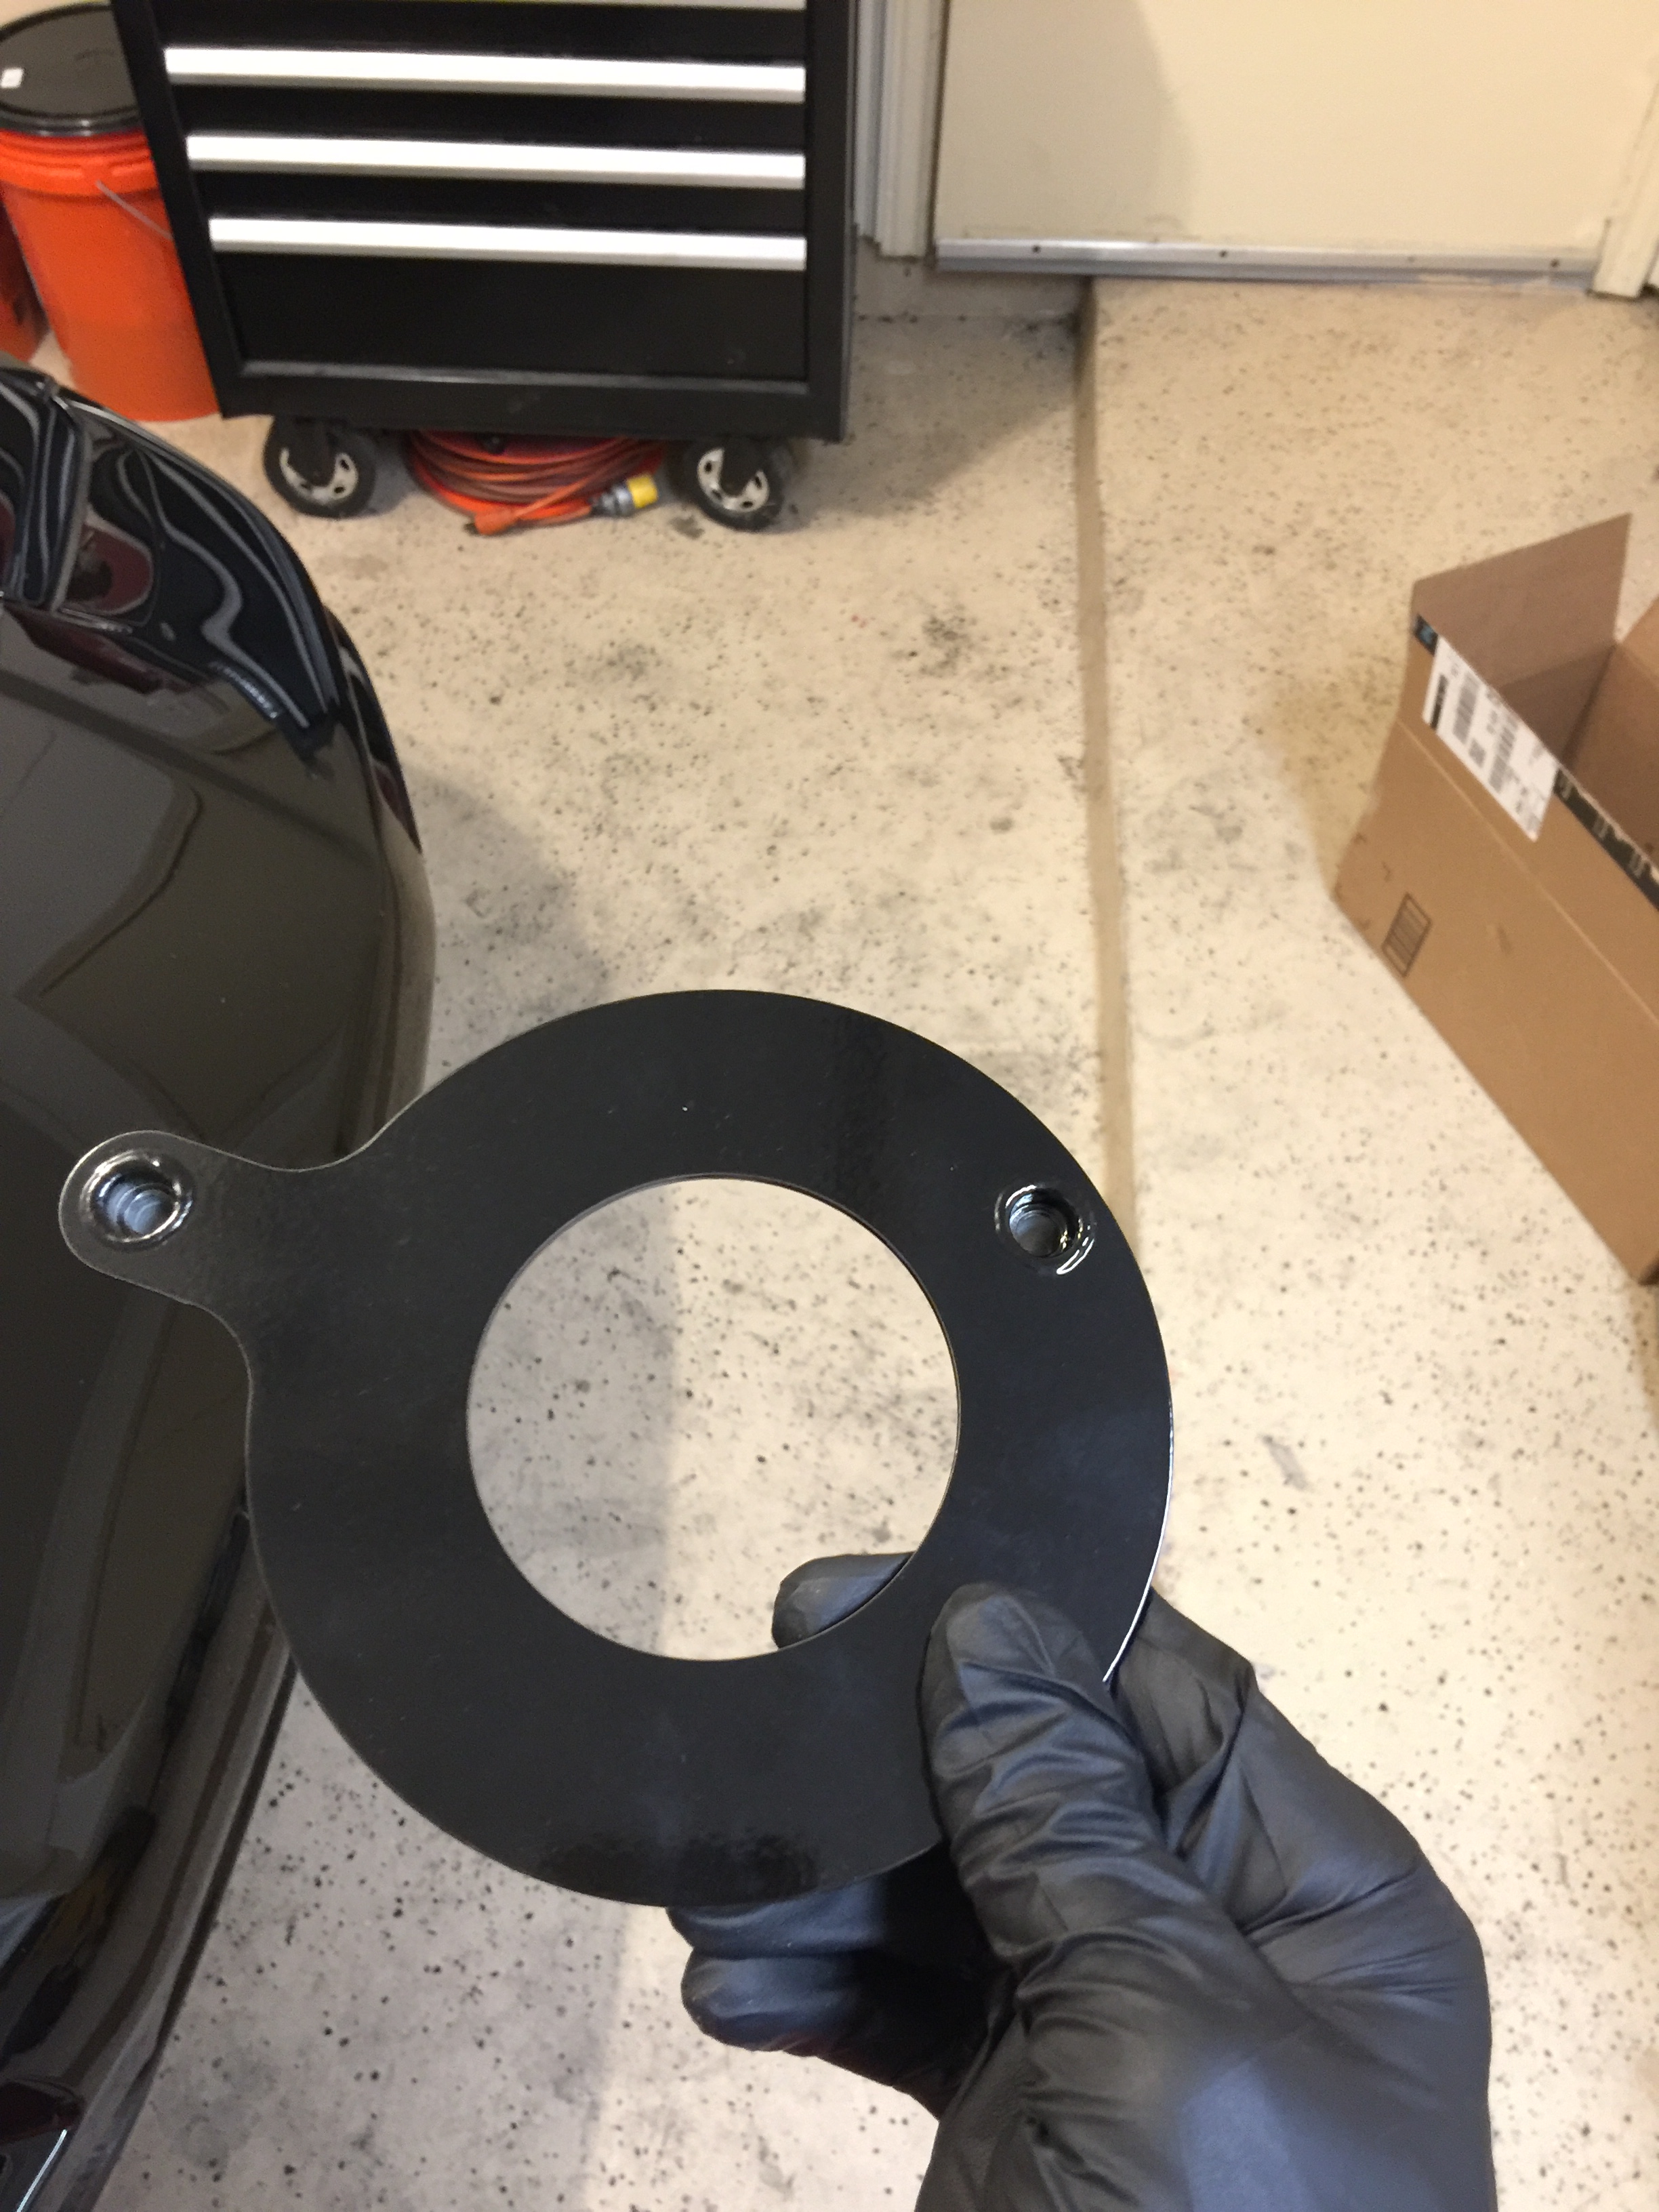
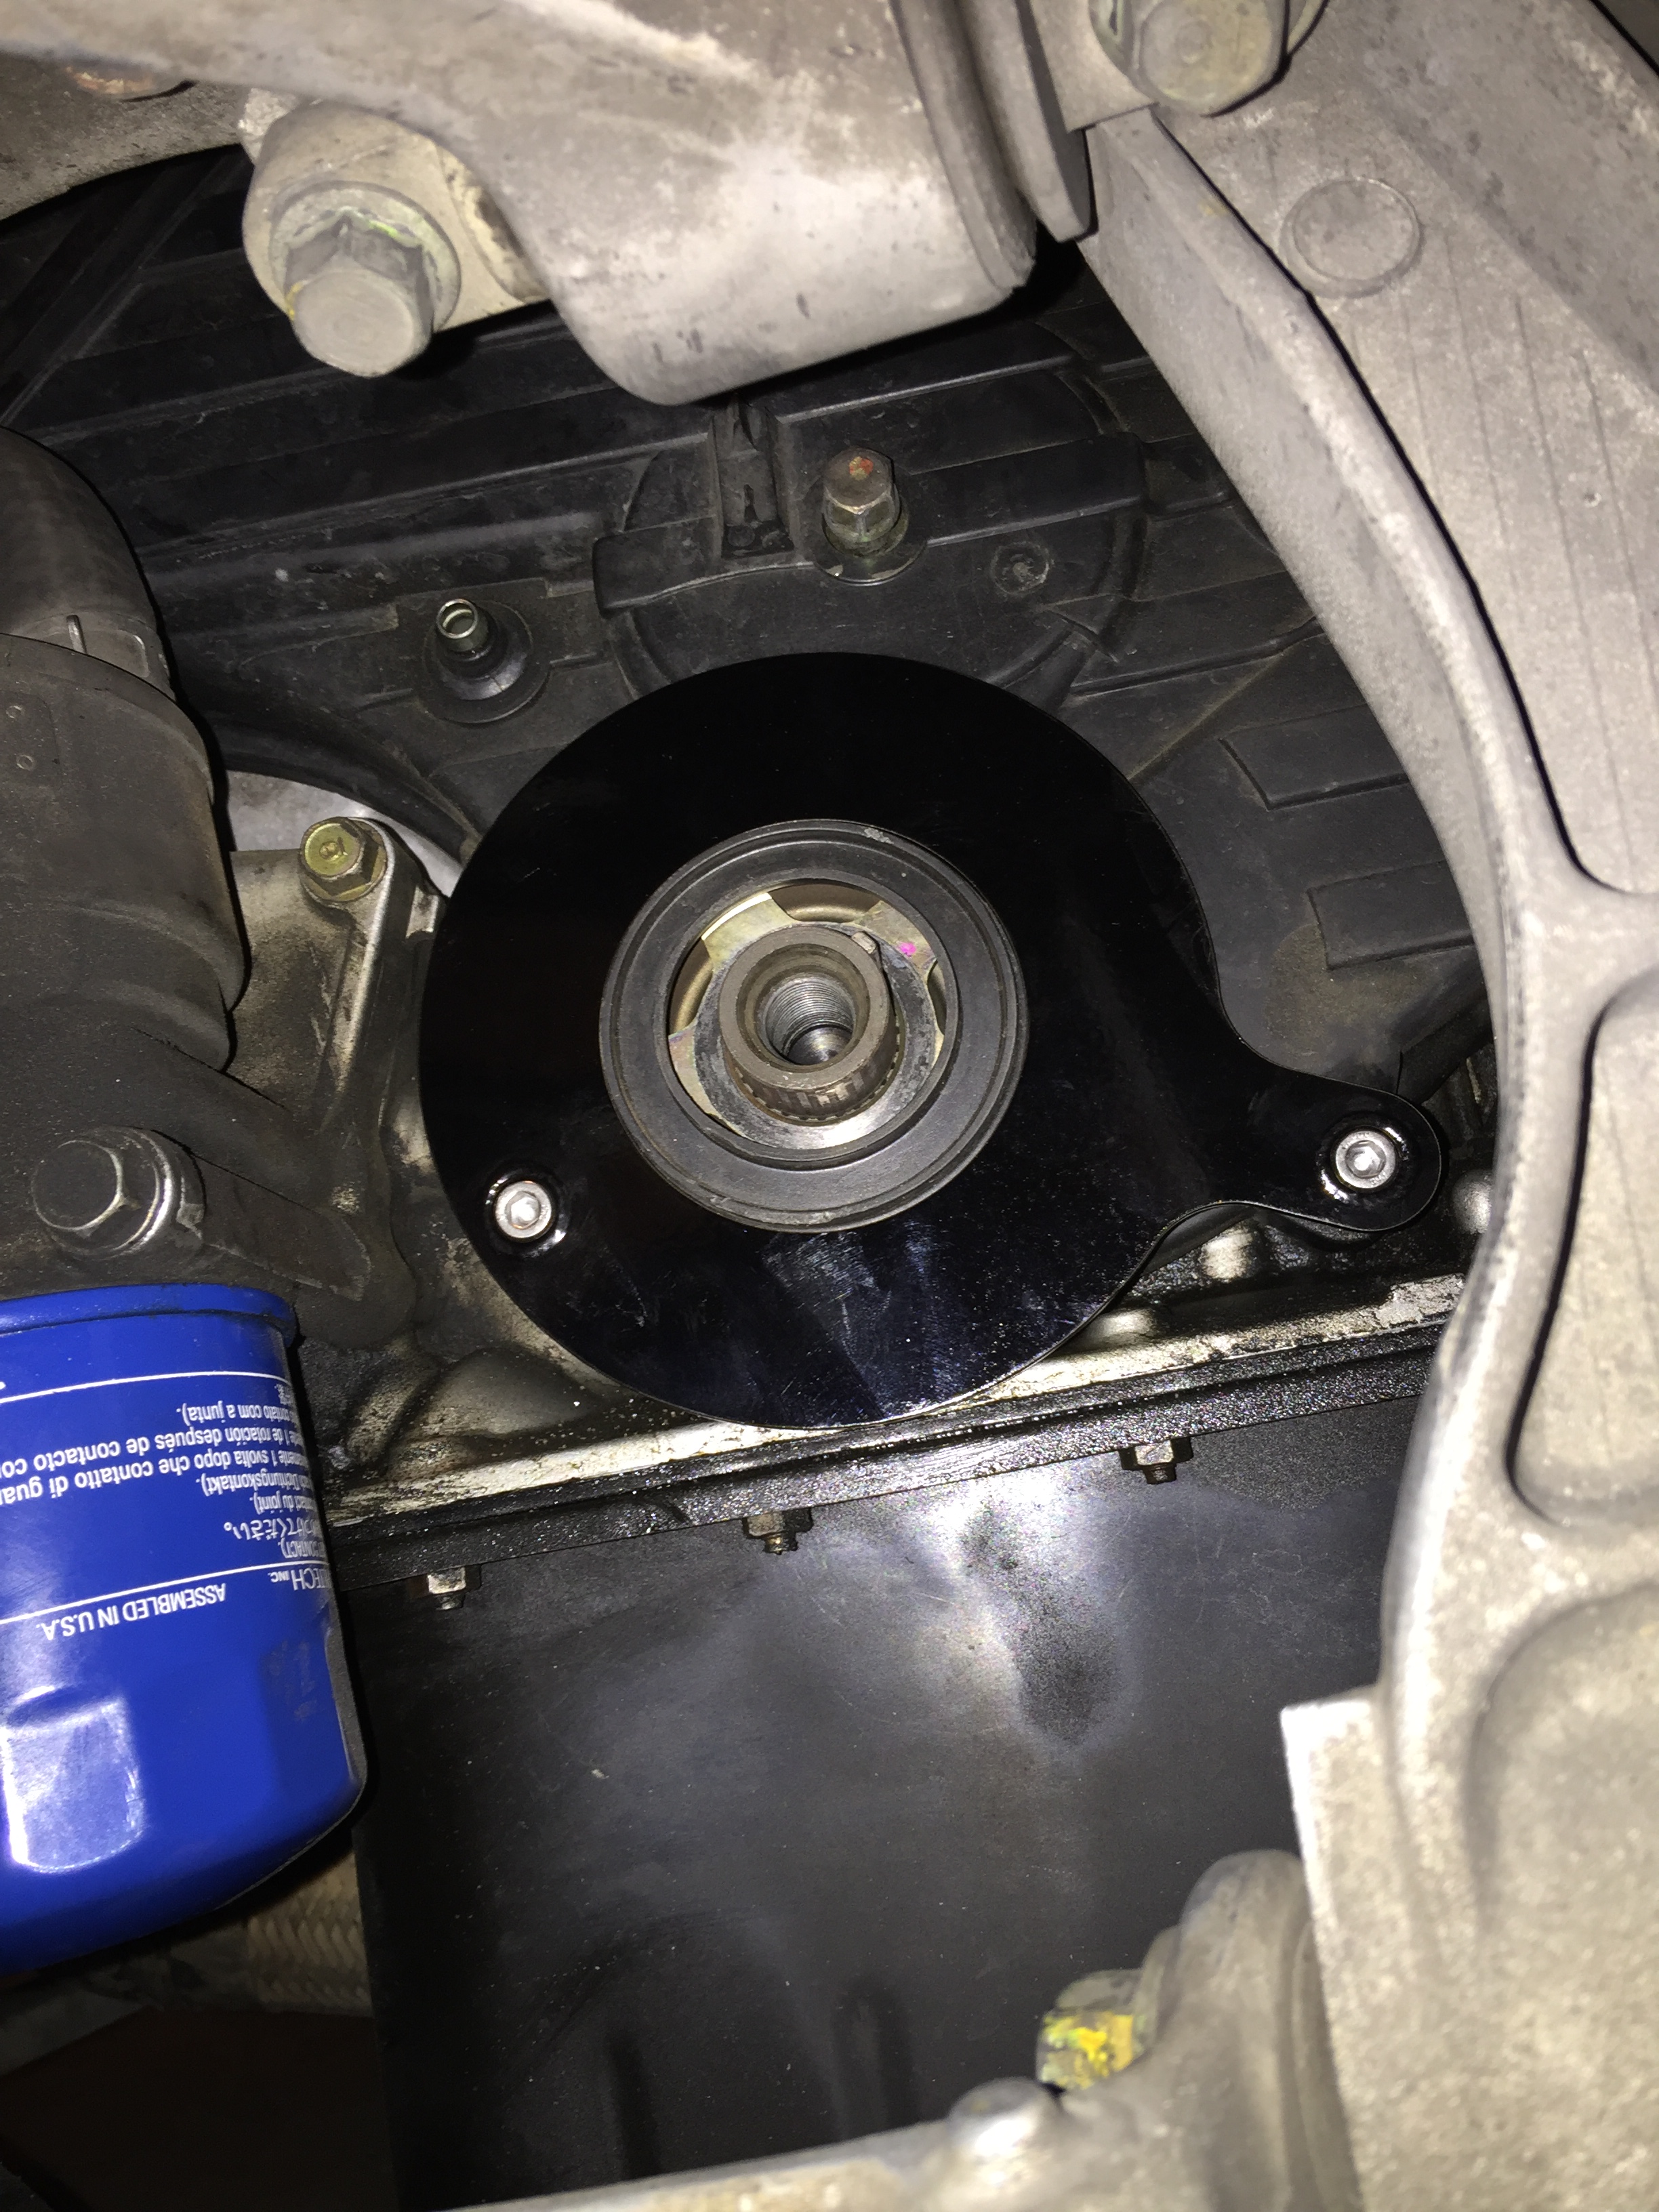
Installation was pretty simple, just loosen the alternator and AC belt tensioners, remove belts, remove crank pulley, install shield. Took about an hour start to finish. The fit is spot on and IMO the black powdercoat came out great. Now I just need to replace the crank pulley for good measure, but now that the shield is there I don't need to worry about it so much.
And coming up next: refinishing my peeling interior trim pieces. I used to build model airplanes and had good experiences with Testors enamel paints, so I bought a few different colors including black and metallic silver so I'm going to start mixing them to try to match the factory finish as closely as possible, then airbrush it on. Since the factory finish is a chrome (or more likely aluminum) plated base with a semi-translucent film on top, perfectly matching the sheen will be impossible but I should be able to get it close enough that anyone who doesn't know what it originally looked like won't see anything out of place, especially once finished with a satin clear coat.
11-14-2017, 12:01 AM
#80
Not being single anymore has made it a bit more difficult to devote my life to this car, but here's another update.
I started off by replacing the super long rear dash cam cable with a much more appropriate one and moving the rear camera to the passenger side so it's not constantly visible in the rear view camera. It's much more out of the way now which I like, and the cable isn't wrapped all over the place anymore either.
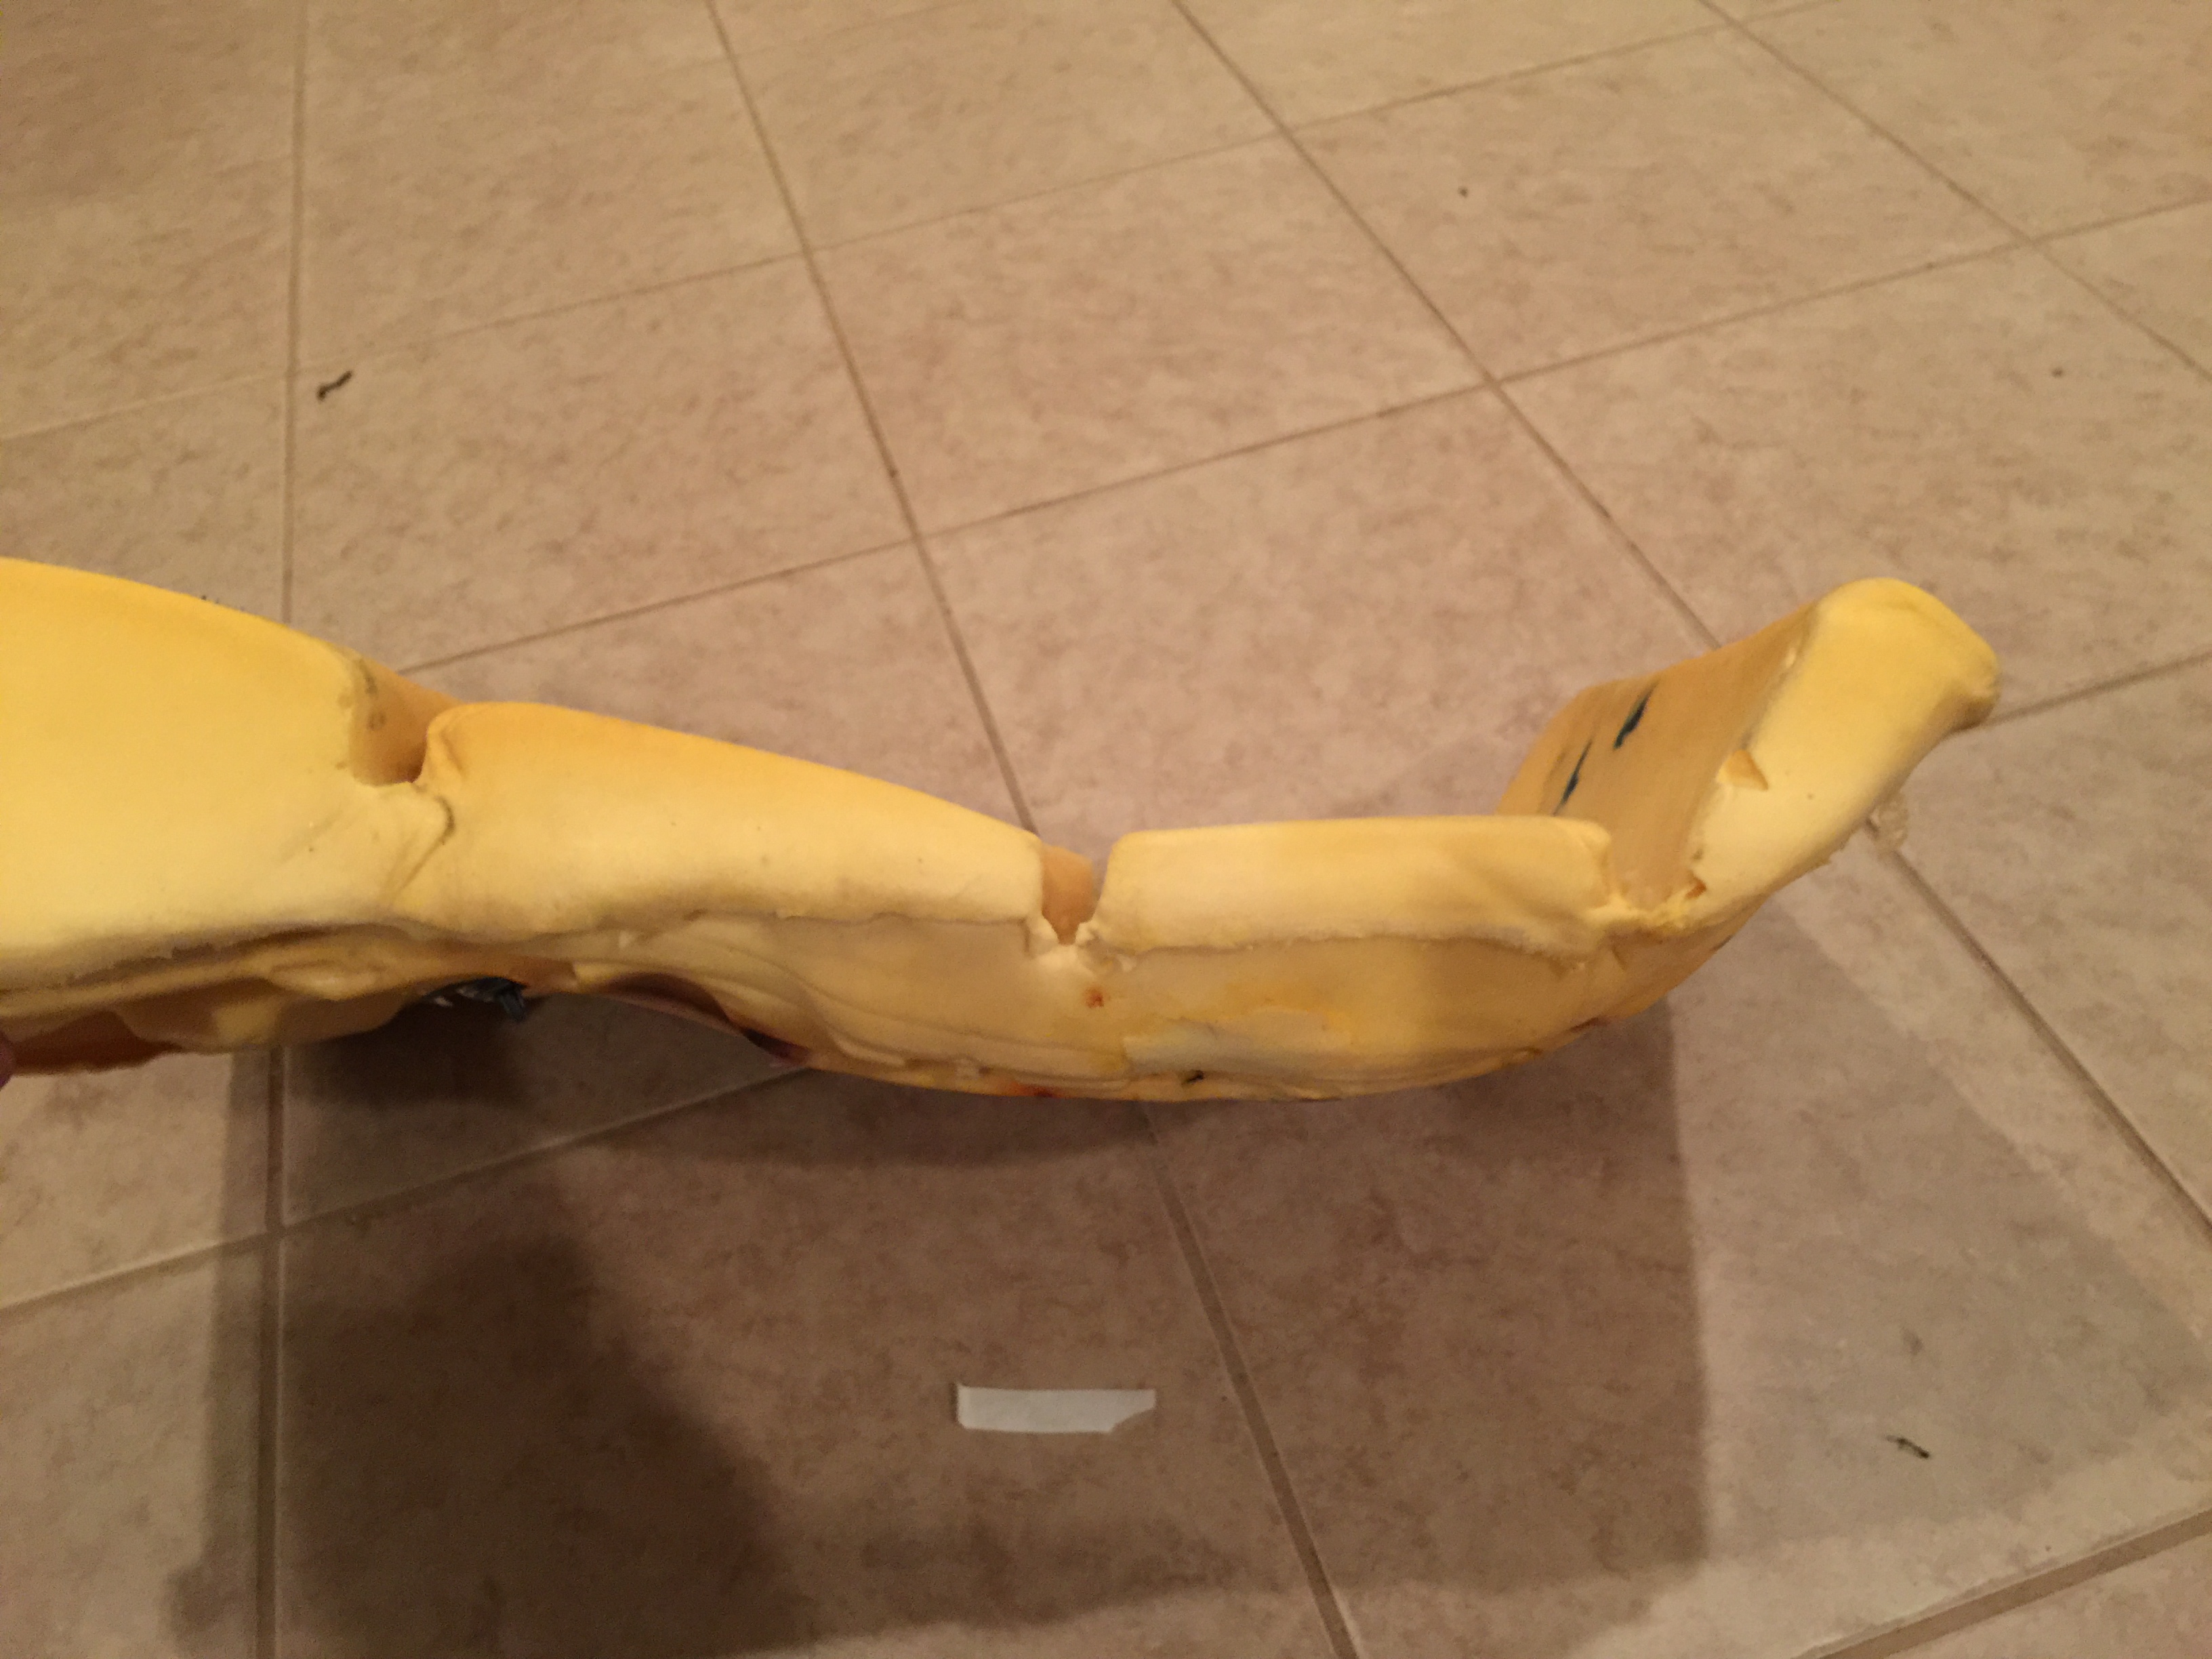
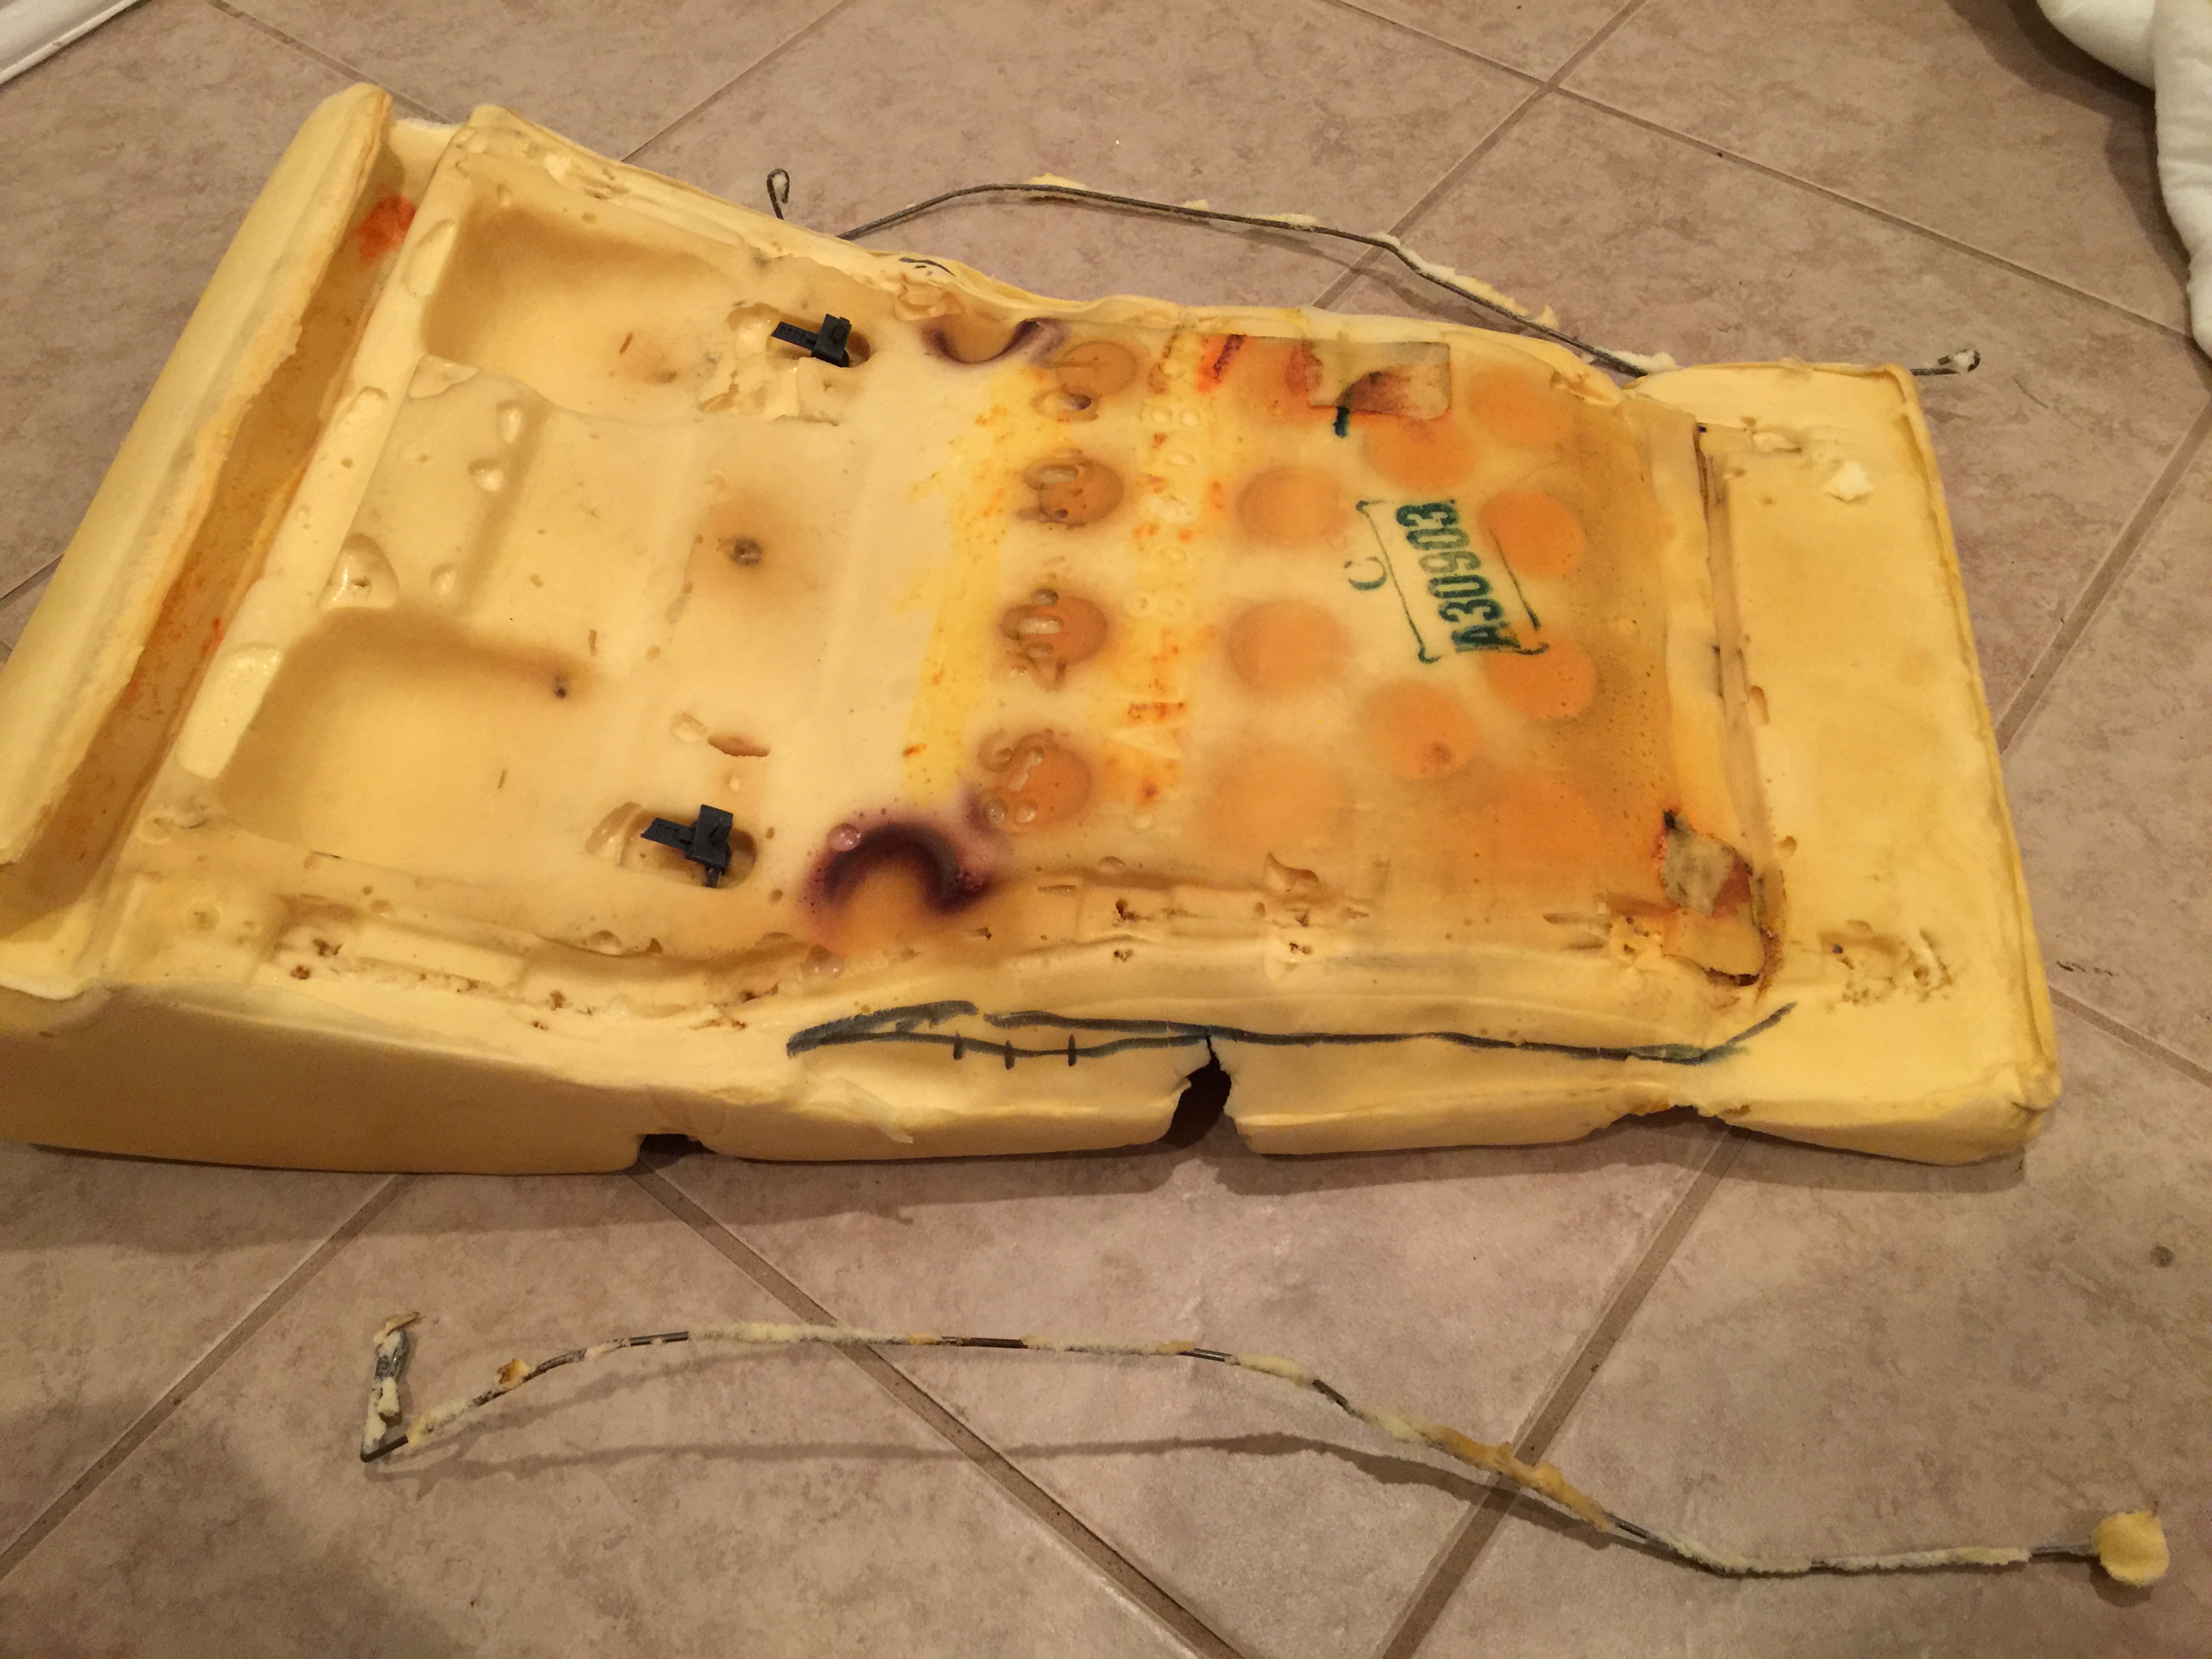
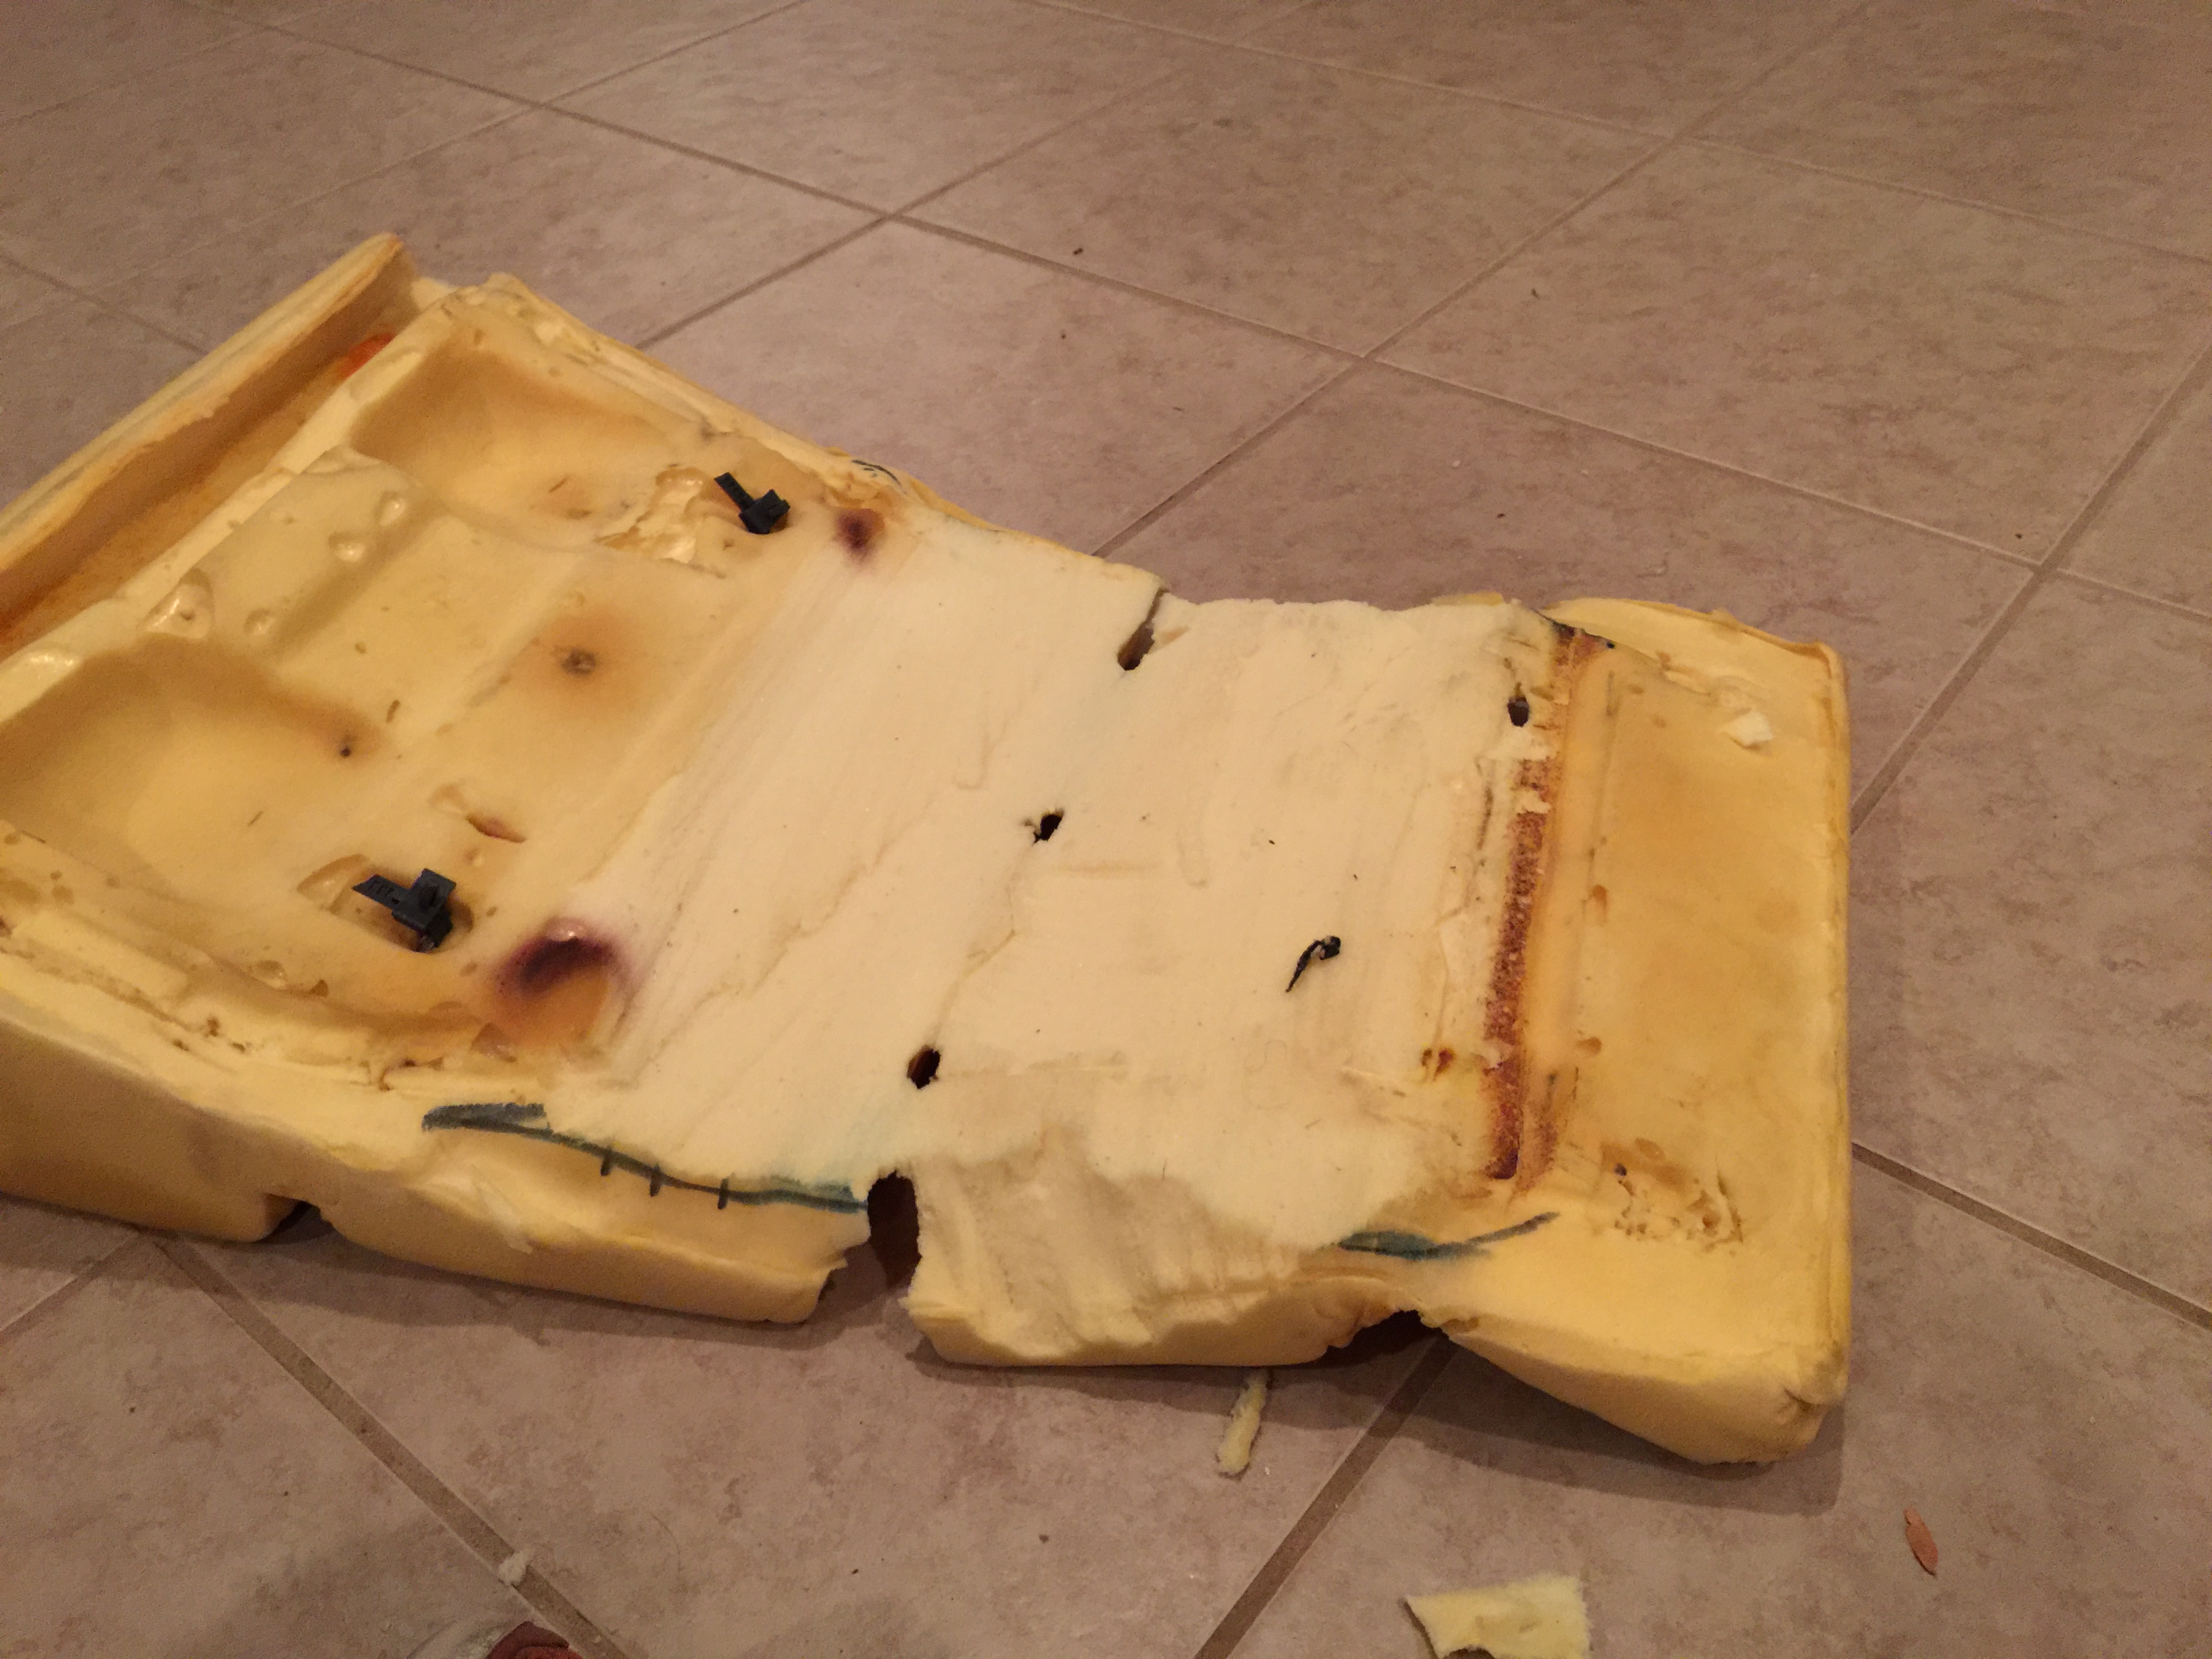
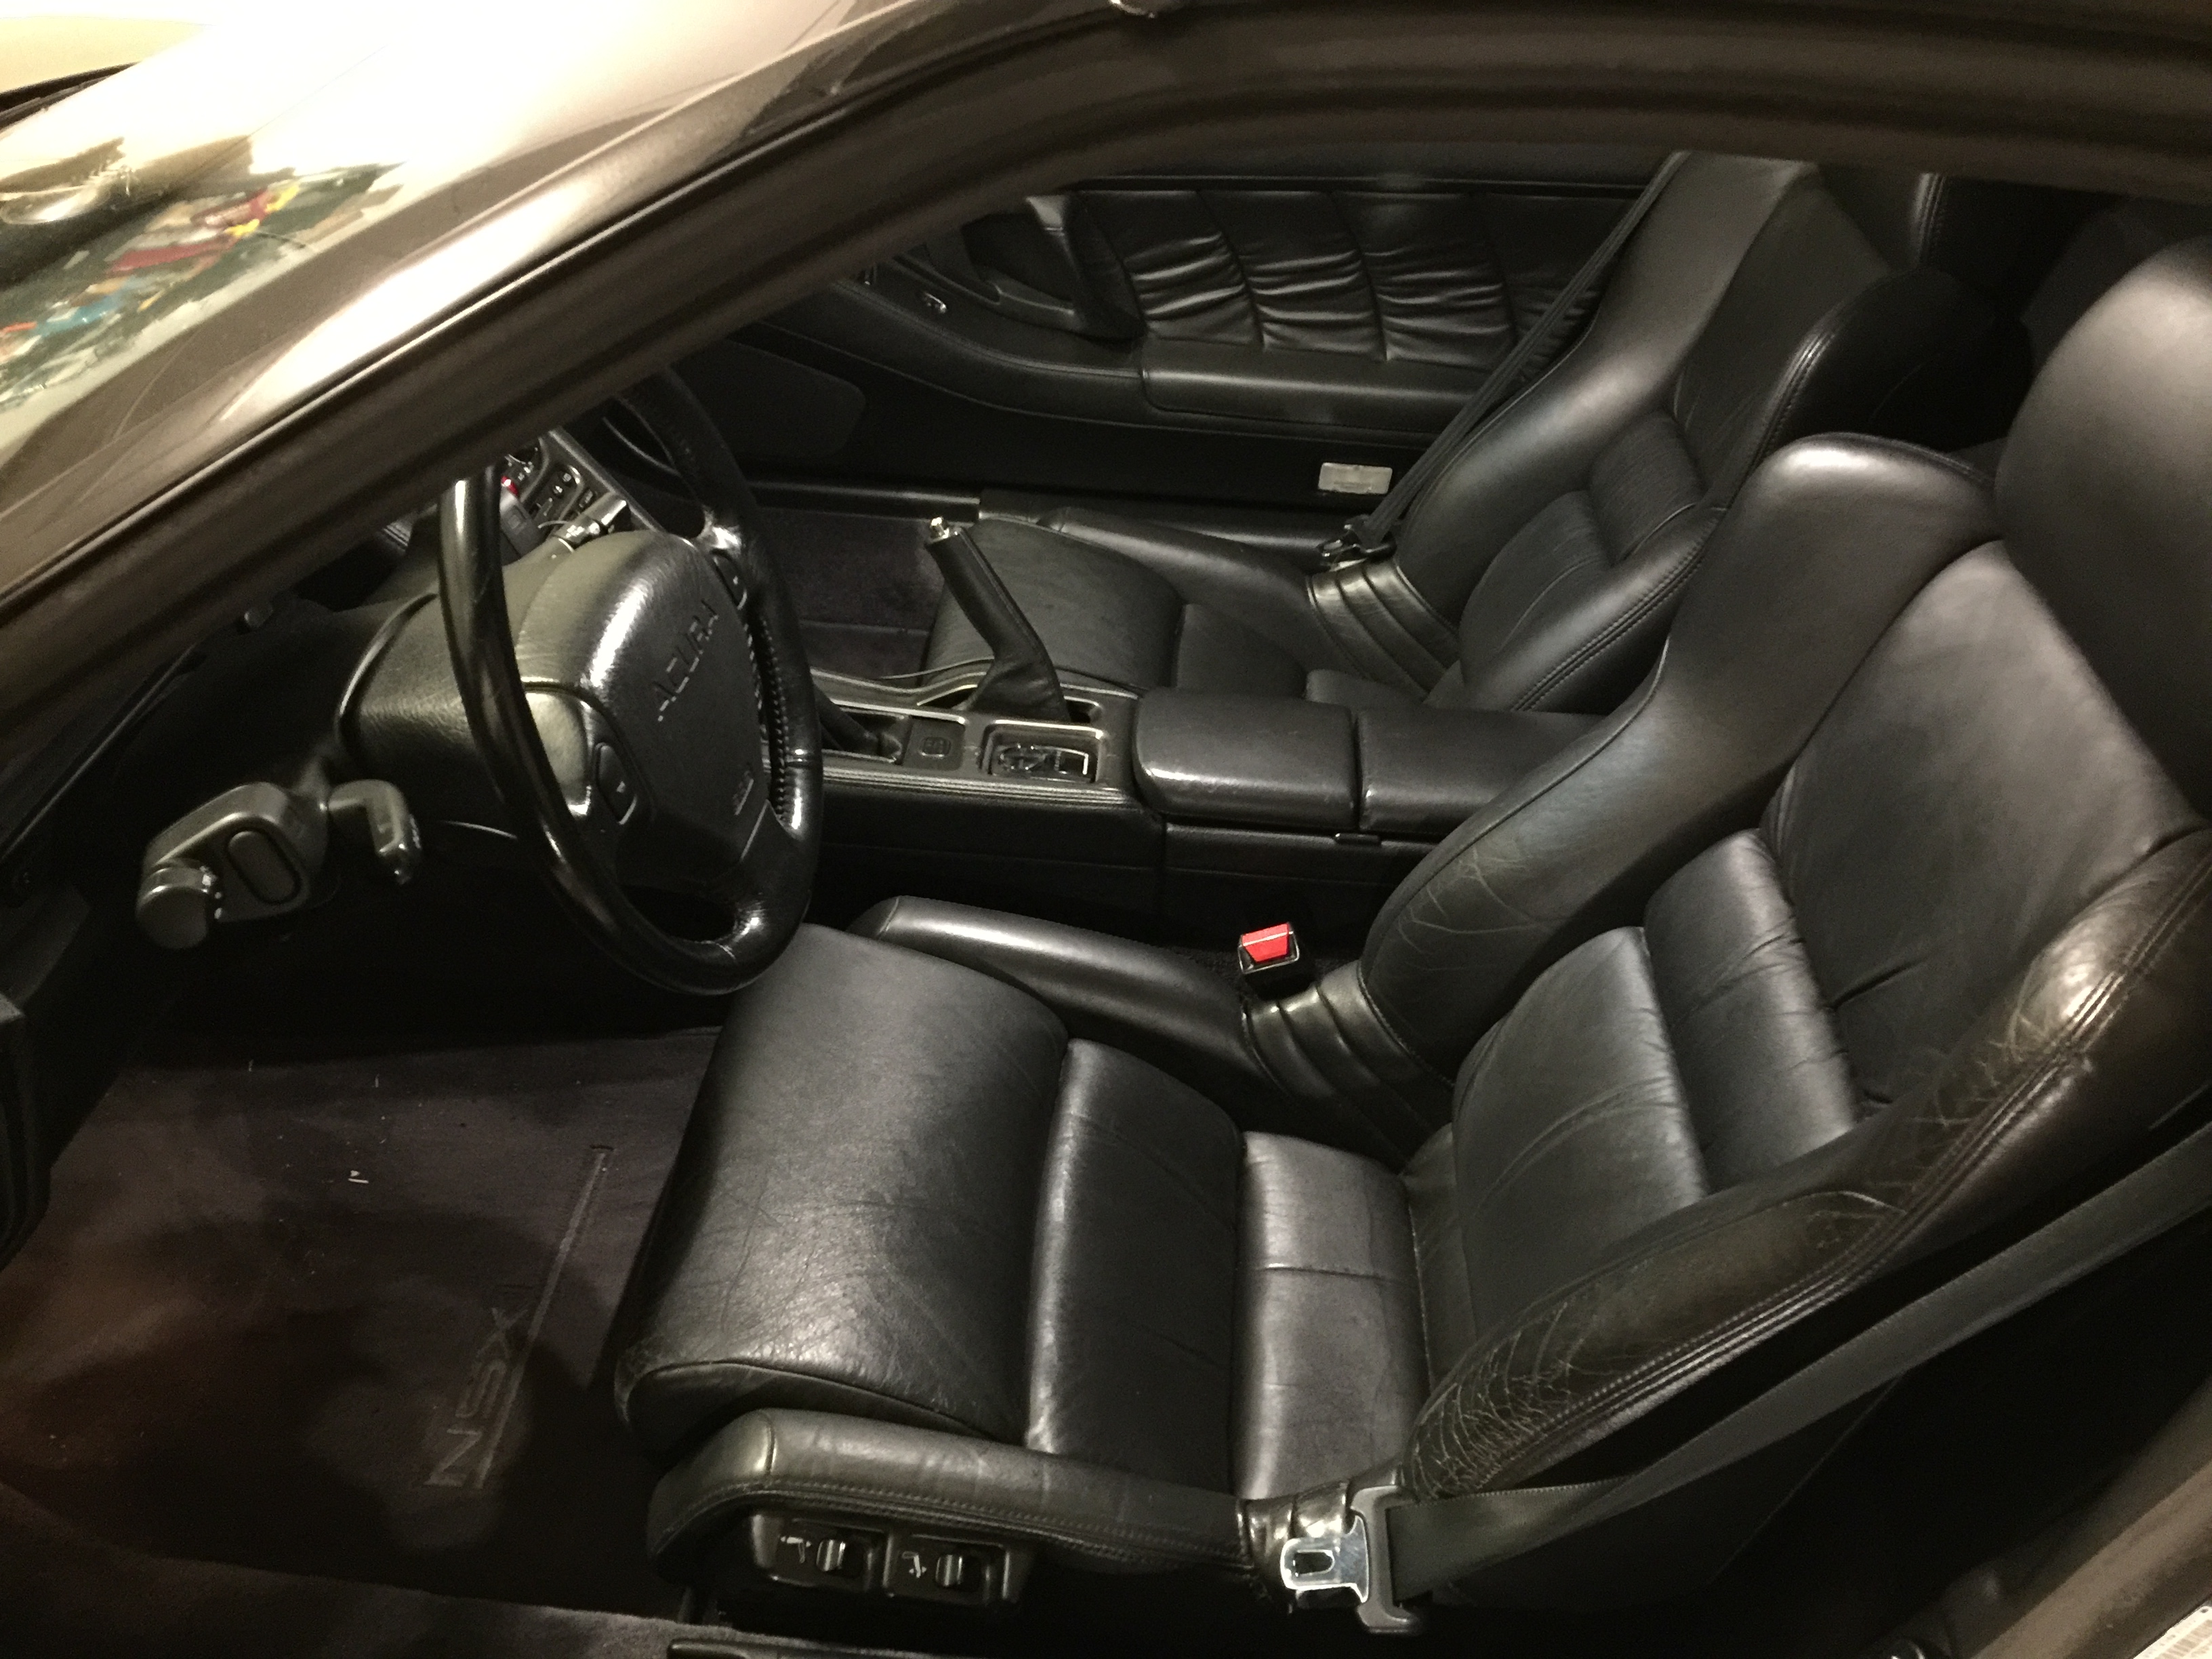
I also decided I needed more head room, I'm 6'1" and had MAYBE 1/2" of head room, so I cut about an inch of foam out of the bottom of the seat and it makes a bigger difference than you'd think. At first I attempted a "hot wire" approach that involved a hack saw blade, a propane torch, and some dangerous smelling fumes (see the burned stripe across the back of the bottom of the cushion?) but that didn't work so I just used a hacksaw properly to cut straight across the bottom of the seat foam, and then used zip ties instead of hog rings since for the reassembly since I absolutely hate hog rings. Overall it isn't noticeable at all and seat comfort seems unchanged.
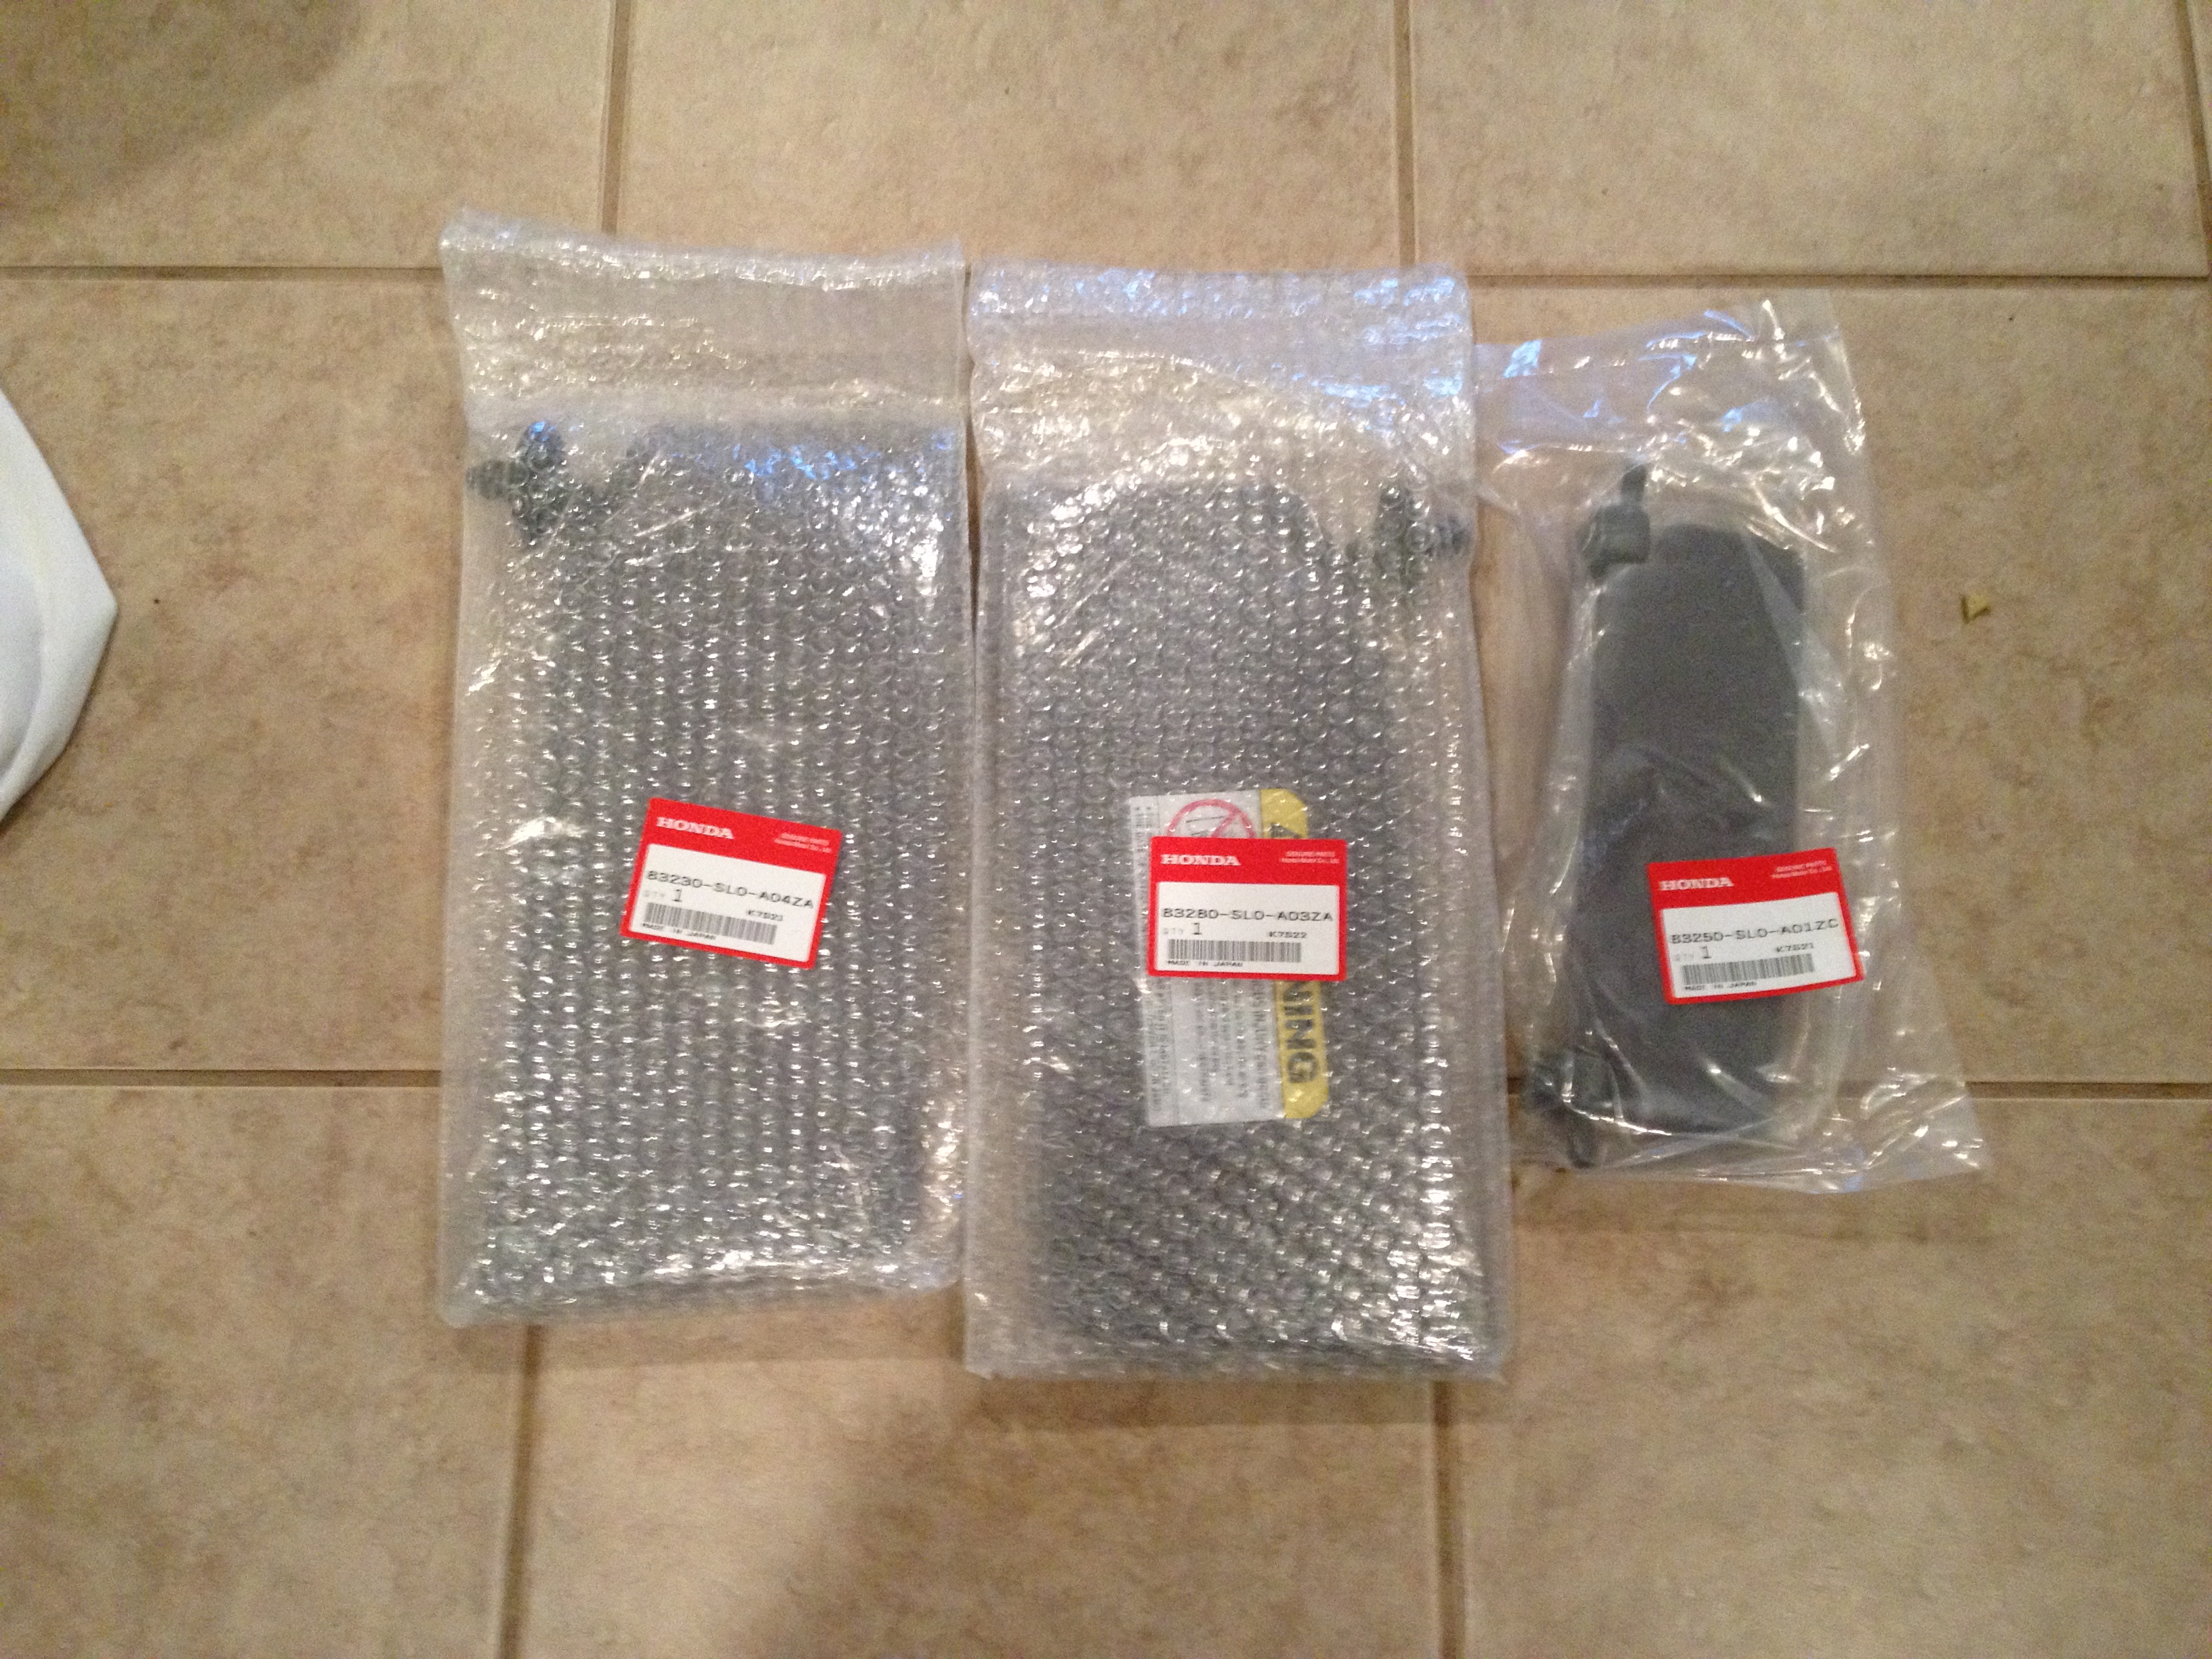
Also picked up a set of sun visors to replace mine that are splitting like crazy, the new ones have giant air bag warnings on them though which is annoying... For whatever reason Acura has discontinued them in North America so I had to order them from some guy running an NSX parts shop in Japan.
I also starting taking apart the interior to repaint the trip pieces, then discovered that it takes weeks for the ferric chloride to dissolve the coating on them, so in the meantime I decided to take care of a few others things, so I replaced the clutch cylinders.
After doing some research I found that the cheap Centric branded clutch master and slave cylinders are the exact same parts as the OEM cylinders, but less than half the price. Sure enough, the markings are identical and the master cylinder are both Nissin and the slave cylinders are both made by AS.
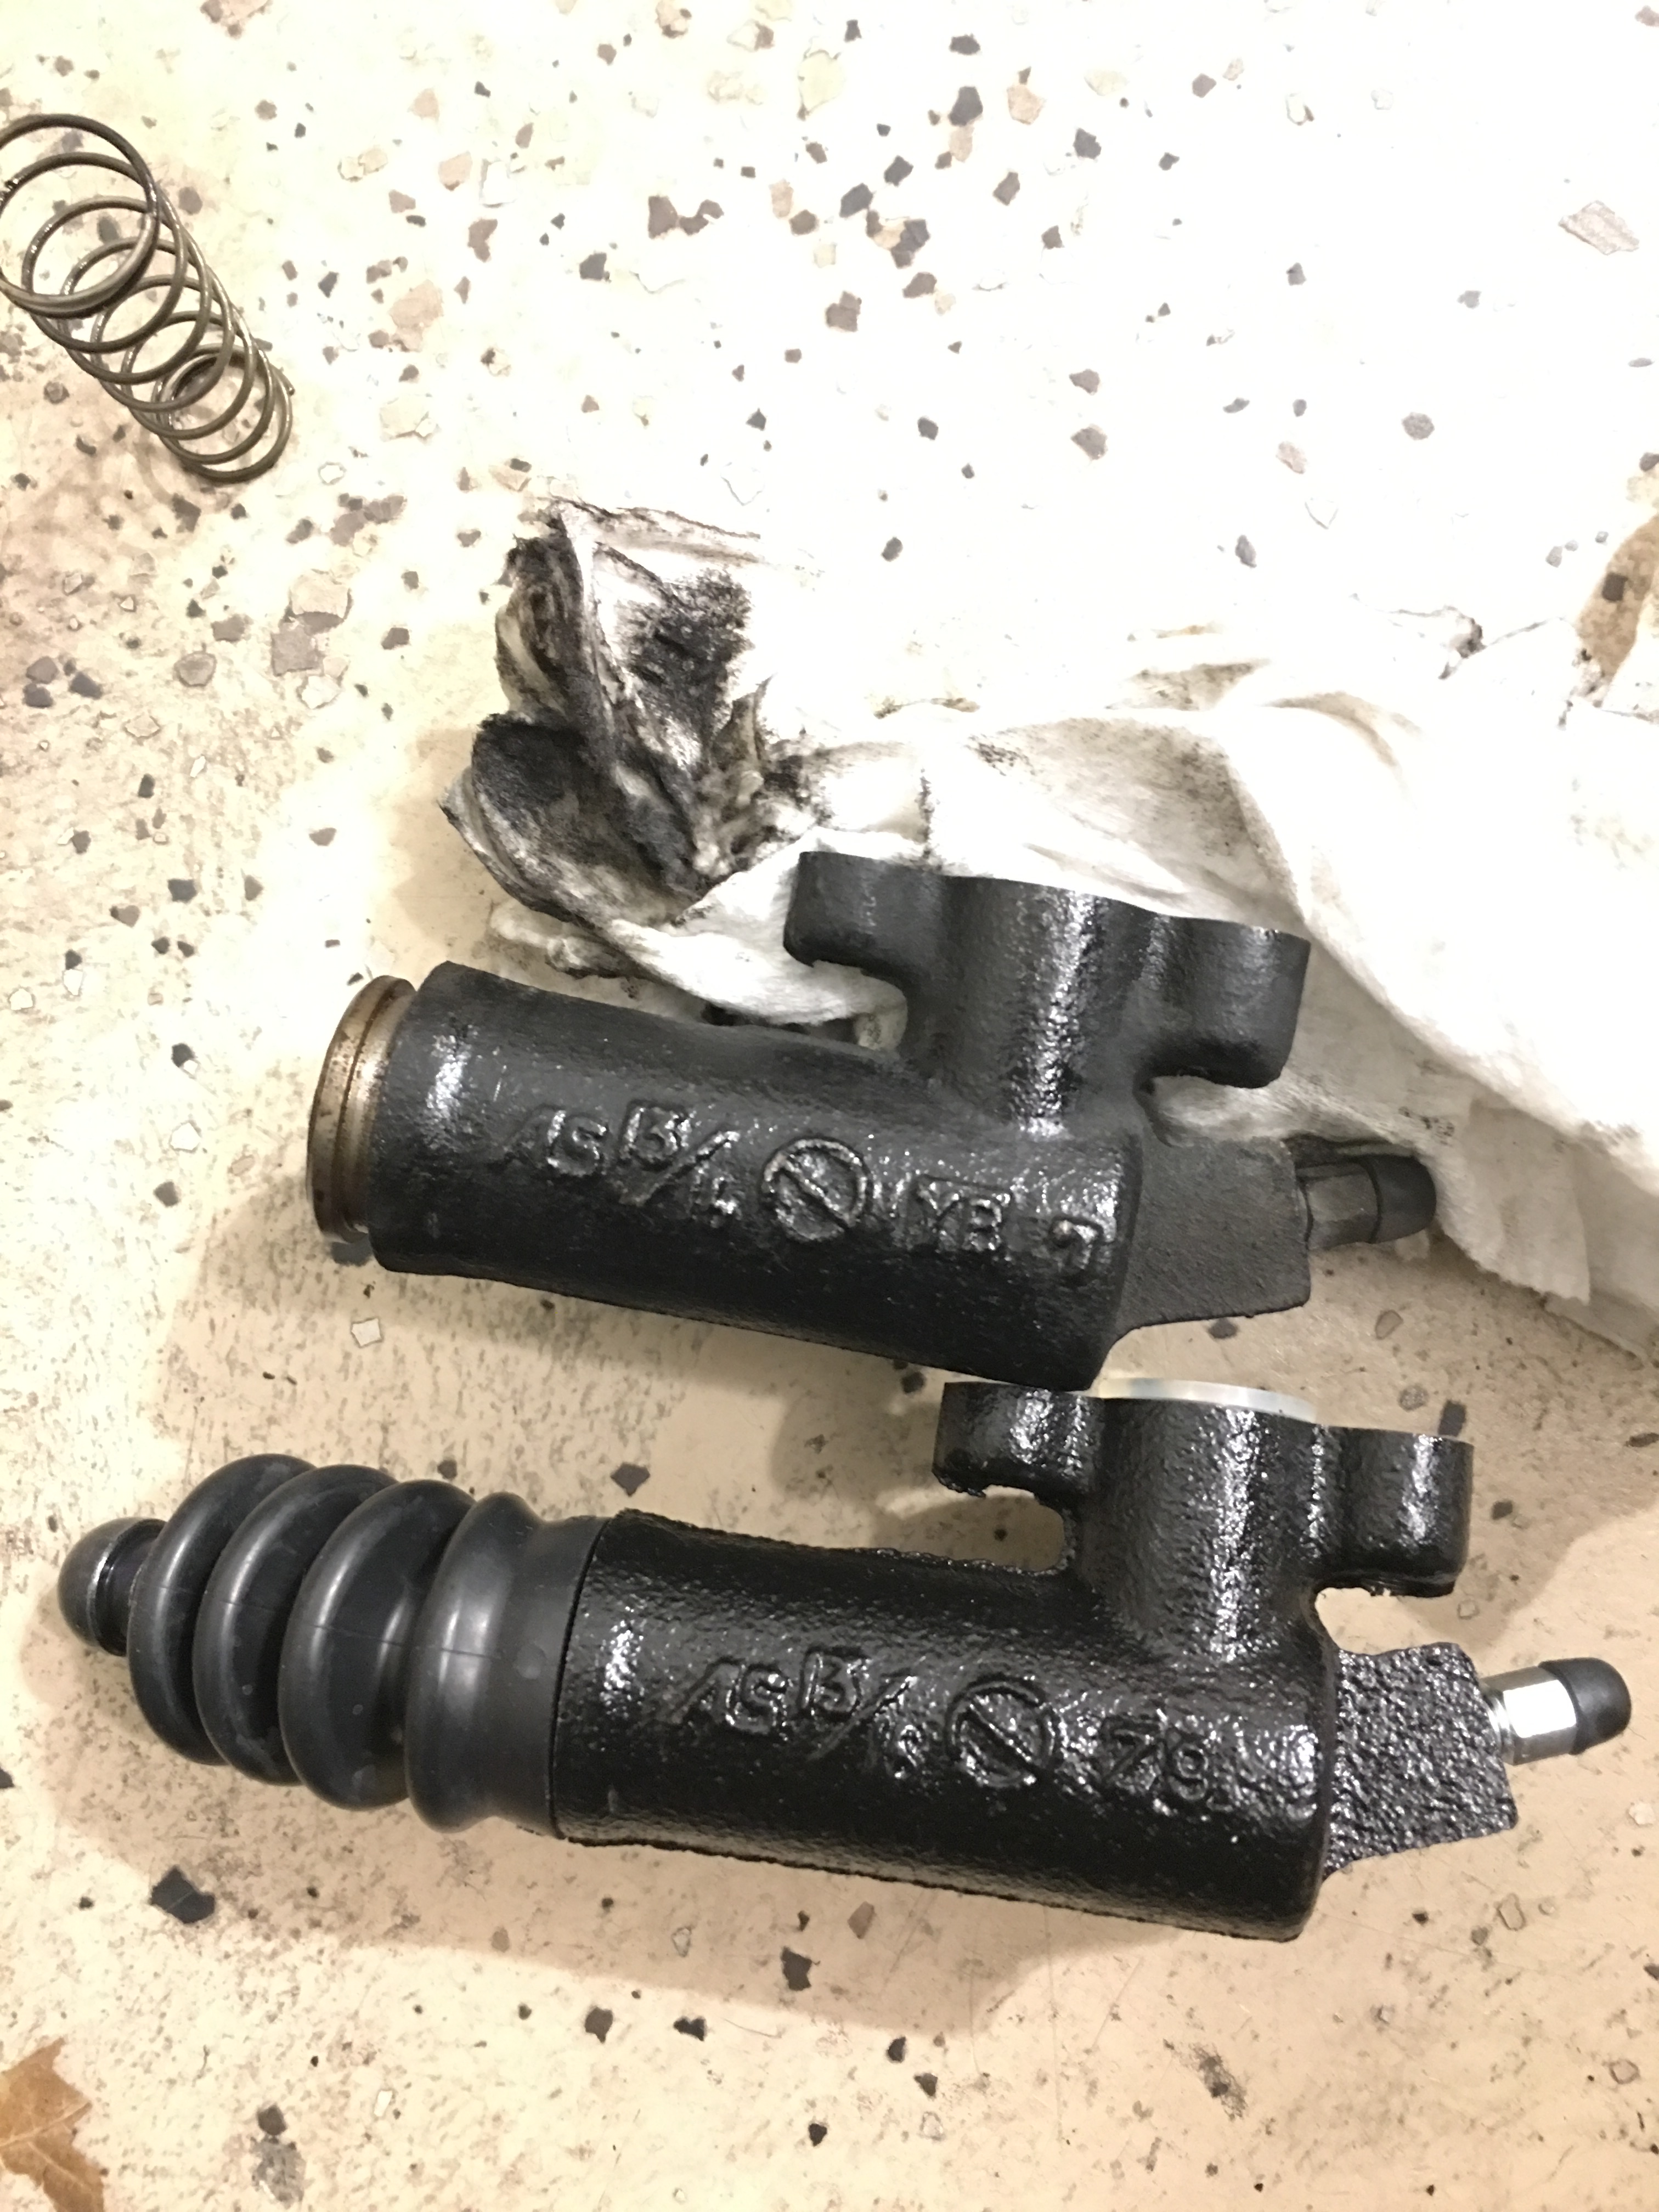
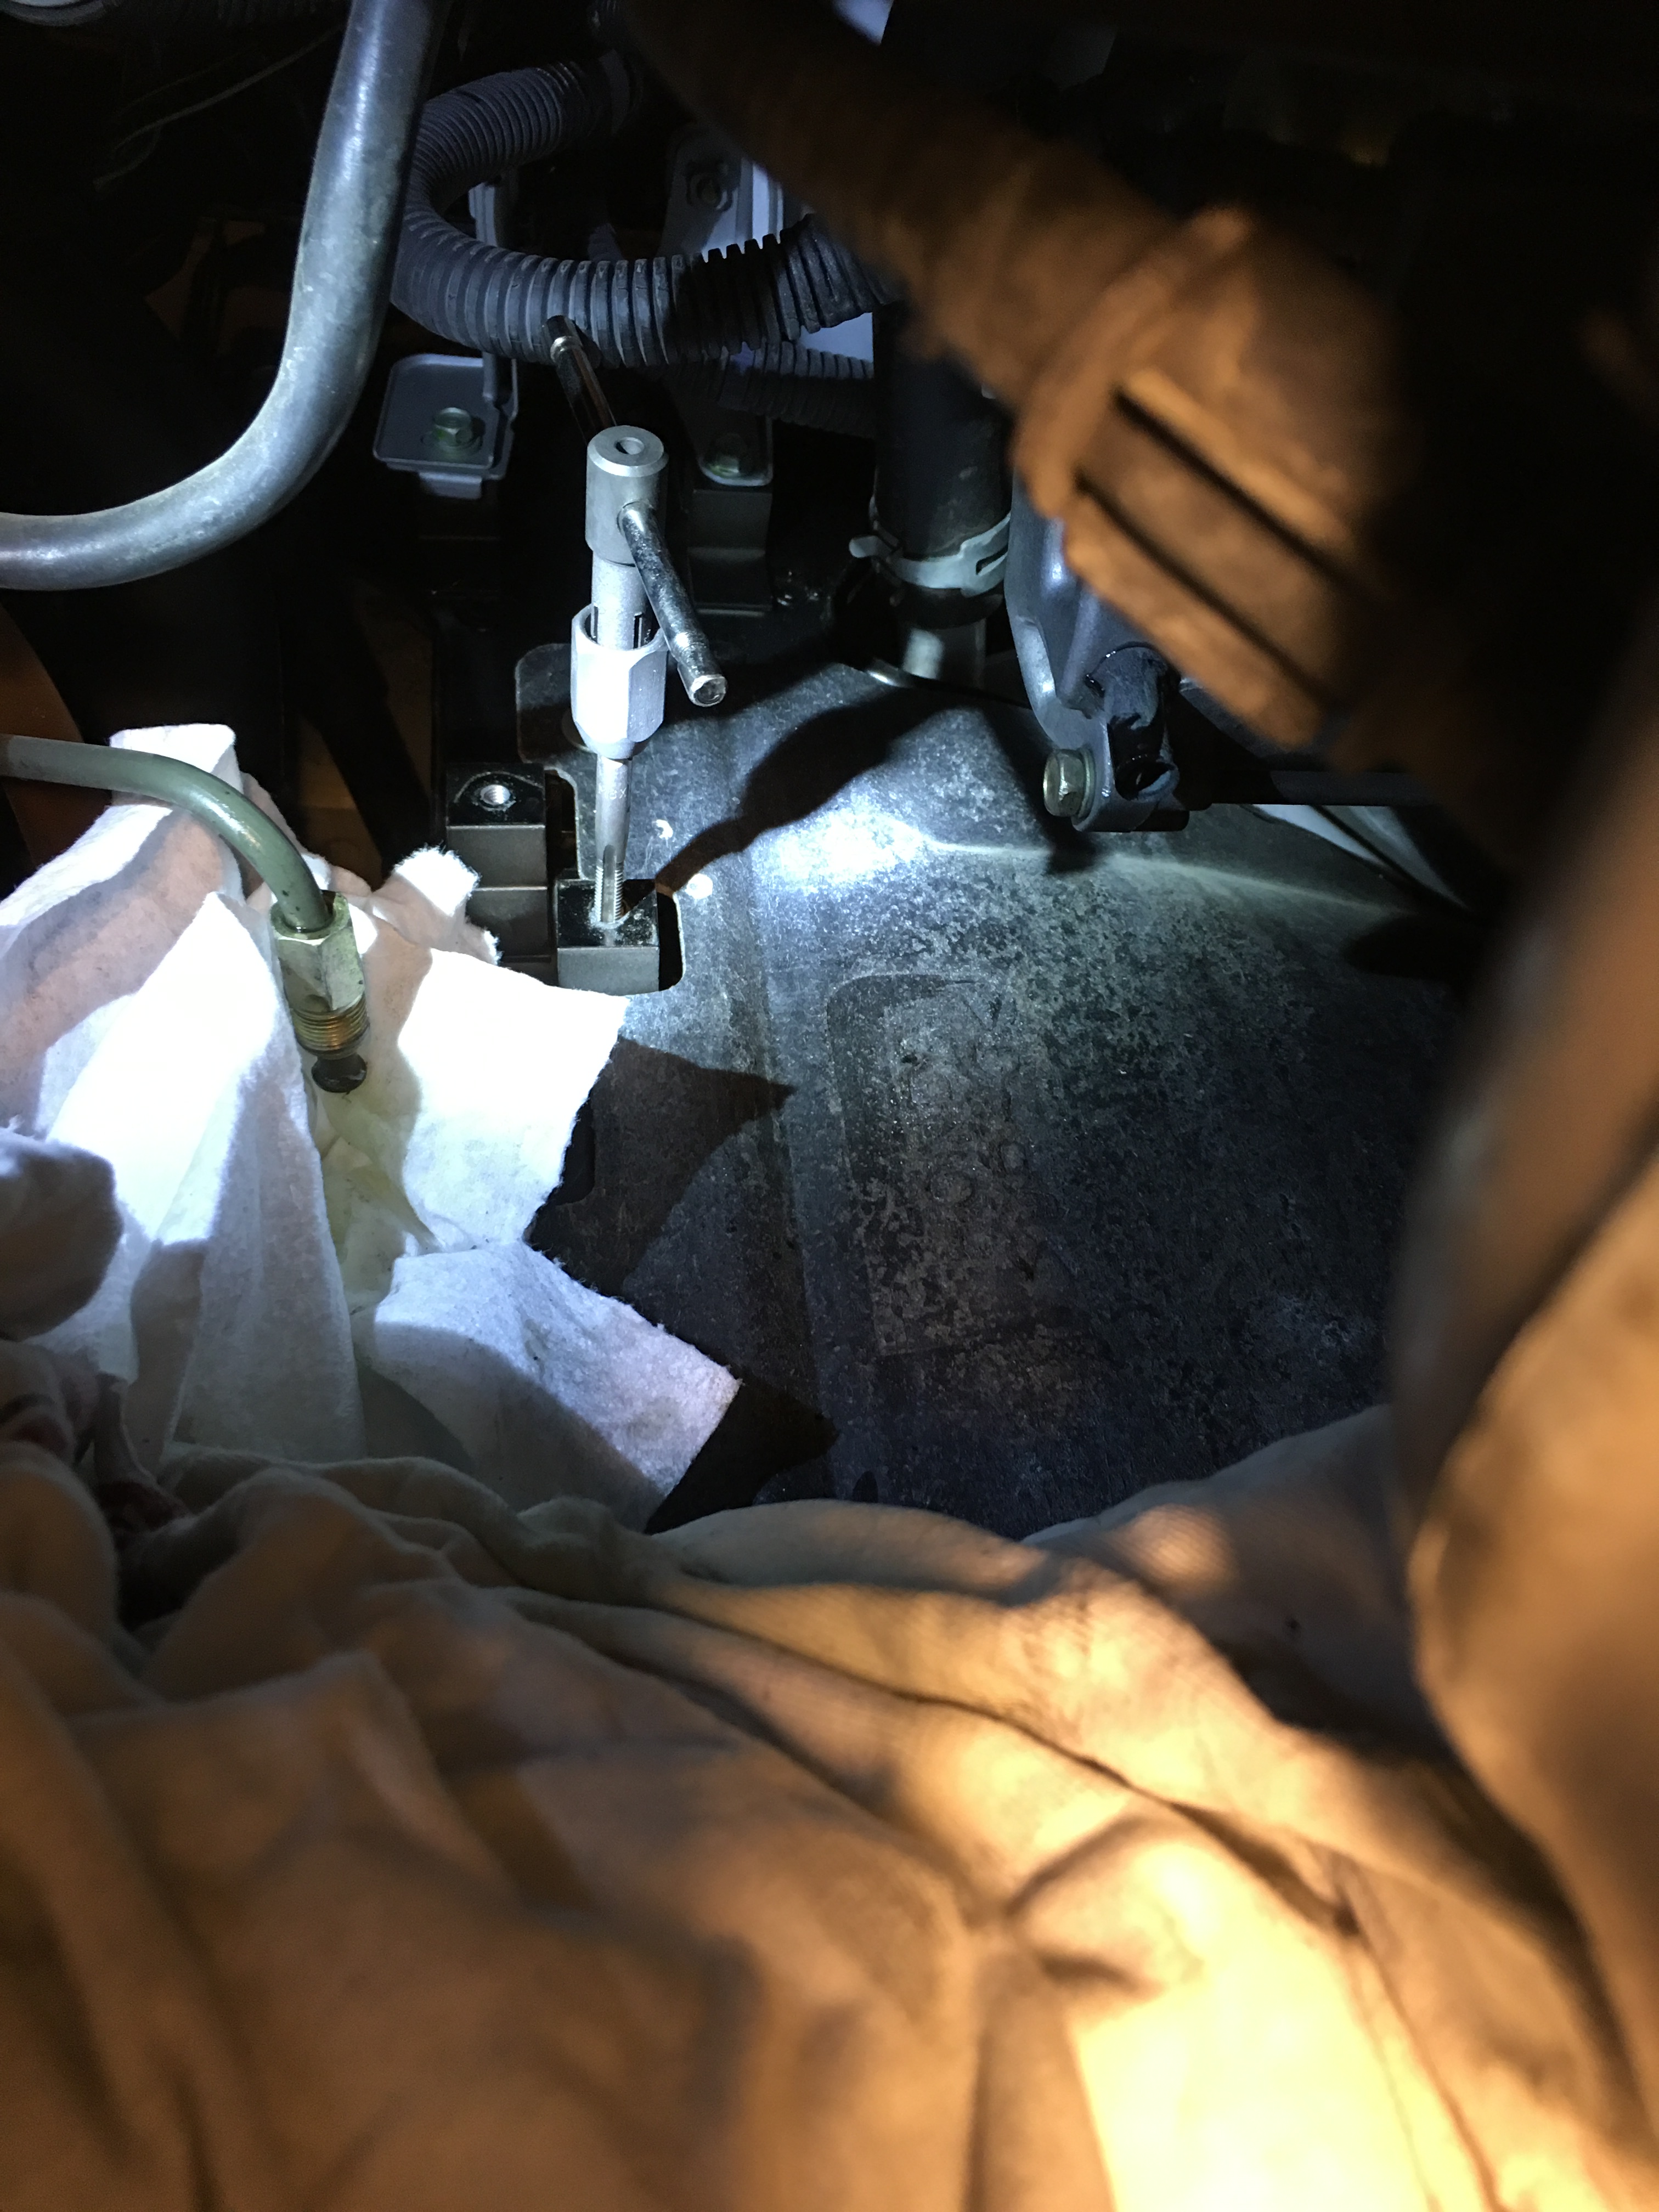
While I was replacing the clutch cylinders I decided to install a ScienceOfSpeed clutch damper delete kit since the clutch damper doesn't do a whole lot besides wear down the clutch faster. It's a much cleaner look too since it gets rid of a bracket and extra tube, as well as replaces the rubber line with a stainless line. I'm not a fan of stainless lines but since it's the clutch and not the brakes I can tolerate it. My only real issue with this kit is that the fitting to connect the SS hose to the new slave cylinder was just ever so slightly too large to fit, so I had to sand it with 800 grit sandpaper for a proper fit. After removing one of the brackets I found that the holes were pretty sticky so I ran an M6x1.0mm tap through them and wire-wheeled the bolts for good measure.

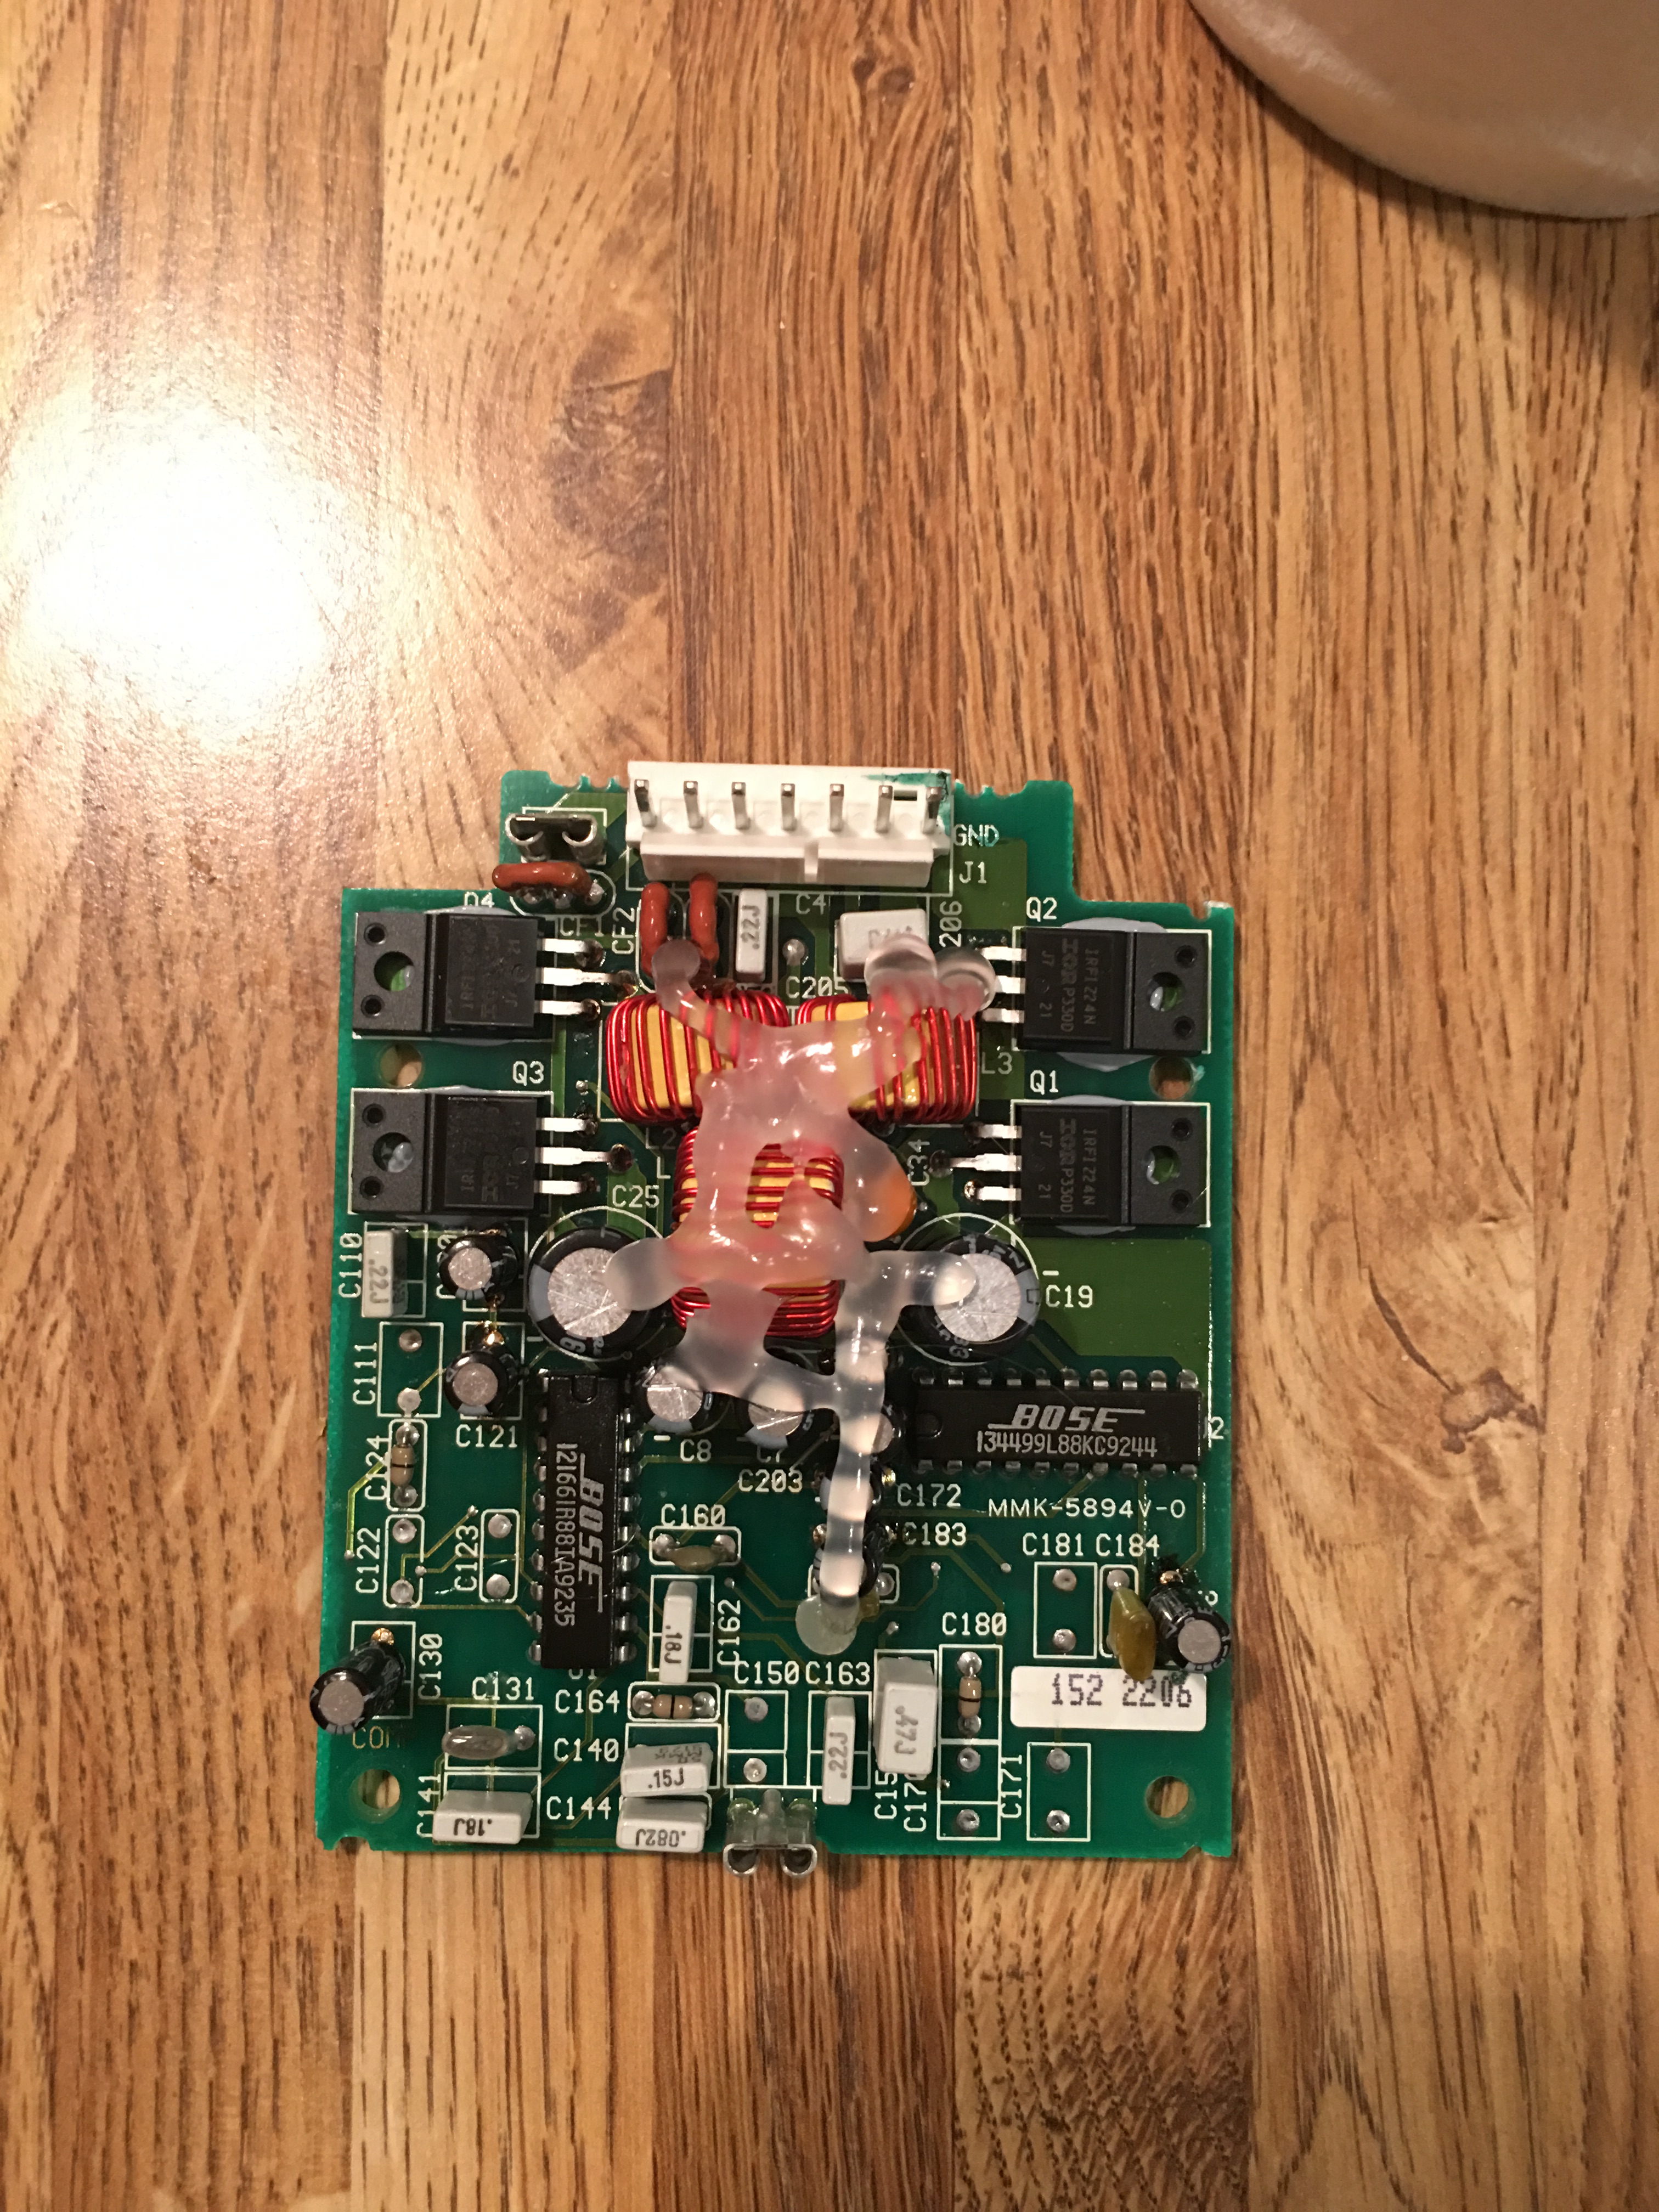
With the door panels and center console out I decided it was time to come up with a final solution for the stereo. I have yet to see an actually good looking aftermarket radio install in an NSX, some look okay but mostly they just look tacky, and I don't need audiophile-level sound in this car since I mainly want to hear the exhaust anyways, so I decided to just rebuild the factory amplifiers and get an aux adapter that plugs into the CD changer port on the radio since it gives much better quality than my tape player aux adapter does. As far as I can tell, my amplifiers hadn't actually failed yet, but it's a lot easier to rebuild them before the capacitors start leaking than it is after because the electrolyte damages the circuit traces and just makes everything more difficult, and parts cost almost nothing.
During the rebuild process, I found a bunch of rat poison in the subwoofer box...my only guess is that a mouse set up camp after crawling in through the port then grabbed a bunch of poison bait pellets and stashed them in there. The weird thing is I haven't seen any other evidence of rodents in this car at all, no chewed wires or carpet, no droppings, nothing. I almost think that the sub box must have come from another car and been used to replace the original, since the capacitors in the subwoofer amplifier were different than the ones in the door speaker amp.
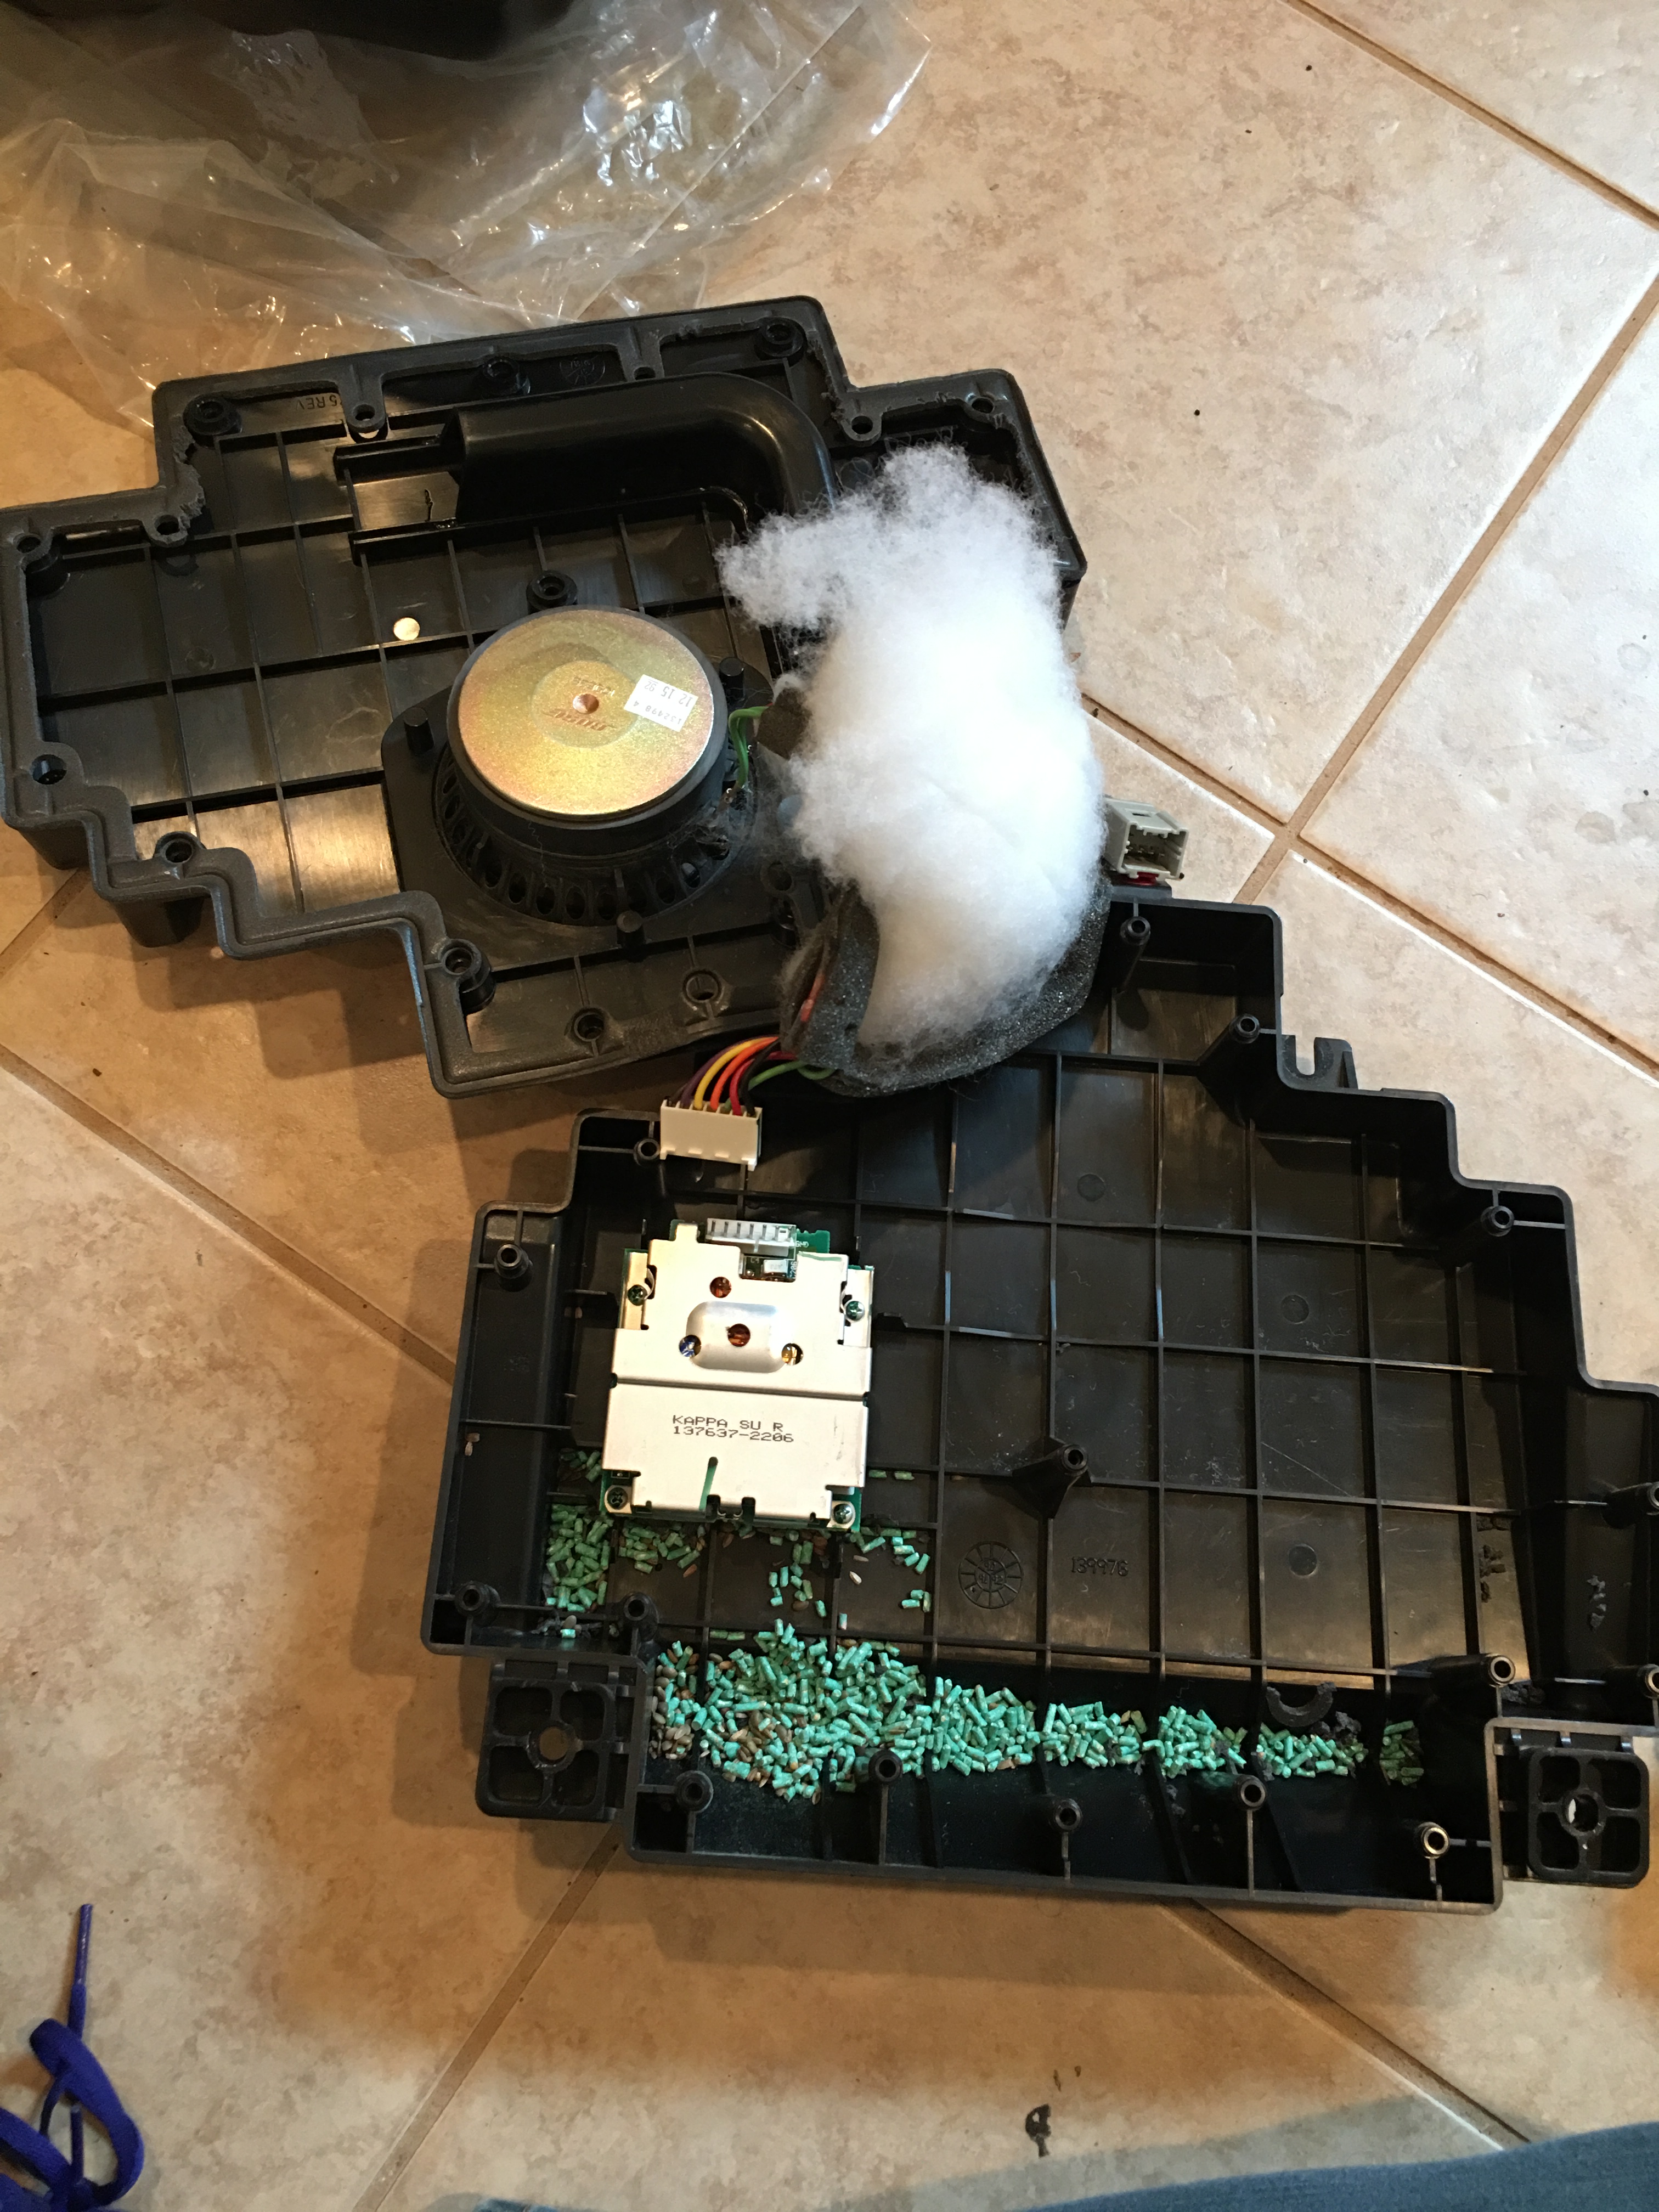
After obsessively cleaning up everything in the vicinity of the box after discovering the rat poison, I took it all apart and washed everything with hot soapy water to get rid of any traces of the poison remaining and went ahead with the amplifier rebuild. New capacitors, new MOSFETs, and new conformal coating.
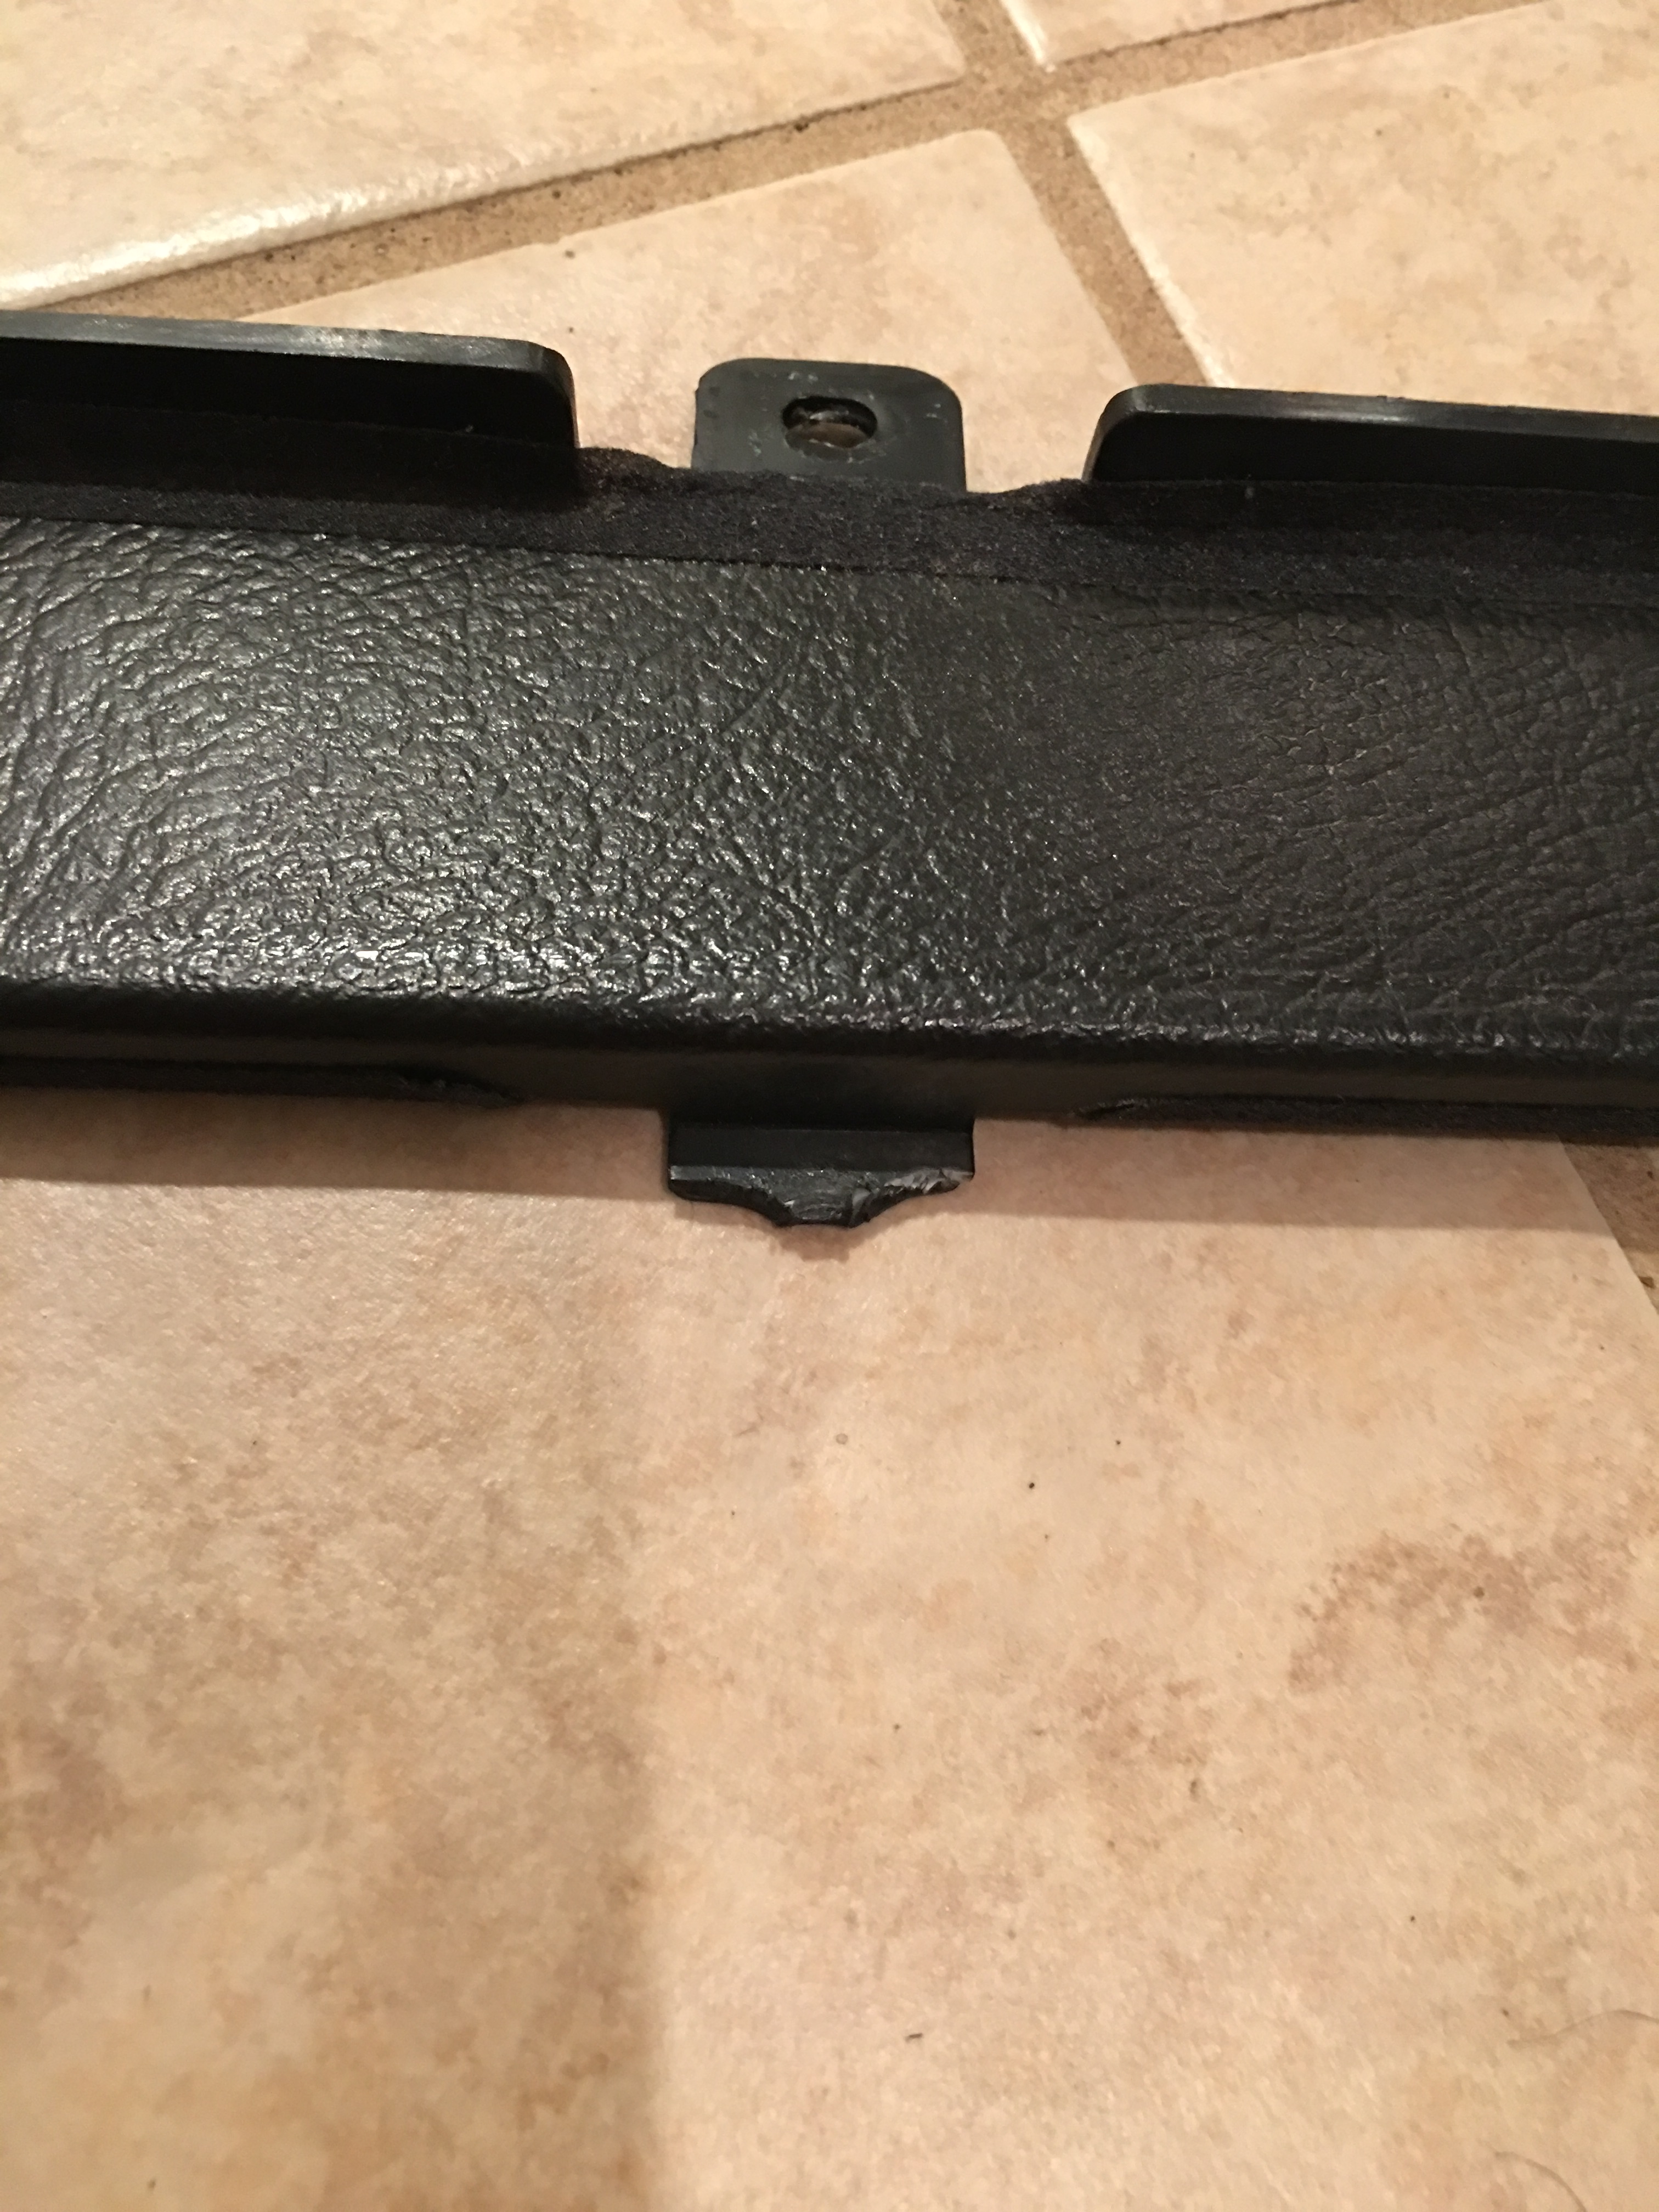
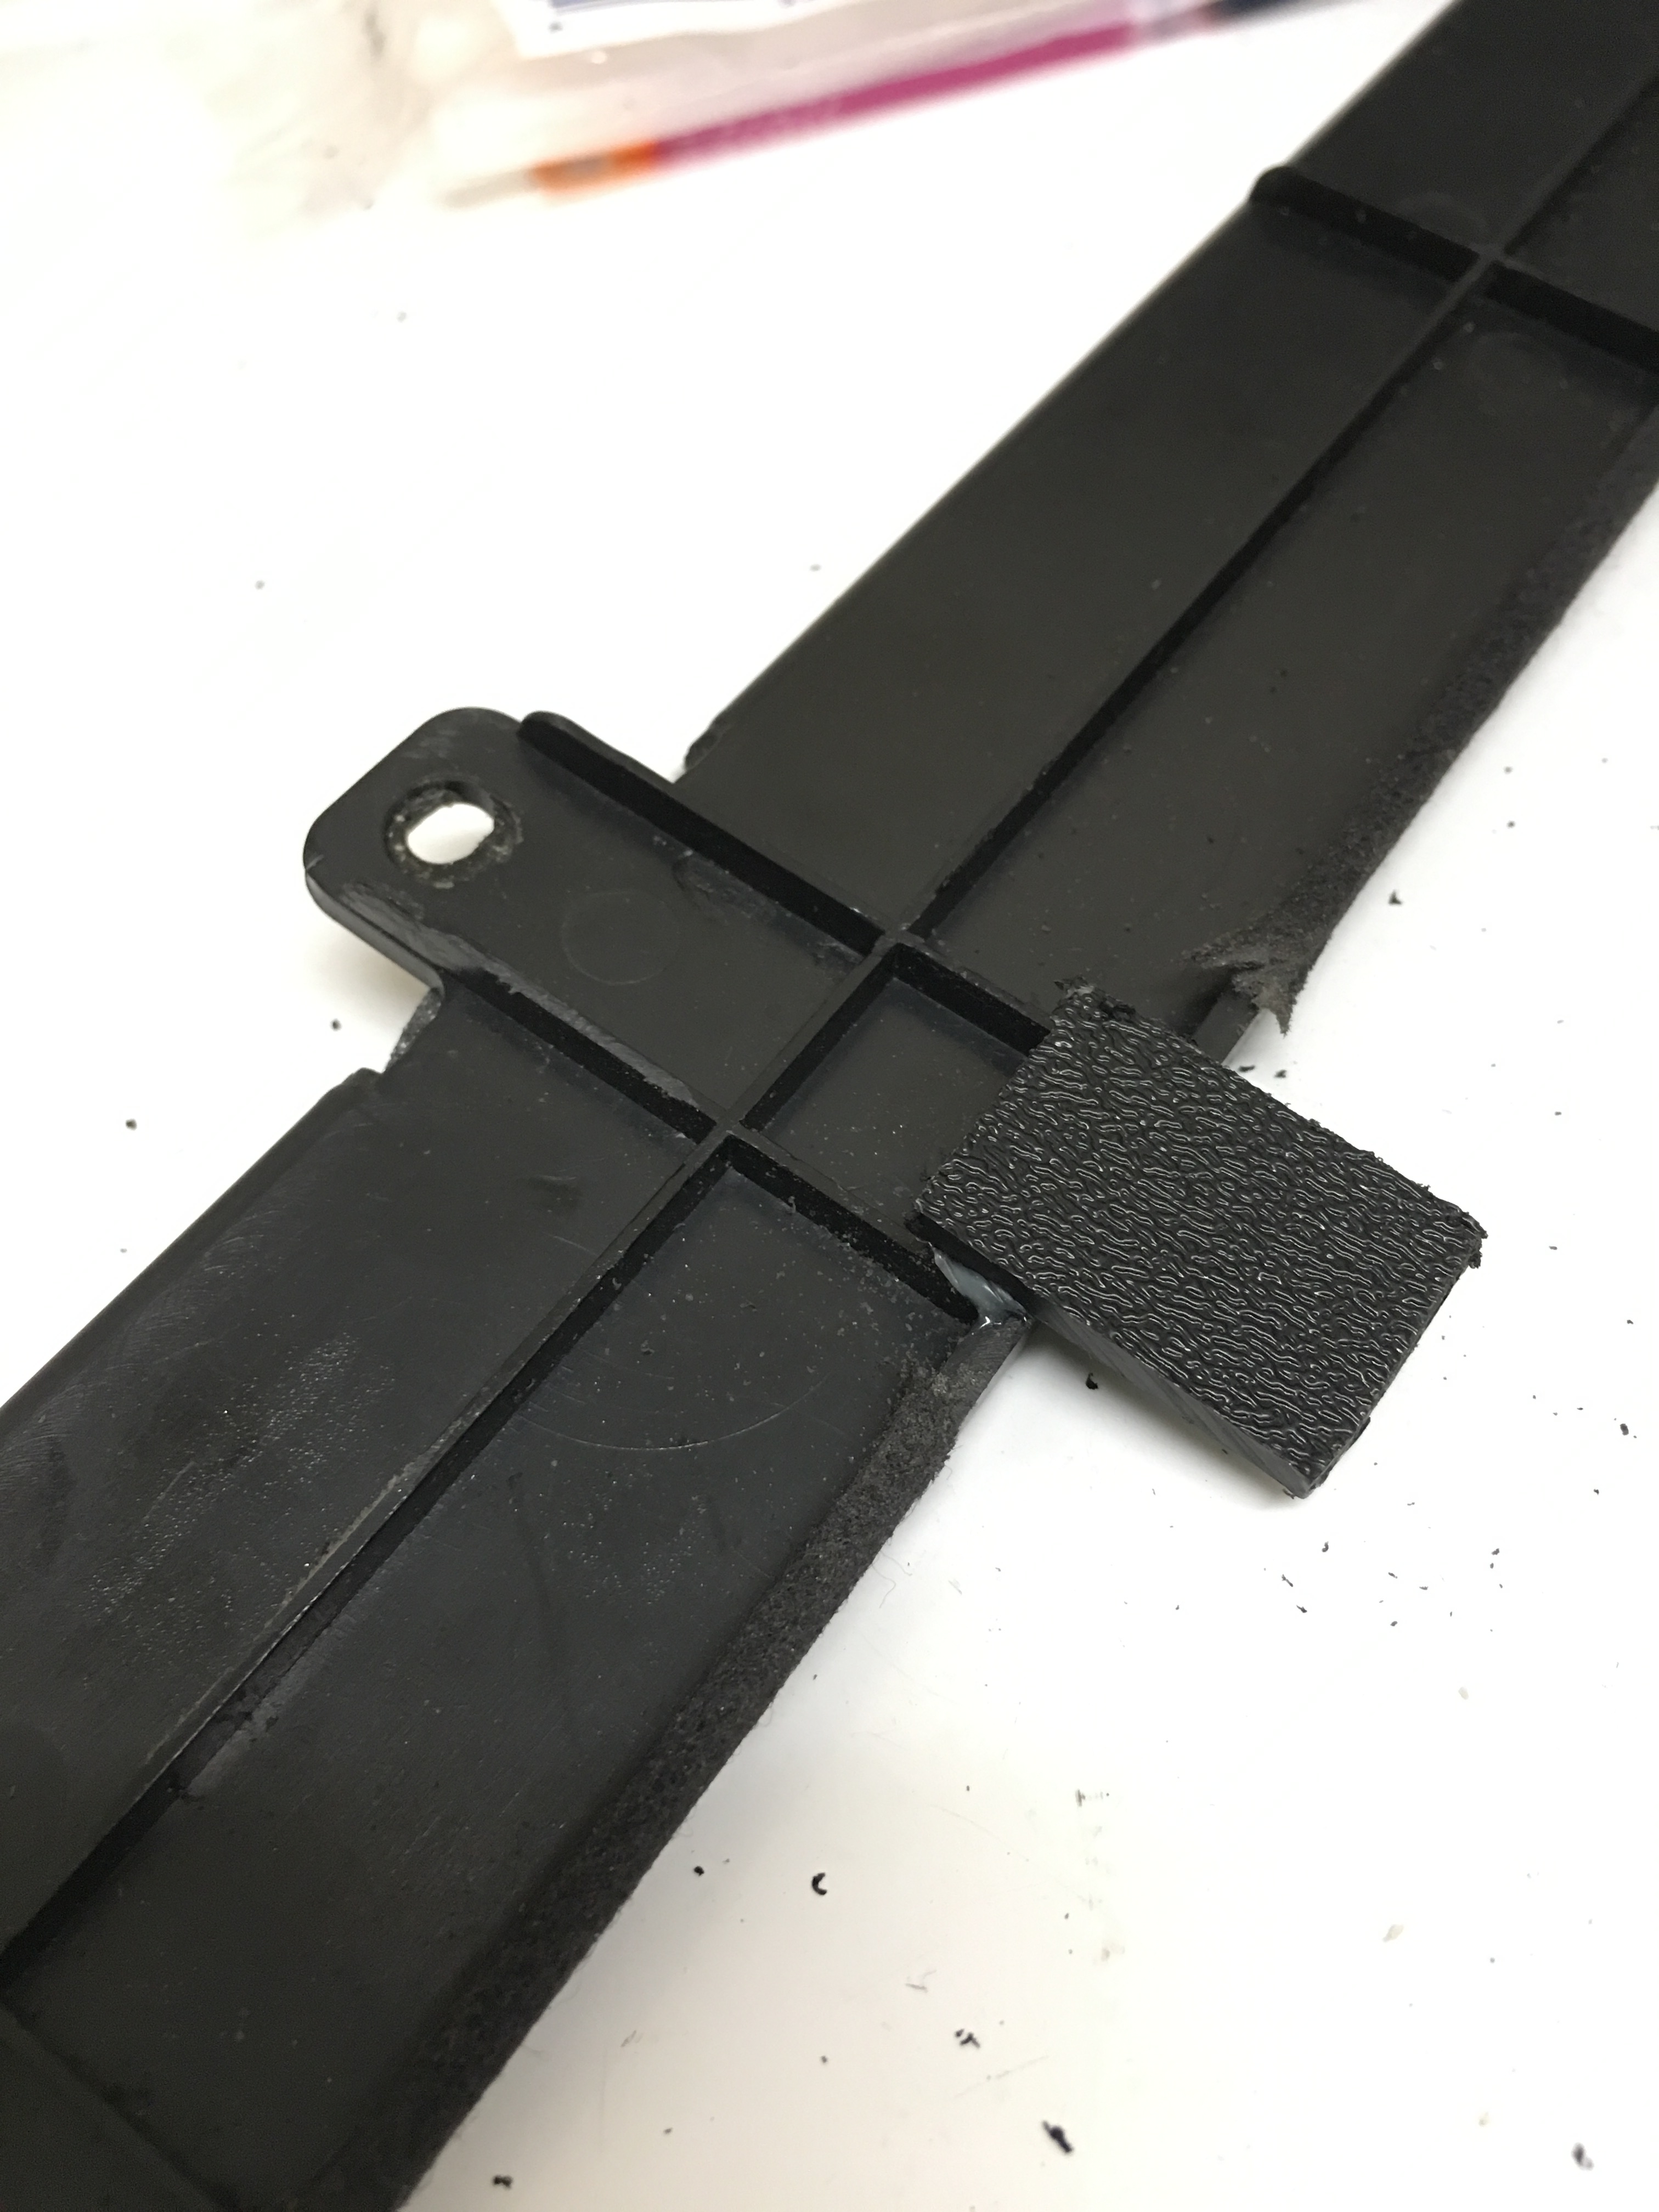
I also fixed a few broken tabs on the speaker box and door panel. Since they are made from ABS plastic I just bought a 12"x12" sheet of 1/8" thick ABS plastic on Amazon, cut pieces to fit the broken tabs, dremeled away the old tabs, and solvent welded the new ones on. So far they seem to be plenty strong but only time will tell how well this fix holds up, I still need to drill the holes and clean up the edges a bit.
I started off by replacing the super long rear dash cam cable with a much more appropriate one and moving the rear camera to the passenger side so it's not constantly visible in the rear view camera. It's much more out of the way now which I like, and the cable isn't wrapped all over the place anymore either.
I also decided I needed more head room, I'm 6'1" and had MAYBE 1/2" of head room, so I cut about an inch of foam out of the bottom of the seat and it makes a bigger difference than you'd think. At first I attempted a "hot wire" approach that involved a hack saw blade, a propane torch, and some dangerous smelling fumes (see the burned stripe across the back of the bottom of the cushion?) but that didn't work so I just used a hacksaw properly to cut straight across the bottom of the seat foam, and then used zip ties instead of hog rings since for the reassembly since I absolutely hate hog rings. Overall it isn't noticeable at all and seat comfort seems unchanged.
Also picked up a set of sun visors to replace mine that are splitting like crazy, the new ones have giant air bag warnings on them though which is annoying... For whatever reason Acura has discontinued them in North America so I had to order them from some guy running an NSX parts shop in Japan.
I also starting taking apart the interior to repaint the trip pieces, then discovered that it takes weeks for the ferric chloride to dissolve the coating on them, so in the meantime I decided to take care of a few others things, so I replaced the clutch cylinders.
After doing some research I found that the cheap Centric branded clutch master and slave cylinders are the exact same parts as the OEM cylinders, but less than half the price. Sure enough, the markings are identical and the master cylinder are both Nissin and the slave cylinders are both made by AS.
While I was replacing the clutch cylinders I decided to install a ScienceOfSpeed clutch damper delete kit since the clutch damper doesn't do a whole lot besides wear down the clutch faster. It's a much cleaner look too since it gets rid of a bracket and extra tube, as well as replaces the rubber line with a stainless line. I'm not a fan of stainless lines but since it's the clutch and not the brakes I can tolerate it. My only real issue with this kit is that the fitting to connect the SS hose to the new slave cylinder was just ever so slightly too large to fit, so I had to sand it with 800 grit sandpaper for a proper fit. After removing one of the brackets I found that the holes were pretty sticky so I ran an M6x1.0mm tap through them and wire-wheeled the bolts for good measure.
With the door panels and center console out I decided it was time to come up with a final solution for the stereo. I have yet to see an actually good looking aftermarket radio install in an NSX, some look okay but mostly they just look tacky, and I don't need audiophile-level sound in this car since I mainly want to hear the exhaust anyways, so I decided to just rebuild the factory amplifiers and get an aux adapter that plugs into the CD changer port on the radio since it gives much better quality than my tape player aux adapter does. As far as I can tell, my amplifiers hadn't actually failed yet, but it's a lot easier to rebuild them before the capacitors start leaking than it is after because the electrolyte damages the circuit traces and just makes everything more difficult, and parts cost almost nothing.
During the rebuild process, I found a bunch of rat poison in the subwoofer box...my only guess is that a mouse set up camp after crawling in through the port then grabbed a bunch of poison bait pellets and stashed them in there. The weird thing is I haven't seen any other evidence of rodents in this car at all, no chewed wires or carpet, no droppings, nothing. I almost think that the sub box must have come from another car and been used to replace the original, since the capacitors in the subwoofer amplifier were different than the ones in the door speaker amp.
After obsessively cleaning up everything in the vicinity of the box after discovering the rat poison, I took it all apart and washed everything with hot soapy water to get rid of any traces of the poison remaining and went ahead with the amplifier rebuild. New capacitors, new MOSFETs, and new conformal coating.
I also fixed a few broken tabs on the speaker box and door panel. Since they are made from ABS plastic I just bought a 12"x12" sheet of 1/8" thick ABS plastic on Amazon, cut pieces to fit the broken tabs, dremeled away the old tabs, and solvent welded the new ones on. So far they seem to be plenty strong but only time will tell how well this fix holds up, I still need to drill the holes and clean up the edges a bit.
12-27-2017, 10:22 PM
#83
Here's another post filled with my obsessing over minor details.
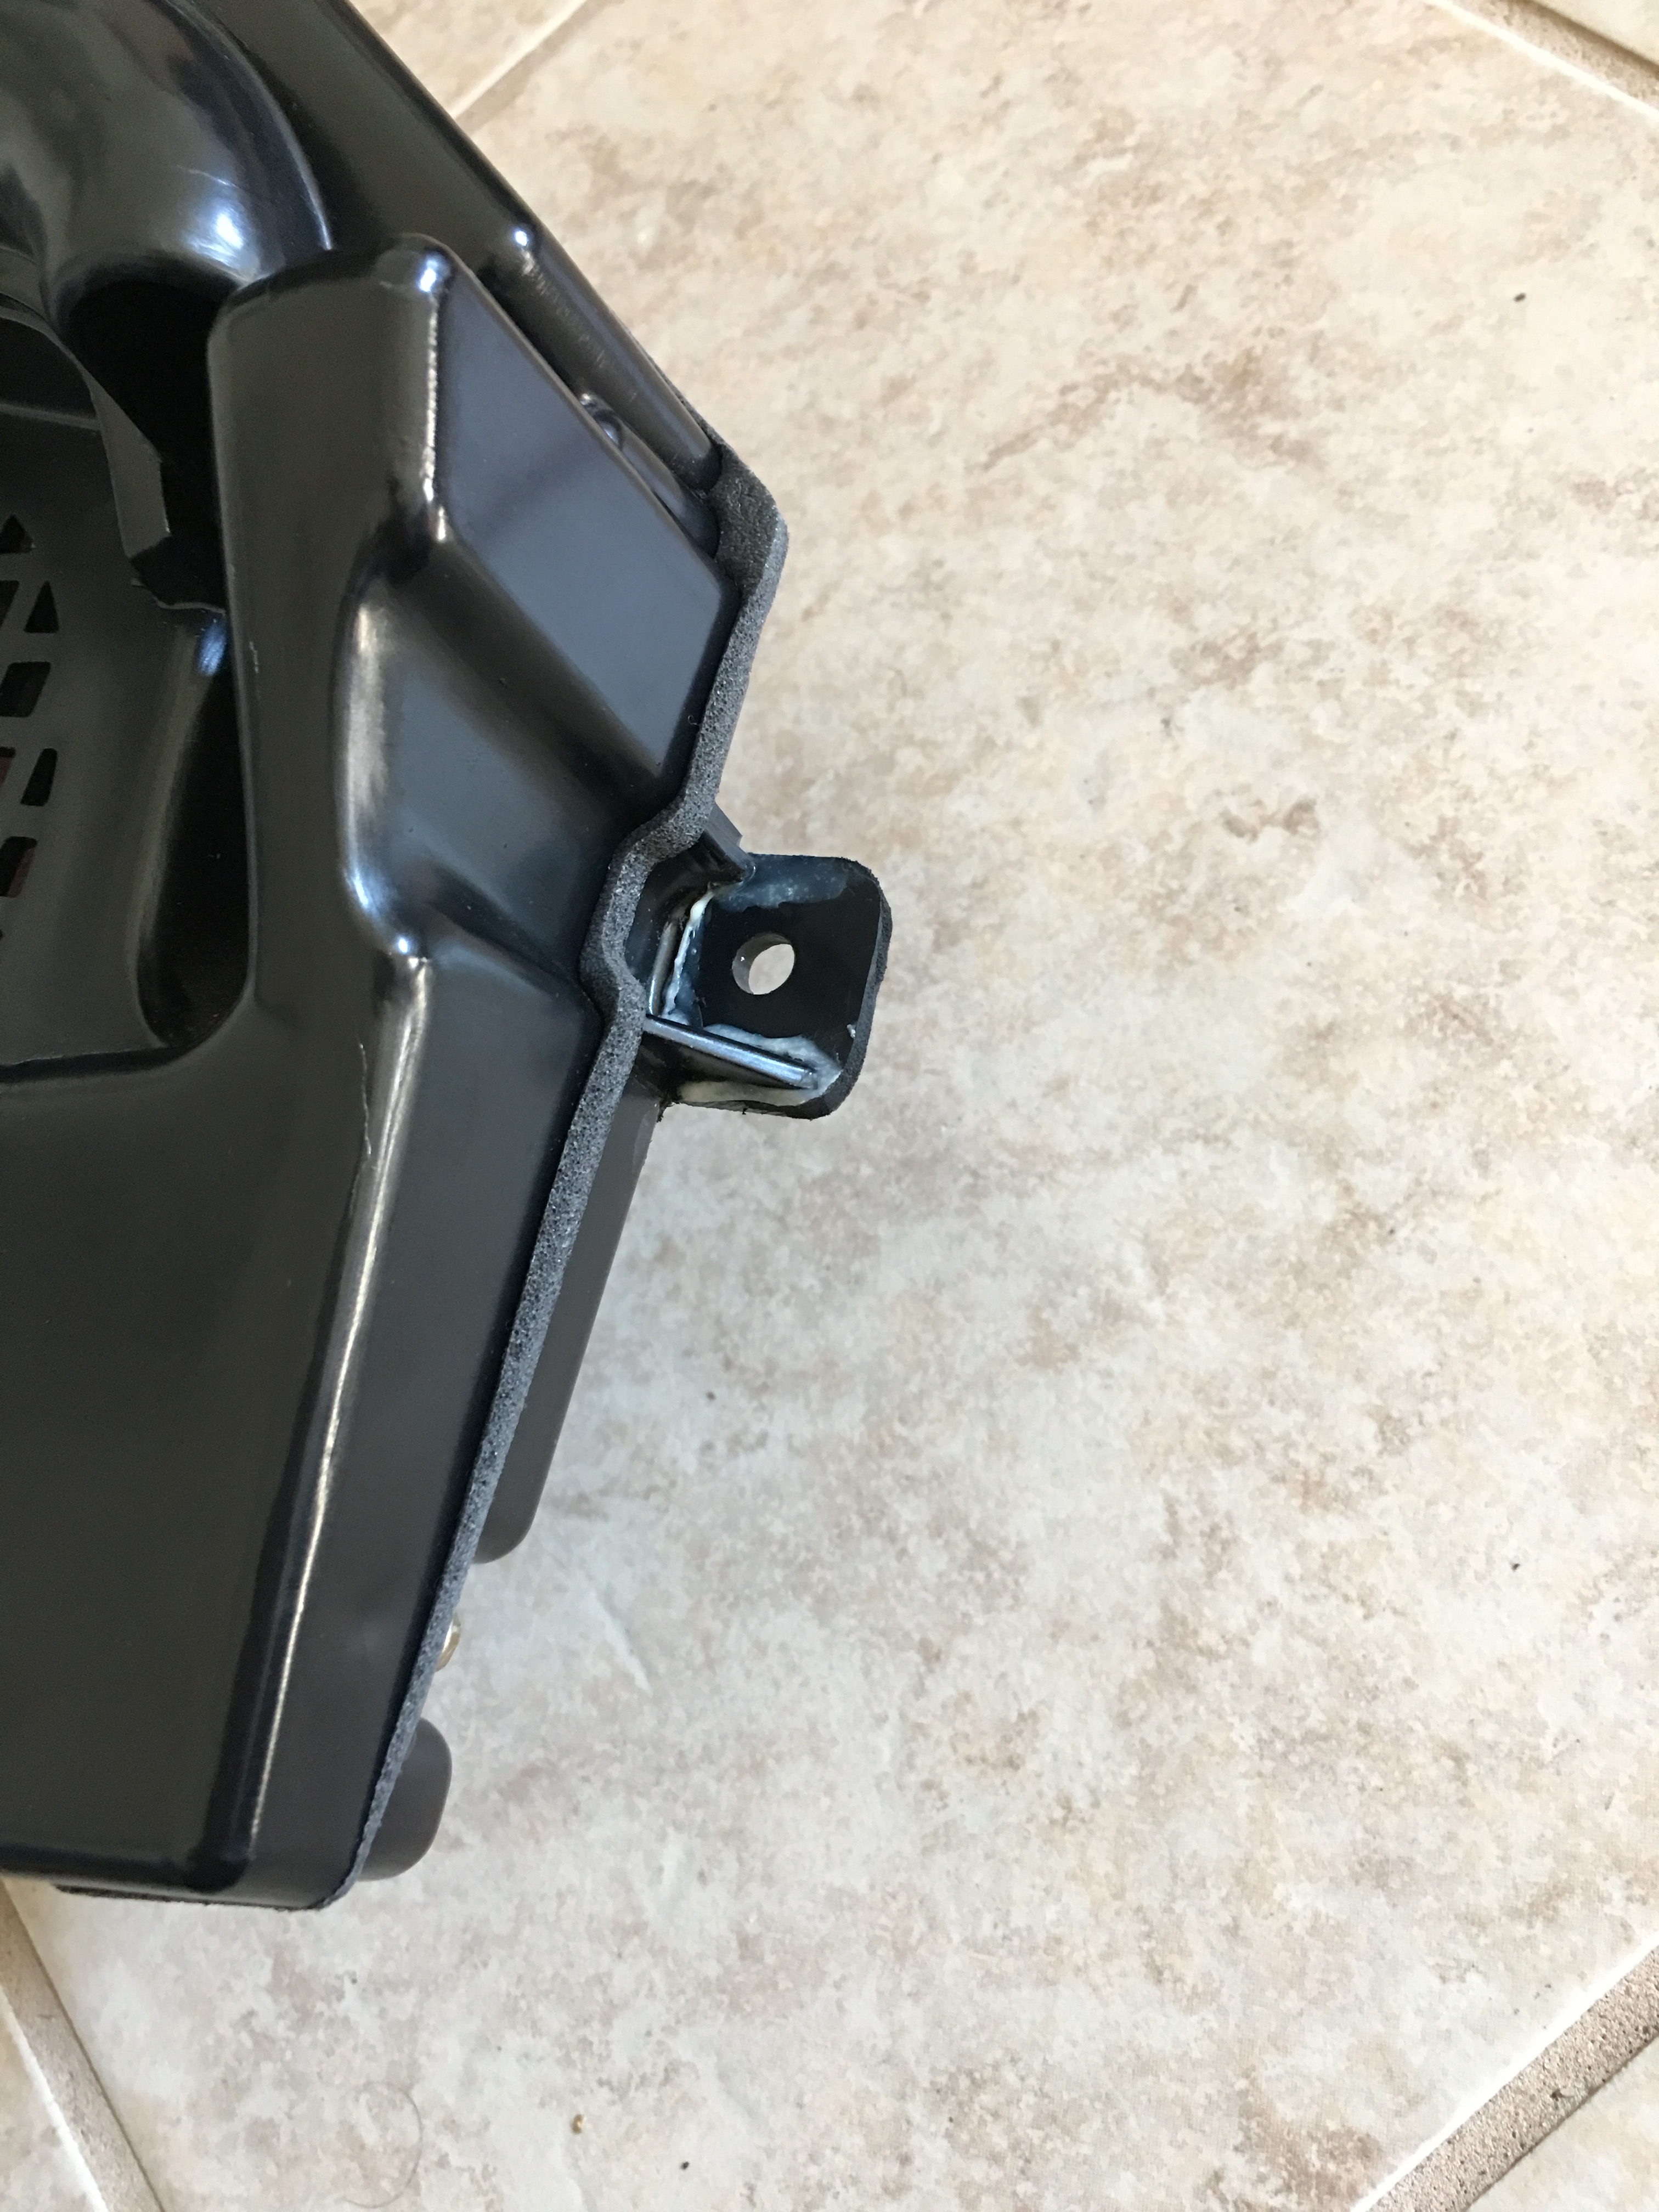
I finished rebuilding all 3 amplifier boards, so during reassembly I repaired the broken tabs on the speaker boxes, again using solvent cement to weld new tabs on. I'm not sure how long they will hold since each time the doors close the tabs get stressed, but if they fail again I'll make new tabs out of aluminum L-brackets bolted to the sides of the housings that should last more or less forever. I tried to make use of whatever existing supporting plastic I could so hopefully I won't have to do that for a while.
I also got some new interior goodies from RedlineGoods, new shift boot, center console covers, and handbrake boot. I ended up not using the handbrake boot since it fit too loose and looked like crap but the rest of the pieces look great, but I have another, better plan for that.
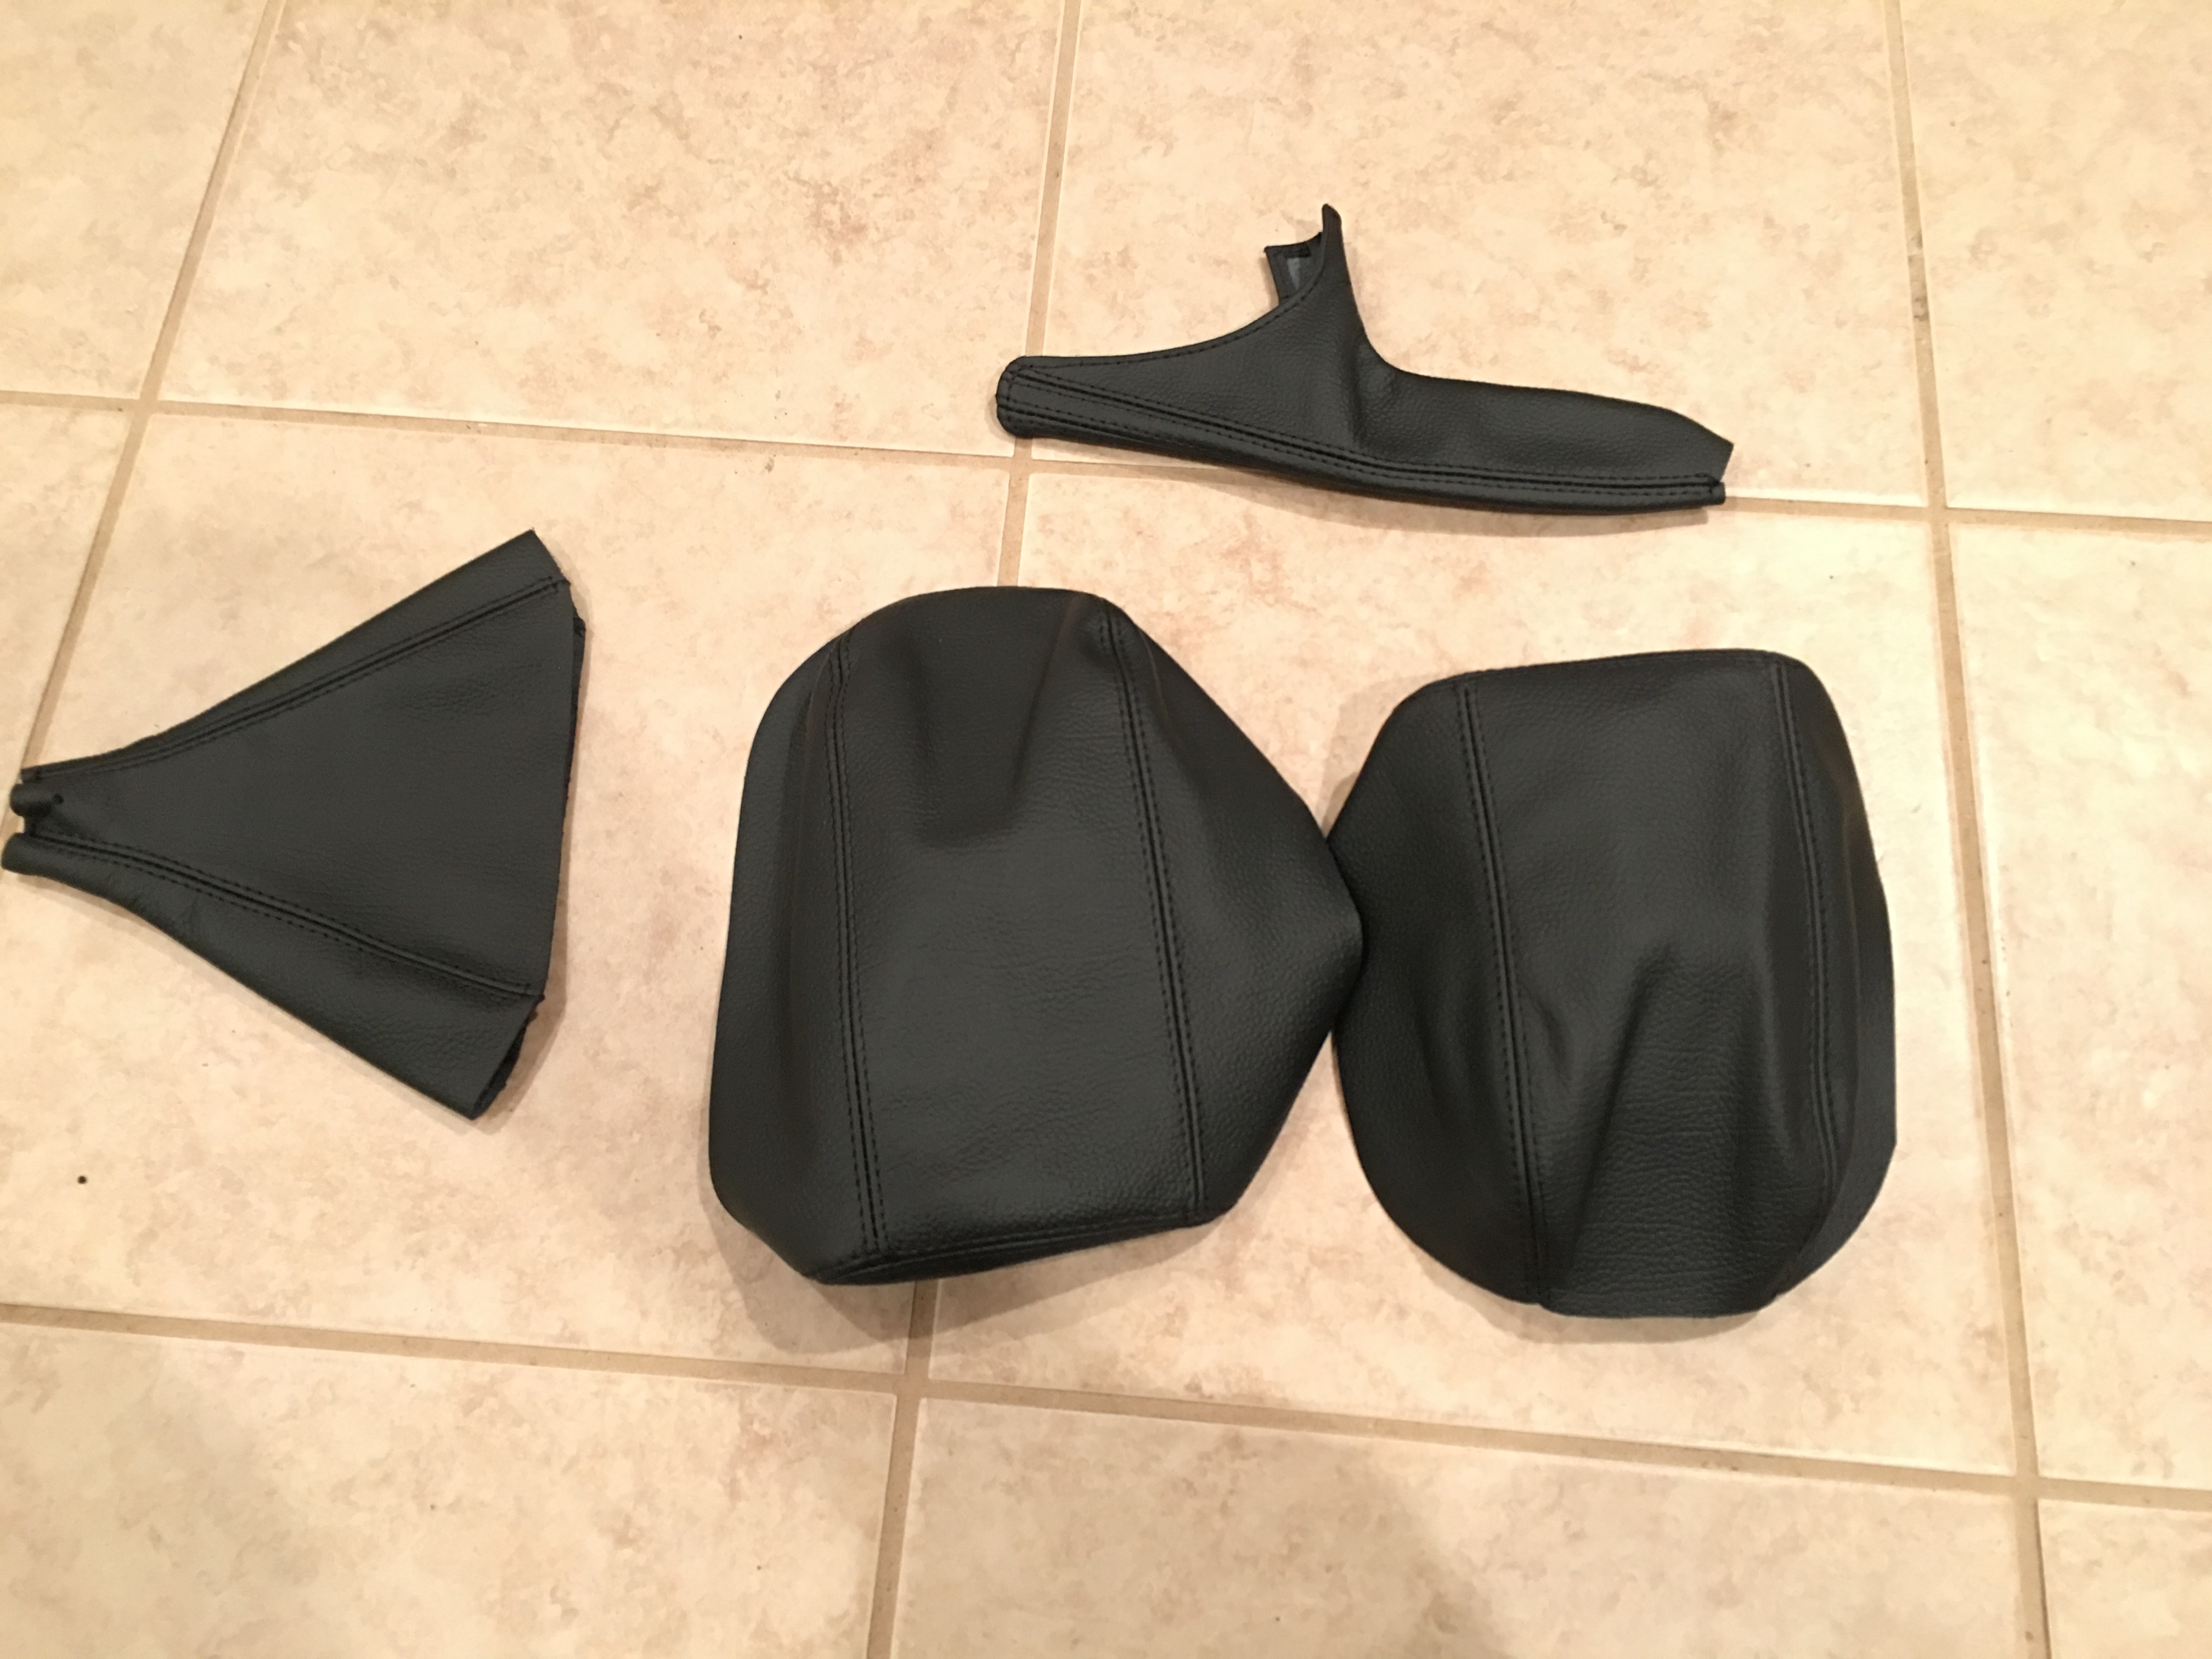
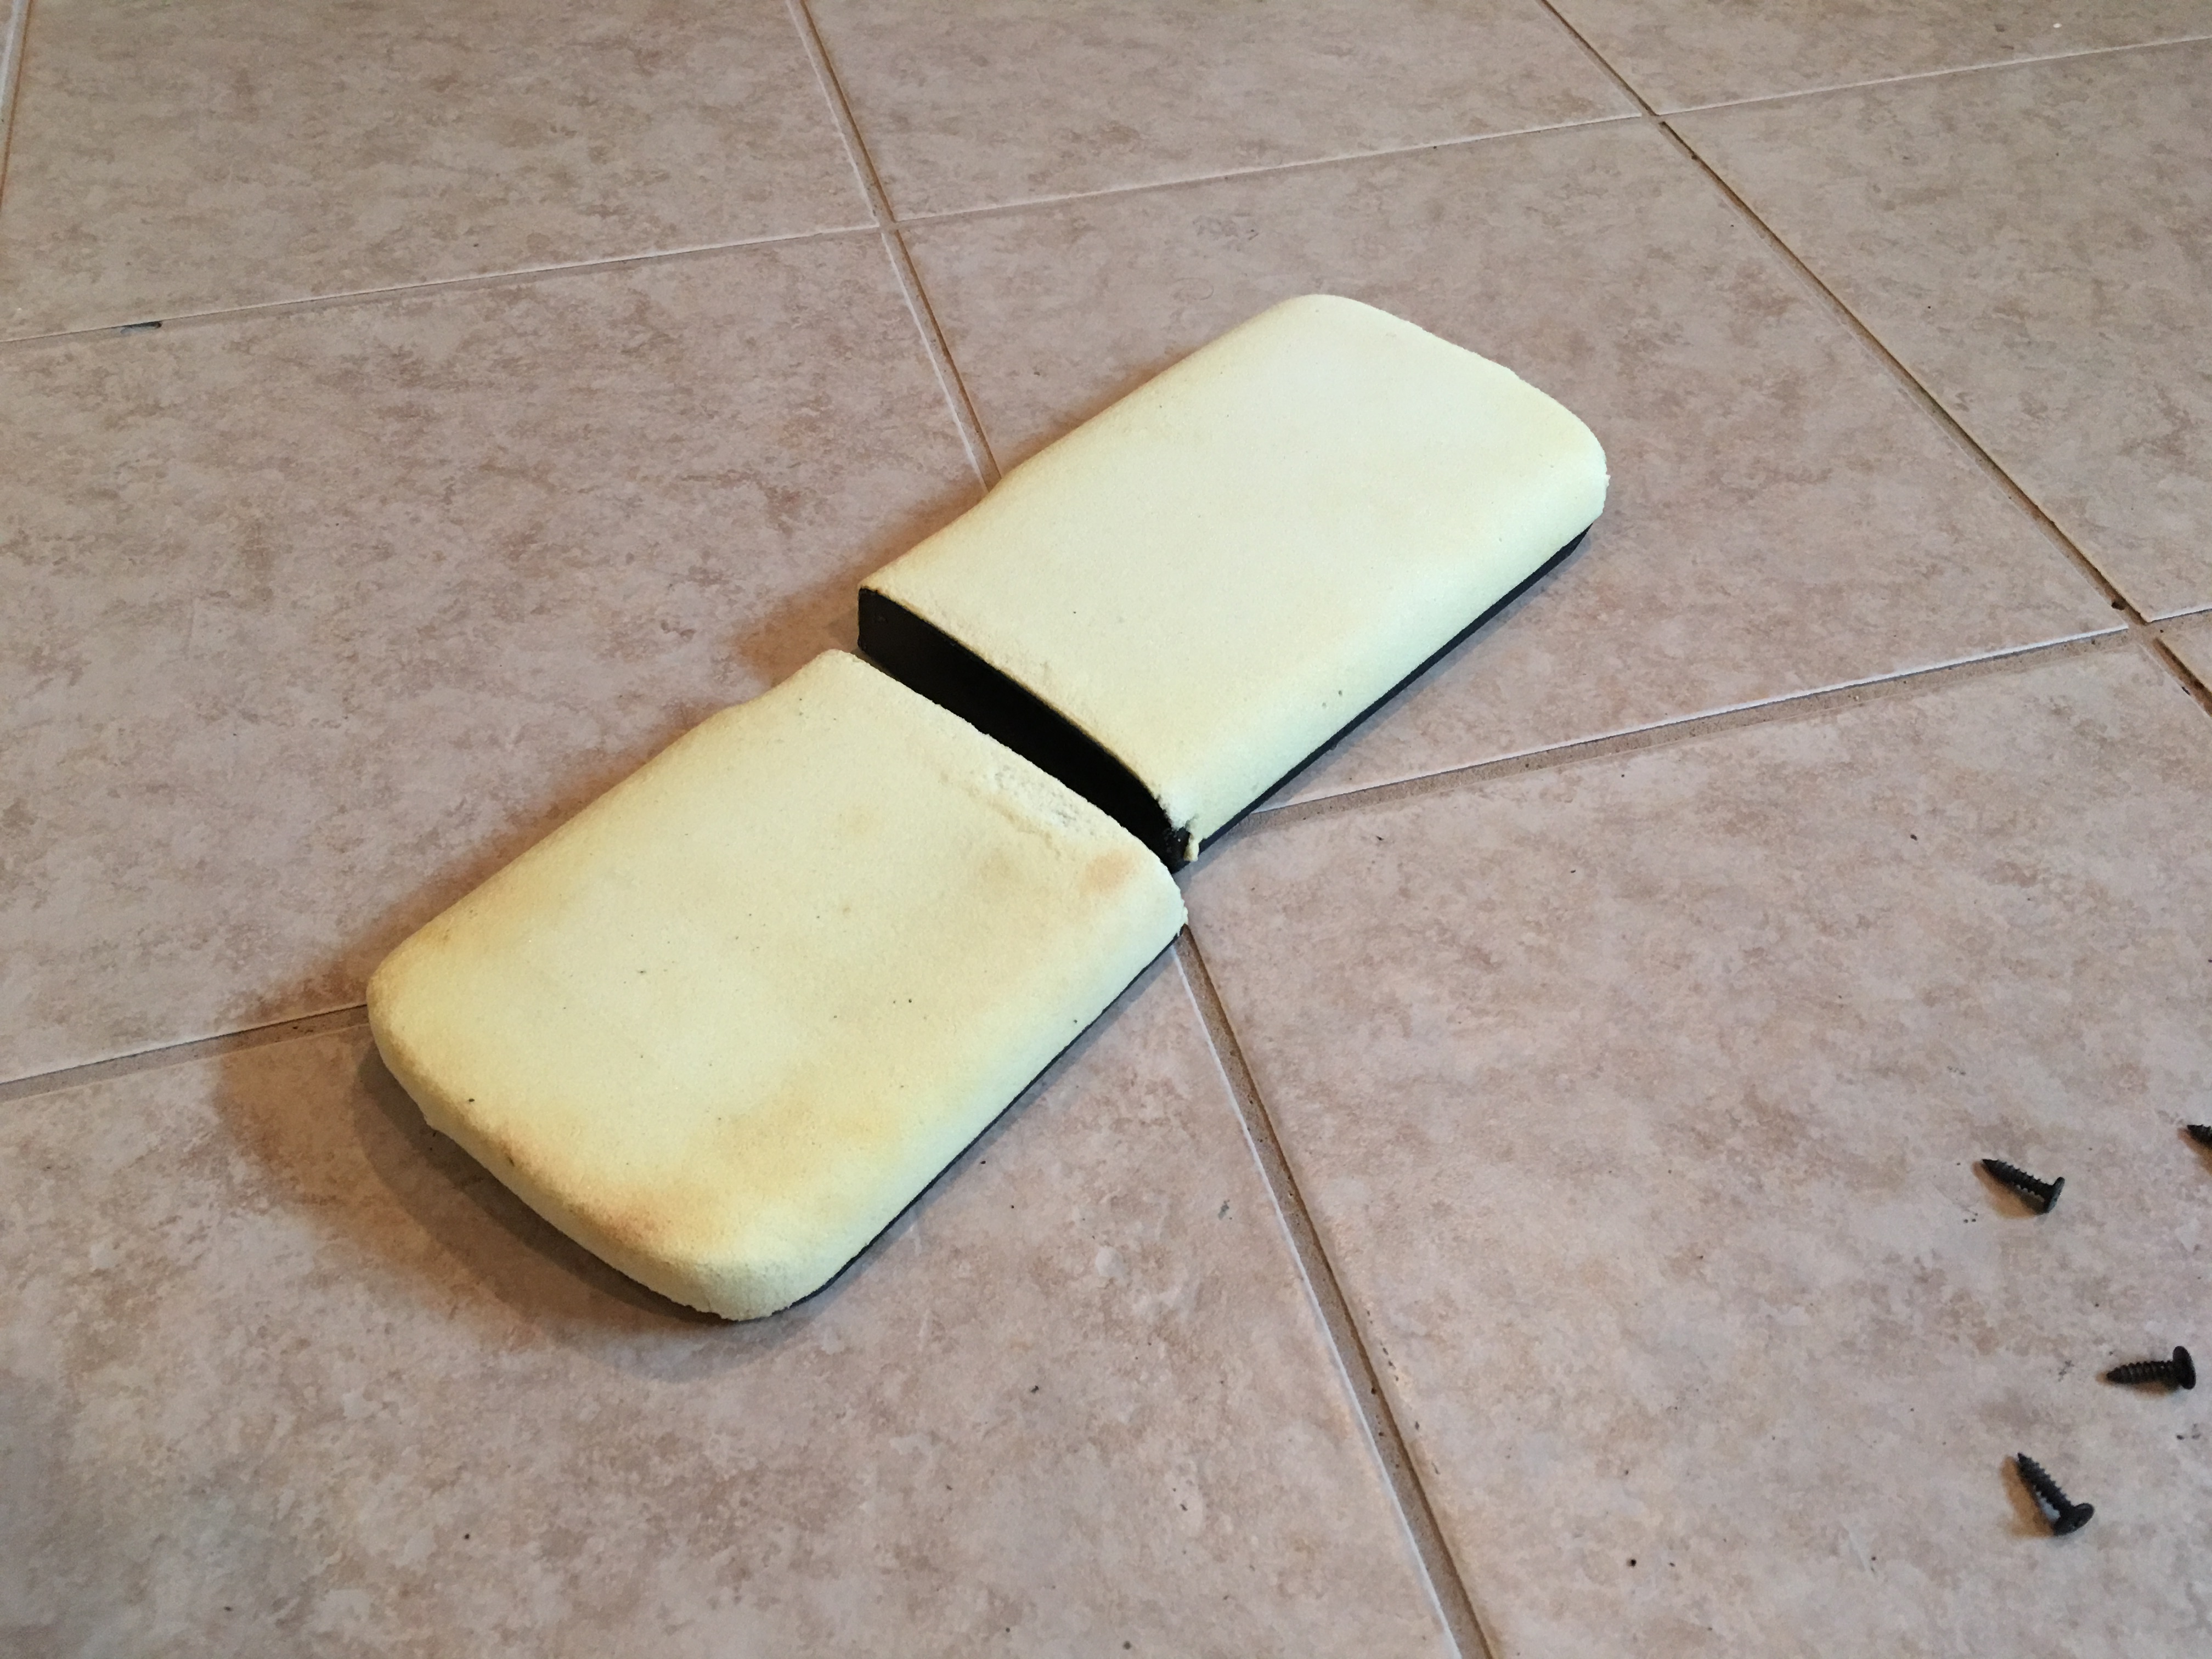
The original center console upholstery was looking pretty bad, it's scuffed up and hard. I tried leatherique conditioner which helped a bit but I still wasn't happy with it, so off they come (without damaging them of course) and into the bag of removed OEM parts.
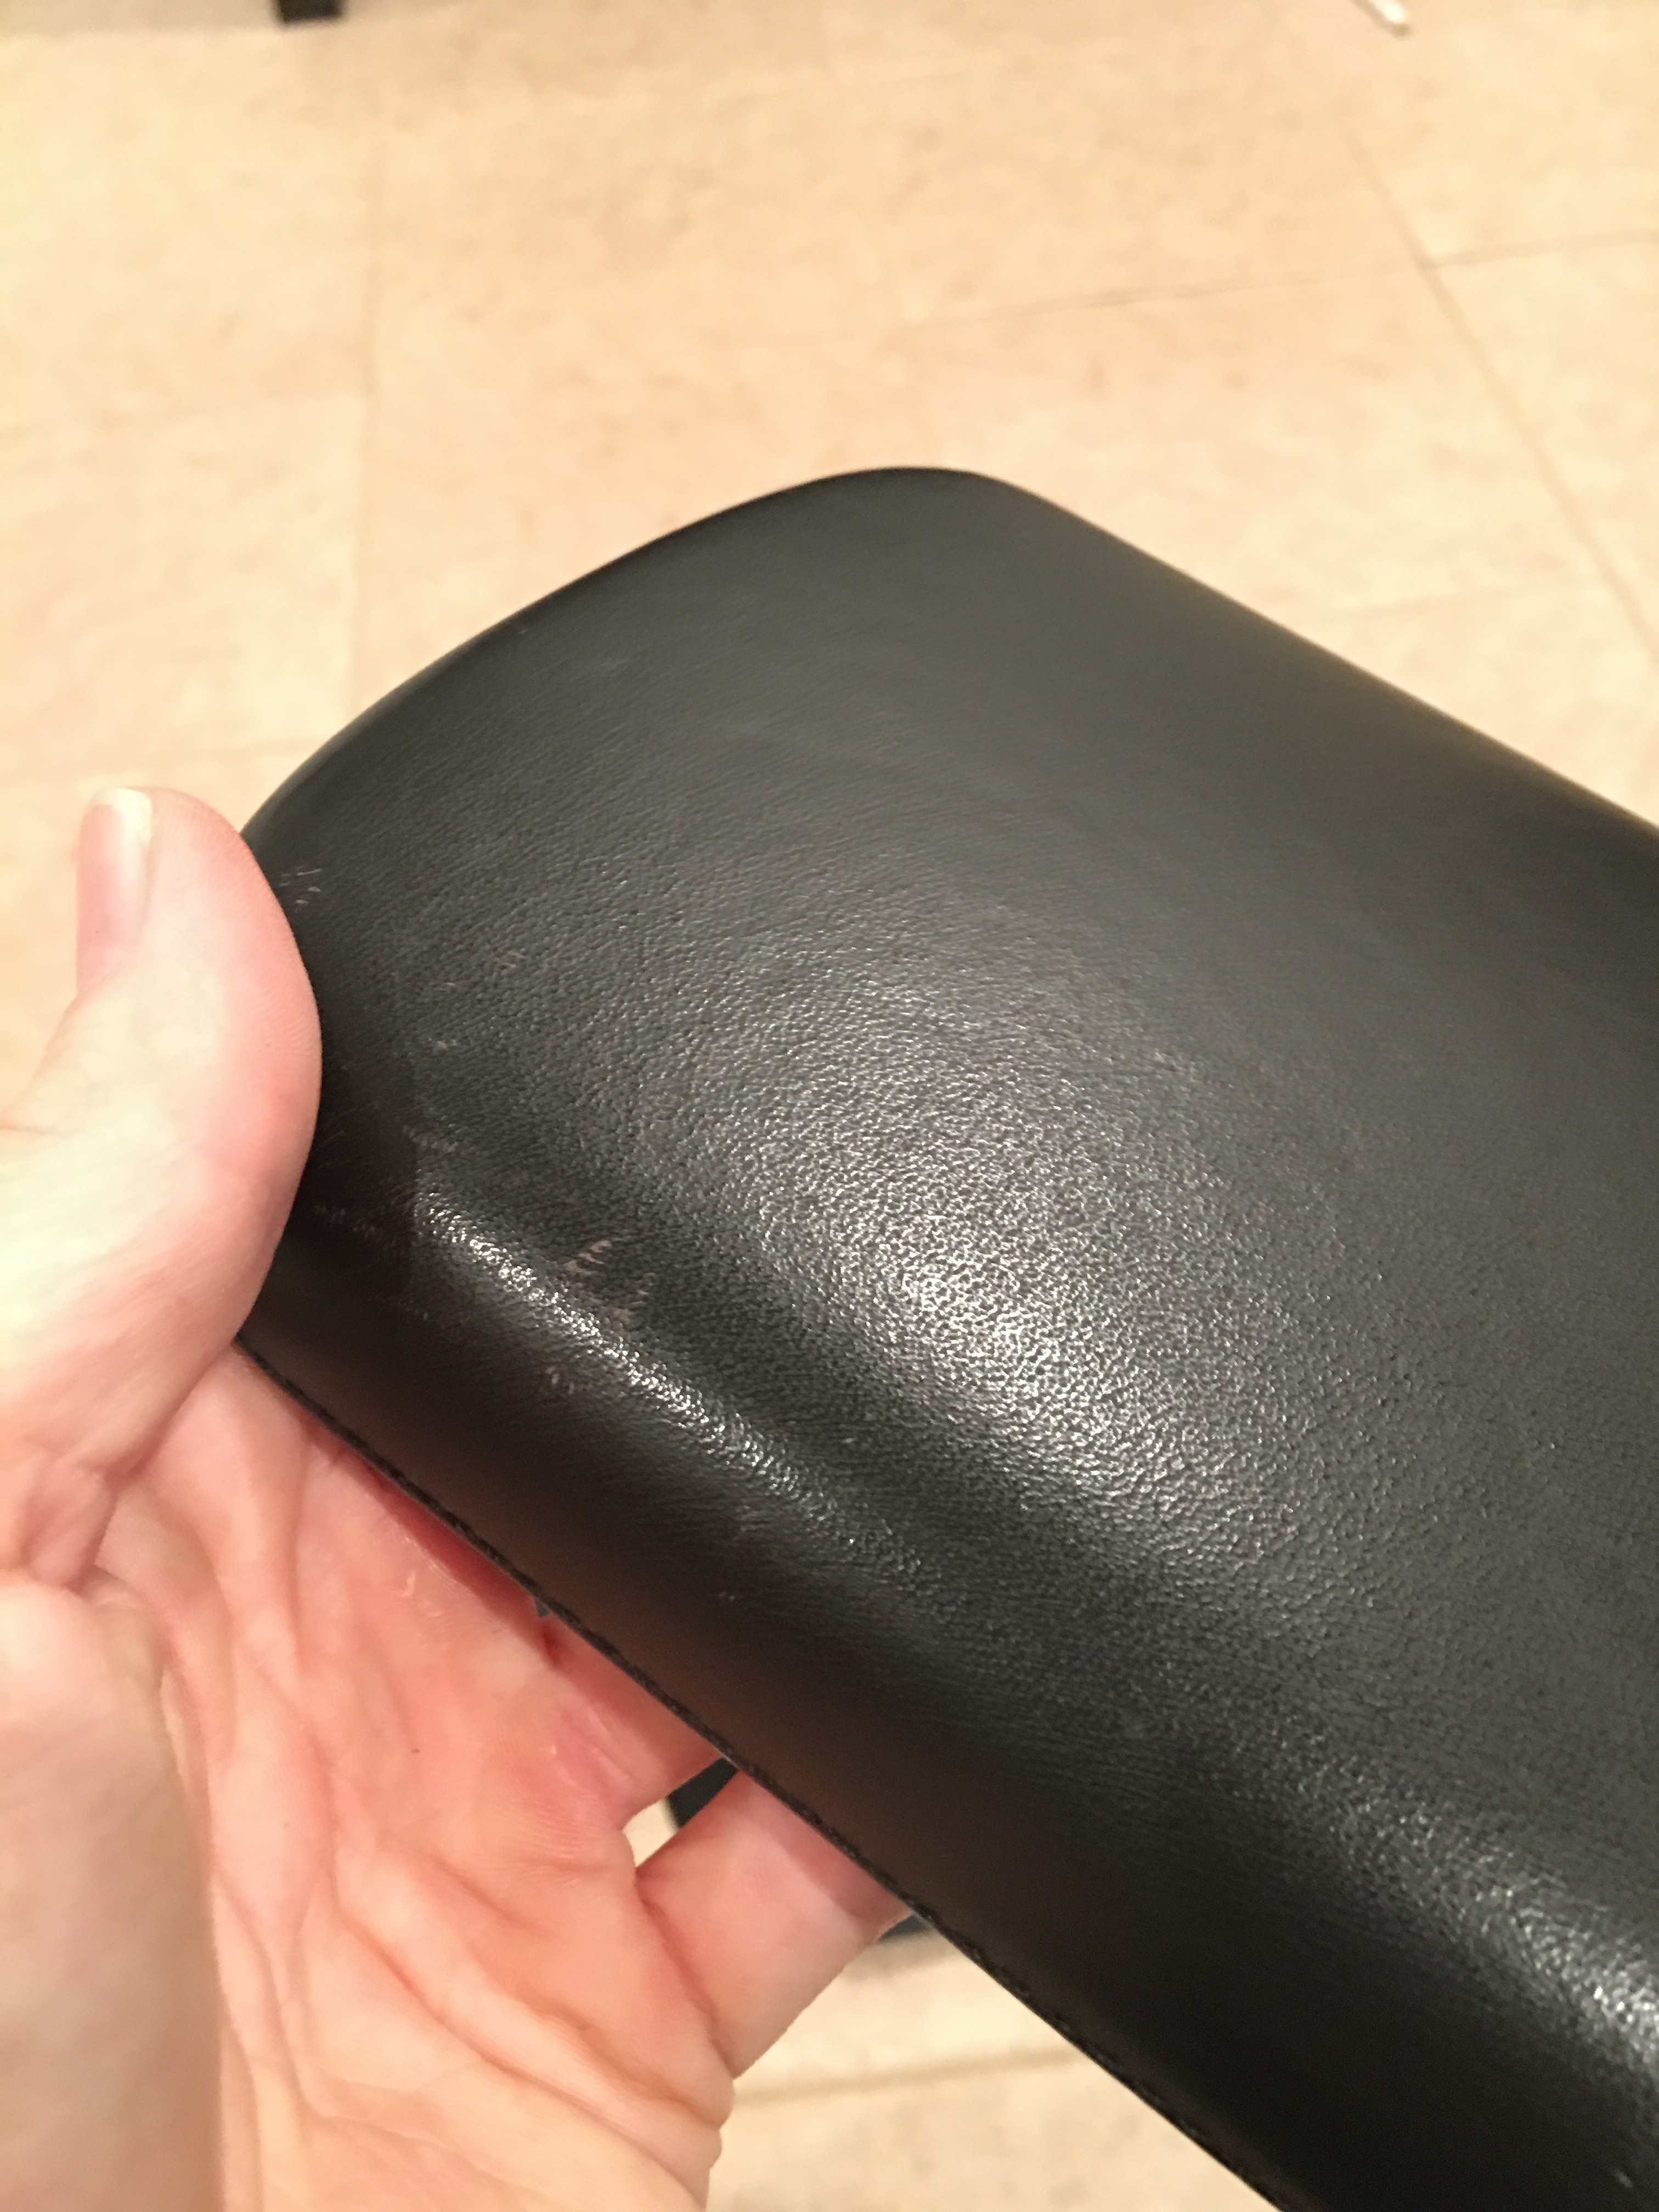
Both covers pulled off, the foam underneath is still in decent condition so I didn't mess with it.
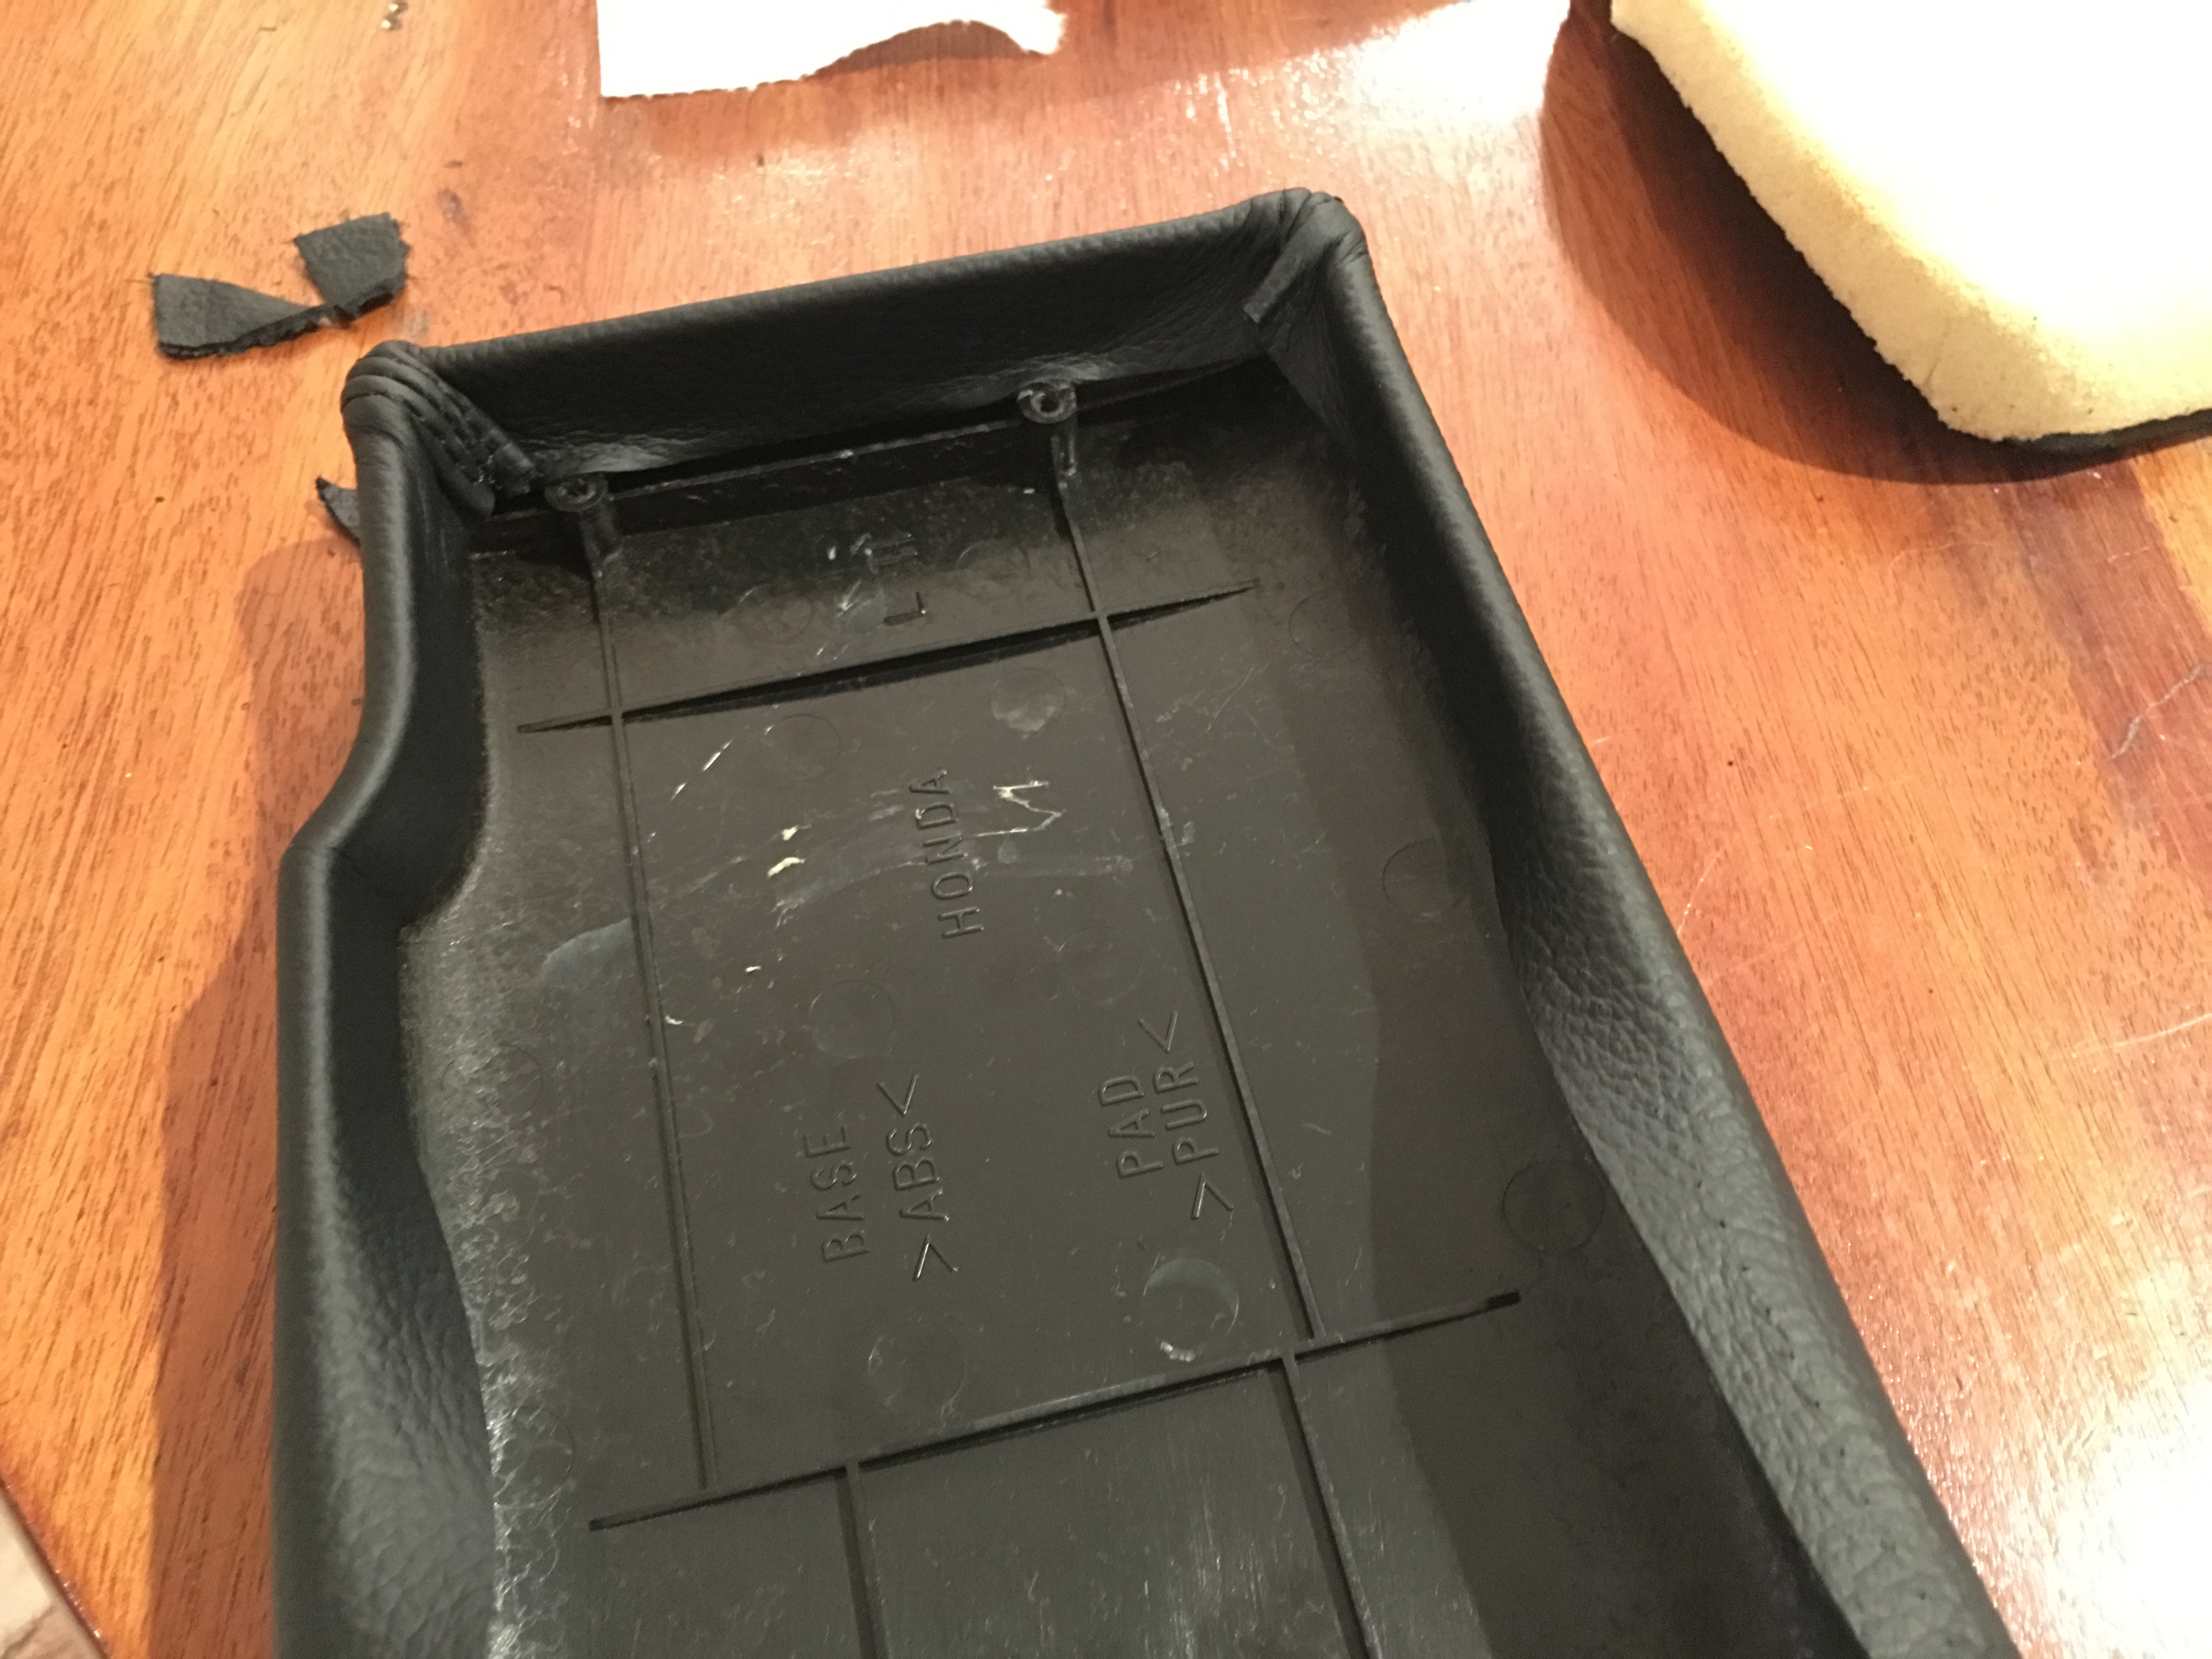
Stretching the new covers over and gluing them down. I use Weldwood contact cement around the edges, it works great for sticking down leather since it's pretty thick and doesn't get immediately soaked into the leather.
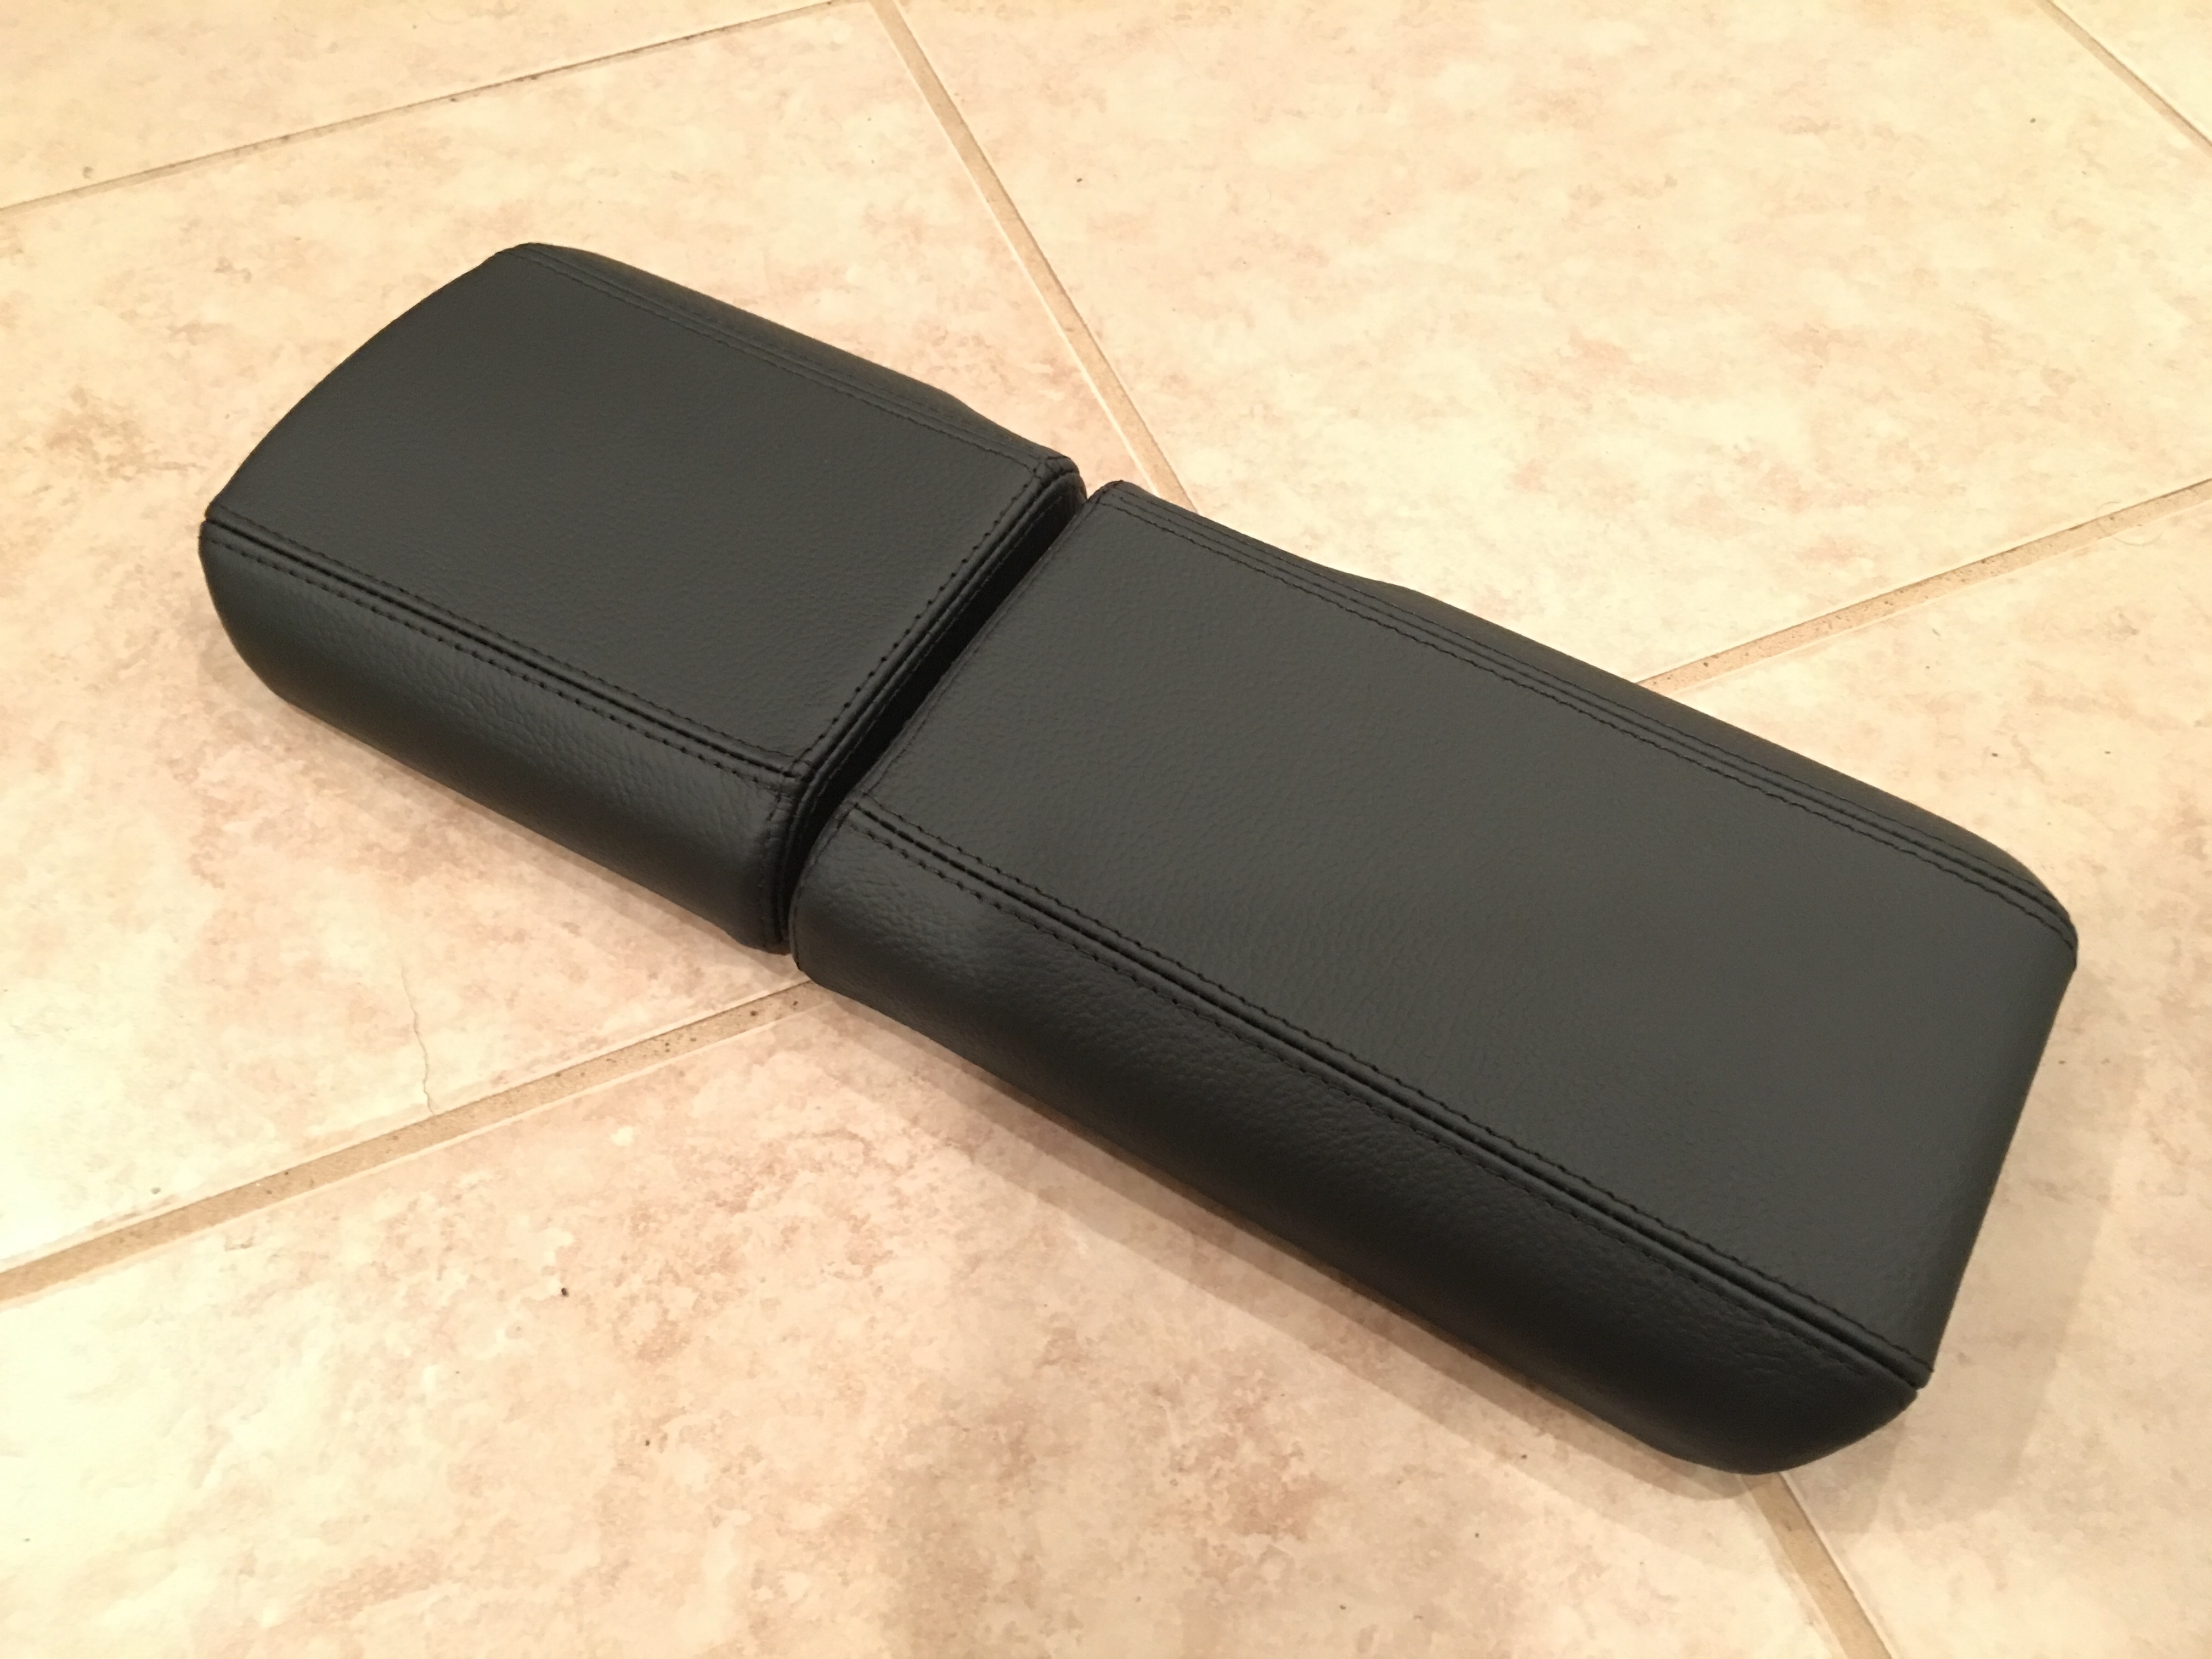
Reinstalled, looks like a factory part but with nicer leather.
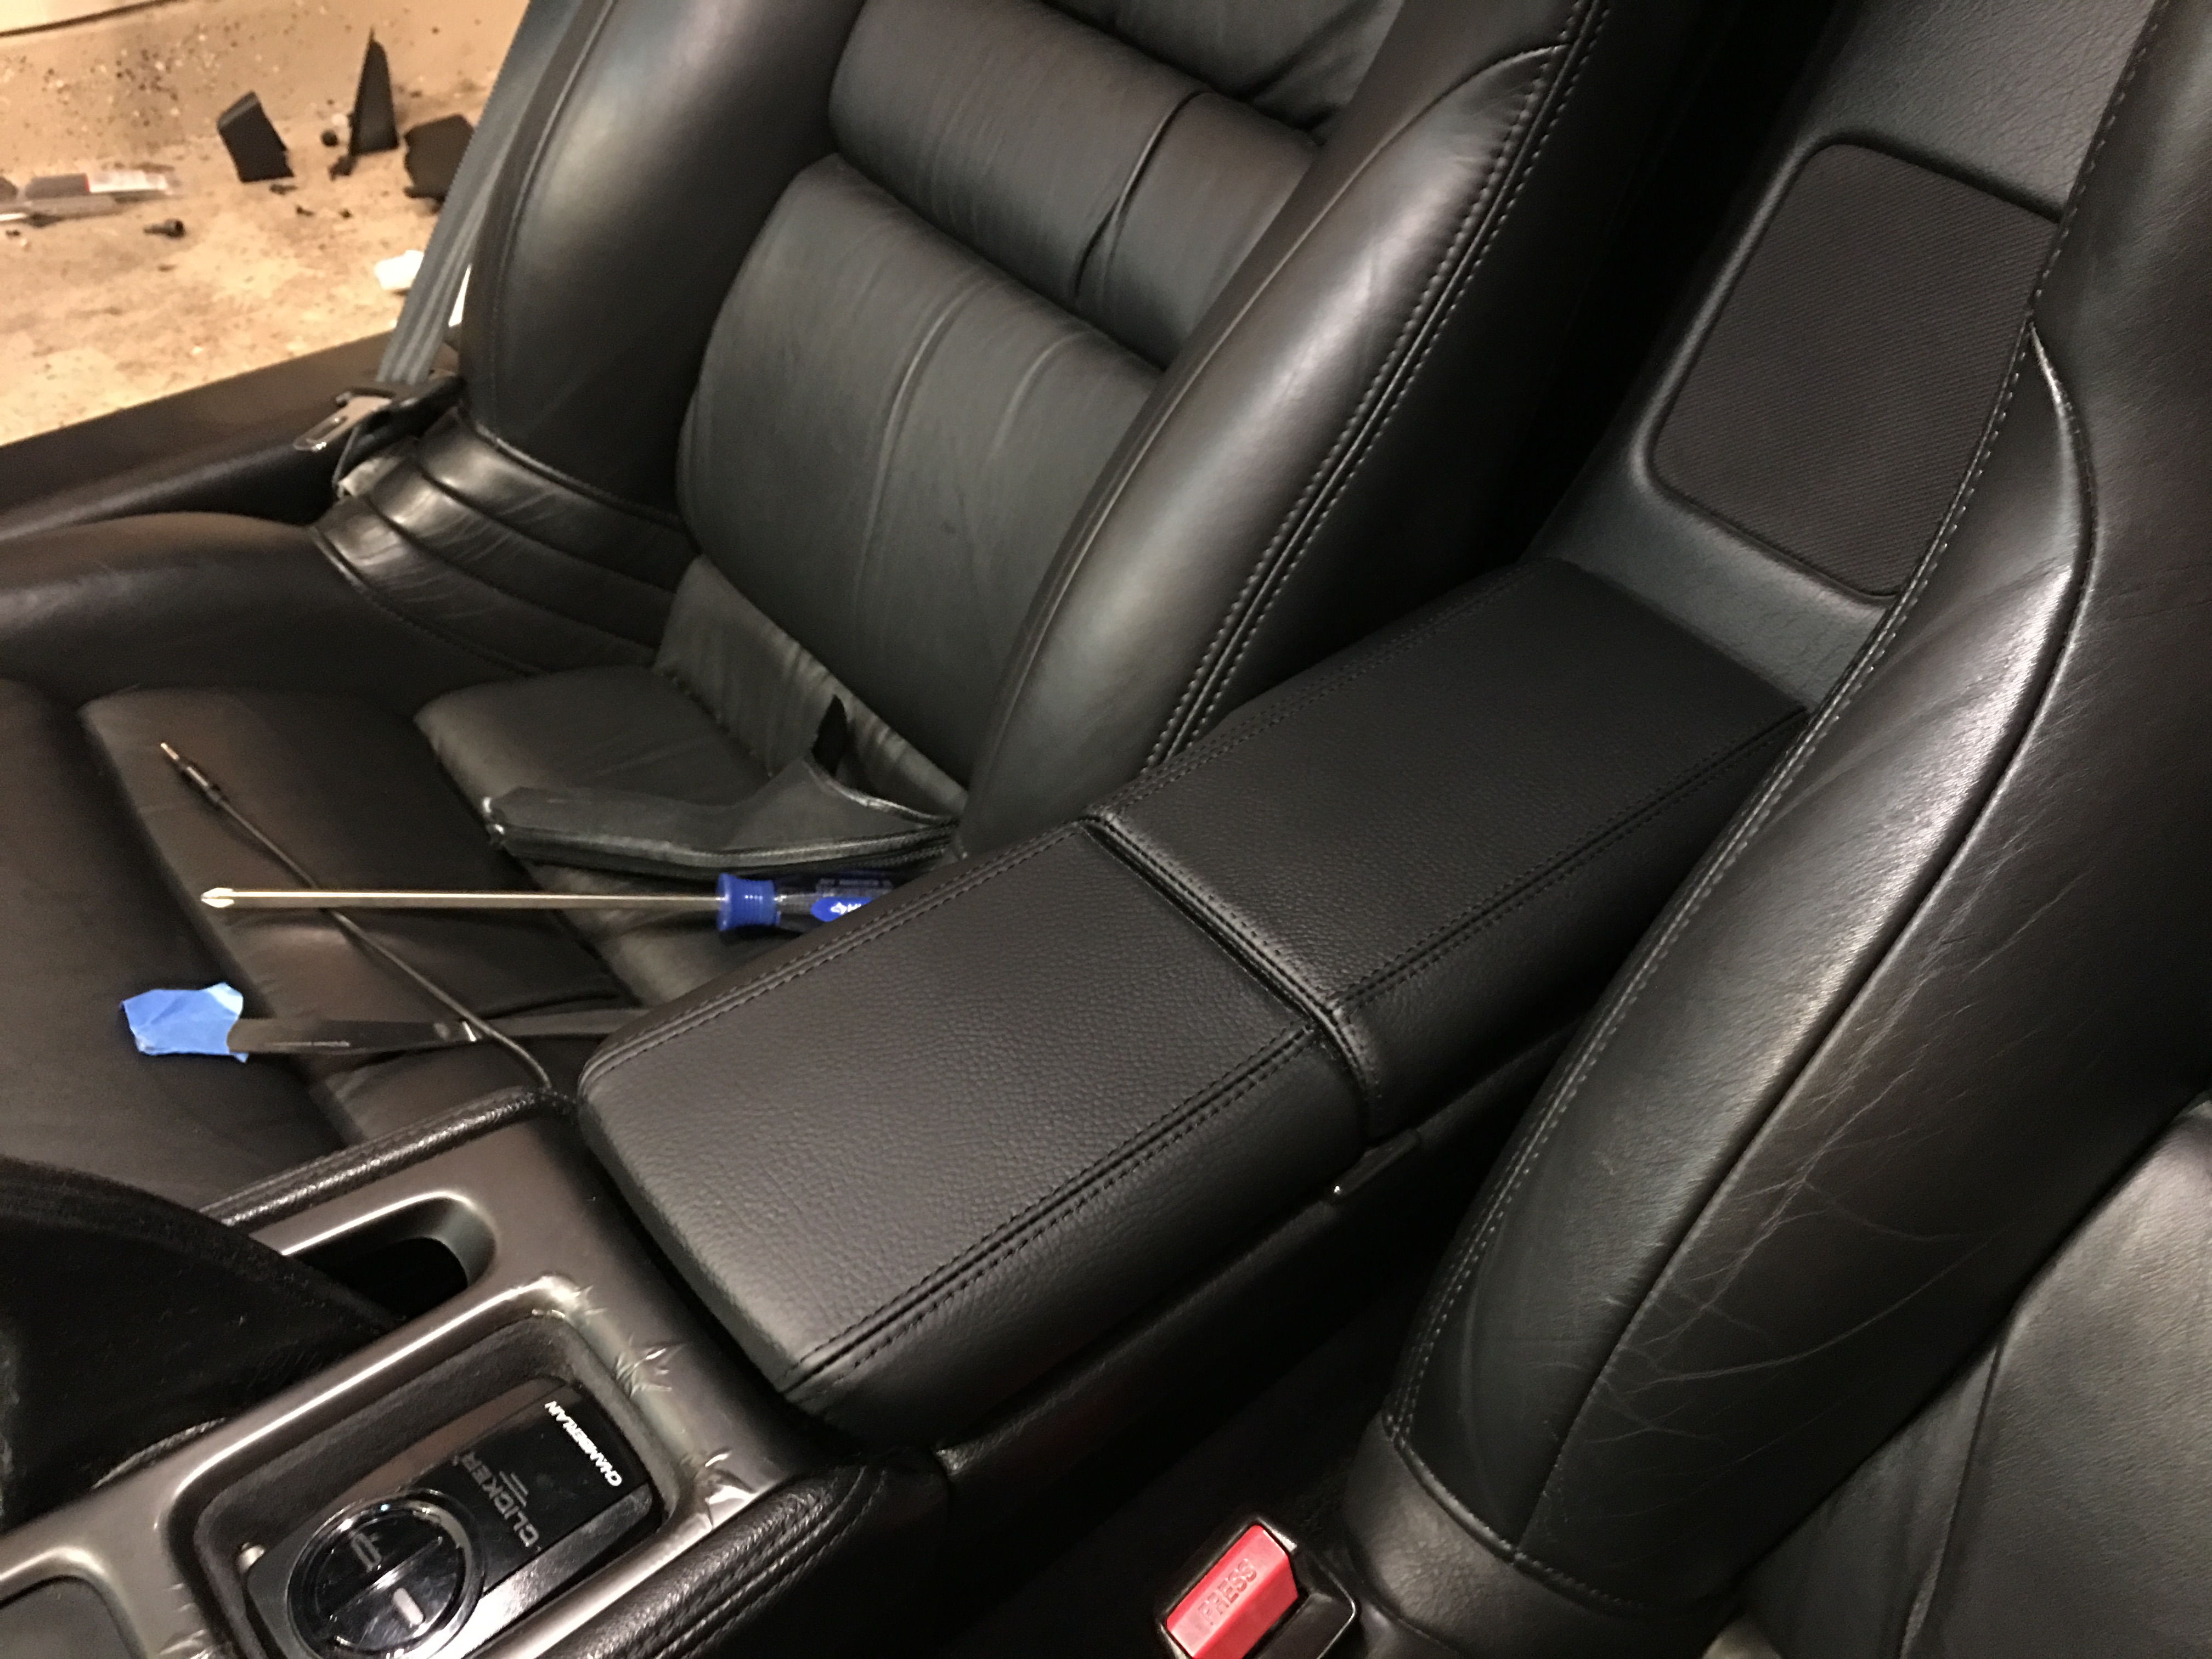
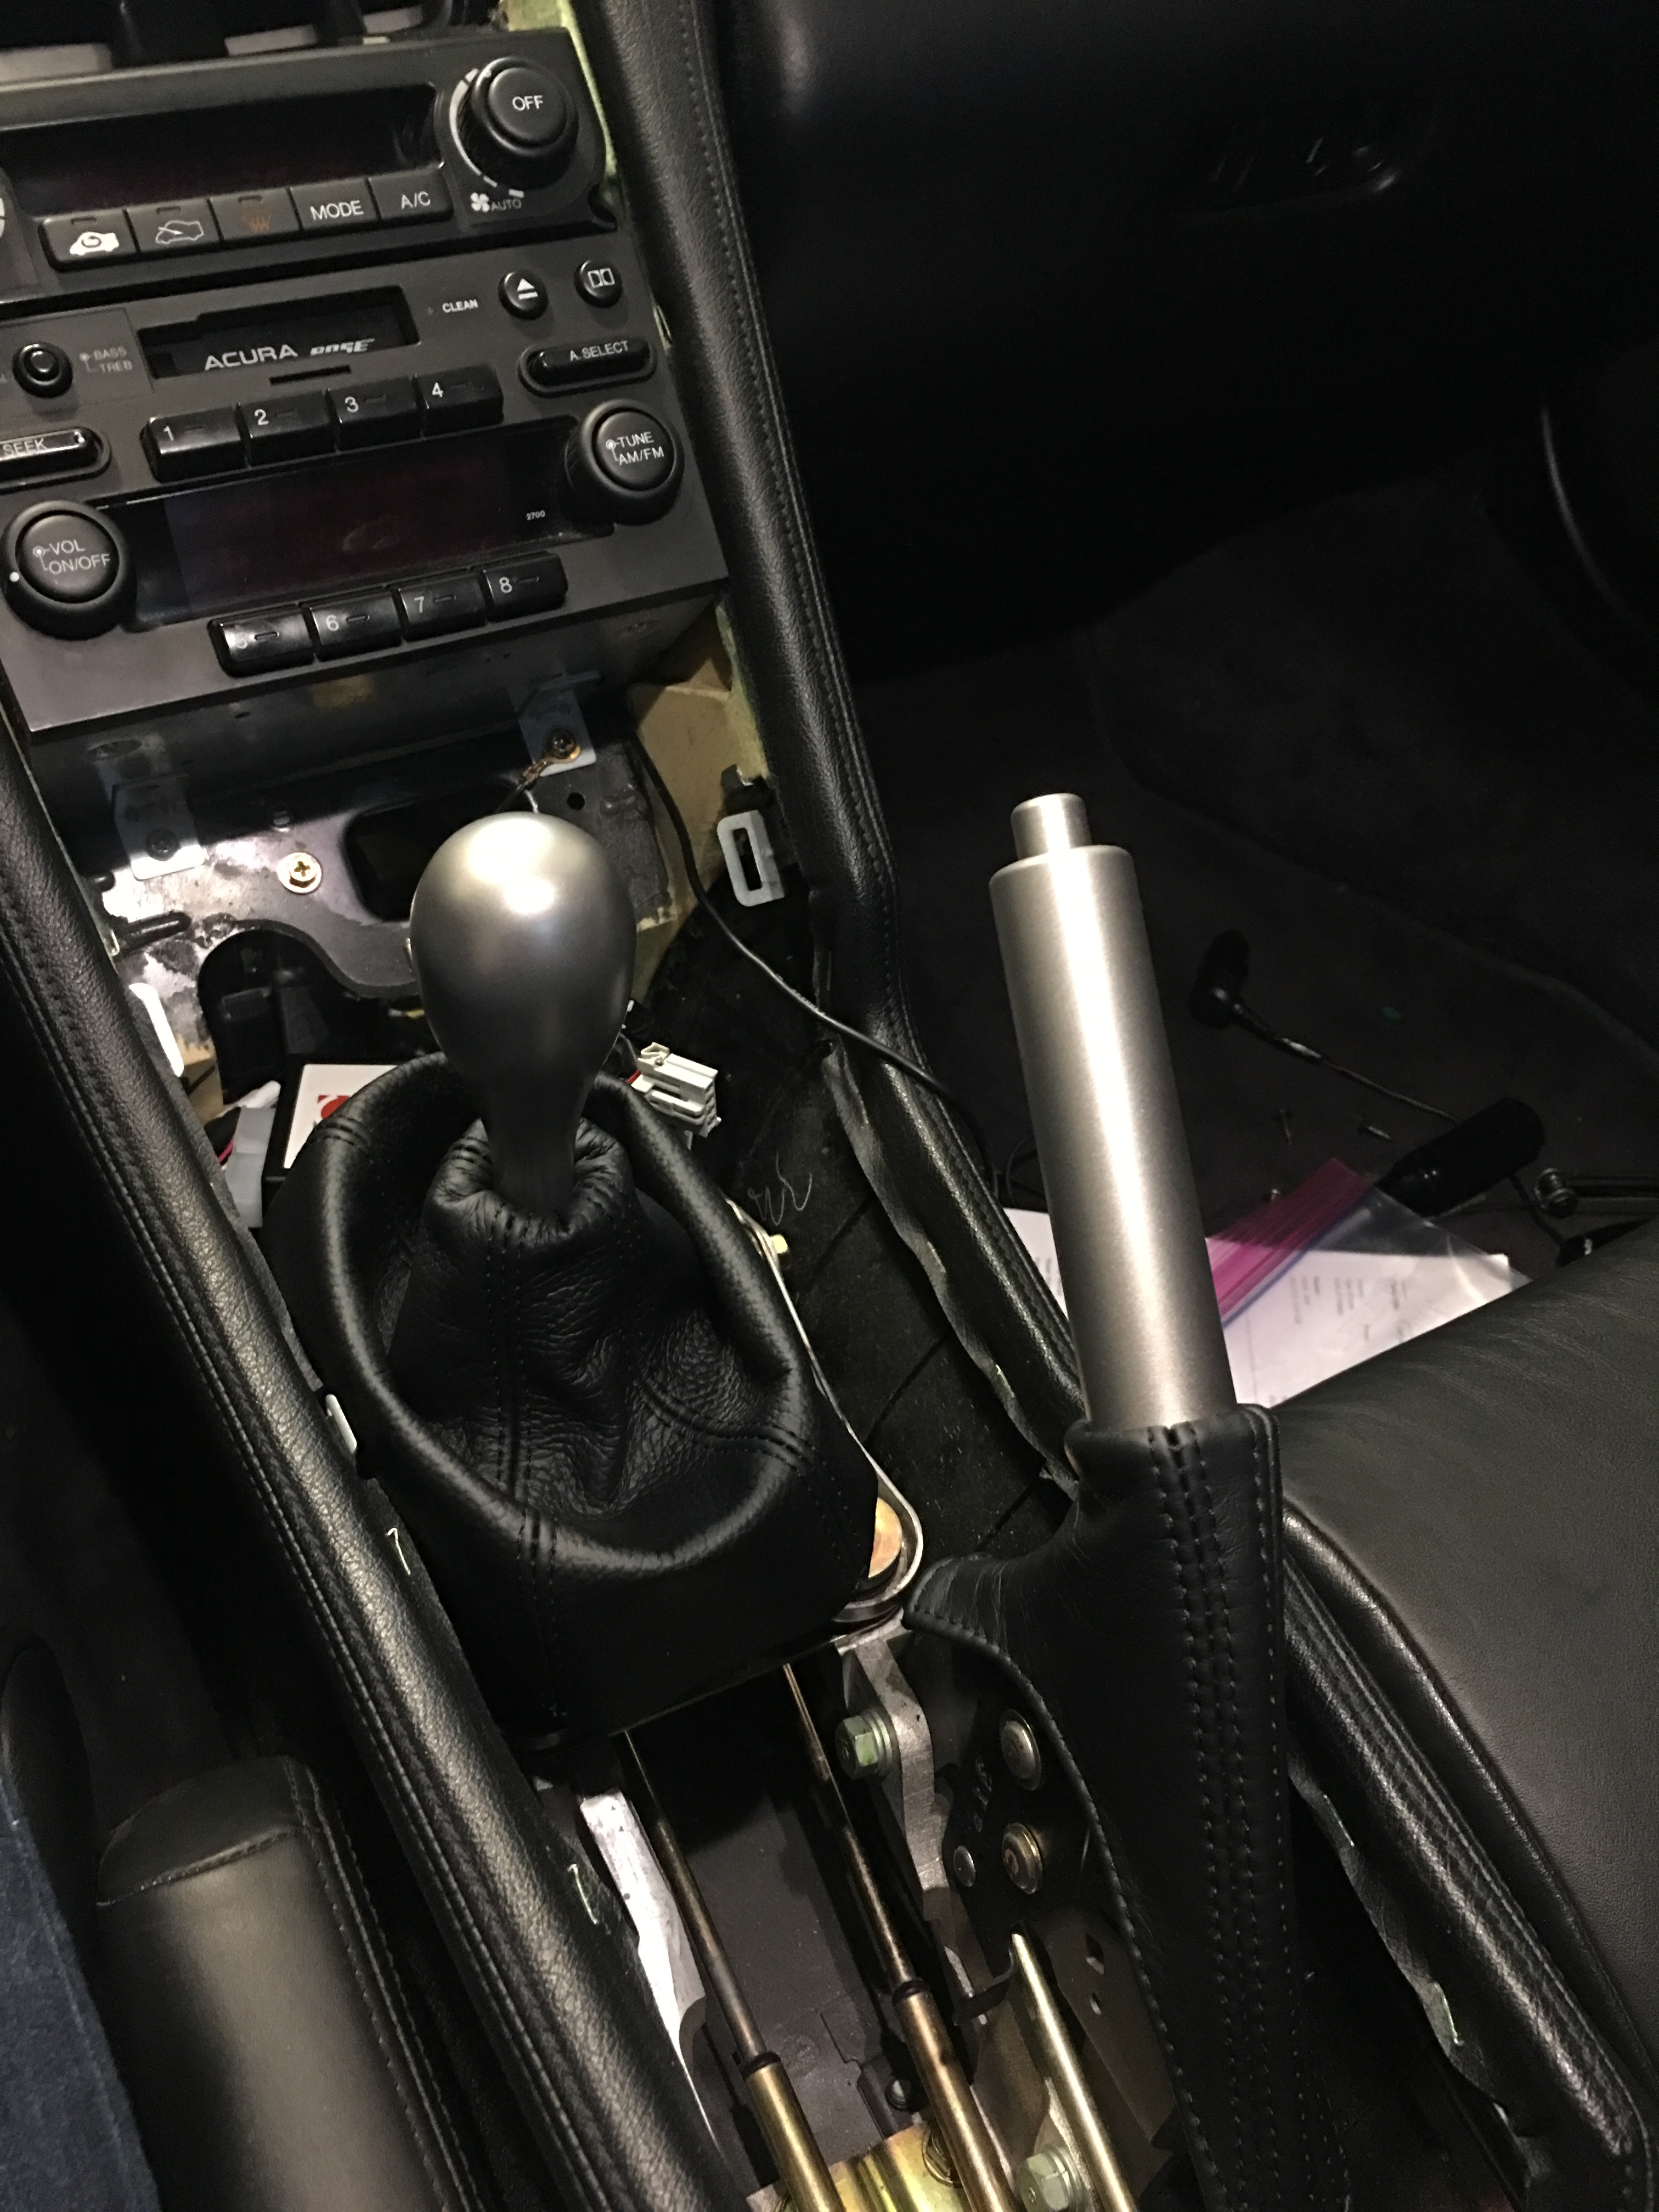
But anyways, about the handbrake lever cover. The leather cover from RedlineGoods is way too loose so it looks bad and feels bad to grab onto, I tried shrinking it by wetting it and then putting it in the oven at 170F for a few hours to dry it but that did absolutely nothing, so that leather piece is completely unusable. About this time I also started looking into what shift **** I wanted, since the leather wrapped original was looking pretty bad after 23 years and almost 100k miles. I settled on the NSX Zanardi/Type-S titanium ****, and came across a thread where a guy put one in his FD RX7 and it perfectly matched his titanium handbrake lever, which is a super rare optional MazdaSpeed part made for RX7s and virtually impossible to find.

I love the way that combo looks, and while I won't try to find an RX7 handbrake and make it work in my car, I did however order a chunk of titanium stock and am having a machine shop mill it out to fit, then I'll do some experimenting with my bead blaster to try to get a perfect match with the shift ****.
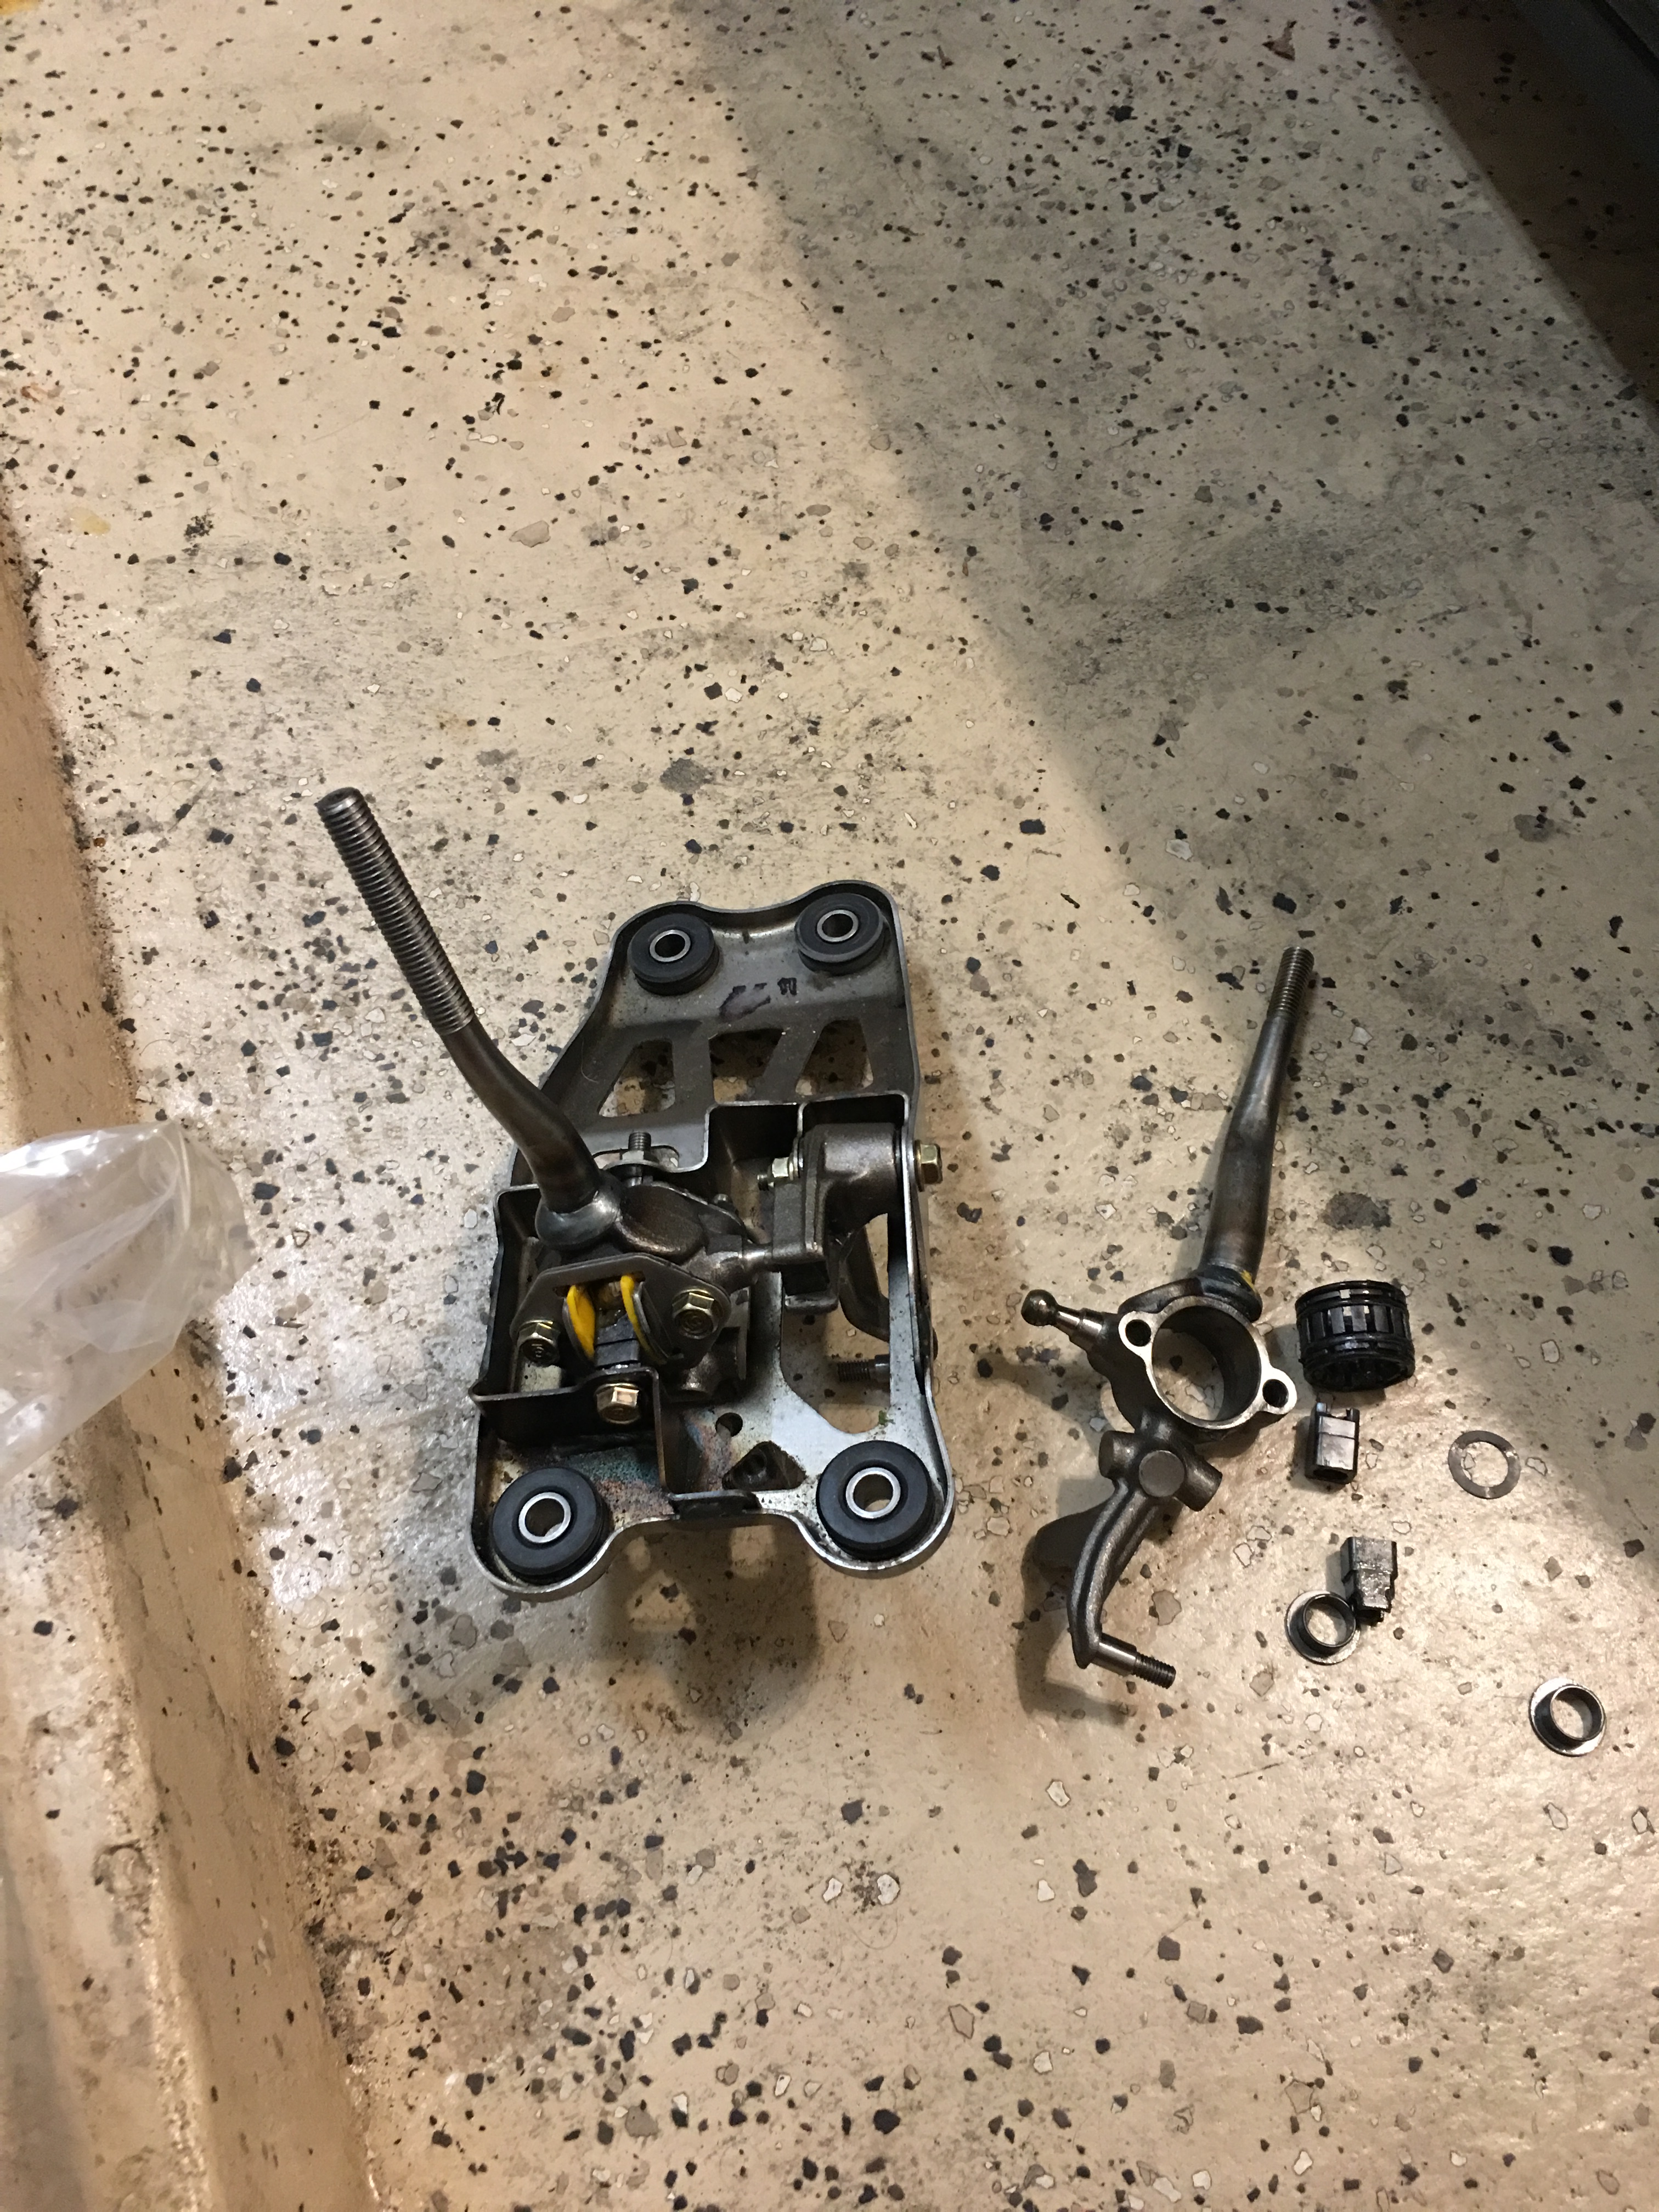
In the process of installing the Zanardi **** and shift stalk I rebuilt the shifter assembly as well since it had to come apart anyways, replacing all of the little plastic bushings and O-rings that keep everything tight. The shifter was good before but now it's great, there is absolutely zero play in the assembly, everything you feel in the shifter is straight from the transmission.

You can also see my new Grom Audio CD changer auxiliary input adapter in the top right corner. The factory stereo isn't great but it sounds way better than the tape player adapter I've been using, the bass comes through much better and overall is a much better sound.
I'm also stripping down the center console to fix the nasty cracking and bubbling in the finish, in a few more days that will be done and I can have them repainted and finally get the interior back together. Since the Integra is stuck in the garage waiting for new wheel bearings I've been dailying the NSX even with the door cards and center console missing.
I finished rebuilding all 3 amplifier boards, so during reassembly I repaired the broken tabs on the speaker boxes, again using solvent cement to weld new tabs on. I'm not sure how long they will hold since each time the doors close the tabs get stressed, but if they fail again I'll make new tabs out of aluminum L-brackets bolted to the sides of the housings that should last more or less forever. I tried to make use of whatever existing supporting plastic I could so hopefully I won't have to do that for a while.
I also got some new interior goodies from RedlineGoods, new shift boot, center console covers, and handbrake boot. I ended up not using the handbrake boot since it fit too loose and looked like crap but the rest of the pieces look great, but I have another, better plan for that.
The original center console upholstery was looking pretty bad, it's scuffed up and hard. I tried leatherique conditioner which helped a bit but I still wasn't happy with it, so off they come (without damaging them of course) and into the bag of removed OEM parts.
Both covers pulled off, the foam underneath is still in decent condition so I didn't mess with it.
Stretching the new covers over and gluing them down. I use Weldwood contact cement around the edges, it works great for sticking down leather since it's pretty thick and doesn't get immediately soaked into the leather.
Reinstalled, looks like a factory part but with nicer leather.
But anyways, about the handbrake lever cover. The leather cover from RedlineGoods is way too loose so it looks bad and feels bad to grab onto, I tried shrinking it by wetting it and then putting it in the oven at 170F for a few hours to dry it but that did absolutely nothing, so that leather piece is completely unusable. About this time I also started looking into what shift **** I wanted, since the leather wrapped original was looking pretty bad after 23 years and almost 100k miles. I settled on the NSX Zanardi/Type-S titanium ****, and came across a thread where a guy put one in his FD RX7 and it perfectly matched his titanium handbrake lever, which is a super rare optional MazdaSpeed part made for RX7s and virtually impossible to find.
I love the way that combo looks, and while I won't try to find an RX7 handbrake and make it work in my car, I did however order a chunk of titanium stock and am having a machine shop mill it out to fit, then I'll do some experimenting with my bead blaster to try to get a perfect match with the shift ****.
In the process of installing the Zanardi **** and shift stalk I rebuilt the shifter assembly as well since it had to come apart anyways, replacing all of the little plastic bushings and O-rings that keep everything tight. The shifter was good before but now it's great, there is absolutely zero play in the assembly, everything you feel in the shifter is straight from the transmission.
You can also see my new Grom Audio CD changer auxiliary input adapter in the top right corner. The factory stereo isn't great but it sounds way better than the tape player adapter I've been using, the bass comes through much better and overall is a much better sound.
I'm also stripping down the center console to fix the nasty cracking and bubbling in the finish, in a few more days that will be done and I can have them repainted and finally get the interior back together. Since the Integra is stuck in the garage waiting for new wheel bearings I've been dailying the NSX even with the door cards and center console missing.
12-30-2017, 10:58 AM
#84
I can imagine the people peering in through the windows while you have your NSX parked when dailying it thinking it's in bad shape with the center console missing. Little do they know it just having an OCD level of care being given to it. Great job on the restoration!
01-08-2018, 12:21 AM
#85
Hah maybe, so far no strangers have commented on the interior but they're probably just being polite lol.
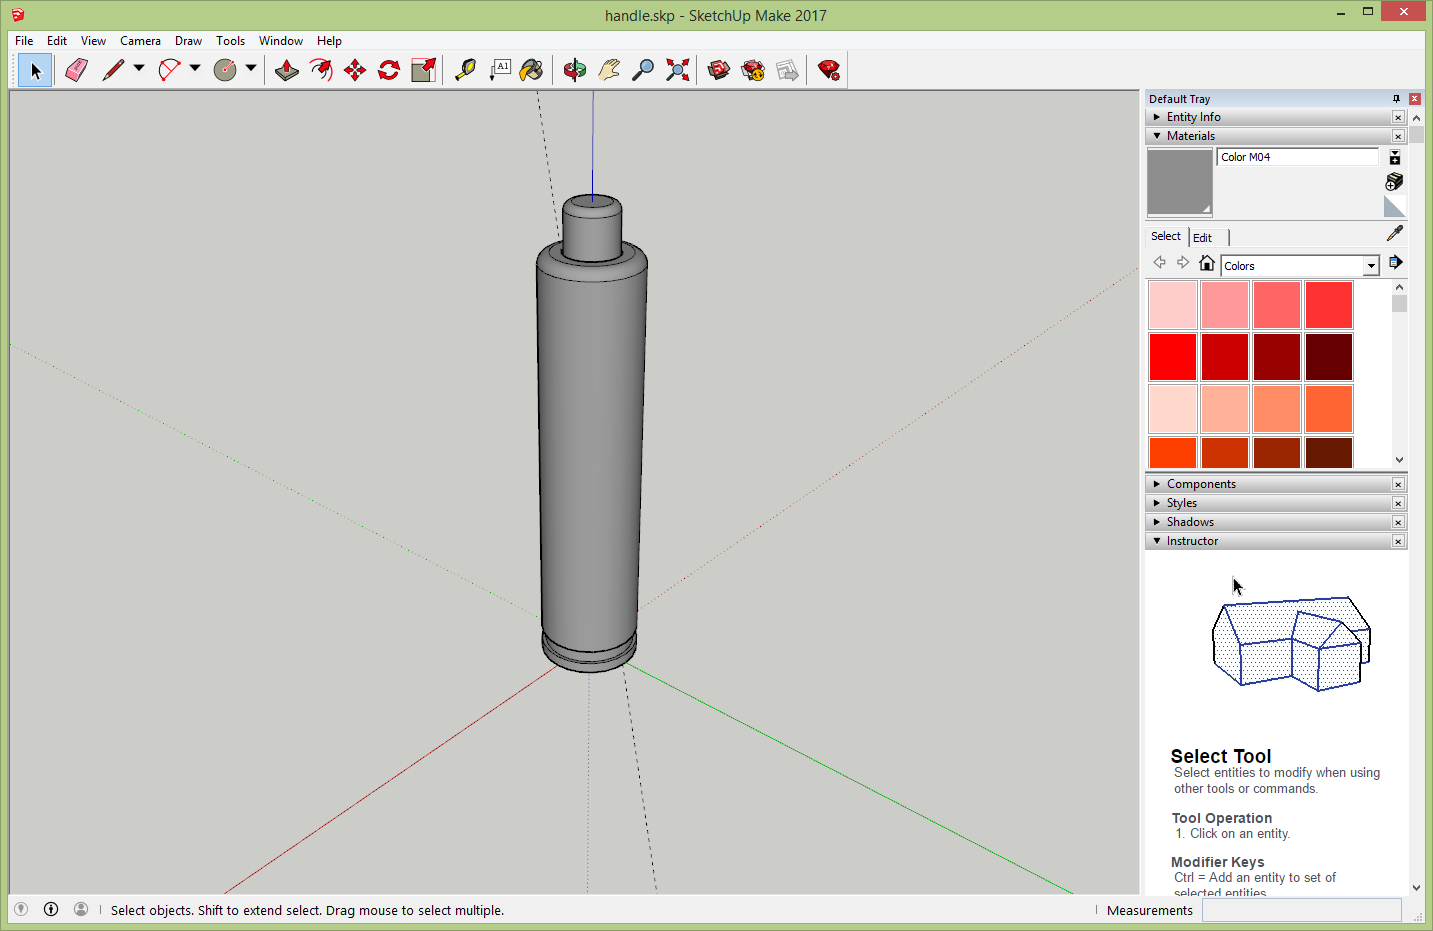
I was going to wait to post this but I'm too excited about it, I made up a design for the hand brake I want in Google Sketchup then gave that along with my chunk of TI to a machine shop so I should have my new hand brake within a week or two.
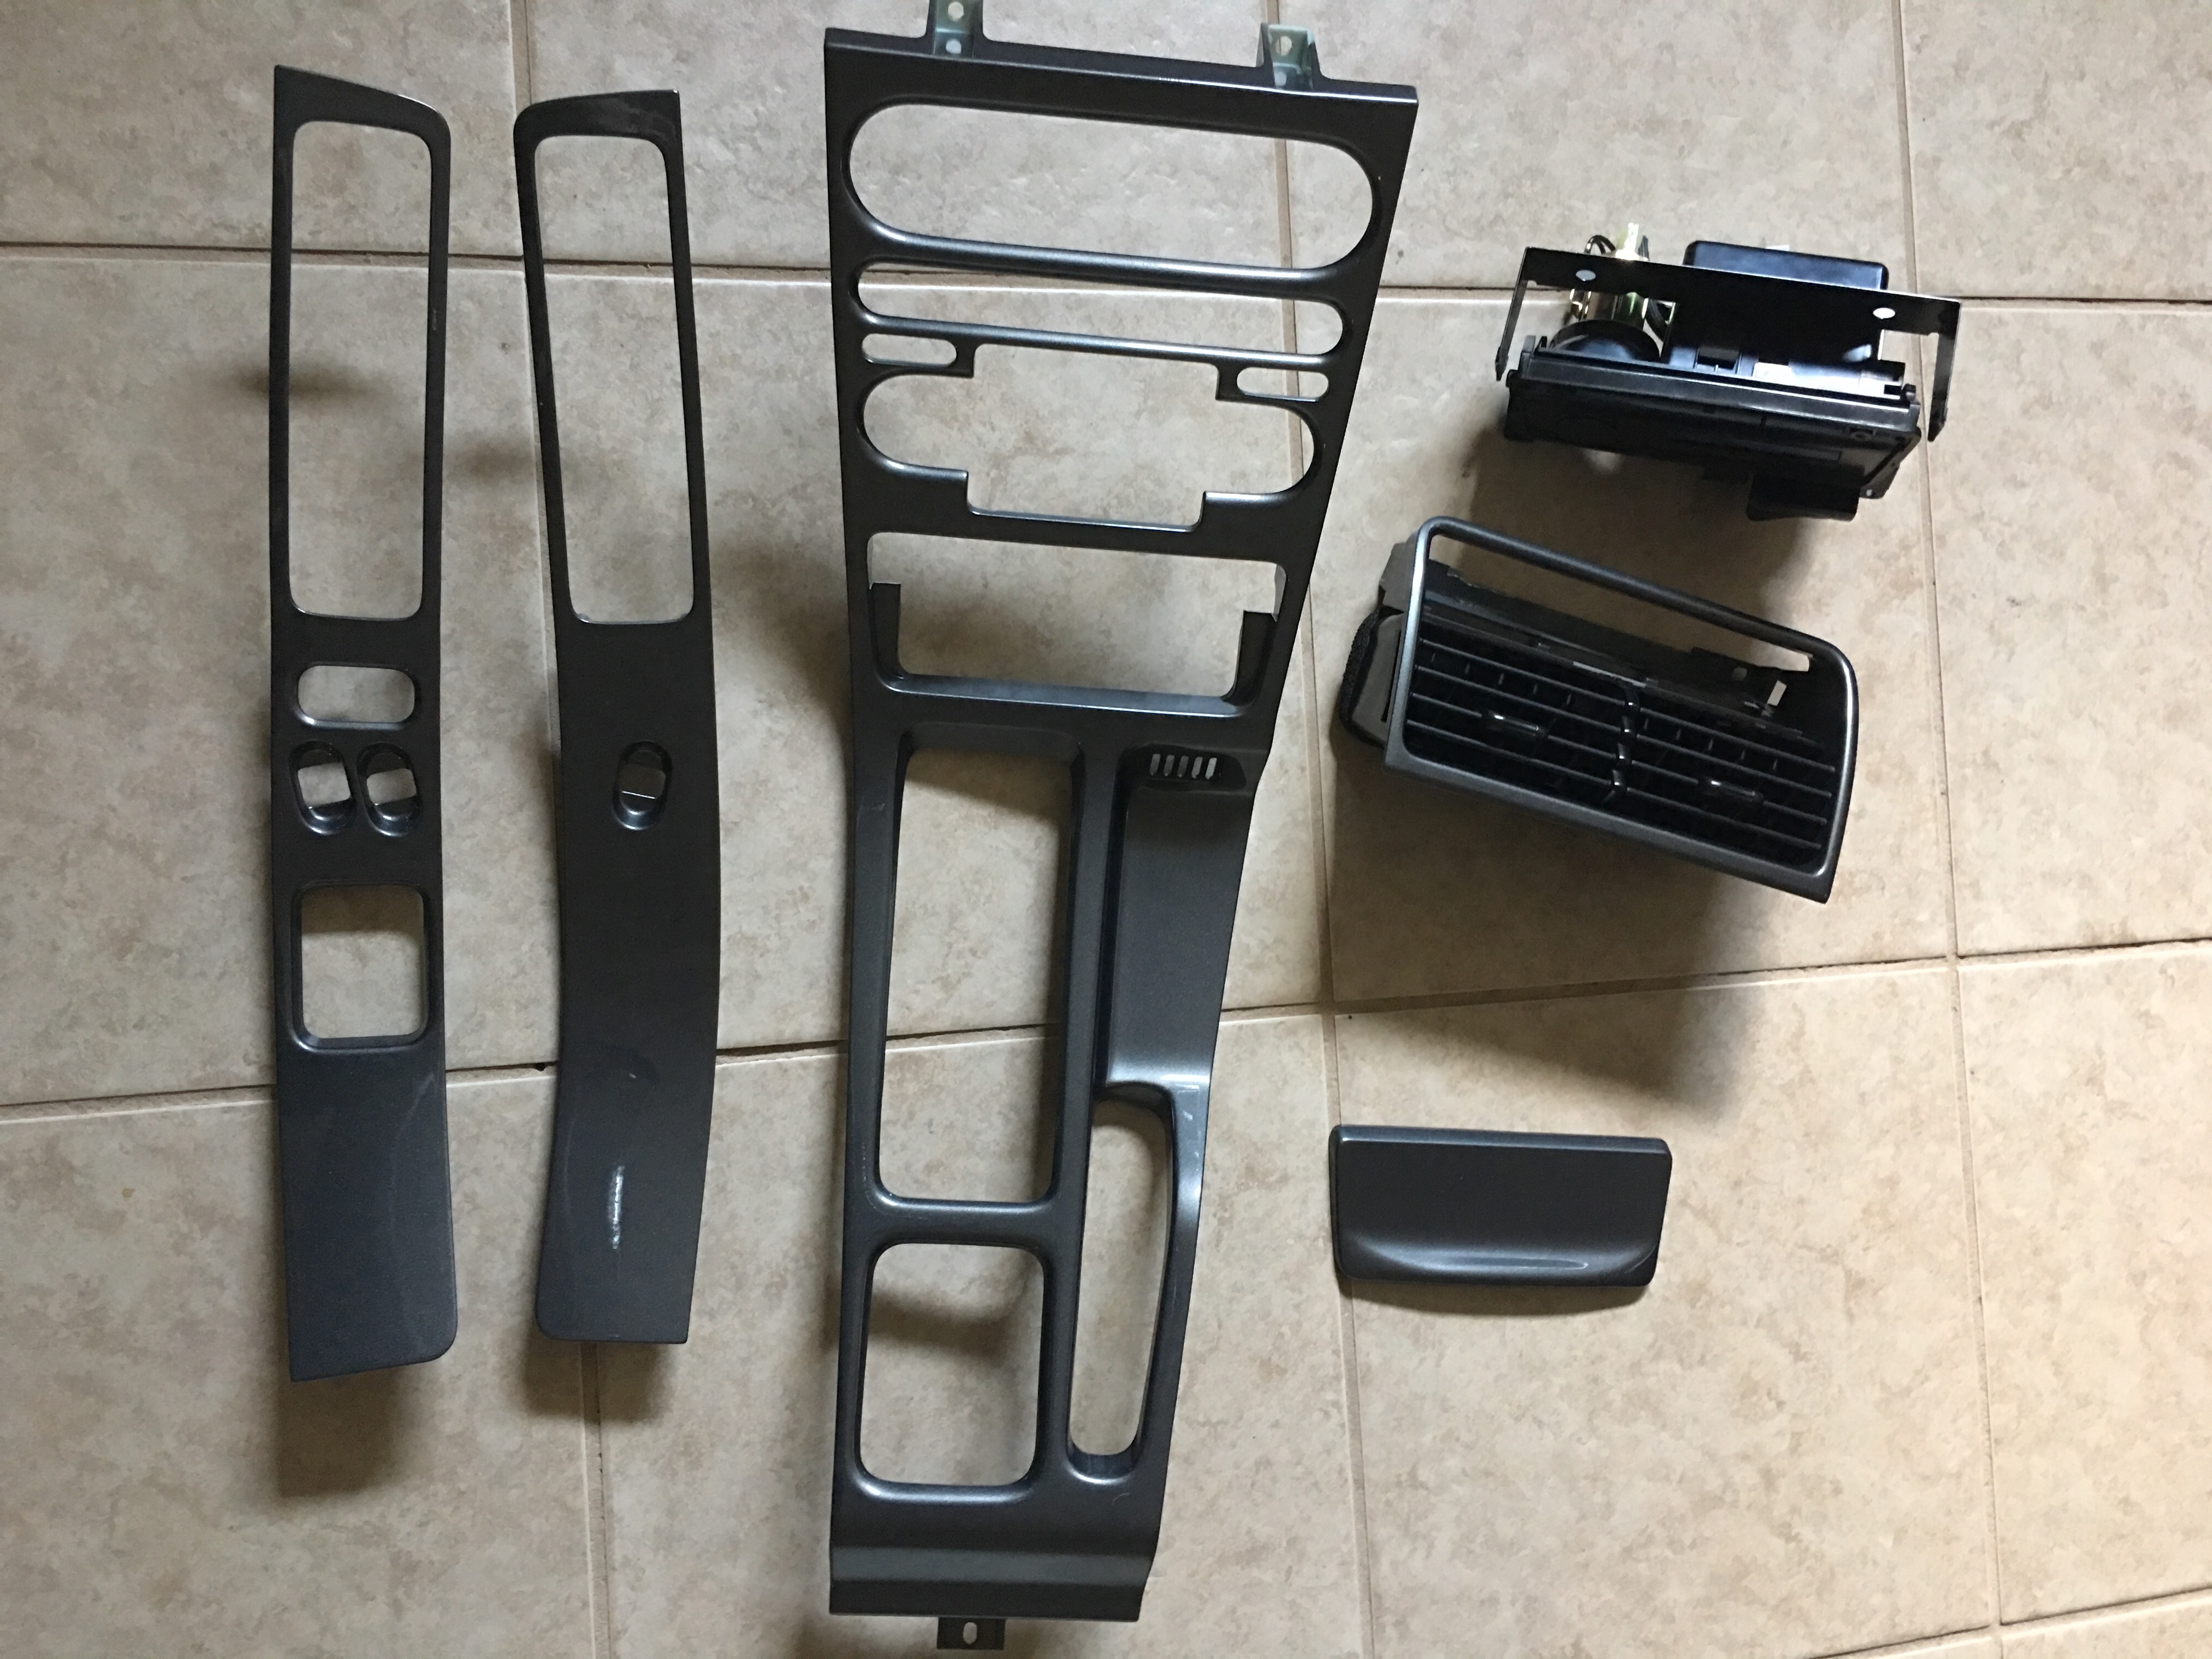
And I finally finished stripping off all of the peeling finish on the trim pieces, I had to do the center console in 3 separate sections since I didn't have any bags the correct shape and size to hold it all at once, so I did each end then the middle as seen below. I am so, so happy to be done with the ferric chloride. I somehow always managed to get it on something, I have a few old tshirts that have orange/yellow stains on them now.

I still have a bit of repair work to do on the center console as it has a crack in the bottom right, the crack was hidden by the peeling finish before so I assume it started under the previous owner. I drilled a tiny hole at the end of the crack to keep it from spreading any more then applied a solvent cement in the crack to try to melt it back together. I'm letting that cure for a few days before I fill the hole with epoxy and sand it smooth. I should be able to drop these pieces off to have them repainted this week sometime, it won't be possible to perfectly match the factory finish due to it being a shiny metallic substrate with a translucent grey finish over that, but a matte or satin metallic grey should get close enough to not know the difference. With any luck, my next post should include interior reassembly photos, having two cars with stripped out interiors is getting old...

I was going to wait to post this but I'm too excited about it, I made up a design for the hand brake I want in Google Sketchup then gave that along with my chunk of TI to a machine shop so I should have my new hand brake within a week or two.
And I finally finished stripping off all of the peeling finish on the trim pieces, I had to do the center console in 3 separate sections since I didn't have any bags the correct shape and size to hold it all at once, so I did each end then the middle as seen below. I am so, so happy to be done with the ferric chloride. I somehow always managed to get it on something, I have a few old tshirts that have orange/yellow stains on them now.
I still have a bit of repair work to do on the center console as it has a crack in the bottom right, the crack was hidden by the peeling finish before so I assume it started under the previous owner. I drilled a tiny hole at the end of the crack to keep it from spreading any more then applied a solvent cement in the crack to try to melt it back together. I'm letting that cure for a few days before I fill the hole with epoxy and sand it smooth. I should be able to drop these pieces off to have them repainted this week sometime, it won't be possible to perfectly match the factory finish due to it being a shiny metallic substrate with a translucent grey finish over that, but a matte or satin metallic grey should get close enough to not know the difference. With any luck, my next post should include interior reassembly photos, having two cars with stripped out interiors is getting old...
01-09-2018, 10:12 AM
#86
Damn dude, that is going to look great. Have you considered getting some really nice recaro seats to replace the factory ones? If you are having issues fitting some low rails and recaro's could definitely help. Store the factory seats in storage in case you decide you want to revert back to stock or resell the car then flip the recaro's. It's a win/win really.
01-09-2018, 12:24 PM
#87
Honda-Tech Member
There is one guy in my country that sent his OEM NSX seats to someone to '' fix '' them. The fix was that they laser cutted sitting pad, and made it thiner, wich resulted in better body handling, and seat position.
01-09-2018, 10:44 PM
#88
Damn dude, that is going to look great. Have you considered getting some really nice recaro seats to replace the factory ones? If you are having issues fitting some low rails and recaro's could definitely help. Store the factory seats in storage in case you decide you want to revert back to stock or resell the car then flip the recaro's. It's a win/win really.
That's pretty much what I did, I cut out just the foam under your butt so you sink further into the seat and it holds your hips better and allows a bit more head room. I did it with a hacksaw instead of a laser though so the foam is a bit ugly underneath the leather lol.
01-16-2018, 10:29 AM
#89
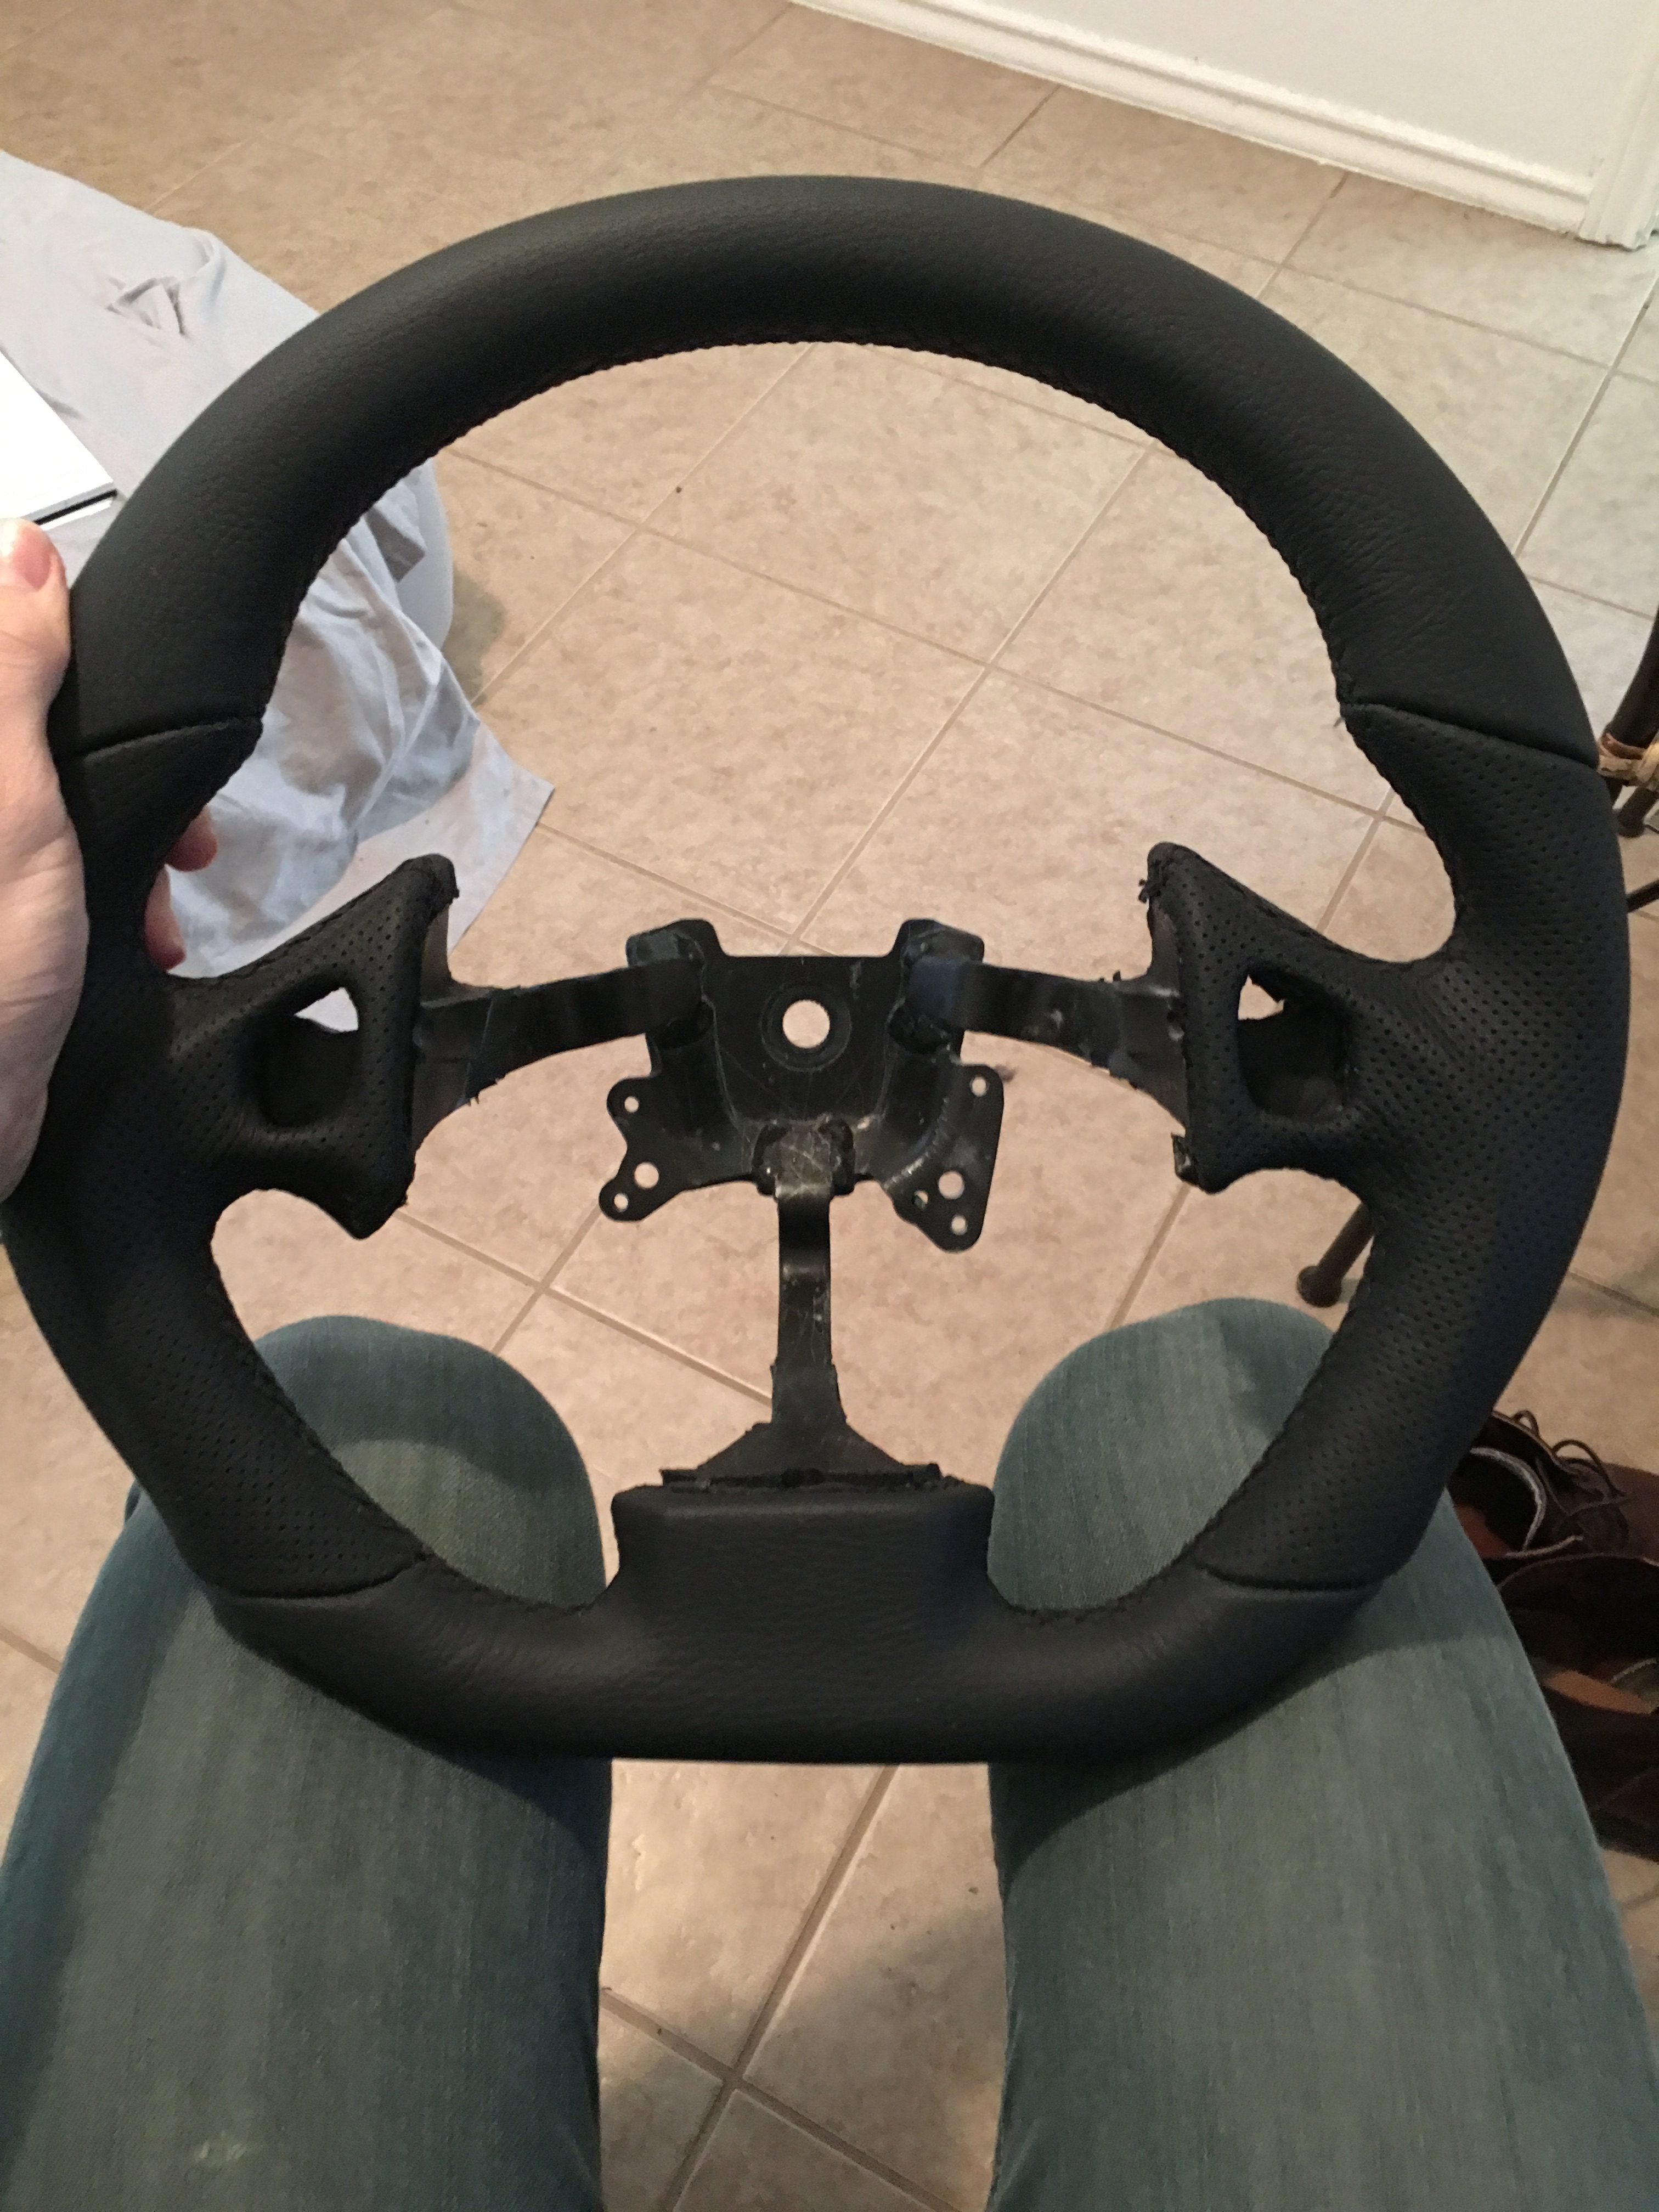
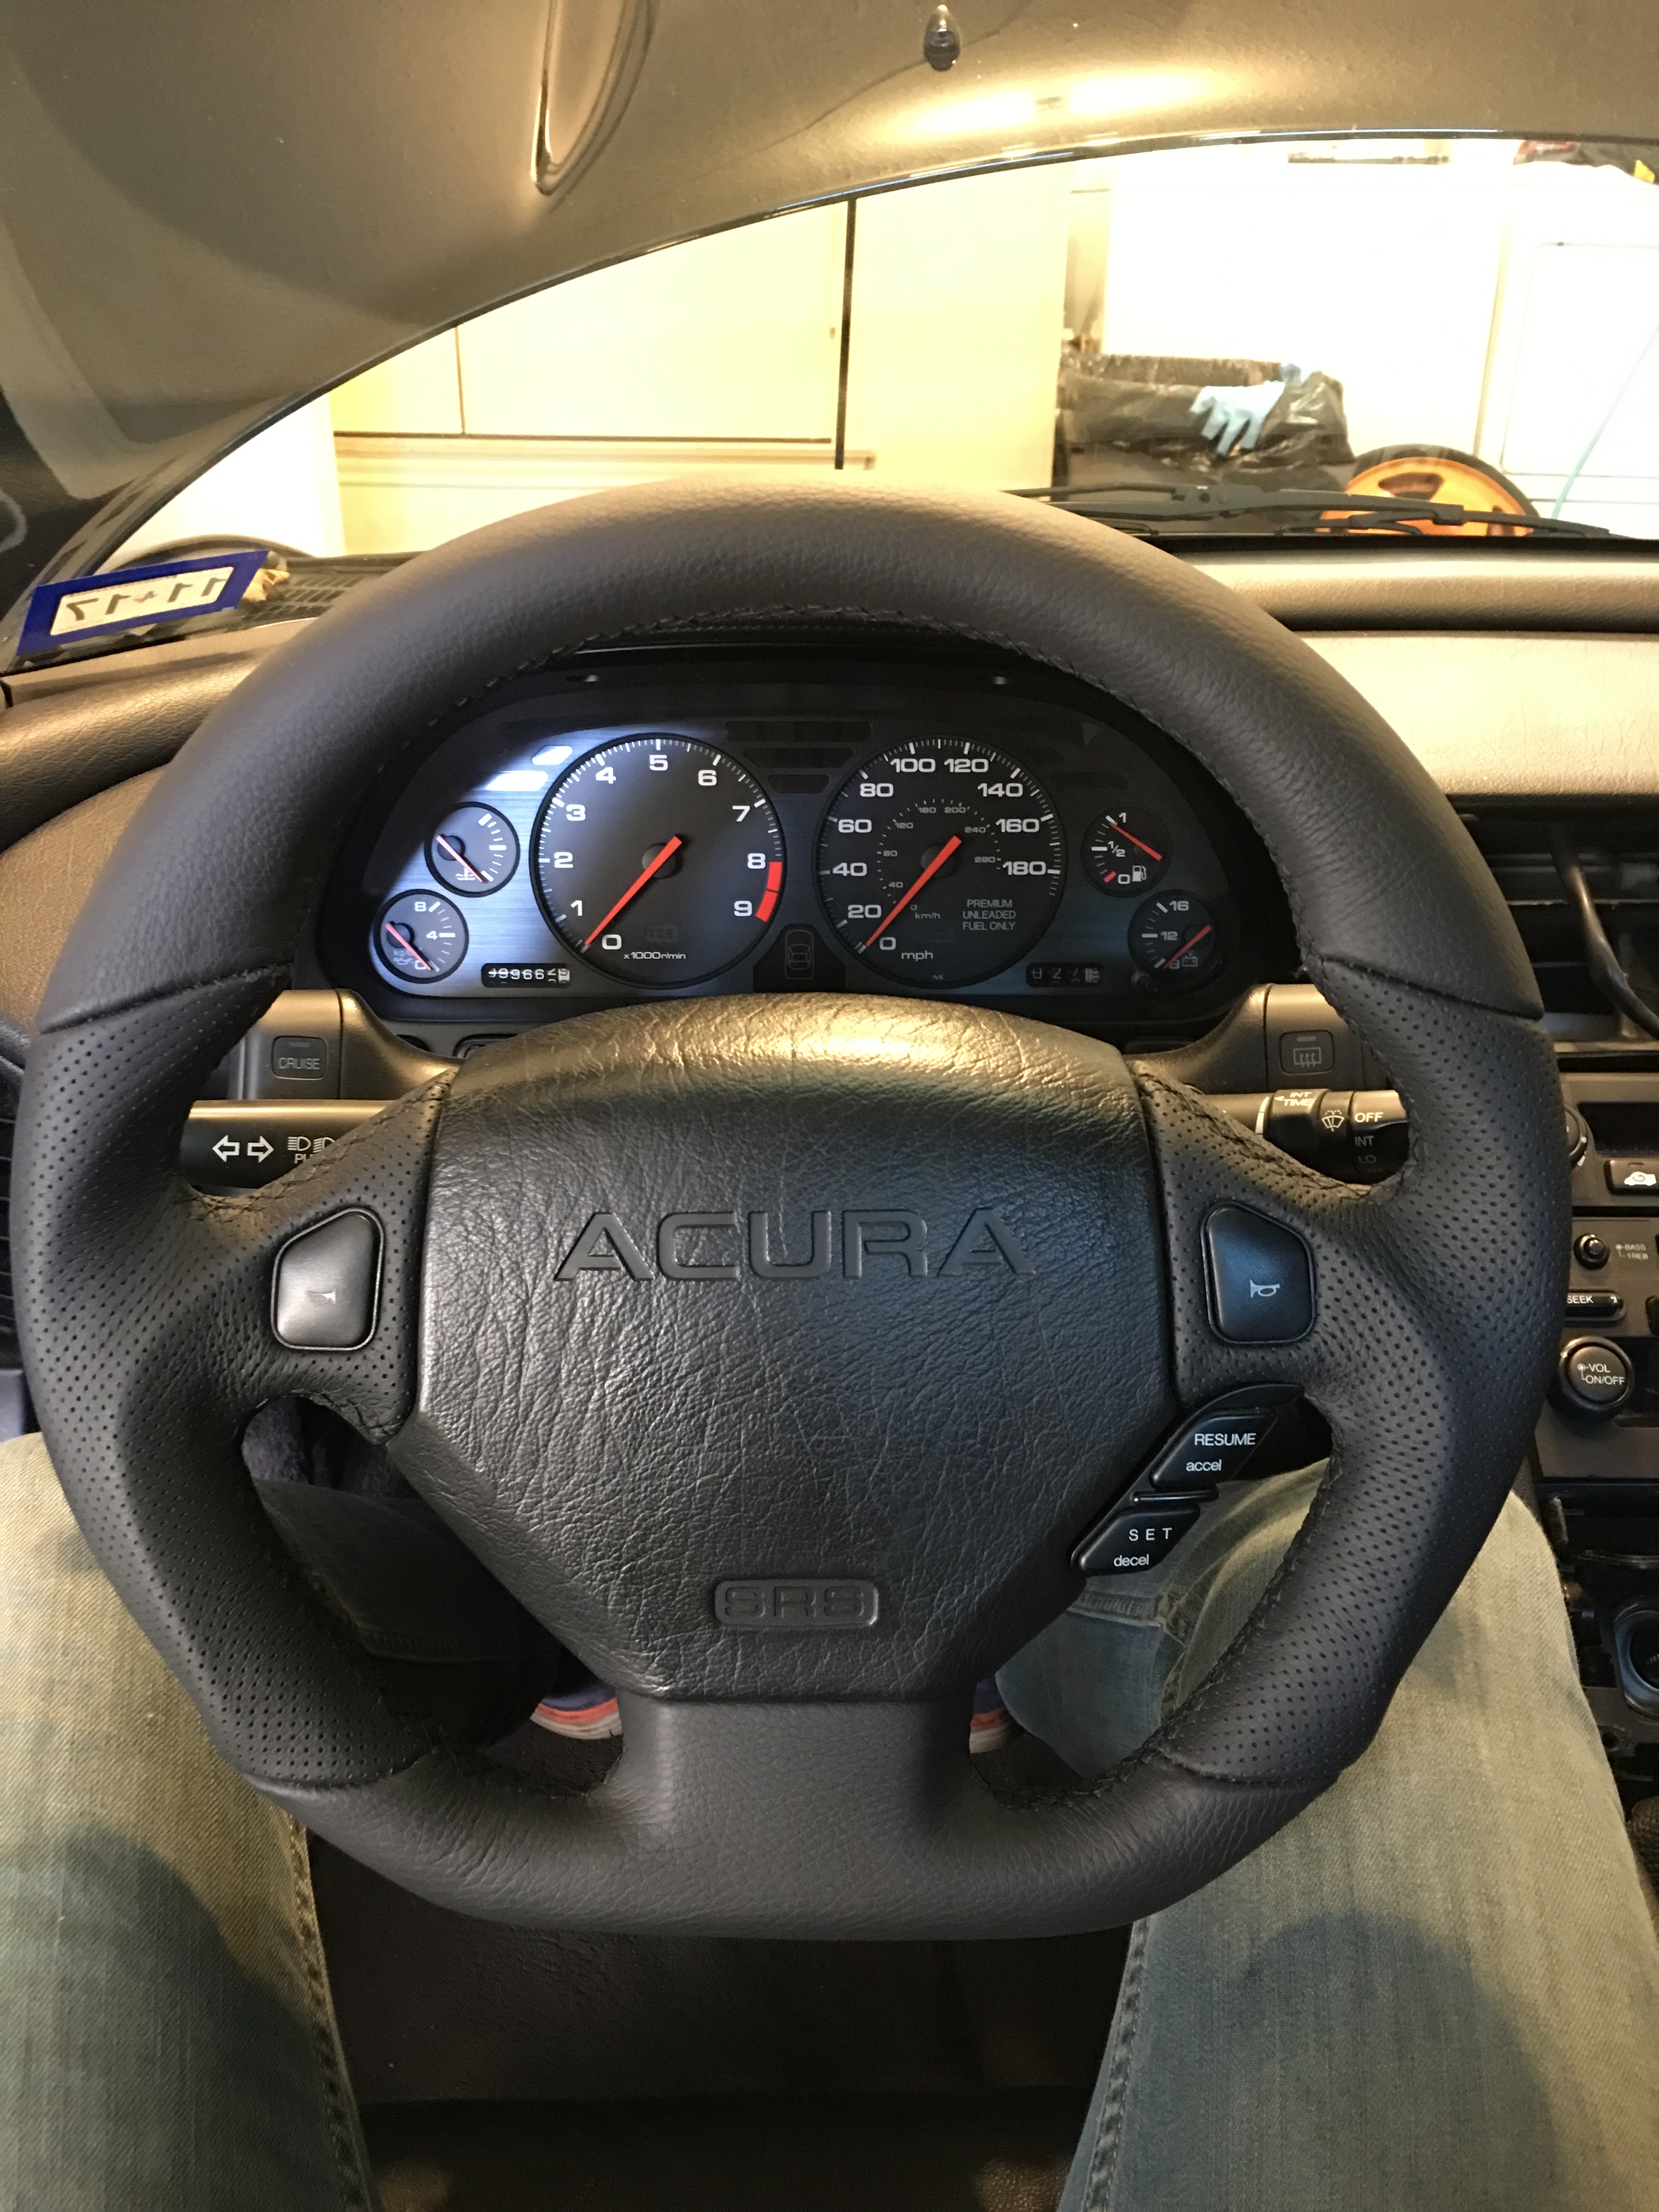
I wasn't planning on doing this yet but Euroboutique had a sale going with their custom NSX steering wheels being discounted pretty substantially so I went ahead and bought one. It looks and feels great and retains the factory airbag and horn buttons. They require a deposit and a core to be sent back so I picked up a rather beat up NSX wheel for cheap to use as a core return and a source for the various plastic bits and horn buttons (but I swapped over my original airbag since it didn't come with one) so I can keep my stock parts intact.
01-16-2018, 11:37 AM
#90
Honda-Tech Member
That's a beautiful finish. Really makes a difference. Very nice. Did you ever consider going the Type R momo wheel? Though I suppose not as you'd lose the airbag and cruise buttons.
01-16-2018, 05:39 PM
#92
I actually like the NSX-R Momo wheel better, but yeah I wanted to keep the airbag and CC controls. Another route would have been an RSX wheel, but I like the shape and materials on this one better despite the outdated looking airbag, and this one was a drop-in piece as opposed to having to source an adapter so was just all around easier.
 03-19-2018, 11:21 PM
#95
Damn, I didn't realize it had been nearly two months since I last posted. The car was at a local body shop to have the driver side door dings from the previous owner fixed for the entirety of February, so that's a big part of it, more on that in a bit.
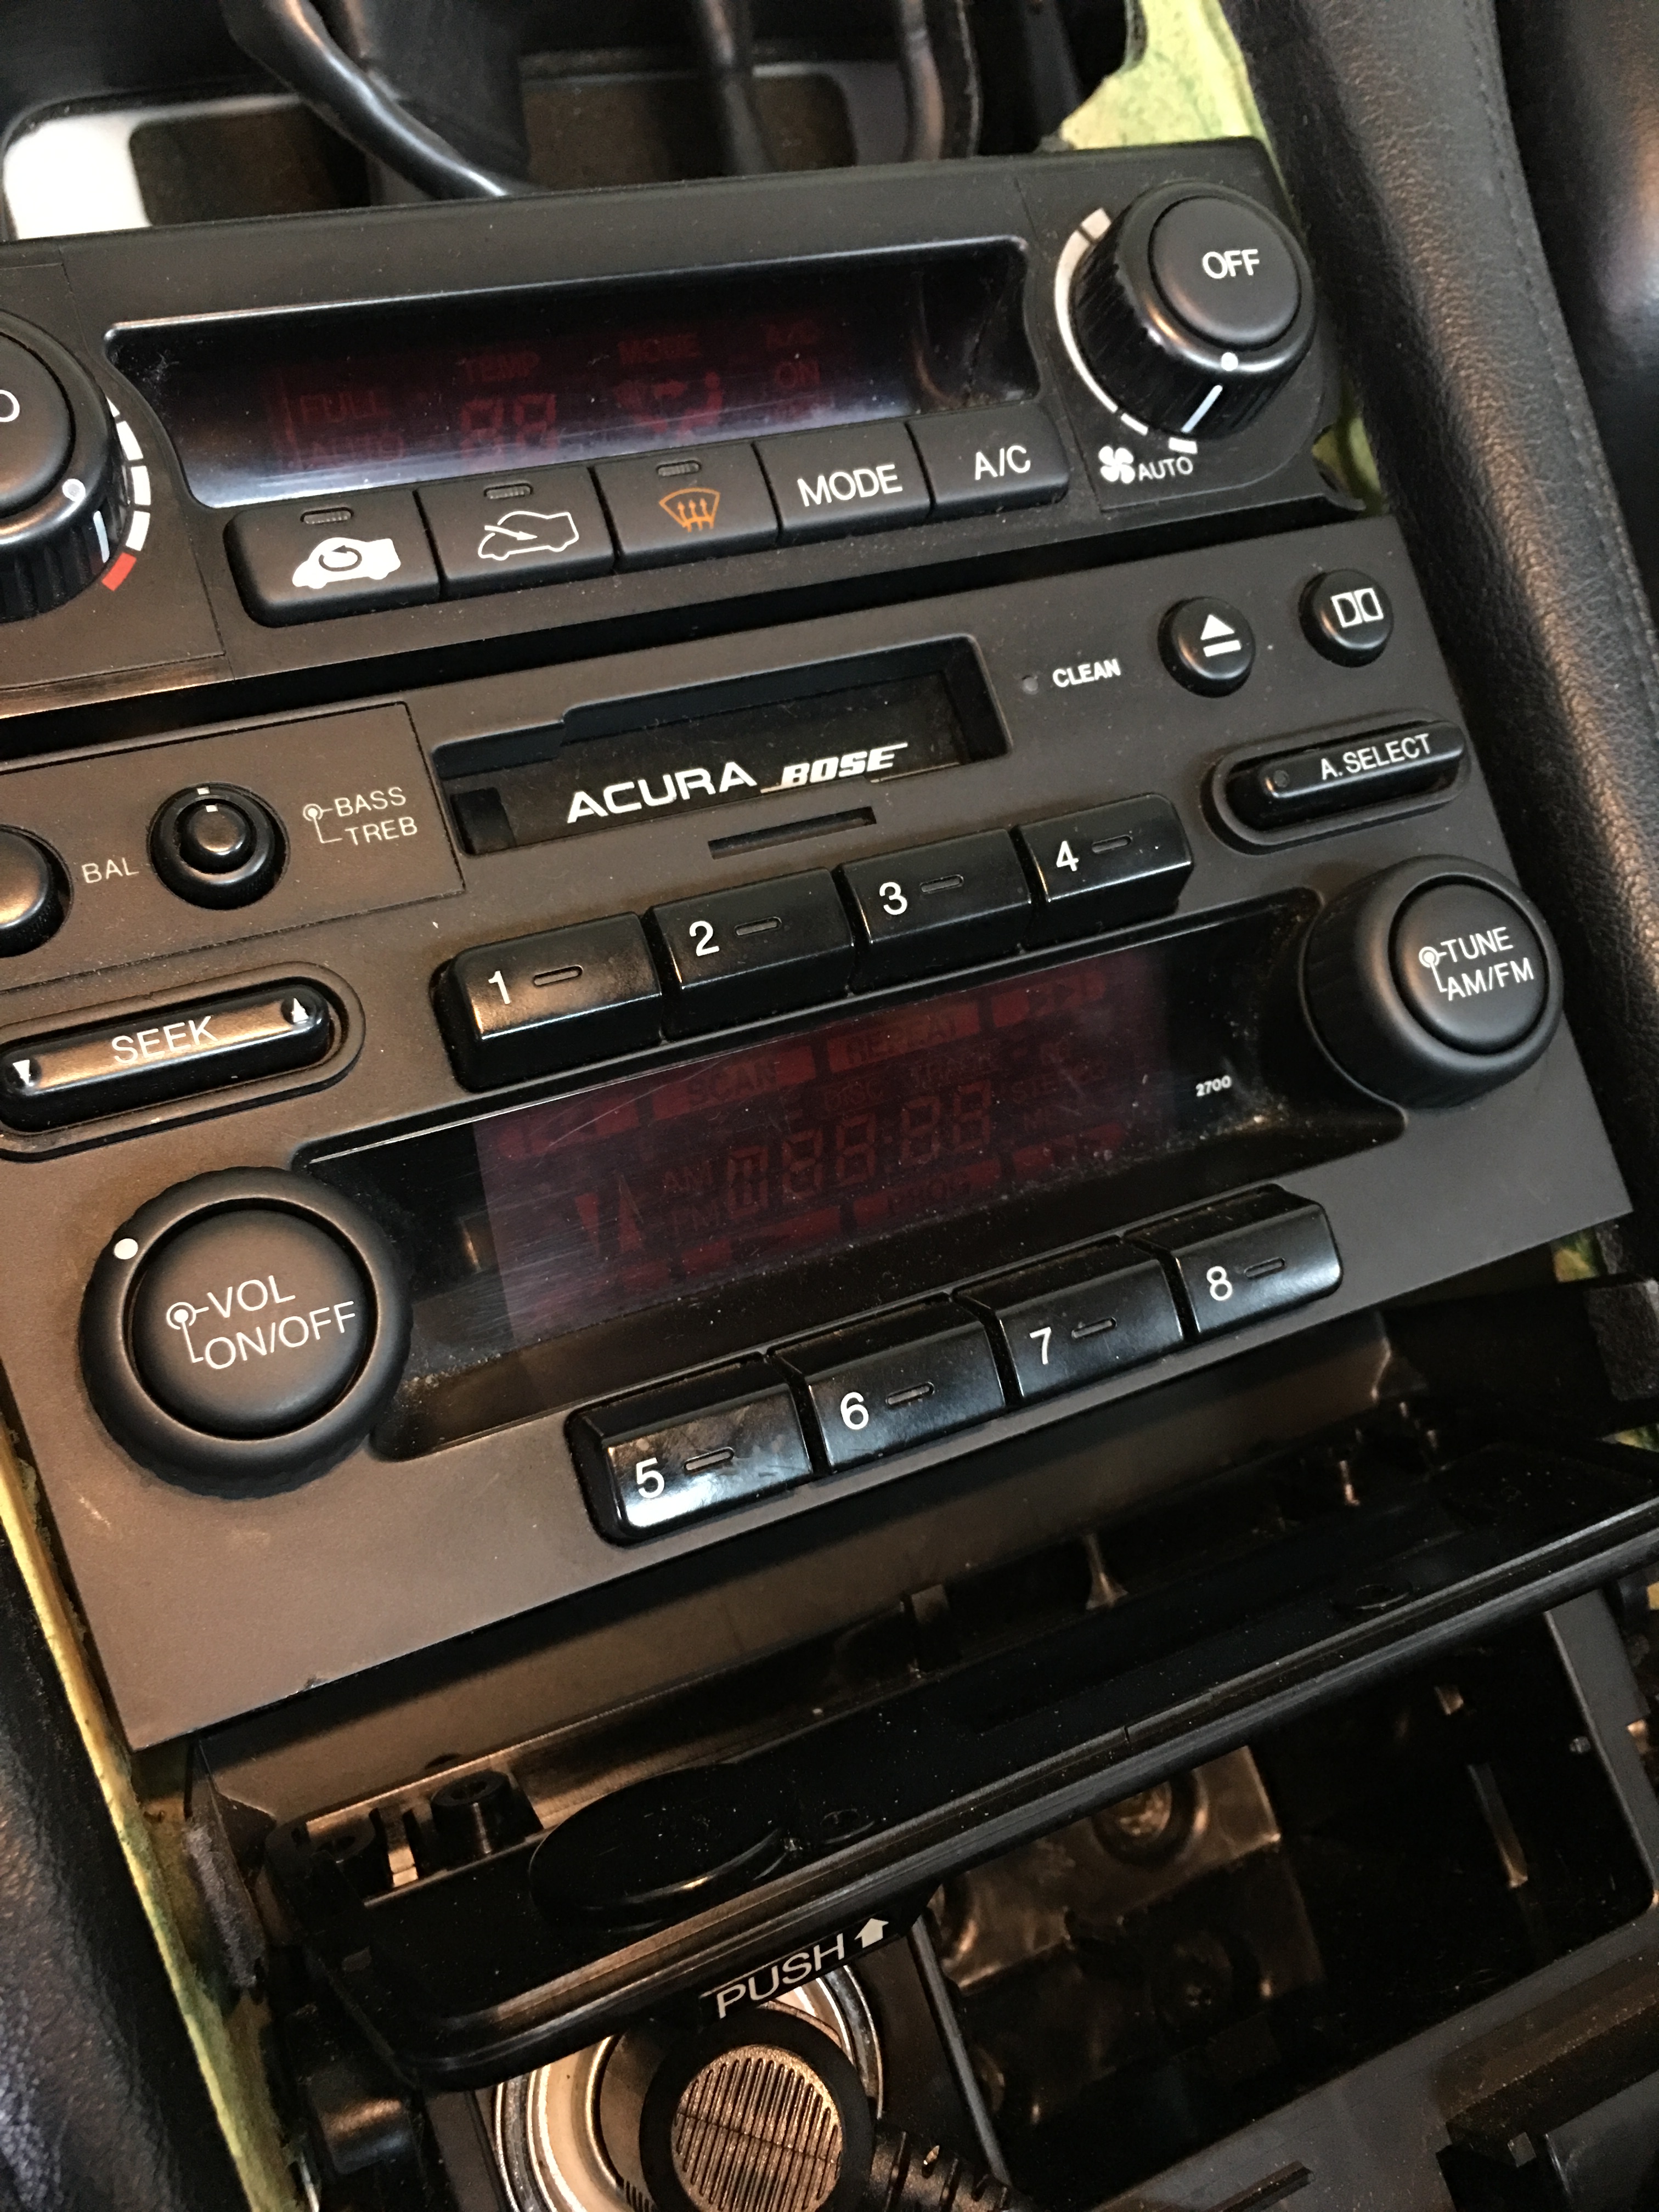
This is a fairly minor detail but the two main button/***** on the radio were cracked and falling apart from use over time, so I sourced new ***** and buttons from Amayama since they aren't all available in the US anymore and replaced them. I couldn't replace the other buttons but those two were by far the worst and now they look brand new.
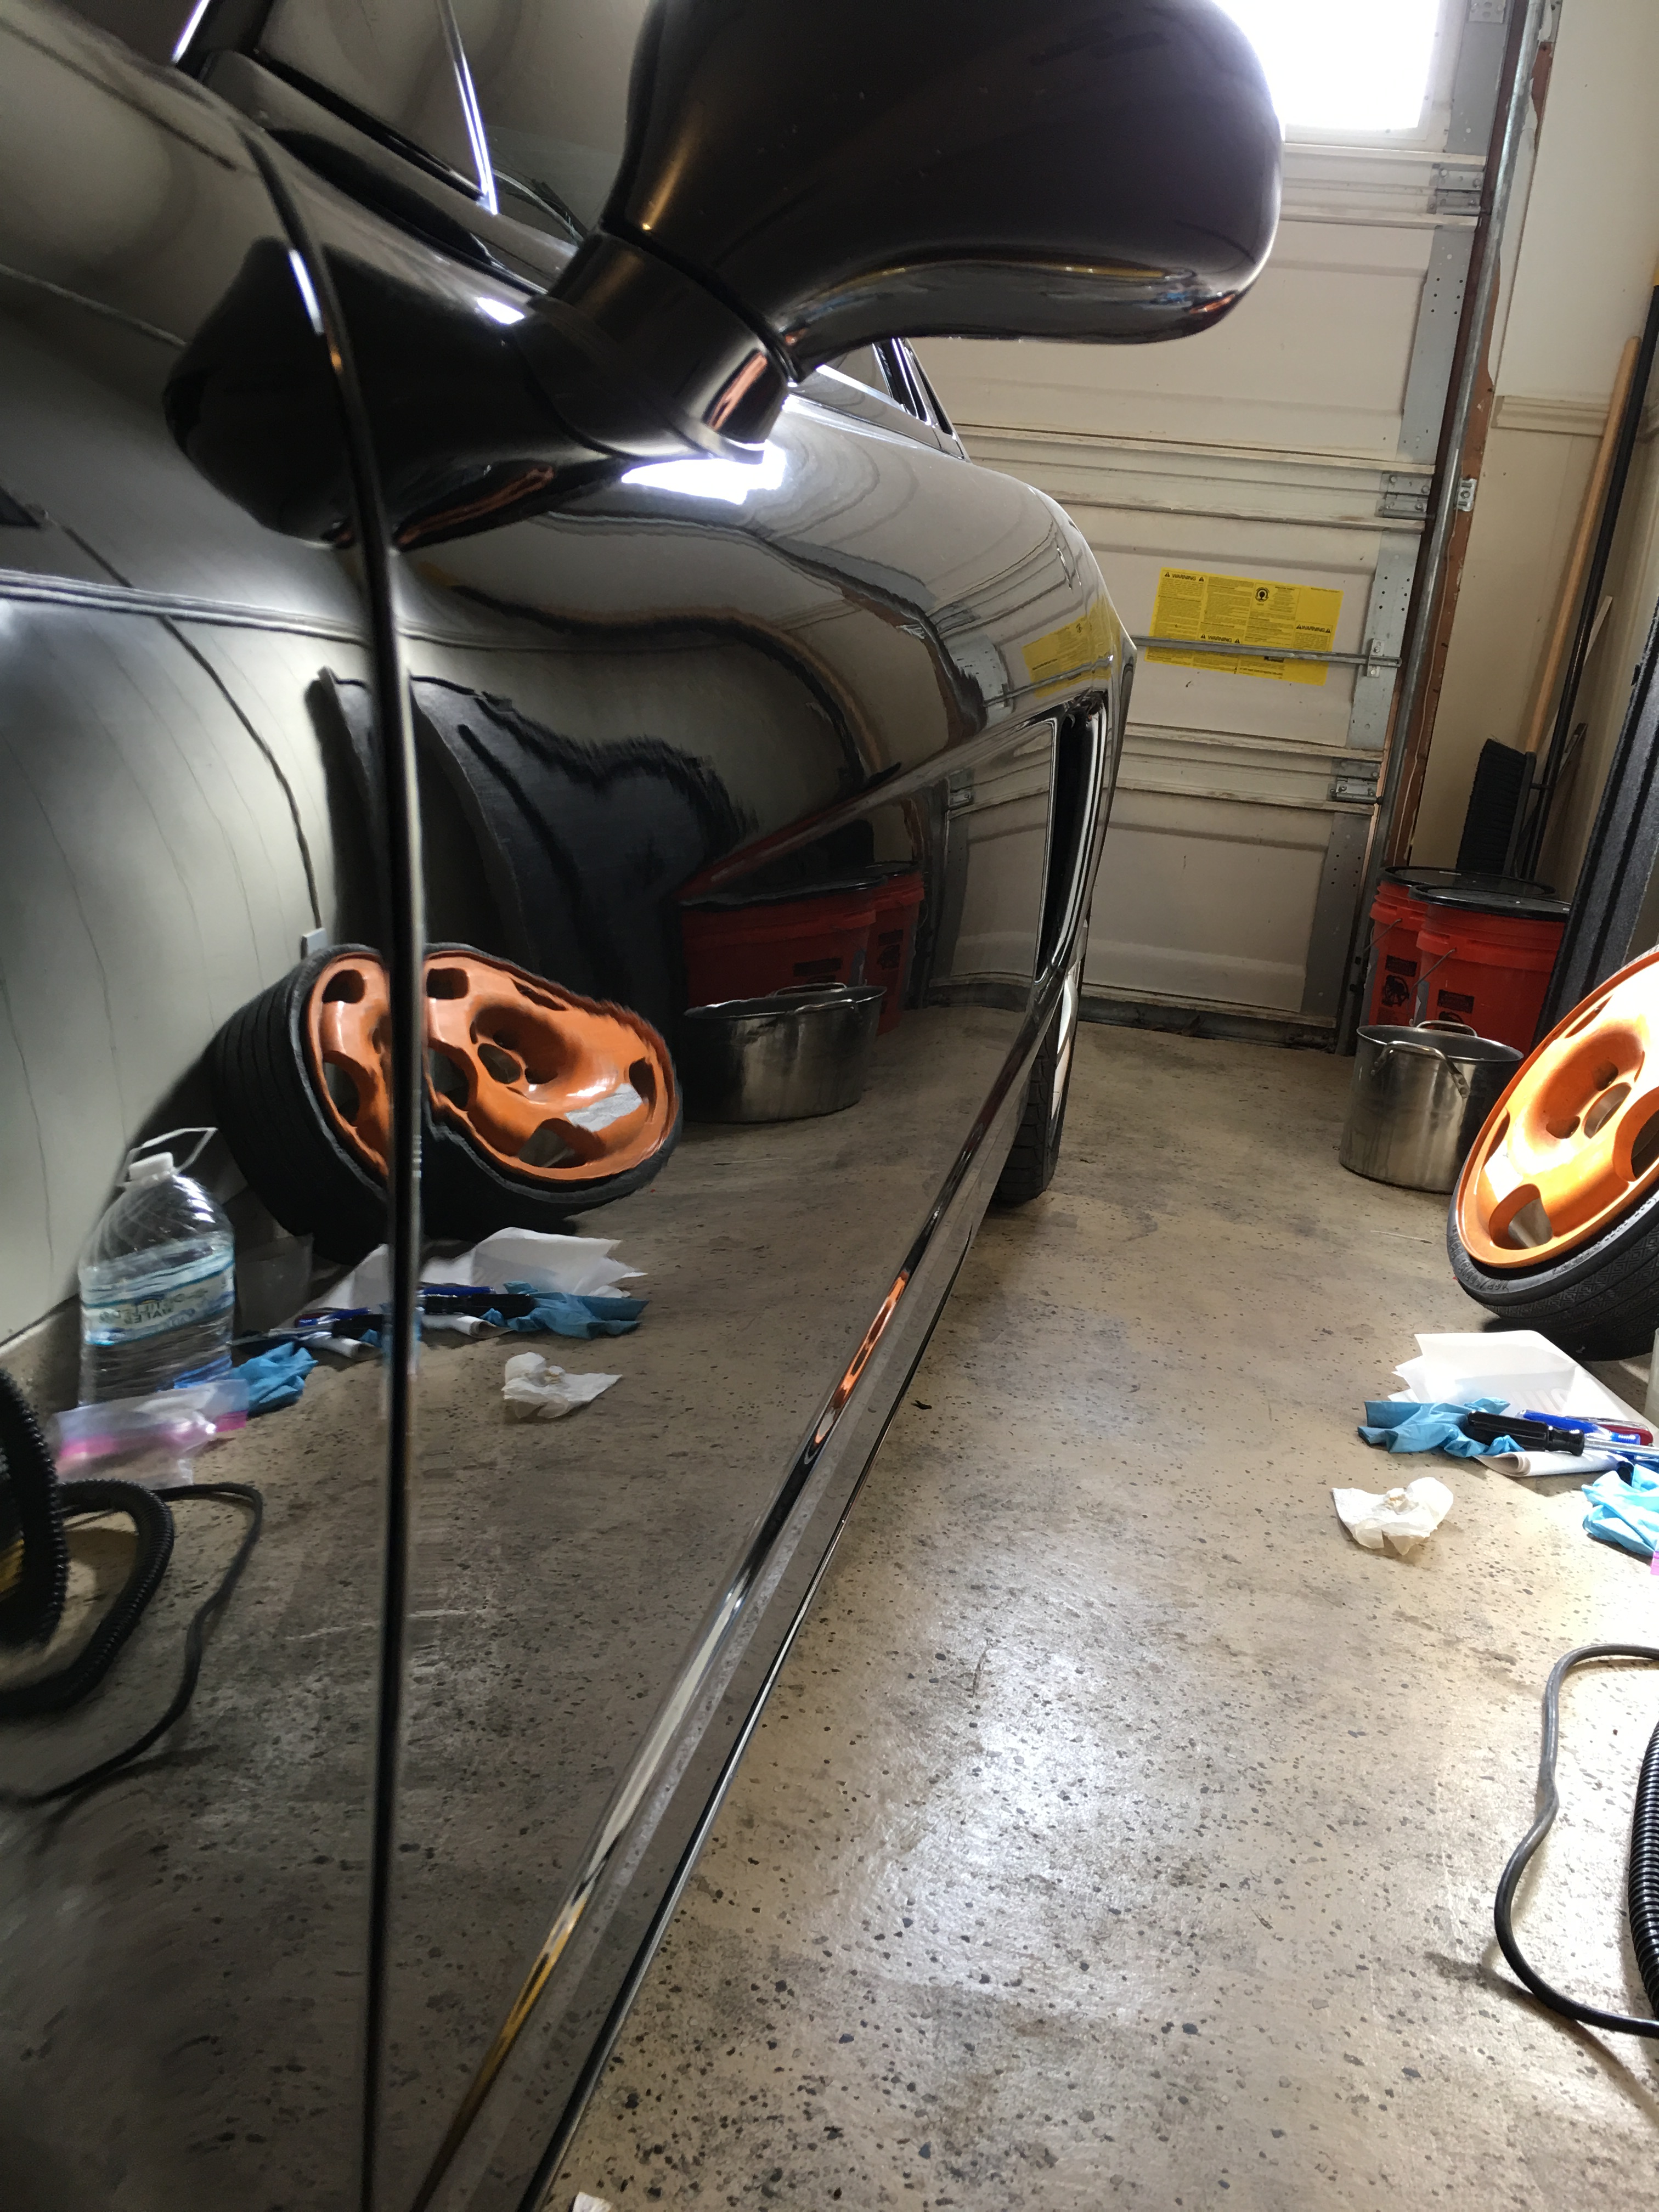
As I mentioned earlier, I finally dropped the car off to have the two dings that couldn't be PDR'd on the driver side door fixed as well as fixing the spot I wetsanded through on the fender last year. I repaired the spot on the fender using touch up paint, and I must say that I did a pretty dang good job, but it wasn't perfect and it wasn't much more money to have the fender sprayed as well as the door so I went for it.
Turns out I did a bad job vetting the shop though, they had great reviews on Google but I forgot that most people aren't car guys, and that car guys have very different standards for a good paint job. I dropped the car off on a Monday. Two weeks later I get a call saying it's done, so I went to get it and immediately saw that the texture on the clear coat was way off (more orange peel than a new Escalade -- nothing like the factory wetsanded finish) and you could still see where the ding was, they didn't even get the sheet metal and filler right. So I point this out, the owner says sure we'll redo it. Two weeks later I get a call that it's done, this time the texture was spot on, they actually wetsanded it this time so it was great in that regard, but when buffing they used a rotary buffer with too heavy pad/compound so it has buffer trails and holograms all over it but I can fix that easily so I'm not too worried. Looking closer though, i can still see the dent. The owner tells me that they couldn't get it perfect, but since the initial quote was for a perfect job that they could either try again or I could pay a significantly discounted price and deal with it not being 100% perfect. Rather than let them add yet another coat of paint to my door I opted to pay the discounted price and get out, they fucked up twice so I had no reason to believe that they'd get it right the 3rd time either, it looks pretty damn near perfect though and I don't think anyone else would ever notice, so I'll just live with until I decide to have a full respray done, if that ever happens. What bothers me about this though is I straight up asked the guy if he could make it 100% perfect and he told me he could. I even offered to buy a replacement door shell so they wouldn't have to do body work on it and he said that wasn't necessary, but hey live and learn I guess.
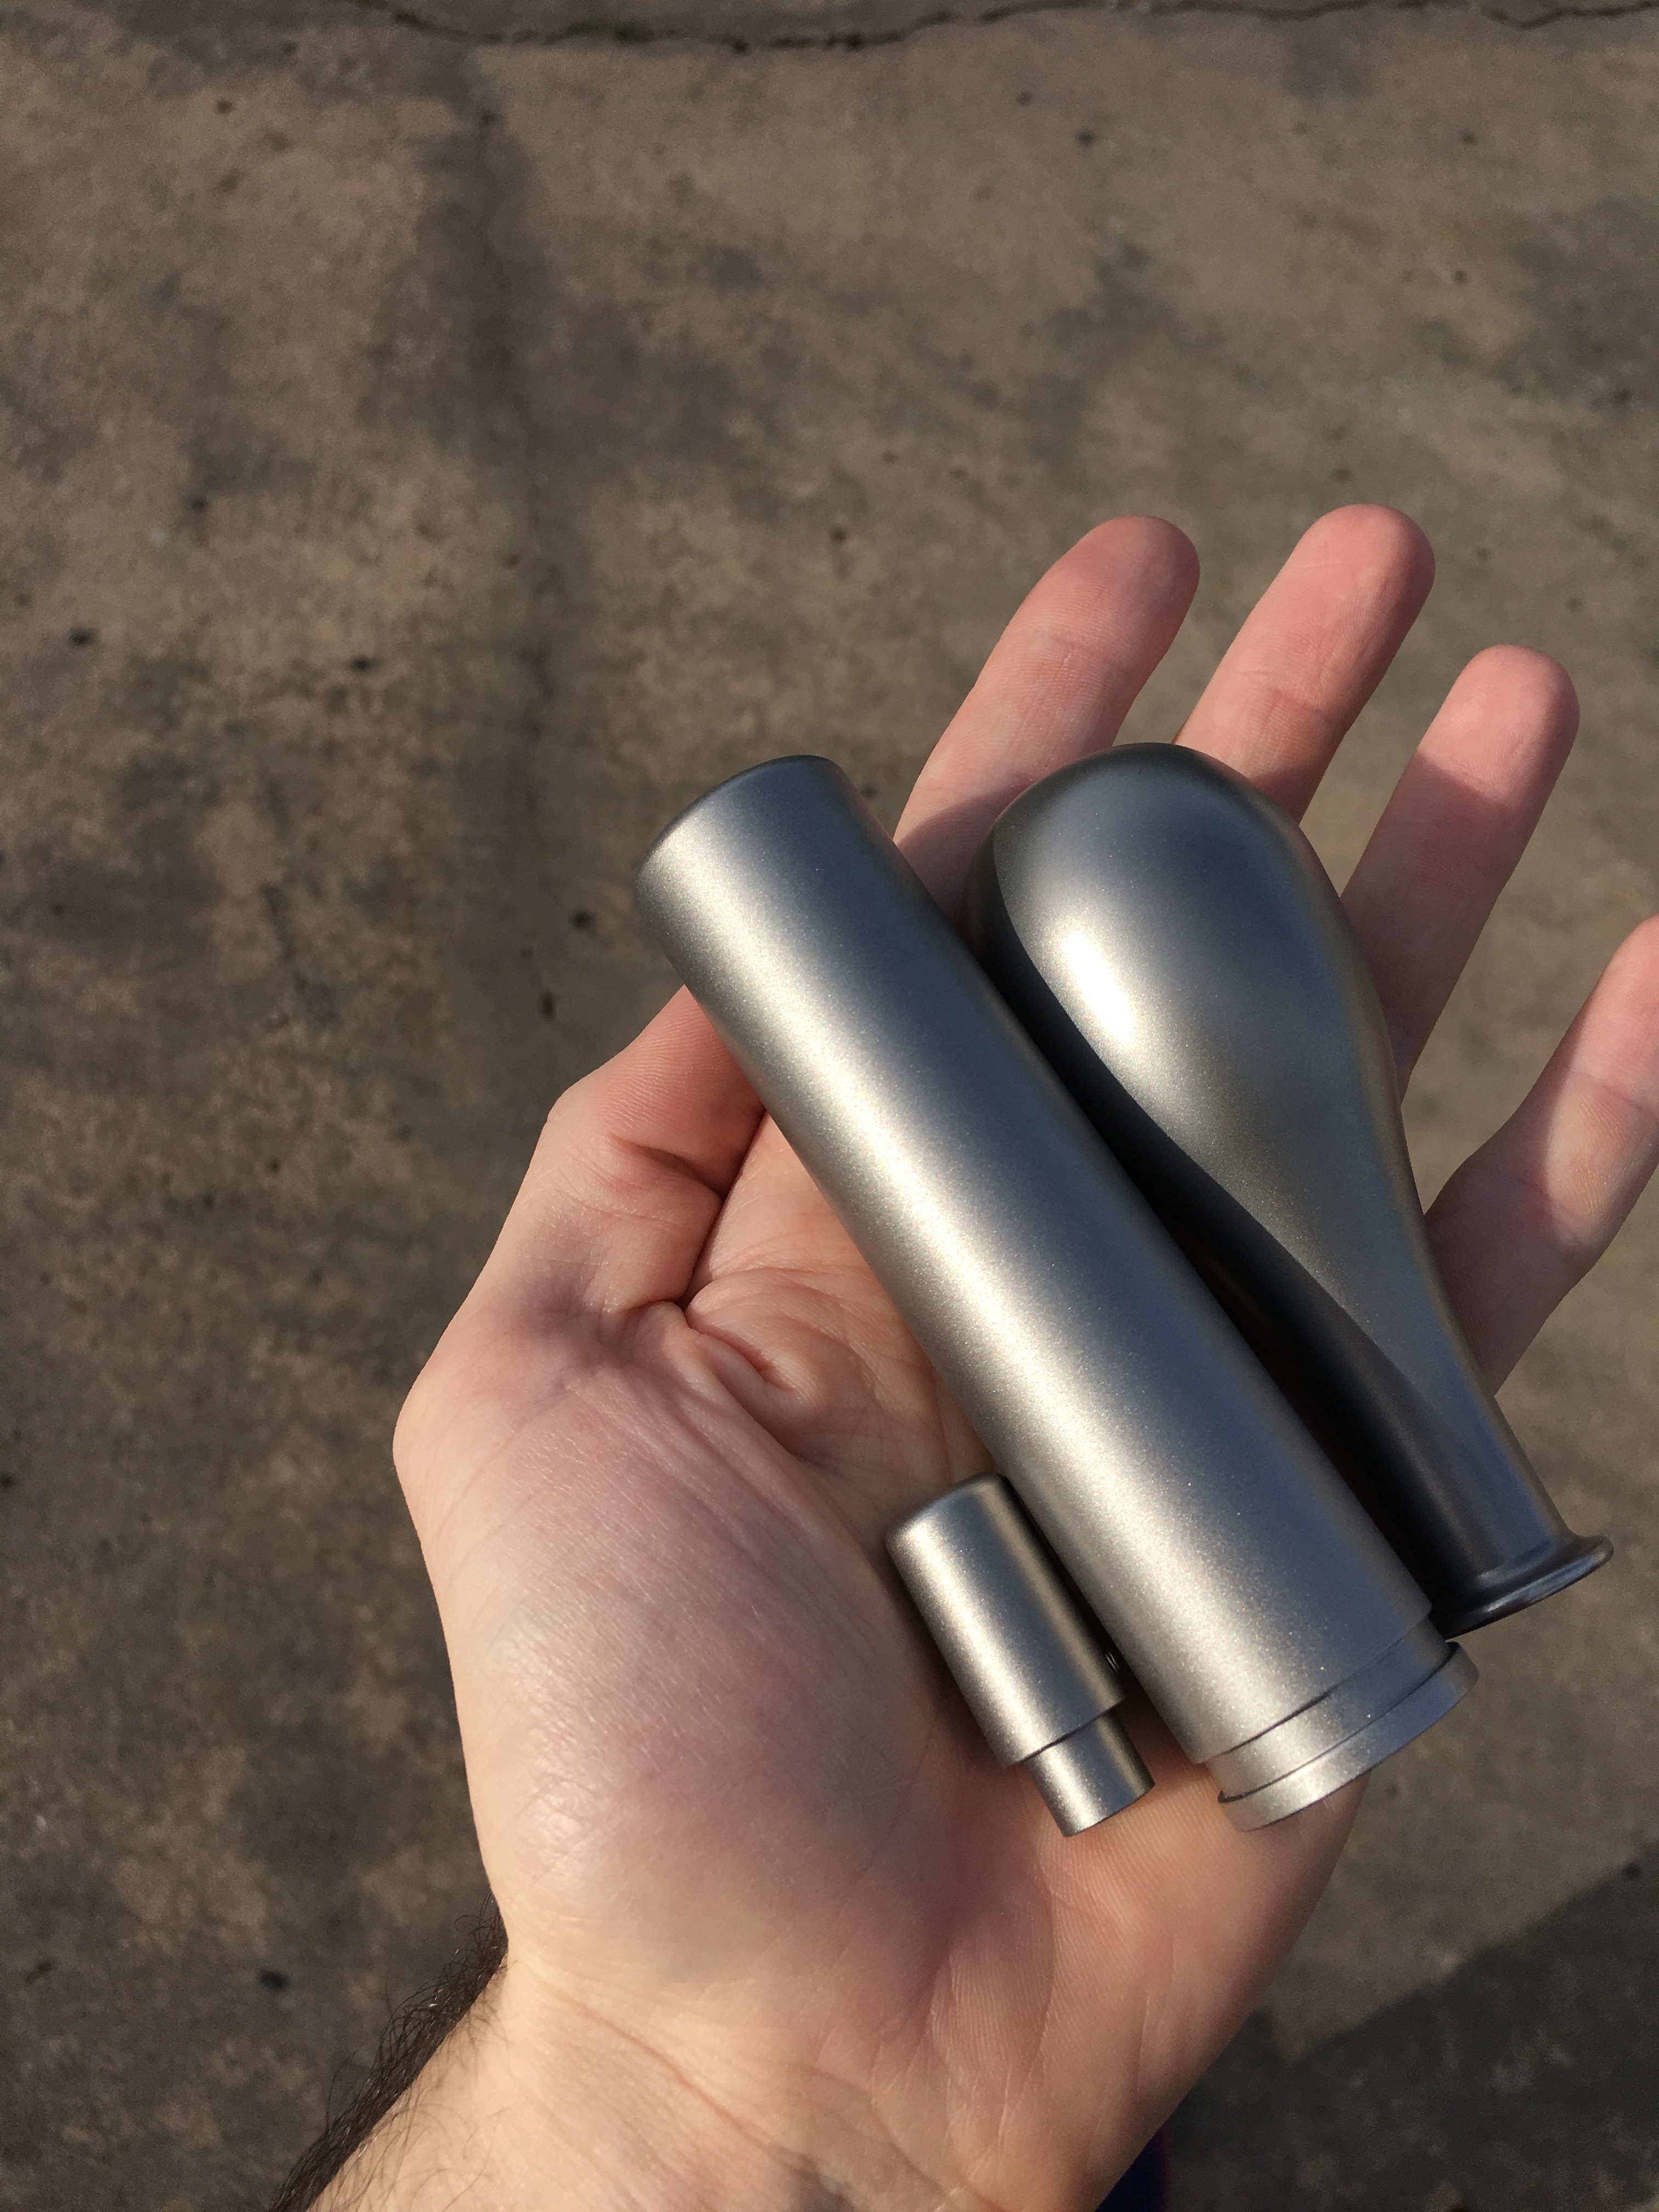
Anyways, in more positive news, I finally finished my hand brake handle. To no ones surprise the bargain bin harbor freight glass beads I had laying around didn't create a good finish at all, I started looking into other bead blasting media for titanium. The best results/closest match to the factory Zanardi shift **** I was able to find was a very fine steel shot blasting media, and while not 100% it's close enough that it's not noticeable and this way I don't have to blast the expensive shift ****. I'm really happy with the way this piece turned out, it will also fit on 90s Civics and Integras so if anyone is interested in replicating it I can share the measurements, having one made up in aluminum would be pretty cheap at most machine shops.

I've also had some other projects I've been working on (as well as the other car, I need to post another update in my Integra thread) so I haven't had as much time to work on this car as I'd like, but I should be getting my interior trim pieces refinished soon so I can finally reassemble the interior after having it apart for the past 3-4 months.
This is a fairly minor detail but the two main button/***** on the radio were cracked and falling apart from use over time, so I sourced new ***** and buttons from Amayama since they aren't all available in the US anymore and replaced them. I couldn't replace the other buttons but those two were by far the worst and now they look brand new.
As I mentioned earlier, I finally dropped the car off to have the two dings that couldn't be PDR'd on the driver side door fixed as well as fixing the spot I wetsanded through on the fender last year. I repaired the spot on the fender using touch up paint, and I must say that I did a pretty dang good job, but it wasn't perfect and it wasn't much more money to have the fender sprayed as well as the door so I went for it.
Turns out I did a bad job vetting the shop though, they had great reviews on Google but I forgot that most people aren't car guys, and that car guys have very different standards for a good paint job. I dropped the car off on a Monday. Two weeks later I get a call saying it's done, so I went to get it and immediately saw that the texture on the clear coat was way off (more orange peel than a new Escalade -- nothing like the factory wetsanded finish) and you could still see where the ding was, they didn't even get the sheet metal and filler right. So I point this out, the owner says sure we'll redo it. Two weeks later I get a call that it's done, this time the texture was spot on, they actually wetsanded it this time so it was great in that regard, but when buffing they used a rotary buffer with too heavy pad/compound so it has buffer trails and holograms all over it but I can fix that easily so I'm not too worried. Looking closer though, i can still see the dent. The owner tells me that they couldn't get it perfect, but since the initial quote was for a perfect job that they could either try again or I could pay a significantly discounted price and deal with it not being 100% perfect. Rather than let them add yet another coat of paint to my door I opted to pay the discounted price and get out, they fucked up twice so I had no reason to believe that they'd get it right the 3rd time either, it looks pretty damn near perfect though and I don't think anyone else would ever notice, so I'll just live with until I decide to have a full respray done, if that ever happens. What bothers me about this though is I straight up asked the guy if he could make it 100% perfect and he told me he could. I even offered to buy a replacement door shell so they wouldn't have to do body work on it and he said that wasn't necessary, but hey live and learn I guess.
Anyways, in more positive news, I finally finished my hand brake handle. To no ones surprise the bargain bin harbor freight glass beads I had laying around didn't create a good finish at all, I started looking into other bead blasting media for titanium. The best results/closest match to the factory Zanardi shift **** I was able to find was a very fine steel shot blasting media, and while not 100% it's close enough that it's not noticeable and this way I don't have to blast the expensive shift ****. I'm really happy with the way this piece turned out, it will also fit on 90s Civics and Integras so if anyone is interested in replicating it I can share the measurements, having one made up in aluminum would be pretty cheap at most machine shops.
I've also had some other projects I've been working on (as well as the other car, I need to post another update in my Integra thread) so I haven't had as much time to work on this car as I'd like, but I should be getting my interior trim pieces refinished soon so I can finally reassemble the interior after having it apart for the past 3-4 months.
03-21-2018, 01:20 PM
#98
Honda-Tech Member
The shift ****/handbrake combo looks bloody fantastic Sir. Nice bit of trial and error and work went into that and it shows. Kudos.
Noticed that when I wasn't logged in "****" comes out as ****. The software mist think it's a swear word only fit for the eyes of the depraved members. :D
Noticed that when I wasn't logged in "****" comes out as ****. The software mist think it's a swear word only fit for the eyes of the depraved members. :D
05-15-2018, 11:09 PM
#99
Thanks for the kind words guys, I am REALLY happy with how the handbrake/shift **** combo turned out.
@Pruds_lude I took the center console piece along with several other trim pieces off the car at the end of last year to strip off the peeling factory finish and have them repainted a similar color. I looked through paint chip books with the guys at the shop and found a color that almost perfectly matched the factory finish, the only difference is the new finish is glossy while the factory finish was matte.
But anyways, another update. I'm losing track of time here it doesn't seem like almost 2 months ago, progress has been slow lately.
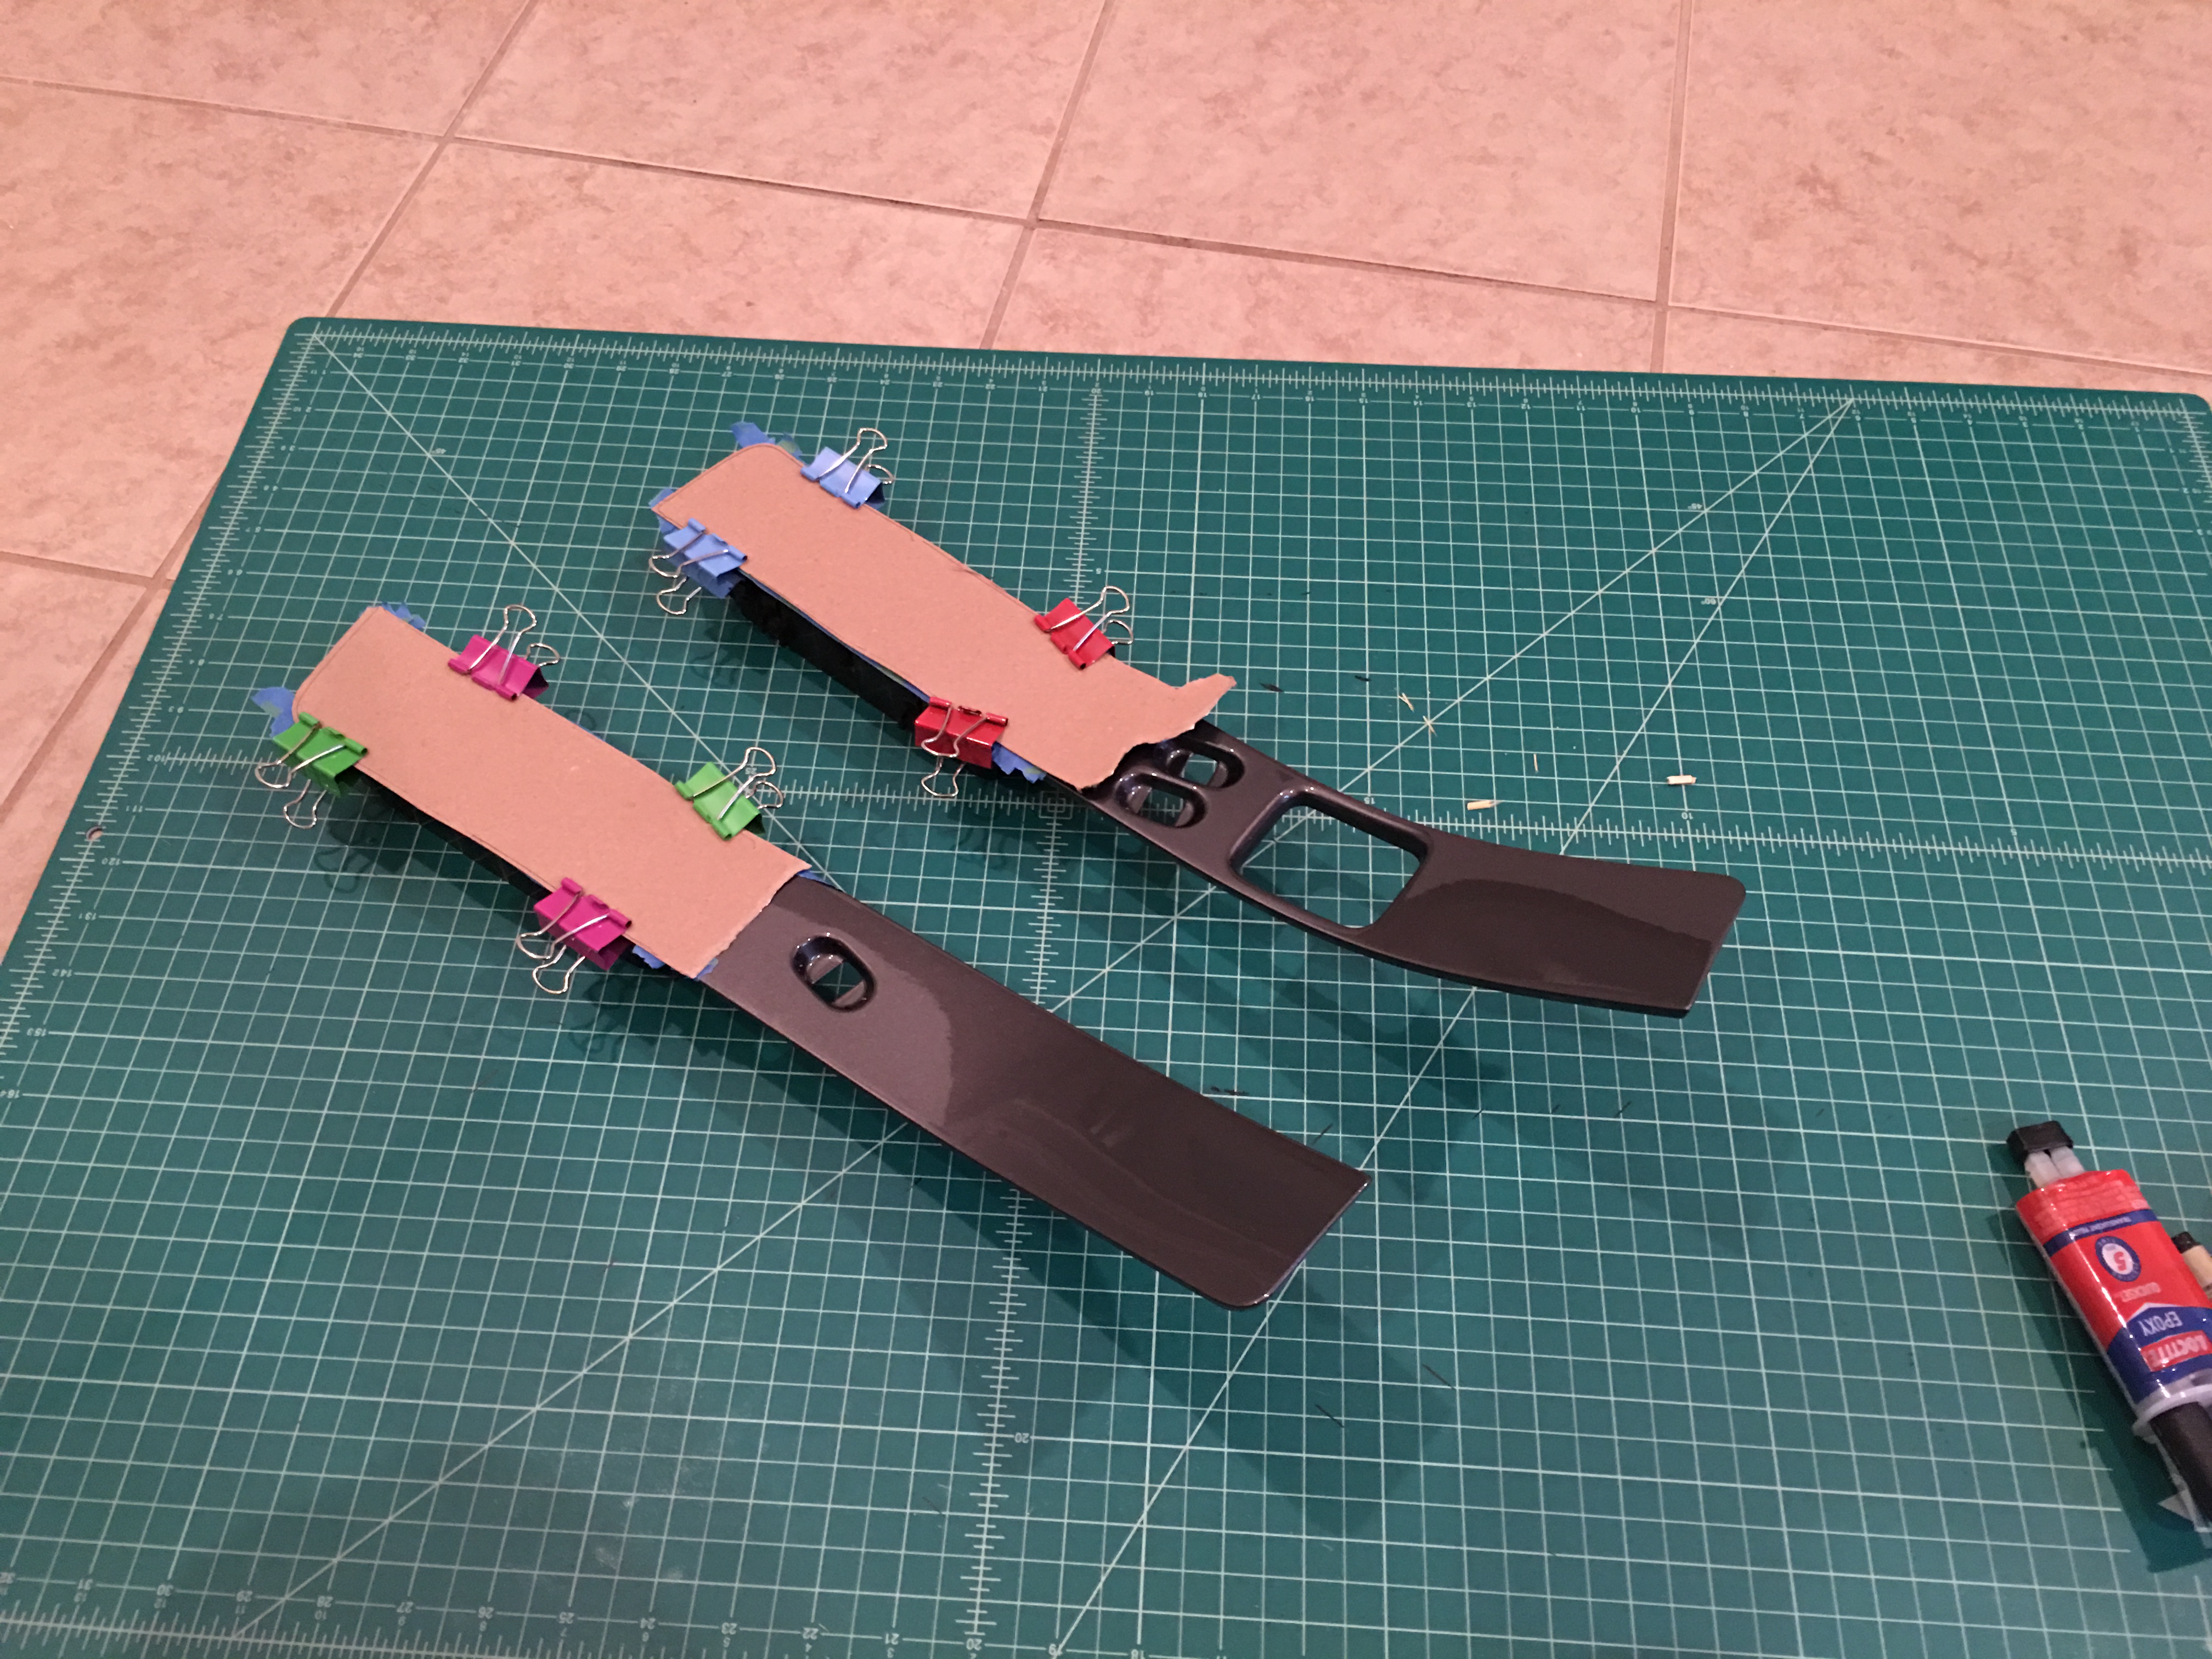
I got the trim piece back from the body shop and am really happy with them.
Here is the air vents being epoxied back onto the trim pieces, I broke the original glue to take them apart to get the best possible results from the refinishing.
I also installed the shift boot and hand brake boot to get an idea how it would look.
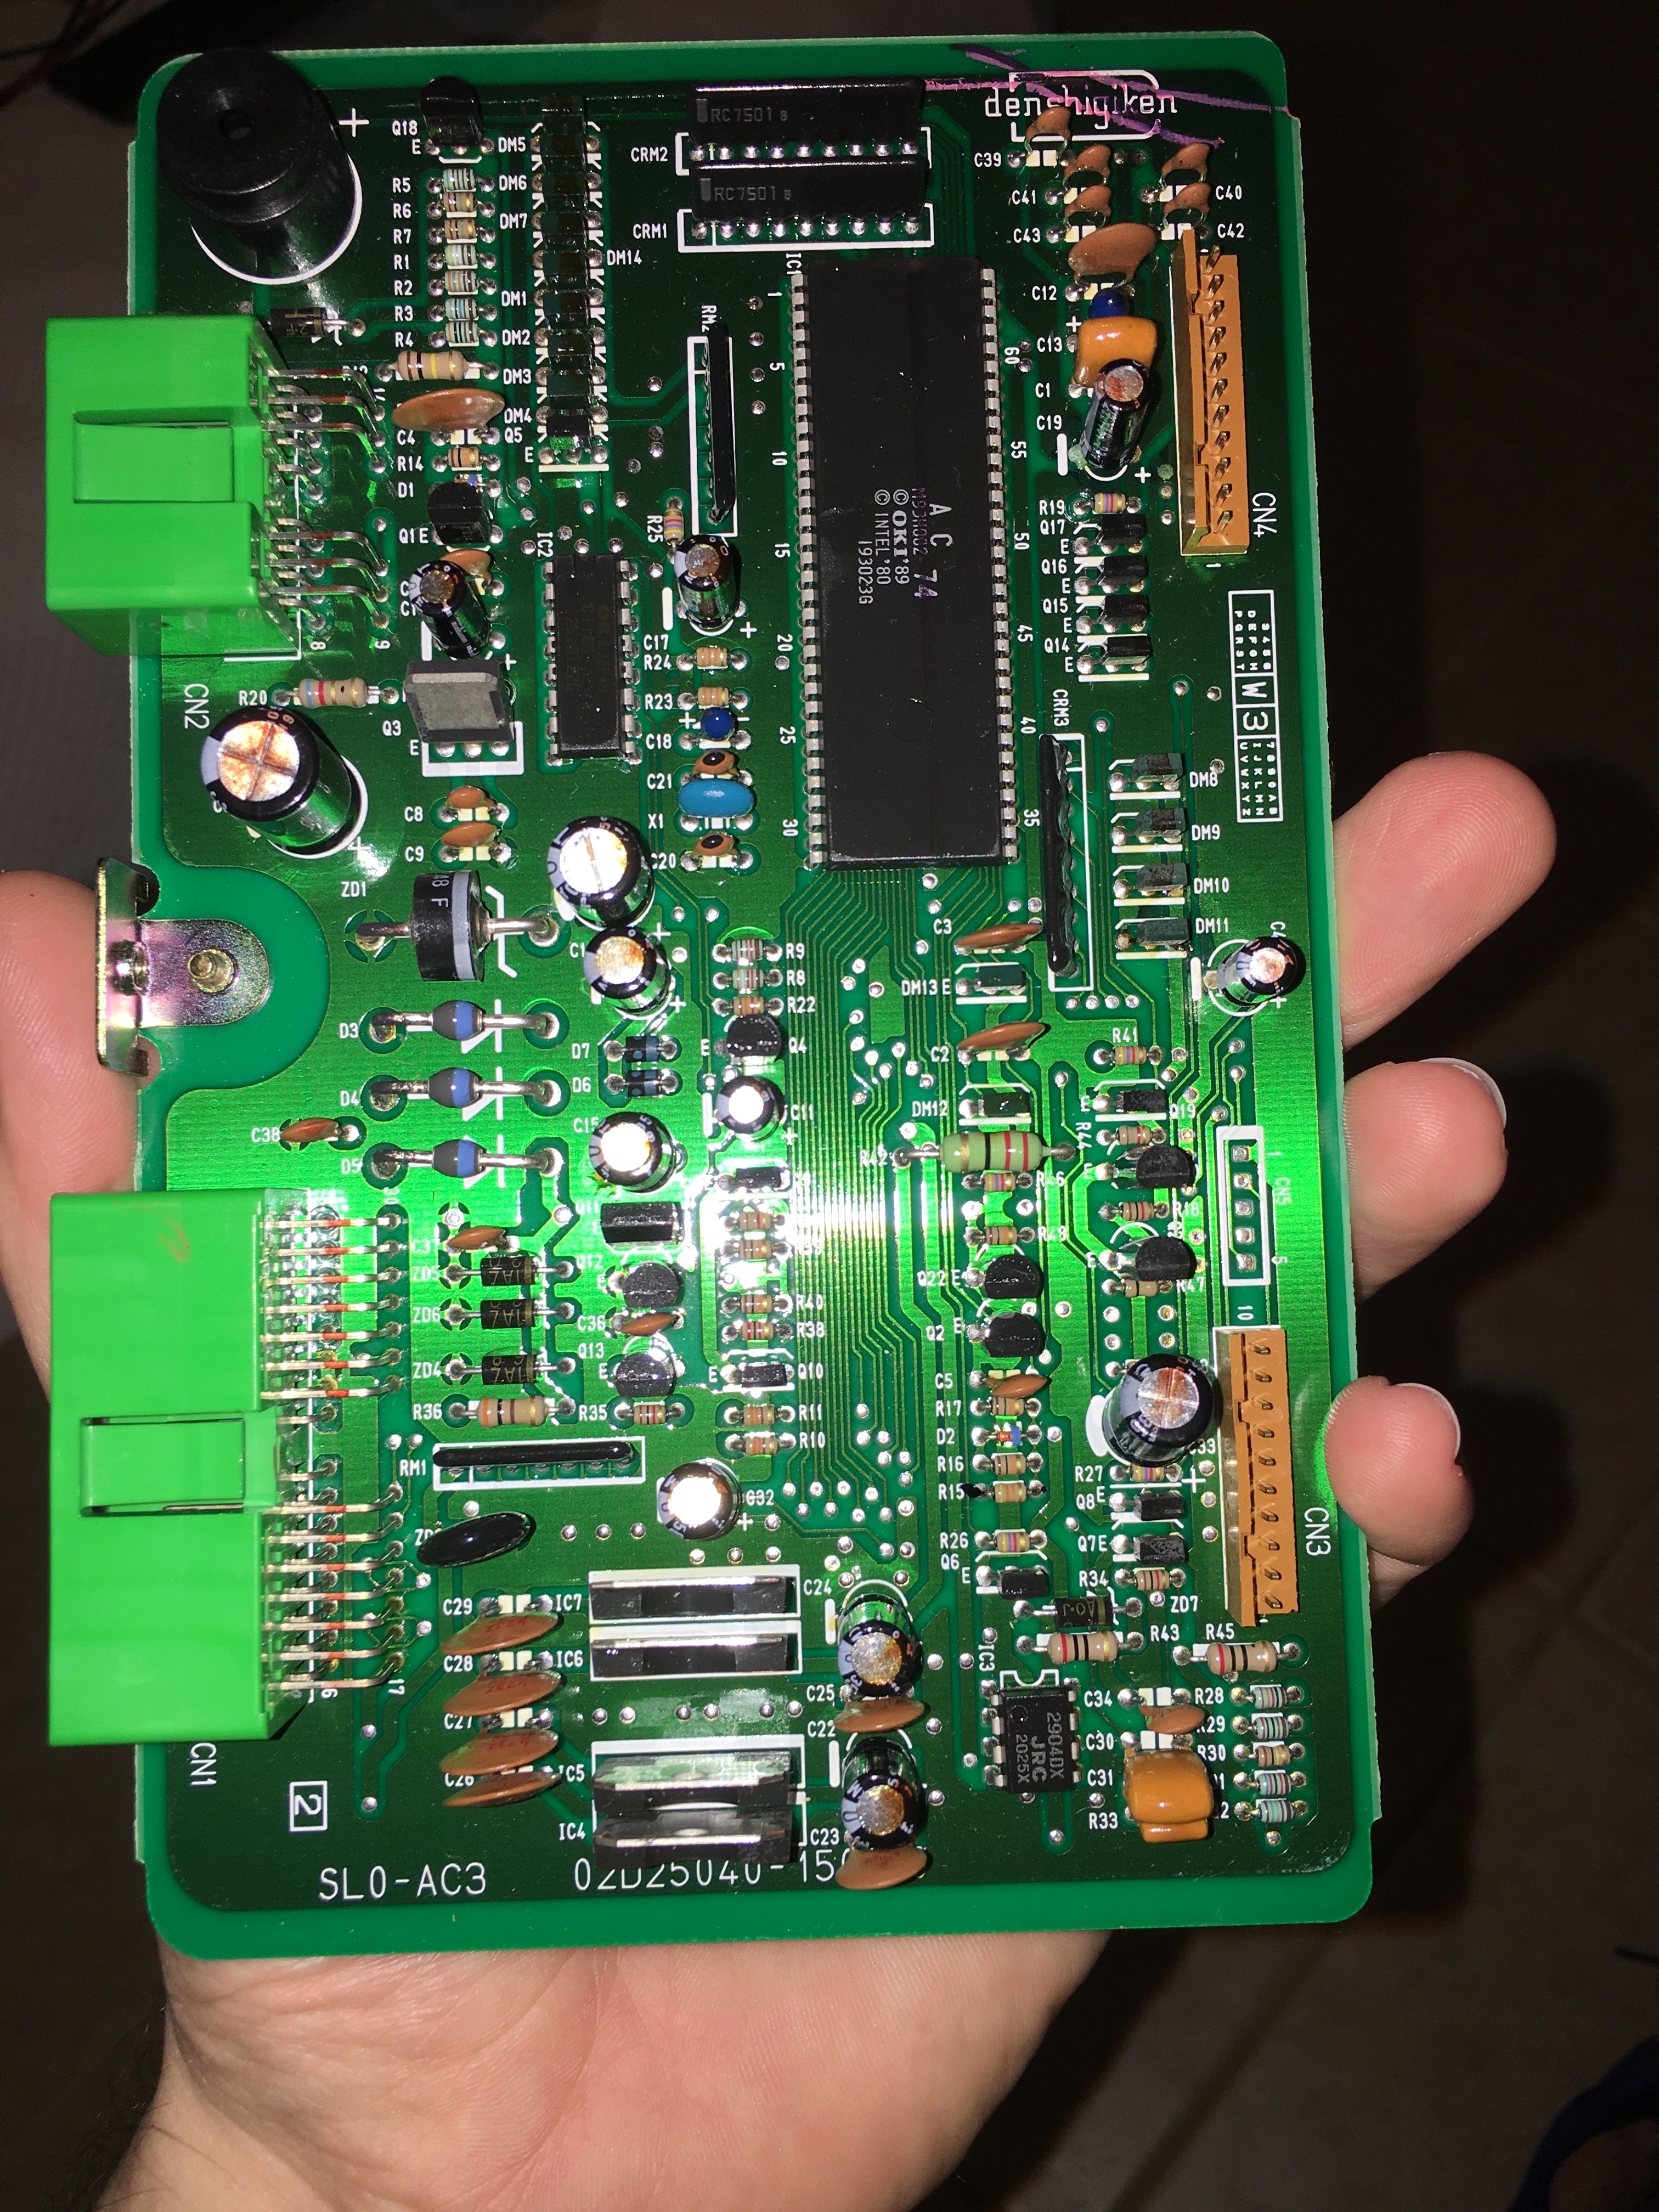
The climate control circuit boards in NSXs are known to fail due to capacitors going bad, so I went ahead and replaced all the capacitors in mine before they can fail and cause more work down the road.
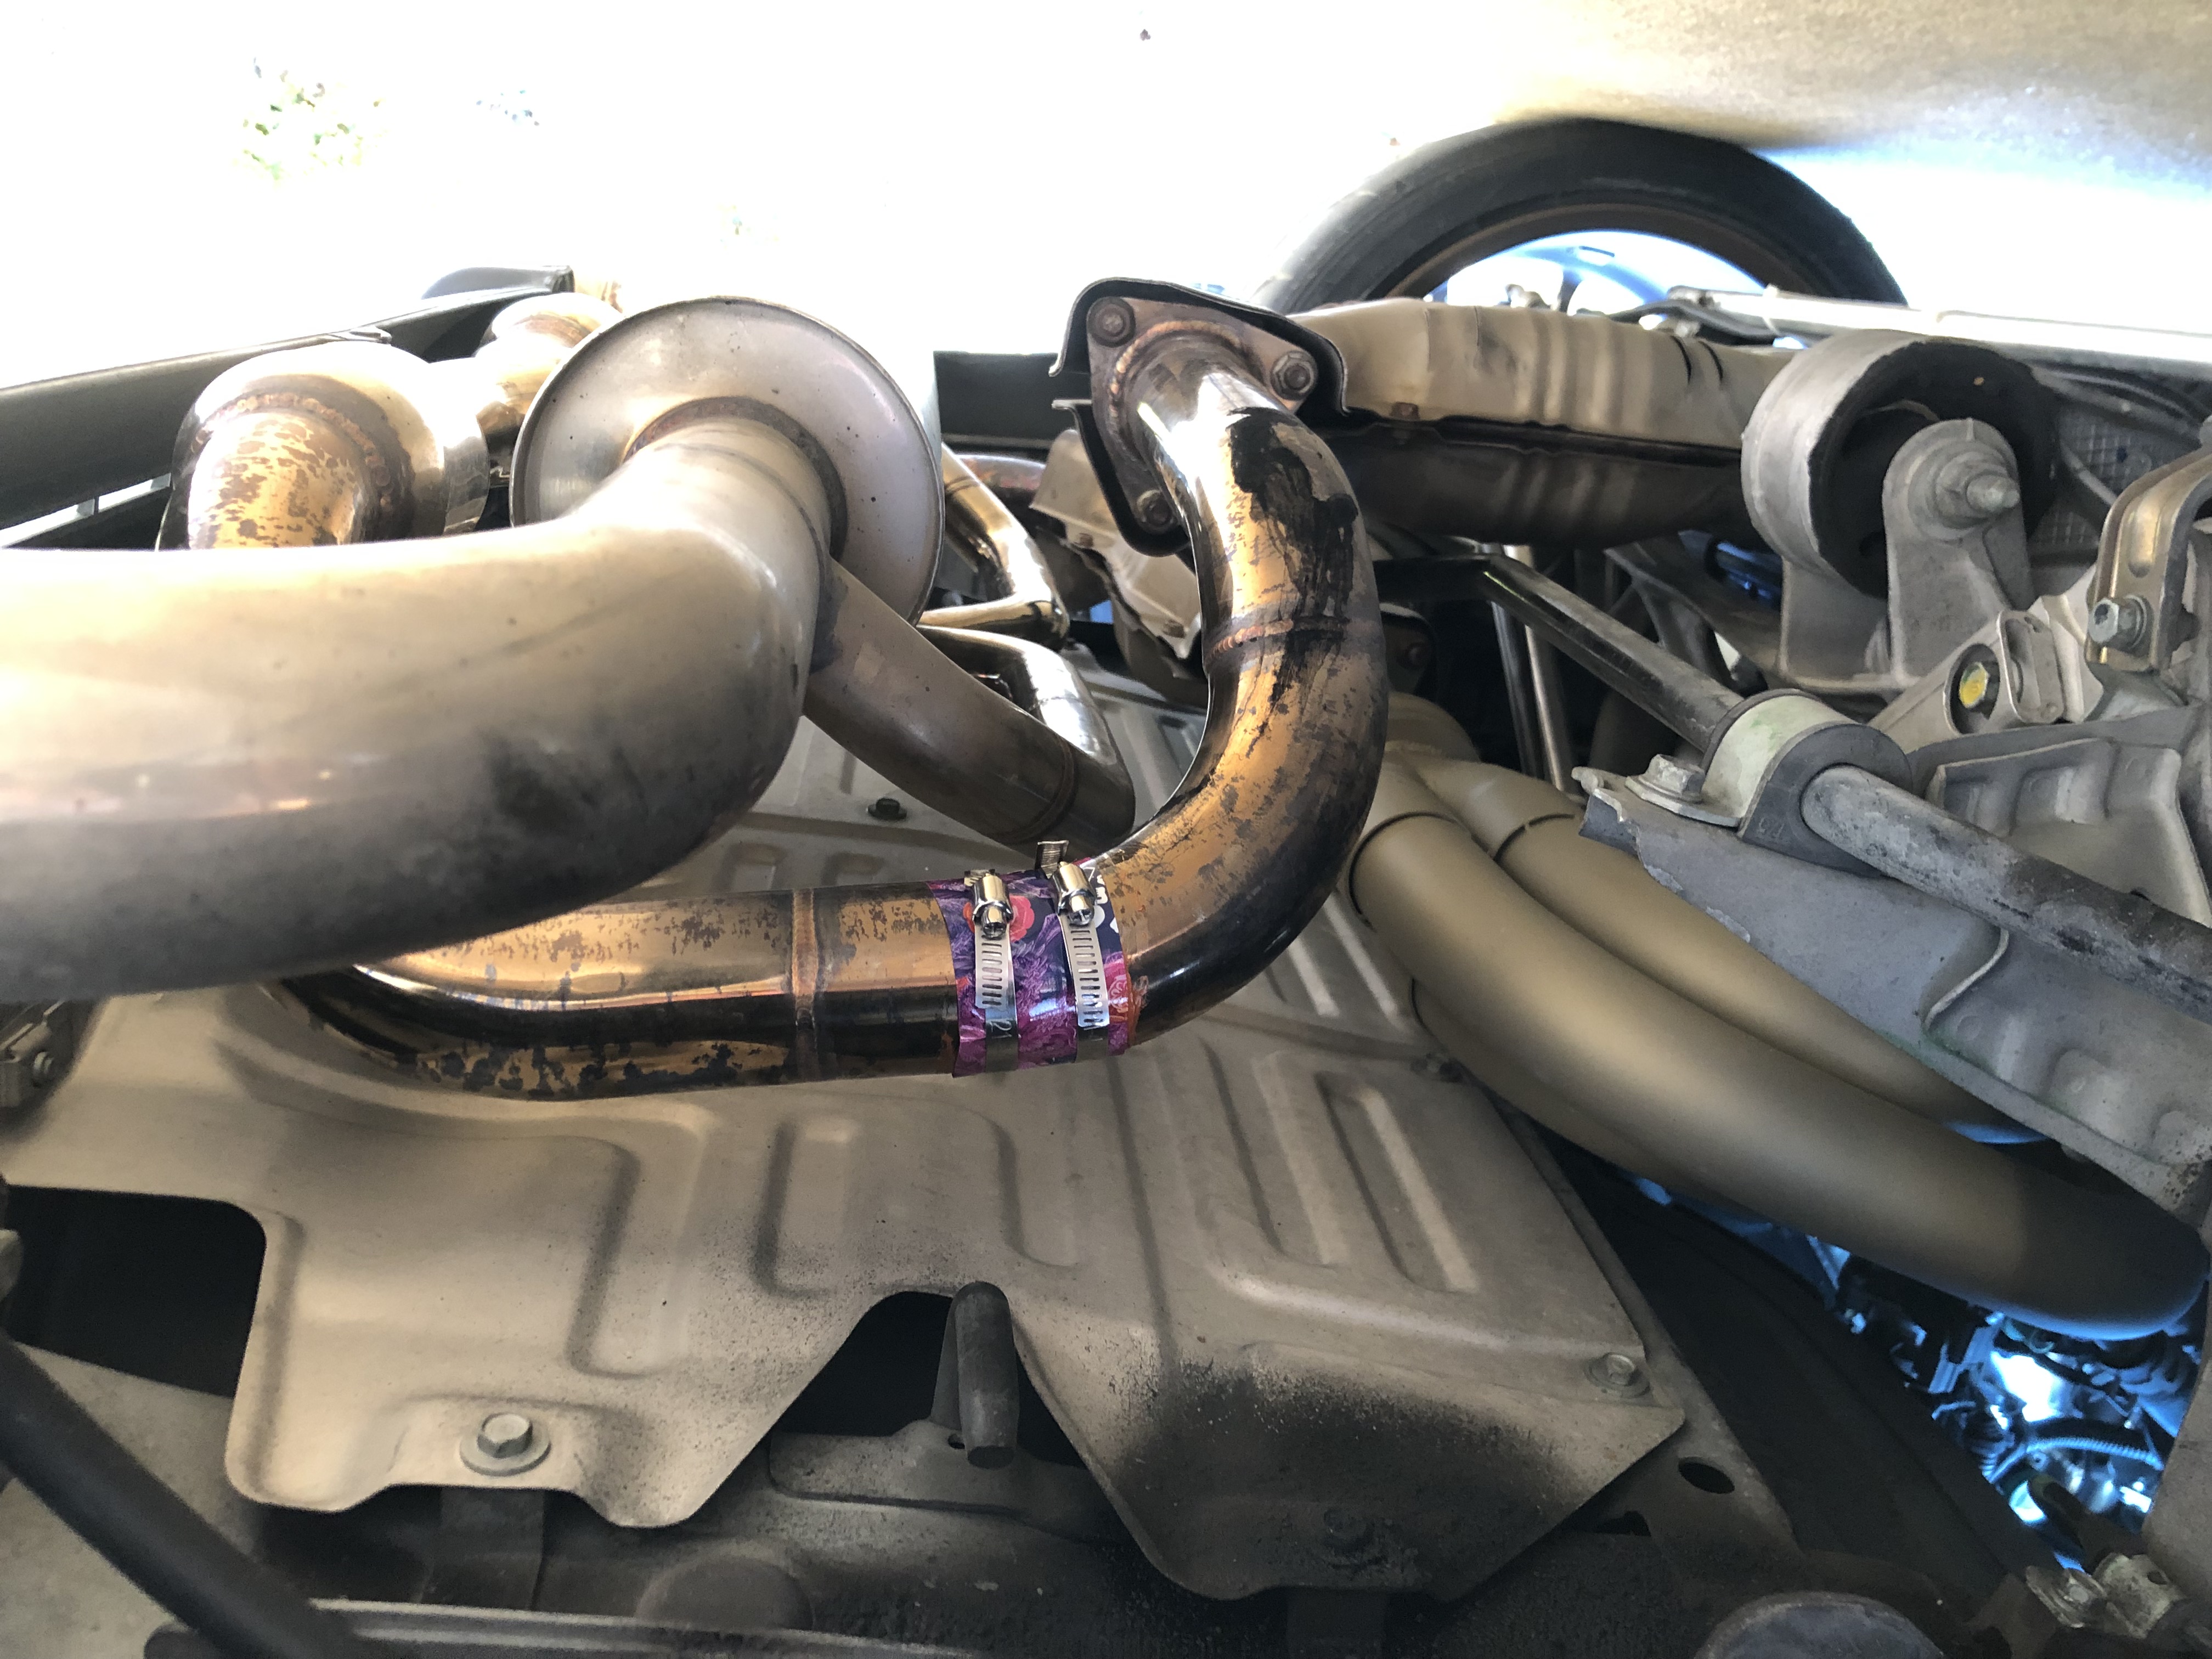
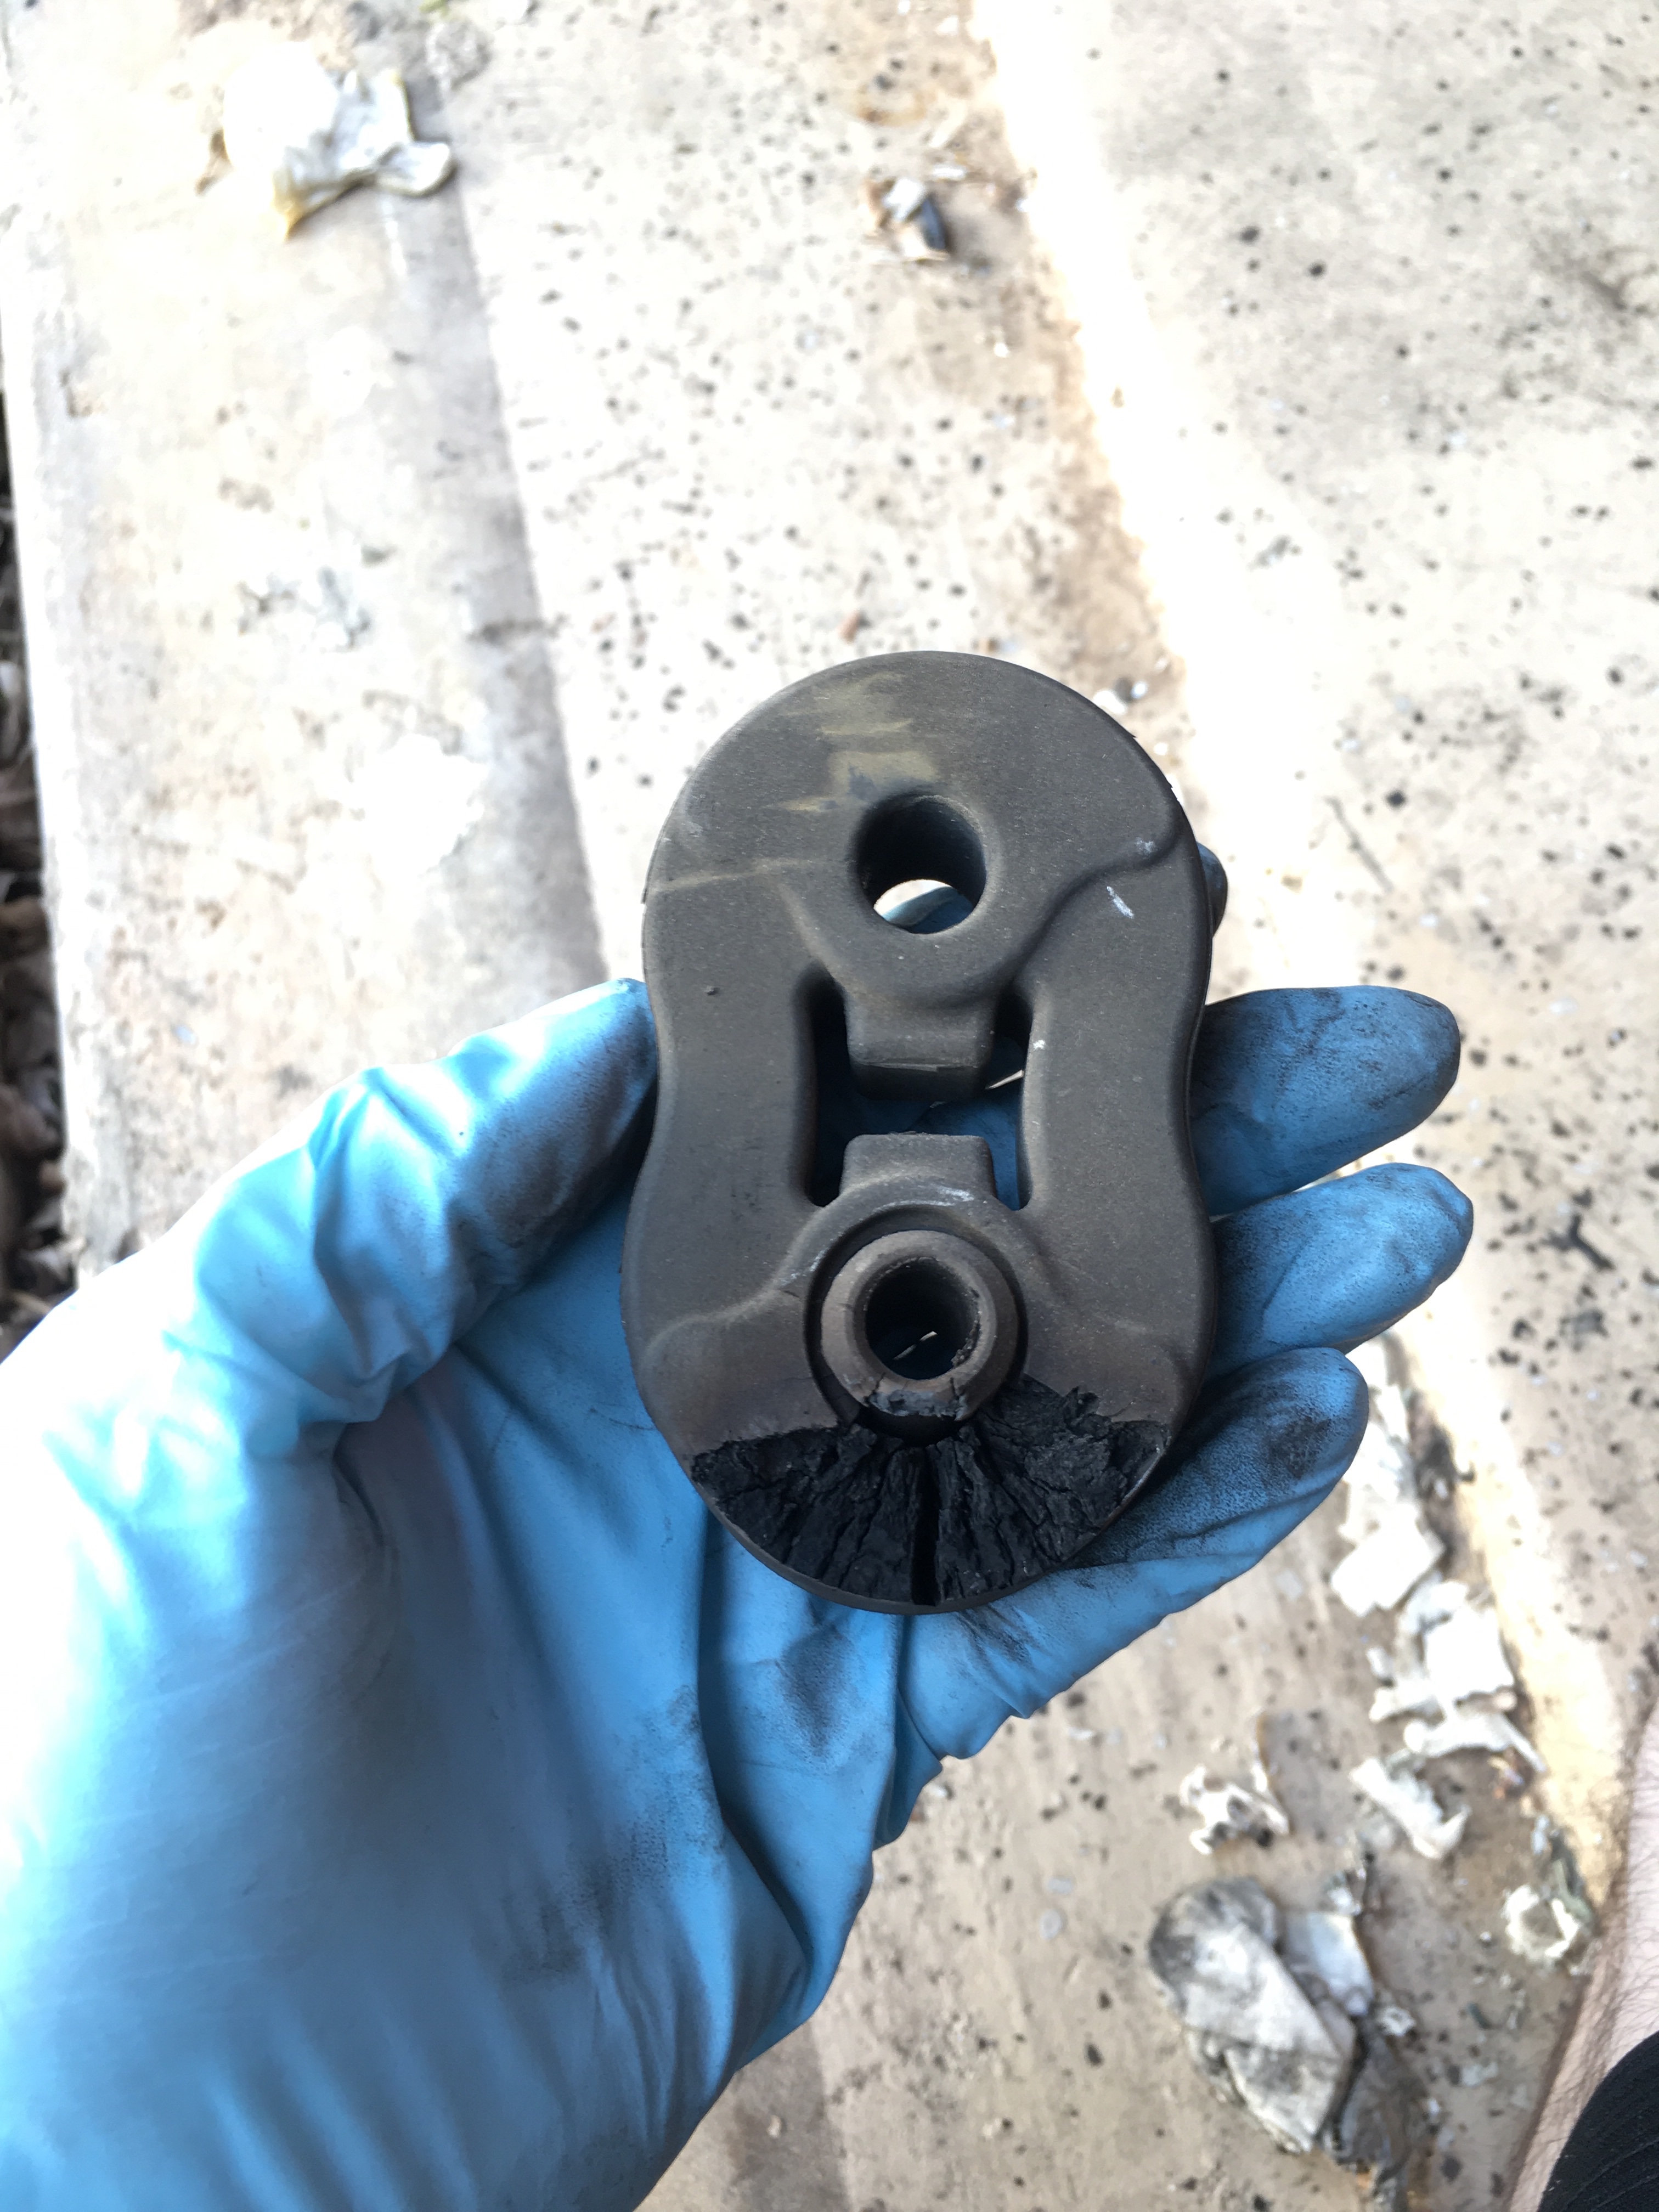
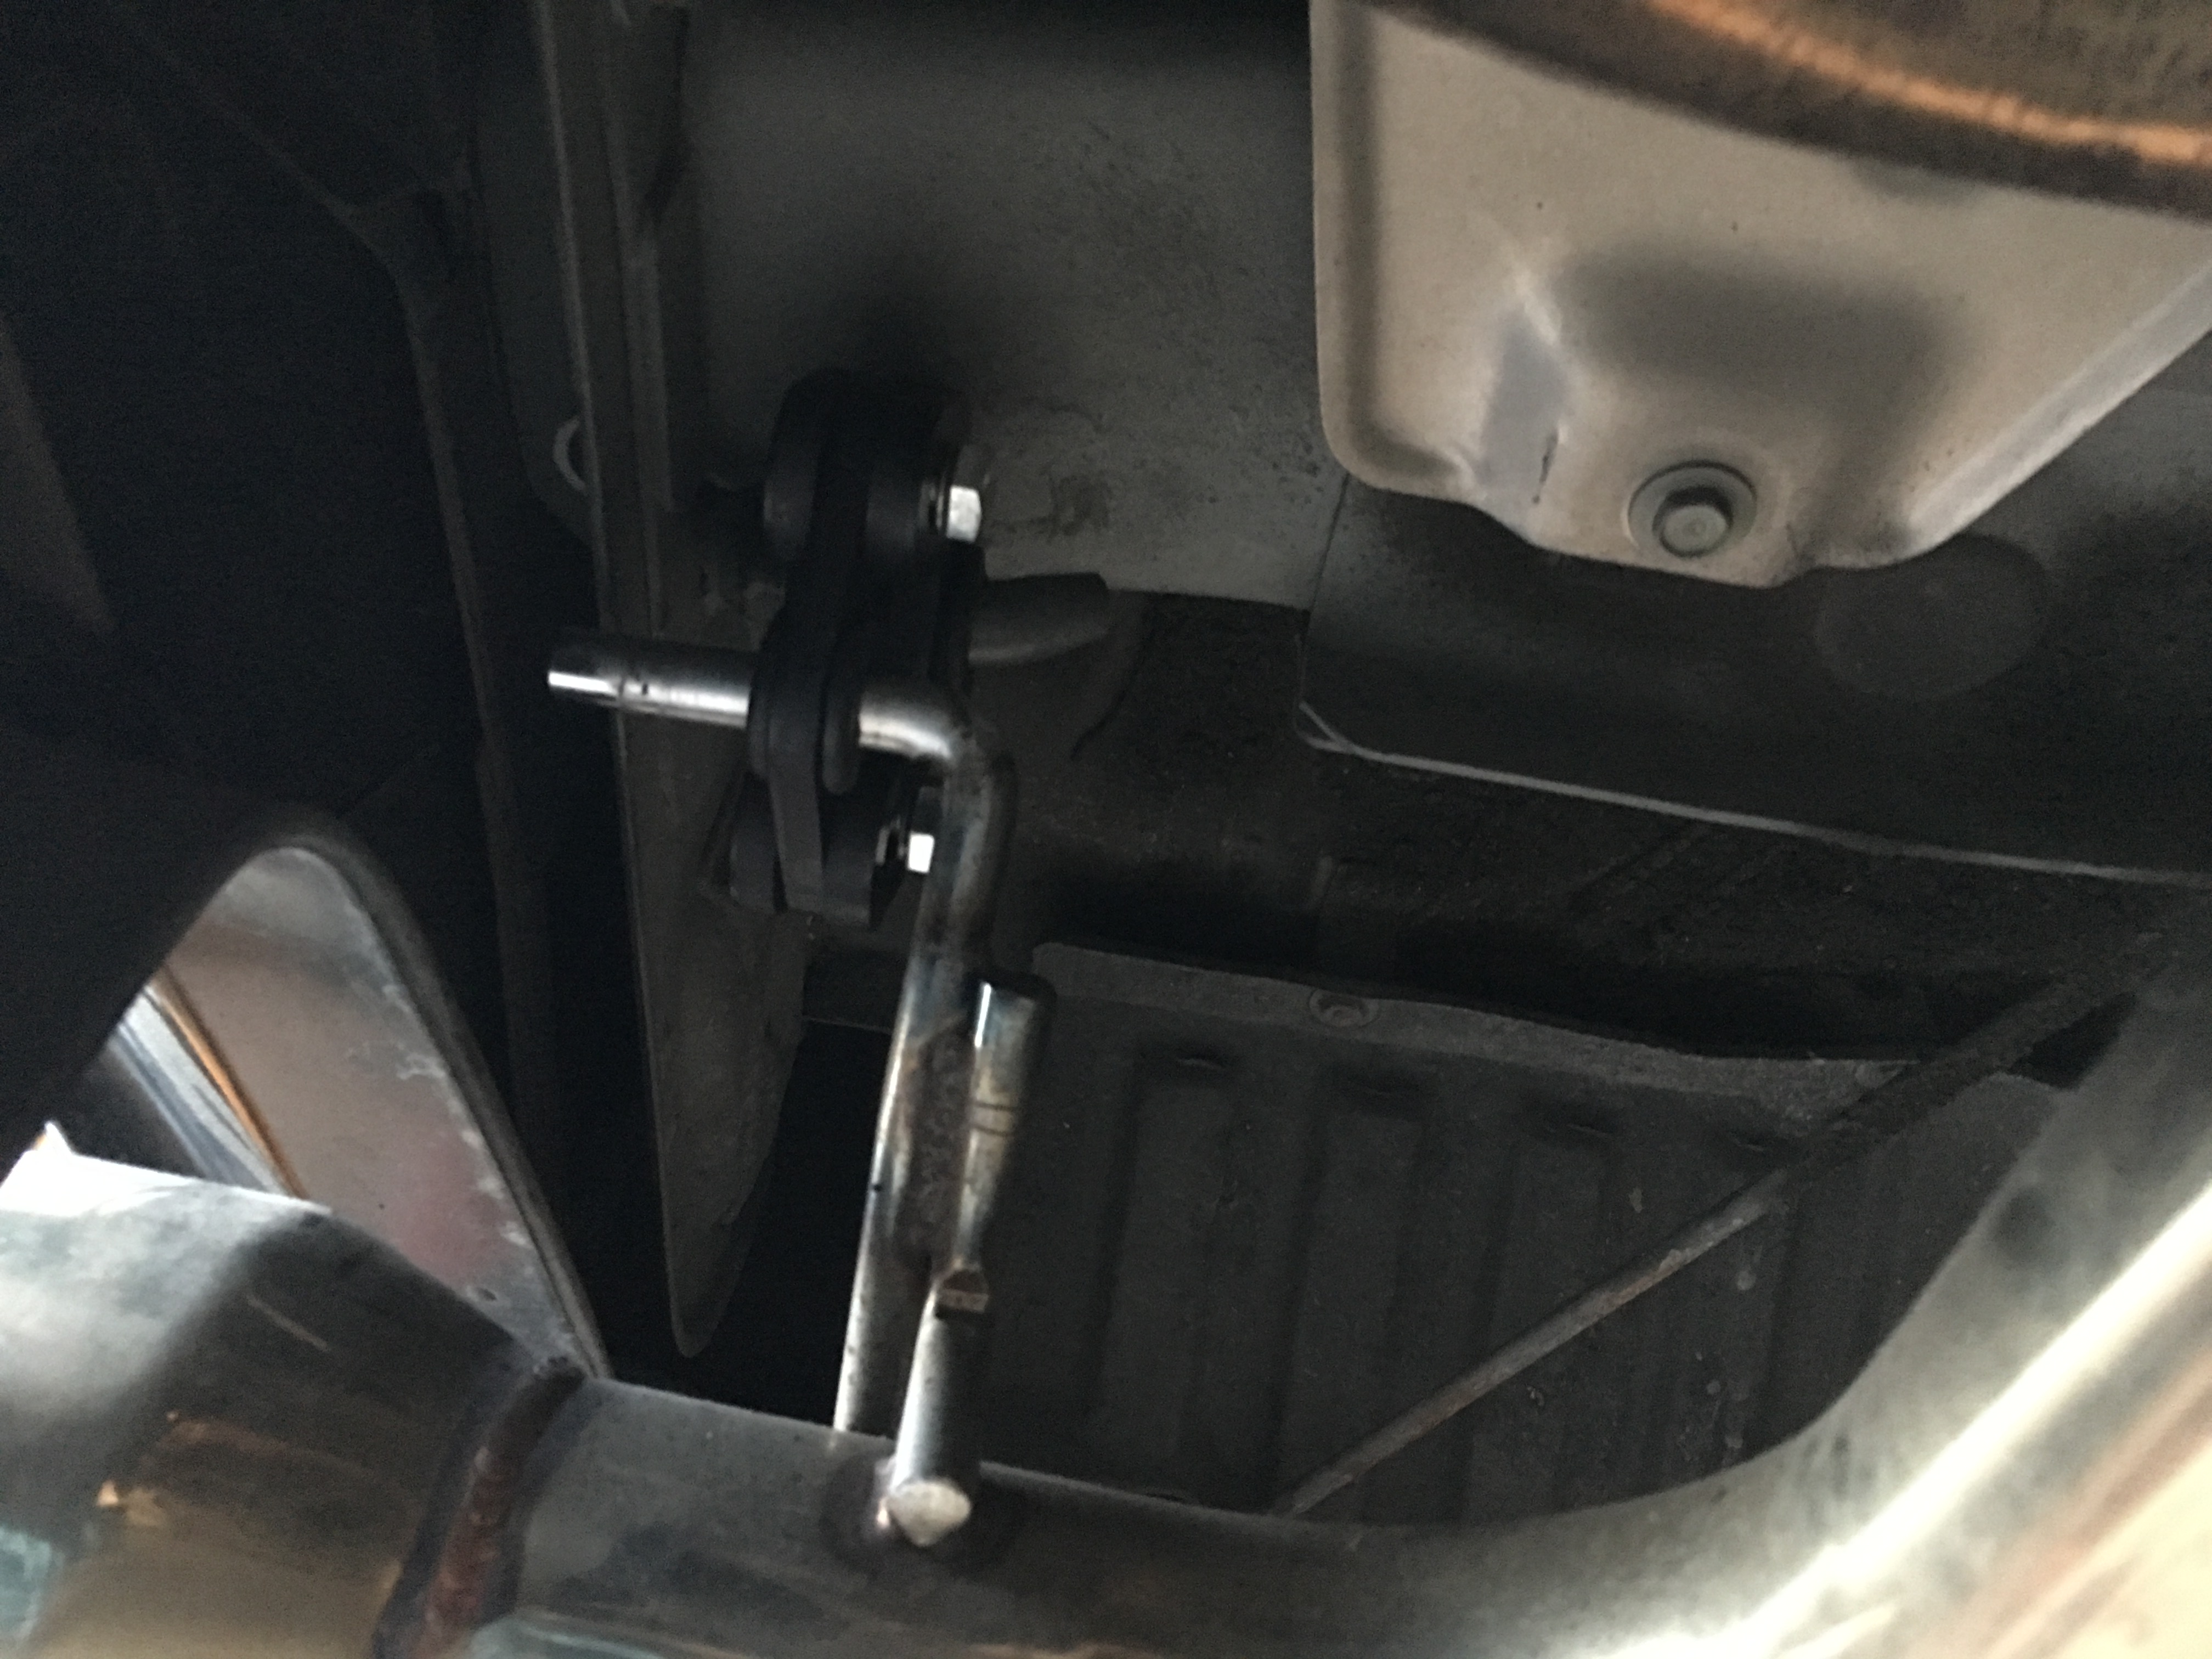
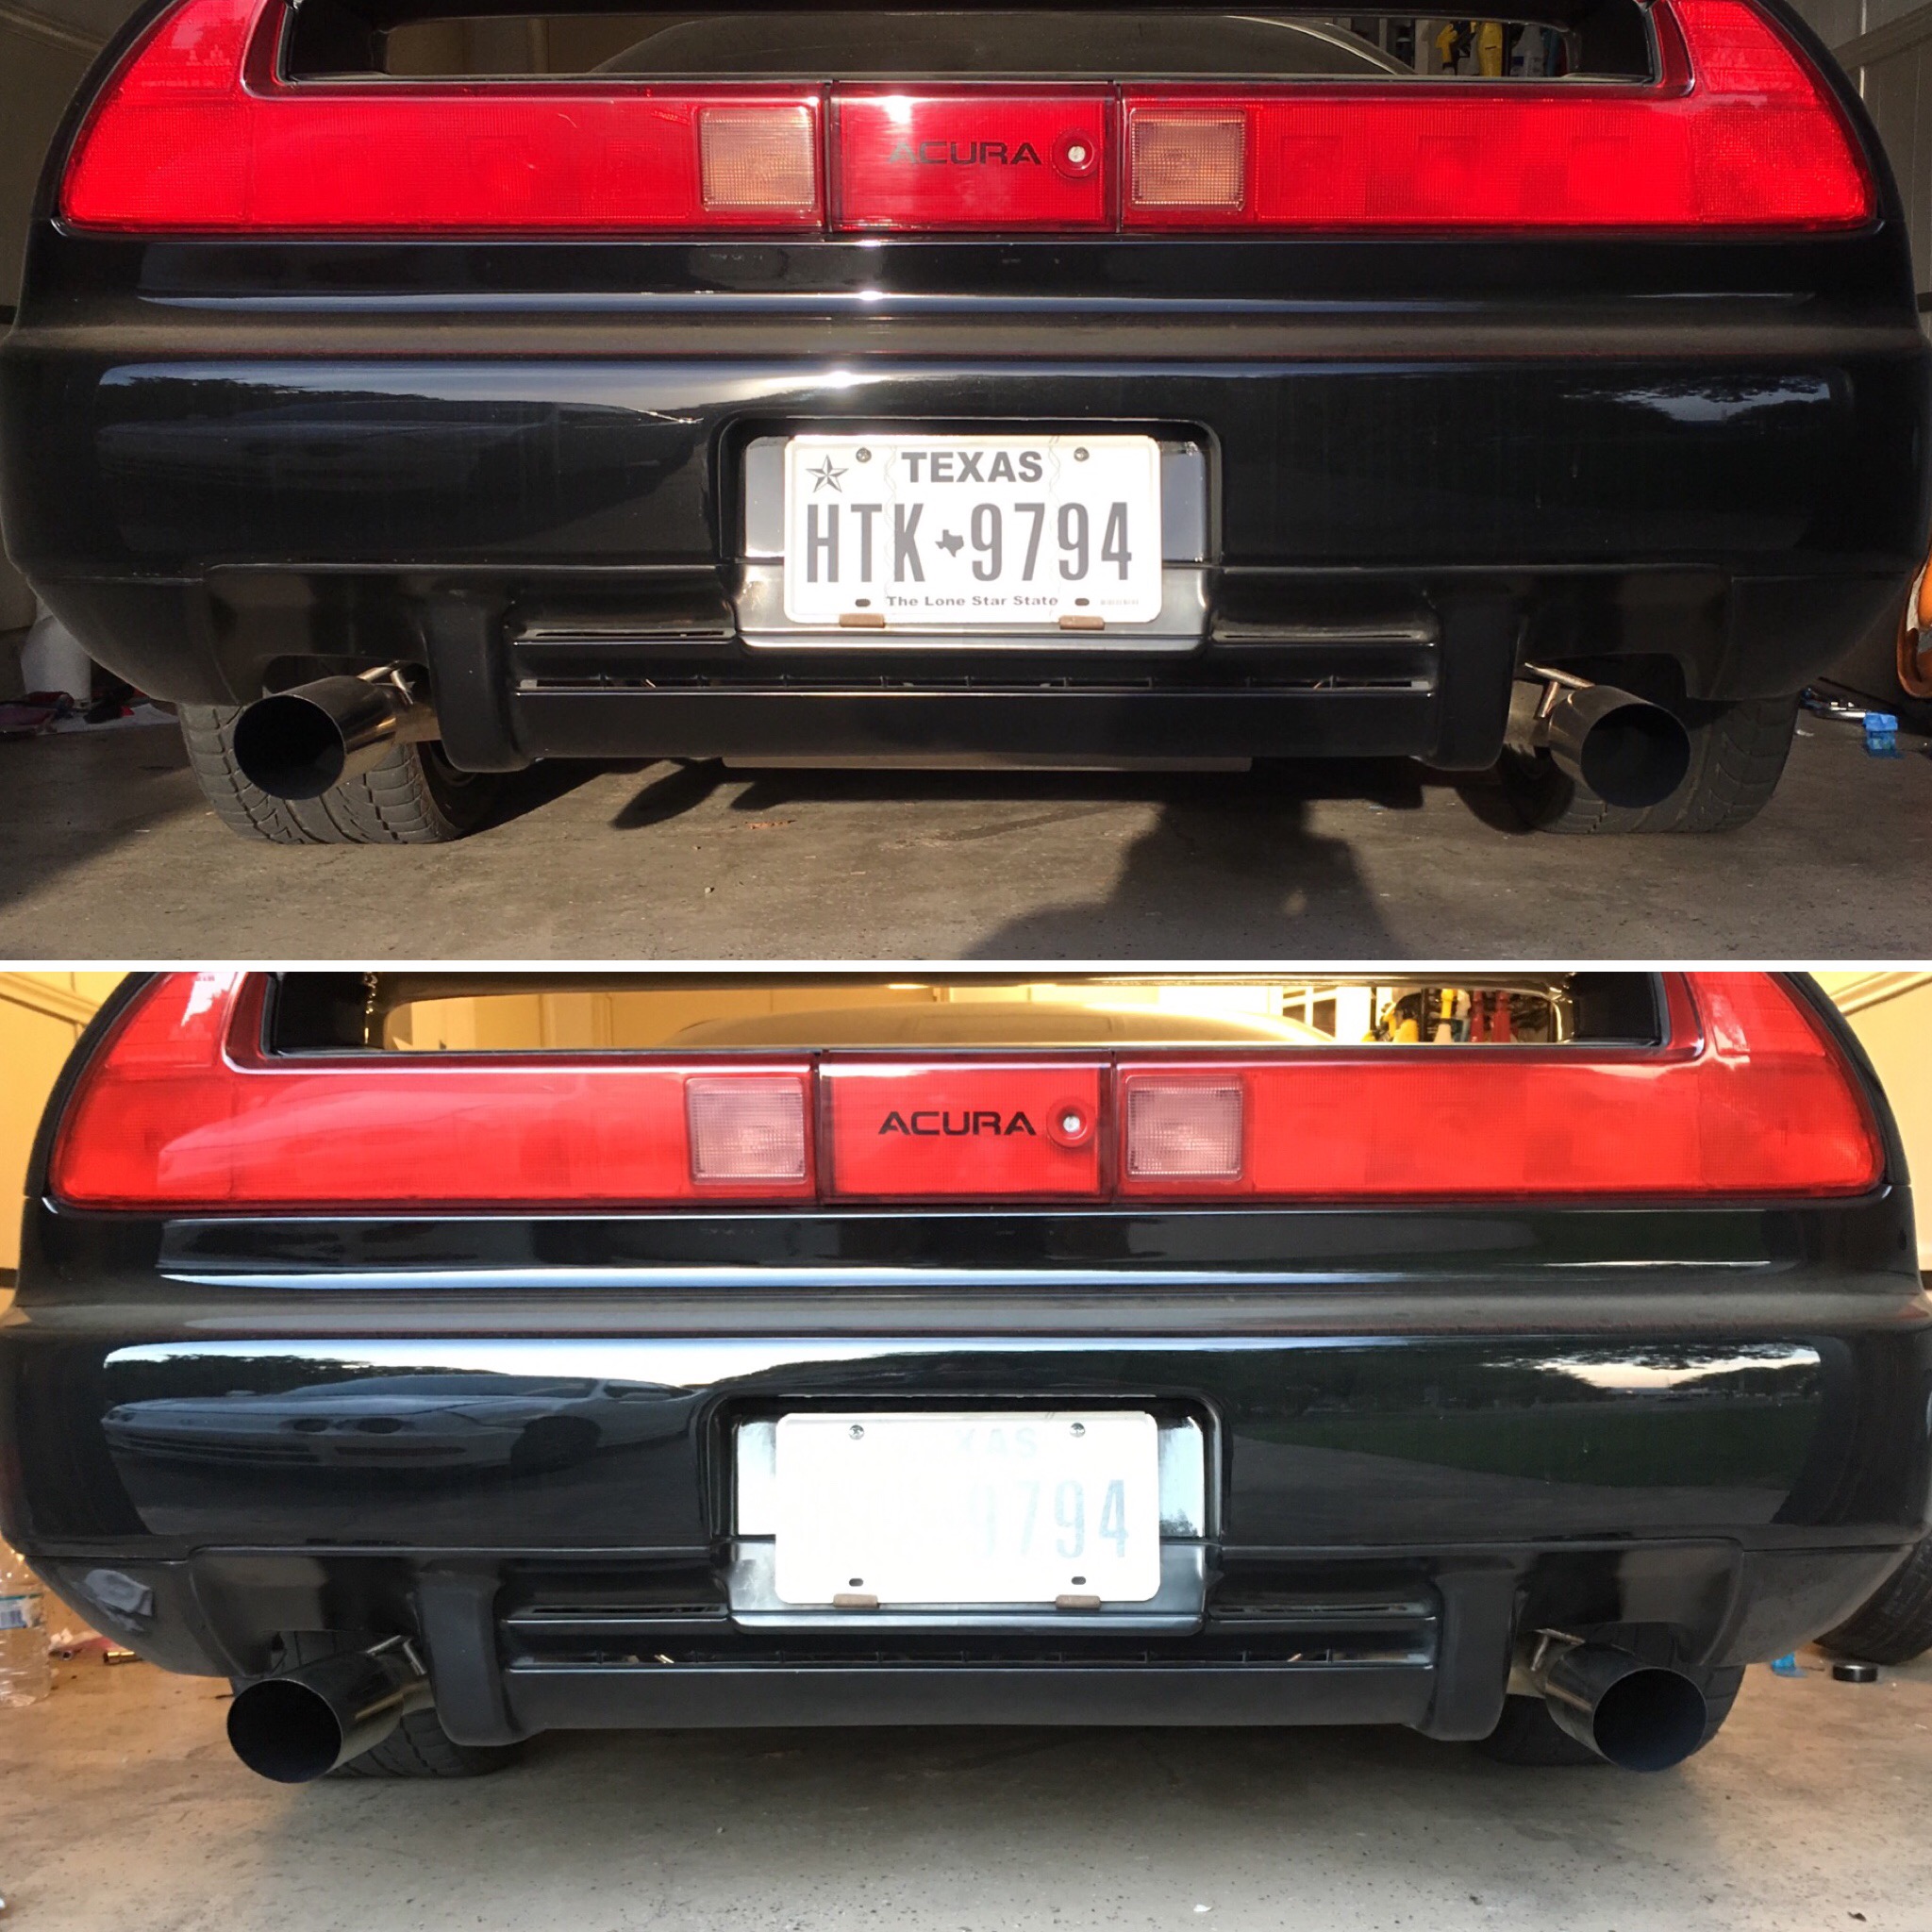
I picked up a set of 4 cedar ridge fabrication adjustable exhaust hangers since one of my hangers was touching the exhaust and burning as well as one side of my exhaust hanging too low. It's a subtle difference but it improves the look.
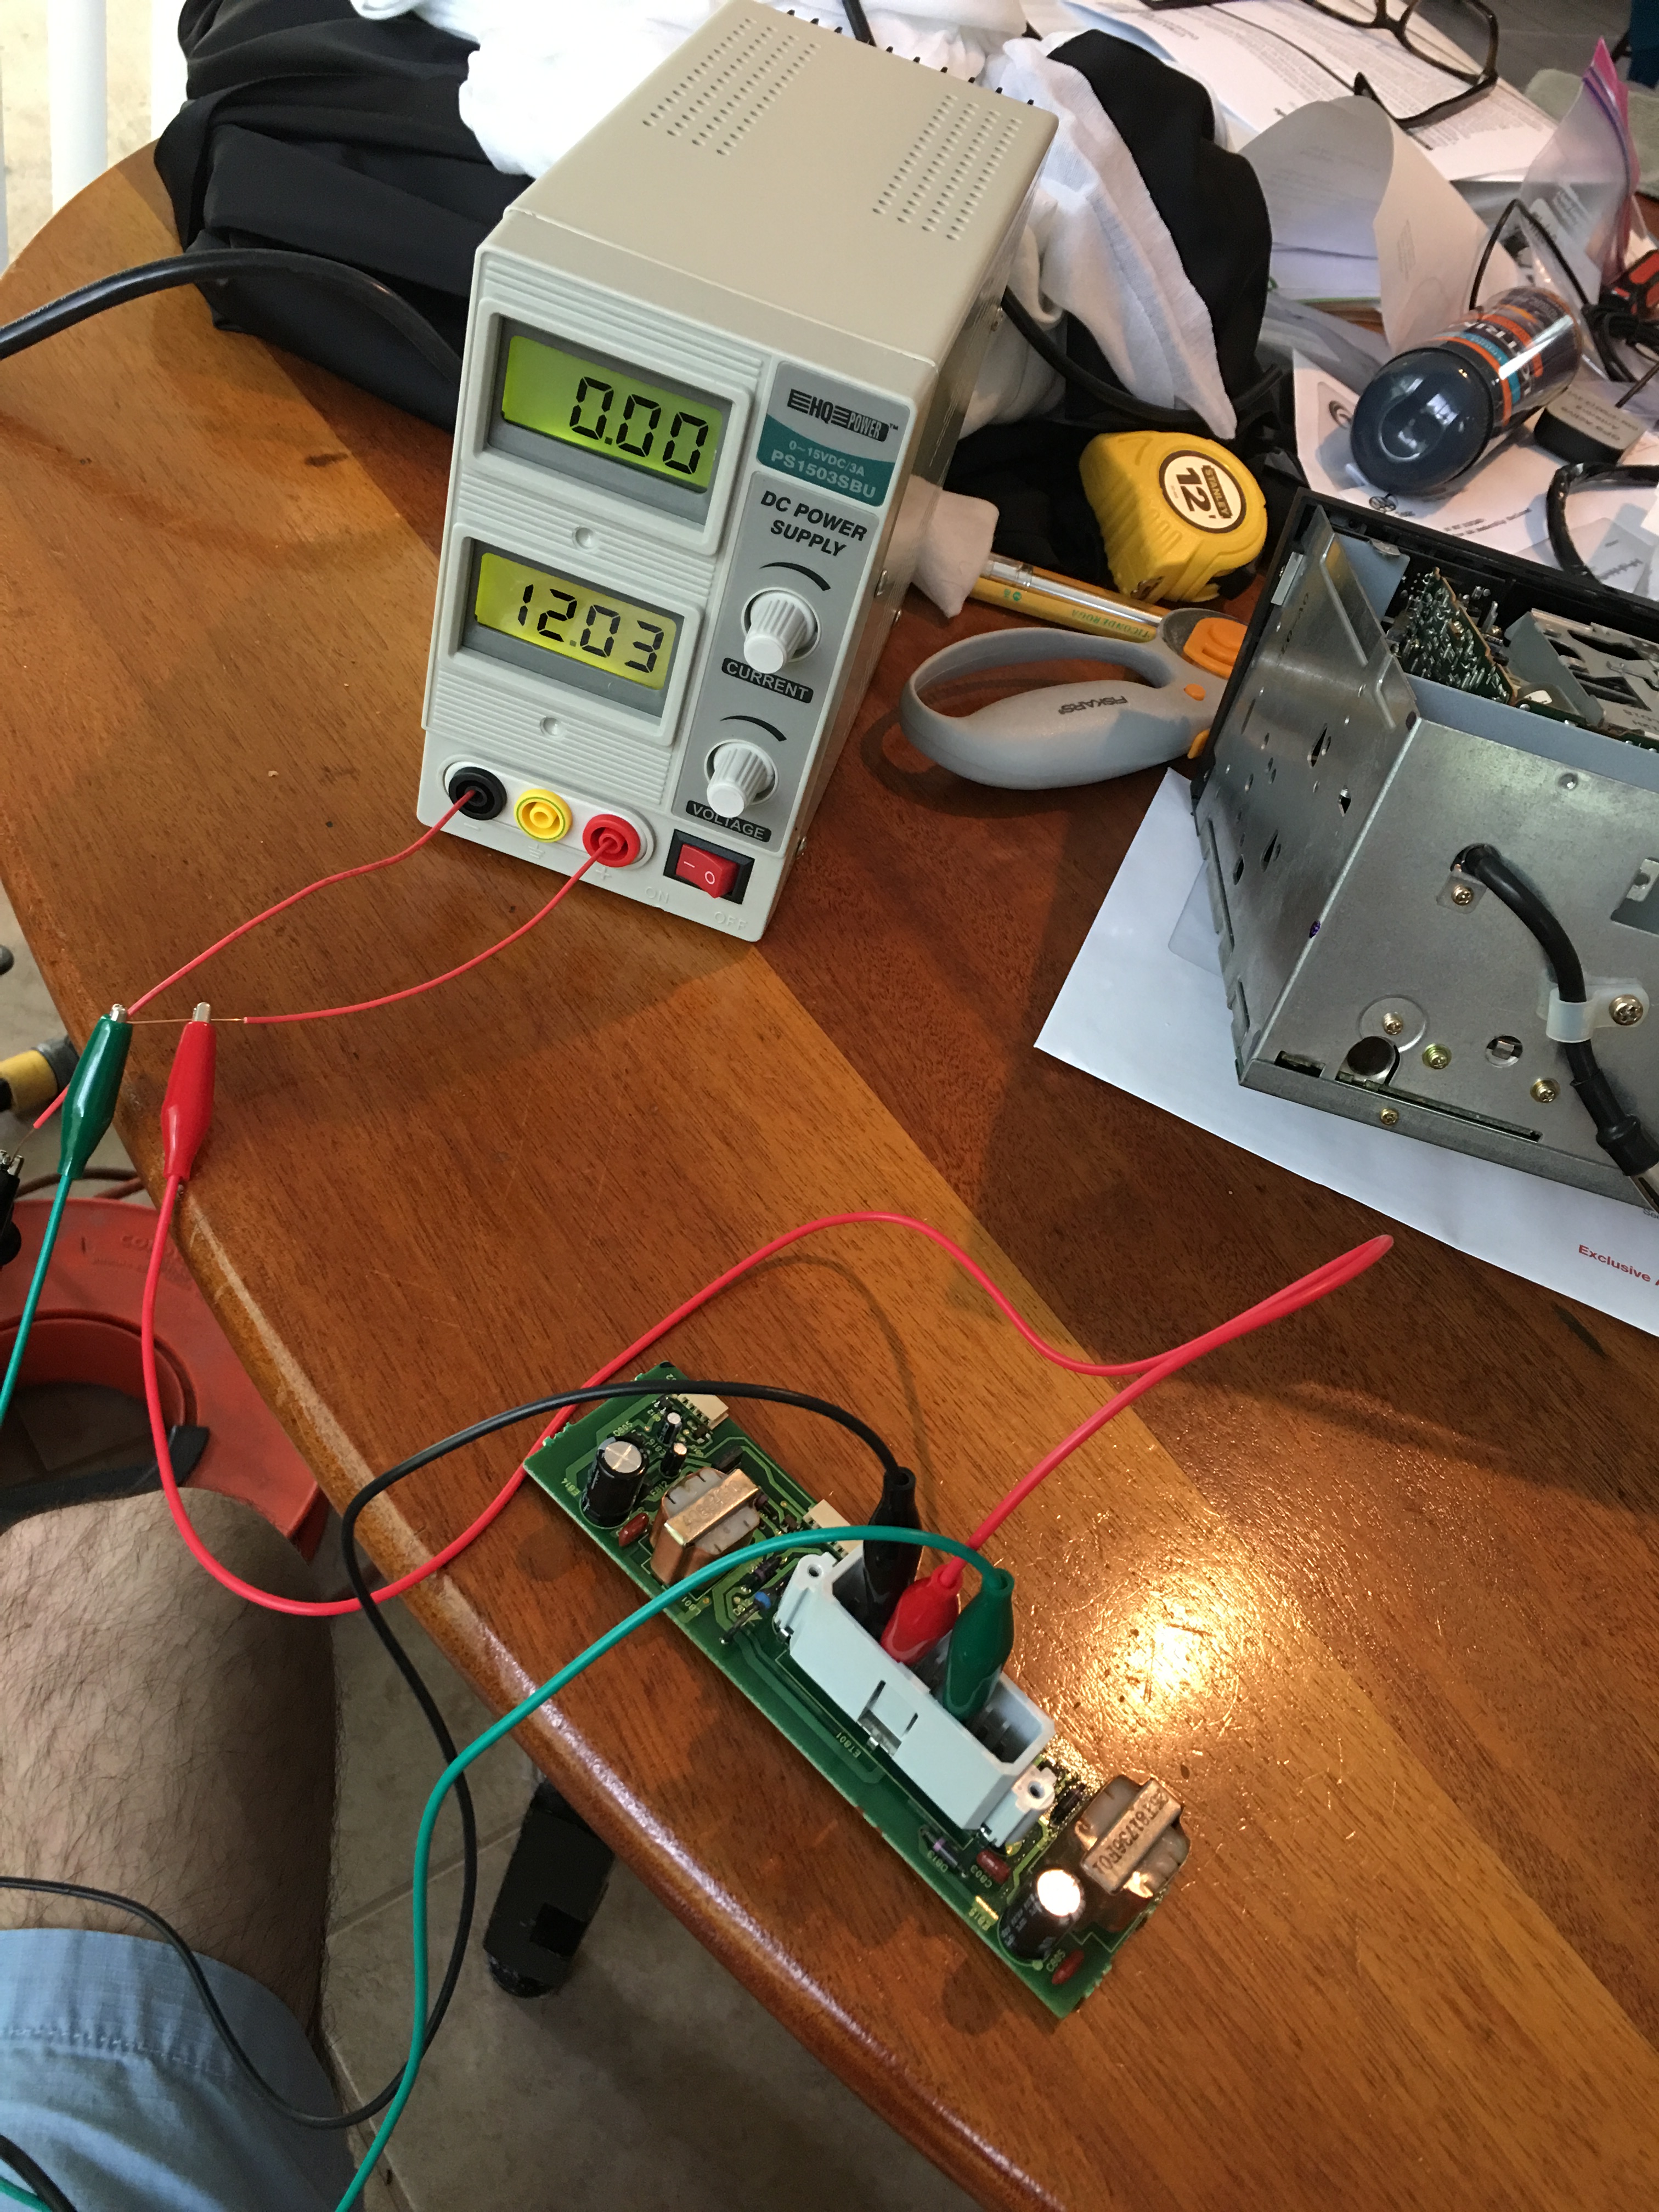
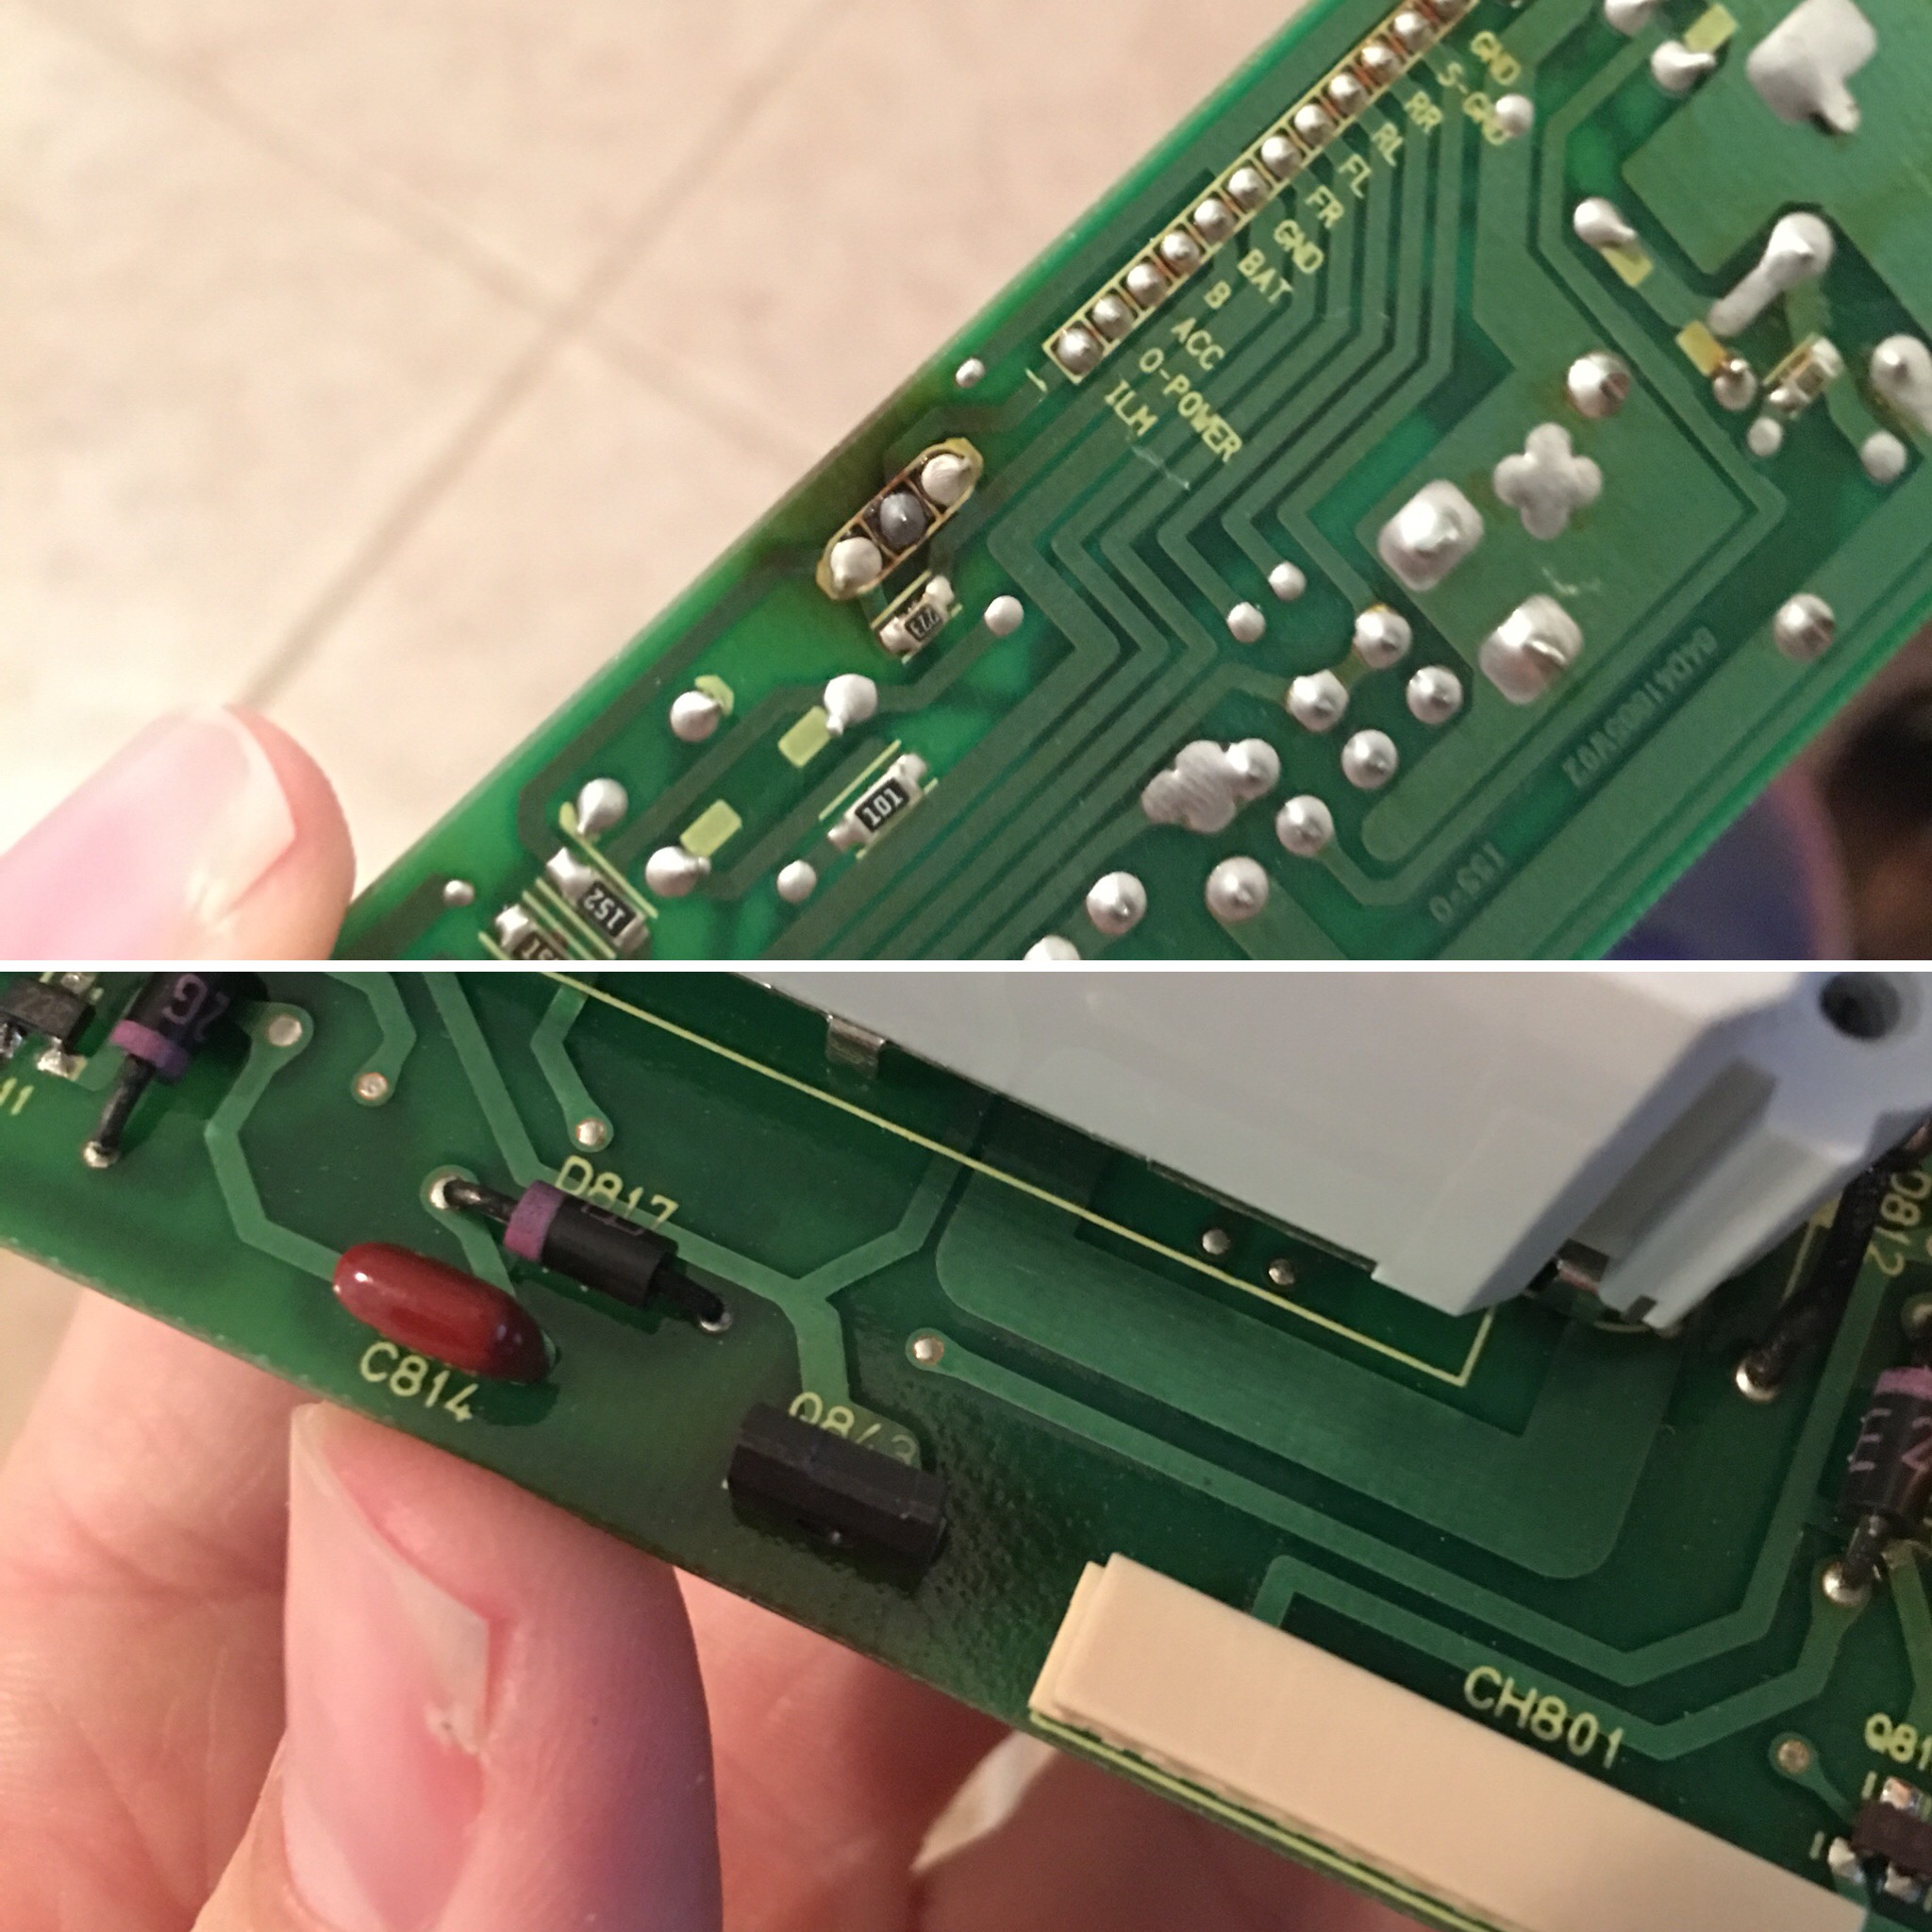
More electronics repair, my radio backlight dimmer stopped working so I set it up on my workbench (dining table) and traced the dimmer circuit through. Then I found some burned looking solder underneath a transistor, did some Googling, and picked out a suitable replacement that has much higher current carrying capacity than the failed original.
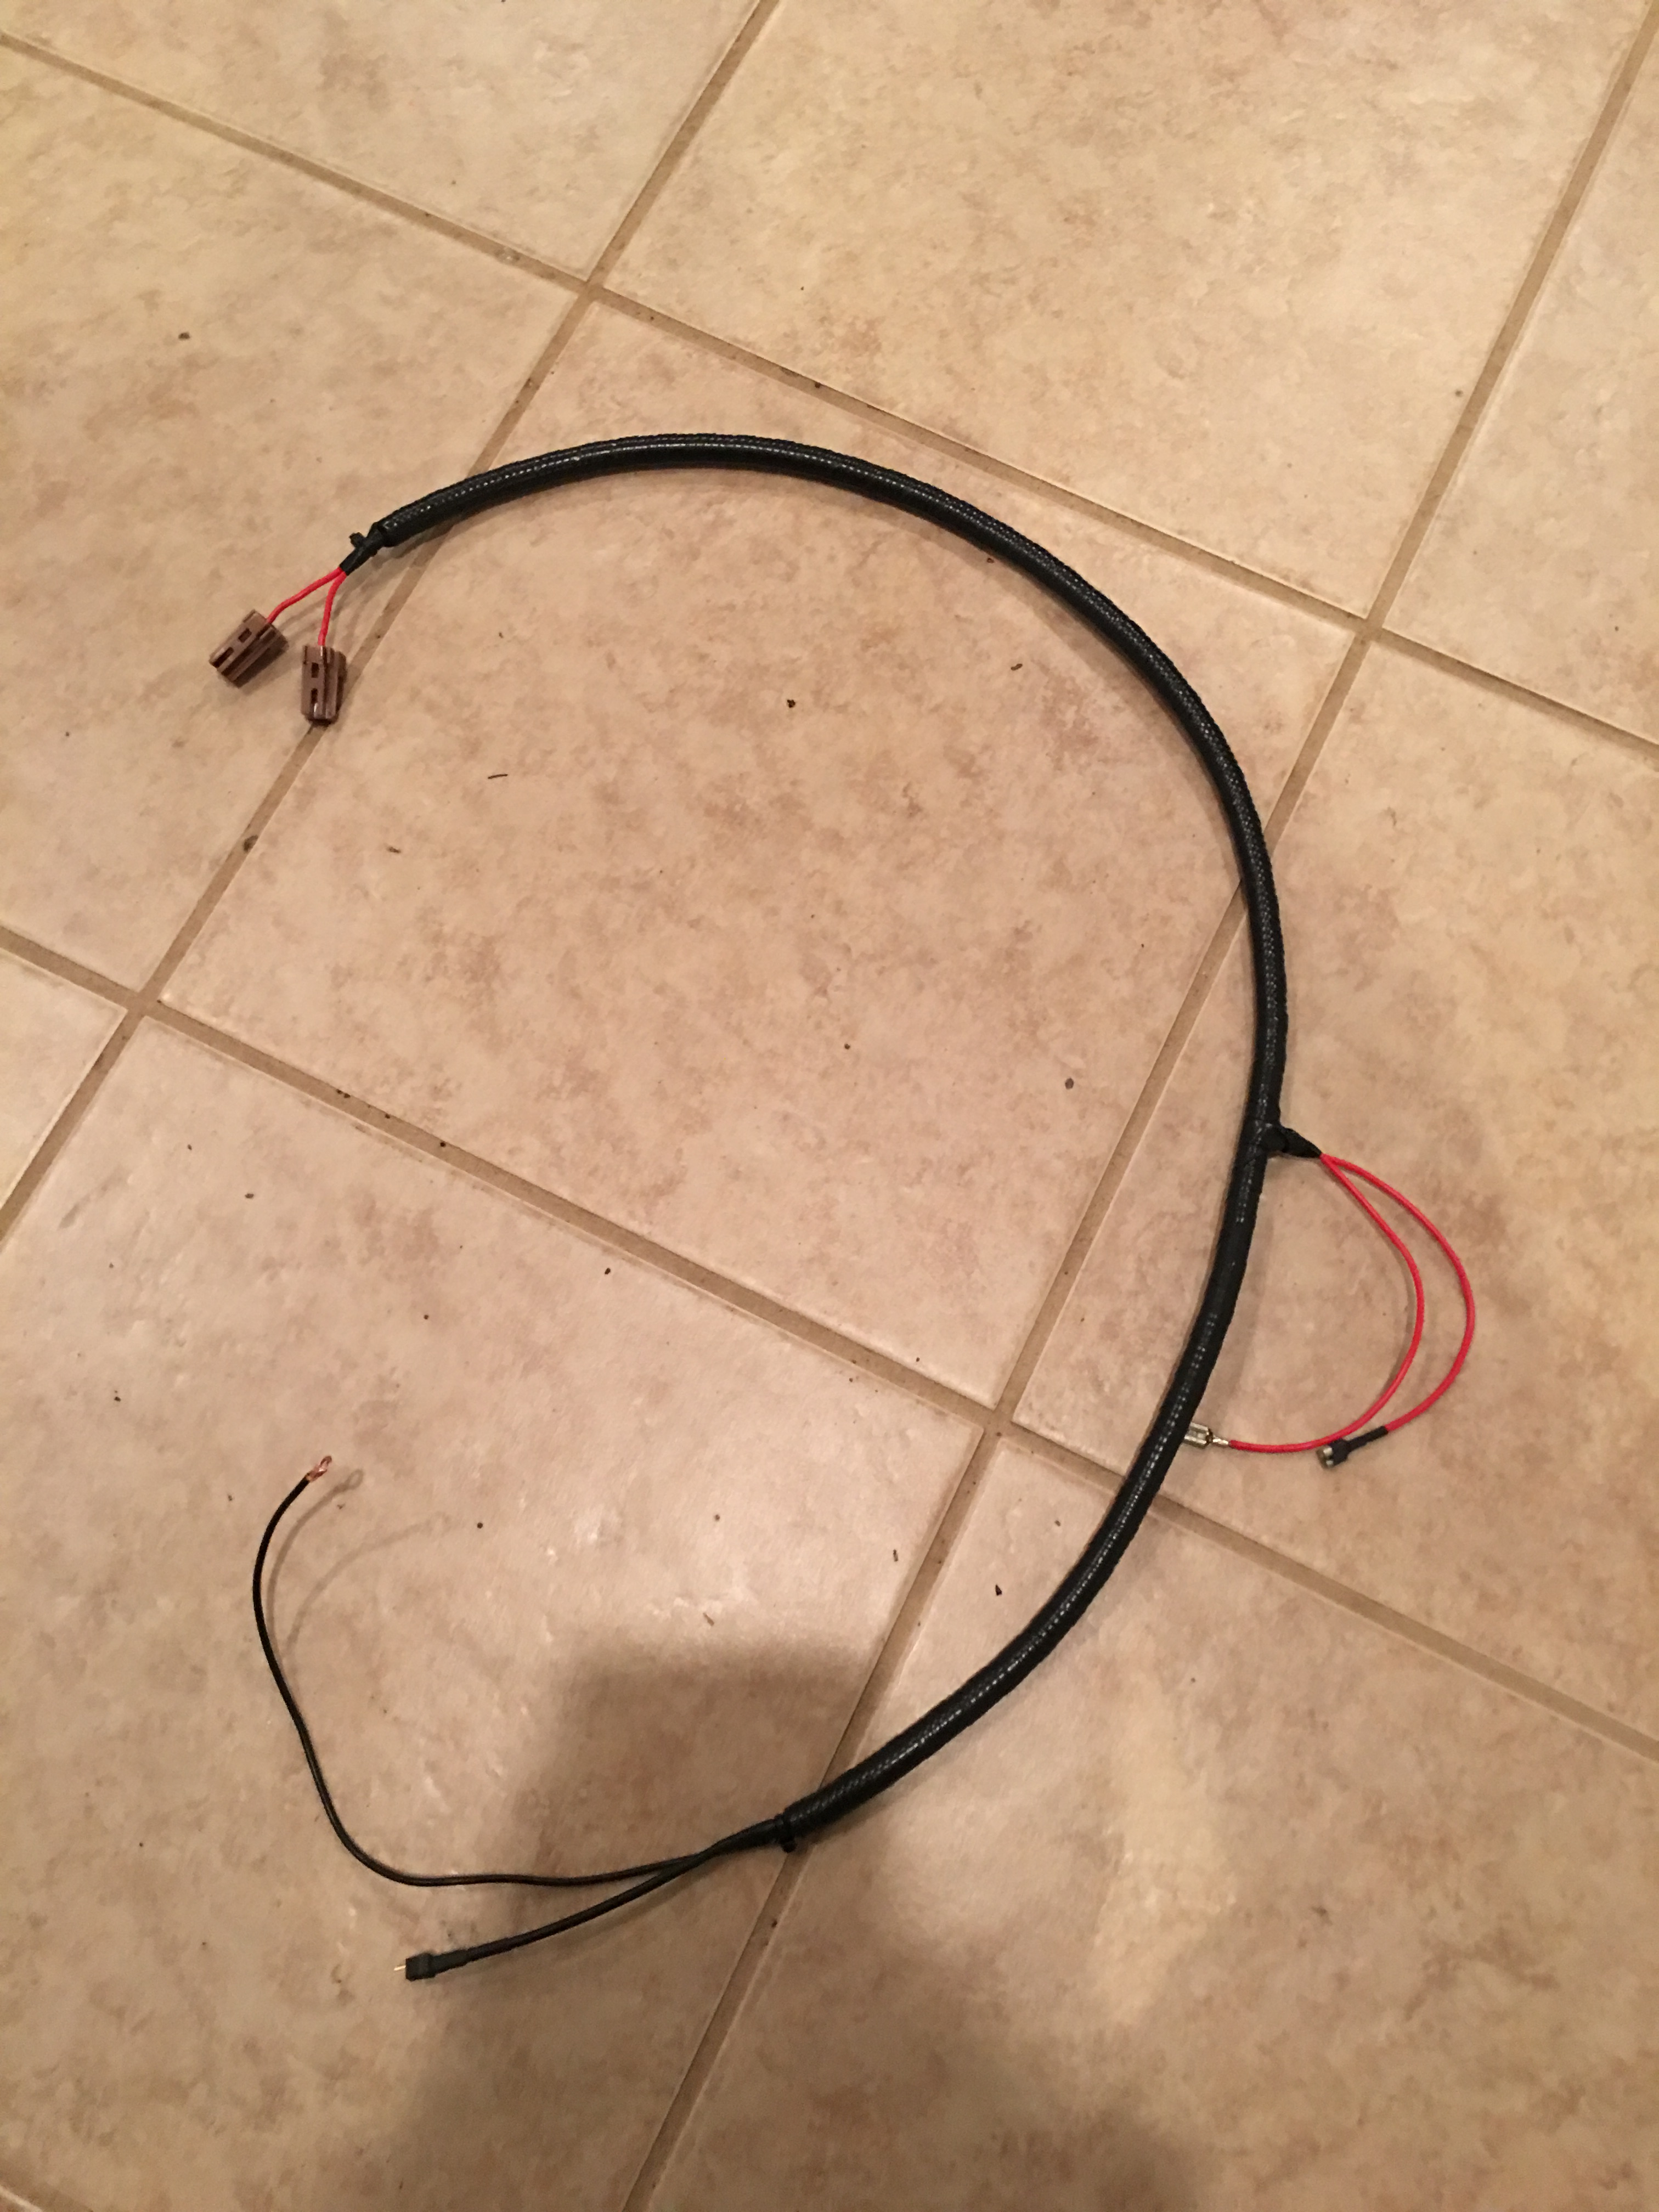
And finally, I finished my dash cam wiring harness, this has been the biggest inhibitor to progress since I've been dragging my feet on it so much. This plugs into the fuse block power ports under the dash, goes to a switch mounted under the dash above the pedals, then up to the camera. The camera always comes on when the car is on, but if you flip the switch it stays on even when the car is off. I used diodes to keep the circuits from feeding back into each other and the switch is just a basic rocker switch I had laying around. The motivation for this is some vandalized cars (not mine fortunately) in my work parking garage and somebody threw hot sauce all over my car when i street parked it downtown a few months ago.
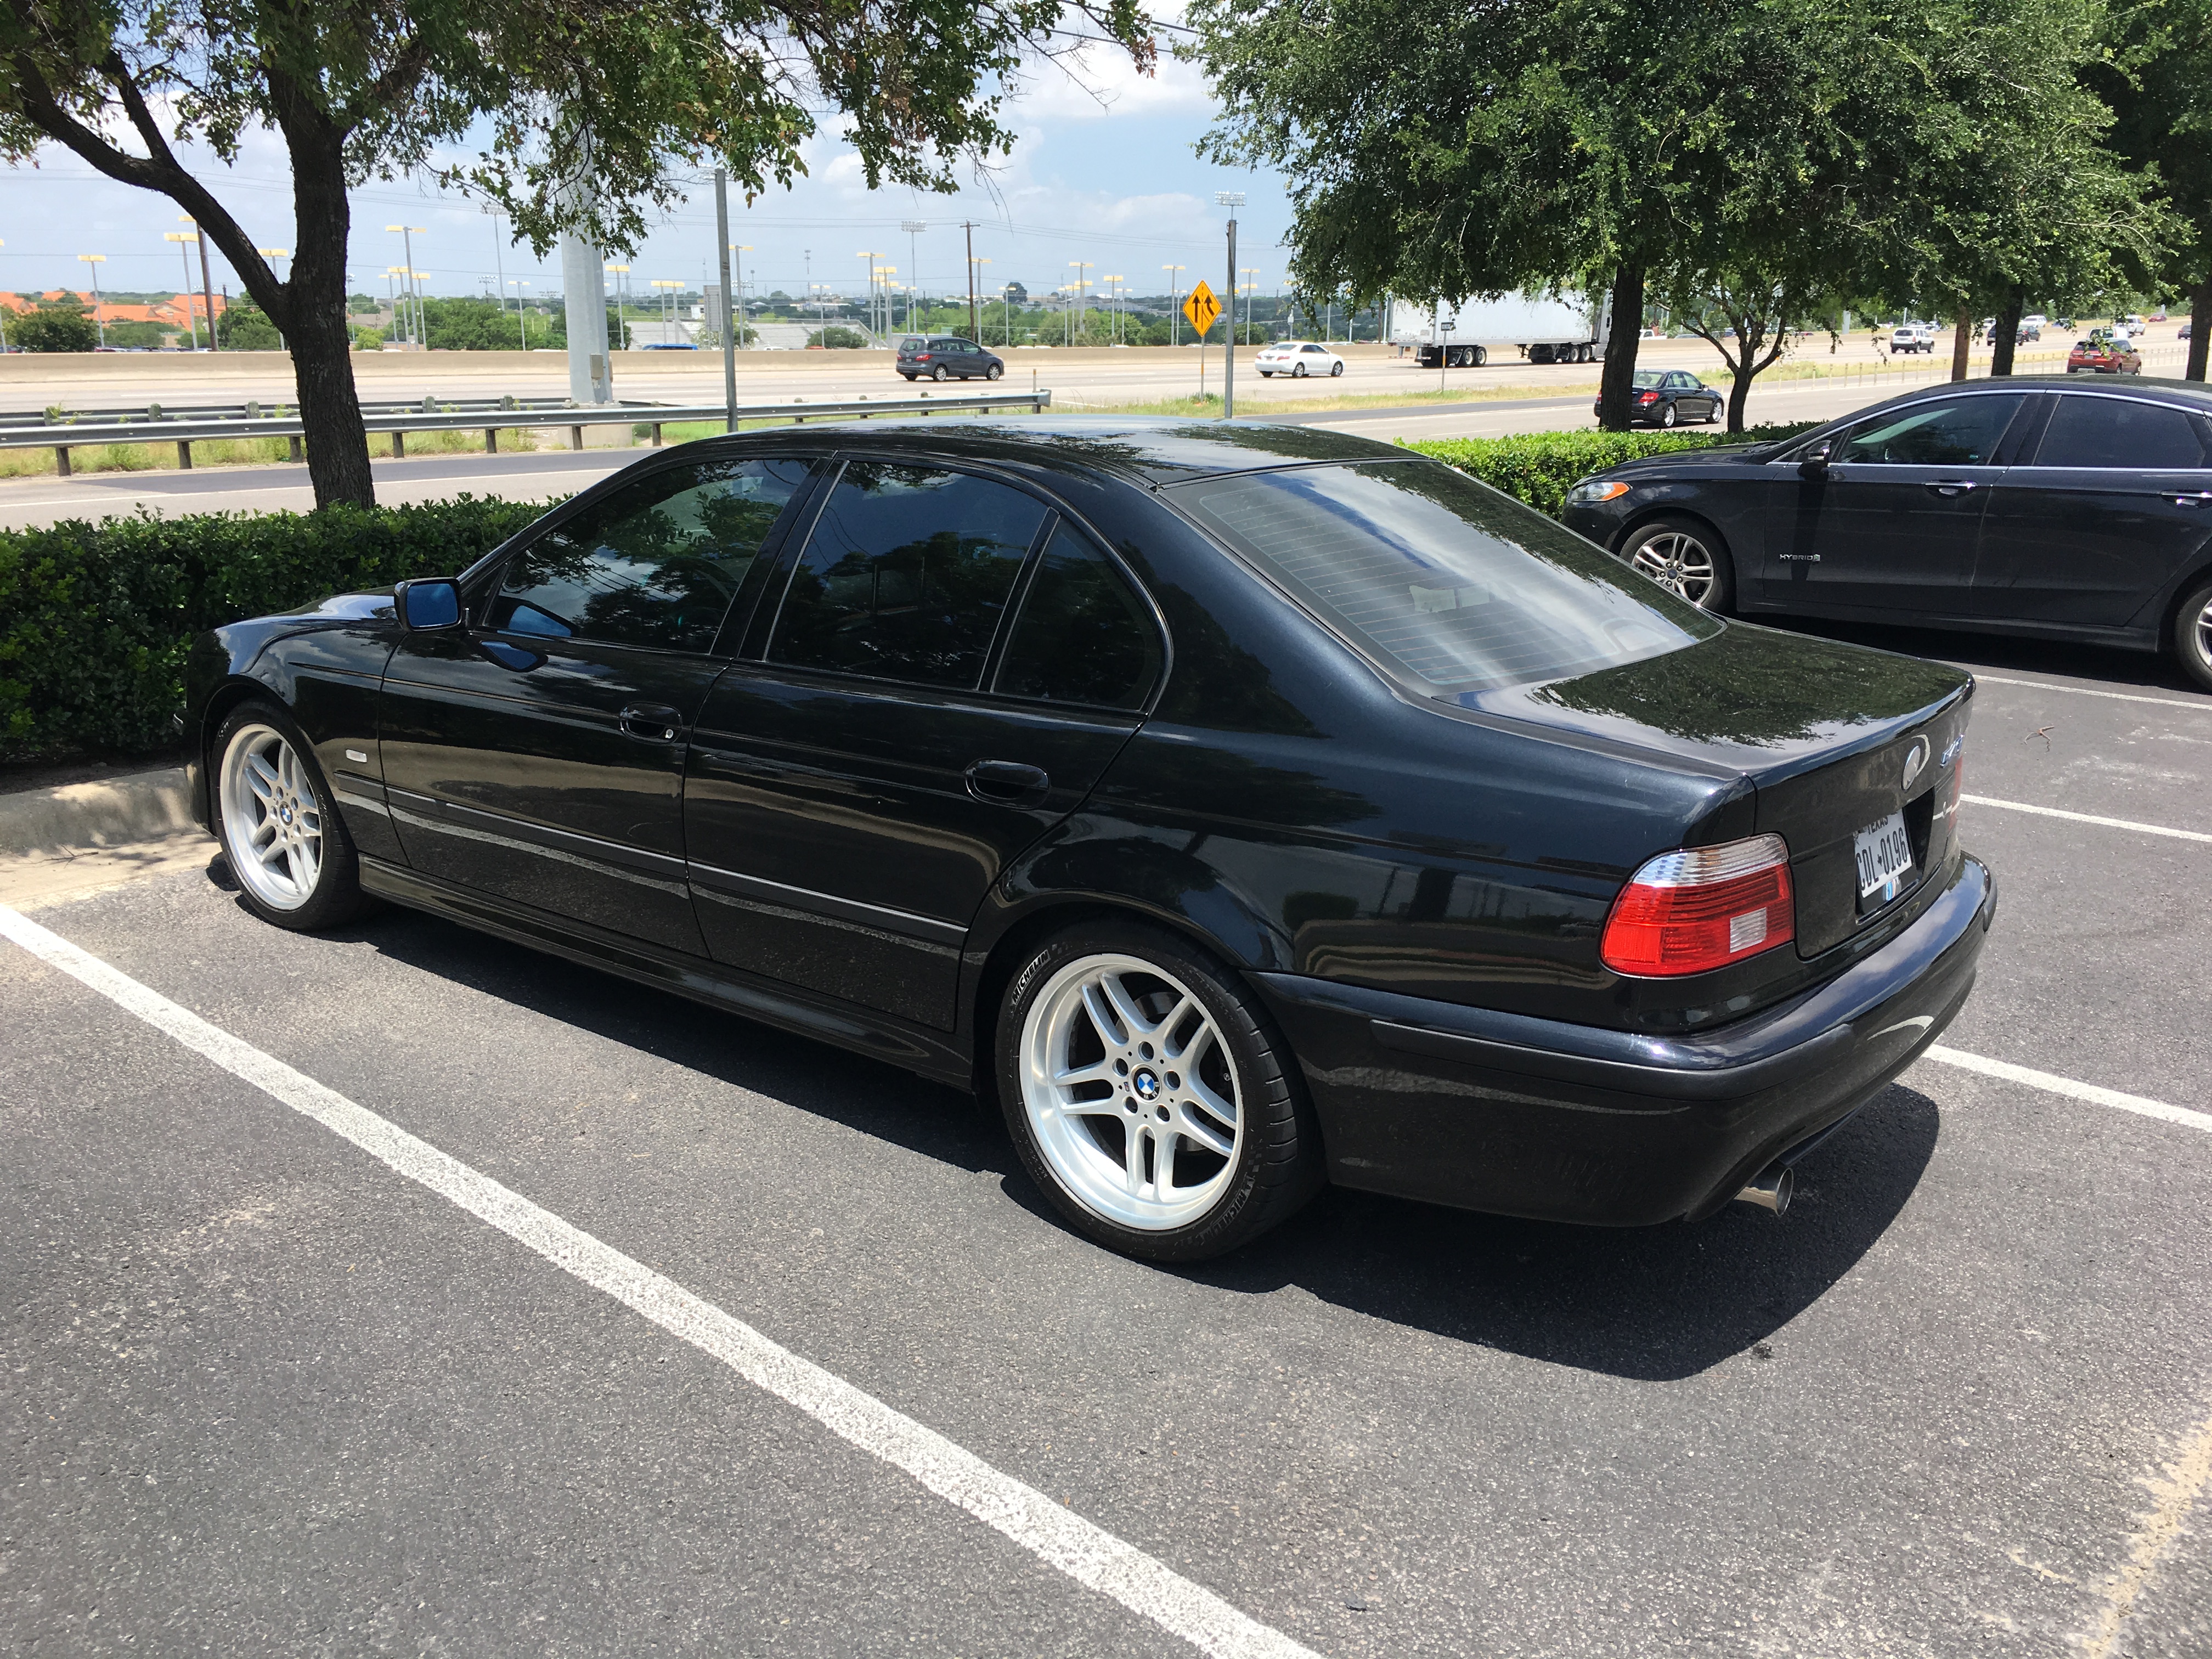
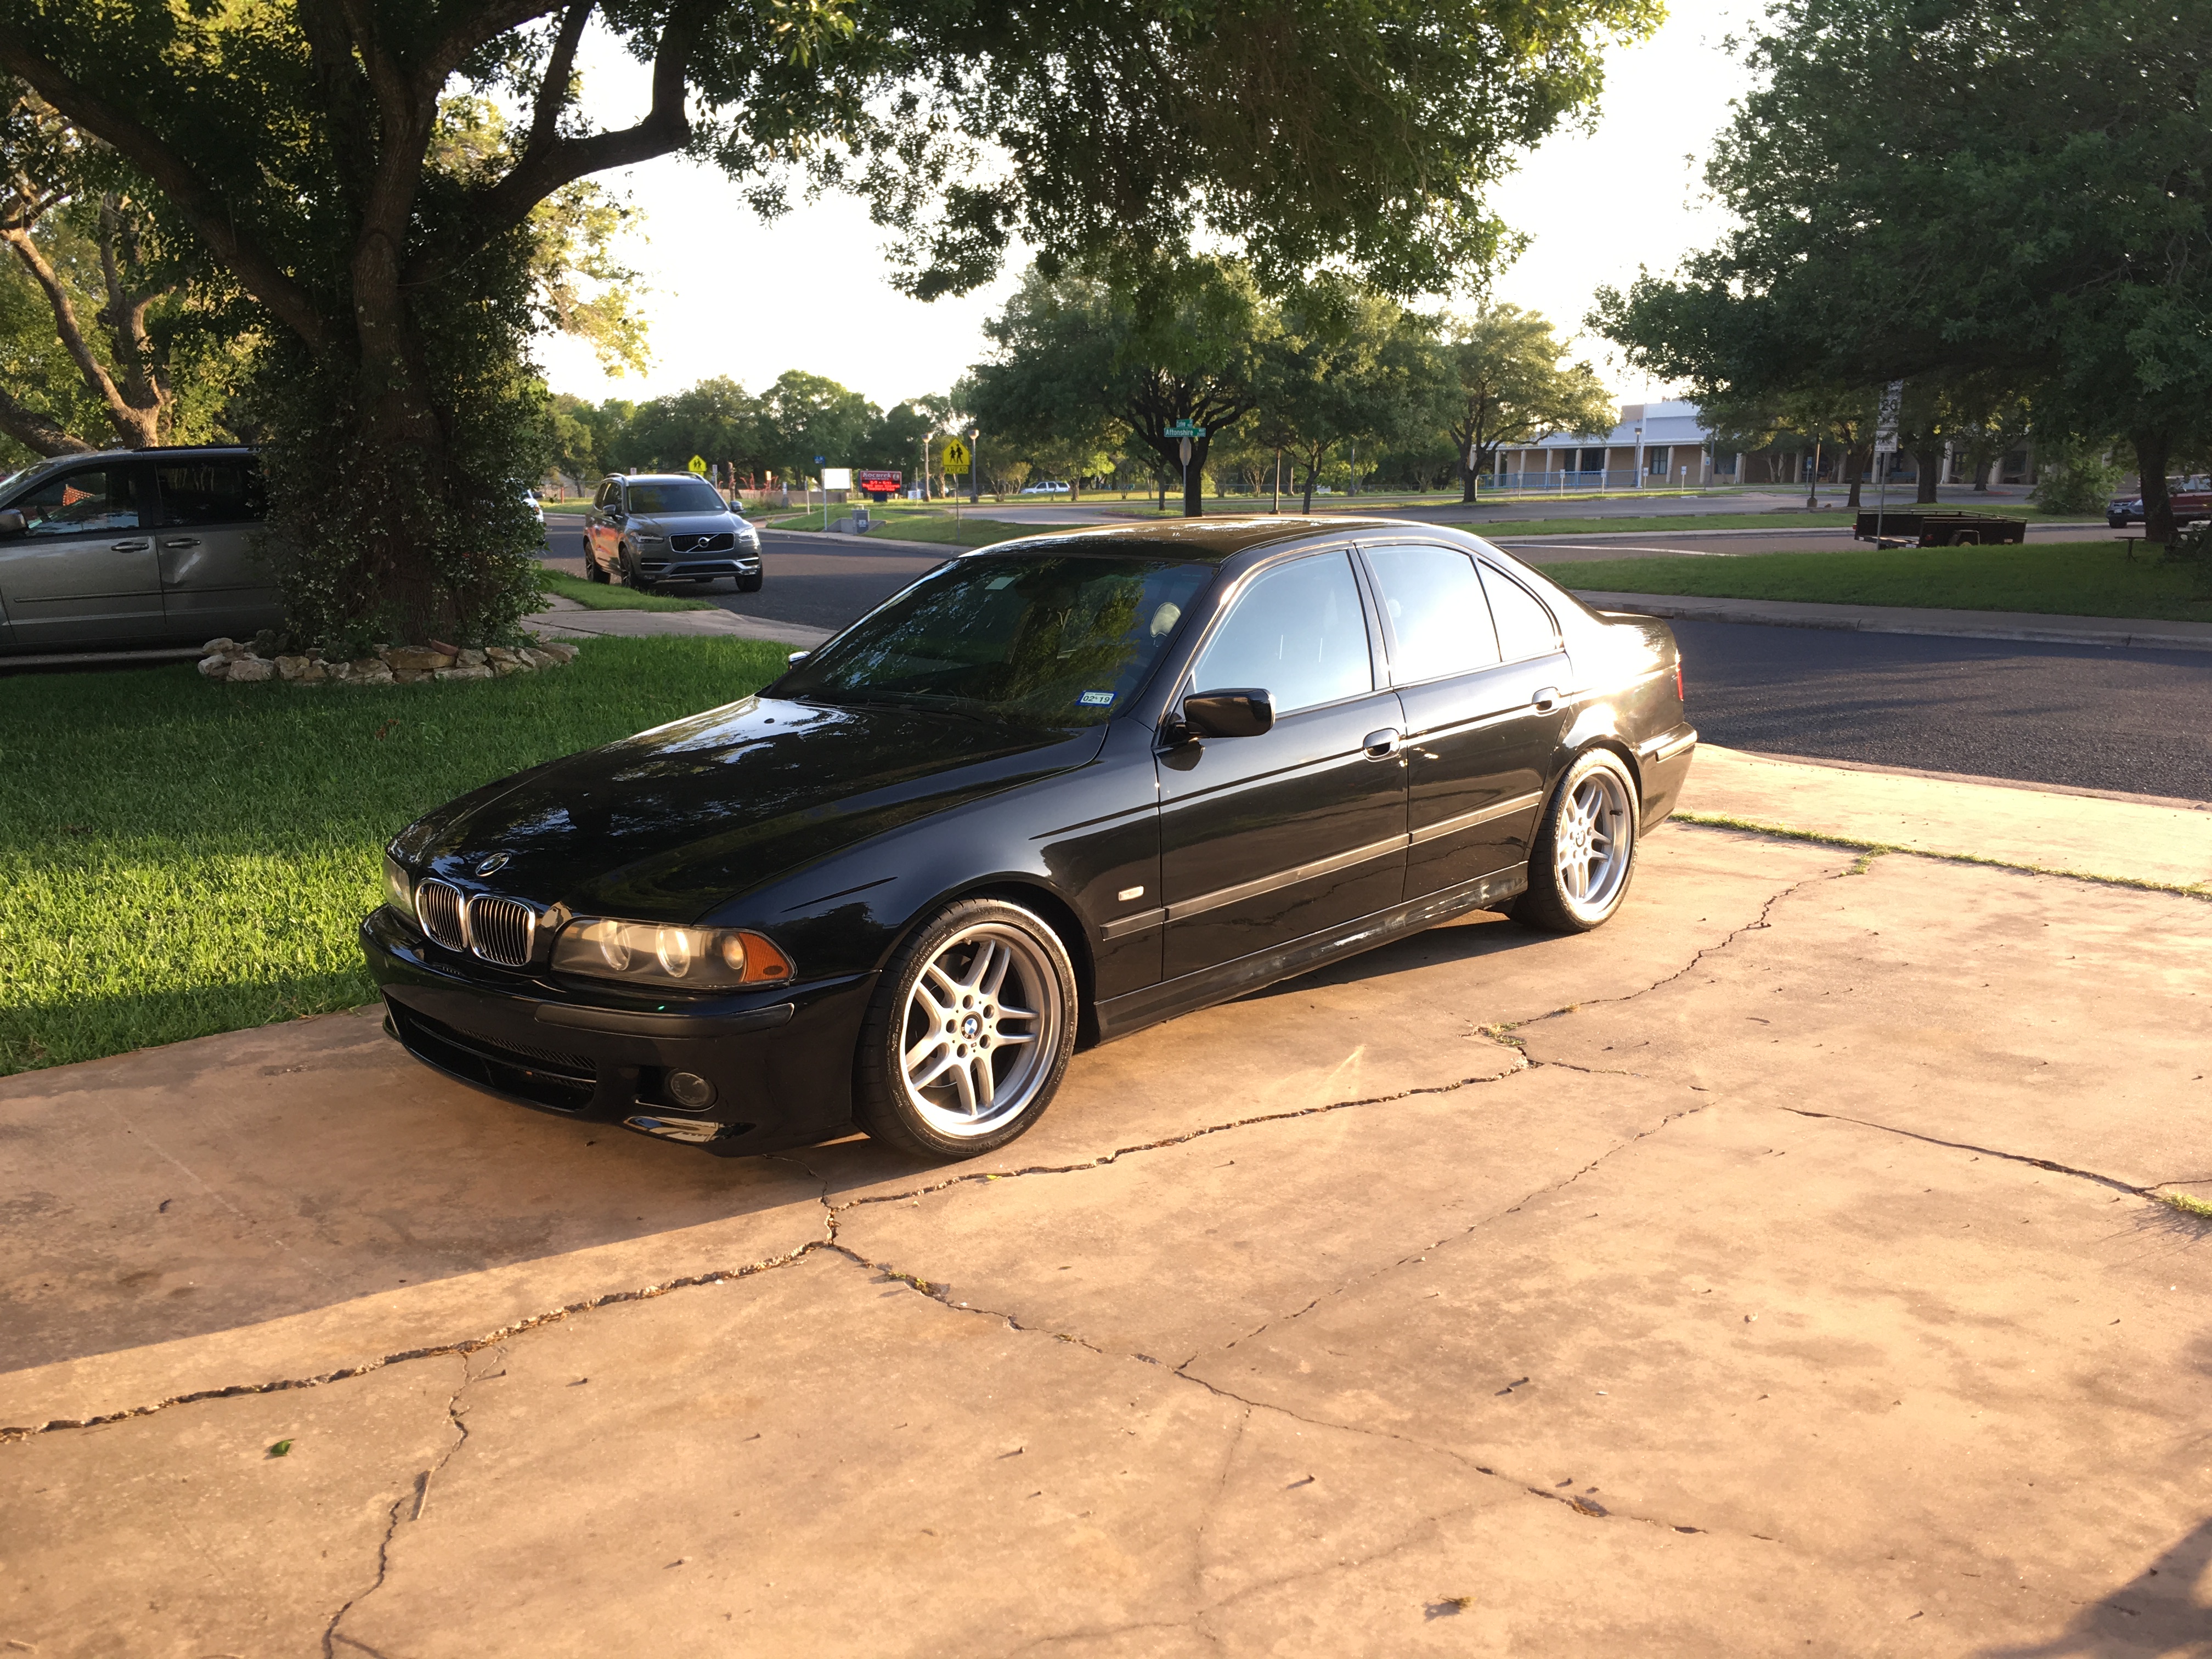
Also, since my Integra was wrecked as you might remember, I needed a new daily. So after some deliberation I settled on this 2003 BMW 540i MSport w/6-speed manual. It needs some work as all 15 year old bimmers do, but damn is it nice to have a car that can cruise in silence at 2000RPM on the highway. The exterior and upholstery are almost perfect, there's some minor door dings that my PDR guy will knock out next week but that's about all that's keeping it from looking perfect.
@Pruds_lude I took the center console piece along with several other trim pieces off the car at the end of last year to strip off the peeling factory finish and have them repainted a similar color. I looked through paint chip books with the guys at the shop and found a color that almost perfectly matched the factory finish, the only difference is the new finish is glossy while the factory finish was matte.
But anyways, another update. I'm losing track of time here it doesn't seem like almost 2 months ago, progress has been slow lately.
I got the trim piece back from the body shop and am really happy with them.
Here is the air vents being epoxied back onto the trim pieces, I broke the original glue to take them apart to get the best possible results from the refinishing.
I also installed the shift boot and hand brake boot to get an idea how it would look.
The climate control circuit boards in NSXs are known to fail due to capacitors going bad, so I went ahead and replaced all the capacitors in mine before they can fail and cause more work down the road.
I picked up a set of 4 cedar ridge fabrication adjustable exhaust hangers since one of my hangers was touching the exhaust and burning as well as one side of my exhaust hanging too low. It's a subtle difference but it improves the look.
More electronics repair, my radio backlight dimmer stopped working so I set it up on my workbench (dining table) and traced the dimmer circuit through. Then I found some burned looking solder underneath a transistor, did some Googling, and picked out a suitable replacement that has much higher current carrying capacity than the failed original.
And finally, I finished my dash cam wiring harness, this has been the biggest inhibitor to progress since I've been dragging my feet on it so much. This plugs into the fuse block power ports under the dash, goes to a switch mounted under the dash above the pedals, then up to the camera. The camera always comes on when the car is on, but if you flip the switch it stays on even when the car is off. I used diodes to keep the circuits from feeding back into each other and the switch is just a basic rocker switch I had laying around. The motivation for this is some vandalized cars (not mine fortunately) in my work parking garage and somebody threw hot sauce all over my car when i street parked it downtown a few months ago.
Also, since my Integra was wrecked as you might remember, I needed a new daily. So after some deliberation I settled on this 2003 BMW 540i MSport w/6-speed manual. It needs some work as all 15 year old bimmers do, but damn is it nice to have a car that can cruise in silence at 2000RPM on the highway. The exterior and upholstery are almost perfect, there's some minor door dings that my PDR guy will knock out next week but that's about all that's keeping it from looking perfect.
05-16-2018, 04:38 AM
#100
that is a SHARP looking Bimmer. I've been checking those out more and more, tyring to get "in the know" about those cars. I never really was interested in them until sometime last year, not sure what clicked in my head lol
got interior pics? I love their interiors.
got interior pics? I love their interiors.