
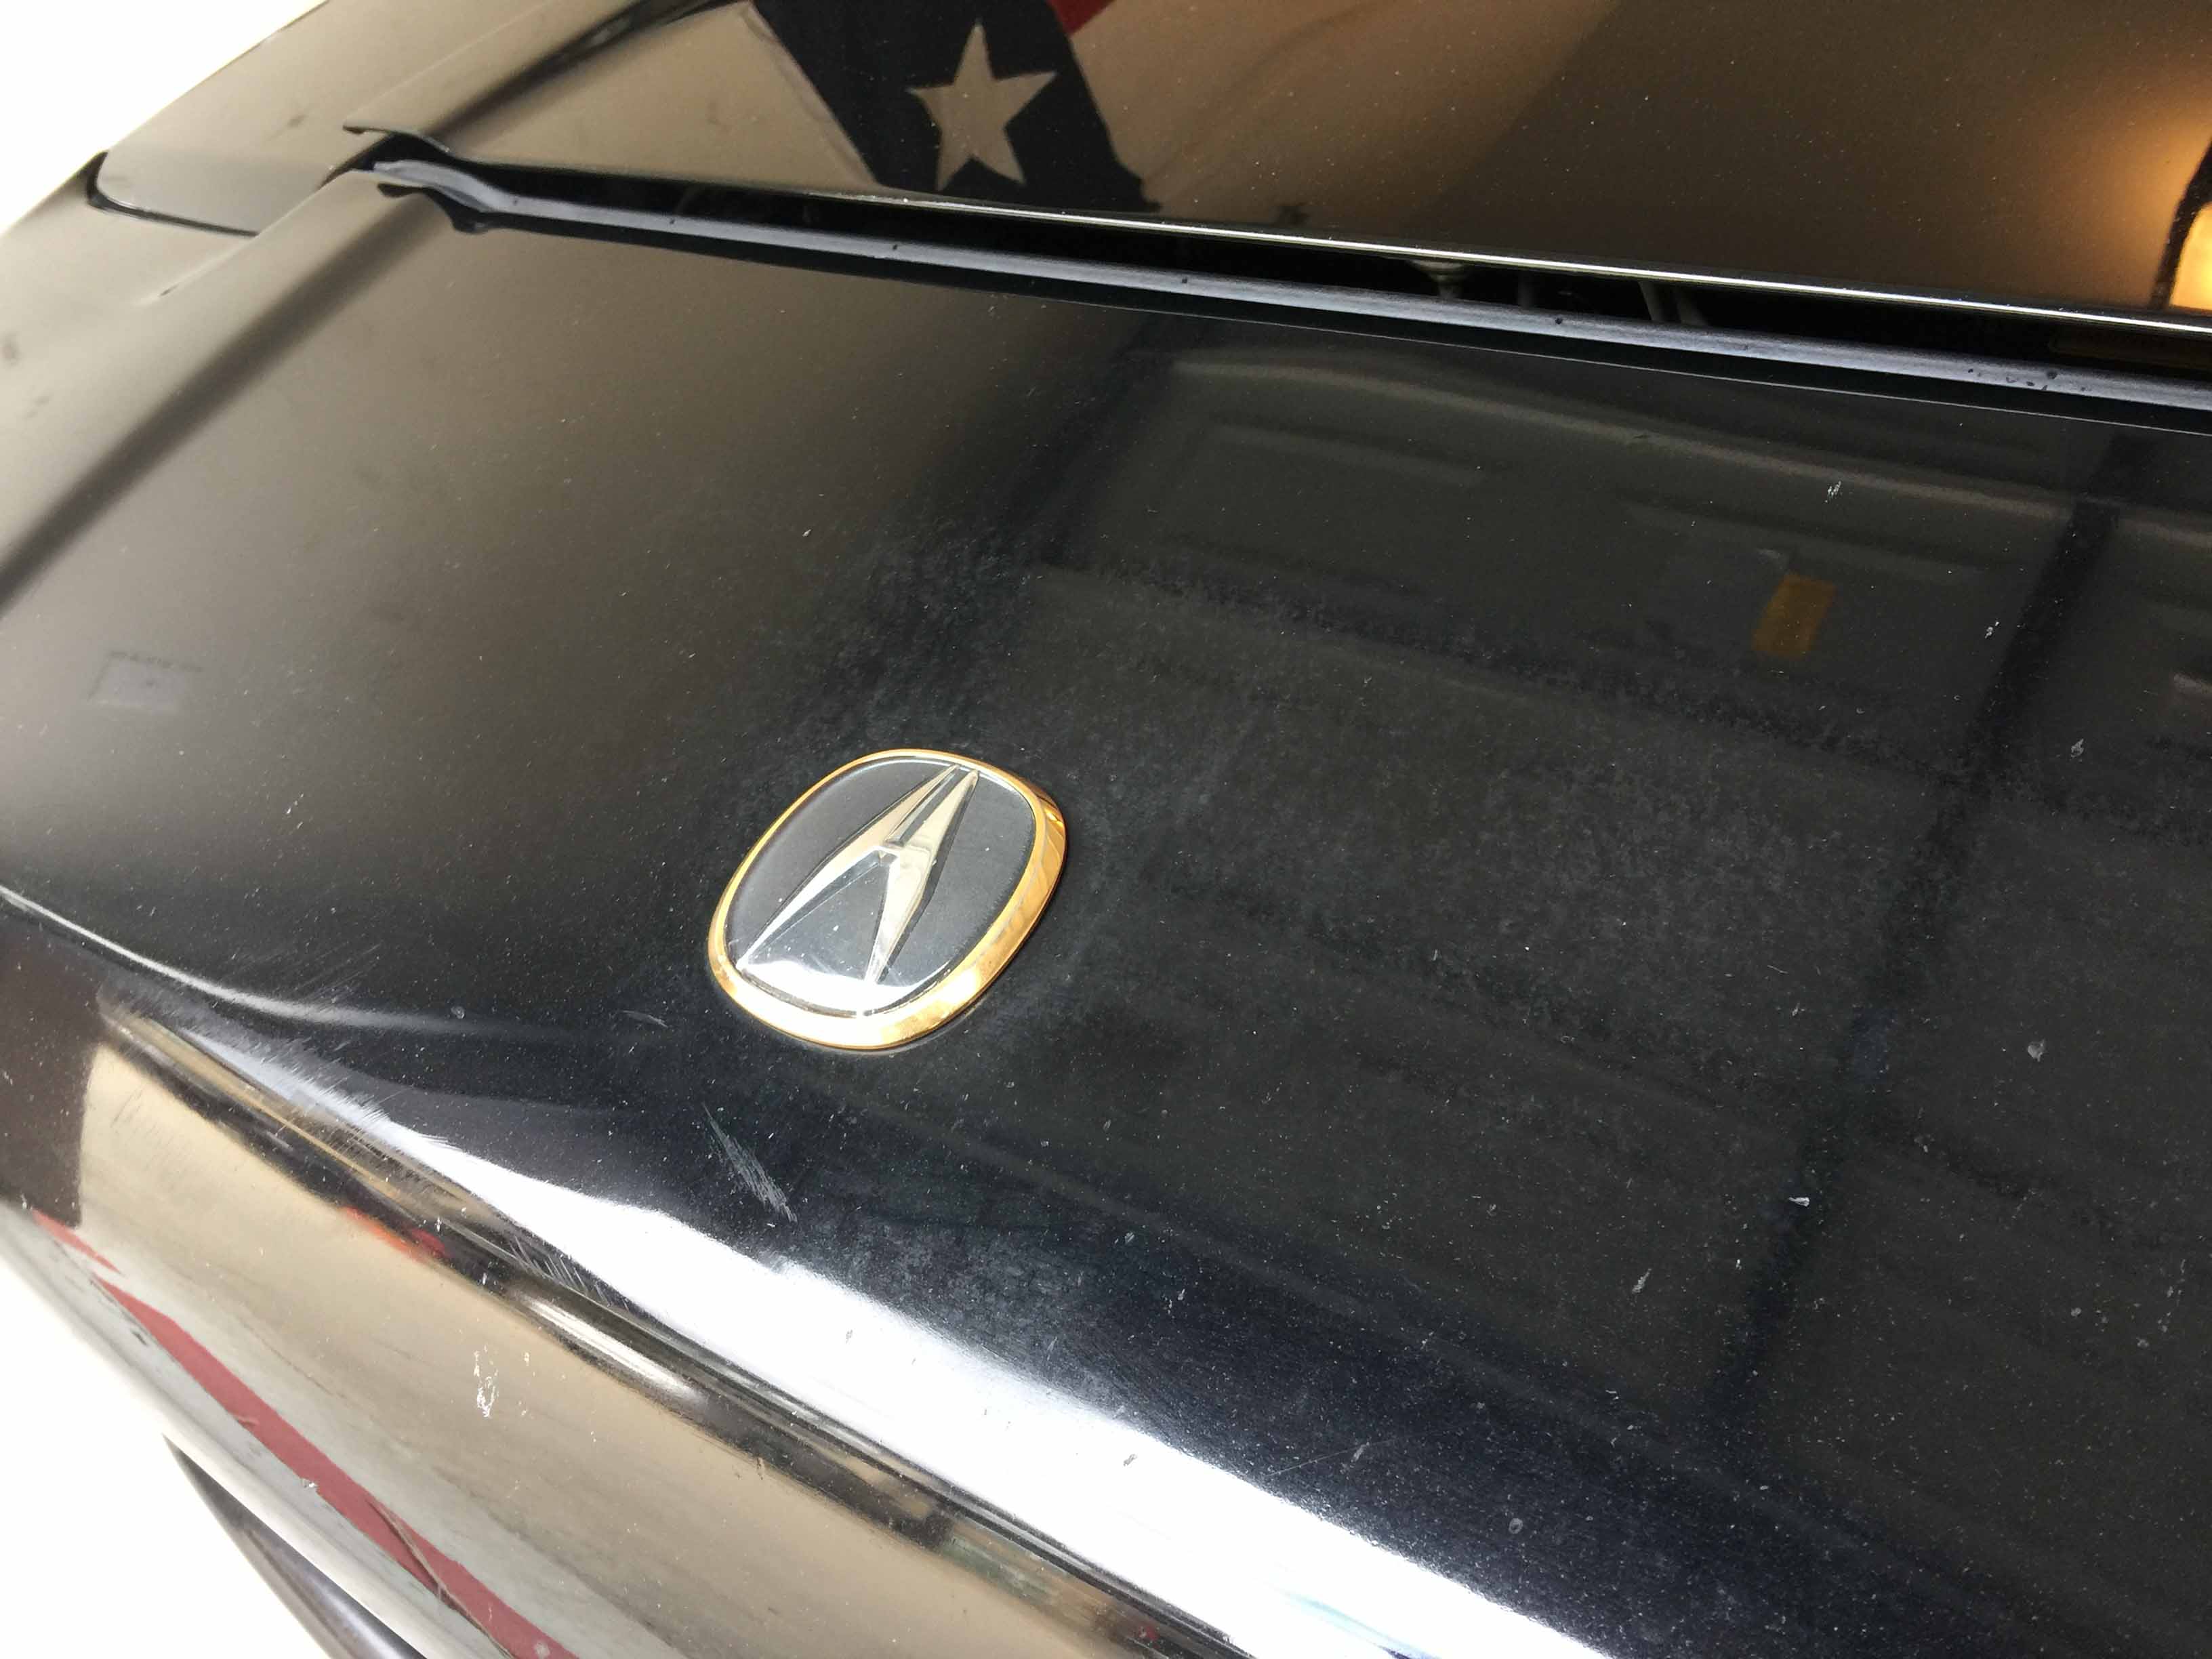
1994 NSX #41
 11-03-2016, 02:20 PM
#1

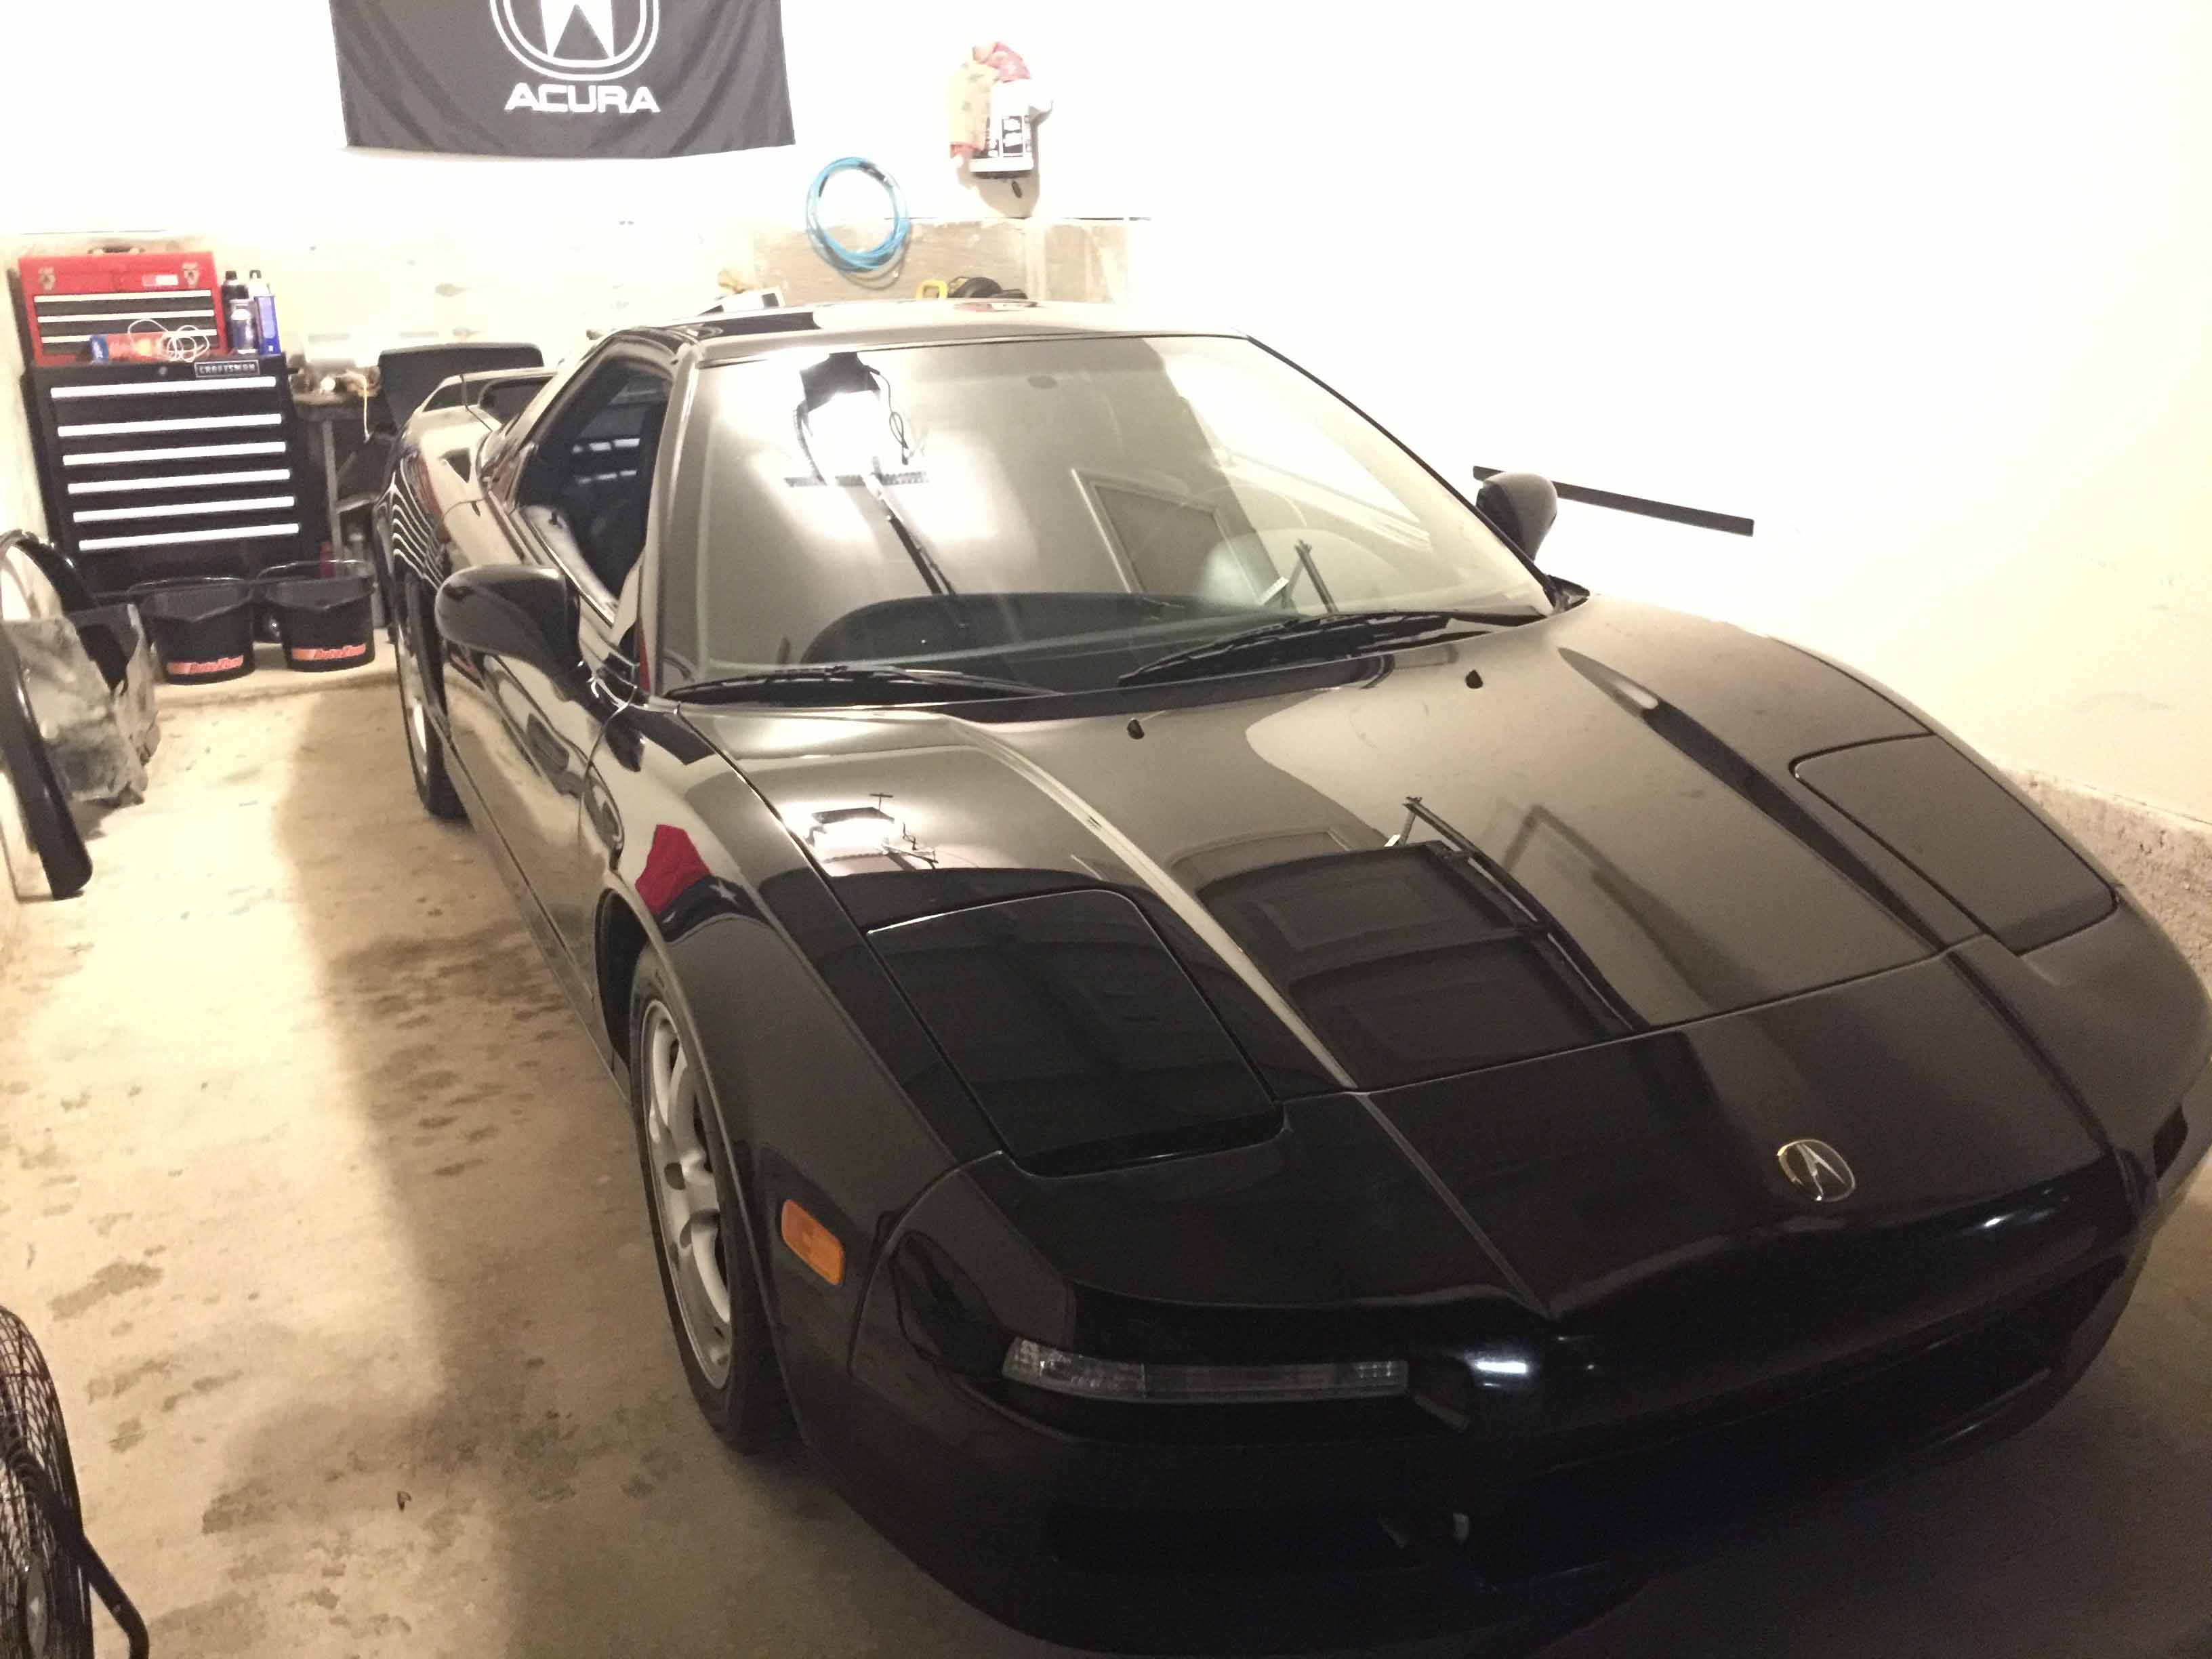
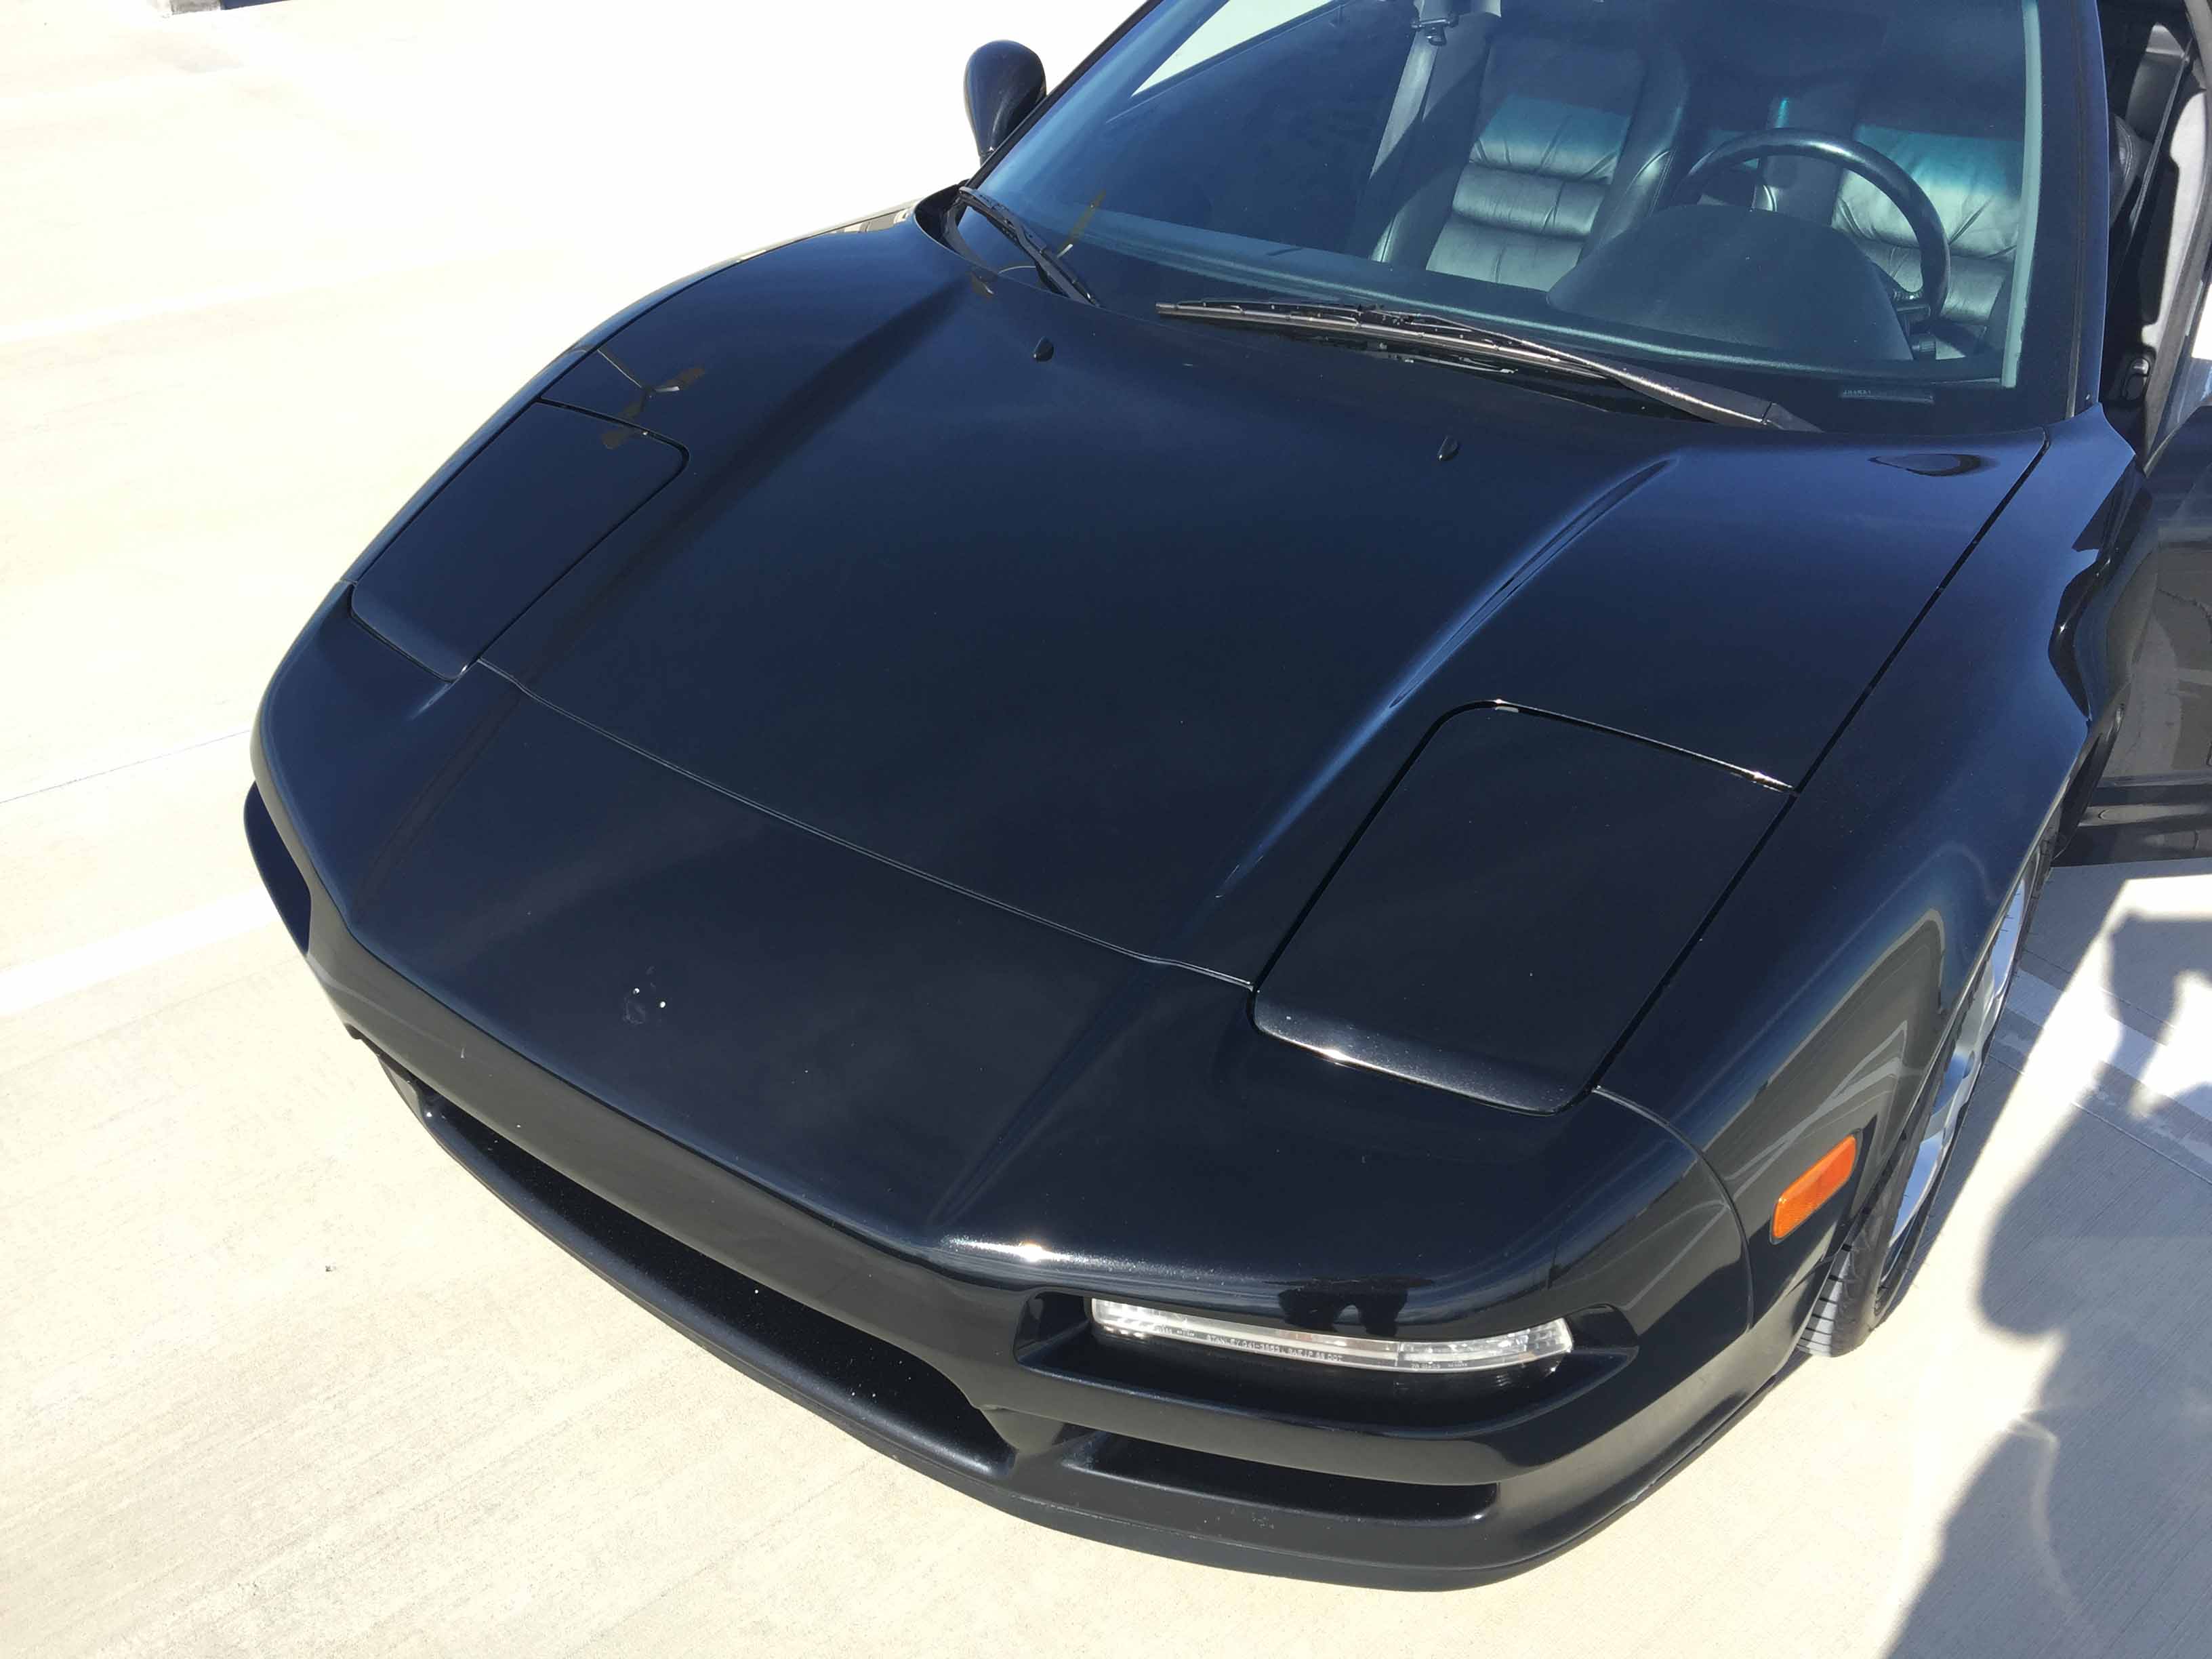
What's up guys? I picked up this 1994 NSX in Denver, CO last weekend so I'll be posting updates about what I do with it here, partially for input and ideas from others (and mostly to stroke my own ego). A bit about it: it has 91,000 miles, berlina black, 5-speed manual transmission, is all original and completely unmodified, single owner before me, and he had all maintenance done at the same Acura dealership in Denver by the same certified NSX technician since the car was new.
My plans are to keep it as close to stock as I reasonably can, at the moment the only aftermarket parts I'm considering are for the stereo system since the original speakers/amplifiers are failing and I can't make myself spend $3000 on shitty stock stereo equipment.
On one hand, having all maintenance done at the dealer would probably be better for the cars value, but I love working on cars so I'll end up doing the vast majority of the work myself. I've spent the past few years restoring an Integra that was too far gone for any reasonable person to touch it so I've amassed the tools to do essentially everything short of dropping the engine since I don't have a lift. I think keeping meticulous records and all receipts for parts for the work that I do will be enough for most buyers if I ever decide to sell it.
The car isn't perfect, however, so I have some work to do.
- Slight grind entering 5th gear quickly, 5th seems to be a bit problematic with these cars so I'm hoping some synchromesh fluid will ease the issue. I'm just going to be careful with 5th until I have to change the clutch, then I'll change the 5th gear synchronizer. I rebuilt the 5-speed transmission in the Integra in my garage so those don't scare me anymore.
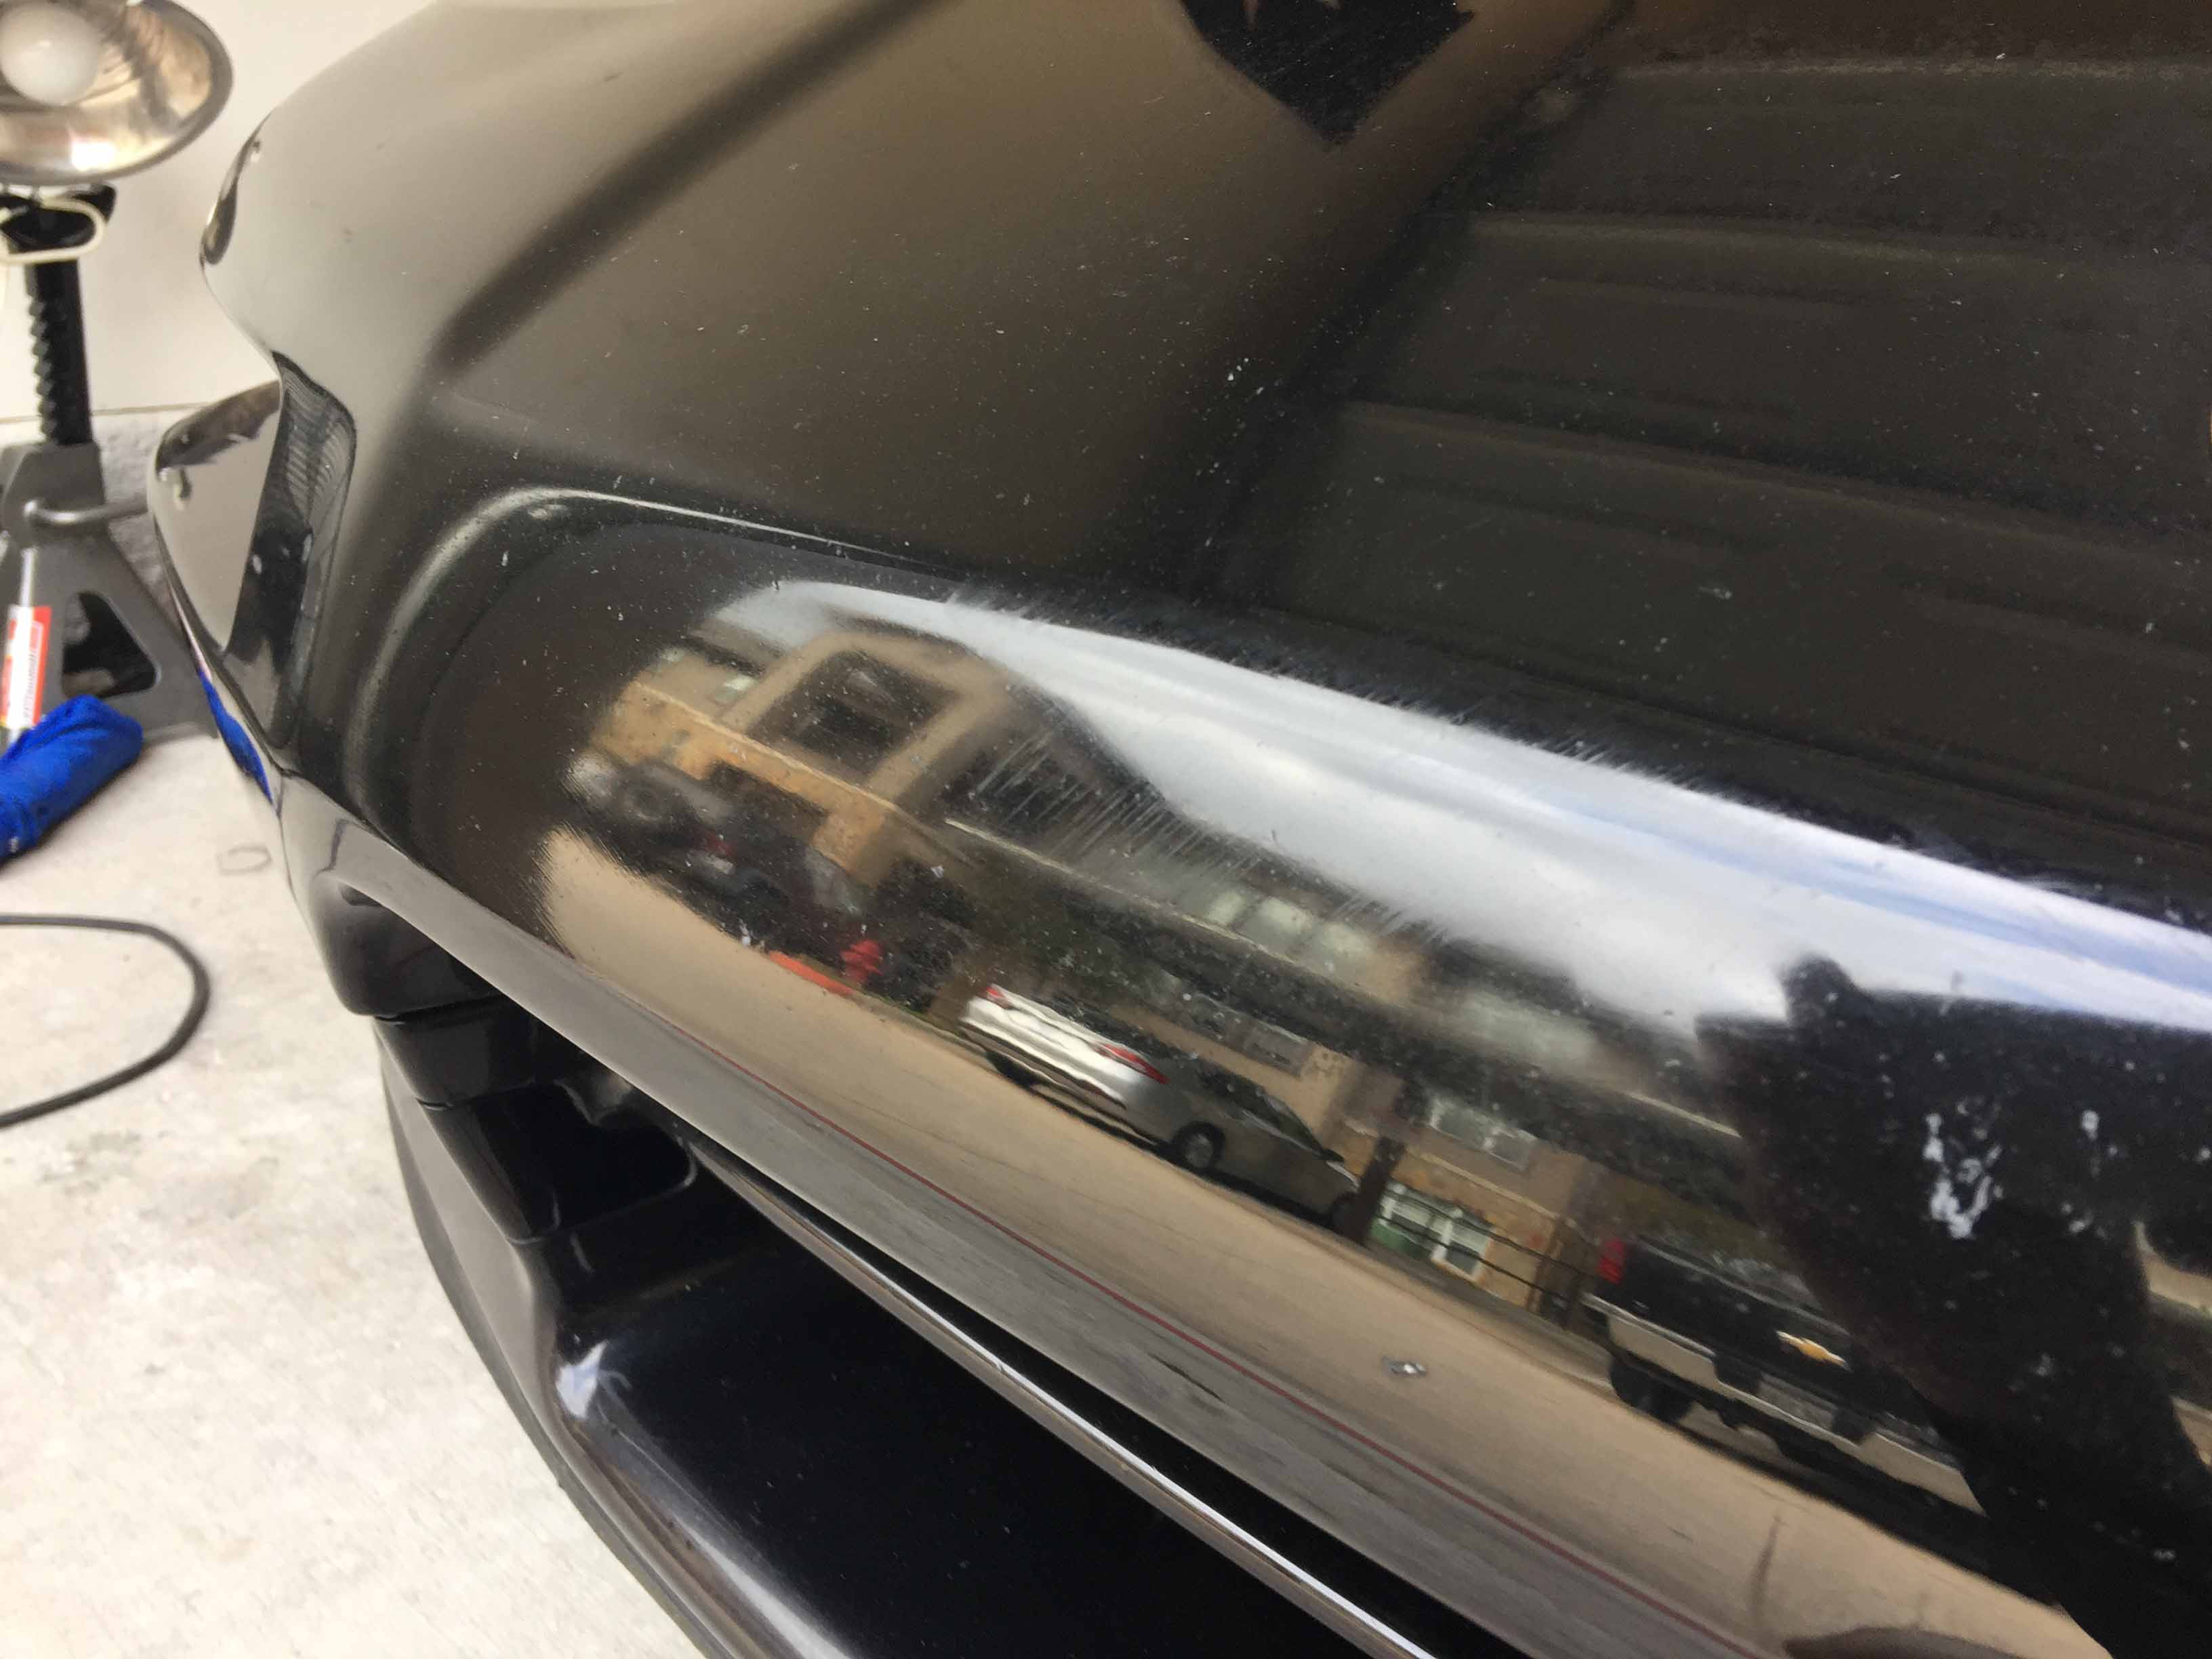
- B-pillars and rear bumper were resprayed and there is some orange peel that needs to be wetsanded and buffed out.
- Swirls all over the car.
- Window tint is peeling and turning purple.
- Slight oxidization on the front bumper that will need to be wetsanded and buffed. Worst case scenario I have a shop scuff and reclear the whole front bumper, but I think I can save it.
- Sun damaged rubber trim around the rear window and on top of the front windshield.
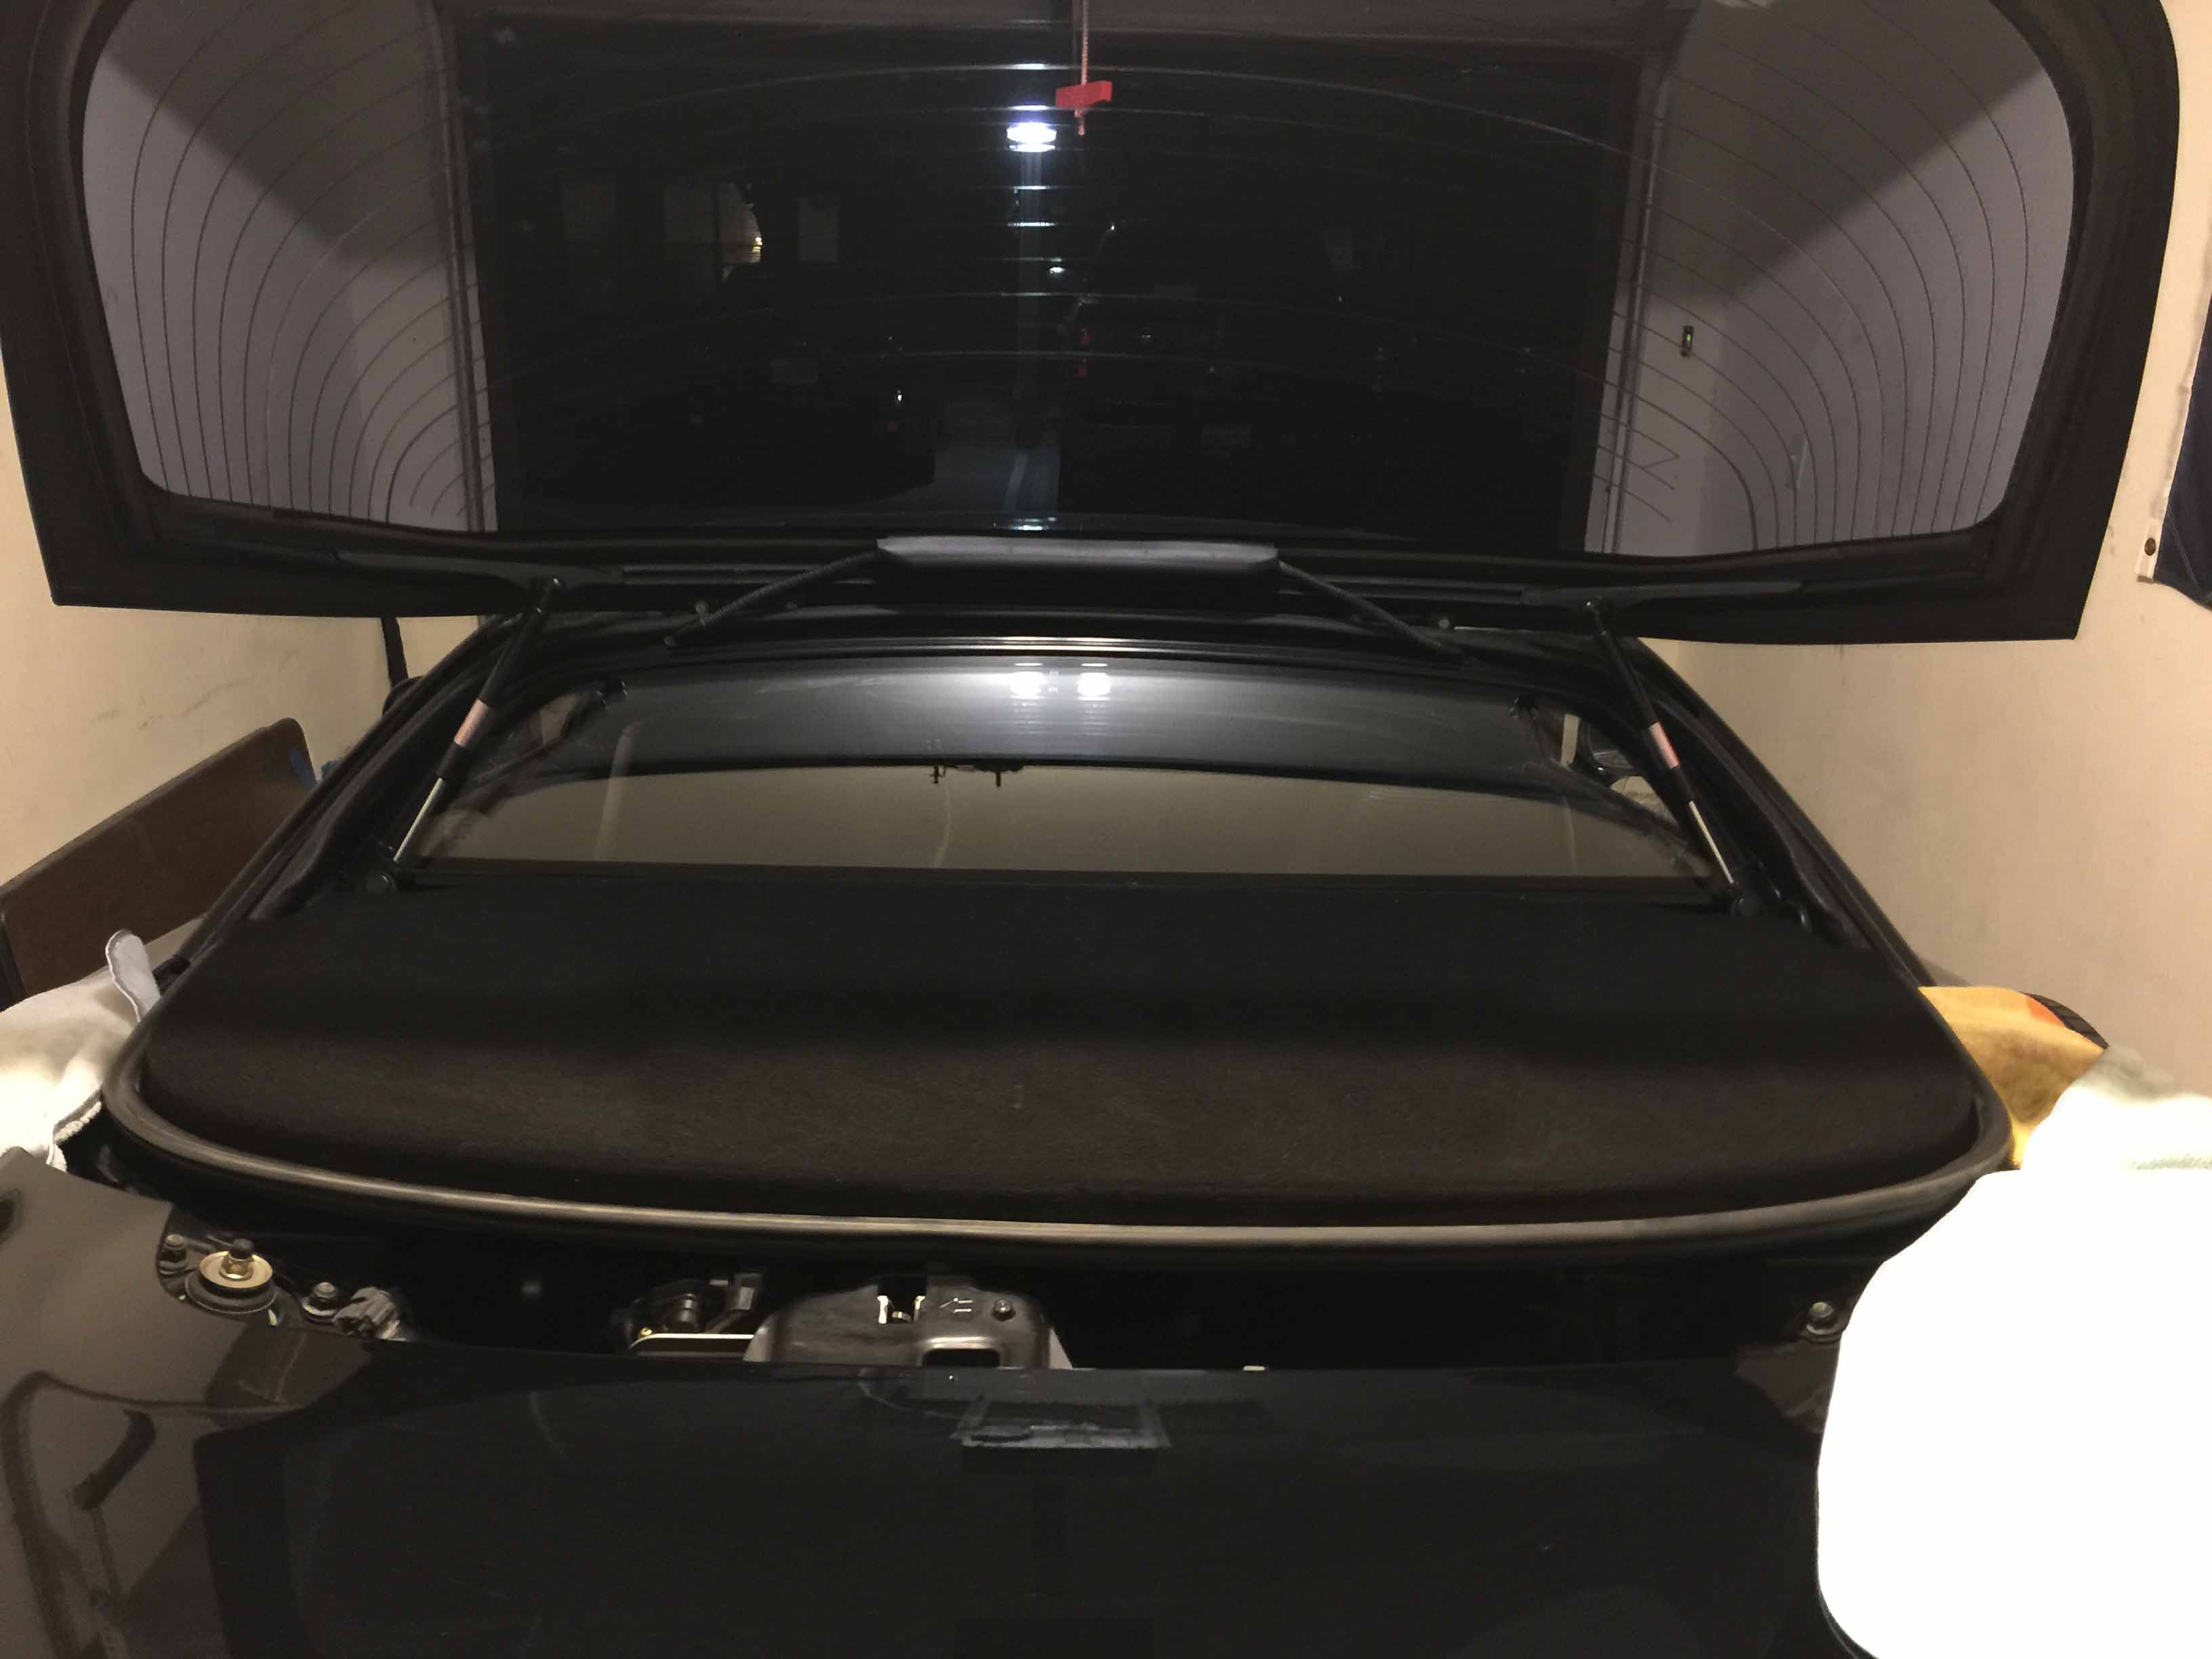
- Trunk and rear glass lifter struts are losing their strength.
- The dealer broke off the radio antenna.
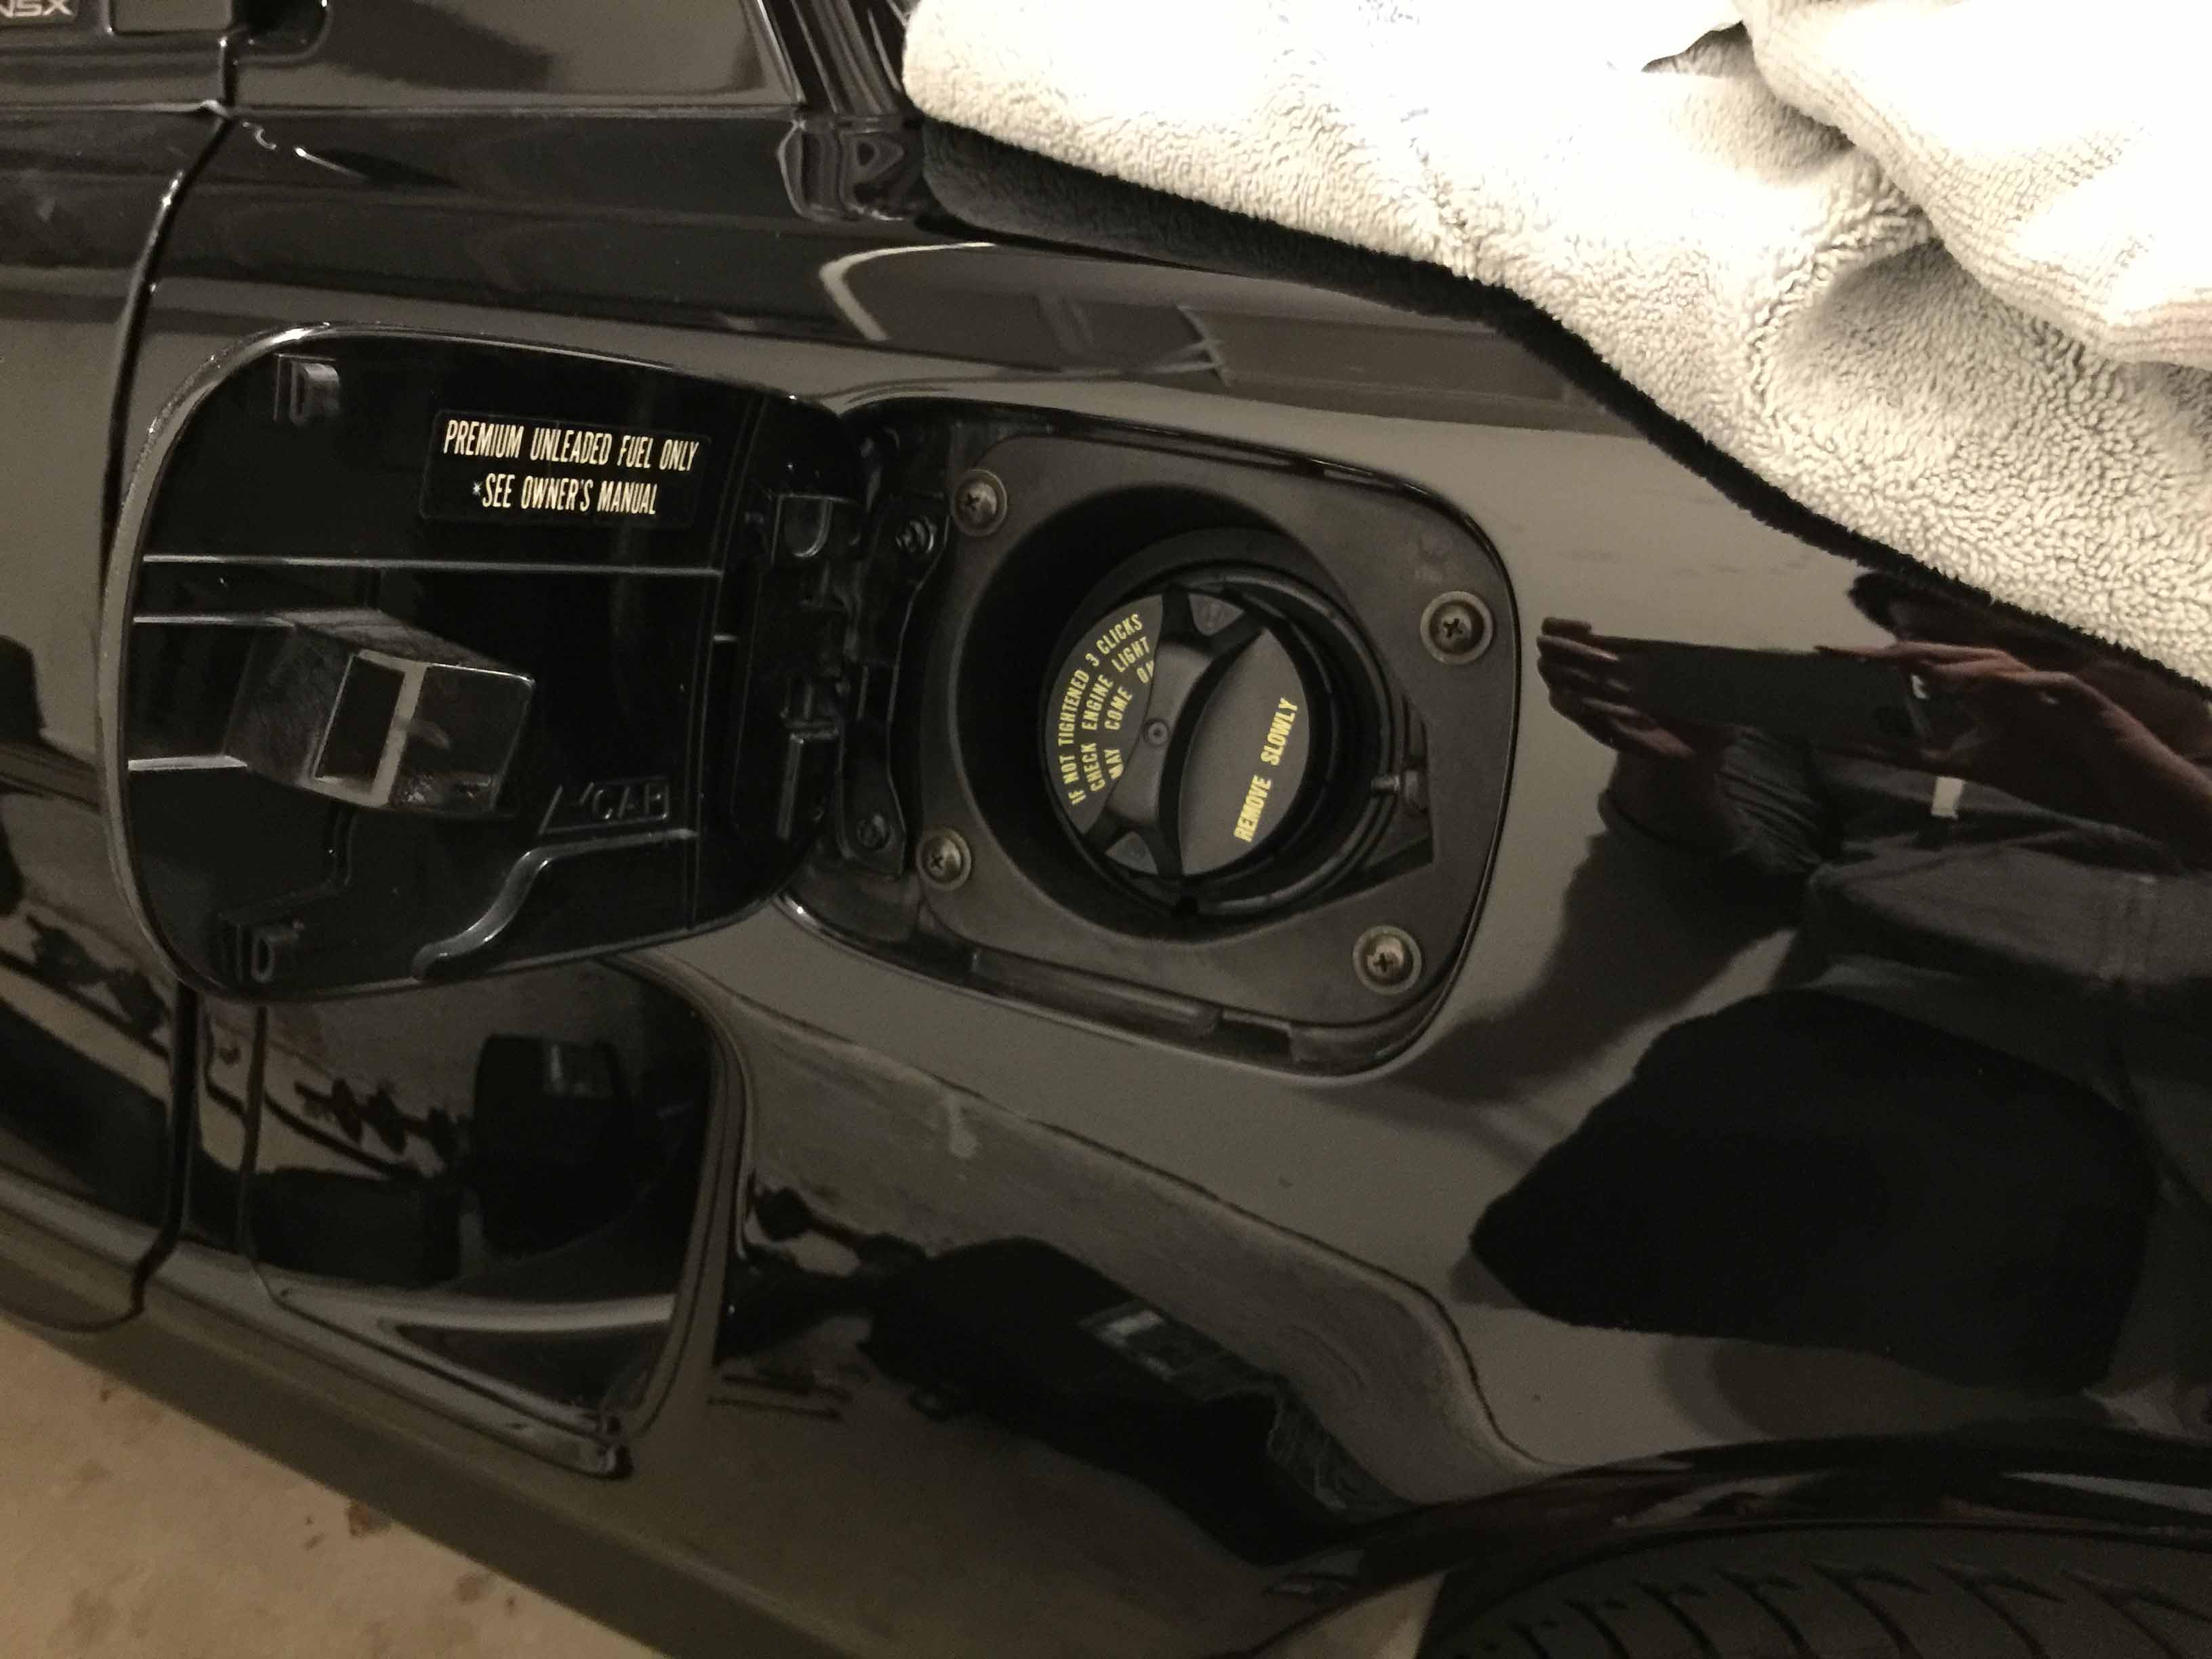
- The dealer lost my gas cap in the process of filling the car up right before I drove off. Currently there is a generic parts store cap on there.
- Timing belt only has 25k miles on it but is 7 years old.
- Missing front tow hook cover.
As it sat on the dealer lot.

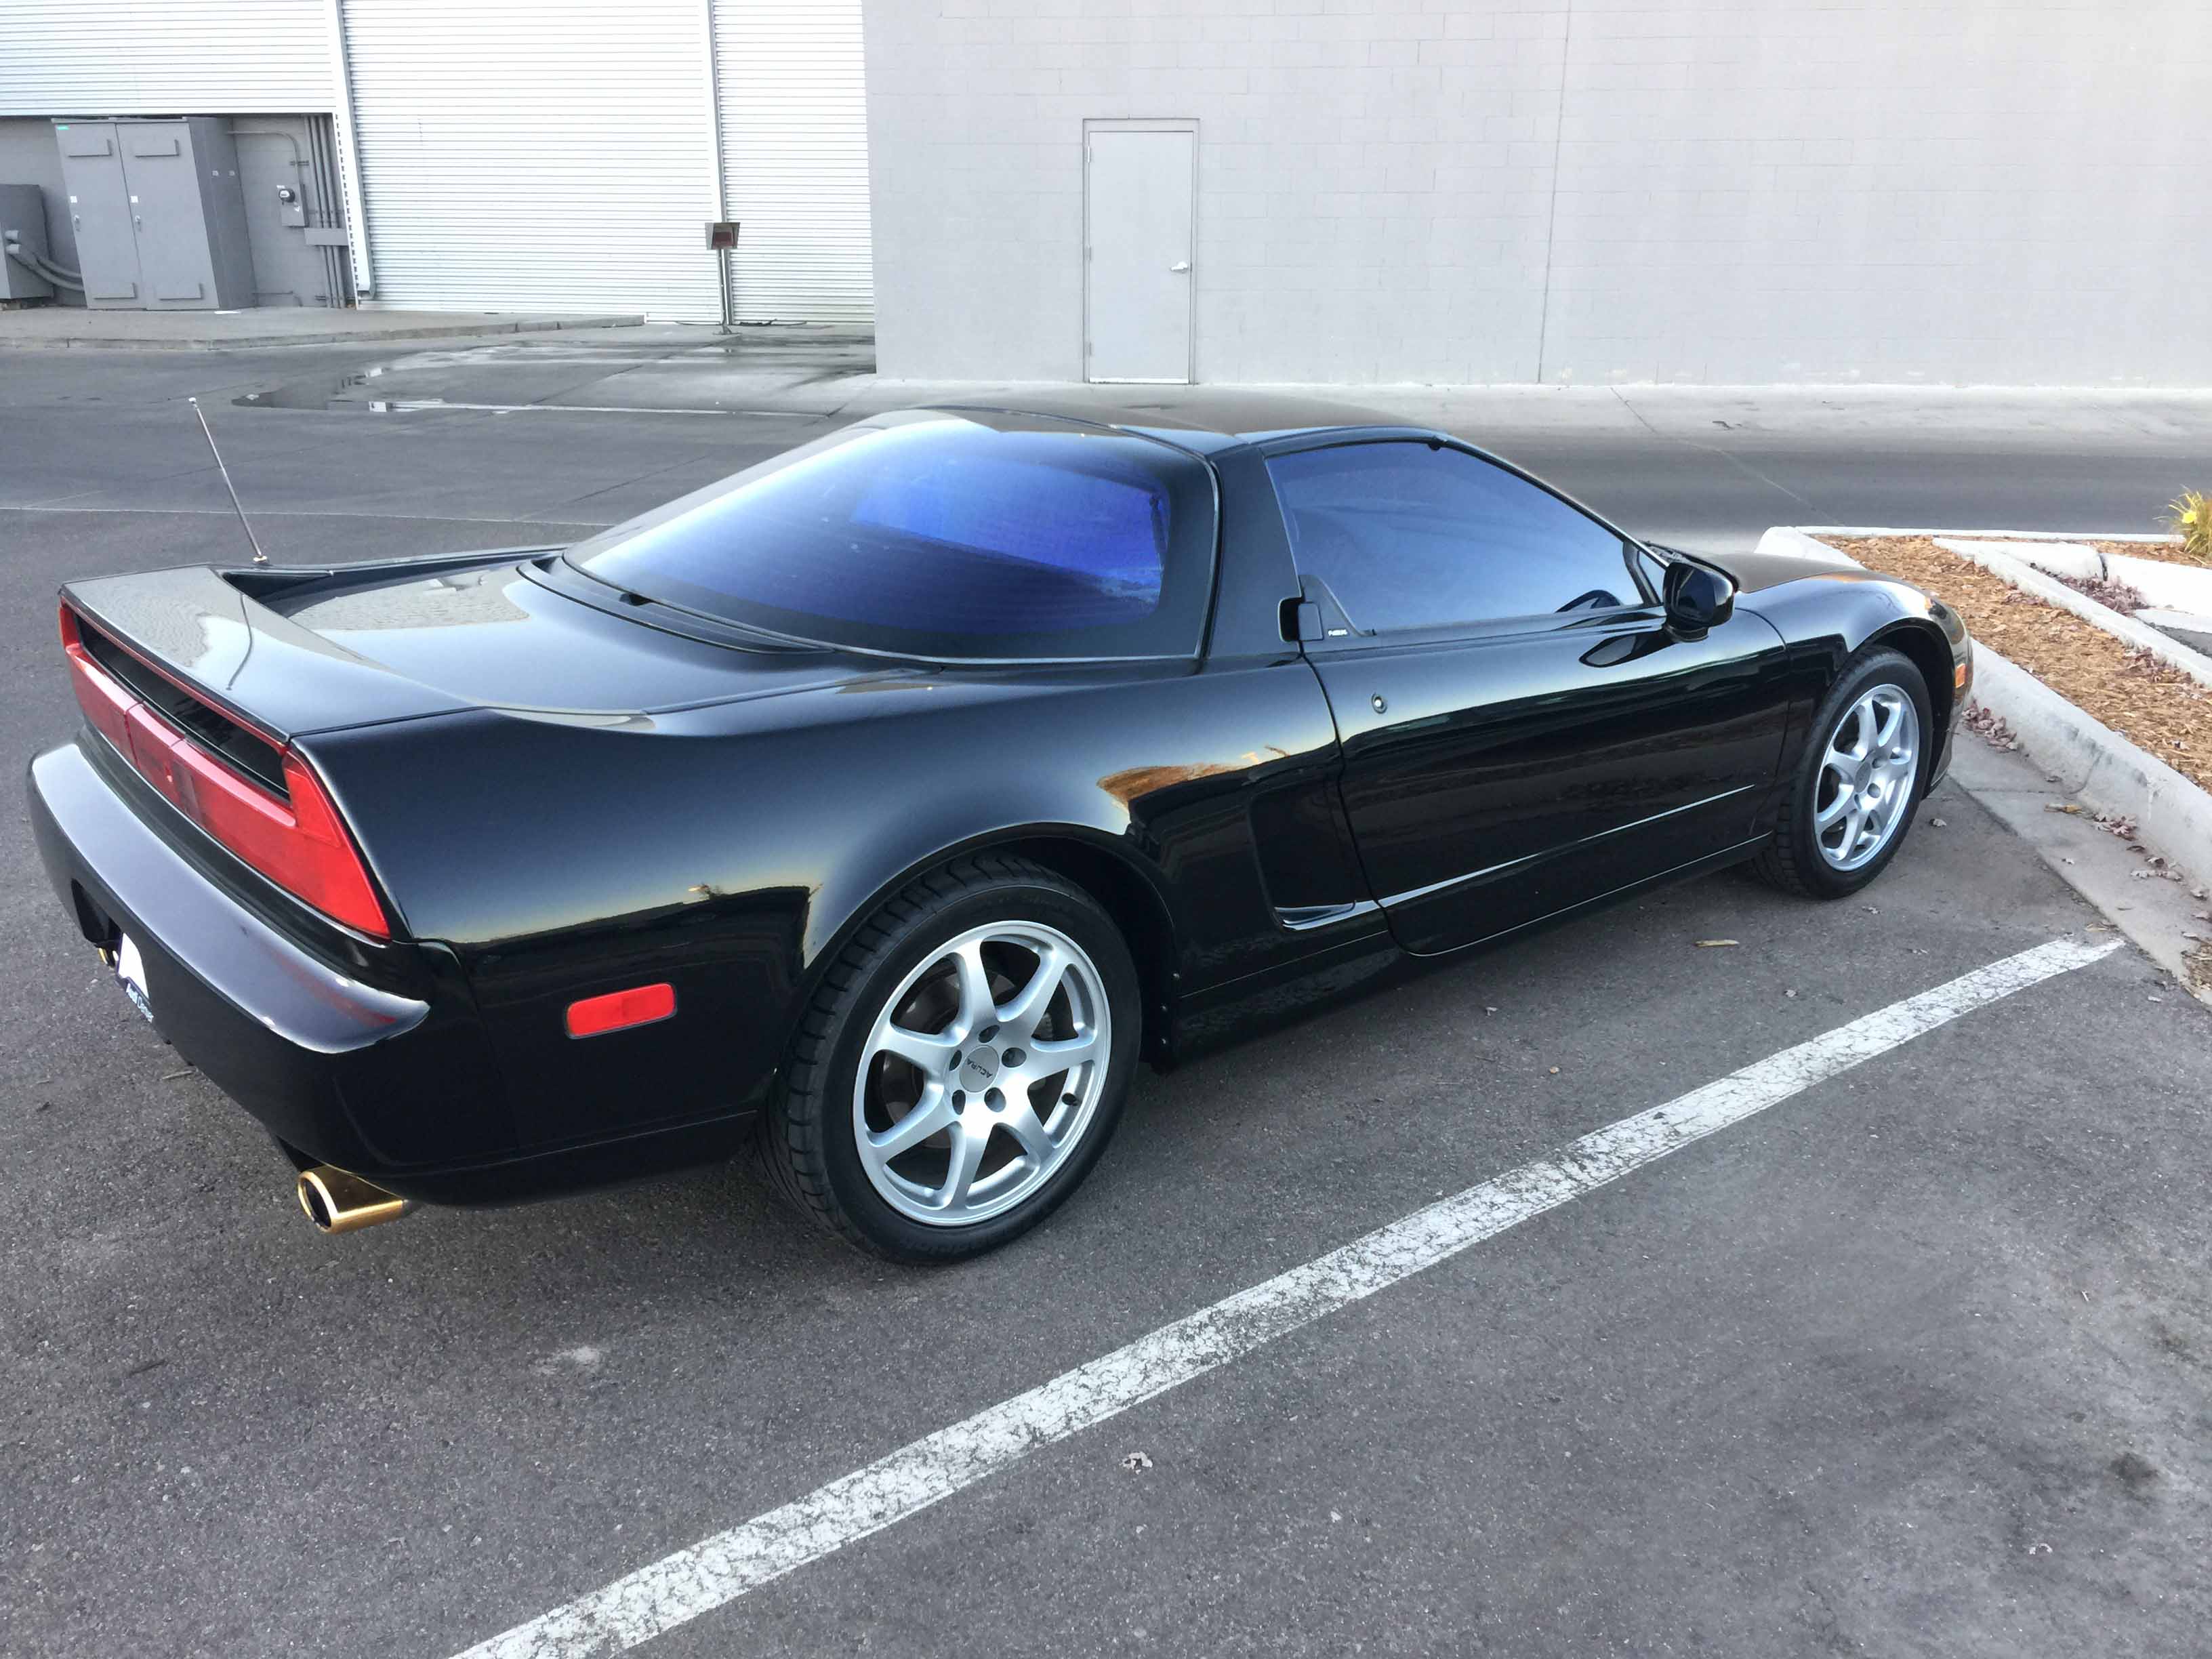
On the road somewhere in New Mexico at sunset. My friend needed to use the restroom...

Freshly washed in her new home with the unsightly front plate removed. :-) I use ONR no-rinse cleaning solution with microfiber sponges and a large waffle weave microfiber towel for drying.
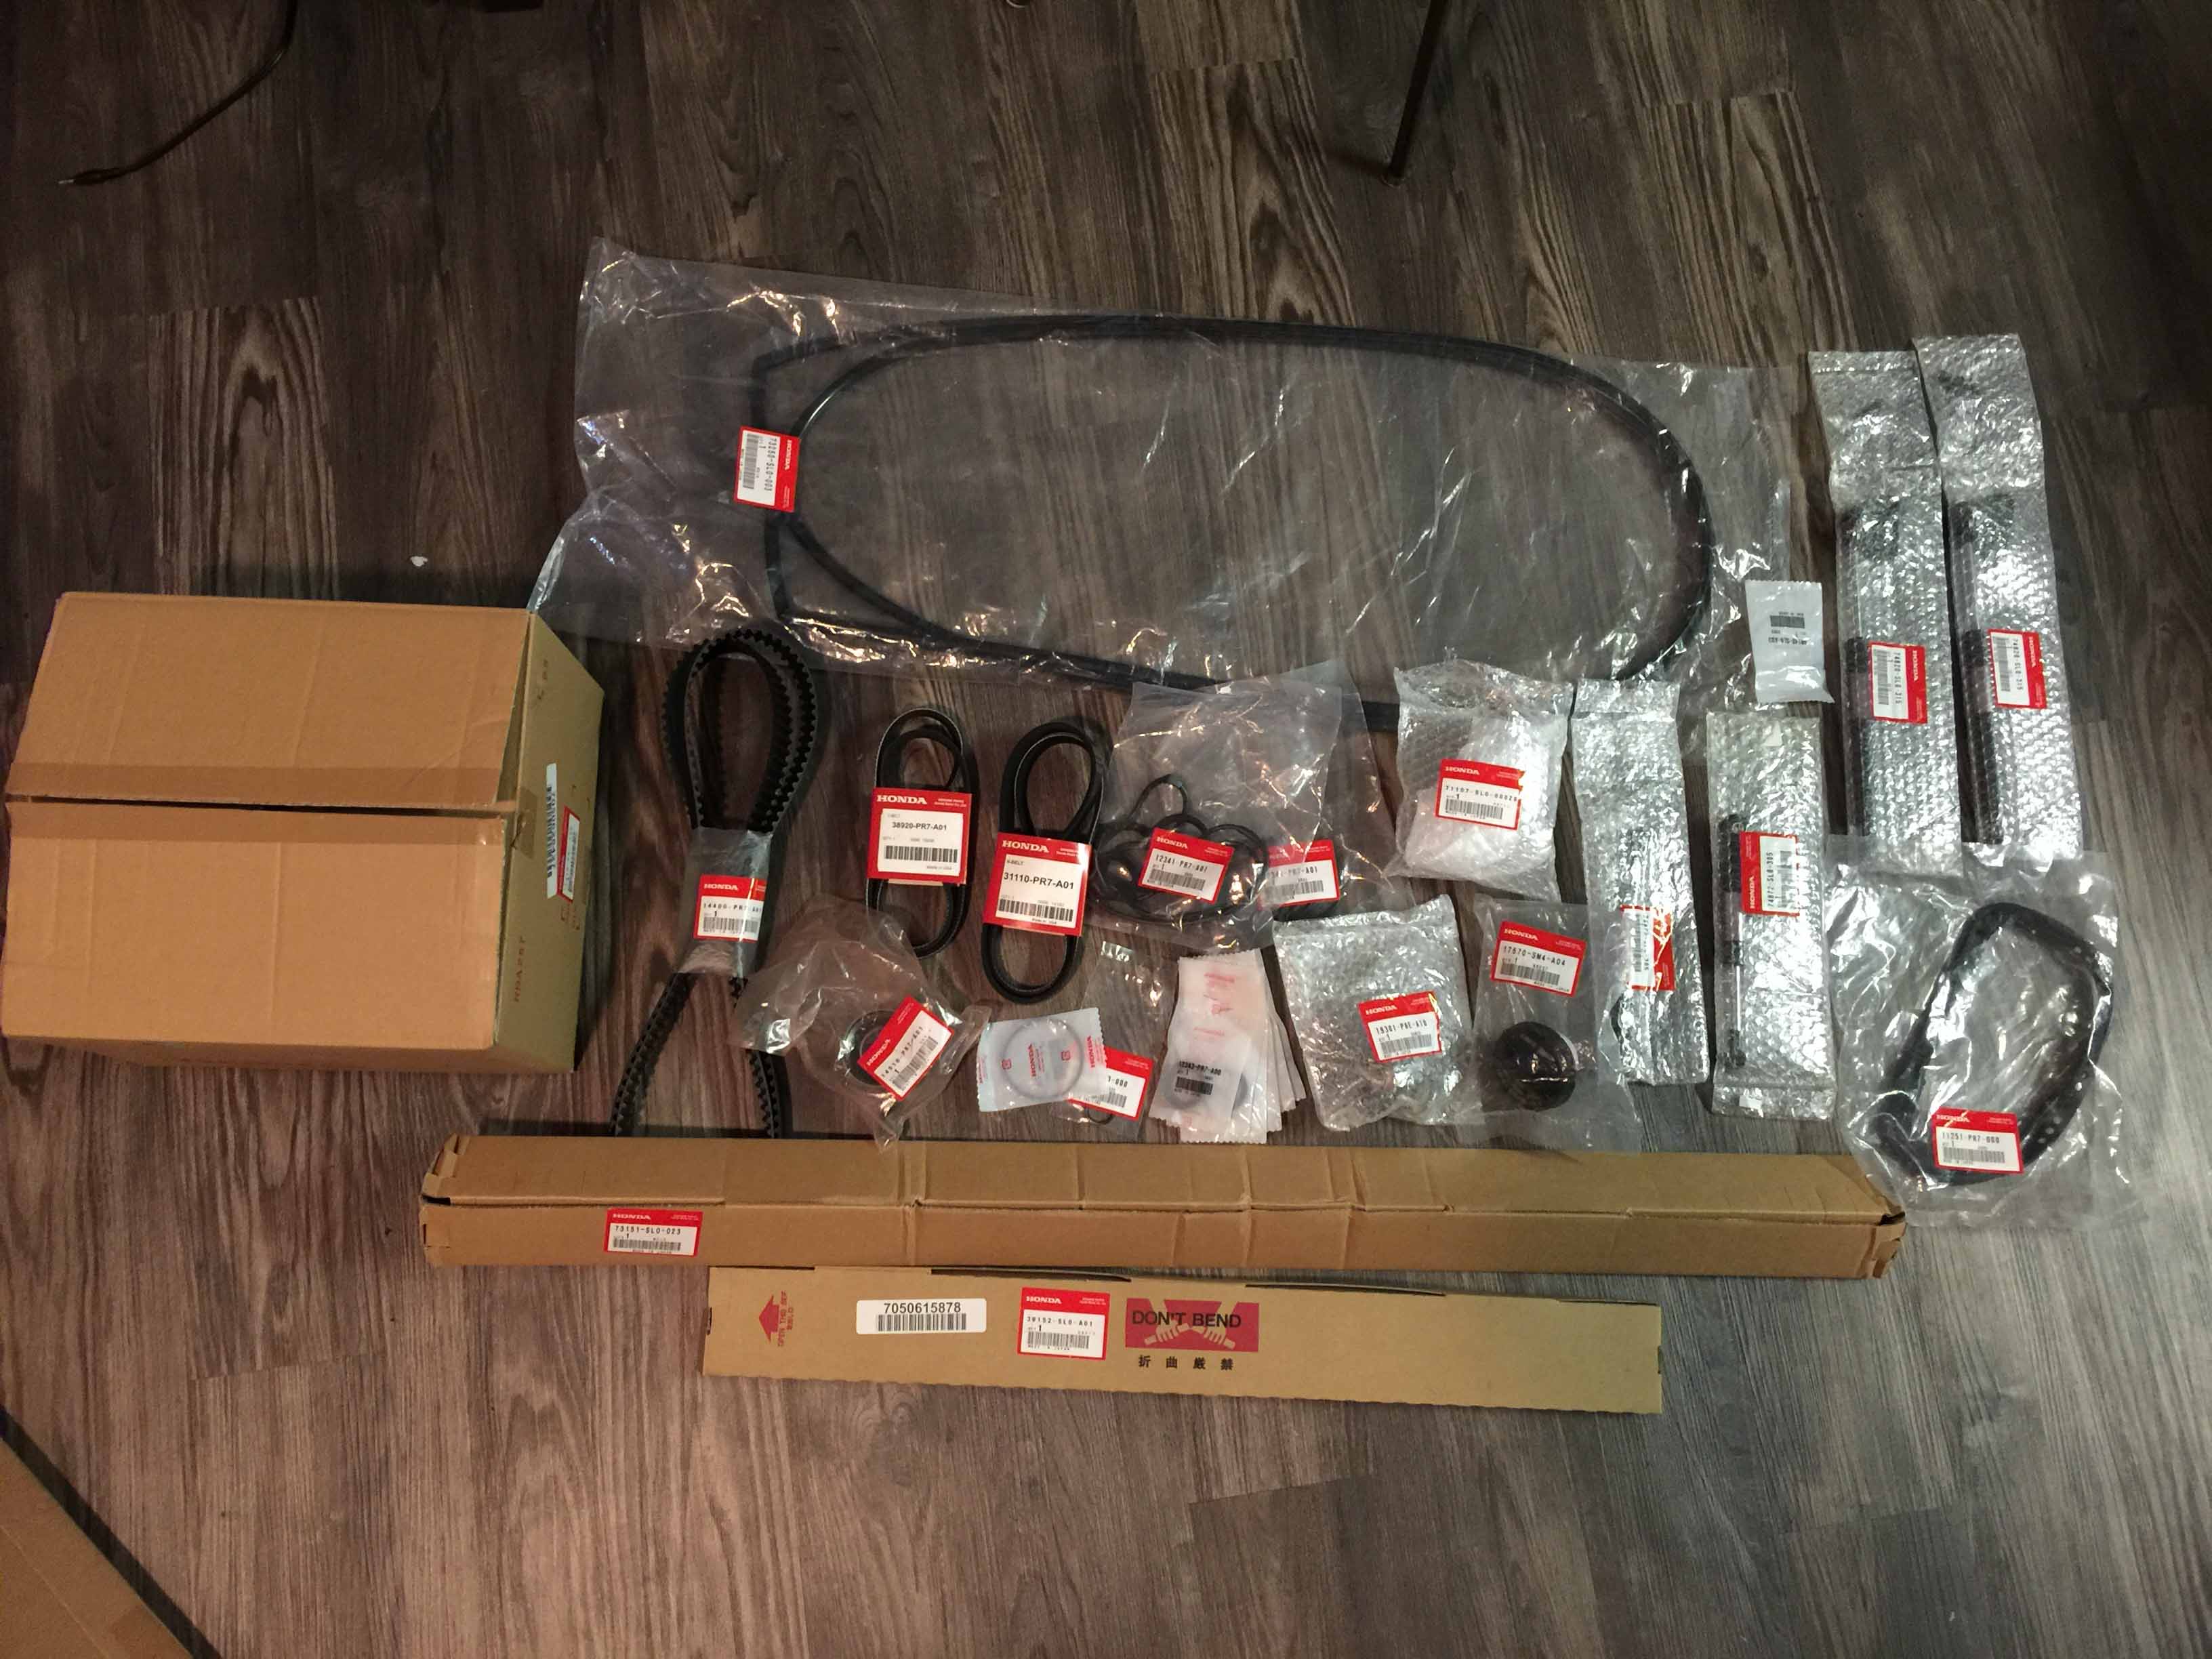
I ordered the following parts today from Delray Acura so hopefully some updates should start rolling out soon when I get them installed and start correcting the paint. Also, if anyone doesn't know, the coupon code ClubRSX is good for 5% off at acuraoemparts.com. When ordering parts for this car 5% can actually be a solid discount.
- Timing belt
- Timing belt tensioner
- Water pump
- Thermostat
- Valve cover gaskets
- Spark plug gaskets
- A/C belt
- Alternator belt
- Oil pan gasket
- Oil filter holder gaskets
- A screw to replace a missing one on the console
- Factory painted front tow hook cover
- Trunk struts
- Rear glass struts
- Antenna mast
- Fuel cap
- Windshield top rubber molding
- Rear window molding
Below is a list of things I've done and things I want to do, in no particular order.
Project Checklist
- Paint correction/protection DONE
- Timing belt/tensioner/water pump DONE
- Accessory belts DONE
- Oil pan gasket DONE
- Valve cover gaskets DONE
- Spark plugs DONE
- Sound system dying, rebuild amplifiers. DONE
- Broken antenna mast DONE
- Worn out trunk struts DONE
- Worn out rear glass struts DONE
- Armrest missing screw DONE
- Rear glass molding DONE
- Upper windshield molding DONE
- Gas cap DONE
- LED lighting DONE
- Transmission fluid change DONE
- Coolant change DONE
- Window tint DONE
- Figure out the noise from passenger side front end DONE (turned out to be uneven tire wear caused by bad shocks, replaced shocks and front tires)
- Plug over passenger side strut bolt missing DONE
- Paintless dent repair DONE (but drivers side door dents could not be repaired)
- Amber vinyl on front turn signalsABANDONED("amber" vinyl was more yellow, didn't like the look that much anyways)
- Retrofit/rebuild window regulators DONE
- Fix B-pillars DONE
- Fix rear bumper DONE
- Replace dampers DONE
- Fabricate fire extinguisher bracket
- Refinish wheels
- Zanardi shifter DONE
- Custom titanium hand brake DONE
- HID retrofit
- Refinish interior trim pieces DONE
- Brake system refresh (powdercoat + rebuild calipers, replace hoses, replace fluid) DONE
- ABS unit refresh (flush fluid, possibly replace seals in ABS unit)
- Clear ceramic film on front windshield
- Replace front windshield
- Have driver side door dings fixed DONE
- Add AUX audio adapter in place of CD changer DONE
- Fix alternator whine, suspect bearings going out.
- Adjustable exhaust hangers
- Extended ARP wheel studs/open lug nuts
- 15mm front/25mm rear spacers
My plans are to keep it as close to stock as I reasonably can, at the moment the only aftermarket parts I'm considering are for the stereo system since the original speakers/amplifiers are failing and I can't make myself spend $3000 on shitty stock stereo equipment.
On one hand, having all maintenance done at the dealer would probably be better for the cars value, but I love working on cars so I'll end up doing the vast majority of the work myself. I've spent the past few years restoring an Integra that was too far gone for any reasonable person to touch it so I've amassed the tools to do essentially everything short of dropping the engine since I don't have a lift. I think keeping meticulous records and all receipts for parts for the work that I do will be enough for most buyers if I ever decide to sell it.
The car isn't perfect, however, so I have some work to do.
- Slight grind entering 5th gear quickly, 5th seems to be a bit problematic with these cars so I'm hoping some synchromesh fluid will ease the issue. I'm just going to be careful with 5th until I have to change the clutch, then I'll change the 5th gear synchronizer. I rebuilt the 5-speed transmission in the Integra in my garage so those don't scare me anymore.
- B-pillars and rear bumper were resprayed and there is some orange peel that needs to be wetsanded and buffed out.
- Swirls all over the car.
- Window tint is peeling and turning purple.
- Slight oxidization on the front bumper that will need to be wetsanded and buffed. Worst case scenario I have a shop scuff and reclear the whole front bumper, but I think I can save it.
- Sun damaged rubber trim around the rear window and on top of the front windshield.
- Trunk and rear glass lifter struts are losing their strength.
- The dealer broke off the radio antenna.
- The dealer lost my gas cap in the process of filling the car up right before I drove off. Currently there is a generic parts store cap on there.
- Timing belt only has 25k miles on it but is 7 years old.
- Missing front tow hook cover.
As it sat on the dealer lot.
On the road somewhere in New Mexico at sunset. My friend needed to use the restroom...
Freshly washed in her new home with the unsightly front plate removed. :-) I use ONR no-rinse cleaning solution with microfiber sponges and a large waffle weave microfiber towel for drying.
I ordered the following parts today from Delray Acura so hopefully some updates should start rolling out soon when I get them installed and start correcting the paint. Also, if anyone doesn't know, the coupon code ClubRSX is good for 5% off at acuraoemparts.com. When ordering parts for this car 5% can actually be a solid discount.
- Timing belt
- Timing belt tensioner
- Water pump
- Thermostat
- Valve cover gaskets
- Spark plug gaskets
- A/C belt
- Alternator belt
- Oil pan gasket
- Oil filter holder gaskets
- A screw to replace a missing one on the console
- Factory painted front tow hook cover
- Trunk struts
- Rear glass struts
- Antenna mast
- Fuel cap
- Windshield top rubber molding
- Rear window molding
Below is a list of things I've done and things I want to do, in no particular order.
Project Checklist
- Paint correction/protection DONE
- Timing belt/tensioner/water pump DONE
- Accessory belts DONE
- Oil pan gasket DONE
- Valve cover gaskets DONE
- Spark plugs DONE
- Sound system dying, rebuild amplifiers. DONE
- Broken antenna mast DONE
- Worn out trunk struts DONE
- Worn out rear glass struts DONE
- Armrest missing screw DONE
- Rear glass molding DONE
- Upper windshield molding DONE
- Gas cap DONE
- LED lighting DONE
- Transmission fluid change DONE
- Coolant change DONE
- Window tint DONE
- Figure out the noise from passenger side front end DONE (turned out to be uneven tire wear caused by bad shocks, replaced shocks and front tires)
- Plug over passenger side strut bolt missing DONE
- Paintless dent repair DONE (but drivers side door dents could not be repaired)
- Amber vinyl on front turn signalsABANDONED("amber" vinyl was more yellow, didn't like the look that much anyways)
- Retrofit/rebuild window regulators DONE
- Fix B-pillars DONE
- Fix rear bumper DONE
- Replace dampers DONE
- Fabricate fire extinguisher bracket
- Refinish wheels
- Zanardi shifter DONE
- Custom titanium hand brake DONE
- HID retrofit
- Refinish interior trim pieces DONE
- Brake system refresh (powdercoat + rebuild calipers, replace hoses, replace fluid) DONE
- ABS unit refresh (flush fluid, possibly replace seals in ABS unit)
- Clear ceramic film on front windshield
- Replace front windshield
- Have driver side door dings fixed DONE
- Add AUX audio adapter in place of CD changer DONE
- Fix alternator whine, suspect bearings going out.
- Adjustable exhaust hangers
- Extended ARP wheel studs/open lug nuts
- 15mm front/25mm rear spacers
Last edited by MotorMouth93; 04-04-2018 at 06:38 PM.

The following users liked this post:
11-08-2016, 11:53 PM
#4
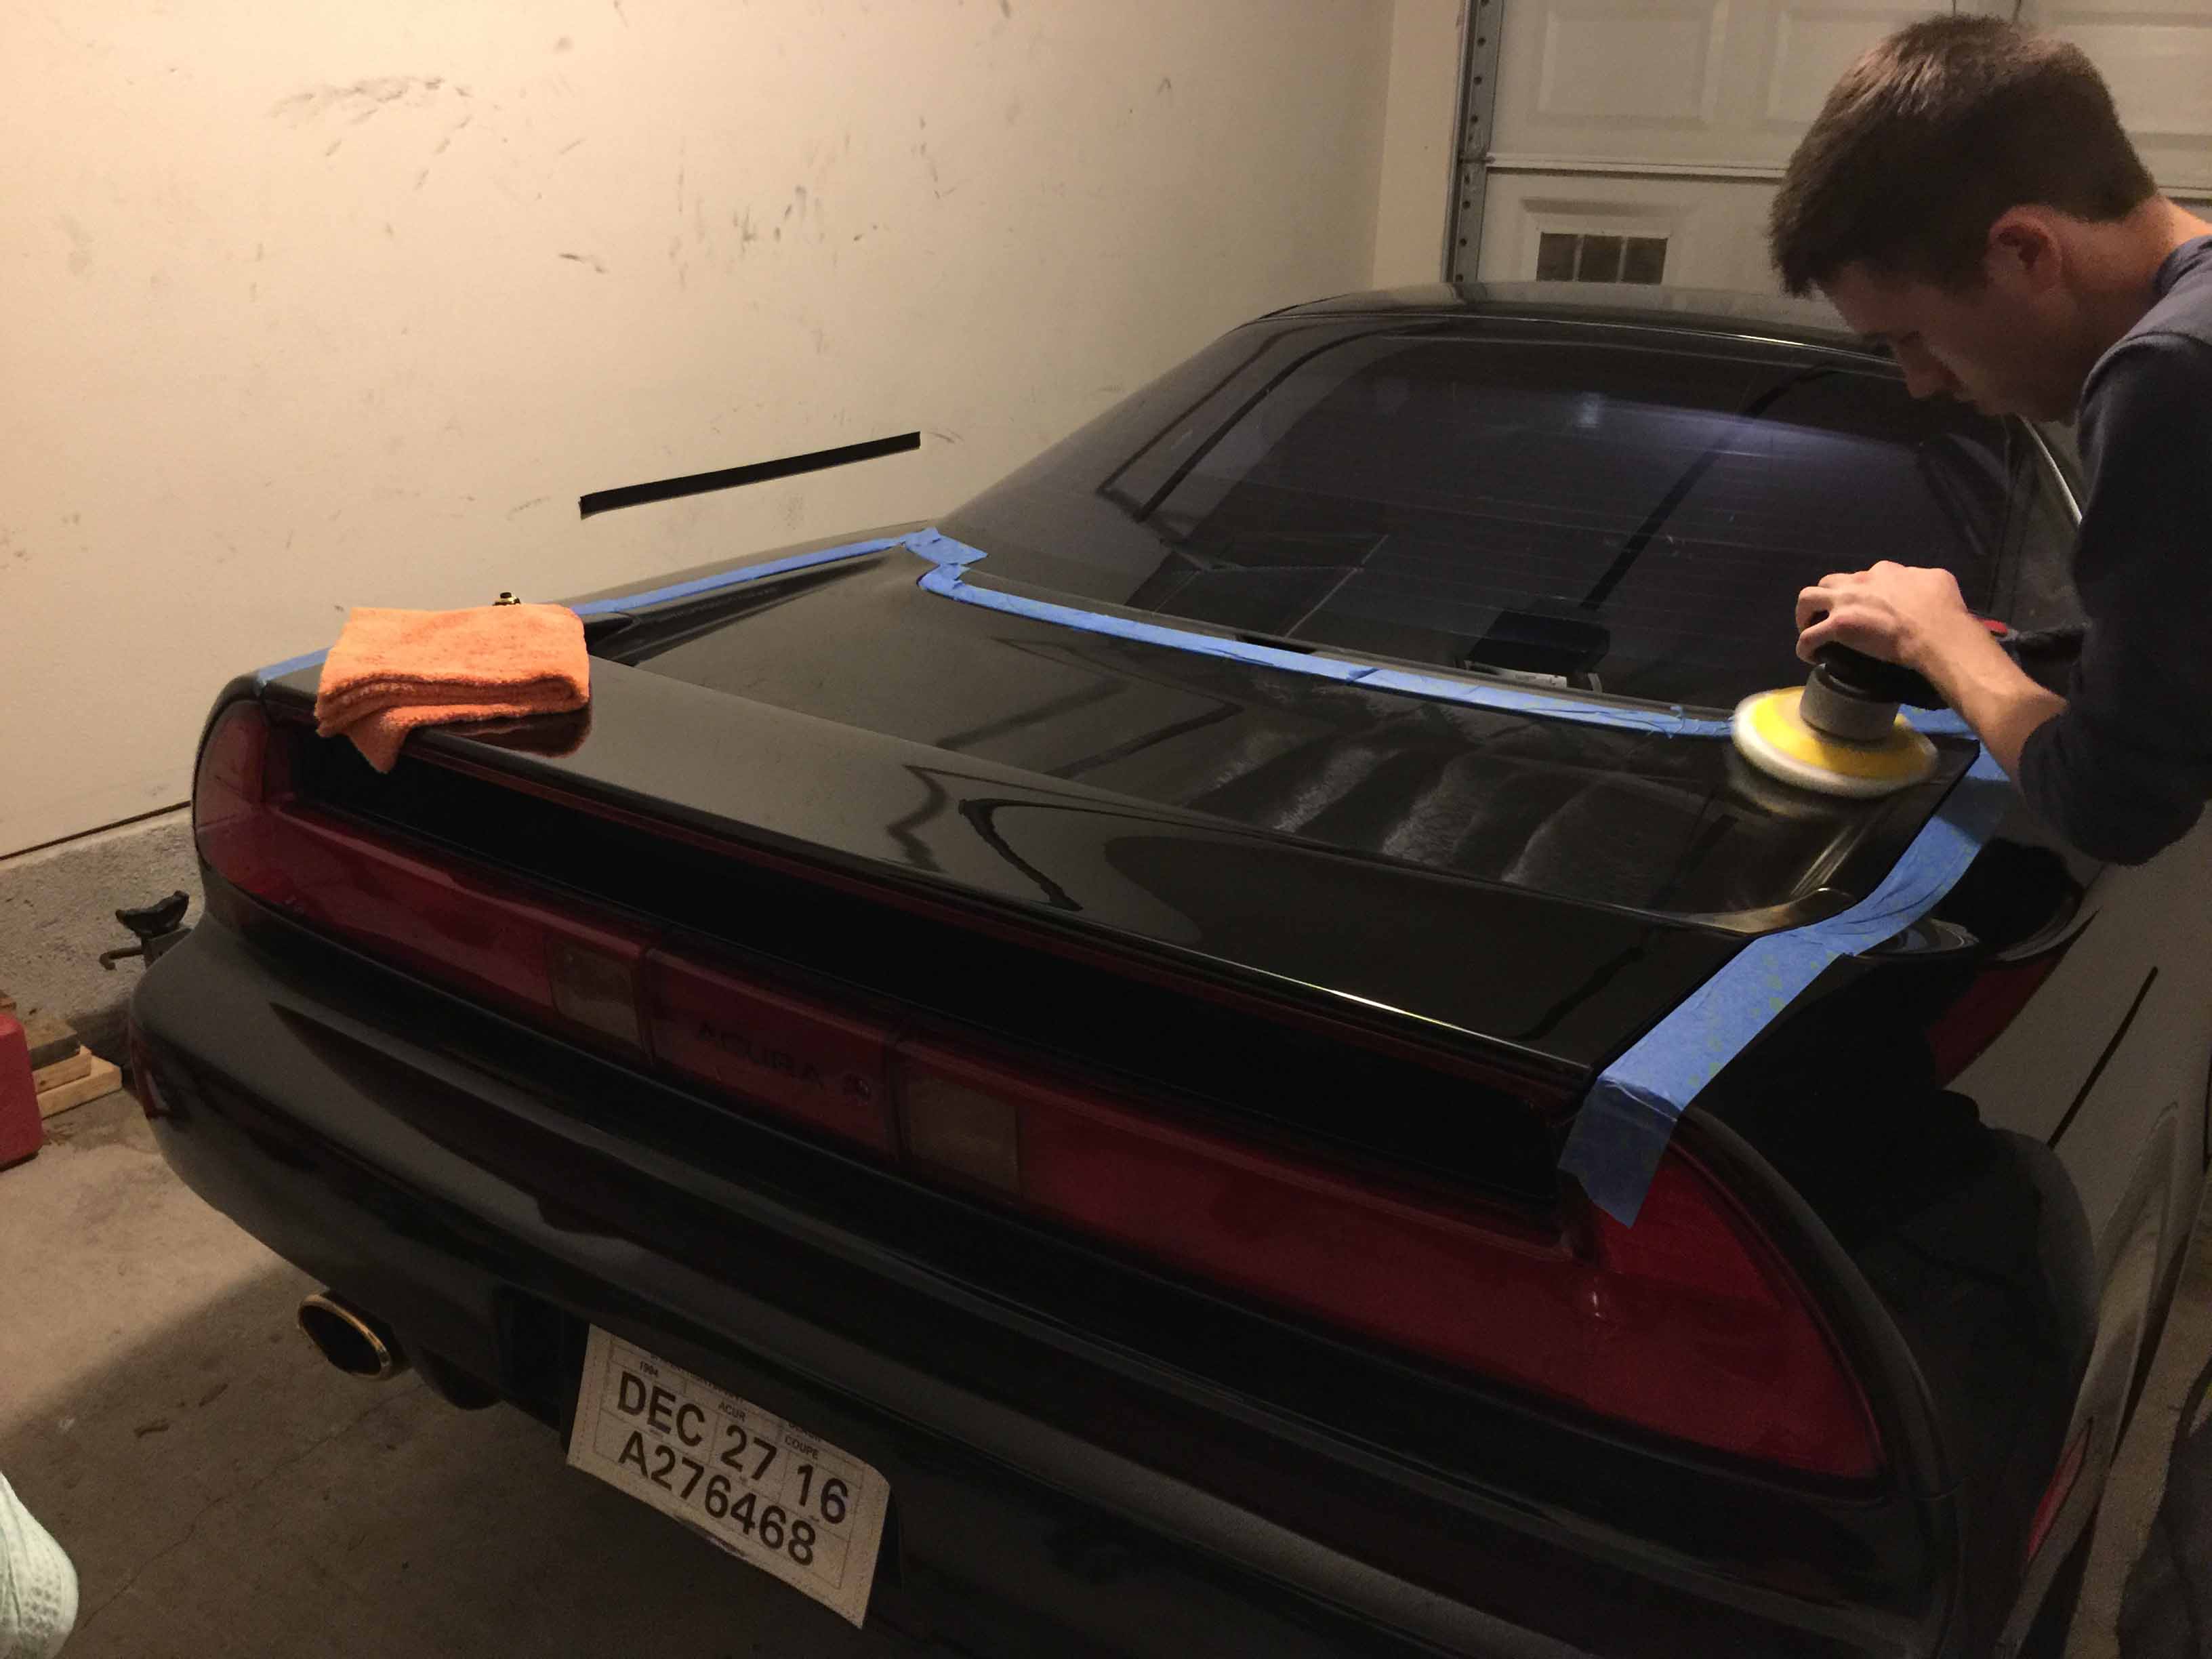
Rather minor update. The whole car has moderate paint swirls so all that needs to be corrected. So to start off we washed the whole car using a soap that can remove wax and then clay bar'd the trunk since that's my test area. Then I ordered the 7 pad kit from ChemicalGuys along with the 4 compound kit from them and started experimenting with different combinations of buffer pads and compounds.

For the polishing, we found that the following yielded good results.
Pass 1) Green pad, "36" compound.
Pass 2) White pad, "38" compound.
Pass 3) Blue pad, "38" compound.
Also seen here is a good friend of mine who is a total wizard when it comes to detaling, he's been helping me out a ton and has taught me pretty much everything I know about keeping a car clean and looking nice. Thanks Carter, I owe you Chipotle burritos for life.
Last edited by MotorMouth93; 08-05-2017 at 09:10 PM.
11-14-2016, 09:26 AM
#7
I'm tearing my hair out, buying a black car was a terrible idea. If I leave it alone for 15 minutes in the garage it's completely covered in dust. Paint swirls and imperfections that wouldn't be visible on any other color are blatantly obvious, and the method I've been using for polishing just randomly decided to stop working so now I need to figure out why. Maybe I didn't wash my microfiber towels properly, or maybe I didn't was the pads properly. Oh well, in a few days my parts will show up and I can go back to the mechanical side of things for a while.
Trending Topics
11-15-2016, 04:26 PM
#9
Painting Masterpieces
I'm tearing my hair out, buying a black car was a terrible idea. If I leave it alone for 15 minutes in the garage it's completely covered in dust. Paint swirls and imperfections that wouldn't be visible on any other color are blatantly obvious, and the method I've been using for polishing just randomly decided to stop working so now I need to figure out why. Maybe I didn't wash my microfiber towels properly, or maybe I didn't was the pads properly. Oh well, in a few days my parts will show up and I can go back to the mechanical side of things for a while.

But a nice, clean black car is stunning to behold. Congrats on the car!
11-15-2016, 10:50 PM
#10
Heh I'm not giving up just yet. I ordered some microfiber buffing pads so we'll see how those work out.

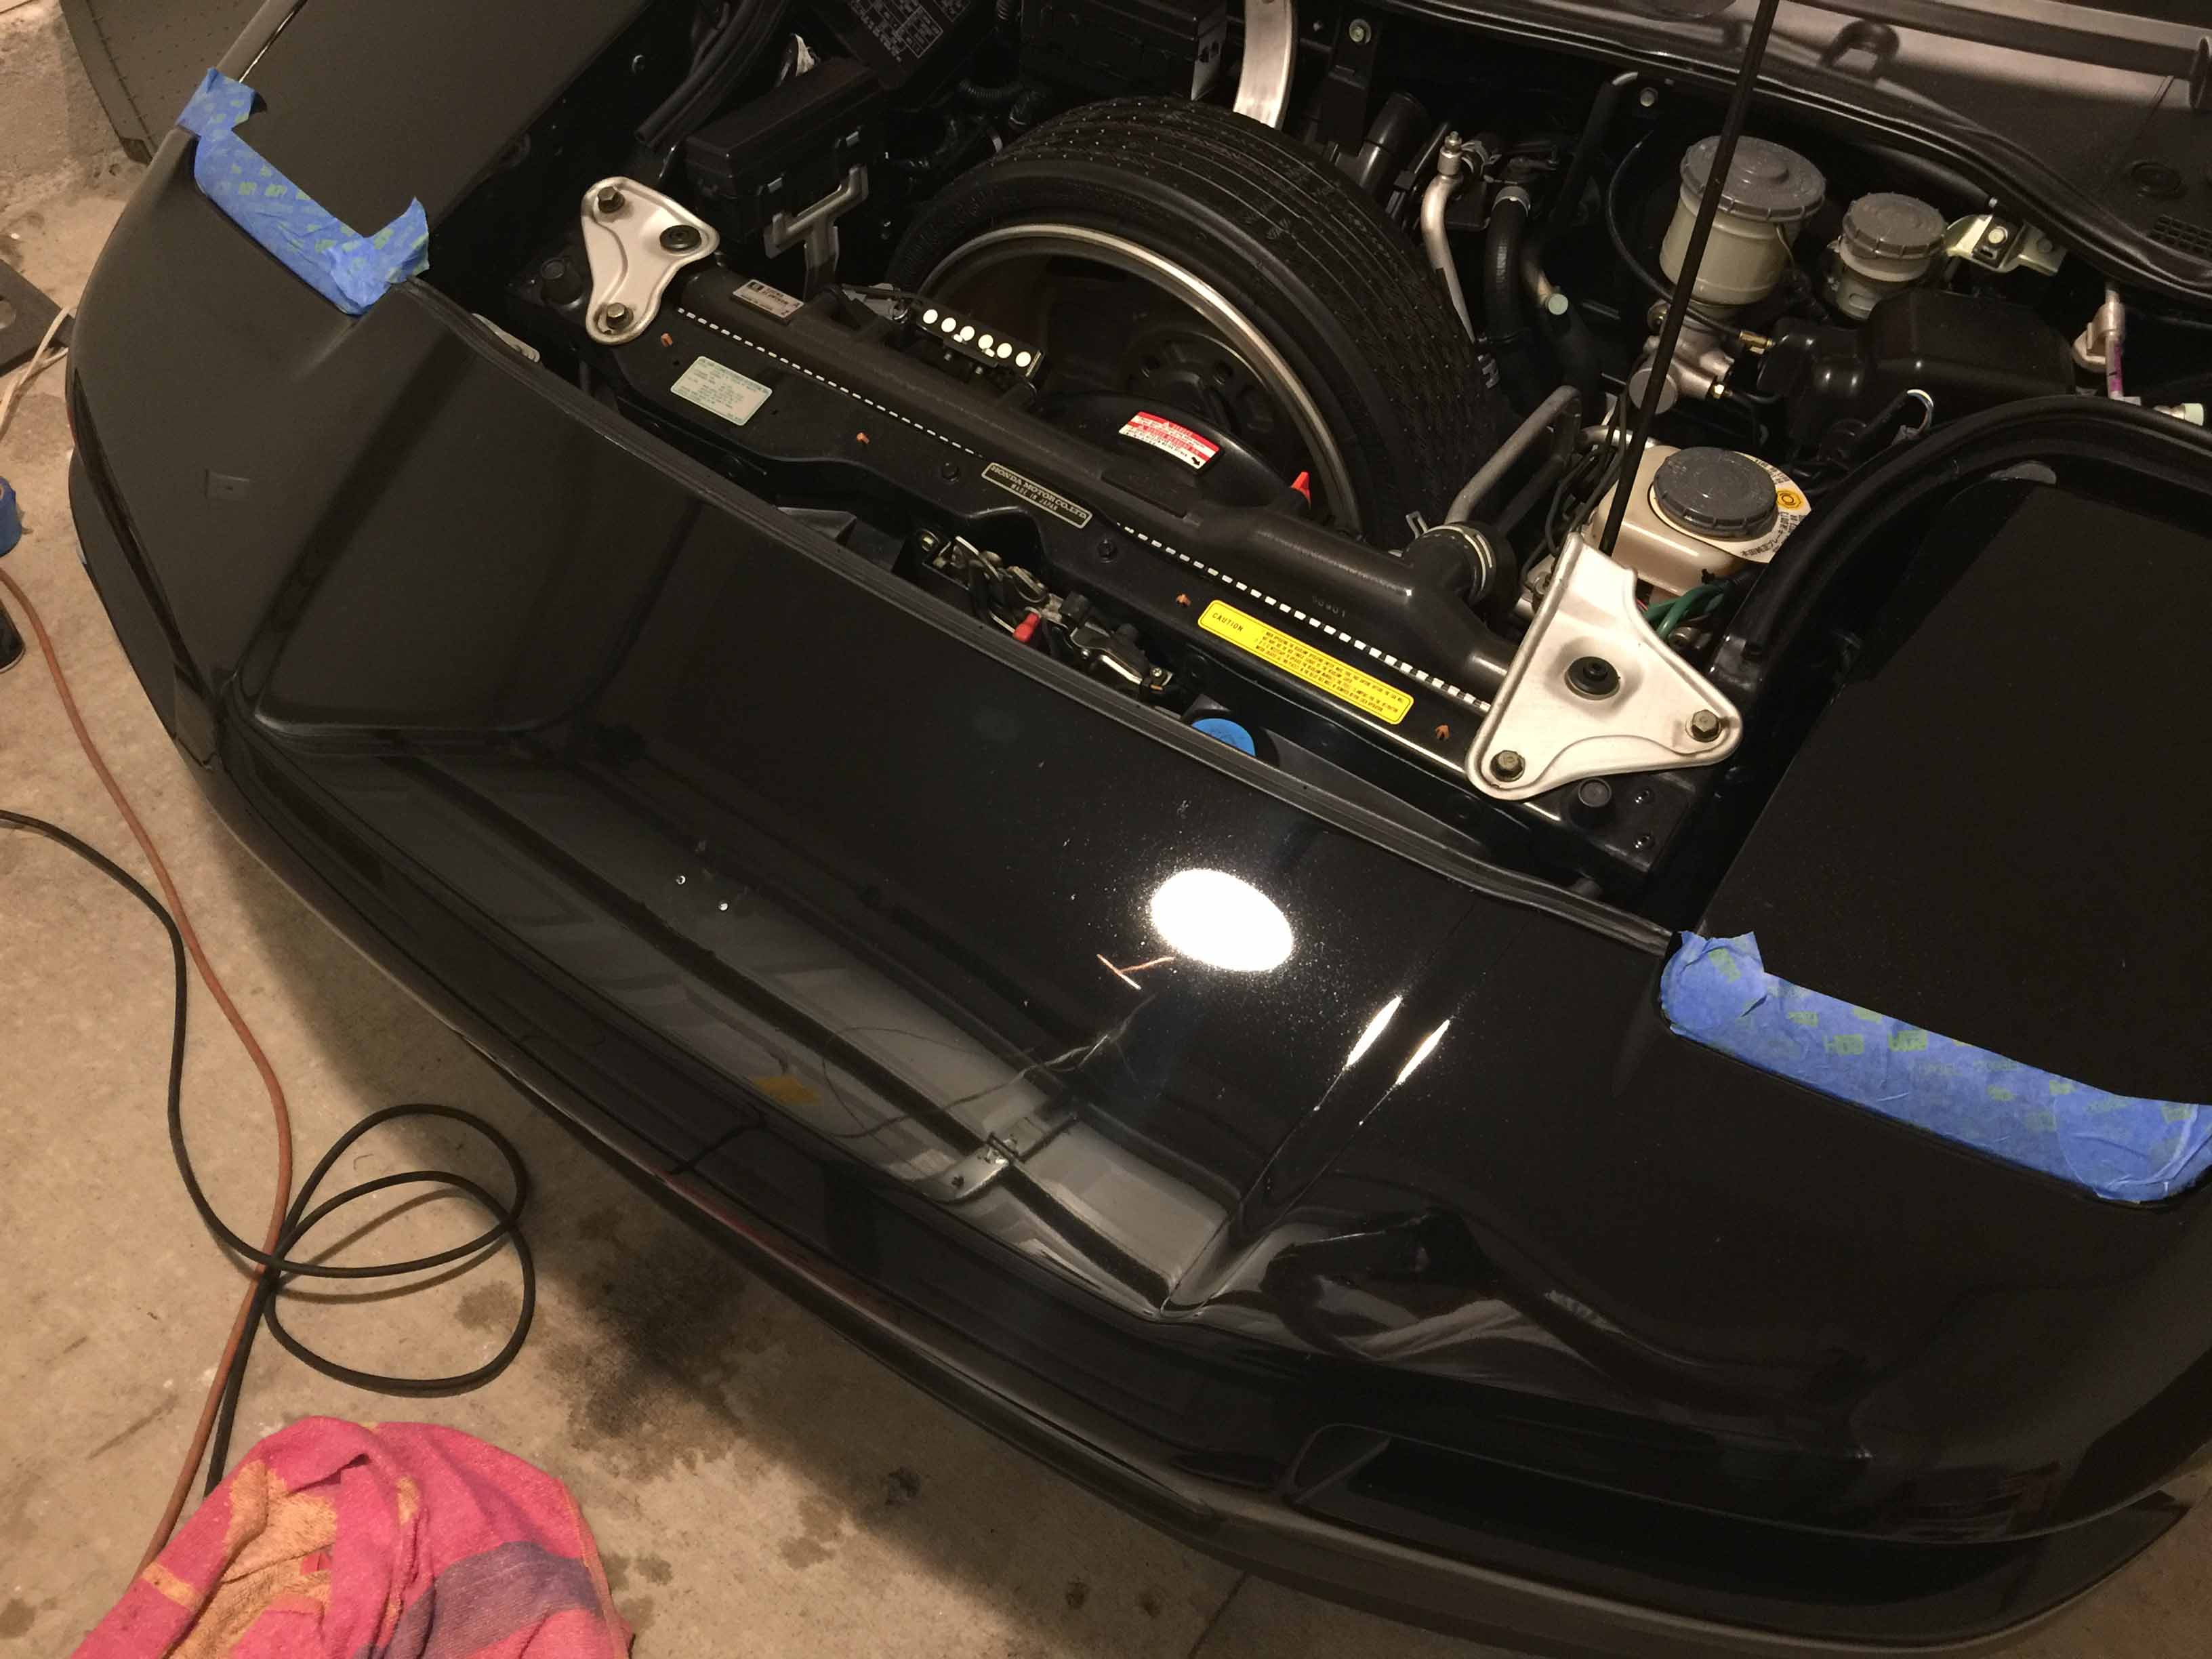
She's going under the knife. My parts aren't supposed to arrive until Wednesday but I had some time so I started on the disassembly process for the timing belt job. Things seem more thought out than on the Integra but overall it's more of a pain in the ***. For instance, there's jack points in the middle of the chassis as well as near the front and rear wheel wells which makes it super easy to get the car up on jack stands and plastic parts have metal inserts to keep you from over-tightening bolts, but everything is so much more cramped that it still sucks to work on lol. Also my garage setup has changed quite a bit from what it was a few months ago, I only have a single garage now but it's much more organized and has much better lighting than my previous space so it's not really a downgrade.

She's going under the knife. My parts aren't supposed to arrive until Wednesday but I had some time so I started on the disassembly process for the timing belt job. Things seem more thought out than on the Integra but overall it's more of a pain in the ***. For instance, there's jack points in the middle of the chassis as well as near the front and rear wheel wells which makes it super easy to get the car up on jack stands and plastic parts have metal inserts to keep you from over-tightening bolts, but everything is so much more cramped that it still sucks to work on lol. Also my garage setup has changed quite a bit from what it was a few months ago, I only have a single garage now but it's much more organized and has much better lighting than my previous space so it's not really a downgrade.
Last edited by MotorMouth93; 08-05-2017 at 09:11 PM.
11-16-2016, 09:35 AM
#11
Buy a california mini duster brush. Those things are incredible, won't scratch and remove layers of dust in a matter of seconds. You can do your entire car in about 1 minute to remove the vale of dust if it bothers you that day. I've owned 5 black cars. Love them when they are cleaned but you need to get a proper duster to keep it clean between details, car washes, etc.
11-17-2016, 10:34 PM
#12
I received a large package from Delray Acura this morning, and they forgot a part. It was a $2 part though so I guess I'll just live with it, but that's two orders in a row that they've messed up so I doubt I'll be ordering from them again.
I ended up having to work pretty late today so I didn't get anything done on the engine but I did turn a Maraca into a shift **** for my Integra (lost a bet...) and installed the easy parts on the NSX. First I swapped out the generic parts store gas cap for the OEM unit. The guy who filled the car up apparently forgot to put it back on right before I picked the car up so I had a parts store cap on there, he was apologetic and offered to pay for the replacement so I'm not mad.
Then I went ahead and installed the new rear glass lifters, the existing ones sort of worked but the new ones are great, you barely have to push up on it at all now.
Replaced the antenna mast as well. I unplugged the antenna motor immediately afterwards since I never use the radio but it makes me happy that it works and is 100% OEM.

And finally, the front tow hook cover was missing so I picked up a brand new painted one. Granted it doesn't match perfectly since one has been driving around for 22 years and one has been in a warehouse, but it's won't be too noticeable after I clean and buff the front end.

Hopefully I'll have time to get a lot done this weekend.
I ended up having to work pretty late today so I didn't get anything done on the engine but I did turn a Maraca into a shift **** for my Integra (lost a bet...) and installed the easy parts on the NSX. First I swapped out the generic parts store gas cap for the OEM unit. The guy who filled the car up apparently forgot to put it back on right before I picked the car up so I had a parts store cap on there, he was apologetic and offered to pay for the replacement so I'm not mad.
Then I went ahead and installed the new rear glass lifters, the existing ones sort of worked but the new ones are great, you barely have to push up on it at all now.
Replaced the antenna mast as well. I unplugged the antenna motor immediately afterwards since I never use the radio but it makes me happy that it works and is 100% OEM.
And finally, the front tow hook cover was missing so I picked up a brand new painted one. Granted it doesn't match perfectly since one has been driving around for 22 years and one has been in a warehouse, but it's won't be too noticeable after I clean and buff the front end.
Hopefully I'll have time to get a lot done this weekend.
Last edited by MotorMouth93; 08-05-2017 at 09:12 PM.
11-22-2016, 10:41 AM
#14
I think I might have figured out why I'm having so much trouble polishing some panels. Apparently it's not unknown for an NSX to have different hardness in the clear coat across different panels, I was pointed to a video by AMMO NYC on water polishing cars with ridiculously sensitive paint so I'm going to give that a shot next.
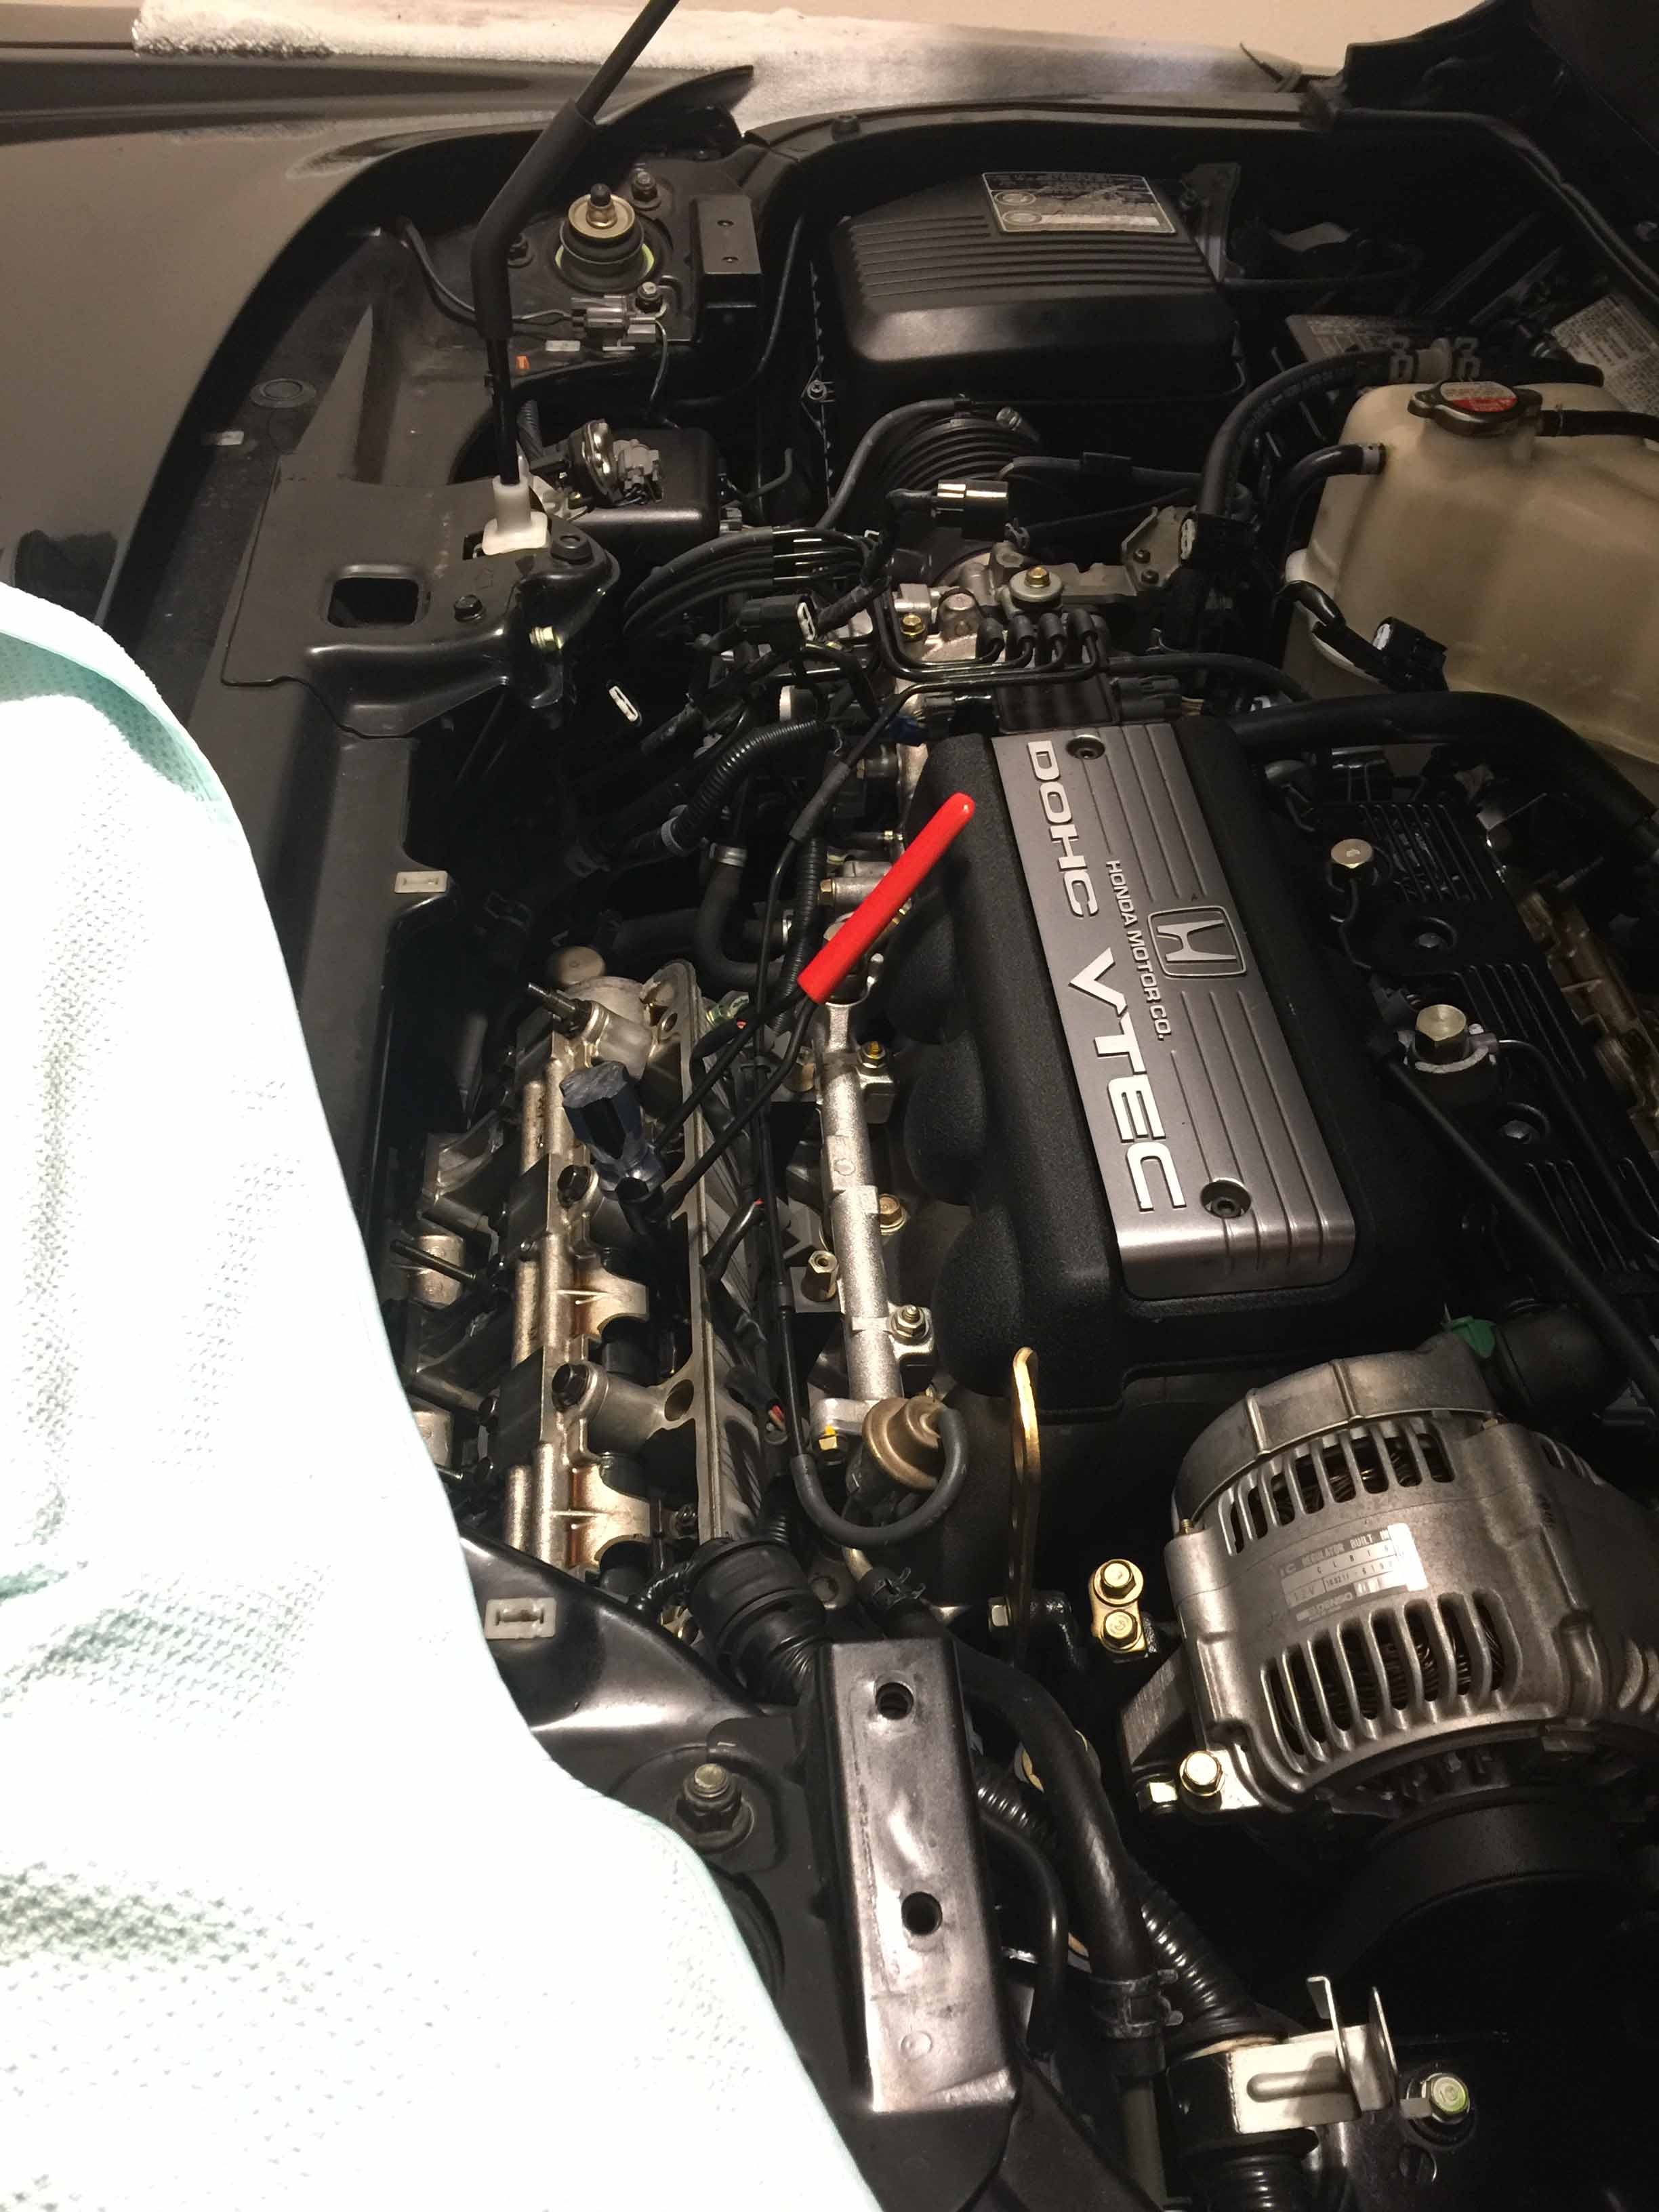
The ****ing crank pulley bolt has been driving me crazy. My 650lbft impact wouldn't touch it. I tried PB Blaster overnight, then the impact again and no dice. So I tried torching it, still no dice. I borrowed an impact from a coworker and it didn't touch it either. Finally I bought a Mac Tools 1200lbft impact second-hand and that STILL wouldn't touch it. So I gave up and am going to take the car to the dealer to have them break it loose before I either destroy something or spend a ton of money on more crap to try to break it loose. I guess the only upside is that I got a pretty sweet impact out of it, the "650lbft" was a cheapish Husky impact from Home Depot.
I did get the valve adjustment finished though. Rather than buy the expensive Honda tool I just got the $15 one from Amazon and cut the end off with a hacksaw, worked like a charm. I did valve adjustments on B-series motors without it and it's definitely worth it even on those cars, it's much easier if you can hold the screw in place while tightening the lock nut, and with the V6 it would be virtually impossible without it if you don't want to pull the engine.
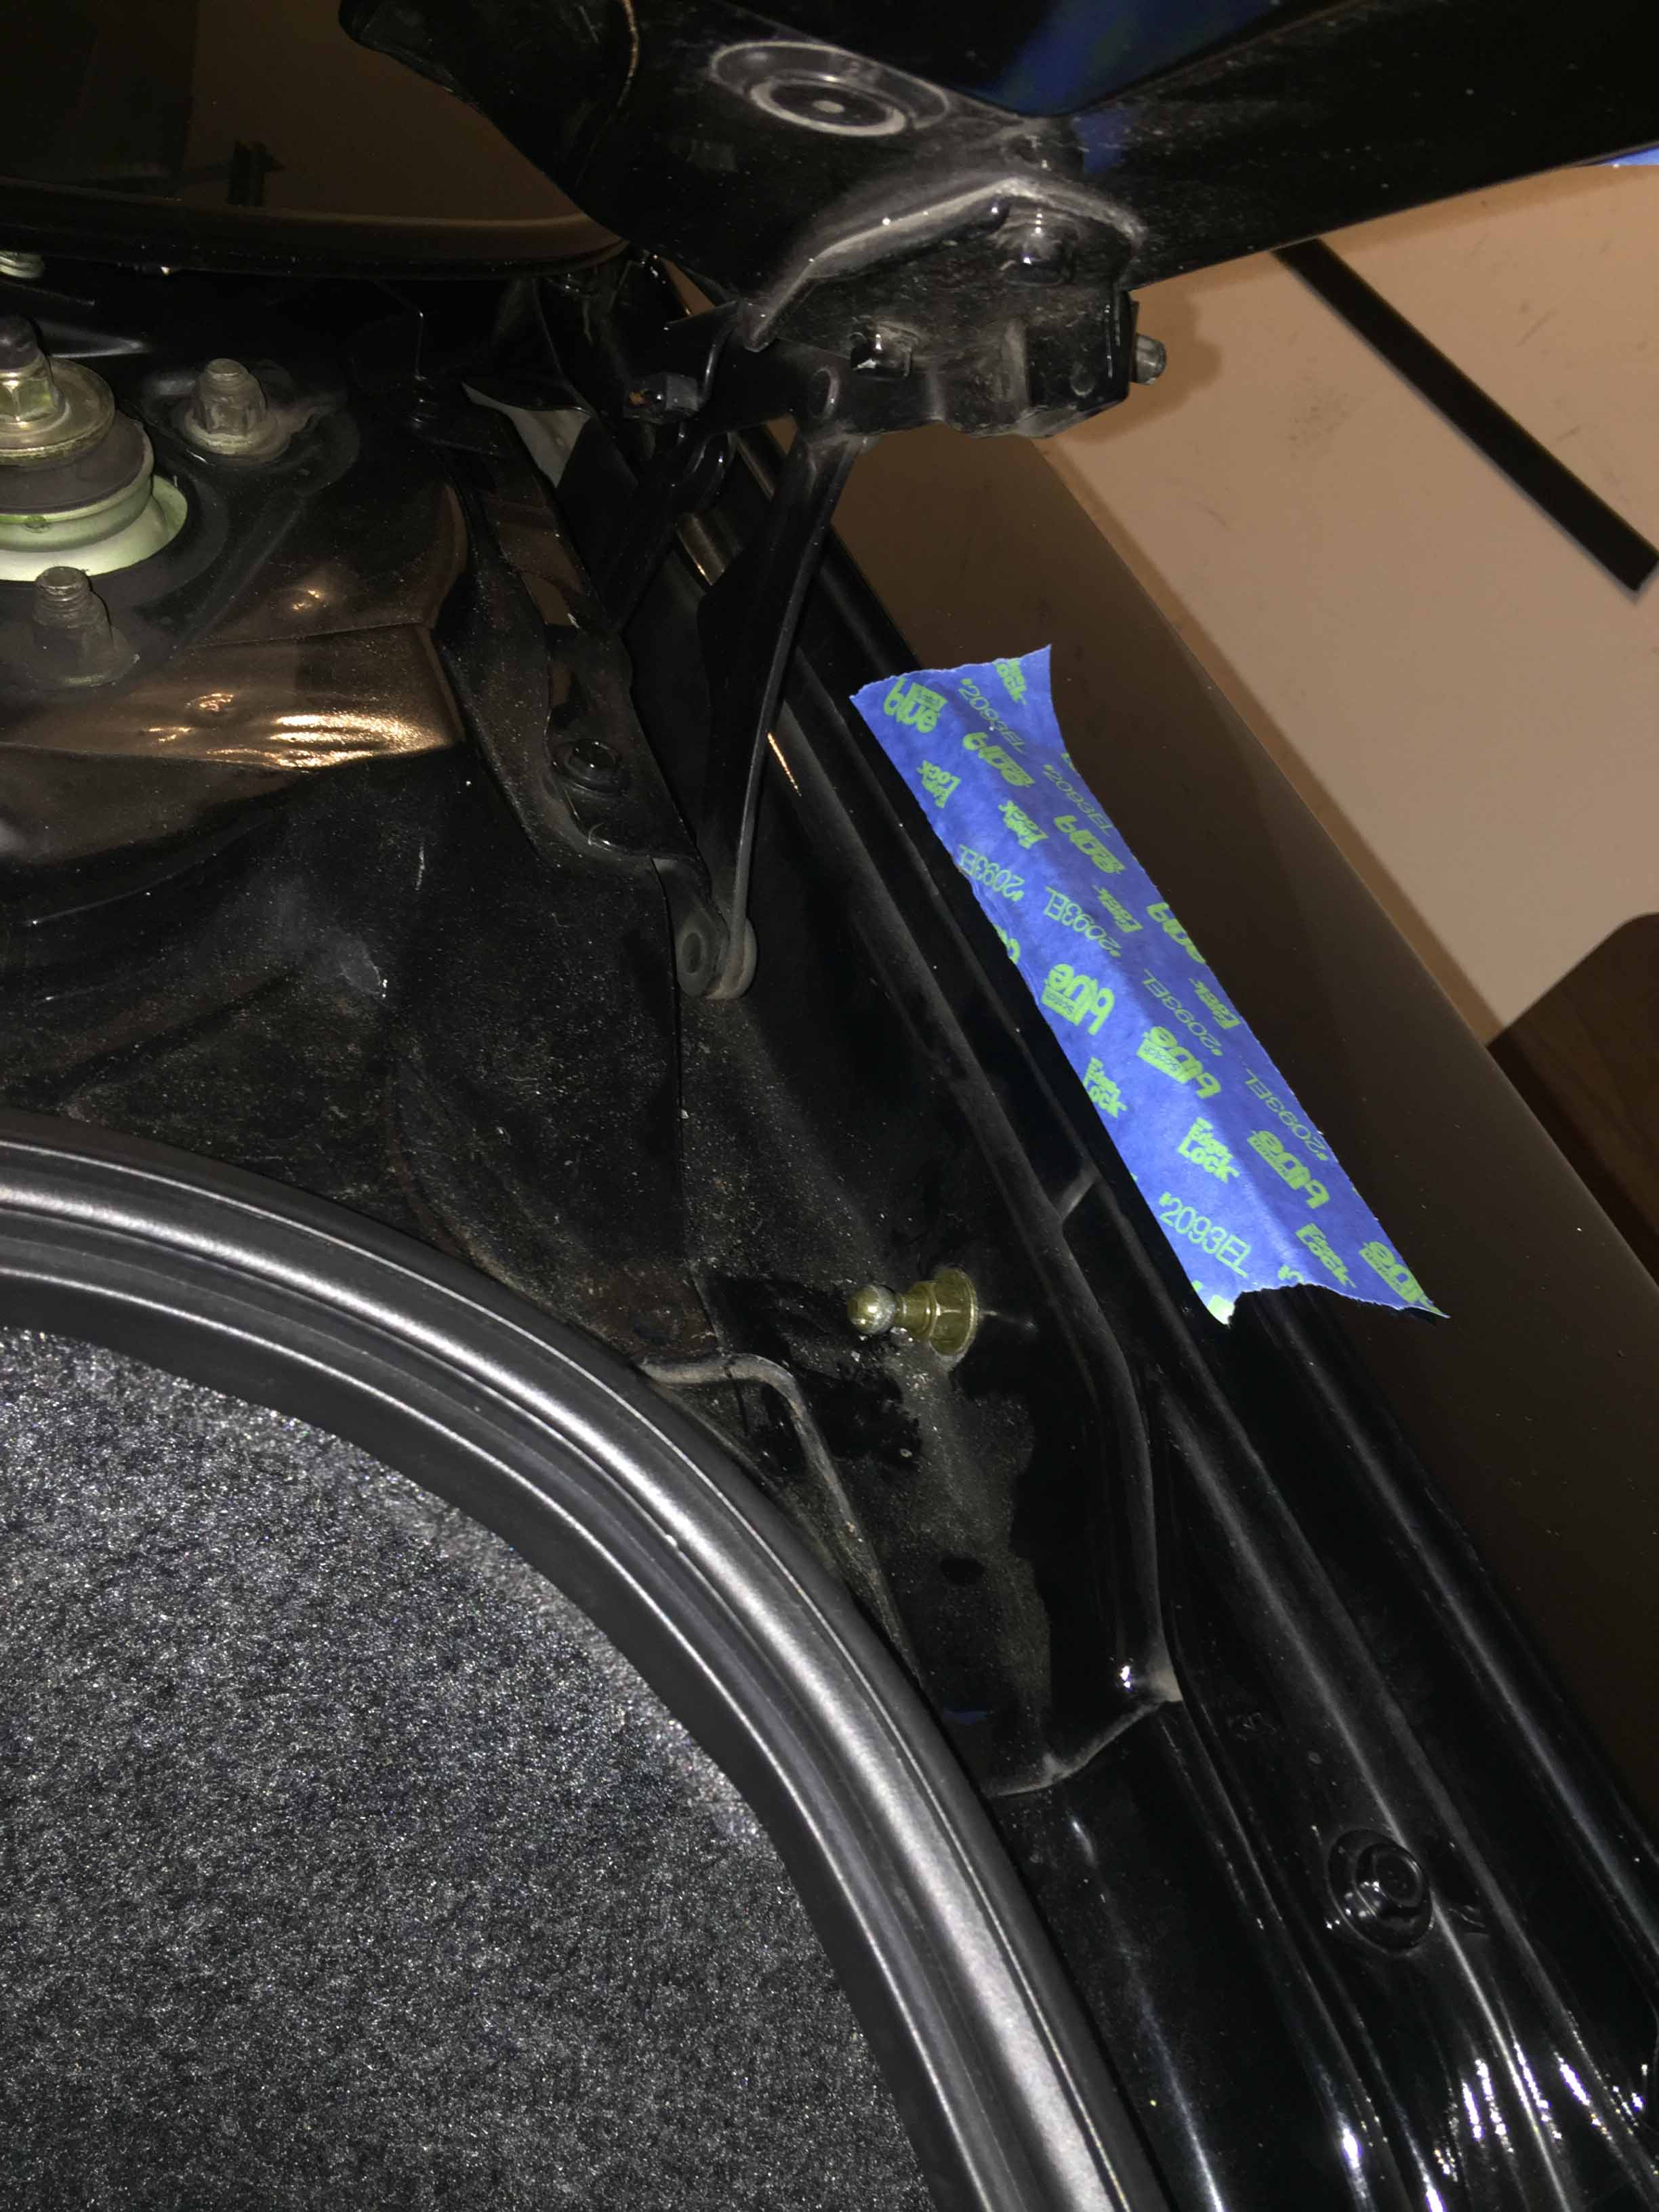
I also replaced the rear window molding, the original one was cracking and discolored from sun damage. I didn't bother using adhesive because it really doesn't need it to stay firmly in place and that's just more mess to deal with.

[imghttp://johnwalterpowell.com/projects/1994_nsx/IMG_1103.jpg
(Rear trim is missing here because I had it off for the valve adjustment.)
The ****ing crank pulley bolt has been driving me crazy. My 650lbft impact wouldn't touch it. I tried PB Blaster overnight, then the impact again and no dice. So I tried torching it, still no dice. I borrowed an impact from a coworker and it didn't touch it either. Finally I bought a Mac Tools 1200lbft impact second-hand and that STILL wouldn't touch it. So I gave up and am going to take the car to the dealer to have them break it loose before I either destroy something or spend a ton of money on more crap to try to break it loose. I guess the only upside is that I got a pretty sweet impact out of it, the "650lbft" was a cheapish Husky impact from Home Depot.
I did get the valve adjustment finished though. Rather than buy the expensive Honda tool I just got the $15 one from Amazon and cut the end off with a hacksaw, worked like a charm. I did valve adjustments on B-series motors without it and it's definitely worth it even on those cars, it's much easier if you can hold the screw in place while tightening the lock nut, and with the V6 it would be virtually impossible without it if you don't want to pull the engine.
I also replaced the rear window molding, the original one was cracking and discolored from sun damage. I didn't bother using adhesive because it really doesn't need it to stay firmly in place and that's just more mess to deal with.
[imghttp://johnwalterpowell.com/projects/1994_nsx/IMG_1103.jpg
(Rear trim is missing here because I had it off for the valve adjustment.)
Last edited by MotorMouth93; 08-05-2017 at 09:13 PM.
11-24-2016, 09:58 AM
#15
Looks good! Are you getting rid of the purple tint and replacing with fresh dark stuff? It would look badass. If you do grab your clothes iron (if it has a steam function) and get close to the tint and press the steam feature. Give a couple of puffs at a corner then pull. Continue giving puffs along the entire thing wherever you are peeling. It will only take a few minutes per window and at the same time pull almost all the glue off leaving virtually no mess. Use a razor blade and some cleaning solution to remove the little bits of glue left behind. I've peel tinted quiet a few times and a tint shop taught me this method. OH and i'll state the obvious! DO NOT use a razor blade on the rear hatch window since the heating elements run across it. Just use a cleaning solution and a rag. A plastic razor being gently used also works.
11-26-2016, 08:07 AM
#16
Thanks for the tip, I'm planning on replacing the tint but I have a few other things to take care of first.
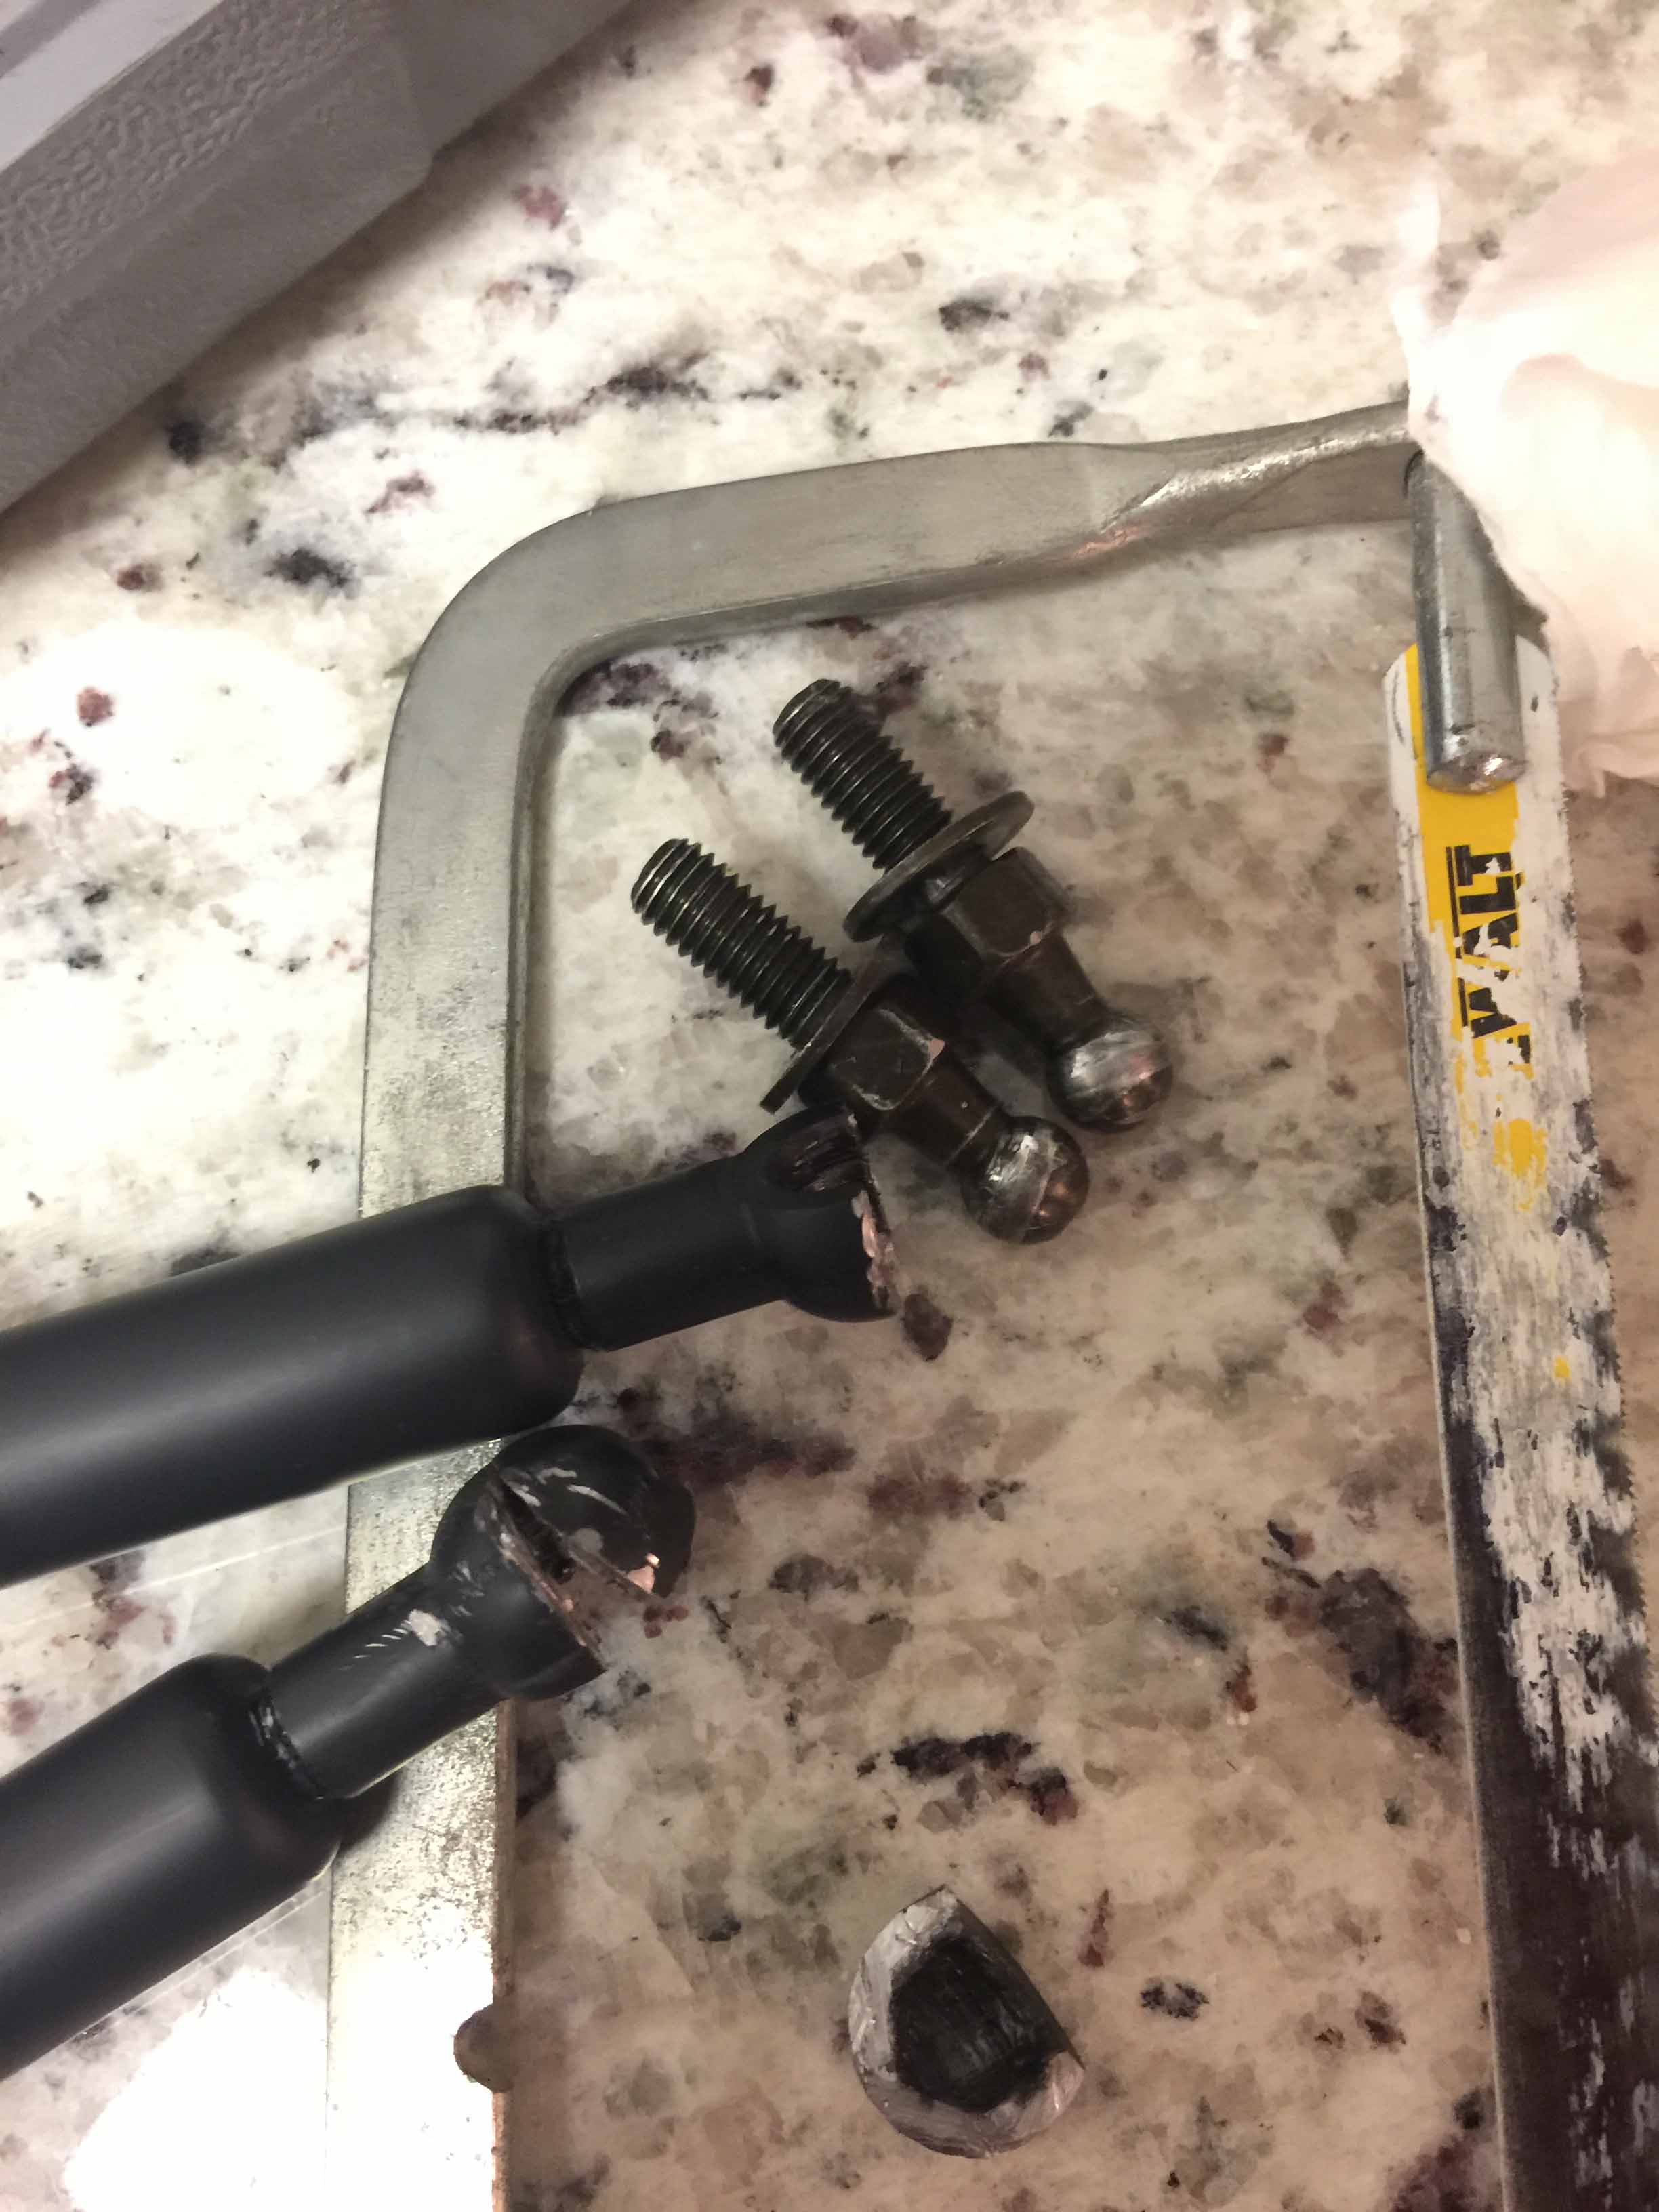
Not much progress lately though, but I did get the trunk struts replaced. For some reason Honda doesn't give you new ball bolts with the trunk like they do with the rear glass struts, so I had to reclaim them from the old struts or pay another $30 and wait another 3 weeks for stuff that's backordered. The process isn't too bad, just mask around the bolts to keep them from getting scratched if the saw slips then carefully cut the socket in half. (Marks on the bolts are not from the saw.)
After carefully removing the "Made In China" stickers that were on the new OEM parts...
Hopefully paint correction will be done by the end of next week, time permitting.
Last edited by MotorMouth93; 08-05-2017 at 09:13 PM.
11-27-2016, 07:44 PM
#17
I made a good bit of progress this weekend.
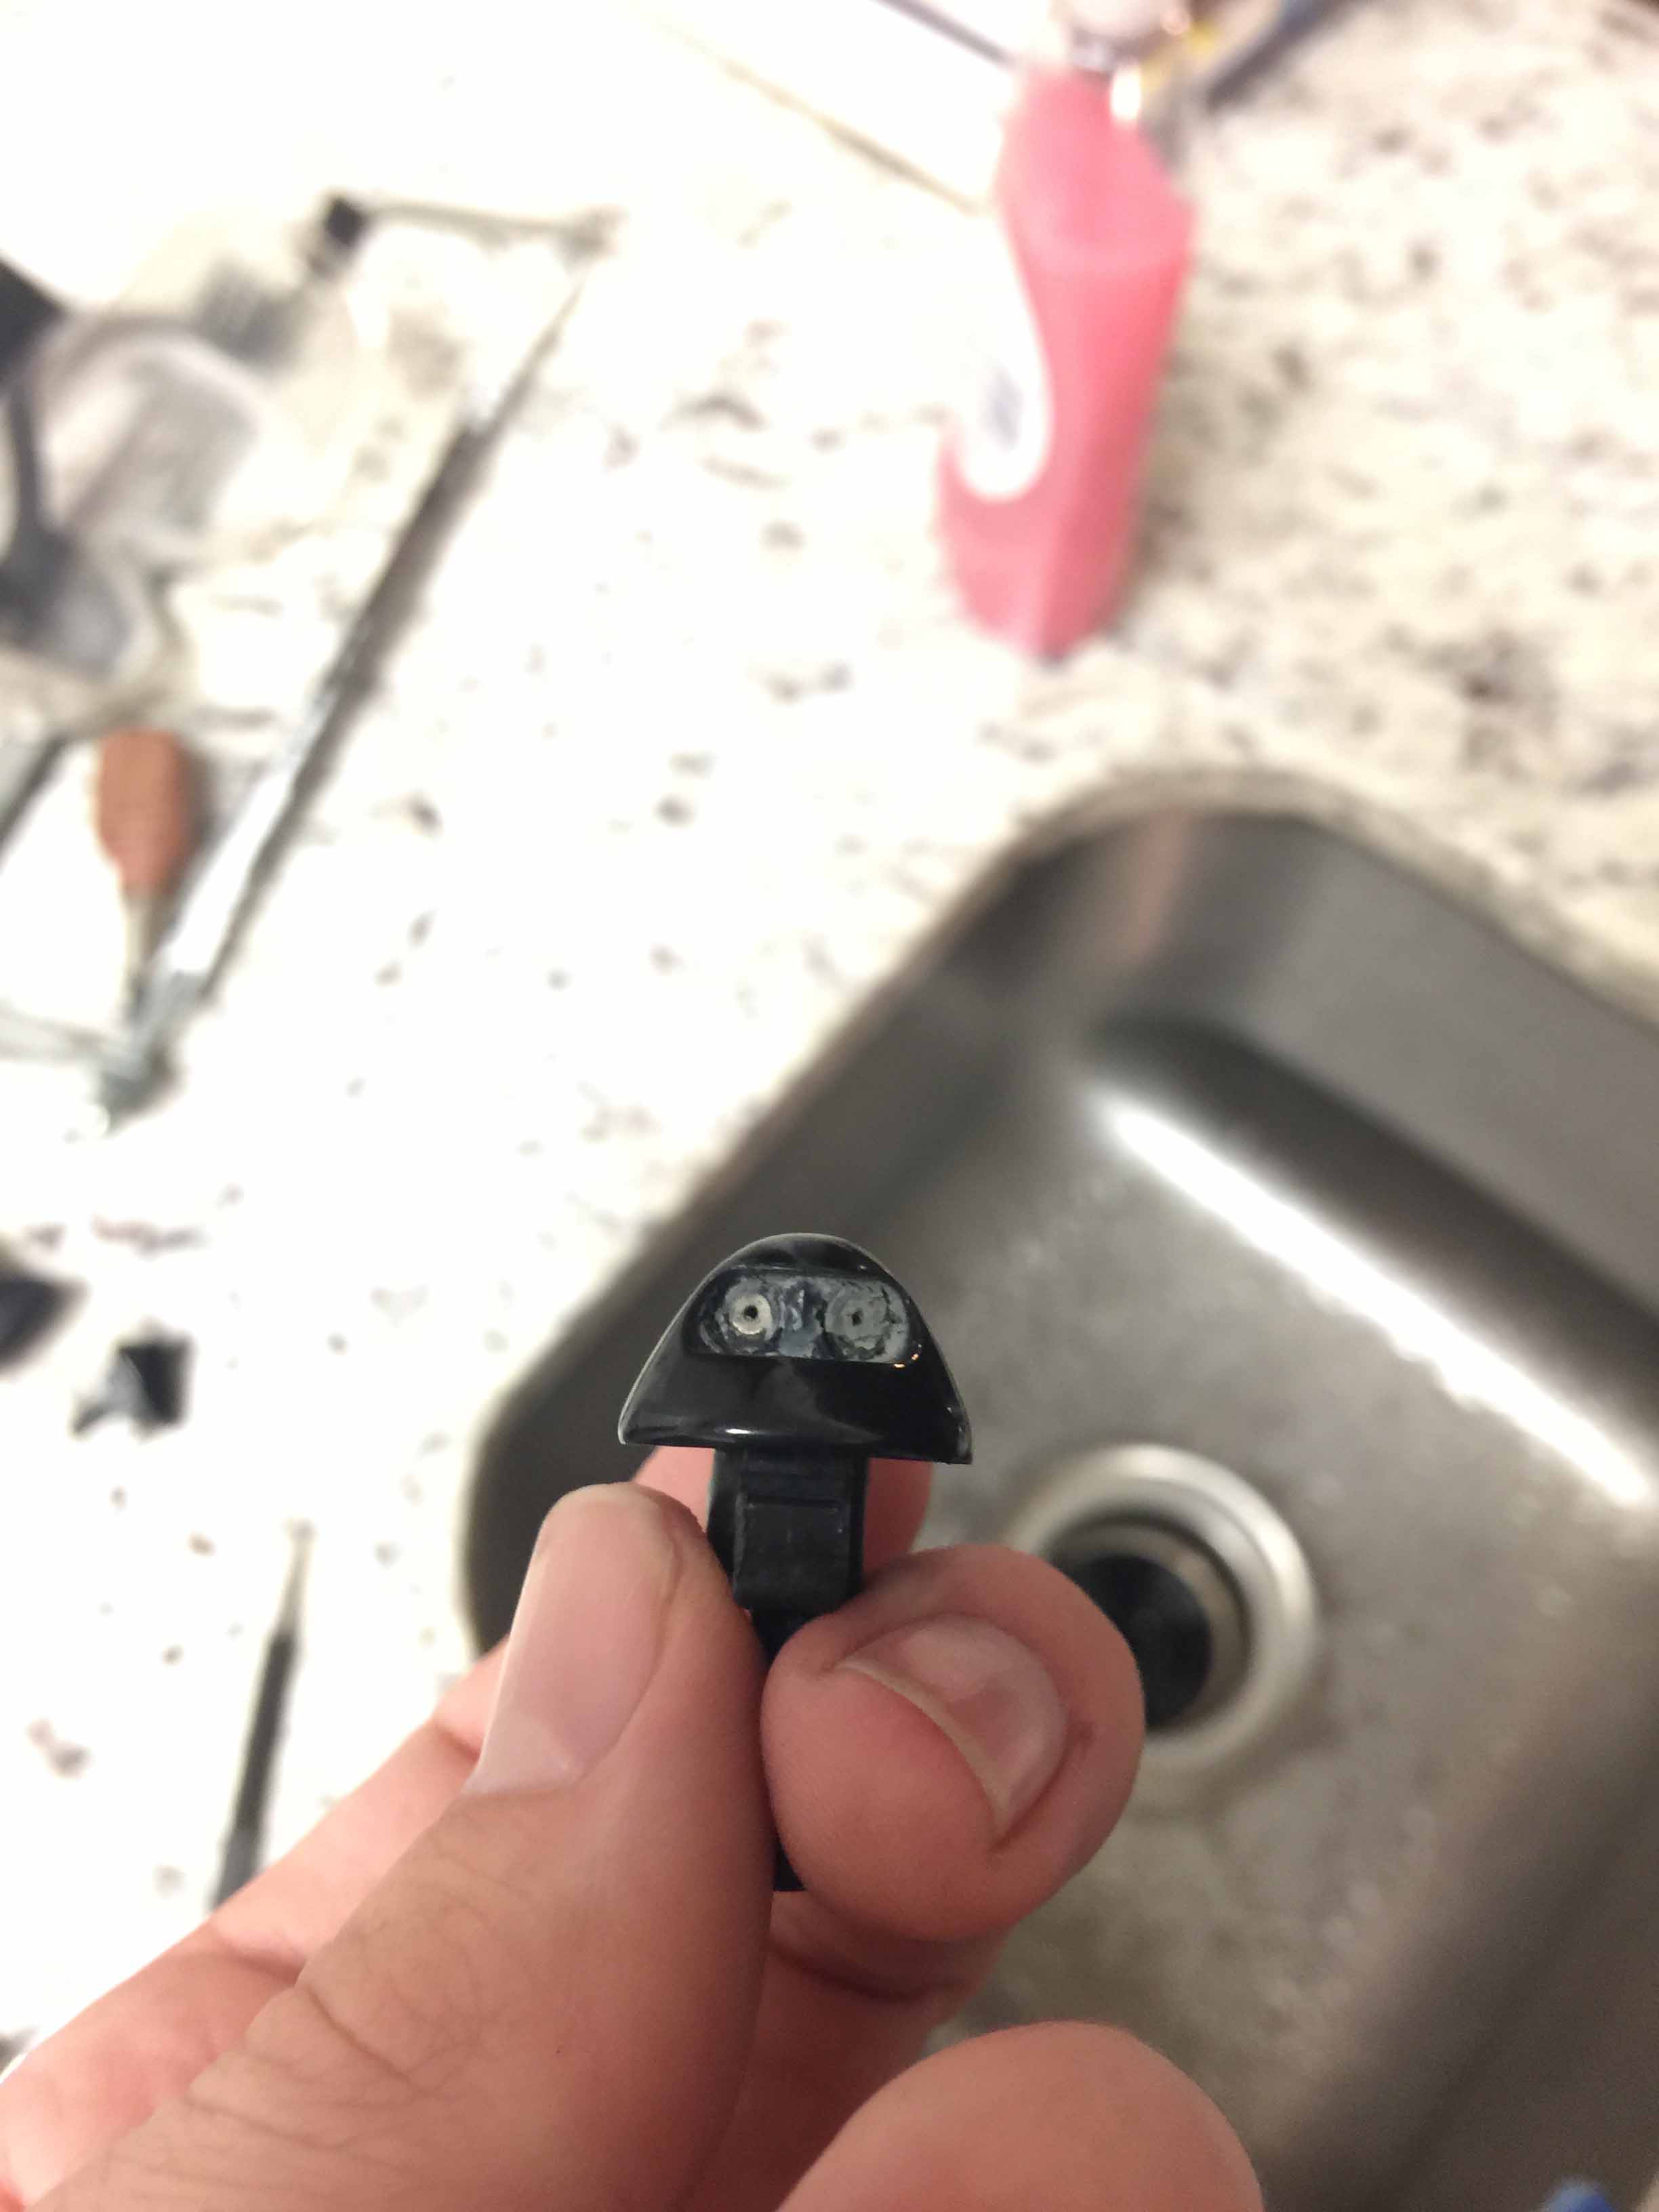
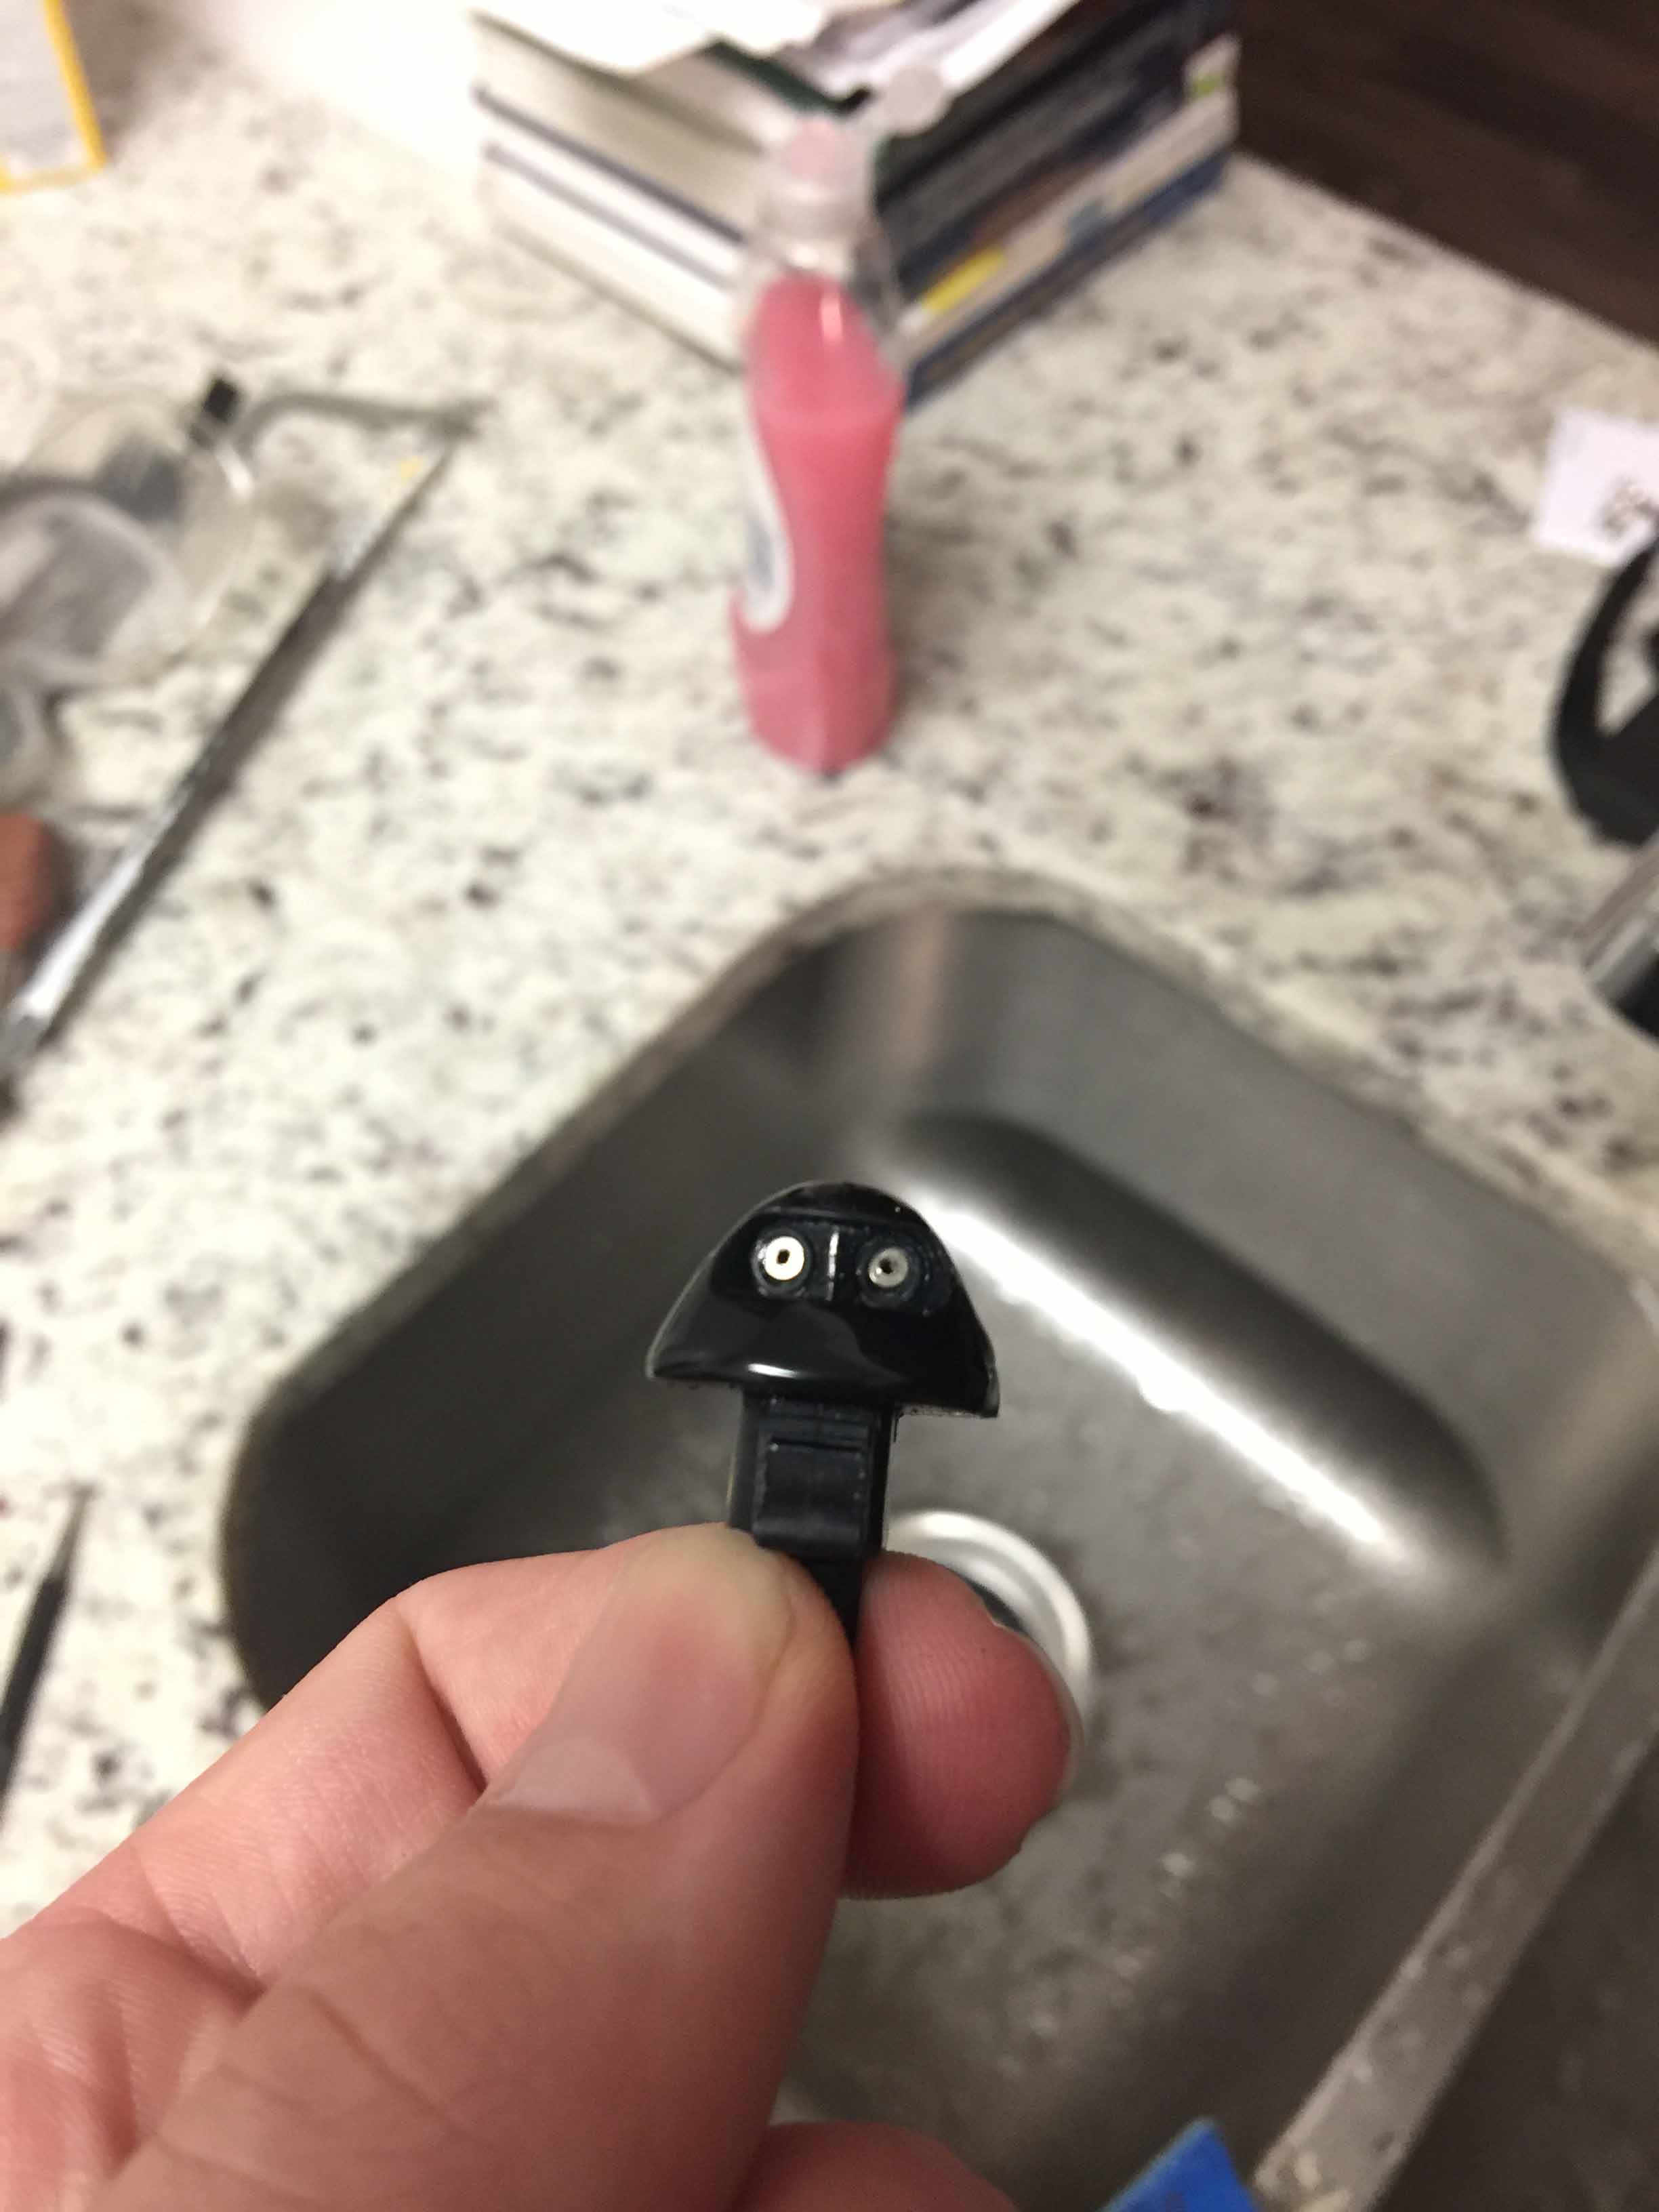
I reinstalled the wiper sprayer nozzles after cleaning them out, they were pretty gunked up.
Before
After
My main project this weekend was the front end, after finally coming to terms with the fact that my paint is soft, I just decided to polish it as best I can (which is pretty darn good but not good enough for my OCD) and wax it to take care of the fine micro-marring that remains. I was planning on regularly waxing the car anyways so I can live with it. So far I've polished and waxed the driver side quarterpanel, trunk, wing, roof, hood, both fenders, and the upper front bumper.
At the beginning the bumper was pretty messed up. There's some pitting which I unfortunately can't do much about, some bad touch up paint job that looks like it was done with a 3" paint brush, and there was some bad surface oxidization on the top. These photos were taken after clay-barring the surface.

After first trying a fairly stiff foam pad and a course compound I realized that the paint isn't particularly flat so the reflections look like trash, so I decided to wetsand the bumper to even it out. The process I used was 2000 grit 3M WetOrDry (do NOT use lesser brands such as the Gator **** that Autozone sells, you will ruin your paint with that crap) using Meguiar's Quick Detailer as a lubricant, then after that I made another pass using 3000 grit 3M paper as well with the quick detailer as lubricant again. The badge, sadly, did not come off without incident. In the process of removing the adhesive, it took some of the clear coat with it. This won't be visible once I replace the badge, but it still bothers me.


To buff the sanding scratches out, I started off with a course pad and a course compound, then progressively moved to finer pads and finer compounds until. You can see the pitting in this photo as well.
And this is after wax has been applied. I'm using Meguiars synthetic paste wax, but if I take the car to a show or something I'll apply a coat of carnauba wax on top of it for a bit more shine. This is the first car I've ever actually waxed and it went on very easily. Just wipe it on, wait for it to haze, and wipe it off with a microfiber cloth.
After letting the wax haze I wiped the excess off but it's too dark to get a good picture, so I'll post tomorrow.
I'm also thinking I might have the wheels media blasted and powder coated the factory color. They were refinished recently and they look pretty nice, but the color is a bit lighter than the factory color and they were redone using paint. And nothing beats a freshly powdercoated set of wheels lol.
I reinstalled the wiper sprayer nozzles after cleaning them out, they were pretty gunked up.
Before
After
My main project this weekend was the front end, after finally coming to terms with the fact that my paint is soft, I just decided to polish it as best I can (which is pretty darn good but not good enough for my OCD) and wax it to take care of the fine micro-marring that remains. I was planning on regularly waxing the car anyways so I can live with it. So far I've polished and waxed the driver side quarterpanel, trunk, wing, roof, hood, both fenders, and the upper front bumper.
At the beginning the bumper was pretty messed up. There's some pitting which I unfortunately can't do much about, some bad touch up paint job that looks like it was done with a 3" paint brush, and there was some bad surface oxidization on the top. These photos were taken after clay-barring the surface.
After first trying a fairly stiff foam pad and a course compound I realized that the paint isn't particularly flat so the reflections look like trash, so I decided to wetsand the bumper to even it out. The process I used was 2000 grit 3M WetOrDry (do NOT use lesser brands such as the Gator **** that Autozone sells, you will ruin your paint with that crap) using Meguiar's Quick Detailer as a lubricant, then after that I made another pass using 3000 grit 3M paper as well with the quick detailer as lubricant again. The badge, sadly, did not come off without incident. In the process of removing the adhesive, it took some of the clear coat with it. This won't be visible once I replace the badge, but it still bothers me.
To buff the sanding scratches out, I started off with a course pad and a course compound, then progressively moved to finer pads and finer compounds until. You can see the pitting in this photo as well.
And this is after wax has been applied. I'm using Meguiars synthetic paste wax, but if I take the car to a show or something I'll apply a coat of carnauba wax on top of it for a bit more shine. This is the first car I've ever actually waxed and it went on very easily. Just wipe it on, wait for it to haze, and wipe it off with a microfiber cloth.
After letting the wax haze I wiped the excess off but it's too dark to get a good picture, so I'll post tomorrow.
I'm also thinking I might have the wheels media blasted and powder coated the factory color. They were refinished recently and they look pretty nice, but the color is a bit lighter than the factory color and they were redone using paint. And nothing beats a freshly powdercoated set of wheels lol.
Last edited by MotorMouth93; 08-05-2017 at 09:15 PM.
11-27-2016, 07:58 PM
#18
The front bumper looks miles better than before. After the polishing it looks great. Excited to see what it looks like after the wax. Also I wouldn't worry to much about the clear. I'm very OCD myself when it comes to these things but just keep in mind the clear coat peel is hidden and it's on plastic, not metal so there is nothing to worry about.
 12-02-2016, 12:17 AM
#21
Relatively minor update: I took the car to Sterling Acura here in Austin on Tuesday and they were able to break the crank pulley bolt loose and torque it back properly so I could get it off. They told me not to worry about it when I went to pay and I was in and out in less than 30 minutes! They have excellent reviews online as well so I'll definitely be going back there if I ever need to have the dealer work on the car.
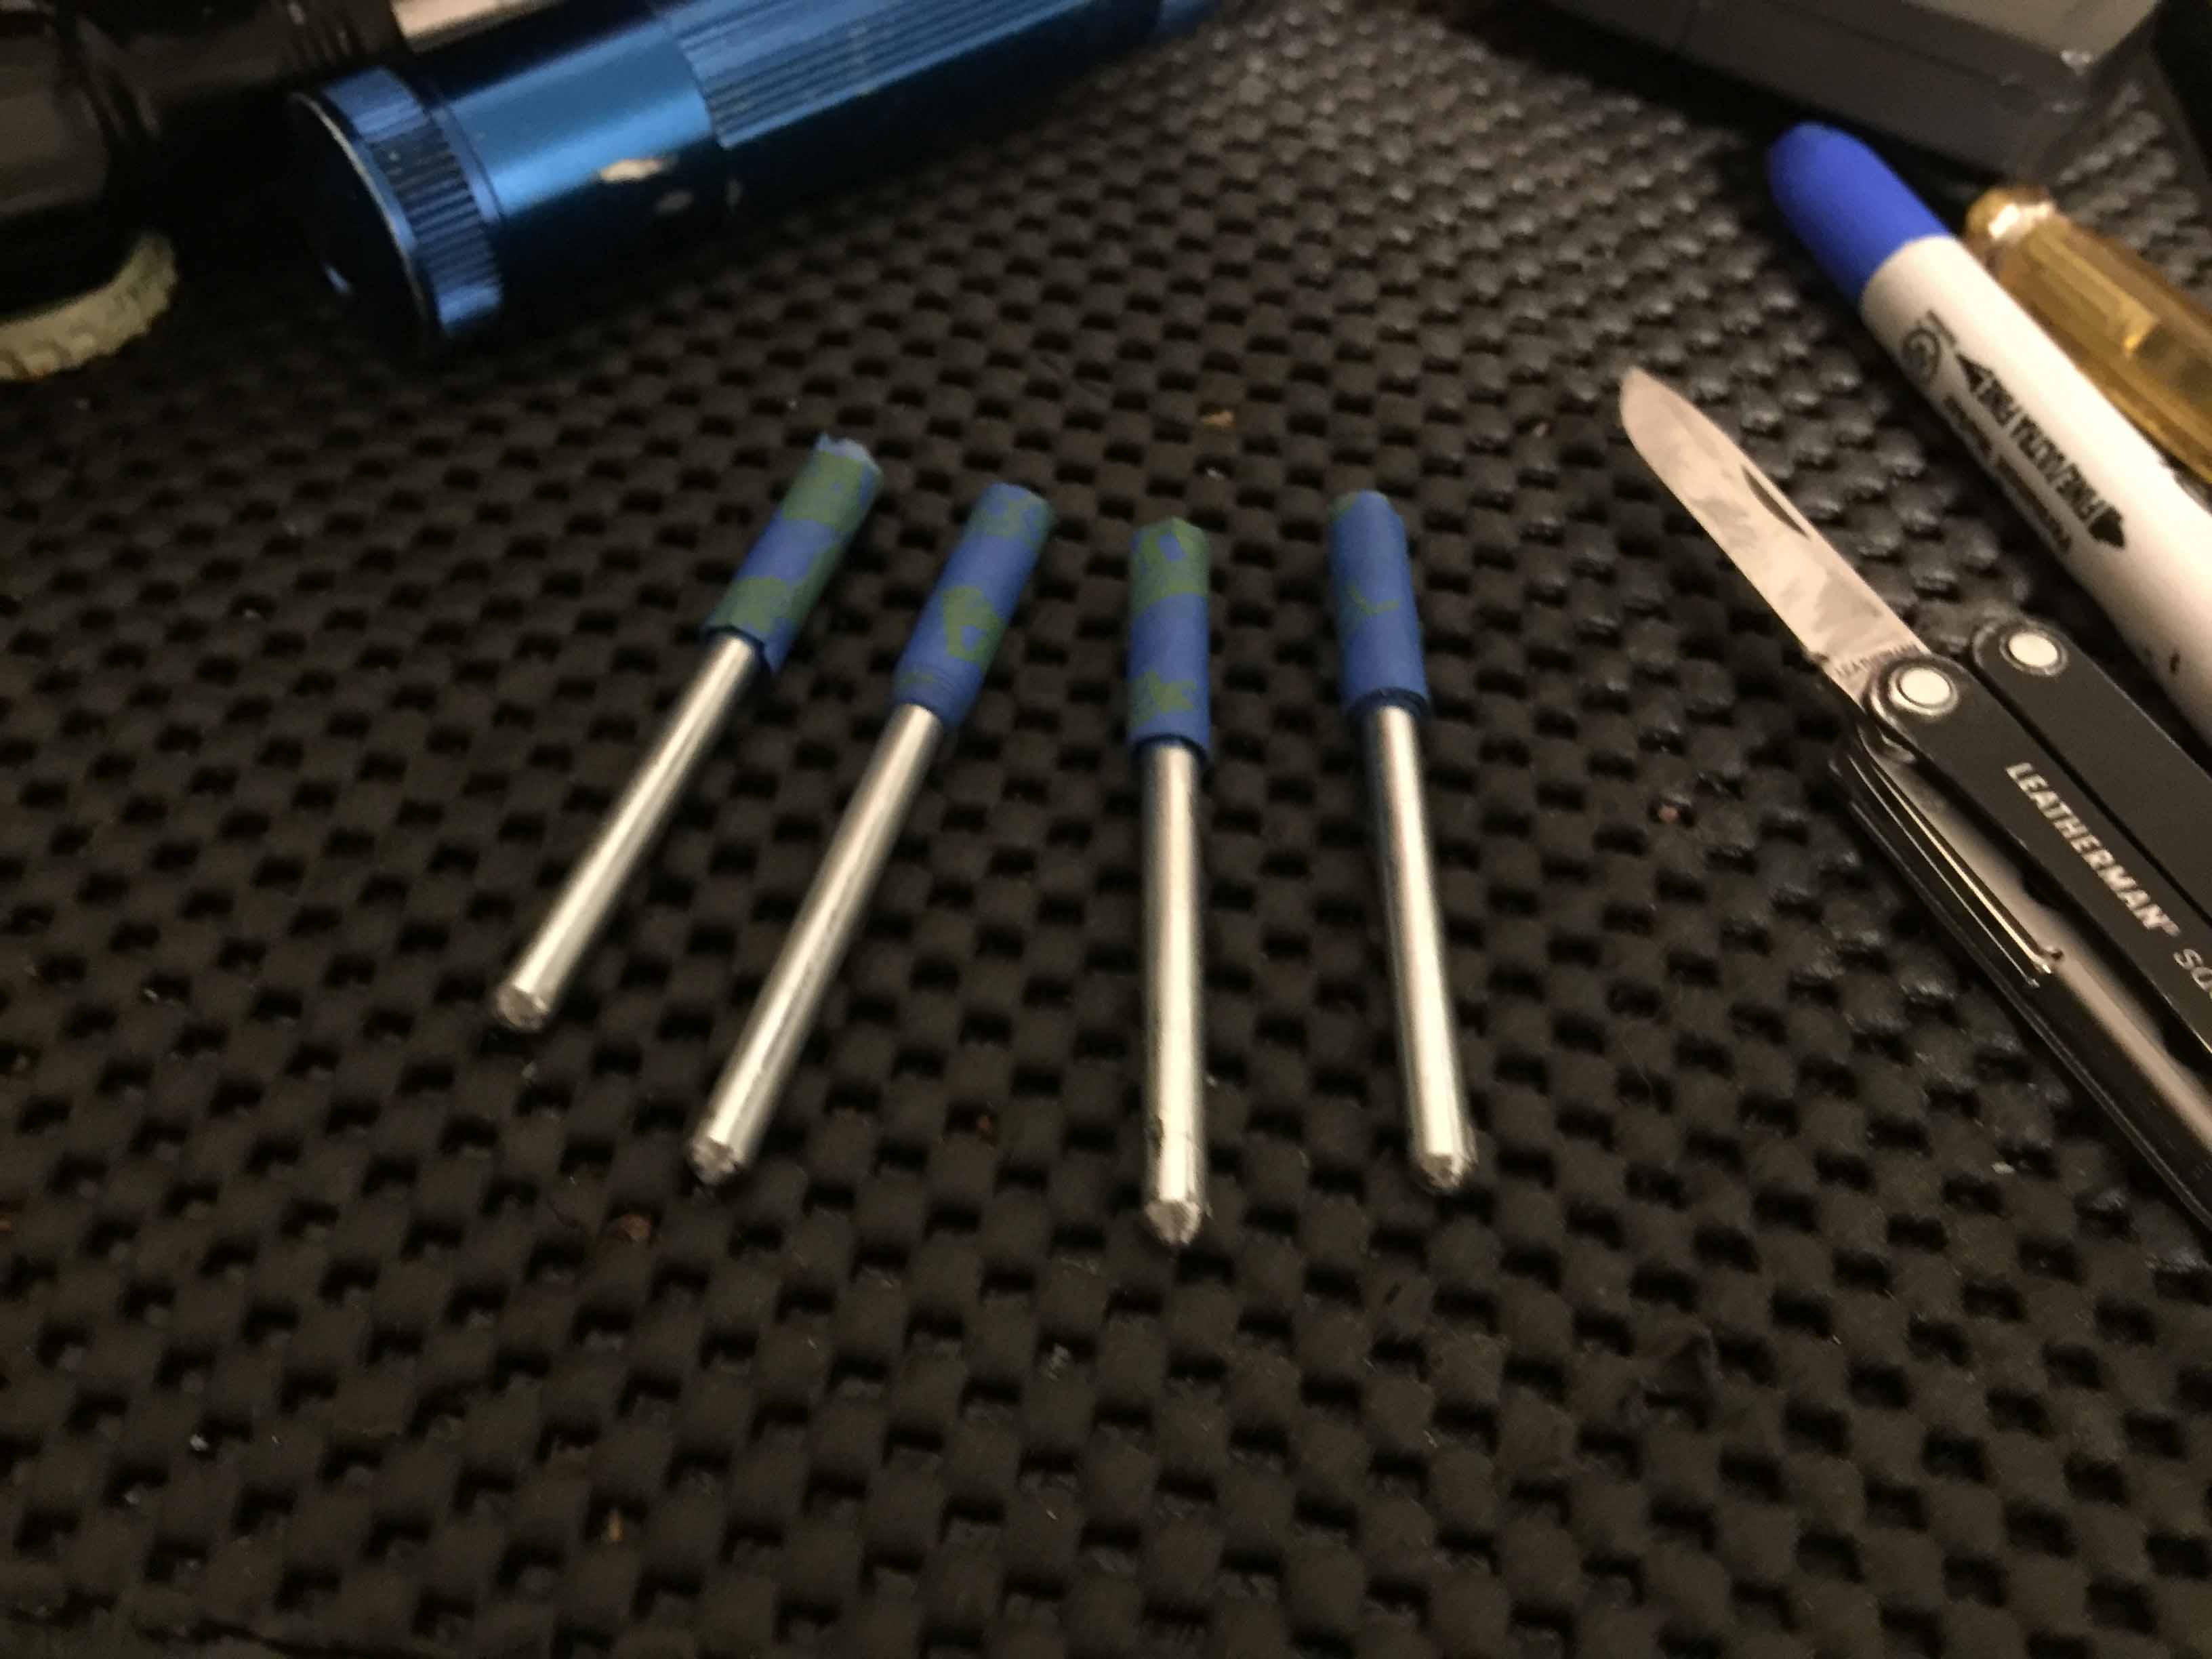
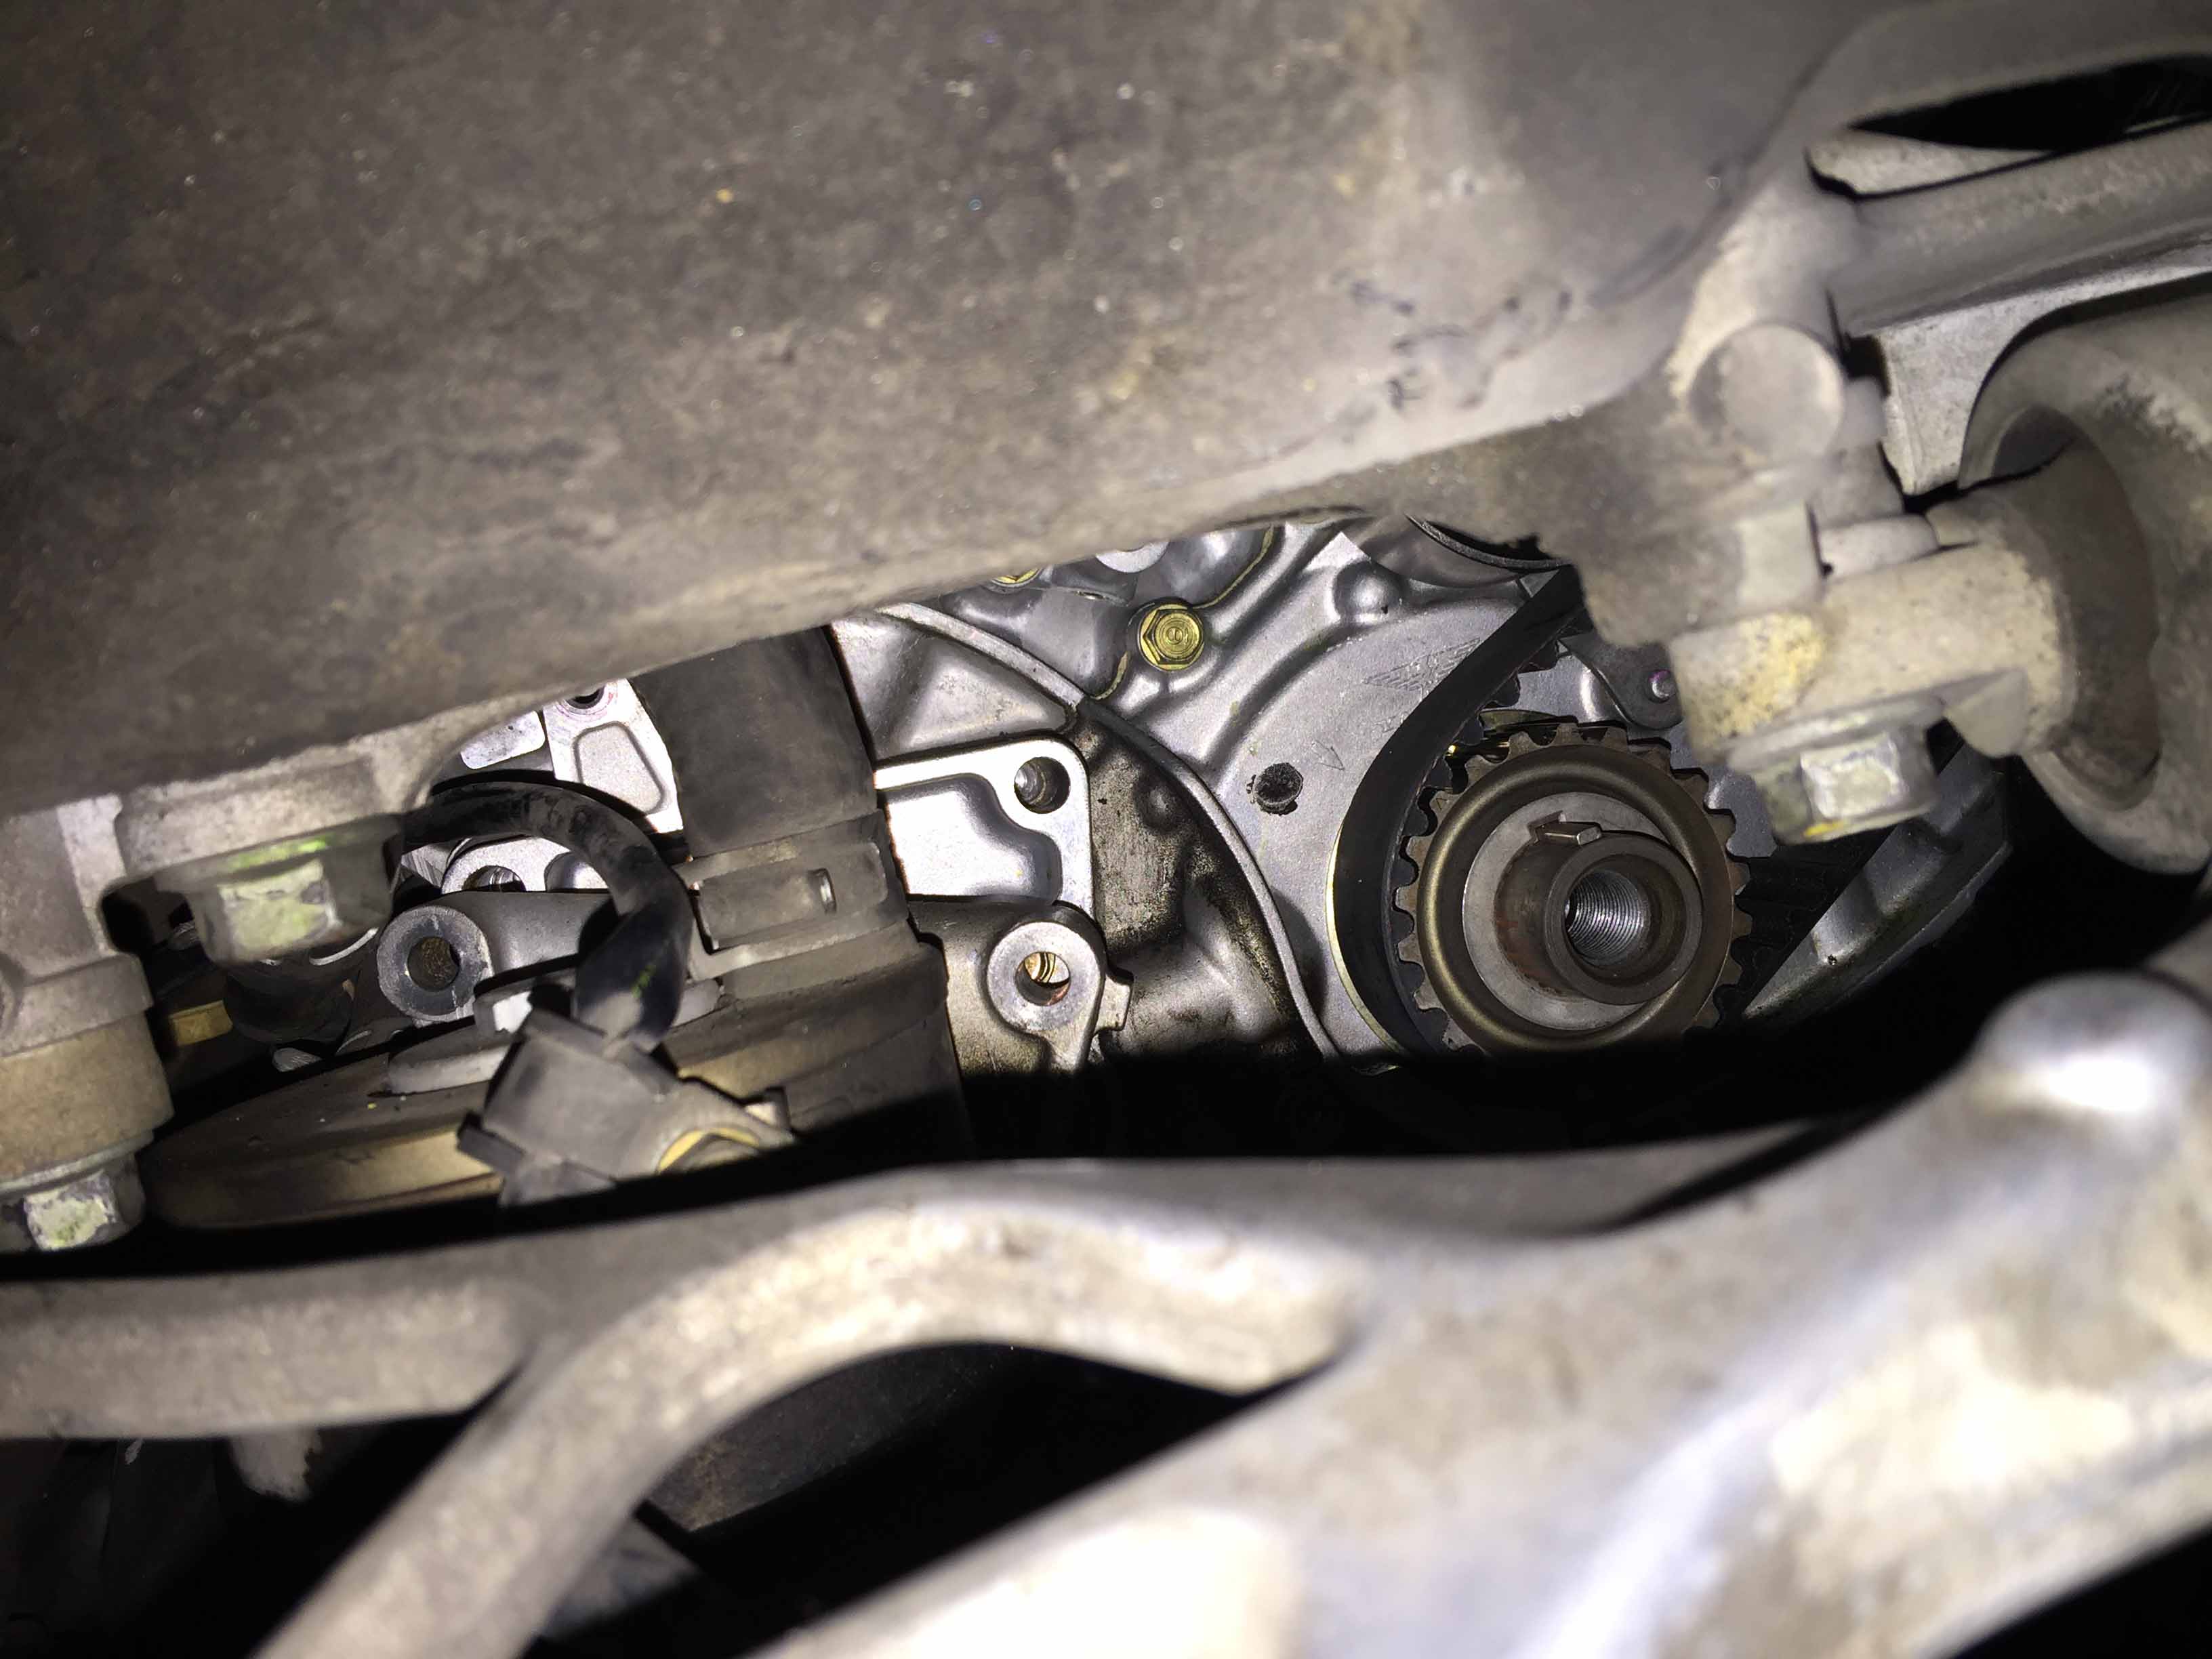
Anyways, with the car back up on jackstands I was able to back the properly torqued crank pulley off with my impact with almost zero effort, so I've started on the engine maintenance. When changing the timing belt you need to lock the cams in place and it's recommended to use 4 5mm punches to do this. I don't happen to have 4 5mm punches laying around, and no store near me sells 5mm punches by themselves, so I bought a 3/16" (4.76mm) steel rod and cut it into small pieces with a cutoff wheel on the Dremel and it worked out perfectly for $5 and 15 minutes of work.

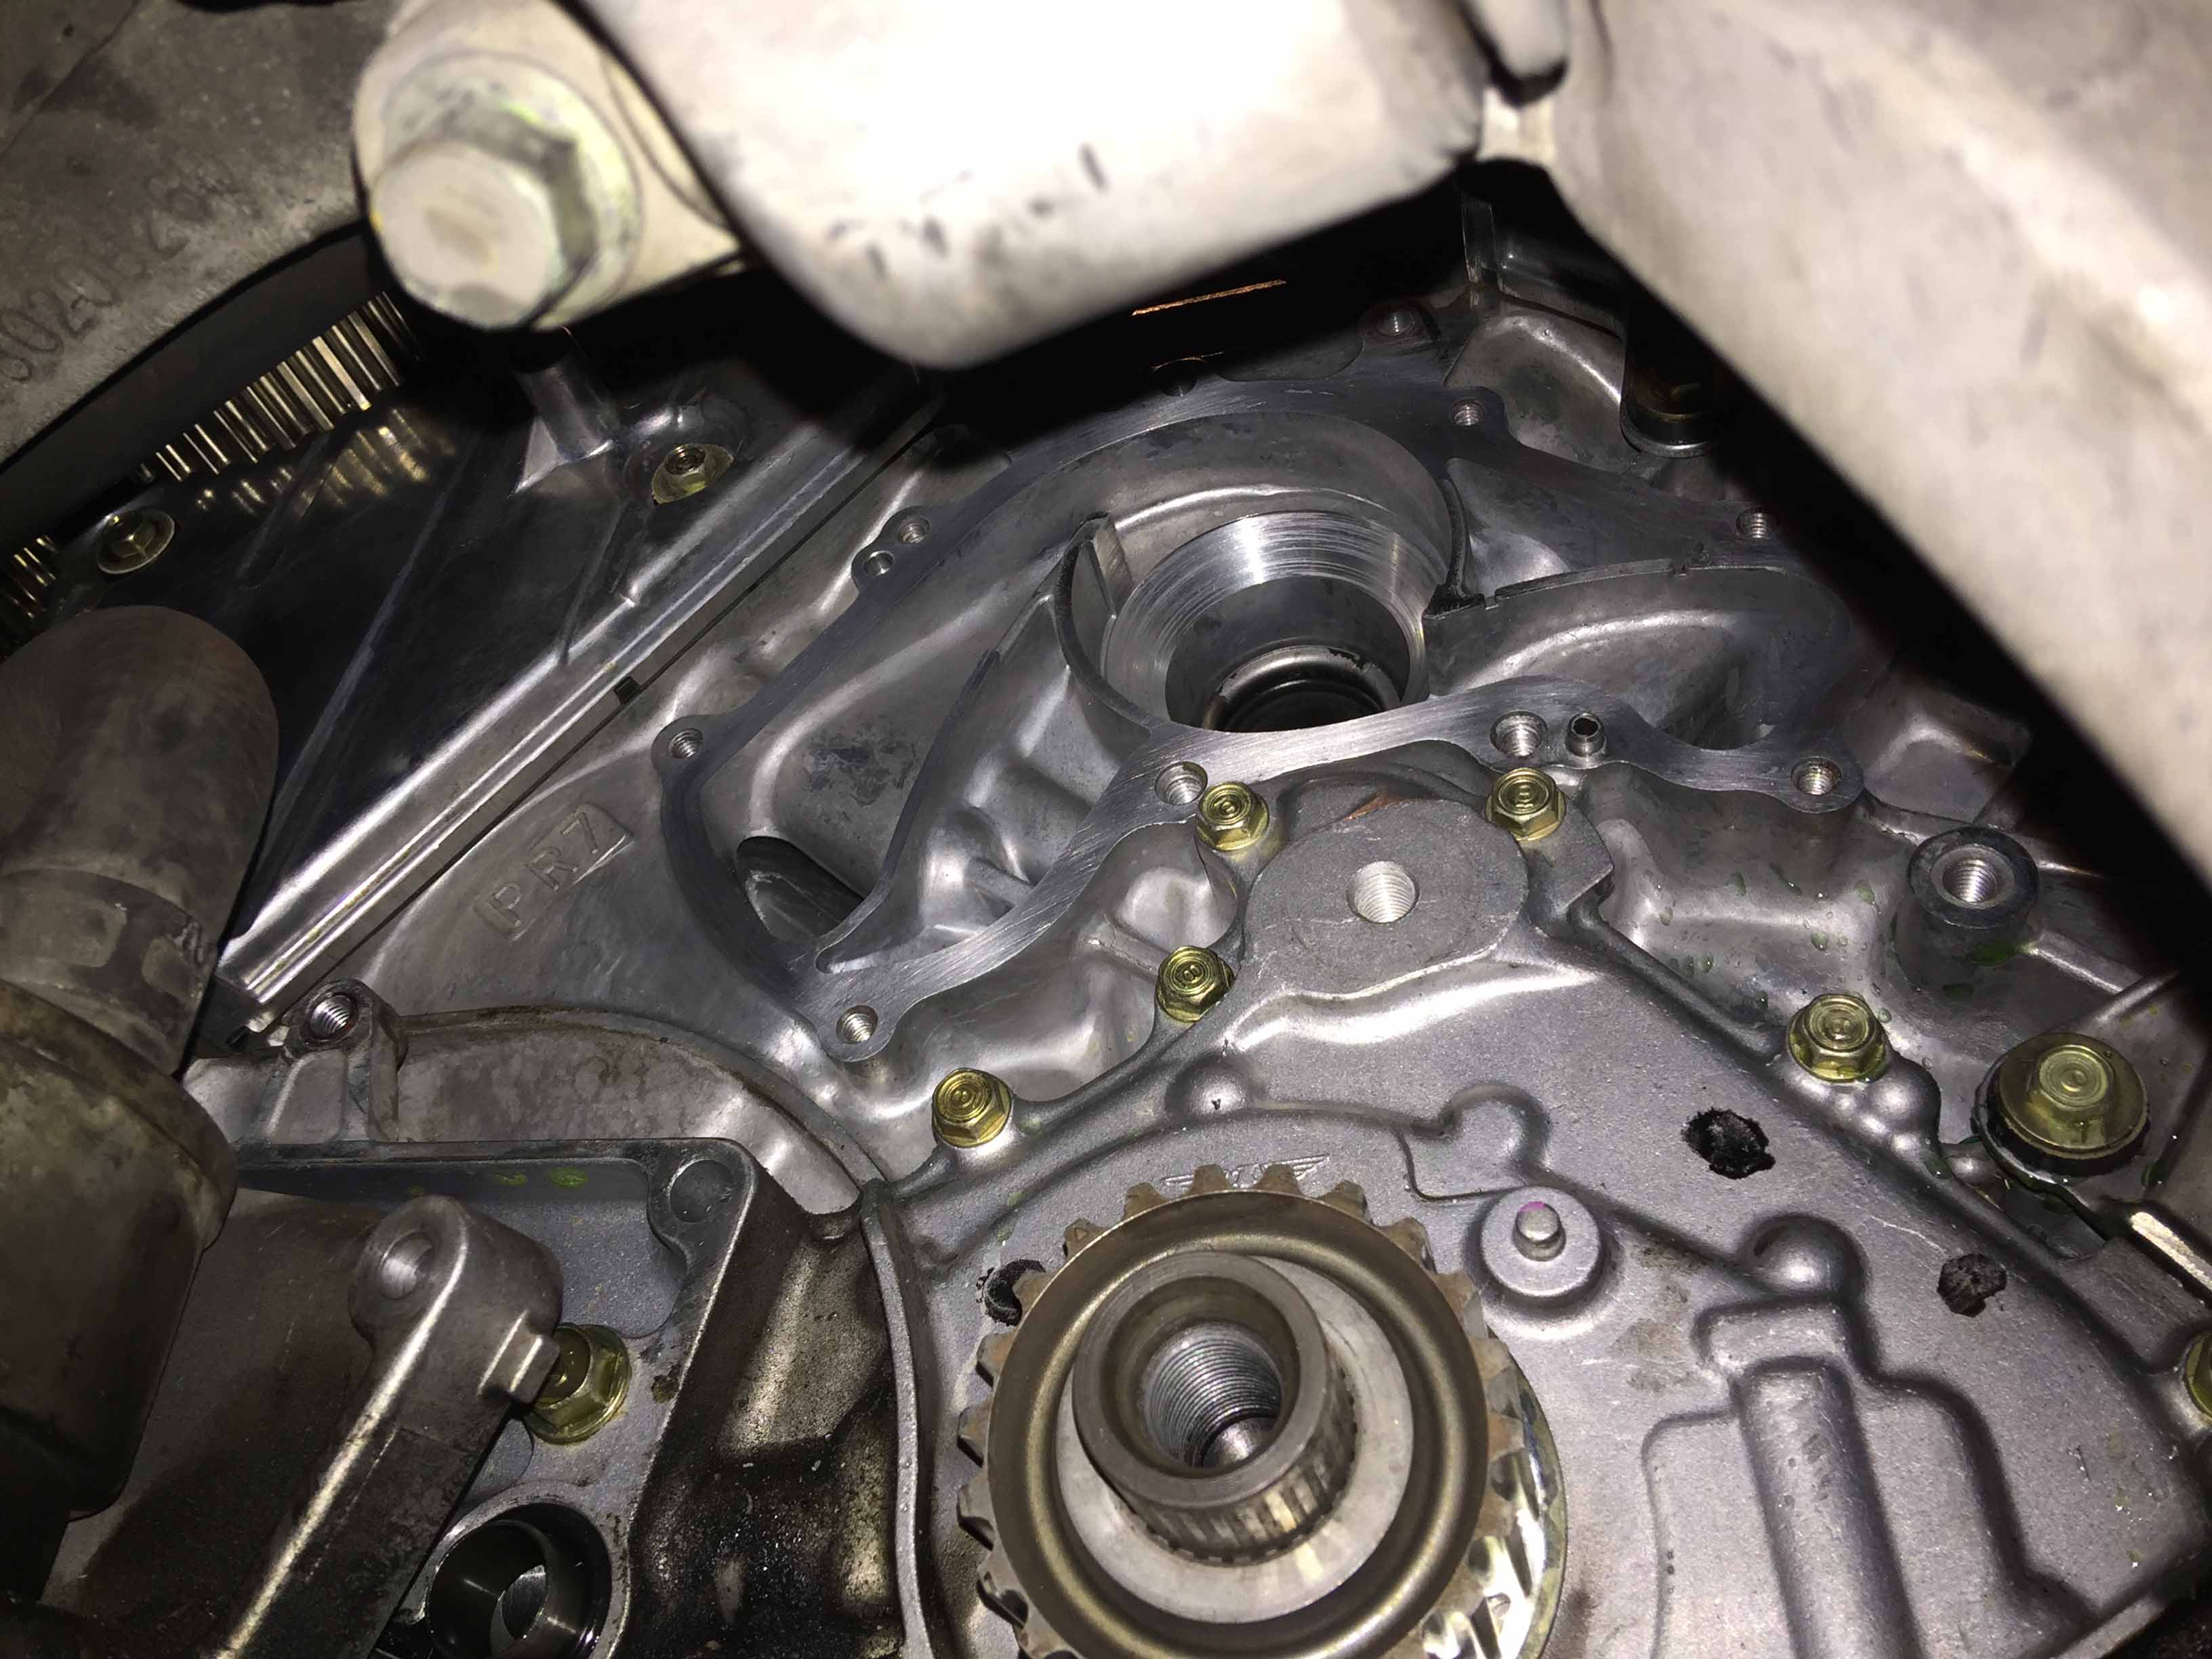
Shortly after taking this picture I started trying to remove the timing covers and gave up after an hour or so. I was able to get all the bolts out but there is just no room on that side of the engine bay, I have no idea how the rear timing and middle covers are going to come out but I'll worry about it this weekend. Working on this car sucks compared to the Integra, which I'm pretty sure had a much bigger engine bay and a much smaller engine.
Anyways, with the car back up on jackstands I was able to back the properly torqued crank pulley off with my impact with almost zero effort, so I've started on the engine maintenance. When changing the timing belt you need to lock the cams in place and it's recommended to use 4 5mm punches to do this. I don't happen to have 4 5mm punches laying around, and no store near me sells 5mm punches by themselves, so I bought a 3/16" (4.76mm) steel rod and cut it into small pieces with a cutoff wheel on the Dremel and it worked out perfectly for $5 and 15 minutes of work.
Shortly after taking this picture I started trying to remove the timing covers and gave up after an hour or so. I was able to get all the bolts out but there is just no room on that side of the engine bay, I have no idea how the rear timing and middle covers are going to come out but I'll worry about it this weekend. Working on this car sucks compared to the Integra, which I'm pretty sure had a much bigger engine bay and a much smaller engine.
Last edited by MotorMouth93; 08-05-2017 at 09:16 PM.
 12-04-2016, 11:33 PM
#25
Thanks, the timing covers came right out when I lifted the engine a bit more.

Anyways, I finally got off my *** and made some progress this weekend. On Saturday morning I went shopping and picked up 4 gallons of Honda coolant, an OEM filter, 6 quarts of Mobile 1 10W30, and 3 quarts of Honda MTF.
I started off by giving the valve cover gaskets a good wash in hot soapy water. I threw the originals out the first time I started taking things apart but then had to put it back together to take it to the dealer so I had to use my new gaskets. This way they'll be ready to seal with the Hondabond around the corners.

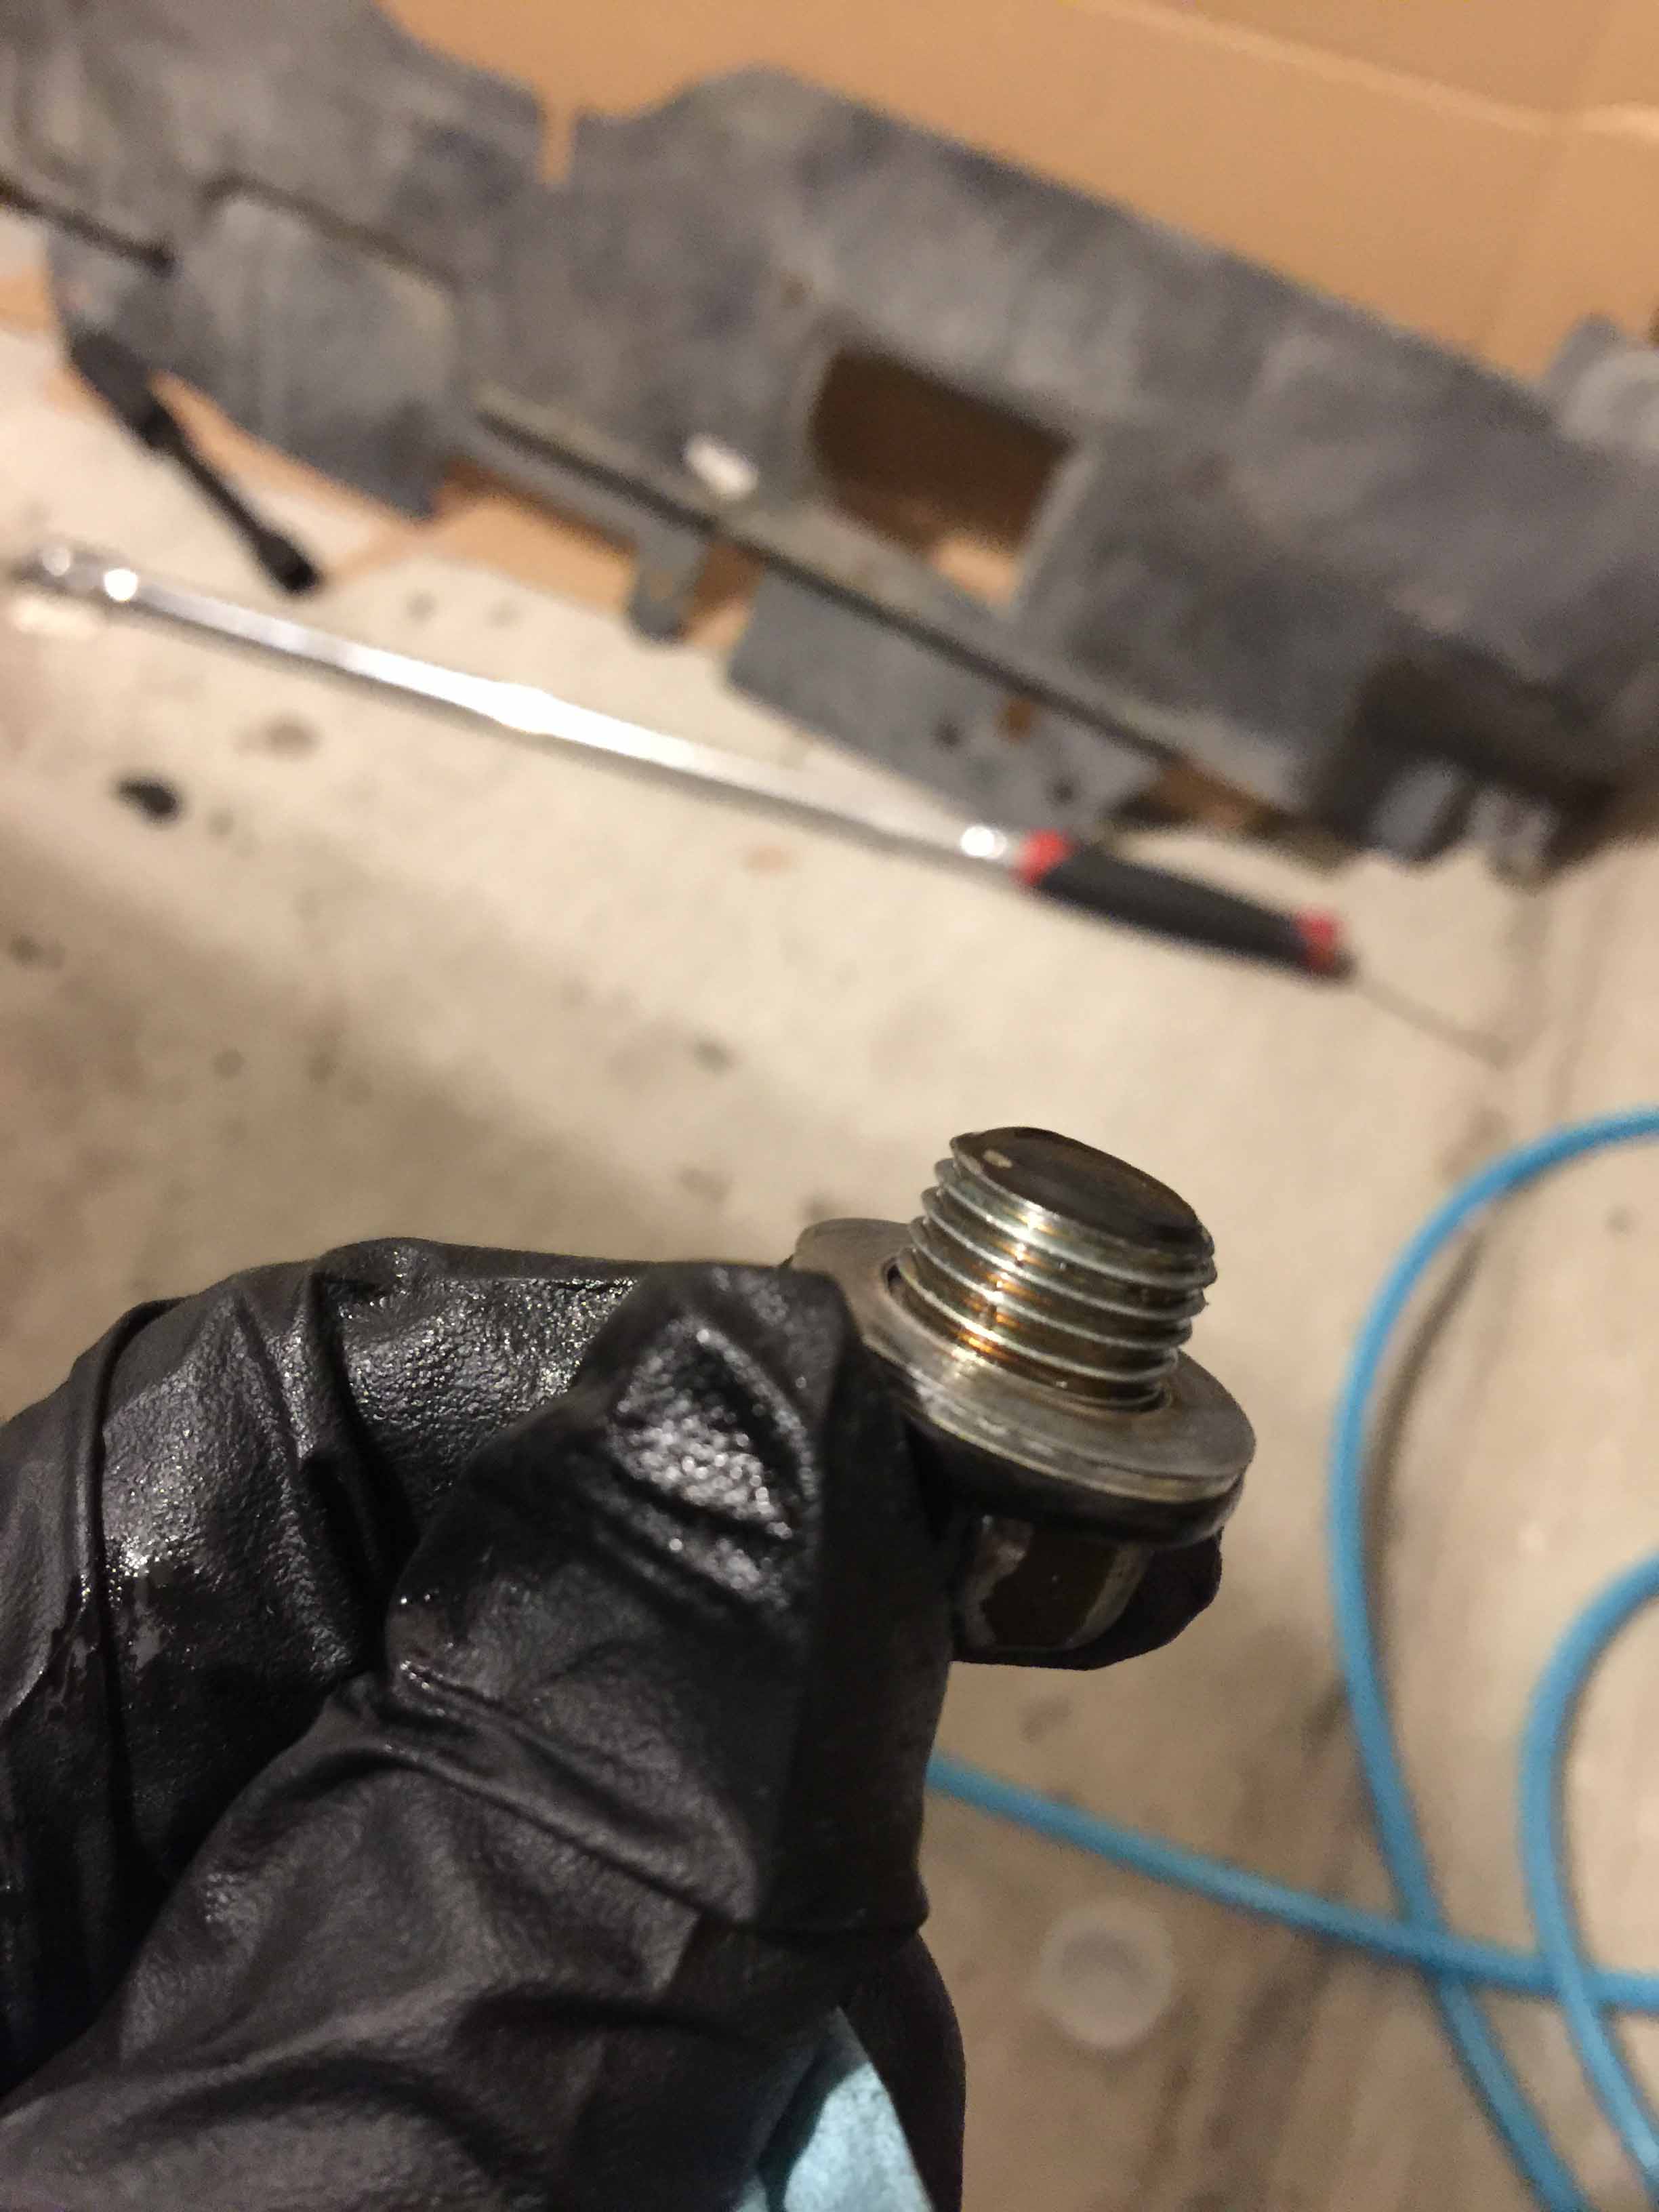
Apparently when the dealer changed the oil they didn't bother with replacing the drain washer. It's way flatter than a single use, properly torqued washer should be. This combined with a broken antenna...It wouldn't surprise me if they used recycled dino oil of the wrong weight.
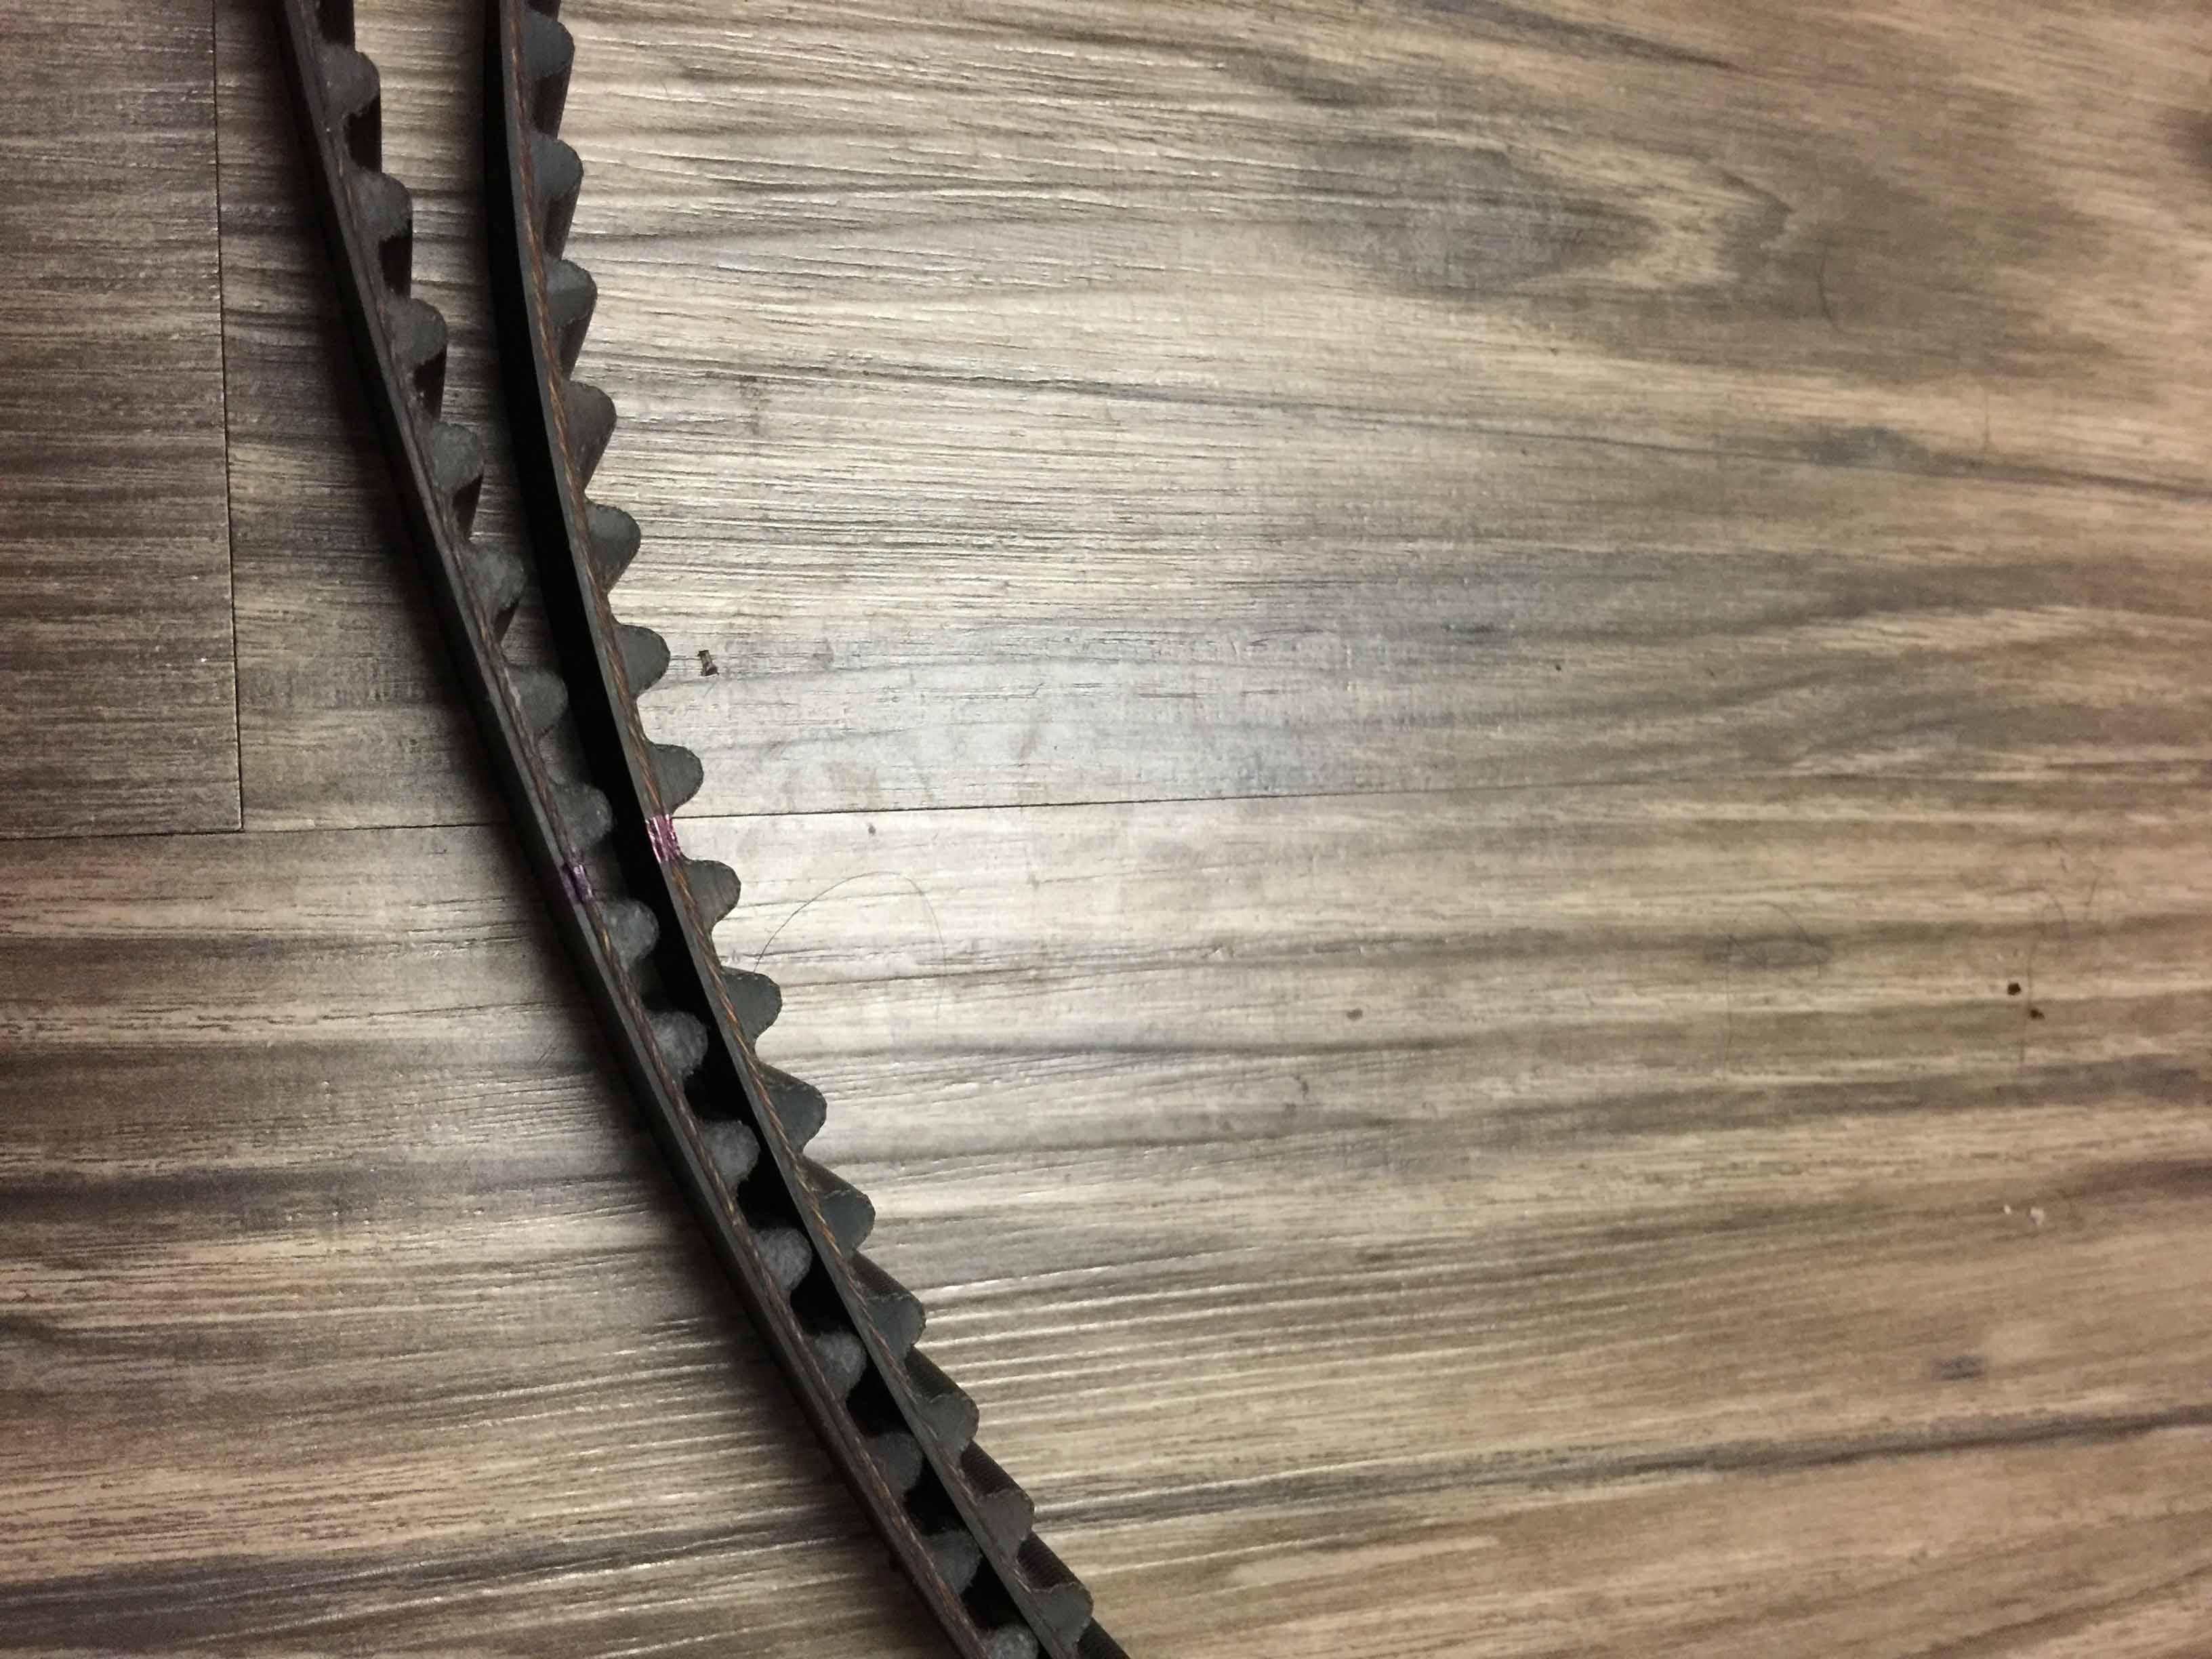
With the timing covers successfully removed, the first thing I did was mark the timing belt and gears with a permanent marker. When I copy the marks to the new belt I'll just line them up on the gears to set the timing. (then verify it four times using the built in marks of course)
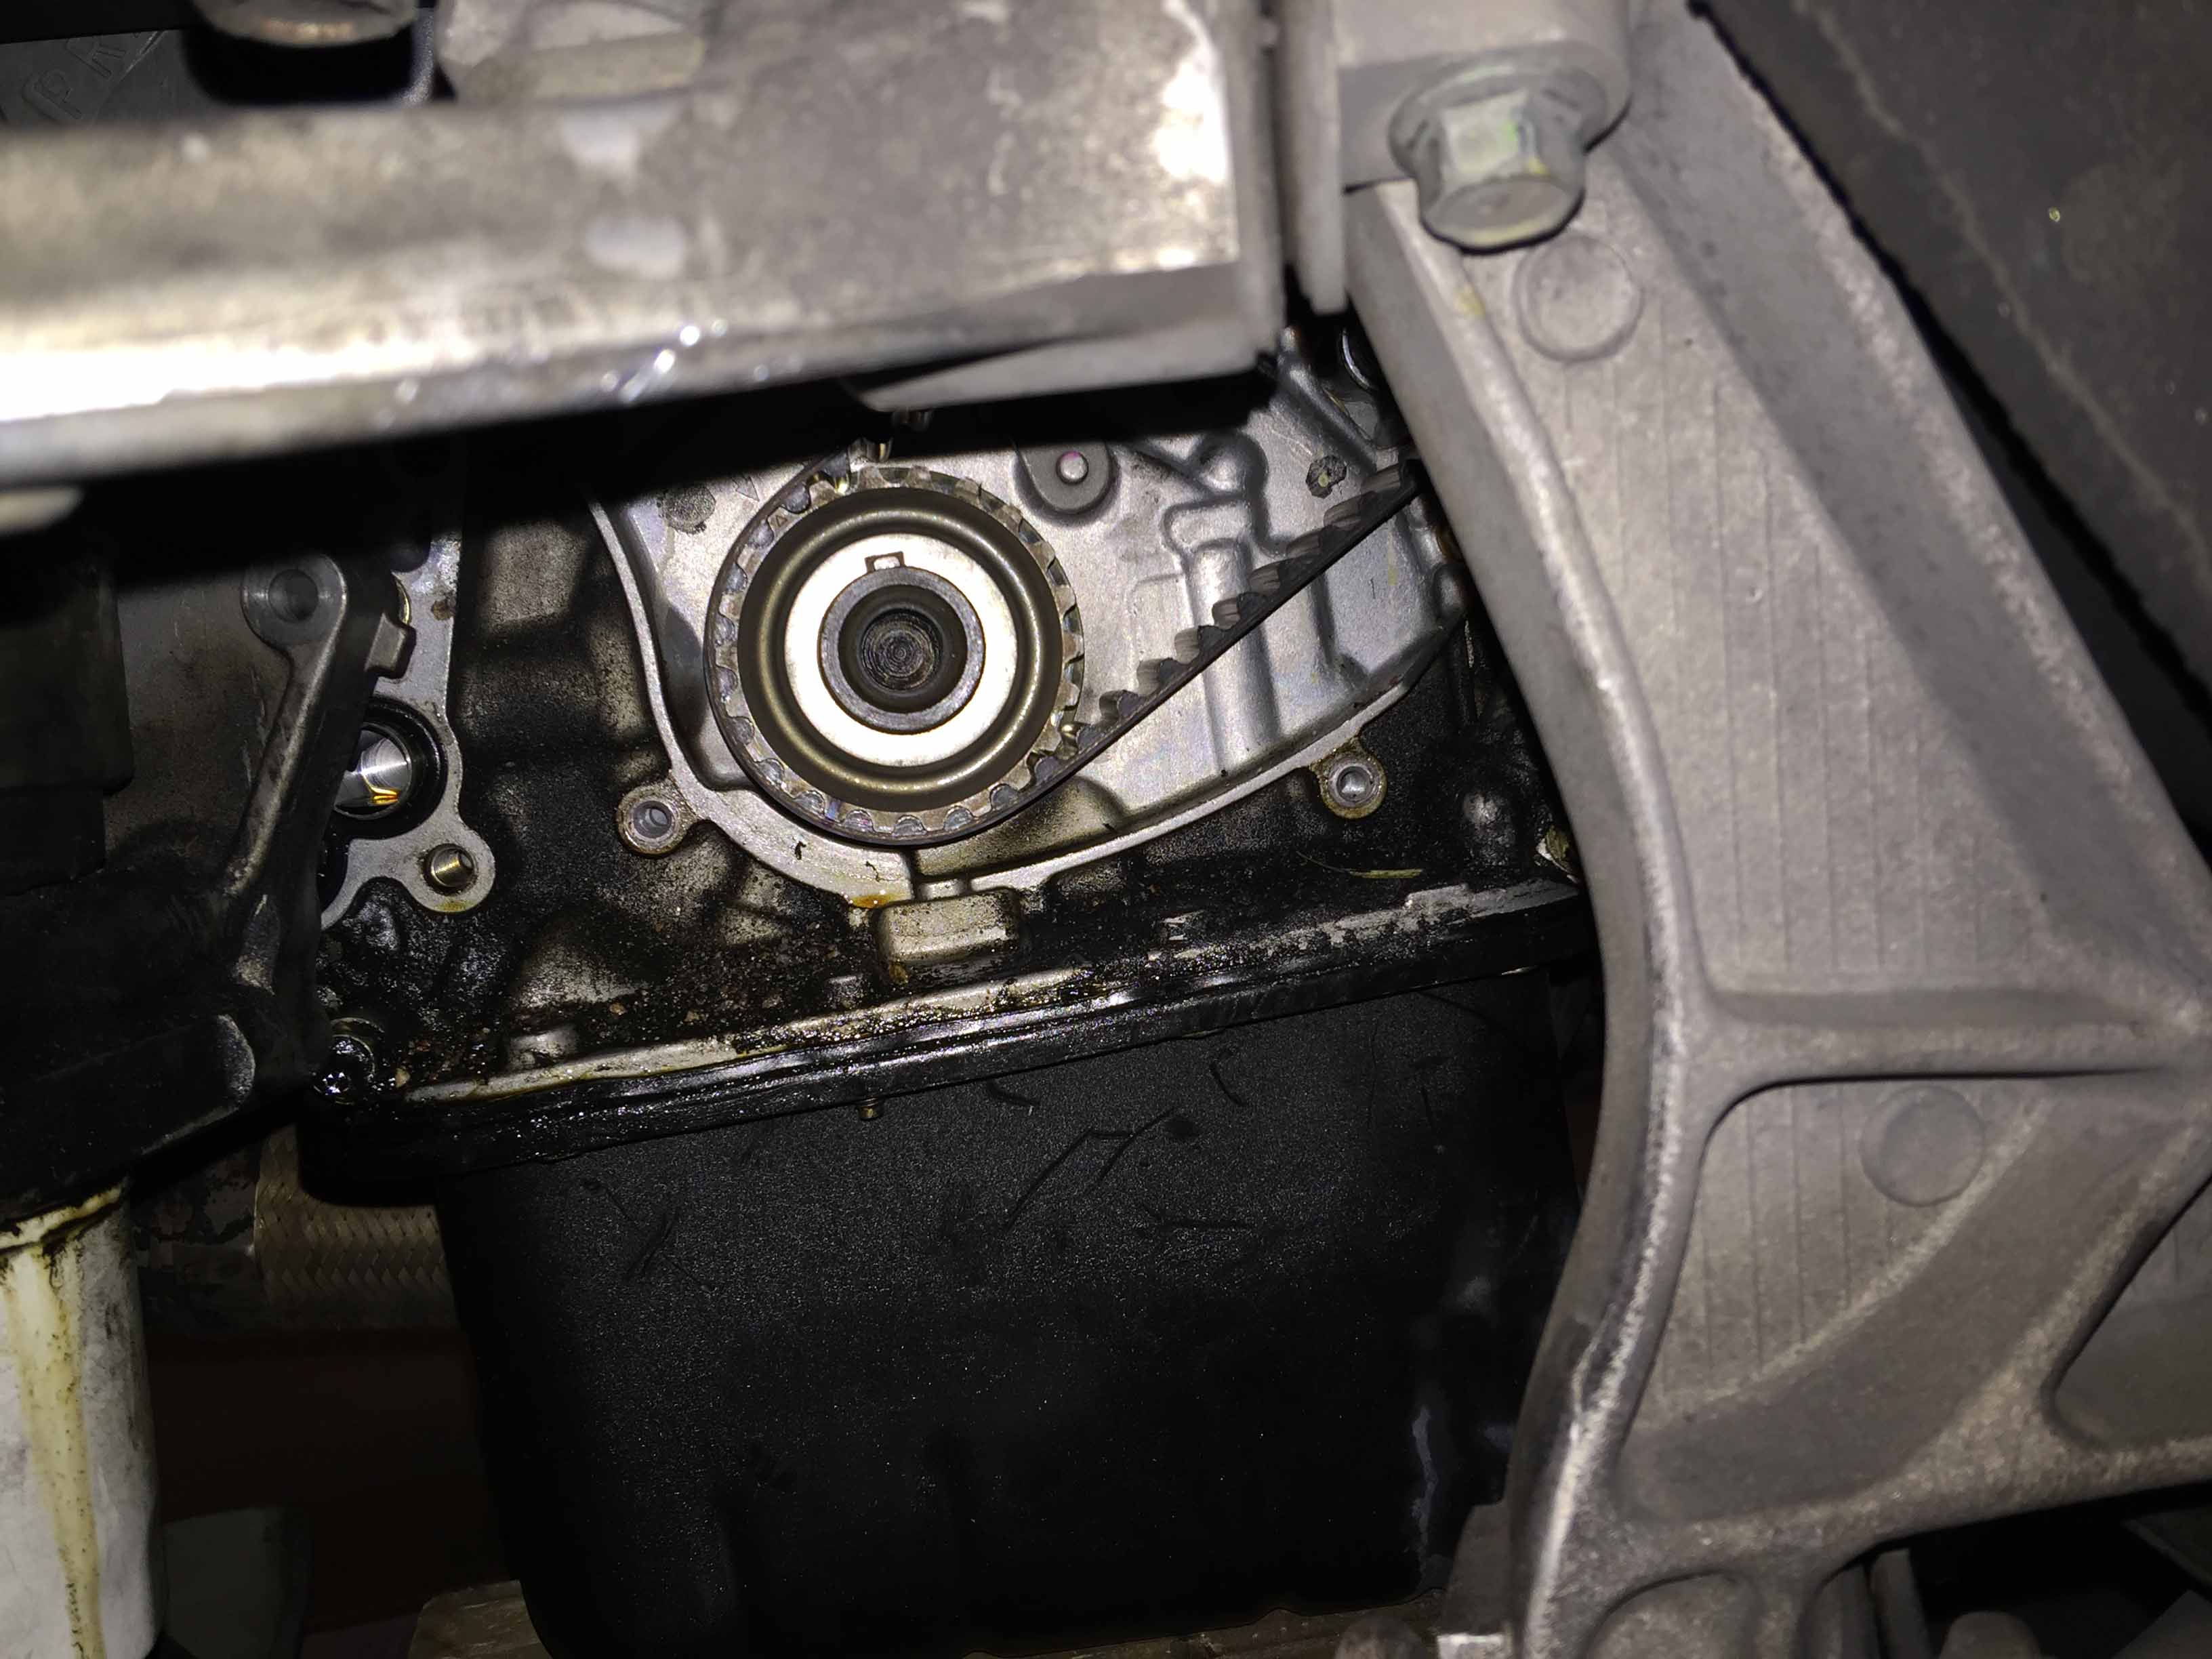
When copying the marks from the old belt to the new make sure to verify that the marks are correct at least 4 times as well. Contrary to popular belief, P2V contact is a VERY bad thing.

Before I put the new belt on though I dropped the oil pan to replace the gasket. This turned out to be a massive pain in the *** as one of the exhaust nuts decided to destroy the stud rather than back off peacefully, so I'll have to figure something out for that. I'm going to try to find a die of the correct size to repair the stud and just buy a new nut I think. I cleaned up the oil pan and lined up the gasket.
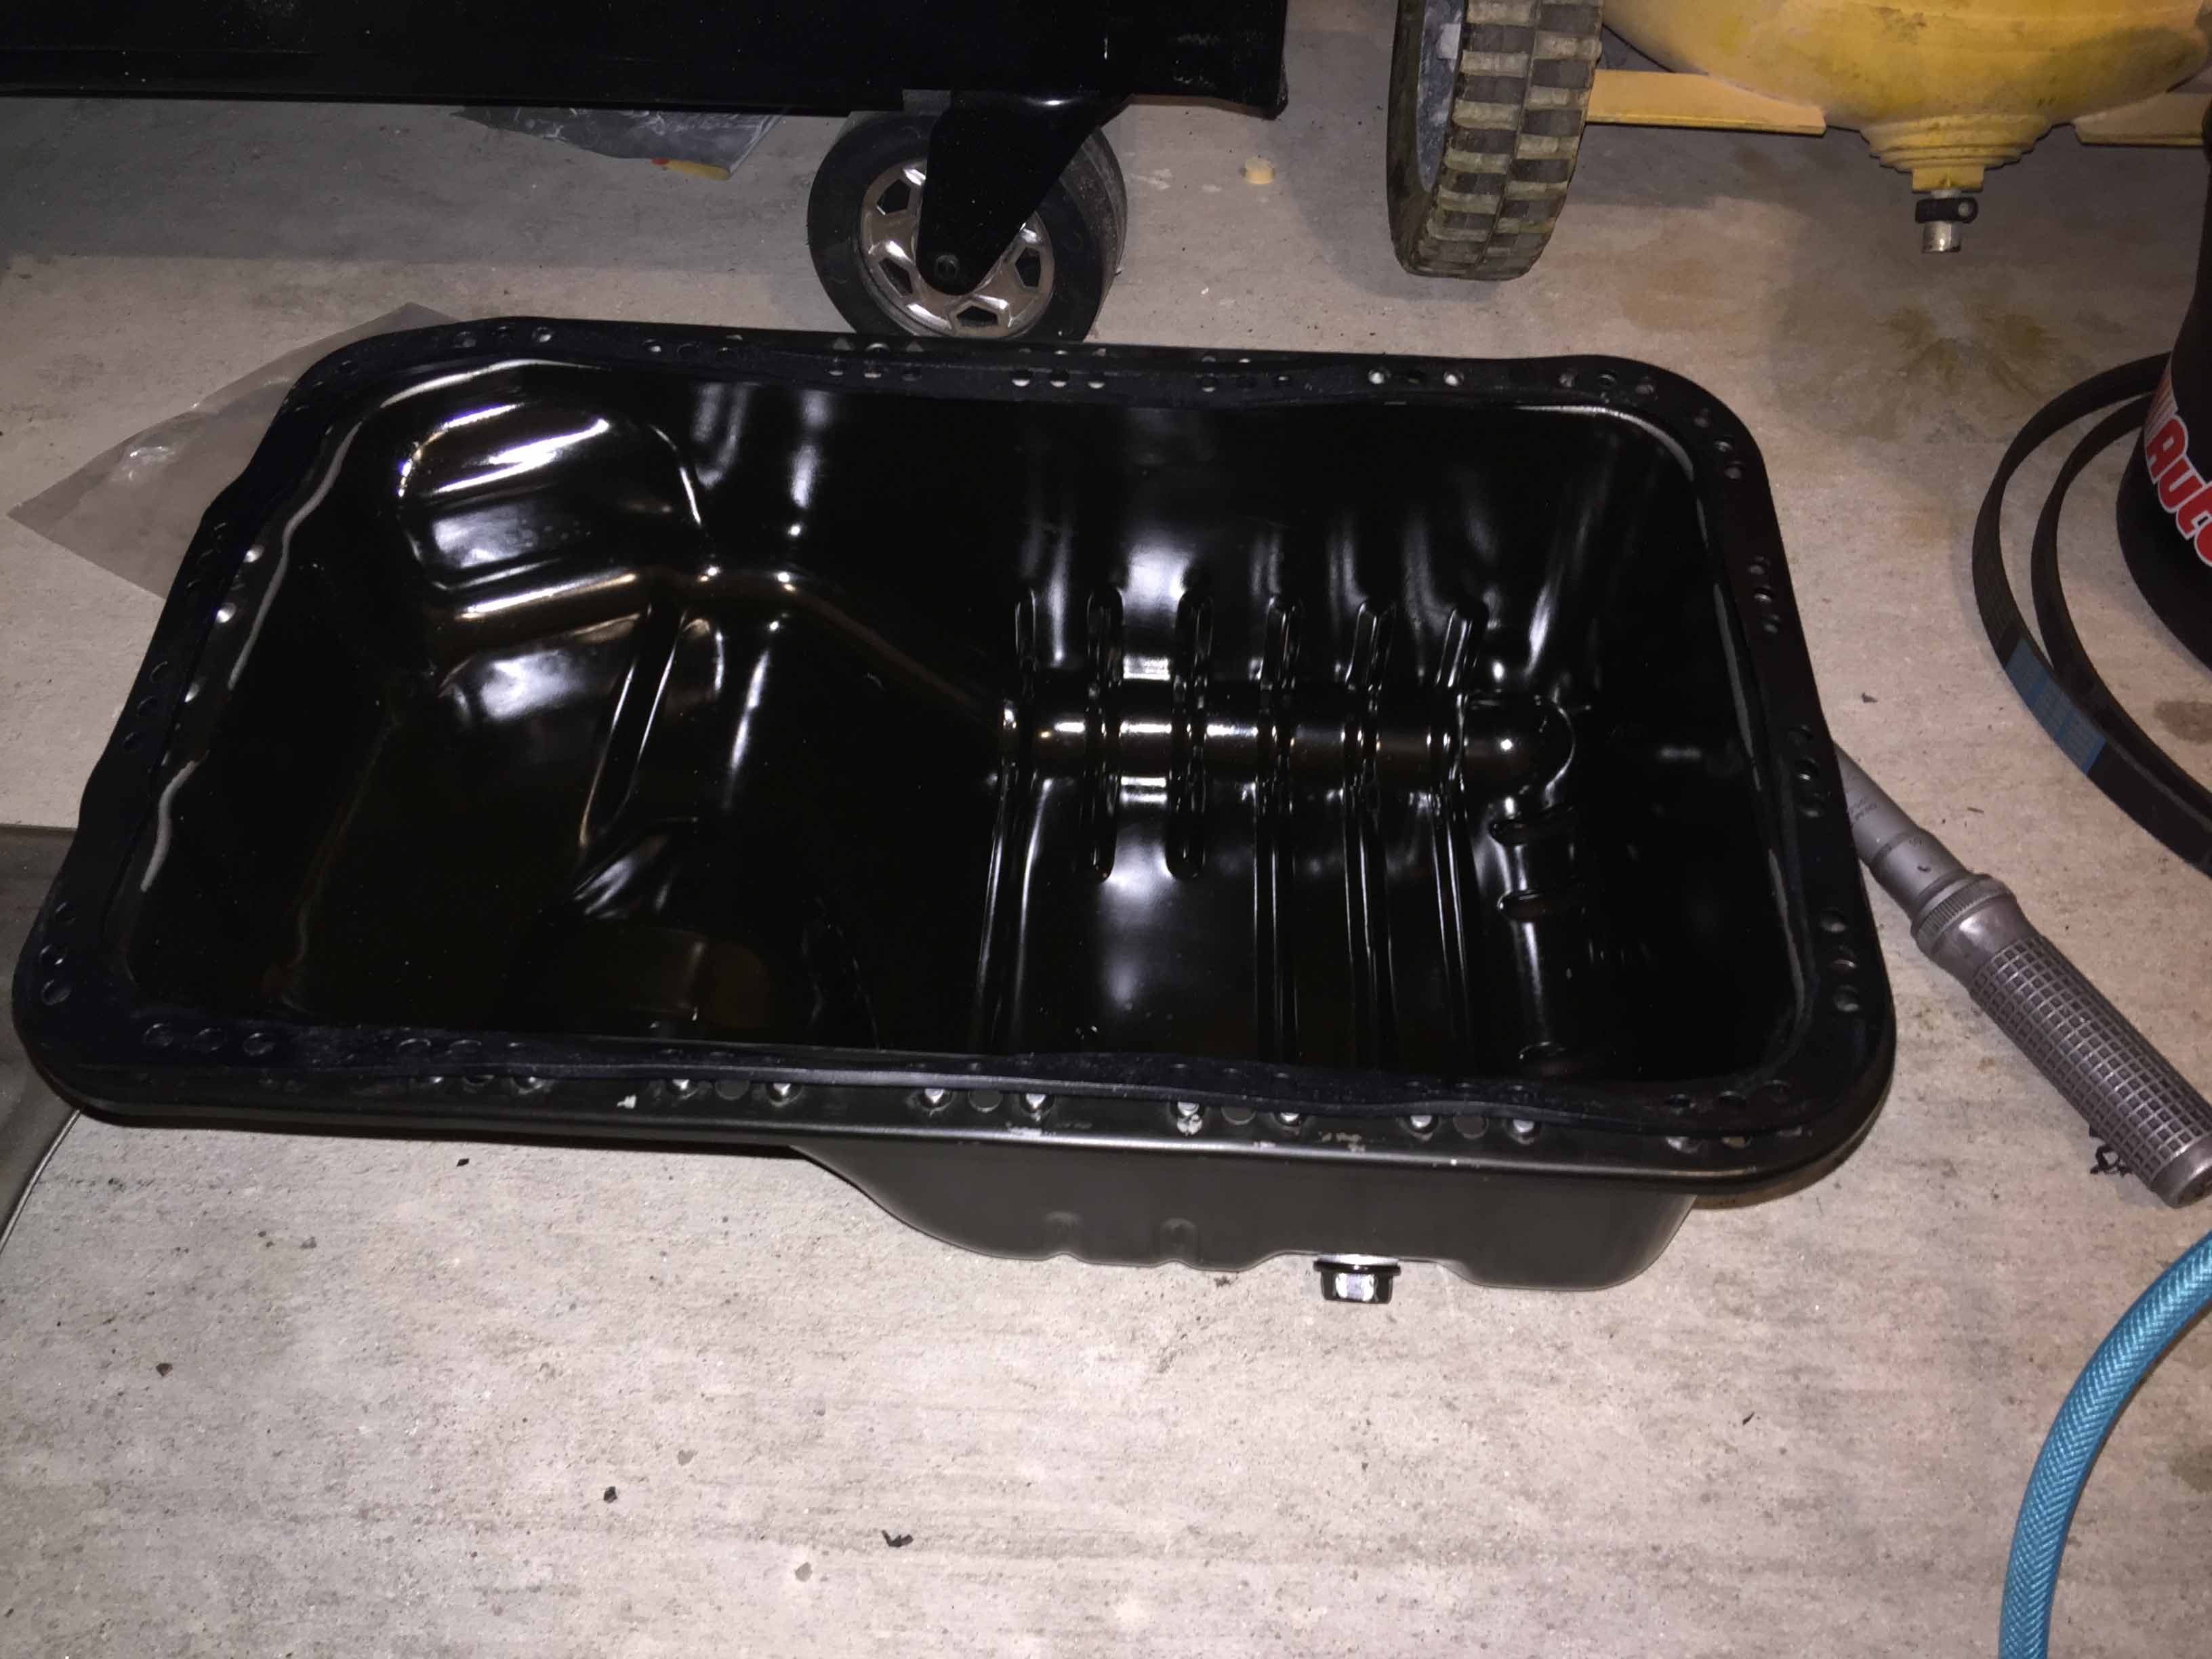
Oil pan studs installed and gasket surface cleaned. Normally the pan only has 4 studs and a whole bunch of bolts , but since I had a ton of B-series oil pan studs laying around and they're the same thing, I installed them instead. This makes it way easier (and looks better IMO) as the gasket will stay on the studs while you maneuver the pan in underneath it.
Oil pan reinstalled. The torque spec for the oil pan nuts/bolts is 8.7lbft but I couldn't go past 4lbft before the gasket started to bulge out the sides too much and there's plenty of reports that 8.7lbft is too much so I left it at 4lbft.
The previous guy to change the water pump used Hondabond, so I spent 45 minutes scrubbing that junk off.
Old vs. new waterpump. The old one only had 20k miles on it but since I was here already I might as well replace it for peace of mind, it does really look brand new though...
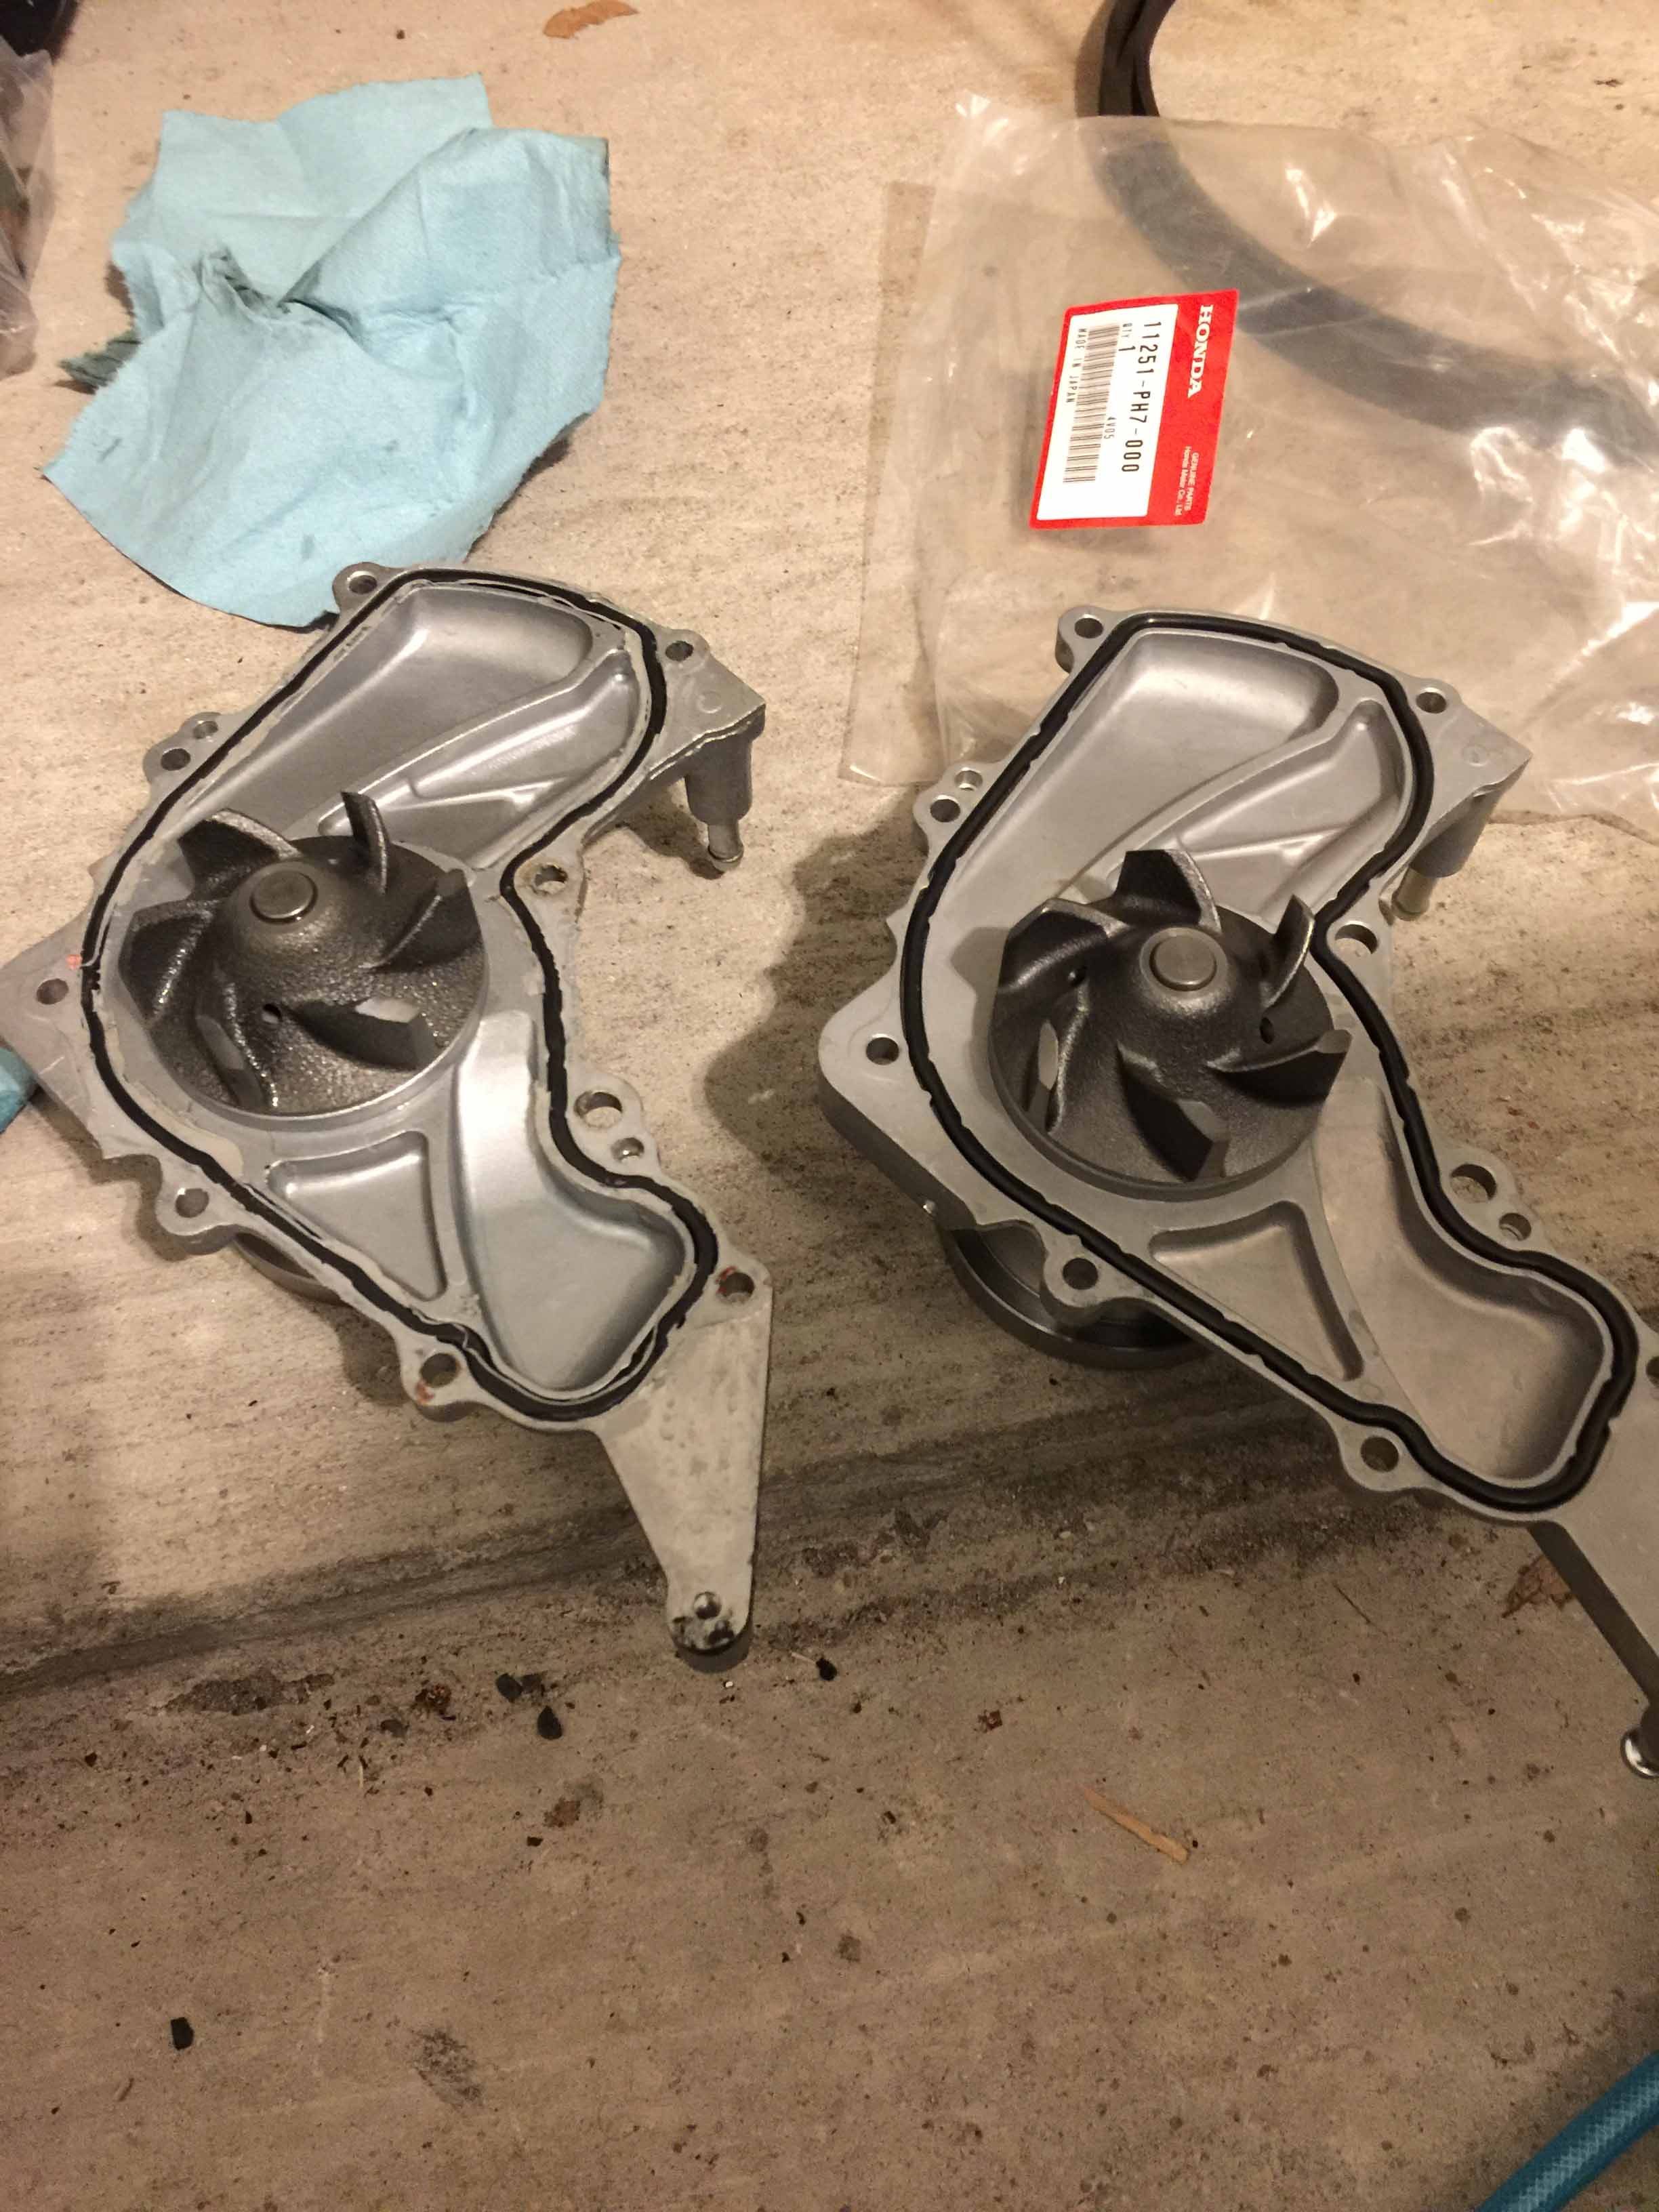
Rather than pay for some more obscenely overpriced new bolts like the manual suggests, I cleaned off and applied new Hondabond sealant to the existing water pump bolts.

Pump installed and all the bolts torqued to 9lbft and 16lbft for 10mm and 12mm respectively.
And finally I put the new belt on and made sure the marks all lined up.
At this point I forgot to take pictures and it was just more boring stuff. I tensioned the timing belt, reinstalled the timing covers with much cursing, installed the AC tensioner and new AC belt, installed he alternator and new alternator belt, and then called it a day. It's looking like a few more days of work at this point before it's back on the road as I still need to drain the rest of the coolant and refill it, replace the transmission fluid, and reinstall all the crap on top of the engine that had to come off for the timing belt.
Last edited by MotorMouth93; 08-05-2017 at 09:23 PM.