
DIY: How to Install JDM Window Visors.
 06-03-2007, 12:36 PM
#1
Honda-Tech Member
Thread Starter
Join Date: Jun 2005
Location: San Diego., CA
Posts: 1,257
Likes: 0
Received 0 Likes
on
0 Posts
Alright, since there are several questions on how to install visors i decided to do my my visors this morning and provide my own write up. I was going to have a friend do it for cash.. but i decided expletive it I'd be happier if i did it myself..its actual an easy install after you get the first one..and took me about 15 mins to put the 2nd one on..after like 30 for the 1st.. BTW there are ones that already exist.. however not all pics are there so i made it easier and i also followed "Solscud007"(BIG THANKS) how to on things i didn't understand <U>https://honda-tech.com/zerothread?id=1549788</U>
in my version however i did not drill the bottom hole next to the side mirrors..i'll tell you more when we get to that step..
Parts
the letters are graved into the brackets.. so if its B just look "B" on the bracket.
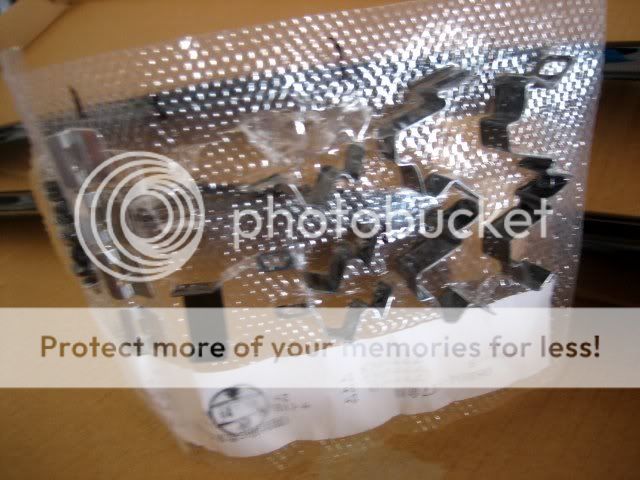
Need a screwdriver, flathead, and a blade to cut..
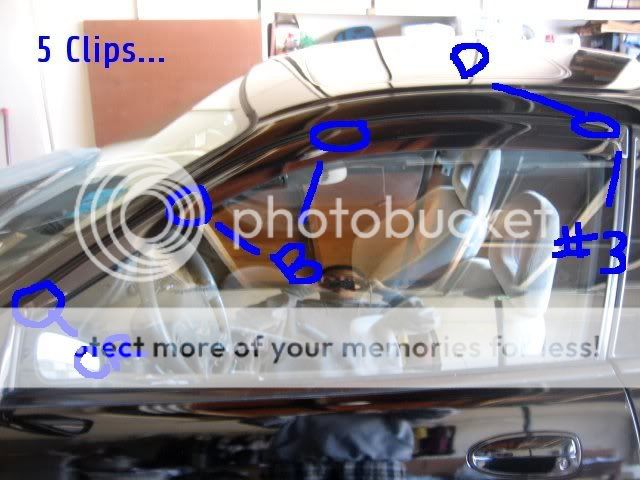
Bracket and Screw Locations..
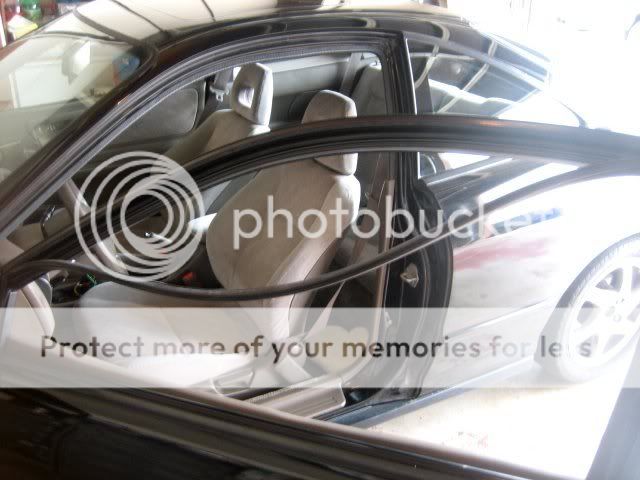
Step 1:
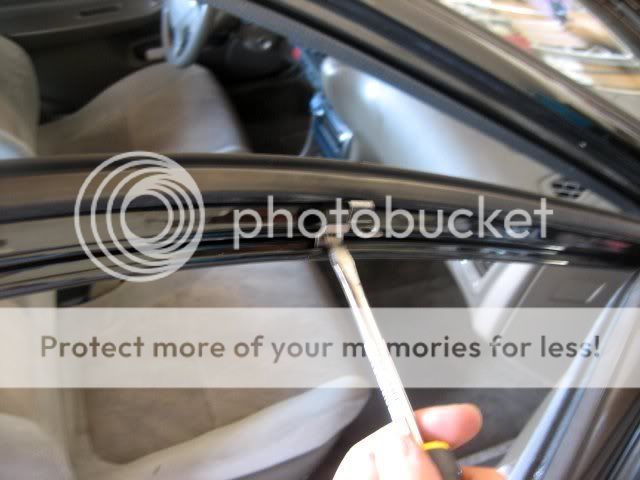
Roll the window down(obvious) and start to peel off the trim starting from the top corner.. (use a flat head to start off then peel away) should look like this
Step 2:
After doing so..hold up the visor to as if they were on and get an estimate on where the brackets belong by looking under the visors to check where they screw into.
start off by placing both "B" brackets which are the two middle ones..the tiny silver things are like locks to hold the brackets into place..

easier way to push in the silver metal little things..wait till you hear a snap
when your done with the "B" brackets it should look something like this

Step 3:
I found it easier to do "D" next which is the one near the top corner of the window...
for this bracket it has to be screwed in which can be a hassle since the screw is hella small.. but you'll get it eventually (probably the most hardest part)
heres a pic of the hole that your looking for.. just hold the bracket up and screw it right in with the "tiny silver" screw provided.. this bracket will not use the same "lock" as with the "B" brackets

Step 4:
After your gonna have to put the one bracket that goes into the side labled "#3".. this step requires cutting HOWEVER is not necessary.. i had it without and it was pretty stable already..if your confident in yourself go ahead and cut like i did to create a more stable fit.. i dont have pictures of this but if you look in the "japan instructions" provided it is VERY self explanatory.. just measure the size of the bracket and cut a slit and slide it in.. and they give you a "push in screw" to plug inthe hole on the visor
Step 5:
Next your gonna have to snap back the trim into place.. takes a while if your not sure what your doing but you'll get it.. USE a flathead again to punch the trim into place it will make life so much easier..the fitment SHOULD be snug..as mines came out real nice your just gonna have to push in real hard in the places where the "brackets".. and if your scared of scratching your paint tape the tip of the flathead.. i didn't use any tape and i didn't have any problems with scratches..
brackets and trim all snapped in ready to put the visor on..
Step 6:
Screw in the screws on from the bottom of the visor using the "black screws they provided" there should be 8 of them..
your gonna use these screws for brackets "B,D and CR".. not the one on the side..

Step 7:
Now your probably wondering what happed to the one by the side mirror.. "CR/CL".. i did this bracket last after screwing in the visor.. it will be hanging.. but dont worry heres what you do.. since i didnt wanna go through the hassle of looking for the correct drill bit and didnt wanna drill through the door frame.. i screwd on the "CR" bracket onto the visor.. and used the OPPOSITE SIDE(the one thats suppose to be screwed into the door frame) and snuged it between trim.. play around with it and you'll get a NICE sturdy fitment as if you screwed it in.. i even drove around to test if id get lose.. just fine
heres how my bottom looks like

Now your all done...
Without visors..

with visors.. enjoy your work..
driver..

passenger..

DONE!..hopefully this **** can help you guys out there its not that hard and doesn't take very long..if your lost post your questions up here.. and i'll try to help hopefully i didnt forget anything this is my first write up
in my version however i did not drill the bottom hole next to the side mirrors..i'll tell you more when we get to that step..
Parts
the letters are graved into the brackets.. so if its B just look "B" on the bracket.
Need a screwdriver, flathead, and a blade to cut..
Bracket and Screw Locations..
Step 1:
Roll the window down(obvious) and start to peel off the trim starting from the top corner.. (use a flat head to start off then peel away) should look like this
Step 2:
After doing so..hold up the visor to as if they were on and get an estimate on where the brackets belong by looking under the visors to check where they screw into.
start off by placing both "B" brackets which are the two middle ones..the tiny silver things are like locks to hold the brackets into place..
easier way to push in the silver metal little things..wait till you hear a snap
when your done with the "B" brackets it should look something like this
Step 3:
I found it easier to do "D" next which is the one near the top corner of the window...
for this bracket it has to be screwed in which can be a hassle since the screw is hella small.. but you'll get it eventually (probably the most hardest part)
heres a pic of the hole that your looking for.. just hold the bracket up and screw it right in with the "tiny silver" screw provided.. this bracket will not use the same "lock" as with the "B" brackets
Step 4:
After your gonna have to put the one bracket that goes into the side labled "#3".. this step requires cutting HOWEVER is not necessary.. i had it without and it was pretty stable already..if your confident in yourself go ahead and cut like i did to create a more stable fit.. i dont have pictures of this but if you look in the "japan instructions" provided it is VERY self explanatory.. just measure the size of the bracket and cut a slit and slide it in.. and they give you a "push in screw" to plug inthe hole on the visor
Step 5:
Next your gonna have to snap back the trim into place.. takes a while if your not sure what your doing but you'll get it.. USE a flathead again to punch the trim into place it will make life so much easier..the fitment SHOULD be snug..as mines came out real nice your just gonna have to push in real hard in the places where the "brackets".. and if your scared of scratching your paint tape the tip of the flathead.. i didn't use any tape and i didn't have any problems with scratches..
brackets and trim all snapped in ready to put the visor on..
Step 6:
Screw in the screws on from the bottom of the visor using the "black screws they provided" there should be 8 of them..
your gonna use these screws for brackets "B,D and CR".. not the one on the side..
Step 7:
Now your probably wondering what happed to the one by the side mirror.. "CR/CL".. i did this bracket last after screwing in the visor.. it will be hanging.. but dont worry heres what you do.. since i didnt wanna go through the hassle of looking for the correct drill bit and didnt wanna drill through the door frame.. i screwd on the "CR" bracket onto the visor.. and used the OPPOSITE SIDE(the one thats suppose to be screwed into the door frame) and snuged it between trim.. play around with it and you'll get a NICE sturdy fitment as if you screwed it in.. i even drove around to test if id get lose.. just fine
heres how my bottom looks like
Now your all done...
Without visors..
with visors.. enjoy your work..
driver..
passenger..
DONE!..hopefully this **** can help you guys out there its not that hard and doesn't take very long..if your lost post your questions up here.. and i'll try to help hopefully i didnt forget anything this is my first write up

 06-03-2007, 05:21 PM
#6
Member
Join Date: Sep 2005
Location: san diego, ca, usa
Posts: 1,390
Likes: 0
Received 0 Likes
on
0 Posts
<TABLE WIDTH="90%" CELLSPACING=0 CELLPADDING=0 ALIGN=CENTER><TR><TD>Quote, originally posted by lesturrr »</TD></TR><TR><TD CLASS="quote">good stuff homie. looks 10x better. this should be added to the integra exterior section. </TD></TR></TABLE>
Modified by ph0shizzle at 8:44 PM 6/3/2007
Modified by ph0shizzle at 8:44 PM 6/3/2007
06-04-2007, 08:36 PM
#7
Honda-Tech Member
Thread Starter
Join Date: Jun 2005
Location: San Diego., CA
Posts: 1,257
Likes: 0
Received 0 Likes
on
0 Posts
<TABLE WIDTH="90%" CELLSPACING=0 CELLPADDING=0 ALIGN=CENTER><TR><TD>Quote, originally posted by ph0shizzle »</TD></TR><TR><TD CLASS="quote">
</TD></TR></TABLE>
thanksss
</TD></TR></TABLE>
thanksss
Trending Topics
06-04-2007, 08:57 PM
#9
Join Date: Dec 2006
Location: Los Angeles
Posts: 59
Likes: 0
Received 0 Likes
on
0 Posts
<TABLE WIDTH="90%" CELLSPACING=0 CELLPADDING=0 ALIGN=CENTER><TR><TD>Quote, originally posted by alexisthemovie »</TD></TR><TR><TD CLASS="quote">cool writeup, ugly tan.</TD></TR></TABLE>
x2 even tho theres like how many threads about this. is this a girls car?
x2 even tho theres like how many threads about this. is this a girls car?
06-05-2007, 12:36 PM
#12
Honda-Tech Member
Thread Starter
Join Date: Jun 2005
Location: San Diego., CA
Posts: 1,257
Likes: 0
Received 0 Likes
on
0 Posts
<TABLE WIDTH="90%" CELLSPACING=0 CELLPADDING=0 ALIGN=CENTER><TR><TD>Quote, originally posted by DCfoyoass »</TD></TR><TR><TD CLASS="quote">
x2 even tho theres like how many threads about this. is this a girls car?</TD></TR></TABLE>
haha nah why??
x2 even tho theres like how many threads about this. is this a girls car?</TD></TR></TABLE>
haha nah why??
06-05-2007, 03:25 PM
#15
Honda-Tech Member
Join Date: Oct 2004
Location: somewhere in, ny, usa
Posts: 221
Likes: 0
Received 0 Likes
on
0 Posts
Good write up. I did mine like 2 years ago and i basically stared at the pics and then just guesstimated from there. The pics show that you have to cut the window stripping.... DON'T!!!! they fit right on without cutting them. I'm sorry I should say notching them where the brackets go. Also for the GS-R owners there should be the per-drilled holes it shows to drill on the top of the frame and down by the mirror. i read some where that LS's and RS's didn't have the holes already only type r's and gs-r's had them but I could be wrong.
Sorry for thread jacking just trying to give extra input on the install.
Sorry for thread jacking just trying to give extra input on the install.

Thread
Thread Starter
Forum
Replies
Last Post
87 SiviK Si
Honda Civic / Del Sol (1992 - 2000)
34
08-26-2013 08:48 PM
jdm_cars
Acura Integra Type-R
1
11-18-2003 04:38 AM