
Write-up: 4g prelude manual rack conversion
 02-05-2006, 12:35 AM
#1
Honda-Tech Member
Thread Starter
DISCLAIMER: If you f*ck this conversion up and die, you did something wrong, not me, so suck my hairy hairy testes.
/disclaimer
<u>4g Prelude Manual Rack Conversion: </u>
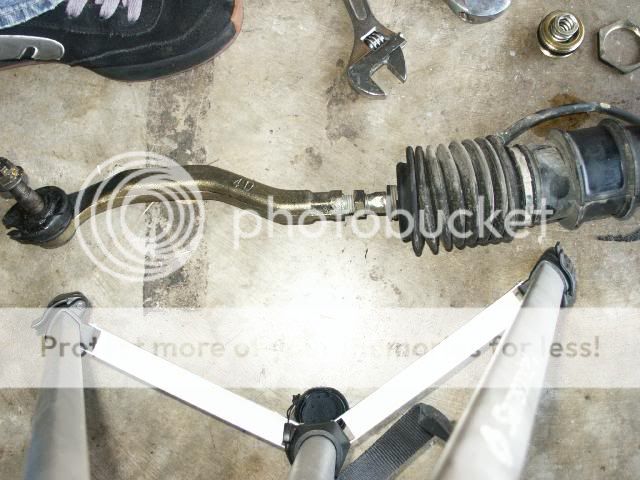
1) go underneath and use a 22mm and 36mm (or adj. wrench) to take off both left and right inner tie rods (you will have to cut the boot bands off and pull the boots back)
2) take off ps pump, reservoir, and all lines, including the cooler in the bumper and the vss lines (make a little loop for the vss lines)
3) take off whatever peice it is of your exhaust that runs underneath the rack
4) take off the under engine crossmember, and the two peices that go underneath the rack to hold it up
5) loosen the steering u-joint from the pinion, and be sure to mark where it was aligned
6) wiggle the rack from side to side until you get it out
inside the rack we go:
7) get out your channel locks and a 22mm wrench to get the inner tie rods off the ends of the rack, take off the huge lockring and 14mm adjustment bolt and the spring and the peice that rides the rack
8) loosen the 4 12mm bolts that hold the long black cylinder on, and pull it off, also pull off the cylinder under it, they just pull off, theyre a little tight
9) take off the 4 10mm bolts where the pinion goes in and then take the snapring off
10) take off the whole valve body, and take the plate off of the end
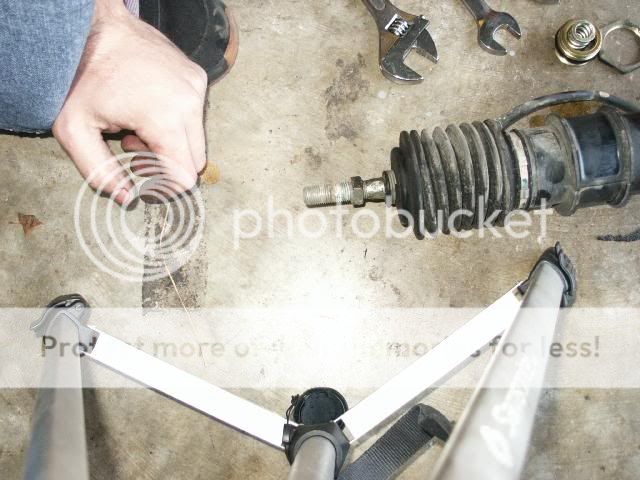
11) gut every single peice possible out of the valve body, and take the little jets out of the two holes you just exposed in the rack, but save the o rings
12) take the two snaprings off of the now exposed bottom of the pinion, and then pull the pinion out
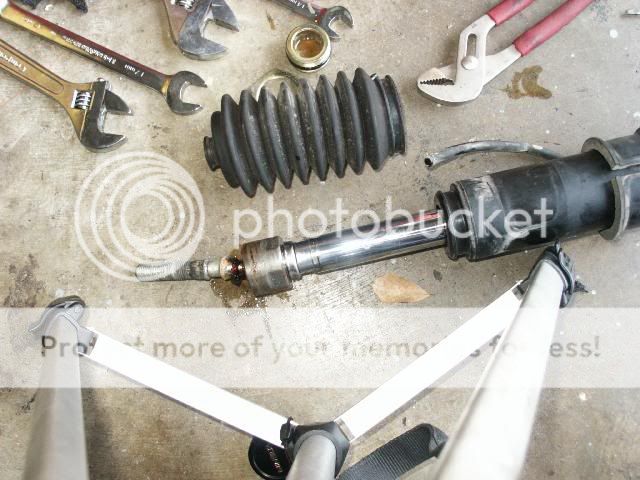
13) pull the rack out, and then the pinion cage
14) cut the white ring off of the piston on the pinion, and then pick the o-ring out of the groove
15) clean everything very well, including inside the rack
16) use a good, thick, synthetic grease, and slob grease all over the whole rack, pinion, and cage
17) put everything back together, take the lockring off of the 14mm adjustment bolt, and tq the adjustment to 2.9 ft lbs.....then back it off 20 degrees, then hold it steady while tightening the locking on
18) you could get some junk lines to cut the ends off of, or maybe get some plugs from a plumbing store, either way you need to plug the holes in the rack....fortunately i had an extra set from a subframe i had laying around, so i had a set of extras...i clipped them about 1/2 inch from the threads, pliered them shut, then packed them full of grease so nothing could get in.....
now, i decided to leave out the cylinder (#15 below), and also the spring and retainer for it, those are no longer used, and i figured why not....i will edit this part out if i run into any problems with this....
edit: on some advice i decided to put this stuff back in, i still am not sure if that was actually necessary, but I was told that it was

enjoy your new, more precise, enjoyable steering.....you feel the road much better, i will never go back to nor desire power steering again
edit: Years later, I come back and read this sentence. lol. For those who are wondering....my current automobile definitely has power steering.
Matt
CHECK BELOW FOR PICS!!! - thanks to skrewdlude for pics
Modified by mgags7 at 4:47 AM 2/5/2006
Modified by mgags7 at 11:32 PM 2/6/2006
Modified by mgags7 at 3:35 PM 3/31/2006
Modified by mgags7 at 3:36 PM 3/31/2006
Modified by mgags7 at 11:34 PM 5/15/2007
/disclaimer
<u>4g Prelude Manual Rack Conversion: </u>
1) go underneath and use a 22mm and 36mm (or adj. wrench) to take off both left and right inner tie rods (you will have to cut the boot bands off and pull the boots back)
2) take off ps pump, reservoir, and all lines, including the cooler in the bumper and the vss lines (make a little loop for the vss lines)
3) take off whatever peice it is of your exhaust that runs underneath the rack
4) take off the under engine crossmember, and the two peices that go underneath the rack to hold it up
5) loosen the steering u-joint from the pinion, and be sure to mark where it was aligned
6) wiggle the rack from side to side until you get it out
inside the rack we go:
7) get out your channel locks and a 22mm wrench to get the inner tie rods off the ends of the rack, take off the huge lockring and 14mm adjustment bolt and the spring and the peice that rides the rack
8) loosen the 4 12mm bolts that hold the long black cylinder on, and pull it off, also pull off the cylinder under it, they just pull off, theyre a little tight
9) take off the 4 10mm bolts where the pinion goes in and then take the snapring off
10) take off the whole valve body, and take the plate off of the end
11) gut every single peice possible out of the valve body, and take the little jets out of the two holes you just exposed in the rack, but save the o rings
12) take the two snaprings off of the now exposed bottom of the pinion, and then pull the pinion out
13) pull the rack out, and then the pinion cage
14) cut the white ring off of the piston on the pinion, and then pick the o-ring out of the groove
15) clean everything very well, including inside the rack
16) use a good, thick, synthetic grease, and slob grease all over the whole rack, pinion, and cage
17) put everything back together, take the lockring off of the 14mm adjustment bolt, and tq the adjustment to 2.9 ft lbs.....then back it off 20 degrees, then hold it steady while tightening the locking on
18) you could get some junk lines to cut the ends off of, or maybe get some plugs from a plumbing store, either way you need to plug the holes in the rack....fortunately i had an extra set from a subframe i had laying around, so i had a set of extras...i clipped them about 1/2 inch from the threads, pliered them shut, then packed them full of grease so nothing could get in.....
now, i decided to leave out the cylinder (#15 below), and also the spring and retainer for it, those are no longer used, and i figured why not....i will edit this part out if i run into any problems with this....
edit: on some advice i decided to put this stuff back in, i still am not sure if that was actually necessary, but I was told that it was
enjoy your new, more precise, enjoyable steering.....you feel the road much better, i will never go back to nor desire power steering again
edit: Years later, I come back and read this sentence. lol. For those who are wondering....my current automobile definitely has power steering.
Matt
CHECK BELOW FOR PICS!!! - thanks to skrewdlude for pics
Modified by mgags7 at 4:47 AM 2/5/2006
Modified by mgags7 at 11:32 PM 2/6/2006
Modified by mgags7 at 3:35 PM 3/31/2006
Modified by mgags7 at 3:36 PM 3/31/2006
Modified by mgags7 at 11:34 PM 5/15/2007
Last edited by mgags7; 03-26-2009 at 08:16 AM.
 02-05-2006, 10:02 AM
#2
Honda-Tech Member
Join Date: Mar 2002
Location: Houston, TX, USA
Posts: 524
Likes: 0
Received 0 Likes
on
0 Posts
Hey man,
I will post the pics here shortly to help everyone out. They are all in tiff format so I need to convert them, and then upload. I haven't finished mine yet because I have a torn boot that I need to replace. I plan to remove the cylinder, and spring, when I reassemble it all.
Modified by skrewdlude at 11:17 AM 2/5/2006
02-05-2006, 11:13 AM
#6
Honda-Tech Member
Join Date: Nov 2004
Location: San Diego, CA
Posts: 1,013
Likes: 0
Received 0 Likes
on
0 Posts
Its not too bad, Mgags, Cgags, and I started yesterday and didnt run into a huge probs except when tryin to get the PS lines out from under the car, thats a real PITA.
Unfortunately I was absent from the reinstalation process/testing phase.
Unfortunately I was absent from the reinstalation process/testing phase.
02-05-2006, 12:03 PM
#7
Junior Member
Join Date: Jun 2004
Location: Abilene, TX, USA
Posts: 224
Likes: 0
Received 0 Likes
on
0 Posts
Don't remove the cylinder#15 or the spring #23 as that is part of the assembly you need to keep the cylinder holds the part with the bumps on it against the gear housing. The part with the bumps on it has the second rack guide bushing in it This is an essential part of the assemby since then you would only have one on the passenger end of the rack and no support in the middle. The pinion area parts aren't designed to hold the rack togeher they just make it so you can turn the car. Also that #23 spring is just to hold the cylinder in place it has nothing to do with being a spring that will resist you in any way. Just do it like my instructions said and you'll be cool. Get those pics up to someone. Thanks!
Trending Topics
02-05-2006, 12:06 PM
#8
Junior Member
Join Date: Jun 2004
Location: Abilene, TX, USA
Posts: 224
Likes: 0
Received 0 Likes
on
0 Posts
Also the super easy condensed version is #23 holds #15 which holds #17 in place otherwise it may pop loose then the rack will fall apart internally. OOCH!
02-05-2006, 12:35 PM
#9
Honda-Tech Member
Join Date: Mar 2002
Location: Houston, TX, USA
Posts: 524
Likes: 0
Received 0 Likes
on
0 Posts
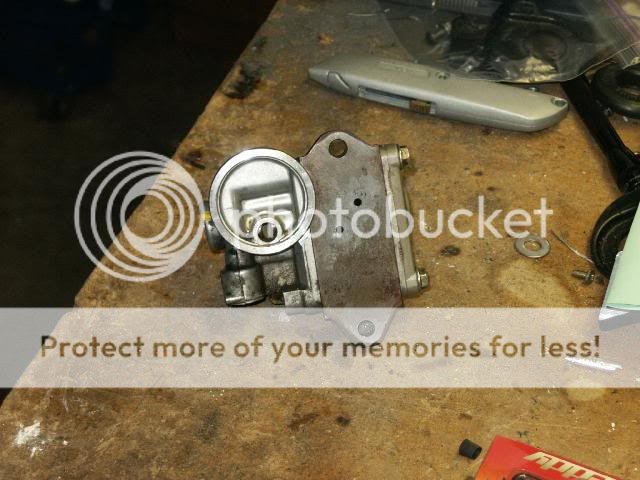
Here is what I have so far. I am still waiting on a new boot from Honda, I discovered one of mine was ripped when taking out the rack 
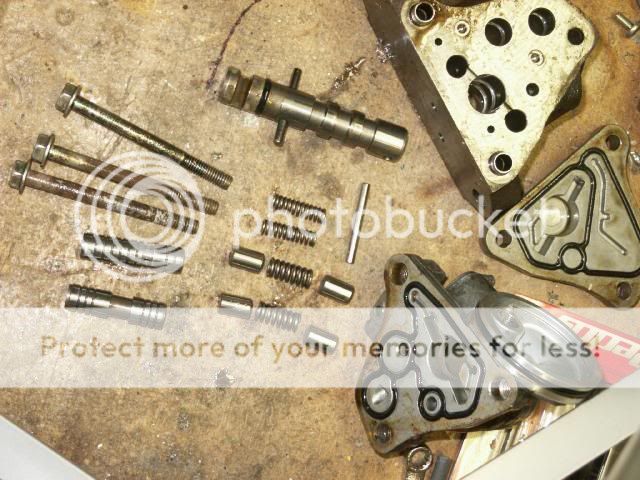
First diassembling the valve body:
Get the valve body:
Remove these 3 bolts:
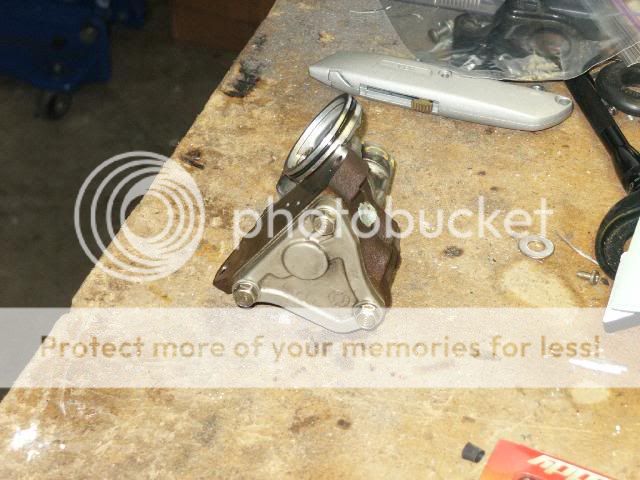
Remove the cover, and set aside:
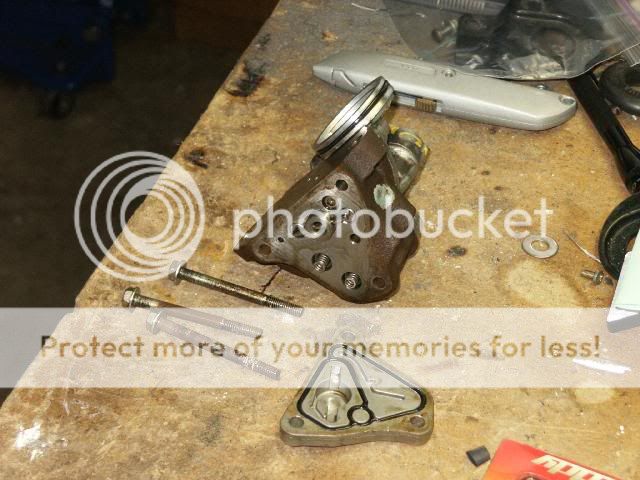
Slide the valve retainer over the pluger:
The remove it completely and set aside:
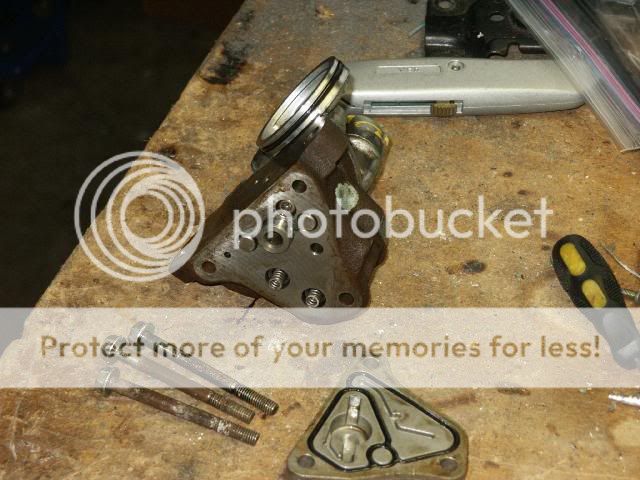
Remove the 2 springs:
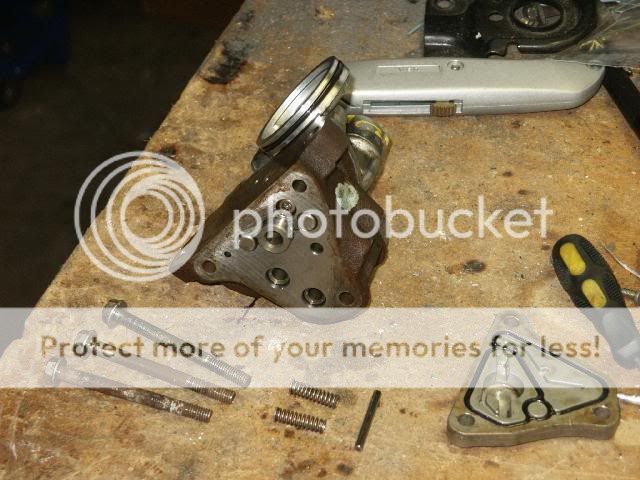
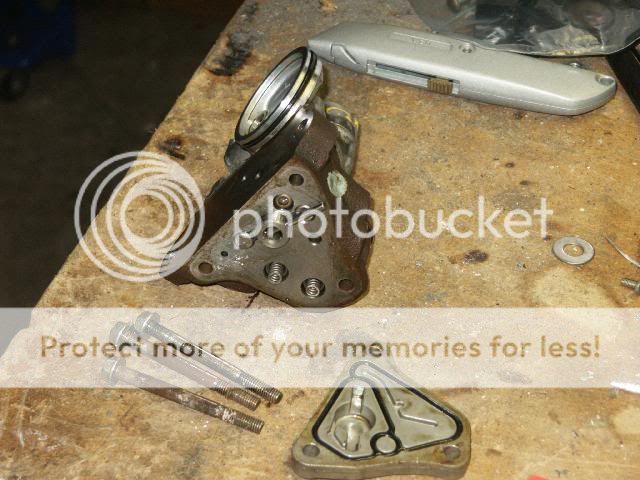
Pull apart the valve body housing:
Pull out the 4 way valve, plungers, and springs:
These are the parts you should have removed:
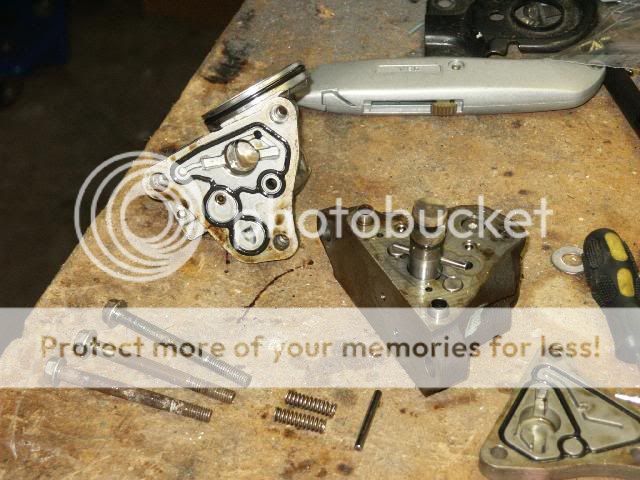
Clean everything, and push the housing back together:
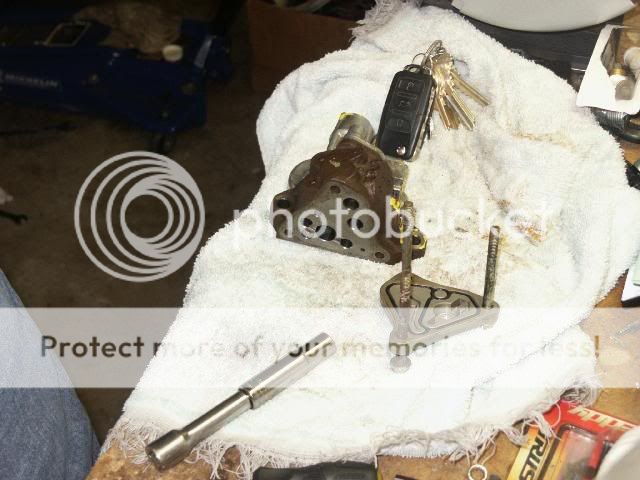
Put the cover back on and:
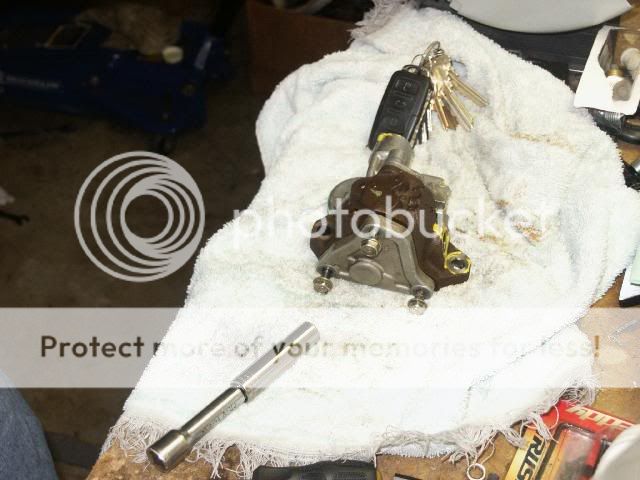
The finished assembly:
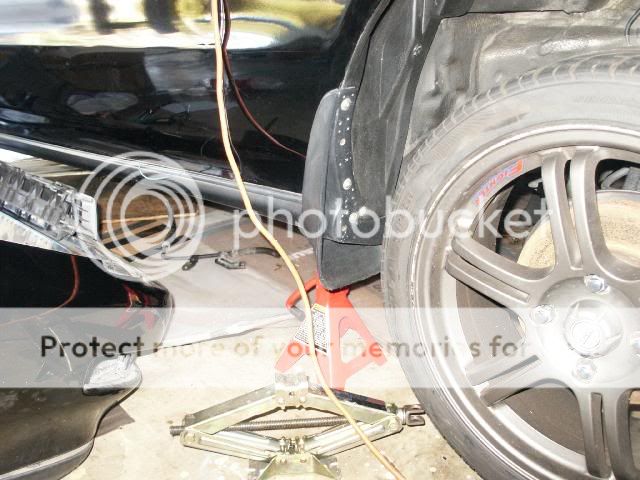
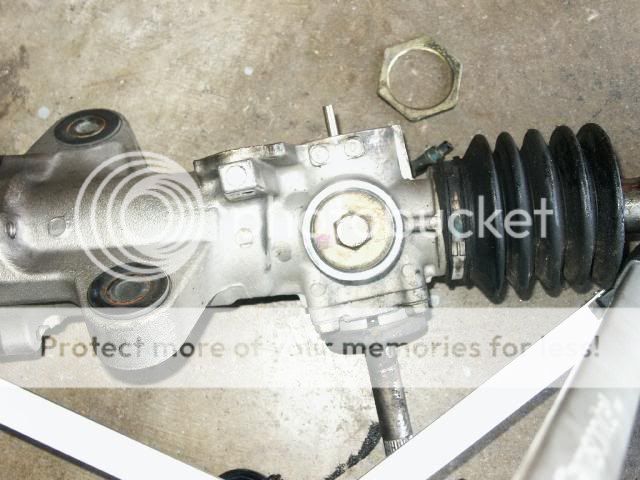
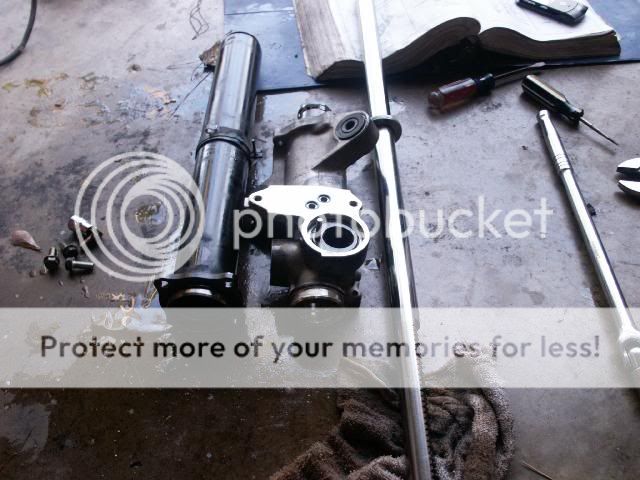
Rack removal
Jack up the car and put it on jack stands:
Remove the cotter pin from the castle nut
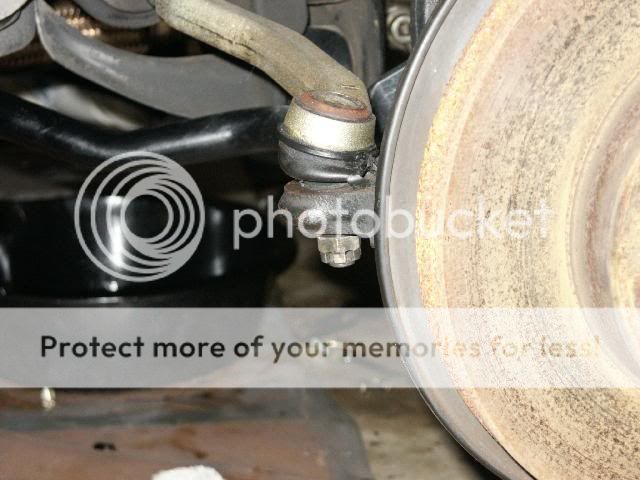
Remove the castle nut:

Break loose the ball joint:
Repeat on other side.
Get under the car:
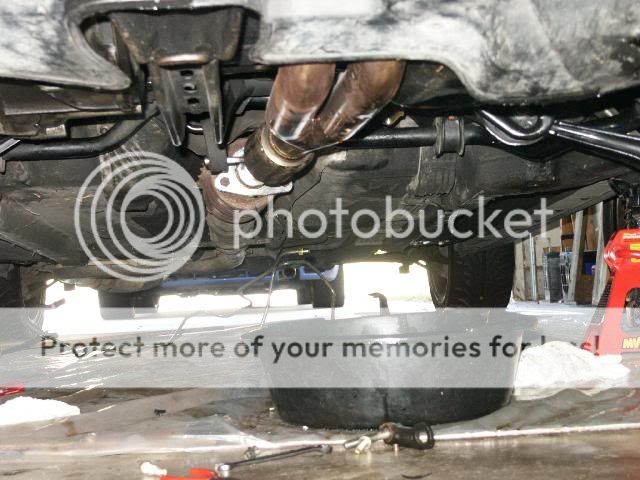
Pull of the lower exhaust section. (header/DP)
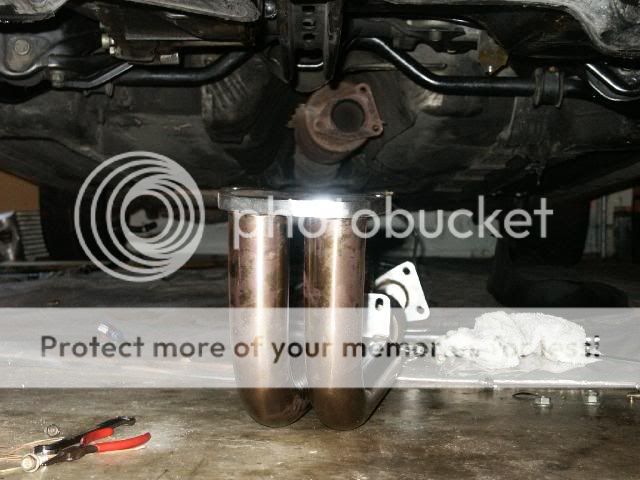
Remove the cross member:

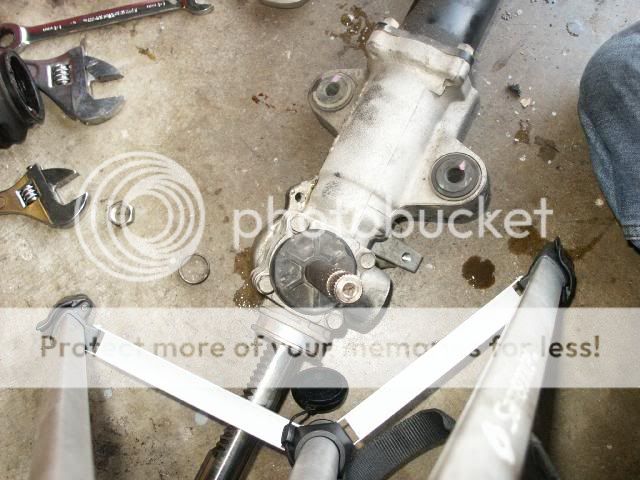
Remove the valve body cover if you have not already:

Remove this bracket that hold the rack:
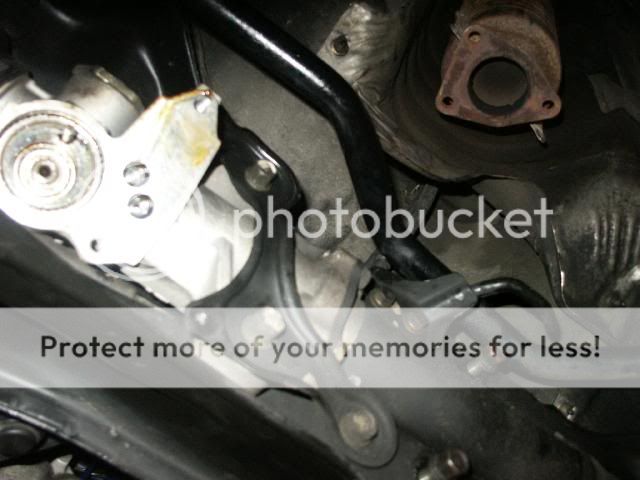
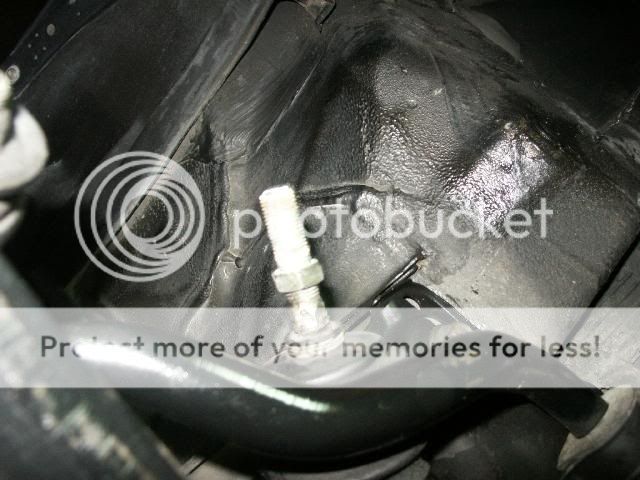
Lock the steering wheel, and mark the joint to remember where it was. Then remove bolt:
Remove this bracket:
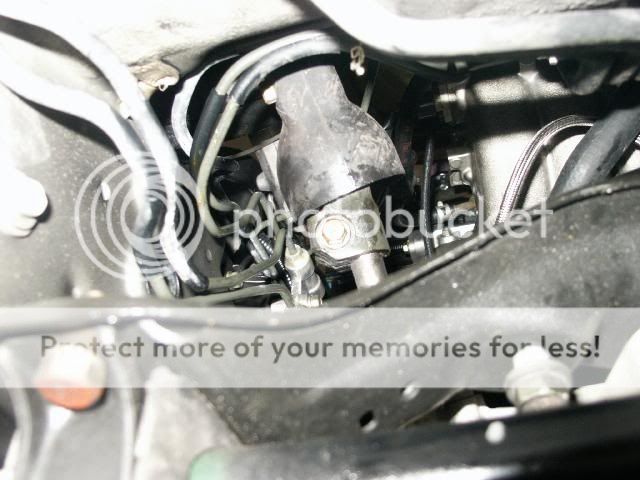
I choose to remove the tie rod, as I need to replace the ball joints. It may be possible to remove the rack with out this. Keep in mind that if you remove these, even though you locked the wheel, and can get the ball joints back in pretty much where they were, you should still get an alignment to corret any toe issues.
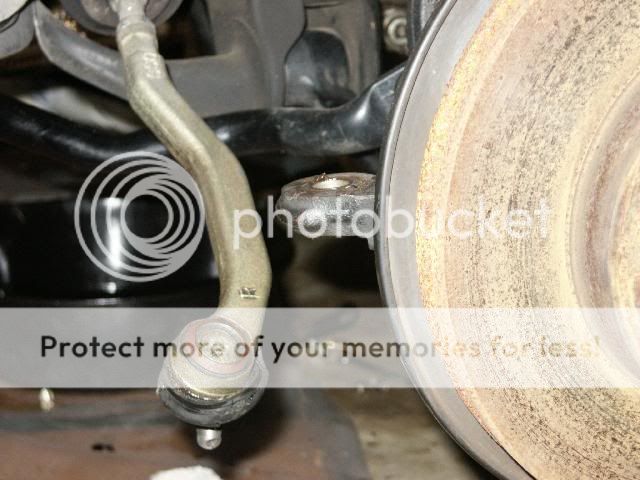
Loosen the ball joint:
Remove the tie rod:
Remove the last bracket holding up the rack:

If you have 4ws there is a sensor connected to the rack guid that you need to remove too.
Move the rack left and right to remove it. I ended up pulling the pass side tie rod (kind of like turning the wheel all the way left) all the way over to make the driver side as small as possible, and it came right out.
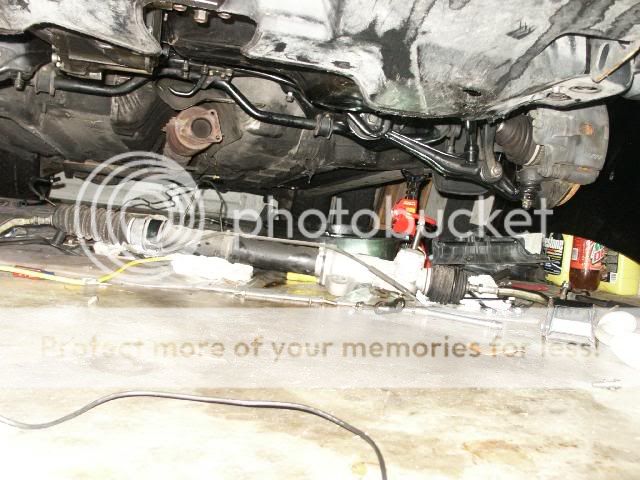
Now the rack is out.
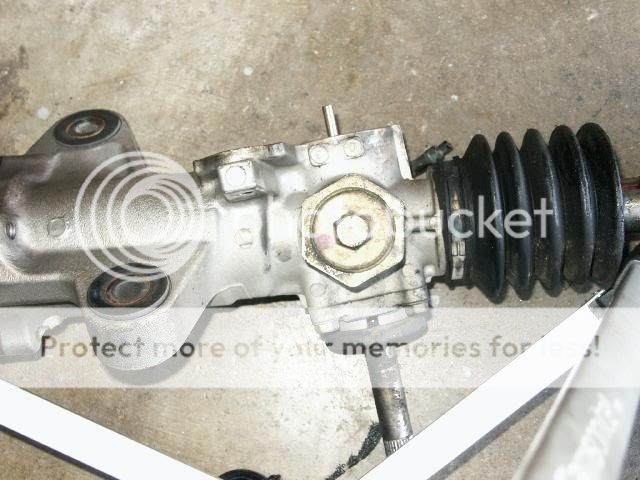
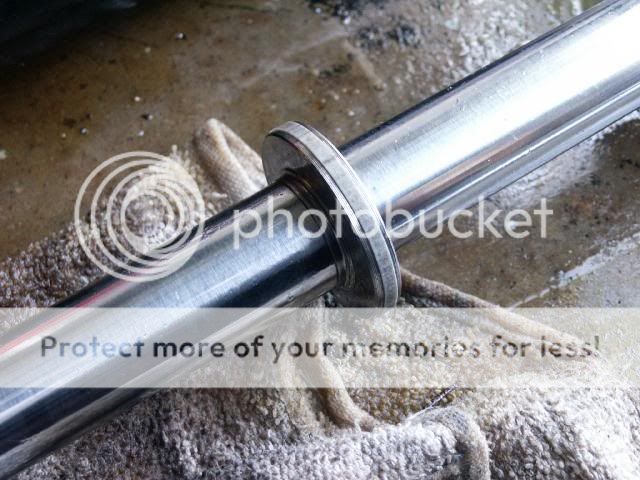
Disassembling the rack
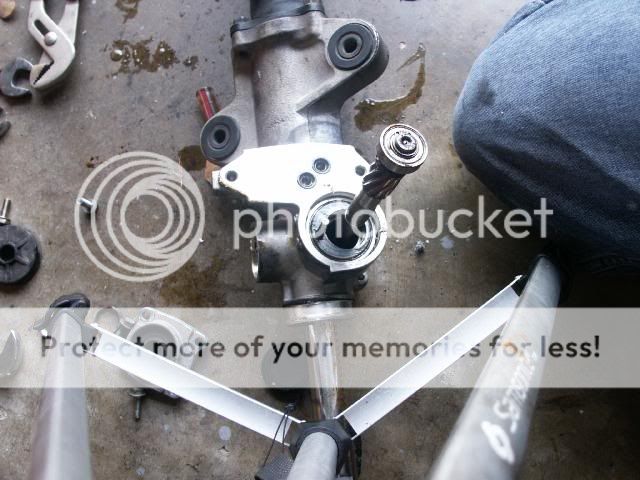
This is where the rack guide is:
Remove the outer lock nut:
Remove the inner piece:
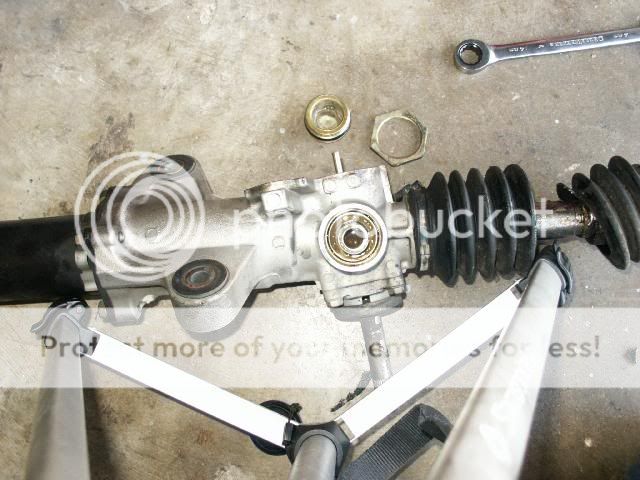
Remove the spring:
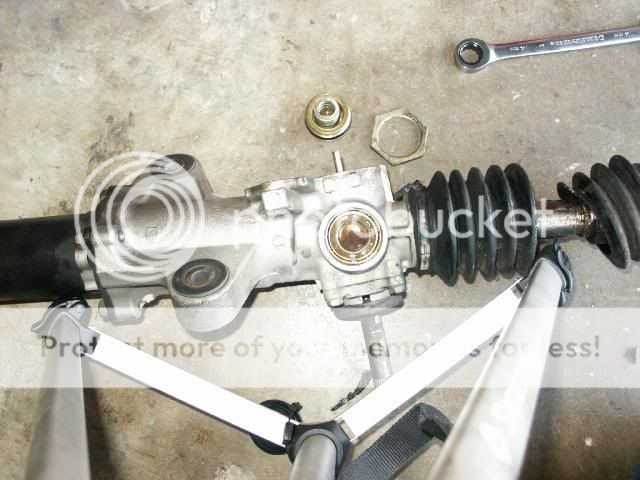
Remove the rack guide:
Loosen the passenger side tie rod:
Remove it:
Remove the boots on both sides:
Loosen the passenger side inner tie rod:
Remove it:

Remove the driver side inner tie rod:
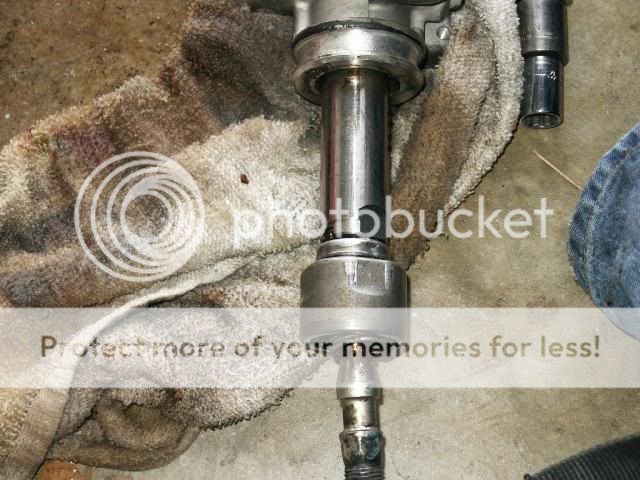
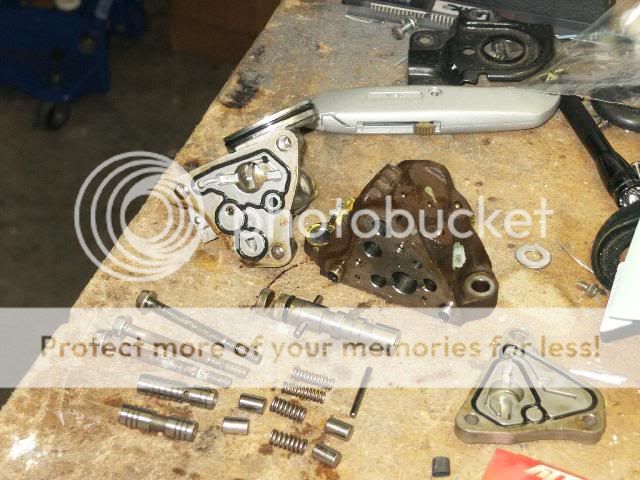
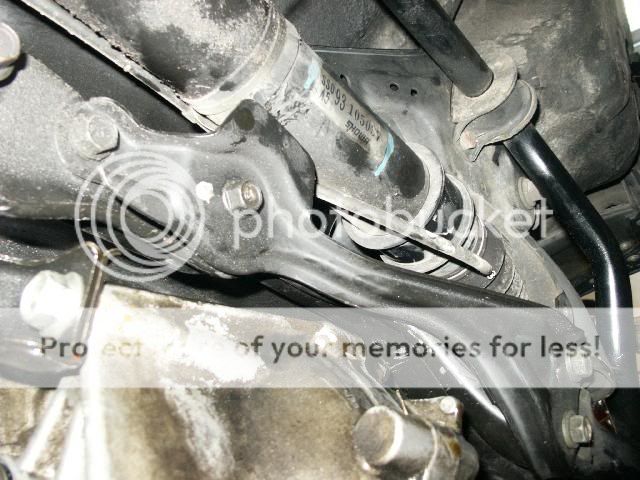
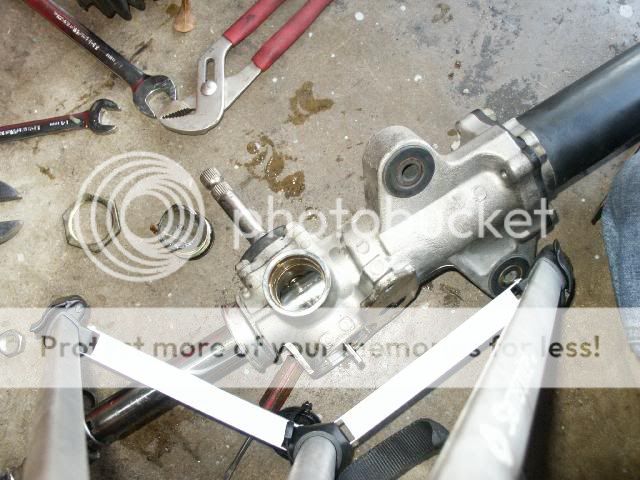
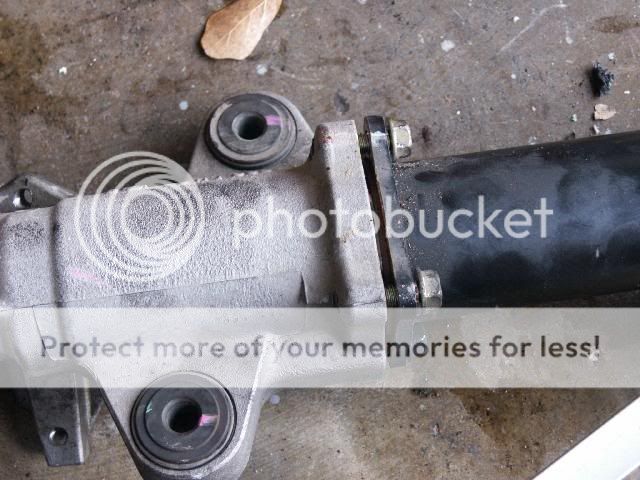
Go to the pinion section, and remove this black piece:
Remove 4 bolts, and cover:

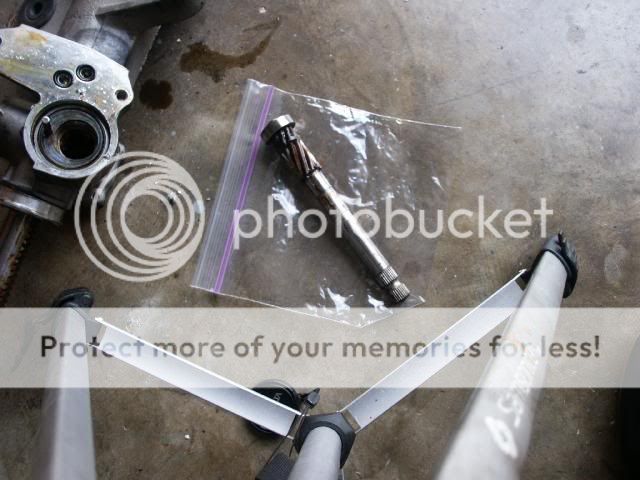
Turn the rack over, and the pinion will come out:
Set aside the pinion taking care to not damage the bearing:
Loosen the bolts holding the rack cover:
Pull off the rack cover:
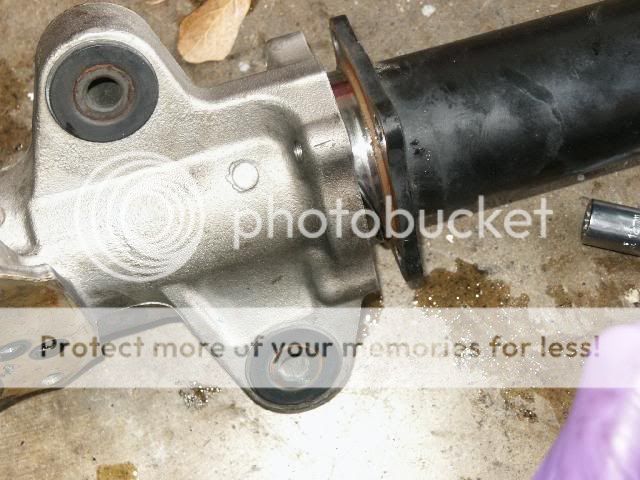
The cylinder is now exposed:
Pull off the cylinder:
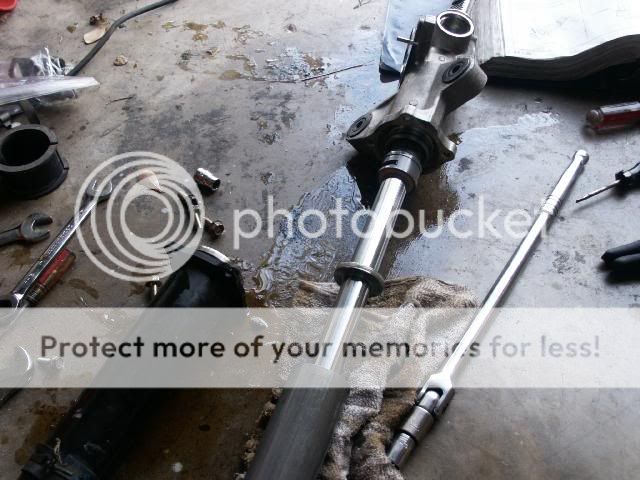
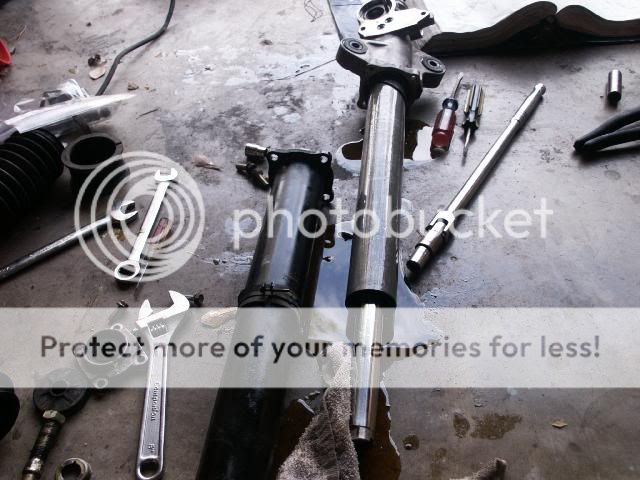
Slide the rack out:
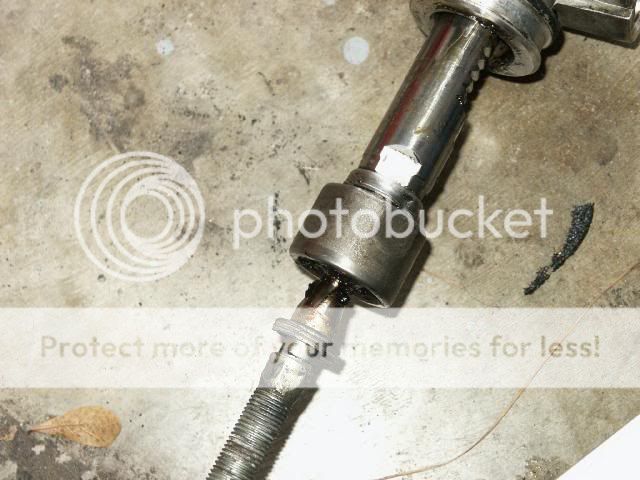
This is the piston:
Remove the outer piston ring:
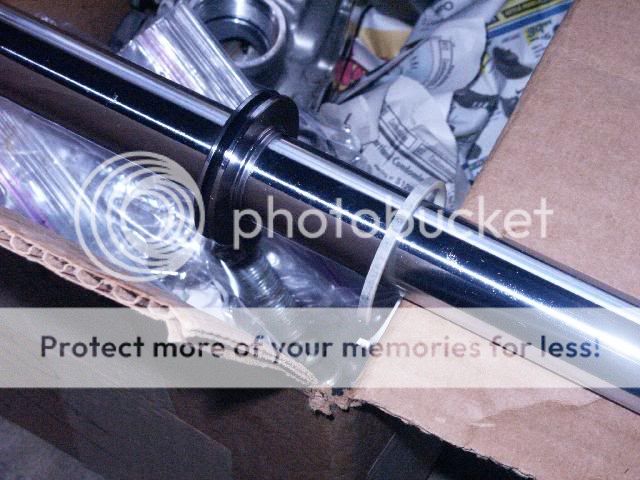
Remove the inner seal:
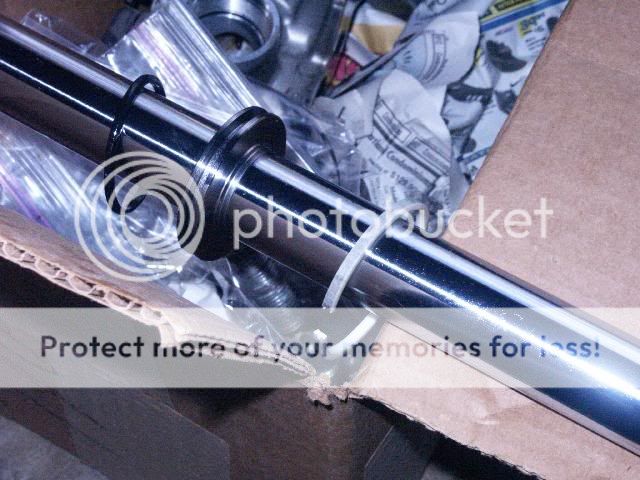
The piston once you are done:
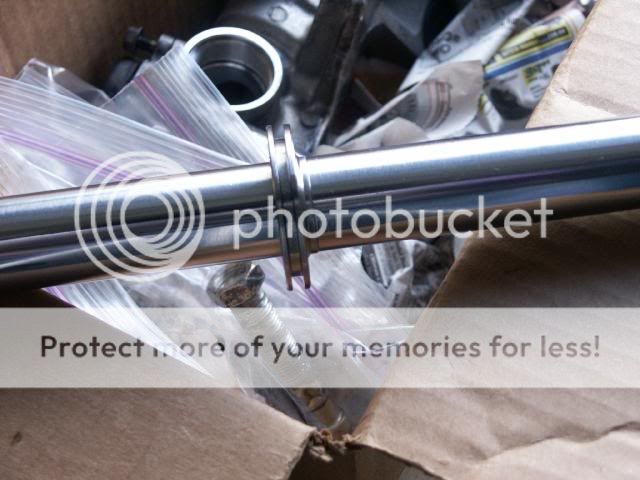
Now you would grease up everything with some good syn grease, I am using mobil 1. Reassemble, and put it all back together. I don't have pics of this part because I have not done it yet. I am replacing my tie rod ball joints, and a tie rod boot. Once that is done I will take more pics of the reinstallation.
Modified by skrewdlude at 3:01 PM 2/5/2006
First diassembling the valve body:
Get the valve body:
Remove these 3 bolts:
Remove the cover, and set aside:
Slide the valve retainer over the pluger:
The remove it completely and set aside:
Remove the 2 springs:
Pull apart the valve body housing:
Pull out the 4 way valve, plungers, and springs:
These are the parts you should have removed:
Clean everything, and push the housing back together:
Put the cover back on and:
The finished assembly:
Rack removal
Jack up the car and put it on jack stands:
Remove the cotter pin from the castle nut
Remove the castle nut:
Break loose the ball joint:
Repeat on other side.
Get under the car:
Pull of the lower exhaust section. (header/DP)
Remove the cross member:
Remove the valve body cover if you have not already:
Remove this bracket that hold the rack:
Lock the steering wheel, and mark the joint to remember where it was. Then remove bolt:
Remove this bracket:
I choose to remove the tie rod, as I need to replace the ball joints. It may be possible to remove the rack with out this. Keep in mind that if you remove these, even though you locked the wheel, and can get the ball joints back in pretty much where they were, you should still get an alignment to corret any toe issues.
Loosen the ball joint:
Remove the tie rod:
Remove the last bracket holding up the rack:
If you have 4ws there is a sensor connected to the rack guid that you need to remove too.
Move the rack left and right to remove it. I ended up pulling the pass side tie rod (kind of like turning the wheel all the way left) all the way over to make the driver side as small as possible, and it came right out.
Now the rack is out.
Disassembling the rack
This is where the rack guide is:
Remove the outer lock nut:
Remove the inner piece:
Remove the spring:
Remove the rack guide:
Loosen the passenger side tie rod:
Remove it:
Remove the boots on both sides:
Loosen the passenger side inner tie rod:
Remove it:
Remove the driver side inner tie rod:
Go to the pinion section, and remove this black piece:
Remove 4 bolts, and cover:
Turn the rack over, and the pinion will come out:
Set aside the pinion taking care to not damage the bearing:
Loosen the bolts holding the rack cover:
Pull off the rack cover:
The cylinder is now exposed:
Pull off the cylinder:
Slide the rack out:
This is the piston:
Remove the outer piston ring:
Remove the inner seal:
The piston once you are done:
Now you would grease up everything with some good syn grease, I am using mobil 1. Reassemble, and put it all back together. I don't have pics of this part because I have not done it yet. I am replacing my tie rod ball joints, and a tie rod boot. Once that is done I will take more pics of the reinstallation.
Modified by skrewdlude at 3:01 PM 2/5/2006
02-05-2006, 05:32 PM
#14
Honda-Tech Member
Thread Starter
skidtron, i yanked on the cylinder cap as hard as i could to try and yank it out
after i couldnt, i decided that i didnt need the cylinder anymore....but im probably gonna put it back in tomorrow night just to be safe
thanks for the advice
and THANKS FOR THE PICS!!!!!
after i couldnt, i decided that i didnt need the cylinder anymore....but im probably gonna put it back in tomorrow night just to be safe
thanks for the advice
and THANKS FOR THE PICS!!!!!
02-05-2006, 08:30 PM
#19
Honda-Tech Member
Join Date: Mar 2002
Location: Houston, TX, USA
Posts: 524
Likes: 0
Received 0 Likes
on
0 Posts
I suppose I should have covered that. Like was said previously it is number 27 in the diagram.
As far as its physical location on the car,
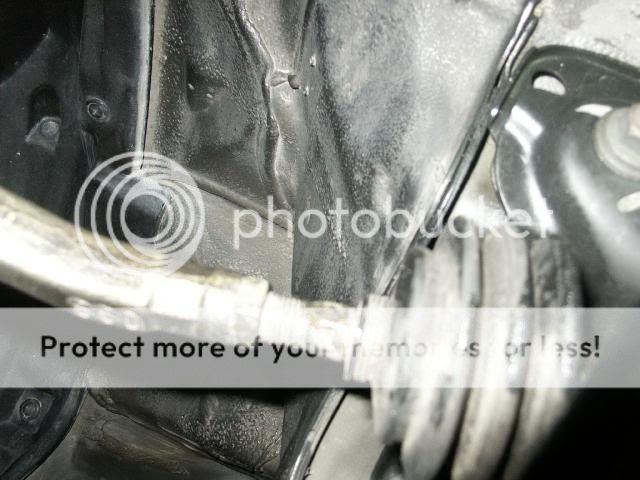
if you look at the upper right side of this picture, just above the sway bar, you will see a machined surface, and that is where the the valve body sits.
I had already removed it a while ago, along with all the lines.
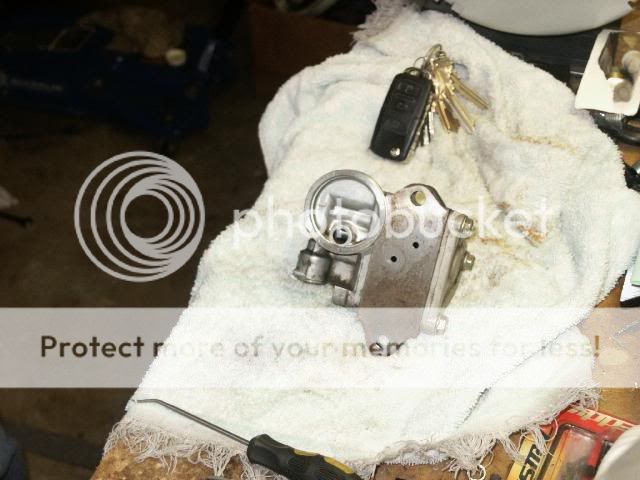
The valve body will be covered by this:
One more shot:
The lower right it can clearly be seen. Again, in these pics it has already been removed. When you remove it 2 little valves will pop out.
Remove these along with the other valve body components. They are #19 in the diagram.
As far as its physical location on the car,
if you look at the upper right side of this picture, just above the sway bar, you will see a machined surface, and that is where the the valve body sits.
I had already removed it a while ago, along with all the lines.
The valve body will be covered by this:
One more shot:
The lower right it can clearly be seen. Again, in these pics it has already been removed. When you remove it 2 little valves will pop out.
Remove these along with the other valve body components. They are #19 in the diagram.
02-06-2006, 01:29 AM
#21

Join Date: Jun 2002
Posts: 167
Likes: 0
Received 0 Likes
on
0 Posts
hmm .. not quite a manual rack but looks as good of a conversion as it can get using the power steering parts. I still say you should retain power steering b/c the effects of driver fatigue are way greater. This would only be benificial in vehicles that require no little turning (drag racing).
02-06-2006, 04:14 AM
#22
Honda-Tech Member
Thread Starter
<TABLE WIDTH="90%" CELLSPACING=0 CELLPADDING=0 ALIGN=CENTER><TR><TD>Quote, originally posted by AccordRacing »</TD></TR><TR><TD CLASS="quote">hmm .. not quite a manual rack but looks as good of a conversion as it can get using the power steering parts. I still say you should retain power steering b/c the effects of driver fatigue are way greater. This would only be benificial in vehicles that require no little turning (drag racing).</TD></TR></TABLE>
there is no effective disadvantage to this setup vs a manual rack besides possibly a few pounds, and the gear ratio, but the rack function is completely manual
driver fatigue?? firstly, over 2mph, the steering is in no way hard, secondly, racecars dont use power steering.....the steering is more precise this way, you can feel the road better
but since youre an accord racer im probably wrong....sorry...
02-06-2006, 06:56 AM
#23
Honda-Tech Member
Join Date: Mar 2002
Location: Houston, TX, USA
Posts: 524
Likes: 0
Received 0 Likes
on
0 Posts
<TABLE WIDTH="90%" CELLSPACING=0 CELLPADDING=0 ALIGN=CENTER><TR><TD>Quote, originally posted by connvict »</TD></TR><TR><TD CLASS="quote">How accurate is this writeup for the 5th gen prelude?</TD></TR></TABLE>
The 5th gen rack is quite a bit different:

Even though the disassembly is different, I think you can still go in and remove the piston seals with no problem. User 117 on here did this on his 5th gen, maybe he can give you some insight. Also, if you do remove the seals, you would plug those top two ports.
The 5th gen rack is quite a bit different:
Even though the disassembly is different, I think you can still go in and remove the piston seals with no problem. User 117 on here did this on his 5th gen, maybe he can give you some insight.
Also, if you do remove the seals, you would plug those top two ports.
02-06-2006, 01:57 PM
#24
Join Date: Aug 2005
Location: melbourne, fl, us
Posts: 110
Likes: 0
Received 0 Likes
on
0 Posts
you guy's are f-in aswome..write up's like this helped me do my first clutch install..still a novice mechanic but thinkin of tryin this one ..whats the level of difficulty and margin for error..
02-06-2006, 02:10 PM
#25
Honda-Tech Member
Join Date: Apr 2004
Location: CT, USA
Posts: 280
Likes: 0
Received 0 Likes
on
0 Posts
Many racers do use powersteering .. (but not drag racers)
.. but as far as your conversion ill go with you on saying its a complete manual conversion .. honestly I never ventured as deep into the power steering system as you have to really say different .. but I always thought the components of a manaul rack and power steering were just too different to go power -> manual as safely as a vehicle that came OEM with a manual system. But also many of the 'removing power steering' articles I have read where by noi means as in depth as your modification.
.. but as far as your conversion ill go with you on saying its a complete manual conversion .. honestly I never ventured as deep into the power steering system as you have to really say different .. but I always thought the components of a manaul rack and power steering were just too different to go power -> manual as safely as a vehicle that came OEM with a manual system. But also many of the 'removing power steering' articles I have read where by noi means as in depth as your modification.