
Modified H22a Intake Manifold
 12-15-2006, 09:11 PM
#1
Thread Starter
Join Date: Aug 2006
Location: Te Kuiti, New Zealand, New Zealand
Posts: 82
Likes: 0
Received 0 Likes
on
0 Posts
Just modified my stock IM. Removed the IAB plate altogether. Then joined the seperated ports into one large one. Haven't had this dynoed yet as I just finished it today. Just thought i'd post it up and see what others think
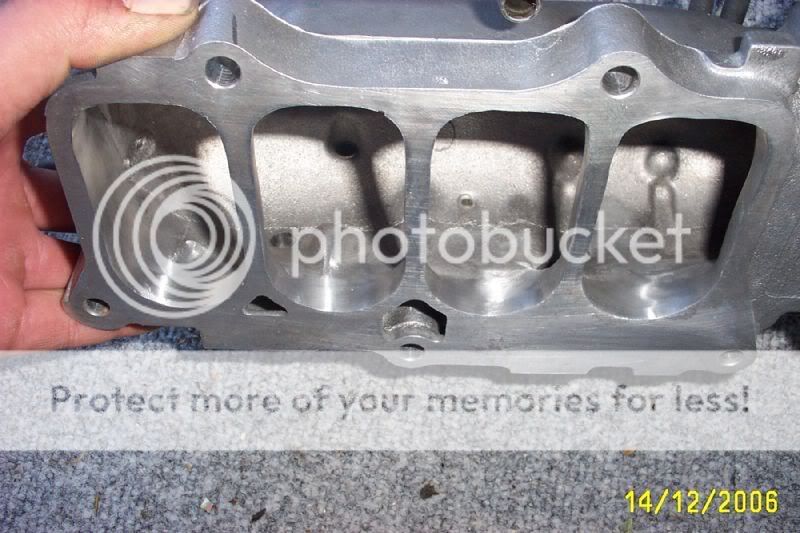
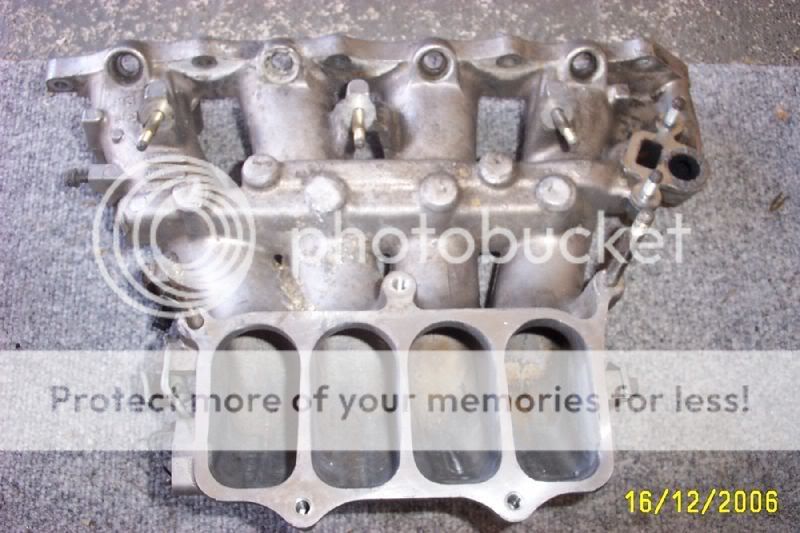
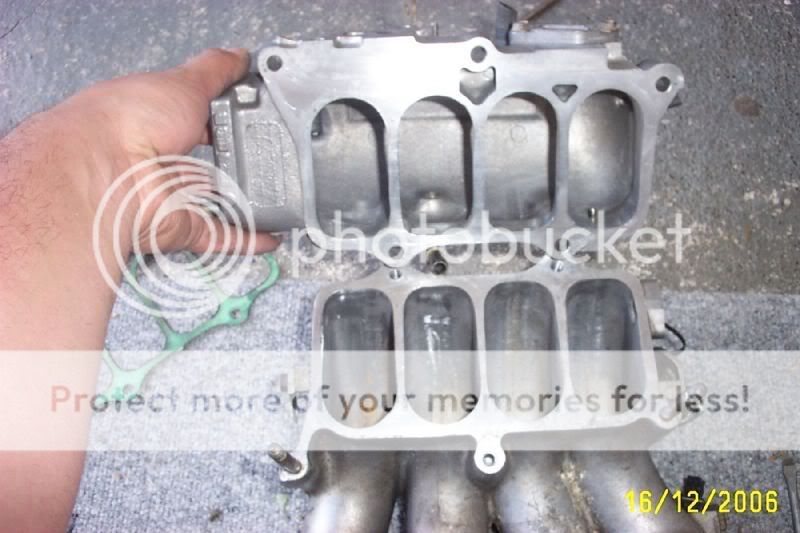
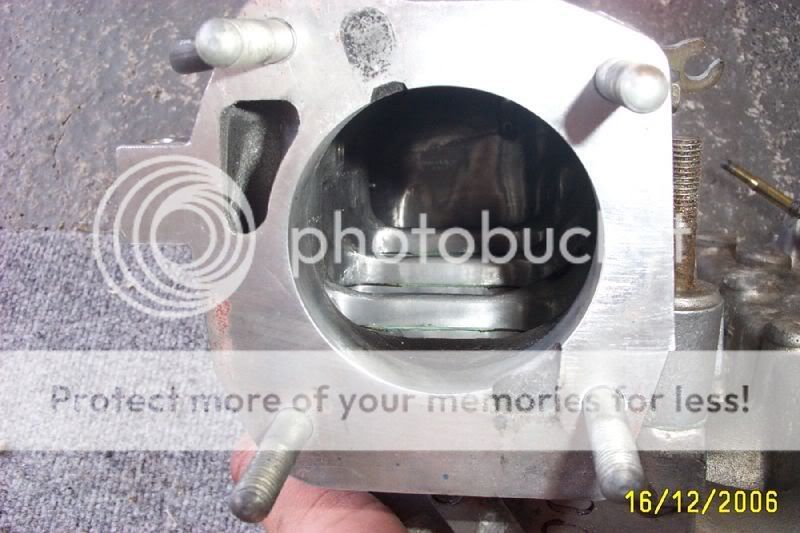
Modified by Deacan at 11:02 PM 12/15/2006
Modified by Deacan at 11:02 PM 12/15/2006
 12-15-2006, 10:40 PM
#3
Thread Starter
Join Date: Aug 2006
Location: Te Kuiti, New Zealand, New Zealand
Posts: 82
Likes: 0
Received 0 Likes
on
0 Posts
Pfft.. flowbench'd.. That's not how we do things down this side of the world 
No offense ment! I'm just going to dyno it and see if it made any difference. I'm not expecting much from it. Just something i thought i'd have a crack at since I was bored and figured that removing the centre piece would be easy enough.
No offense ment! I'm just going to dyno it and see if it made any difference. I'm not expecting much from it. Just something i thought i'd have a crack at since I was bored and figured that removing the centre piece would be easy enough.
12-16-2006, 06:29 AM
#4
moderator emeritus

i'd love to see a dyno of this. I took out my IAB plate a few weeks back and had the same modification planned but i cant find my got damn dremel 


Trending Topics
12-17-2006, 02:47 PM
#10
Member
Join Date: Nov 2004
Location: NorCar!?
Posts: 1,519
Likes: 0
Received 0 Likes
on
0 Posts
Looks good man, I am curious to see how it works out for you. I remember talking to a guy a while back who attempted this and wasn't happy with the end result, but there may have been other factors affecting it. Do you just have the stock tb on there?
12-17-2006, 10:43 PM
#12
Thread Starter
Join Date: Aug 2006
Location: Te Kuiti, New Zealand, New Zealand
Posts: 82
Likes: 0
Received 0 Likes
on
0 Posts
<TABLE WIDTH="90%" CELLSPACING=0 CELLPADDING=0 ALIGN=CENTER><TR><TD>Quote, originally posted by h22__guy »</TD></TR><TR><TD CLASS="quote"> haha thats cool... just a question. let us know how it goes for real... i would like to try this to. how many man hours went into it? </TD></TR></TABLE>
Yeah, when I get it tested i'll post results. Probably took 6-7 hours. Only 'cause I was doing it for myself though and wasn't rushing.
<TABLE WIDTH="90%" CELLSPACING=0 CELLPADDING=0 ALIGN=CENTER><TR><TD>Quote, originally posted by hamadiscool »</TD></TR><TR><TD CLASS="quote"> Ya use atleast a 72mm throttle body that tapers to 70mm. GOOD LUCK and POST SOME RESULTS! </TD></TR></TABLE>
Yeah - looking at modifying an altezza throttle body for another guy, so i'll see how that goes and might do the same for my car.
01-15-2007, 08:41 PM
#18
Honda-Tech Member
Join Date: Aug 2006
Location: garner, ia, usa
Posts: 177
Likes: 0
Received 0 Likes
on
0 Posts
im goin that to mine but i cut everything out and kept the butter fly plate and cut everything off that too.. but mines goin to be for FI :D yay.. cant wait for this ****..
01-20-2007, 01:22 AM
#20
Thread Starter
Join Date: Aug 2006
Location: Te Kuiti, New Zealand, New Zealand
Posts: 82
Likes: 0
Received 0 Likes
on
0 Posts
Sorry haven't chcked here in awhile - Installed it in the car but won't be able to dyno it for awhile. Might make up another one in a couple of weeks and get somone else to dyno it. Will get back to you all on this one!! Try not to take so long this time....
Sandblasted it before putting it back on. Came out mint!!
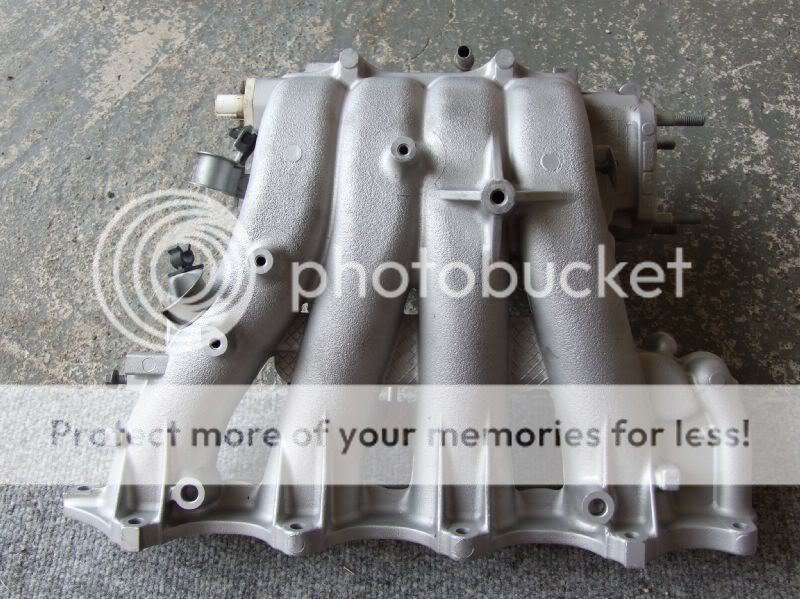
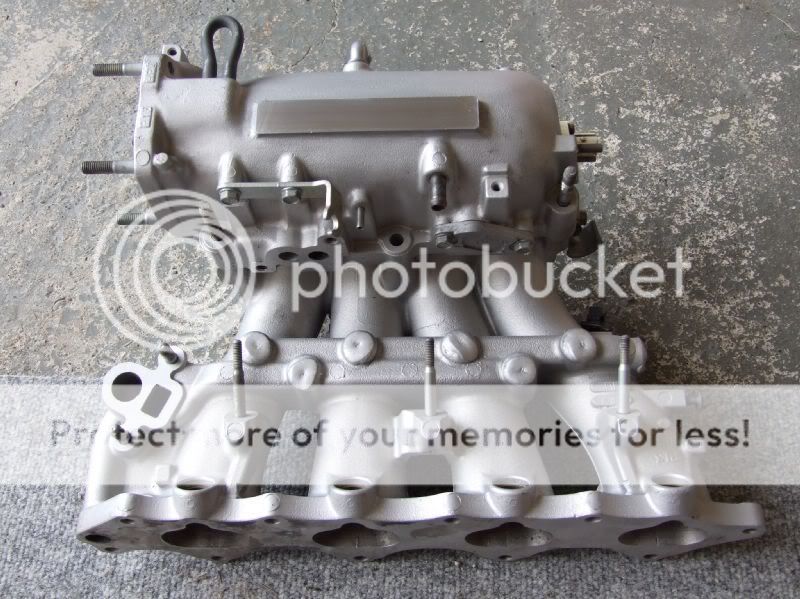
Sandblasted it before putting it back on. Came out mint!!


Thread
Thread Starter
Forum
Replies
Last Post