
DIY: Low Fuel Light Not Working/Fuel Gauge isn't Accurate (96-00)
 03-16-2013, 04:15 PM
#1

FYI these apply to STOCK CLUSTERS ONLY. If you've done some rewiring or put in a different cluster....you're on your own.
Simple low light check-(also just FYI the Fuel Gauge will usually "float" quite wildly when driving i.e. going from half-to near "E" when accelerating/decelerating)
Tools Needed:
Electrical Contact Cleaner (available at your local autoparts store or some big-box stores like WalMart)
10mm Socket (or 10mm wrench and long spindly arms)
Drive for socket
Phillips-Head screwdriver
Large-ish Paper-clip
Shop-vac (or something to clean up the mess you'll find (purely optional) )
Pre-steps:
Ensure that all your fuses are in good working condition and pull the instrument cluster.
i.) drop the steering wheel as low as it can go and lock in place.
ii.) 2 phillips head screws on the plastic surrounding the cluster. pull it out directly towards you & try not to break it
iii.) then 4 that anchor the cluster itself, unplug the electrical connectors and pull out
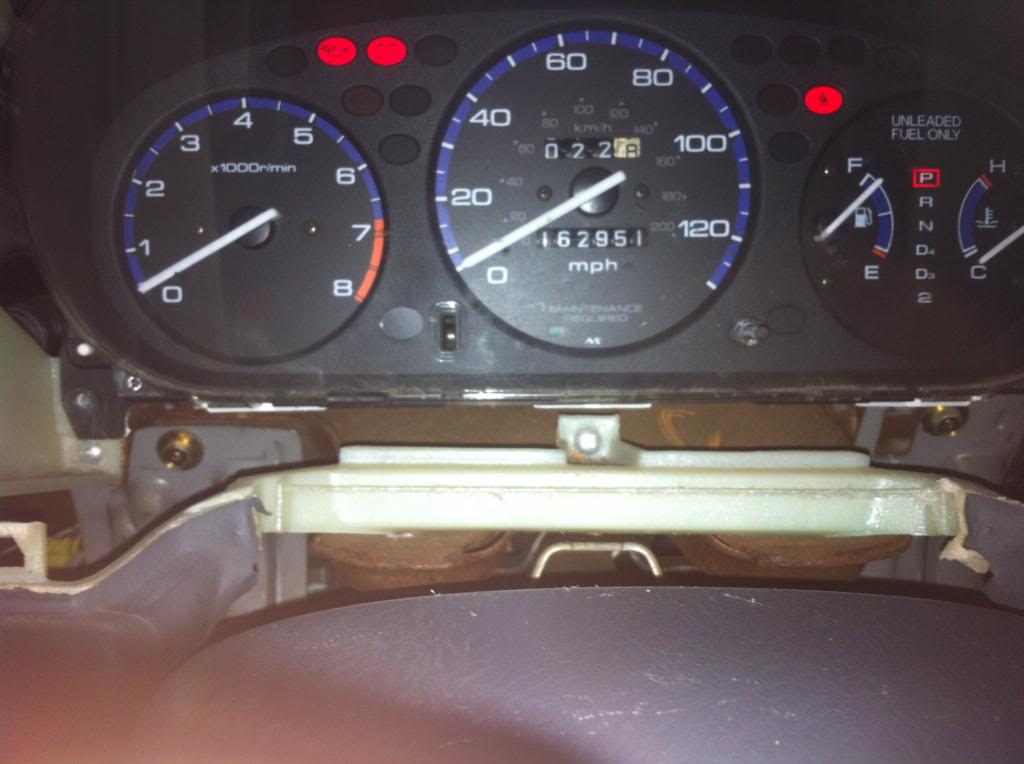
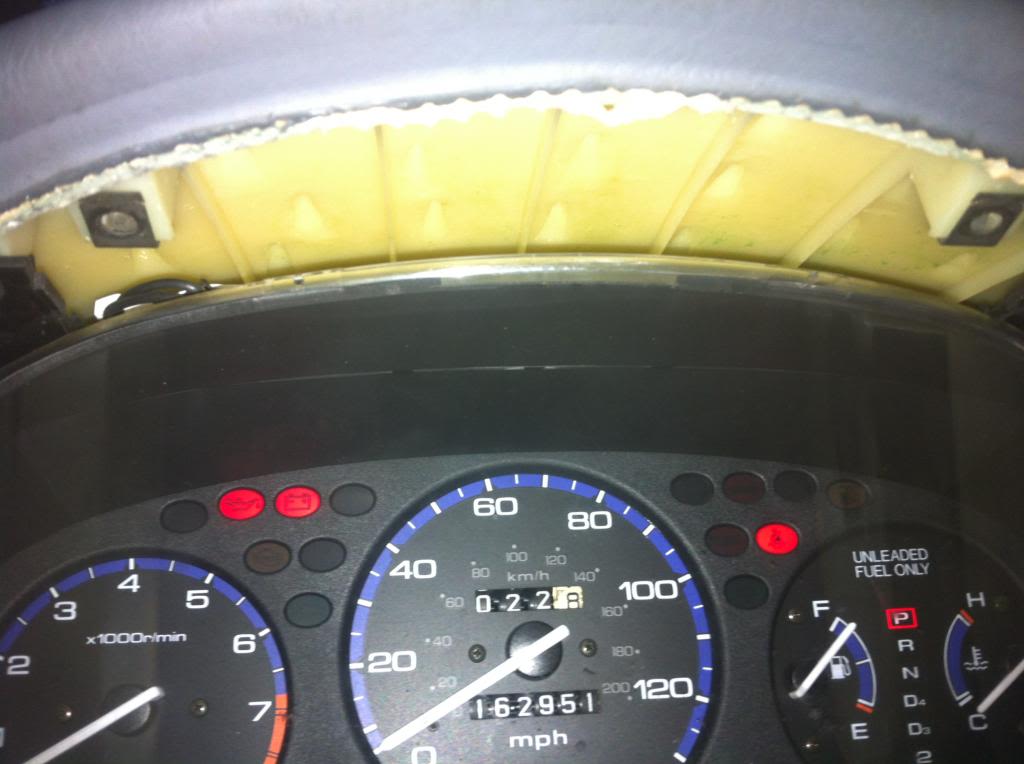
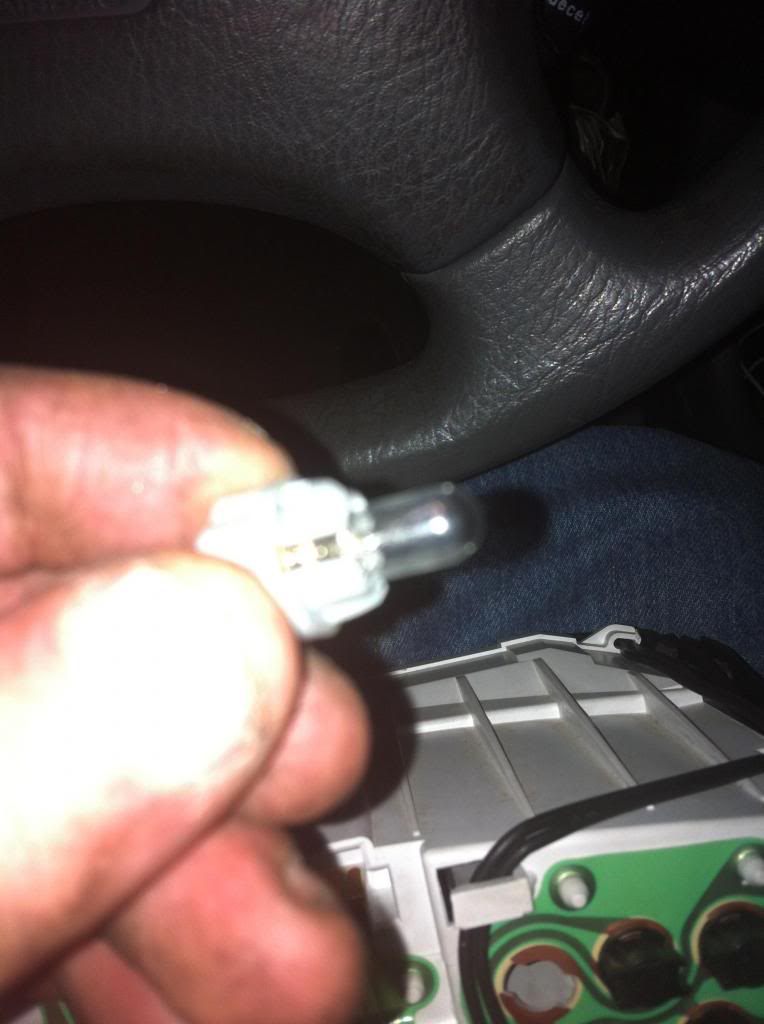
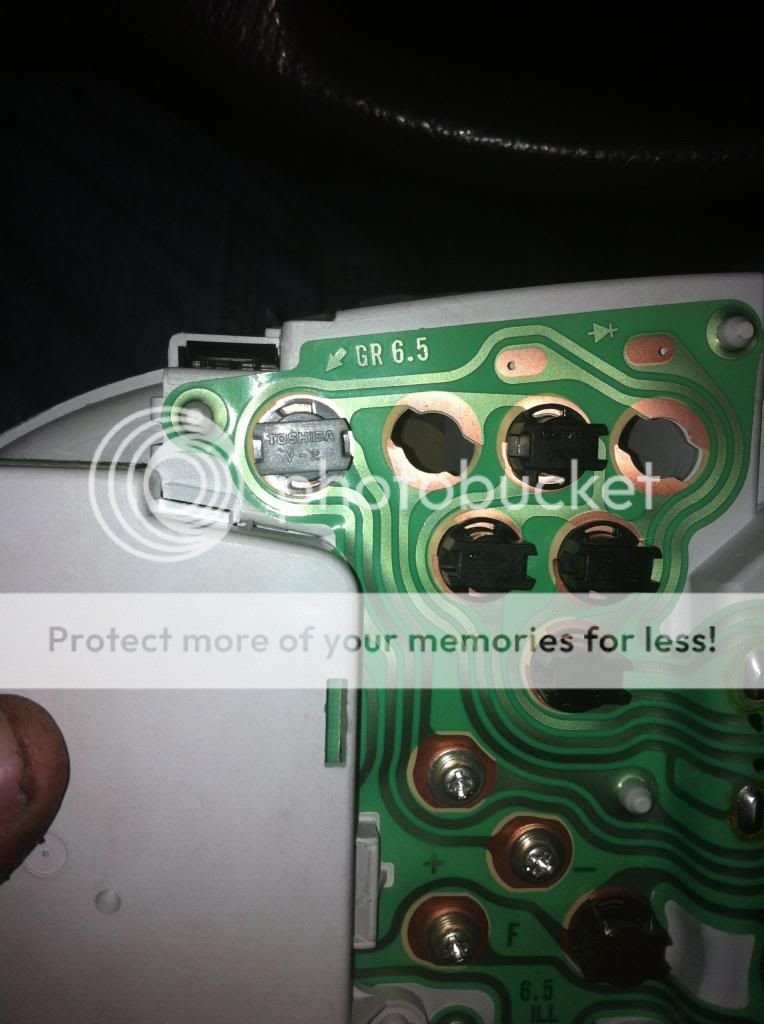
Note the non-illuminated low-fuel light in the top right.
Grey plug here is the low fuel light bulb holder
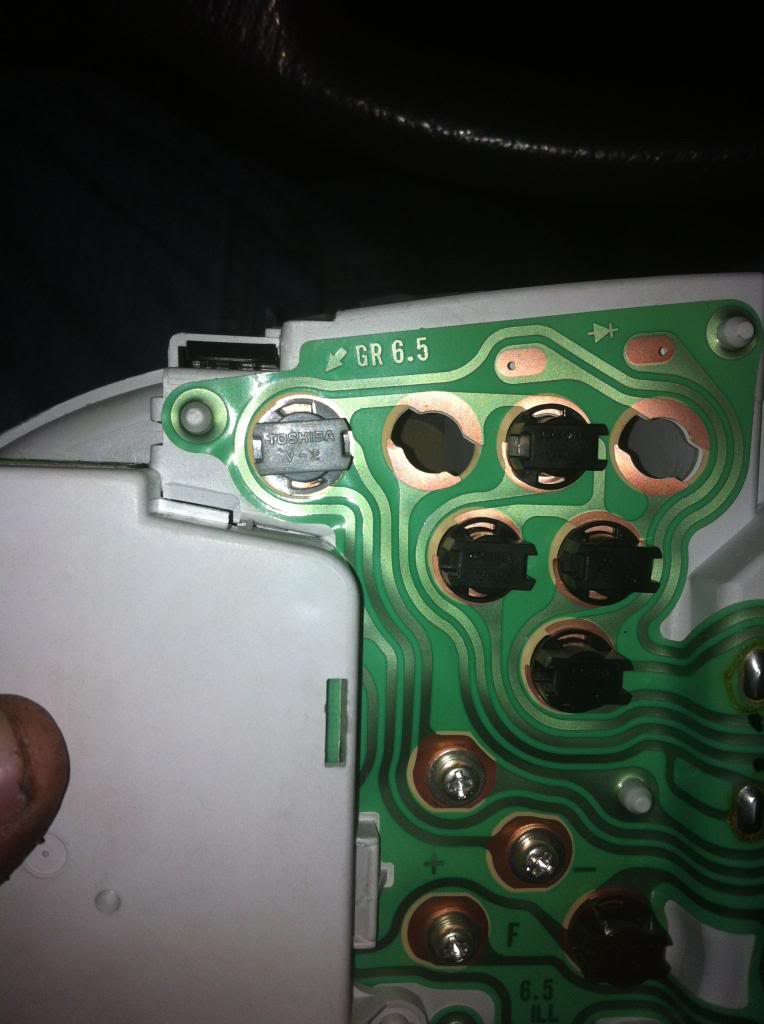
iv.) check the bulbs (turn counter-clockwise and tug out) and replace any blown ones as necessary (small bulbs are size #74, large ones are #194)
v.) Remember that contact cleaner I mentioned earlier? Unplug all of the plugs to the cluster and give each plug a good spritz of it. Try to have the door open or window down as it's not really the best thing to breathe in.
vi.) After giving the contact cleaner about 5 minutes to dry & do its thing, re-assemble of the cluster is reverse of removal.
vii.)Ensure you CHECK it BEFORE proceeding! If all it was, was a blown fuse or bulb your steps end here.
EDIT FOR SAFETY NOTE: PLEASE READ THIS
When working on the fuel tank (or any component where fuel and/or vapors will be part of the job) please observe some basic safety procedures.
I.)Take off the gas cap to release any built up pressure in the system
II.) Unplug that other black plug next to the sender in Step 9, it goes to your fuel pump and then try to turn the engine over 4-5 times. That should remove any residual pressure.
III.)Ensure you do this and any work on your fuel tank when your tank is nearly empty-if not crawl under the car and find the fuel drain plug (should be under your fuel tank and a 14-17mm bolt) and drain the fuel into a safe container before servicing the pump, sender or any other components.
IV.) Keep any small children and others who are not a part of this job well away from your work area and clean up any spills, or fuel covered rags in a prompt manner-ensuring they are disposed of safely and properly.
V.) Finally this should go without saying but do this in a well-ventilated area, have your windows rolled down to eliminate fume build up and for the love of your face, hands, fingers, and unburned body-keep any flames or heat sources well away from the vehicle and be careful with the electrical connections. Creating sparks, flames or heat buildup (such as a space heater in cold climates) around fuel & fumes isn't good for your health.
FAILURE TO OBSERVE THESE SAFETY PRECAUTIONS CAN RESULT IN SEVERE, PERMANENT BODILY INJURY OR DEATH FOR WHICH NEITHER I NOR ANY OTHER POSTER HERE SHALL BE LIABLE FOR. CONSIDER YOURSELF FOREWARNED.
Steps
1.) Pop trunk/hatch
2.) Find black handles (these unlock your rear seats) & pull them
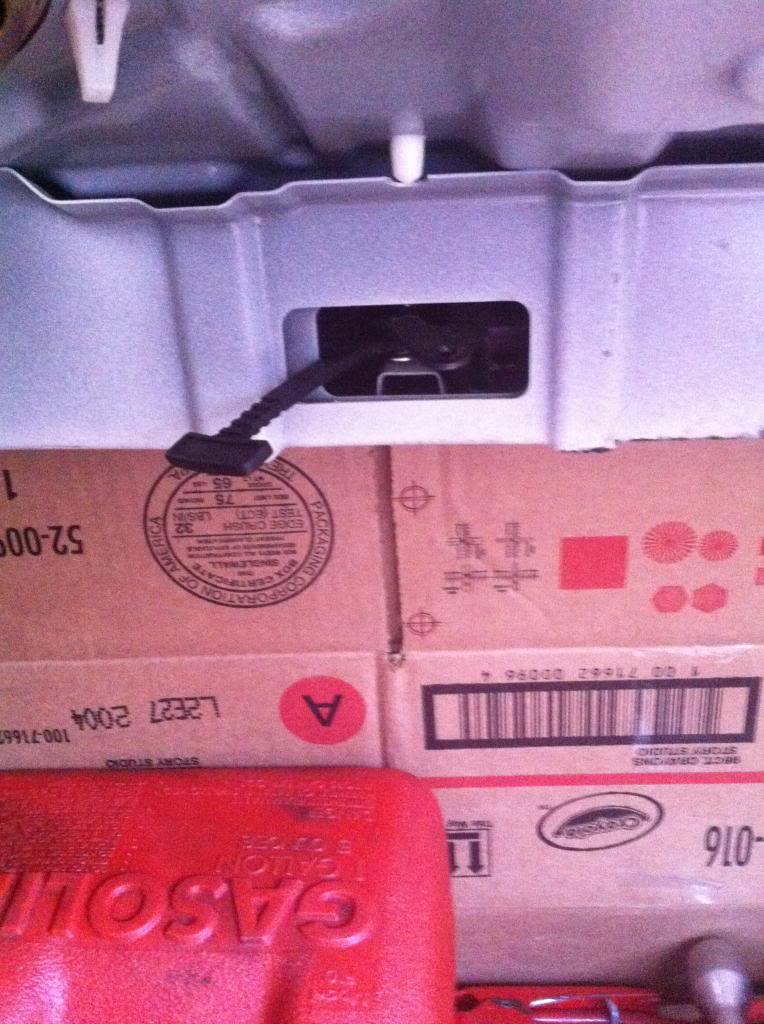
3.)Seatbacks should now be free
and move "down"
so grab the 10mm socket and remove (starting from driver's side)
2 10mm bolts (on door side)
2 more 10mm bolts (about "middle") of the 2/3 back seats and
finally 2 10mm bolts on the passenger's side door area
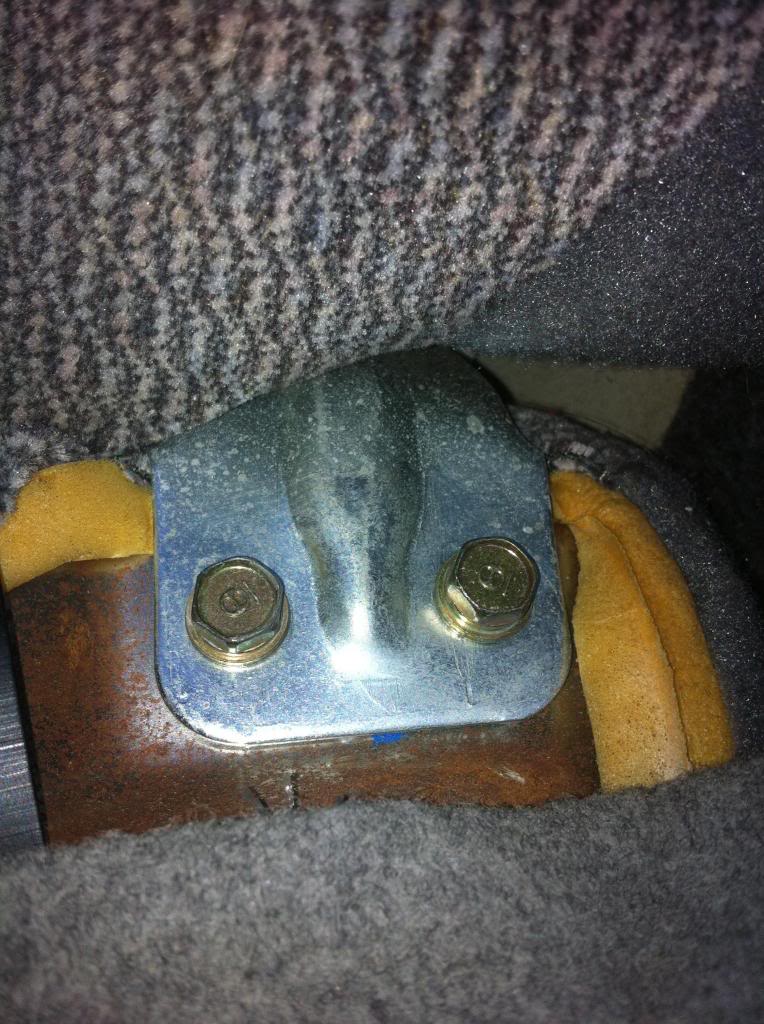
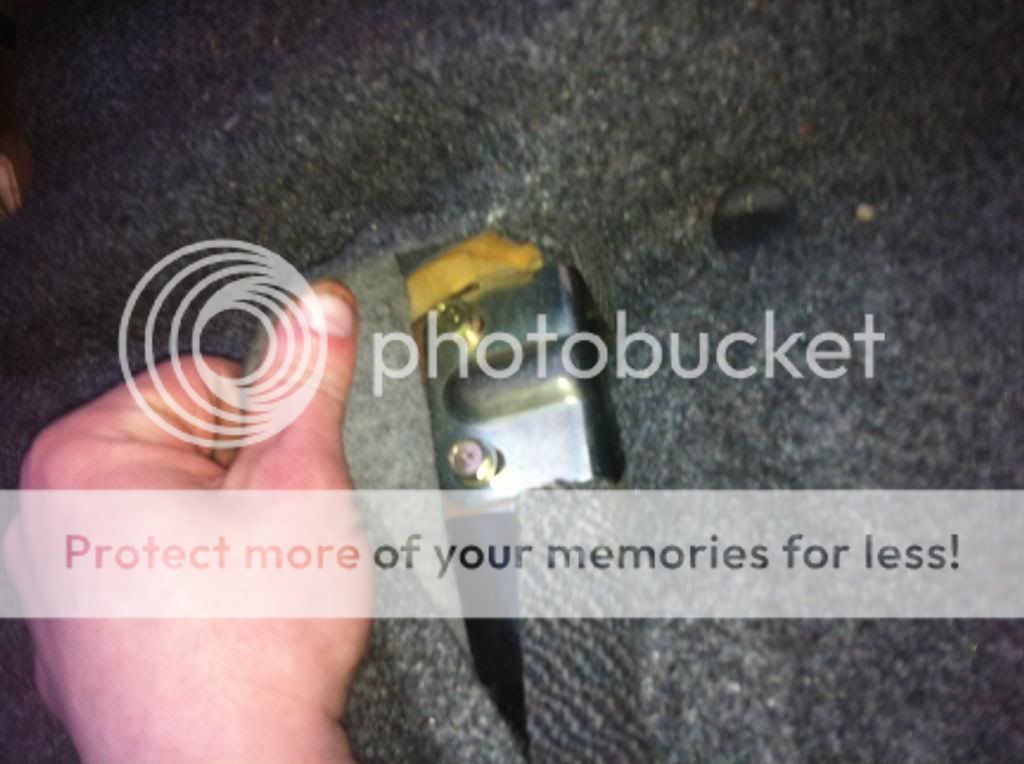
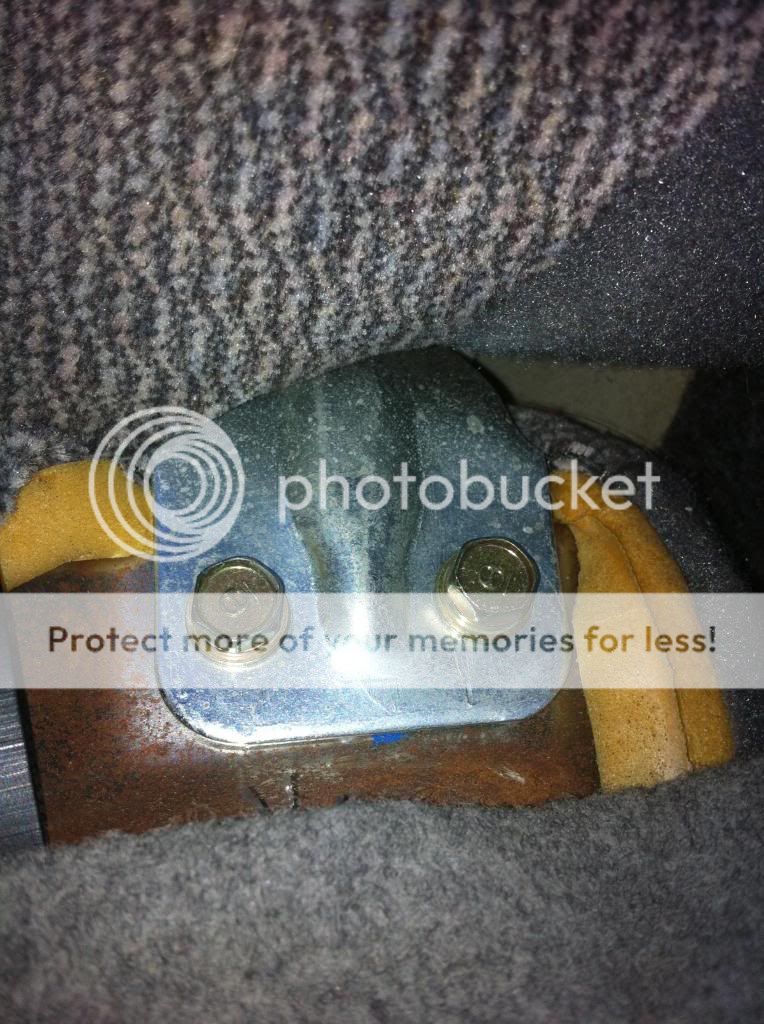
4.) Once you have all 6 bolts stowed safely there is one last 10mm bolt to remove and it should be dead in the "middle" of the seat partition. On my 98 LX it is black and goes inside a silver hinge that 2 of the earlier 10mm bolts went into.
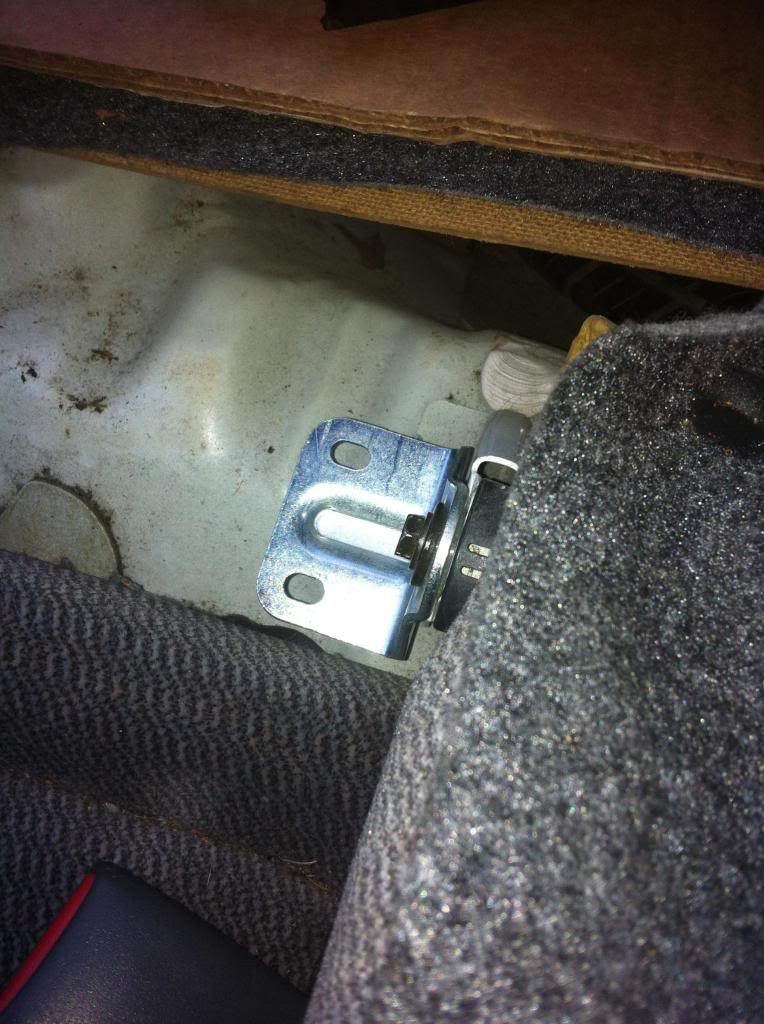
5.) Once this is removed (be careful as there are two small plastic pieces that are easy to lose) the entire back part of the rear seats should remove as one big piece (no need to remove the seat backing yay!!!
") )
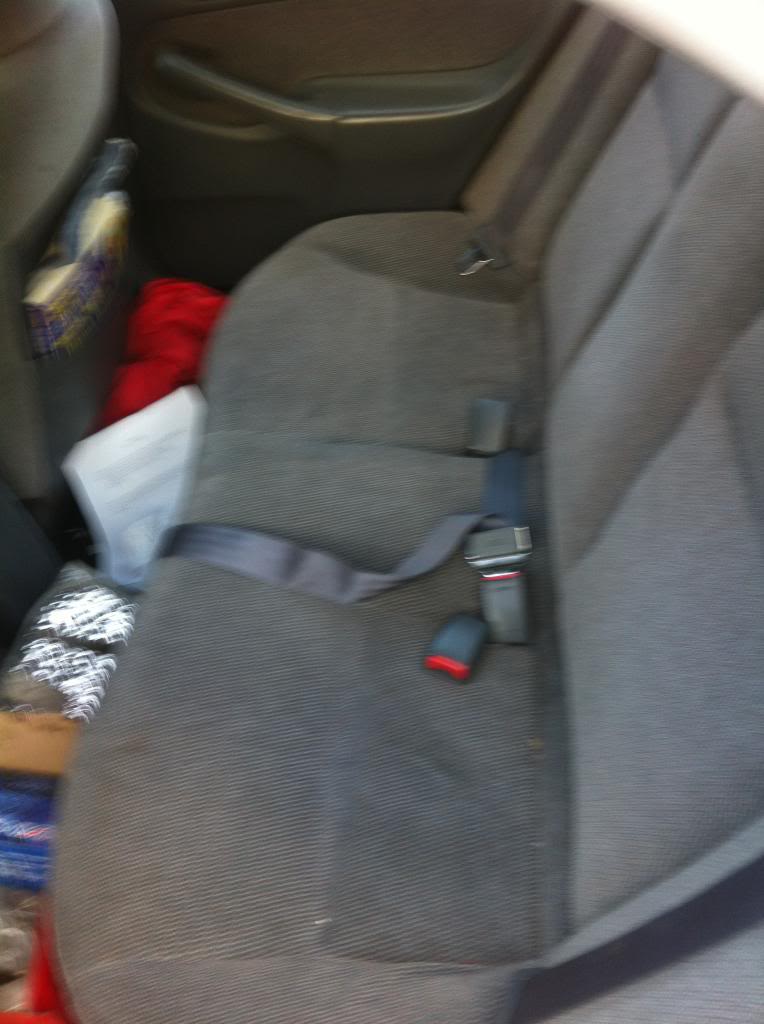
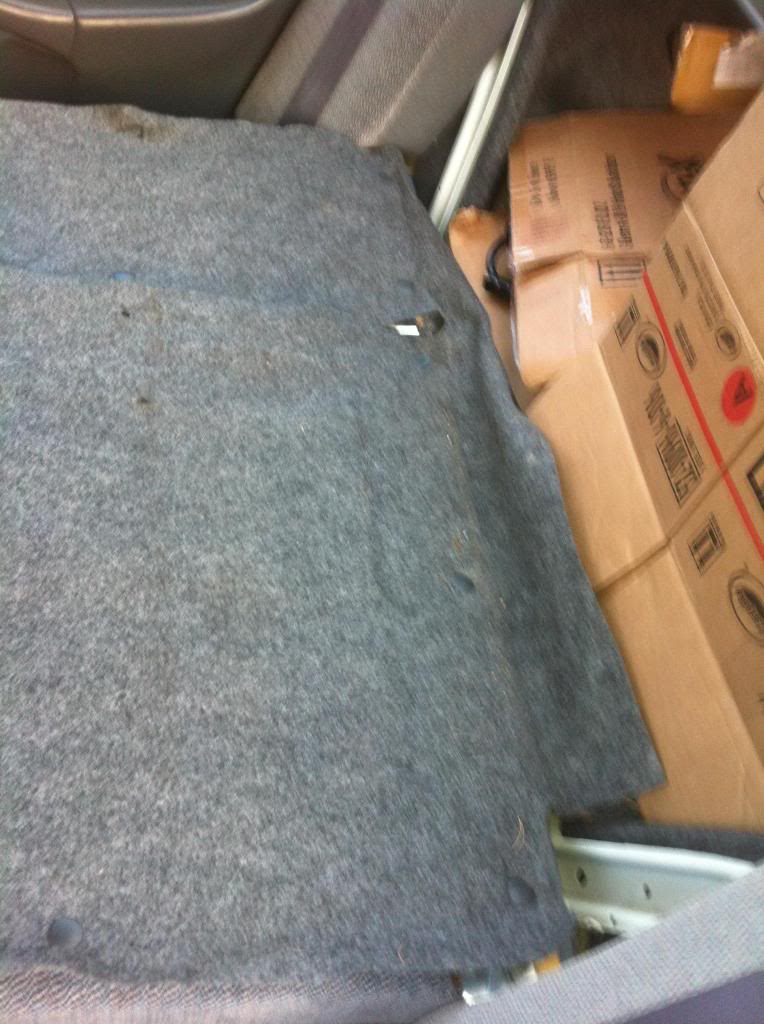
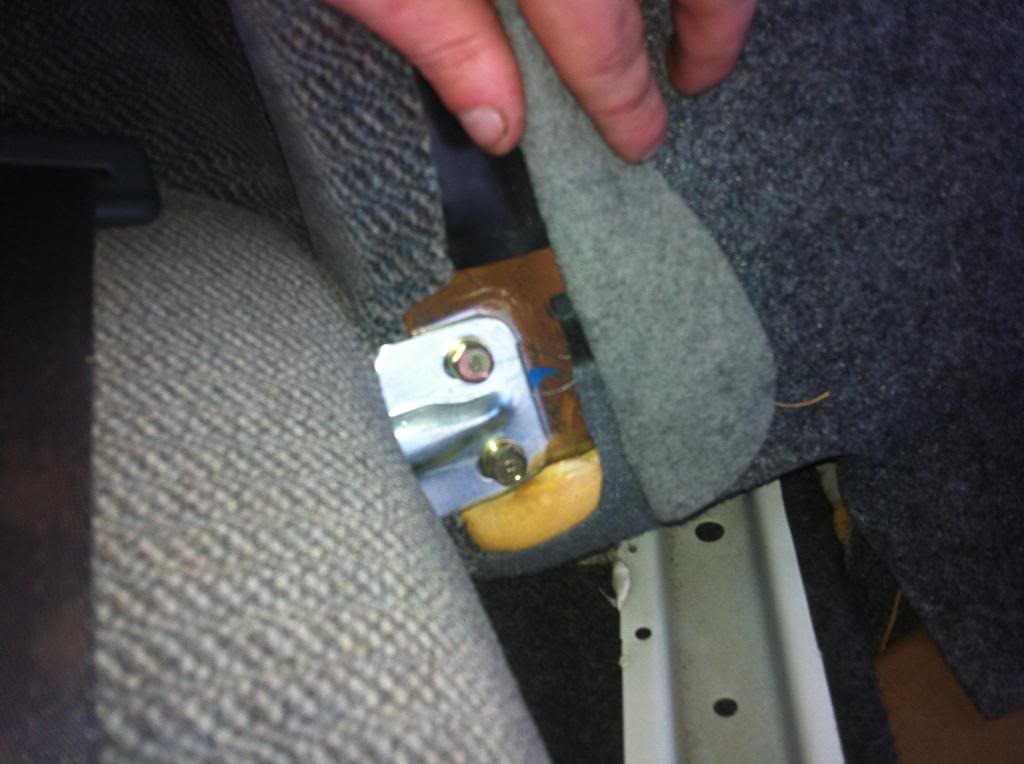
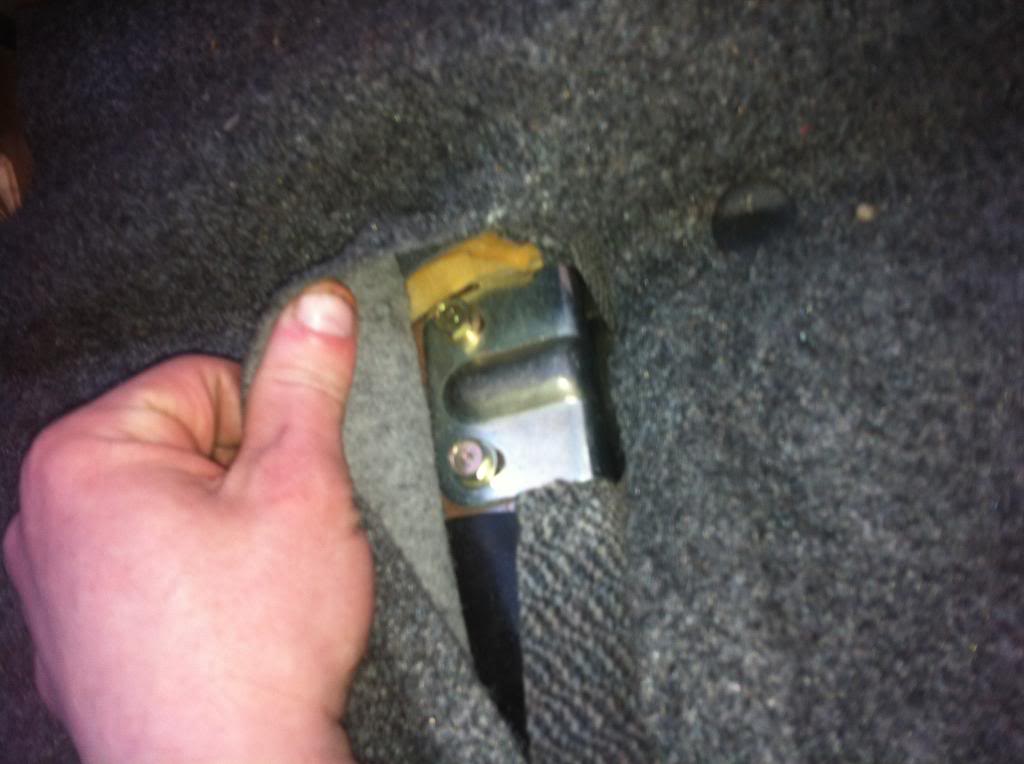
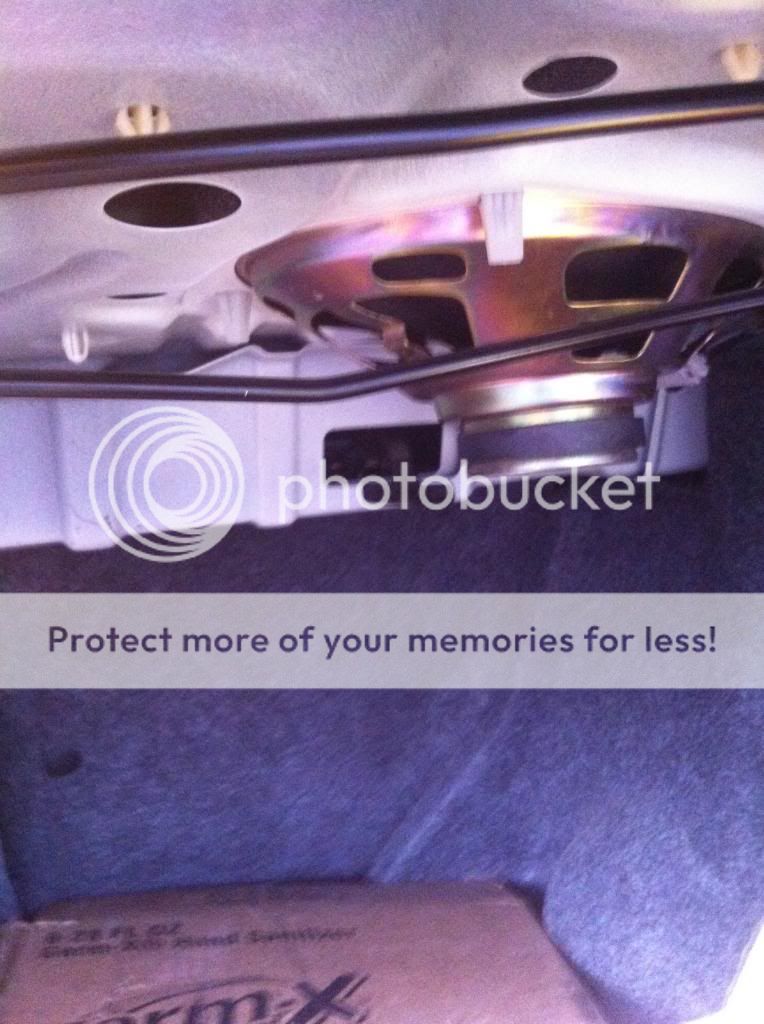
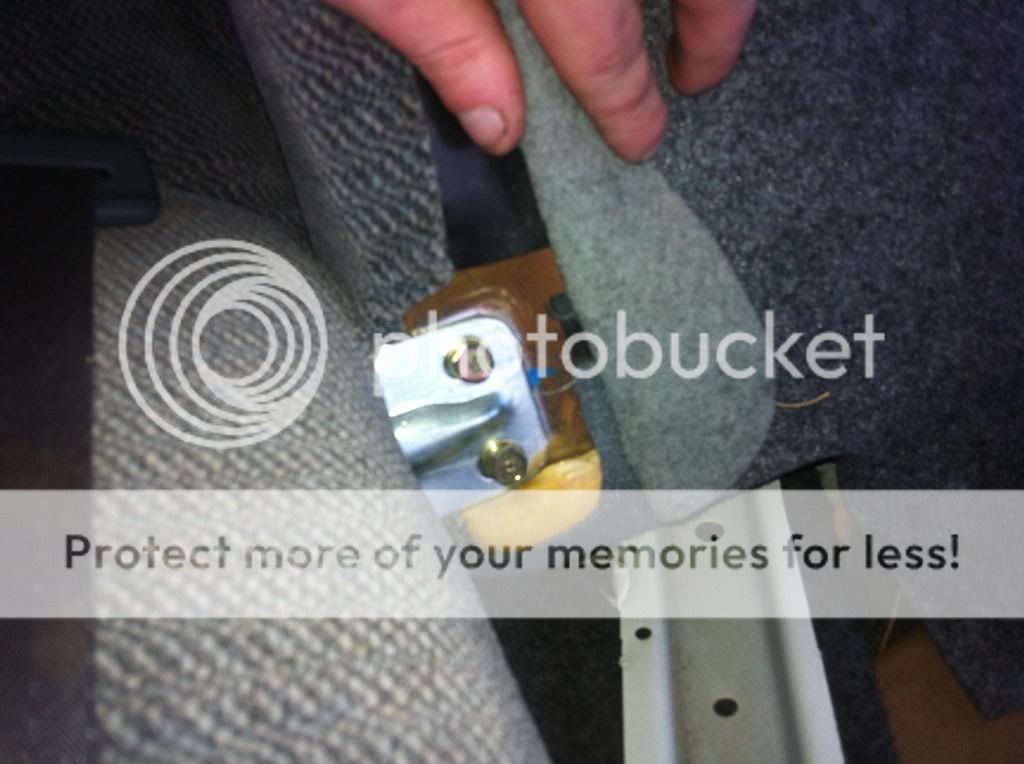
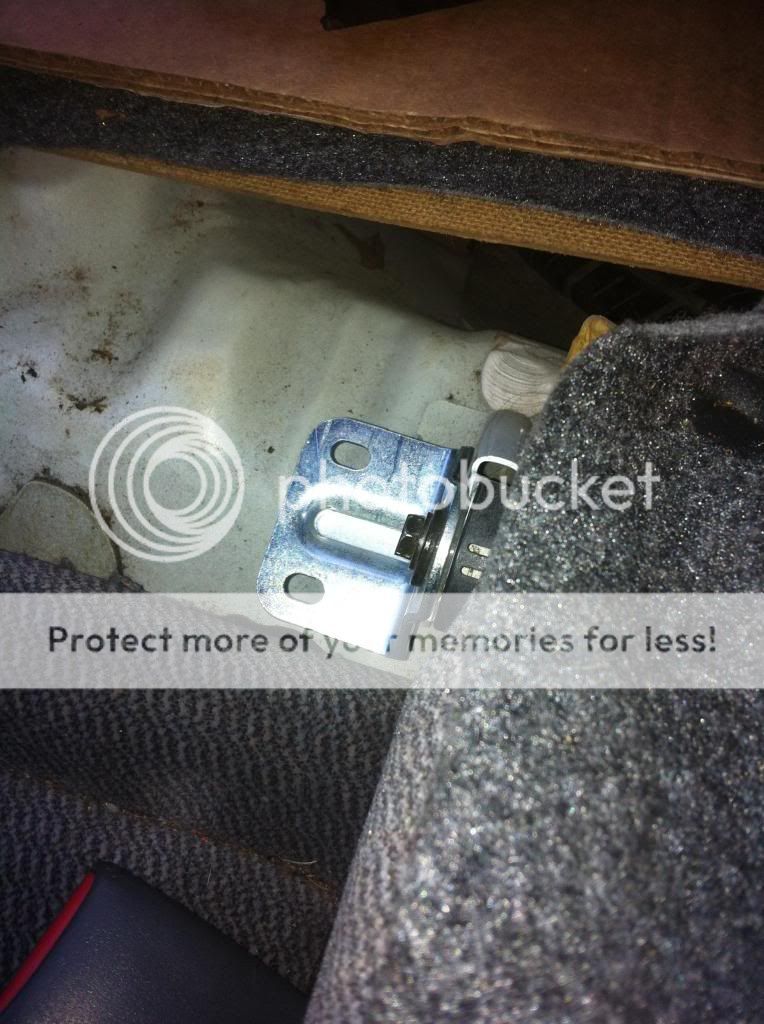
)6.) After removing the seat back look "down" on the driver's side area (you may have to jiggle the seat cushion a bit) and you should see one FINAL 10mm bolt (on my vehicle it's brown) that goes into a U-shaped piece of metal. Remove that and the seat cushion should easily raise up (total removal not required) towards the front seats.
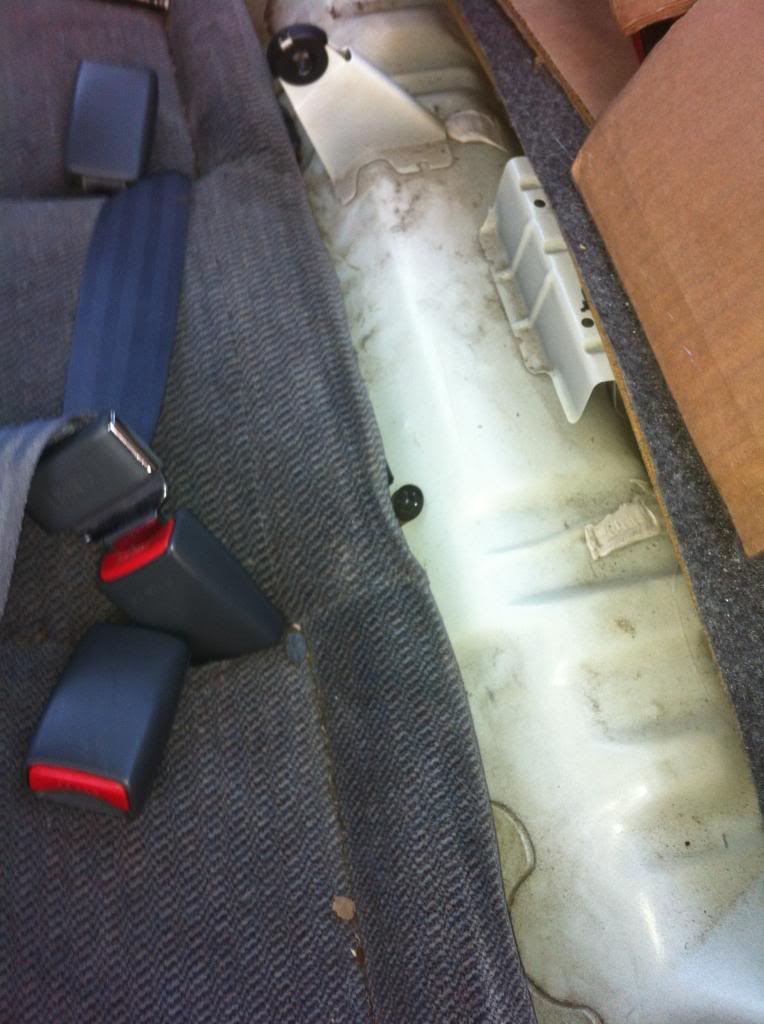
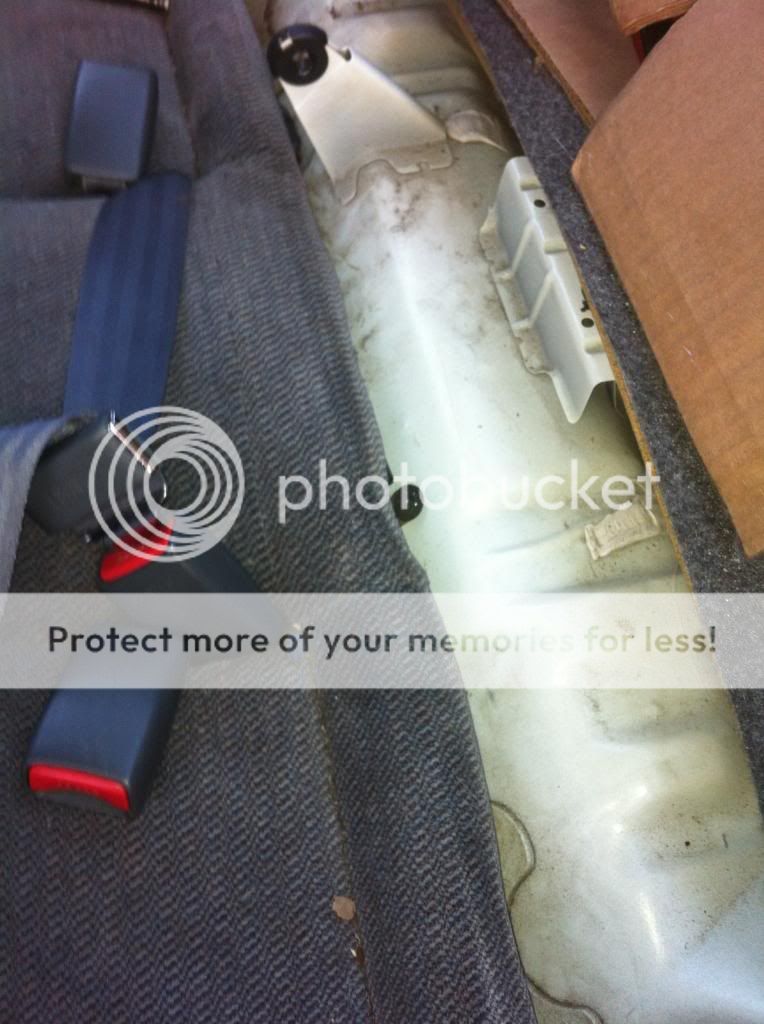
7.) After wresting with the belts and buckles to get them separate from the seat cushion and grabbing all the lose change you never thought you'd see again (I made $1.10 USD from this) and the ancient french-fries Johnny and Suzie lost last year, take that vacuum and clean up. Or not...your choice really.
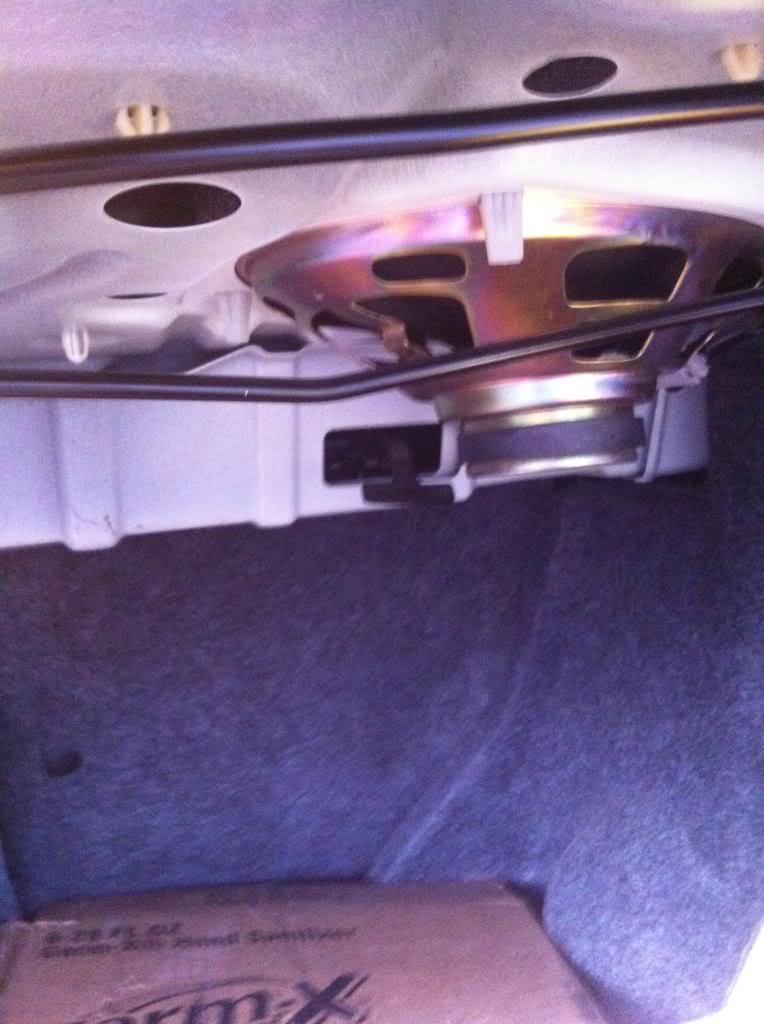
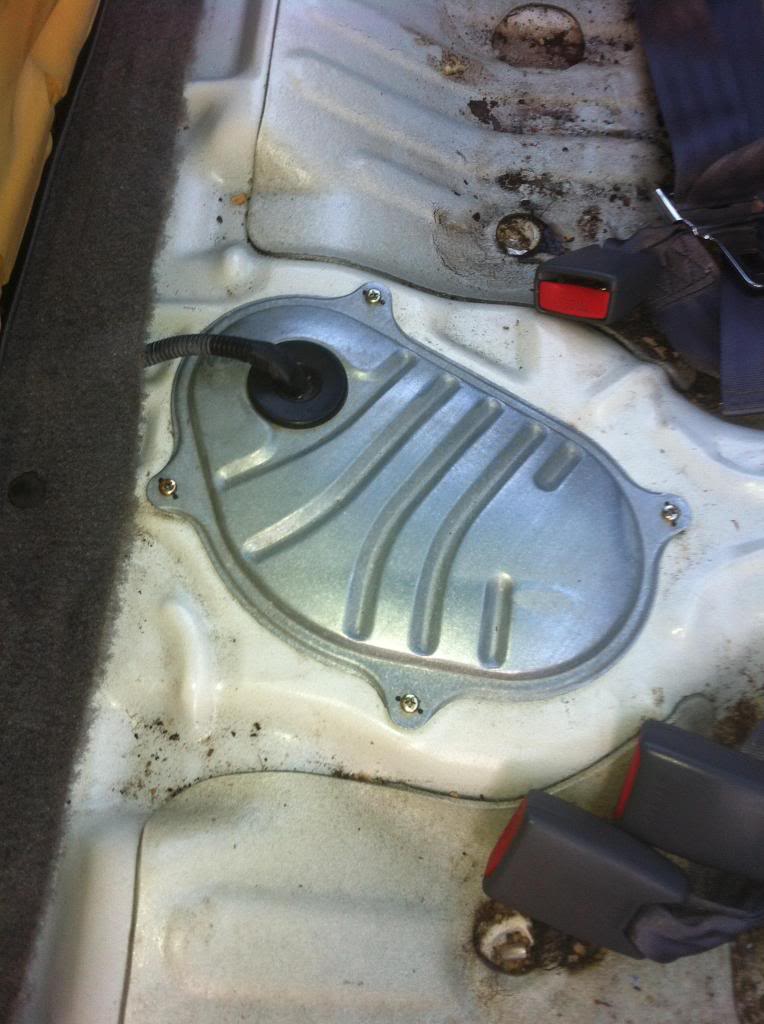
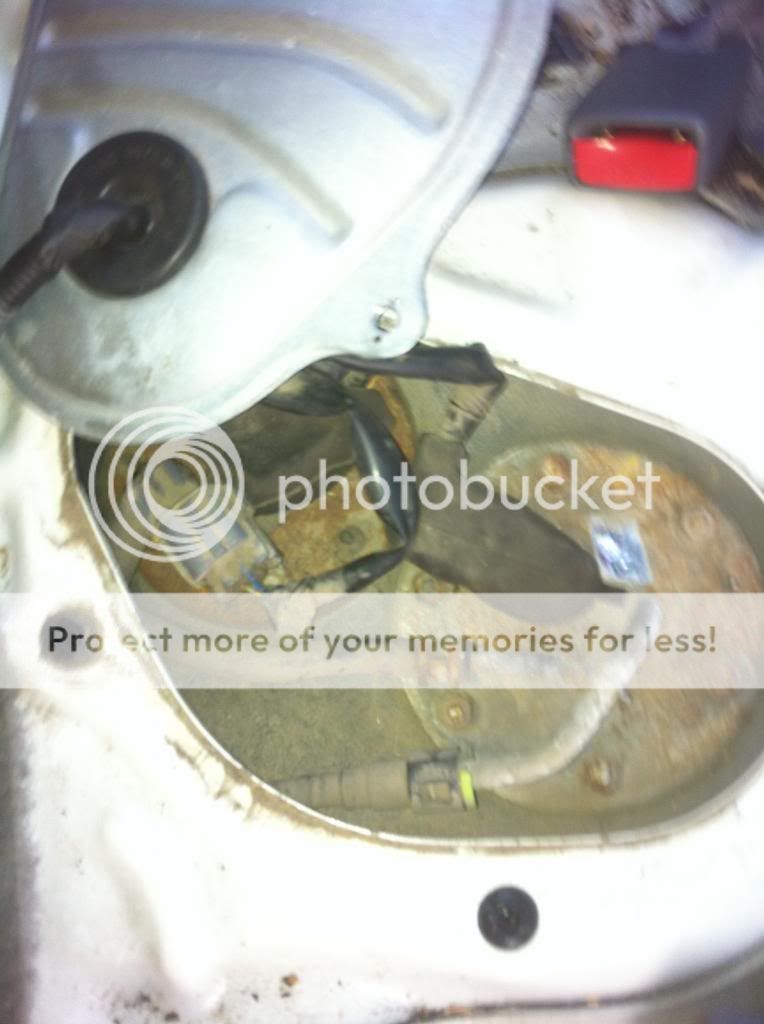
8.) Okay now that it's all nice and clean again you should see a nice metal plate with 4-6 (depending on vehicle year and model) Phillips head screws in it. Take out the screwdriver and remove all of them, then pry the plate up-gently mind you-so that you don't damage the gasket underneath.
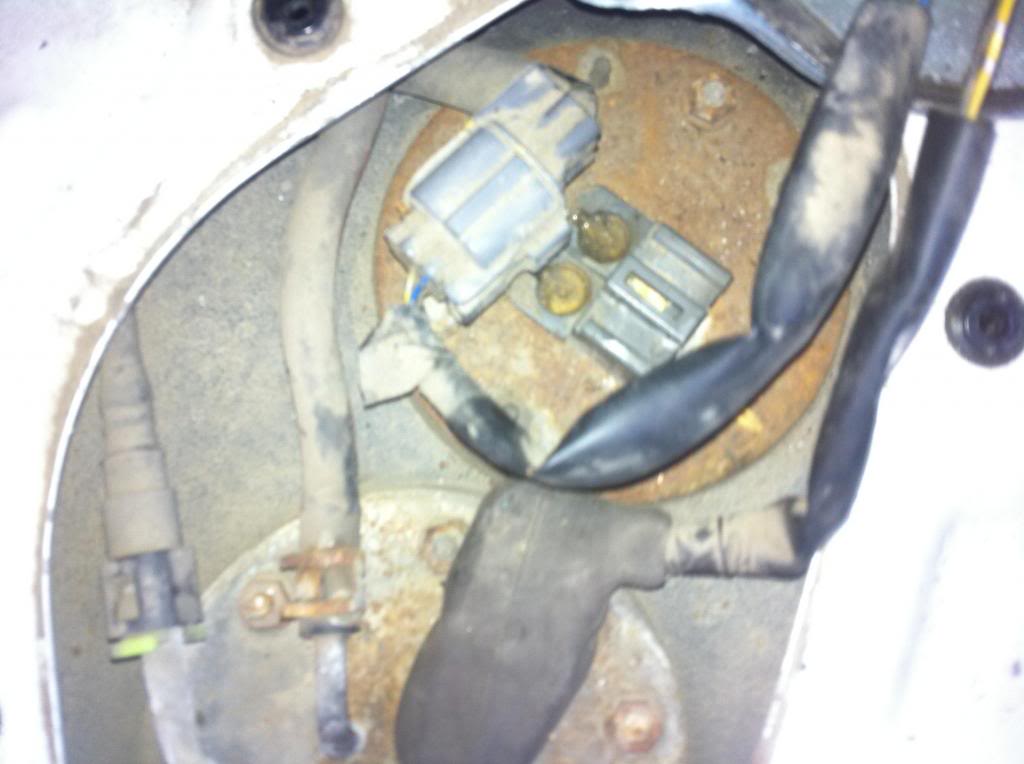
9.) You should see 2-3 plugs now arranged like this

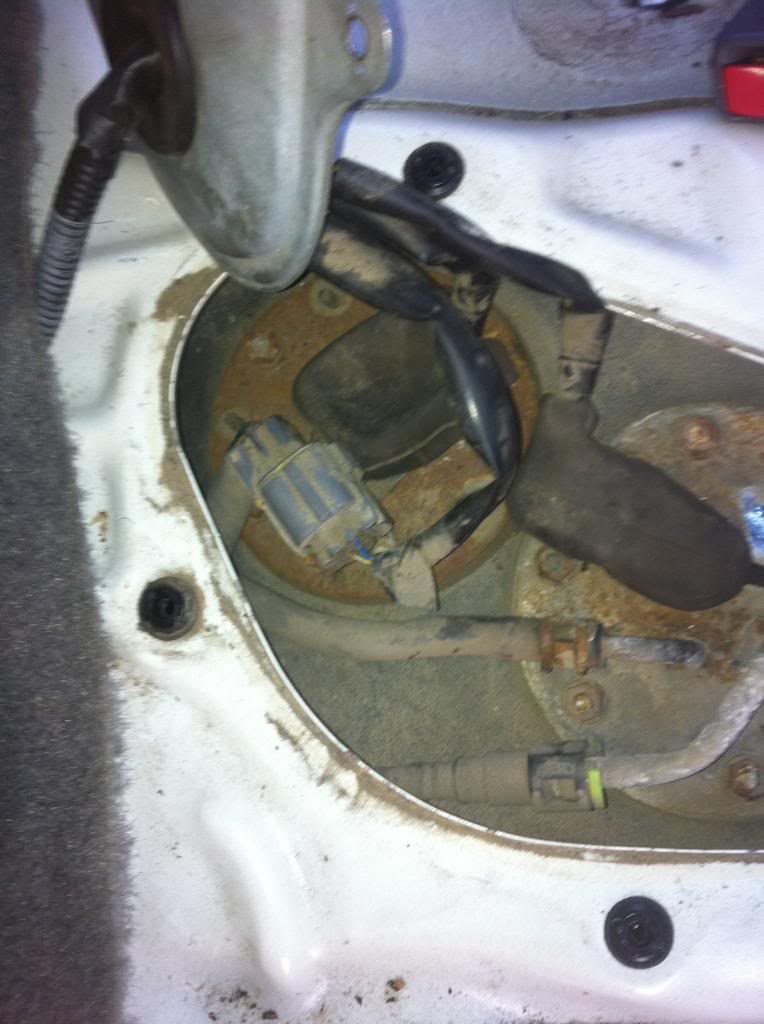
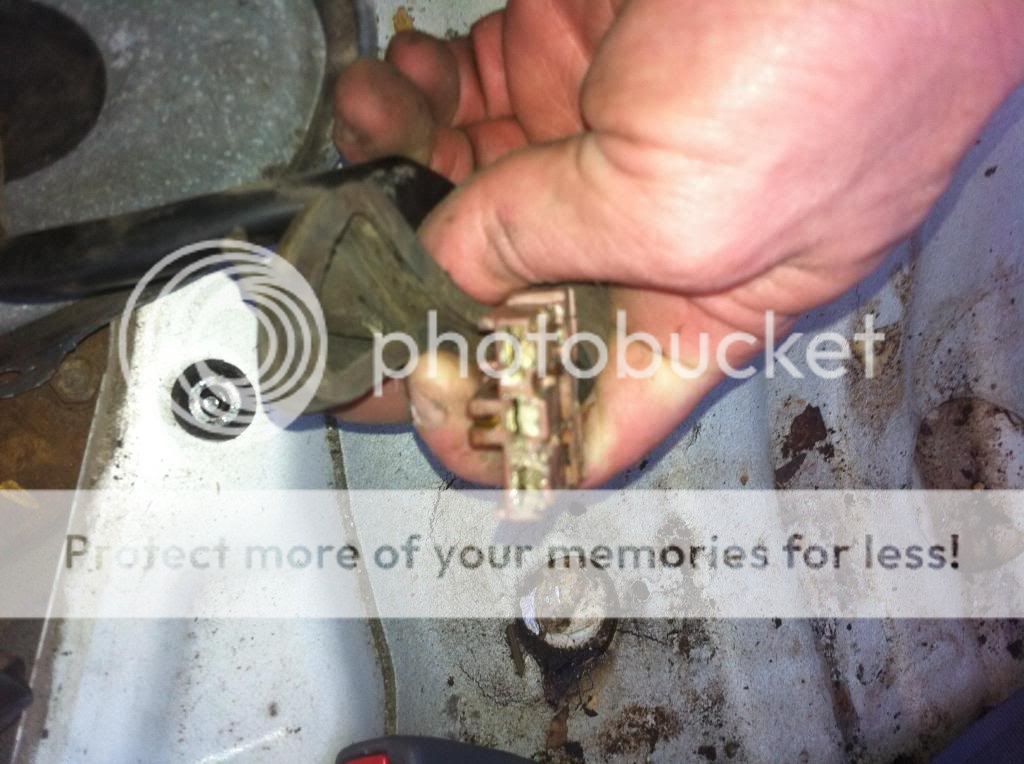
Unplug the "FLOAT" plug and take a look-see. It should have 3 wires going into it and be orange/red-ish. Top left in above pic
How it looks without that plug
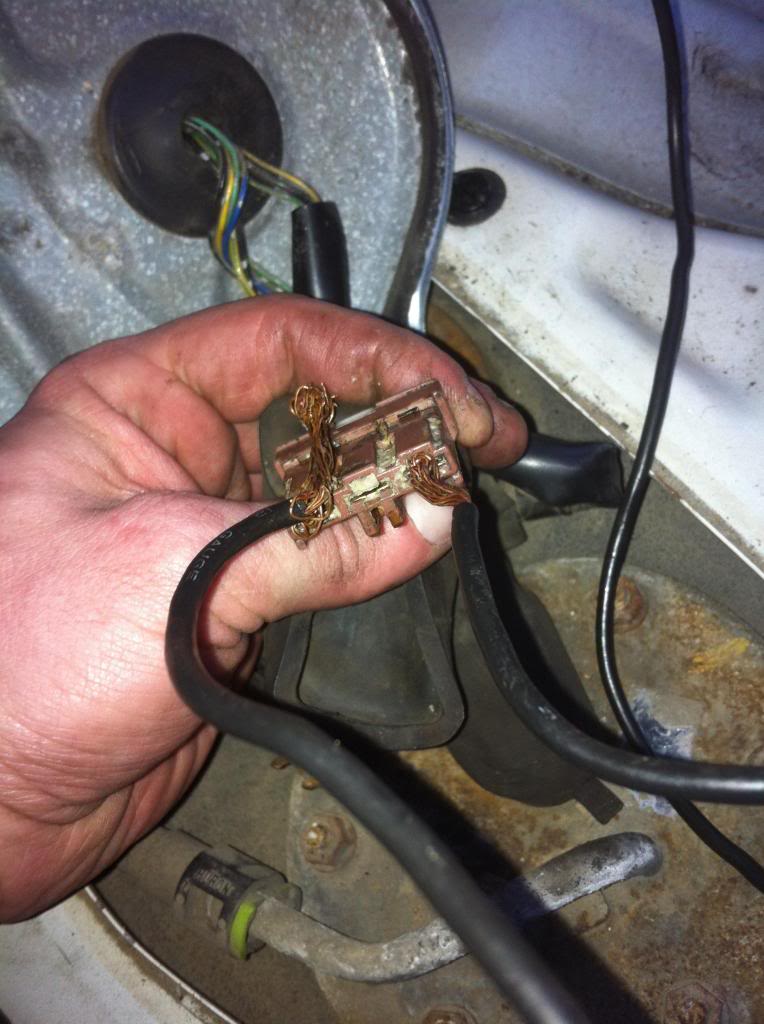
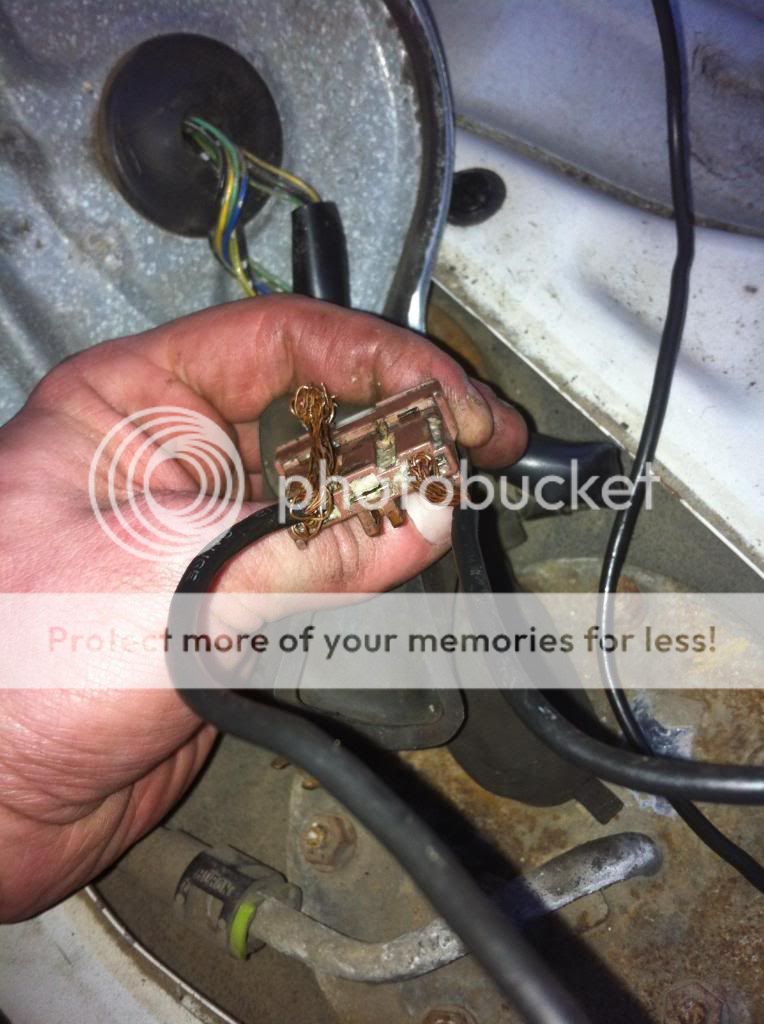
Closeup of plug
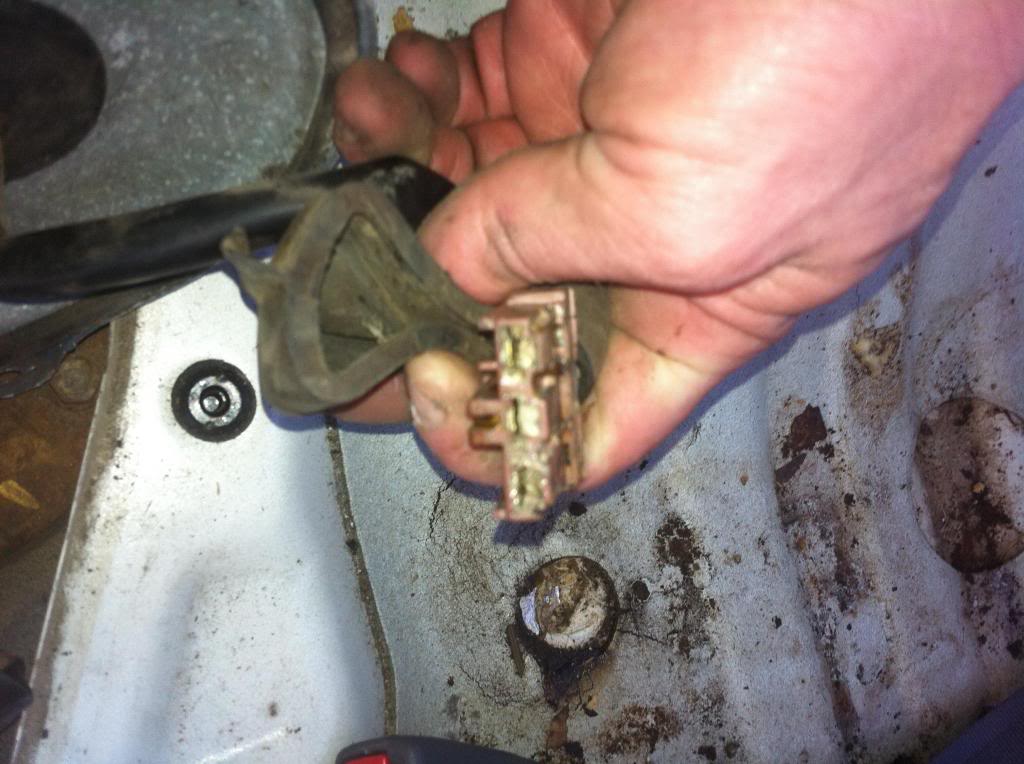
Take that paperclip you should have and bend it out so you have a nice long u-shaped metal piece and stick each end in the two connector clip ends (I used a wire in this pic but a paperclip is much easier)
10.) Now stick the key in the ignition and turn it ON. Your little yellow low fuel light should come on & the fuel gauge should drop like a rock towards "E"
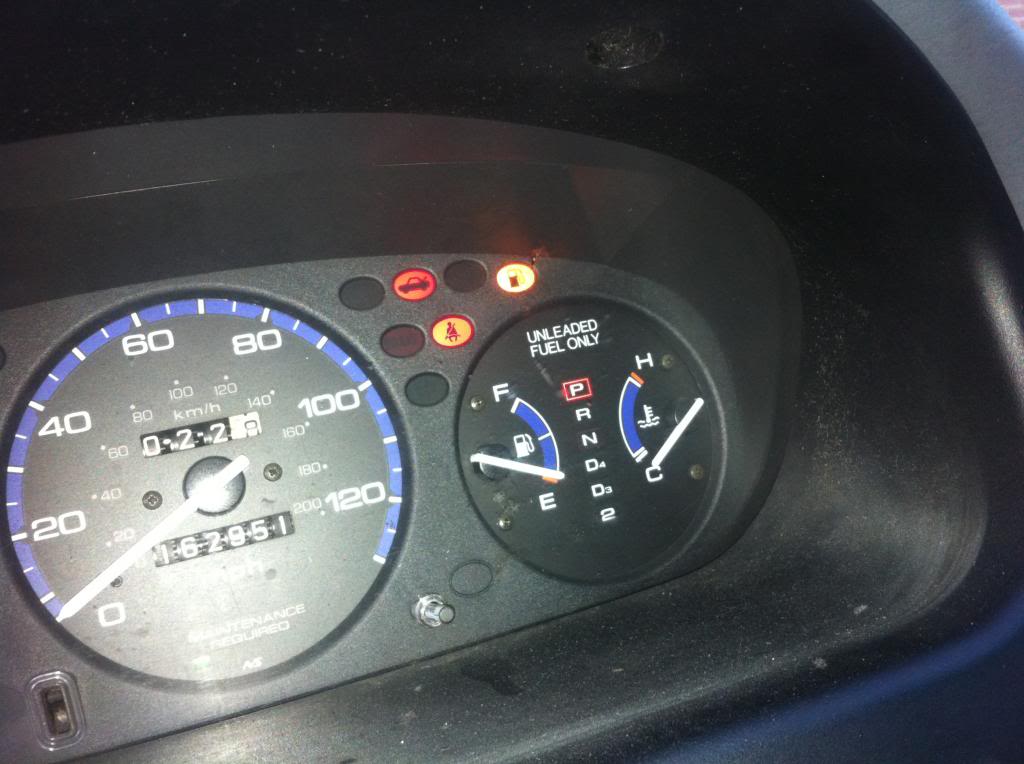
11.) MAKE SURE YOU TURN IT OFF BEFORE IT HITS THE BOTTOM (BELOW E) OR IT COULD GET STUCK THERE

12.) Since we're right here with 3 electrical connectors handy take them out one by one and give each a good dose of contact cleaner as well. Plug them all back in and recheck for proper indicator operation since this may also clear up your problem without having to replace the sending unit.
13.) If everything works after a good dose of cleaner you just saved a bunch of money by not having to order a new sending unit. However if the light only comes on using the paperclip method-order a new float and use that 10mm ratchet to pull out the 6-8 10mm bolts holding the float unit in place. Replace it, and plug it in-do a quick check to ensure it is sending properly.
14.) Enjoy having a properly working fuel gauge and low fuel light.
Last edited by jonsey1886; 02-01-2017 at 02:11 PM.
 03-16-2013, 05:16 PM
#3
Honda-Tech Member

i noticed after swapping my crv cluster in my ek my gauge stopped fluctuating when driving. i think its something normal with the stock civic cluster does reguardless of the float.
03-18-2013, 08:22 PM
#4
This may or may not be applicable to the 92-96 models however I do know some of them do NOT have a low fuel indicator.
05-02-2017, 10:33 PM
#5
Honda-Tech Member

Join Date: Apr 2017
Posts: 14
Likes: 0
Received 0 Likes
on
0 Posts
Yea it should. And it should light up for a brief second when you first turn on the car and all the dash lights come on. If it doesn't follow these steps below.
FYI these apply to STOCK CLUSTERS ONLY. If you've done some rewiring or put in a different cluster....you're on your own.
Simple low light check-(also just FYI the Fuel Gauge will usually "float" quite wildly when driving i.e. going from half-to near "E" when accelerating/decelerating)
Tools Needed:
Electrical Contact Cleaner (available at your local autoparts store or some big-box stores like WalMart)
10mm Socket (or 10mm wrench and long spindly arms)
Drive for socket
Phillips-Head screwdriver
Large-ish Paper-clip
Shop-vac (or something to clean up the mess you'll find (purely optional) )
Pre-steps:
Ensure that all your fuses are in good working condition and pull the instrument cluster.
i.) drop the steering wheel as low as it can go and lock in place.
ii.) 2 phillips head screws on the plastic surrounding the cluster. pull it out directly towards you & try not to break it

iii.) then 4 that anchor the cluster itself, unplug the electrical connectors and pull out


Note the non-illuminated low-fuel light in the top right.
Grey plug here is the low fuel light bulb holder
iv.) check the bulbs (turn counter-clockwise and tug out) and replace any blown ones as necessary (small bulbs are size #74, large ones are #194)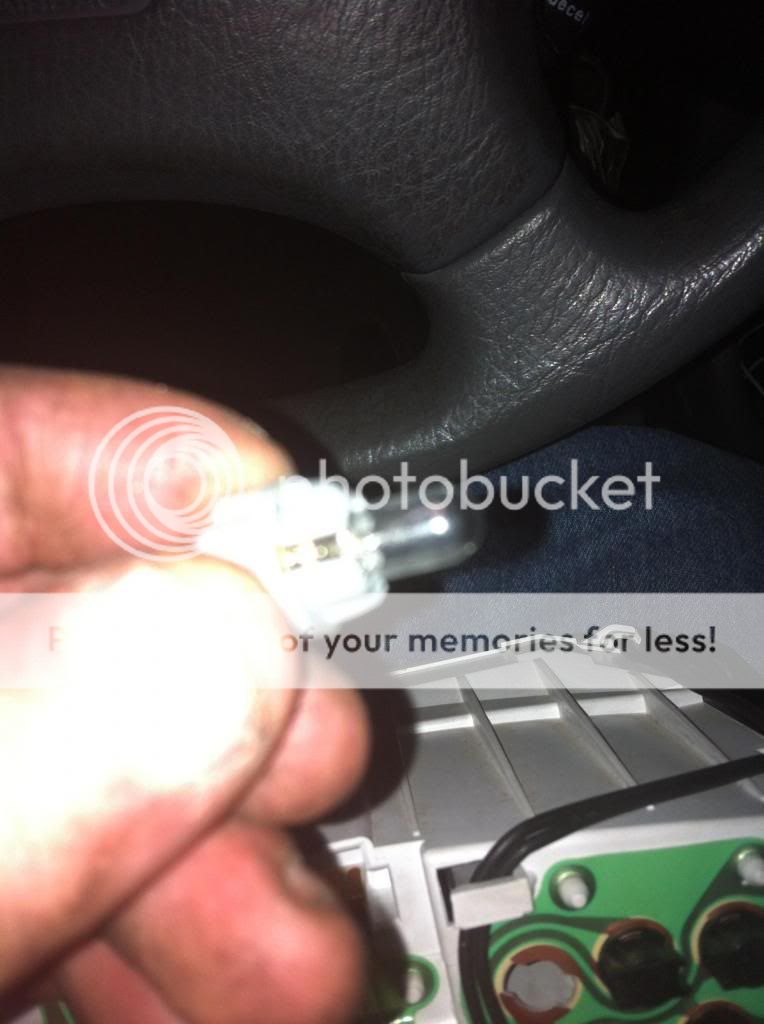
v.) Remember that contact cleaner I mentioned earlier? Unplug all of the plugs to the cluster and give each plug a good spritz of it. Try to have the door open or window down as it's not really the best thing to breathe in.
vi.) After giving the contact cleaner about 5 minutes to dry & do its thing, re-assemble of the cluster is reverse of removal.
vii.)Ensure you CHECK it BEFORE proceeding! If all it was, was a blown fuse or bulb your steps end here.
EDIT FOR SAFETY NOTE: PLEASE READ THIS
When working on the fuel tank (or any component where fuel and/or vapors will be part of the job) please observe some basic safety procedures.
I.)Take off the gas cap to release any built up pressure in the system
II.) Unplug that other black plug next to the sender in Step 9, it goes to your fuel pump and then try to turn the engine over 4-5 times. That should remove any residual pressure.
III.)Ensure you do this and any work on your fuel tank when your tank is nearly empty-if not crawl under the car and find the fuel drain plug (should be under your fuel tank and a 14-17mm bolt) and drain the fuel into a safe container before servicing the pump, sender or any other components.
IV.) Keep any small children and others who are not a part of this job well away from your work area and clean up any spills, or fuel covered rags in a prompt manner-ensuring they are disposed of safely and properly.
V.) Finally this should go without saying but do this in a well-ventilated area, have your windows rolled down to eliminate fume build up and for the love of your face, hands, fingers, and unburned body-keep any flames or heat sources well away from the vehicle and be careful with the electrical connections. Creating sparks, flames or heat buildup (such as a space heater in cold climates) around fuel & fumes isn't good for your health.
FAILURE TO OBSERVE THESE SAFETY PRECAUTIONS CAN RESULT IN SEVERE, PERMANENT BODILY INJURY OR DEATH FOR WHICH NEITHER I NOR ANY OTHER POSTER HERE SHALL BE LIABLE FOR. CONSIDER YOURSELF FOREWARNED.
Steps
1.) Pop trunk/hatch
2.) Find black handles (these unlock your rear seats) & pull them

3.)Seatbacks should now be free

and move "down"

so grab the 10mm socket and remove (starting from driver's side)
2 10mm bolts (on door side)
2 more 10mm bolts (about "middle") of the 2/3 back seats and
finally 2 10mm bolts on the passenger's side door area
4.) Once you have all 6 bolts stowed safely there is one last 10mm bolt to remove and it should be dead in the "middle" of the seat partition. On my 98 LX it is black and goes inside a silver hinge that 2 of the earlier 10mm bolts went into.
5.) Once this is removed (be careful as there are two small plastic pieces that are easy to lose) the entire back part of the rear seats should remove as one big piece (no need to remove the seat backing yay!!! )
6.) After removing the seat back look "down" on the driver's side area (you may have to jiggle the seat cushion a bit) and you should see one FINAL 10mm bolt (on my vehicle it's brown) that goes into a U-shaped piece of metal. Remove that and the seat cushion should easily raise up (total removal not required) towards the front seats.
7.) After wresting with the belts and buckles to get them separate from the seat cushion and grabbing all the lose change you never thought you'd see again (I made $1.10 USD from this) and the ancient french-fries Johnny and Suzie lost last year, take that vacuum and clean up. Or not...your choice really.
8.) Okay now that it's all nice and clean again you should see a nice metal plate with 4-6 (depending on vehicle year and model) Phillips head screws in it. Take out the screwdriver and remove all of them, then pry the plate up-gently mind you-so that you don't damage the gasket underneath.
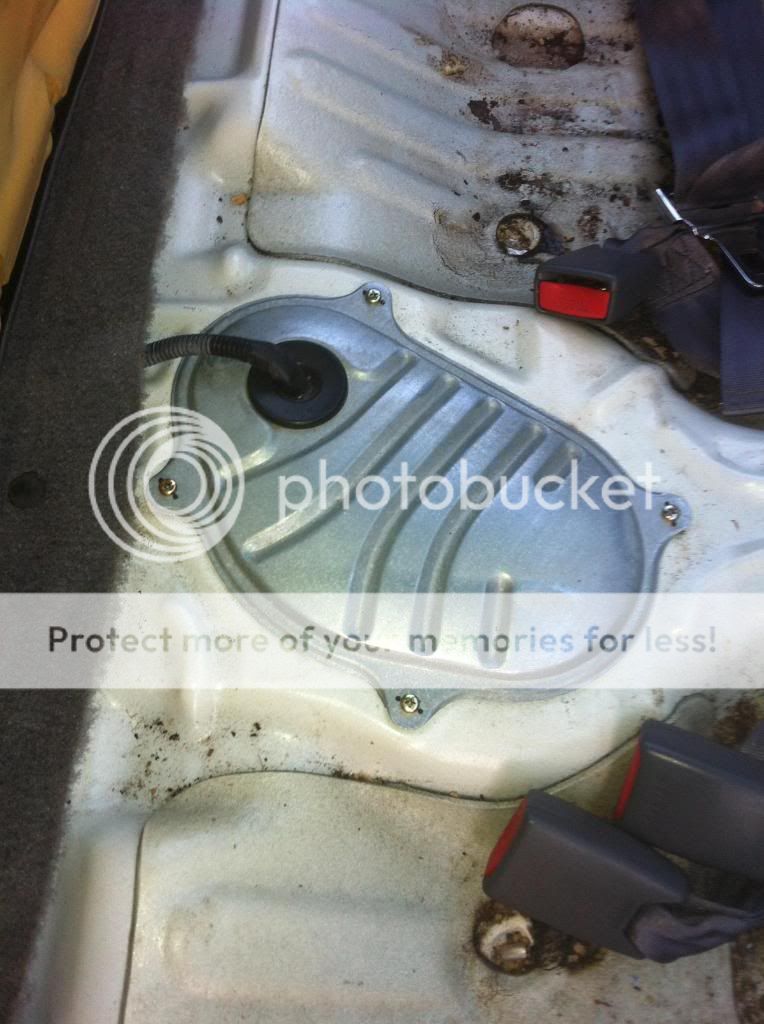
9.) You should see 2-3 plugs now arranged like this
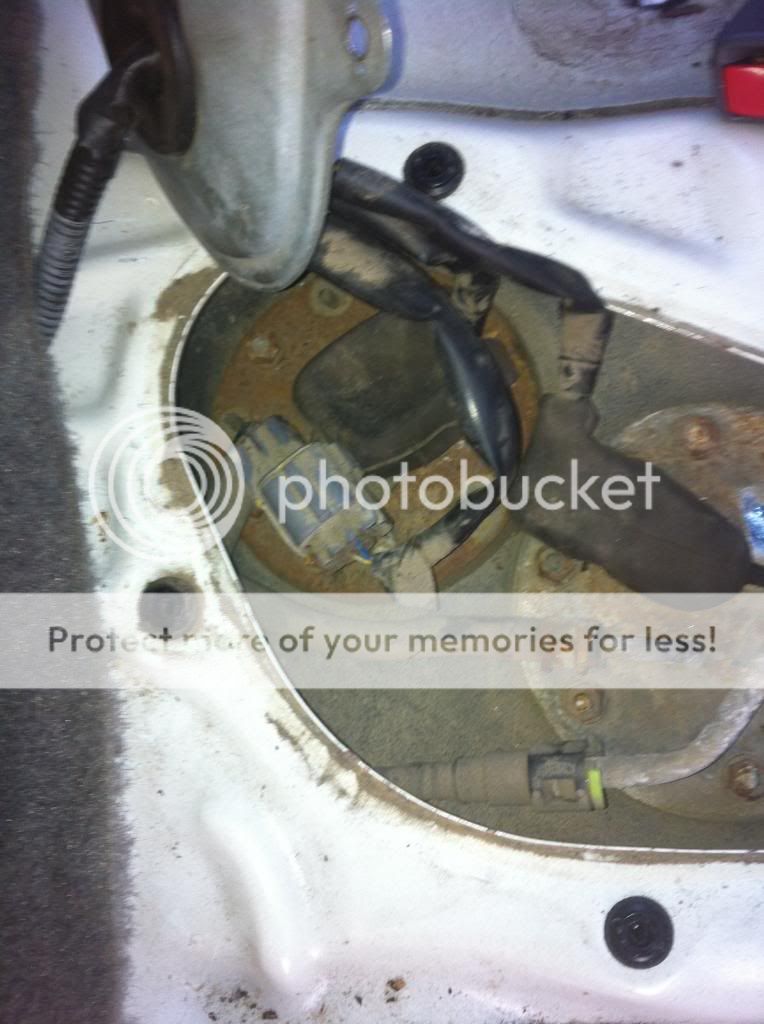
Unplug the "FLOAT" plug and take a look-see. It should have 3 wires going into it and be orange/red-ish. Top left in above pic
How it looks without that plug
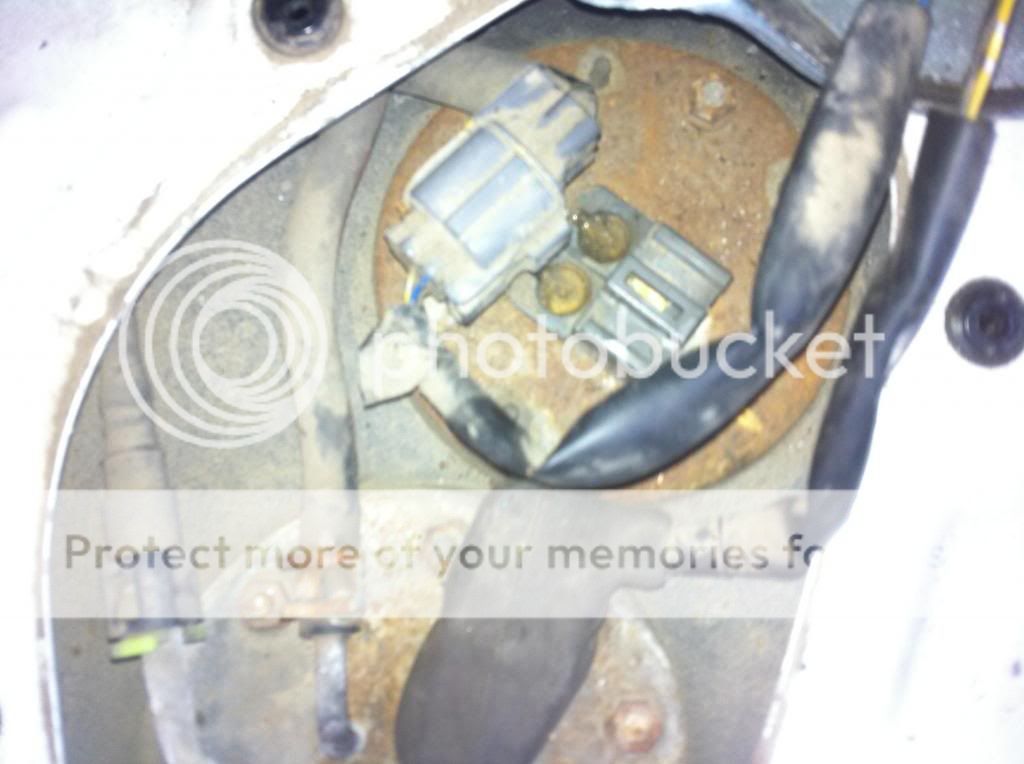
Closeup of plug
Take that paperclip you should have and bend it out so you have a nice long u-shaped metal piece and stick each end in the two connector clip ends (I used a wire in this pic but a paperclip is much easier)
10.) Now stick the key in the ignition and turn it ON. Your little yellow low fuel light should come on & the fuel gauge should drop like a rock towards "E"

11.) MAKE SURE YOU TURN IT OFF BEFORE IT HITS THE BOTTOM (BELOW E) OR IT COULD GET STUCK THERE
12.) Since we're right here with 3 electrical connectors handy take them out one by one and give each a good dose of contact cleaner as well. Plug them all back in and recheck for proper indicator operation since this may also clear up your problem without having to replace the sending unit.
13.) If everything works after a good dose of cleaner you just saved a bunch of money by not having to order a new sending unit. However if the light only comes on using the paperclip method-order a new float and use that 10mm ratchet to pull out the 6-8 10mm bolts holding the float unit in place. Replace it, and plug it in-do a quick check to ensure it is sending properly.
14.) Enjoy having a properly working fuel gauge and low fuel light.
FYI these apply to STOCK CLUSTERS ONLY. If you've done some rewiring or put in a different cluster....you're on your own.
Simple low light check-(also just FYI the Fuel Gauge will usually "float" quite wildly when driving i.e. going from half-to near "E" when accelerating/decelerating)
Tools Needed:
Electrical Contact Cleaner (available at your local autoparts store or some big-box stores like WalMart)
10mm Socket (or 10mm wrench and long spindly arms)
Drive for socket
Phillips-Head screwdriver
Large-ish Paper-clip
Shop-vac (or something to clean up the mess you'll find (purely optional) )
Pre-steps:
Ensure that all your fuses are in good working condition and pull the instrument cluster.
i.) drop the steering wheel as low as it can go and lock in place.
ii.) 2 phillips head screws on the plastic surrounding the cluster. pull it out directly towards you & try not to break it
iii.) then 4 that anchor the cluster itself, unplug the electrical connectors and pull out
Note the non-illuminated low-fuel light in the top right.
Grey plug here is the low fuel light bulb holder
iv.) check the bulbs (turn counter-clockwise and tug out) and replace any blown ones as necessary (small bulbs are size #74, large ones are #194)
v.) Remember that contact cleaner I mentioned earlier? Unplug all of the plugs to the cluster and give each plug a good spritz of it. Try to have the door open or window down as it's not really the best thing to breathe in.
vi.) After giving the contact cleaner about 5 minutes to dry & do its thing, re-assemble of the cluster is reverse of removal.
vii.)Ensure you CHECK it BEFORE proceeding! If all it was, was a blown fuse or bulb your steps end here.
EDIT FOR SAFETY NOTE: PLEASE READ THIS
When working on the fuel tank (or any component where fuel and/or vapors will be part of the job) please observe some basic safety procedures.
I.)Take off the gas cap to release any built up pressure in the system
II.) Unplug that other black plug next to the sender in Step 9, it goes to your fuel pump and then try to turn the engine over 4-5 times. That should remove any residual pressure.
III.)Ensure you do this and any work on your fuel tank when your tank is nearly empty-if not crawl under the car and find the fuel drain plug (should be under your fuel tank and a 14-17mm bolt) and drain the fuel into a safe container before servicing the pump, sender or any other components.
IV.) Keep any small children and others who are not a part of this job well away from your work area and clean up any spills, or fuel covered rags in a prompt manner-ensuring they are disposed of safely and properly.
V.) Finally this should go without saying but do this in a well-ventilated area, have your windows rolled down to eliminate fume build up and for the love of your face, hands, fingers, and unburned body-keep any flames or heat sources well away from the vehicle and be careful with the electrical connections. Creating sparks, flames or heat buildup (such as a space heater in cold climates) around fuel & fumes isn't good for your health.
FAILURE TO OBSERVE THESE SAFETY PRECAUTIONS CAN RESULT IN SEVERE, PERMANENT BODILY INJURY OR DEATH FOR WHICH NEITHER I NOR ANY OTHER POSTER HERE SHALL BE LIABLE FOR. CONSIDER YOURSELF FOREWARNED.
Steps
1.) Pop trunk/hatch
2.) Find black handles (these unlock your rear seats) & pull them
3.)Seatbacks should now be free
and move "down"
so grab the 10mm socket and remove (starting from driver's side)
2 10mm bolts (on door side)
2 more 10mm bolts (about "middle") of the 2/3 back seats and
finally 2 10mm bolts on the passenger's side door area
4.) Once you have all 6 bolts stowed safely there is one last 10mm bolt to remove and it should be dead in the "middle" of the seat partition. On my 98 LX it is black and goes inside a silver hinge that 2 of the earlier 10mm bolts went into.
5.) Once this is removed (be careful as there are two small plastic pieces that are easy to lose) the entire back part of the rear seats should remove as one big piece (no need to remove the seat backing yay!!!
)6.) After removing the seat back look "down" on the driver's side area (you may have to jiggle the seat cushion a bit) and you should see one FINAL 10mm bolt (on my vehicle it's brown) that goes into a U-shaped piece of metal. Remove that and the seat cushion should easily raise up (total removal not required) towards the front seats.
7.) After wresting with the belts and buckles to get them separate from the seat cushion and grabbing all the lose change you never thought you'd see again (I made $1.10 USD from this) and the ancient french-fries Johnny and Suzie lost last year, take that vacuum and clean up. Or not...your choice really.
8.) Okay now that it's all nice and clean again you should see a nice metal plate with 4-6 (depending on vehicle year and model) Phillips head screws in it. Take out the screwdriver and remove all of them, then pry the plate up-gently mind you-so that you don't damage the gasket underneath.
9.) You should see 2-3 plugs now arranged like this
Unplug the "FLOAT" plug and take a look-see. It should have 3 wires going into it and be orange/red-ish. Top left in above pic
How it looks without that plug
Closeup of plug
Take that paperclip you should have and bend it out so you have a nice long u-shaped metal piece and stick each end in the two connector clip ends (I used a wire in this pic but a paperclip is much easier)
10.) Now stick the key in the ignition and turn it ON. Your little yellow low fuel light should come on & the fuel gauge should drop like a rock towards "E"
11.) MAKE SURE YOU TURN IT OFF BEFORE IT HITS THE BOTTOM (BELOW E) OR IT COULD GET STUCK THERE
12.) Since we're right here with 3 electrical connectors handy take them out one by one and give each a good dose of contact cleaner as well. Plug them all back in and recheck for proper indicator operation since this may also clear up your problem without having to replace the sending unit.
13.) If everything works after a good dose of cleaner you just saved a bunch of money by not having to order a new sending unit. However if the light only comes on using the paperclip method-order a new float and use that 10mm ratchet to pull out the 6-8 10mm bolts holding the float unit in place. Replace it, and plug it in-do a quick check to ensure it is sending properly.
14.) Enjoy having a properly working fuel gauge and low fuel light.

Thread
Thread Starter
Forum
Replies
Last Post
ultima.maniac
Honda Civic / Del Sol (1992 - 2000)
3
06-10-2008 02:24 PM