
Introduce myself and my 2005 CR-V EX AWD
 04-22-2012, 01:12 PM
#1
DC5/EP3 MOD :)
Thread Starter
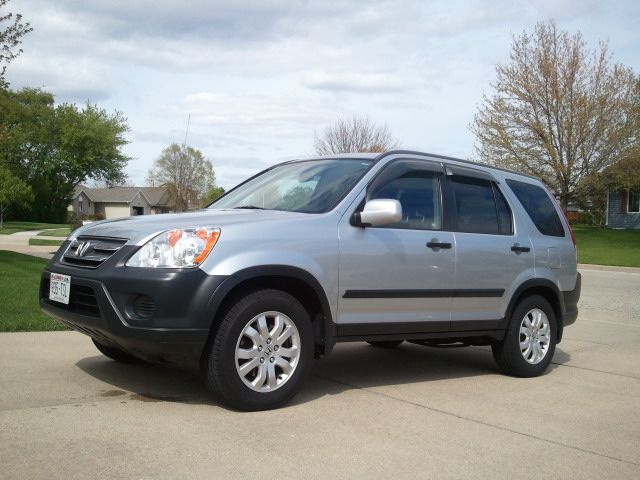
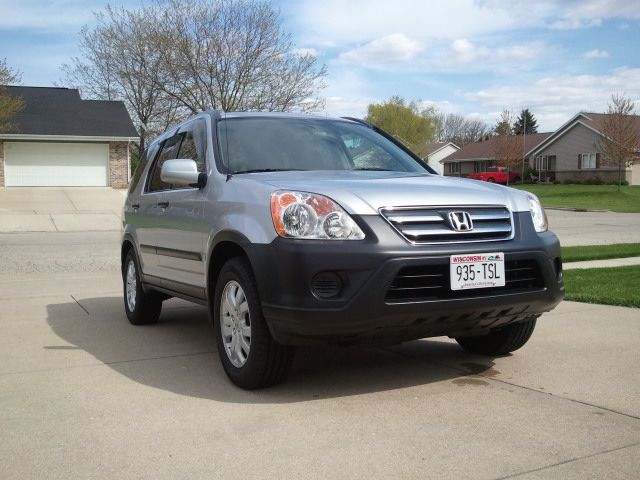
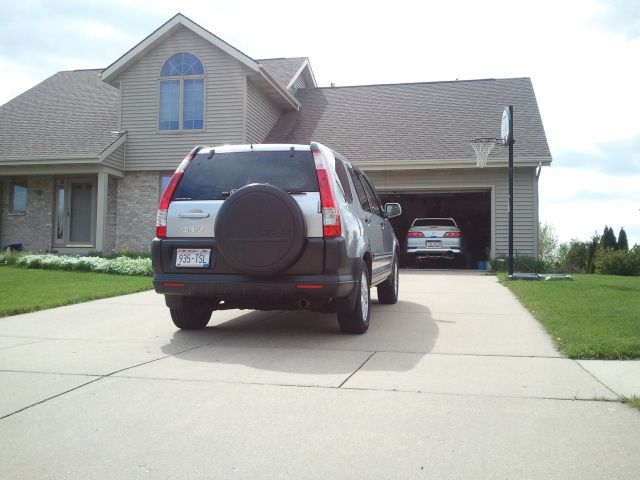
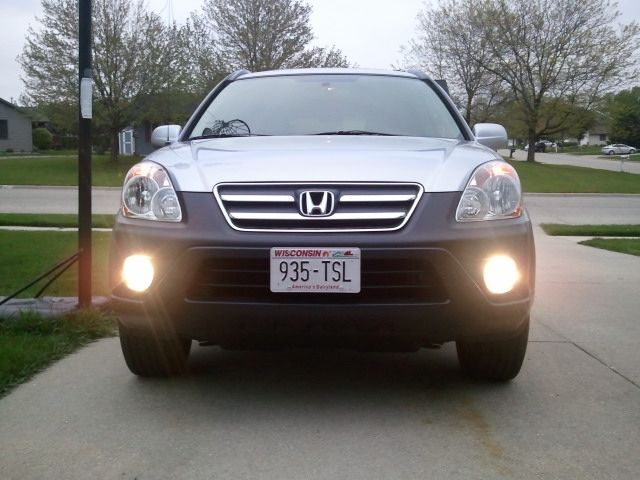
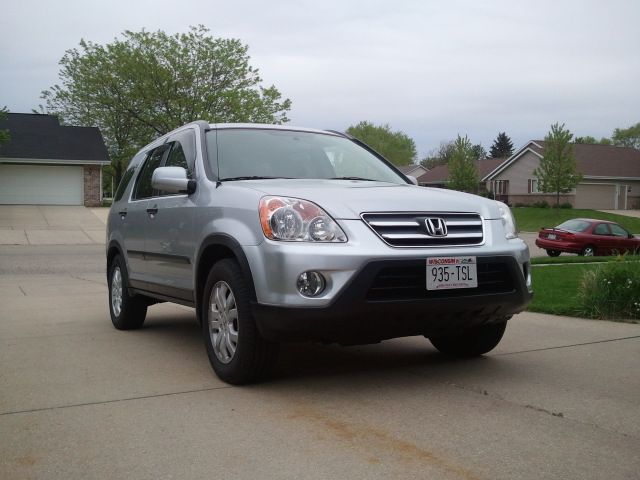
So I figured I would post up some photos of the new Daily
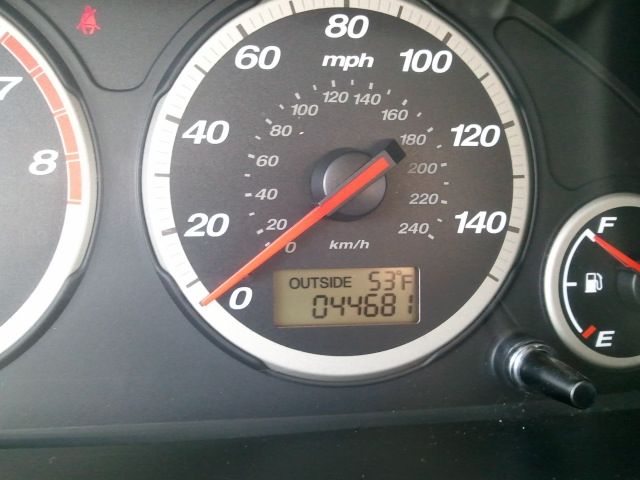
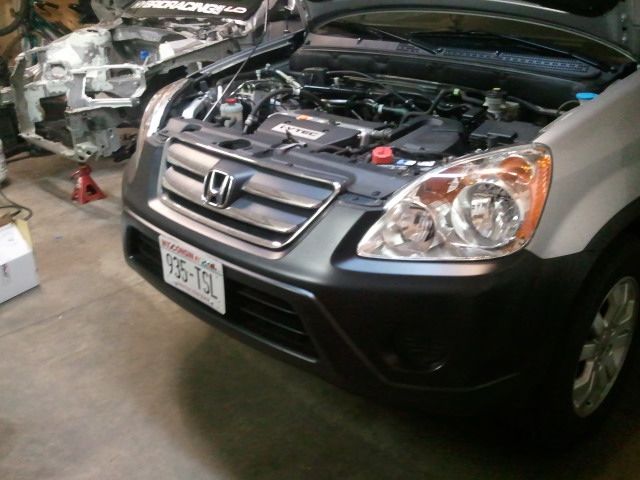
It's a 2005 Honda CR-V EX K24 AWD
One Owner with 44XXX Miles
So far I'm absolutely loving it and I'm glad I didn't go with the Honda Element like originally planned.
It's a 2005 Honda CR-V EX K24 AWD
One Owner with 44XXX Miles
So far I'm absolutely loving it and I'm glad I didn't go with the Honda Element like originally planned.
 04-22-2012, 01:13 PM
#2
DC5/EP3 MOD :)
Thread Starter
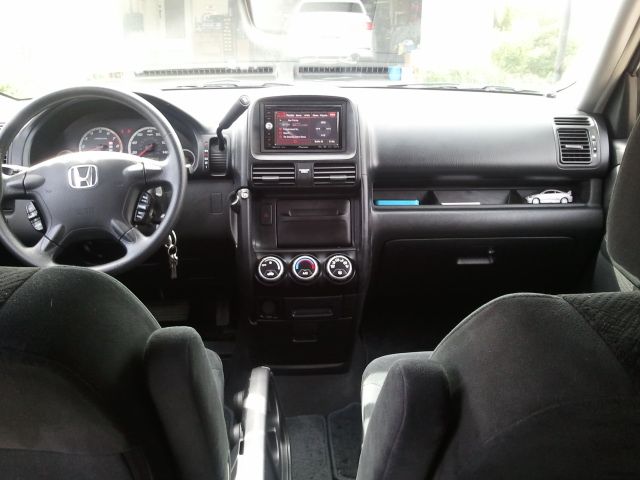
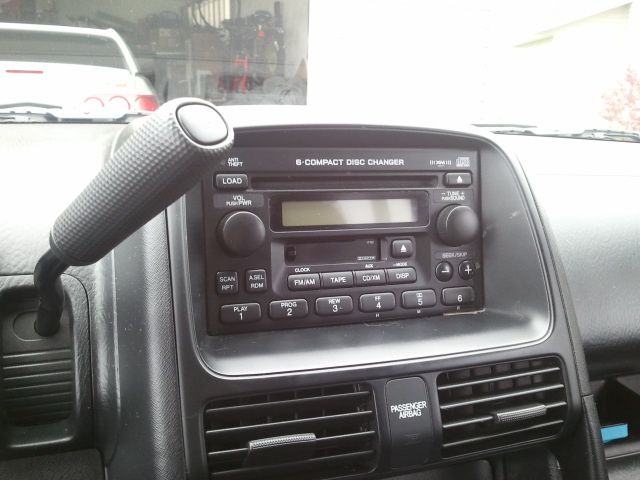
Well my new Daily Driver got an upgrade today since my summer car is down for the count...
Now I'm not showing the wiring harness because this is going from one 2005 honda to another so the harness is the same and already done. Or else you would normally need to buy a conversion harness to attach the new radio to your factory harness plug.
Factory it comes with a 6disc change and a tape player just like my other car...
So first remove the two panel screws (phillips) under need the vents

Then pull from underneath carefully as there are three tabs on each side you need to pop out
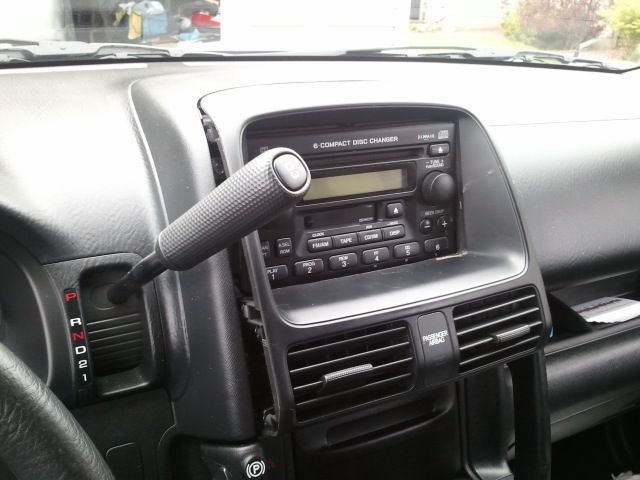
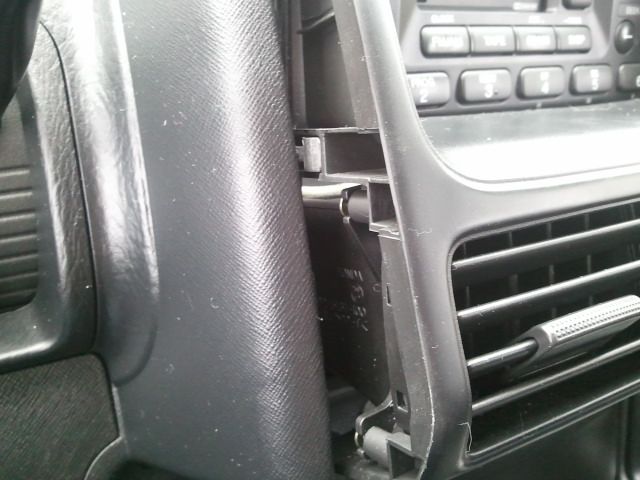
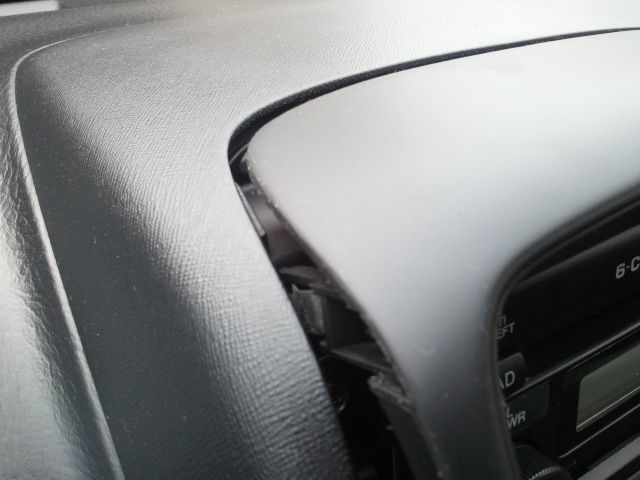
Once you get the cover off you'll need to unplug the passenger airbag light
Now using either an 8mm or a philip screw driver remove the four screws holding the radio in place
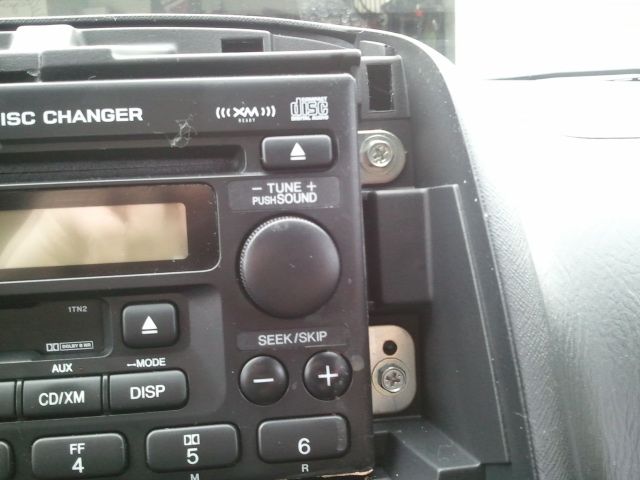
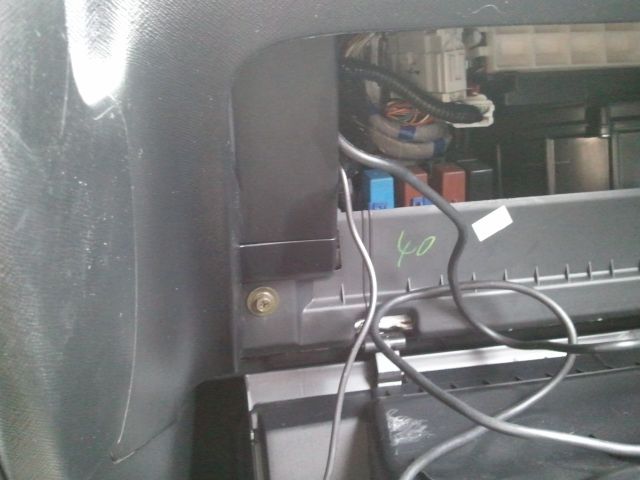
Then with the radio out I ran my ipod cable and my GPS navi cable down into the glove box (navi sensor I just ran up and is sitting on the dash I will deal with it later but it works where it is)
Then go ahead and take off the panels that hold on the stock radio
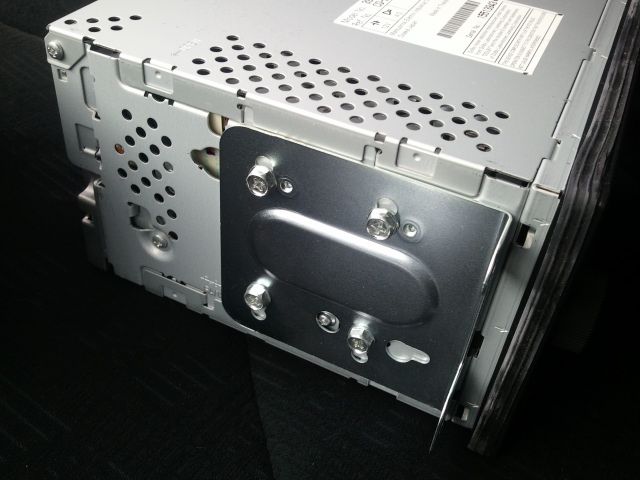
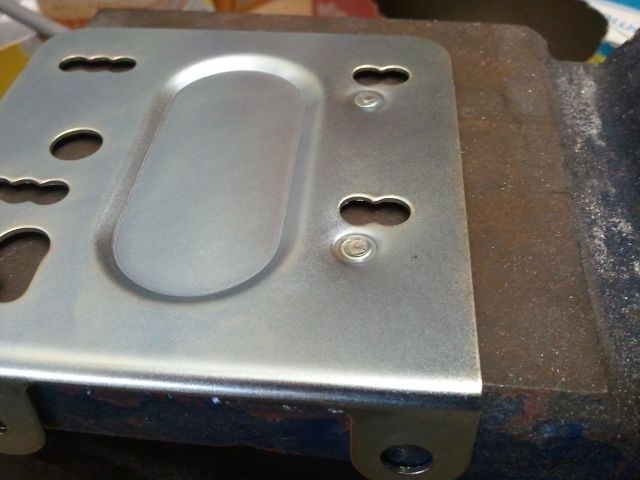
You'll need a hammer and a flat surface...
You need to hit the little points that stick out to flatten them to fit flush on the new deck
so from this
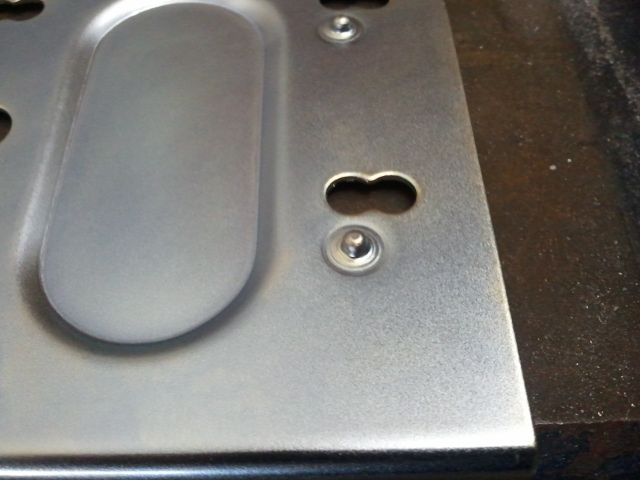
to this
now bolt plates onto your new deck and bolt in place
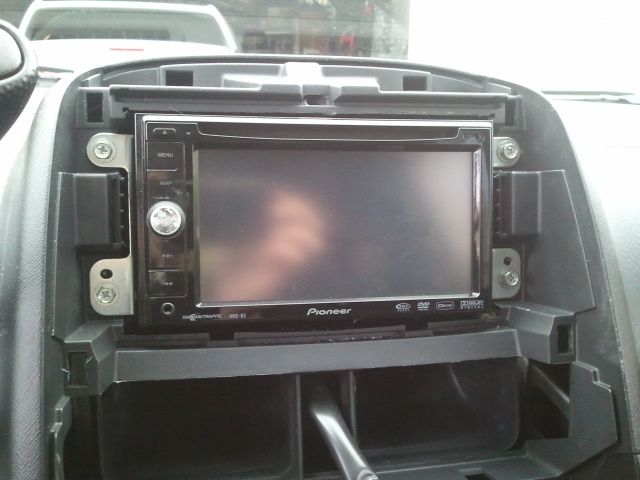
place your face back on and call it a day
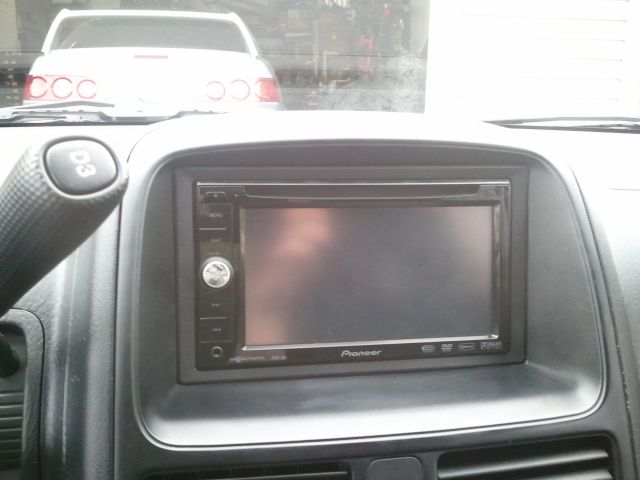
Now I'm not showing the wiring harness because this is going from one 2005 honda to another so the harness is the same and already done. Or else you would normally need to buy a conversion harness to attach the new radio to your factory harness plug.
Factory it comes with a 6disc change and a tape player just like my other car...
So first remove the two panel screws (phillips) under need the vents
Then pull from underneath carefully as there are three tabs on each side you need to pop out
Once you get the cover off you'll need to unplug the passenger airbag light
Now using either an 8mm or a philip screw driver remove the four screws holding the radio in place
Then with the radio out I ran my ipod cable and my GPS navi cable down into the glove box (navi sensor I just ran up and is sitting on the dash I will deal with it later but it works where it is)
Then go ahead and take off the panels that hold on the stock radio
You'll need a hammer and a flat surface...
You need to hit the little points that stick out to flatten them to fit flush on the new deck
so from this
to this
now bolt plates onto your new deck and bolt in place
place your face back on and call it a day
04-22-2012, 01:13 PM
#3
DC5/EP3 MOD :)
Thread Starter
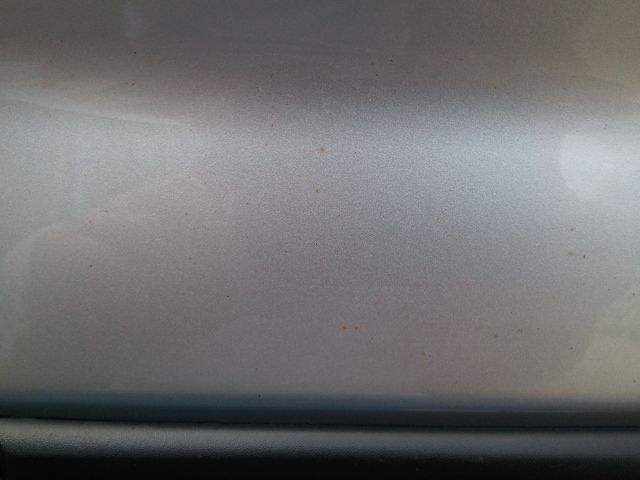
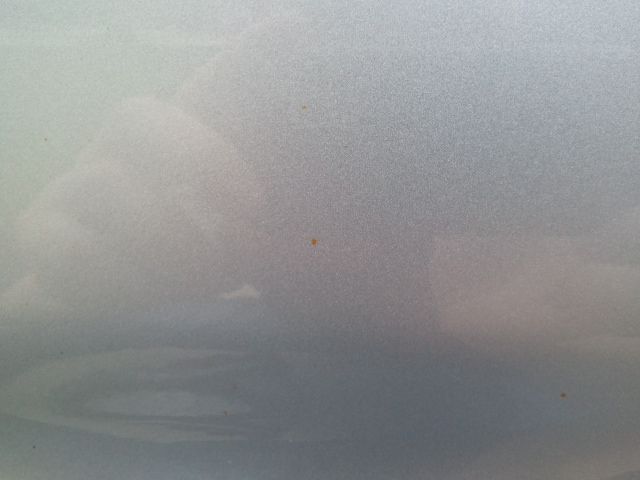
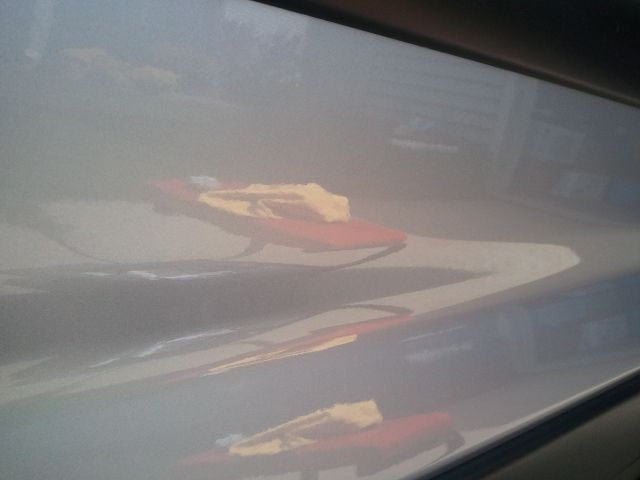
I decided today I would do a full wash and clean and learned the paint down below isn't as clean as I thought......
it's hard to tell but there were a MILLION little rust spots all under the black plastic body line
so I got out my clar bar and went to town...
spots like these
gone
my god look at this ****...
bye bye
more horror
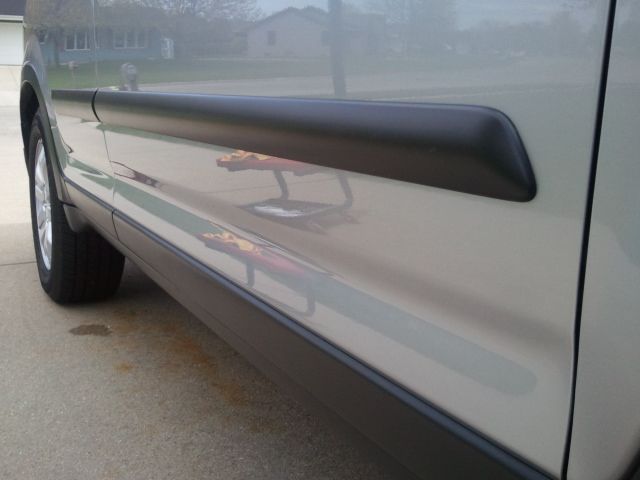
now so shinny!
this whole bottom half... both side...
but now it's clean
it's hard to tell but there were a MILLION little rust spots all under the black plastic body line
so I got out my clar bar and went to town...
spots like these
gone
my god look at this ****...
bye bye
more horror
now so shinny!
this whole bottom half... both side...
but now it's clean
04-28-2012, 07:56 PM
#5
DC5/EP3 MOD :)
Thread Starter
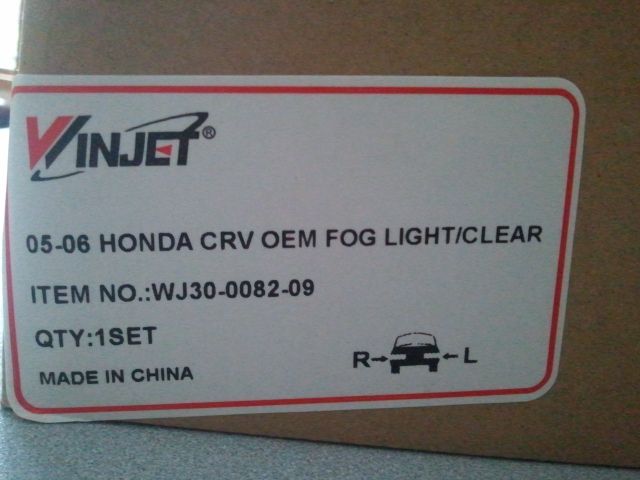
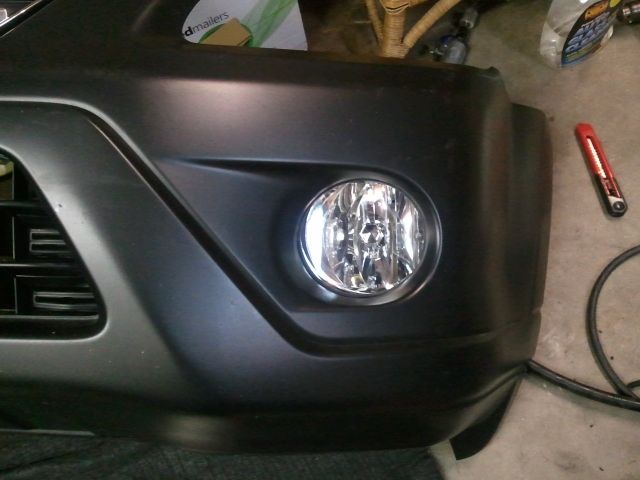
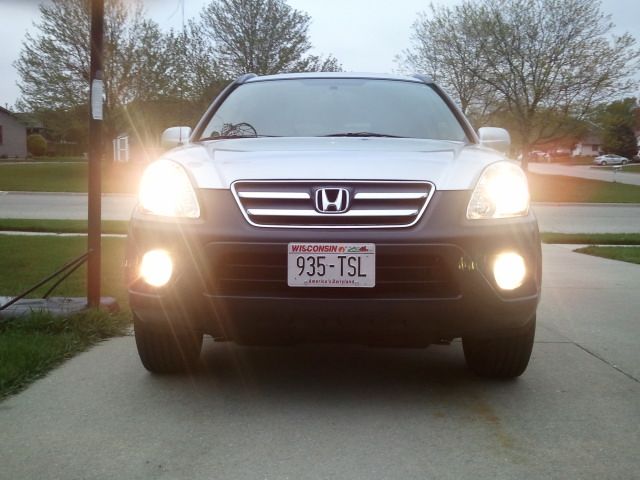
So today I got my fogs in the mail. Just some cheapo fog lights from ebay because on my good car I bought BNIB fogs from the dealership and 2 weeks later rock busted them and buy buy $300....
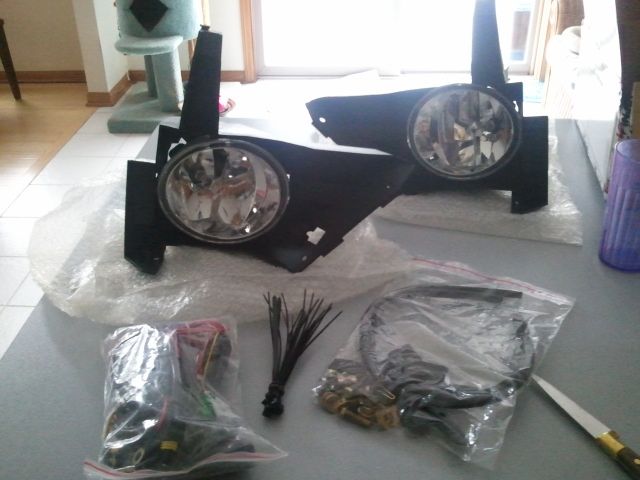
Here is what I got
So lets get started.
First thing pop your hood so you can get to the clips on the top
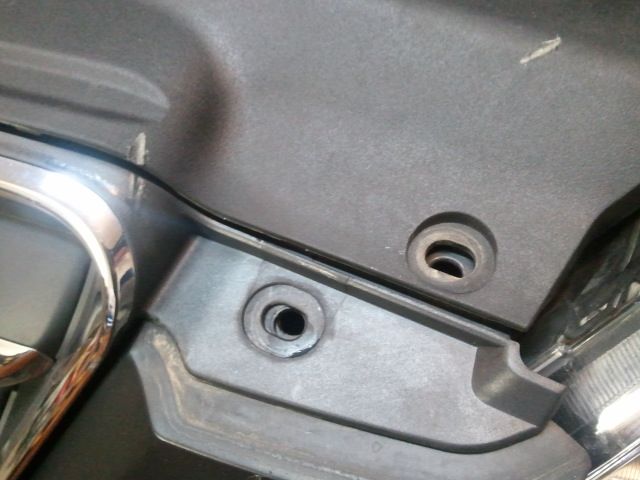
Then turn your wheels to one side then the other so you can get these side screws out
and the classic upper screws
then all the pop screws underneath
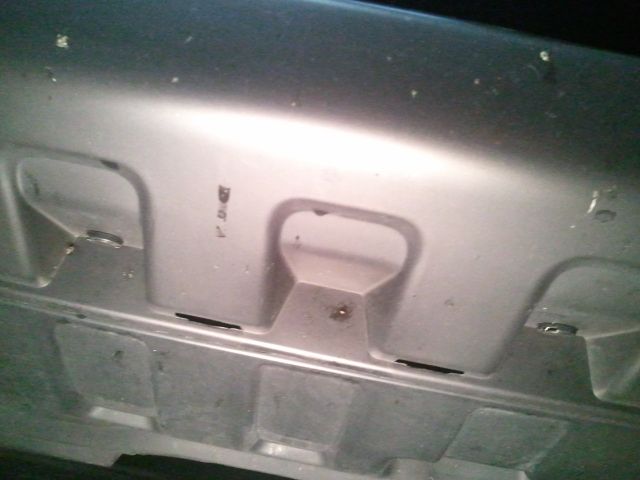
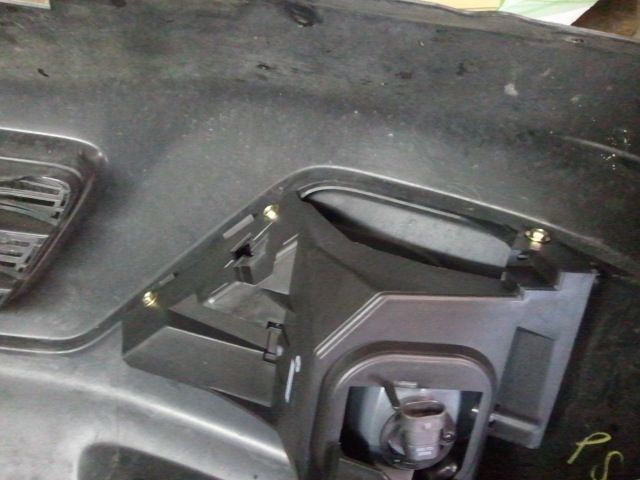
then with some force pop and pull the bumper off
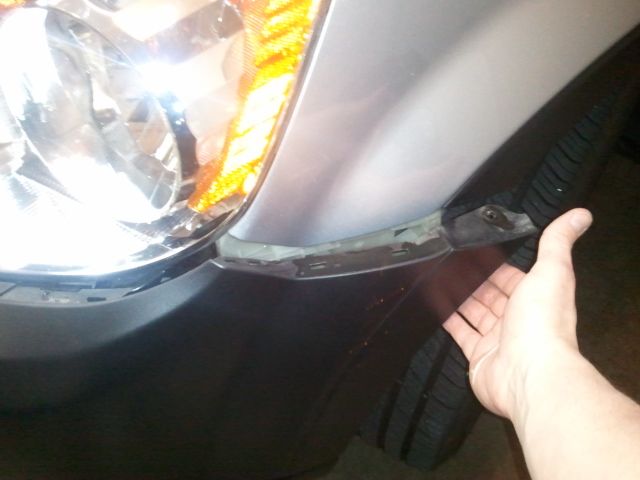
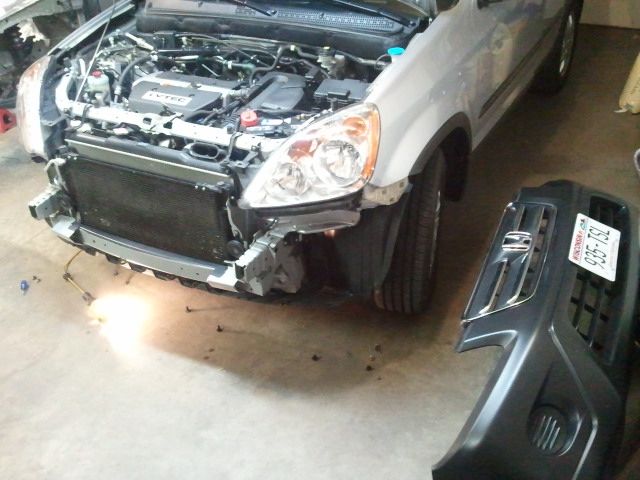
Now lay down some carpet and put your bumper down so you can start working on your foglights

First using a razor and a dremel cut out the fog light housing
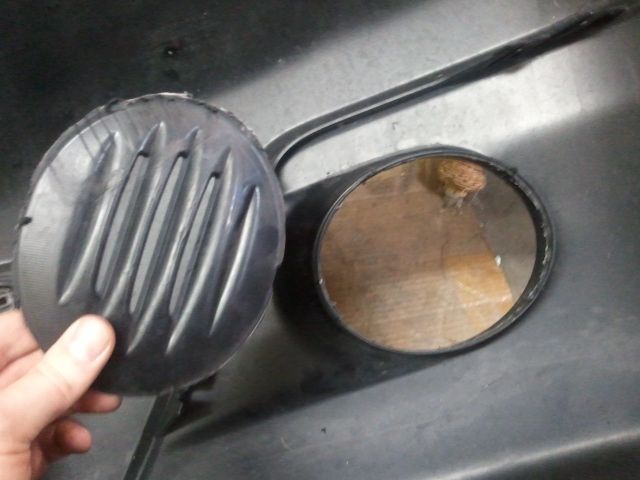
then use sand paper to clean it up. Mine didn't come with a beauty trim but came with some rubber seal to place on the cut
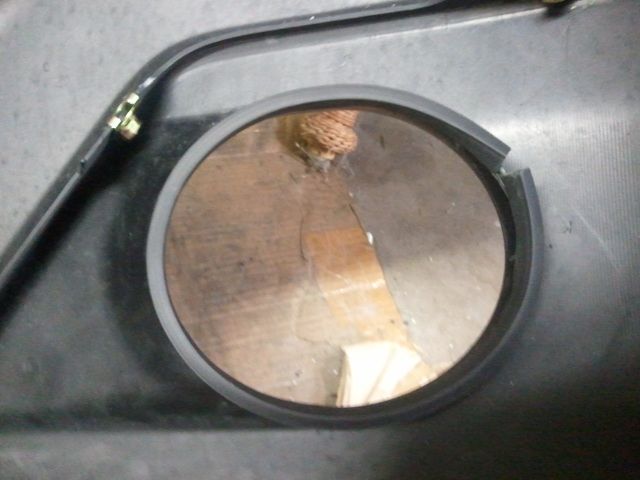
Now add your spring clips (3 on each side)
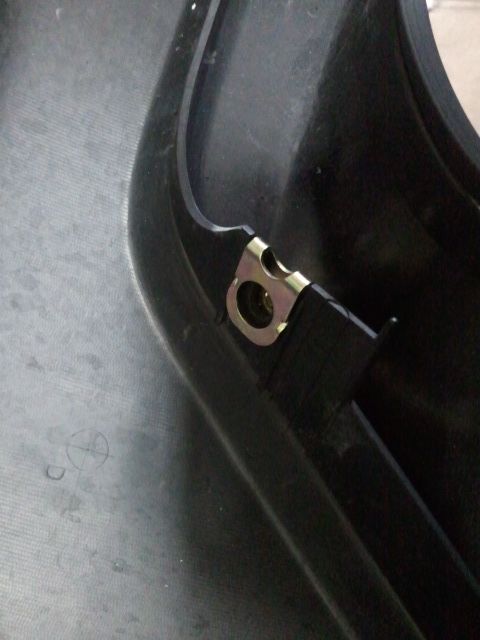
and go ahead and mount your fog light
beautiful
Now for the wiring..... this bullshit ebay kit was so bad the switch literally did not fit! WTF?! So I wired it to not use a switch since I love foglights anyways...
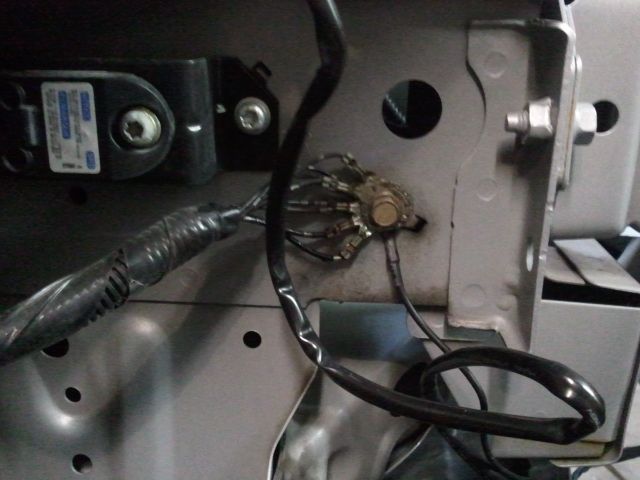
So first you need to stretch out your wiring and figure out your ground and power situation. For my ground I added the ground to the factory harness on the passenger side
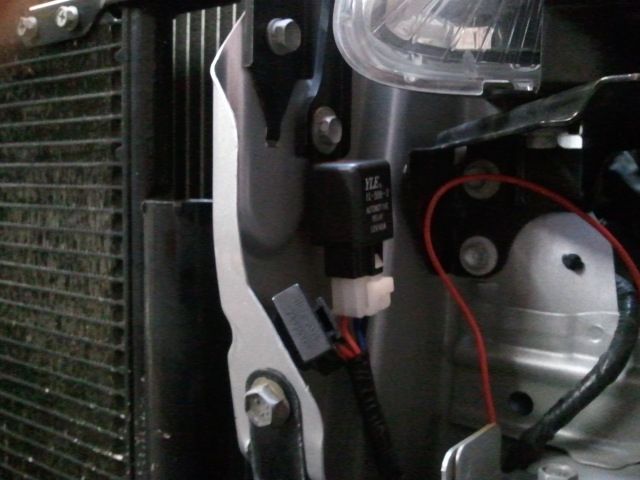
Then I found a place to mount my relay and fuse for power on the battery side...
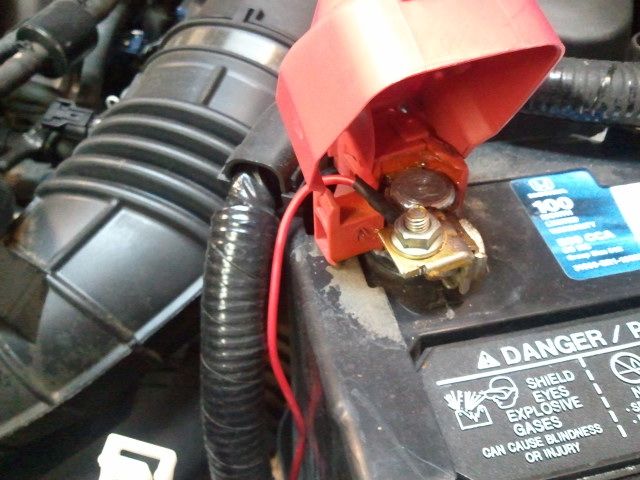
Then ran the power wire up to the battery
Now to turn on our fogs.. I used the city light for an on switch. So first I unplugged the socket
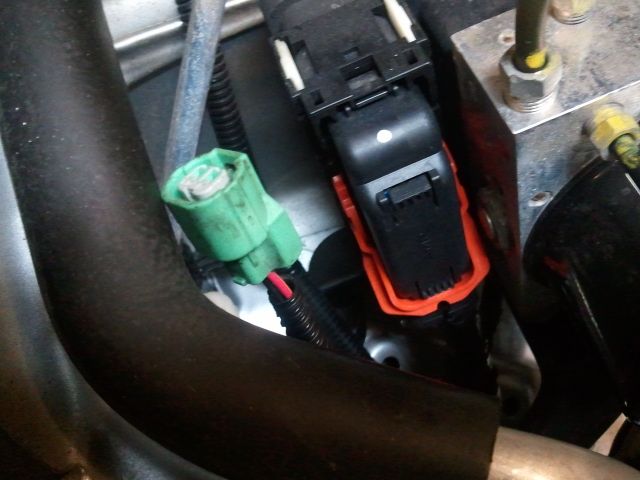
I was having a tough time getting to the wiring so I unplugged all the headlights so I could pull the harness down! Made a world of difference. Now I used a t-tap to tap into the power line of the socket
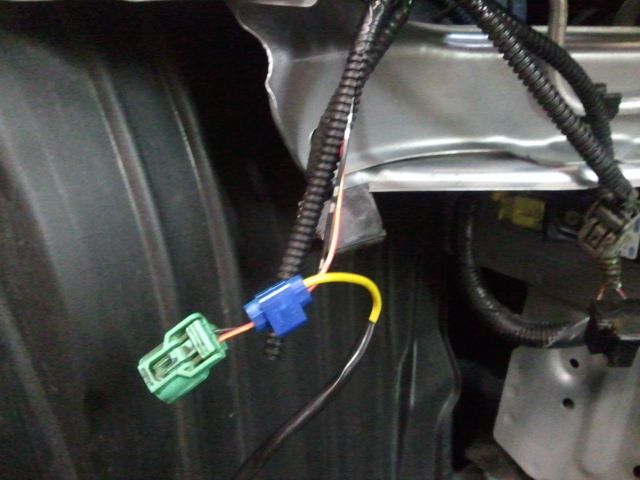
Then taped it all up with electrical tape to clean it up and protect it!
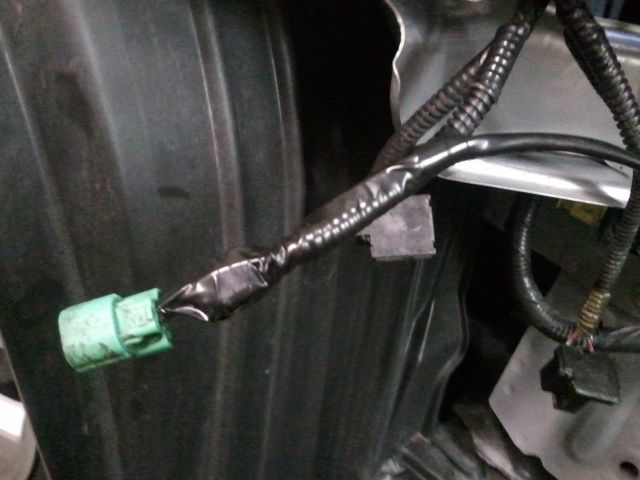
Now bolt it all back up and test it out!!
no lights
city lights on
headlights on
Here is what I got
So lets get started.
First thing pop your hood so you can get to the clips on the top
Then turn your wheels to one side then the other so you can get these side screws out
and the classic upper screws
then all the pop screws underneath
then with some force pop and pull the bumper off
Now lay down some carpet and put your bumper down so you can start working on your foglights
First using a razor and a dremel cut out the fog light housing
then use sand paper to clean it up. Mine didn't come with a beauty trim but came with some rubber seal to place on the cut
Now add your spring clips (3 on each side)
and go ahead and mount your fog light
beautiful
Now for the wiring..... this bullshit ebay kit was so bad the switch literally did not fit! WTF?! So I wired it to not use a switch since I love foglights anyways...
So first you need to stretch out your wiring and figure out your ground and power situation. For my ground I added the ground to the factory harness on the passenger side
Then I found a place to mount my relay and fuse for power on the battery side...
Then ran the power wire up to the battery
Now to turn on our fogs.. I used the city light for an on switch. So first I unplugged the socket
I was having a tough time getting to the wiring so I unplugged all the headlights so I could pull the harness down! Made a world of difference. Now I used a t-tap to tap into the power line of the socket
Then taped it all up with electrical tape to clean it up and protect it!
Now bolt it all back up and test it out!!
no lights
city lights on
headlights on
05-05-2012, 02:03 PM
#6
DC5/EP3 MOD :)
Thread Starter
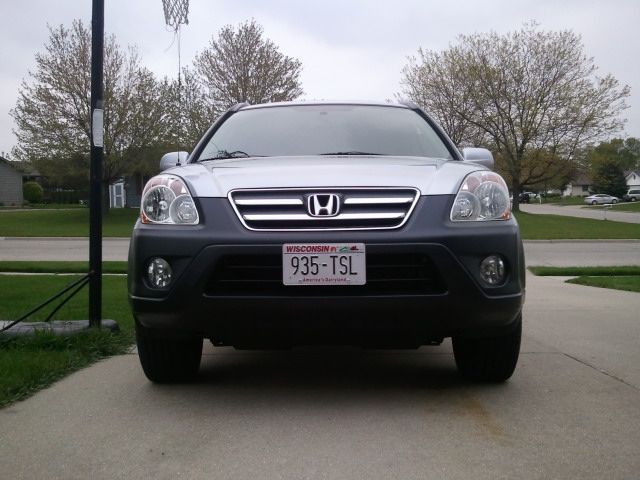
So I painted my front end....
I went from this
to this

it is so much better!

They should have done it from the factory to them all... oh well now mine is different
I went from this
to this
it is so much better!
They should have done it from the factory to them all... oh well now mine is different
Trending Topics
05-10-2012, 01:24 PM
#9
DC5/EP3 MOD :)
Thread Starter
05-10-2012, 01:31 PM
#10
DC5/EP3 MOD :)
Thread Starter
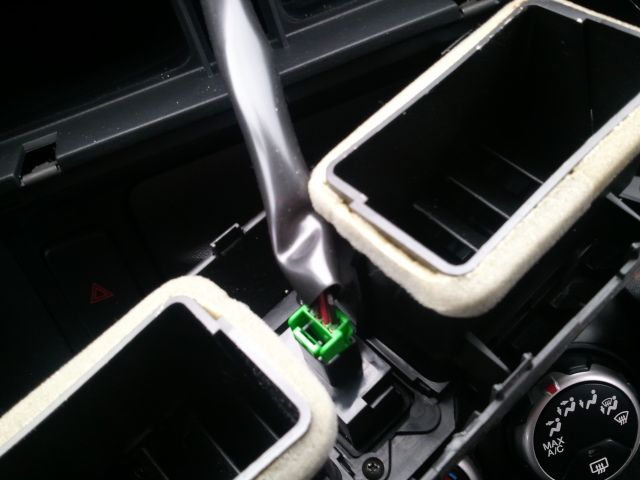
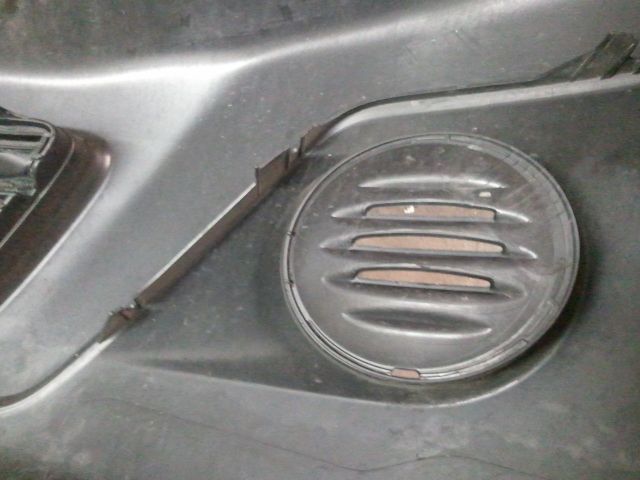
So I finally got time to instal my PAC steering wheel controller
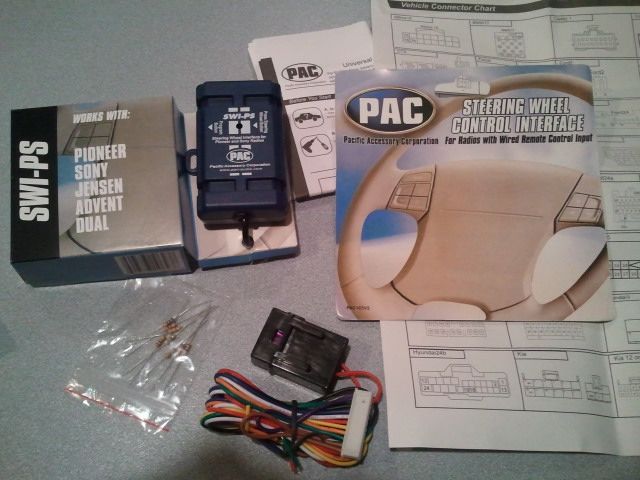
I must say installing it with sooo simple but programming it was frustrating the hell out of me until I finally figured it out. Now it seems so simple..
So I had to take my player back out and look for the 1/8 plug in the back
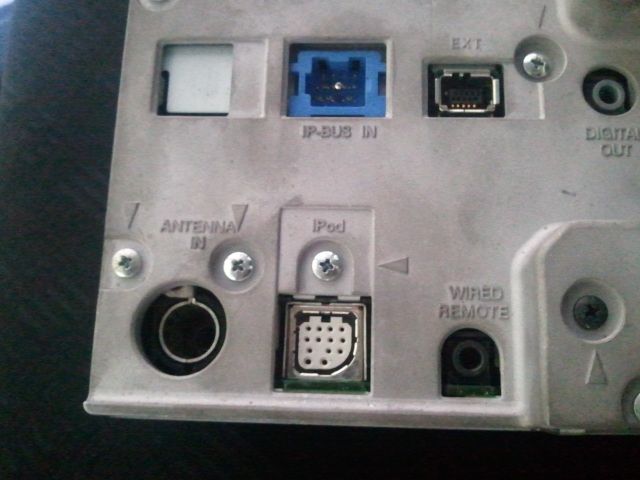
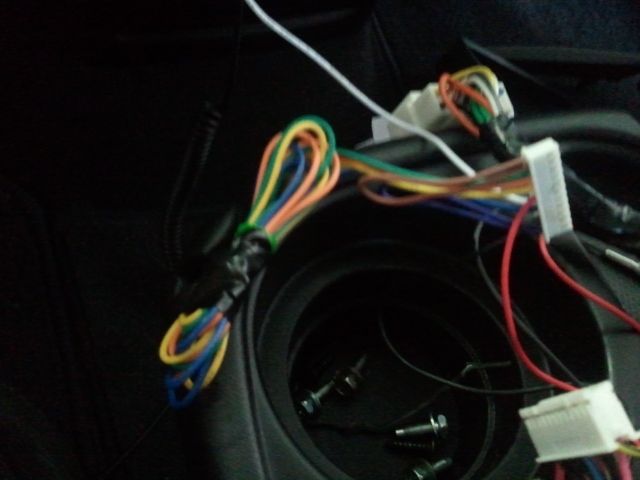
now connect the main PAC unit into the radio remote controller plug
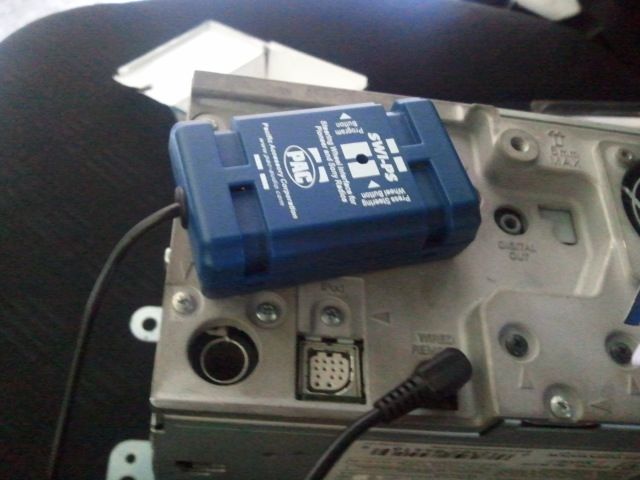
now take your wiring harness and splice into your ground and power for your new wiring harness to the PAC controller
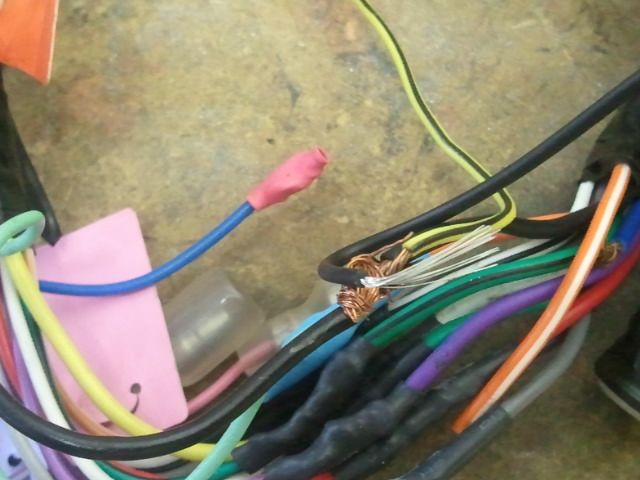
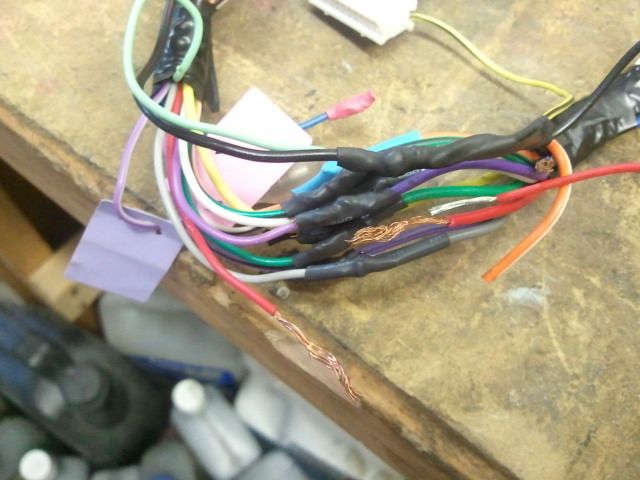
Then using electrical tape make it back to pretty and clean
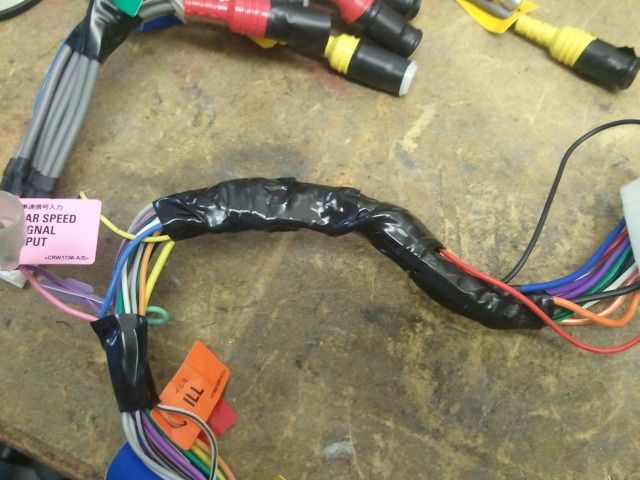
Now we only need one remote wire. For my car it is the white wire. So I just bundled up the other wires not needed instead of cutting them (for resale someday i guess)
Here is where I connected the white wire to the factory harness. Look for the green with red stripe. I didn't cut the harness open, instead I simply depinned the harness for future reasons and ease.
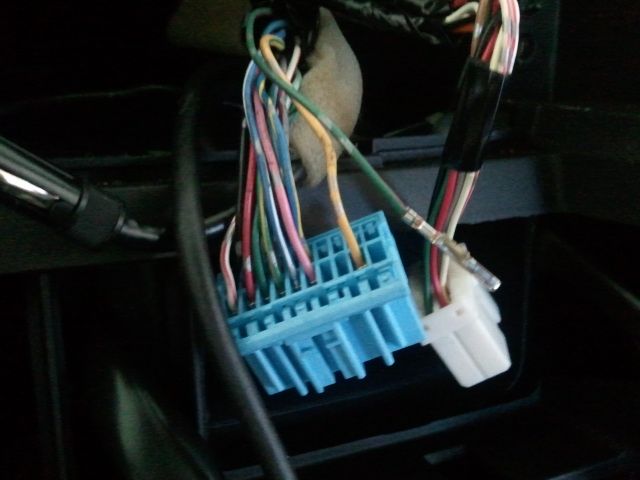
Then plugged it all back in but left the controller out so I could program it. You need to be able to hit the button.
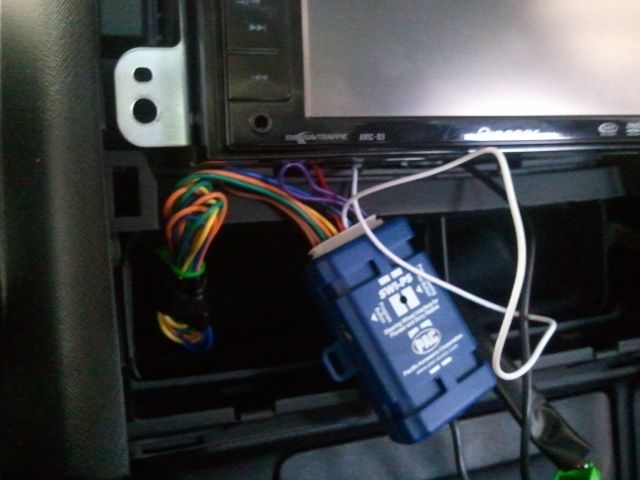
Now to program it following the directions how you want it and you're set. Then I tucked the box behind the stereo with all the wiring.
Now my steering wheel controls my radio again!
I must say installing it with sooo simple but programming it was frustrating the hell out of me until I finally figured it out. Now it seems so simple..
So I had to take my player back out and look for the 1/8 plug in the back
now connect the main PAC unit into the radio remote controller plug
now take your wiring harness and splice into your ground and power for your new wiring harness to the PAC controller
Then using electrical tape make it back to pretty and clean
Now we only need one remote wire. For my car it is the white wire. So I just bundled up the other wires not needed instead of cutting them (for resale someday i guess)
Here is where I connected the white wire to the factory harness. Look for the green with red stripe. I didn't cut the harness open, instead I simply depinned the harness for future reasons and ease.
Then plugged it all back in but left the controller out so I could program it. You need to be able to hit the button.
Now to program it following the directions how you want it and you're set. Then I tucked the box behind the stereo with all the wiring.
Now my steering wheel controls my radio again!
06-06-2012, 07:55 PM
#11
DC5/EP3 MOD :)
Thread Starter
I figured I would put this here instead of the DIY section but it could go both places...
So since the CR-V isn't a big modifier I don't see much for intakes. So I figured I would give the Hondata Airbox modification a try. People claim to see 2-5mpg increase with this modification. Also response is better and the sound is throatier.
So first you need to take out your stock airbox
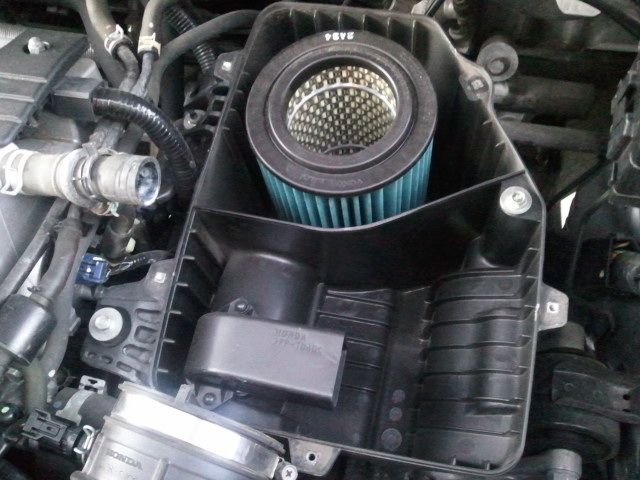
As you can see there is a fresh air tube coming from the grill into the air box but everything is blocked off and the air only goes into a small section of the box. So I started gutting it all out.
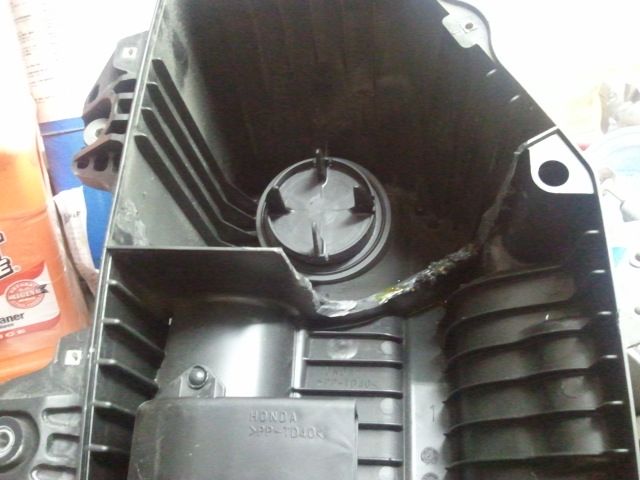
then opened up the fresh air tube section
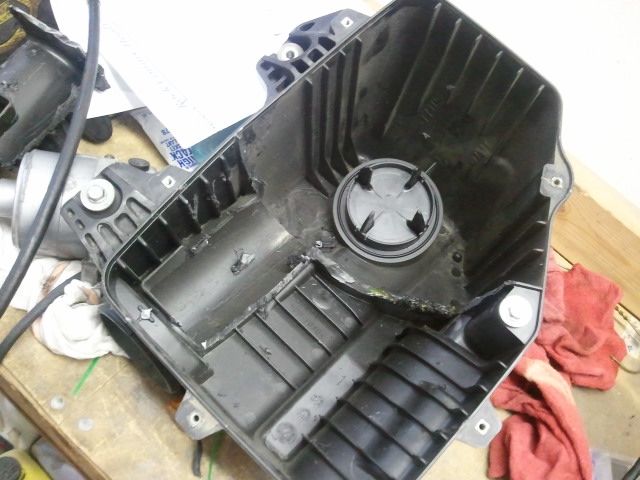
and then cleaned it up real nice
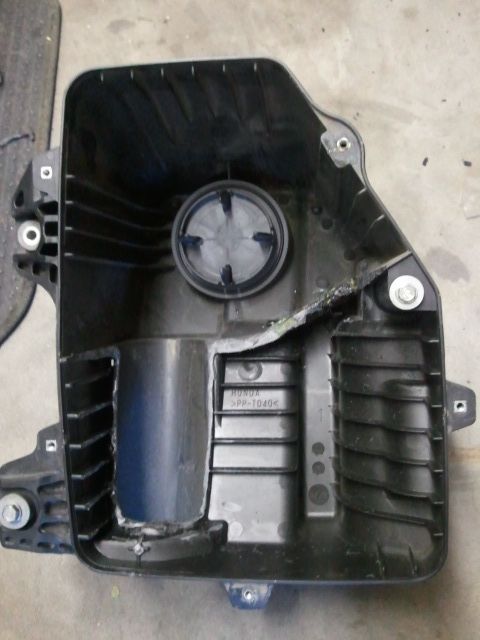
now there is more air volume going to the filter and it is still fresh air coming in from the grill tube. I'm exited to try it out and see what my next tank of gas gets me. I can definitely hear and feel a difference in reaction! But I also did a valve adjustment while I had the airbox out.
So since the CR-V isn't a big modifier I don't see much for intakes. So I figured I would give the Hondata Airbox modification a try. People claim to see 2-5mpg increase with this modification. Also response is better and the sound is throatier.
So first you need to take out your stock airbox
As you can see there is a fresh air tube coming from the grill into the air box but everything is blocked off and the air only goes into a small section of the box. So I started gutting it all out.
then opened up the fresh air tube section
and then cleaned it up real nice
now there is more air volume going to the filter and it is still fresh air coming in from the grill tube. I'm exited to try it out and see what my next tank of gas gets me. I can definitely hear and feel a difference in reaction! But I also did a valve adjustment while I had the airbox out.
06-14-2012, 12:53 PM
#12
DC5/EP3 MOD :)
Thread Starter
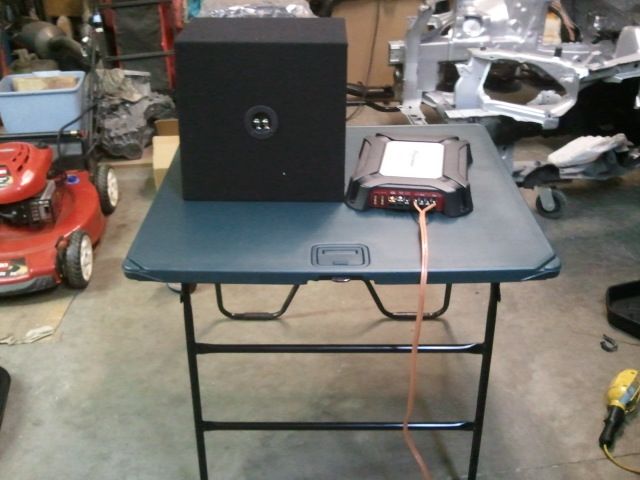
well I bought myself a new sound setup for the daily as a birthday present! Didn't need anything fancy or expensive but still wanted new and decent... so I went with a full Pioneer sub/amp combo to go with the Pioneer head unit. I am extremely pleased with the setup!
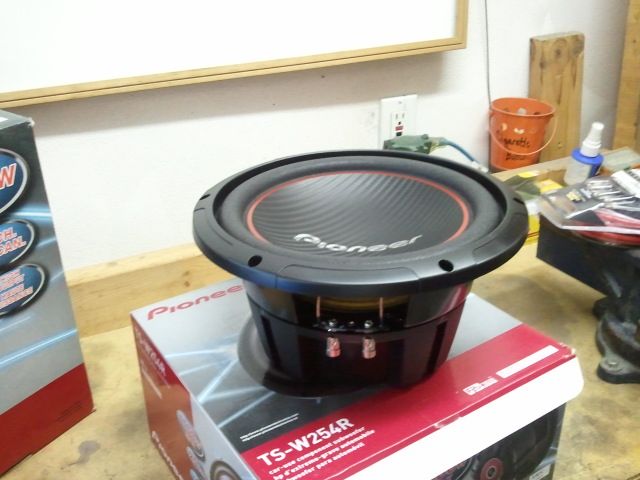
Here are the parts going in:
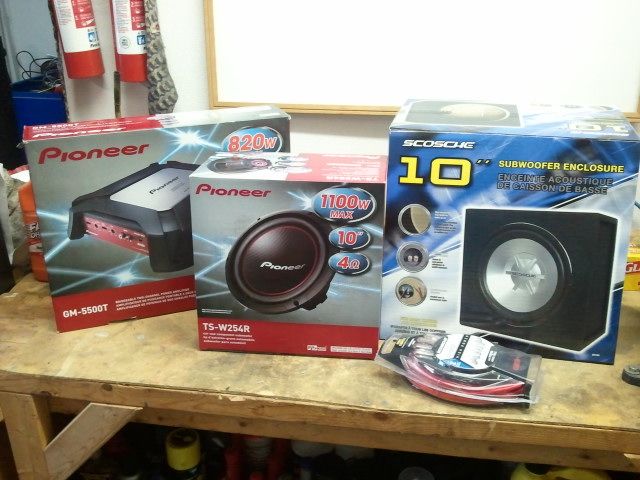
and a better shot of the subwoofer itself.
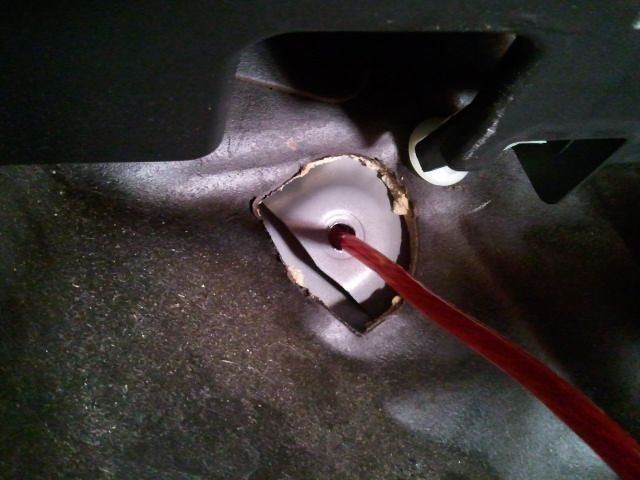
first thing I did was run my power wire.
I drilled a hole from the back side...
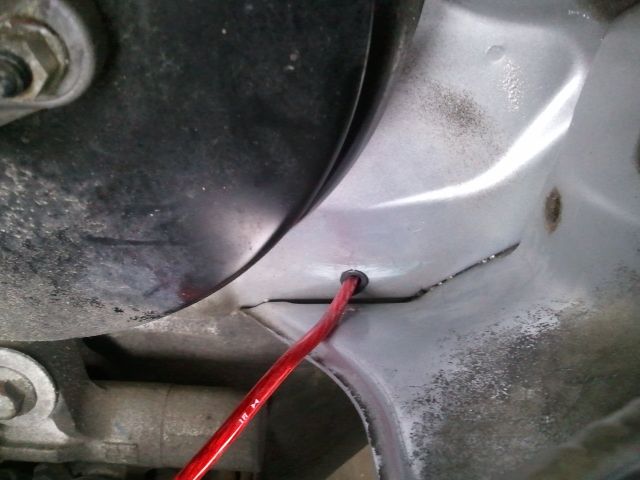

Here is where it comes in by the pedals
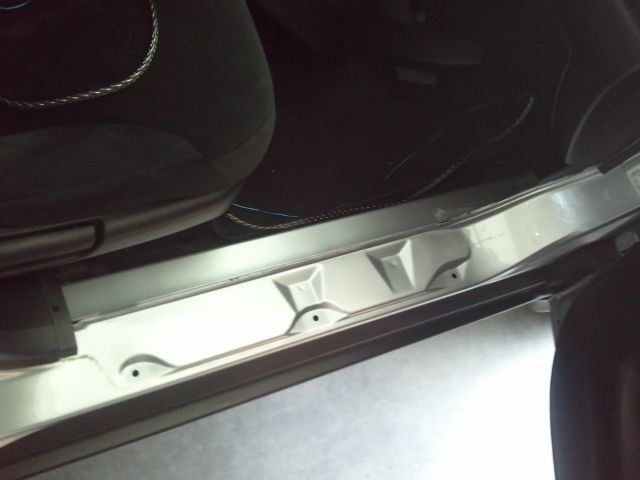
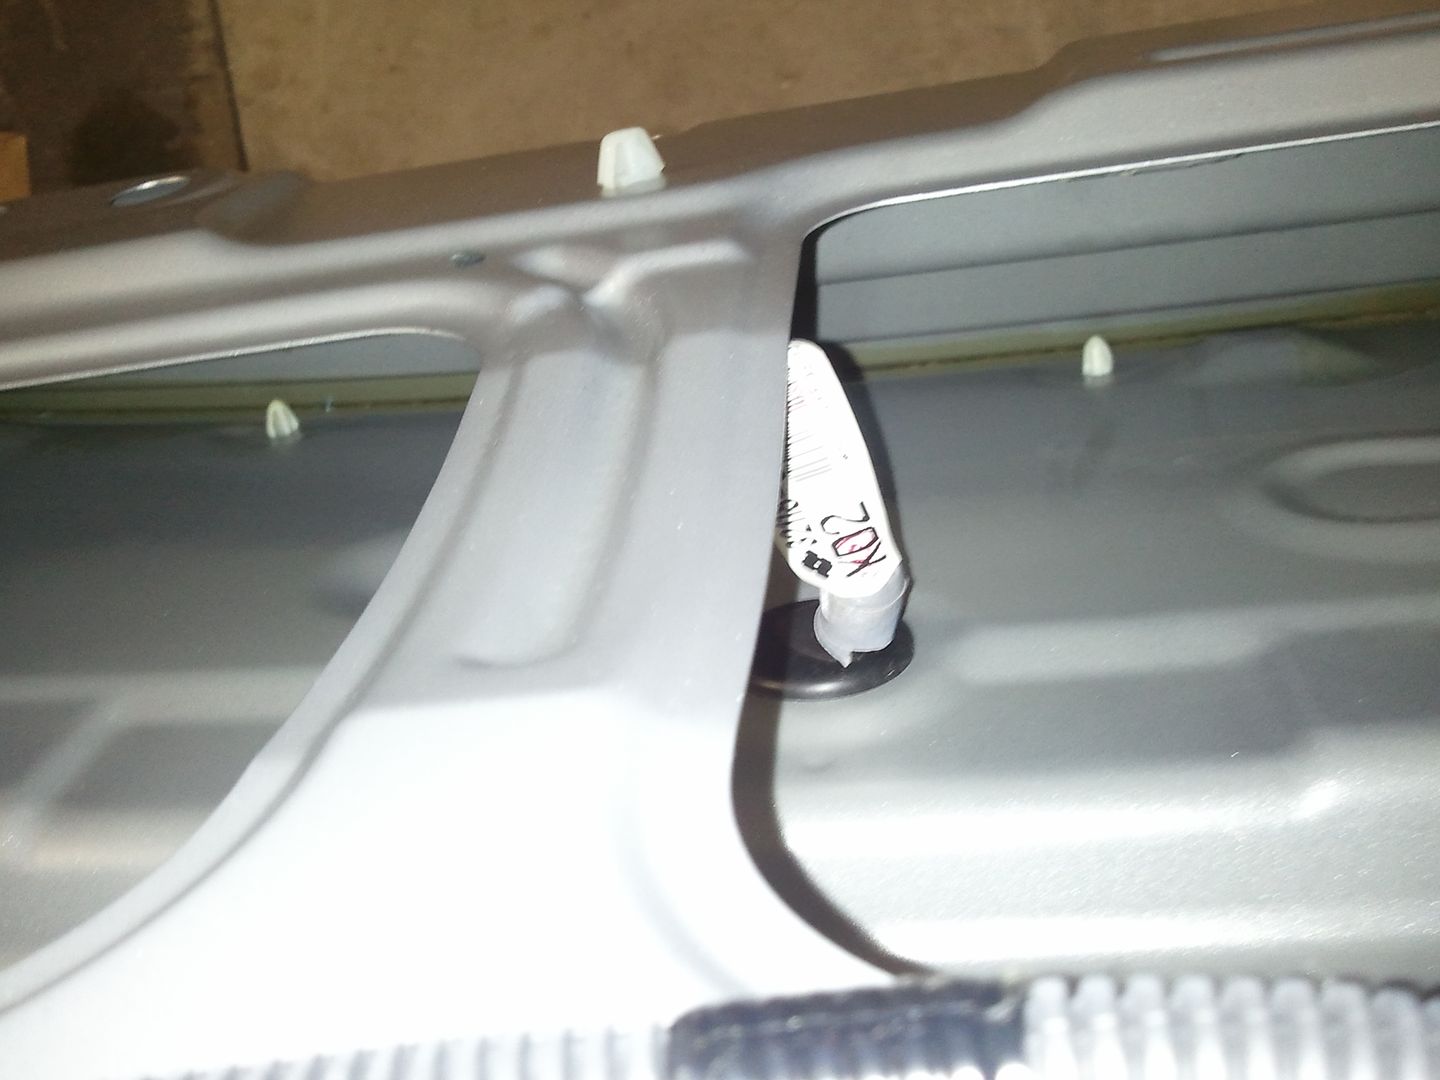
Then I took off the clip panels in the front and back over the door sills

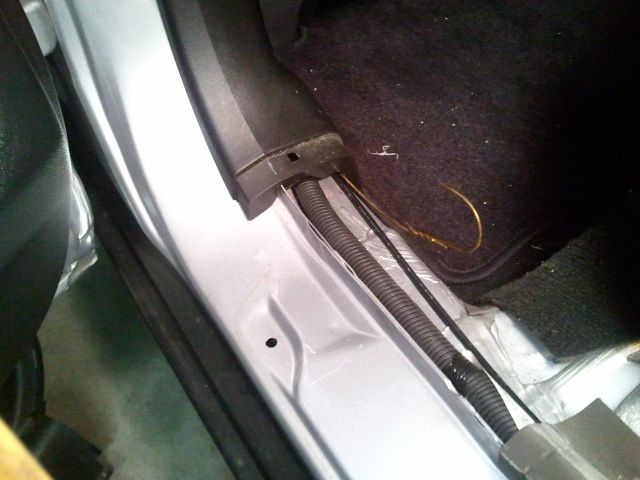
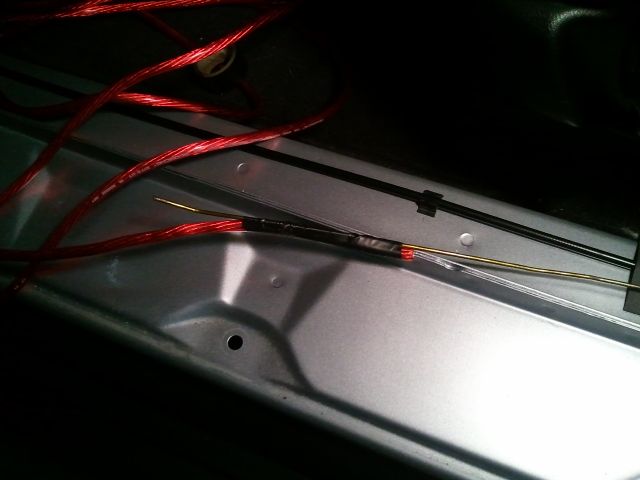
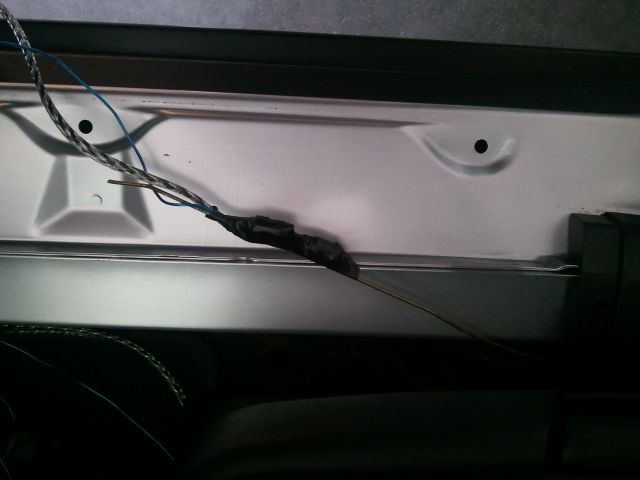
and then used a coat hanger to go from the back to the front... then connected the power wire to the hanger and pulled it through to the back
and pulled through

Now I did the same on the passenger side with the RCAs and the Remote wire.
and pulled through
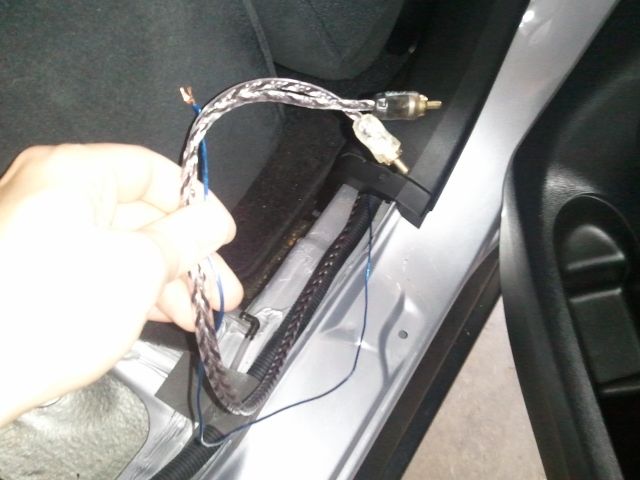
now put the sills back on and you see no wires

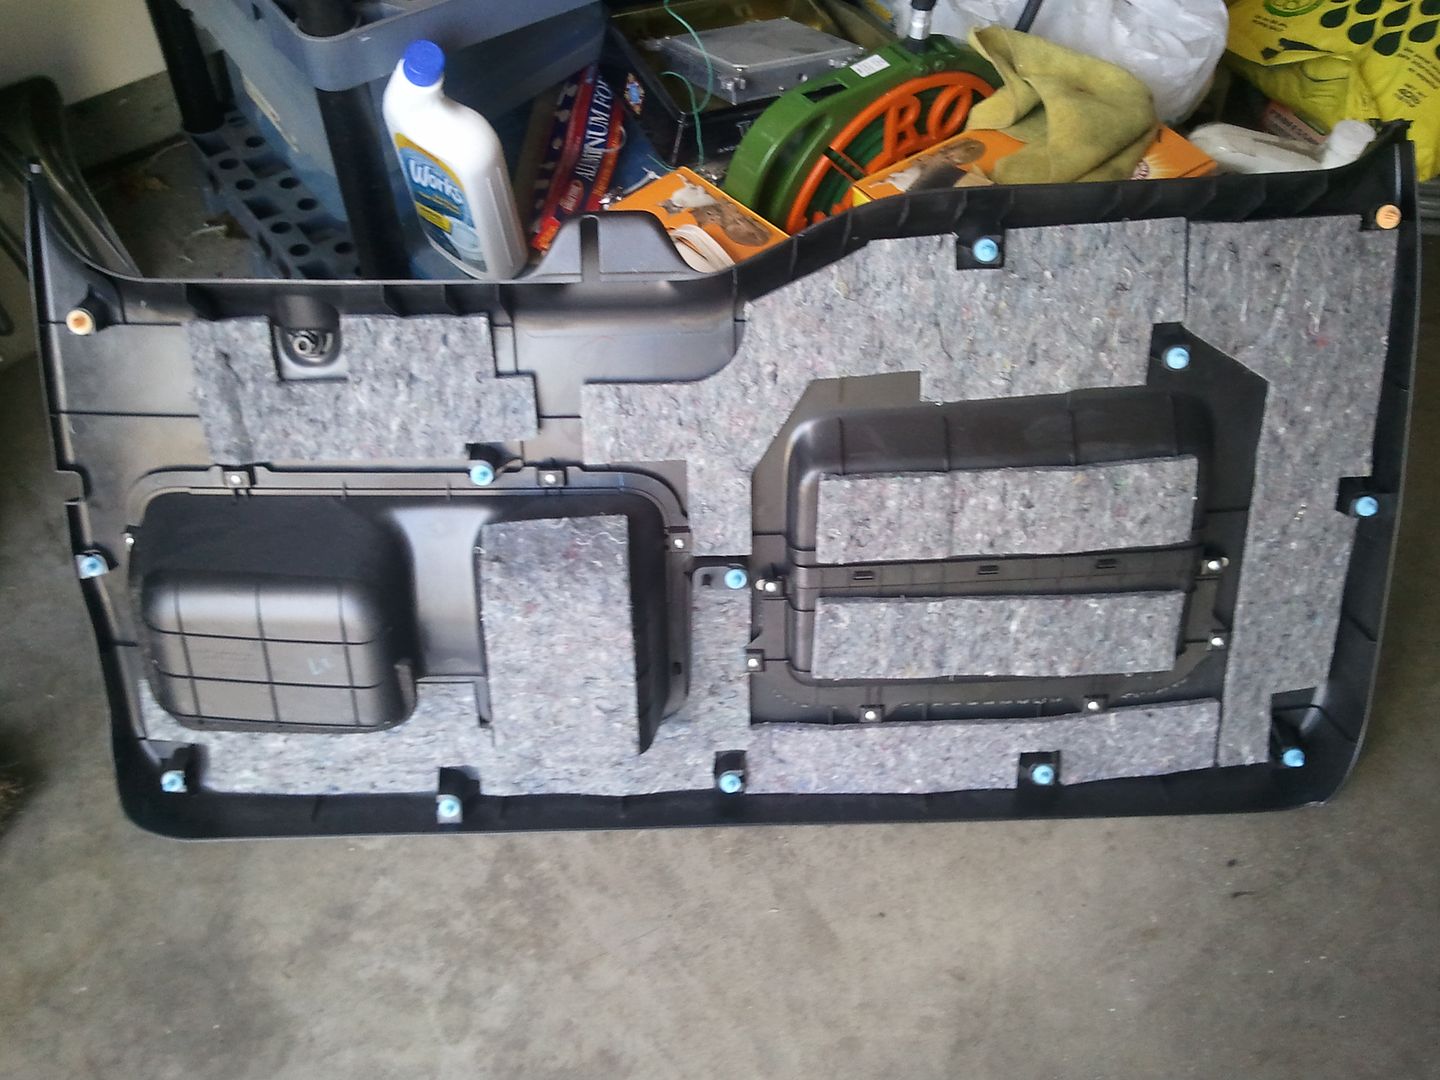
now to the back. I pulled out everything even the table... and I finally found a use for it!
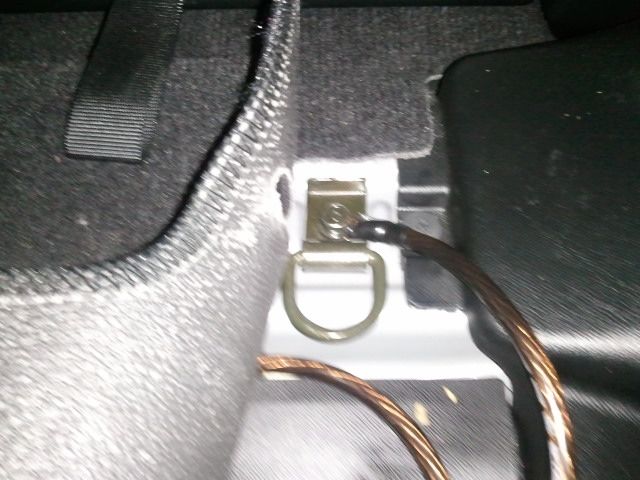
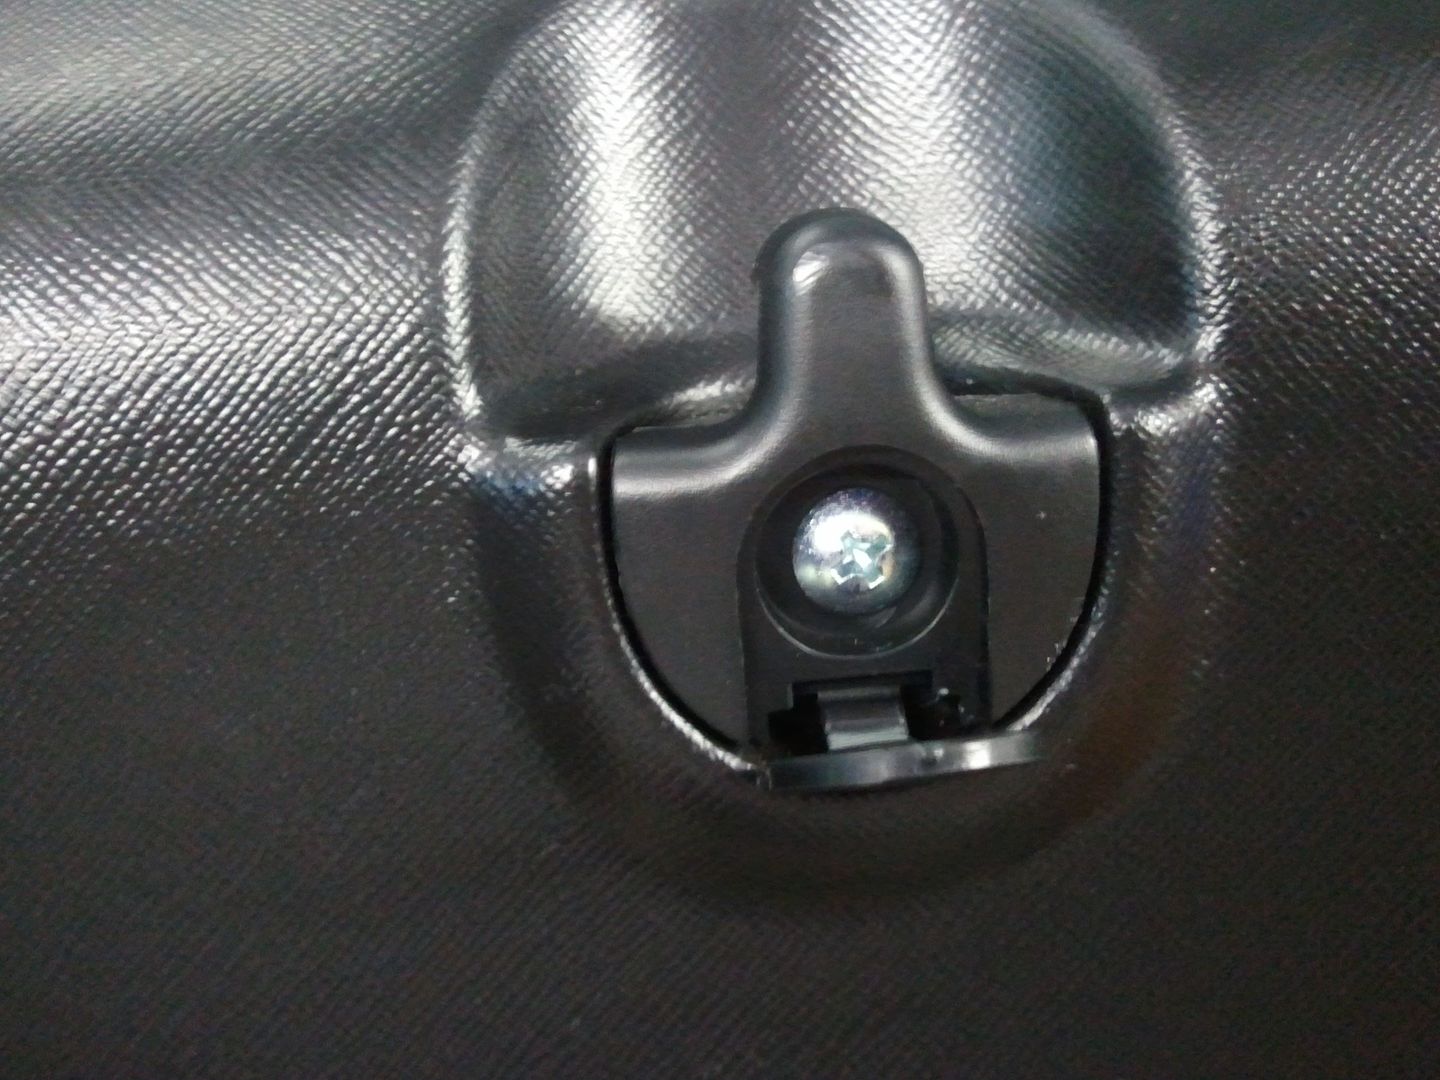
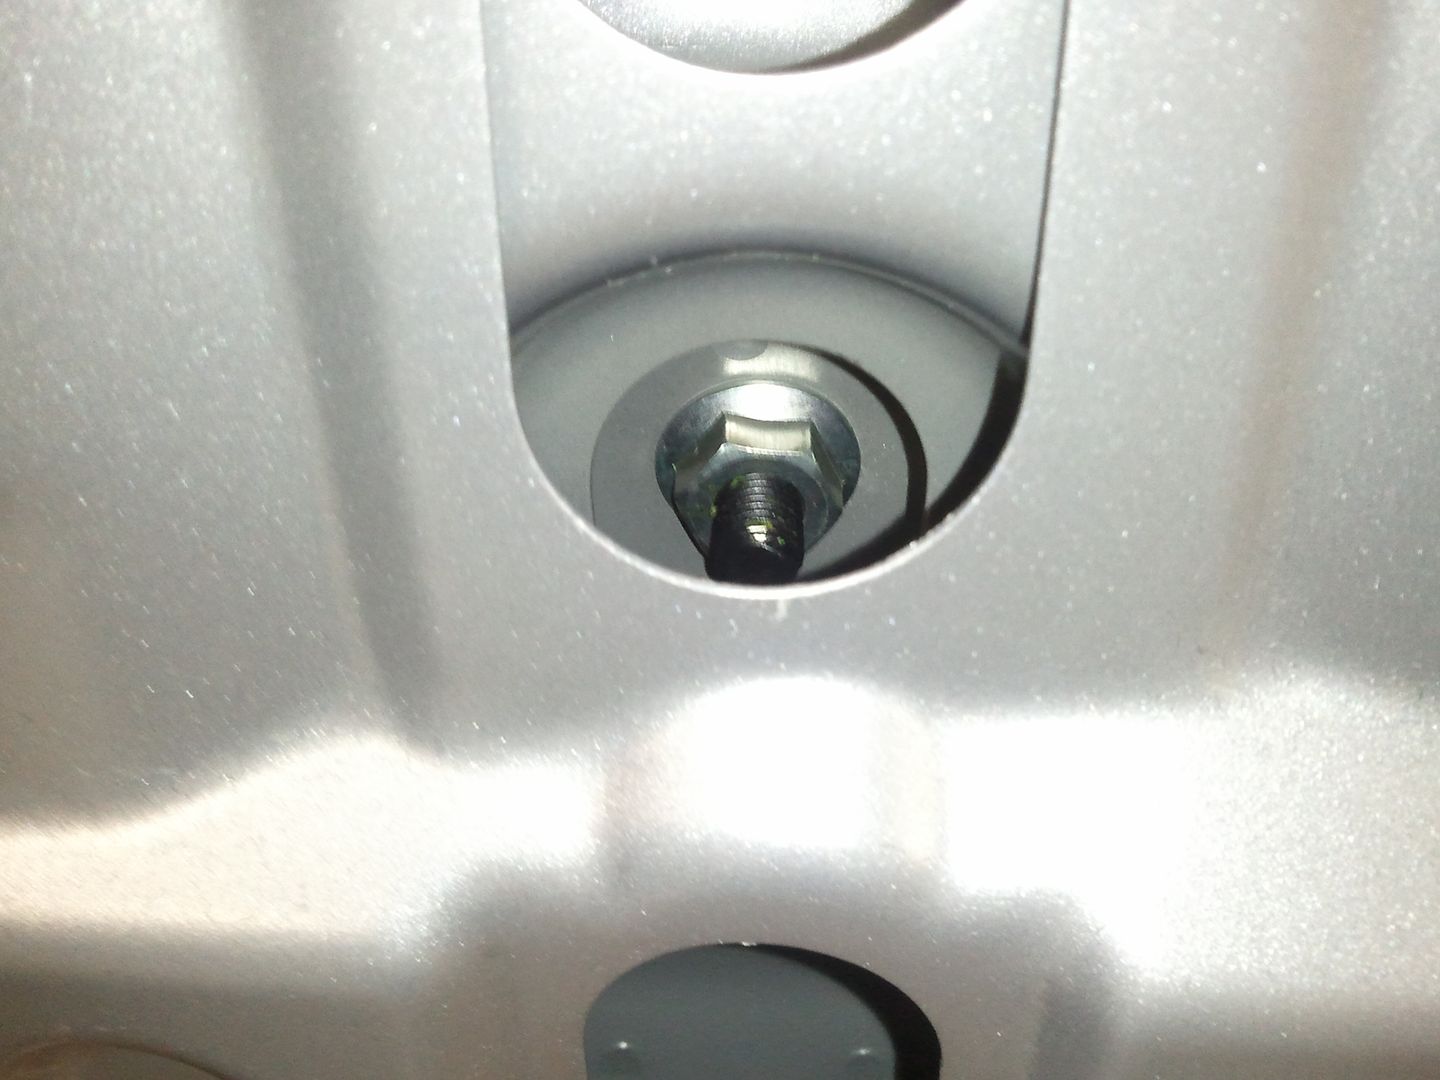
so first I found a ground. I used one of the only bolts I could find... the hooks
then found a place to mount my amp hidden underneath the table and protected
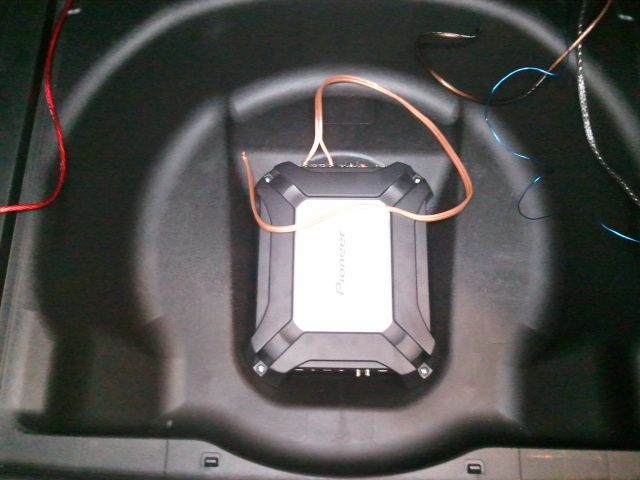
used four screws to bolt it down to the plastic and then wired the amp up
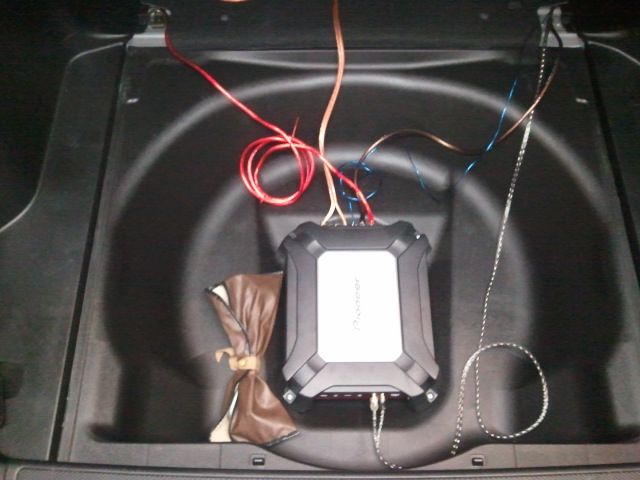
but it all together and boom!
clean and easy and remove-able if needed quickly!
Here are the parts going in:
and a better shot of the subwoofer itself.
first thing I did was run my power wire.
I drilled a hole from the back side...
Here is where it comes in by the pedals
Then I took off the clip panels in the front and back over the door sills
and then used a coat hanger to go from the back to the front... then connected the power wire to the hanger and pulled it through to the back
and pulled through
Now I did the same on the passenger side with the RCAs and the Remote wire.
and pulled through
now put the sills back on and you see no wires
now to the back. I pulled out everything even the table... and I finally found a use for it!
so first I found a ground. I used one of the only bolts I could find... the hooks
then found a place to mount my amp hidden underneath the table and protected
used four screws to bolt it down to the plastic and then wired the amp up
but it all together and boom!
clean and easy and remove-able if needed quickly!
07-12-2012, 03:31 AM
#13
DC5/EP3 MOD :)
Thread Starter
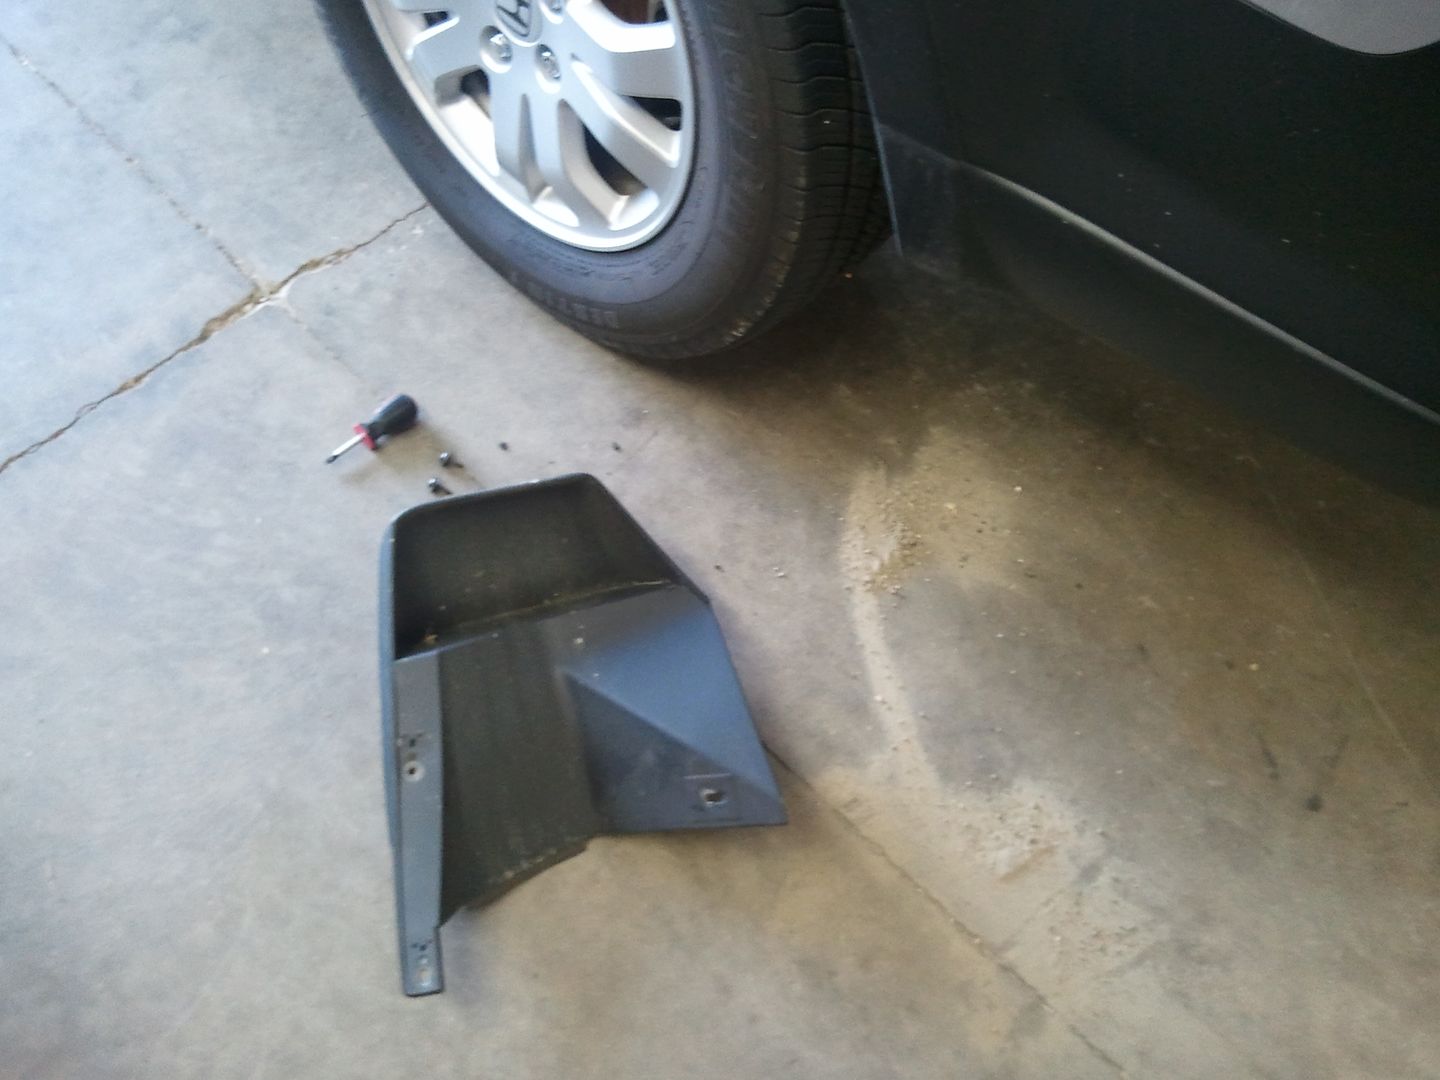
So I decided to paint the rear bumper and center piece too....
(sorry i must have went dumb using my camera as a lot of shots are blurry)
So here is what I started with
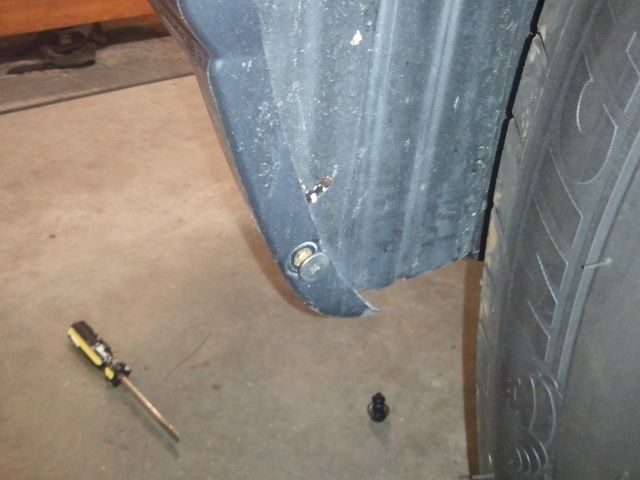
first thing remove the mudflaps
then the standard upper bumper screw

now pop off these caps to find two 10mm bolts
and other side has no caps but the two bolts

Also release the screw holding on the gas strut
and one pop clip underneath
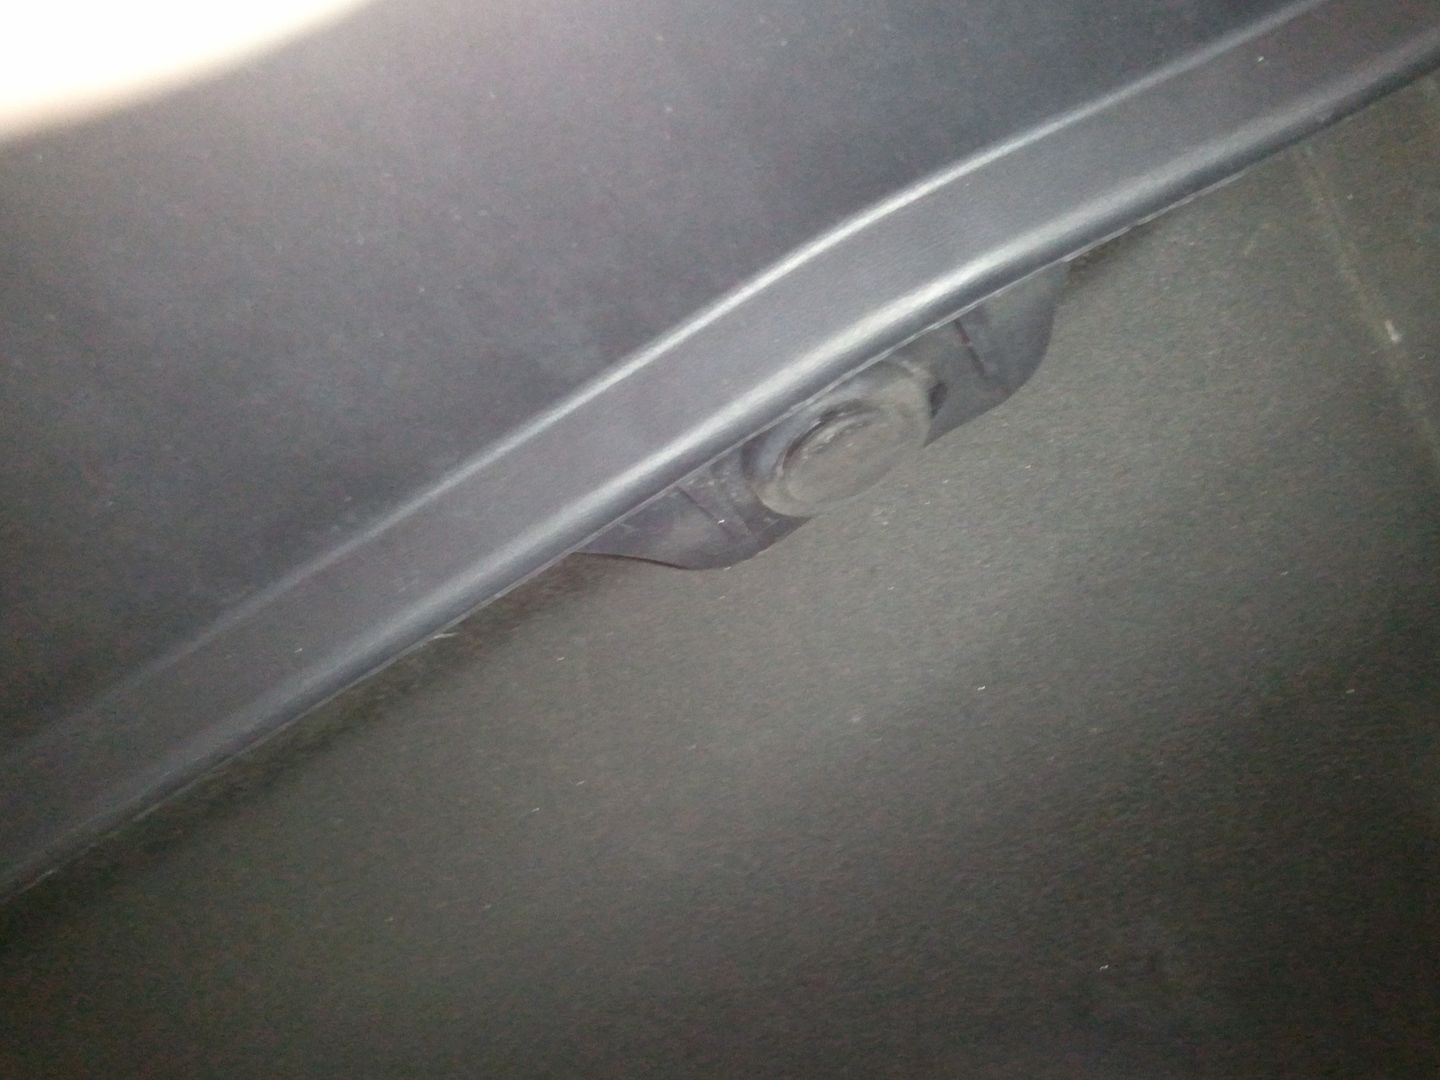
and start removing the bumper
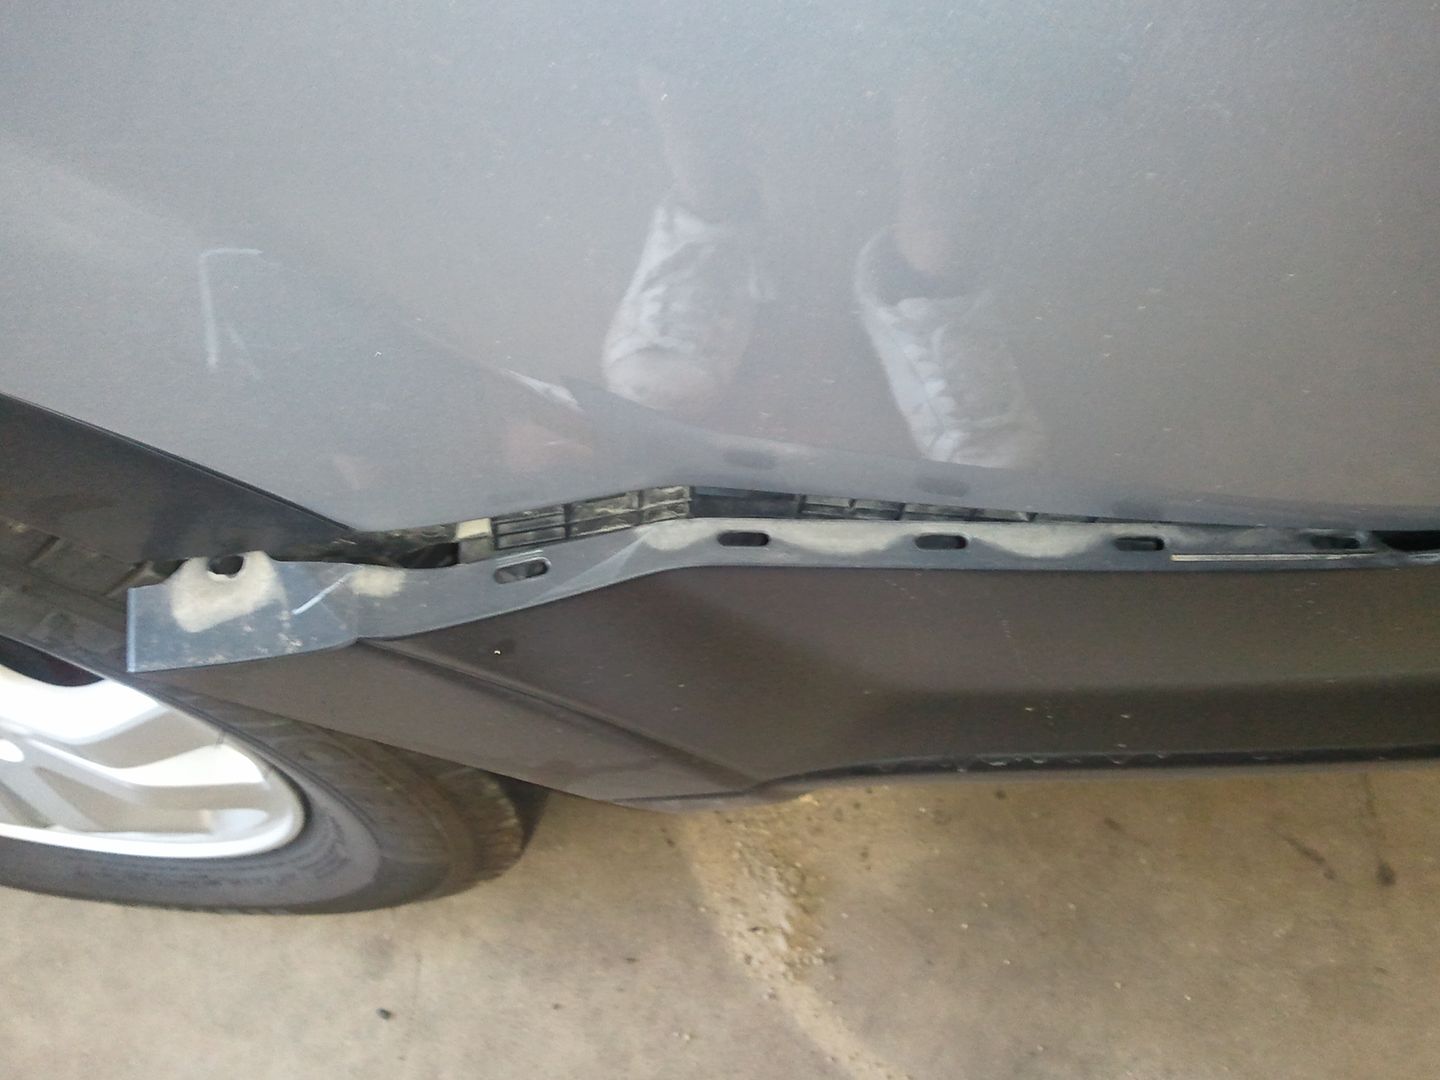
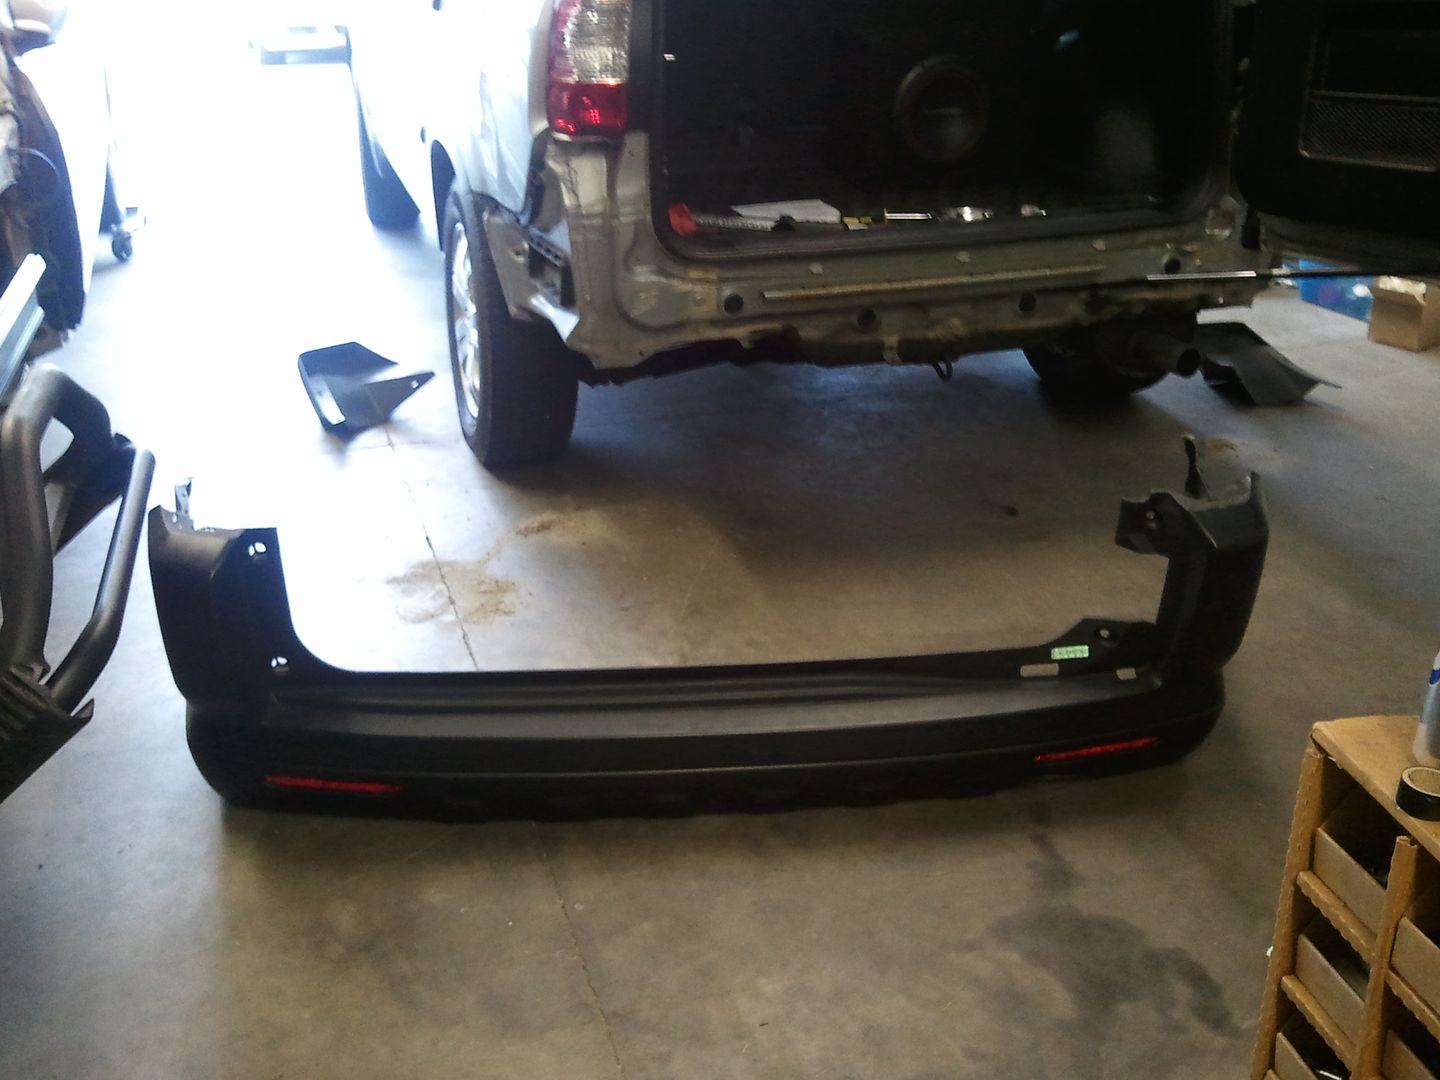
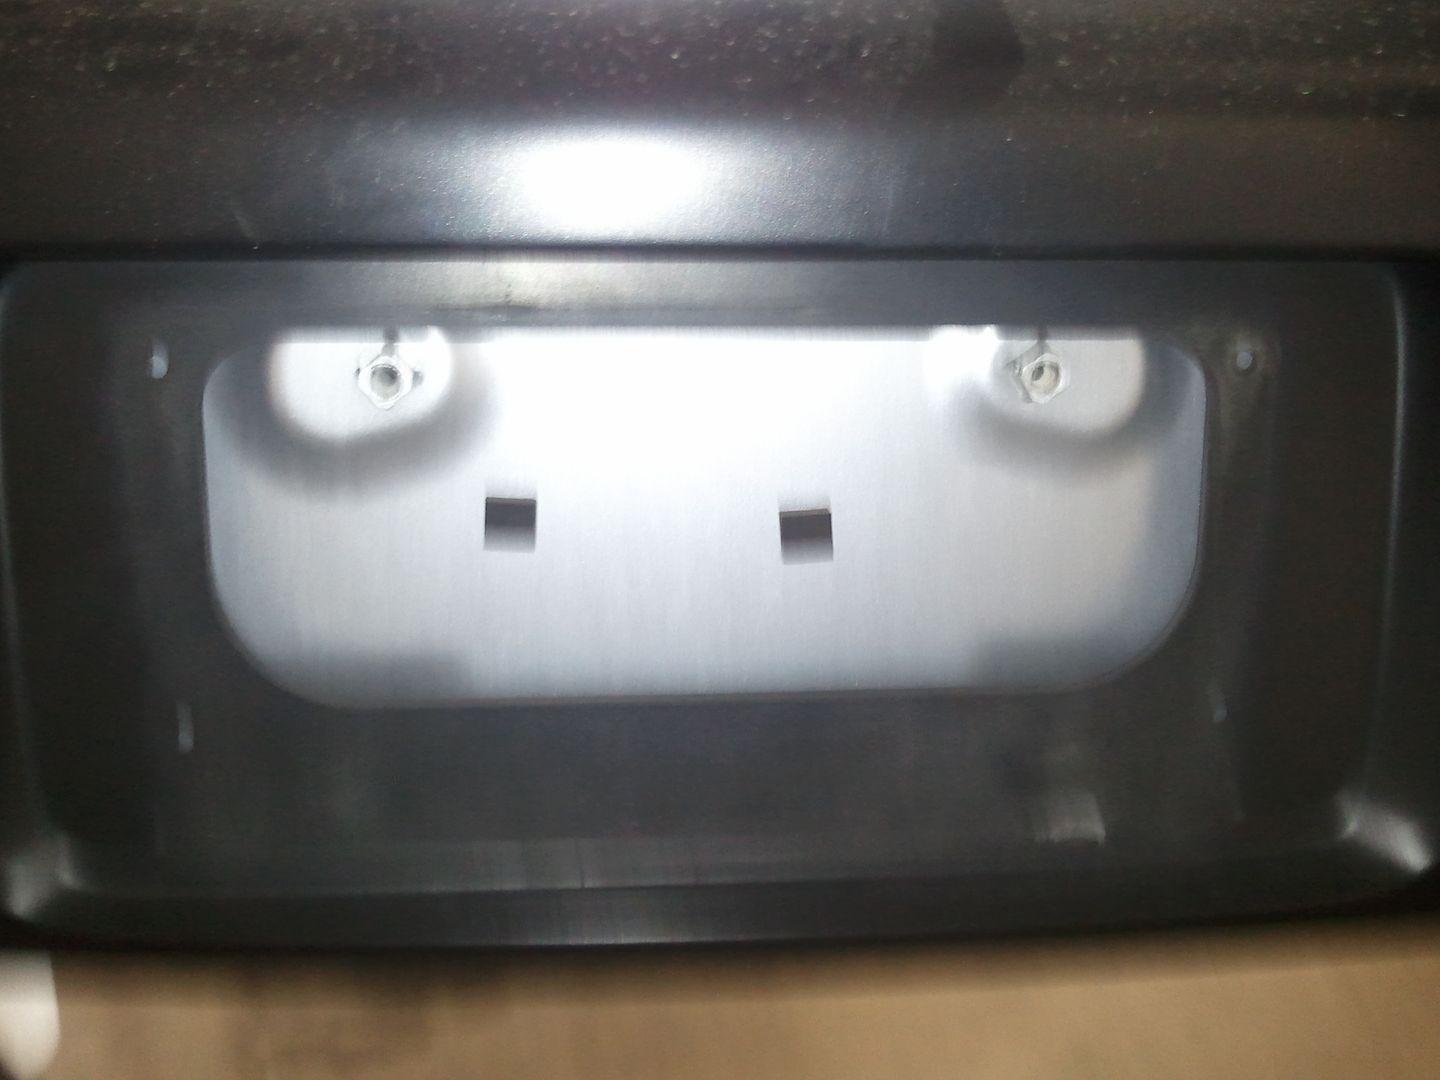
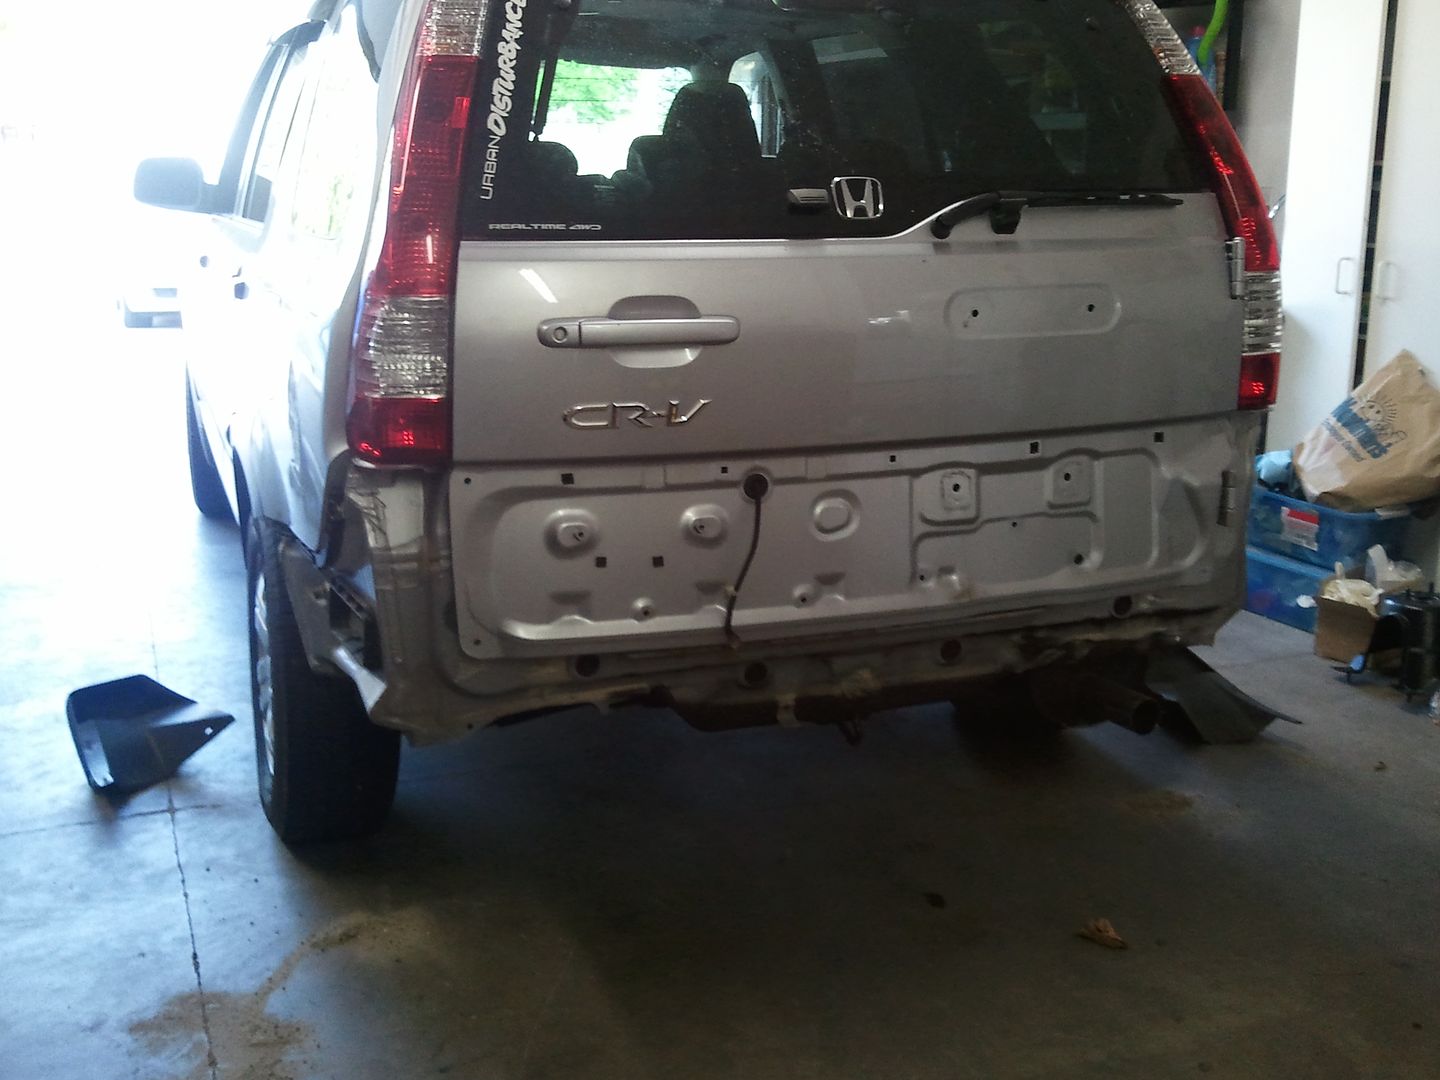
Now the middle piece sucks!! You pretty much have to get the door... start with the license plate bracket and light
now remove the spare tire

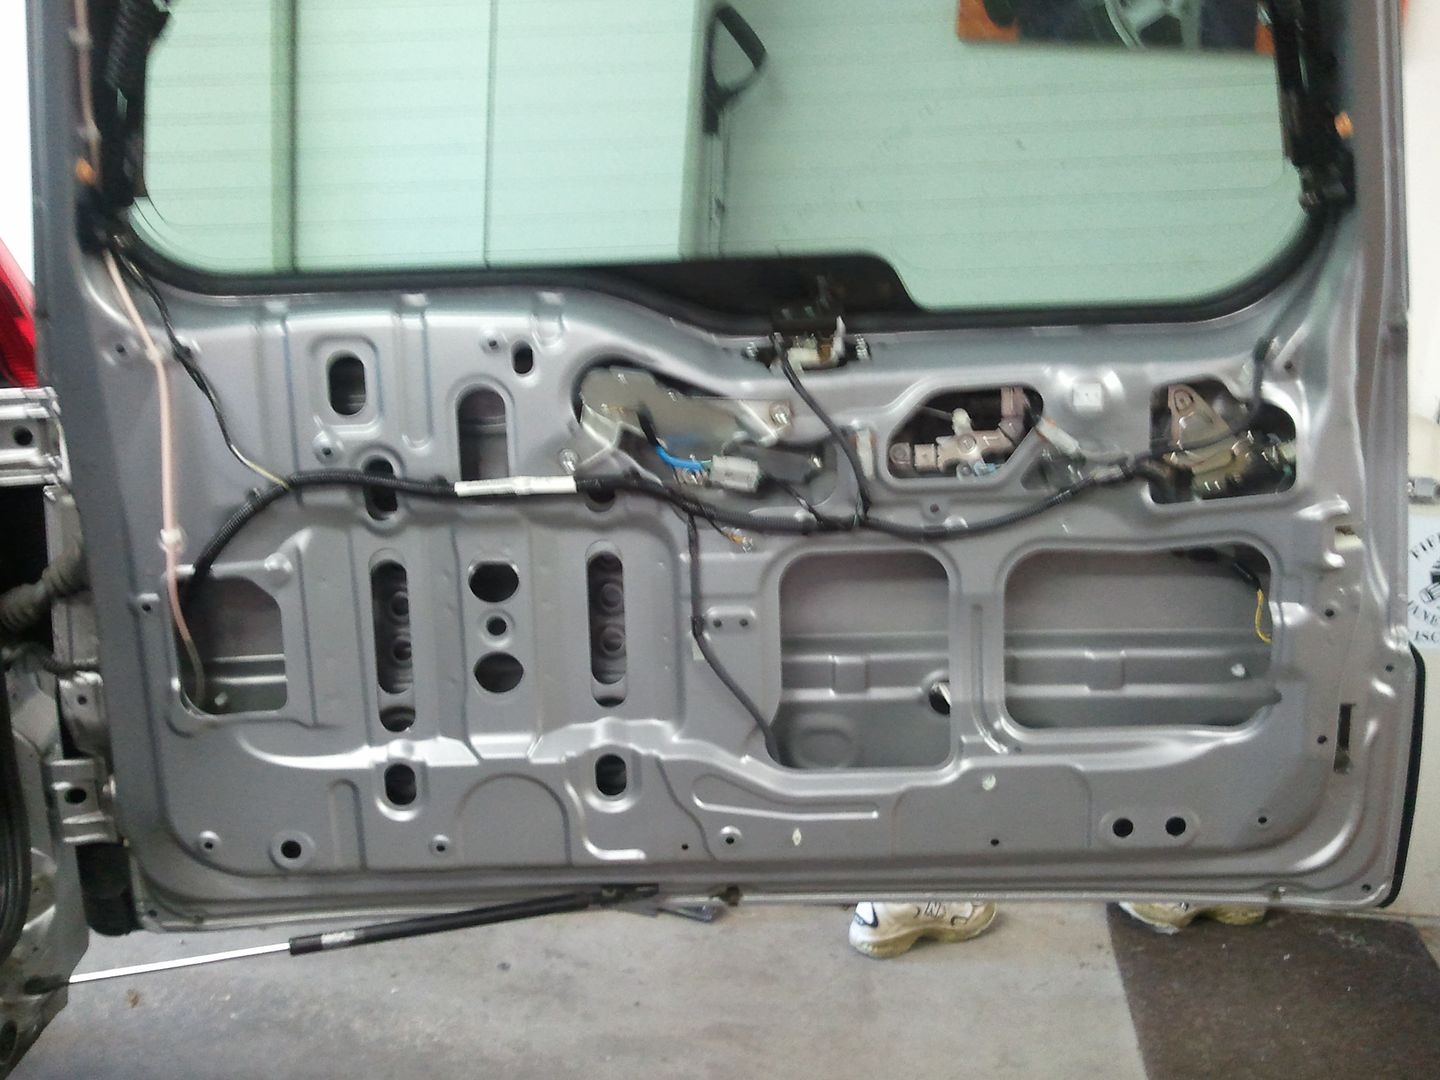
go inside the car remove the four 10mm bolts on each side

start unpoping all the trim top trim
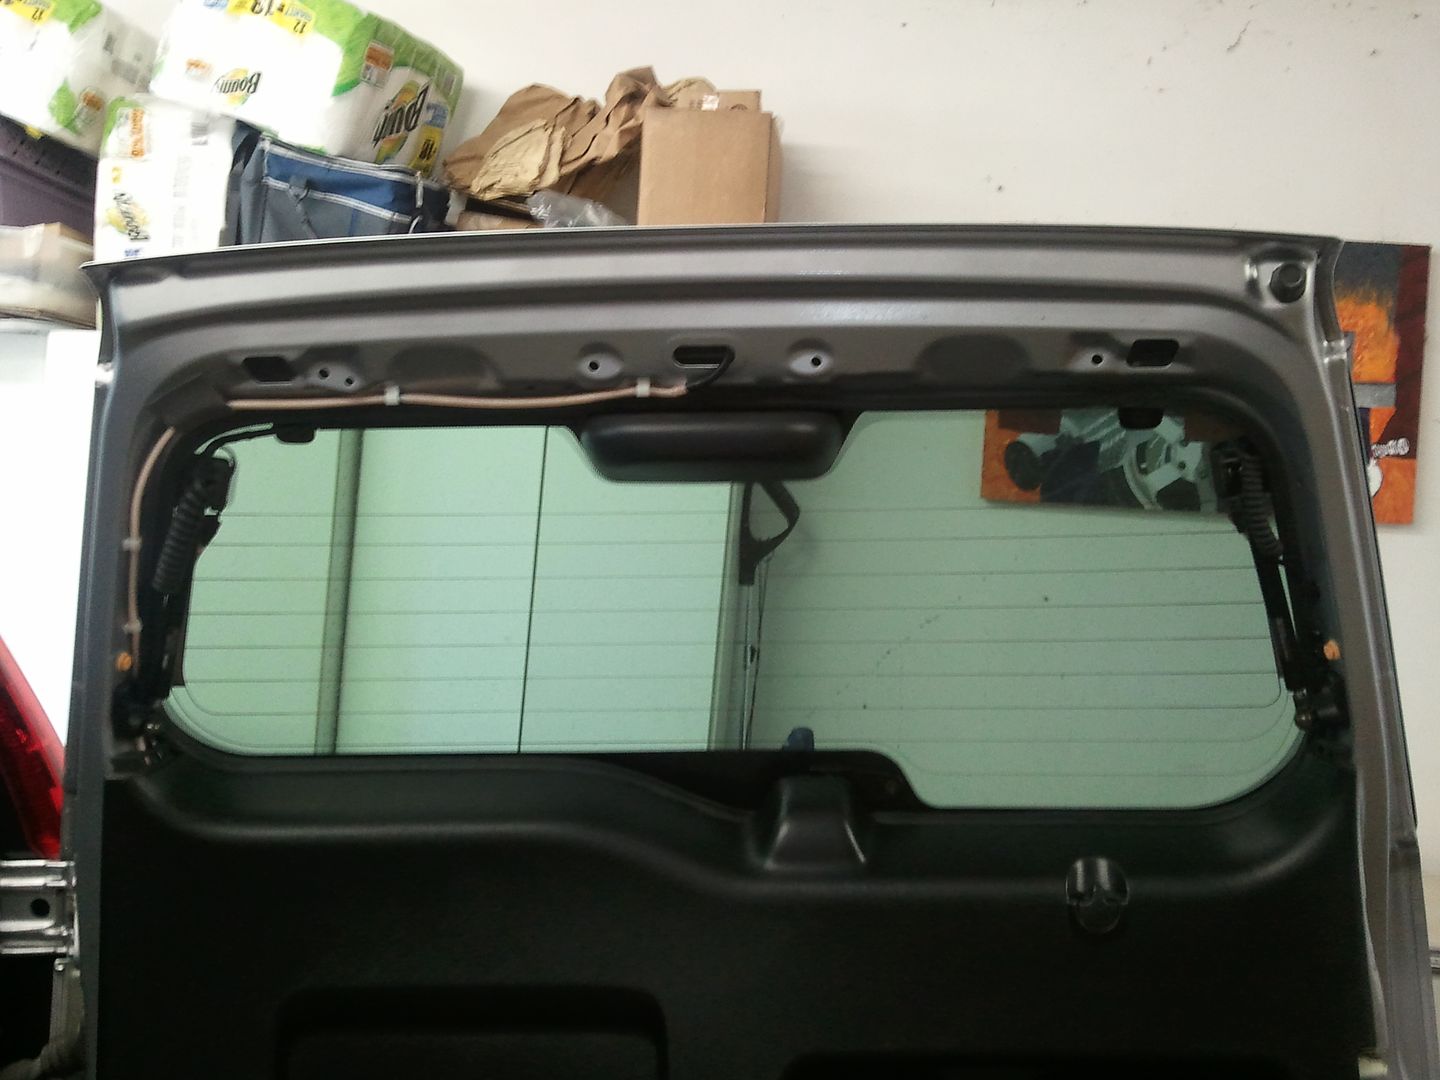
now the main trim
here is the inside of the door so you can see where they are
also there is one screw
now the four big bolts holding on the wheel support
Now all thats left are the push in tabs
and now you have no rear lol
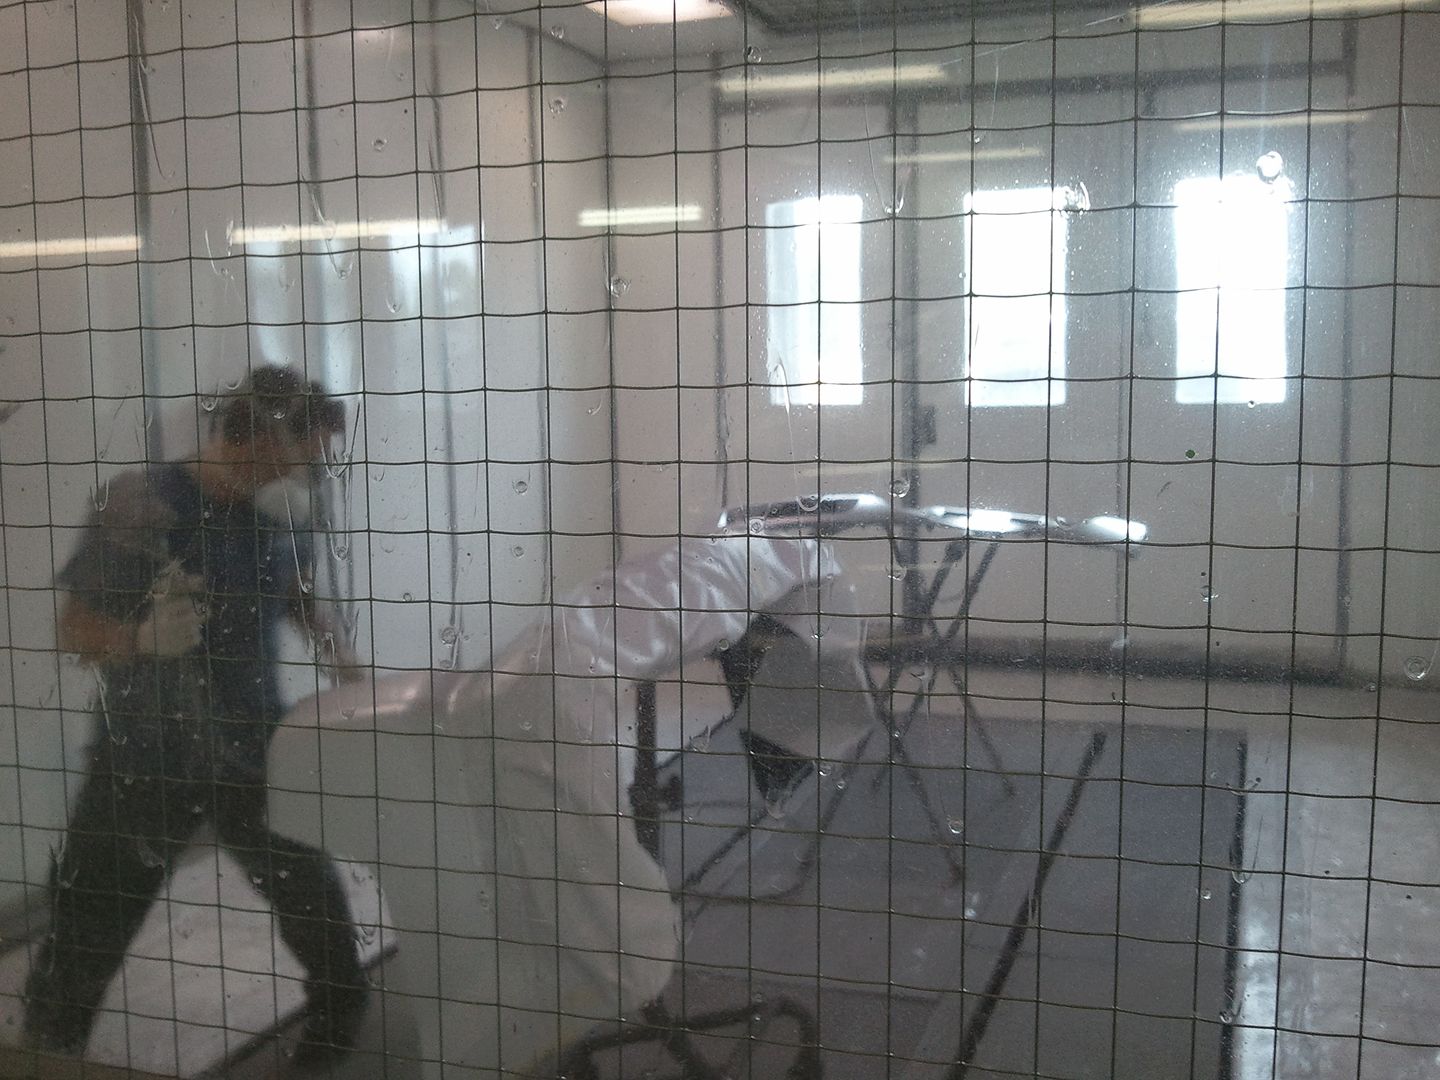
here it is getting painted
and finished product!!
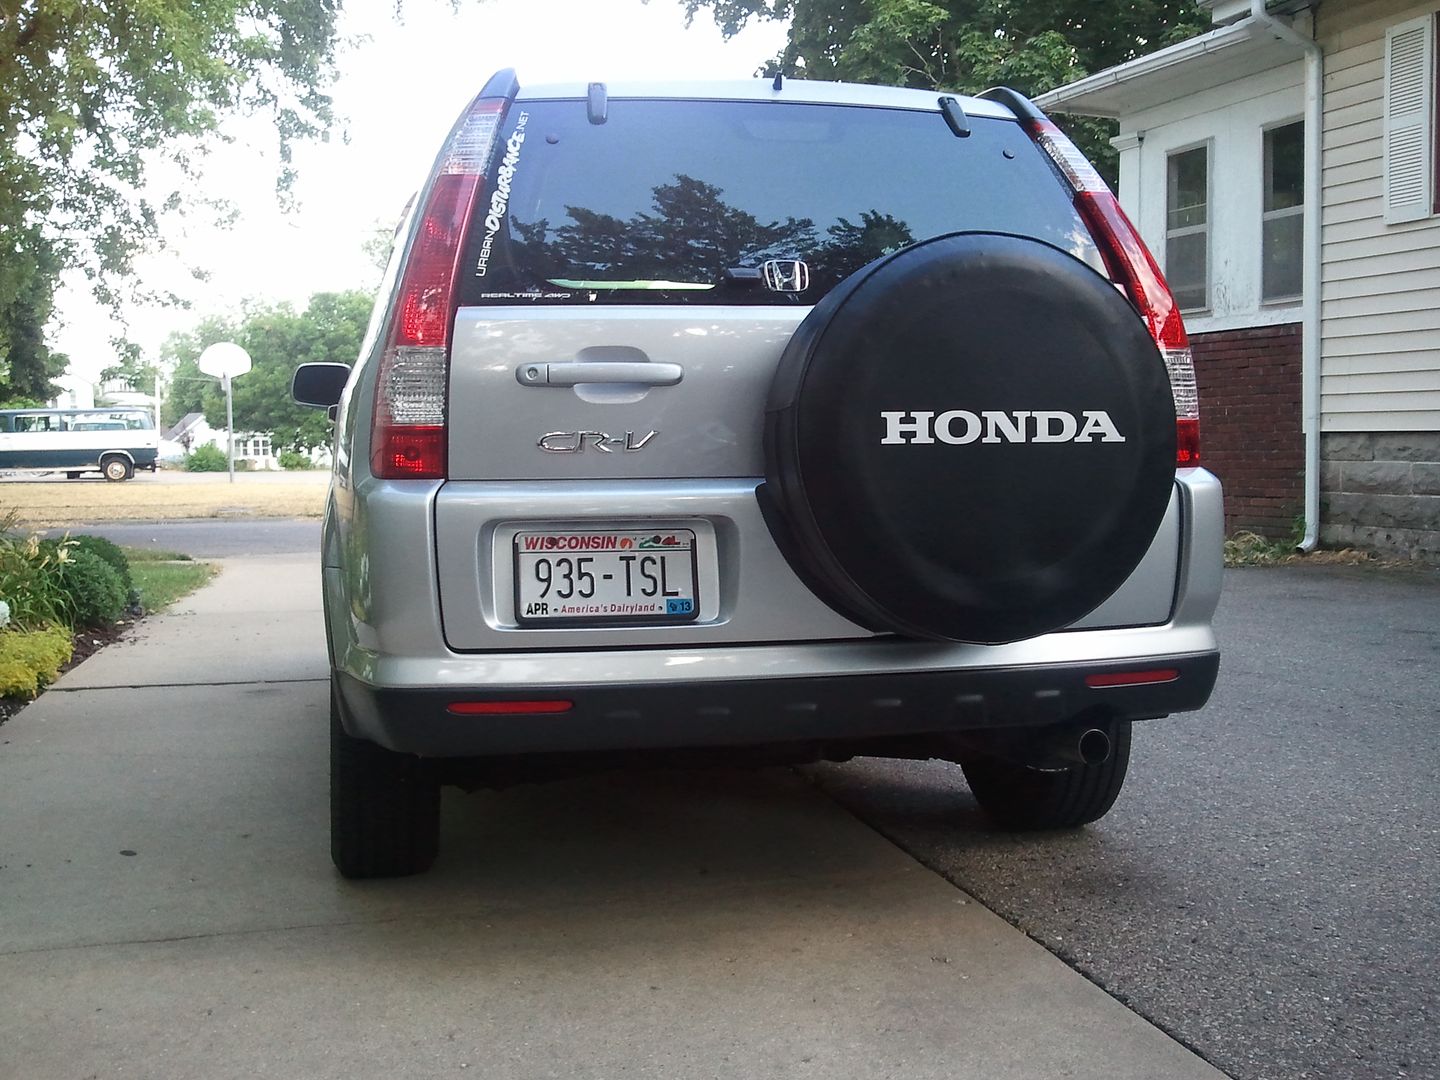
so much better than before!
(sorry i must have went dumb using my camera as a lot of shots are blurry)
So here is what I started with
first thing remove the mudflaps
then the standard upper bumper screw
now pop off these caps to find two 10mm bolts
and other side has no caps but the two bolts
Also release the screw holding on the gas strut
and one pop clip underneath
and start removing the bumper
Now the middle piece sucks!! You pretty much have to get the door... start with the license plate bracket and light
now remove the spare tire
go inside the car remove the four 10mm bolts on each side
start unpoping all the trim top trim
now the main trim
here is the inside of the door so you can see where they are
also there is one screw
now the four big bolts holding on the wheel support
Now all thats left are the push in tabs
and now you have no rear lol
here it is getting painted
and finished product!!
so much better than before!
 07-13-2012, 12:44 PM
#15
DC5/EP3 MOD :)
Thread Starter
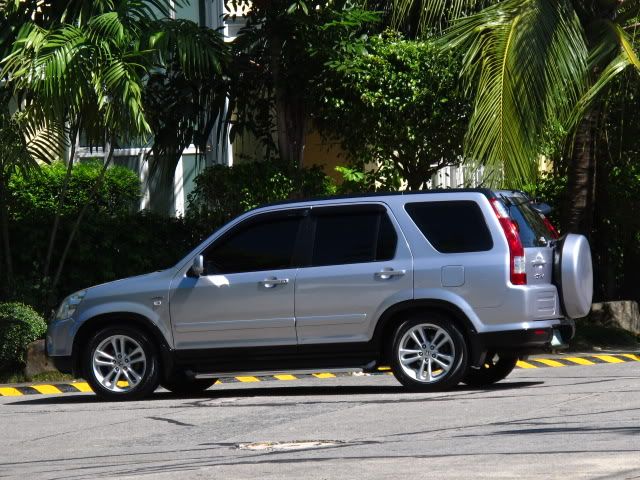
That is so funny! I literally just ordered side markers for my CR-V like I see you have AND my other car is sitting on those same SI wheels while I finish building it and we made jokes about putting them on my CR-V..... HOLY **** looks awesome! Are you lowered? On what if so
07-14-2012, 05:23 AM
#16
Honda-Tech Member
Join Date: Jun 2004
Posts: 573
Likes: 0
Received 0 Likes
on
0 Posts
The side markers actually come stock here in Asia. I think the 17" wheel is perfect. It adds a little bit of style but still retains its utility. Installed are the Tanabe NF210 lowering springs which brings it 1.5" closer to the ground.
07-14-2012, 07:34 AM
#19
Honda-Tech Member
07-17-2012, 06:11 PM
#20
DC5/EP3 MOD :)
Thread Starter
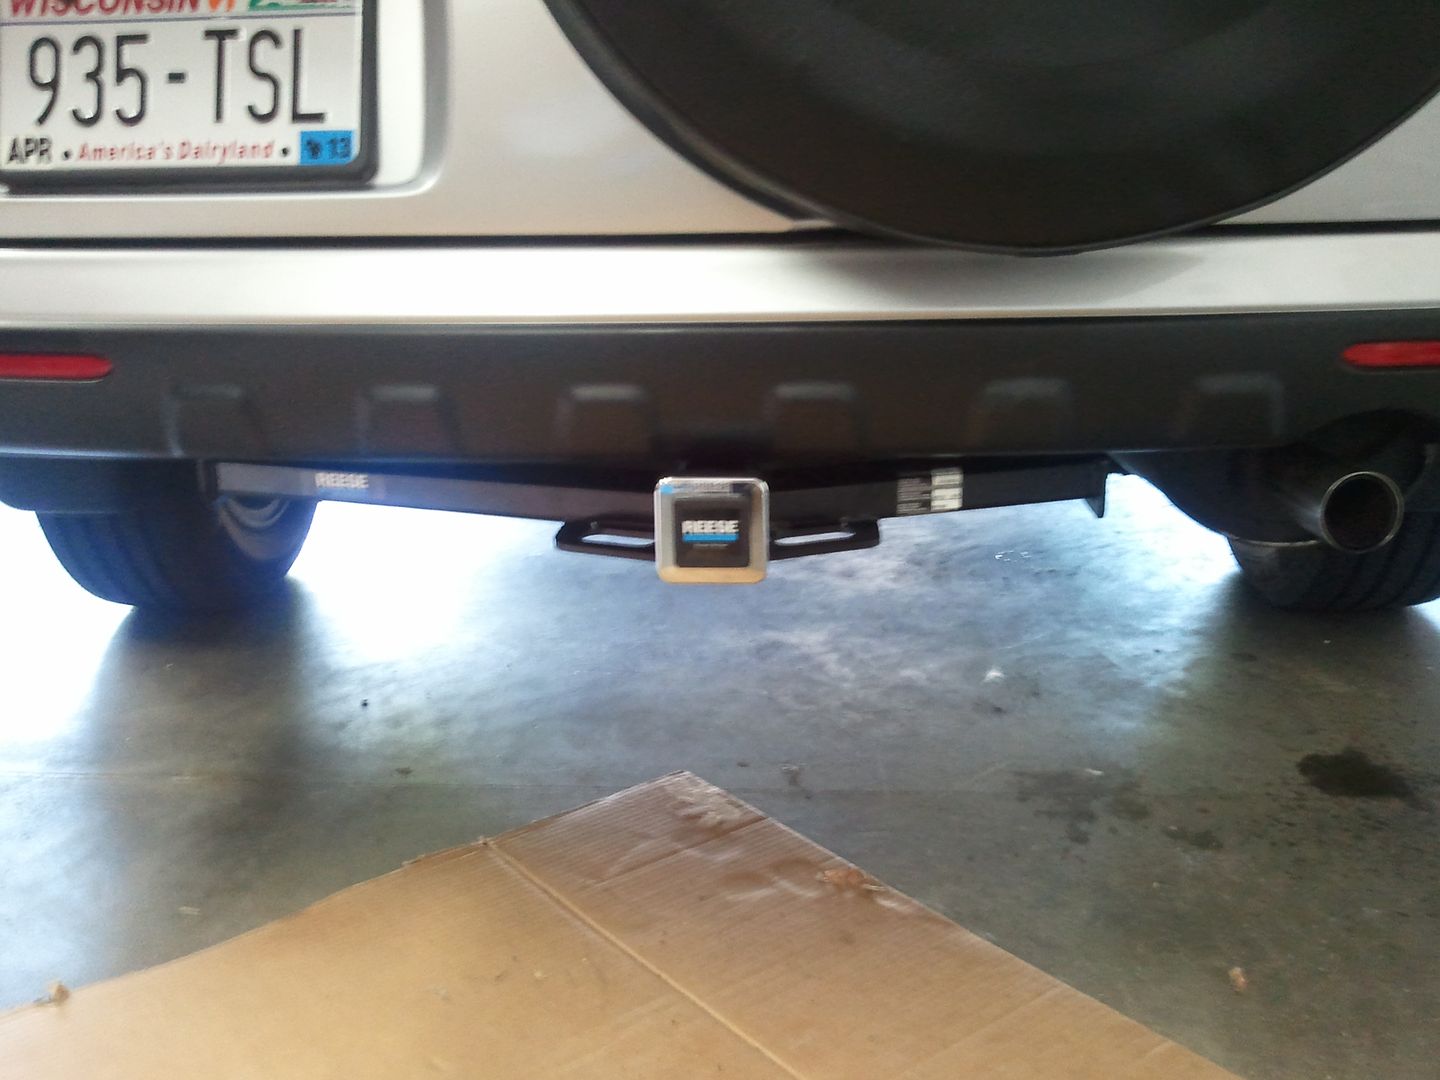
Got a new toy for the CR-V
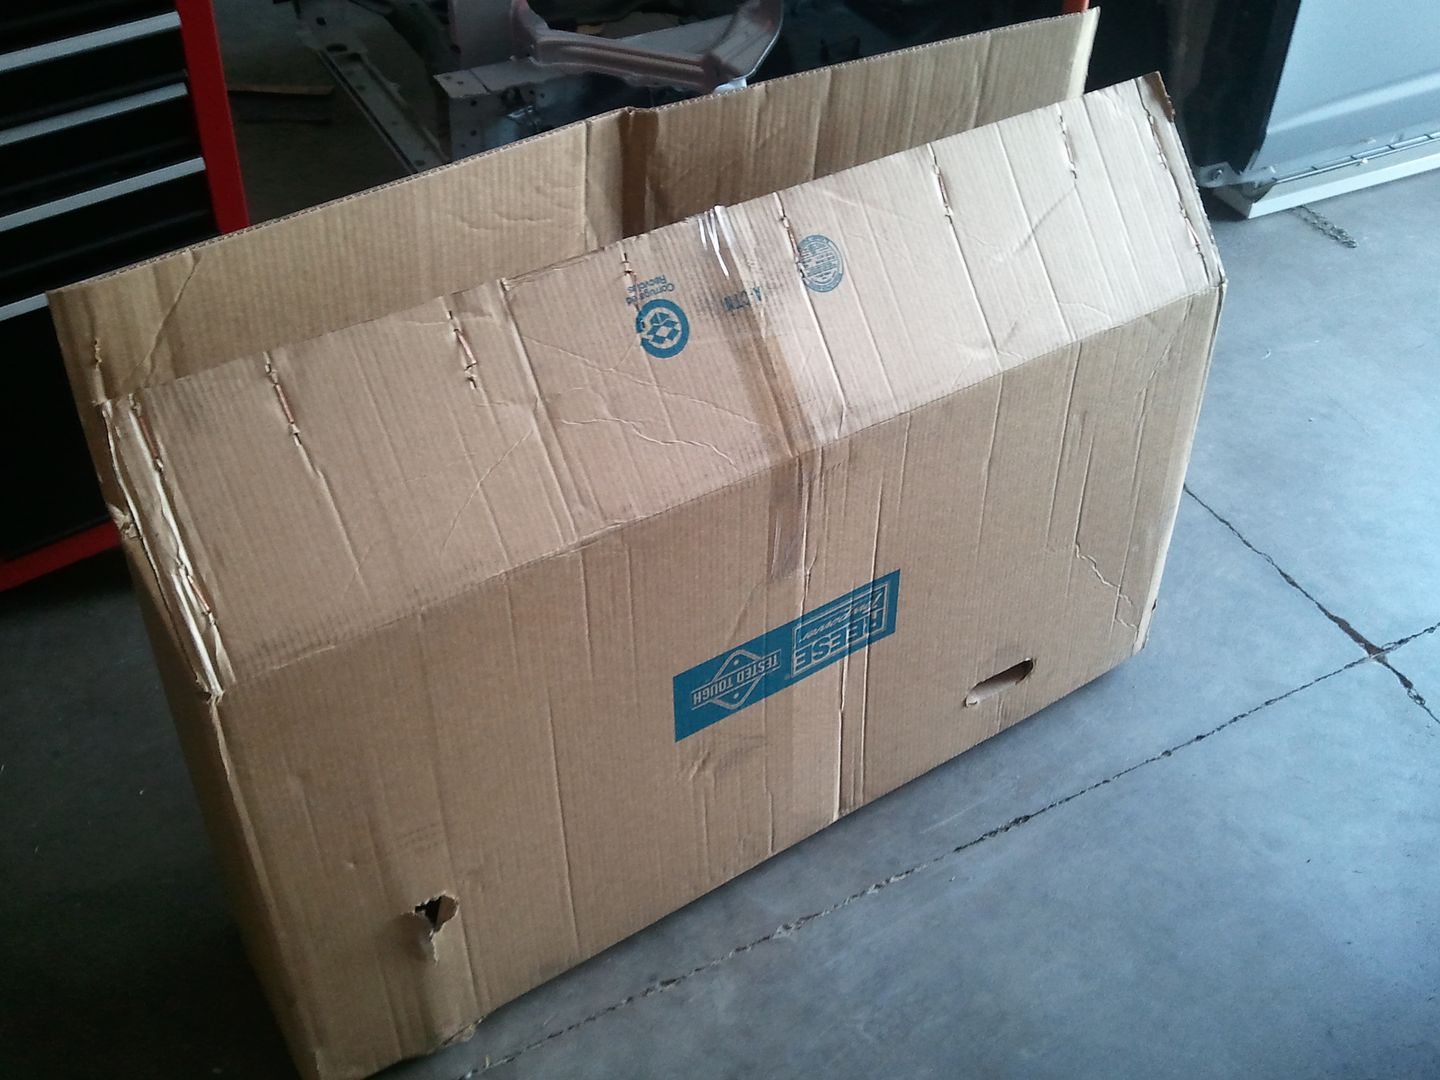
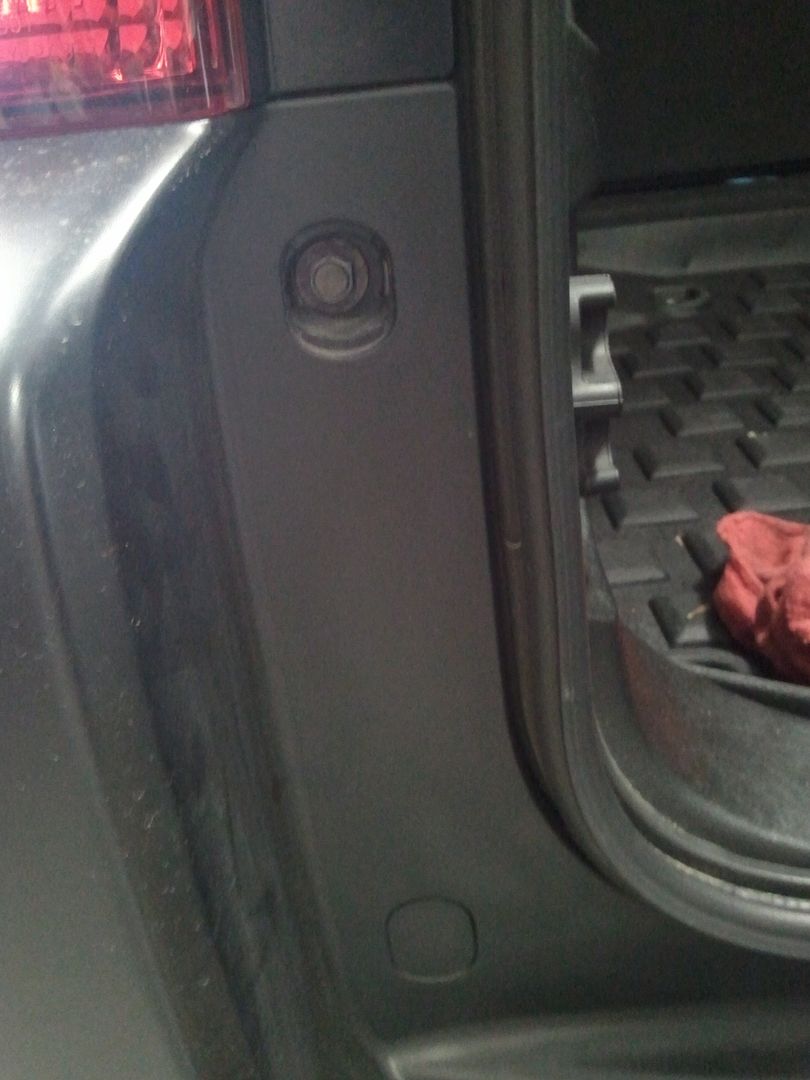
Reese Class III trailer hitch
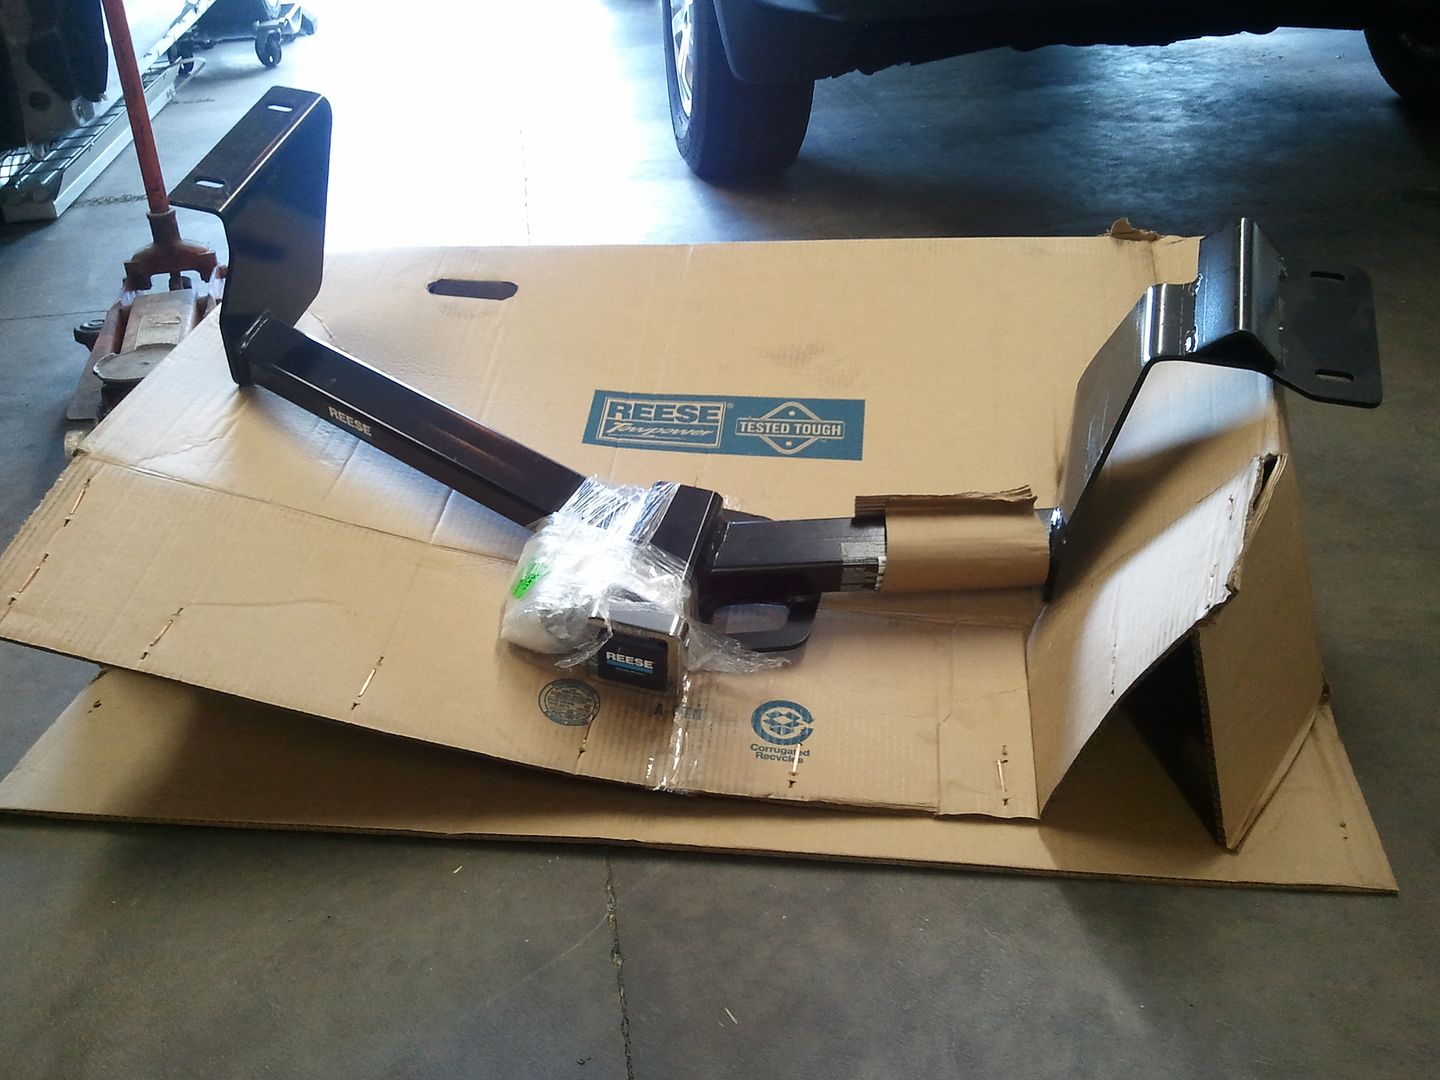
So lets get to installation! I bought the direct bolt kit which was really nice!
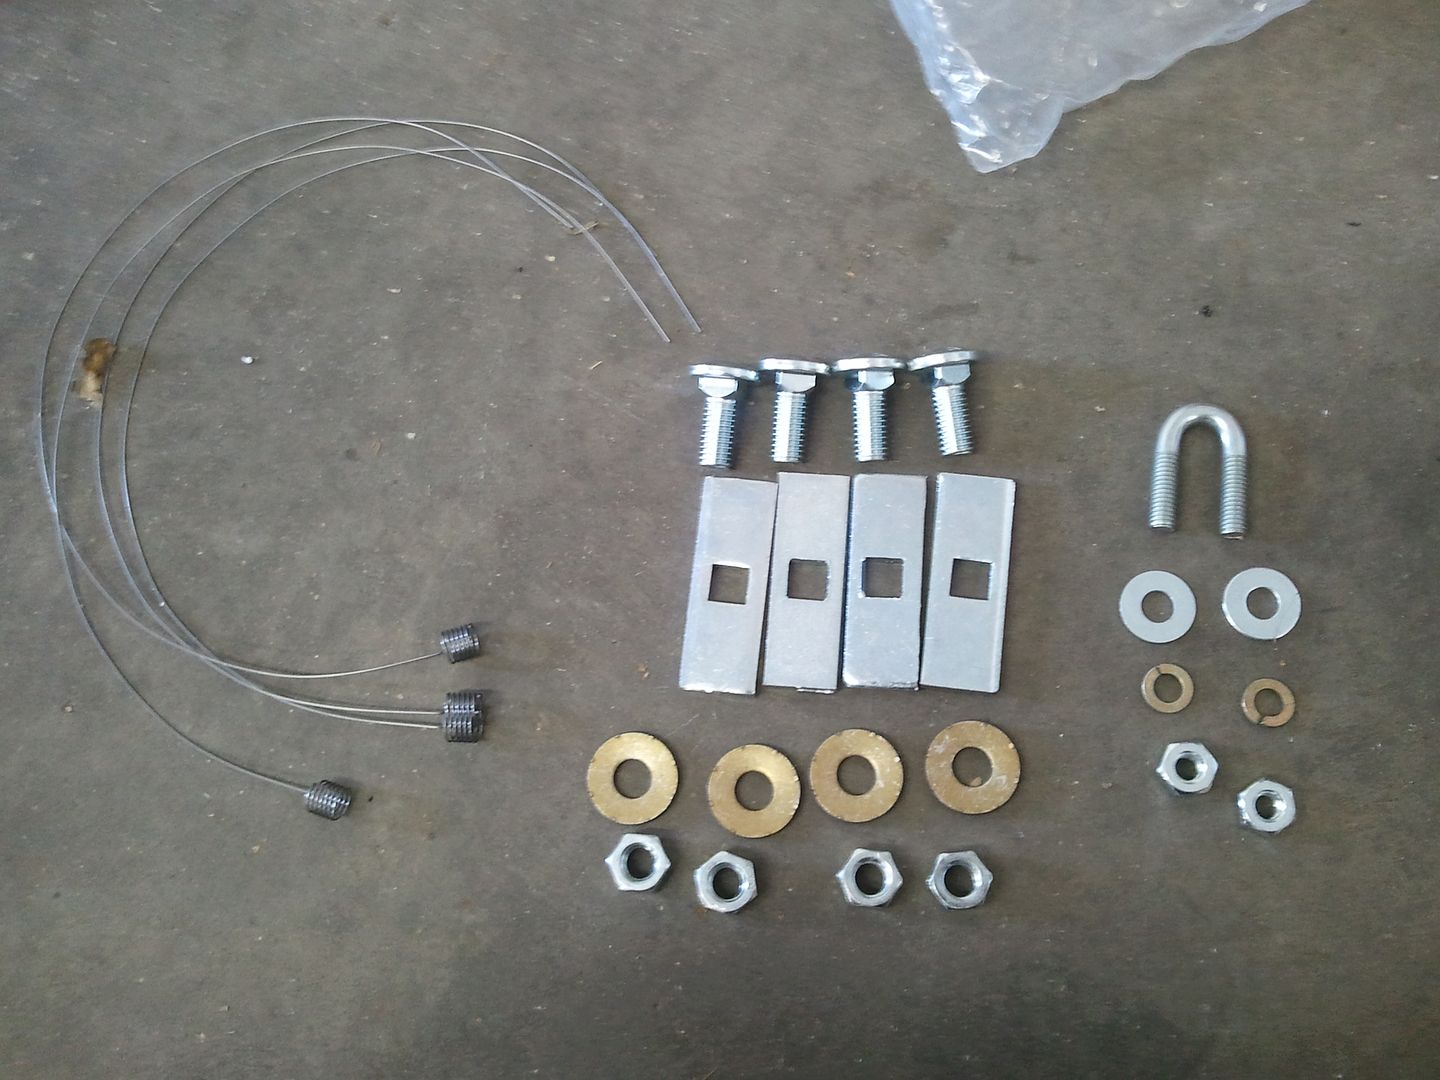
parts with kit
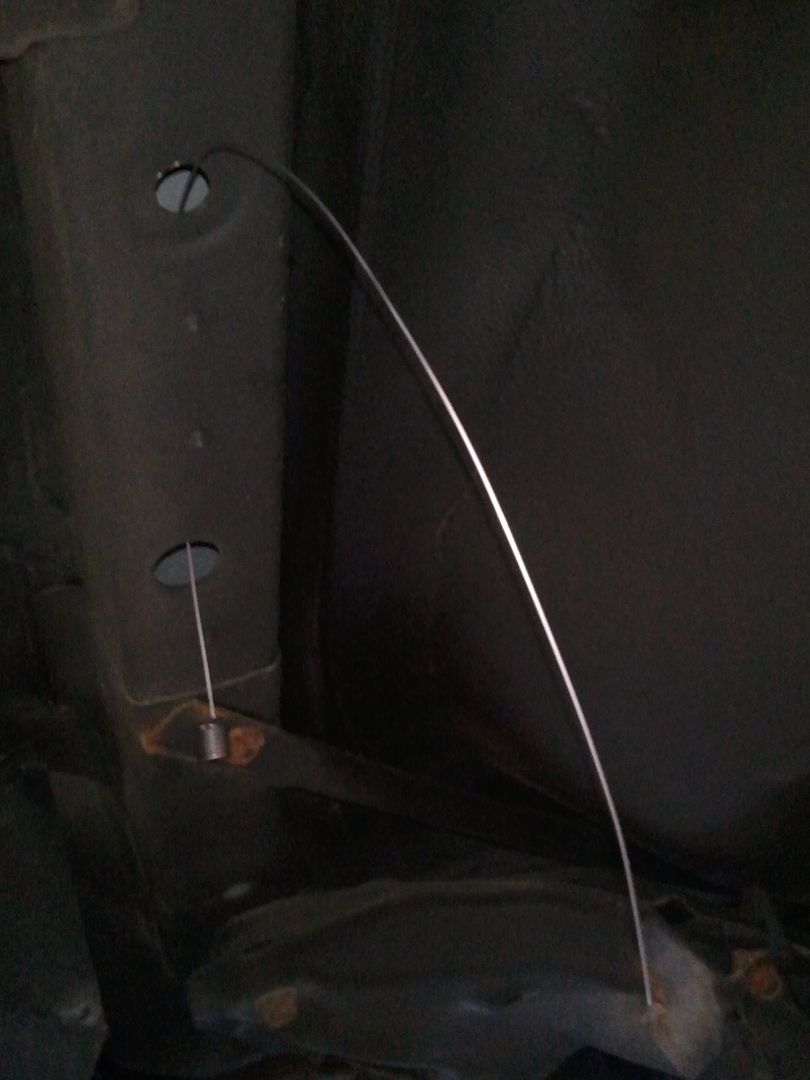
first we're gonna feed this fishing wire they gave with the kit through the little hole into the big hole
then place on the plates through it and screw the bolt into the fishing line
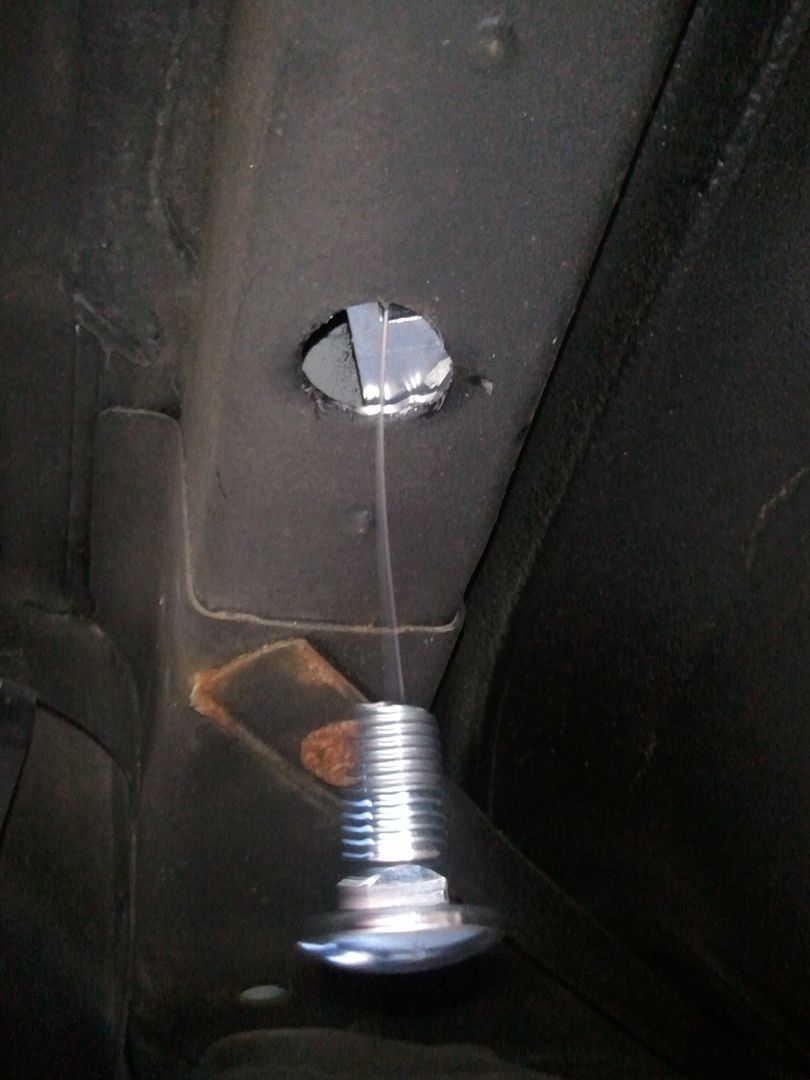
now feed it through the frame
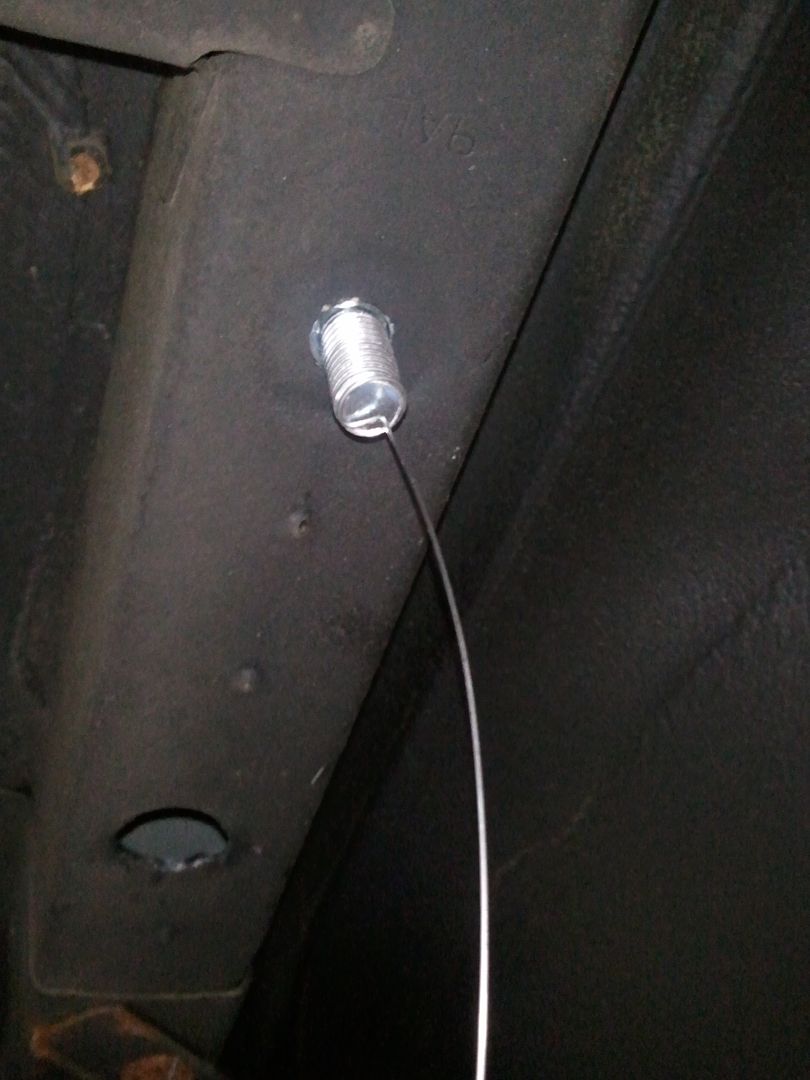
and do the same in reverse order for the larger hole. Bolt first then plate
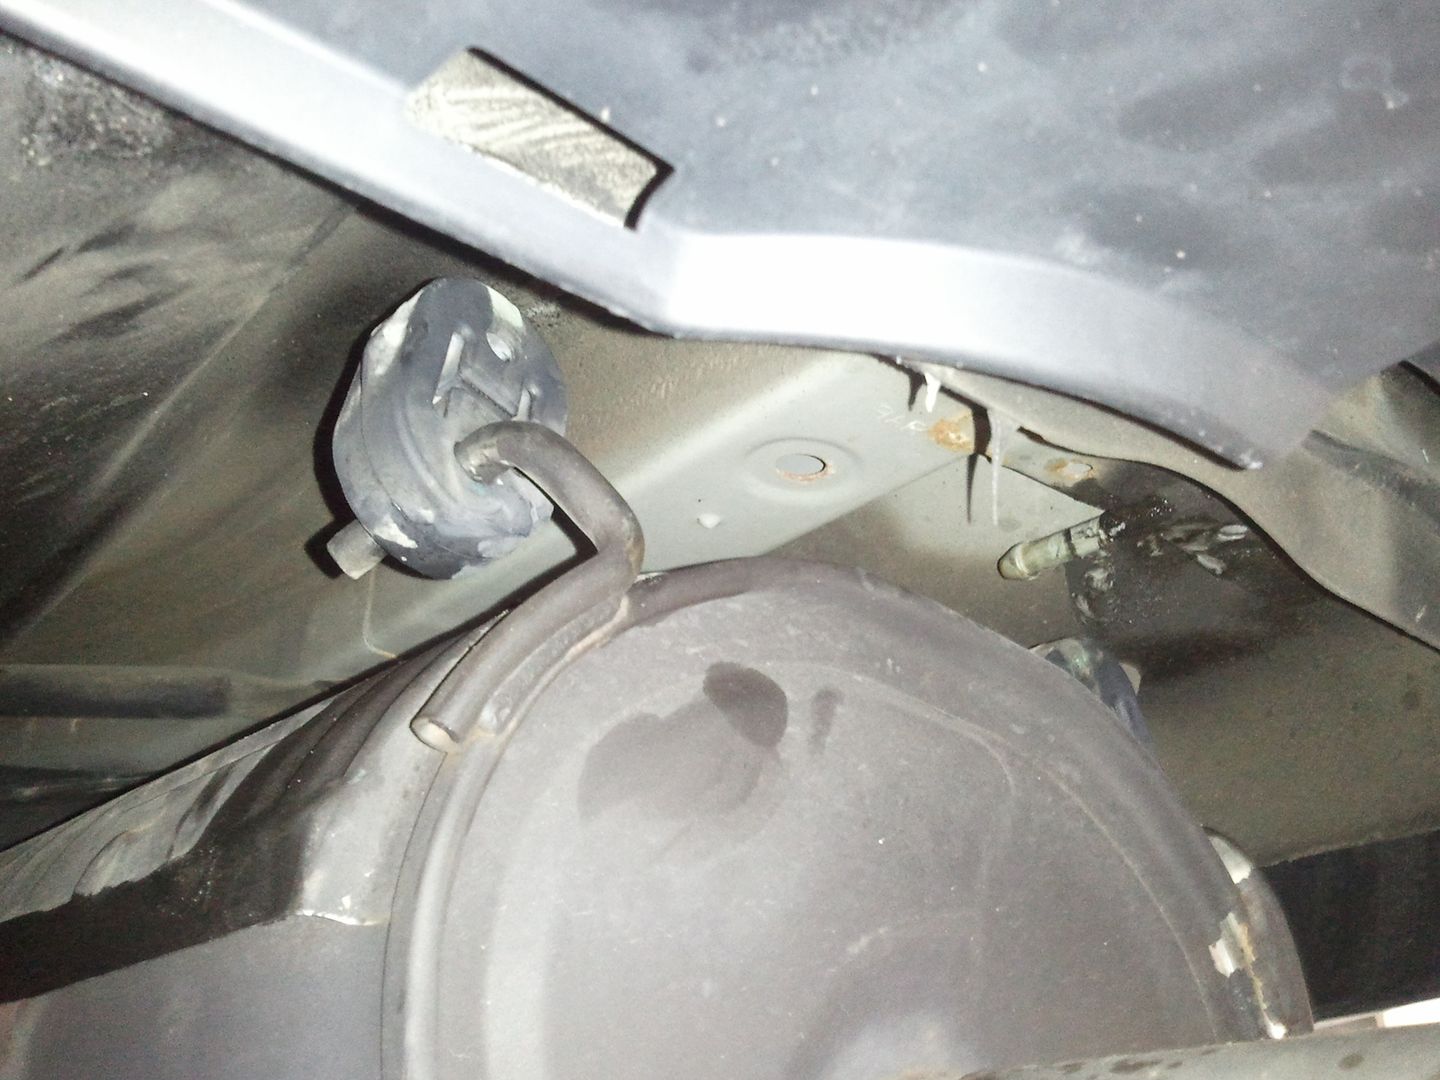
now lower the exhaust by removing the hangers
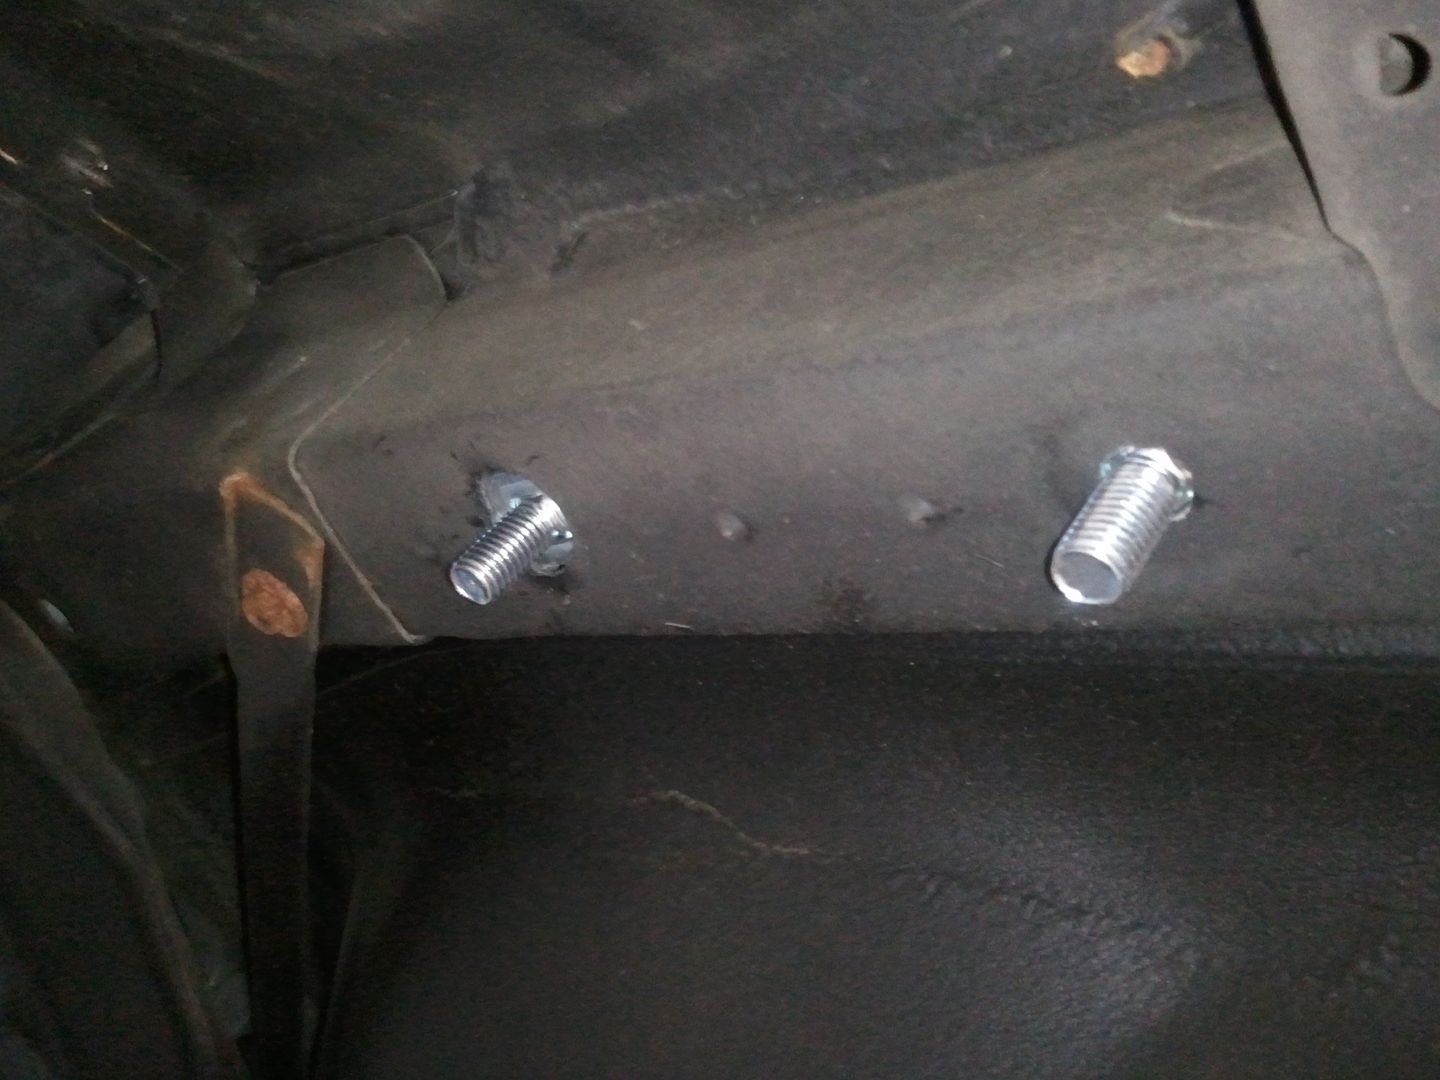
and do the same bolt trick on this side...
now just bolt it up using the nuts and washers
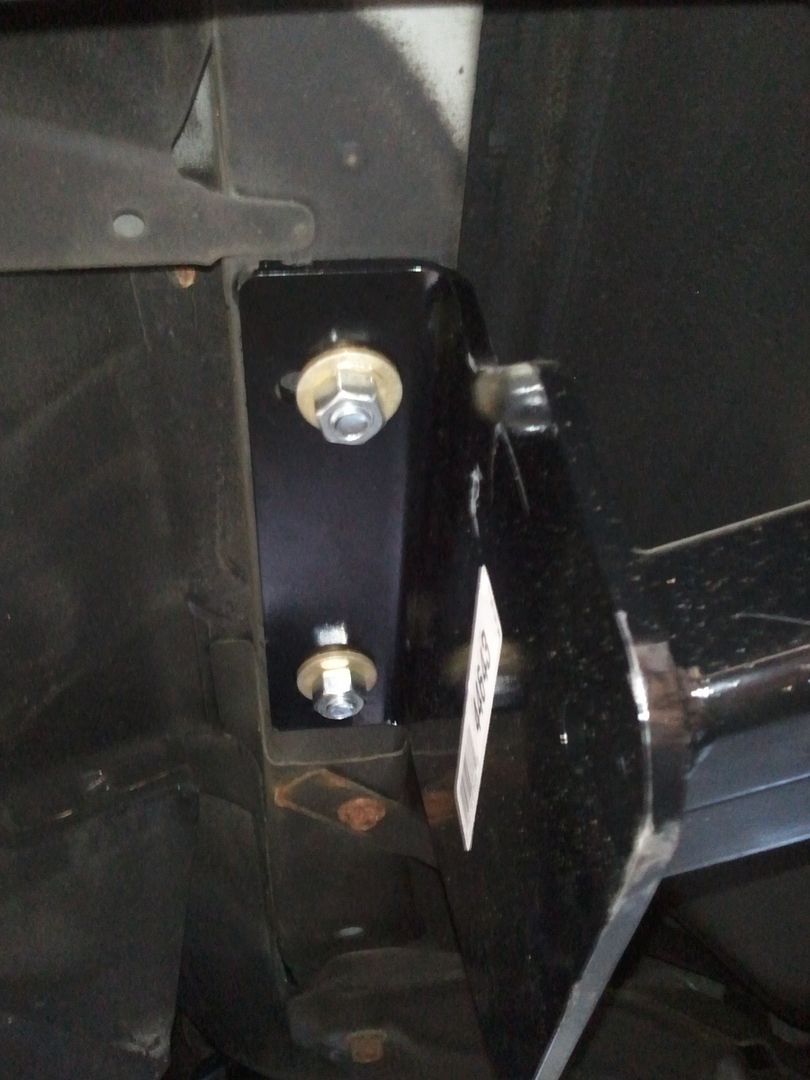
and enjoy
I still need to get a wiring harness
Reese Class III trailer hitch
So lets get to installation! I bought the direct bolt kit which was really nice!
parts with kit
first we're gonna feed this fishing wire they gave with the kit through the little hole into the big hole
then place on the plates through it and screw the bolt into the fishing line
now feed it through the frame
and do the same in reverse order for the larger hole. Bolt first then plate
now lower the exhaust by removing the hangers
and do the same bolt trick on this side...
now just bolt it up using the nuts and washers
and enjoy
I still need to get a wiring harness
 08-26-2013, 06:27 PM
#23
Honda-Tech Member
Awesome thread. This is like a walkthrough for anyone with the same V.
Kind of curious what has been done since last year.
Kind of curious what has been done since last year.
08-28-2013, 04:54 AM
#24
Honda-Tech Member
Join Date: Apr 2002
Location: Fort Bragg, CA, USA
Posts: 1,490
Likes: 0
Received 0 Likes
on
0 Posts
that fishing wire for the tow package really simplifies the installation. I have the reese tow package on mine and installation was a breeze. Nice looking crv
10-26-2013, 07:50 AM
#25
Honda-Tech Member
Join Date: Aug 2013
Location: Skippack, PA
Posts: 6
Likes: 0
Received 0 Likes
on
0 Posts

Thank you very much for clear cut pictures & instructions for radio removal. My sis has asked me to help her remove her CRV radio.