
How To: s2000 Clutch Master Cylinder into DC/EG
 09-02-2010, 11:42 AM
#1
Honda-Tech Member
Thread Starter
Join Date: Sep 2002
Location: East of Sac, CA, USA
Posts: 2,869
Likes: 0
Received 0 Likes
on
0 Posts
BIG THANKS TO www.checkerdsports.com and b16rex_02 FOR PARTS AND HELP!
I decided to replace my leaky clutch master cylinder with an s2000 unit instead of going with a new Integra one.
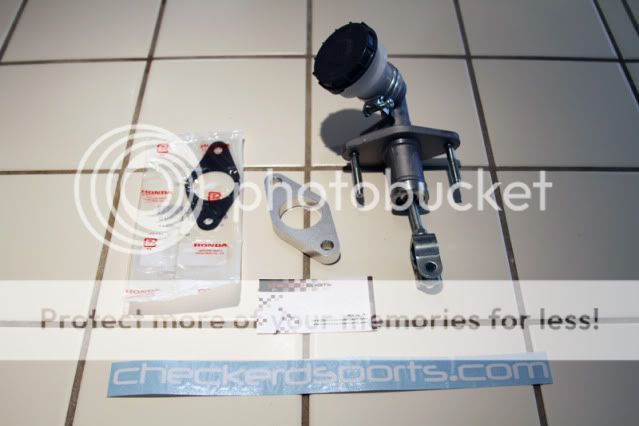
After doing some research I found b16rex_02 here on Honda-Tech who sells an awesome "kit" through www.checkerdsports.com. The kit includes the s2000 CMC, Machined aluminum spacer (required to achieve the desired pedal travel/engagement), and firewall gasket. I went to a local street rod shop to source the braided line that I will use to replace my hard line.
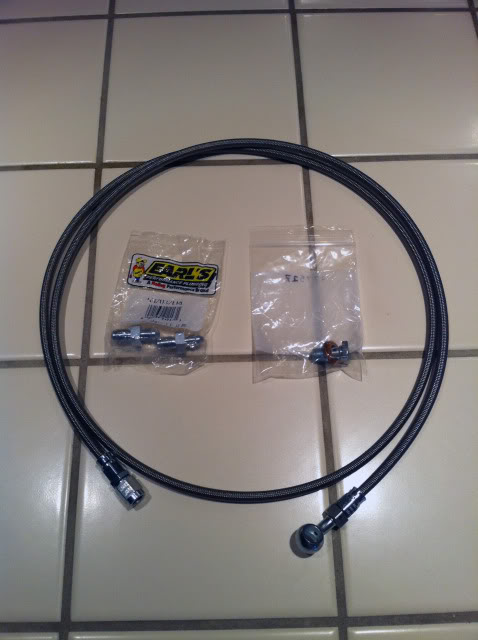
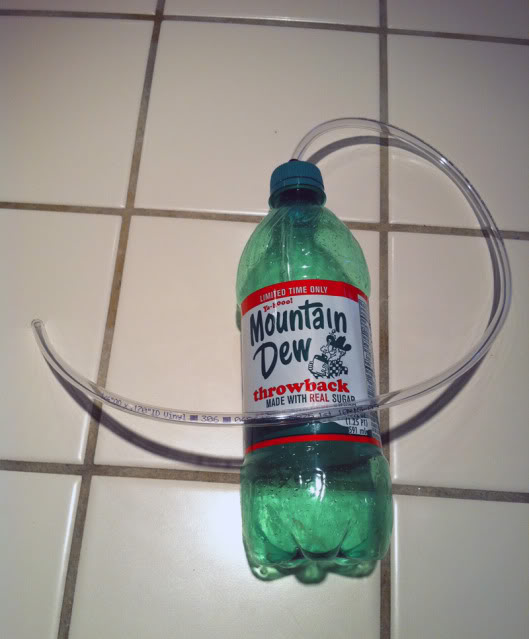
Here are a few pictures of my soft line, the CMC kit, and a home made bleeder that I used to both drain the old system and bleed the new system.
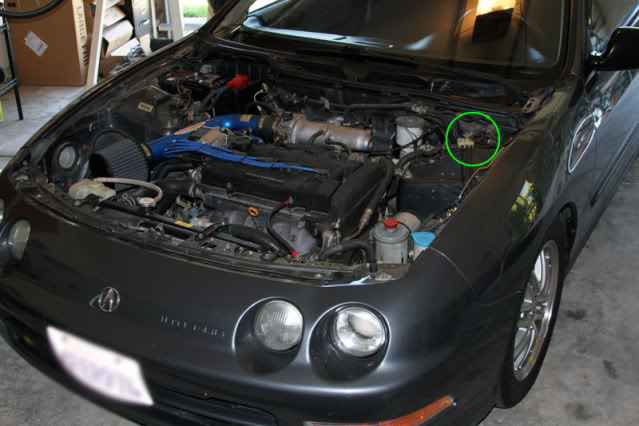
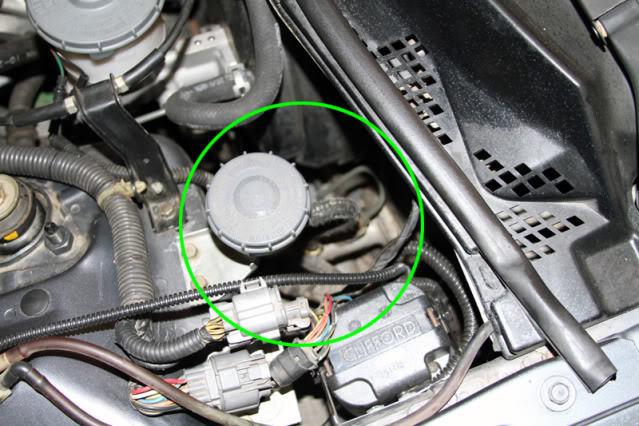
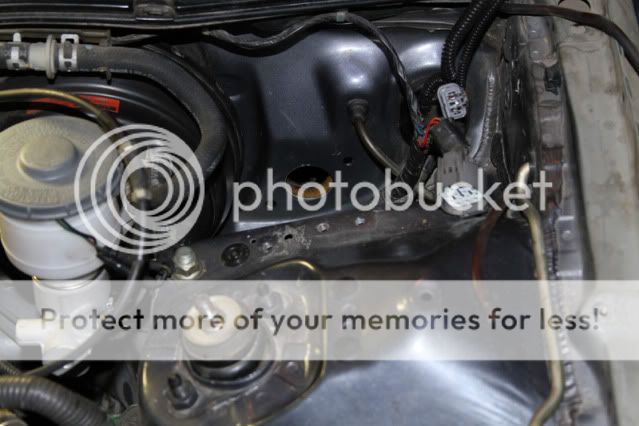
Here you can see the location of the old master cylinder (referred to as the "Wack MC" from here on) The reservoir is bolted on to the shock tower with (2) 10mm bolts, the MC itself is bolted to the firewall directly under/behind the reservoir.
Top view of the wack MC (pay no attention thieves, this alarm siren has been moved )
)
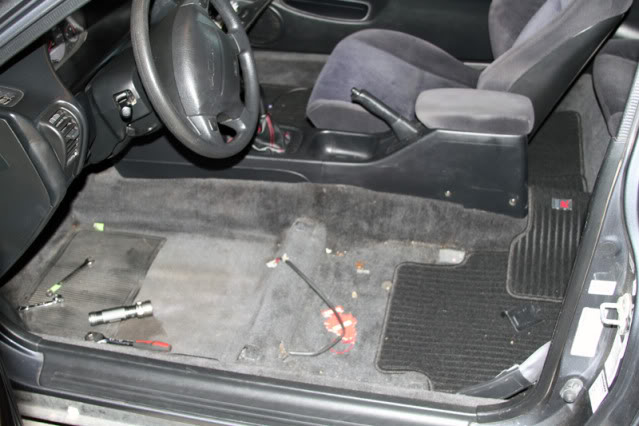
The wack MC is held on by (2) 12mm nuts on the inside of the car (pictured below). The shaft is connected to the pedal assembly by a pin held in place by a cotter pin. The upper 12mm nut is hidden in this picture but it is directly behind the pedal and bracket where the empty circle is. You can also see where it has been leaking all over the carpet and padding

After getting under the dash and looking at the situation, I decided to remove my drivers seat so that I could lay on the floor without breaking my back...
All that hard work made me thirsty...

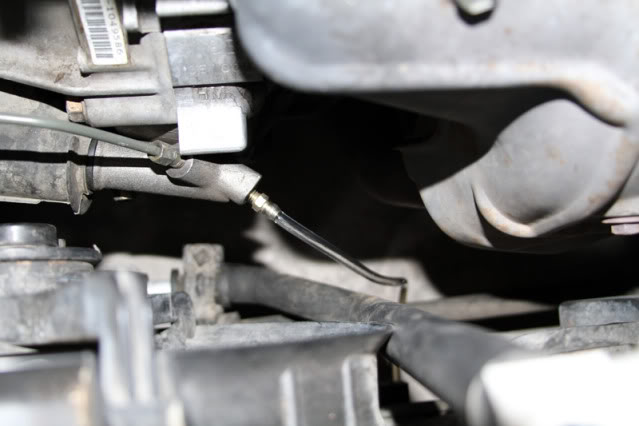
Time to drain the wack MC and hard line. Instead of using a syringe to suck the fluid out of the resivoir, I attached my home made bleeder to the slave cylinder and opened the bleeder screw.
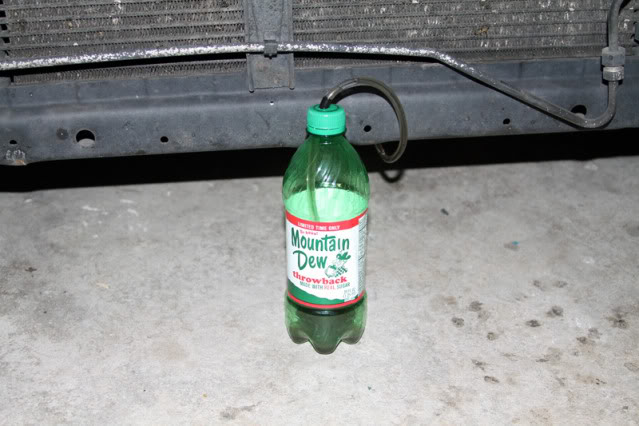
Now that the system is open, I pumped the clutch pedal until the reservoir was empty. This will not get ALL of the fluid out of the system, but it was enough so that I could remove the wack MC without spilling.

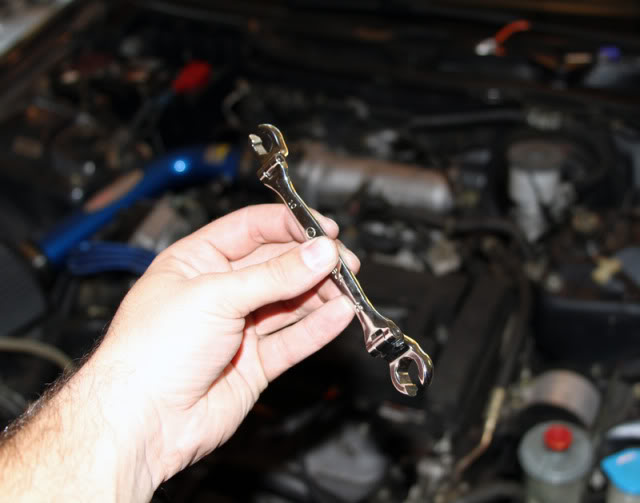
I highly recommend this tool for the job, or just to have in general. I was able to use this for all the OEM hard lines and the flex feature helped a lot. It is 10mm on one side and 12mm on the other side.
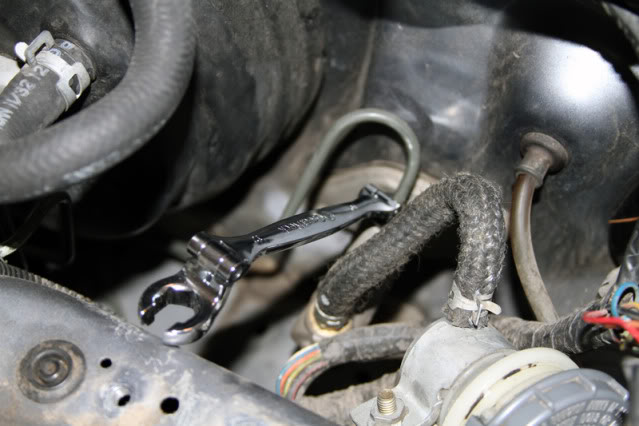
Disconnecting the hard line from the wack MC.
Next I went inside the car to remove the (2) nuts from the studs, and to remove the cotter pin from the pedal. For the 12mm nuts I used a 12mm wrench and 12mm deep socket. For the cotter pin, pliers.

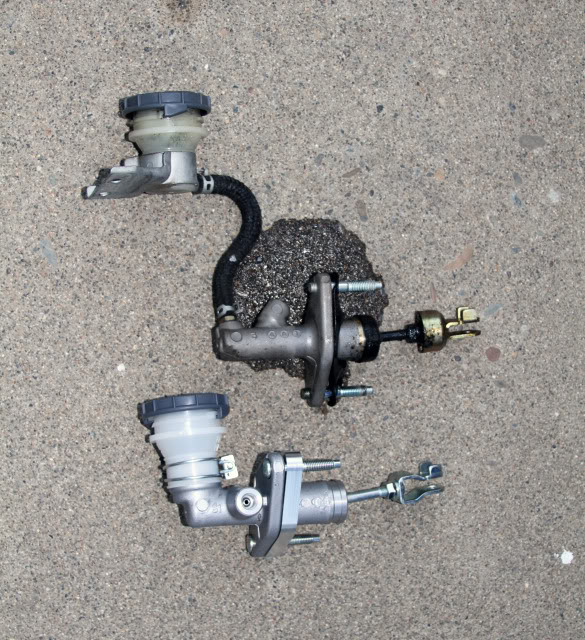
Here are the two units side by side. If you hate clutter in your engine bay than you can see the benefit of the new CMC and line.
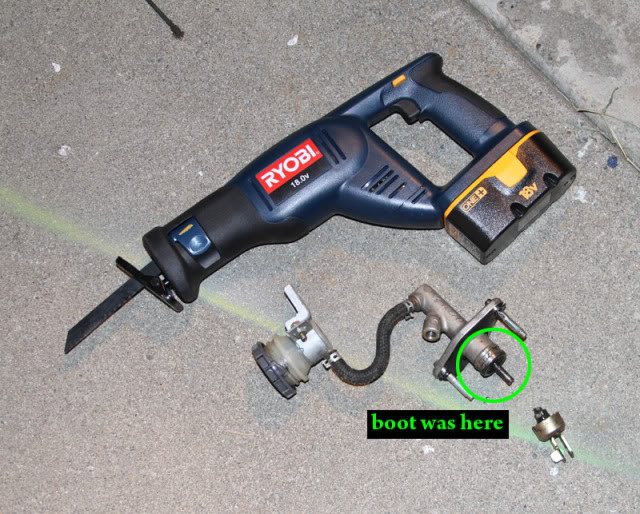
In the previous picture you can see that the new CMC did not include a boot. I got out the power tools and went to town on the wack MC in order to remove and reuse the old boot.
I am not going in to much detail on the next few photos. If you are going to remove the existing hard line then just follow it from the master cylinder and remove each bracket as you go, some of them take a lot of patience to get out. My pictures are in order going right to left....or master cylinder to slave cylinder.
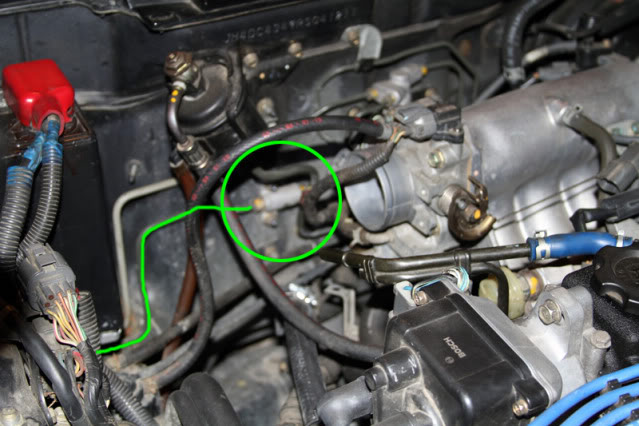
Closer...
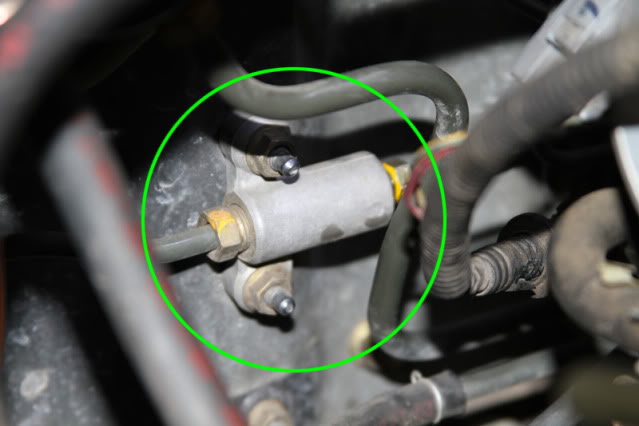
Next bracket below shock tower...
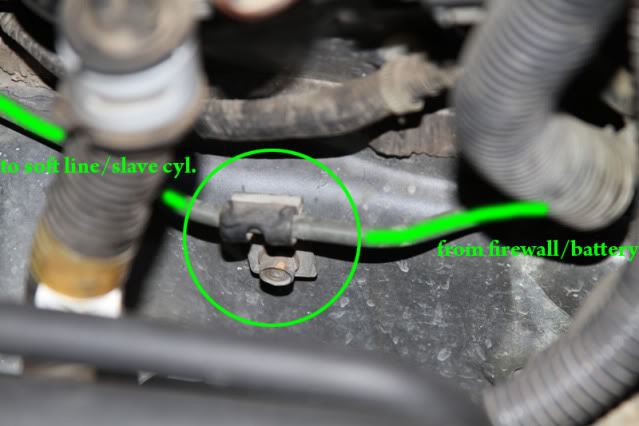
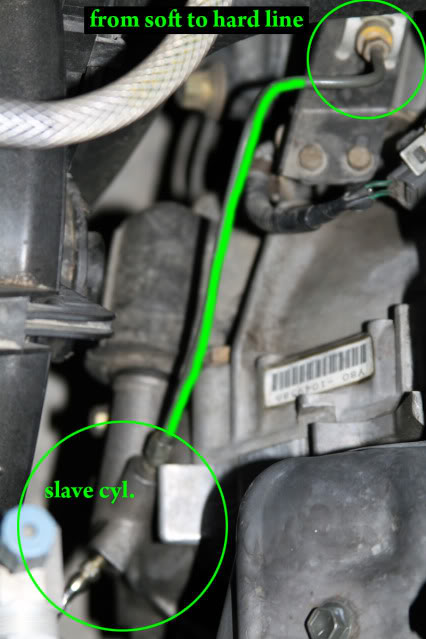
Next bracket going from hard line to soft line near the tranny mount...
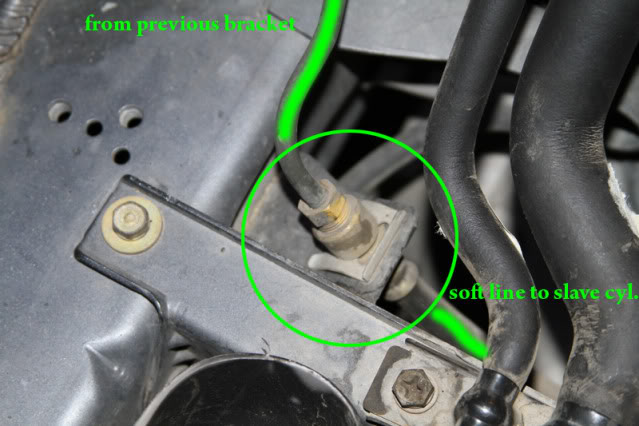
Next bracket going from soft line back to hard line...
Now everything is removed, wack MC, lines, everything.
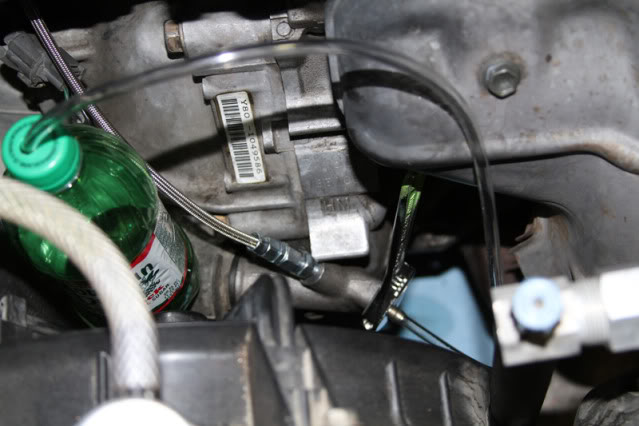
In this picture you can see the CMC mounted with the line attached. Get back inside the car and install the CMC with the bots and pins you removed from the old one. You may need to take the CMC out to adjust the shaft so that it lines up with the pedal correctly so don't get in there and bolt it all the way down right away.
THIS PART IS VERY IMPORTANT
Once the CMC is bolted in place, you must bleed the CMC without the line connected. If you try to bleed the CMC with the line attached you will be there for a VERY LONG TIME. Trust me : )
This is how you do it. detach the line from the CMC, fill the resivoir with brake fluid and depress the pedal. The pedal will go to the floor and not come up. Now have a friend plug the open port on CMC with their finger and manually raise the pedal - this will prime the CMC. Now you can attach the line and proceed to bleed as normal.
As seen here: http://www.team-integra.net/sections...?ArticleID=644

Here is a picture of the braided line on the slave cylinder side. I had to get a file and shave about 1-2mm off the block under the "HM" stamp to accommodate the 10x1.0 fitting that I used to connect the braided line to the slave cylinder.
That's pretty much it!
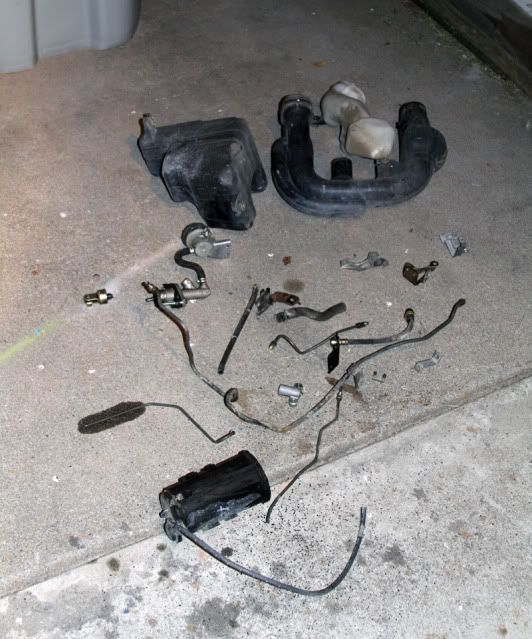
Here is a pile of crap that I removed during the process.
I decided to replace my leaky clutch master cylinder with an s2000 unit instead of going with a new Integra one.
After doing some research I found b16rex_02 here on Honda-Tech who sells an awesome "kit" through www.checkerdsports.com. The kit includes the s2000 CMC, Machined aluminum spacer (required to achieve the desired pedal travel/engagement), and firewall gasket. I went to a local street rod shop to source the braided line that I will use to replace my hard line.
Here are a few pictures of my soft line, the CMC kit, and a home made bleeder that I used to both drain the old system and bleed the new system.
Here you can see the location of the old master cylinder (referred to as the "Wack MC" from here on) The reservoir is bolted on to the shock tower with (2) 10mm bolts, the MC itself is bolted to the firewall directly under/behind the reservoir.
Top view of the wack MC (pay no attention thieves, this alarm siren has been moved
)The wack MC is held on by (2) 12mm nuts on the inside of the car (pictured below). The shaft is connected to the pedal assembly by a pin held in place by a cotter pin. The upper 12mm nut is hidden in this picture but it is directly behind the pedal and bracket where the empty circle is. You can also see where it has been leaking all over the carpet and padding
After getting under the dash and looking at the situation, I decided to remove my drivers seat so that I could lay on the floor without breaking my back...
All that hard work made me thirsty...
Time to drain the wack MC and hard line. Instead of using a syringe to suck the fluid out of the resivoir, I attached my home made bleeder to the slave cylinder and opened the bleeder screw.
Now that the system is open, I pumped the clutch pedal until the reservoir was empty. This will not get ALL of the fluid out of the system, but it was enough so that I could remove the wack MC without spilling.
I highly recommend this tool for the job, or just to have in general. I was able to use this for all the OEM hard lines and the flex feature helped a lot. It is 10mm on one side and 12mm on the other side.
Disconnecting the hard line from the wack MC.
Next I went inside the car to remove the (2) nuts from the studs, and to remove the cotter pin from the pedal. For the 12mm nuts I used a 12mm wrench and 12mm deep socket. For the cotter pin, pliers.
Here are the two units side by side. If you hate clutter in your engine bay than you can see the benefit of the new CMC and line.
In the previous picture you can see that the new CMC did not include a boot. I got out the power tools and went to town on the wack MC in order to remove and reuse the old boot.
I am not going in to much detail on the next few photos. If you are going to remove the existing hard line then just follow it from the master cylinder and remove each bracket as you go, some of them take a lot of patience to get out. My pictures are in order going right to left....or master cylinder to slave cylinder.
Closer...
Next bracket below shock tower...
Next bracket going from hard line to soft line near the tranny mount...
Next bracket going from soft line back to hard line...
Now everything is removed, wack MC, lines, everything.
In this picture you can see the CMC mounted with the line attached. Get back inside the car and install the CMC with the bots and pins you removed from the old one. You may need to take the CMC out to adjust the shaft so that it lines up with the pedal correctly so don't get in there and bolt it all the way down right away.
THIS PART IS VERY IMPORTANT
Once the CMC is bolted in place, you must bleed the CMC without the line connected. If you try to bleed the CMC with the line attached you will be there for a VERY LONG TIME. Trust me : )
This is how you do it. detach the line from the CMC, fill the resivoir with brake fluid and depress the pedal. The pedal will go to the floor and not come up. Now have a friend plug the open port on CMC with their finger and manually raise the pedal - this will prime the CMC. Now you can attach the line and proceed to bleed as normal.
As seen here: http://www.team-integra.net/sections...?ArticleID=644
Here is a picture of the braided line on the slave cylinder side. I had to get a file and shave about 1-2mm off the block under the "HM" stamp to accommodate the 10x1.0 fitting that I used to connect the braided line to the slave cylinder.
That's pretty much it!
Here is a pile of crap that I removed during the process.
 09-02-2010, 04:59 PM
#4
Honda-Tech Member
Thread Starter
Join Date: Sep 2002
Location: East of Sac, CA, USA
Posts: 2,869
Likes: 0
Received 0 Likes
on
0 Posts
09-04-2010, 12:07 AM
#6
Honda-Tech Member
Join Date: Feb 2010
Location: The People's Republik of Kalifornia
Posts: 385
Likes: 0
Received 0 Likes
on
0 Posts
Nice very good write up and pics. I just changed mine out with a daikin unit from ebay.
Is the pedal feel different? Is it easier to shift fast like an omnipower CMC?
Is the pedal feel different? Is it easier to shift fast like an omnipower CMC?
09-04-2010, 09:37 AM
#7
Honda-Tech Member
Thread Starter
Join Date: Sep 2002
Location: East of Sac, CA, USA
Posts: 2,869
Likes: 0
Received 0 Likes
on
0 Posts
The pedal feels great compared to the leaky one. There is a lot more resistance, the pedal feels harder and engages harder. My clutch actually pops if I want it to. It also feels like the pedal does not need as much travel, it engages/disengages at the very top.
Trending Topics
09-04-2010, 10:18 AM
#8
Honda-Tech Member
Join Date: Feb 2004
Location: Carson City, NV, USA
Posts: 3,894
Likes: 0
Received 0 Likes
on
0 Posts
Yea that's how mine feels too, I don't need as much travel either. I love it. The write up is great, Thanks again
09-04-2010, 12:45 PM
#9
Honda-Tech Member
Join Date: Oct 2001
Location: Herndon, VA
Posts: 1,136
Likes: 0
Received 0 Likes
on
0 Posts
Nice write-up. I didn't even know about this kit. I'm about to order a new master and slave for my GS-R, and I might have to look into this over the stock GS-R unit. I have a steel braided line before the slave cylinder but having the entire unit would be nice as well. This S2k kit looks pretty slick.
Did you do the slave too while you were at it?
Did you do the slave too while you were at it?

 09-10-2010, 05:58 AM
#14
Honda-Tech Member
Join Date: Jan 2007
Location: California
Posts: 640
Likes: 0
Received 0 Likes
on
0 Posts
Very nice! Looks way clean too.
About the boot- it's just that rubber peice aye?
And how much did this cost you? I'm deff gonna consider this in a couple weeks. Thanks a lot good work
About the boot- it's just that rubber peice aye?
And how much did this cost you? I'm deff gonna consider this in a couple weeks. Thanks a lot good work
09-10-2010, 08:26 AM
#15
I wish I would have known about the adapter plate a couple of years ago when I replacement my leaky CMC.
Any better pics of how (where) you ran your braided line? Is the braided line connected via banjo bolt to the new CMC?
Any better pics of how (where) you ran your braided line? Is the braided line connected via banjo bolt to the new CMC?
09-10-2010, 08:36 AM
#16
Honda-Tech Member
Join Date: Feb 2004
Location: Carson City, NV, USA
Posts: 3,894
Likes: 0
Received 0 Likes
on
0 Posts
You can do a banjo bolt, or I use the 10mm to -3an adapter, same one you will use on the tranny. They come in pairs.
09-10-2010, 09:18 AM
#17
Honda-Tech Member
Thread Starter
Join Date: Sep 2002
Location: East of Sac, CA, USA
Posts: 2,869
Likes: 0
Received 0 Likes
on
0 Posts
The braided line that I used (w/banjo bolt) cost me $60 at a local street rod place. I imagine if you just used the 10mm -3 fitting it would be a little bit cheaper.
09-10-2010, 09:25 AM
#18
Honda-Tech Member
Thread Starter
Join Date: Sep 2002
Location: East of Sac, CA, USA
Posts: 2,869
Likes: 0
Received 0 Likes
on
0 Posts
I will take better pictures of the MC and line tonight and post them. If you use a 30 or 45 degree banjo fitting and low profile bolt the whole system is VERY clean and simple. If my car was RHD I would deffinately use the strait 10mm -3 fitting ; )
09-22-2010, 06:30 AM
#22
Honda-Tech Member
Thread Starter
Join Date: Sep 2002
Location: East of Sac, CA, USA
Posts: 2,869
Likes: 0
Received 0 Likes
on
0 Posts
10-04-2010, 10:31 AM
#25
Honda-Tech Member
Thread Starter
Join Date: Sep 2002
Location: East of Sac, CA, USA
Posts: 2,869
Likes: 0
Received 0 Likes
on
0 Posts