
SHG is back! Easy's EP3 goes under the knife...

 09-24-2012, 09:32 AM
#2452
Honda-Tech Member
Join Date: Oct 2004
Location: Rhode Island
Posts: 5,749
Likes: 0
Received 0 Likes
on
0 Posts
 09-24-2012, 09:52 AM
#2453
Sick man you're nasty with the Honda game! Lol. Thats some very valuable information and know how you have there. Not that we ever need to rebuild our shocks because they're blown since our stuff will surely last 60k+ but in the event of wanting to revalve them this will come in handy. Love the wrenches as well, very neat.
09-24-2012, 11:24 AM
#2454
Honda-Tech Member
Join Date: Oct 2004
Location: Rhode Island
Posts: 5,749
Likes: 0
Received 0 Likes
on
0 Posts
Sick man you're nasty with the Honda game! Lol. Thats some very valuable information and know how you have there. Not that we ever need to rebuild our shocks because they're blown since our stuff will surely last 60k+ but in the event of wanting to revalve them this will come in handy. Love the wrenches as well, very neat.
You don't plan on driving your car for more then 60k?
And the more intricate the equipment becomes (motorsports level with multiple adjustments, where small changes in clearances make a larger difference) the more frequently engines,dampers, suspension needs to be rebuilt. I believe they will last longer then some of the competition, but I doubt you'll see N+ longevity. I would be happy to find out I am wrong though.
09-25-2012, 05:46 PM
#2455
Honda-Tech Member

Join Date: Sep 2012
Posts: 12
Likes: 0
Received 0 Likes
on
0 Posts
I'm from tsxclub.com and I joined this forum just to commend you on your work. I've been watching this thread since page 40 something and I've never seen such meticulous and detailed fabrication. There's nothing more motivating than flipping through these pictures, you're awesome bud, just been itching to show some love. Keep it up!
 09-26-2012, 05:52 AM
#2458
Honda-Tech Member
Join Date: Oct 2004
Location: Rhode Island
Posts: 5,749
Likes: 0
Received 0 Likes
on
0 Posts
 09-26-2012, 06:46 AM
#2459
Honda-Tech Member
Join Date: Dec 2006
Location: Dallas Texas
Posts: 989
Likes: 0
Received 0 Likes
on
0 Posts
fixed. quoted wrong person
Last edited by mattrt09; 09-26-2012 at 10:16 AM.
09-26-2012, 08:27 AM
#2460
Honda-Tech Member
Join Date: Oct 2004
Location: Rhode Island
Posts: 5,749
Likes: 0
Received 0 Likes
on
0 Posts
09-26-2012, 08:52 AM
#2461
Honda-Tech Member
Join Date: Dec 2006
Location: Dallas Texas
Posts: 989
Likes: 0
Received 0 Likes
on
0 Posts
09-26-2012, 10:44 AM
#2463
Honda-Tech Member
 09-29-2012, 08:44 AM
#2467
Honda-Tech Member
Thread Starter
Join Date: Dec 2003
Location: True Honda Enthusiast
Posts: 12,680
Likes: 0
Received 1 Like
on
1 Post
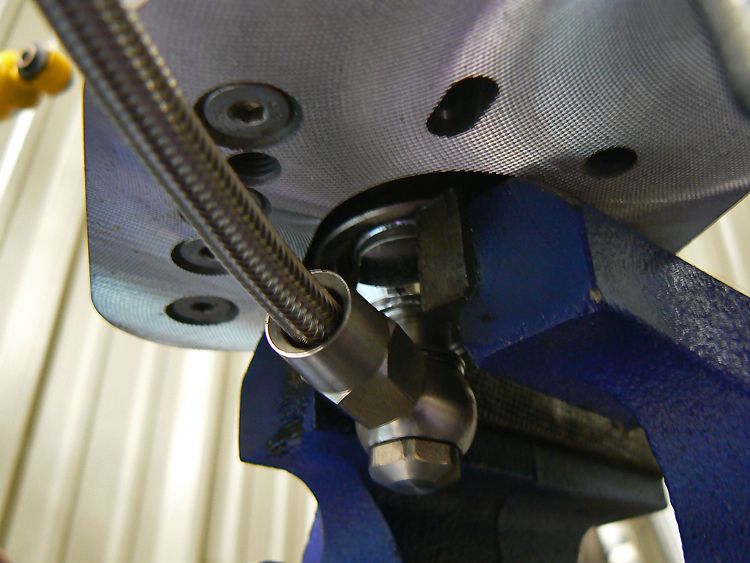
Spent last night assembling and bleeding the front struts! It was pretty time consuming, since the floating piston in the caliper doesnt have a threaded hole for a tool to screw in it made it much more difficult to bleed the unit.
Normally to bleed a remote reservoir shock you would insert a "tool" through the hole in the end cap for the nitrogen port that screws into the floating piston in the canister. This allows you to fill the whole shock and reservoir as a unit and push/pull on the floating piston to draw fluid in and out of the reservoir and line to bleed the system.
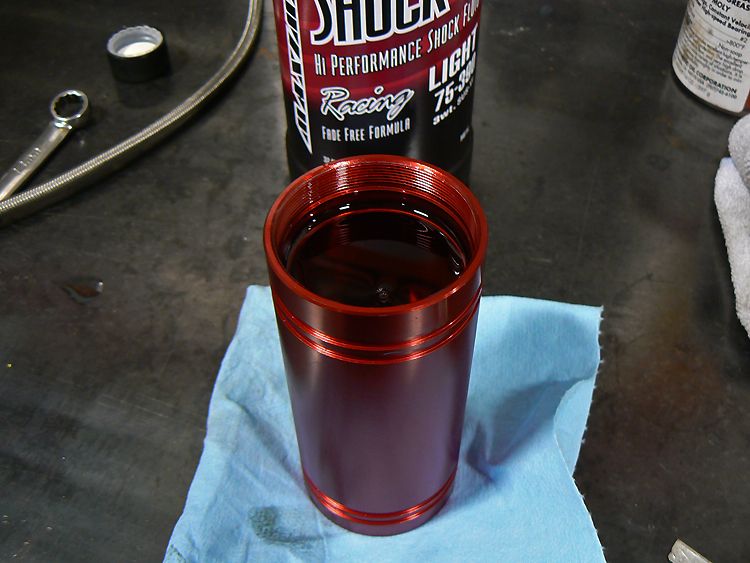
Since these pistons don't have that feature, I had to figure out another way to bleed the shocks. I started by pushing the floating piston all the way down in the canister. This will allow me to compress it later on to push fluid up through the line and remove most of the air. Then I filled the canister to right below the threads. Since the valve stack and seal protrude past those threads, they will compress the fluid as the cap is tightened and force fluid through the return check valve to fill the cap and valve stack.
.
.
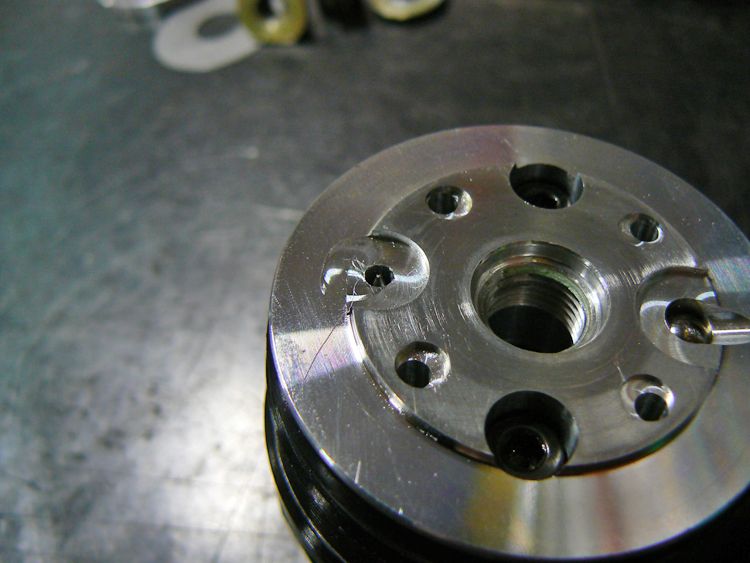
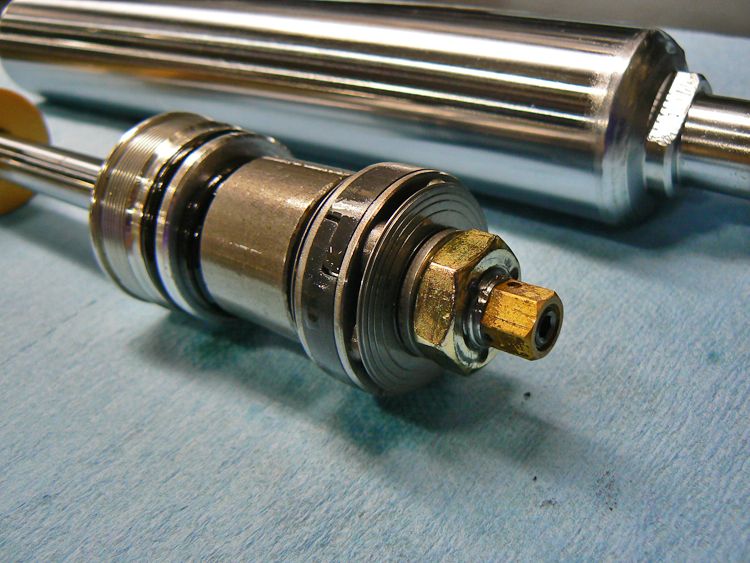
Here are some shots of the cap and compression assembly before i re-installed it in the canister. The first two pictures show the low speed compression needle valve. In full stiff the needle is fully extended blocking most of the orifice.
.
.
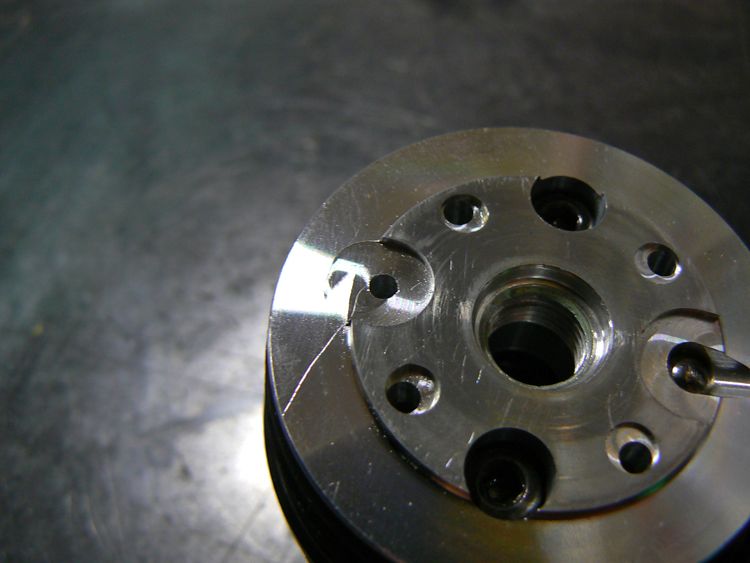
On full soft the needle valve is sunk far in allowing for more fluid to travel through the orifice at higher speed
.
.
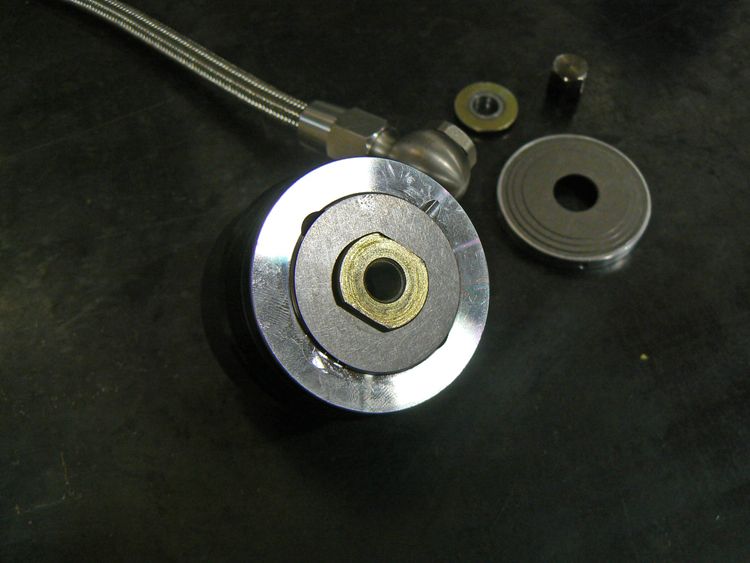
Here is the base shim for the high speed compression stack. This shim seals the holes off on the piston and controls the separate shim stack that sits on top of it. This allows for adjustability of the separate shim stack.
.
.
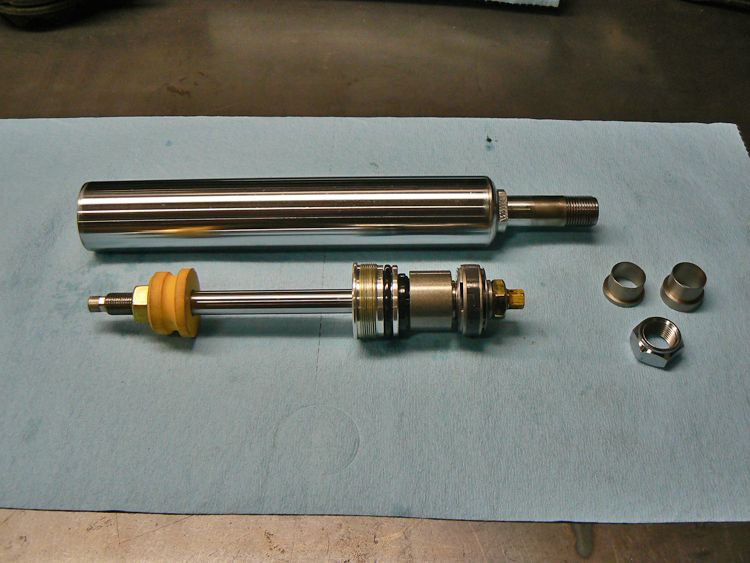
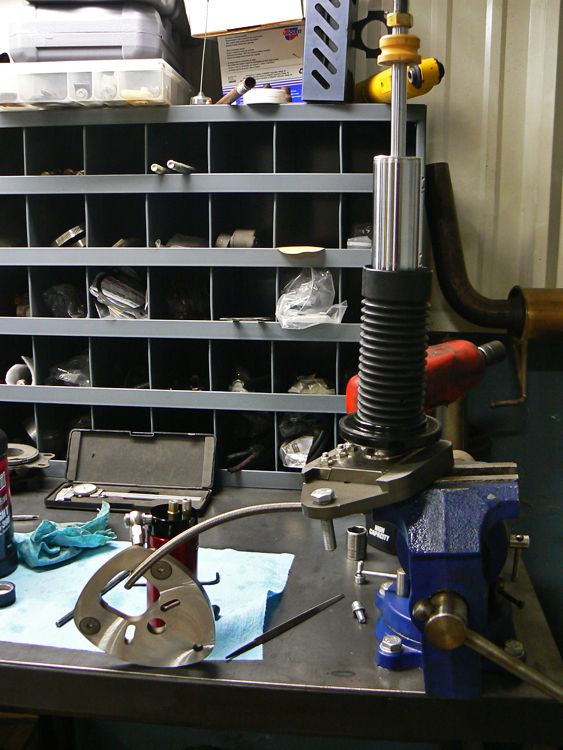
Once the canister was assembled and the line fitted I went to disassembling the shock itself. This is so I can drain the old fluid, replace with new and bleed the shock.
.
.
I took measurements of the shaft, seals, shims etc to compare to replacements when I have some extra time. This is the high speed rebound valve stack on the working piston. This is non adjustable in this shock. High end shocks that have 4 way adjustability like Penske, Moton, Ohlins have an adjustable high speed rebound stack which works similar to the adjustable compression stack In my shocks. Low speed rebound is controlled by another needle valve that sits inside the shaft.
.
.
After the parts were cleaned I mounted the dust boot, top perch, shoulder bushings, top hat, nut and line. All of this needs to be done now since the parts cant be removed/installed when the line is in place.
.
.
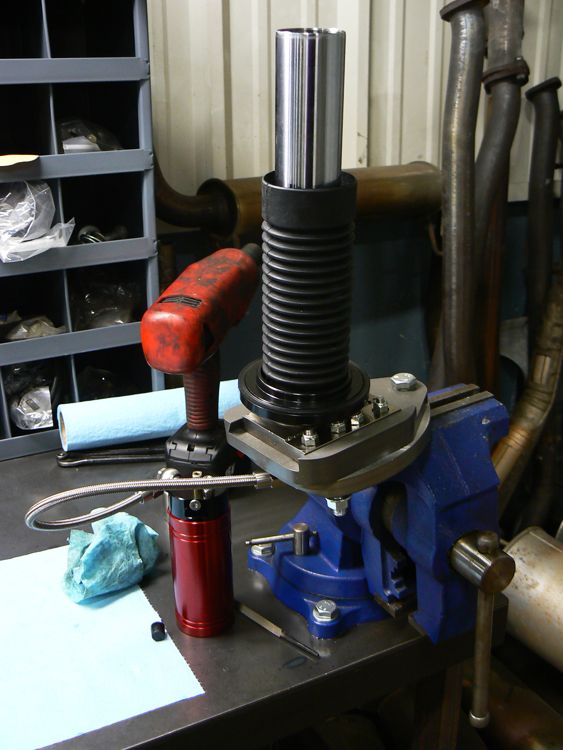
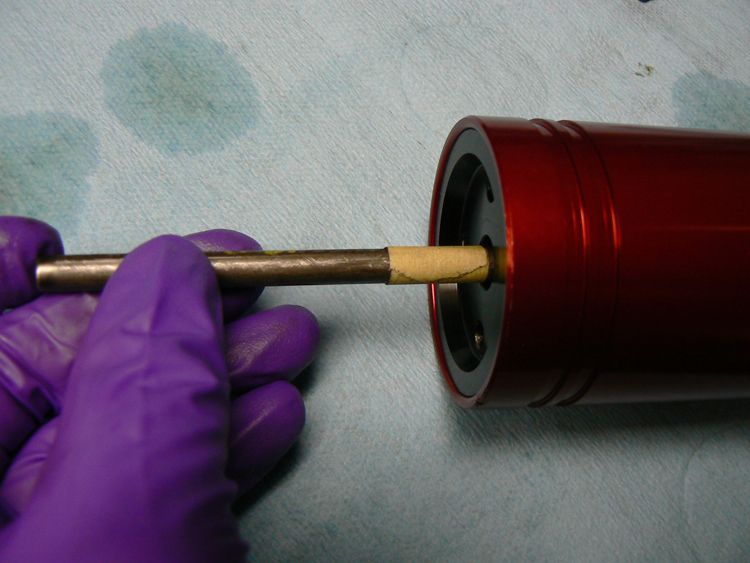
Now that everything was installed I added some fluid to the shock so I could see air bubbles coming up through the line into the shock. I then used this rod that I marked for setting the floating piston depth to push the piston up into the canister, forcing air and fluid up through the line.
Before assembly I had taken measurements as to where I needed the piston to sit when the shock is fully extended. This is so the piston does not bottom out on the compression valve stack when the shock fully extends. The rod is marked so that when the tape is at the edge of the cap the piston depth is set.
.
.
I then had to experiment with how much fluid to put in the shock. This is where things got time consuming. Too much fluid and the floating piston will bottom out in the canister as the shock is compressed. Too little and it will top out on the compression stack during full extension.
Once I had the correct amount of fluid, I cycled the shock up and down, being careful not to fully extend it causing the piston to pick up the air trapped in the top of the shock. While cycling the shock you can hear the air bubbles passing through the piston. Once you dont hear it anymore it tells you all the air in the system is now trapped at the top of the shock under the top guide/cap. Last thing left to do was remove the cap, top off fluid and overfill slightly so then when the cap is tightened it pushed out the excess fluid along with any air.
.
.
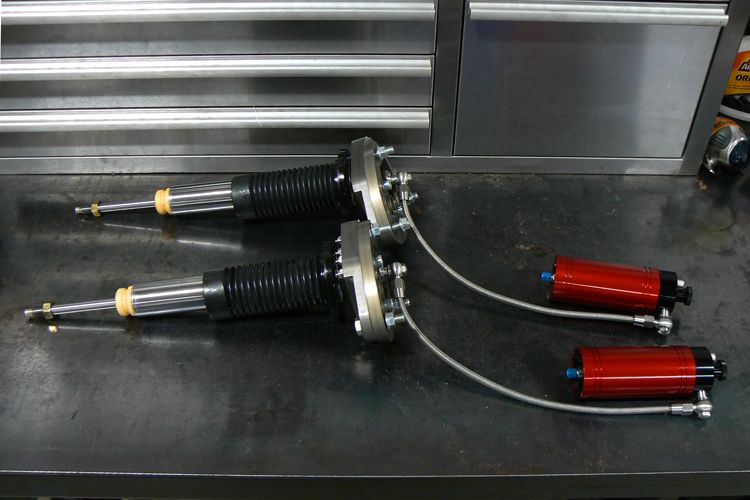
Here they are all done and ready for final assembly and installation!
Normally to bleed a remote reservoir shock you would insert a "tool" through the hole in the end cap for the nitrogen port that screws into the floating piston in the canister. This allows you to fill the whole shock and reservoir as a unit and push/pull on the floating piston to draw fluid in and out of the reservoir and line to bleed the system.
Since these pistons don't have that feature, I had to figure out another way to bleed the shocks. I started by pushing the floating piston all the way down in the canister. This will allow me to compress it later on to push fluid up through the line and remove most of the air. Then I filled the canister to right below the threads. Since the valve stack and seal protrude past those threads, they will compress the fluid as the cap is tightened and force fluid through the return check valve to fill the cap and valve stack.
.
.
Here are some shots of the cap and compression assembly before i re-installed it in the canister. The first two pictures show the low speed compression needle valve. In full stiff the needle is fully extended blocking most of the orifice.
.
.
On full soft the needle valve is sunk far in allowing for more fluid to travel through the orifice at higher speed
.
.
Here is the base shim for the high speed compression stack. This shim seals the holes off on the piston and controls the separate shim stack that sits on top of it. This allows for adjustability of the separate shim stack.
.
.
Once the canister was assembled and the line fitted I went to disassembling the shock itself. This is so I can drain the old fluid, replace with new and bleed the shock.
.
.
I took measurements of the shaft, seals, shims etc to compare to replacements when I have some extra time. This is the high speed rebound valve stack on the working piston. This is non adjustable in this shock. High end shocks that have 4 way adjustability like Penske, Moton, Ohlins have an adjustable high speed rebound stack which works similar to the adjustable compression stack In my shocks. Low speed rebound is controlled by another needle valve that sits inside the shaft.
.
.
After the parts were cleaned I mounted the dust boot, top perch, shoulder bushings, top hat, nut and line. All of this needs to be done now since the parts cant be removed/installed when the line is in place.
.
.
Now that everything was installed I added some fluid to the shock so I could see air bubbles coming up through the line into the shock. I then used this rod that I marked for setting the floating piston depth to push the piston up into the canister, forcing air and fluid up through the line.
Before assembly I had taken measurements as to where I needed the piston to sit when the shock is fully extended. This is so the piston does not bottom out on the compression valve stack when the shock fully extends. The rod is marked so that when the tape is at the edge of the cap the piston depth is set.
.
.
I then had to experiment with how much fluid to put in the shock. This is where things got time consuming. Too much fluid and the floating piston will bottom out in the canister as the shock is compressed. Too little and it will top out on the compression stack during full extension.
Once I had the correct amount of fluid, I cycled the shock up and down, being careful not to fully extend it causing the piston to pick up the air trapped in the top of the shock. While cycling the shock you can hear the air bubbles passing through the piston. Once you dont hear it anymore it tells you all the air in the system is now trapped at the top of the shock under the top guide/cap. Last thing left to do was remove the cap, top off fluid and overfill slightly so then when the cap is tightened it pushed out the excess fluid along with any air.
.
.
Here they are all done and ready for final assembly and installation!
 09-29-2012, 02:30 PM
#2470
Honda-Tech Member
Thread Starter
Join Date: Dec 2003
Location: True Honda Enthusiast
Posts: 12,680
Likes: 0
Received 1 Like
on
1 Post

The fronts will be mounted to the new strut bar (main reason I got it). Im currently working on installing the rears in the car, battling to find a way to mount the canisters so they dont contact anything. I think Ive got it though, Ill update tonight
09-29-2012, 03:34 PM
#2471
Honda-Tech Member
Join Date: Sep 2005
Location: Sacramento, CA, USA
Posts: 113
Likes: 0
Received 0 Likes
on
0 Posts
This may be inappropriate but I have a boner because of all the sexy, creative, and smart stuff going on in this thread.
09-29-2012, 06:42 PM
#2472
Honda-Tech Member
Thread Starter
Join Date: Dec 2003
Location: True Honda Enthusiast
Posts: 12,680
Likes: 0
Received 1 Like
on
1 Post
Part 1 of the new suspension install!
Got a late start today, so I was only able to install the rear shocks before I was starving and ready to go home lol.
Here is the whole setup ready to go in!

.
.
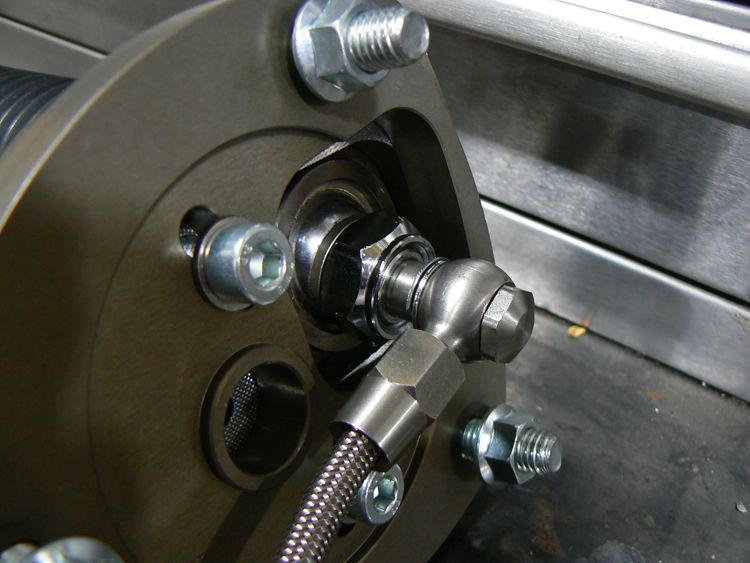
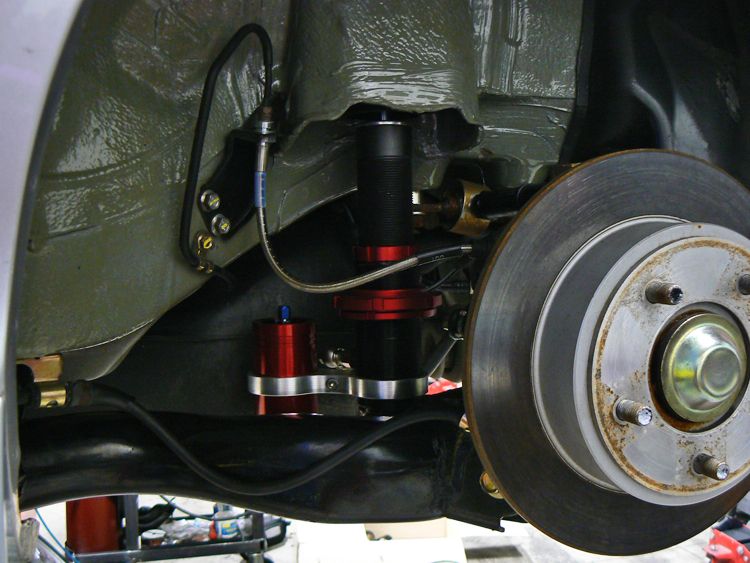
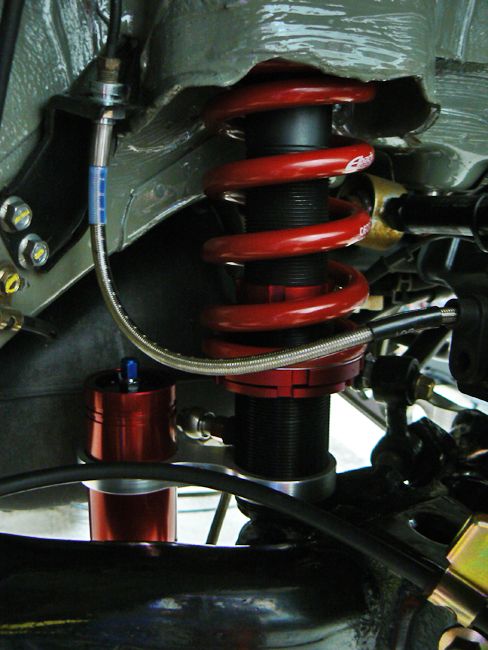
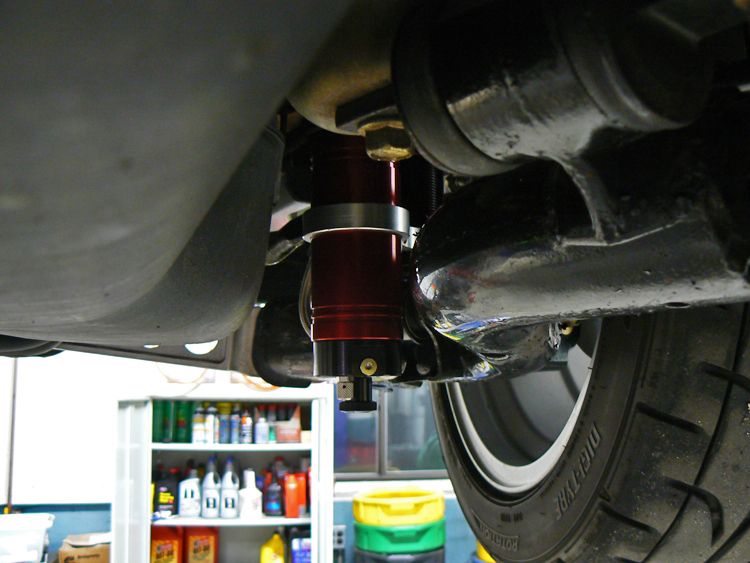
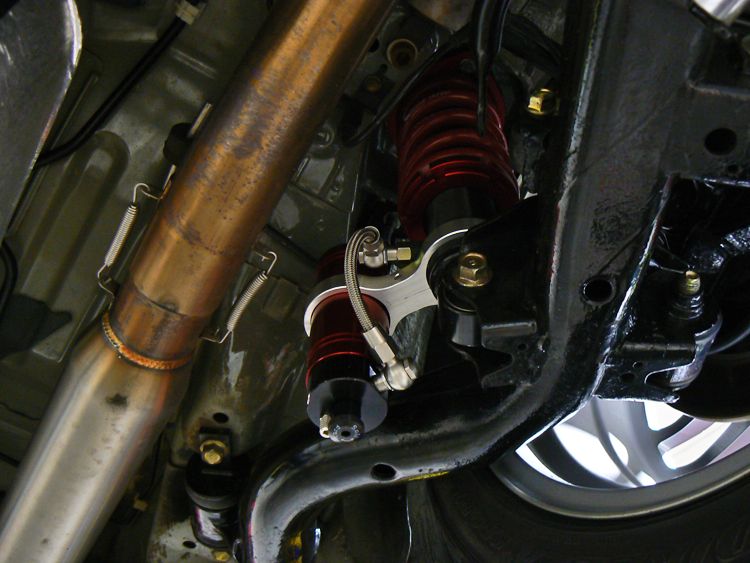
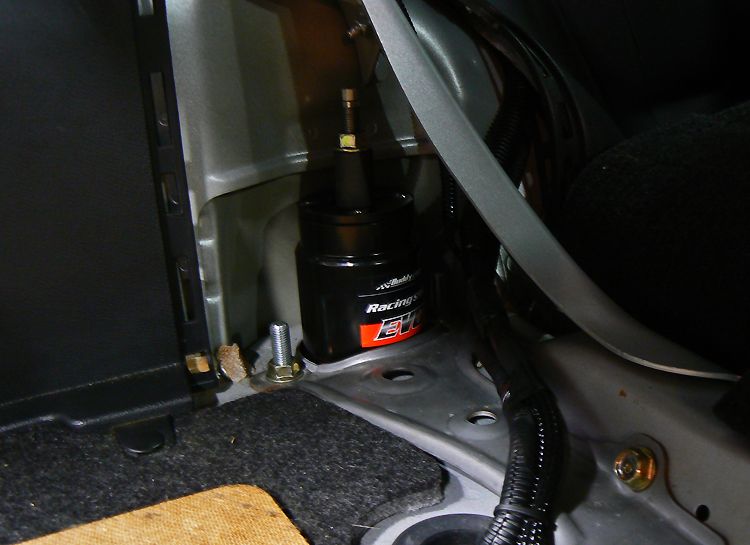
It took quite a while to figure out an orientation for the canisters so that they wouldnt contact the frame, suspension, or brake lines. I finally got this figured out, works great too because it makes the adjusters easily accessible when the car is on the ground. I installed one without a spring so I could check clearance throughout the suspension stroke...
.
.
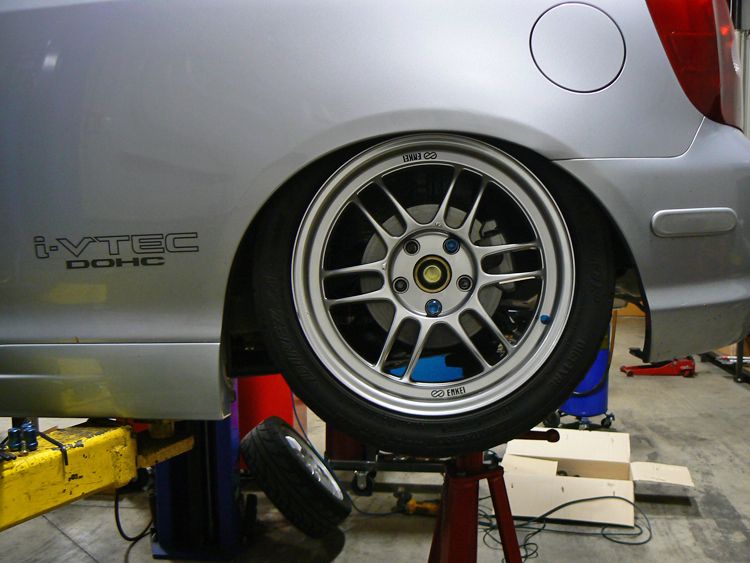
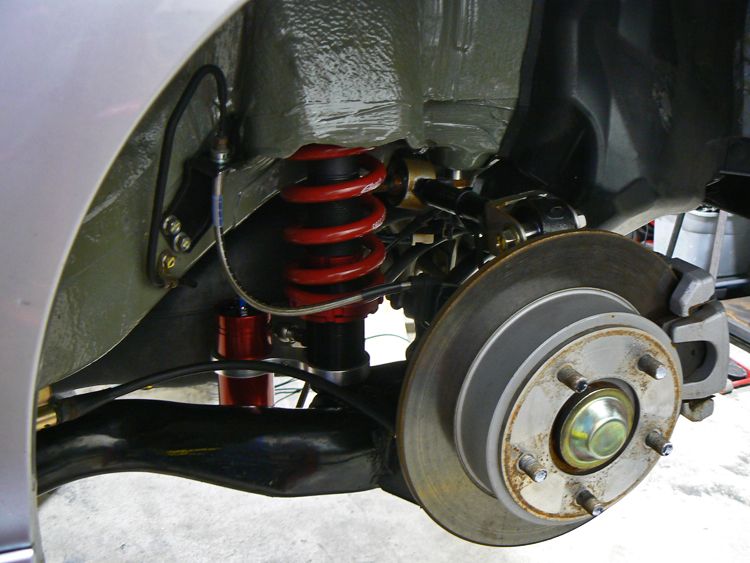
Here they are in all their glory, so trick!
.
.
Through the drive home from the shop I paid close attention to the rear end and how it handled both large and small bumps in the road. I set the high speed compression on full soft for the most comfortable ride, and started at position 5 on both rebound and low speed compression since Im running 2k stiffer springs than what they came with. The verdict on the street - FABULOUS! They are considerably smoother than the AST's yet still firm and taught. Harshness over cracks and little potholes in the road is gone. It's hard to tell overall balance without the fronts in so Im excited to have the setup complete tomorrow! Stay tuned
Got a late start today, so I was only able to install the rear shocks before I was starving and ready to go home lol.
Here is the whole setup ready to go in!
.
.
It took quite a while to figure out an orientation for the canisters so that they wouldnt contact the frame, suspension, or brake lines. I finally got this figured out, works great too because it makes the adjusters easily accessible when the car is on the ground. I installed one without a spring so I could check clearance throughout the suspension stroke...
.
.
Here they are in all their glory, so trick!
.
.
Through the drive home from the shop I paid close attention to the rear end and how it handled both large and small bumps in the road. I set the high speed compression on full soft for the most comfortable ride, and started at position 5 on both rebound and low speed compression since Im running 2k stiffer springs than what they came with. The verdict on the street - FABULOUS! They are considerably smoother than the AST's yet still firm and taught. Harshness over cracks and little potholes in the road is gone. It's hard to tell overall balance without the fronts in so Im excited to have the setup complete tomorrow! Stay tuned
09-29-2012, 10:35 PM
#2475
Honda-Tech Member
Join Date: Dec 2006
Location: Dallas Texas
Posts: 989
Likes: 0
Received 0 Likes
on
0 Posts
Wow that looks great! Made me jealous seeing that it doesn't ride harsh over cracks and things. Your using 14k(f) 18k(r)?