
Automotive Refinishing A-Z 99 EM1
 12-15-2009, 04:38 PM
#1
So I've been putting this off for a few weeks due to crummy weather, but I'm going ahead and starting it but bear with me as this will not be an overnight write up by any means and some things I will be doing you should not follow, such as my current status of bare metal that now has surface rust but this is my only vehicle at the moment and my DD, I will explain as I go along. I hope this thread will help you guys decide if you would like to attempt this with your own or if you should allow a professional take care of it, regardless, enjoy and feel free to ask any questions you like, and for the guys on here that do this everyday, constructive criticism is always welcome since I went to school and obtained my certifications and have been using it as side work for the past 8 years.
I will be using my 99 EM1 for this write up, back in the summer I did a little drinking and driving(flame on), haven't drank since that night though, swerved to miss a deer near my house and over corrected and right into a ditch. Had several places in the body prior to this incident from random things, which will be shown in the pictures so here we go:
Before:

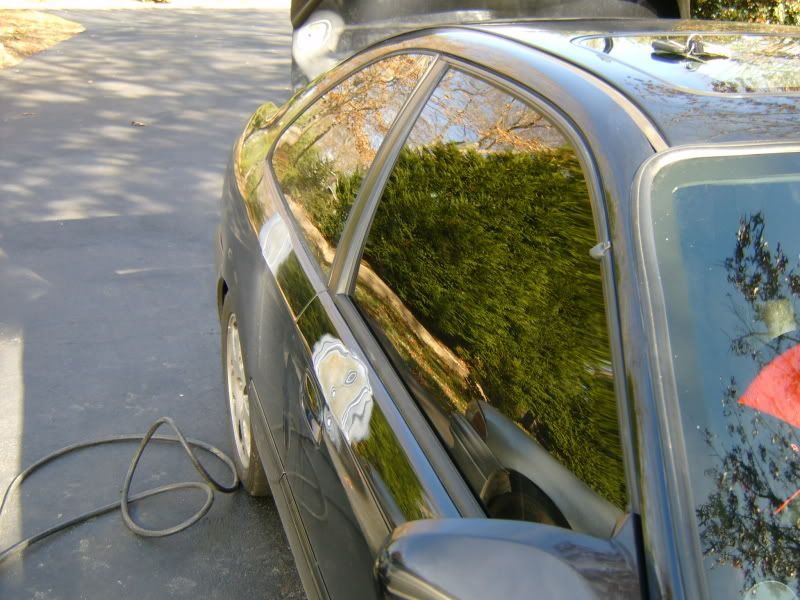
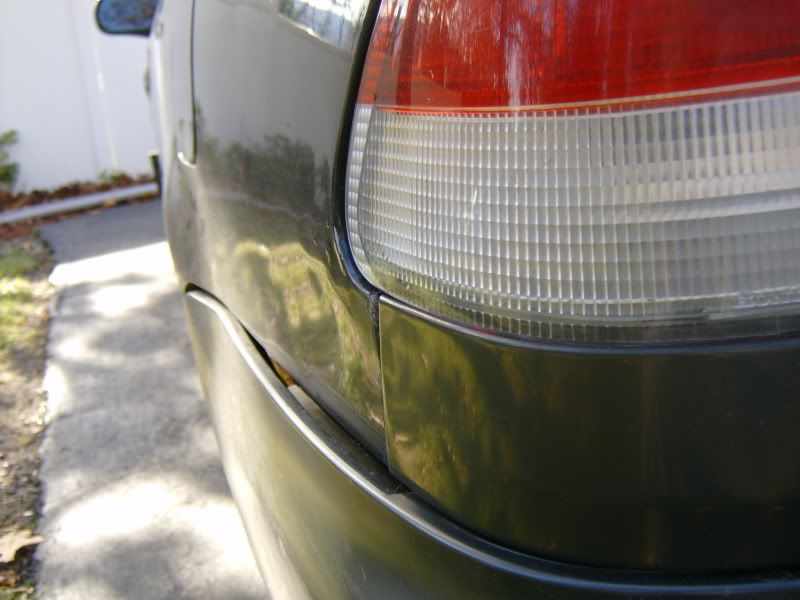
Passenger side quarter, sporting my first paint job ever lol also notice right behind the door handle, where that section of the door protrudes the front of the rear quarter...this will be addressed later on as well.

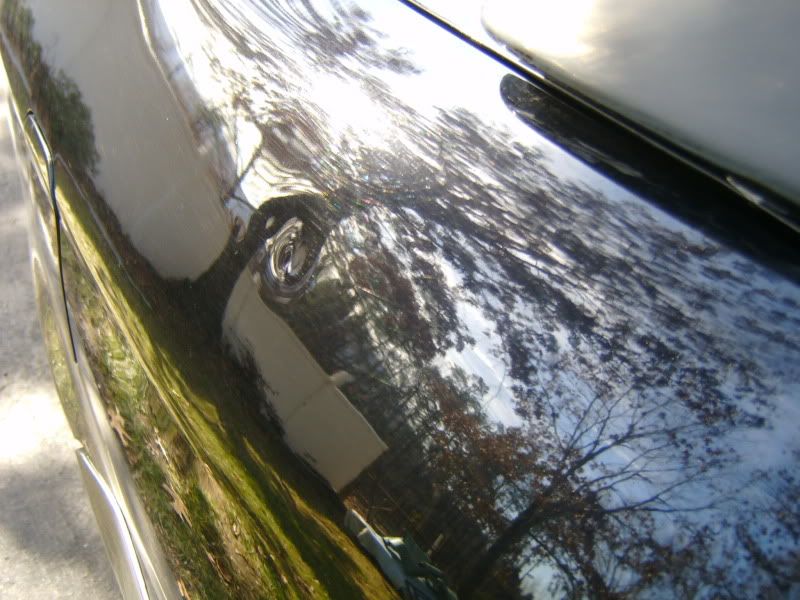
Dent in top of passenger door already grinded down, and small ding right below PS quarter glass
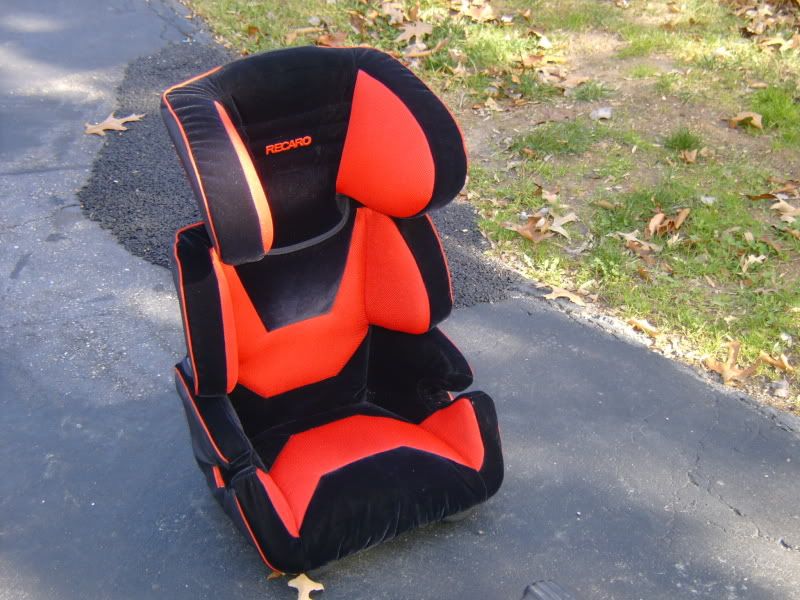
My sons car seat, straight reppin Recaro since age 2!
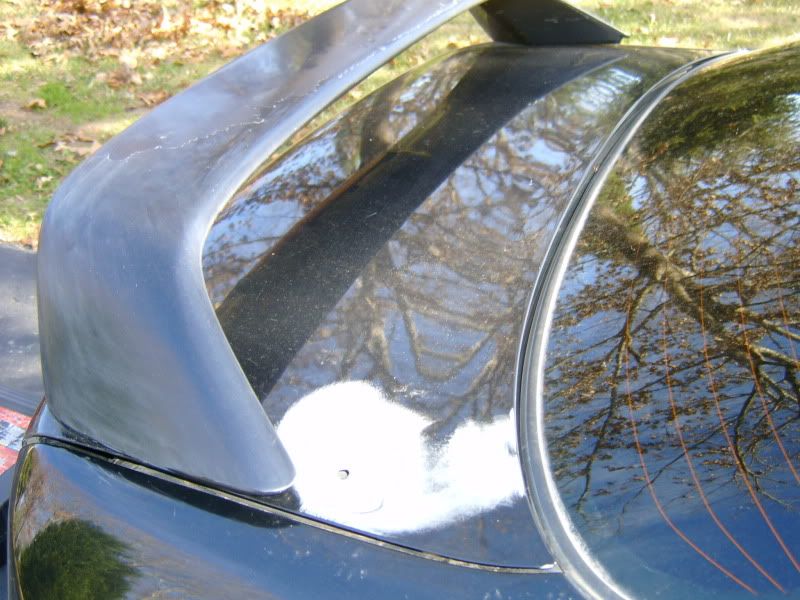
Holes in trunk from prior rice days that I did not repair properly in school, look hard and you can see the key mark across the whole spoiler in the middle
Another look at the PS damage thats been grinded with 80 Grit on a Dual Action(DA)Sander

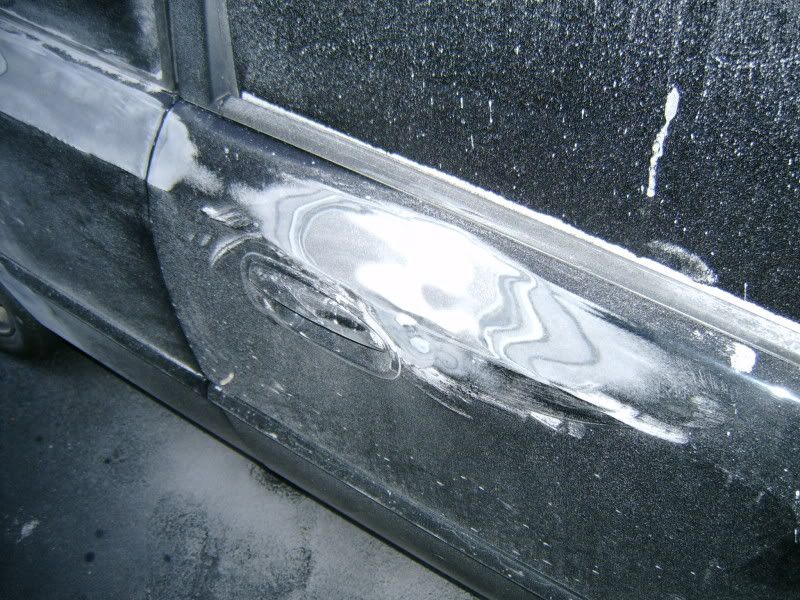
This one on this very structurally sound location was provided by the installer of my security system at Best Buy back in 2003...how he did this while he was "testing" the alarm still boggles my mind....try pushing on yours and see how strong this point is
DS rear quarter damage right above rear bumper line, thanks to drunk lady in a parking lot
My anger getting the best of me on top of DS rear quarter(thrown keys)
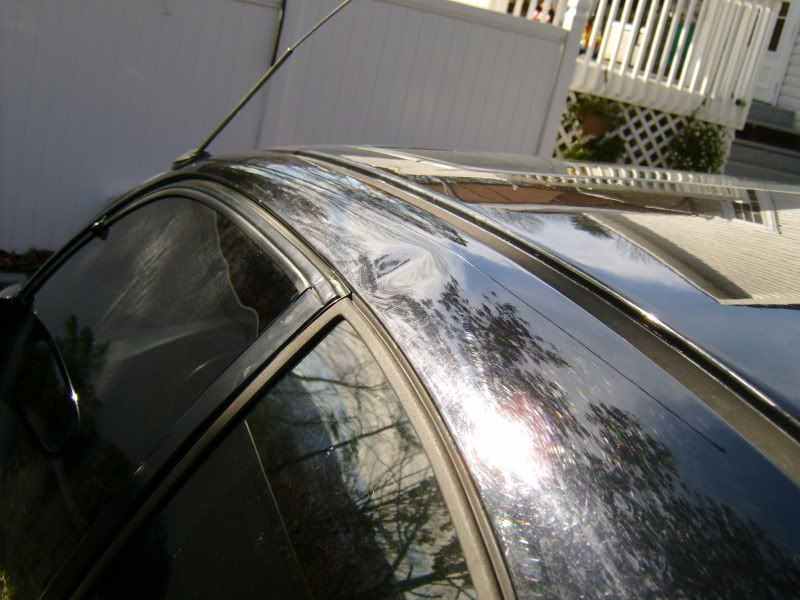
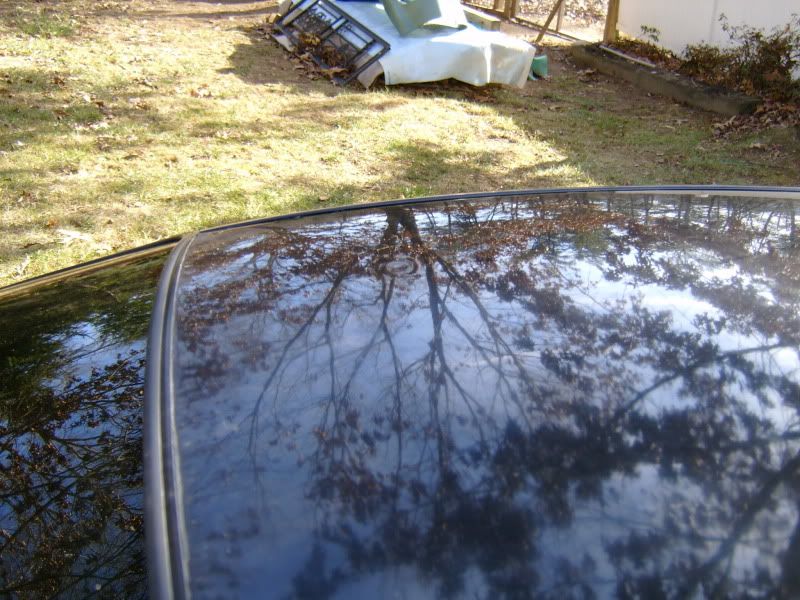
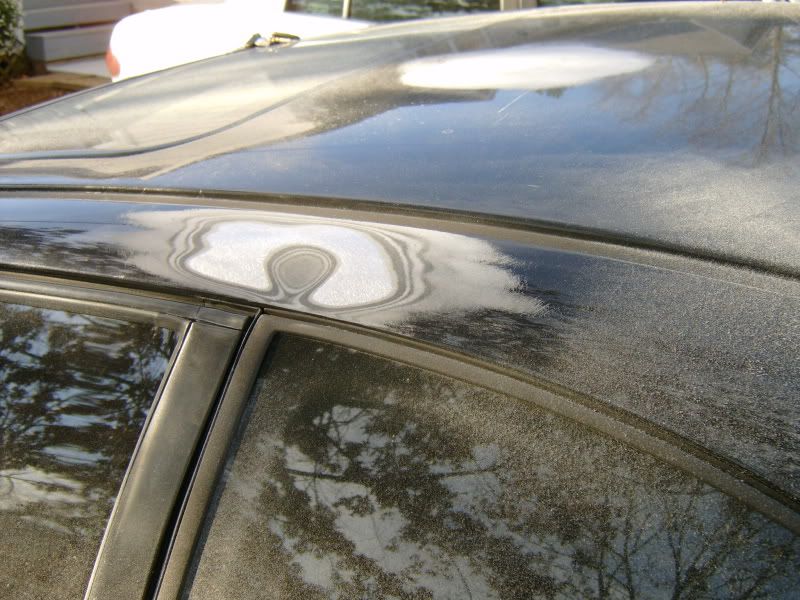
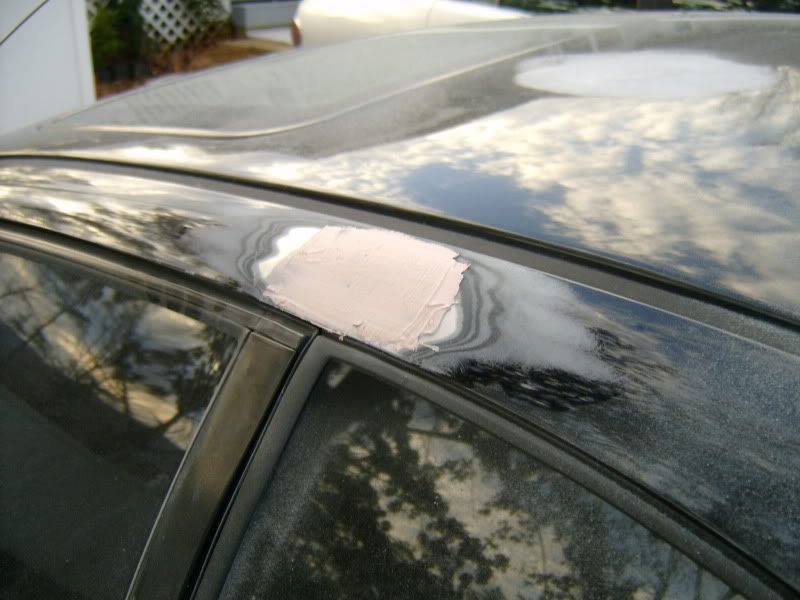
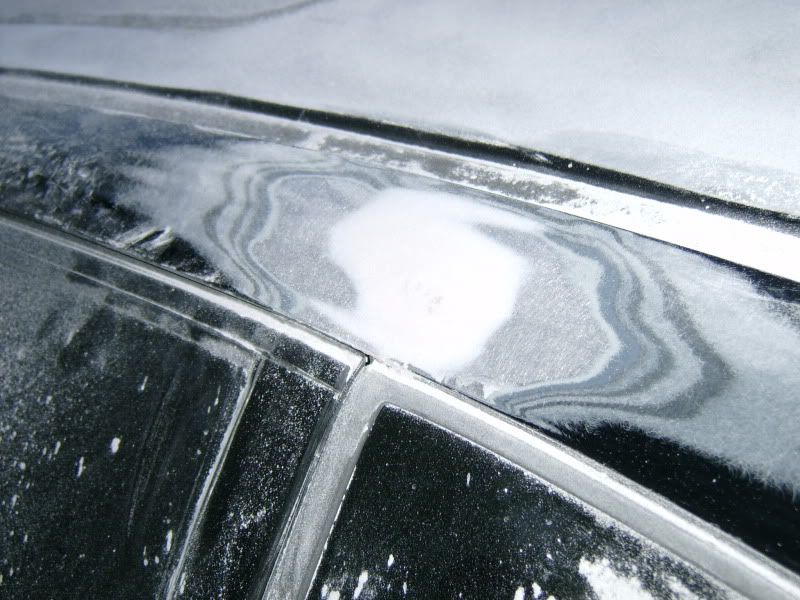
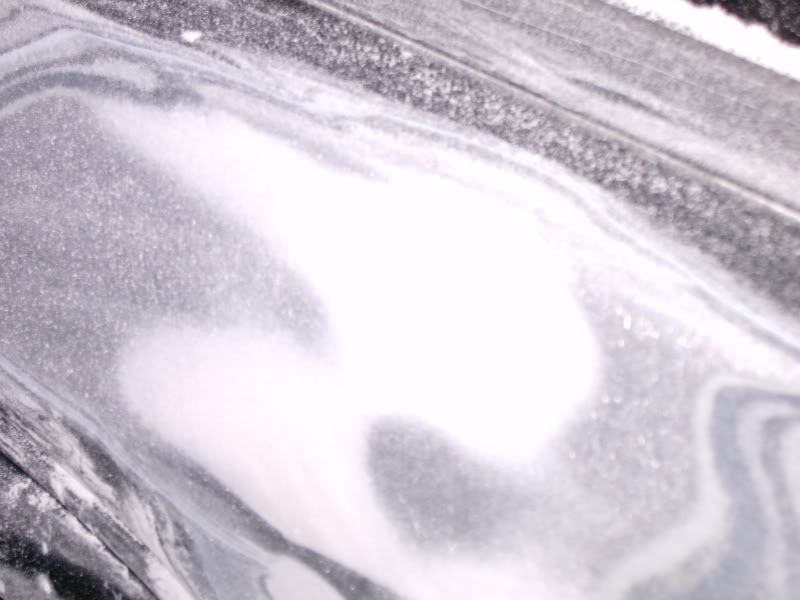
Little bit of hail/acorn damage on the roof, not very noticeable in the pic but oh well
Now that we've went over what damage needs to be repaired we can start off with taking a compressor, DA Sander with 80 grit sanding disks, and begin "Feather edging" around the dent. Feather edge approximately 3-5" from where filler will be applied. You can also use a line file sander/planing sander and whatever else you may like to call it. I will be taking my whole car to bare metal and starting from the ground up, only due to the fact that its got several paint jobs on it. heres another shot of the dent compliments of the best buy douche bag:
I did this with the DA Sander flat against the surface, working up and down with the curvature of the body... Notice the paint left, this is a low spot and will need to be filled later on... there are multiple methods to fixing this problem. One is to take off the paint and fill, rasp, sand, fill, rasp, sand until there are no low spots or high spots and the filler matches the curvature of the body, I don't recommend this method. Another method, and my choice even though i have done both, is to pick up a tool called a stud gun. These tools range anywhere from around 70-500 bucks. I picked up mine at harbor freight tools...cheap but it gets the job done, if I had a shop with more income i would definitely pick up a better quality one. Haven't gotten to use it on my EM1 yet, but will post more pics as I go along. The stud gun welds a copper stud to bare metal in the center of the dent. After the stud is welded to the body, you use a special slide hammer that comes with the stud gun, lock it on to the stud and begin using the weight on the slide hammer to pull the damaged metal back to its original form, or as close as possible. The trick about dent repair is to get the metal as close to original as possible, and using the least about of filler as possible to achieve best results. This is a pic of the first method that I stated:
Notice my error, I did not feather edge enough on this one. Also when using standard body filler you must apply it over bare metal. Polyester/light weight filler can be applied over nearly any sanded surface and will be demonstrated on my hail damage before I take the whole car down to metal just to give you an idea.
Sanded down with DA Sander with 80 grit disk being very very careful to not remove too much filler:
PS Damage sanded down with DA and 80 grit:
After using 80 grit you should have a little bit of a high spot where the filler is. This will allow "wiggle room" to step up your grit to smooth out your filler. It doesn't really matter which grit numbers you use here, but just for arguments sake I used 80, 120, and 220. I will update this thread soon and also show and explain in more detail using the stud gun. The stud gun is a real life saver over the traditional slide hammer, which requires you to drill a hole in the body in order to attach the hammer via dent. After using the stud and getting the repair area to your liking with the stud slide hammer you simply release it and grind the stud off of the body, with no appearance of anything ever being connected to the body. If you have any questions thus far, feel free to PM me or post here. Thanks for looking! again, updates will be coming as often as I can manage and apologize for the lengthy time. Thanks!
I will be using my 99 EM1 for this write up, back in the summer I did a little drinking and driving(flame on), haven't drank since that night though, swerved to miss a deer near my house and over corrected and right into a ditch. Had several places in the body prior to this incident from random things, which will be shown in the pictures so here we go:
Before:
Passenger side quarter, sporting my first paint job ever lol also notice right behind the door handle, where that section of the door protrudes the front of the rear quarter...this will be addressed later on as well.
Dent in top of passenger door already grinded down, and small ding right below PS quarter glass
My sons car seat, straight reppin Recaro since age 2!
Holes in trunk from prior rice days that I did not repair properly in school, look hard and you can see the key mark across the whole spoiler in the middle
Another look at the PS damage thats been grinded with 80 Grit on a Dual Action(DA)Sander
This one on this very structurally sound location was provided by the installer of my security system at Best Buy back in 2003...how he did this while he was "testing" the alarm still boggles my mind....try pushing on yours and see how strong this point is
DS rear quarter damage right above rear bumper line, thanks to drunk lady in a parking lot
My anger getting the best of me on top of DS rear quarter(thrown keys)
Little bit of hail/acorn damage on the roof, not very noticeable in the pic but oh well
Now that we've went over what damage needs to be repaired we can start off with taking a compressor, DA Sander with 80 grit sanding disks, and begin "Feather edging" around the dent. Feather edge approximately 3-5" from where filler will be applied. You can also use a line file sander/planing sander and whatever else you may like to call it. I will be taking my whole car to bare metal and starting from the ground up, only due to the fact that its got several paint jobs on it. heres another shot of the dent compliments of the best buy douche bag:
I did this with the DA Sander flat against the surface, working up and down with the curvature of the body... Notice the paint left, this is a low spot and will need to be filled later on... there are multiple methods to fixing this problem. One is to take off the paint and fill, rasp, sand, fill, rasp, sand until there are no low spots or high spots and the filler matches the curvature of the body, I don't recommend this method. Another method, and my choice even though i have done both, is to pick up a tool called a stud gun. These tools range anywhere from around 70-500 bucks. I picked up mine at harbor freight tools...cheap but it gets the job done, if I had a shop with more income i would definitely pick up a better quality one. Haven't gotten to use it on my EM1 yet, but will post more pics as I go along. The stud gun welds a copper stud to bare metal in the center of the dent. After the stud is welded to the body, you use a special slide hammer that comes with the stud gun, lock it on to the stud and begin using the weight on the slide hammer to pull the damaged metal back to its original form, or as close as possible. The trick about dent repair is to get the metal as close to original as possible, and using the least about of filler as possible to achieve best results. This is a pic of the first method that I stated:
Notice my error, I did not feather edge enough on this one. Also when using standard body filler you must apply it over bare metal. Polyester/light weight filler can be applied over nearly any sanded surface and will be demonstrated on my hail damage before I take the whole car down to metal just to give you an idea.
Sanded down with DA Sander with 80 grit disk being very very careful to not remove too much filler:
PS Damage sanded down with DA and 80 grit:
After using 80 grit you should have a little bit of a high spot where the filler is. This will allow "wiggle room" to step up your grit to smooth out your filler. It doesn't really matter which grit numbers you use here, but just for arguments sake I used 80, 120, and 220. I will update this thread soon and also show and explain in more detail using the stud gun. The stud gun is a real life saver over the traditional slide hammer, which requires you to drill a hole in the body in order to attach the hammer via dent. After using the stud and getting the repair area to your liking with the stud slide hammer you simply release it and grind the stud off of the body, with no appearance of anything ever being connected to the body. If you have any questions thus far, feel free to PM me or post here. Thanks for looking! again, updates will be coming as often as I can manage and apologize for the lengthy time. Thanks!
Last edited by FearTheH; 12-15-2009 at 04:47 PM.
 12-15-2009, 04:43 PM
#2
Remember, when repairing dents, it is important to use proper body tools, such as the stud gun, slide hammer, hammers and dolleys Here are some pictures of different hammers, dollies and a stud gun with slide hammer:
Stud welder, best alternative to drilling the body and screwing in a traditional slide hammer

Here is a picture of some of the hammers and dollies used in the auto body industry:
Dollies from top to bottom: Multipurpose dolly, Heel dolly, and a Toe dolly... the long black one is called a Spoon dolly.
Hammers from top to bottom: Shrinking Hammer, Chisel finishing hammer, and Pick finishing hammer.
Hammers and dollies are important to use to get the body damage as close to its original form as possible...Rule of thumb: For best results use hammers and dollies to repair dent as much as possible, best results are within 1/8th of an inch to the panels original level, thus using only 1/8th of an inch of filler to prevent filler cracking out of the repair area.

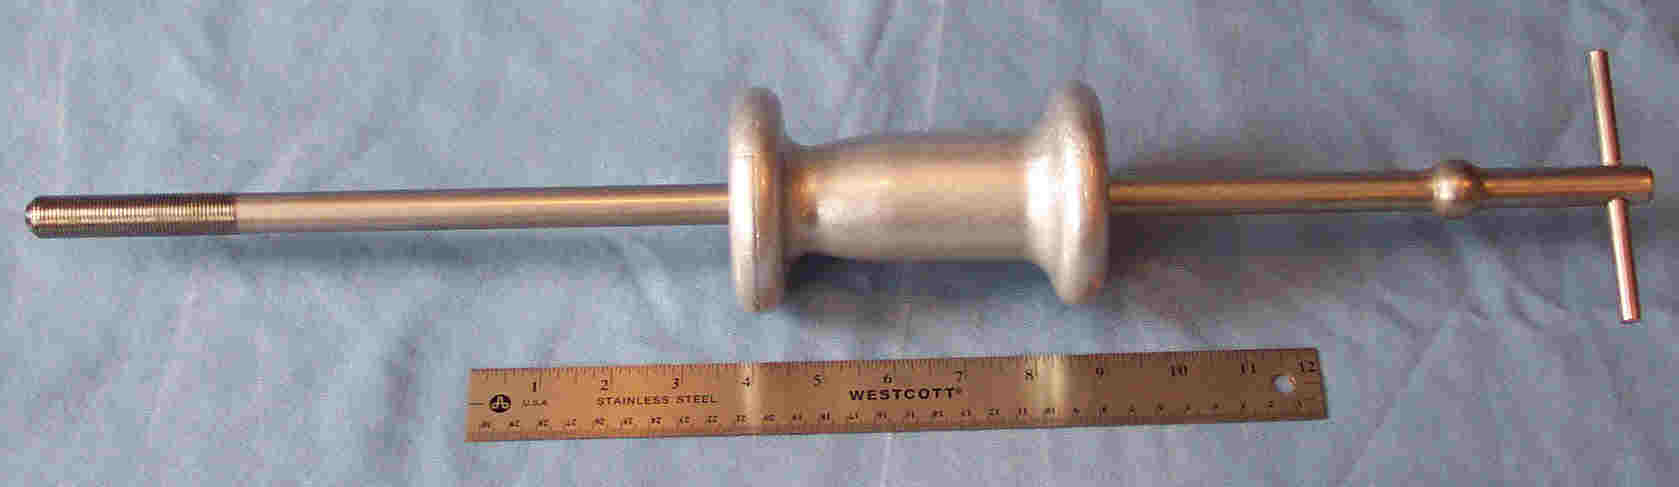
Here is a picture of a slide hammer from a stud gun/stud welder:

Here is a picture of the tip of the stud welders slide hammer, notice how the copper stud is shown in the end. The small wheel is turned after the stud is in the tip to lock onto the stud and begin pulling the dent. This copper stud will be welded to the bare metal of the dent and then slipped into the end of the slide hammer like shown below.

Here is a picture of a traditional slide hammer and the tip of a slide hammer just so you can see the better benefits of the stud welder and not having to drill a hole in the body that will need to be filled:

I dont know about you, but I don't want to put anymore holes in my car. The two from the old days of rice are more than enough and need to be gone ASAP! again, let me know if you have any questions.
A little trick I picked up over the years is that after removing paint, and getting to bare metal of the dent...right before using hammers and dollies to get the repair area back as close as possible to its original form, use a heat gun set on its highest setting and heat the metal before hammering. When a dent occurs, the metal actually stretches and is now in theory more surface area than originally, not much, but there is a difference which you will see when you cant get it back to its exact form. Heating the metal causes the molecules to disperse, making the metal slightly more malliable. When it cools the molecules, along with the metal, contract. I will demonstrate in the near future.
Stud welder, best alternative to drilling the body and screwing in a traditional slide hammer
Here is a picture of some of the hammers and dollies used in the auto body industry:
Dollies from top to bottom: Multipurpose dolly, Heel dolly, and a Toe dolly... the long black one is called a Spoon dolly.
Hammers from top to bottom: Shrinking Hammer, Chisel finishing hammer, and Pick finishing hammer.
Hammers and dollies are important to use to get the body damage as close to its original form as possible...Rule of thumb: For best results use hammers and dollies to repair dent as much as possible, best results are within 1/8th of an inch to the panels original level, thus using only 1/8th of an inch of filler to prevent filler cracking out of the repair area.
Here is a picture of a slide hammer from a stud gun/stud welder:
Here is a picture of the tip of the stud welders slide hammer, notice how the copper stud is shown in the end. The small wheel is turned after the stud is in the tip to lock onto the stud and begin pulling the dent. This copper stud will be welded to the bare metal of the dent and then slipped into the end of the slide hammer like shown below.
Here is a picture of a traditional slide hammer and the tip of a slide hammer just so you can see the better benefits of the stud welder and not having to drill a hole in the body that will need to be filled:
I dont know about you, but I don't want to put anymore holes in my car. The two from the old days of rice are more than enough and need to be gone ASAP! again, let me know if you have any questions.
A little trick I picked up over the years is that after removing paint, and getting to bare metal of the dent...right before using hammers and dollies to get the repair area back as close as possible to its original form, use a heat gun set on its highest setting and heat the metal before hammering. When a dent occurs, the metal actually stretches and is now in theory more surface area than originally, not much, but there is a difference which you will see when you cant get it back to its exact form. Heating the metal causes the molecules to disperse, making the metal slightly more malliable. When it cools the molecules, along with the metal, contract. I will demonstrate in the near future.
Last edited by FearTheH; 12-16-2009 at 03:09 PM.
12-15-2009, 10:16 PM
#5
Honda-Tech Member
Join Date: Jun 2008
Location: Eureka, CA, USA
Posts: 615
Likes: 0
Received 0 Likes
on
0 Posts
Interesting. Looks like you got your work cut out for you! That's what my car looked like at the start. All dents and stuff.
12-15-2009, 10:58 PM
#6
yeah for sure, its not too bad... not even close to some of the things I've had to repair before lol. I think the small dents are the worst though, just for the fact that not a lot of people notice them, but you know exactly where they are and theyre nothing but an eyesore, especially on a black car. Hopefully it wont take me too long to get this thing done, just so I can get this thread finished up for you guys.
Trending Topics
12-16-2009, 03:42 PM
#10
Honda-Tech Member
Join Date: Dec 2008
Location: Middle Earth
Posts: 106
Likes: 0
Received 0 Likes
on
0 Posts
Looks like in that first picture you bondo'd over paint? Shouldn't you have taken down to BARE metal prior to bondo application?
12-17-2009, 06:10 AM
#15
stud gun, fantastic way to cause rust behind your body panels, snap on has a newer style dent puller that is much more effective and doesnt put holes in your panels or cause rust from burning away the galvacoat, do yourself a favor people, dont put holes where you dont need them if you dont plan on doing something behind the panel to prevent rust.
 12-17-2009, 09:53 AM
#18
Yeah, no one that is doing this for their first time is going to spend 1000 for over priced snap on ****. Not knocking snap on, as I have a full set. That product is not practical for the DIYer. I've been using a stud gun for years and have NEVER, read that again, NEVER had it rust the back of the panel. You obviously held it too long if it got that hot to melt the interior coating and you should probably reconsider reading directions before using something. I will take pics of where I used a stud gun on my car 6 years ago, you tell me if its rusted or not.
12-17-2009, 01:52 PM
#19
Yeah, no one that is doing this for their first time is going to spend 1000 for over priced snap on ****. Not knocking snap on, as I have a full set. That product is not practical for the DIYer. I've been using a stud gun for years and have NEVER, read that again, NEVER had it rust the back of the panel. You obviously held it too long if it got that hot to melt the interior coating and you should probably reconsider reading directions before using something. I will take pics of where I used a stud gun on my car 6 years ago, you tell me if its rusted or not.
12-17-2009, 02:07 PM
#20
I used one as a beginner, but I read the instructions. And I will be demonstrating use of the stud welder as well, pics and descriptions are for noobs who don't know what this stuff is, or looks like. Like my instructor always said "what I'm going to teach you is just a drop in the bucket. The best tool of learning is going hands on and making mistakes." Either way thanks for the constructive criticism. Do you work in the collision repair industry spawne? If so, where did you take your training?
Last edited by FearTheH; 12-17-2009 at 02:13 PM.
12-17-2009, 08:02 PM
#22
Honda-Tech Member
Glad you got this going. Will have to book mark this for when I start on the Rex. Hope you go in-depth with the dent repair as this seems to be the thing I have found the least info on.
12-17-2009, 10:10 PM
#24
thanks for the support fellaz... i will definitely go as in depth with the dent repair as i possibly can. Just hope it helps some of you, and im sure there will be some more **** talking of the methods im using, but ive used them for 8 years and they work. There are also a few other tricks I like to use but I will be leaving those out, and I'm doing this using the basics because its easier to learn and it works. If you would like to make some negative comments, also post a picture of your certifications, thanks have a nice day 
12-18-2009, 12:24 AM
#25
Honda-Tech Member
How would you go about fixing waviness in the doors? Like not dents, but I guess just from years of use it just isn't completely flat, probably from a bunch of small taps if that makes since.