
Radiator Replacement for DumDums
 08-19-2009, 10:39 PM
#1
Honda-Tech Member
Thread Starter
How-tos for DumDums - 91 Civic DX Radiator Replacement
Note: These pictures were taken after I replaced the radiator.
Set the parking brake and block the rear wheels with a couple of bricks (I used pavers).
Jack up the front of the car on the front cross-member and put jackstands on the front support points behind the front wheels. Remove jack once car stable on jackstands.
Open the hood and disconnect the negative battery cable from the battery.
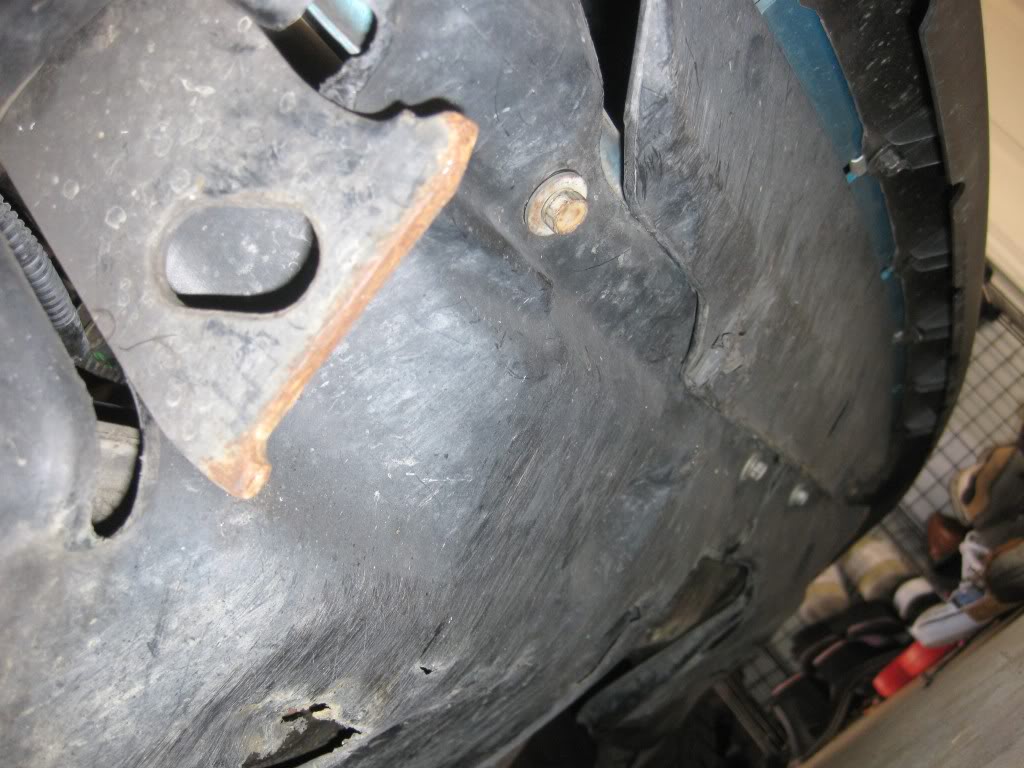
To get access to the radiator draining plug on the bottom of the radiator, remove the plastic cover under the radiator on the passenger's side. Use a 10mm socket and Phillip screwdriver.
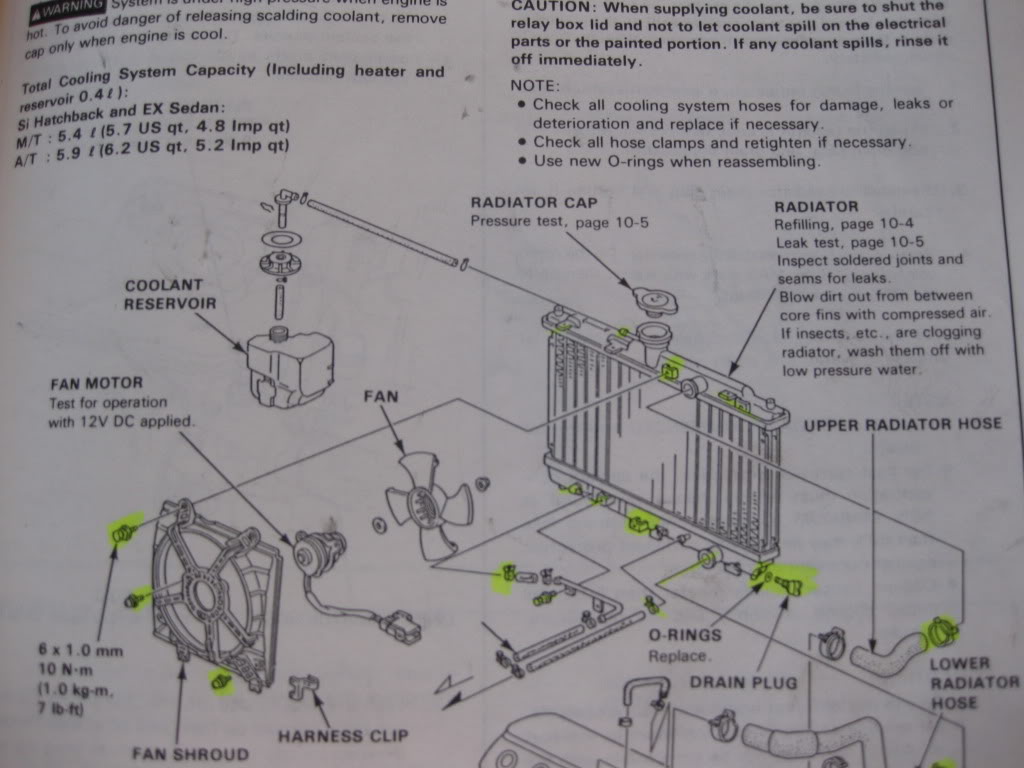
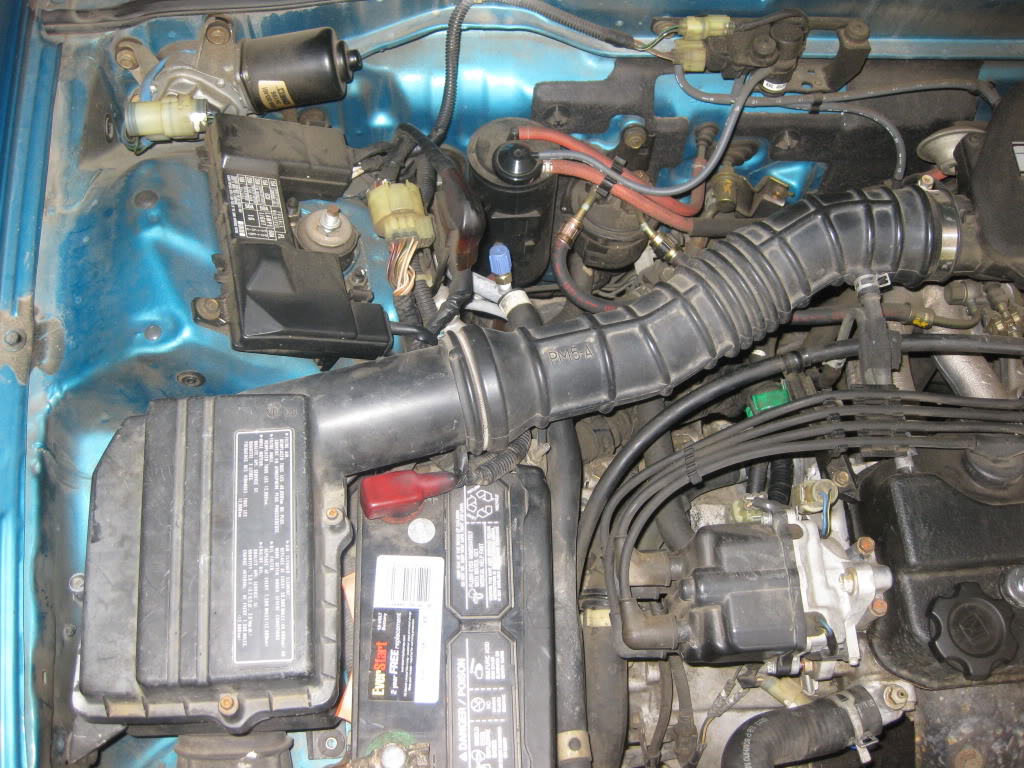
Put a bucket under the radiator draining plug and unscrew the drain plug to drain the coolant. Remove radiator cap. This is a diagram of the radiator and all the parts you'll be working with.
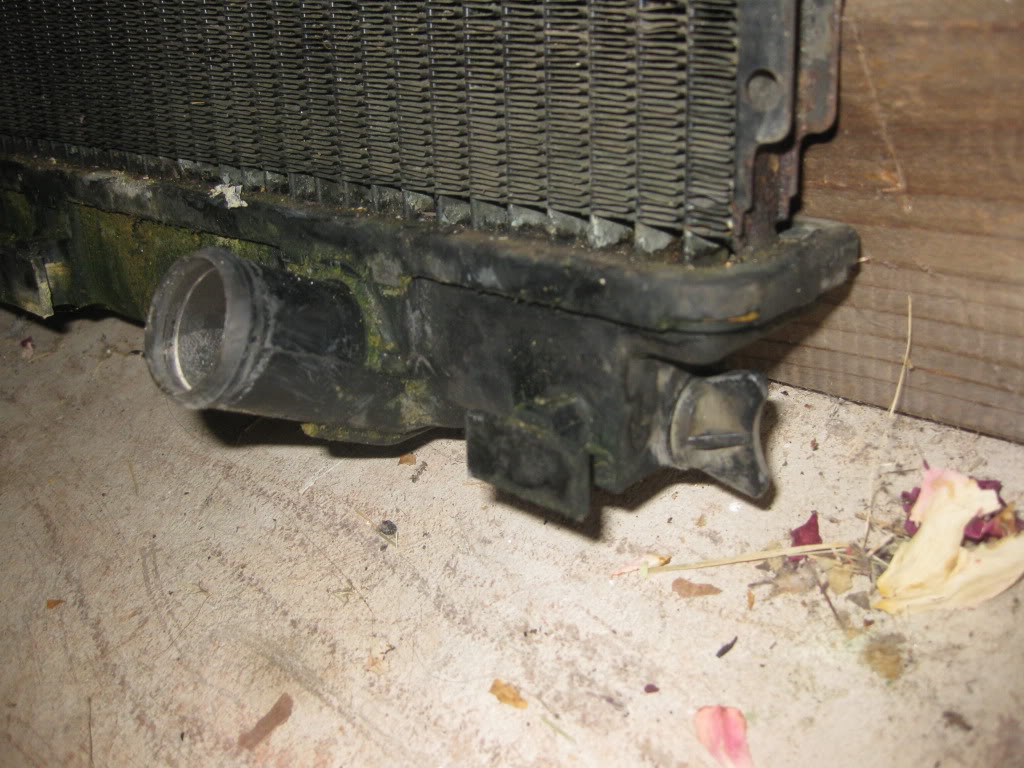
Picture of the old radiator showing the draining plug.
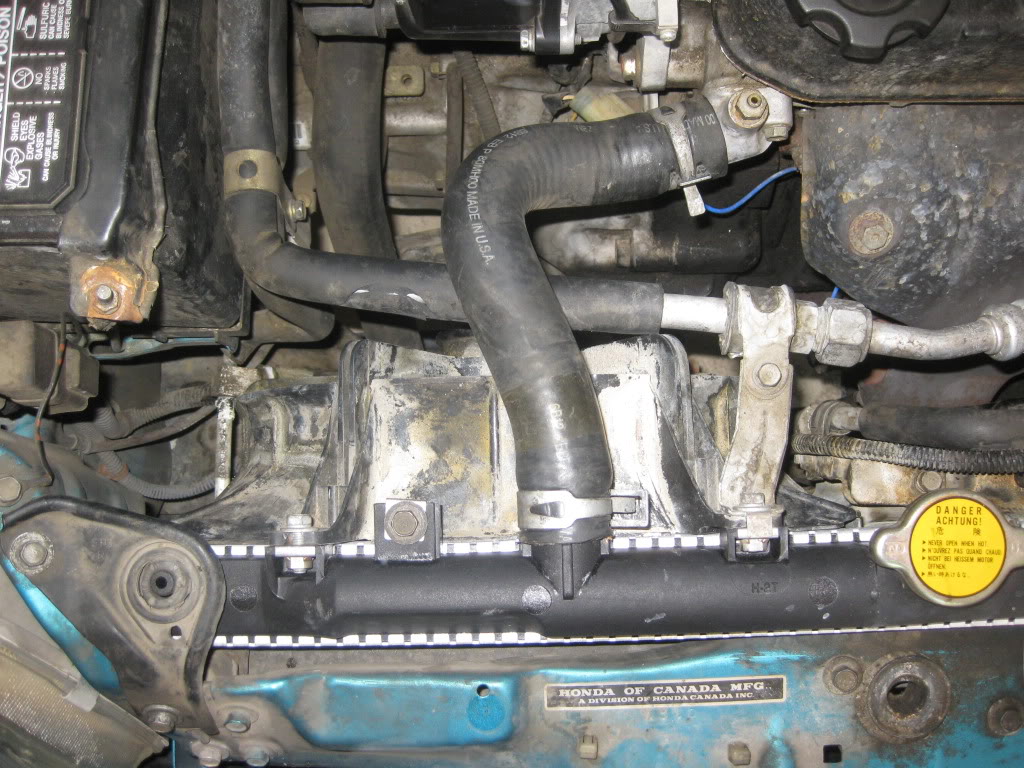
Once all the coolant is drained, compress the hose clamp on the upper radiator hose with pliers and slide it off the radiator. Do the same on the other end to the engine. Remove this hose.
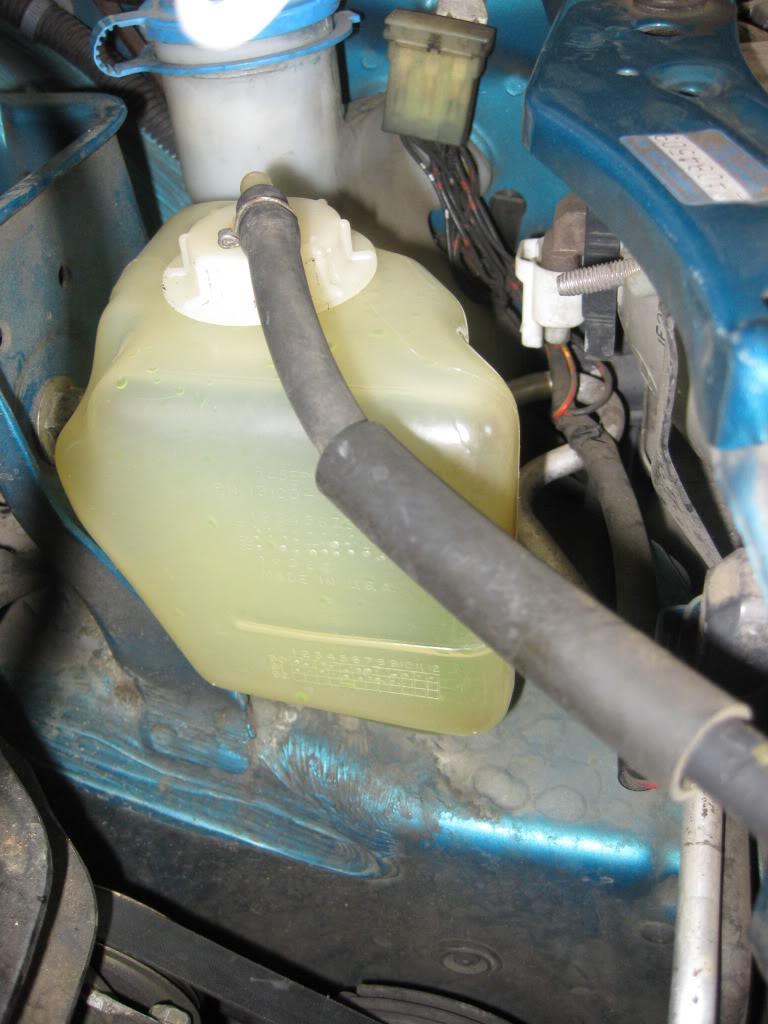
Disconnect the coolant reservoir hose from the radiator and the coolant reservoir bottle. Remove the coolant reservoir bottle by lifting it straight up. Later, wash it clean before putting it back.

Coolant reservoir bottle after wash
Remove the two bolts on top of the radiator holding the fan. Slide the lever holding the fan to the ac line up and toward the engine for more room. Use a 10mm socket
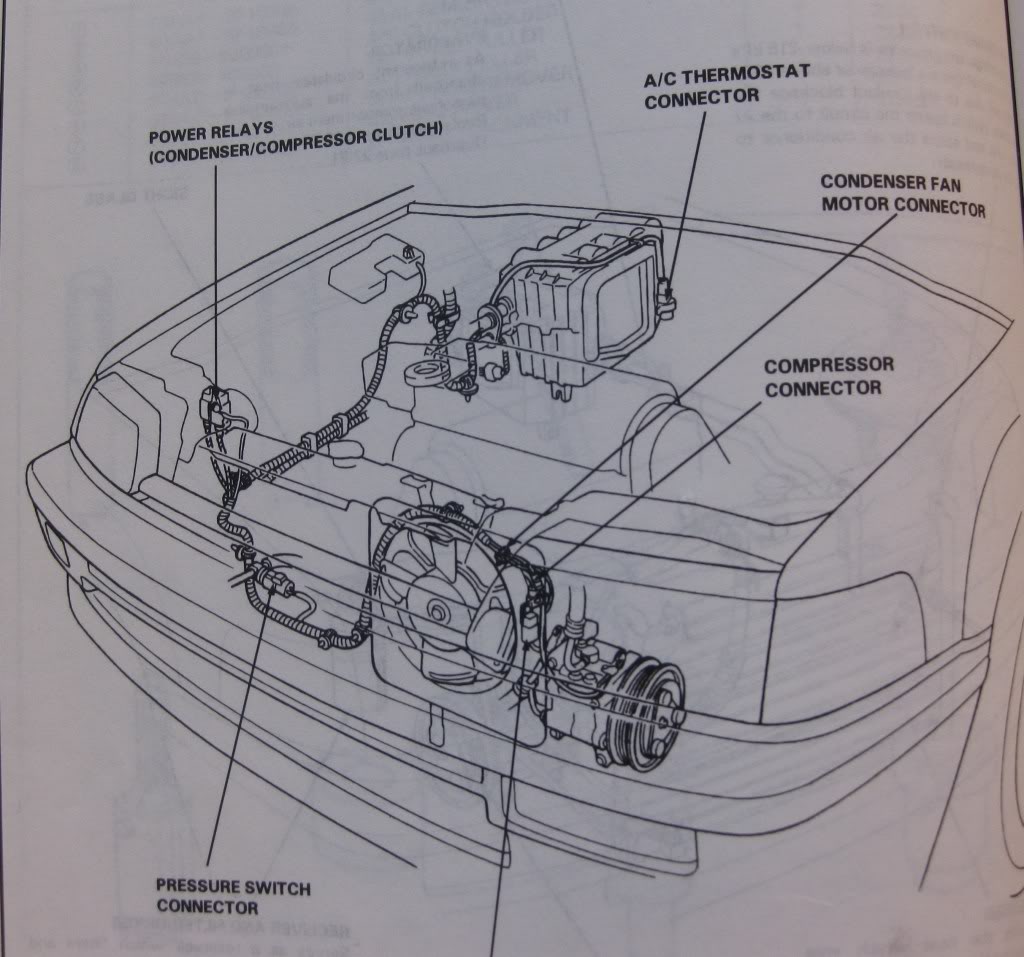
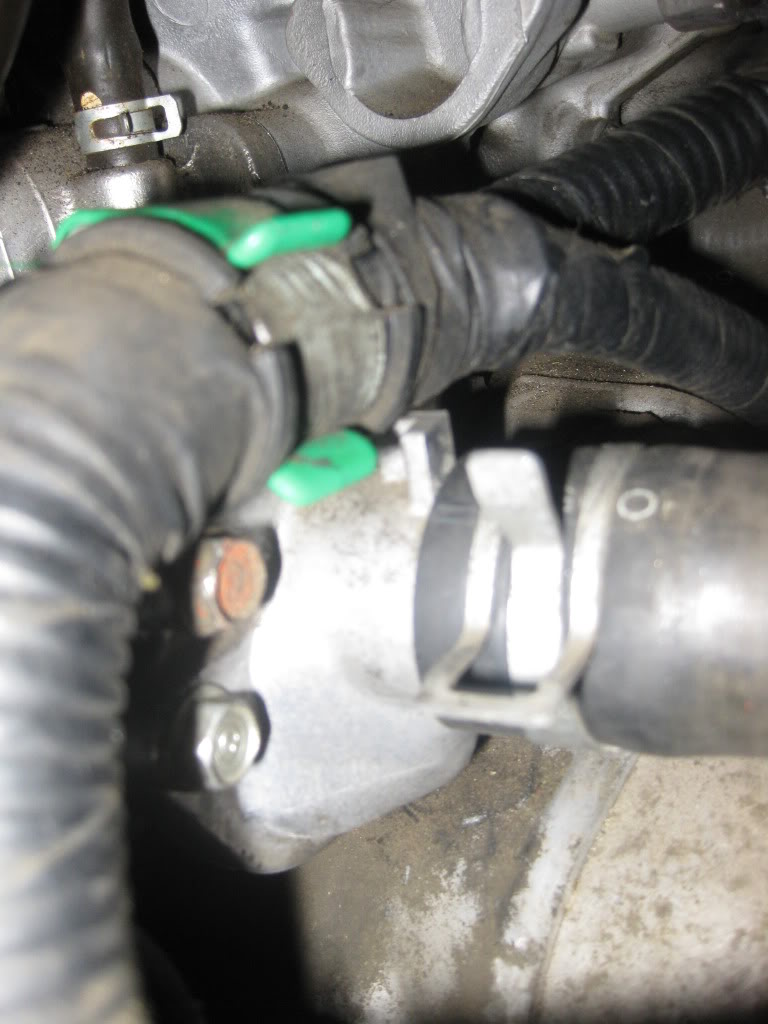
Go under the car and unplug the green-colored fan electrical plug (Not inlcuded in this diagram. See first picture above for the green plug behind the plastic cover). While there, remove the wiring harness attached around the bottom of the fan. There should be 2 attachments. This is a diagram of the wiring harness around the top of the condenser fan and under the radiator fan (not in diagram).
Remove the bolt holding the two ac line near the battery for easy removal of the fan. Use a 10 mm socket.
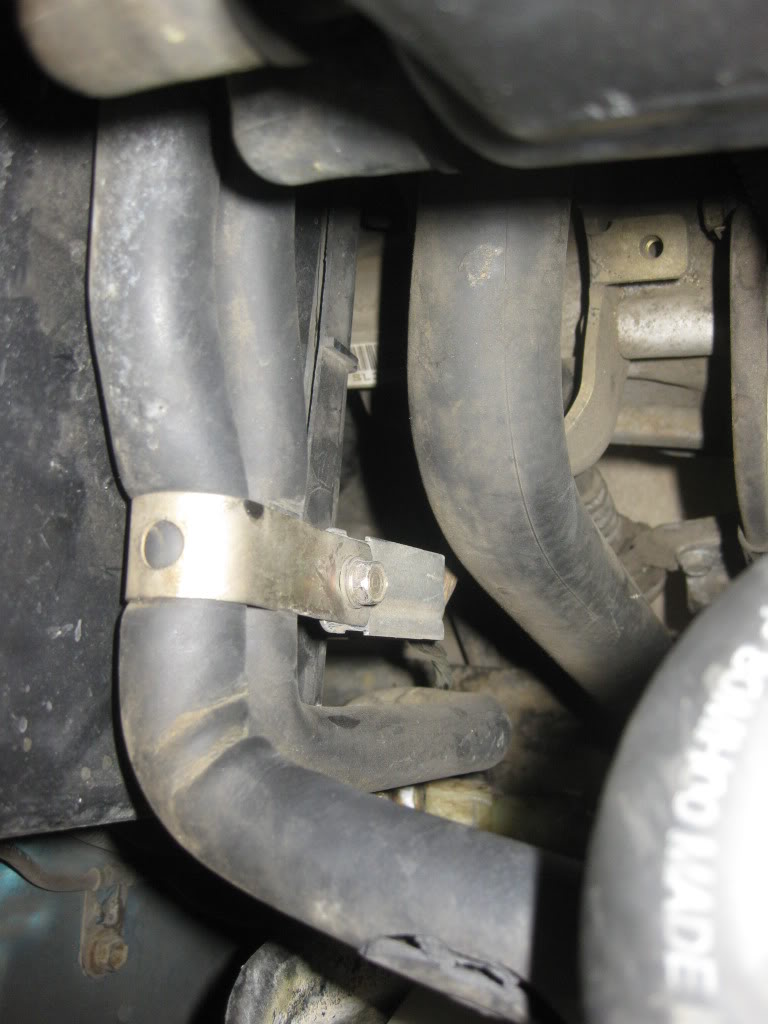
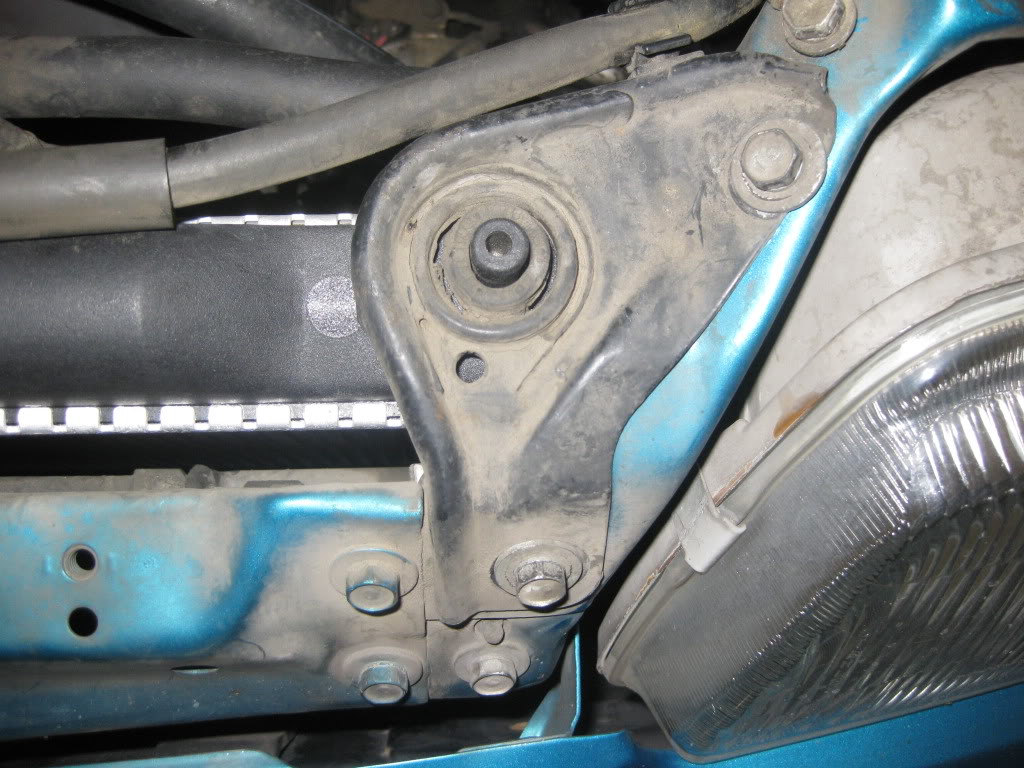
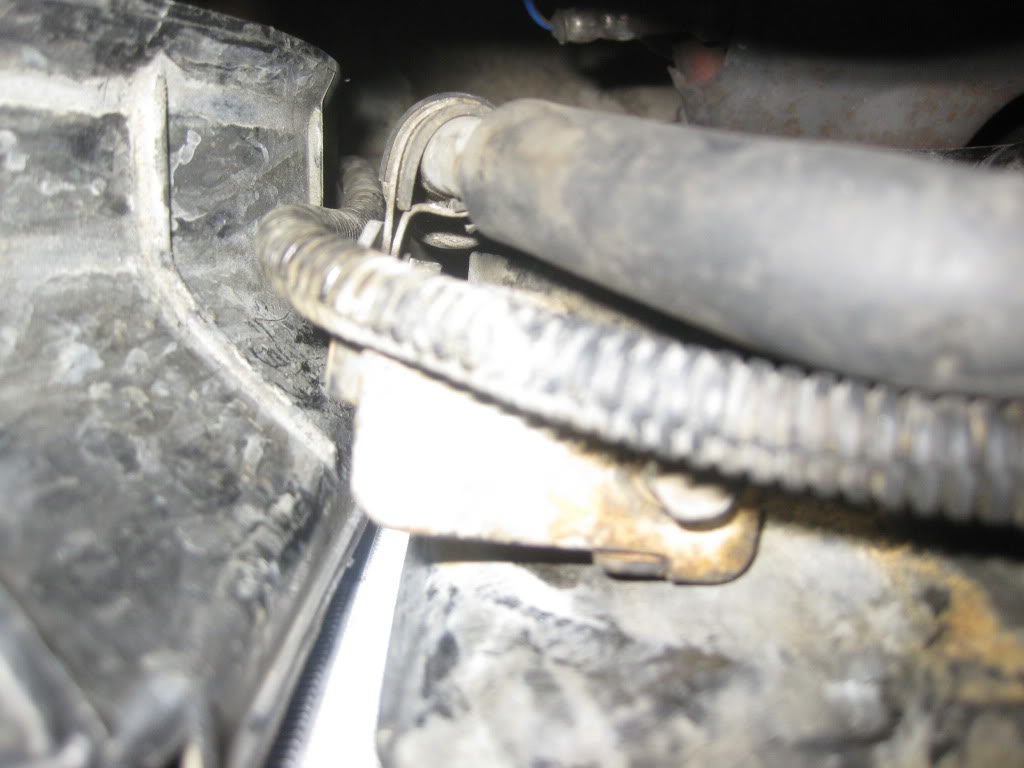
Remove the brackets holding the radiator for easy removal of the fan. Use a 10mm socket. This is a picture of the left bracket .
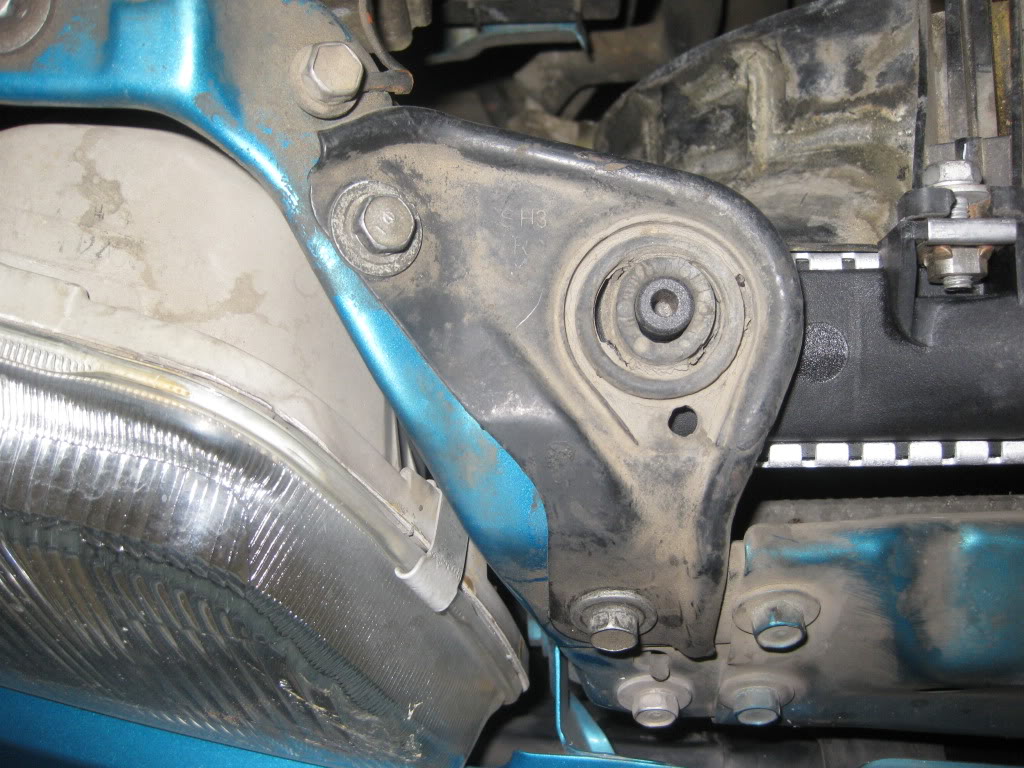
And the right bracket
Remove the fan by carefully and slowly moving it upward between the radiator and the ac line running parallel to the radiator. Be careful when you do this. Slowly but surely.
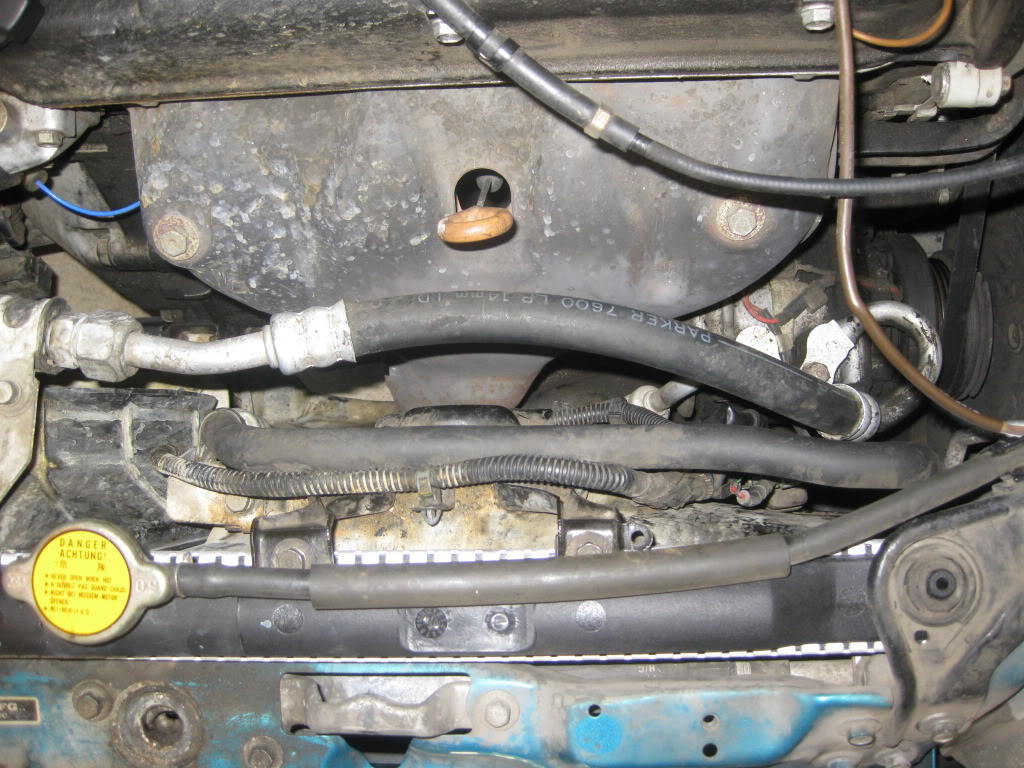
With the fan removed, you have clear access to the lower radiator hose to the thermostat housing. Use pliers to remove the clamp and pull hose off the radiator. There might be some coolant left so put a bucket under here before removing this hose. See first diagram above for reference.
To remove the condenser fan, remove the wiring harness attachments on top and on the outside of the condenser fan above the compressor. There should be 4 or so of these. Also, See picture above from repair manual.
On the left side of the condenser fan, remove this bolt and an AC line attachment on the bottom of the condenser fan.
In addition, unplug condenser fan connector on the side of the condenser fan right above the compressor. Also, detach this connector from the fan by sliding it upward.
Once all the wires and plugs are detached, remove the radiator and the ac condenser together by lifting it upward pass the ac line.
While the radiator is out, remove the drain plug from the engine block and drain the coolant from the engine. Remember to put a bucket under here.
Installing is the reverse.
I would recommend replacing the thermostat while you're doing this.
For easier access, remove the air filter tube and housing by loosening the clamp with a phillips screwdriver, compress clamp. Remove this whole thing.
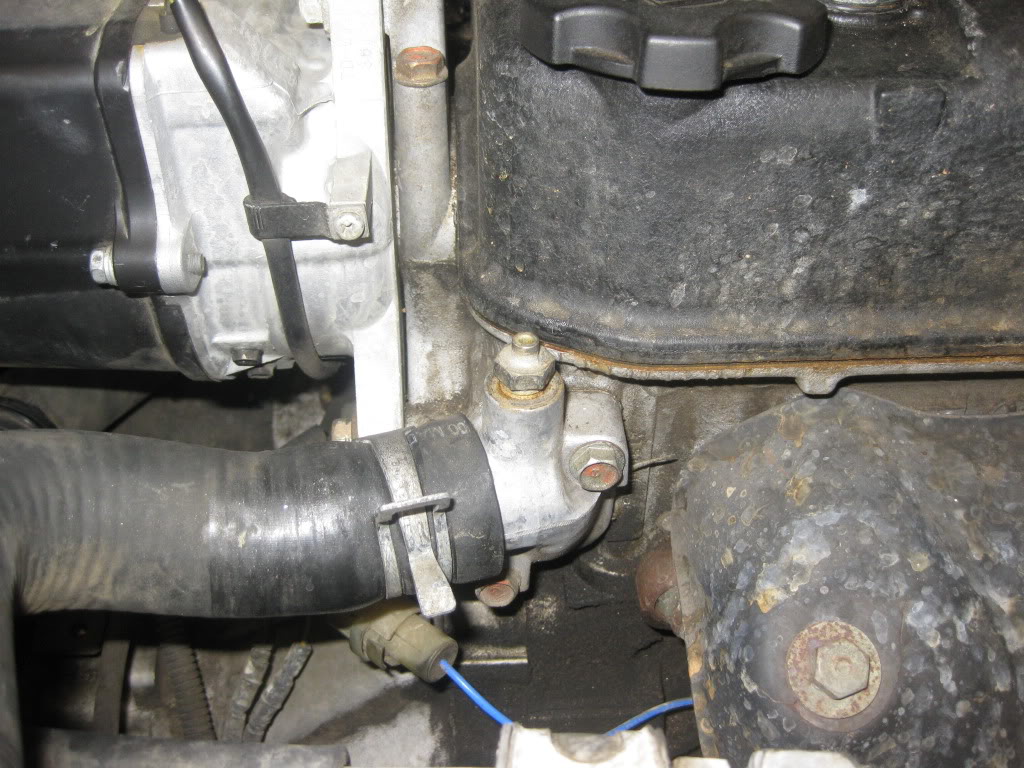
Compress the clamp with pliers and slide the hose off the thermostat housing inlet. Before you pull off this hose, put a bucket under here to catch any coolant coming out.
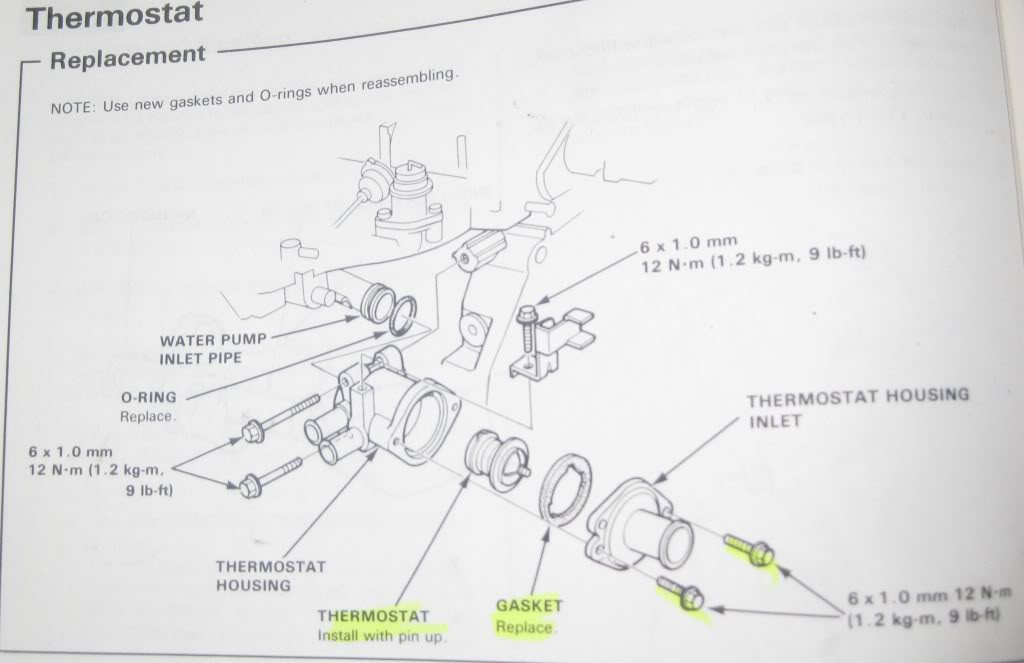
Remove the two bolts on the thermostat housing and the grounding bolt. Remove the thermostat housing inlet.
Remove the old thermostat and clean both the thermostat housing inlet and the thermostat housing.
Insert the new thermostat inside the groove around the new gasket.
Put a light coat of sealant on both side of the gasket. Install the new thermostat with the air bleed at the top and the spring toward the engine
Installation is reverse
Once all is done, refill with new coolant with a 50/50 mixture of coolant and water. Make sure you open the bleeding screw �till the air is bled out.
Now, it's time for a cold one. Cheers, DumDums!
Note: These pictures were taken after I replaced the radiator.
Set the parking brake and block the rear wheels with a couple of bricks (I used pavers).
Jack up the front of the car on the front cross-member and put jackstands on the front support points behind the front wheels. Remove jack once car stable on jackstands.
Open the hood and disconnect the negative battery cable from the battery.
To get access to the radiator draining plug on the bottom of the radiator, remove the plastic cover under the radiator on the passenger's side. Use a 10mm socket and Phillip screwdriver.
Put a bucket under the radiator draining plug and unscrew the drain plug to drain the coolant. Remove radiator cap. This is a diagram of the radiator and all the parts you'll be working with.
Picture of the old radiator showing the draining plug.
Once all the coolant is drained, compress the hose clamp on the upper radiator hose with pliers and slide it off the radiator. Do the same on the other end to the engine. Remove this hose.
Disconnect the coolant reservoir hose from the radiator and the coolant reservoir bottle. Remove the coolant reservoir bottle by lifting it straight up. Later, wash it clean before putting it back.
Coolant reservoir bottle after wash
Remove the two bolts on top of the radiator holding the fan. Slide the lever holding the fan to the ac line up and toward the engine for more room. Use a 10mm socket
Go under the car and unplug the green-colored fan electrical plug (Not inlcuded in this diagram. See first picture above for the green plug behind the plastic cover). While there, remove the wiring harness attached around the bottom of the fan. There should be 2 attachments. This is a diagram of the wiring harness around the top of the condenser fan and under the radiator fan (not in diagram).
Remove the bolt holding the two ac line near the battery for easy removal of the fan. Use a 10 mm socket.
Remove the brackets holding the radiator for easy removal of the fan. Use a 10mm socket. This is a picture of the left bracket .
And the right bracket
Remove the fan by carefully and slowly moving it upward between the radiator and the ac line running parallel to the radiator. Be careful when you do this. Slowly but surely.
With the fan removed, you have clear access to the lower radiator hose to the thermostat housing. Use pliers to remove the clamp and pull hose off the radiator. There might be some coolant left so put a bucket under here before removing this hose. See first diagram above for reference.
To remove the condenser fan, remove the wiring harness attachments on top and on the outside of the condenser fan above the compressor. There should be 4 or so of these. Also, See picture above from repair manual.
On the left side of the condenser fan, remove this bolt and an AC line attachment on the bottom of the condenser fan.
In addition, unplug condenser fan connector on the side of the condenser fan right above the compressor. Also, detach this connector from the fan by sliding it upward.
Once all the wires and plugs are detached, remove the radiator and the ac condenser together by lifting it upward pass the ac line.
While the radiator is out, remove the drain plug from the engine block and drain the coolant from the engine. Remember to put a bucket under here.
Installing is the reverse.
I would recommend replacing the thermostat while you're doing this.
For easier access, remove the air filter tube and housing by loosening the clamp with a phillips screwdriver, compress clamp. Remove this whole thing.
Compress the clamp with pliers and slide the hose off the thermostat housing inlet. Before you pull off this hose, put a bucket under here to catch any coolant coming out.
Remove the two bolts on the thermostat housing and the grounding bolt. Remove the thermostat housing inlet.
Remove the old thermostat and clean both the thermostat housing inlet and the thermostat housing.
Insert the new thermostat inside the groove around the new gasket.
Put a light coat of sealant on both side of the gasket. Install the new thermostat with the air bleed at the top and the spring toward the engine
Installation is reverse
Once all is done, refill with new coolant with a 50/50 mixture of coolant and water. Make sure you open the bleeding screw �till the air is bled out.
Now, it's time for a cold one. Cheers, DumDums!
 08-19-2009, 11:28 PM
#4
Honda-Tech Member
Thread Starter
I asked for help earlier this month and here's the response I got. It was so summarized and lacking so much details, it's not even funny. So, I wanted to post this write-up for all of us who are looking for a step-by-step on how to do it, for all of us DumDums. Cheers!
Help - Replacing OEM radiator with AC
91 Civic Hatchback DX with AC
I am replacing the OEM radiator. Does anyone have a write-up on how to replace the OEM radiator? How do you remove the lower hose from the radiator w/o removing the fan assembly? Thanks
ORIGINAL OWNER ONLY
'91 TAHITIAN GREEN EFer
es.roadster
Default Re: Help - Replacing OEM radiator with AC
don't be lazy.
you are already wasting a lot of time posting this when you could have used your 10mm to take out : radiator brackets, both the fan shrouds and grab a channel lock/pliers to squeeze the hose clamps.
OR maybe you're lazy to do so cus elk grove is HELLA hot.
i have a house down there on little harbor way
zrickety
Default Re: Help - Replacing OEM radiator with AC
take out the fan(s), drain the radiator, remove the hoses, pull it out.
install is the reverse.
it's not that hard...you can get a free service manual online that will tell you the basics. if you really need a write up, you probably shouldn't do it.
Last edited by braass91; 08-20-2009 at 06:07 AM. Reason: update
08-19-2009, 11:53 PM
#5
Honda-Tech Member
iTrader: (1)
Join Date: Jun 2009
Location: Evil Empire,CA
Posts: 9,673
Likes: 0
Received 0 Likes
on
0 Posts
https://honda-tech.com/forums/showth...l+pump+removal
 11-24-2012, 02:04 PM
#7
Honda-Tech Member
Thread Starter

Thread
Thread Starter
Forum
Replies
Last Post