
Complete build thread of my JDM TSX
 09-03-2008, 03:34 PM
#1
Honda-Tech Member
Thread Starter
Join Date: Sep 2005
Posts: 215
Likes: 0
Received 0 Likes
on
0 Posts
Compilation of the last 10 months
Stage I
Decided I would post a build thread of my car from the last 9 months of posts from other sites since I don't Actually have the stuff actually compiled anywhere so here it is.
After 10 hours Thursday, 8 hours Friday, 8 hours Saturday, and 4 hours today I finally finished the final details of my most recent addition to my car. I started this project 2 weeks ago by gutting the car and then found when I begin to assemble all of the new parts I was missing one which end up being on backorder. My parts came in this Wednesday so I decided to finish it this weekend.
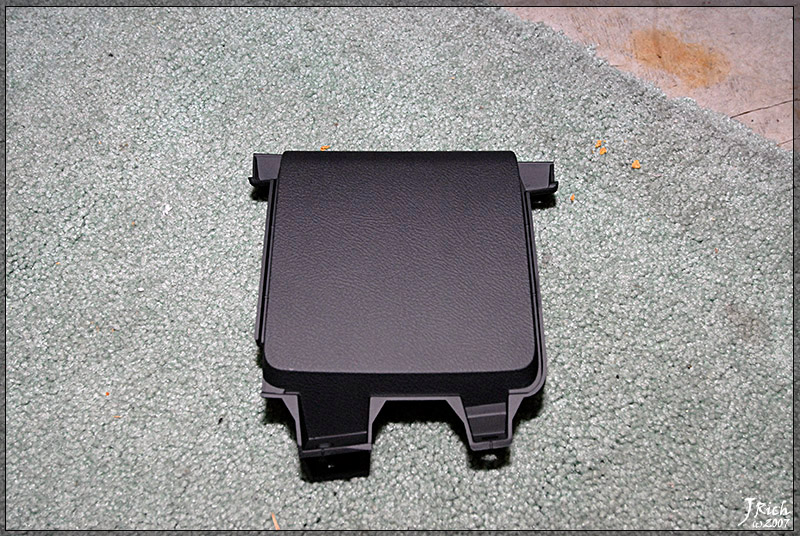
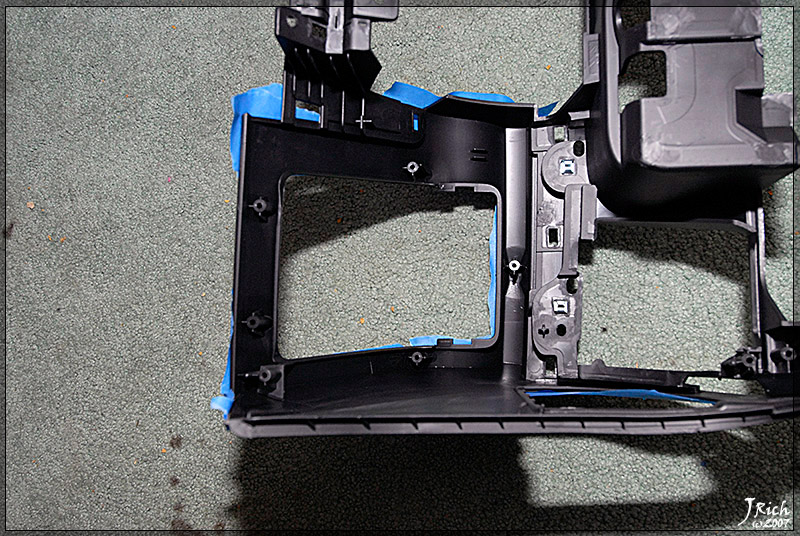
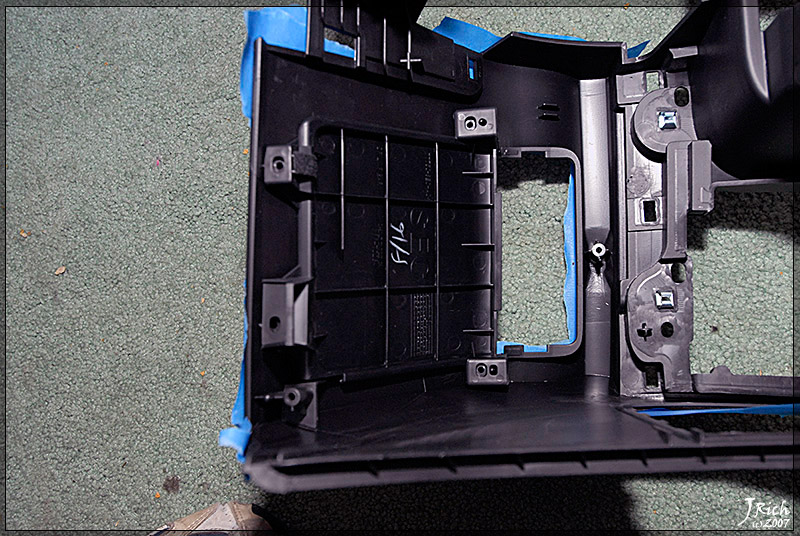
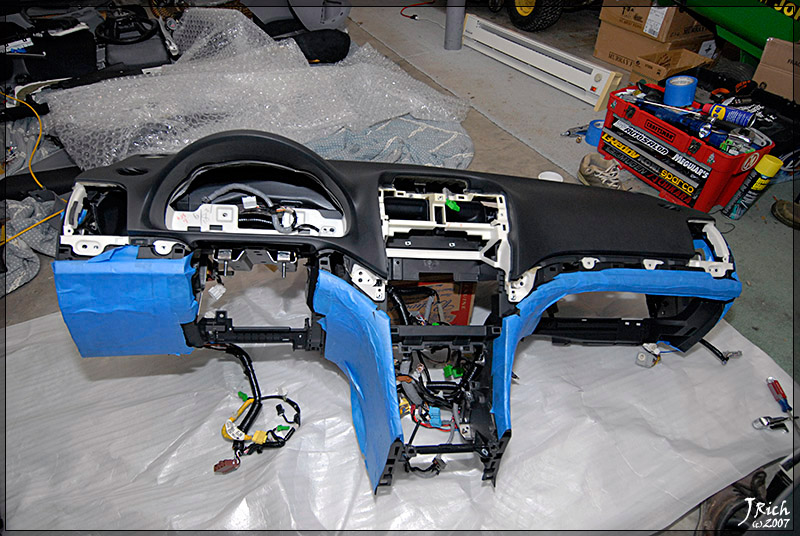
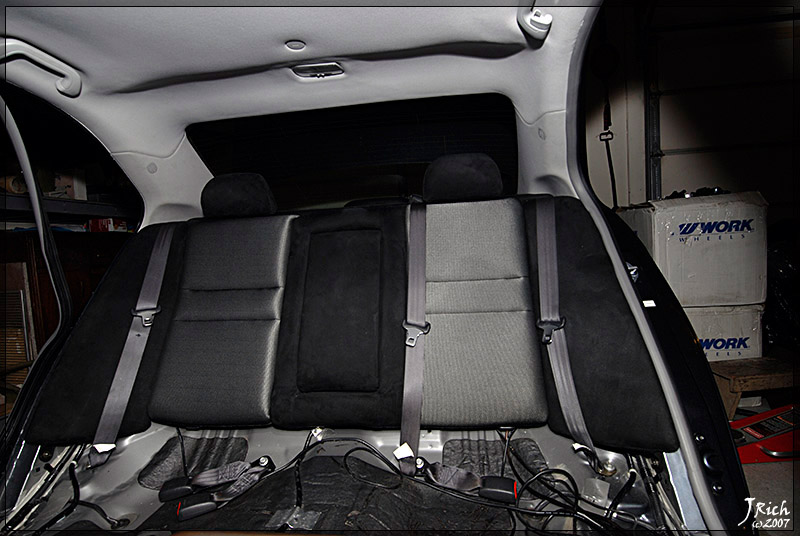
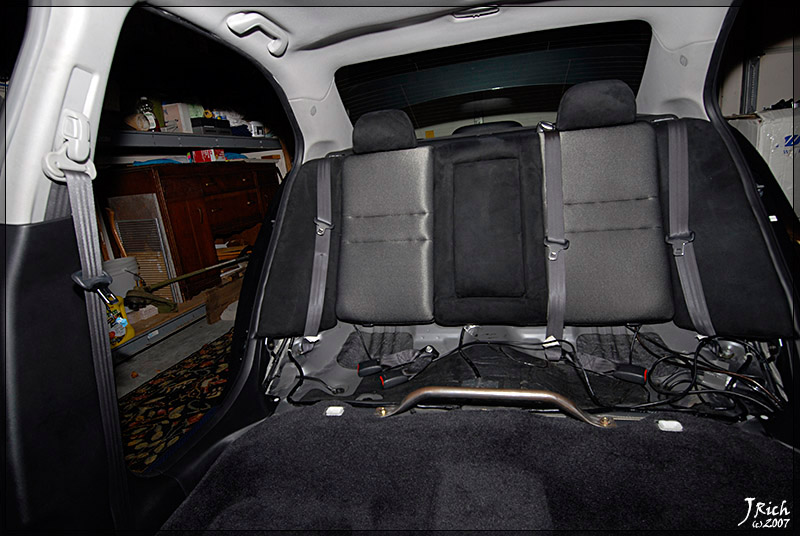
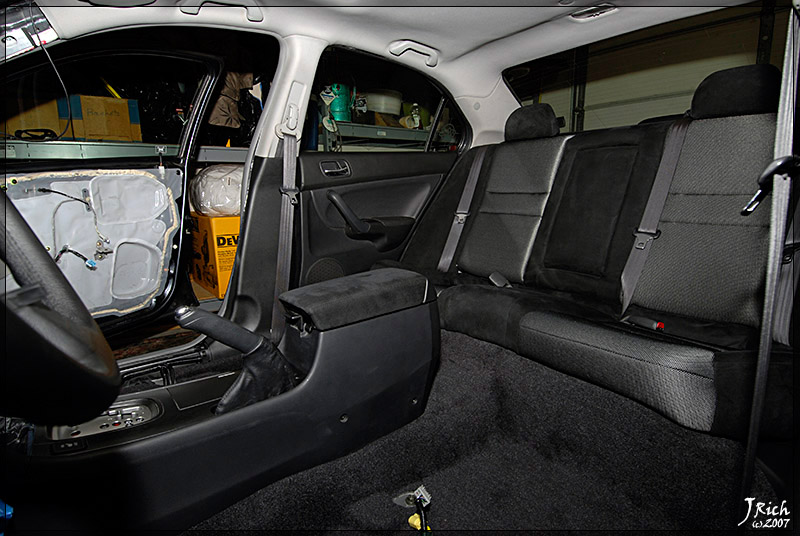
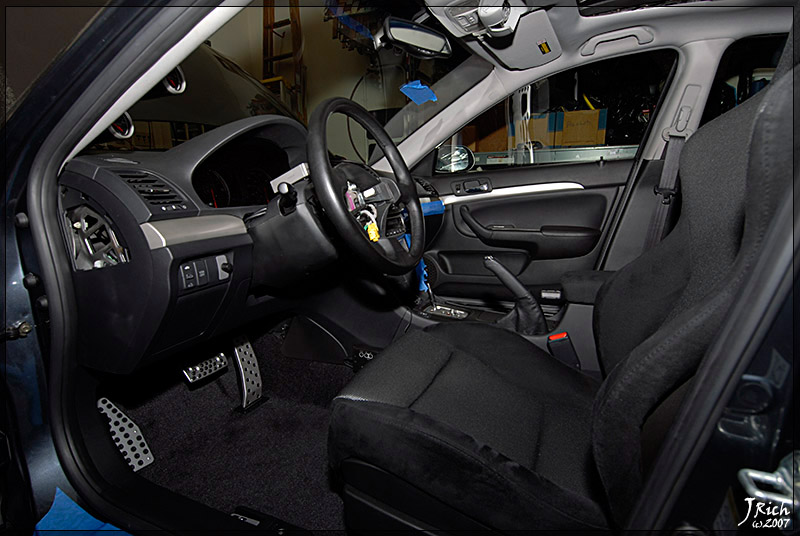
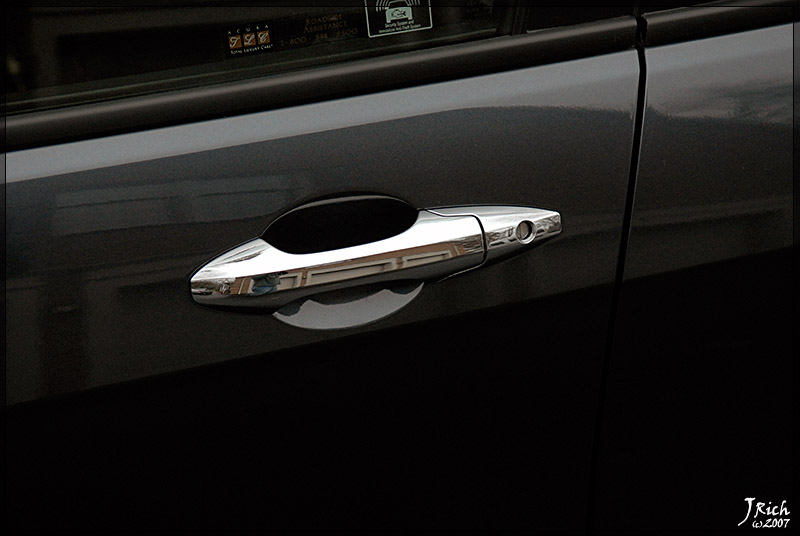
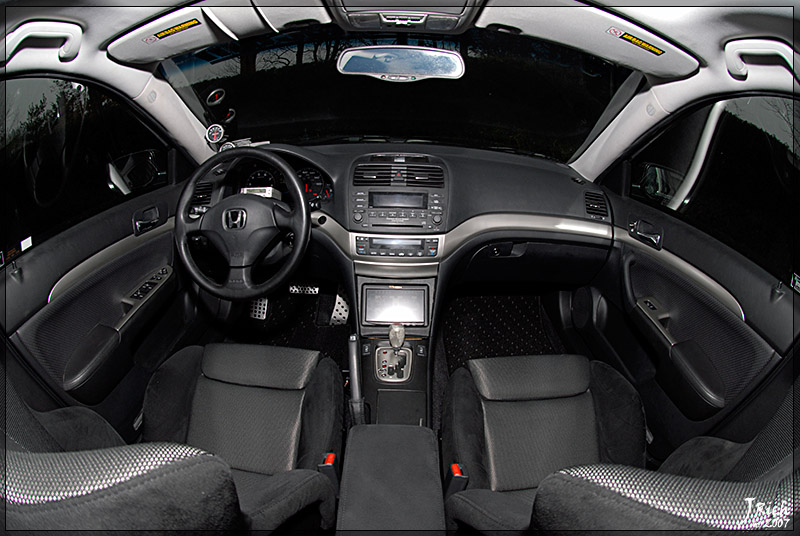
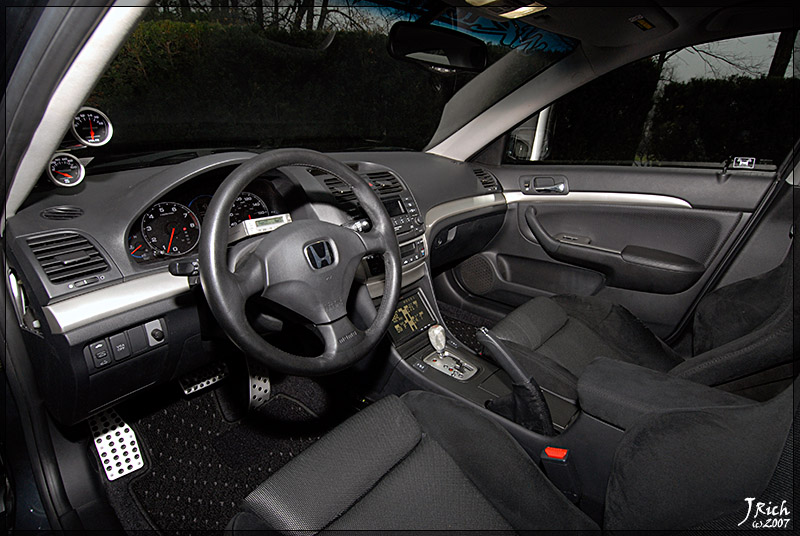
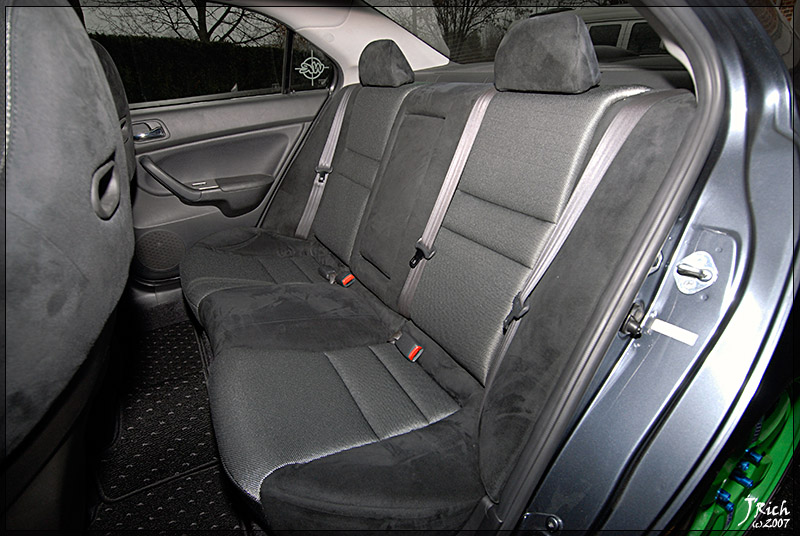
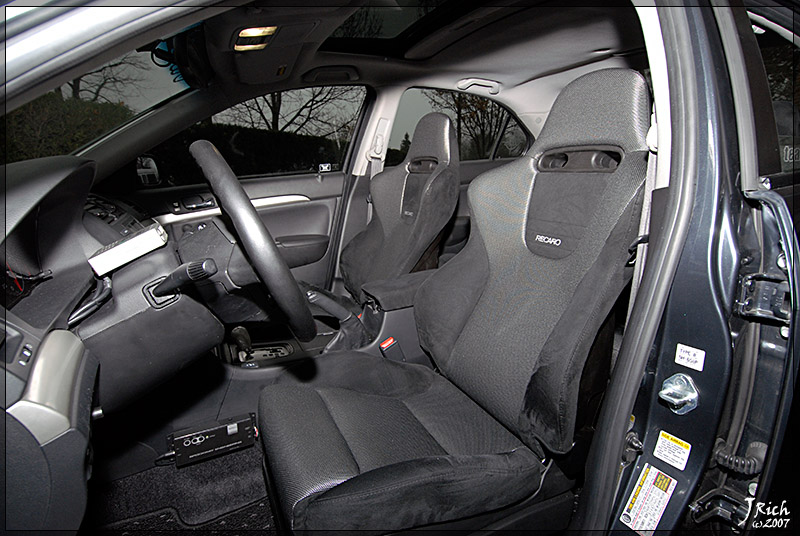
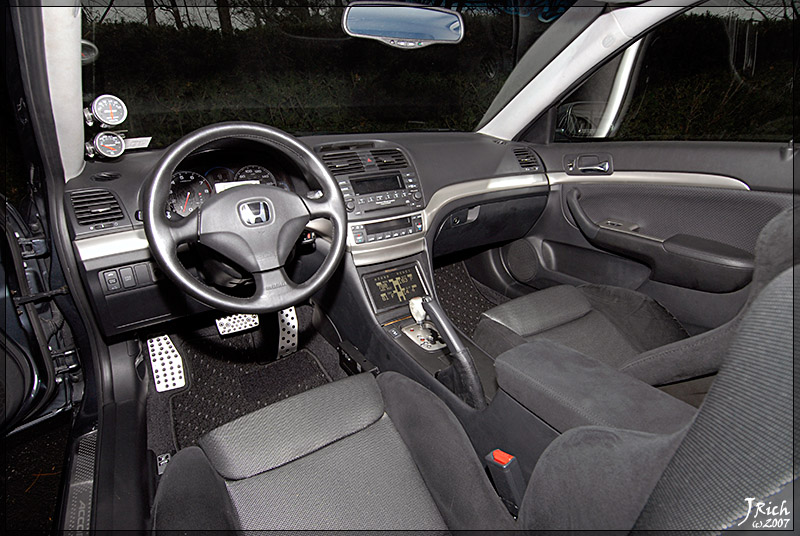
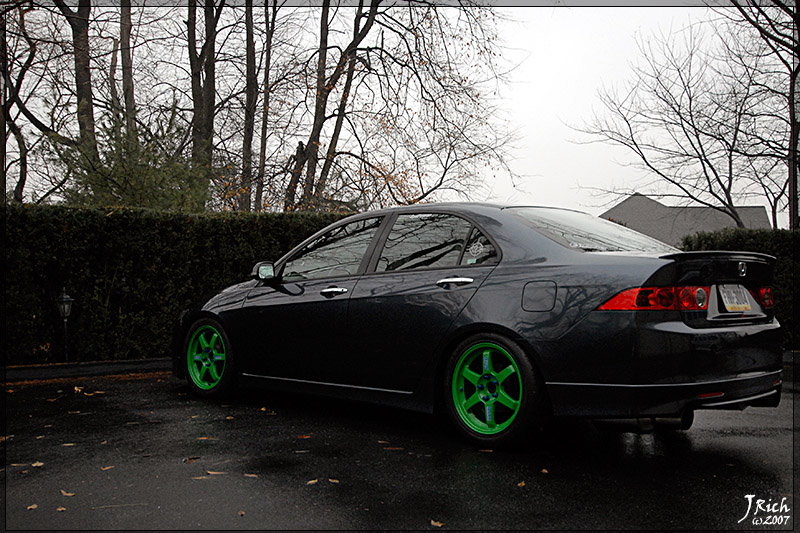
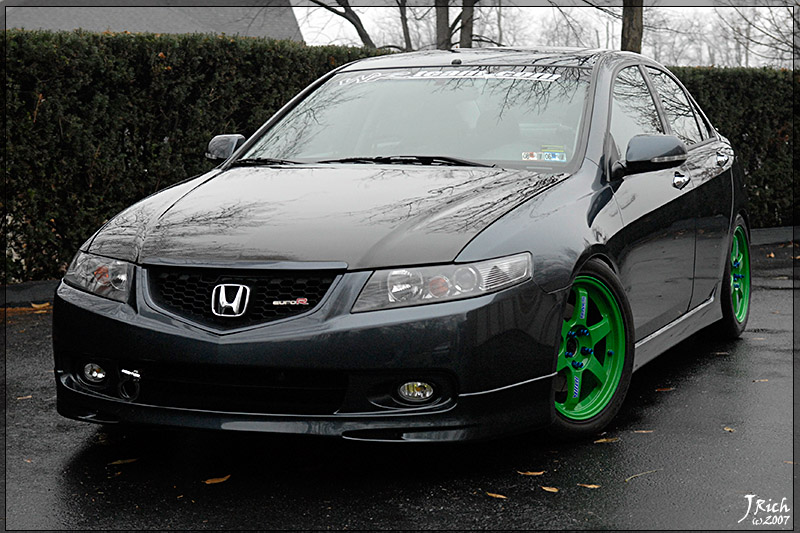
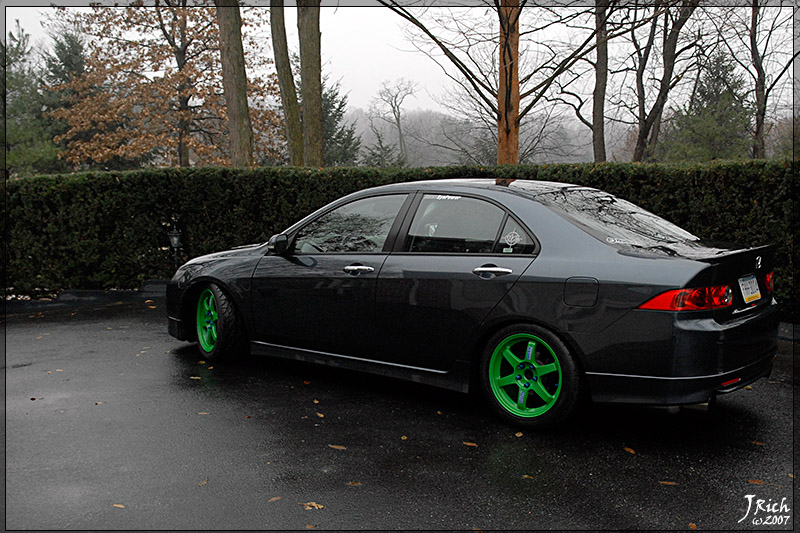
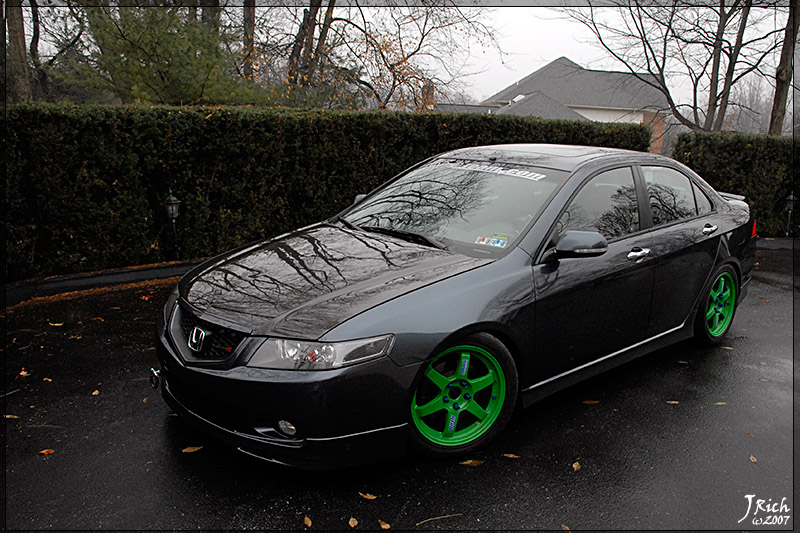
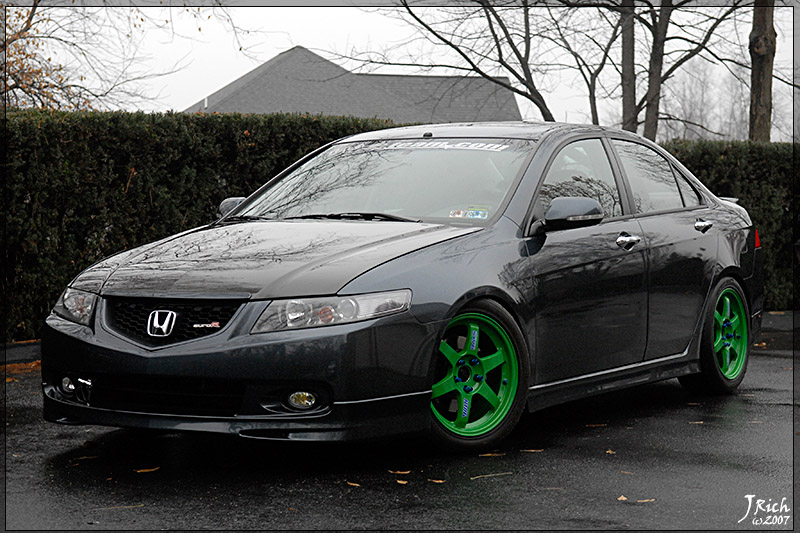
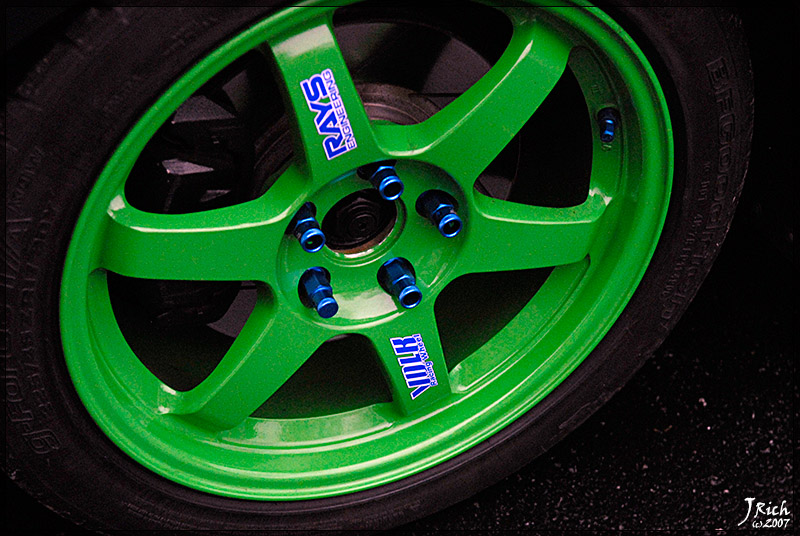
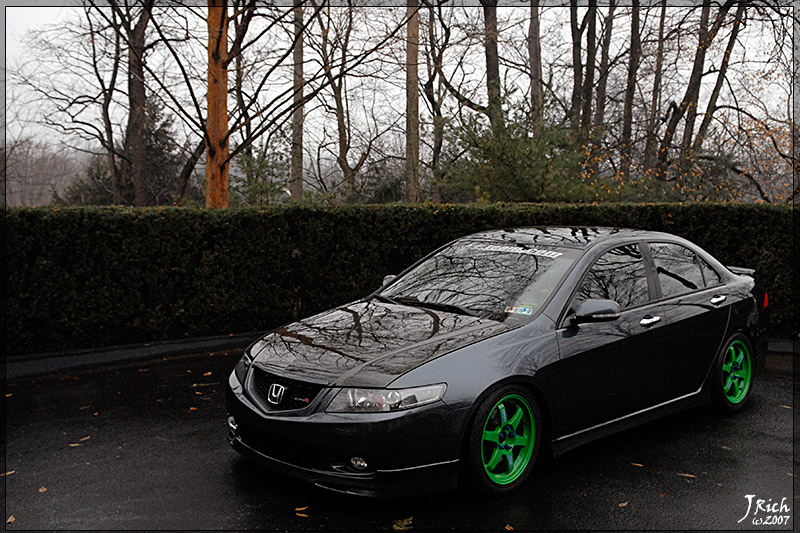
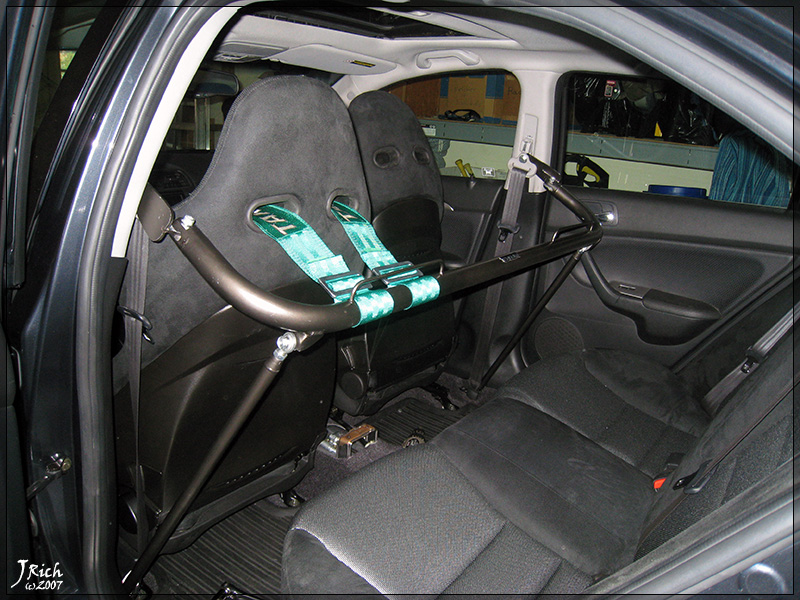
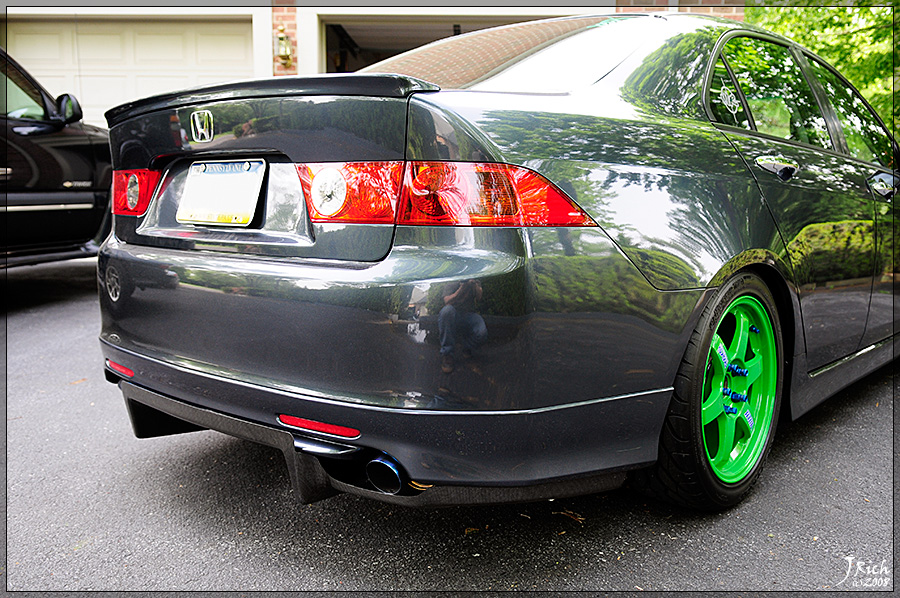
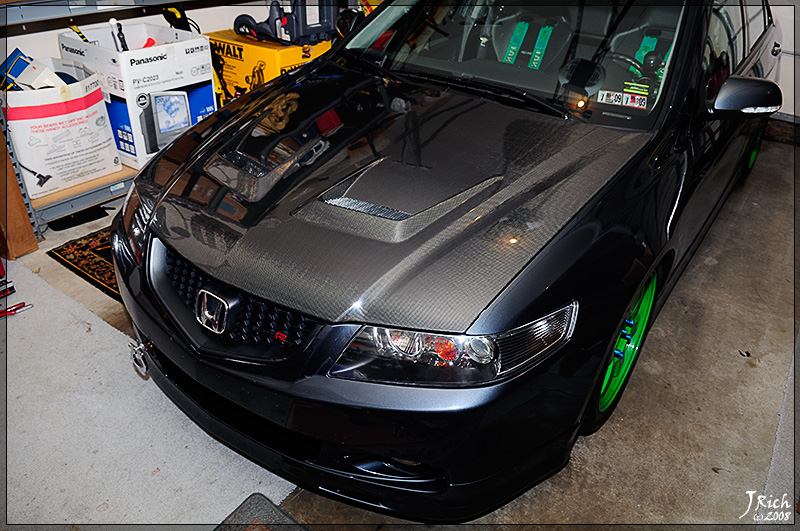
I have been slowly collecting both new and used black interior parts over the last year for. I had basically everything but seats around the beginning of this fall when I happened on a set of Recaro Sportline front seats and recaro wrapped rear seat from a 2004 Accord Euro R on Ebay. Finally changes as of current include full black interior conversion, recaro sport line front seats and recaro wrapped rear seat, brockway engineering race date display for my video screen, blacked out window trim, chrome door handles, blue 5zigen lug nuts, and 17x7.5 +40 takata green volk te37 wheels. There is still more to come but the rest will not be arriving till after Christmas.
So with out any further wait here are the build photos I took and the final pictures I took in my driveway since the weather was to bad to make it anywhere for a good shoot unfortunately.


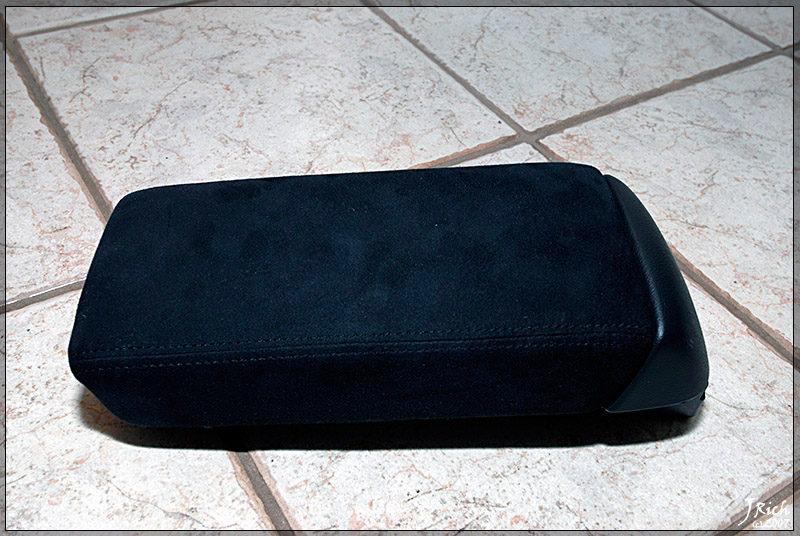
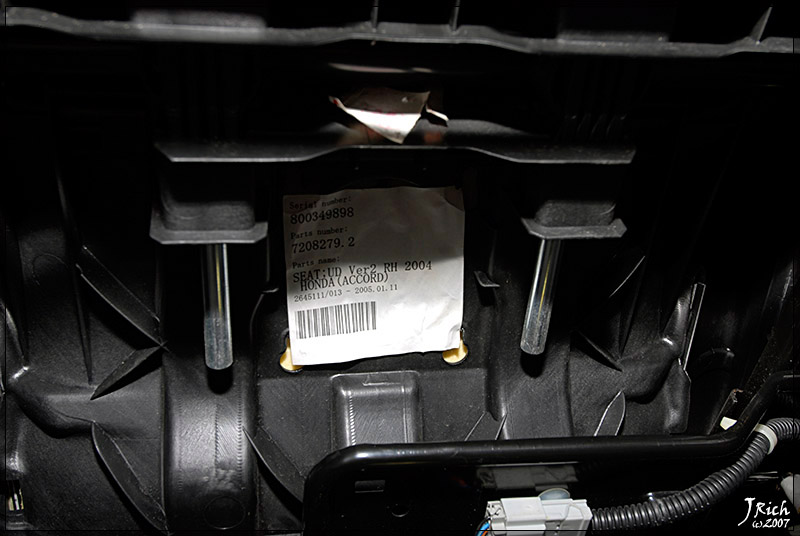
The piece that caused the hold up.


Yes they are from a real accord euro r and even a 2004.
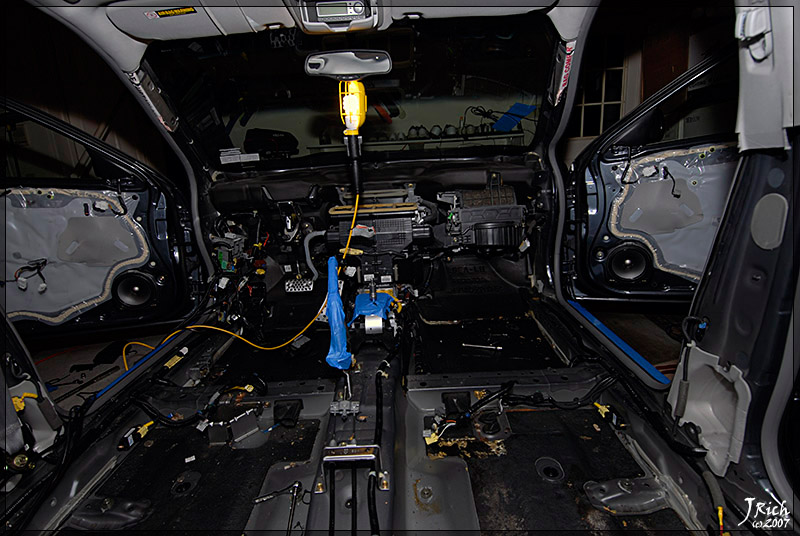
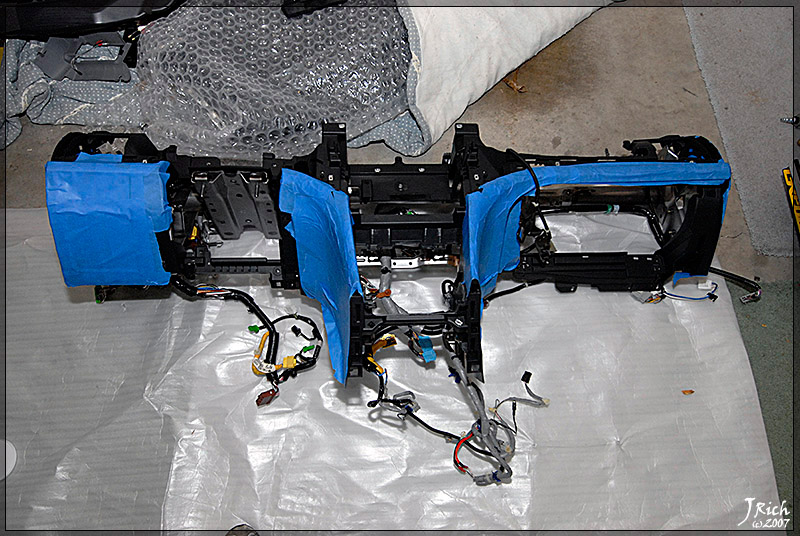
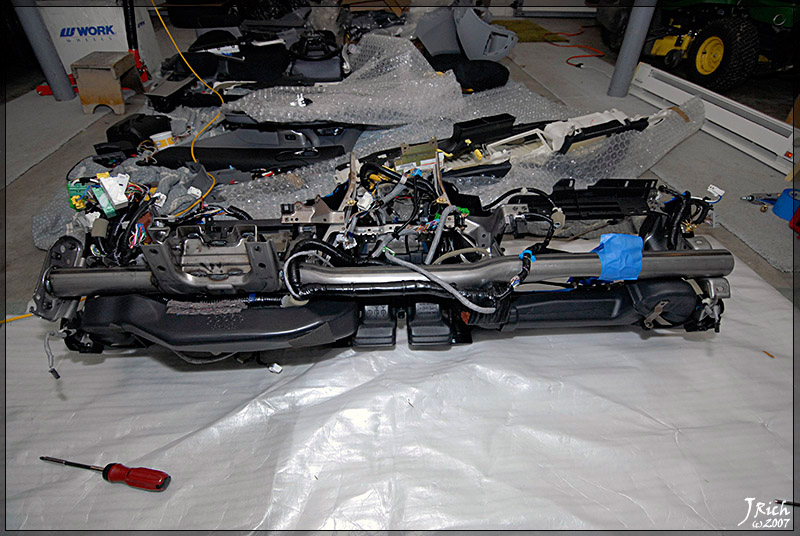
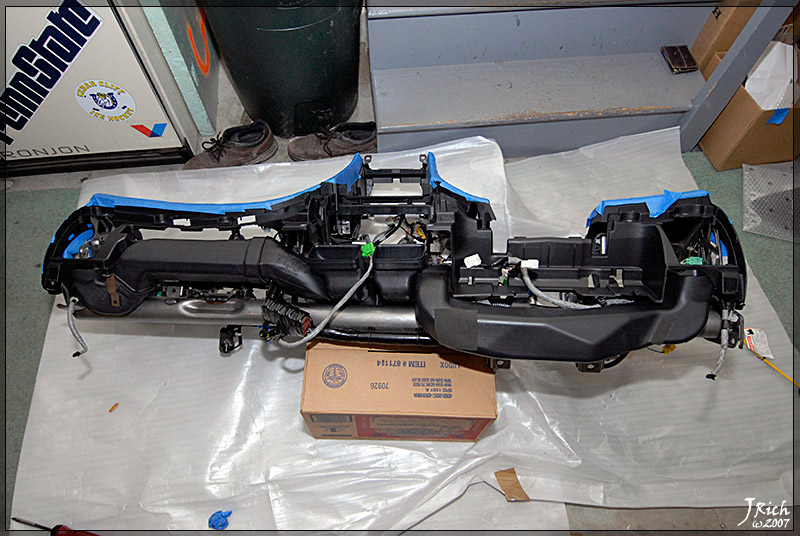
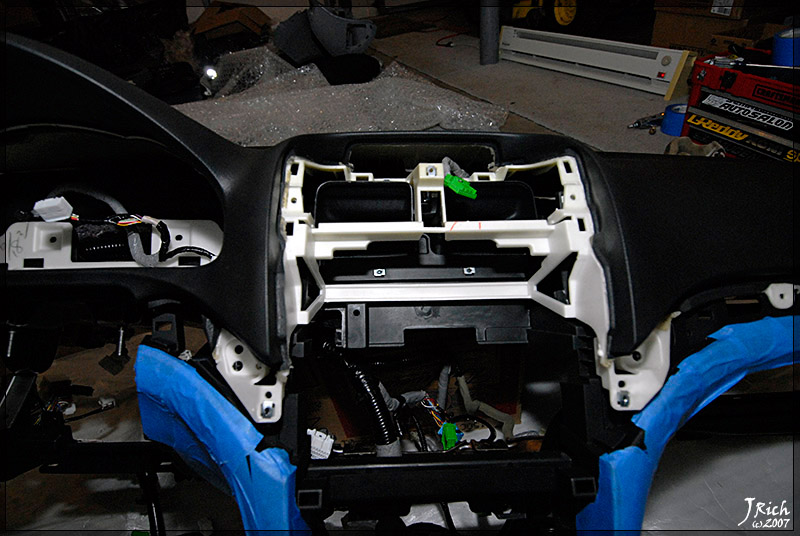
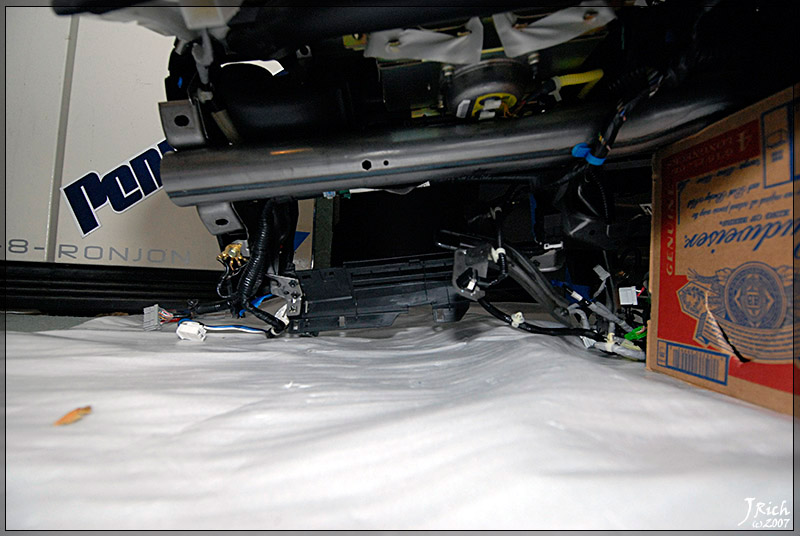
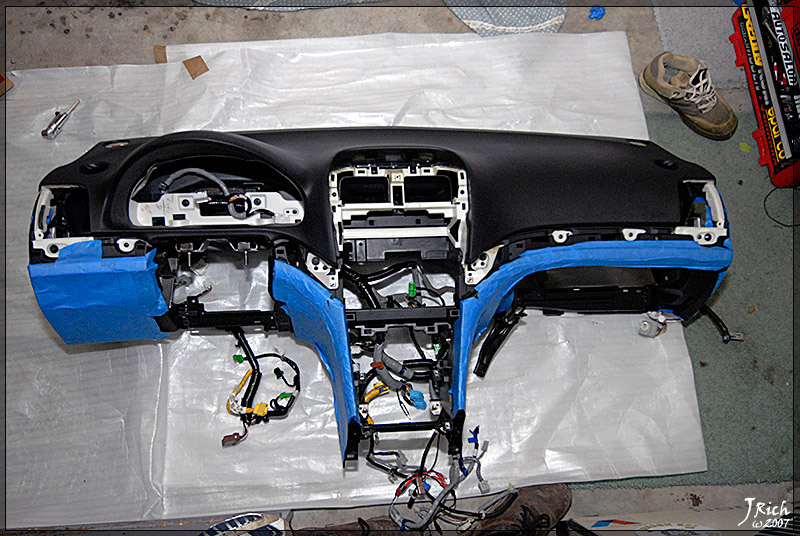
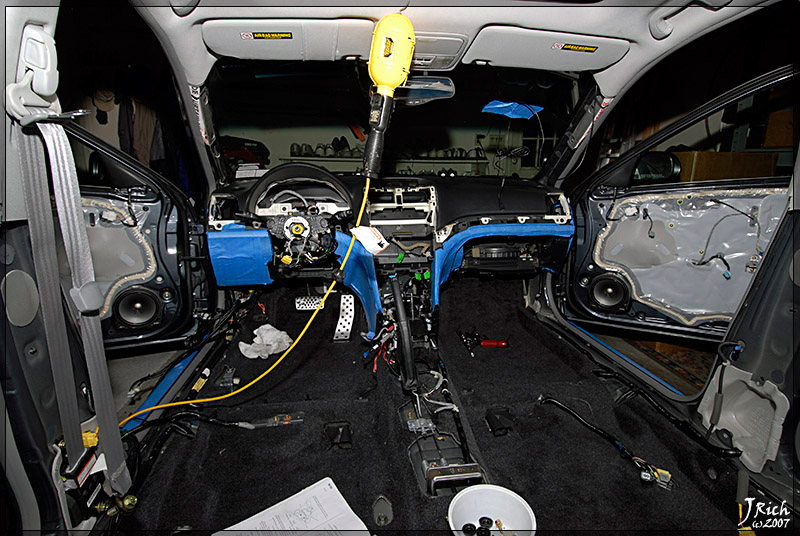
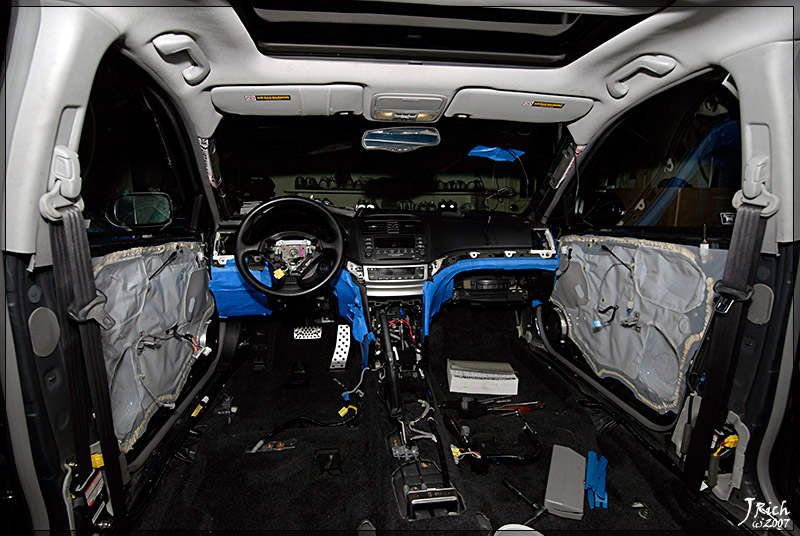
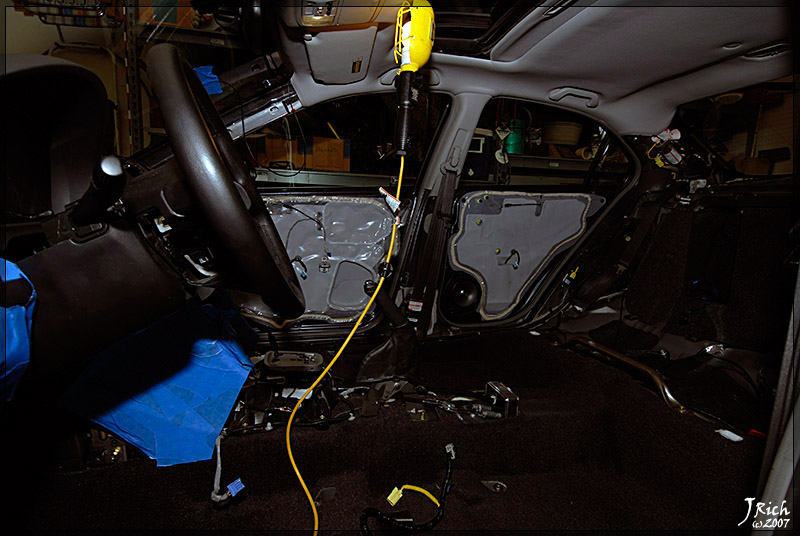
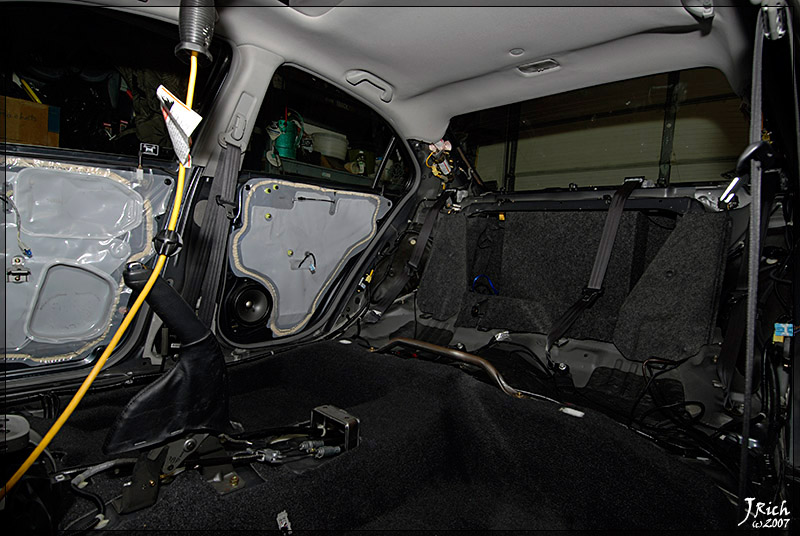
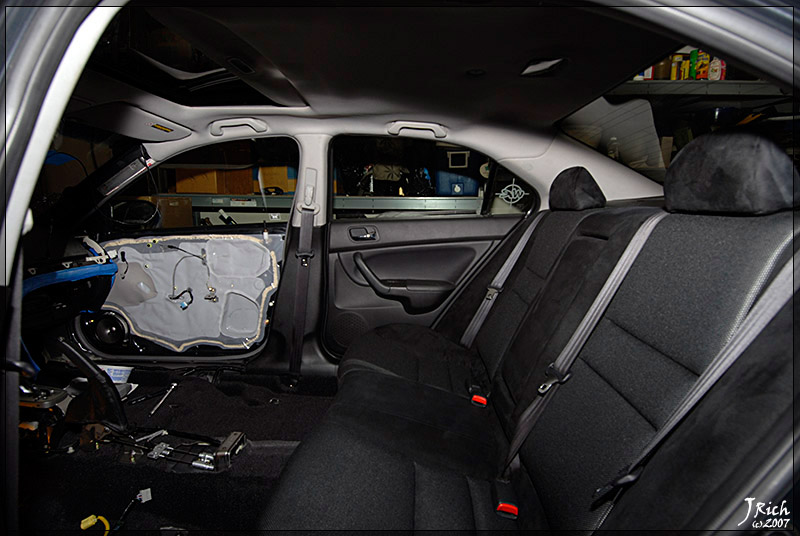
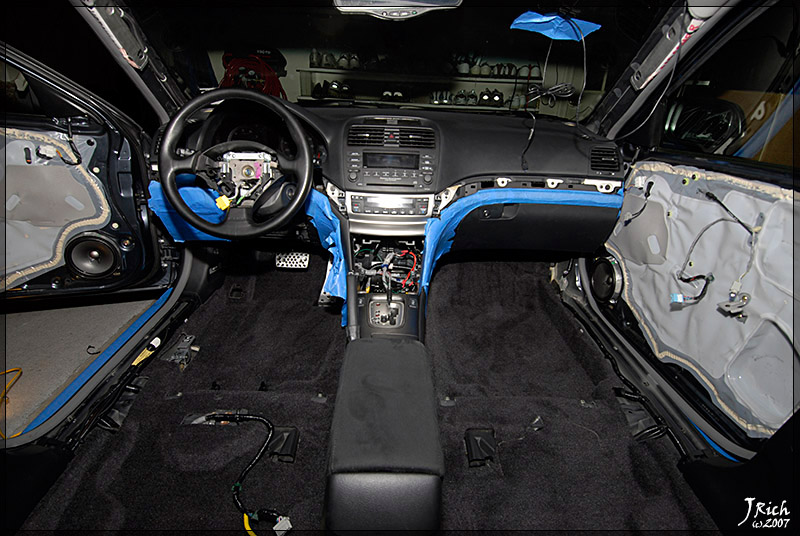
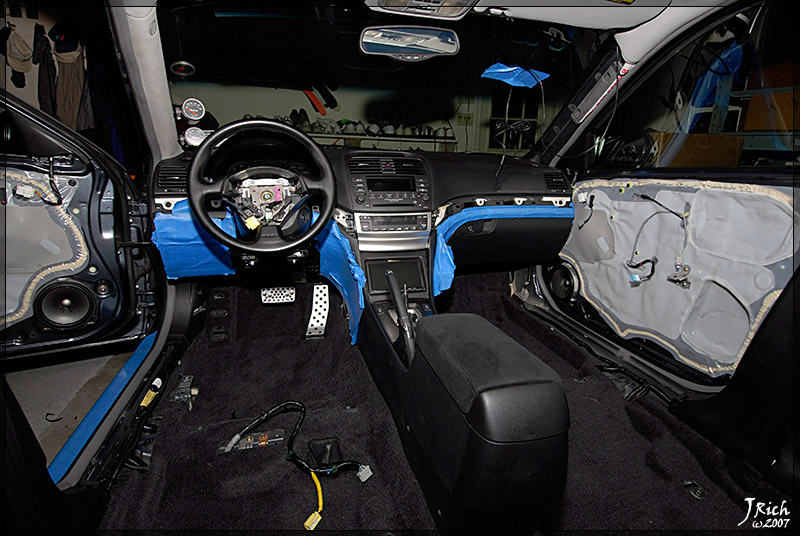
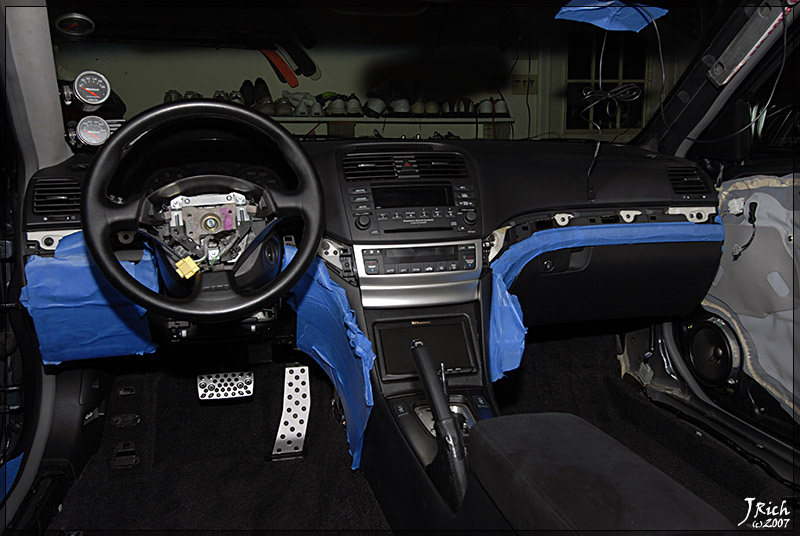
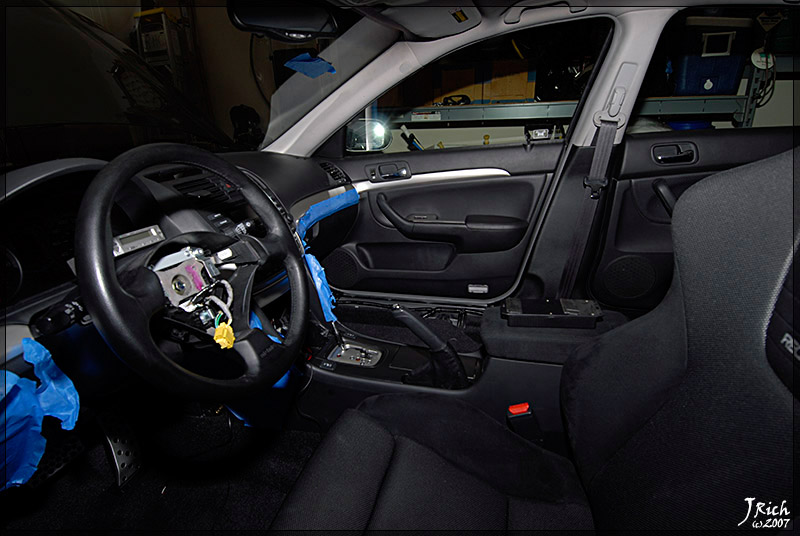
Interior Before
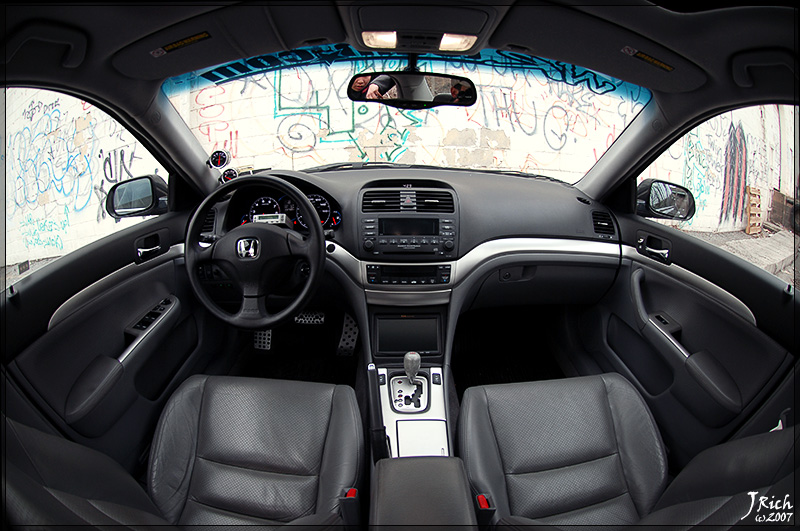
The finished pictures

Stage II

Stage III
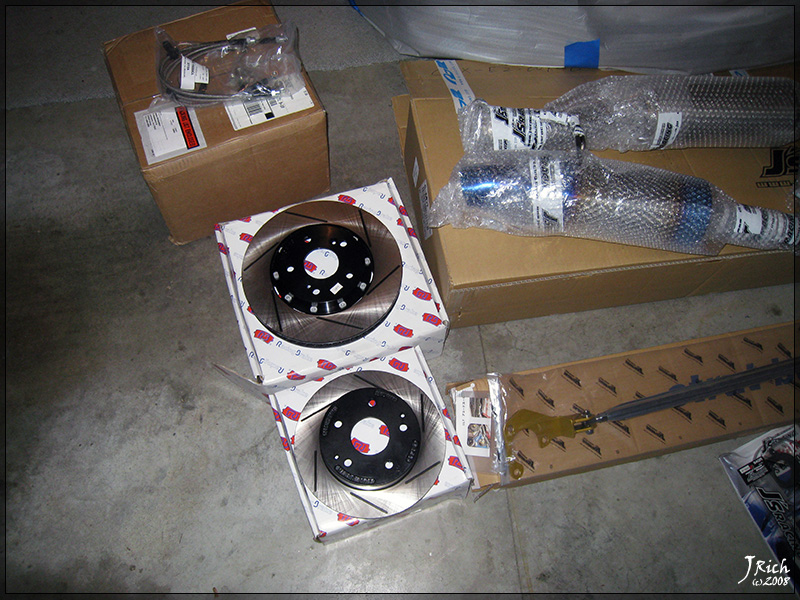
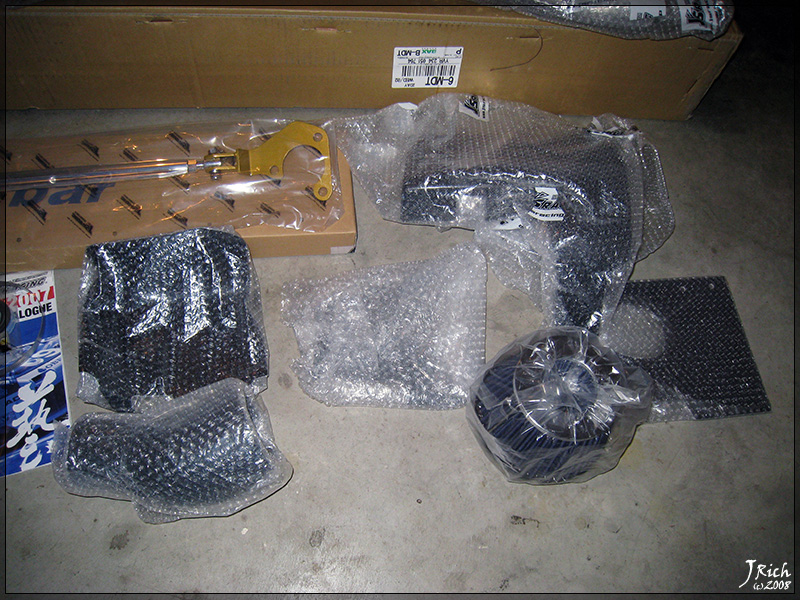
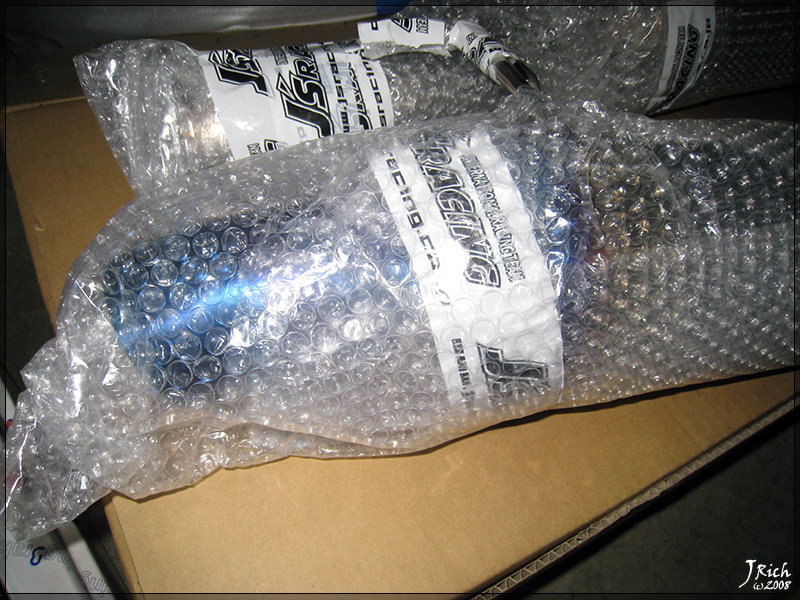
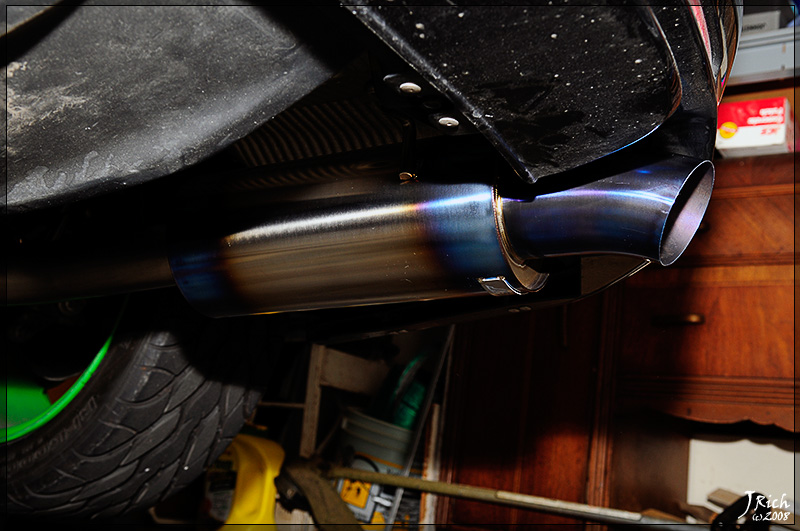
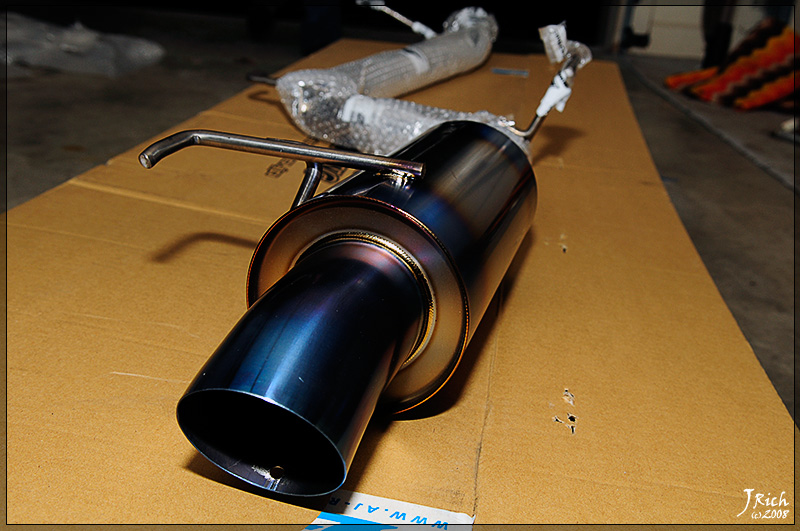
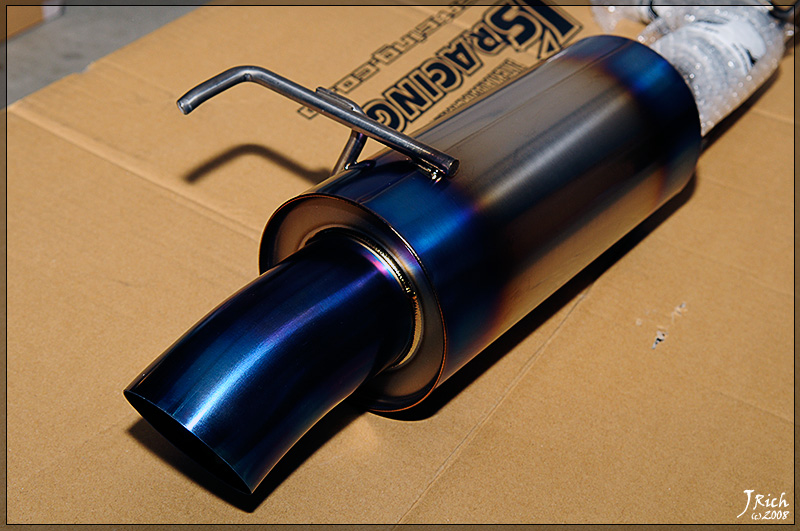
J's Racing 60RS Exhaust, J's Racing Intake, J's Racing Strut Bar, Racing Brake 2pc Front Rotors, Racing Brake Slotted Rear Rotors, Racing Brake Stainless Steel Brake Lines, and a new euro r front lip. More coming soon, so stay tuned. So no more words and just pictures.
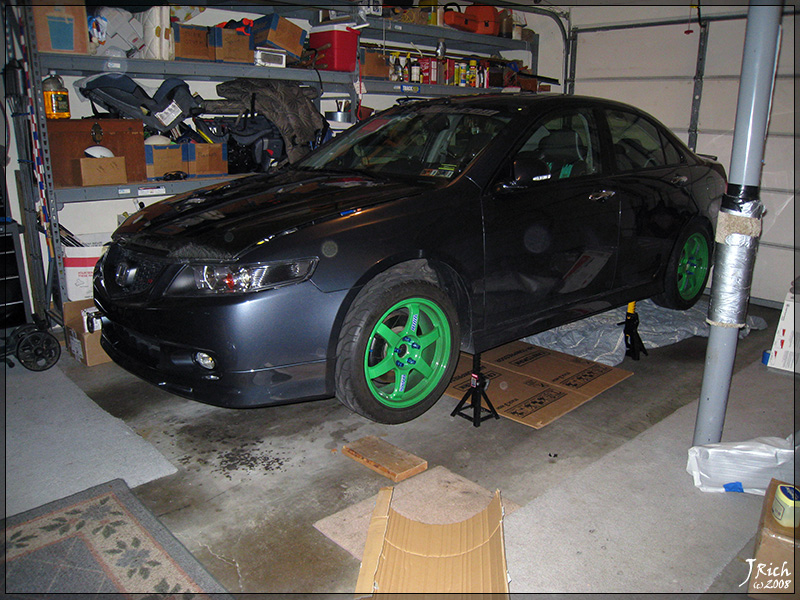
17in lift kit


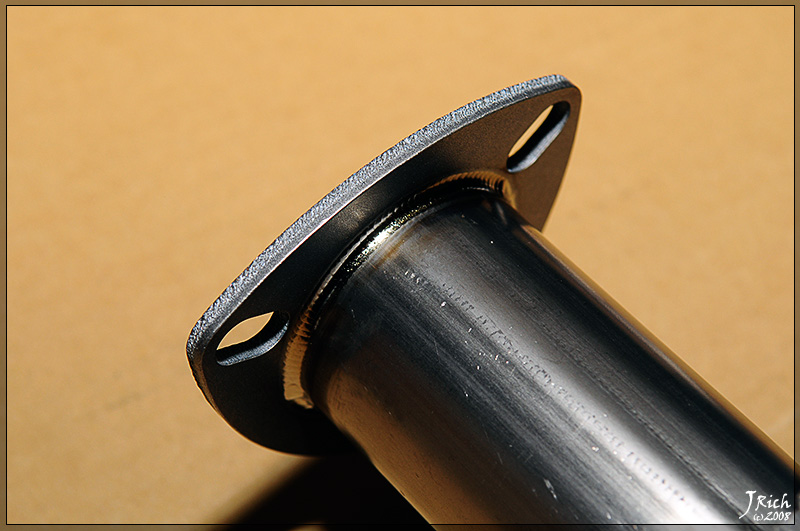
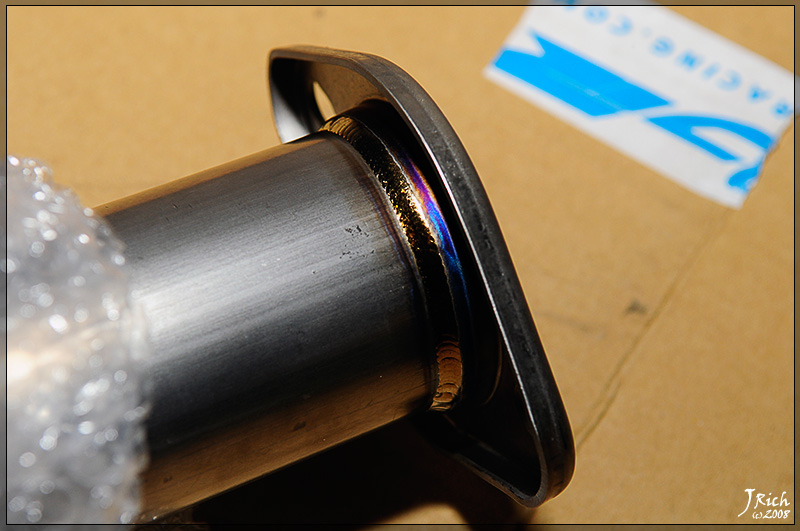
Sweet Closeups of J's Exhaust


Damn those are some sexy welds
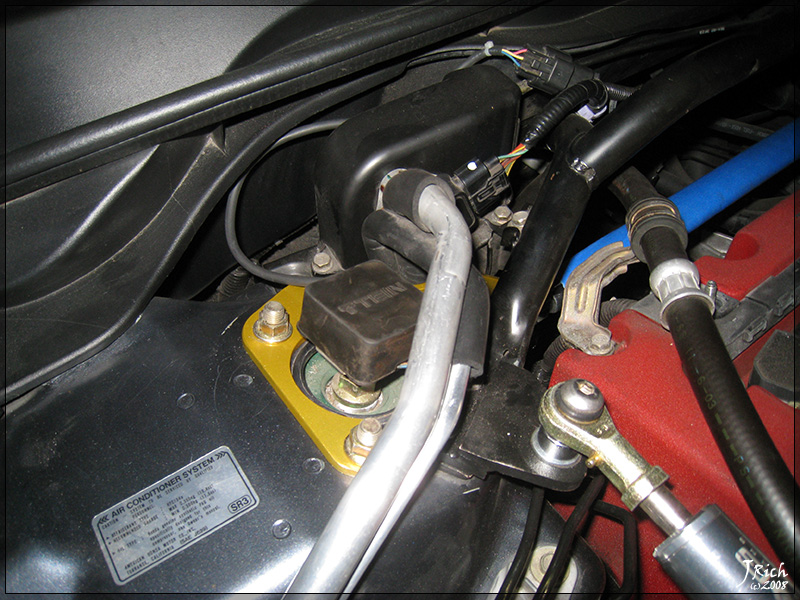
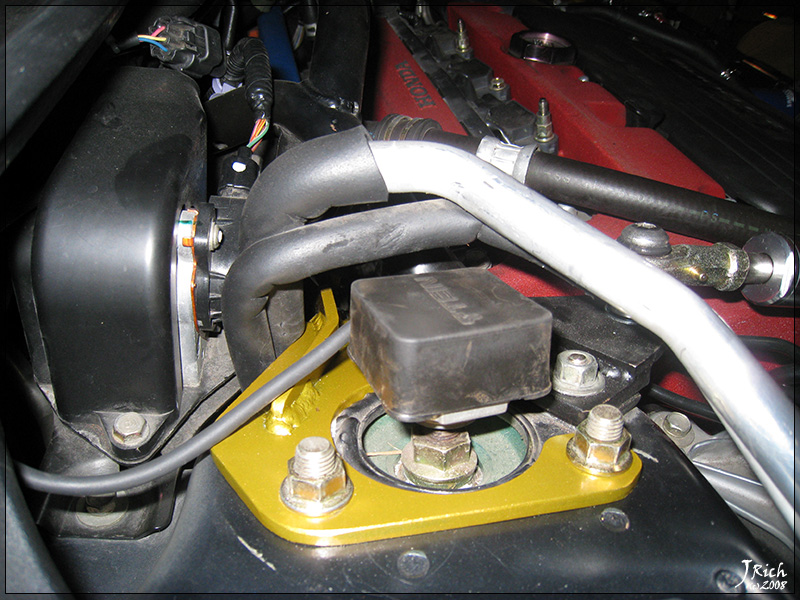
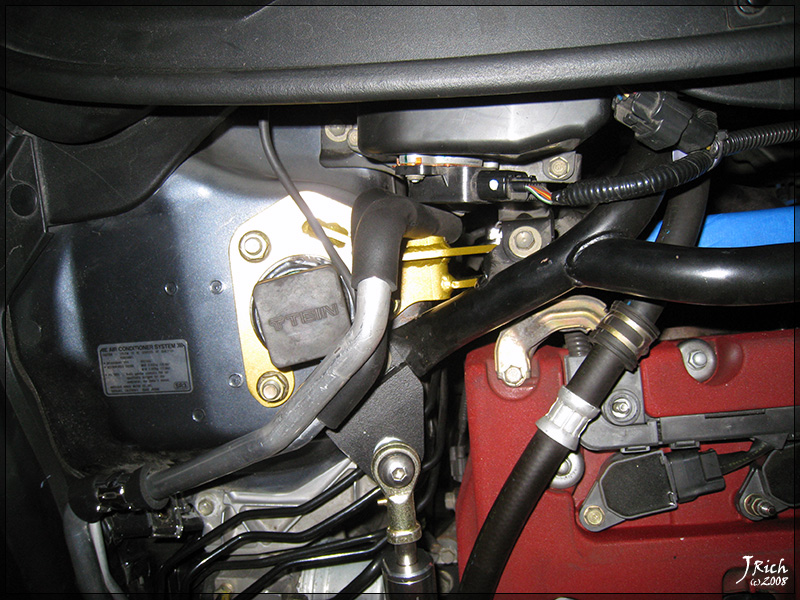
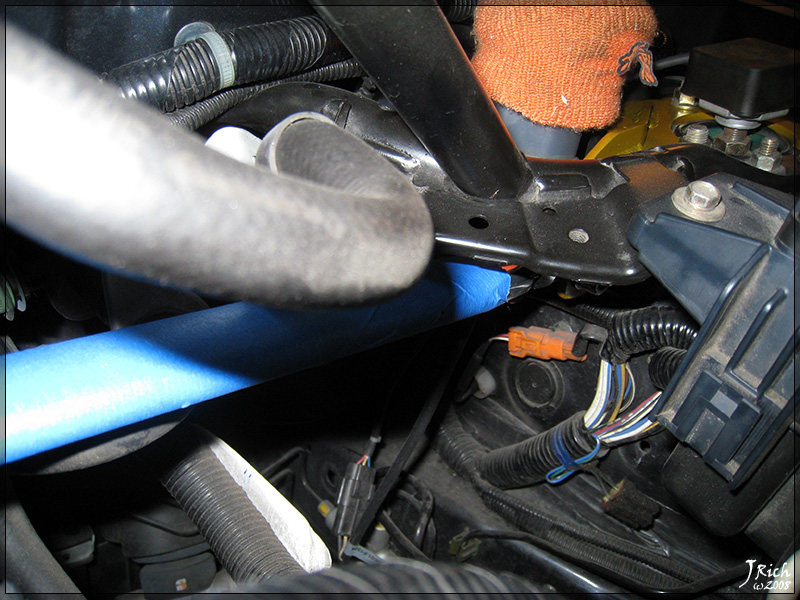
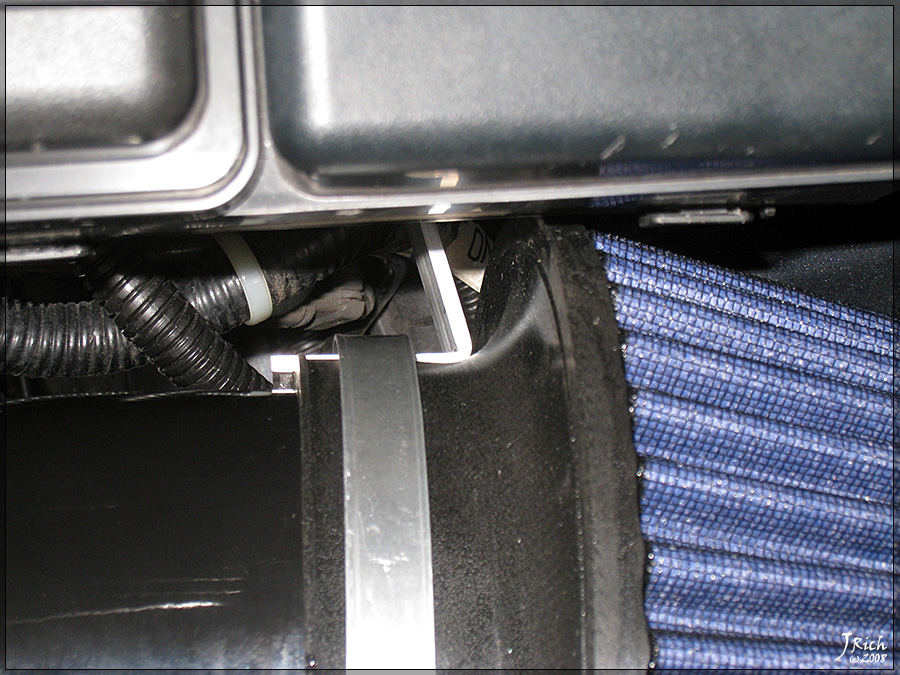
Did some more installs yesterday. Worked on the intake and the strut bar. The intake wasn't that hard so far but I wasn't able to install the entire thing because for some reason it didn't come with all the neccessary screws. Luckily I was able to come up with some screws that works and get all the parts installed that involved removed the bumper. The strut bar mount on the drivers side was easy to put on however the passenger side was not so easy. You had to unscrew both AC line mounting bracket screws so you could pull the lines up and to the back of the engine bay as far as possible just to be able to spend about 5 minutes wiggling the bracket through the small whole to get it on. Unfortunately I had to do this twice cause in the process of being annoyed by how hard it was to install I forgot to remove the strut tower bolts the first time. You had to install the brackets first and the bar seperate for this strut bar as well. One bolt must go one direction and one must go the other to mount the bar to the brackets and actually have room to tighten the bolts.
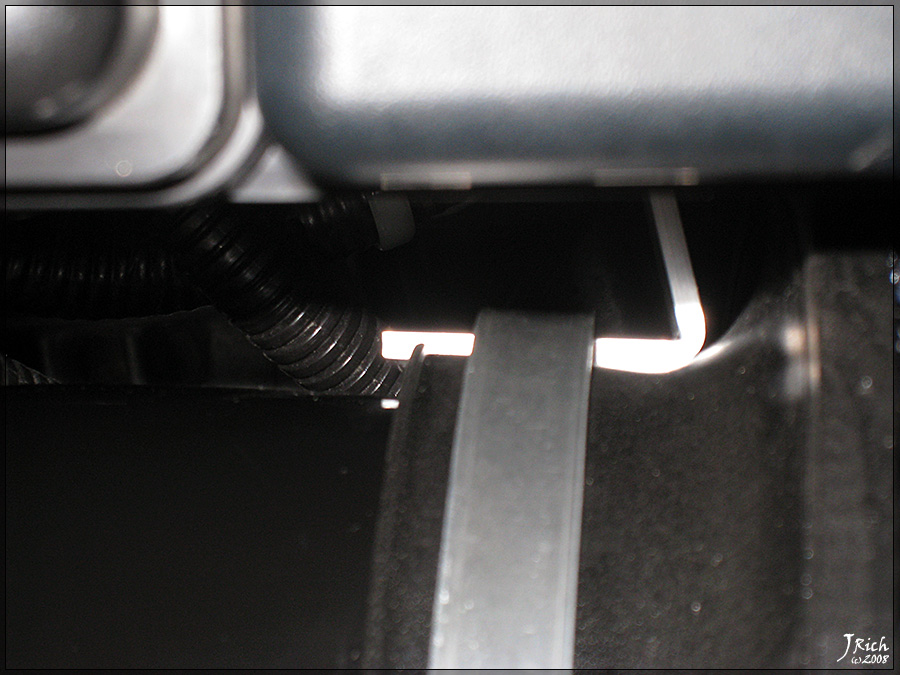
So here are pics of both installs. Lots more of the strut tower to try and show how tight the fit is. Also the reason there is blue tape on the strut bar is because I didn't want to scratch it during install.


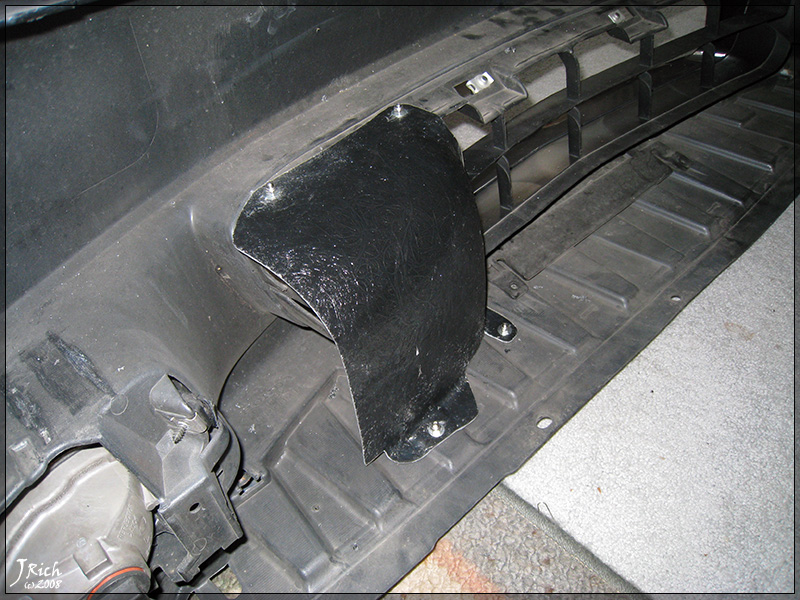
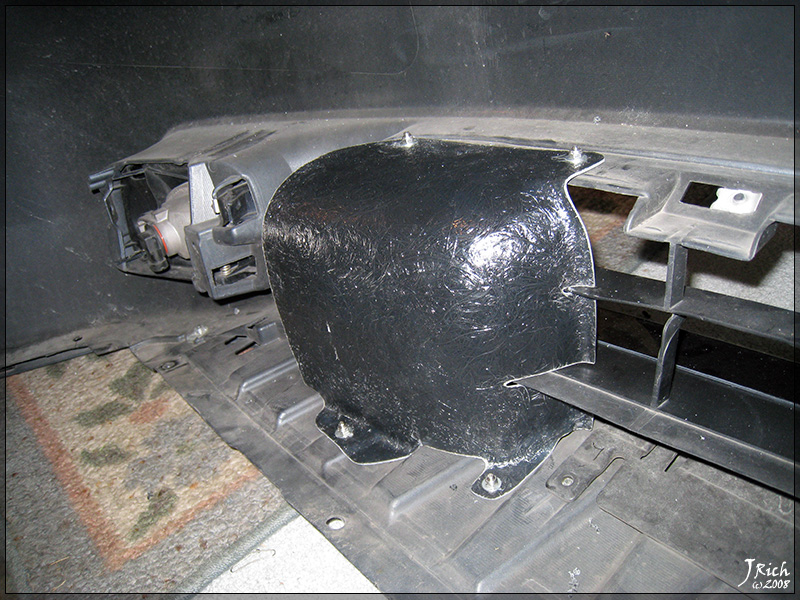
Air block off plate that fits perfectly around the subframe to keep air from entering the engine bay from the intake side other than through the whole up to the filter.
Air directional plate from center air dam with sweet allen head bolts I bought since it didn't come with any.

Stage IV
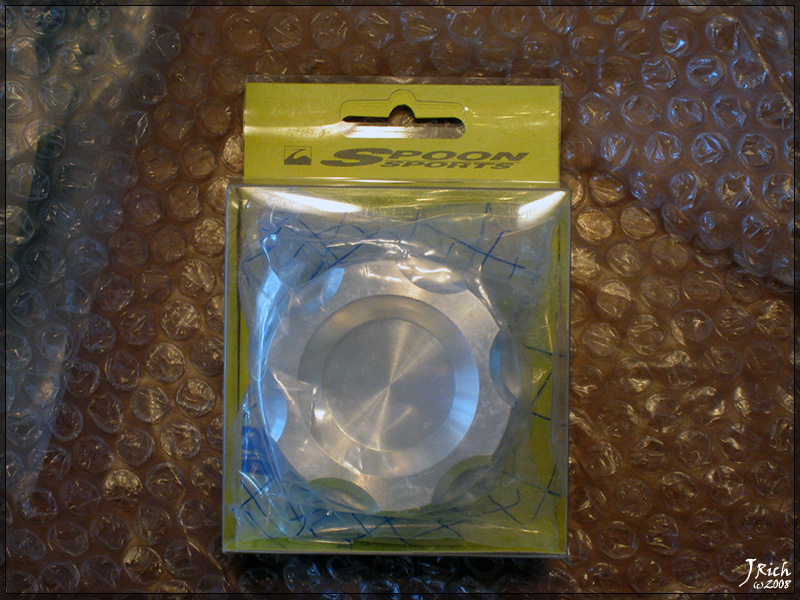
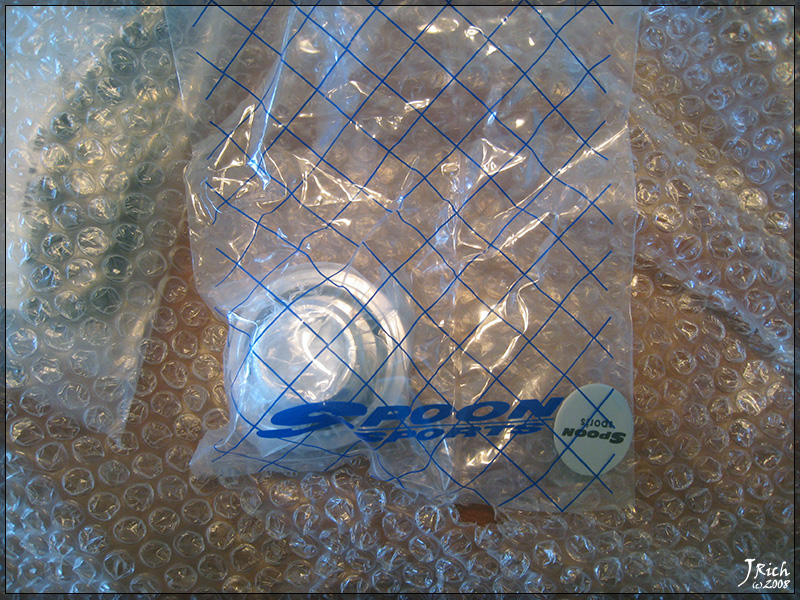
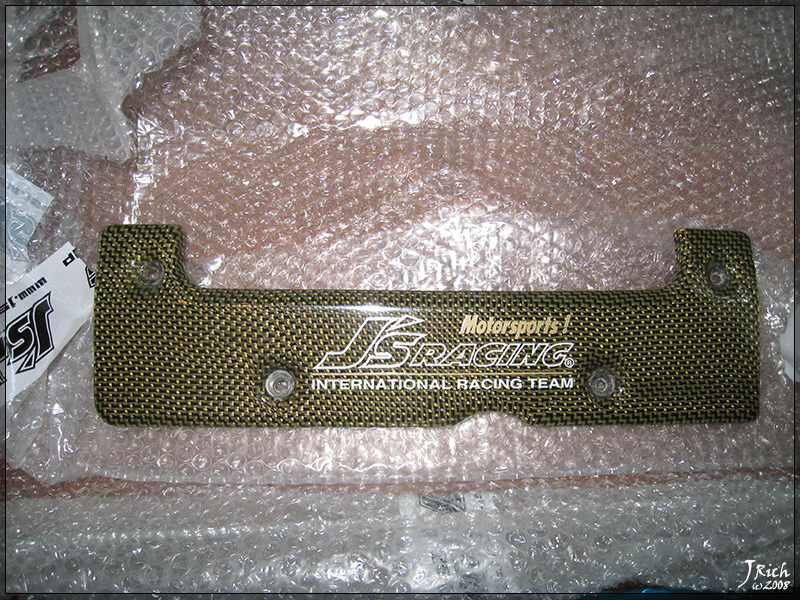
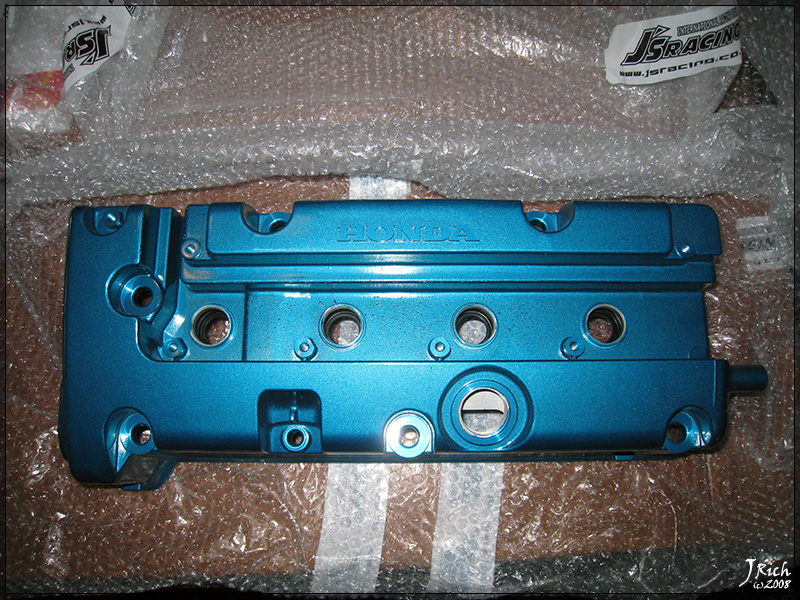
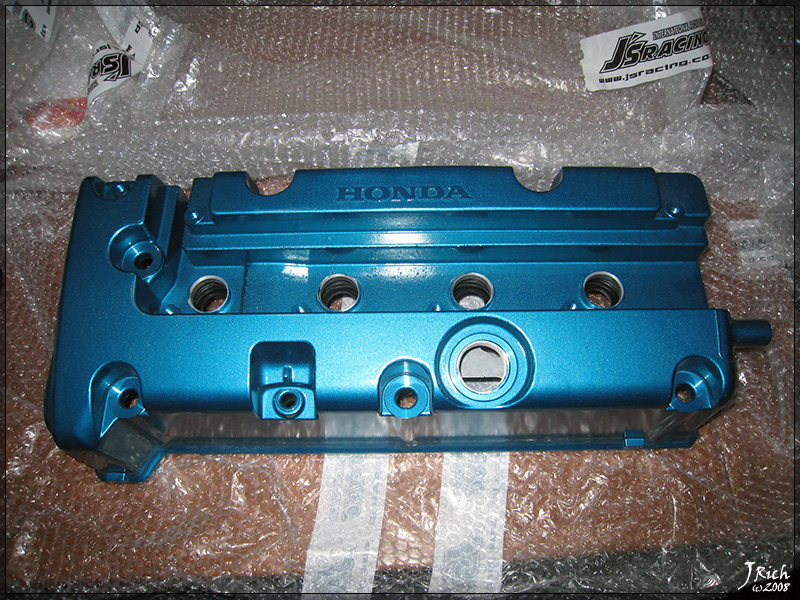
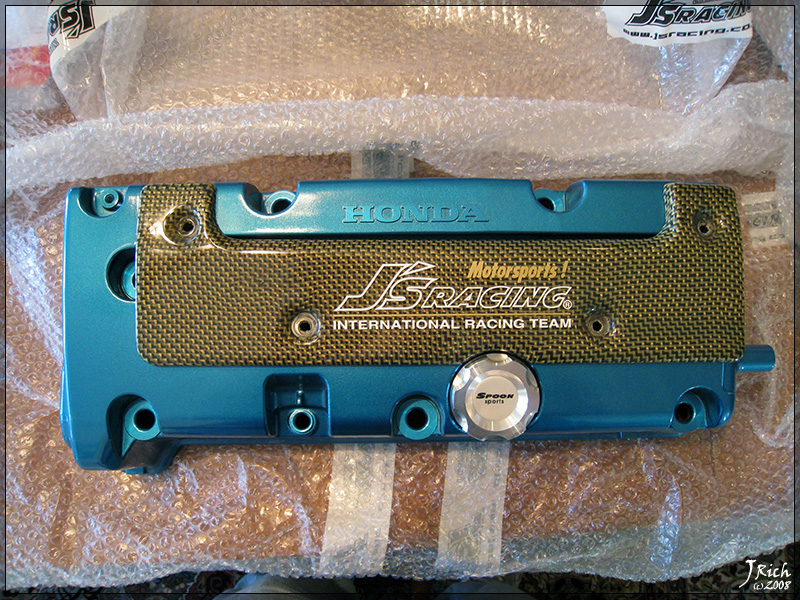
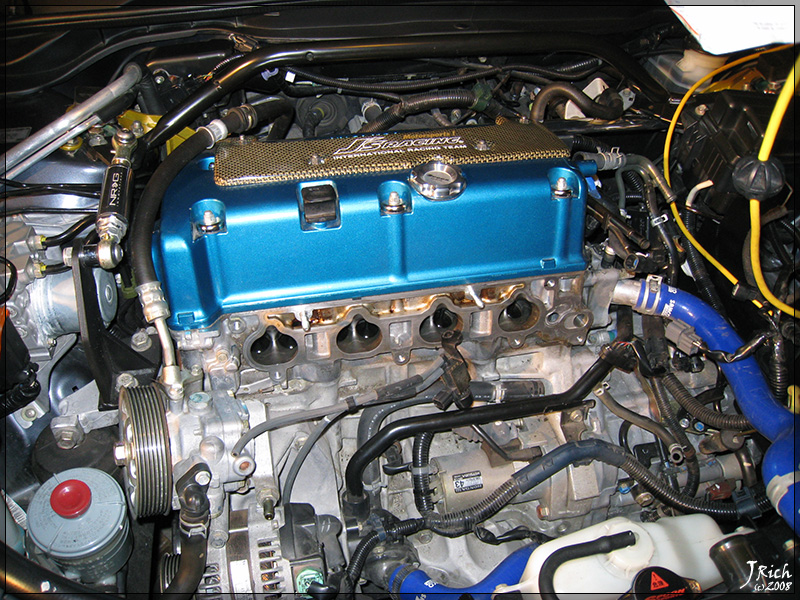
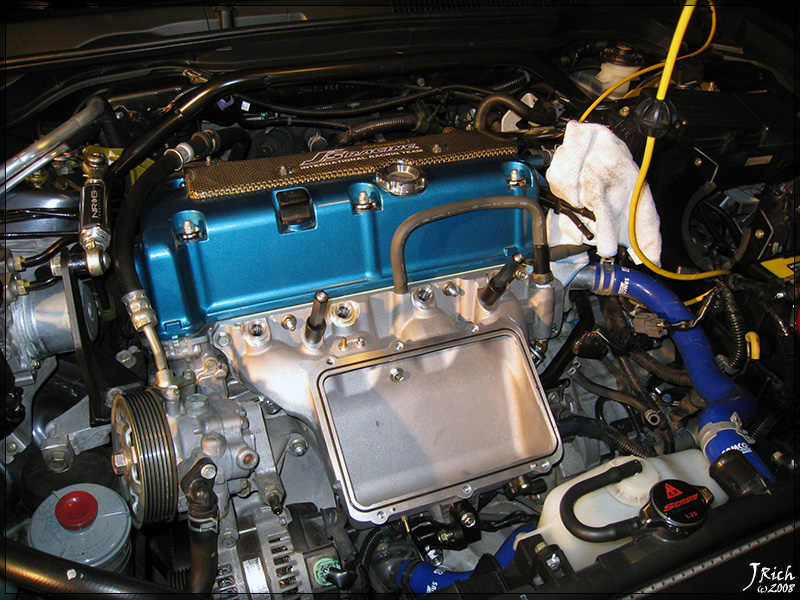
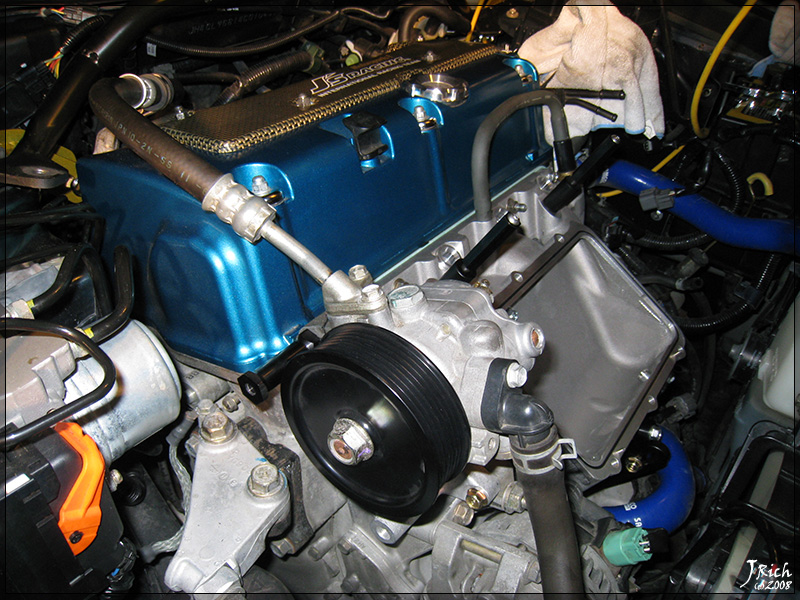
Spoon Radiator Cap, Spoon Oil Cap, Spoon Spark Cover, J's Valve Cover. Also on the way Spoon Reservoir Covers.


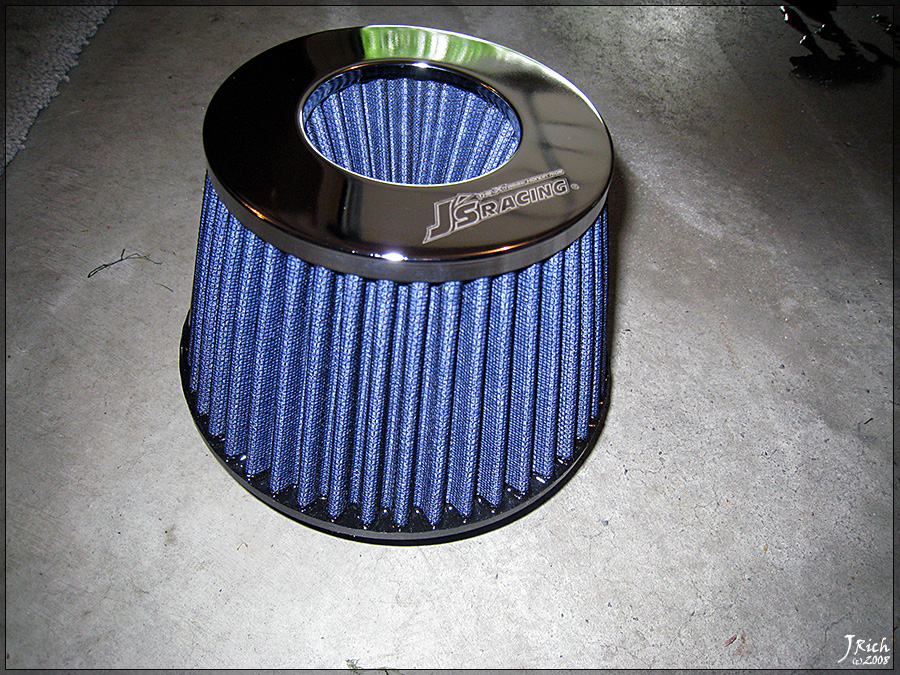
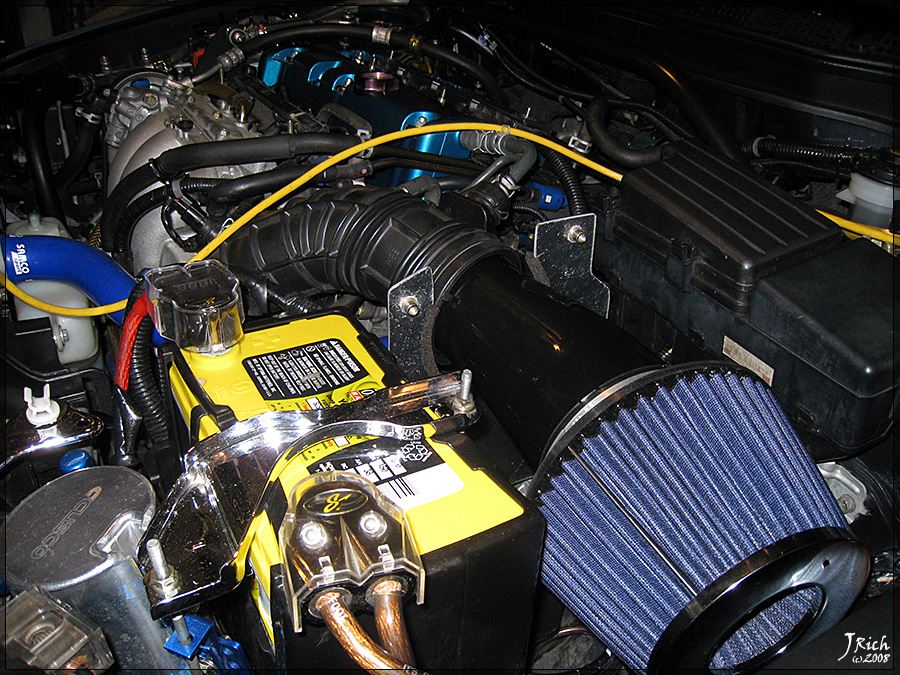
J's Racing Air Intake
The install of the j�s racing intake is very straight forward as long as you can get the second chamber to attach to the rubber hose. That was the only tough part I had when trying to install the intake. I was looking forward to trying to do the P2R spacer but the fit is already tight right now so I am pretty sure it will not be possible.


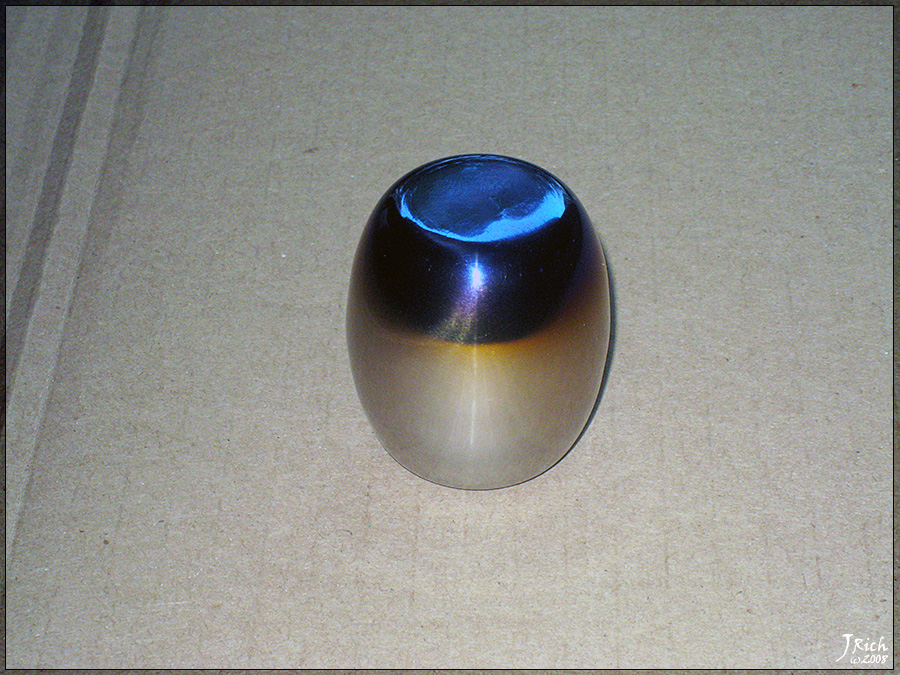
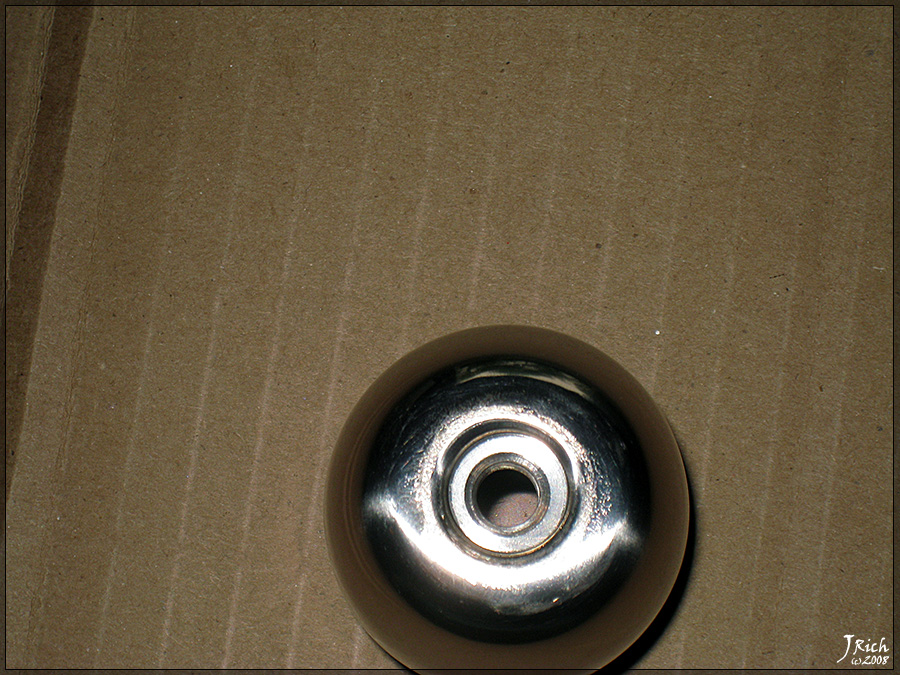
Spoon Titanium Auto Shift ****
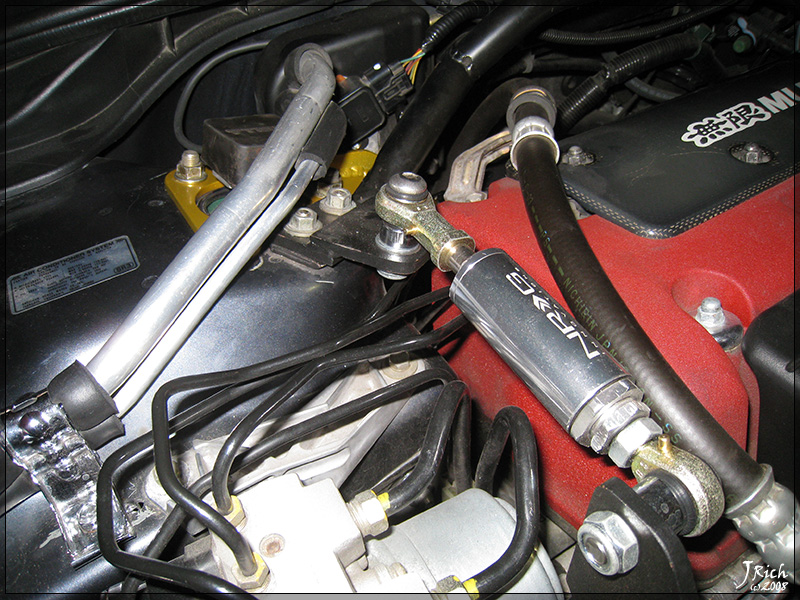
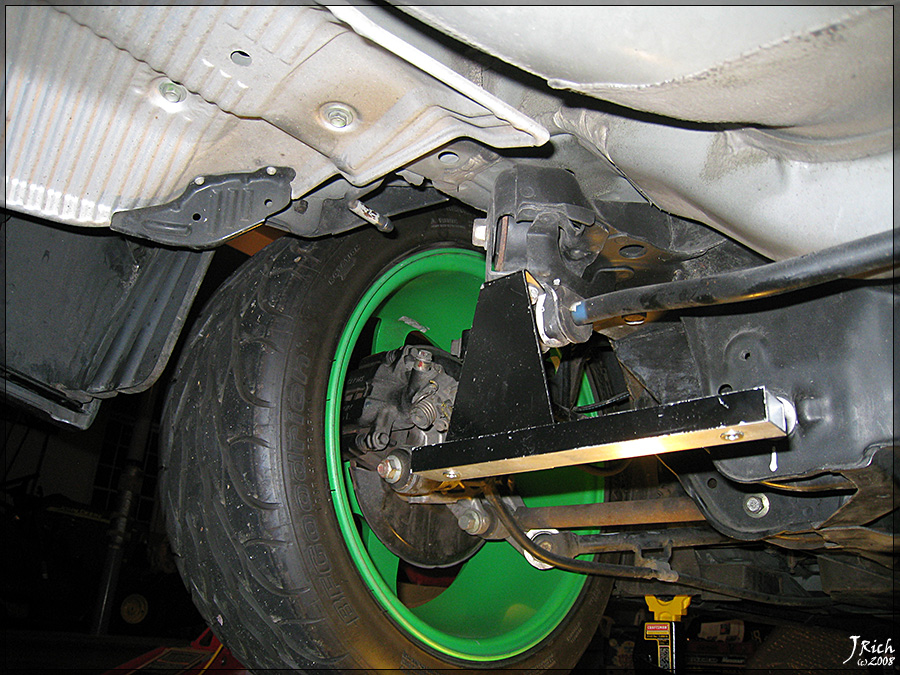
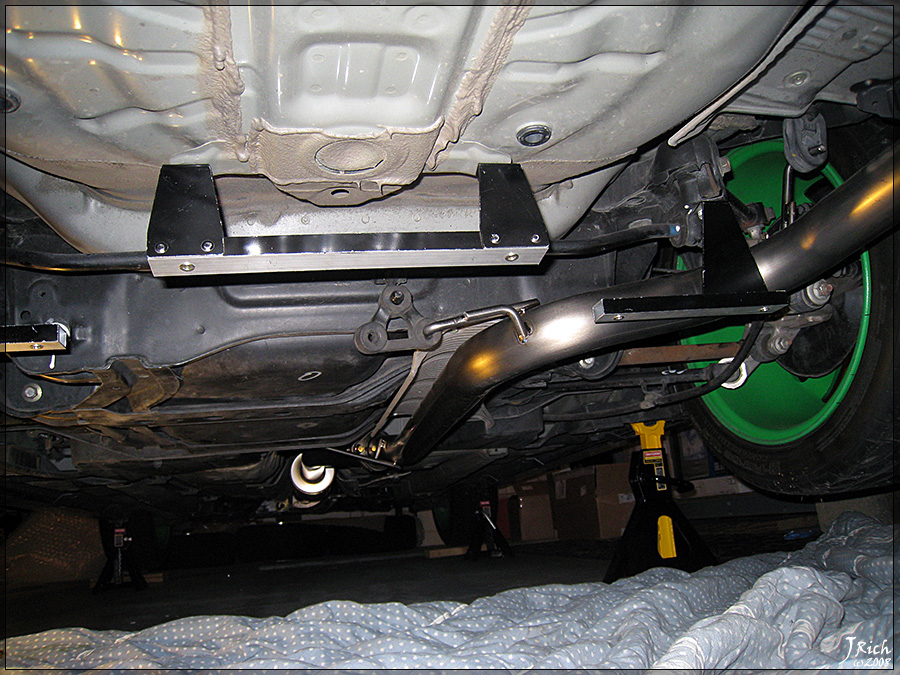
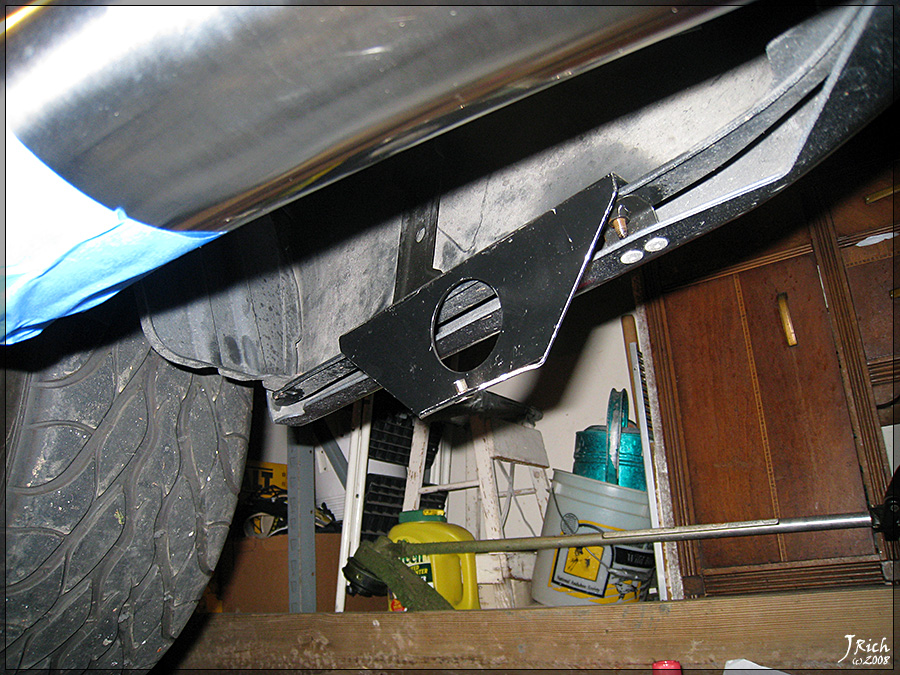
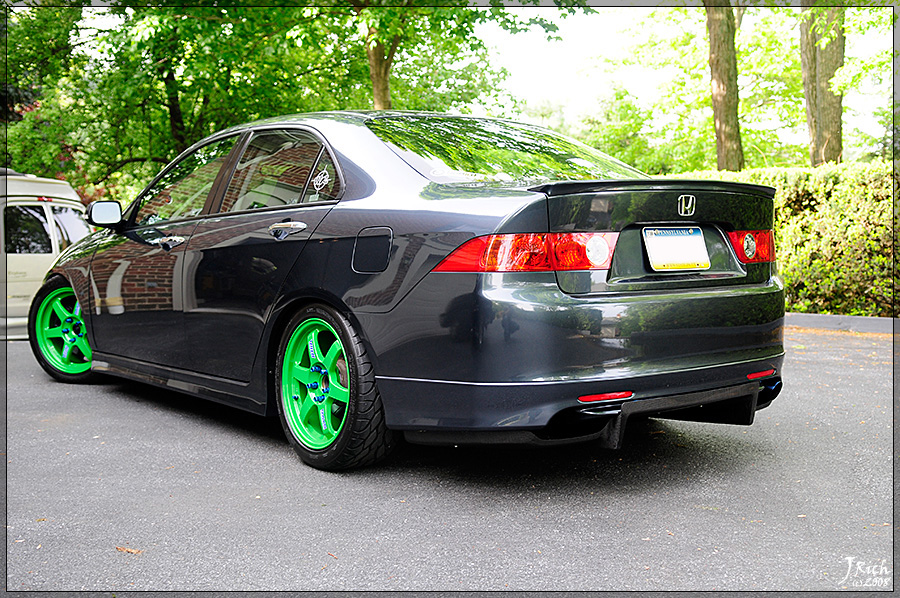
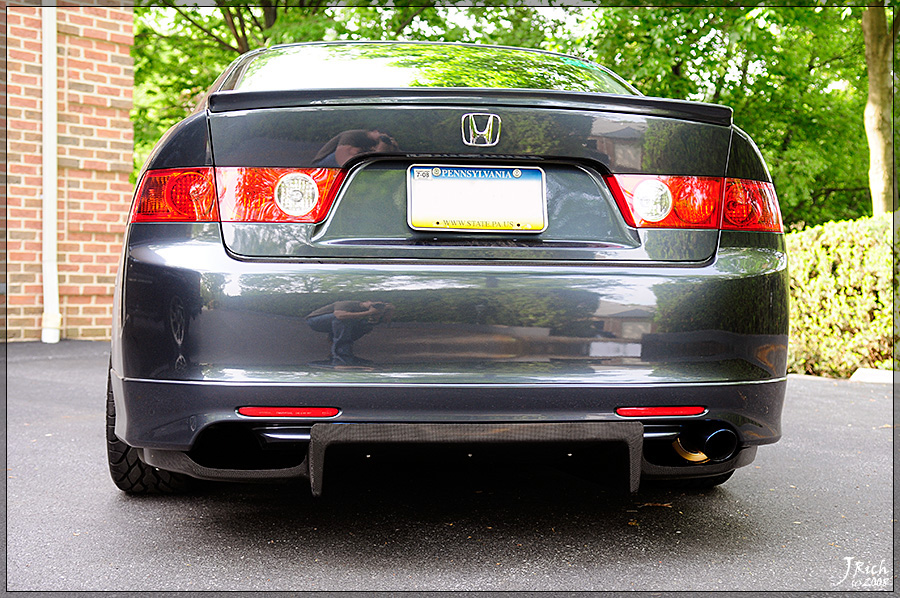
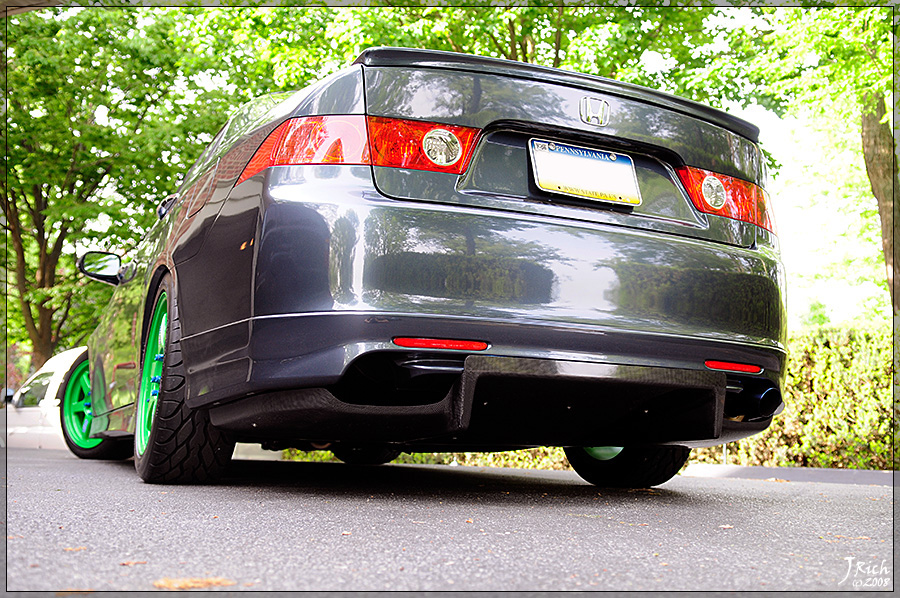
J's Racing Carbon Rear Diffuser
The rear diffuser is a real pain to install and is not something you can do with just one person. I had two friends help me with the install and I can�t imagine trying to do it with less people really. You have to make sure all the brackets are correctly aligned. I think I test fitted the diffuser on 6 times before I had all the brackets lined up 90% of the way so that I could tweak them into the place the remainder of the way. The build quality of the diffuser is top notch. Once you have it mounted too the brackets with all 11 screws that thing is super solid.
Unwaxed
Waxed
Bracket Install


Diffuser Install


Installed Daylight Pics
Stage V
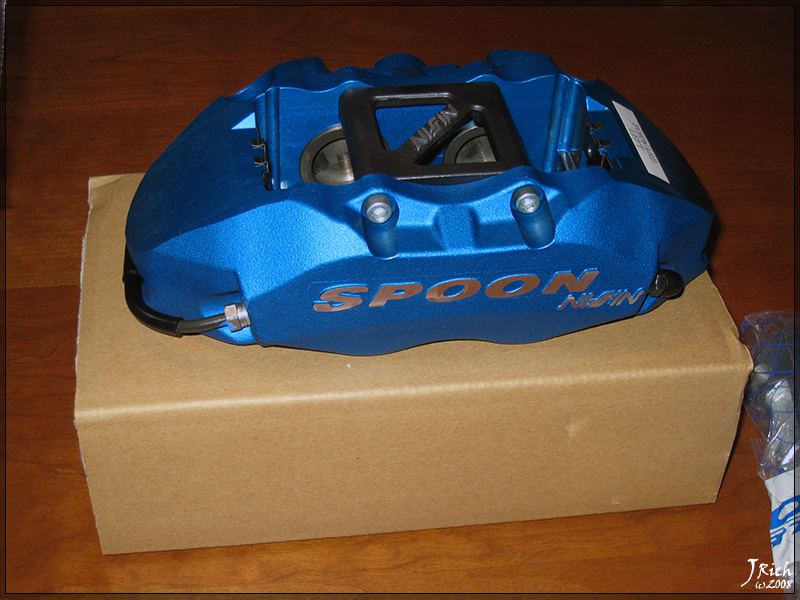
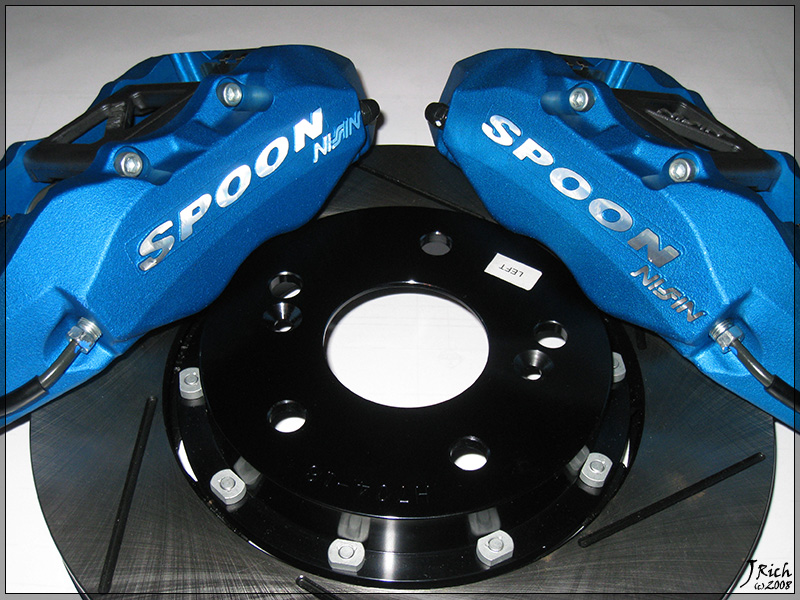
Hopefully I will be able to get these installed early next week as brakes is one of the only things I don't feel comfortable tackling yet.
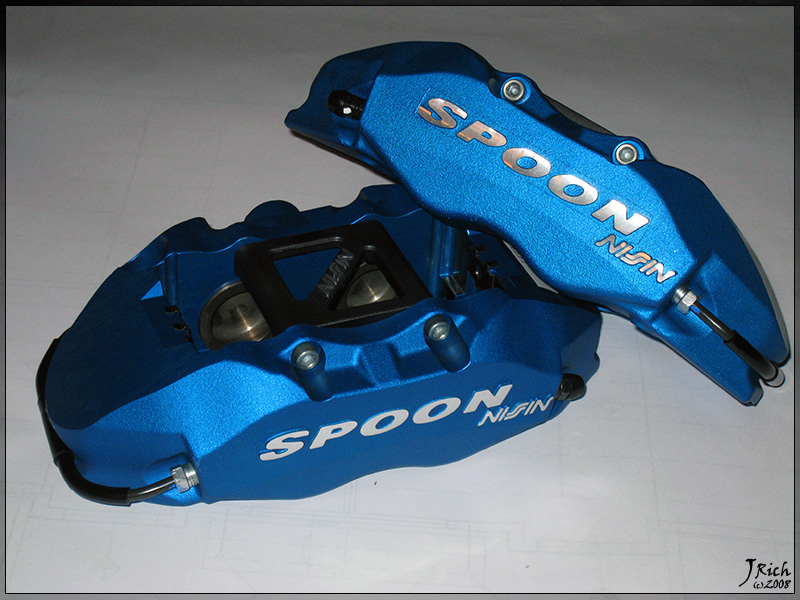
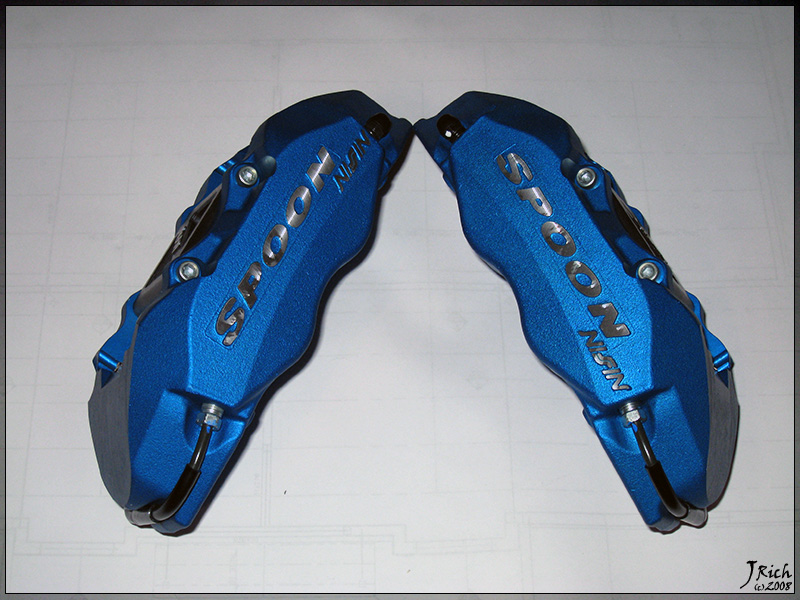
My new brake setup will be Spoon Calipers, Hawk HPS Pads All Around, Racing Brake 2pc Front Rotros, Racing Brake Rear Rotors, and Racing Brake Stainless Steel Brake Lines.


Stage VI
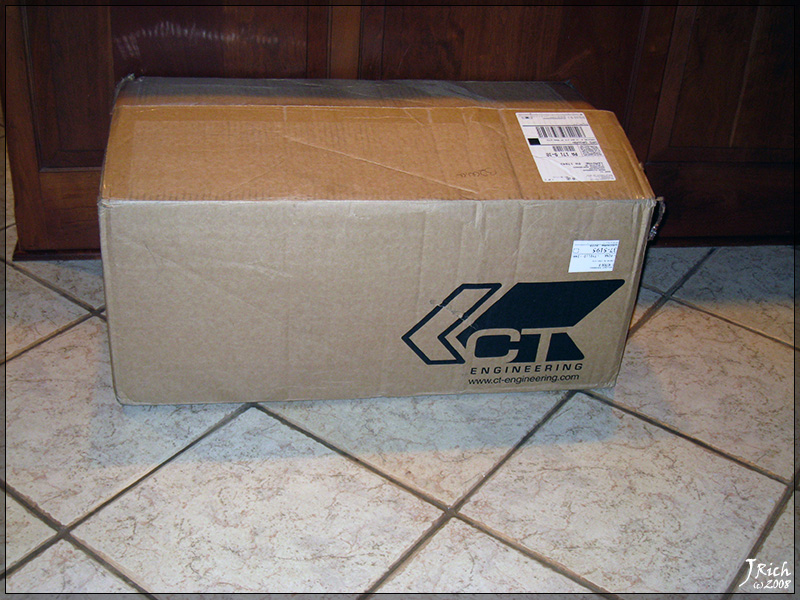
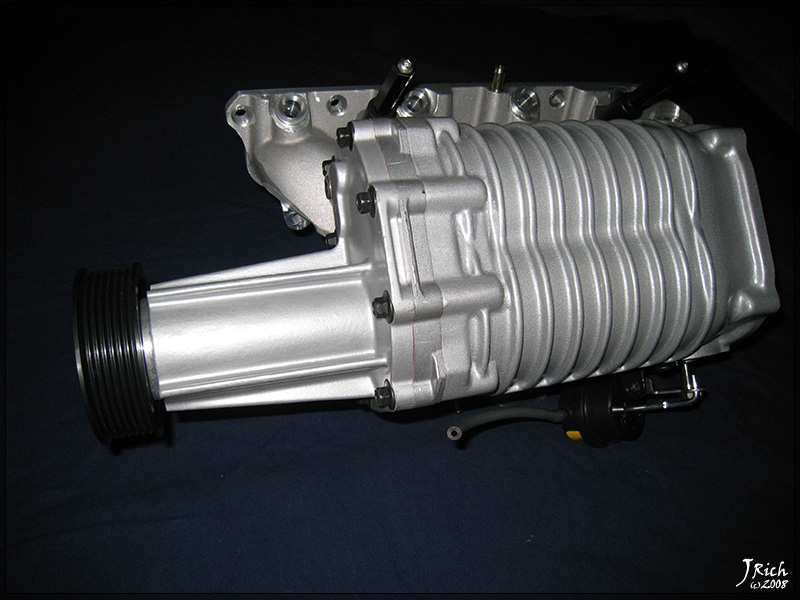


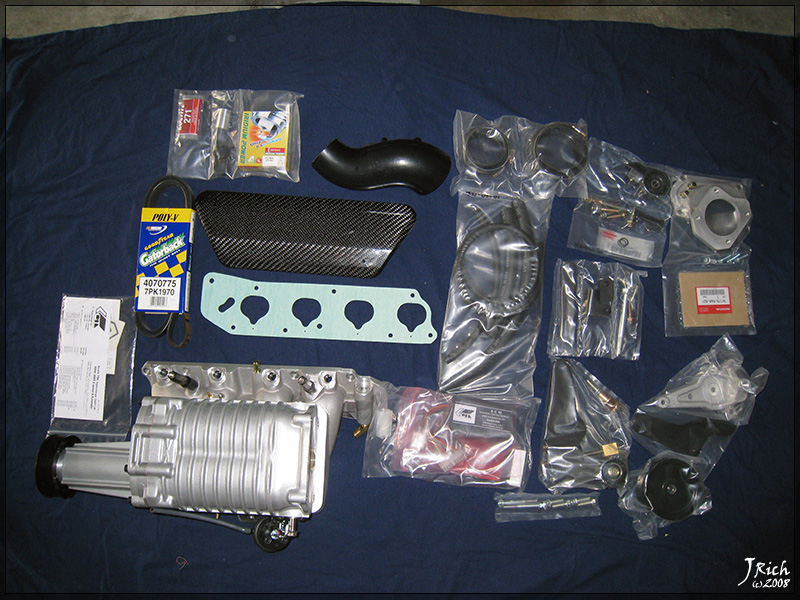
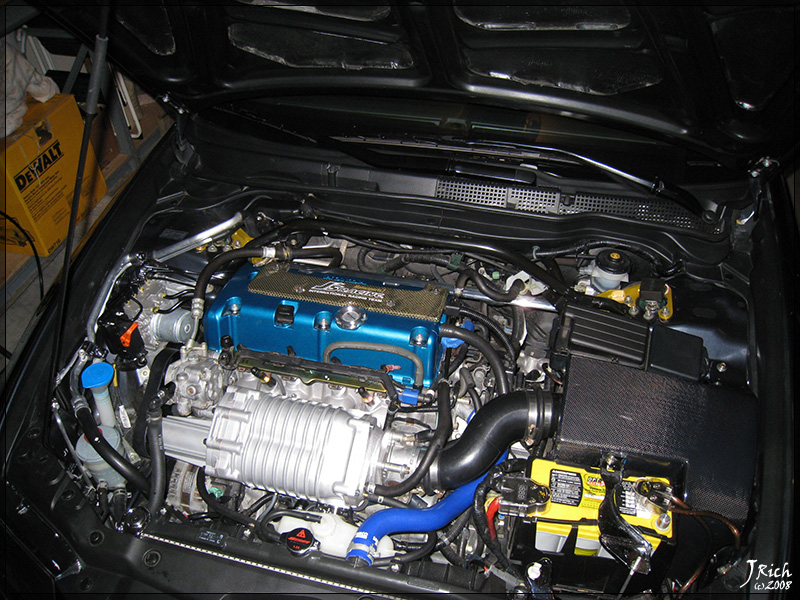
Well finally decided to leave the AT in for now and Supercharge the car cause I still have interest in doing RHD and JDM k20 motor swap eventually when the price of a front clip finally comes down. I would like to thank board vendor Excelerate.com for getting me the supercharger extremely fast after I placed my order so that I would be able to get it installed this weekend.
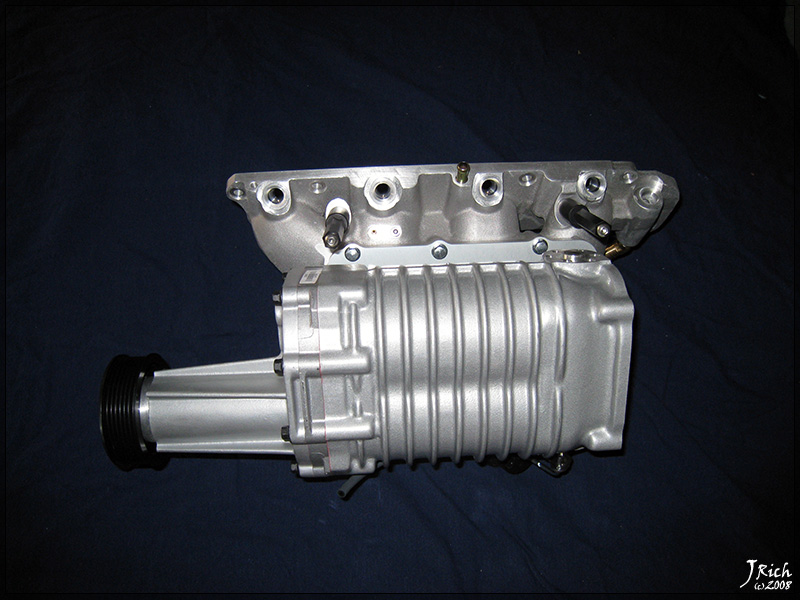
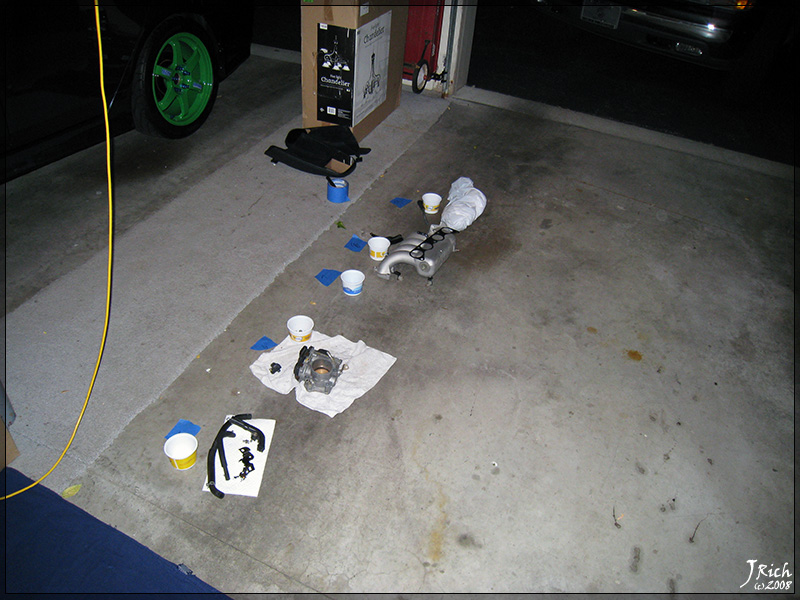
Well its been just over a week since I finally got the supercharger installed however I have maybe logged 3 hours total driving the car since I have been so busy with work and going to a show this past weekend. The install I thought was basically fairly easy minus a couple small hiccups along the way. First problem I ran into was the screw hole for the map sensor was not tapped to receive the bolt to hold the map sensor on so I had to run to my buddies shop to get that tapped. The second problem I ran into when I first started the car was that there was a horrible scretching noise and I noticed that the bolts holding the pulley on were touching the the auto tensioner and grinding against it cause for some reason comptech had put washer on the bolts along with using flared nuts and the pictures on the installation instructions only had them using the flared bolts. So once the washers were removed the clearance was fine however I need to contact comptech and email them pictures cause I want a replacement auto tensioner that is not scratched now. Last problem I had was in the process of installing the extension on the power steering hose I had an o-ring tear. While I tried to bleed the power steering system to get air our that I thought was a result of the longer hose I was really just pumping more air into the system the entire time so a trip to the Acura dealer for a new o-ring a bottle of power steering fluid to top of the fluid that came out.
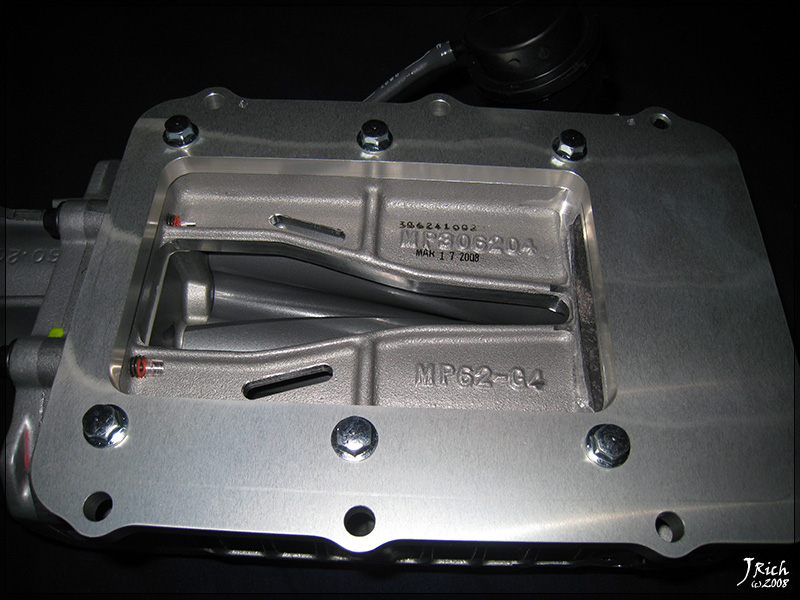
First half stock manifold removed

Step by step layout of parts removed
Second half of stock manifold removed
New manifold gasket

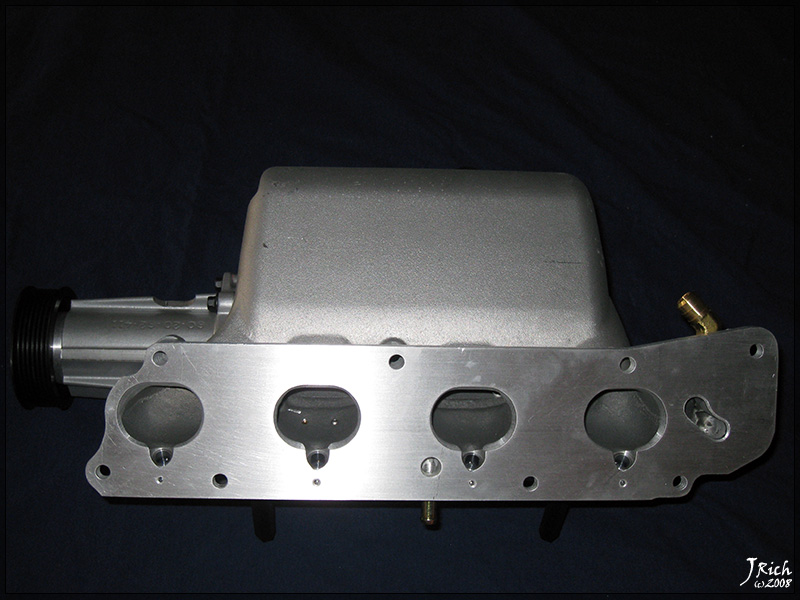
New manifold on

Stupid whole that wasn't tapped and caused me to have to remove manifold after it was on
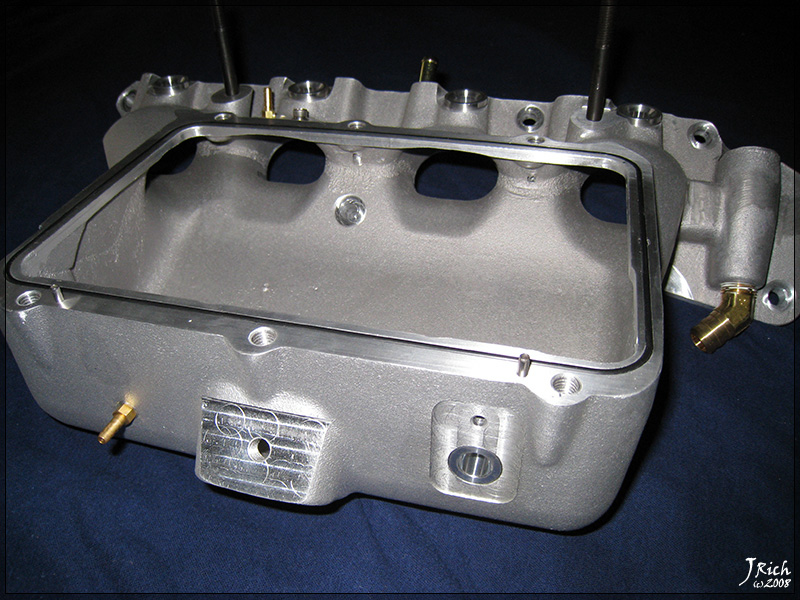
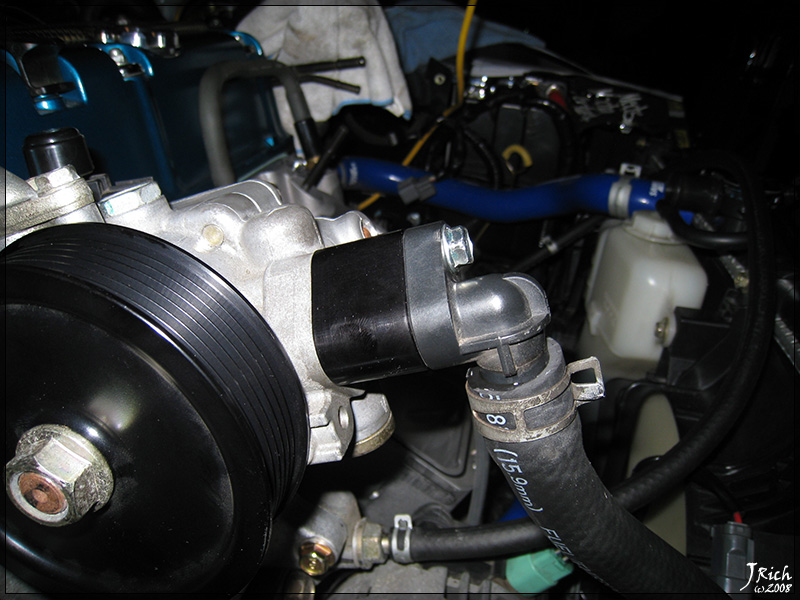
Power steering pump relocated
Removing power steering 90 degree adapter
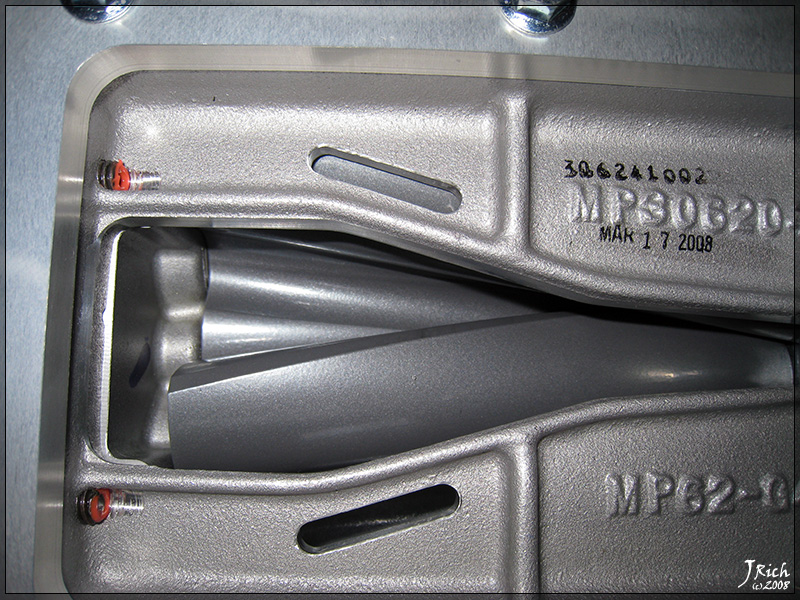
Spacer installed
Spacer installed close up
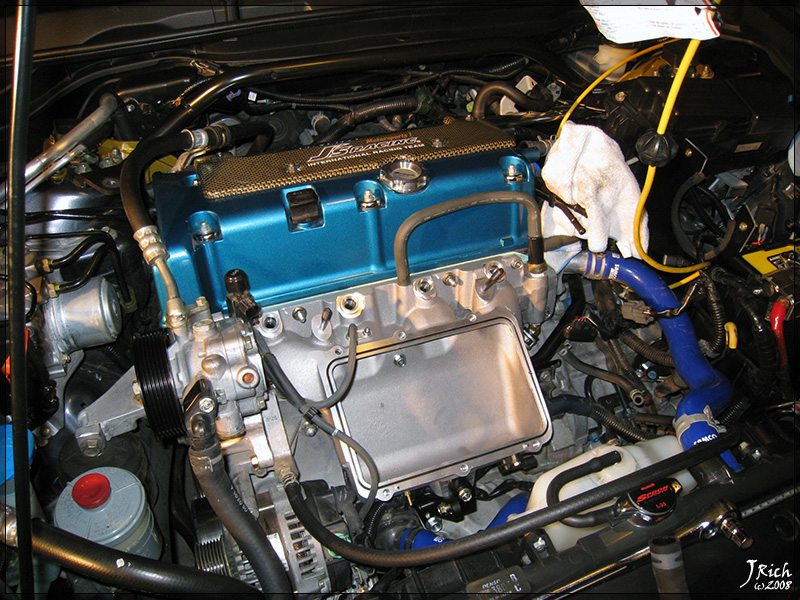
Blower on
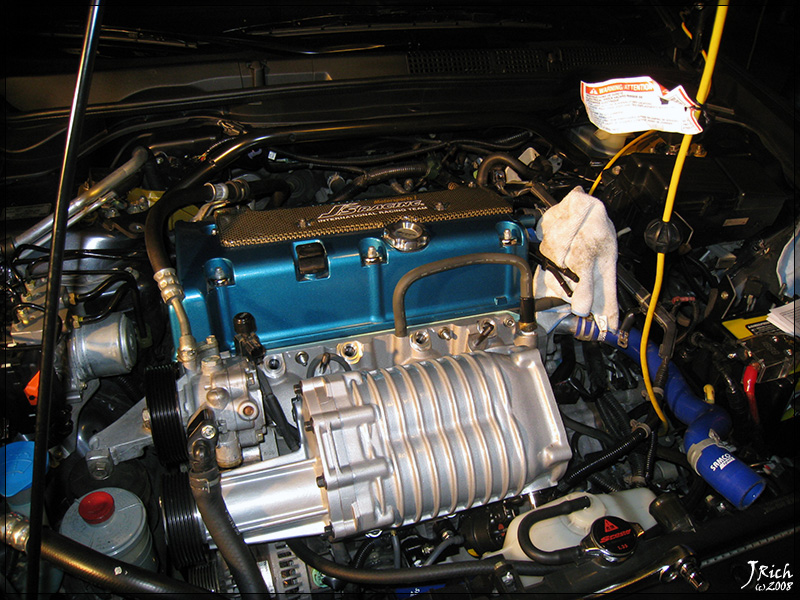
Blower on

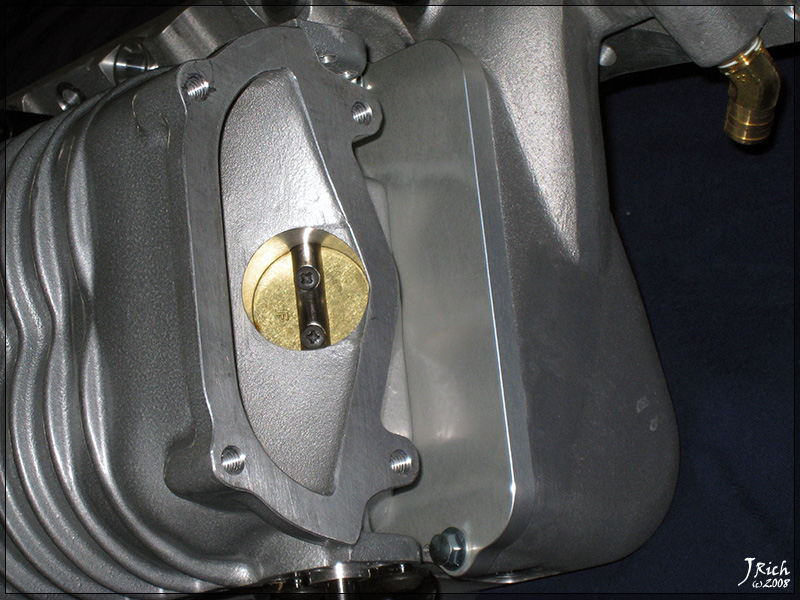
Blower throttle body plate

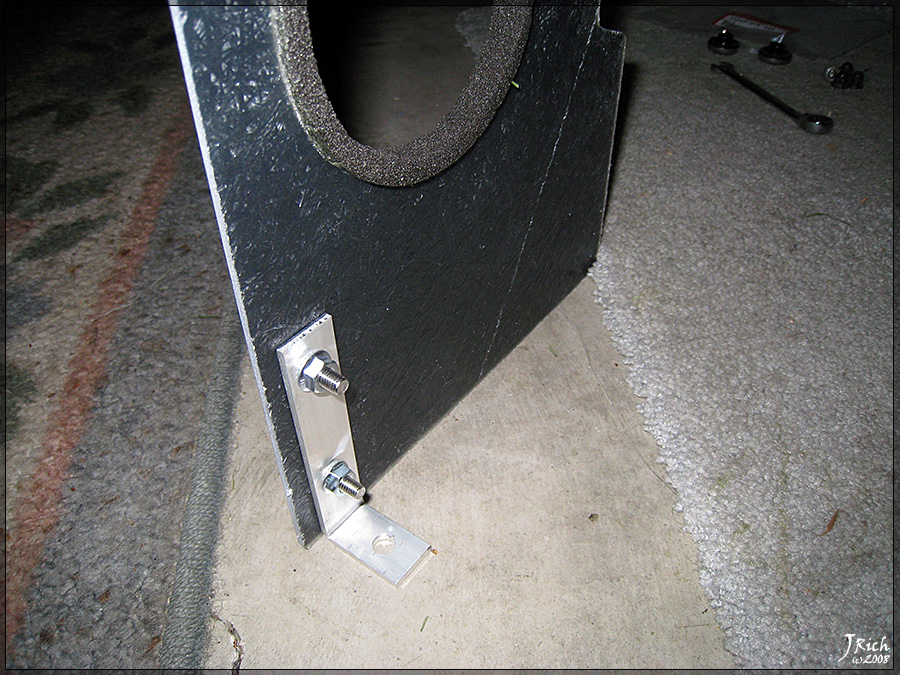
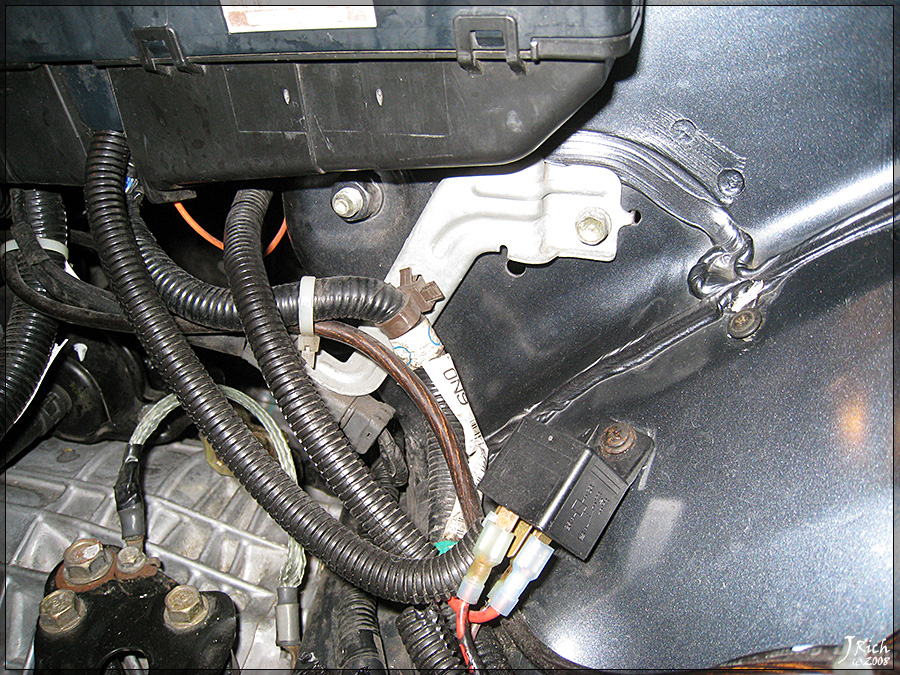
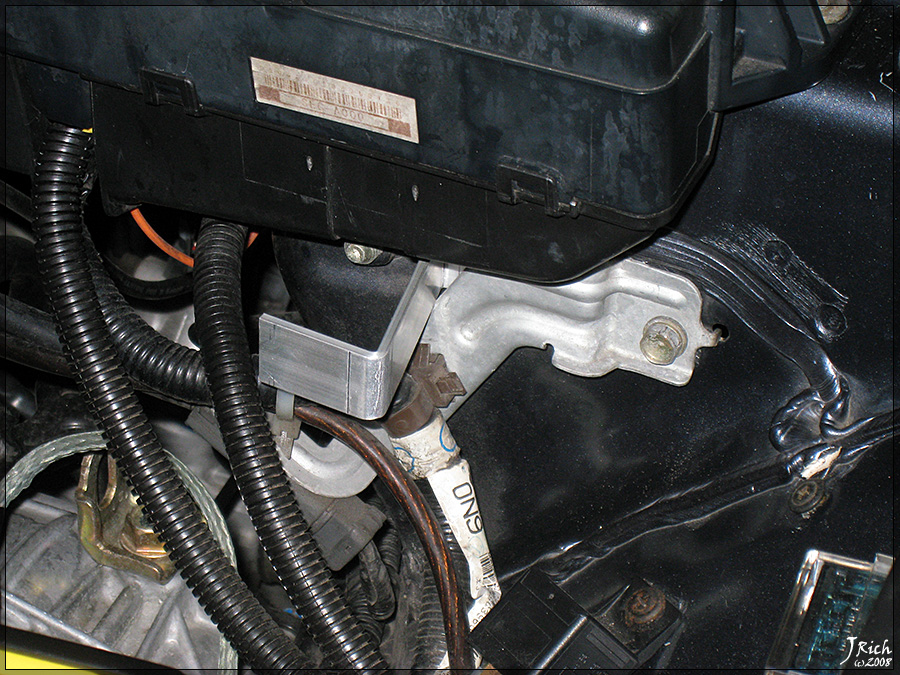
Manifold ground relocation
Auto tensioner and belt installed
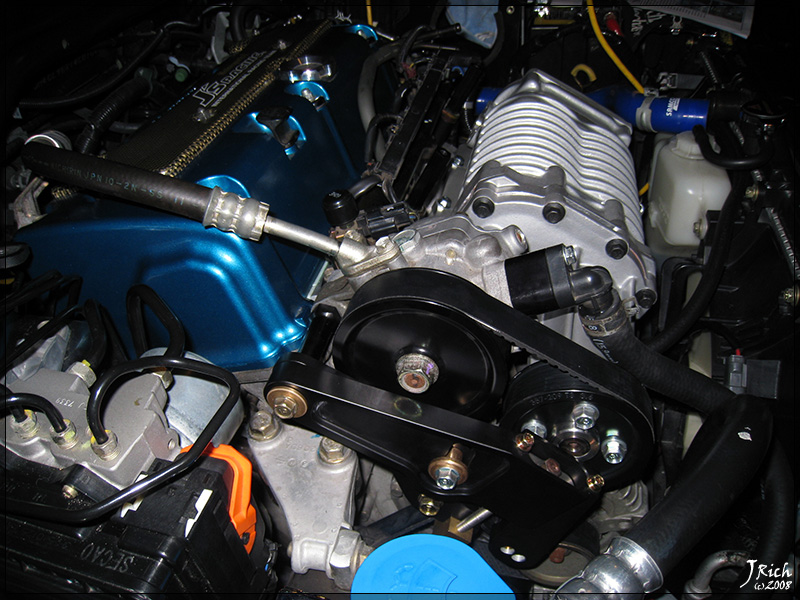
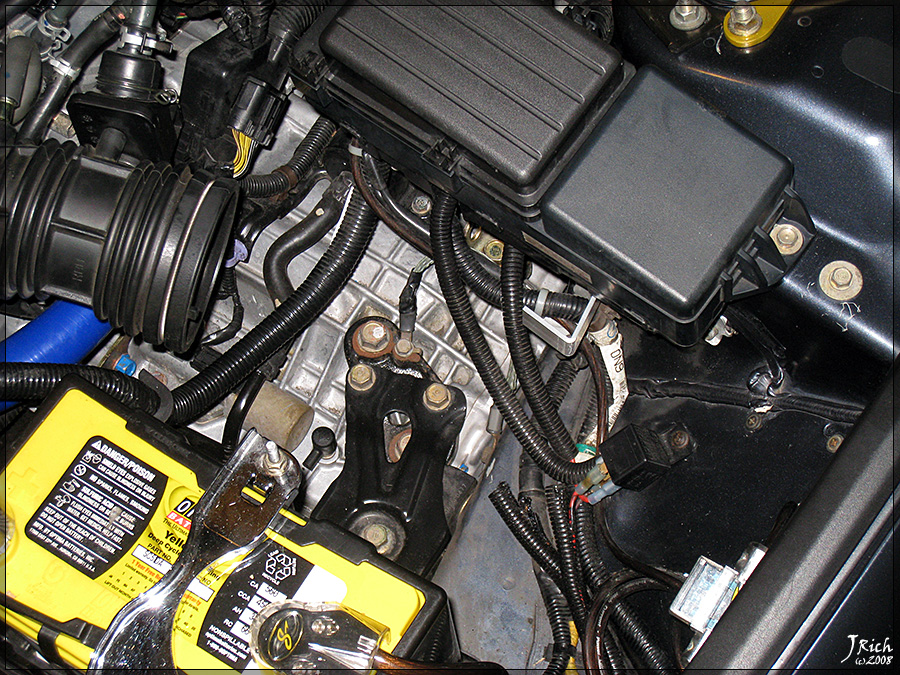
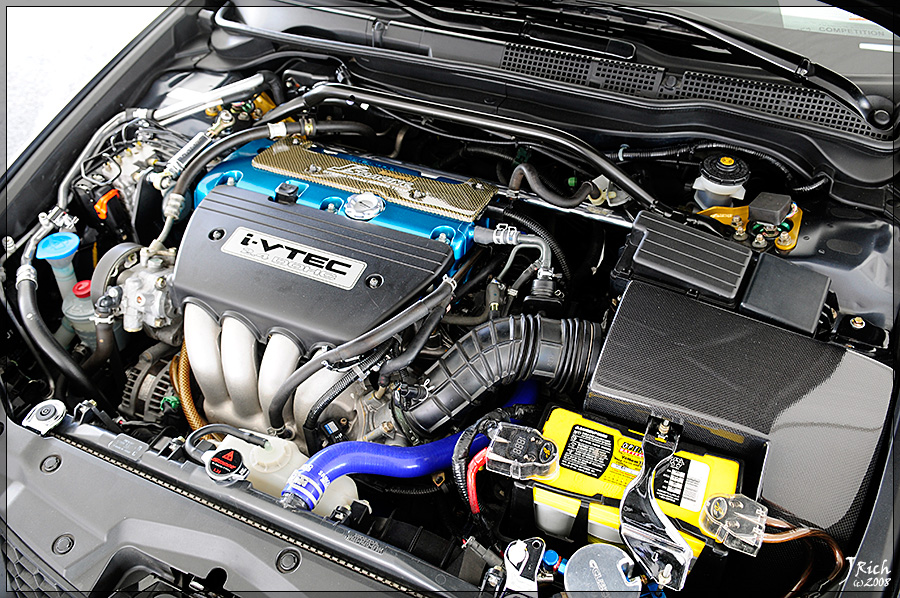
Completely installed
Stage VII
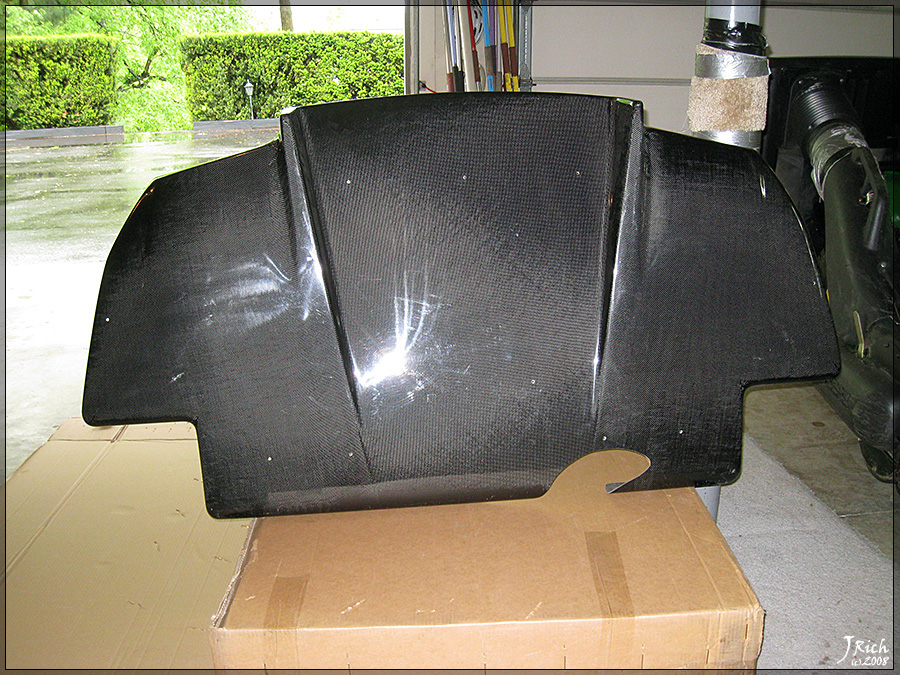
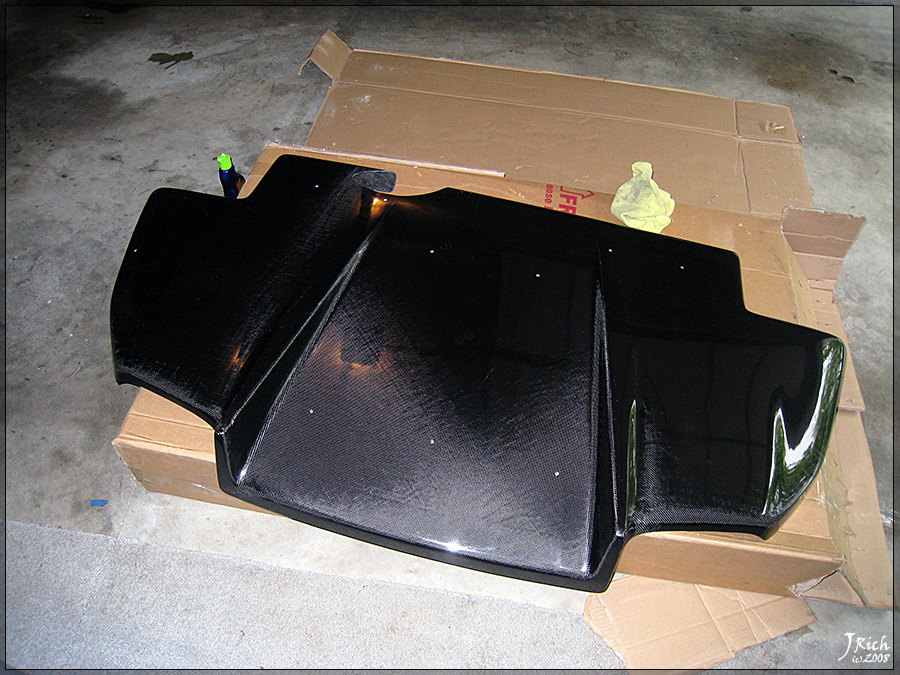
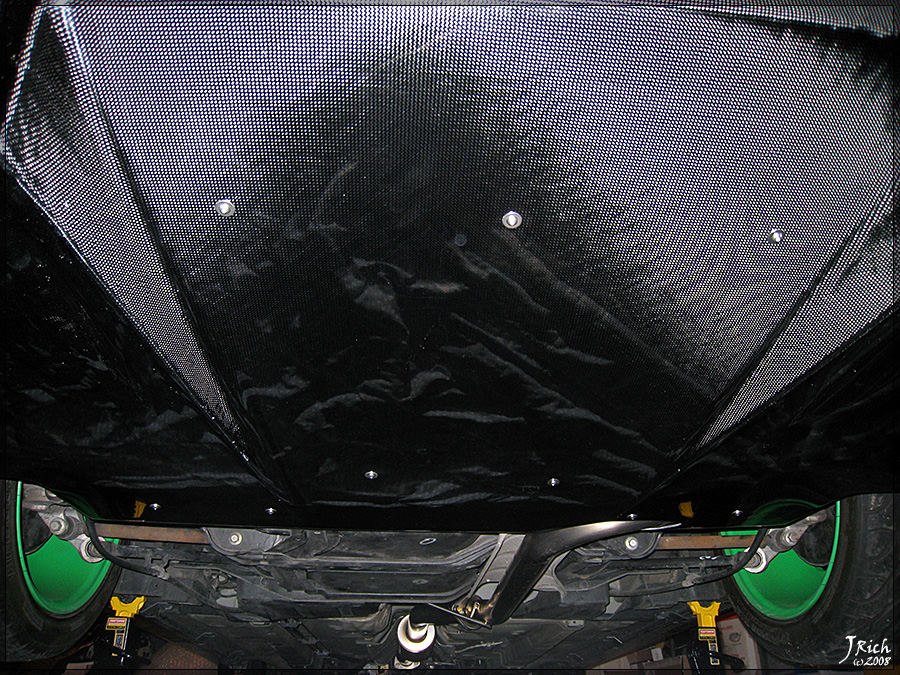
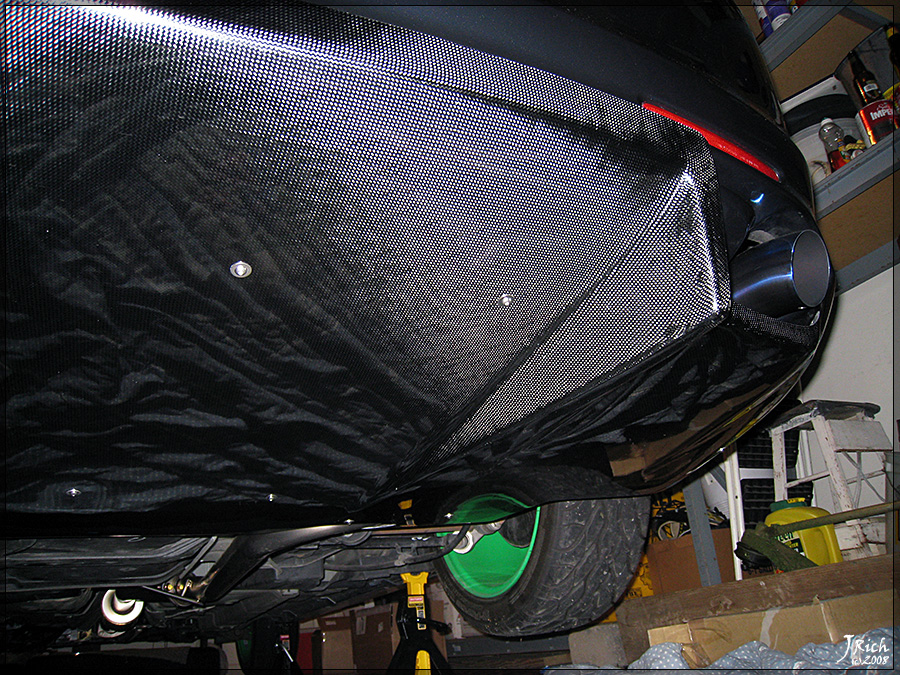
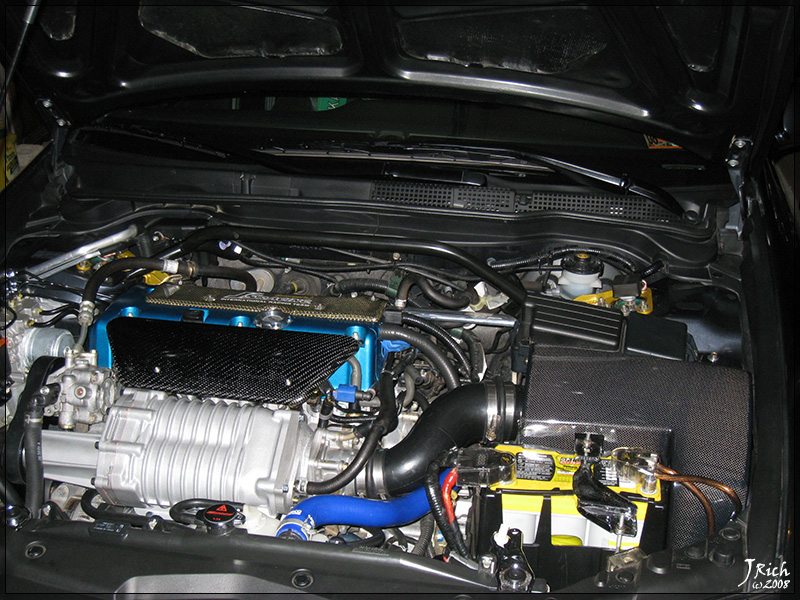
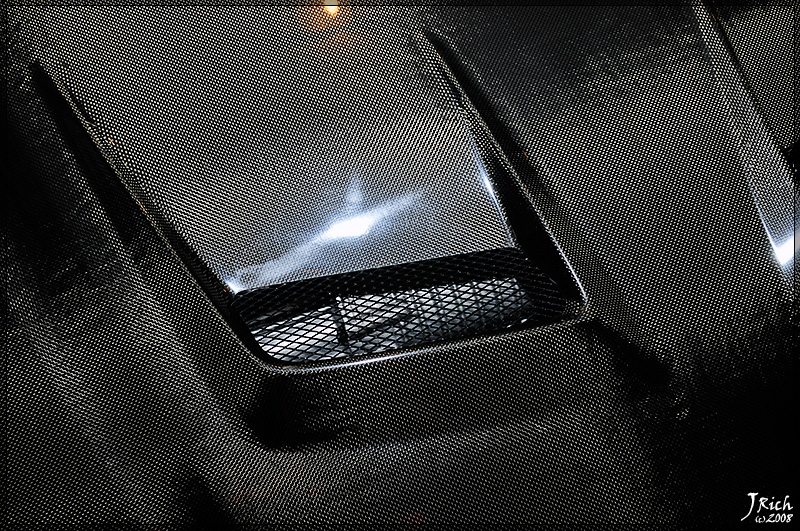
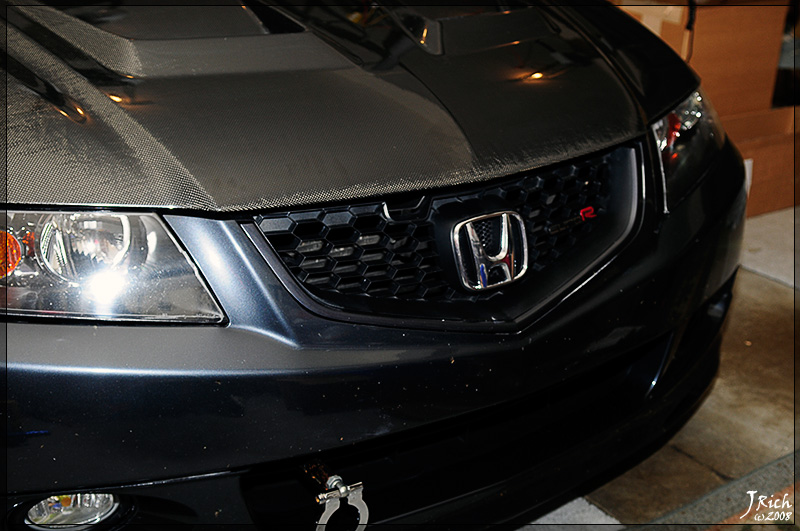
Well after picking up the supercharger my intake temperature grew greatly so I decided to pick up this J's Racing hood to hopefully reduce the intake temperatures a little. I haven't had a chance to drive it since getting to install it last night but hopefully it will help. The hood which is a 1x1 square weave which matches my rear diffuser and the intake by j's racing is amazing quality and weights only 15lbs. So without further wait here are some pictures.
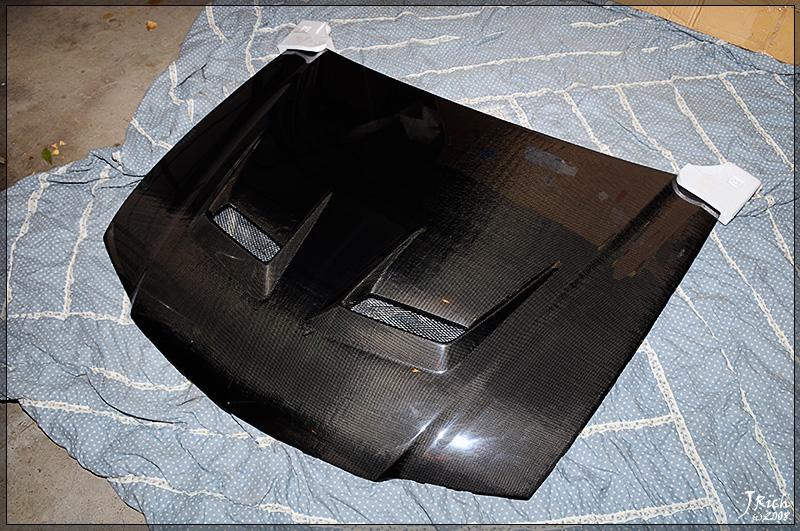
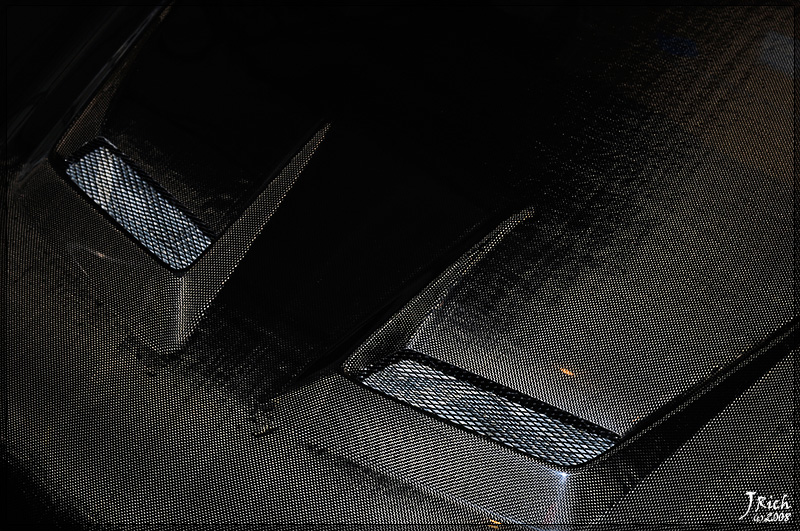
CL-7 stamp in the underside of the hood


Supercharger through the vent
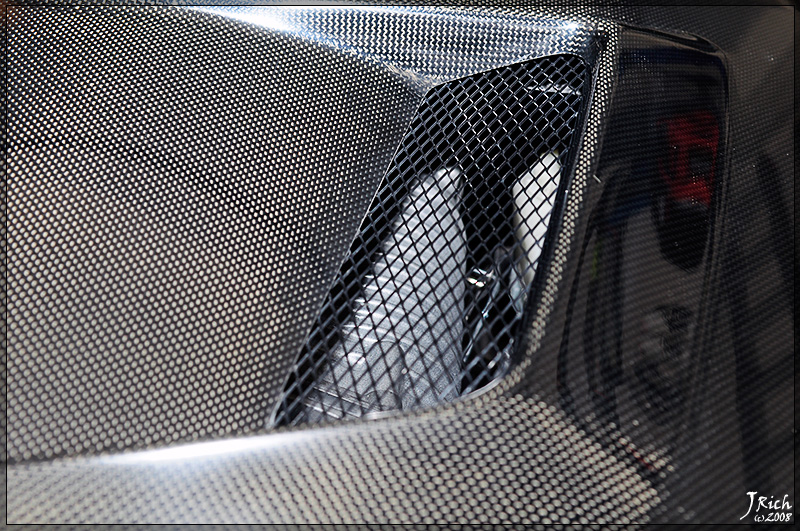
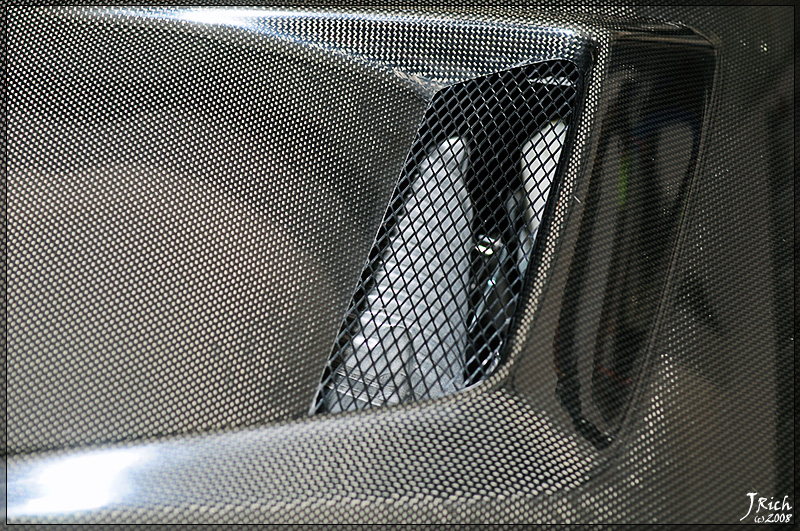
No more hood trim
Stage I
Decided I would post a build thread of my car from the last 9 months of posts from other sites since I don't Actually have the stuff actually compiled anywhere so here it is.
After 10 hours Thursday, 8 hours Friday, 8 hours Saturday, and 4 hours today I finally finished the final details of my most recent addition to my car. I started this project 2 weeks ago by gutting the car and then found when I begin to assemble all of the new parts I was missing one which end up being on backorder. My parts came in this Wednesday so I decided to finish it this weekend.
I have been slowly collecting both new and used black interior parts over the last year for. I had basically everything but seats around the beginning of this fall when I happened on a set of Recaro Sportline front seats and recaro wrapped rear seat from a 2004 Accord Euro R on Ebay. Finally changes as of current include full black interior conversion, recaro sport line front seats and recaro wrapped rear seat, brockway engineering race date display for my video screen, blacked out window trim, chrome door handles, blue 5zigen lug nuts, and 17x7.5 +40 takata green volk te37 wheels. There is still more to come but the rest will not be arriving till after Christmas.
So with out any further wait here are the build photos I took and the final pictures I took in my driveway since the weather was to bad to make it anywhere for a good shoot unfortunately.
The piece that caused the hold up.
Yes they are from a real accord euro r and even a 2004.
Interior Before
The finished pictures
Stage II
Stage III
J's Racing 60RS Exhaust, J's Racing Intake, J's Racing Strut Bar, Racing Brake 2pc Front Rotors, Racing Brake Slotted Rear Rotors, Racing Brake Stainless Steel Brake Lines, and a new euro r front lip. More coming soon, so stay tuned. So no more words and just pictures.
17in lift kit
Sweet Closeups of J's Exhaust
Damn those are some sexy welds
Did some more installs yesterday. Worked on the intake and the strut bar. The intake wasn't that hard so far but I wasn't able to install the entire thing because for some reason it didn't come with all the neccessary screws. Luckily I was able to come up with some screws that works and get all the parts installed that involved removed the bumper. The strut bar mount on the drivers side was easy to put on however the passenger side was not so easy. You had to unscrew both AC line mounting bracket screws so you could pull the lines up and to the back of the engine bay as far as possible just to be able to spend about 5 minutes wiggling the bracket through the small whole to get it on. Unfortunately I had to do this twice cause in the process of being annoyed by how hard it was to install I forgot to remove the strut tower bolts the first time. You had to install the brackets first and the bar seperate for this strut bar as well. One bolt must go one direction and one must go the other to mount the bar to the brackets and actually have room to tighten the bolts.
So here are pics of both installs. Lots more of the strut tower to try and show how tight the fit is. Also the reason there is blue tape on the strut bar is because I didn't want to scratch it during install.
Air block off plate that fits perfectly around the subframe to keep air from entering the engine bay from the intake side other than through the whole up to the filter.
Air directional plate from center air dam with sweet allen head bolts I bought since it didn't come with any.
Stage IV
Spoon Radiator Cap, Spoon Oil Cap, Spoon Spark Cover, J's Valve Cover. Also on the way Spoon Reservoir Covers.
J's Racing Air Intake
The install of the j�s racing intake is very straight forward as long as you can get the second chamber to attach to the rubber hose. That was the only tough part I had when trying to install the intake. I was looking forward to trying to do the P2R spacer but the fit is already tight right now so I am pretty sure it will not be possible.
Spoon Titanium Auto Shift ****
J's Racing Carbon Rear Diffuser
The rear diffuser is a real pain to install and is not something you can do with just one person. I had two friends help me with the install and I can�t imagine trying to do it with less people really. You have to make sure all the brackets are correctly aligned. I think I test fitted the diffuser on 6 times before I had all the brackets lined up 90% of the way so that I could tweak them into the place the remainder of the way. The build quality of the diffuser is top notch. Once you have it mounted too the brackets with all 11 screws that thing is super solid.
Unwaxed
Waxed
Bracket Install
Diffuser Install
Installed Daylight Pics
Stage V
Hopefully I will be able to get these installed early next week as brakes is one of the only things I don't feel comfortable tackling yet.
My new brake setup will be Spoon Calipers, Hawk HPS Pads All Around, Racing Brake 2pc Front Rotros, Racing Brake Rear Rotors, and Racing Brake Stainless Steel Brake Lines.
Stage VI
Well finally decided to leave the AT in for now and Supercharge the car cause I still have interest in doing RHD and JDM k20 motor swap eventually when the price of a front clip finally comes down. I would like to thank board vendor Excelerate.com for getting me the supercharger extremely fast after I placed my order so that I would be able to get it installed this weekend.
Well its been just over a week since I finally got the supercharger installed however I have maybe logged 3 hours total driving the car since I have been so busy with work and going to a show this past weekend. The install I thought was basically fairly easy minus a couple small hiccups along the way. First problem I ran into was the screw hole for the map sensor was not tapped to receive the bolt to hold the map sensor on so I had to run to my buddies shop to get that tapped. The second problem I ran into when I first started the car was that there was a horrible scretching noise and I noticed that the bolts holding the pulley on were touching the the auto tensioner and grinding against it cause for some reason comptech had put washer on the bolts along with using flared nuts and the pictures on the installation instructions only had them using the flared bolts. So once the washers were removed the clearance was fine however I need to contact comptech and email them pictures cause I want a replacement auto tensioner that is not scratched now. Last problem I had was in the process of installing the extension on the power steering hose I had an o-ring tear. While I tried to bleed the power steering system to get air our that I thought was a result of the longer hose I was really just pumping more air into the system the entire time so a trip to the Acura dealer for a new o-ring a bottle of power steering fluid to top of the fluid that came out.
First half stock manifold removed
Step by step layout of parts removed
Second half of stock manifold removed
New manifold gasket
New manifold on
Stupid whole that wasn't tapped and caused me to have to remove manifold after it was on
Power steering pump relocated
Removing power steering 90 degree adapter
Spacer installed
Spacer installed close up
Blower on
Blower on
Blower throttle body plate
Manifold ground relocation
Auto tensioner and belt installed
Completely installed
Stage VII
Well after picking up the supercharger my intake temperature grew greatly so I decided to pick up this J's Racing hood to hopefully reduce the intake temperatures a little. I haven't had a chance to drive it since getting to install it last night but hopefully it will help. The hood which is a 1x1 square weave which matches my rear diffuser and the intake by j's racing is amazing quality and weights only 15lbs. So without further wait here are some pictures.
CL-7 stamp in the underside of the hood
Supercharger through the vent
No more hood trim

 ...Holding it down for Pa
Trending Topics

 09-04-2008, 01:53 PM
#17
Honda-Tech Member

Join Date: Nov 2000
Location: San Diego, CA, USA
Posts: 462
Likes: 0
Received 0 Likes
on
0 Posts
I like the performance mods you have done to it. I don't care for the green wheels and carbon fiber hood. It just seems... not classy I guess. I don't have word to describe it.
You have put a ton of work into it though. And I think that is awesome.
You have put a ton of work into it though. And I think that is awesome.
09-04-2008, 04:07 PM
#19
Honda-Tech Member
Join Date: Oct 2007
Location: Neverland Ranch
Posts: 702
Likes: 0
Received 0 Likes
on
0 Posts
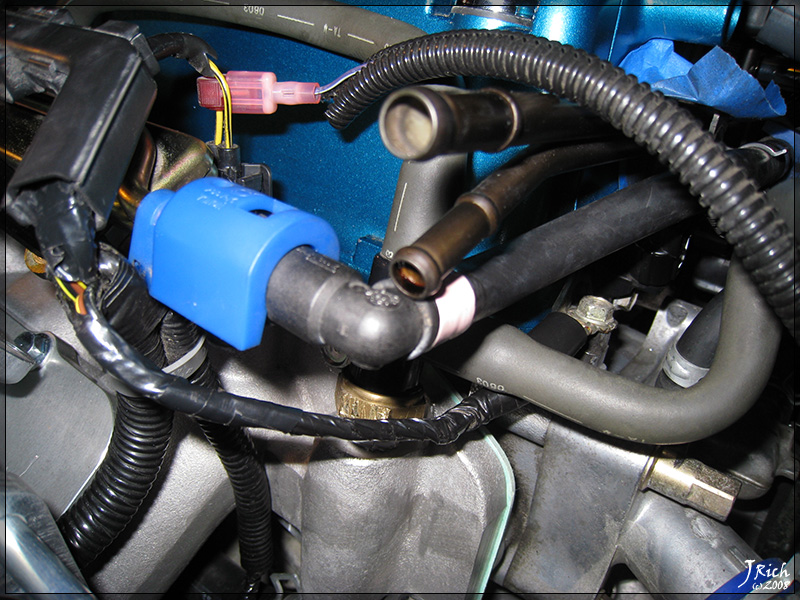
wow, looks good, but that scotch lock off what looks to be your fuel injector is bad news bears for electrical issues (shorts etc) just splice it correctly you obviously havent cut any corners on this build so why risk it all for shitty wiring?
09-04-2008, 04:20 PM
#20
Honda-Tech Member
<TABLE WIDTH="90%" CELLSPACING=0 CELLPADDING=0 ALIGN=CENTER><TR><TD>Quote, originally posted by MORENO67 »</TD></TR><TR><TD CLASS="quote">i just cant stop looking at this project...
Nice and clean........ </TD></TR></TABLE>
Nice and clean........
</TD></TR></TABLE>
09-04-2008, 04:40 PM
#21
Junior Member

Join Date: Sep 2008
Location: Fayetteville, Ar
Posts: 22
Likes: 0
Received 0 Likes
on
0 Posts
this car is freaking amazing you have put some great parts into this car. I dont know if i like the color of the wheels though but...for each thier own right?
09-04-2008, 05:43 PM
#22
Honda-Tech Member
Thread Starter
Join Date: Sep 2005
Posts: 215
Likes: 0
Received 0 Likes
on
0 Posts
<TABLE WIDTH="90%" CELLSPACING=0 CELLPADDING=0 ALIGN=CENTER><TR><TD>Quote, originally posted by TurboIntegra »</TD></TR><TR><TD CLASS="quote">I like the performance mods you have done to it. I don't care for the green wheels and carbon fiber hood. It just seems... not classy I guess. I don't have word to describe it.
You have put a ton of work into it though. And I think that is awesome.</TD></TR></TABLE>
after installing the supercharger my intake temperatures increased by 15 degrees. by getting the vented hood the temperatures stay at the same temp as the outside air temperature while driving. I don't hate it but I'm still getting used to it as well but bought it to be functional.