
DIY - Rotor Over Hub Conversion
 06-27-2007, 08:03 PM
#1
Honda-Tech Member
Thread Starter
I just finished my Rotor-Over-Hub Conversion today, and I took pics along the way, so I figured I would share it with you guys, and maybe help some people out. I also noted that in the Guide to Basic Accords, the R-O-H conversion link is actually from accordingly done, which I think is an insult to us H-T guys. We can have our own DIY's.
Before I begin the process, I will list out the tools and parts you need to get the job done.
Tools:
Proper sized socket to remove lug nuts (usually 19mm, unless aftermarket)
10mm 12 point socket - Wheel bearing bolts
17mm Socket - Caliper bolts, ball joints, tie rod end, caliper bracket bolts
10mm 6 point socket - upper ball joint nut cover, ABS wire bracket bolts, Brake line bracket bolts
14mm Socket - Brake line to caliper bolt (optional)
Torque wrench - same size drive as sockets
36mm socket - Axel nut
48Oz Hammer - Separate ball joints
pliers - To remove cotter pins
Parts:
1998 Acura 2.3CL Front Hubs OEM part # - 44600-YS8-A00
1998 Acura 2.3CL Front Rotors OEM Part # - 45251-S84-A01
1990-1998 Accord Front wheel bearing OEM Part # - 44200-SM1-008
1990-1998 Accord Front brake pads OEM Part # - 45022-SY8-A01
New cotter pins
Step 1:
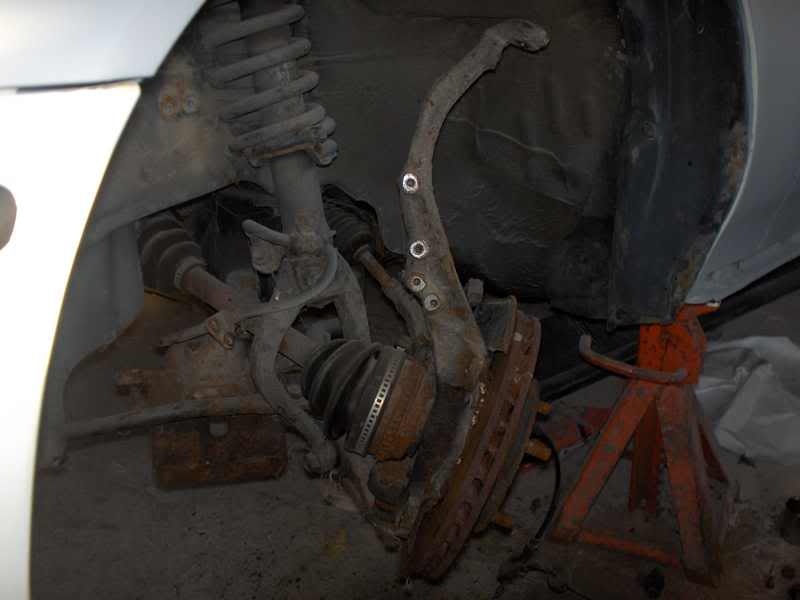
Raise and support the front of the vehicle safely on jack stands and remove the front wheels.

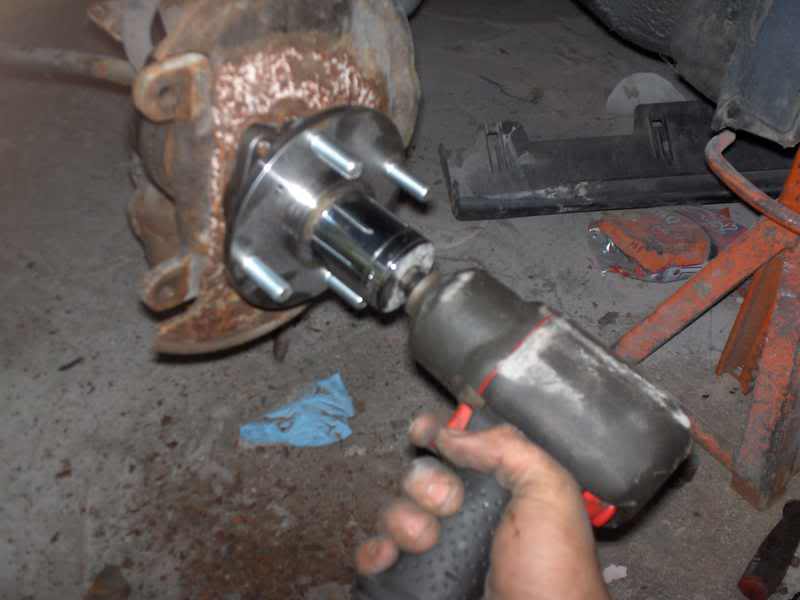
Step 2:
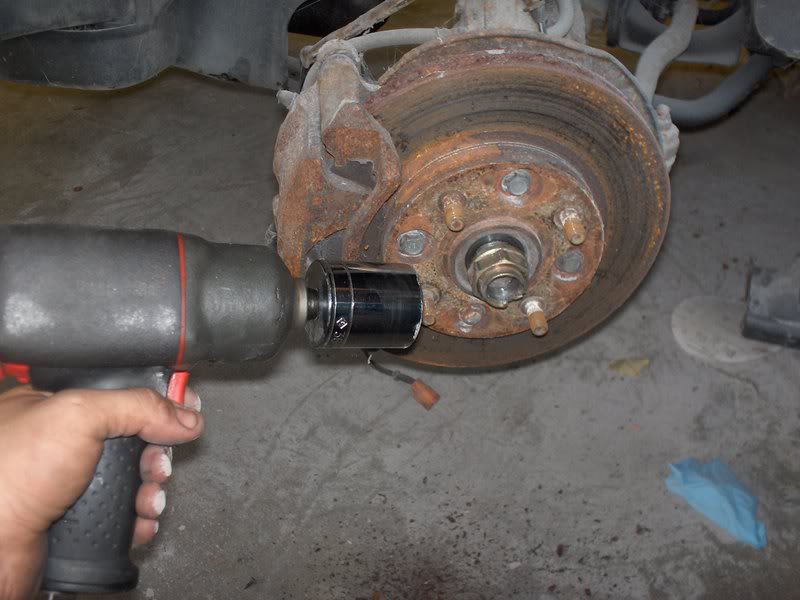
The first thing I like to do is loosen the axel nut. You will need a 36mm socket, and an Impact gun(preferred) or a breaker bar, and a long pipe for extra leverage.

Step 3:
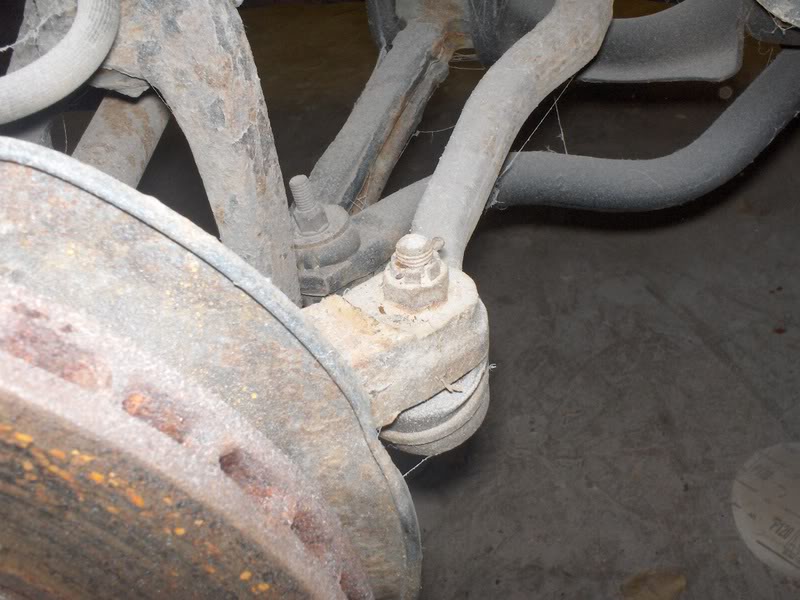
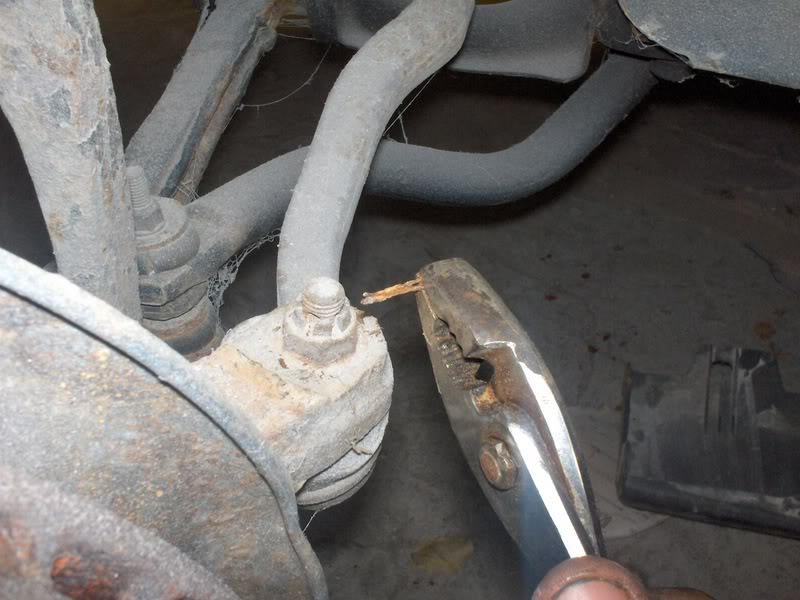
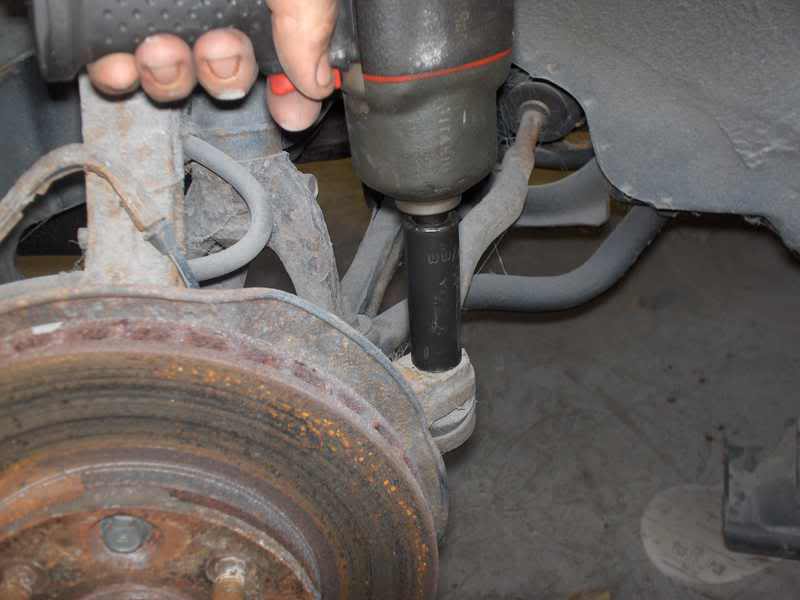
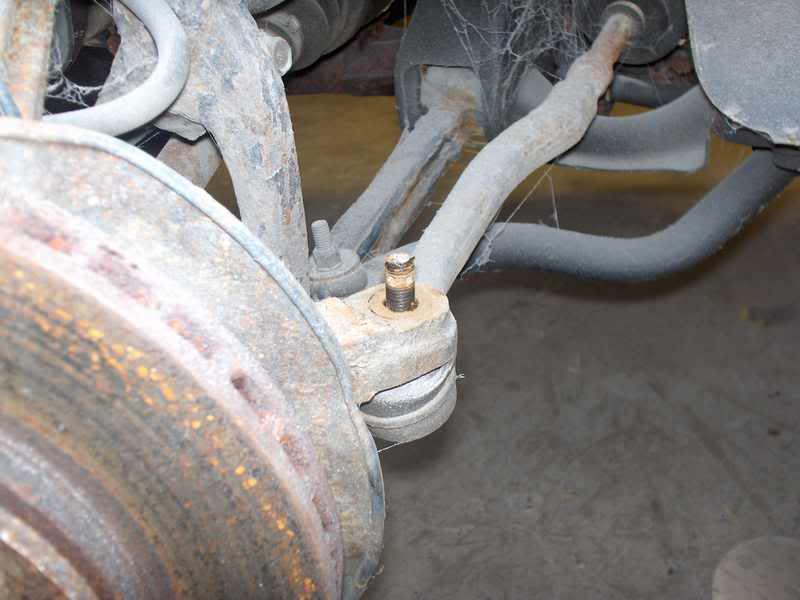
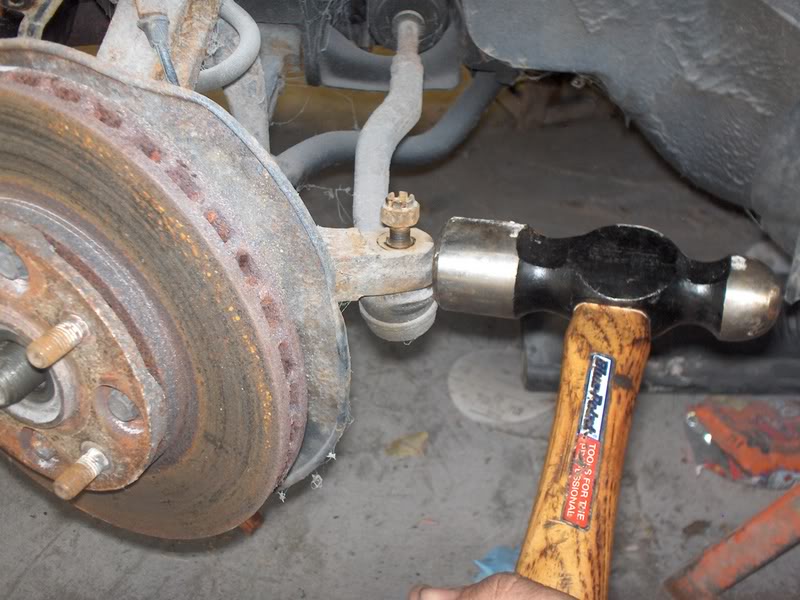
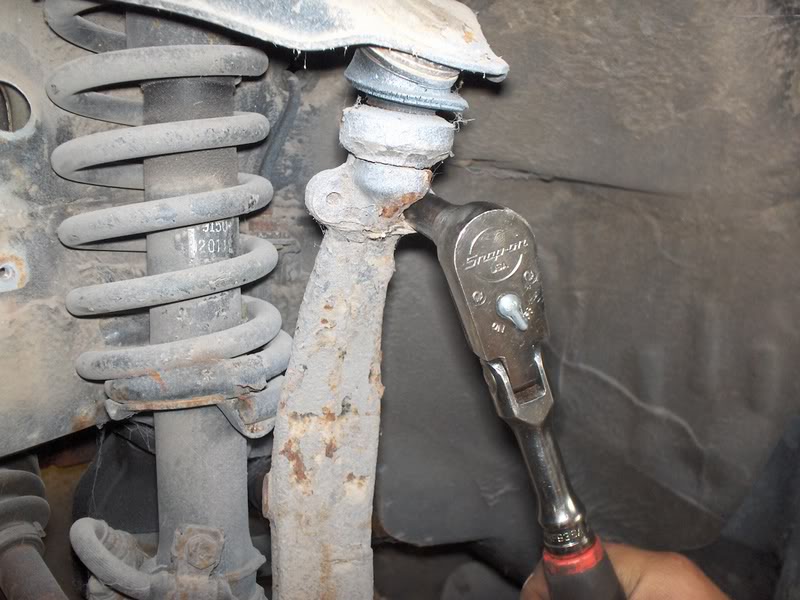
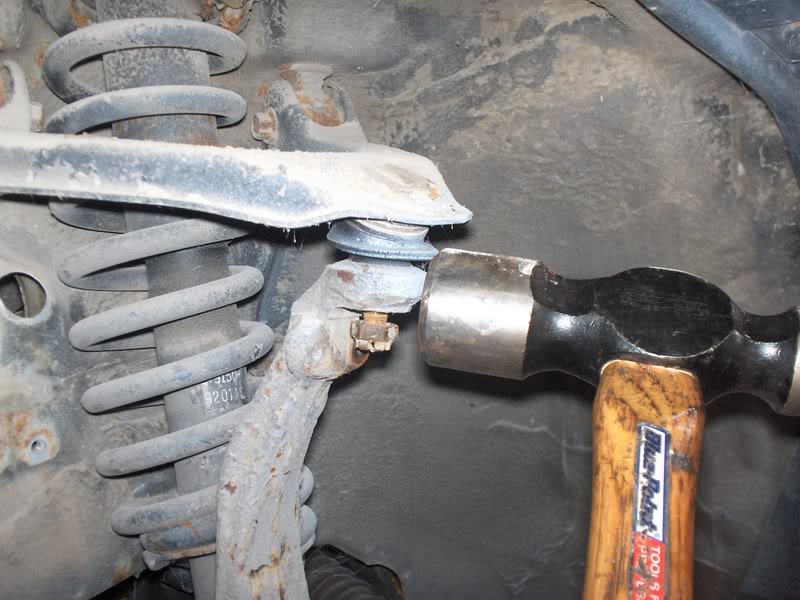
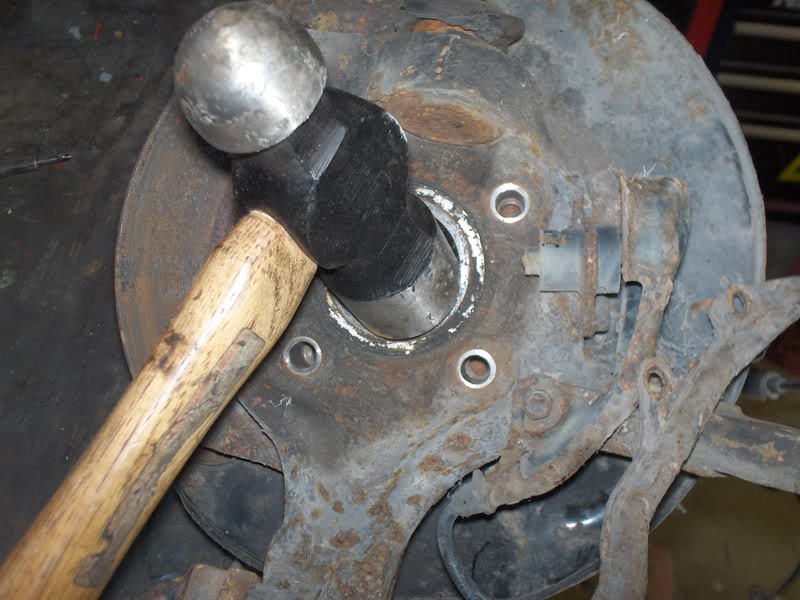
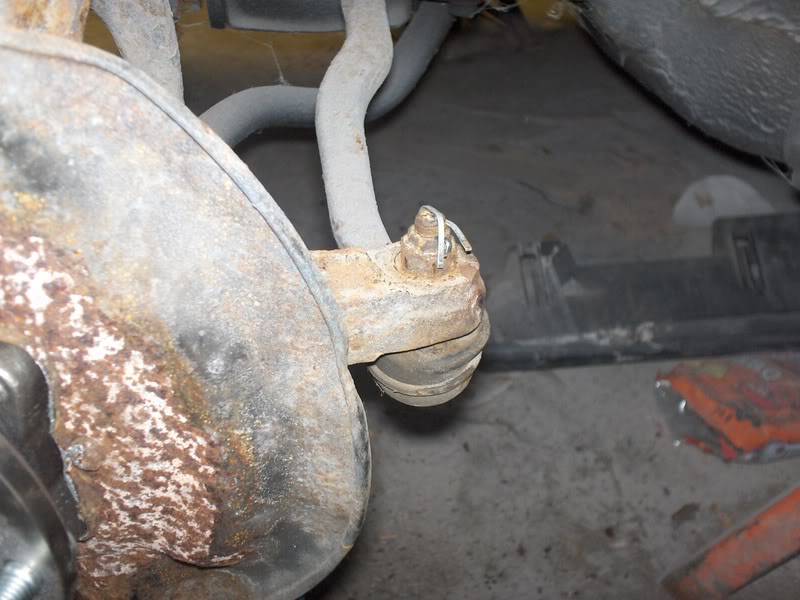
using pliers, remove the cotter pins in the tie rod and lower ball joint. Using a 17mm socket or wrench (socket preferred), loosen the castle nuts on the lower ball joint, and tie rod end. Once he castle nuts are loose, whack the knuckle with a hammer perpendicular to the studs. Note* Ball joints and tie rods are taper fit, always hit the knuckle, not the stud itself or you will ruin the threads. Once the tie rod end is loose, remove the castle nut, and remove the tie rod from the knuckle assembly. Leave the lower ball joint loose, but in place for the time being.
Step 4:
Using the 10mm 6 point socket, remove the upper ball joint cover (2 bolts), Brake line bracket (2 bolts) and if applicable, the ABS sensor wire bracket (2 bolts)

Step 5:
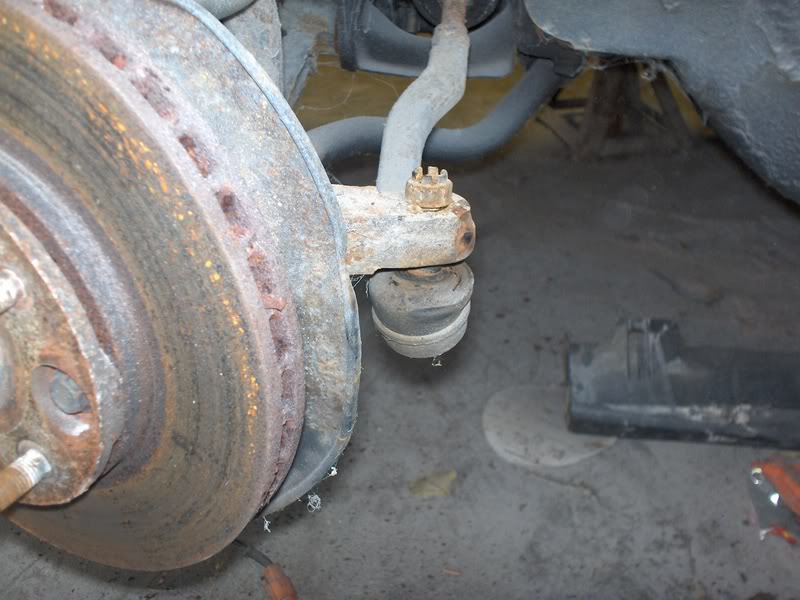
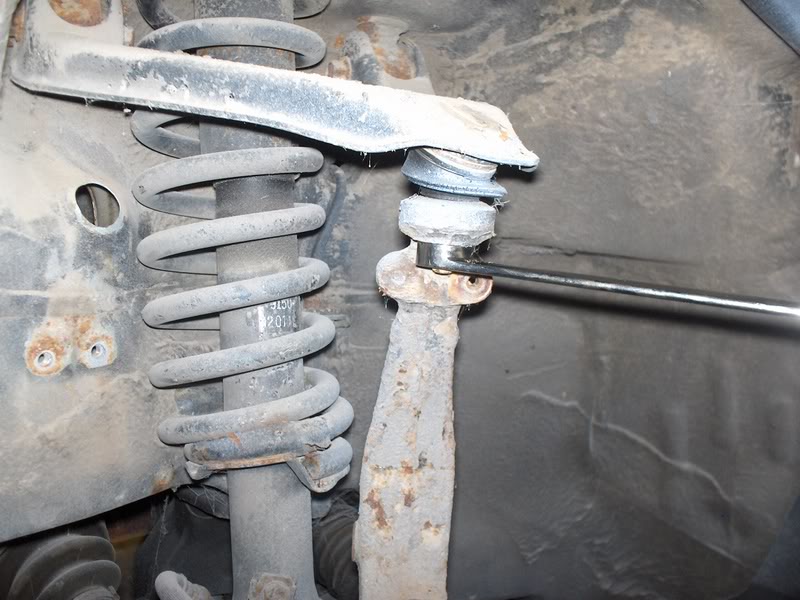
With the upper ball joint cover removed, remove the cotter pin and loosen the castle nut like on the lower ball joint, and whack it free, but still leave it loosely in place.
Step 6:
You can either unbolt the caliper and caliper bracket assembly, and swing it aside, OR, you can undo the brake line bolt and leave the bracket and caliper on the knuckle. I recommend to simply remove the caliper and bracket, and swing it aside. Note* If you do decide to unbolt the brake line, be sure to bleed the brakes when it is reattached.

Step 7:
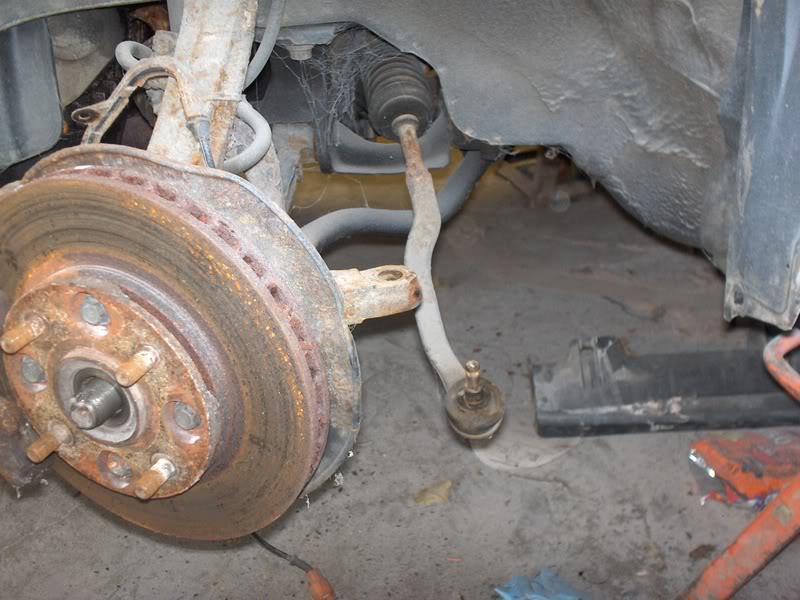
Remove the castle nut on the upper ball joint, and separate the top of the knuckle from the upper control arm. Remove the axel nut and tilt the knuckle forward and remove the axel from the bearing/hub assembly. Remove the castle nut on the lower ball joint, and lift the knuckle out.
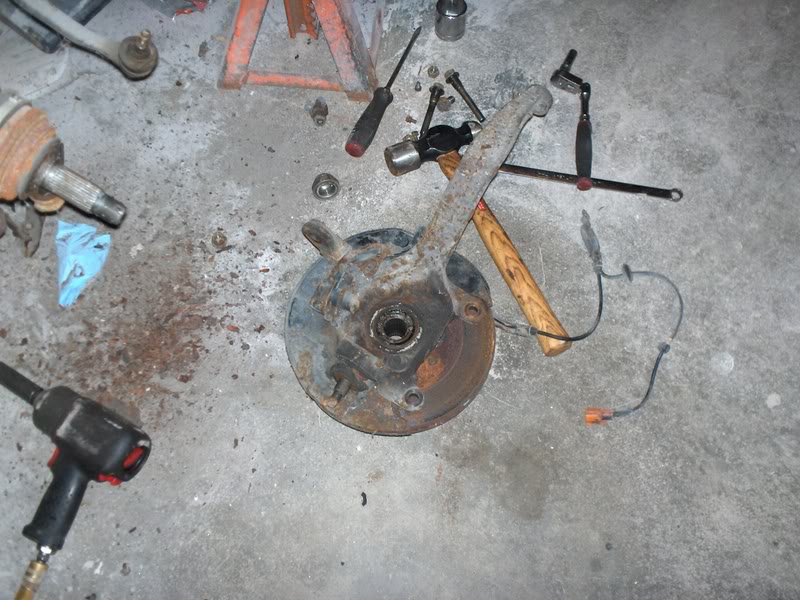
Step 8:
Using the 10mm 12 point socket, remove the 4 bolts on the back of the knuckle holding the wheel bearing in place. If you undid the brake line and left the caliper and bracket on the knuckle, now is the time to remove it.

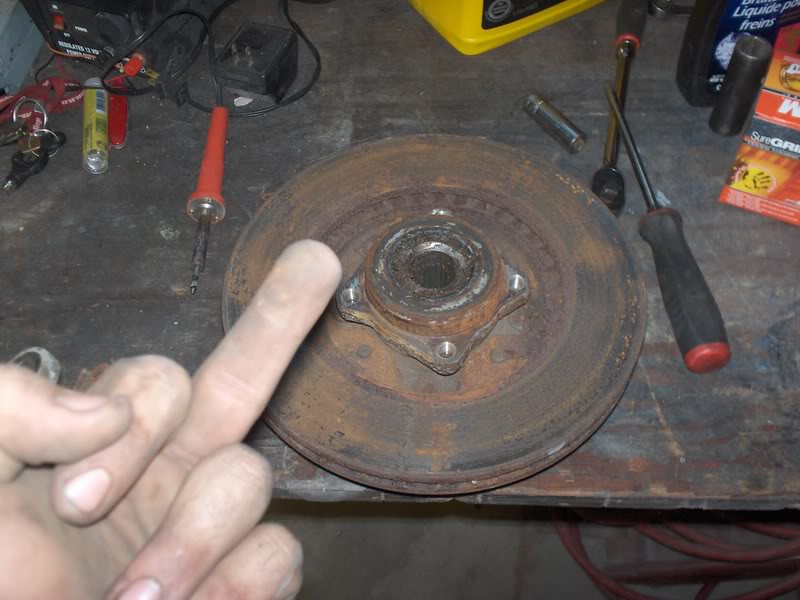
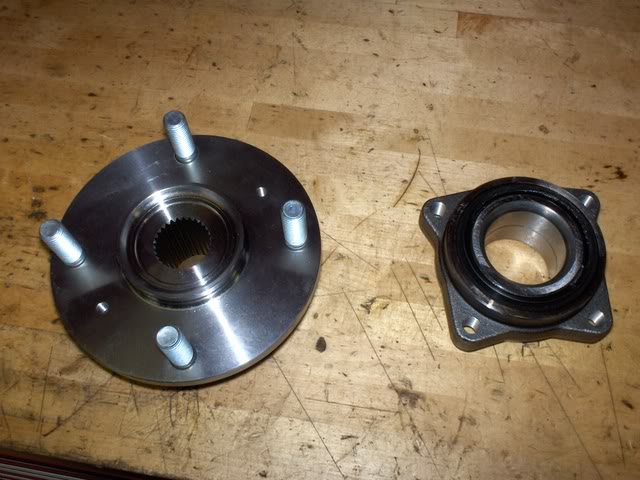
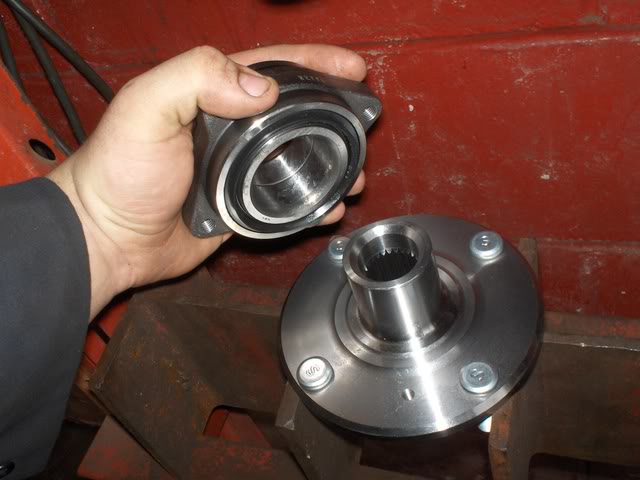
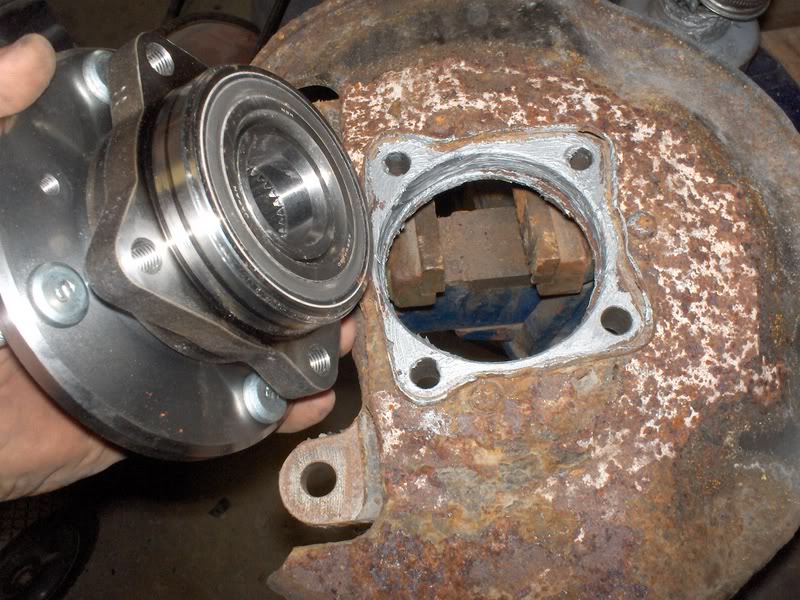
Step 9:
Get your wheel bearing and your new front hub, pictured here:
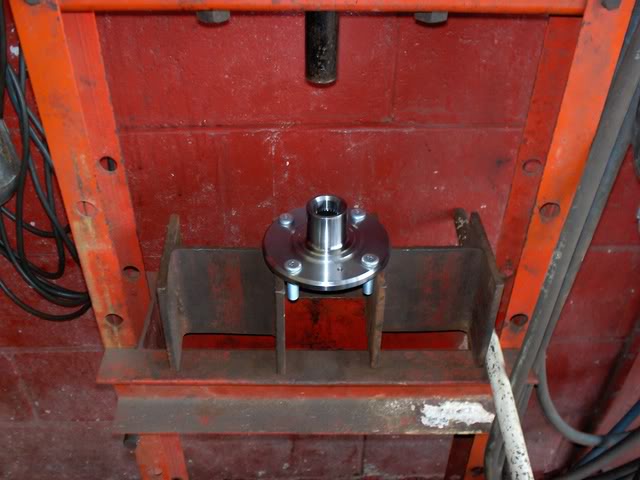
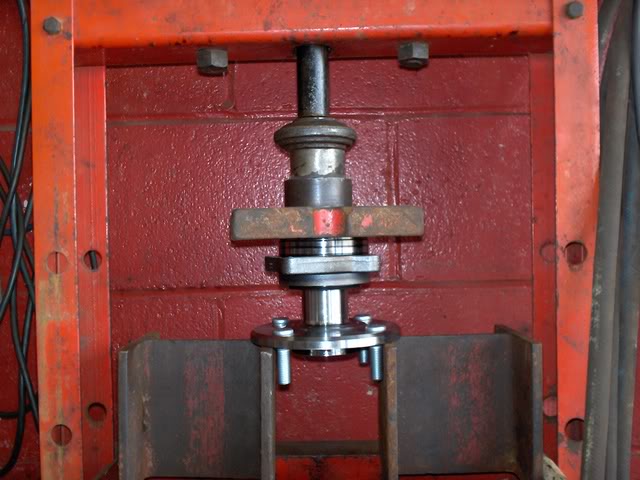
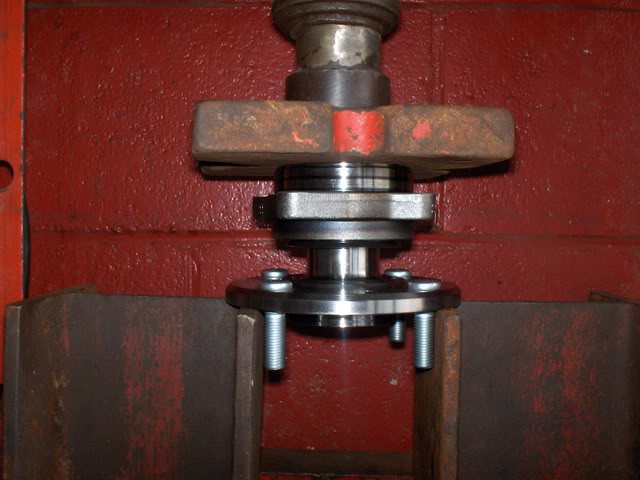
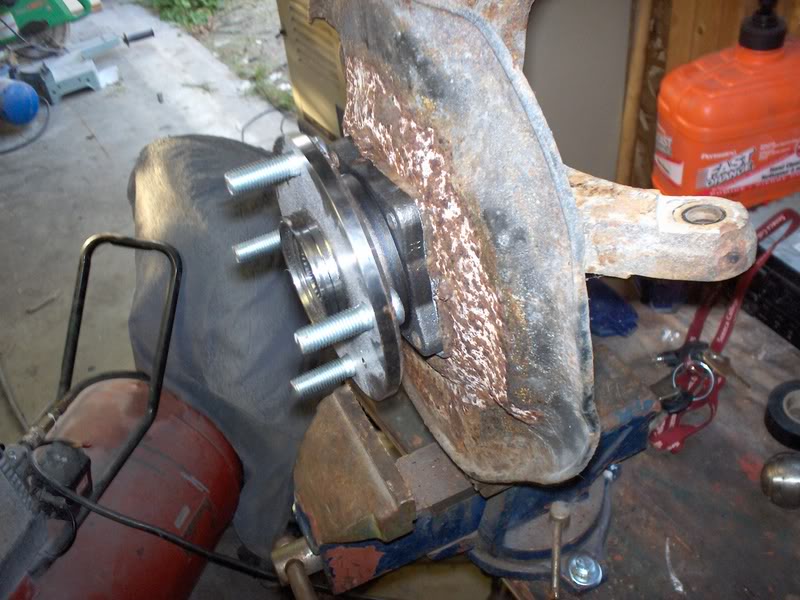
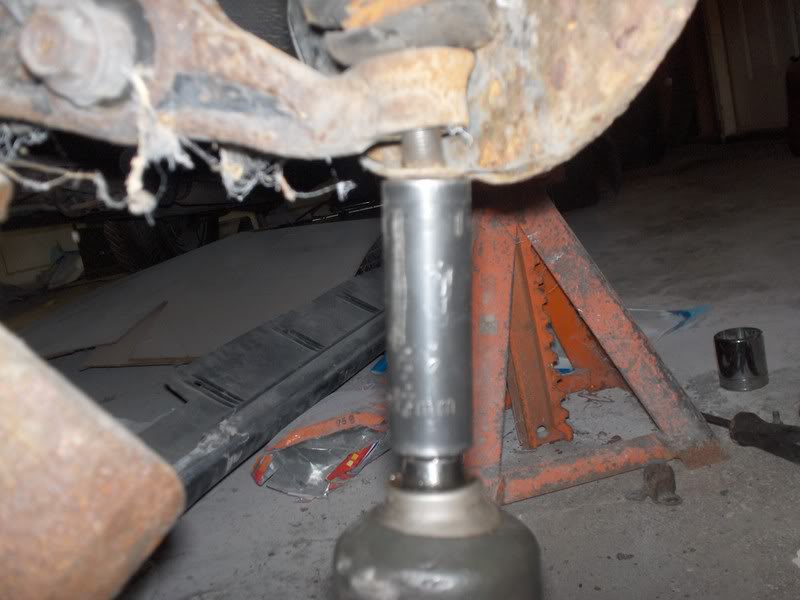
Step 10:
I did this at work, so I have access to a press, if you don't have a press, most garages or machine shops will have one, and should press it for a minimal fee.
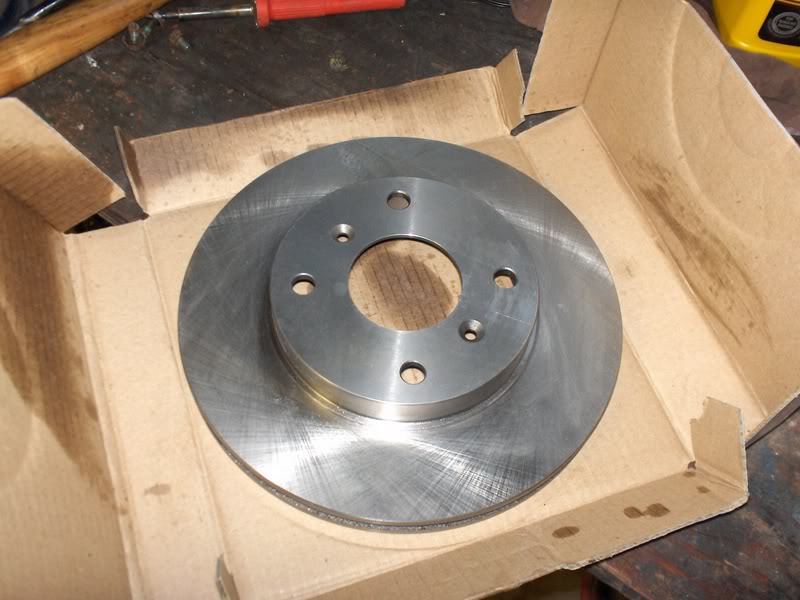
It will look something like this.

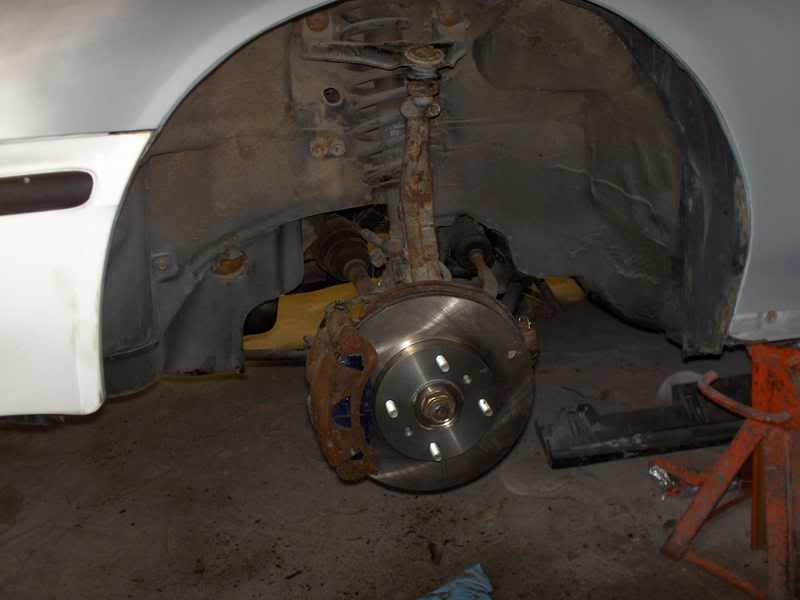
The finished product should look like this.
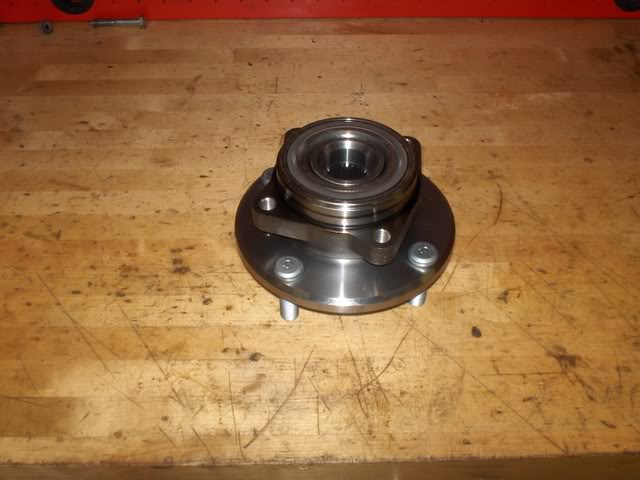
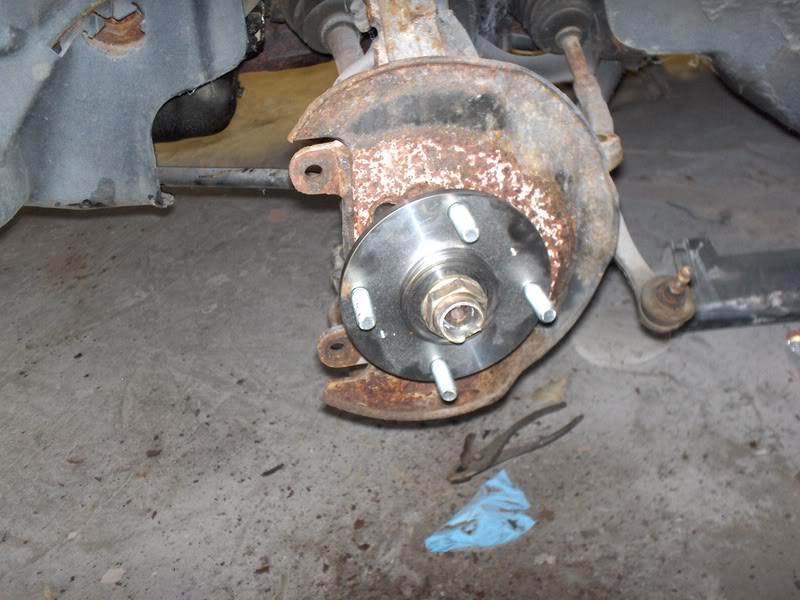
Here are the finishing steps in order.


Modified by JDM_DC4_Fanatic at 7:30 PM 7/3/2007
Modified by JDM_DC4_Fanatic at 7:32 PM 7/3/2007
Modified by JDM_DC4_Fanatic at 7:52 PM 7/3/2007
Before I begin the process, I will list out the tools and parts you need to get the job done.
Tools:
Proper sized socket to remove lug nuts (usually 19mm, unless aftermarket)
10mm 12 point socket - Wheel bearing bolts
17mm Socket - Caliper bolts, ball joints, tie rod end, caliper bracket bolts
10mm 6 point socket - upper ball joint nut cover, ABS wire bracket bolts, Brake line bracket bolts
14mm Socket - Brake line to caliper bolt (optional)
Torque wrench - same size drive as sockets
36mm socket - Axel nut
48Oz Hammer - Separate ball joints
pliers - To remove cotter pins
Parts:
1998 Acura 2.3CL Front Hubs OEM part # - 44600-YS8-A00
1998 Acura 2.3CL Front Rotors OEM Part # - 45251-S84-A01
1990-1998 Accord Front wheel bearing OEM Part # - 44200-SM1-008
1990-1998 Accord Front brake pads OEM Part # - 45022-SY8-A01
New cotter pins
Step 1:
Raise and support the front of the vehicle safely on jack stands and remove the front wheels.
Step 2:
The first thing I like to do is loosen the axel nut. You will need a 36mm socket, and an Impact gun(preferred) or a breaker bar, and a long pipe for extra leverage.
Step 3:
using pliers, remove the cotter pins in the tie rod and lower ball joint. Using a 17mm socket or wrench (socket preferred), loosen the castle nuts on the lower ball joint, and tie rod end. Once he castle nuts are loose, whack the knuckle with a hammer perpendicular to the studs. Note* Ball joints and tie rods are taper fit, always hit the knuckle, not the stud itself or you will ruin the threads. Once the tie rod end is loose, remove the castle nut, and remove the tie rod from the knuckle assembly. Leave the lower ball joint loose, but in place for the time being.
Step 4:
Using the 10mm 6 point socket, remove the upper ball joint cover (2 bolts), Brake line bracket (2 bolts) and if applicable, the ABS sensor wire bracket (2 bolts)
Step 5:
With the upper ball joint cover removed, remove the cotter pin and loosen the castle nut like on the lower ball joint, and whack it free, but still leave it loosely in place.
Step 6:
You can either unbolt the caliper and caliper bracket assembly, and swing it aside, OR, you can undo the brake line bolt and leave the bracket and caliper on the knuckle. I recommend to simply remove the caliper and bracket, and swing it aside. Note* If you do decide to unbolt the brake line, be sure to bleed the brakes when it is reattached.
Step 7:
Remove the castle nut on the upper ball joint, and separate the top of the knuckle from the upper control arm. Remove the axel nut and tilt the knuckle forward and remove the axel from the bearing/hub assembly. Remove the castle nut on the lower ball joint, and lift the knuckle out.
Step 8:
Using the 10mm 12 point socket, remove the 4 bolts on the back of the knuckle holding the wheel bearing in place. If you undid the brake line and left the caliper and bracket on the knuckle, now is the time to remove it.
Step 9:
Get your wheel bearing and your new front hub, pictured here:
Step 10:
I did this at work, so I have access to a press, if you don't have a press, most garages or machine shops will have one, and should press it for a minimal fee.
It will look something like this.
The finished product should look like this.
Here are the finishing steps in order.
Modified by JDM_DC4_Fanatic at 7:30 PM 7/3/2007
Modified by JDM_DC4_Fanatic at 7:32 PM 7/3/2007
Modified by JDM_DC4_Fanatic at 7:52 PM 7/3/2007
 06-28-2007, 05:09 PM
#4
Honda-Tech Member
Thread Starter
<TABLE WIDTH="90%" CELLSPACING=0 CELLPADDING=0 ALIGN=CENTER><TR><TD>Quote, originally posted by TOP END MS »</TD></TR><TR><TD CLASS="quote">You forgot to mention which hub you got. But im assuming the CL '98?</TD></TR></TABLE>
Corrected, thanks
Corrected, thanks
07-03-2007, 06:37 PM
#6
Honda-Tech Member
Thread Starter
I get shop discount, so each hub cost me $62 and $40 for the bearings. CL Rotors were $40 for both and front pads were $50 for Wagner Thermo quiets. Bringing my total to $194. Now, you may end up paying more for it, everybody gets diffrent prices.
Also, You can re-use your stock bracke calipers, brackets, pads and wheel bearings, However, you can not press out the hub from the bearing without taking the outer race out. So, if you do this swap, you MUST get new wheel bearings. Accord and 98 2.3CL are the same.
Also, You can re-use your stock bracke calipers, brackets, pads and wheel bearings, However, you can not press out the hub from the bearing without taking the outer race out. So, if you do this swap, you MUST get new wheel bearings. Accord and 98 2.3CL are the same.
Trending Topics
The following users liked this post:
07-04-2007, 01:56 PM
#10
Honda-Tech Member
Thread Starter
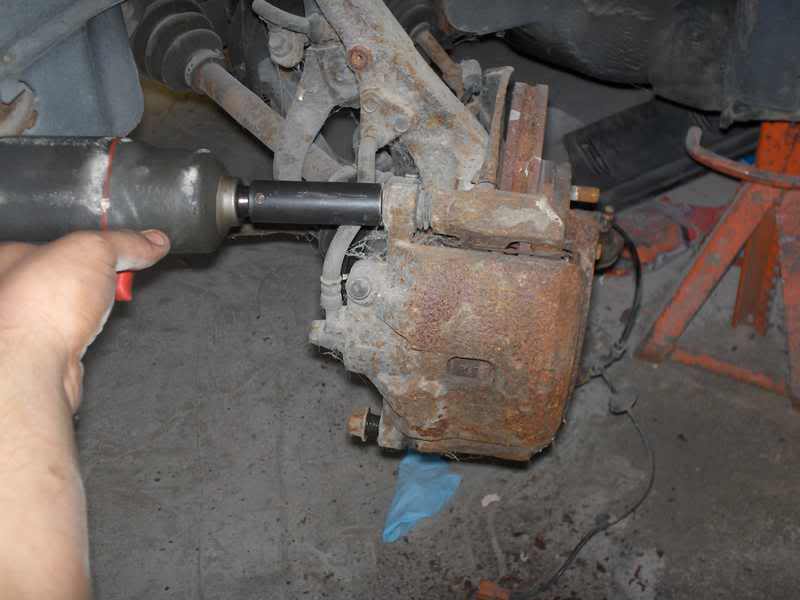
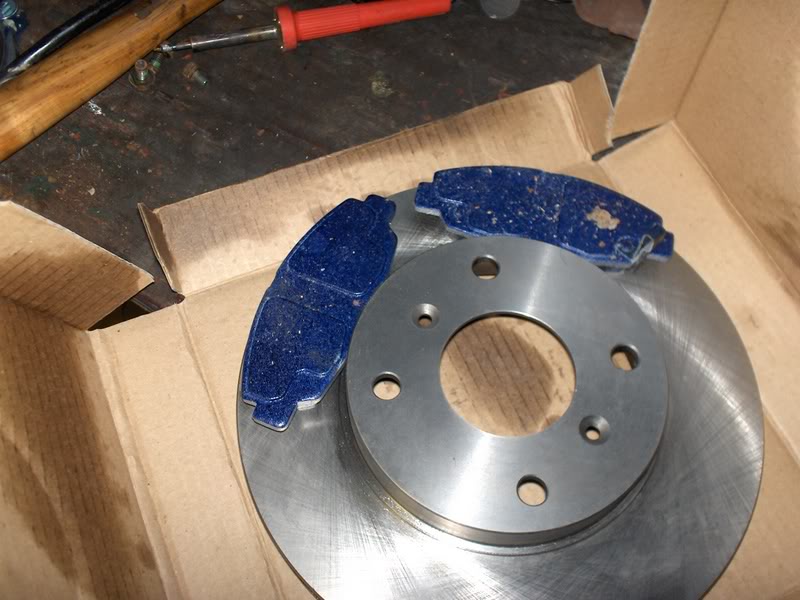
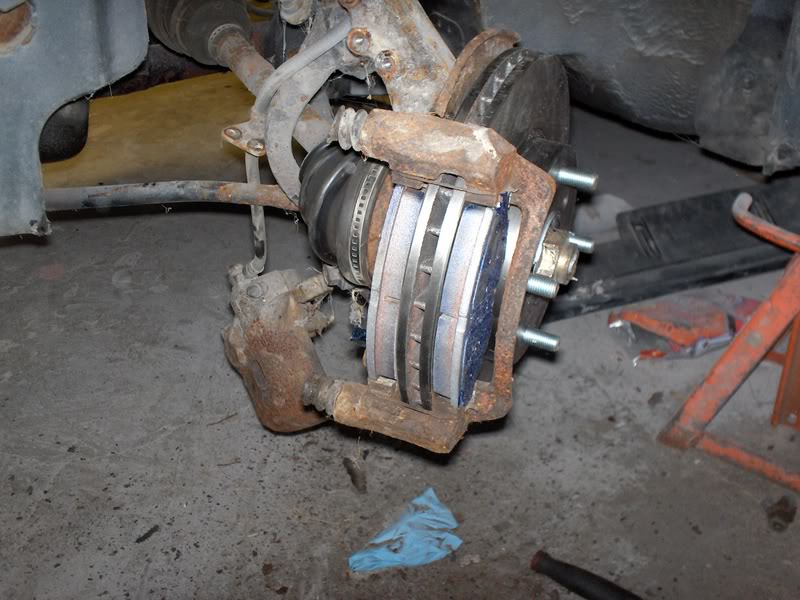
For threads I use Anti-sieze compound. for the actuial slider pins on the caliper I used Sil-Glide. Its a synthetic brake lubricant. The blue stuff on the back of the brake pads is Disc Brake Quiet. It never completly dries, so it stays kinda tackey, and its designed to hold the pads to the caliper so they dont make noise.
<TABLE WIDTH="90%" CELLSPACING=0 CELLPADDING=0 ALIGN=CENTER><TR><TD>Quote, originally posted by SuShiBoiiii »</TD></TR><TR><TD CLASS="quote">looks good pretty much the advantage saving alot of time doing a brake service... also op shoulda cleaned up them calipers </TD></TR></TABLE>
I actuially ordred new calipers. But I need to get this car on the road, so I didnt really care how rusty they were. The whole car is a pile of rust, but i'm bringing it back to life one bolt at a time. The bodywork is finished, it just needs paint. I think I will make a progress thread, the accord Forum needs more activity
07-04-2007, 01:59 PM
#11
Honda-Tech Member
Thread Starter
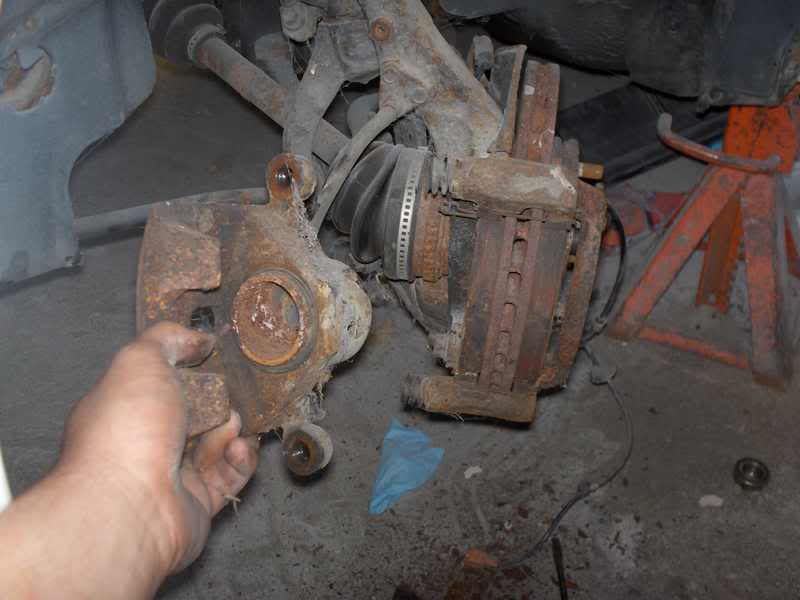
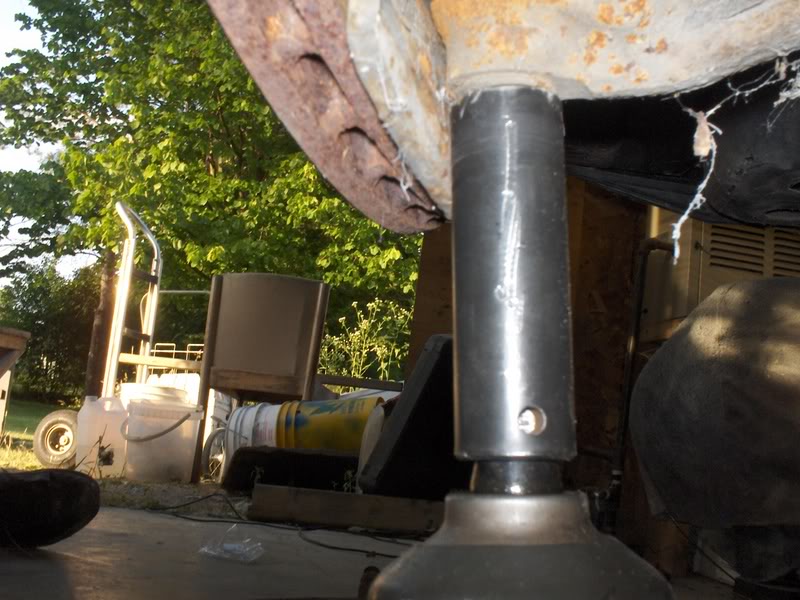
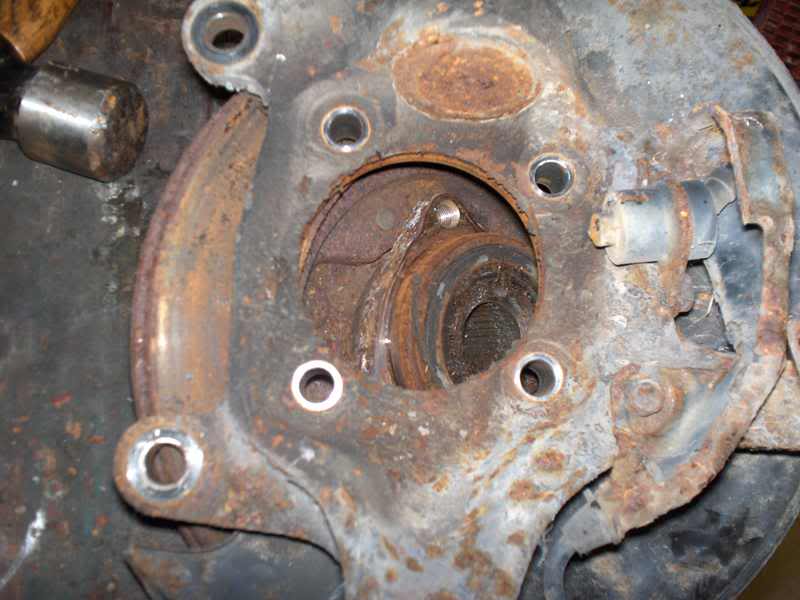
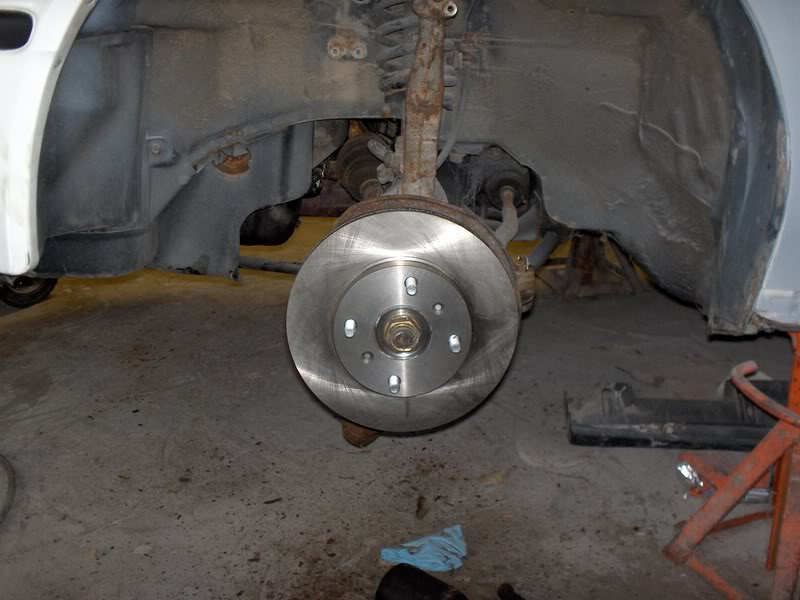
The original brakes had the hub bolted ontop of the rotor, as you can see in the first pic. There are a few reasons to consider this swap. I did it because I plan to autox the car, and if I need to change rotors, its much easier to do it this way the to sit in the pits and dismantel my whole front suspension just to change a rotor.
The following users liked this post:
07-04-2007, 02:10 PM
#13
Honda-Tech Member
Thread Starter
I wouldent say theres NO advantage, I would say that there is less of a reason.
Pros:
-Easier to change (doesnt require a press, no need to remove axel nut)
Cons:
-Expensive comprared to just changing your rotors.(you probably have to change your rotors atleast 4 times to break even)
Neutral:
-Doesnt increase re-sale value
-Same braking power as OEM set up
Pros:
-Easier to change (doesnt require a press, no need to remove axel nut)
Cons:
-Expensive comprared to just changing your rotors.(you probably have to change your rotors atleast 4 times to break even)
Neutral:
-Doesnt increase re-sale value
-Same braking power as OEM set up
07-04-2007, 05:46 PM
#15
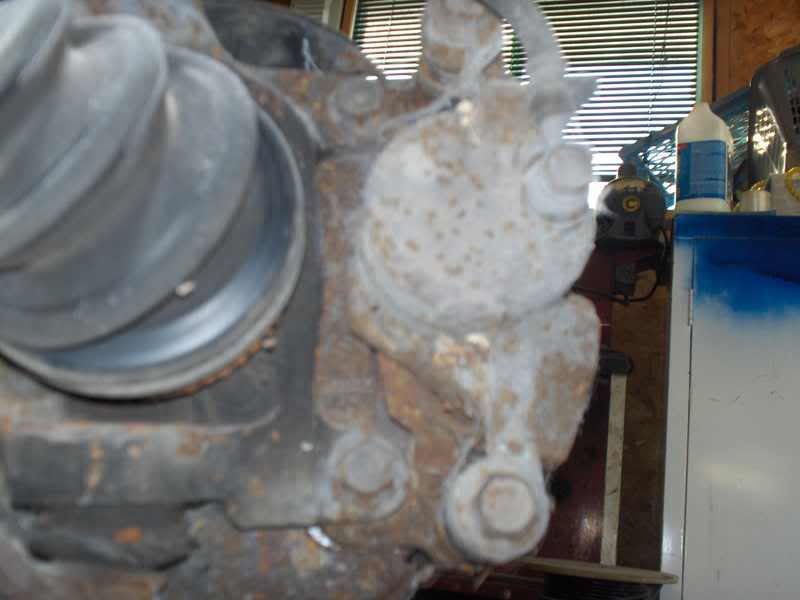
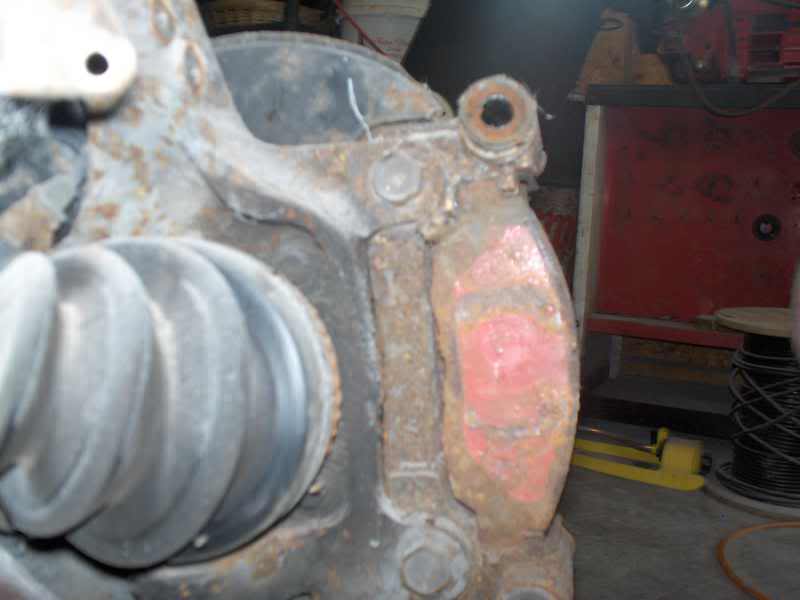
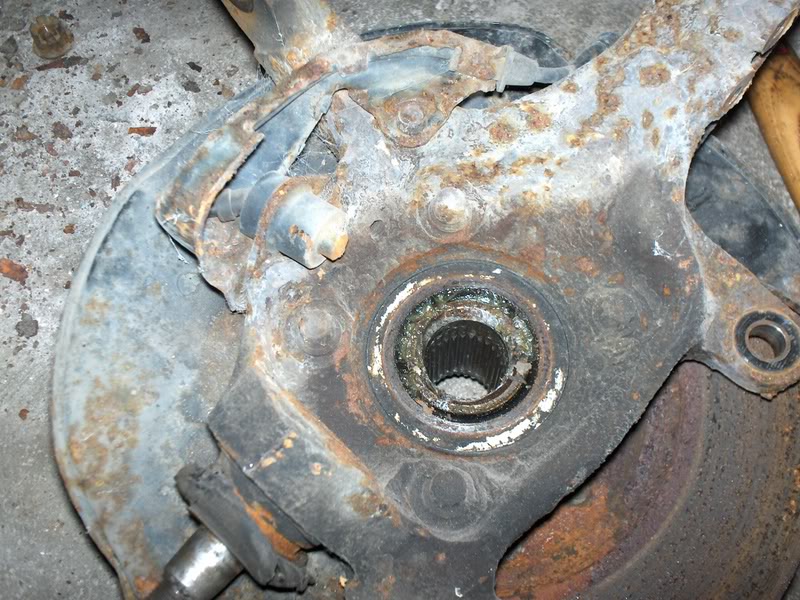
What did you do to the inside of the steering knuckle where the hub mounts up? I know you're supposed to clean the mating surface, but what's that silvery goop? Some kind of grease, or rust remover?
07-04-2007, 06:27 PM
#16
Member
Join Date: Apr 2007
Location: Driving Slow, Through Your City
Posts: 1,260
Likes: 0
Received 0 Likes
on
0 Posts
<TABLE WIDTH="90%" CELLSPACING=0 CELLPADDING=0 ALIGN=CENTER><TR><TD>Quote, originally posted by dleccord »</TD></TR><TR><TD CLASS="quote">where the hell do you live? i mean your suspension has seen better days.</TD></TR></TABLE>
somebody said it before i did. jdm man this accord screams POR_15
somebody said it before i did. jdm man this accord screams POR_15
07-05-2007, 04:01 AM
#17
H-T Order of Merit
why are you guys worrying about the look of the suspension, maybe he has other plans for fixing other things as well.
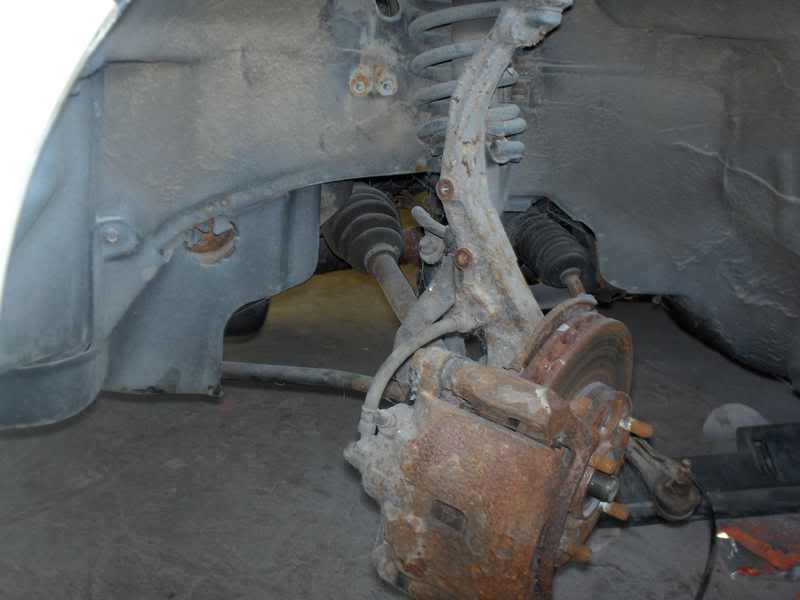
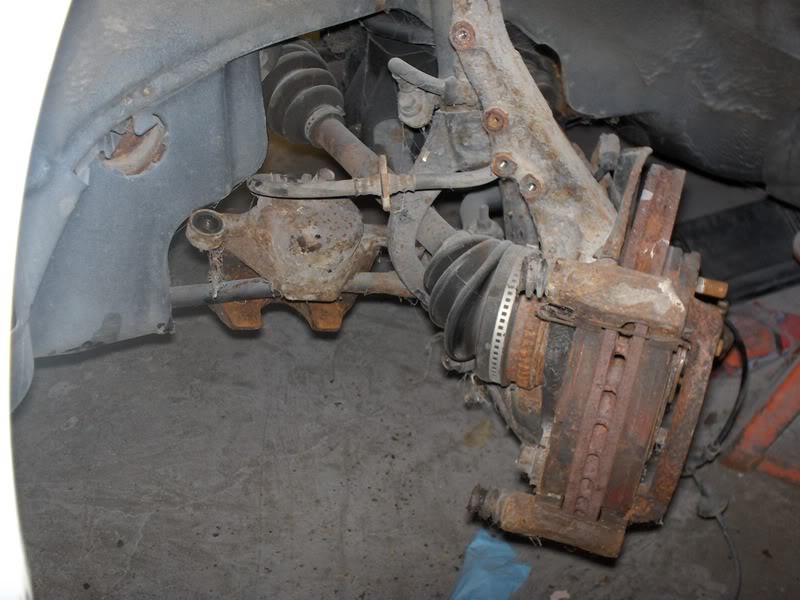
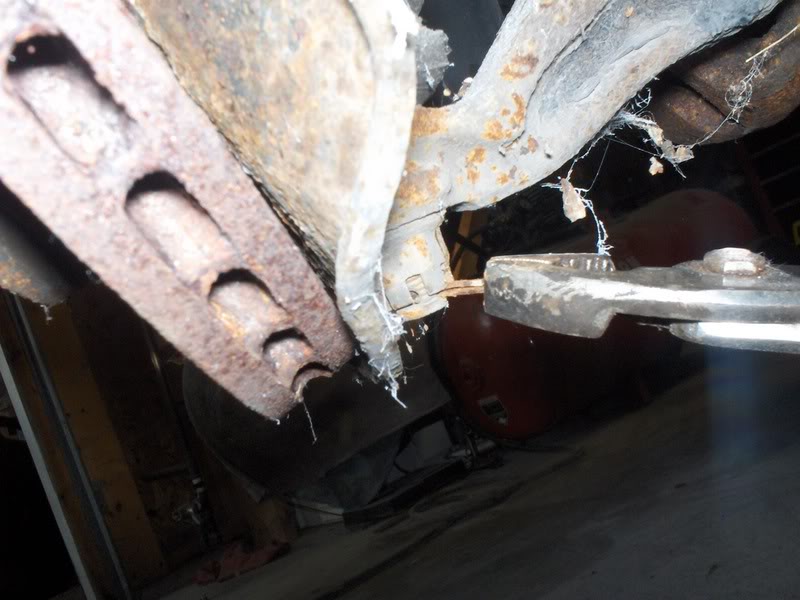
I'm going to guess the car has been sitting for a little due to the rust on the braking surface and the spider webs. Other than that though, not everyone lives in a sunny state that doesn't see winter conditions so rusty bolts and that is normal.
It's a write-up, lets keep it on topic
I'm going to guess the car has been sitting for a little due to the rust on the braking surface and the spider webs. Other than that though, not everyone lives in a sunny state that doesn't see winter conditions so rusty bolts and that is normal.
It's a write-up, lets keep it on topic
07-05-2007, 10:55 AM
#19
H-T Order of Merit
yes, all 90-97 Accord are like this.
Pretty much the same steps are involved in replacing just the rotor. You don't always have to remove the knuckle, but you do have to pop the lower balljoint free to remove the axle from the hub, then just set the knuckle back into the lower control arm while you finish the job. Also, since you aren't replacing the hub or bearing, you dont need access to a press. Once the hub/rotor/bearing assembly is out of the car all you have to do is unbolt the rotor from the hub and bolt the new rotor on.
If you have the money to buy the extra part required to to the conversion, I would. Simply because it makes any future rotor changes that much easier.
07-05-2007, 06:01 PM
#20
Honda-Tech Member
Join Date: Jun 2007
Location: Sacramento
Posts: 590
Likes: 0
Received 0 Likes
on
0 Posts
yeah i thought so too. thanks for the write up.
can you just verify one more time that i do not need a press if i were just to replace a warped rotor?
btw, i was curios about what was making your suspension all rusted, not appearance or looks in anway. later.
can you just verify one more time that i do not need a press if i were just to replace a warped rotor?
btw, i was curios about what was making your suspension all rusted, not appearance or looks in anway. later.
07-05-2007, 08:05 PM
#22
Honda-Tech Member
Thread Starter
I appreciate everybodys responses.
First off, that silver stuff applied to the hub and threads of all the bolts is Anti Sieze. Just like the name says, its a lubricant and rust inhibitor.
Second, I purchased this car for $500 from a co-worker, who had the car sitting in his driveway for over a year, and it sat in my garage for about 6 months now. I live in canada, so snow is a part of life here. I have some Bilstien shock, and H&R race springs waiting to go in. I have an energy suspension urathane bushing kit waiting to go in and an ST sway bar kit. I am waiting till I get this car on the road before I do any performance modifications. Also, I want to align the car at the same time I do all the suspension stuff, so I need it at work to do that.
As for any further questions about this swap, or pretty much anything car related, feel free to PM me, however, if I hear about how rusty my car is one more time, someone is getting a swift kick in the nuts
07-06-2007, 04:39 AM
#23
H-T Order of Merit
<TABLE WIDTH="90%" CELLSPACING=0 CELLPADDING=0 ALIGN=CENTER><TR><TD>Quote, originally posted by dleccord »</TD></TR><TR><TD CLASS="quote">can you just verify one more time that i do not need a press if i were just to replace a warped rotor? </TD></TR></TABLE>
<TABLE WIDTH="90%" CELLSPACING=0 CELLPADDING=0 ALIGN=CENTER><TR><TD>Quote, originally posted by TouringAccord »</TD></TR><TR><TD CLASS="quote">...since you aren't replacing the hub or bearing, you dont need access to a press...</TD></TR></TABLE>
The only parts that are pressed together are the hub and bearing. A LOT of people make the mistake of thinking the bearing is pressed into the knuckle or the rotor pressed onto the hub, but neither is the case. The bearing is just bolted to the knuckle but because of rust it can be a real PITA to remove, and the rotor is just bolted to the back of the hub making you remove everything to get to it.
07-09-2007, 09:04 AM
#25
Honda-Tech Member
Really nice write up, you answer tons of questions i had!. Am going to try this soon, but I have one more question: are the 98 cl rotors the same size as the accords?