
Bense's H23A Swap HowTo & Discussion Thread
 07-13-2014, 02:59 PM
#1
Go Tigers!
Thread Starter
The purpose of this thread is for me to post pictures, discuss my findings, address the obstacles that I will need to overcome, exchange ideas, and to serve as my rolling write-up of how to perform this engine swap. Once I have completed all tasks, and have sufficiently tested this setup (for a few days), I will organize, clean up, and make a post with a concise, procedural step by step outline on how to perform this swap. I will continue to edit and update this post to keep everything as clear and concise as possible.
I will provide as much associated information/media/documentation/data that I am able to post. However not freely providing to the public something that was given to me may become a constraint. If this is the case, please respect that.
Additionally, due to the days of users with 56k modems being long gone, and the fact that most users will be viewing this with a screen resolution such as 1280x800, 1366x768, 1920x1080, 1920x1200, along with a "broadband" internet connection, I will be very liberal in posting full size images. I will try to display images that are less than 1200 pixels wide, as well as provide a URL below to the full size of the image.
Moving forward.
Objective: To document the progress of my process of replacing the original F23A1 engine with a "Blue-Top" JDM H23A DOHC VTEC engine.
Vehicle: 2001 Honda Accord EX 5MT
ECU/ECM Engine Management: I have the OEM H23A ECU for an automatic transmission. If there is a feasible method in which I can use this with my manual transmission, I will use it. If this proves to not be a viable option, I have the equipment to convert to OBD1.
Moving on to pics..
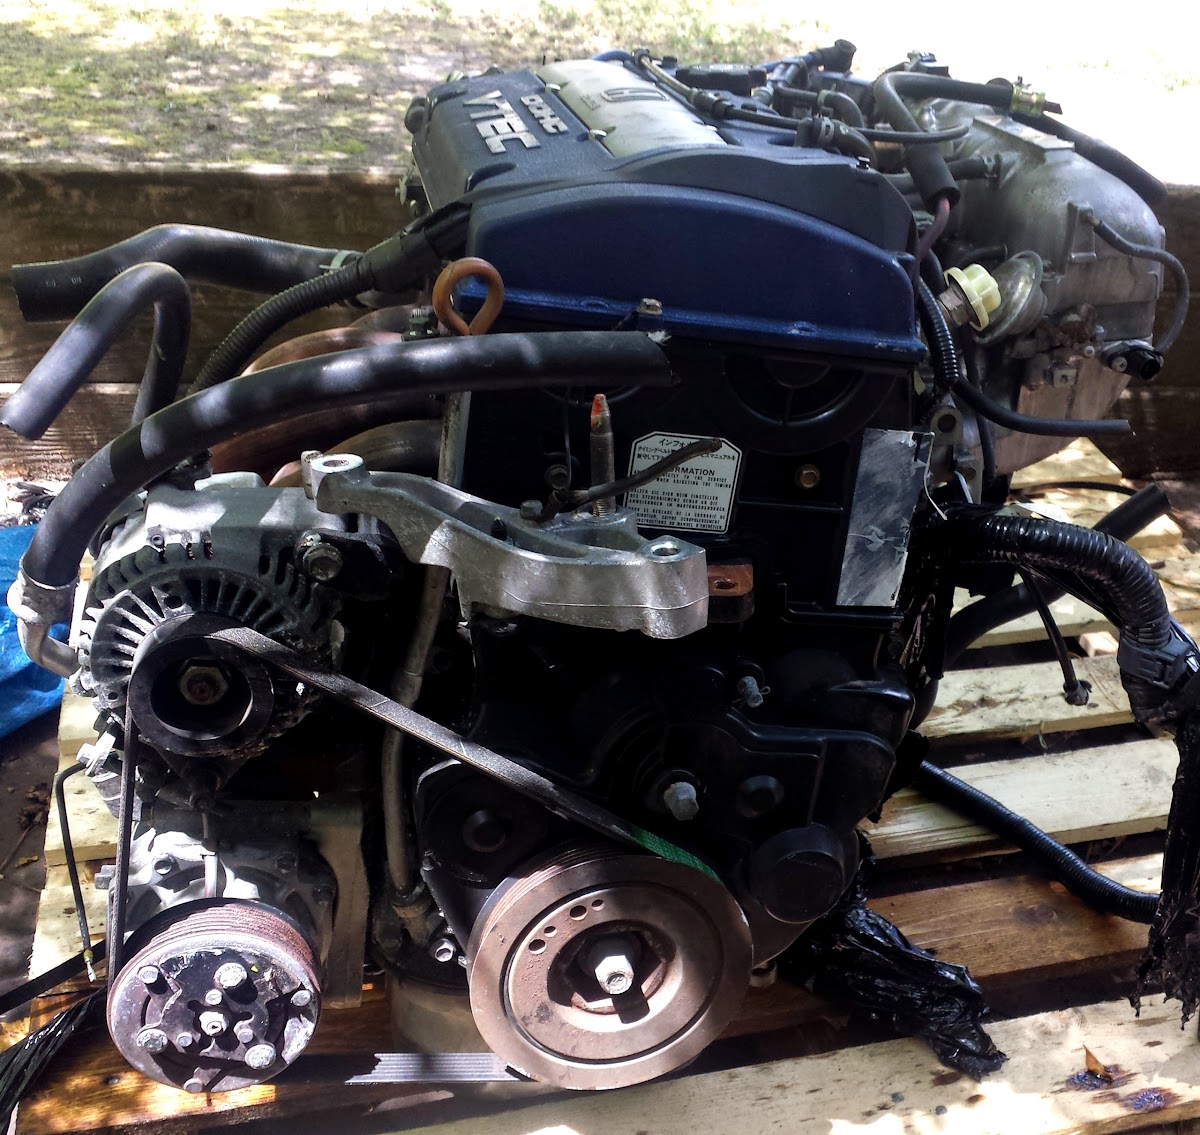
The H23A that I have received.

Full Size: https://lh5.googleusercontent.com/-r...702_144959.jpg
Block stamp:

Full Size: https://lh5.googleusercontent.com/-4...702_144406.jpg
Head stamps

Full Size: https://lh3.googleusercontent.com/-c...702_145025.jpg
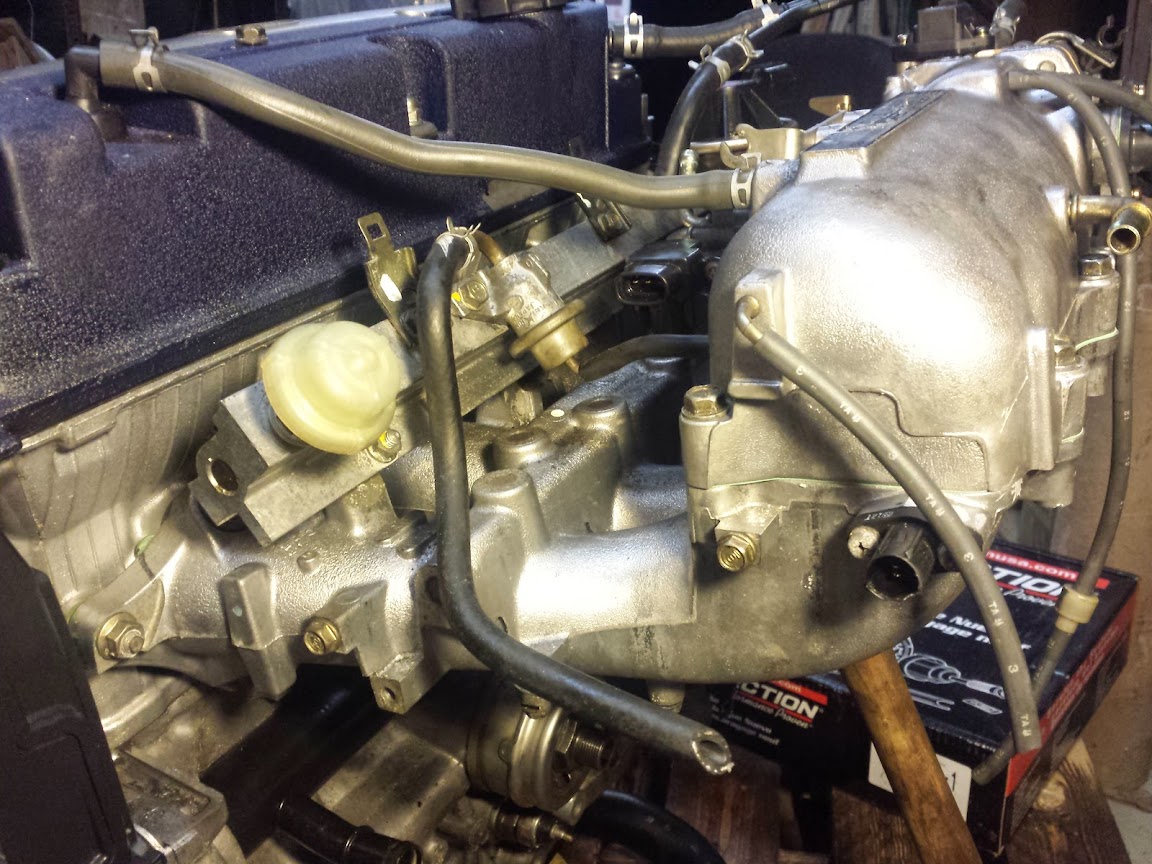
Intake manifold view
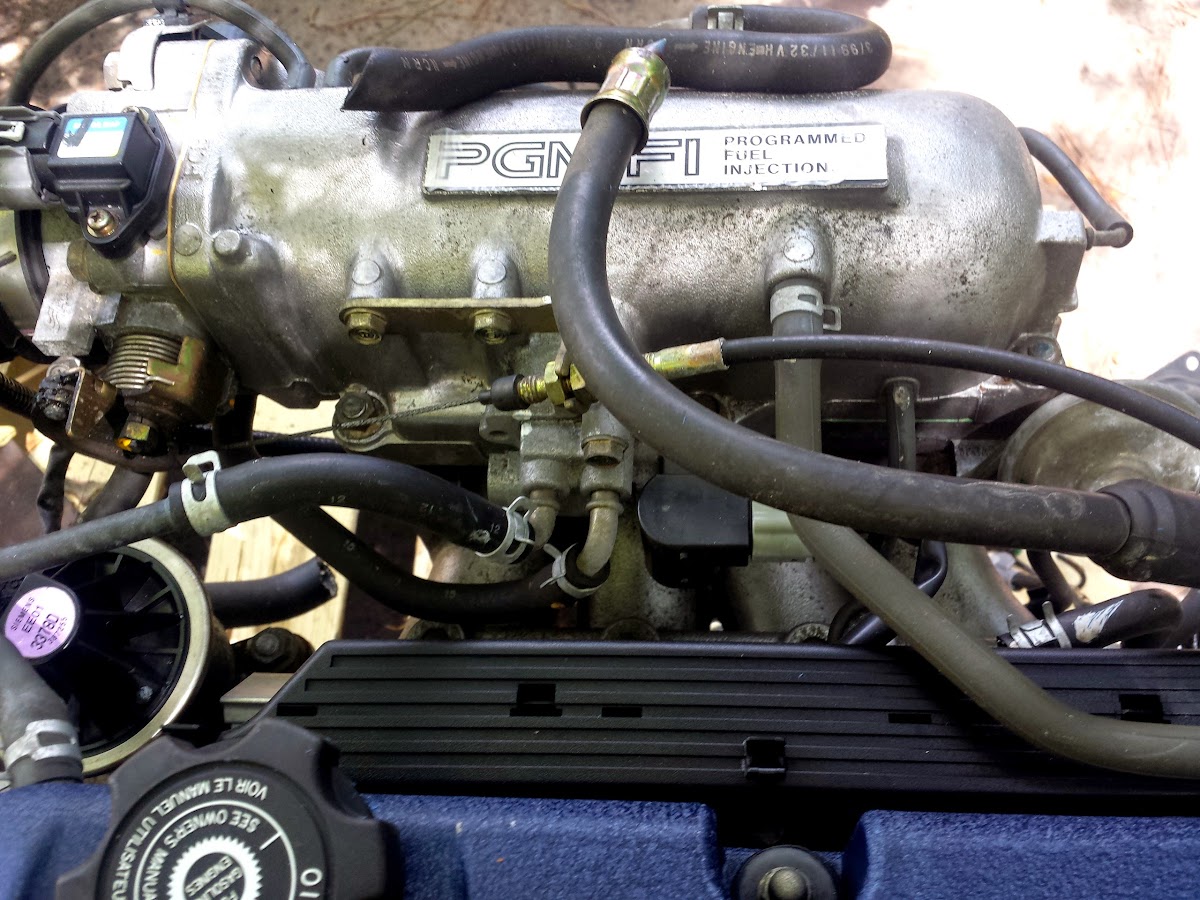
Full Size: https://lh4.googleusercontent.com/-I...702_145033.jpg
Timing belt, crankshaft pulley view. Note the single channel crank pulley, along with the aluminium bracket that goes between the drivers side chassis mount and the cast steel "timing belt" engine mount bracket. Will having this bracket alleviate me from having to modify the cast steel "timing belt" mount? Hmm.
Full Size: https://lh4.googleusercontent.com/-U...702_145105.jpg
The H23A IACV (Idle Air Control Valve) is 3-wire, like the F23A1's IACV. If I am to convert to OBD1, how will I get this working?

Full Size: https://lh6.googleusercontent.com/-k...713_163707.jpg
The H23A PCF ECU

Full Size: https://lh3.googleusercontent.com/-_...600/pcf_04.jpg
PCF ECU PCB (Top-View)

Full Size: https://lh5.googleusercontent.com/-Z...600/pcf_01.jpg
PCF ECU PCB (Bottom-View)

Full Size: https://lh6.googleusercontent.com/-c...600/pcf_02.jpg
PCF ECU PCB (Plug View)

Full Size: https://lh6.googleusercontent.com/-6...600/pcf_03.jpg
Test mule

Full Size: https://lh5.googleusercontent.com/-w...4/IMG_4284.JPG
The dirty

Full Size: https://lh4.googleusercontent.com/-1...4/IMG_4289.JPG
I will provide as much associated information/media/documentation/data that I am able to post. However not freely providing to the public something that was given to me may become a constraint. If this is the case, please respect that.
Additionally, due to the days of users with 56k modems being long gone, and the fact that most users will be viewing this with a screen resolution such as 1280x800, 1366x768, 1920x1080, 1920x1200, along with a "broadband" internet connection, I will be very liberal in posting full size images. I will try to display images that are less than 1200 pixels wide, as well as provide a URL below to the full size of the image.
Moving forward.
Objective: To document the progress of my process of replacing the original F23A1 engine with a "Blue-Top" JDM H23A DOHC VTEC engine.
Vehicle: 2001 Honda Accord EX 5MT
ECU/ECM Engine Management: I have the OEM H23A ECU for an automatic transmission. If there is a feasible method in which I can use this with my manual transmission, I will use it. If this proves to not be a viable option, I have the equipment to convert to OBD1.
Moving on to pics..
The H23A that I have received.
Full Size: https://lh5.googleusercontent.com/-r...702_144959.jpg
Block stamp:
Full Size: https://lh5.googleusercontent.com/-4...702_144406.jpg
Head stamps
Full Size: https://lh3.googleusercontent.com/-c...702_145025.jpg
Intake manifold view
Full Size: https://lh4.googleusercontent.com/-I...702_145033.jpg
Timing belt, crankshaft pulley view. Note the single channel crank pulley, along with the aluminium bracket that goes between the drivers side chassis mount and the cast steel "timing belt" engine mount bracket. Will having this bracket alleviate me from having to modify the cast steel "timing belt" mount? Hmm.
Full Size: https://lh4.googleusercontent.com/-U...702_145105.jpg
The H23A IACV (Idle Air Control Valve) is 3-wire, like the F23A1's IACV. If I am to convert to OBD1, how will I get this working?
Full Size: https://lh6.googleusercontent.com/-k...713_163707.jpg
The H23A PCF ECU
Full Size: https://lh3.googleusercontent.com/-_...600/pcf_04.jpg
PCF ECU PCB (Top-View)
Full Size: https://lh5.googleusercontent.com/-Z...600/pcf_01.jpg
PCF ECU PCB (Bottom-View)
Full Size: https://lh6.googleusercontent.com/-c...600/pcf_02.jpg
PCF ECU PCB (Plug View)
Full Size: https://lh6.googleusercontent.com/-6...600/pcf_03.jpg
Test mule
Full Size: https://lh5.googleusercontent.com/-w...4/IMG_4284.JPG
The dirty
Full Size: https://lh4.googleusercontent.com/-1...4/IMG_4289.JPG
 07-13-2014, 03:35 PM
#2
Honda-Tech Member
Word.
I like how this is presented as if it were an engineering/scientific journal submission. Keep the big words and high levels of detail and organization coming!
Shoot me a PM if you need a hand or a test driver...
I like how this is presented as if it were an engineering/scientific journal submission. Keep the big words and high levels of detail and organization coming!
Shoot me a PM if you need a hand or a test driver...
07-20-2014, 03:23 AM
#4
Honda-Tech Member
07-20-2014, 03:49 AM
#5
Honda-Tech Member
Timing belt, crankshaft pulley view. Note the single channel crank pulley, along with the aluminium bracket that goes between the drivers side chassis mount and the cast steel "timing belt" engine mount bracket. Will having this bracket alleviate me from having to modify the cast steel "timing belt" mount? Hmm.
http://www.blacktrax.net/products/In...r_Adapter.html
07-21-2014, 02:33 AM
#6
Honda-Tech Member
one wire is removed and one or both of the remaining wires are re-pinned at the ECU. I've got the pinouts around somewhere.
Last edited by hondamark35; 08-31-2014 at 04:23 PM.
Trending Topics
07-25-2014, 11:10 AM
#8
Go Tigers!
Thread Starter
Once again, Rosko (Rosko Racing) has managed to help me out by sending me a mystery box of random F/H gears. Here's what I have found.
Assuming that the values listed in these tables are correct https://honda-tech.com/forums/honda-prelude-4/prelude-h-series-transmission-codes-ratios-master-list-2548441/
Rosko Mystery Gear Stack #1 - JDM Prelude Si - M2K4 - H23A1/H23A2
1st - 43/13 - 3.307
2nd - 38/21 - 1.8095
3rd - 33/26 - 1.2692
4th - 29/30 - 0.9666
5th - 26/33 - 0.7878
FNL - 65/16 - 4.0625
Rosko Mystery Gear Stack #2 - USDM H23A1
1st - 43/13 - 3.307
2nd - 39/21 - 1.8571
3rd - 33/25 - 1.3200
4th - 30/29 - 1.0344
5th - 26/32 - 0.8125
FNL - 64/15 - 4.2666
My F23A1 Trans
1st - 46/14 - 3.285
2nd - 47/26 - 1.807
3rd - 37/31 - 1.193
4th - 28/31 - 0.903
5th - 24/35 - 0.685
FNL - 65/16 - 4.026
I now have the H23A1 3/4/5 and the H23A1 final drive of 4.266 in my F23A1 trans. Although I'm considering placing that 0.787 5th gear in.
4th -> 5th gear reductions from H23A1 4th gear
1.034 -> 0.8125 = 0.785
1.034 -> 0.7878 = 0.761
Hmmmm...
EDIT: Adding teeth count to F23A1 Trans
Last edited by Bense; 08-15-2016 at 11:13 AM. Reason: Editing teeth count for F23A1 trans (2nd revision)
07-25-2014, 12:34 PM
#9
Honda-Tech Member
Have you considered sticking the 4.266FD in with the standard F23 gearing? I almost did that when I built mine for a little extra pep, but I'm glad I stuck with the tallest gear option now.
Oh, are you scuffing too?


Oh, are you scuffing too?
 08-05-2014, 02:25 AM
#12
Honda-Tech Member
Your New Hybrid Trans
1st - ??/?? - 3.285
2nd - ??/?? - 1.807
3rd - 33/25 - 1.3200
4th - 30/29 - 1.0344
5th - 26/32 - 0.8125 (or 26/33 - 0.7878)
FNL - 64/15 - 4.2666
what would be the difference in RPM at 70MPH between the two 5th gear options? that would decide it for me. in fact I would just go for the 0.7878. more exciting 4th gear downshifts on the interstate when coming from the longer 5th.
08-05-2014, 02:49 AM
#13
Honda-Tech Member
It would only be 100rpm difference between the two at 70mph, (3,160 vs 3,260rpm) Why not the .685 from the F23? That would put you just about 2,750 @ 70mph. With the 4.266 FD, you won't have a lack of power with the taller 5th. I used to drive up Hwy 25 from Greenville to Asheville with that combo and never had to downshift.
08-05-2014, 09:27 AM
#14
Honda-Tech Member
It would only be 100rpm difference between the two at 70mph, (3,160 vs 3,260rpm) Why not the .685 from the F23? That would put you just about 2,750 @ 70mph. With the 4.266 FD, you won't have a lack of power with the taller 5th. I used to drive up Hwy 25 from Greenville to Asheville with that combo and never had to downshift.
08-11-2014, 08:11 PM
#15
Go Tigers!
Thread Starter
Swap is certainly still being worked on about every other day. I have taken my time with every single step along the way. Things that are covered in grease, crud have been purple powered and scrubbed. Rather than extending the CKP sensor wires over to the distributor, I unwrapped my harness section by section and re-threaded the CKP wires back towards the distributor. I did the same with the o2 sensor plug, and whatever else needed it.
So far, in this project I have:
* replaced timing belt and water pump
* h23a1 manual timing belt tensioner swap
* removed balance shaft belt
* removed IAB butterfly plate
* rebuilt my F23A1 transmission with h23a1 gears (usdm final,3rd, 4th, jdm 5th)
* replaced clutch and pressureplate
* removed catalytic converter (it was the easiest way to get the header mounted to the exhaust)
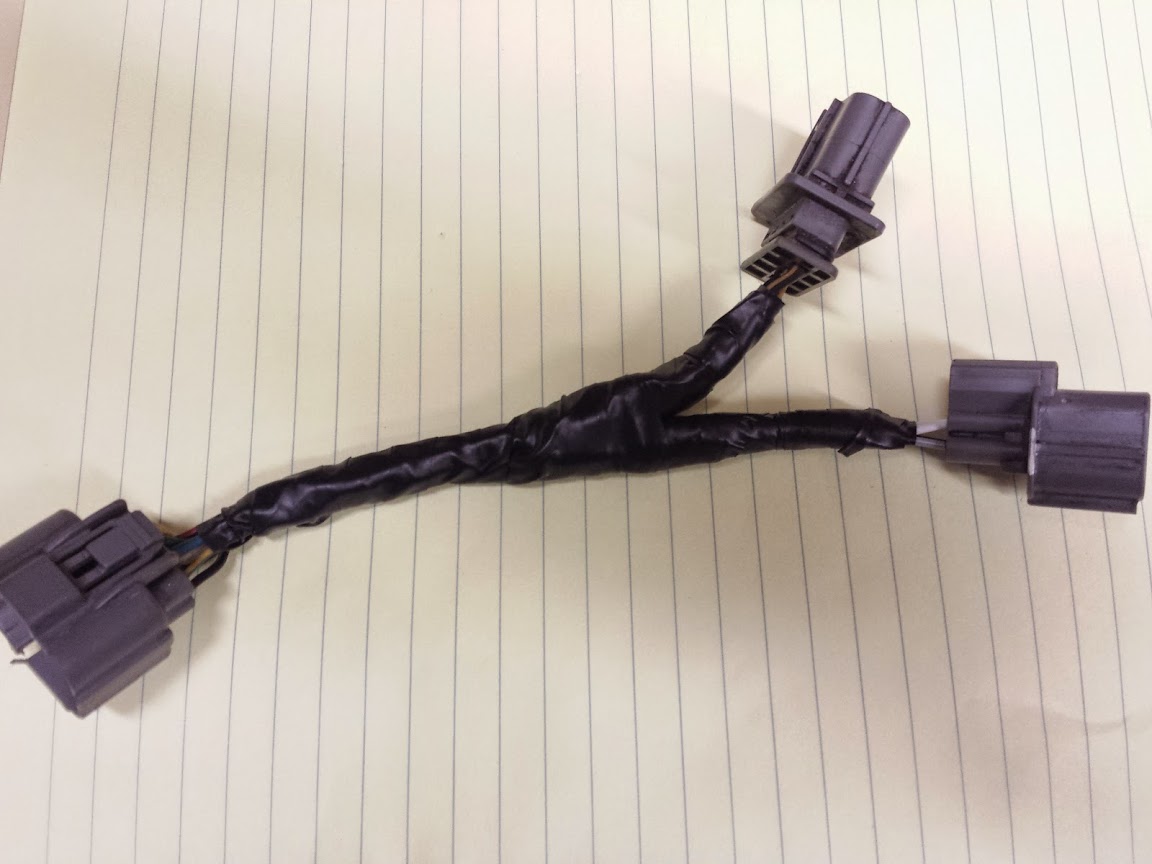
* made a "custom" distributor adapter harness that allows me to plug my original accord f23a1 harness into the JDM distributor.
* replaced driver side outer CV boot.
* Replaced most hoses, new alternator/ac belt.
* Replaced radiator (found out original was cracked and had been JB welded.)
* Made a throttle cable adapter bracket.
To do:
* Find my chips so I can burn the H23A ROM that Blundar sent me.
* Re-wire 3-wire IACV to work as 2-wire until I can get an OBD1 2-wire IACV adapter plate.
* Move F23A1 dual throttle cable pulley over to H23A throttlebody.
* Filter for the intake.
I attempted to start the vehicle with the OBD2B H23A automatic ECU. Engine just turns over and doesn't fire. I tried starting with the F23A1 PAA ECU (just to see if the engine will idle) and I smell fuel. It doesn't fire and there is a fuel leak somewhere in the engine bay, I am unsure where.
I have read that others have had to wire in a resistor box for the JDM injectors, I am not sure if this is needed for these. If so, would using my original F23A1 injectors prevent me from having to do this?
I currently have the barb that comes out the top of the throttlebody hooked up to the EVAP canister valve, which then has a hose to a black plastic cylindrical component (I assume that it's a check valve), that is then connected to a fuel return line.
The other fuel line that is connected to (I guess it's the FPR) with the two 10mm head (M6-1.0) bolts onto the fuel rail is the one that was originally on my F23A1. Perhaps I should put the H23A on instead.
The larger fuel line has one washer between the hose banjo fitting and the fuel rail, then there is one uniquely shaped washer between the fuel line banjo fitting and the 22mm nut that fastens the fuel line to the fuel rail. This seems to correspond with the inadequately documented factory service manual.
If anyone has any suggestions for my fuel leak, please advise. I have a plethora of pictures, but I am attempting to hold off bombarding this post with unnecessary clutter.
So far, in this project I have:
* replaced timing belt and water pump
* h23a1 manual timing belt tensioner swap
* removed balance shaft belt
* removed IAB butterfly plate
* rebuilt my F23A1 transmission with h23a1 gears (usdm final,3rd, 4th, jdm 5th)
* replaced clutch and pressureplate
* removed catalytic converter (it was the easiest way to get the header mounted to the exhaust)
* made a "custom" distributor adapter harness that allows me to plug my original accord f23a1 harness into the JDM distributor.
* replaced driver side outer CV boot.
* Replaced most hoses, new alternator/ac belt.
* Replaced radiator (found out original was cracked and had been JB welded.)
* Made a throttle cable adapter bracket.
To do:
* Find my chips so I can burn the H23A ROM that Blundar sent me.
* Re-wire 3-wire IACV to work as 2-wire until I can get an OBD1 2-wire IACV adapter plate.
* Move F23A1 dual throttle cable pulley over to H23A throttlebody.
* Filter for the intake.
I attempted to start the vehicle with the OBD2B H23A automatic ECU. Engine just turns over and doesn't fire. I tried starting with the F23A1 PAA ECU (just to see if the engine will idle) and I smell fuel. It doesn't fire and there is a fuel leak somewhere in the engine bay, I am unsure where.
I have read that others have had to wire in a resistor box for the JDM injectors, I am not sure if this is needed for these. If so, would using my original F23A1 injectors prevent me from having to do this?
I currently have the barb that comes out the top of the throttlebody hooked up to the EVAP canister valve, which then has a hose to a black plastic cylindrical component (I assume that it's a check valve), that is then connected to a fuel return line.
The other fuel line that is connected to (I guess it's the FPR) with the two 10mm head (M6-1.0) bolts onto the fuel rail is the one that was originally on my F23A1. Perhaps I should put the H23A on instead.
The larger fuel line has one washer between the hose banjo fitting and the fuel rail, then there is one uniquely shaped washer between the fuel line banjo fitting and the 22mm nut that fastens the fuel line to the fuel rail. This seems to correspond with the inadequately documented factory service manual.
If anyone has any suggestions for my fuel leak, please advise. I have a plethora of pictures, but I am attempting to hold off bombarding this post with unnecessary clutter.
Last edited by Bense; 09-04-2014 at 11:02 AM.
 08-12-2014, 08:46 AM
#17
Honda-Tech Member
 .
.I'm happy to lend a hand in person. Just let me know.
08-12-2014, 01:31 PM
#18
Go Tigers!
Thread Starter
I found the culprit of my fuel leaks. I mounted the FPR upside down. Oops.
Engine started with the F23A1 PAA ECU, and ran smooth long enough for me to gently move the car off of the ramps that were under the rear wheels. I pulled the ramps out, and moved the car out of the car bay.
I'll need to get some fuel hose, find a way to mount an air filter, and find my eproms.
Engine started with the F23A1 PAA ECU, and ran smooth long enough for me to gently move the car off of the ramps that were under the rear wheels. I pulled the ramps out, and moved the car out of the car bay.
I'll need to get some fuel hose, find a way to mount an air filter, and find my eproms.
08-15-2014, 10:04 AM
#19
Go Tigers!
Thread Starter
Removed the buttlerfly plate
Swapped out JDM H23A (left) with the Accord F23A1 (right) oil pressure sensors so that I didn't have to change the plug on my F23A engine wiring harness.

All of the F23A1 internal distributor wiring in one shot.

Reworking the engine harness.

H23A1 manual tensioner conversion.


New clutch and pressure plate

Gasket arrived and installed the upper intake manifold plenum with five d-series transmission housing bolts.
Transmission mess

Breaking 4.05 ring gear loose.

Yours truly

New lipstick

4.266 ring gear installed. I put a minuscule amount of paint on the gears that I would be using for the purpose of me not mixing things up. It had been about 6 years since I'd built a trans, this helped get my confidence back. I

Finishing up the hybrid trans


Countershaft snap-ring locked in place, refreshing positive sign.
Trans mounted

Been cleaning the bay

Getting hoses routed and ready, as well as installing the half shaft and writing harness.

Here goes nothing...

Mounted


NO modification required when using the JDM H23A aluminium timing mount bracket.

Bubba helped too

I chopped the ends off of the catalytic converter, got this coupler from autozone with the ubolts and lined everything up Accordingly (pun intended).

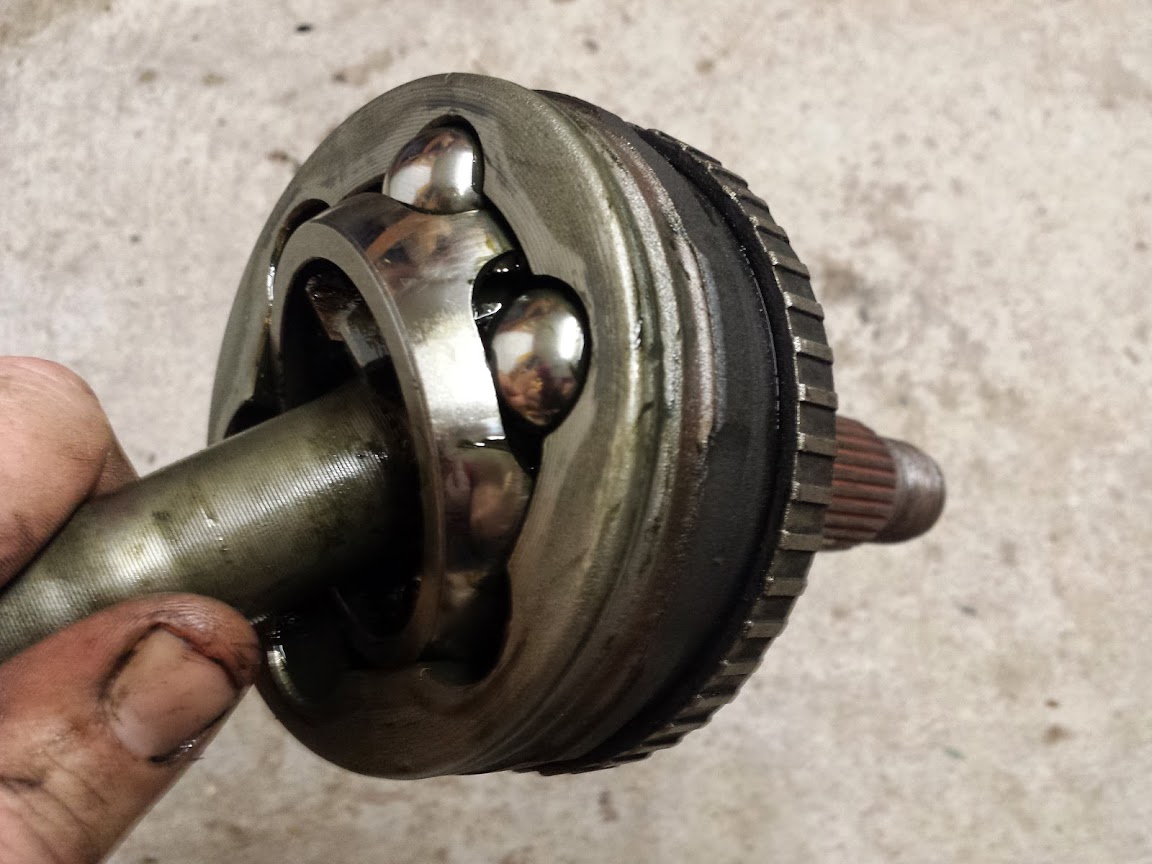
Replacing the torn boot on my CV axle
***** deep

Exhausting efforts

Found a pinhole in the oil pan.

Fixed

Distributor conversion harness that I made.
Swapped out JDM H23A (left) with the Accord F23A1 (right) oil pressure sensors so that I didn't have to change the plug on my F23A engine wiring harness.
All of the F23A1 internal distributor wiring in one shot.
Reworking the engine harness.
H23A1 manual tensioner conversion.
New clutch and pressure plate
Gasket arrived and installed the upper intake manifold plenum with five d-series transmission housing bolts.
Transmission mess
Breaking 4.05 ring gear loose.
Yours truly
New lipstick
4.266 ring gear installed. I put a minuscule amount of paint on the gears that I would be using for the purpose of me not mixing things up. It had been about 6 years since I'd built a trans, this helped get my confidence back. I
Finishing up the hybrid trans
Countershaft snap-ring locked in place, refreshing positive sign.
Trans mounted
Been cleaning the bay
Getting hoses routed and ready, as well as installing the half shaft and writing harness.
Here goes nothing...
Mounted
NO modification required when using the JDM H23A aluminium timing mount bracket.
Bubba helped too
I chopped the ends off of the catalytic converter, got this coupler from autozone with the ubolts and lined everything up Accordingly (pun intended).
Replacing the torn boot on my CV axle
***** deep
Exhausting efforts
Found a pinhole in the oil pan.
Fixed
Distributor conversion harness that I made.
Last edited by Bense; 11-09-2016 at 02:52 AM.


 08-31-2014, 04:32 PM
#23
Honda-Tech Member
after having a look at a few of my FSMs (including, but not limited to 98-02 Accord Shop Manual and 95 Civic Electrical Troubleshooting) and getting some hands-on with my spare F23 TB and box of assorted IACVs I then discovered this description on the web:
http://www.nmbtc.com/nmb-component-a...ves/index.html
Motors in Idle Air Control Valves: How do Stepper Motors in IAC Valves Operate?
Stepper motors are capable of highly accurate movements, enabling the positioning of the idle air control valve into one of its 125 possible steps to vary the airflow in the bypass passage. The stepper motor, also known as a step motor, in the idle air control valve divides a full rotary motion into short, incremental steps resulting in small, limited movements that are ideal for IAC valves. The short steps of the stepper motors in IAC valves occur whenever a digital pulse of electrical power is applied, making them rotate in short and steady angular movements. These types of motors are made up of four coils that have stator cups formed around each coil, magnetic rotor, valve, and seat. The electronic control module energizes each of the four coils sequentially, and with each coil that is pulsed a displacement in the pole pitch occurs where the pole pairs are repositioned mechanically, thus causing the rotor to move a single step with every electronic pulse input. These graduated positions caused by electrical windings, in turn, change the valve position slightly. The electronic control module repeats the process and keeps energizing the coils until the desired position is reached. The higher the number of the steps, the larger the opening of the valve, which allows a greater volume of air to bypass the throttle body. If the electronic control module is inoperative, then the stepper motors in IAC valves remain fixed in the step count where it last failed.
Seems to me that building an adapter would be easier and more sensible than integrating a stepper motor control into the ECU output signal. Stepper motors are capable of highly accurate movements, enabling the positioning of the idle air control valve into one of its 125 possible steps to vary the airflow in the bypass passage. The stepper motor, also known as a step motor, in the idle air control valve divides a full rotary motion into short, incremental steps resulting in small, limited movements that are ideal for IAC valves. The short steps of the stepper motors in IAC valves occur whenever a digital pulse of electrical power is applied, making them rotate in short and steady angular movements. These types of motors are made up of four coils that have stator cups formed around each coil, magnetic rotor, valve, and seat. The electronic control module energizes each of the four coils sequentially, and with each coil that is pulsed a displacement in the pole pitch occurs where the pole pairs are repositioned mechanically, thus causing the rotor to move a single step with every electronic pulse input. These graduated positions caused by electrical windings, in turn, change the valve position slightly. The electronic control module repeats the process and keeps energizing the coils until the desired position is reached. The higher the number of the steps, the larger the opening of the valve, which allows a greater volume of air to bypass the throttle body. If the electronic control module is inoperative, then the stepper motors in IAC valves remain fixed in the step count where it last failed.
 06-25-2016, 06:56 PM
#25
Honda-Tech Member
Join Date: Sep 2002
Location: Saugus, ca, USA
Posts: 496
Likes: 0
Received 0 Likes
on
0 Posts
I got the IACV Adapter from Rosko. Im not sure if they have been released to his site yet but it worked great for me. I used the 2 Wire IACV, Adapter and H23A Manifold. I was also able to use the injectors and throttle body with no issues.
This may be a dumb question but is your H23A still not running? This is a pretty old thread.
This may be a dumb question but is your H23A still not running? This is a pretty old thread.