
[DIY] How to change rear brake pads [PICS]
 08-25-2012, 01:40 PM
#1
Honda-Tech Member
Thread Starter
This will be a short guide on how to change your rear brake pads on a CRX or Civic with rear disc brakes. It should be noted that proper procedure would dictate having your rotors turned on a lathe any time new brake pads are being installed. Some go as far as replacing the rotors with brand new ones with each pad change. Aggressive compound racing pads eat through rotors more quickly. I always check my rotors for warp, grooves, and pitting, and have them turned if they are not within specification. Unless you have other problems, you can usually get away with NOT turning your rotors. Proceed at your own risk I will not be held liable for anything you damage as a result of this DIY guide.
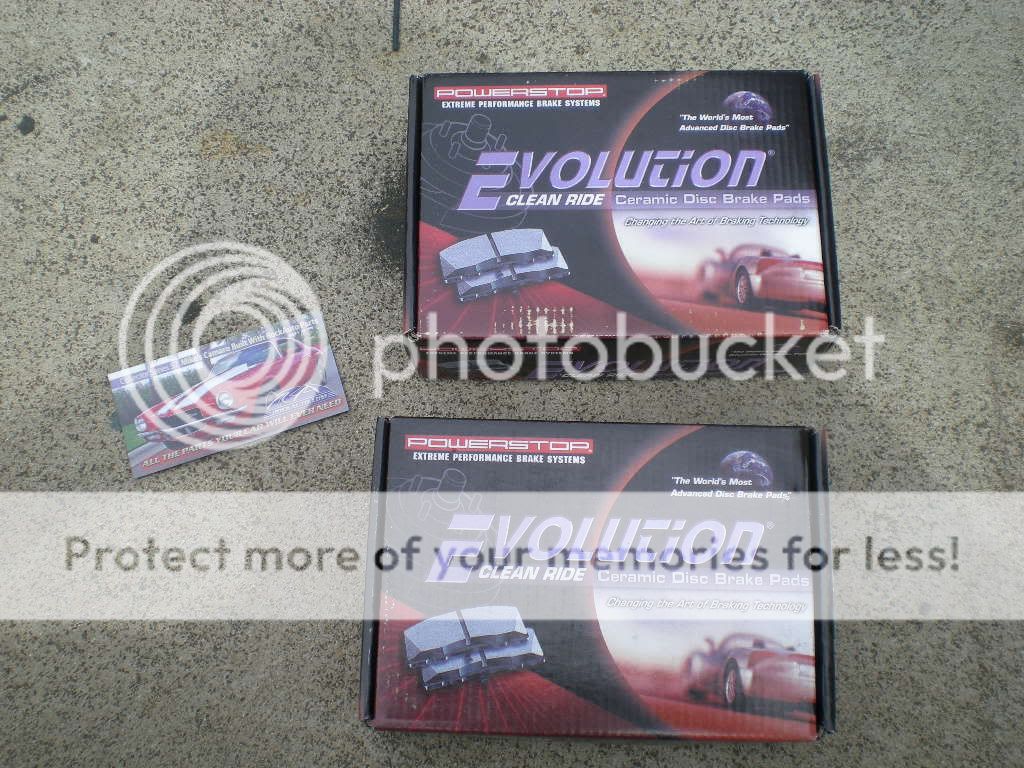
Make sure you have the proper front and rear pads for your car before you start the project. If your brakes are oversized or included swapped parts from another car, make sure to order pads for the proper calipers.
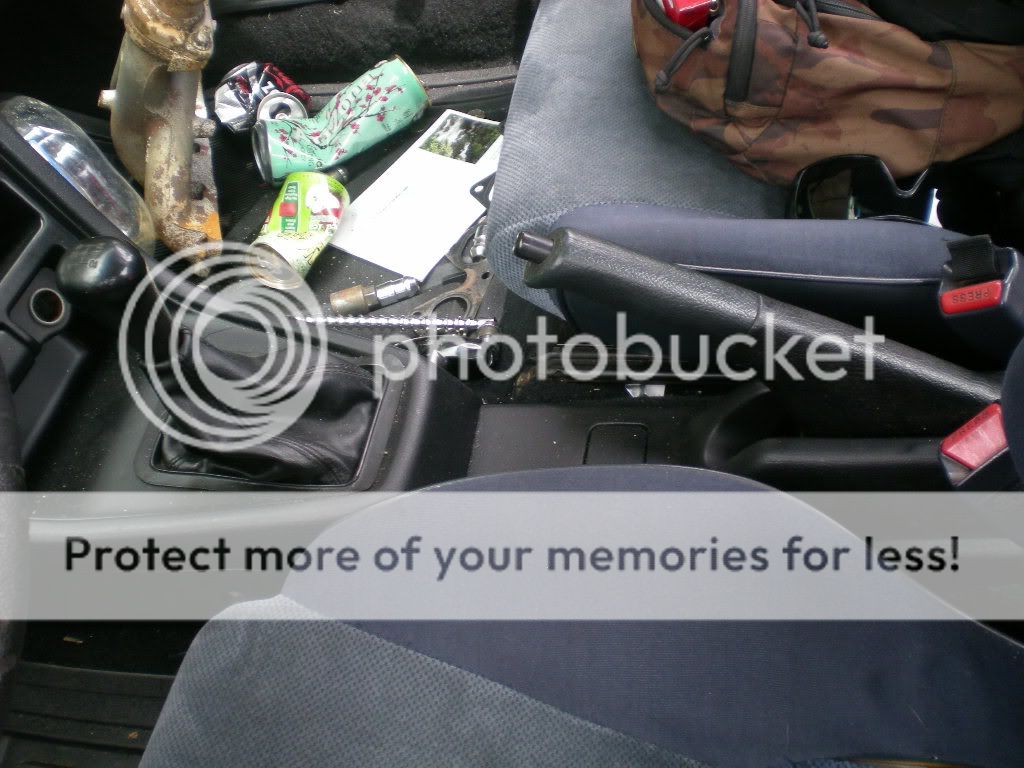
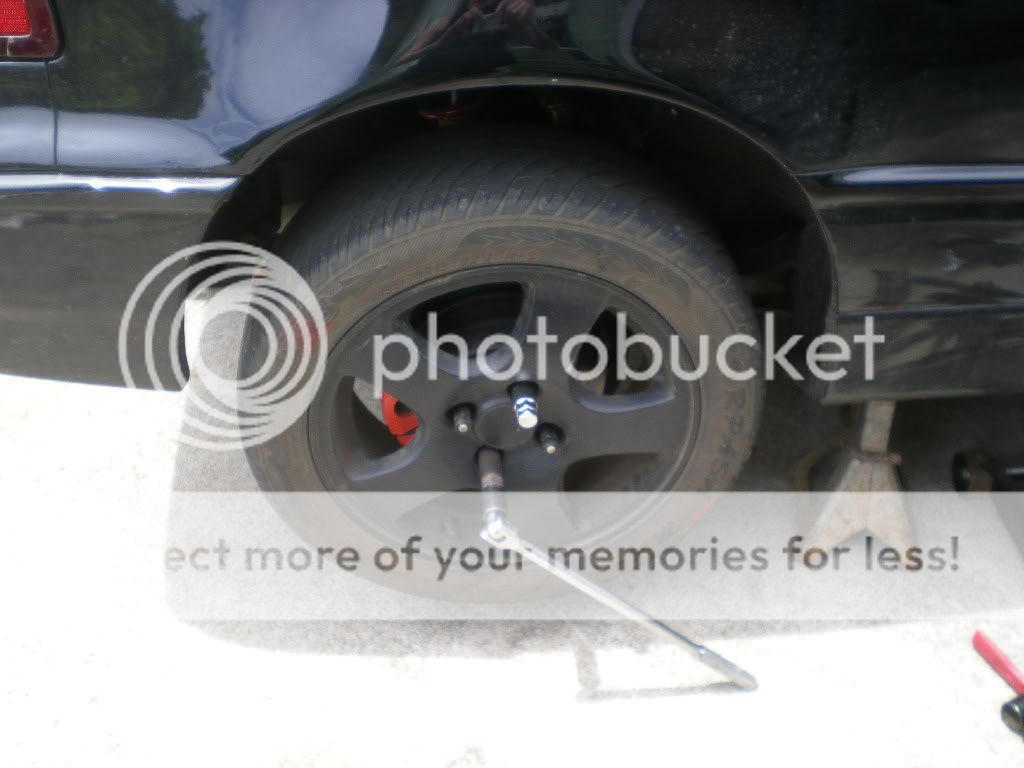
Set the parking brake and put the car in first gear. You may want to loosen the rear lugnuts now, but I prefer to loosen them with the rear wheels in the air because it serves as a basic two-side parking brake test.
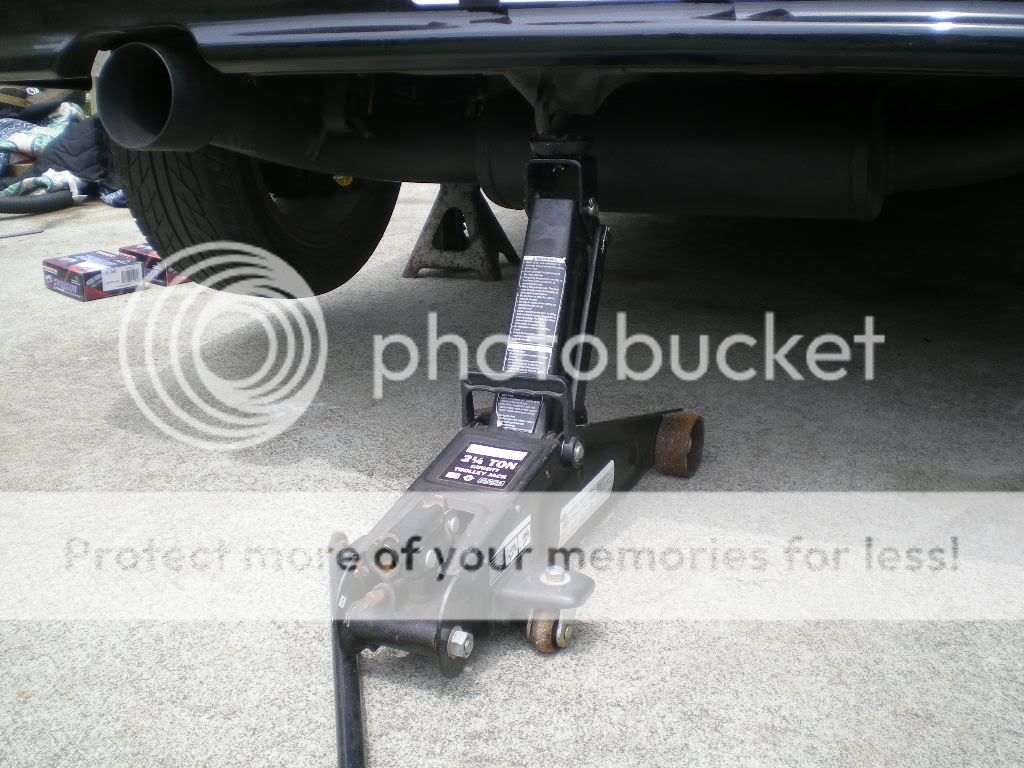
Jack up the rear of the car. I prefer to use the tow hook because it will lift both sides of the car if on level ground.
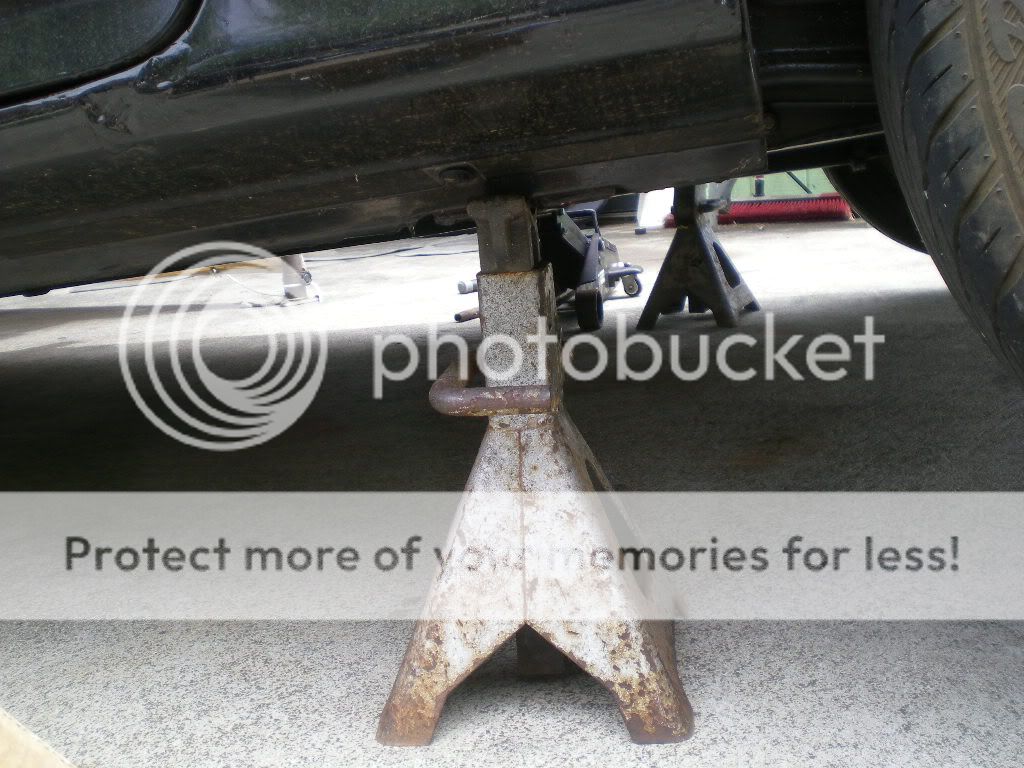
Set your jack stands at the proper lift points, just forward of the rear wheels. Lower the car onto the jack stands and shake the chassis to make sure everything has settled solidly.
Remove the lug nuts. If you can't figure this step out, do not proceed.
The first part to come off will be the dust shield, located above the caliper.
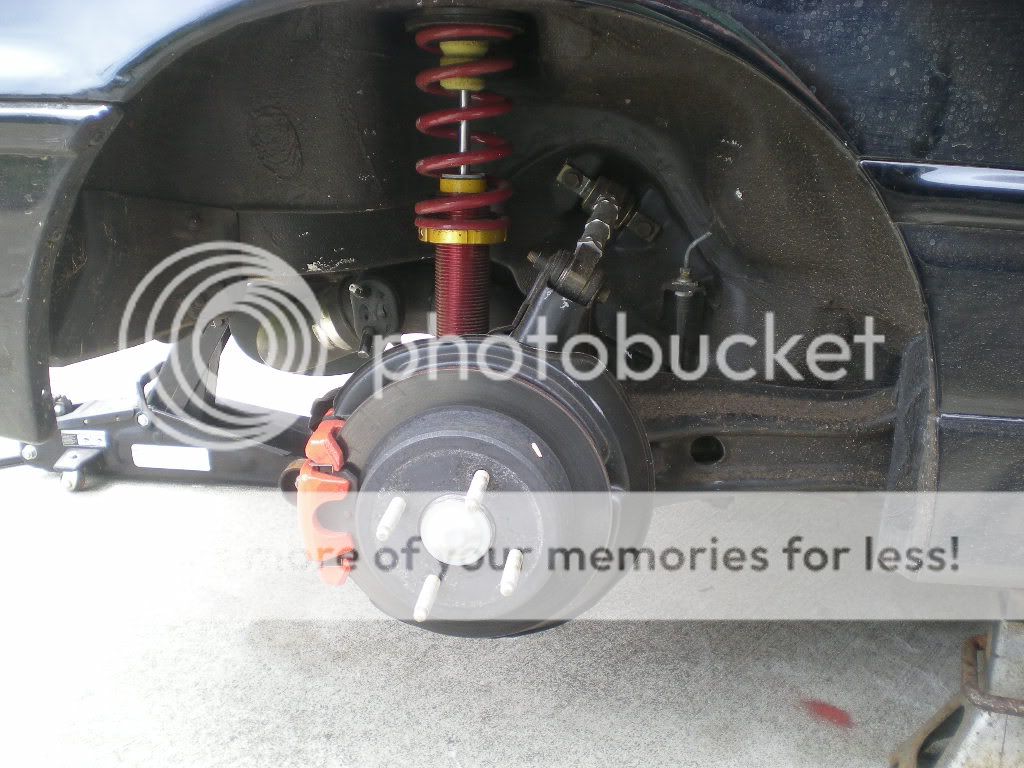
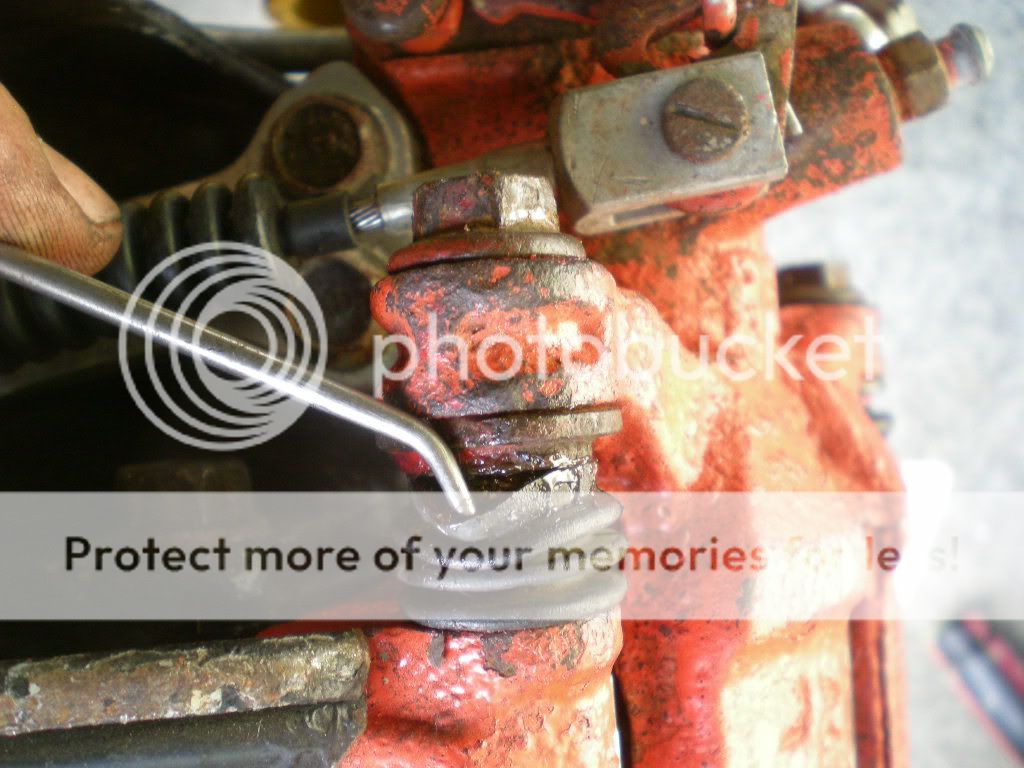
It is held on by two 10mm-head bolts. One is located here.
The other is on the back of the dust shield, horizontally penetrating the rear trailing arm.
You may now disengage the parking brake.
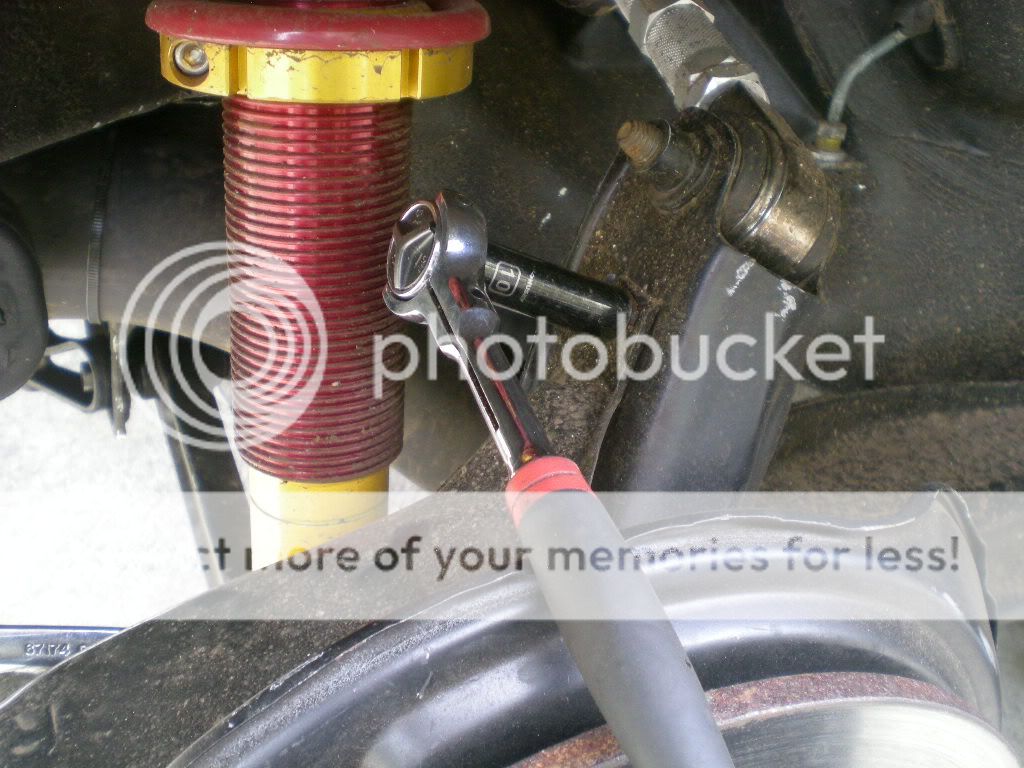
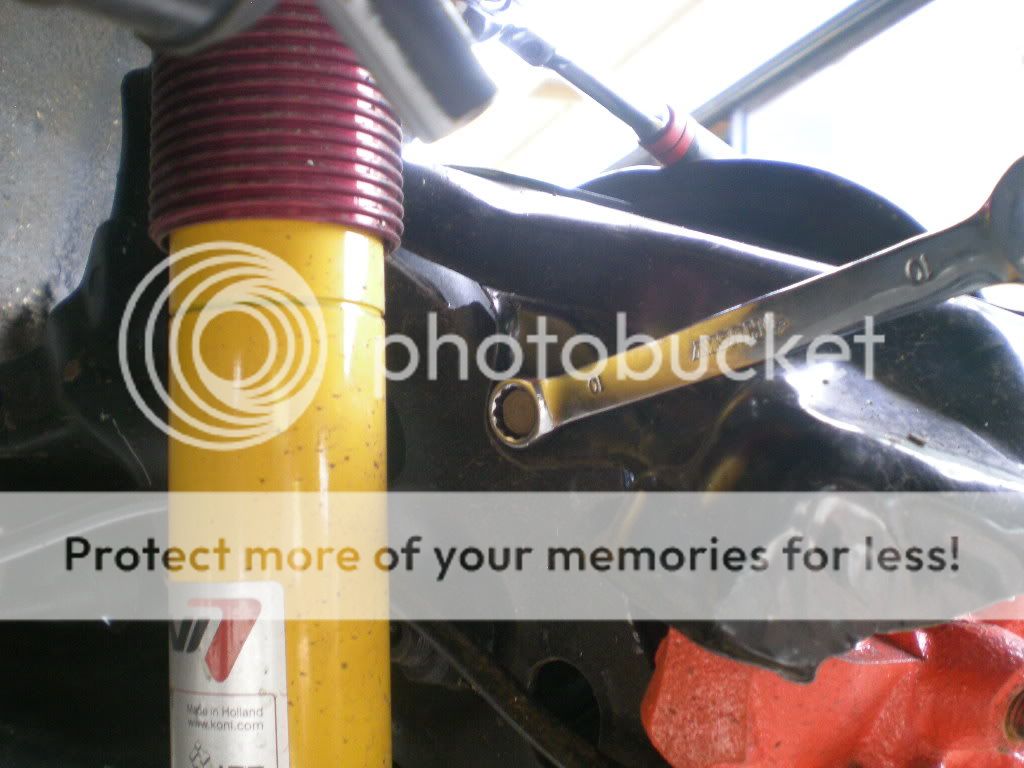
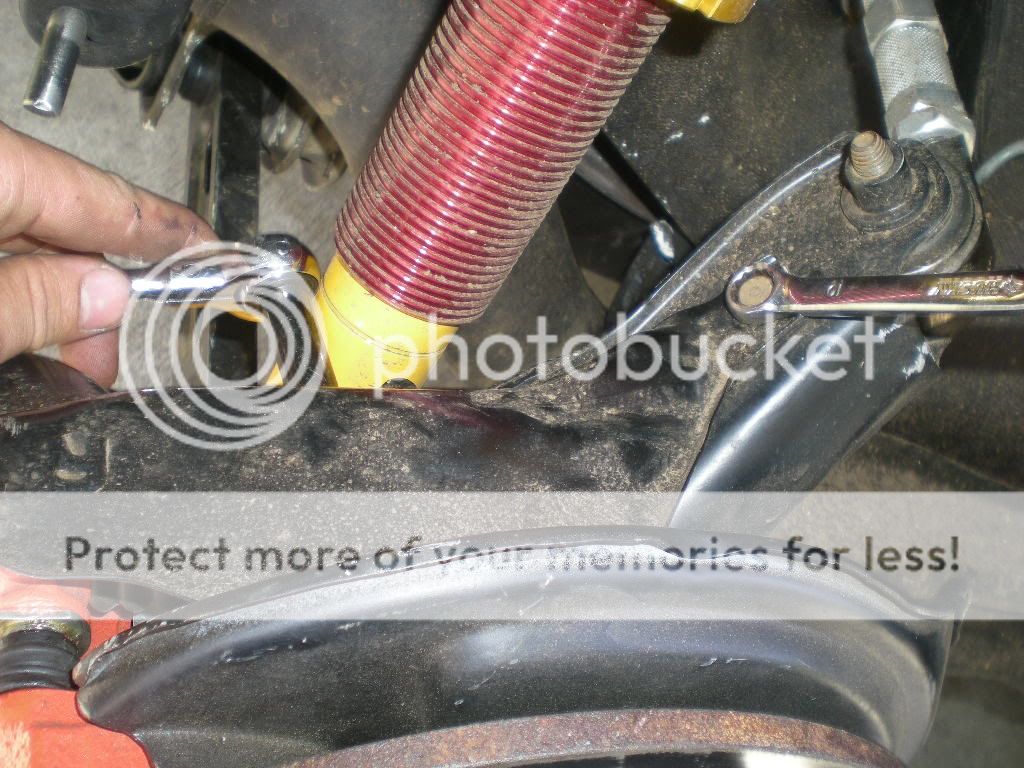
Now remove the two caliper mounting bolts. They should be 12/14mm-head depending on what brake parts you have.
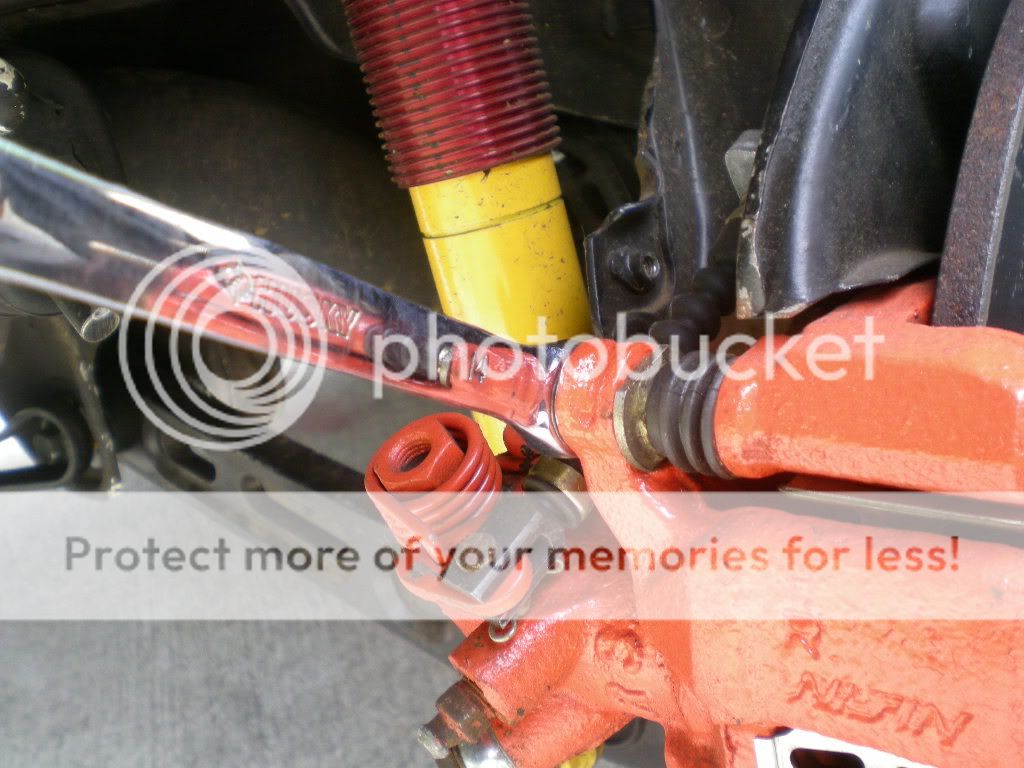
It's possible to change pads without removing both bolts, but I prefer to inspect the caliper slide pins for wear and removing both bolts makes the pad installation much easier.
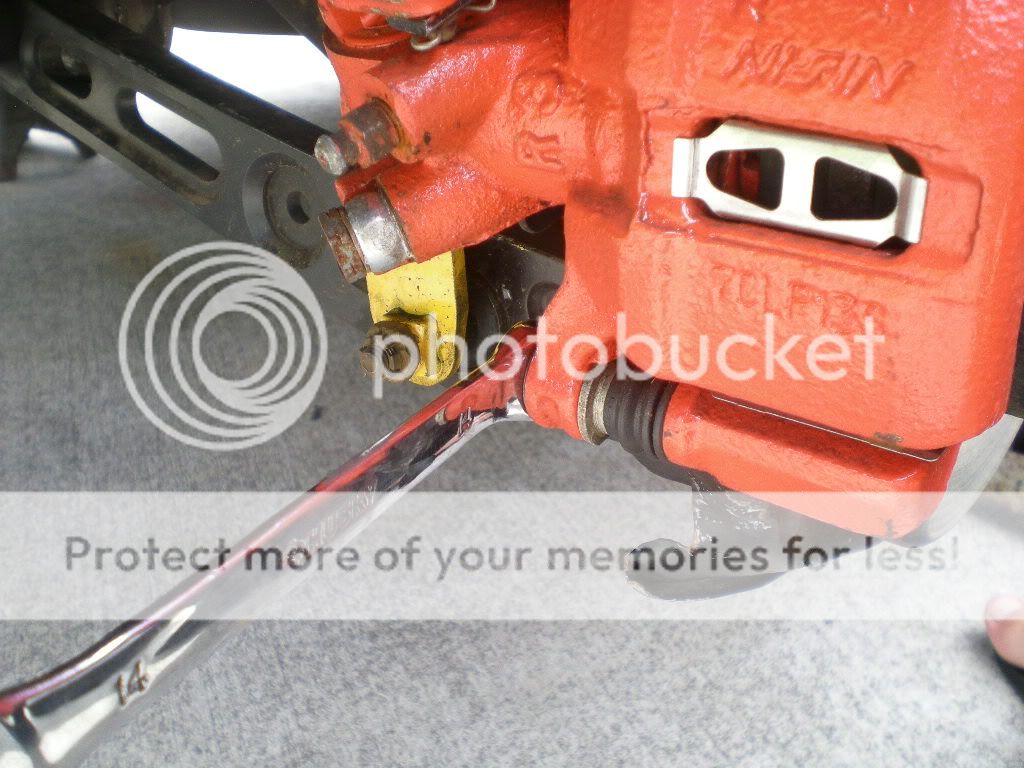
With the parking brake cable still connected, you should be able to swing the caliper off the rotor and away from the old pads.
Now would be a good time to use a dial indicator and check the rear rotors for warp and assure they are within proper specifications without being turned on a lathe.
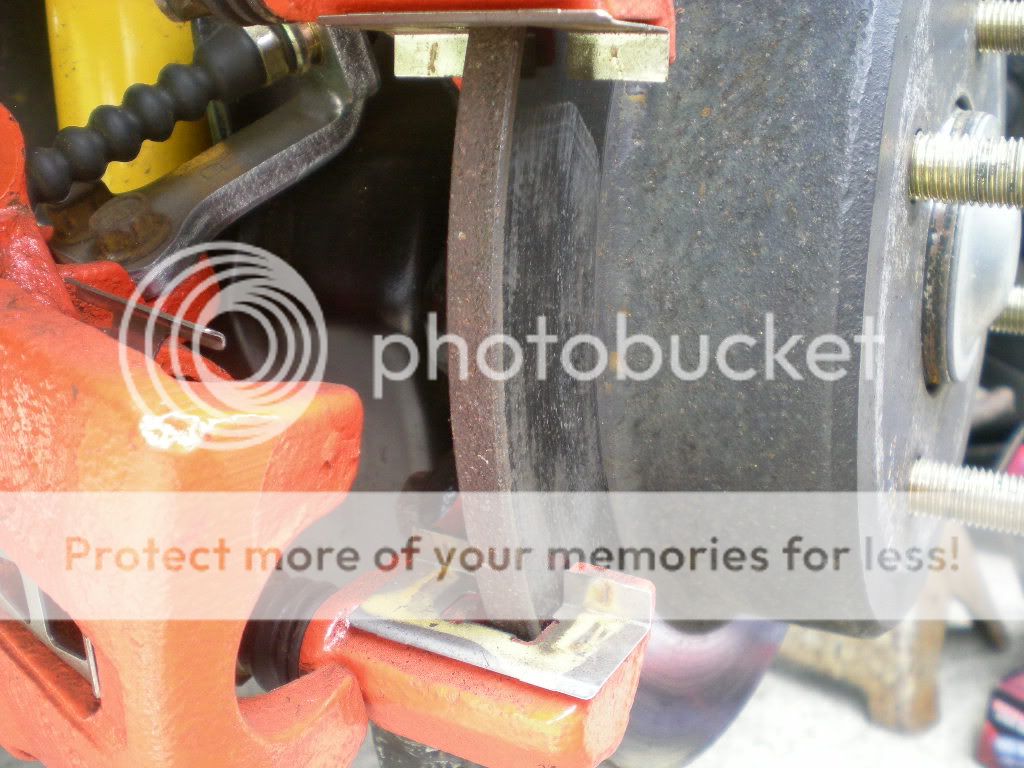
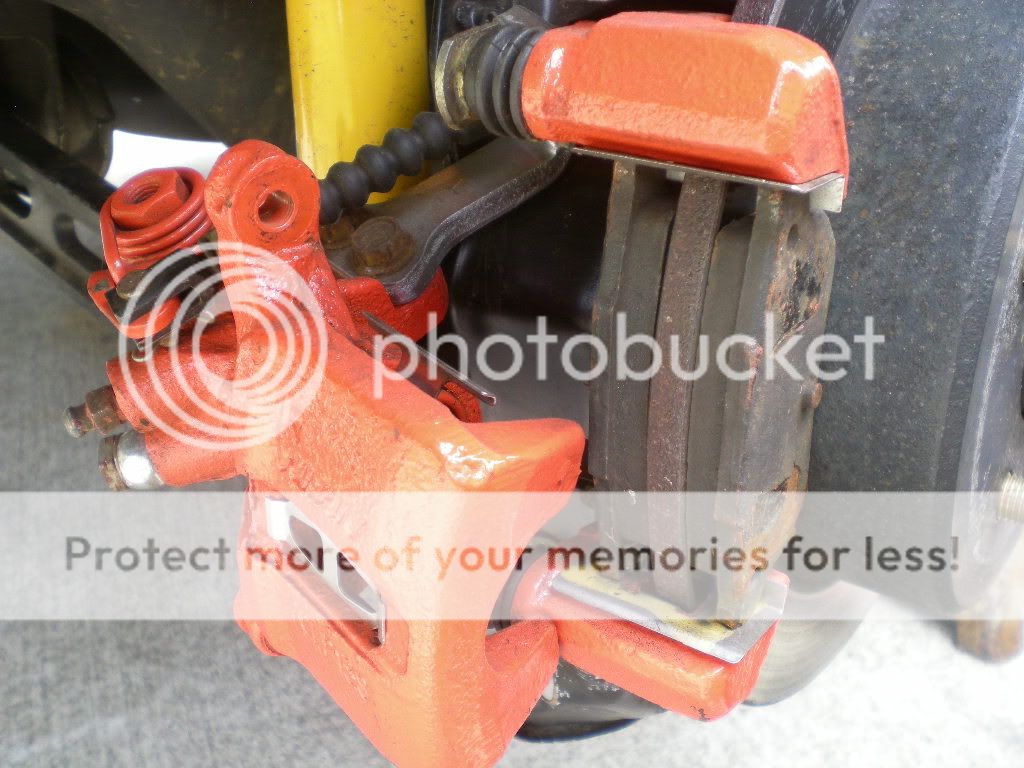
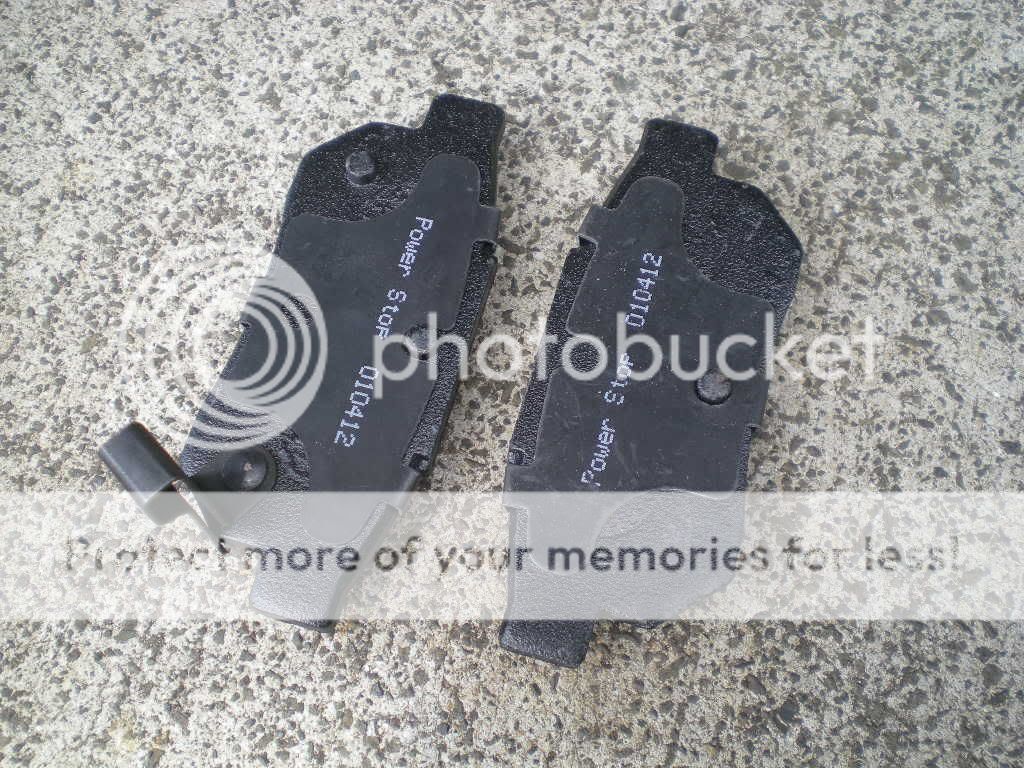
These are the pads for the rear right caliper. I always install the pad with the squealer tab inside, with the tab facing down.
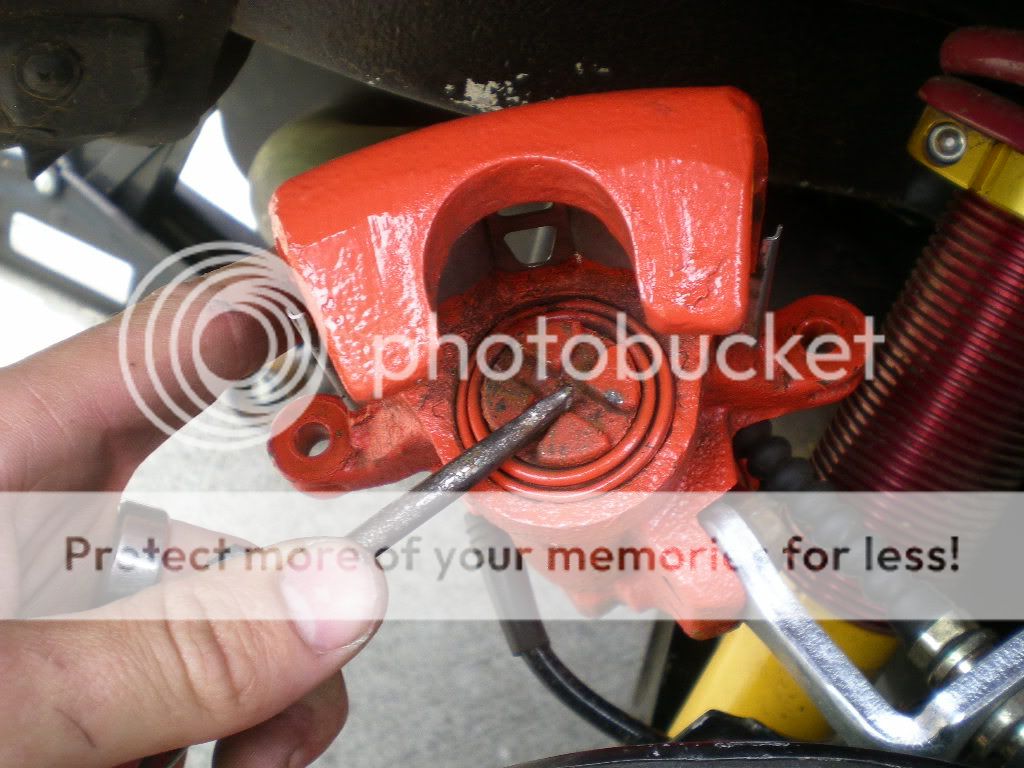
Depending on which calipers you have, you may have to use a tool to 'screw' the piston back into the caliper. If you see no markings or indentations on the piston, you should be safe to use a C-clamp to press the piston back into the caliper.
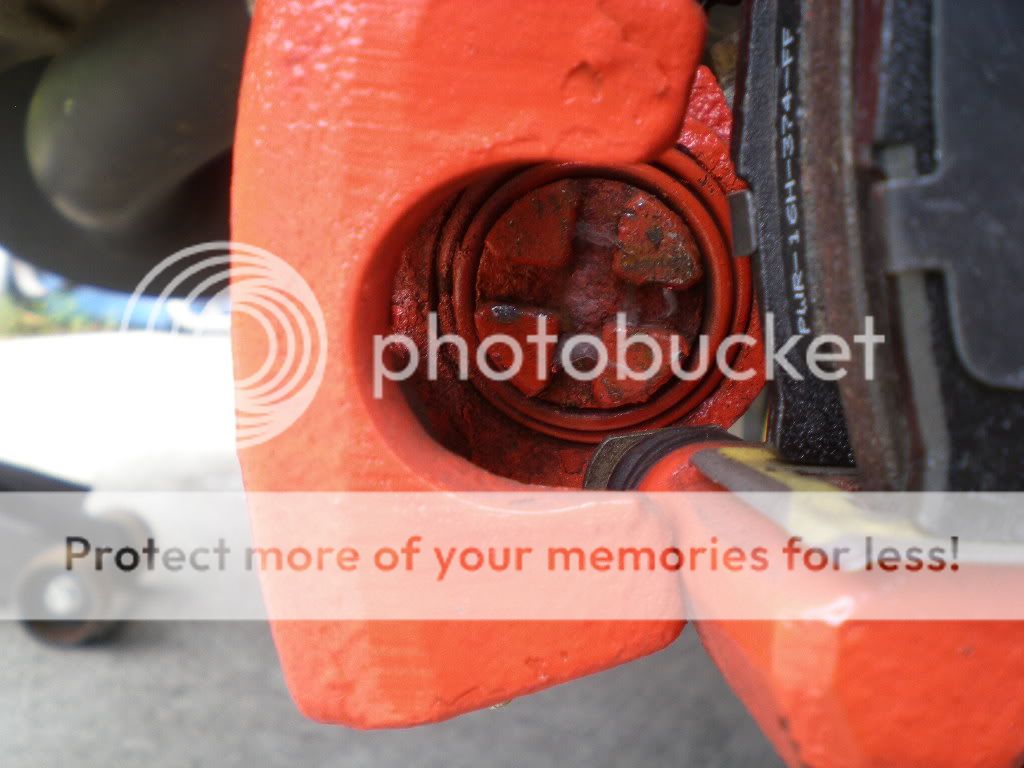
If you do not have access to the proper specialty tool, a screwdriver or pair of needlenose pliers should suffice.
Now we turn our attention elsewhere. Set the caliper aside and carefully remove the two slide pins from the rubber dust boots holding them in the caliper brackets.
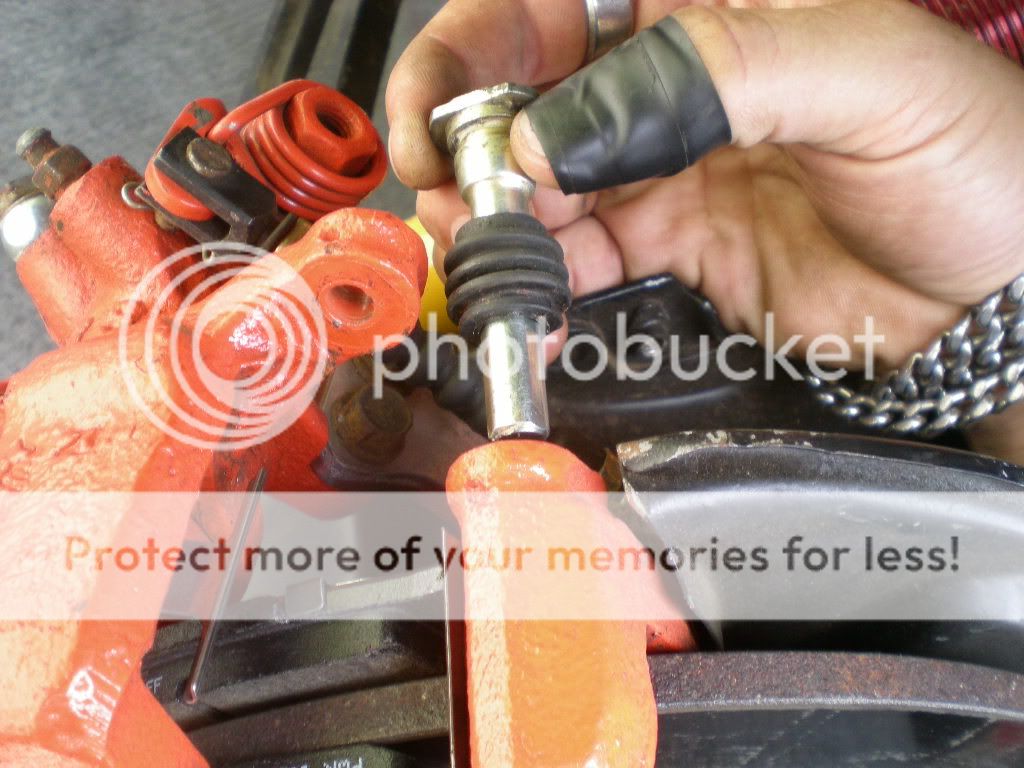
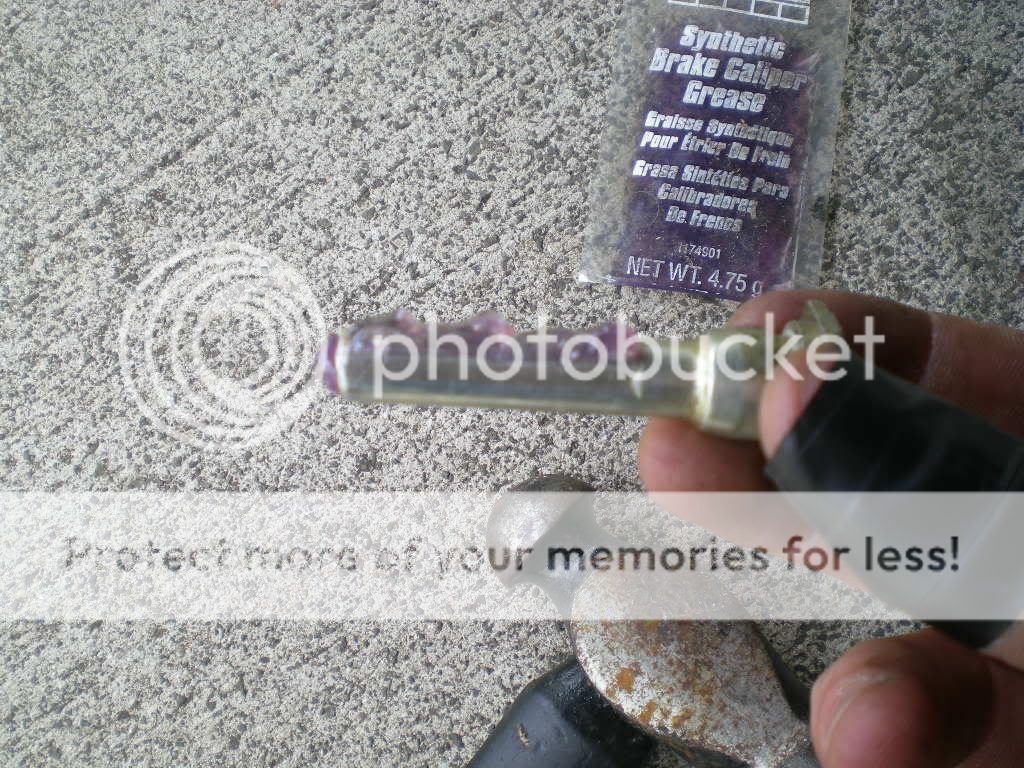
Wipe the pins clean, wipe the inside of the dust boots, and spray some parts cleaner in the caliper bracket holes to get all the old grease and dirt cleaned off. Then apply a small amount of high-temp synthetic brake caliper grease to the pins.

Be sure to coat all sides of the pin for even lubrication.
Carefully reinstall the greased pins and dust boots into the caliper bracket.
You may need to separate the dust boots from the pins while you seat them in the bracket. Air can become trapped between the boot and the pin, causing the boot to balloon up because of the air pressure inside it.
A small screwdriver or pick can be used to free this trapped air.
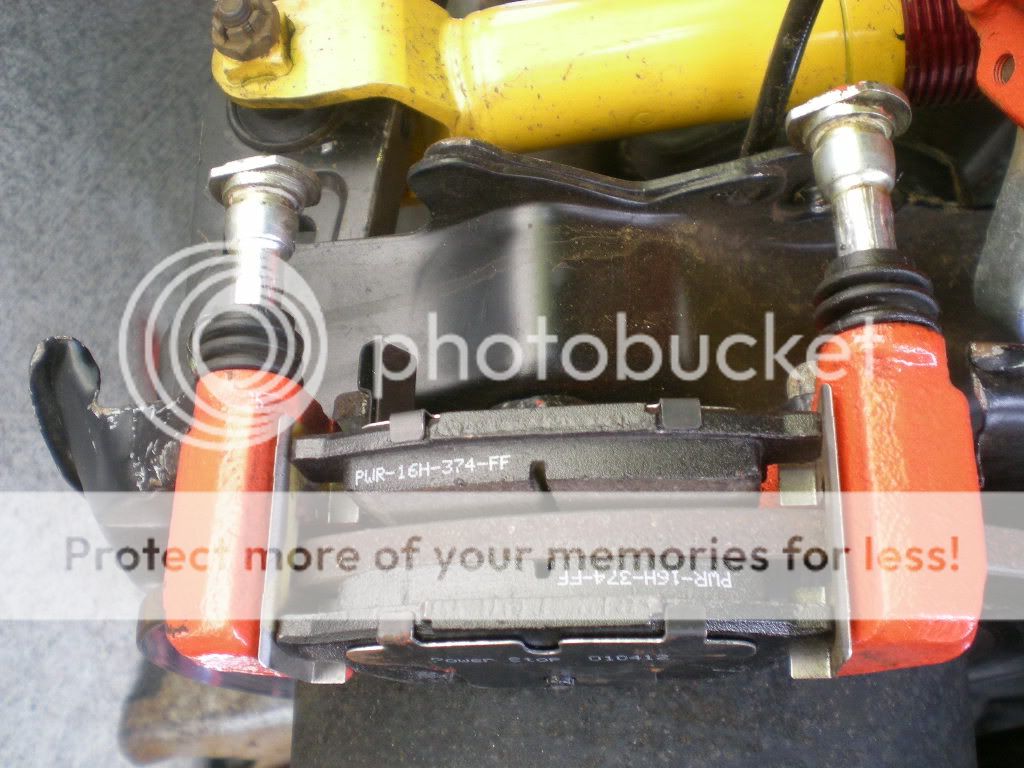
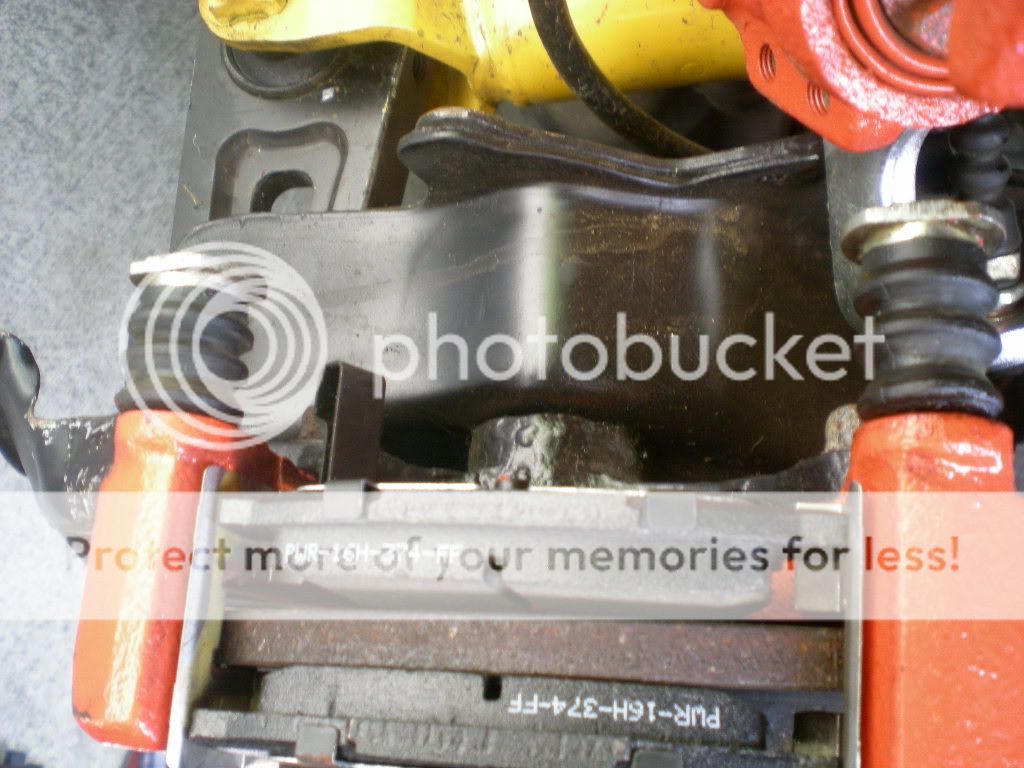
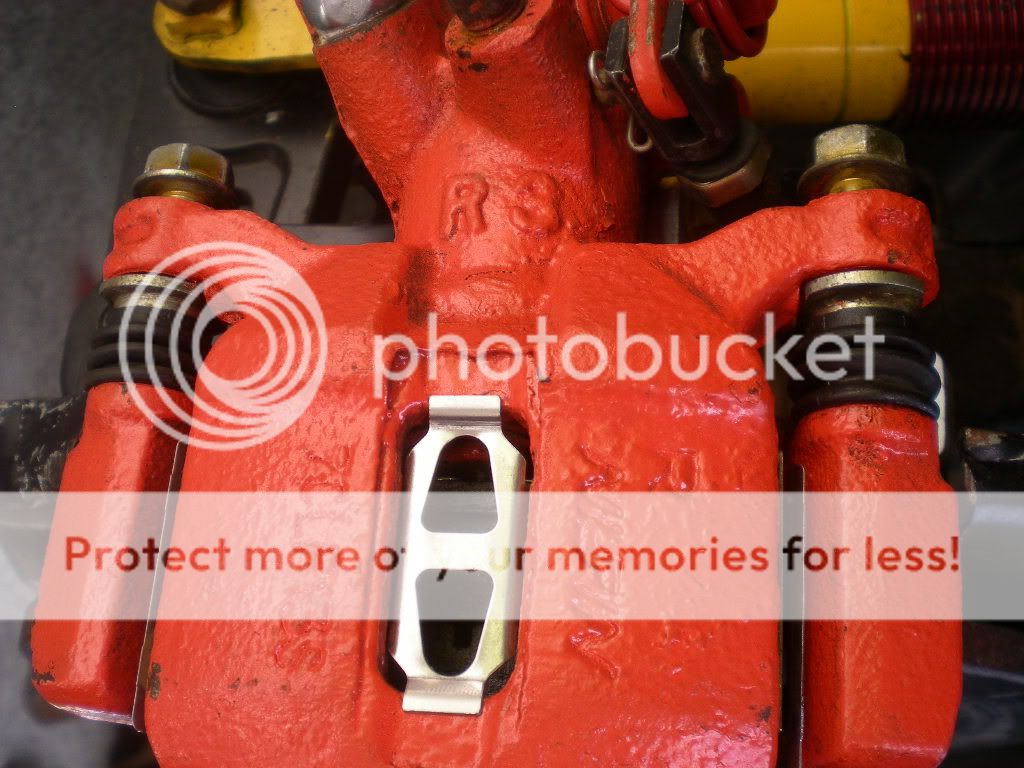
Reinstall both caliper securing bolts into the pins, snugly mounting the caliper around the new pads you have loaded into the caliper bracket.
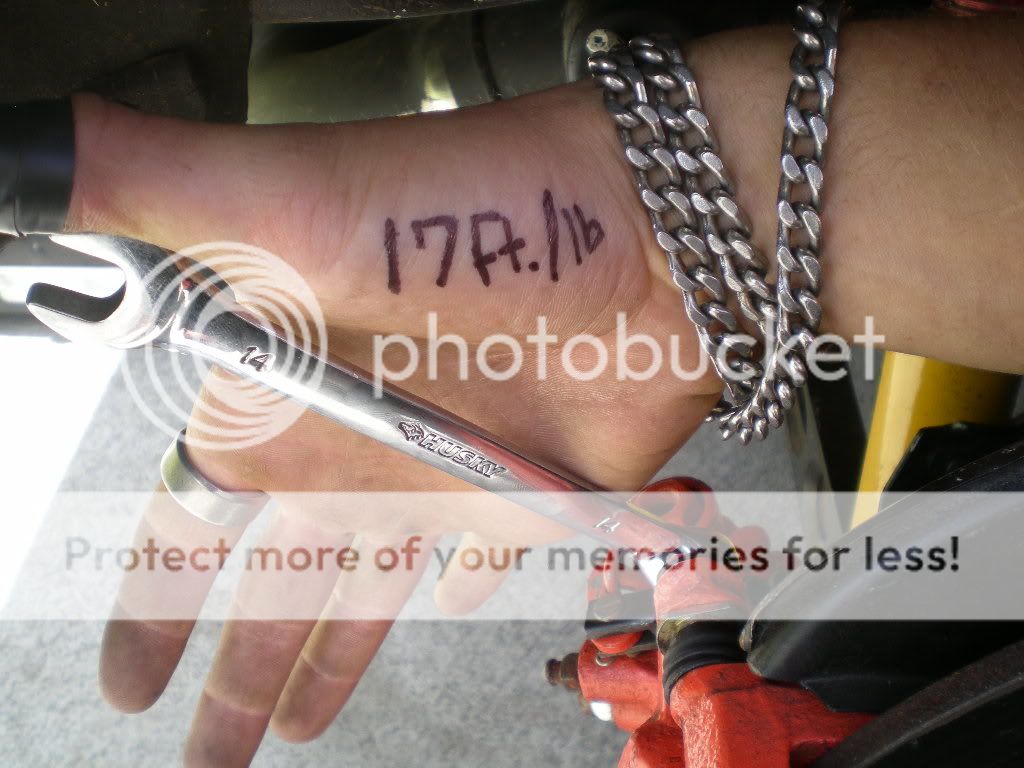
Torque the upper and lower caliper mounting bolts to the recommended torque specification. These trailing arms and calipers happen to be off of a 94' Del Sol VTEC, which required 17ft/lbs. Depending on the brake parts you have, your proper torque specifications may vary.
Reinstall the upper and lower 10mm-head caliper cover mounting bolts. Do not overtorque.
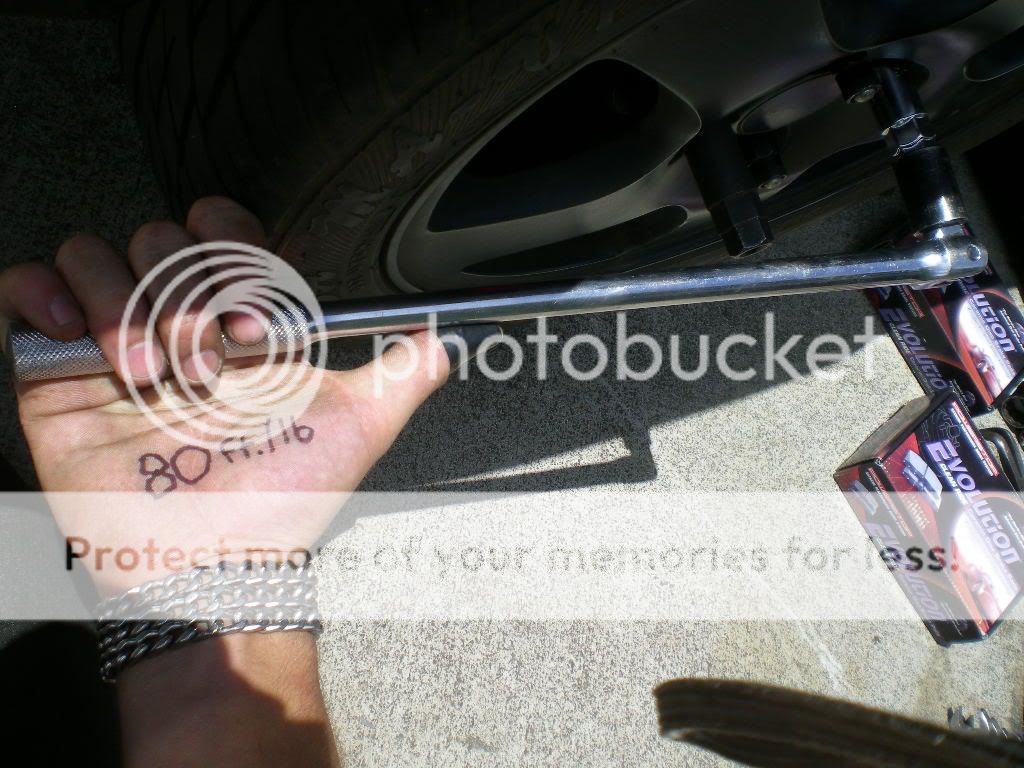
Set the parking brake and reinstall the wheel. Snug all four lugnuts and lower the vehicle onto the ground. Torque the lug nuts to recommended torque specification listed in your shop manual. Most honda lug nuts require 80ft/lb of torque, but you may want a higher torque number with aftermarket lug nuts and studs.
Follow the recommended procedure for properly breaking in your new pads. Due to rotor runout, incongruencies between pad and rotor surface, and other factors, your brakes may be very weak for the first few stops. Be cautious and test your new pads out in a controlled area, with a large runoff if you should have a problem.
Make sure you have the proper front and rear pads for your car before you start the project. If your brakes are oversized or included swapped parts from another car, make sure to order pads for the proper calipers.
Set the parking brake and put the car in first gear. You may want to loosen the rear lugnuts now, but I prefer to loosen them with the rear wheels in the air because it serves as a basic two-side parking brake test.
Jack up the rear of the car. I prefer to use the tow hook because it will lift both sides of the car if on level ground.
Set your jack stands at the proper lift points, just forward of the rear wheels. Lower the car onto the jack stands and shake the chassis to make sure everything has settled solidly.
Remove the lug nuts. If you can't figure this step out, do not proceed.
The first part to come off will be the dust shield, located above the caliper.
It is held on by two 10mm-head bolts. One is located here.
The other is on the back of the dust shield, horizontally penetrating the rear trailing arm.
You may now disengage the parking brake.
Now remove the two caliper mounting bolts. They should be 12/14mm-head depending on what brake parts you have.
It's possible to change pads without removing both bolts, but I prefer to inspect the caliper slide pins for wear and removing both bolts makes the pad installation much easier.
With the parking brake cable still connected, you should be able to swing the caliper off the rotor and away from the old pads.
Now would be a good time to use a dial indicator and check the rear rotors for warp and assure they are within proper specifications without being turned on a lathe.
These are the pads for the rear right caliper. I always install the pad with the squealer tab inside, with the tab facing down.
Depending on which calipers you have, you may have to use a tool to 'screw' the piston back into the caliper. If you see no markings or indentations on the piston, you should be safe to use a C-clamp to press the piston back into the caliper.
If you do not have access to the proper specialty tool, a screwdriver or pair of needlenose pliers should suffice.
Now we turn our attention elsewhere. Set the caliper aside and carefully remove the two slide pins from the rubber dust boots holding them in the caliper brackets.
Wipe the pins clean, wipe the inside of the dust boots, and spray some parts cleaner in the caliper bracket holes to get all the old grease and dirt cleaned off. Then apply a small amount of high-temp synthetic brake caliper grease to the pins.
Be sure to coat all sides of the pin for even lubrication.
Carefully reinstall the greased pins and dust boots into the caliper bracket.
You may need to separate the dust boots from the pins while you seat them in the bracket. Air can become trapped between the boot and the pin, causing the boot to balloon up because of the air pressure inside it.
A small screwdriver or pick can be used to free this trapped air.
Reinstall both caliper securing bolts into the pins, snugly mounting the caliper around the new pads you have loaded into the caliper bracket.
Torque the upper and lower caliper mounting bolts to the recommended torque specification. These trailing arms and calipers happen to be off of a 94' Del Sol VTEC, which required 17ft/lbs. Depending on the brake parts you have, your proper torque specifications may vary.
Reinstall the upper and lower 10mm-head caliper cover mounting bolts. Do not overtorque.
Set the parking brake and reinstall the wheel. Snug all four lugnuts and lower the vehicle onto the ground. Torque the lug nuts to recommended torque specification listed in your shop manual. Most honda lug nuts require 80ft/lb of torque, but you may want a higher torque number with aftermarket lug nuts and studs.
Follow the recommended procedure for properly breaking in your new pads. Due to rotor runout, incongruencies between pad and rotor surface, and other factors, your brakes may be very weak for the first few stops. Be cautious and test your new pads out in a controlled area, with a large runoff if you should have a problem.
Last edited by Corksil; 08-26-2012 at 12:31 PM.
 08-25-2012, 02:34 PM
#3

Nice right up but if you need one to change brakes you should not be working on cars. I like how you did not have the rotors turned like you should always do when replacing brake pads.
 08-25-2012, 03:27 PM
#5
Technical Hero
Join Date: May 2002
Location: Charlotte, NC, 28227
Posts: 9,876
Likes: 0
Received 28 Likes
on
20 Posts
I think thats why he left the ebrake on until after he broke them loose. I always loosen them on the ground but to each their own.
08-25-2012, 03:40 PM
#6
Honda-Tech Member
Thread Starter
the manual is at the shop, the office is elsewhere. didn't know how to remember the torque ratings so wtf might as well write them in an obvious place.
thanks dude!
Yeah well if i can b-swap a crx i sure don't need a guide to change out pads.
maybe more people would do their own minor car maintenance instead of taking it to shops, if they only knew how simple it was.
thanks dude.
Yup, I like the e-brake for loosening and tightening.
thanks for the shouts guys.
thanks dude!
maybe more people would do their own minor car maintenance instead of taking it to shops, if they only knew how simple it was.
thanks dude.
I'm sorry but people have to start somewhere. It's not like people are born ready to work on cars. Plus I never turn rotors unless there is some pulsation, done hundreds of jobs this way and never had an issue.
I think thats why he left the ebrake on until after he broke them loose. I always loosen them on the ground but to each their own.
I think thats why he left the ebrake on until after he broke them loose. I always loosen them on the ground but to each their own.
thanks for the shouts guys.
Last edited by Former User; 09-13-2012 at 06:55 AM. Reason: post clean up
08-25-2012, 04:49 PM
#7
The Grumpiest
iTrader: (4)
Join Date: May 2008
Location: Oak Ridge, TN, USA
Posts: 28,333
Likes: 0
Received 16 Likes
on
15 Posts
I saw a guy nearly kill himself doing it this way when he pretty much torqued the car backwards and sideways off the jackstands. To each his own but I'll always err on the side of caution
Last edited by Former User; 09-13-2012 at 06:55 AM. Reason: post clean up
Trending Topics
08-26-2012, 12:34 PM
#8
Honda-Tech Member
Thread Starter
Anyways thanks for the info everyone. I edited the diy to include some more information.
thanks guys.
thanks guys.
Last edited by Former User; 09-13-2012 at 06:56 AM. Reason: post clean up
 08-29-2012, 11:45 AM
#10
Honda-Tech Member
Thread Starter
Happy to help.
I've got a few other diy floating around and the 'how to remove a b-series cylinder head' should be helpful if you have a b.
I've got a few other diy floating around and the 'how to remove a b-series cylinder head' should be helpful if you have a b.
08-29-2012, 03:24 PM
#11
The Grumpiest
iTrader: (4)
Join Date: May 2008
Location: Oak Ridge, TN, USA
Posts: 28,333
Likes: 0
Received 16 Likes
on
15 Posts
Here's a link to a brake DIY conscripted from D-series.org that was done back in '07 for instance.
http://www.marcanthonyross.com/2012/...r-disc-brakes/
http://www.marcanthonyross.com/2012/...r-disc-brakes/
Last edited by Former User; 09-13-2012 at 06:59 AM. Reason: post clean up
08-29-2012, 03:26 PM
#12
Honda-Tech Member
Thread Starter
+1 on the opinion
as for the pictures and links going dead... no guarantees.
all the images i post are hosted on my photobucket subscrip but recently photobucket has been going offline for hours at a time (even tho the links work) and sometimes the images show up as broken until i refresh the page 5 times.
i want to switch to something else, but with thousands of images hosted and linked to photobucket all over the internet, i don't know how i would.
i advise against photobucket. it's buggy, slow, unpredictable, and often goes down for no reason.
08-29-2012, 03:57 PM
#13
The Grumpiest
iTrader: (4)
Join Date: May 2008
Location: Oak Ridge, TN, USA
Posts: 28,333
Likes: 0
Received 16 Likes
on
15 Posts
The car fell off the jacks stands diagonally towards him because of the direction he was pulling at the breaker bar and the semi stuck lug nut that had been over-torqued. He literally pulled the car off the jack stands. He wasn't under the car. I never said he was. You added that detail. If you cannot picture it then I cannot help you.
Kudos for taking the time and pictures.
Kudos for taking the time and pictures.
08-29-2012, 04:03 PM
#14
Honda-Tech Member
Thread Starter
edit: mspaint proves to be impossible. no graphic representations of the car falling off the jack stands could be made. comprehension of said car falling off of said jackstands after applying 80ft/lb of force to an 8mm stud located near the lowest point of the car still lacking.
i will be meditating on this one.
i will be meditating on this one.

Thread
Thread Starter
Forum
Replies
Last Post
cmyates007
Honda Accord & Crosstour (2003 - 2012)
18
04-14-2012 10:19 PM
Donboss
Honda Accord (1990 - 2002)
14
11-10-2007 10:25 AM