When you click on links to various merchants on this site and make a purchase, this can result in this site earning a commission. Affiliate programs and affiliations include, but are not limited to, the eBay Partner Network.
Front Wheel Bearing Replacement with Harbor Freight Tool Set 66829
Hello all,
Well everything went very well yesterday, so I thought I would share. This is a write-up of how to replace your front wheel bearings with the Harbor freight Tool set "66829 Front Wheel Bearing Adapters" $89.99 (This tool part# is now obsolete, instead search for "Front Wheel Drive Bearing Remover and Installer Kit")
FYI: This tool kit has been recently updated! I opened up 2 kits at the store today, and found out they have changed the main forcing bolt. The older kit from 11/2010 had the 2 piece bolt where the hex-head has clearly been welded on. This is obvious because if you inspect the bolt where the hex-head meets the threads, you can clearly see the threads are machined all the way up to, and continue underneath, the bolt head. The updated kit (with 08/2011 on the box) has a 1 piece bolt where you can clearly see the chamfer at the base of the bolt head leading to the shaft. In addition, the threads are not cut all the way up to the bolt head (they stop just short). It looks as though US General may have listened to the complaints of broken bolts on the HF website.
The updated kit can also be easily identified because it has a black-oxide coating on it, instead of the old shiny black-painted finish. Of course the black-oxide coating comes with considerable surface rust and crunch white grit. It was this nasty-ness that prompted me to open up the next kit below and find the differences. Definitely use the ugly updated kit! The new style bolt performed flawlessly on my nearly 18 year old junkyard knuckles. No sign of stretch or failure in the bolt head.
This first picture shows everything I was using to make it work.
- Harbor Freight kit
- 1/2" ratchet
- 36mm socket
- jack-handle (cheater bar)
- extreme-pressure moly grease (or any grease on hand)
In addition to these tools, I also used:
- pair of vice grips
- towel to protect the bolt head from said grips
In each segment, you can put the screw & bolt on either side to make it work. It's all up to you. Probably makes a big difference weather or not your knuckles are still on the car, and what size sockets you have available to you.
Hub Removal: My hub had already been hammered out with a socket and 5lb dumbell before this point. I used the method shown bellow of placing the knuckle on some wood blocks and pounding it downward from the back side (pic stolen from N3va3vaSatisfi3d's thread). Once it starts moving, it comes out pretty easy. One of the bearing races will come out with the hub, but we'll deal with that later:
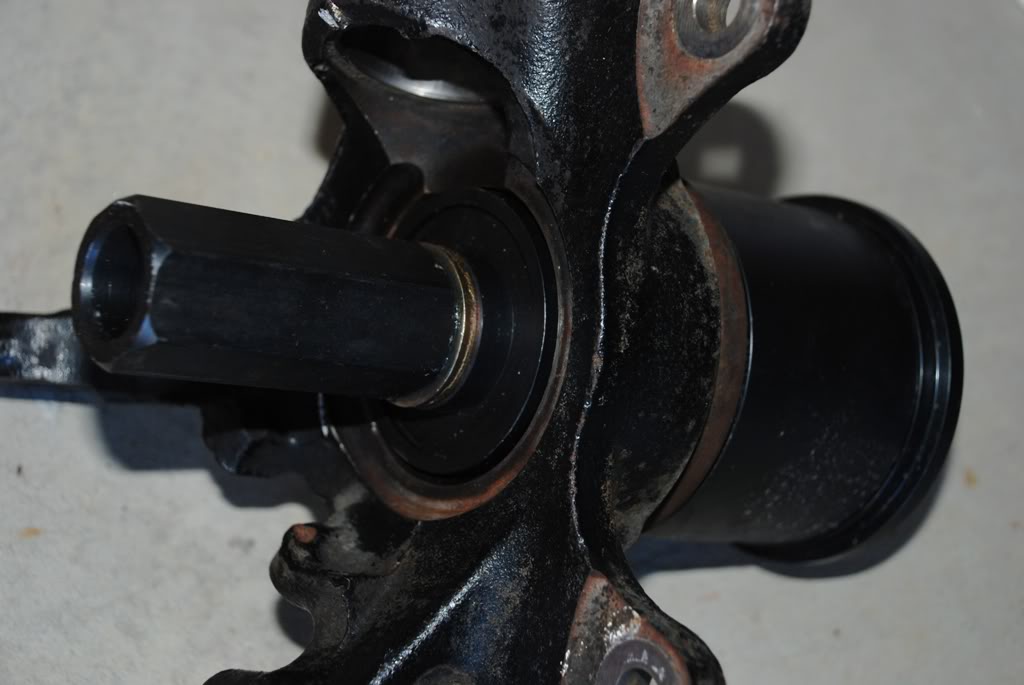
Bearing Removal: Be sure to remove the large Cir-clip holding the bearing in before you start (this is a bitch). Mine was already out, so I don't have a picture. I've setup the tool with the largest size disk on the back side that wouldn't hang up on the knuckle while pressing out the bearing. I took these pictures after the bearing started moving out, so your disk won't sit as deep when you first mount it. I didn't have a socket big enough to fit the head of the bolt, but my 32mm hub socket fit perfectly onto the kits provided nut (yay!).
Surprisingly, at this stage the bolt never even tried to turn on it's own as I pressed out the bearing. Therefore I didn't have to put another wrench on it to hold it steady.
Grease up your screw and nut for this step.
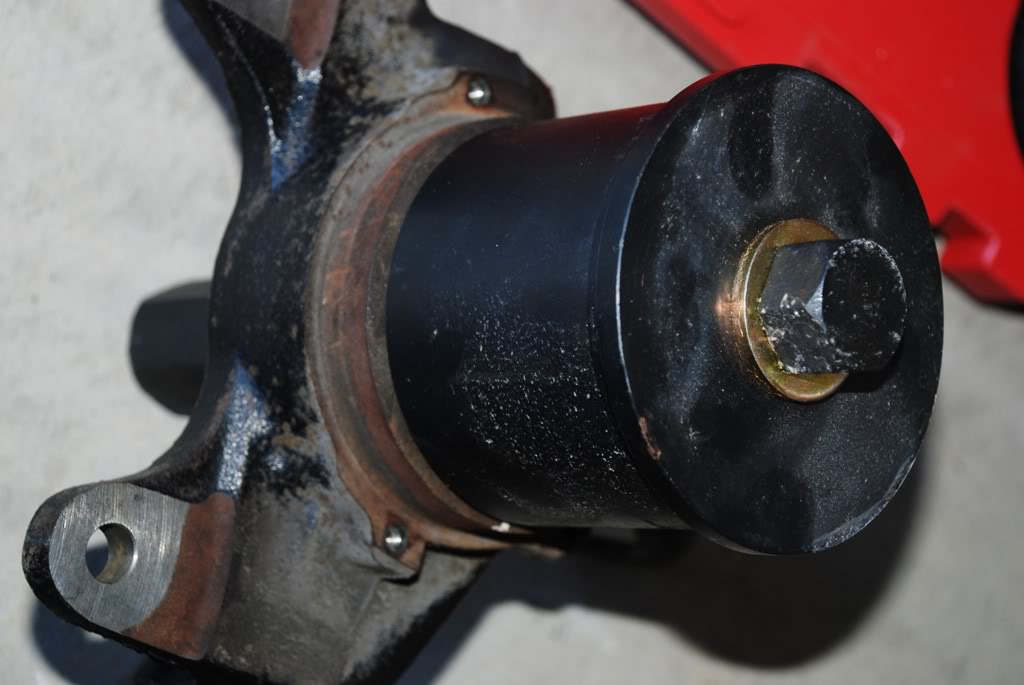
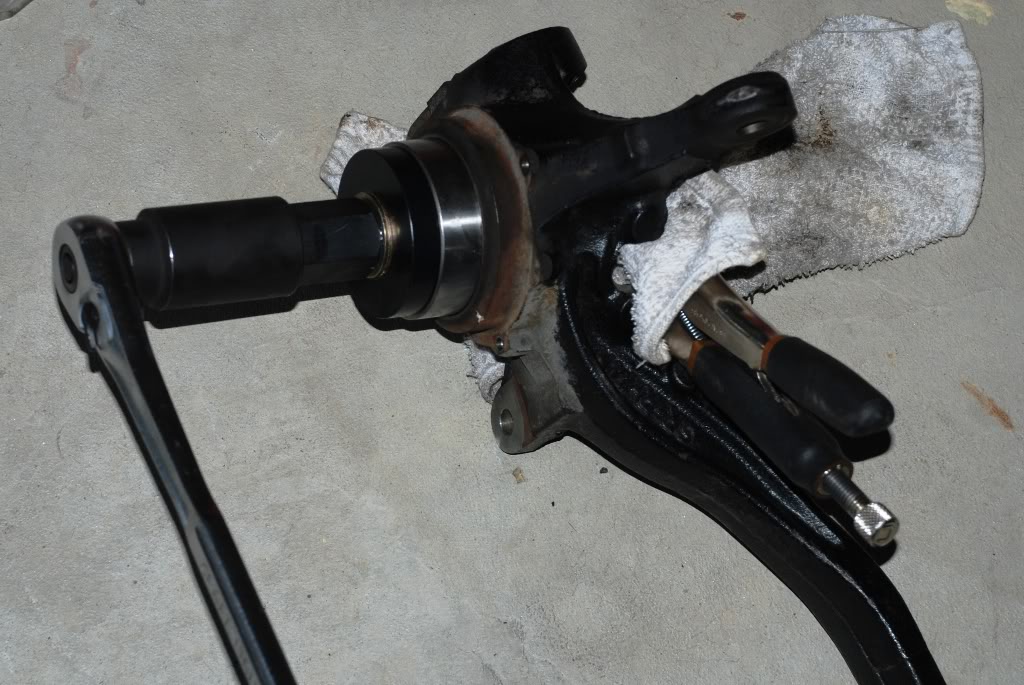
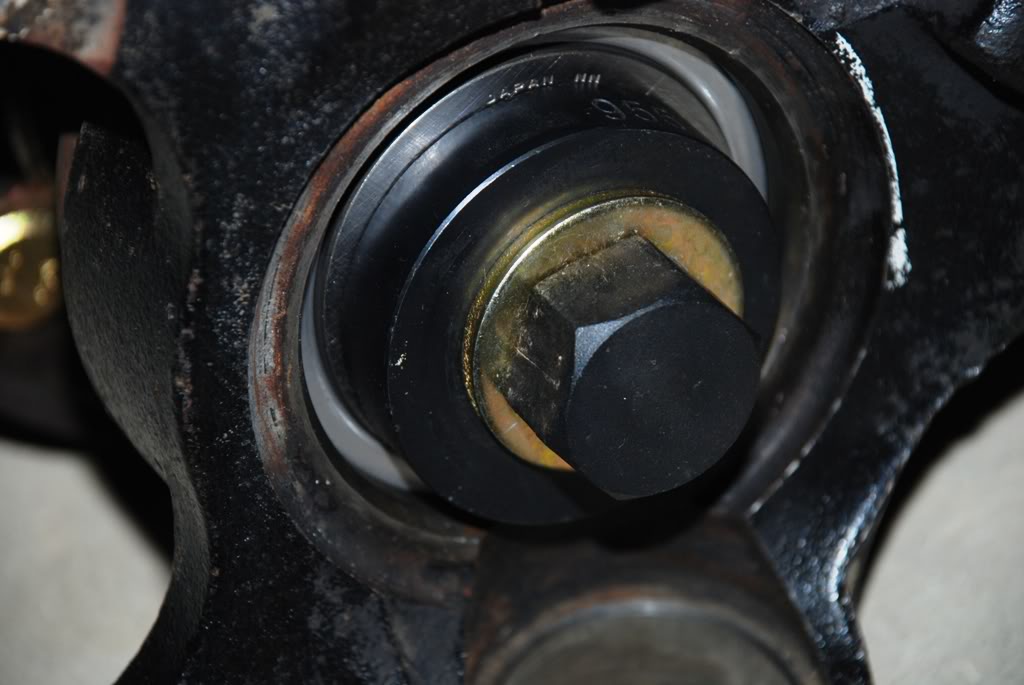
Bearing Install: Now these pictures show how I set it up to press the new bearing in. You definitely want the discs facing as I've shown so you are ONLY pressing on the outer race of the bearing. The inner race of the bearing DEFINITELY DOES stick out further than the outer race, and you DO NOT WANT TO PRESS THE INNER RACE! If you do, you could flat-spot the ***** inside.
This time the bolt did want to spin as I turned the nut. Since I don't have a socket big enough, I just put the vice grips on the head of the bolt (which I covered with a rag), and started wrenching. Worked perfectly. Pace yourself; it takes forever.
Grease up the Inside of the knuckle (very thin layer), the outside of the bearing (very thin layer), the screw, the nut and the washer that the nut is pressing against.
Hub & Inner Race Separation: Sorry I didn't take any pics of this, I had already removed the inner race before I got this tool. To make it happen, cut a deep V-shaped groove across the race with your dremel kinda at a 45* angle. Once your almost through, hit it with a chisel and hammer and it will crack all the way across (I actually managed this with a flat-blade screwdriver). Then it will slide right off with a little help from a screwdriver and the head of a hammer. This video is where I learned the technique. Skip to 4:28 to see:
You can also use a bearing separator like they show in the other wheel-bearing threads in the FAQ, but I wanted to use what I already had on hand.
Hub install: Here you can see I've setup the tool to press the hub (I didn't actually do this yet as I'm going to order a new dust shield). The key is to make sure your only pulling against the inner race of the bearing for this one. Otherwise you know what will happen. I also found it very helpful to orient the discs as I've shown to help center them on the hub and bearing. Don't forget to install your cir-clip and dust shield BEFORE this step. Otherwise you'll be buying another bearing.
I'm starting to wonder if a 32mm hub-nut will thread onto this bolt...
Grease inside the bearing (thin layer), outside the hub (thin layer), your screw, nut and washer. Now go to town!
I hope this helps some folks out. You can always sell this kit when your done. And if it breaks on you, you can simply return it for a refund (within 90 days) and take your hubs to a machine shop. Not too much to loose on this one.
Re: Front Wheel Bearing Replacement with Harbor Freight Tool Set 66829
Nice! I usually have success with Harbor Freight's hand tools. Their electric tools can be a little hit-or-miss, but for how cheap everything is there, it's a wash.
Re: Front Wheel Bearing Replacement with Harbor Freight Tool Set 66829
Thanks for the kind words guys. Sorry I didn't respond sooner. Don't know why this didn't stay in my watched topics...
Originally Posted by dave brown
Do you know which size adapter you used to remove your bearings? I don't want to buy an entire set just to change the bearings on my Honda Odyssey.
thanks!
Dave
Sorry I don't know. But each vehicle has a different size bearing & knuckle. I imagine the odyssey would be much bigger than a Civic or Integra. You wouldn't know till you get in there. For $80 it's kinda worth it just to have the variety of adapter sizes in your tool arsenal.
Originally Posted by 93civicsedan
Nice write up, just curious can something similar be rented at Autozone?
I could not find anything similar at AZ. I tried looking everywhere for a cheaper alternative to this tool. The HF set is about half the price of anything similar from anywhere else. The only thing that I've seen that might make this set any nicer would be a thrust bearing instead of the steel washers they provide. But the washers work fine.
Re: Front Wheel Bearing Replacement with Harbor Freight Tool Set 66829
Great write up. You should post a link in whatever general repair forum is appropriate.
FYIs:
- Alltrade 648741 is a "professional" version of this tool that will probably last longer that twice and is only about $25 more through Amazon.
- The adaptors can be used with a shop press if you have one and the knuckle is off. Makes a very quick job.
-Rusted in cur clip is pretty common and a PITA. To make life easy soak it with penetrating oil. Take a small flat nose punch and hit it at an angle so that you spin the clip in its groove, this spinning breaks the rust loose. If it will not spin it will never come out. Bad ones will take multiple soakings and a little heat from a propane torch.
Re: Front Wheel Bearing Replacement with Harbor Freight Tool Set 66829
Originally Posted by ScottBell
FYIs:
- Alltrade 648741 is a "professional" version of this tool that will probably last longer that twice and is only about $25 more through Amazon.
to be fair, its probably closer to $50
the altrade is currently 135 at amazon, and i just walked outa the store with the harbor freight unit for $85 using a 20% off coupon (easily found by googling "harbor freight 20%").
Re: Front Wheel Bearing Replacement with Harbor Freight Tool Set 66829
Any chance you remember which plates you used and what the diameters were? I'm looking to locate a similar tool that can be rented from O'Reilly's to do mine. This looks like it wouldn't be very hard with the right tools. Just want to make sure I find them.
Re: Front Wheel Bearing Replacement with Harbor Freight Tool Set 66829
Originally Posted by Tims98SS
Any chance you remember which plates you used and what the diameters were? I'm looking to locate a similar tool that can be rented from O'Reilly's to do mine. This looks like it wouldn't be very hard with the right tools. Just want to make sure I find them.
Thanks for the great write up.
You will not find it at OAP or Autozone for rent. Currently work for OAP and gave AZ 6 1/2 years. Neither have it for rent. You can buy one from OAP from the company OTC but you will pay a small fortune for it.
Re: Front Wheel Bearing Replacement with Harbor Freight Tool Set 66829
No sorry I don't remember. They are not really labled anything secific. Besides, the ones you use will depend on what knuckles you have. The bearing size is different for different models/trims.
No sorry I don't remember. They are not really labled anything secific. Besides, the ones you use will depend on what knuckles you have. The bearing size is different for different models/trims.
How long did each corner take everyone to do both the ball joint and wheel bearing?
I'd say I'm decent with mechanic work and have done suspension in the past (bagged an S10 front and rear, changed struts on an Aveo and a friend's Civic).
Planning on getting the bearing race and seal driver tool from OAP, but it looks like it's the kind you'd tap out and in rather that use the screw leverage and ratchet like you used.
Re: Front Wheel Bearing Replacement with Harbor Freight Tool Set 66829
Originally Posted by Tims98SS
How long did each corner take everyone to do both the ball joint and wheel bearing?
I'd say I'm decent with mechanic work and have done suspension in the past (bagged an S10 front and rear, changed struts on an Aveo and a friend's Civic).
Planning on getting the bearing race and seal driver tool from OAP, but it looks like it's the kind you'd tap out and in rather that use the screw leverage and ratchet like you used.
It took me about 4 hrs to do both side with this tool. Took me a while to get the old race off, I was being very careful not to knick the hub. I didn't do the ball joints or any other work, the total time includes tear down and reassembly of all the suspension.
Ps: I would use this tool, tapping it in will prove difficult to hold everything in place when pressing the hub into the new bearing.
Re: Front Wheel Bearing Replacement with Harbor Freight Tool Set 66829
Originally Posted by Tims98SS
How long did each corner take everyone to do both the ball joint and wheel bearing?
I'd say I'm decent with mechanic work and have done suspension in the past (bagged an S10 front and rear, changed struts on an Aveo and a friend's Civic).
Planning on getting the bearing race and seal driver tool from OAP, but it looks like it's the kind you'd tap out and in rather that use the screw leverage and ratchet like you used.
I had the knuckles from the junk yard and only needed to replace one bearing. I think this is about how long I spent on the project of replacing the bearing alone:
- 10 minutes pounding the hub out of the old bearing with a big hammer
- 5 minutes pressing the old bearing out with this tool set
- 5 minutes pressing the new bearing in with this tool set
- 20-30 minutes to crack the bearing race off my old hub with a basic corded Dremel
- 5 minutes pressing the hub back into the old bearing
As Meoshe said, you probably have no chance of getting that bearing out & in with a seal driver. Screw press (this tool) or hydraulic press are the only way to go.
Is there an adapter that will fit and work with integra knuckles?
Not sure what you mean. The knuckles I'm showing in the pics ARE Integra knuckles (Civic 93-95 Civic EX coupe uses Integra brakes & knuckles). As you can see by the picture of the kit at the top, it includes a crap ton of cups and discs to press pretty much ANY size bearing up to ~4".

 09-29-2011, 02:12 PM