
D16Z6 Engine Rebuild (pictures)
 04-27-2012, 09:41 PM
#1
No-Traction = Fun
Thread Starter
iTrader: (6)
Join Date: Feb 2010
Location: Follow Me on "InstaGram"
Posts: 2,679
Likes: 0
Received 3 Likes
on
3 Posts
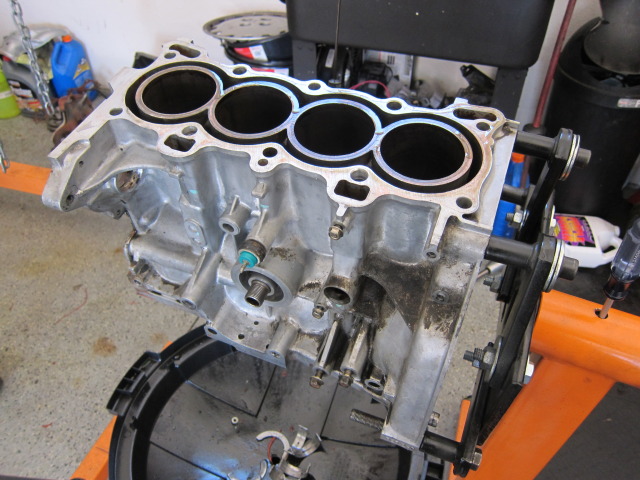
Hope this helps someone out. I'm rebuilding this engine for my co-worker, and decided to do a general step by step. So here it goes......
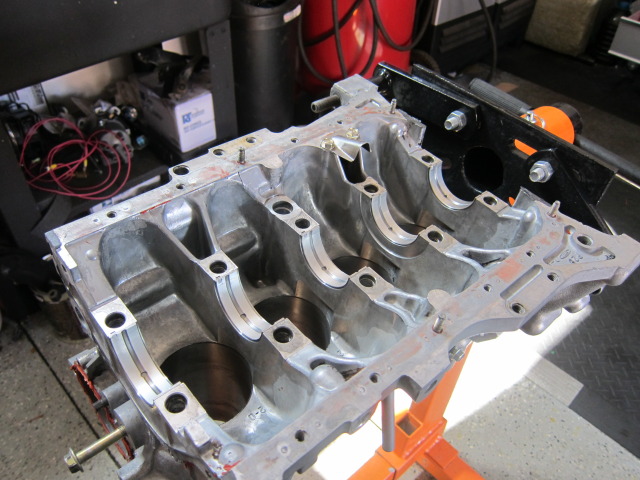
Here is the block tore down and I decided to hone it a little to break the shine in the cylinder walls.
Before
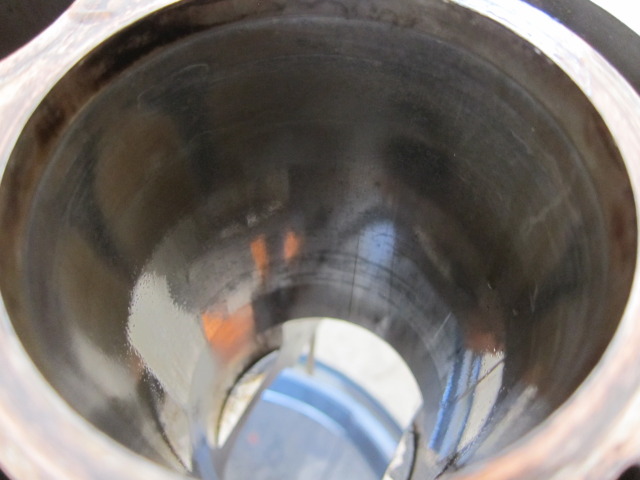
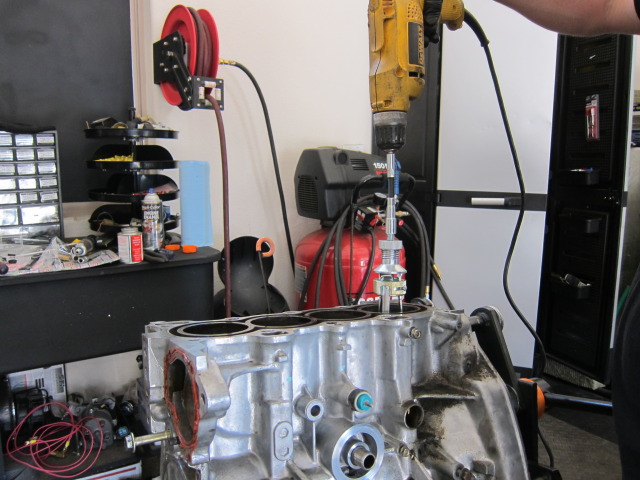
I'm just using a basic honing tool I picked up at harbor freight. I'm using mineral oil while doing the honing. Remember your not trying to bore out the block, just break the glaze and put a nice cross hatch.
After
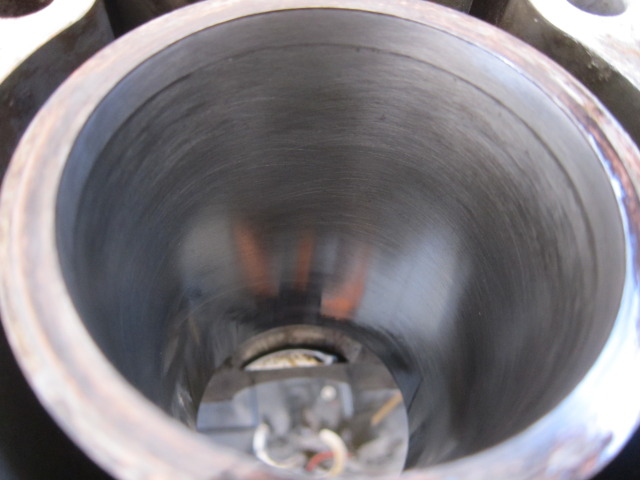
When you finish with all the cylinders, clean the block inside and out really good with warm soapy water, rinse and blow or air dry. But make sure you wipe down the cylinder walls with oil or WD40 to keep them from rusting.
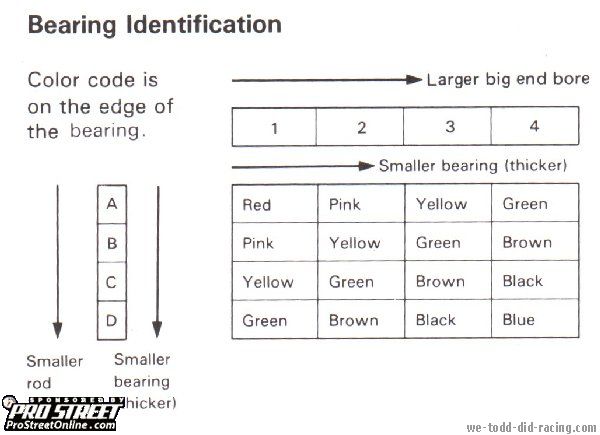
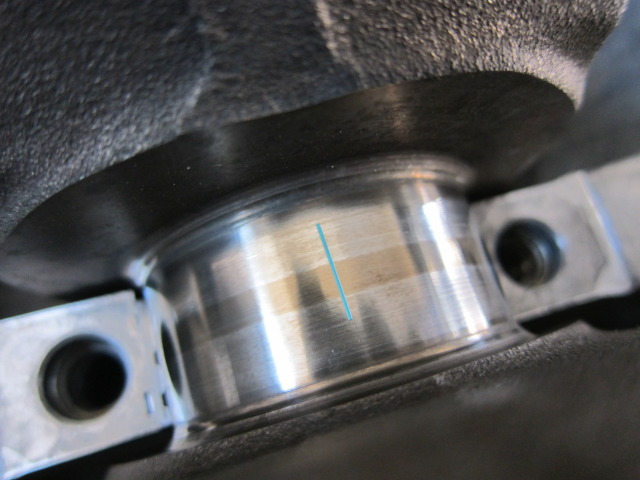
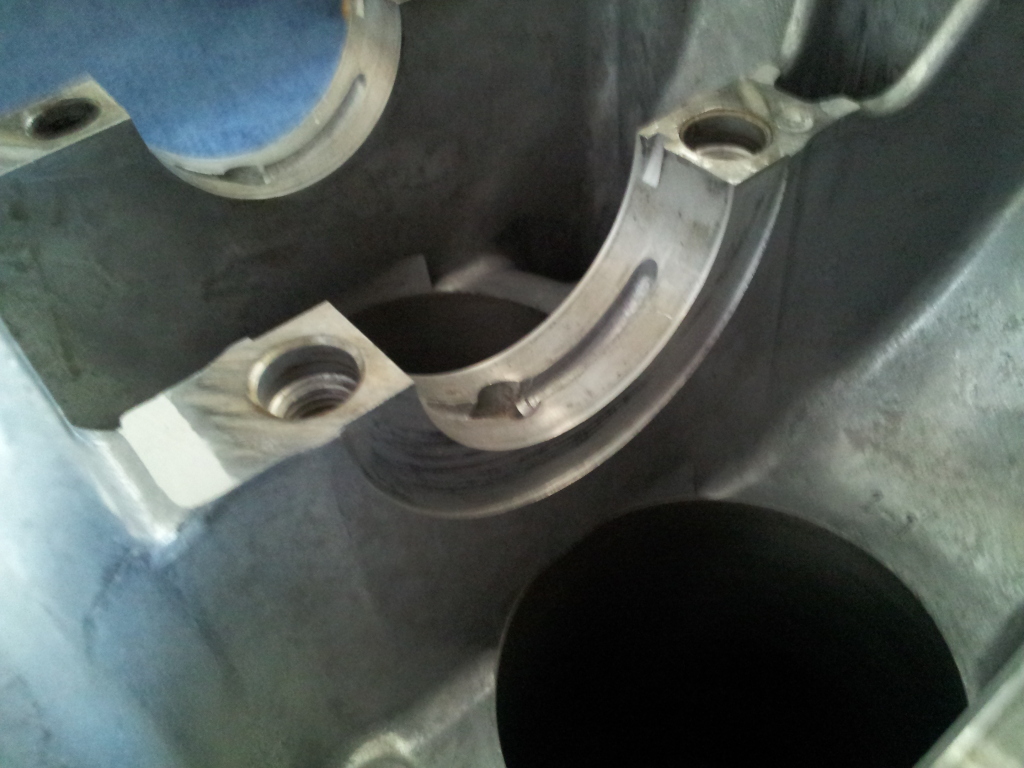
Now once dry you can set in your new main bearings as shown. NOTE: On this particular block I chose to run with a standard set of KING engine bearings as the crank and rods have never been damaged. You have the option to rung OEM bearings in your engine, there are codes on the inside edge of the block in the flywheel area and codes on the crank and rods. Here is a honda chart for this.

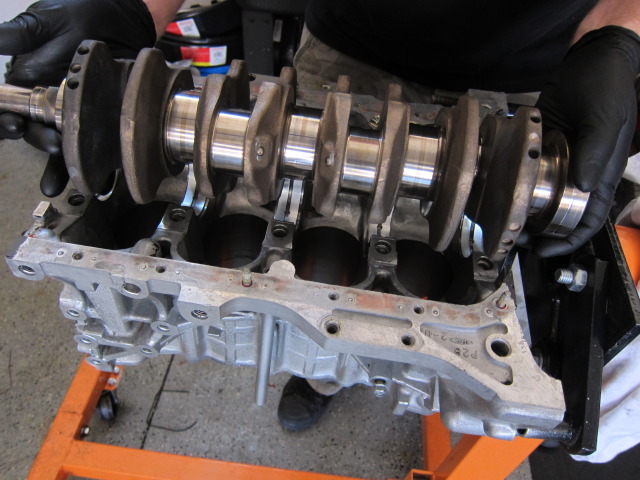
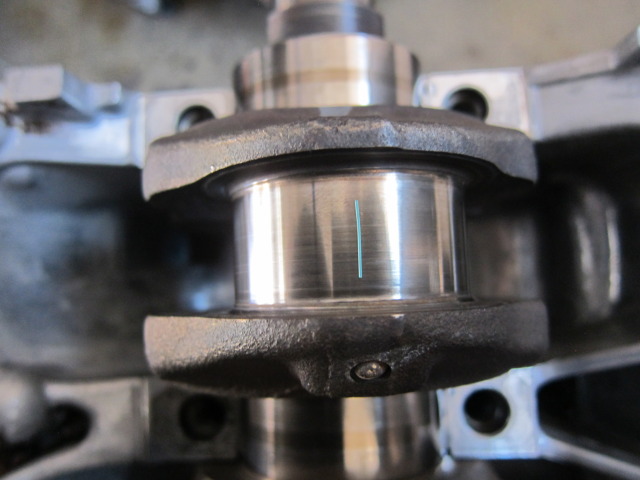
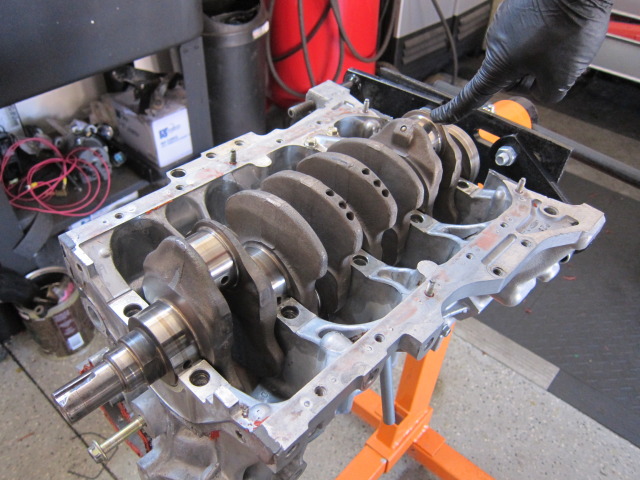
Now we can set the crank in place so we can check the main bearing clearances. make sure the bearings are dry and DO NOT rotate the crank while you do this.
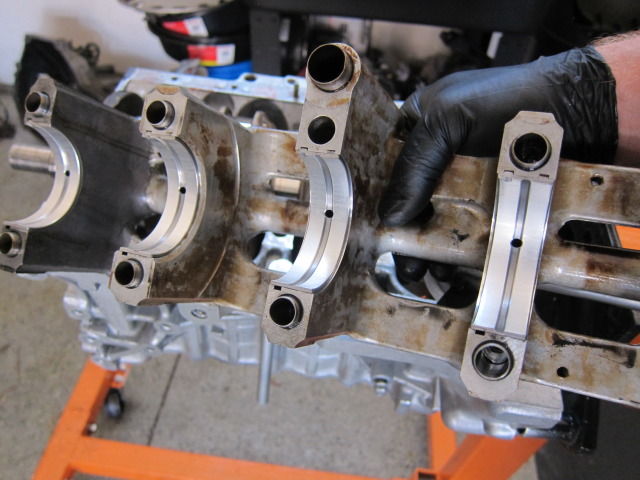
Cut and set all 5 plasti-gauge strips on each main journal.
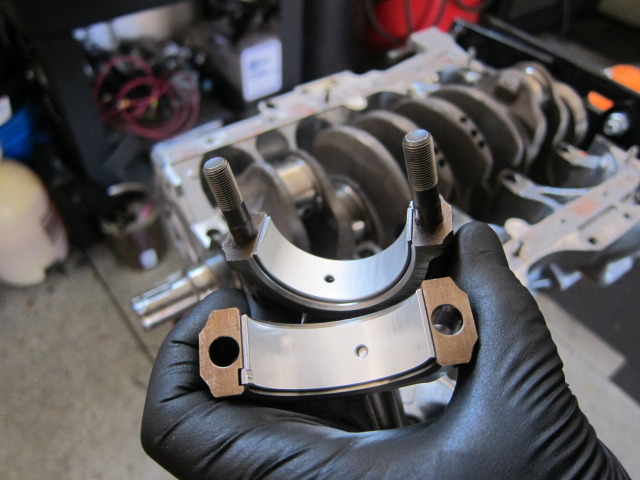
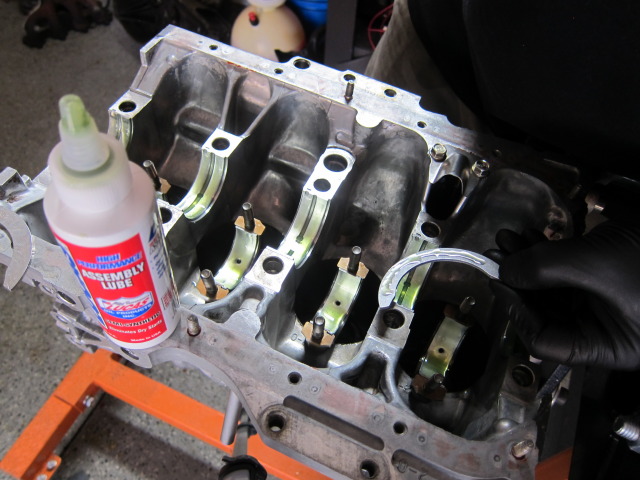
Install the upper main bearings and install the housing.
Install the main bolts, and dip the threads in clean oil.
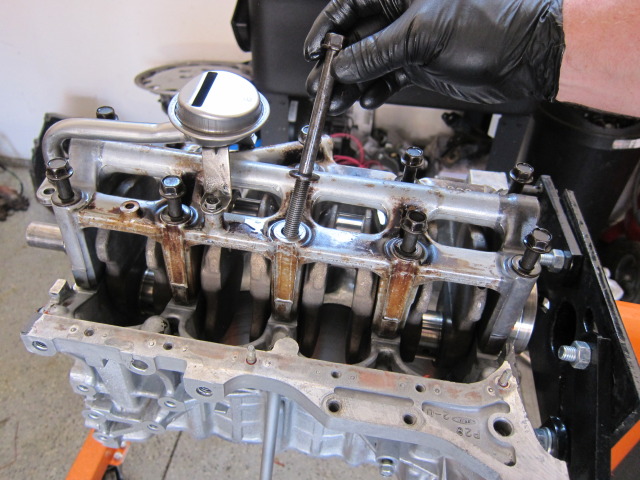
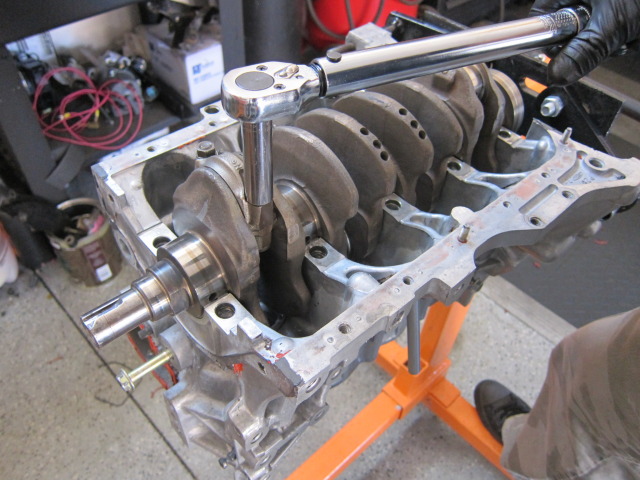
Tightening sequence
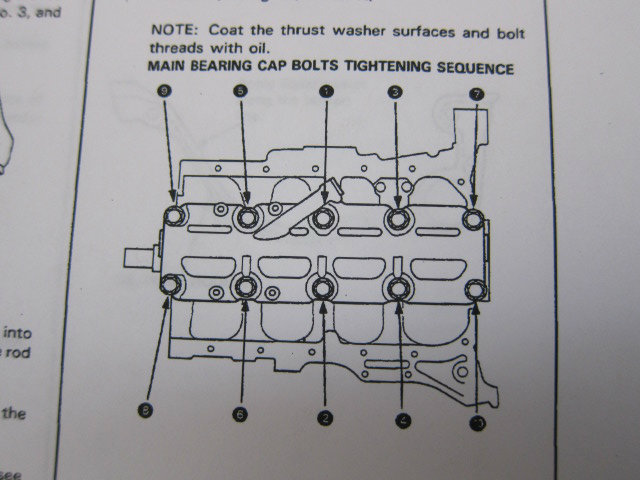
step#1 32ftlbs Step#2 53ftlbs
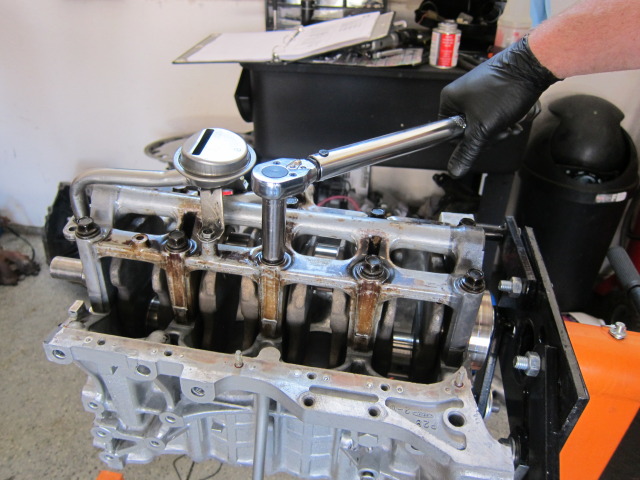
Remove cradle and check the clearances. All 5 of mine came in perfect at .0014"
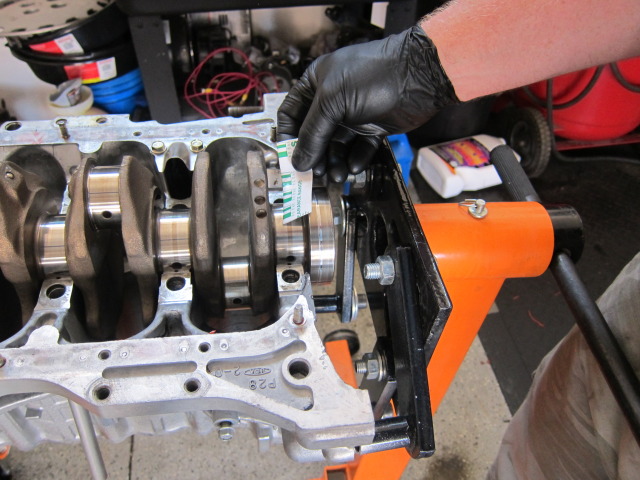
Now we will check each rod bearing clearance. cut and lay down your plasti-gauge on the rod journal
Here is the block tore down and I decided to hone it a little to break the shine in the cylinder walls.
Before
I'm just using a basic honing tool I picked up at harbor freight. I'm using mineral oil while doing the honing. Remember your not trying to bore out the block, just break the glaze and put a nice cross hatch.
After
When you finish with all the cylinders, clean the block inside and out really good with warm soapy water, rinse and blow or air dry. But make sure you wipe down the cylinder walls with oil or WD40 to keep them from rusting.
Now once dry you can set in your new main bearings as shown. NOTE: On this particular block I chose to run with a standard set of KING engine bearings as the crank and rods have never been damaged. You have the option to rung OEM bearings in your engine, there are codes on the inside edge of the block in the flywheel area and codes on the crank and rods. Here is a honda chart for this.
Now we can set the crank in place so we can check the main bearing clearances. make sure the bearings are dry and DO NOT rotate the crank while you do this.
Cut and set all 5 plasti-gauge strips on each main journal.
Install the upper main bearings and install the housing.
Install the main bolts, and dip the threads in clean oil.
Tightening sequence
step#1 32ftlbs Step#2 53ftlbs
Remove cradle and check the clearances. All 5 of mine came in perfect at .0014"
Now we will check each rod bearing clearance. cut and lay down your plasti-gauge on the rod journal
Last edited by CaliforniaDad; 04-28-2012 at 06:19 AM.

The following users liked this post:
04-27-2012, 10:05 PM
#2
No-Traction = Fun
Thread Starter
iTrader: (6)
Join Date: Feb 2010
Location: Follow Me on "InstaGram"
Posts: 2,679
Likes: 0
Received 3 Likes
on
3 Posts
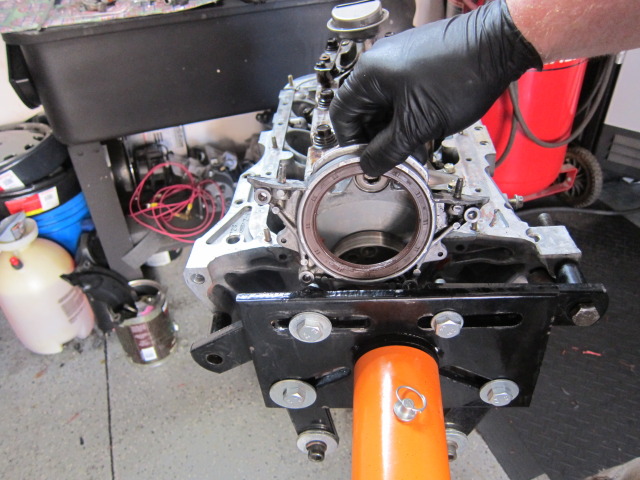
Install the new rod bearings.
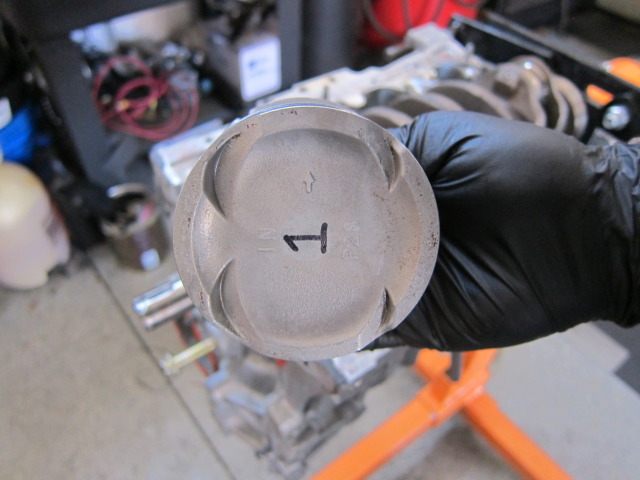
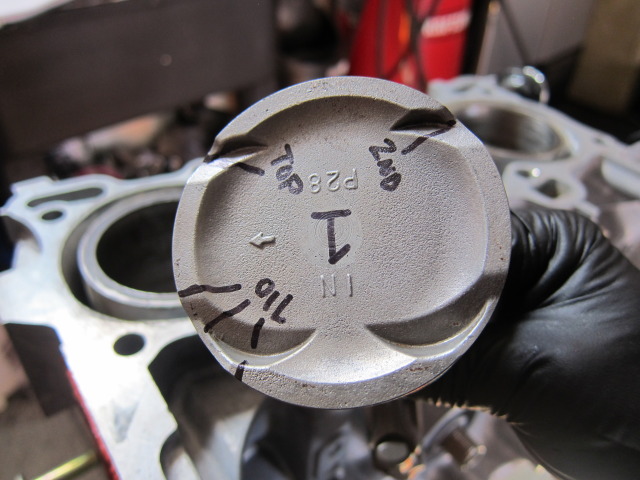
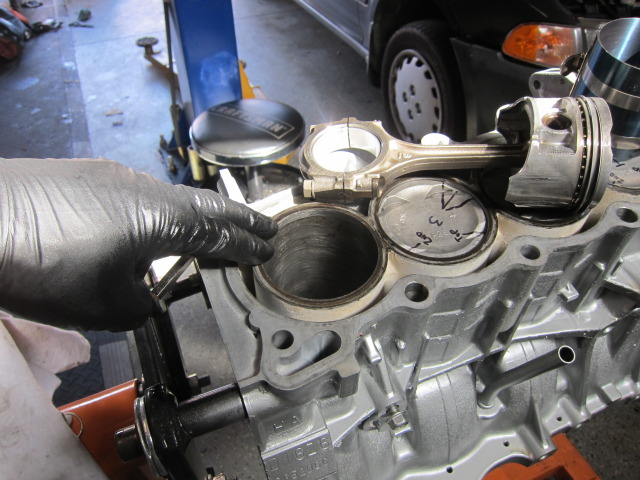
when you slide the piston on to the bore make sure the arrow is facing the timing belt side of the motor. no ring will be installed on the piston at this time. be careful when your installing not to scratch anything.
Tighten the rod bolts to 23ftlbs.
Remove the cap and check the clearance. All 4 of my rods cam out right at .0015"

Once all 4 are done remove the crank and rotate the engine over so we can check ring end gap now.
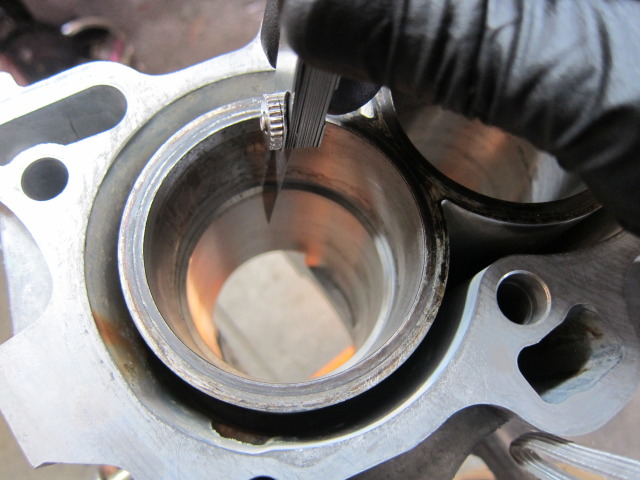
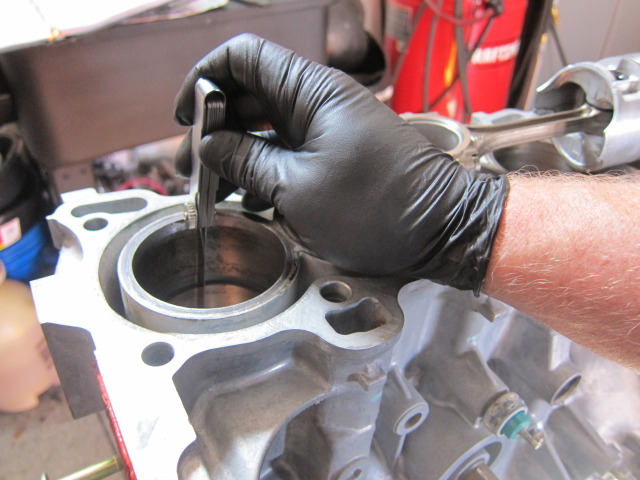
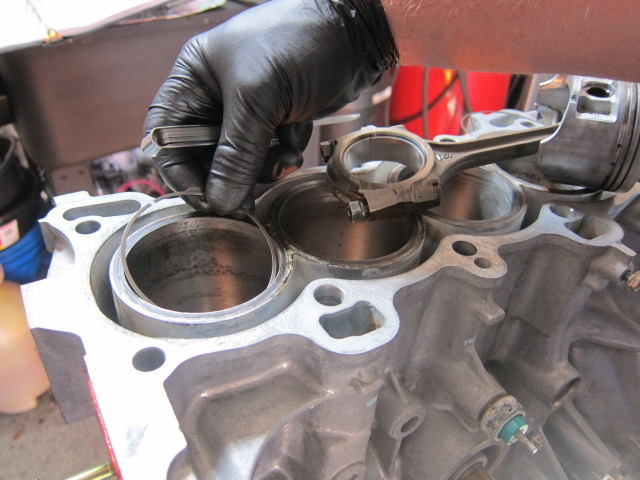
Install your top ring and make sure any markings on the ring are facing up.
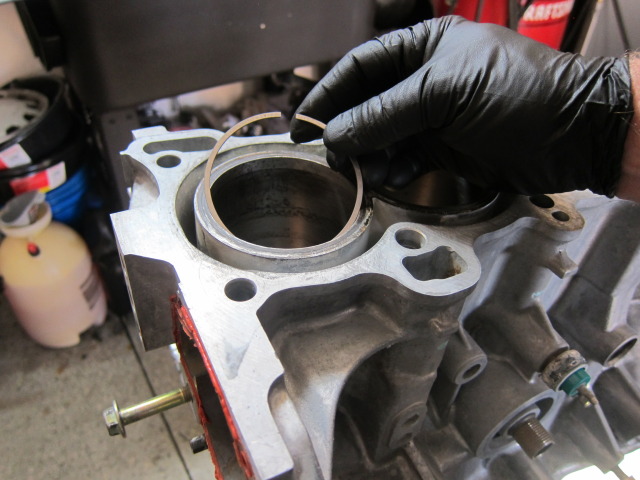
Use the piston to push the ring down square in the block as I did here.
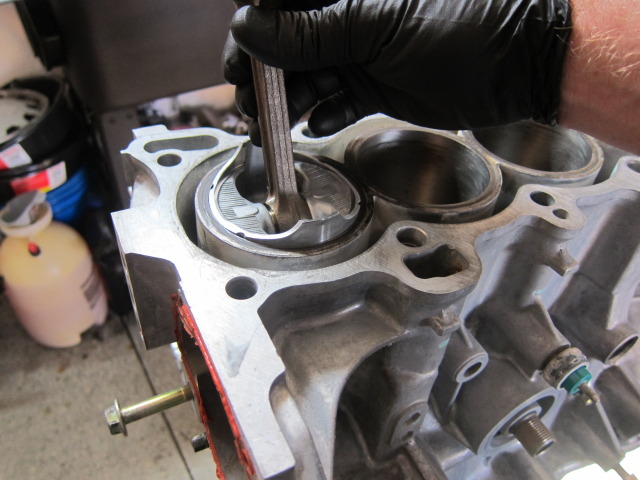
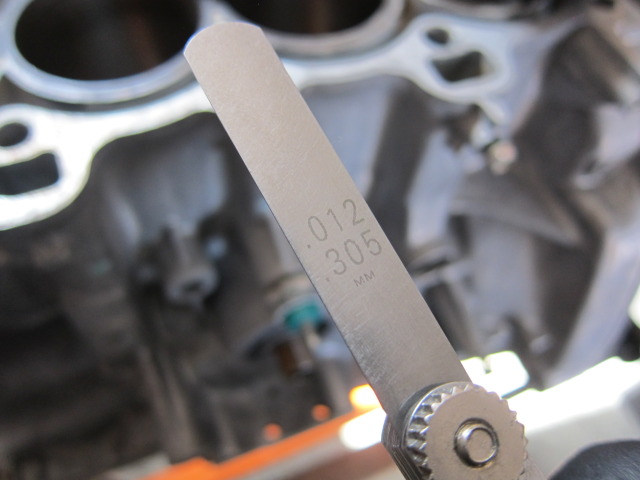
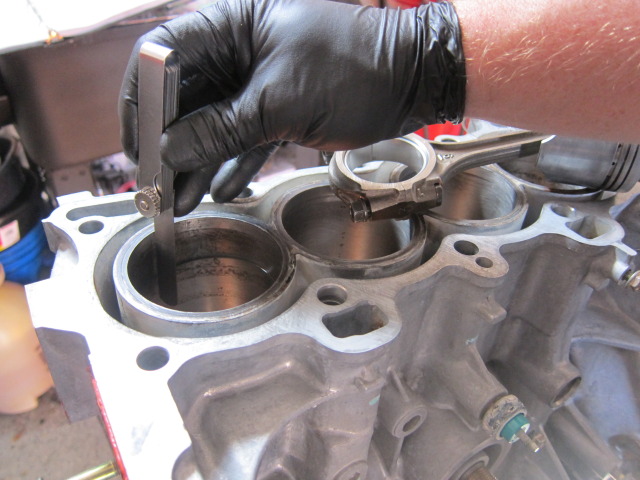
Use a feeler gauge to check the ring end gap. I was shooting for .012"
Now check the 2nd ring, here is a closeup of the marking on the ring that needs to be facing up.
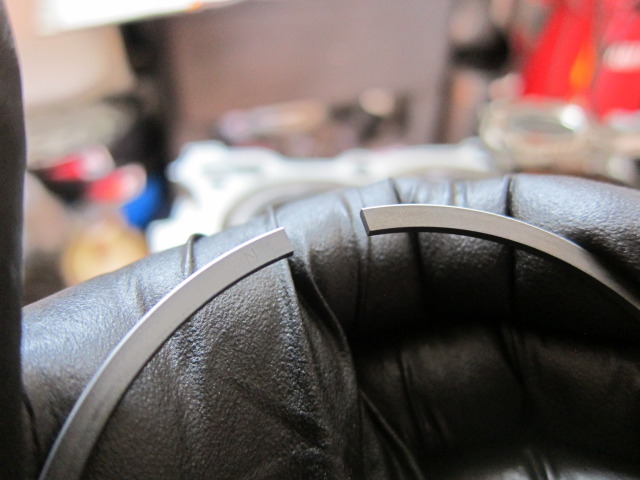
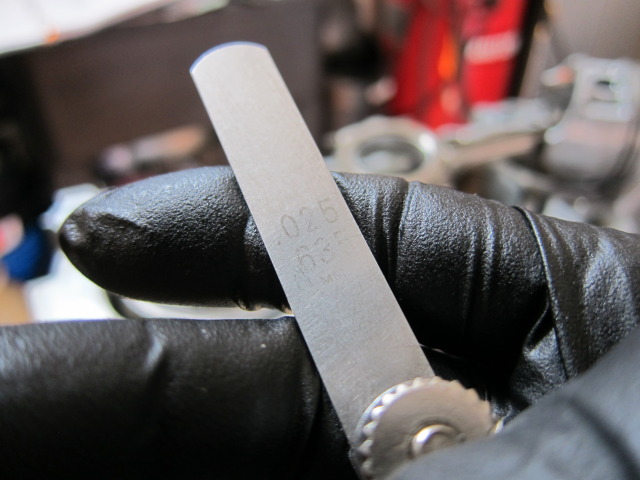
Check the gap with the feeler gauge as well. I was going for .018"

Now check the oil control rings. mine came in at .025"
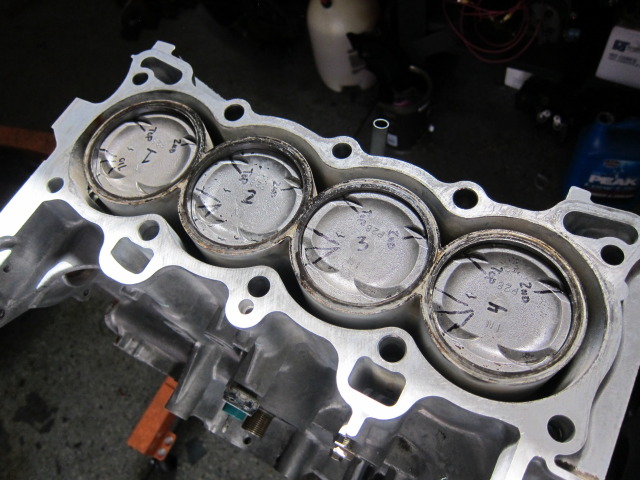
Now that we checked all the rings, lets install them on each piston as shown here.
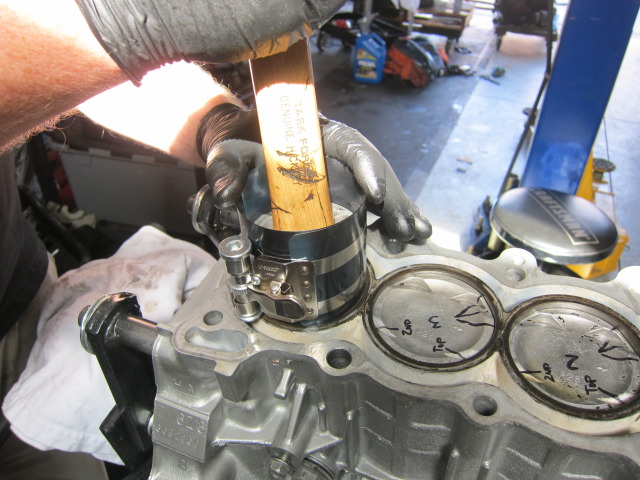
Make sure and coat each piston with fresh oil and do the same for each cylinder bore. I used a basic ring compressor here.
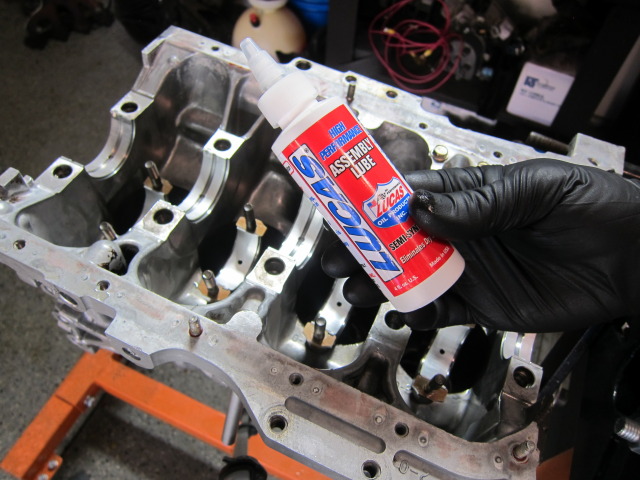
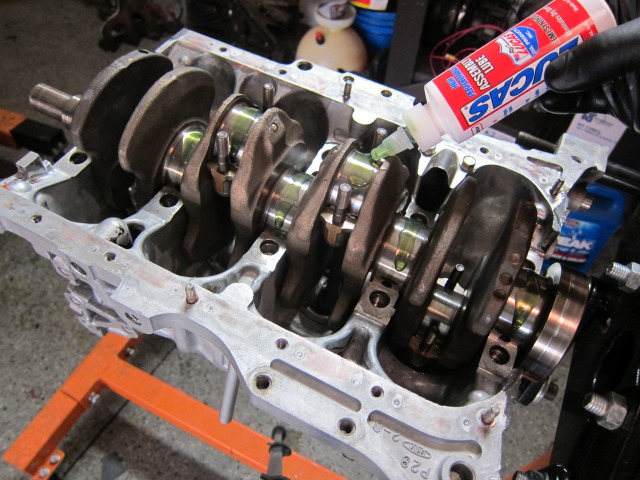
Now rotate the block over and lets lube up all the bearing surfaces so we can set in the crankshaft.

Install your thrust bearings with the notches facing out.
Install the crankshaft
Slide each rod in place and tighten to 23ftlbs
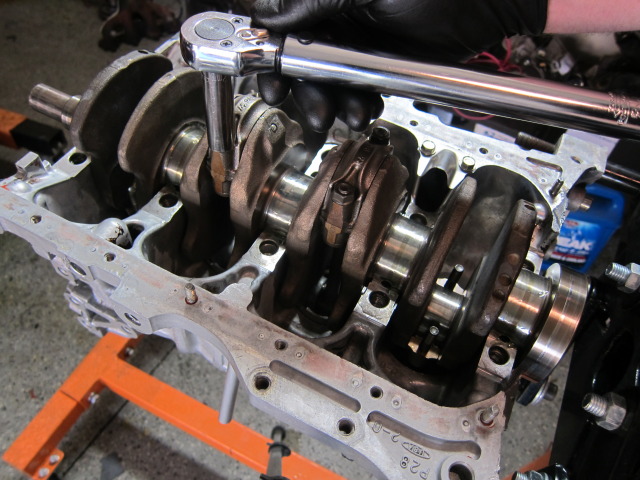
Once all rods are tightened down, install the crank cradle
Tighten to spec, step#1 18ftlbs step#2 38ftlbs
Apply a little sealant to your new oil pump as shown. Install the oil pump and the oil pump pickup. make sure you use a fresh gasket on the pickup. Just hand tighten snug but do not over do it.

when you slide the piston on to the bore make sure the arrow is facing the timing belt side of the motor. no ring will be installed on the piston at this time. be careful when your installing not to scratch anything.
Tighten the rod bolts to 23ftlbs.
Remove the cap and check the clearance. All 4 of my rods cam out right at .0015"
Once all 4 are done remove the crank and rotate the engine over so we can check ring end gap now.
Install your top ring and make sure any markings on the ring are facing up.
Use the piston to push the ring down square in the block as I did here.
Use a feeler gauge to check the ring end gap. I was shooting for .012"
Now check the 2nd ring, here is a closeup of the marking on the ring that needs to be facing up.
Check the gap with the feeler gauge as well. I was going for .018"
Now check the oil control rings. mine came in at .025"
Now that we checked all the rings, lets install them on each piston as shown here.
Make sure and coat each piston with fresh oil and do the same for each cylinder bore. I used a basic ring compressor here.
Now rotate the block over and lets lube up all the bearing surfaces so we can set in the crankshaft.
Install your thrust bearings with the notches facing out.
Install the crankshaft
Slide each rod in place and tighten to 23ftlbs
Once all rods are tightened down, install the crank cradle
Tighten to spec, step#1 18ftlbs step#2 38ftlbs
Apply a little sealant to your new oil pump as shown. Install the oil pump and the oil pump pickup. make sure you use a fresh gasket on the pickup. Just hand tighten snug but do not over do it.
Last edited by CaliforniaDad; 04-28-2012 at 06:28 AM.
04-27-2012, 10:18 PM
#5
No-Traction = Fun
Thread Starter
iTrader: (6)
Join Date: Feb 2010
Location: Follow Me on "InstaGram"
Posts: 2,679
Likes: 0
Received 3 Likes
on
3 Posts
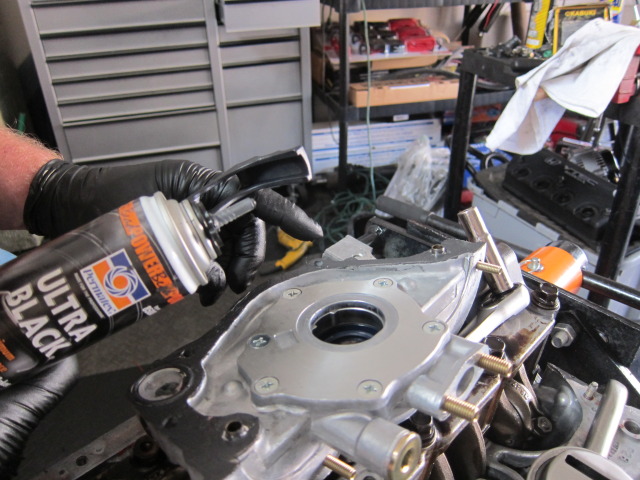
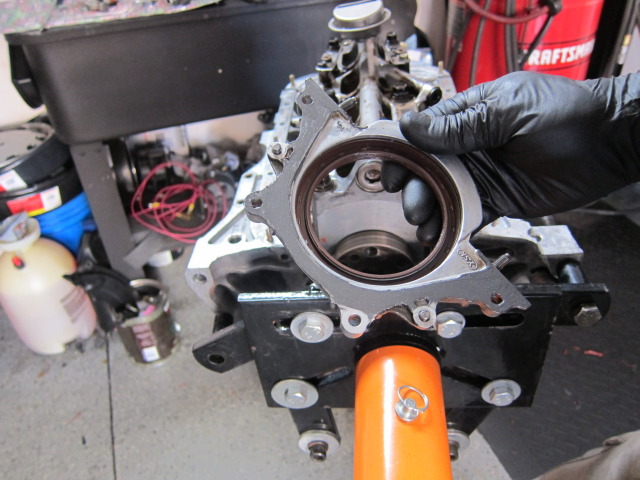
apply a little sealant to the rear main seal housing as shown here. And install the cover. Snug up all 4 10mm bolts
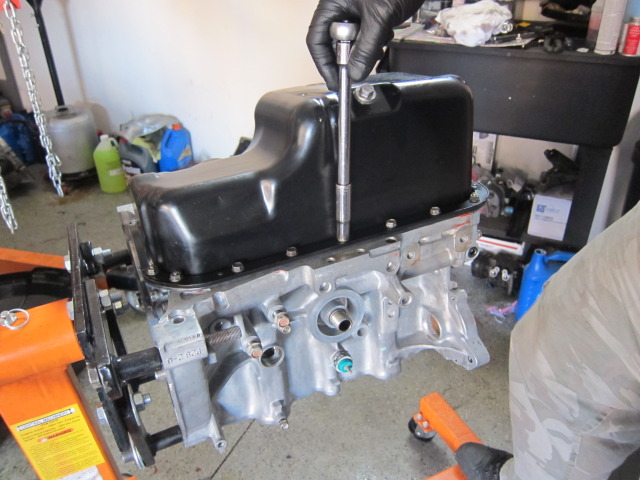
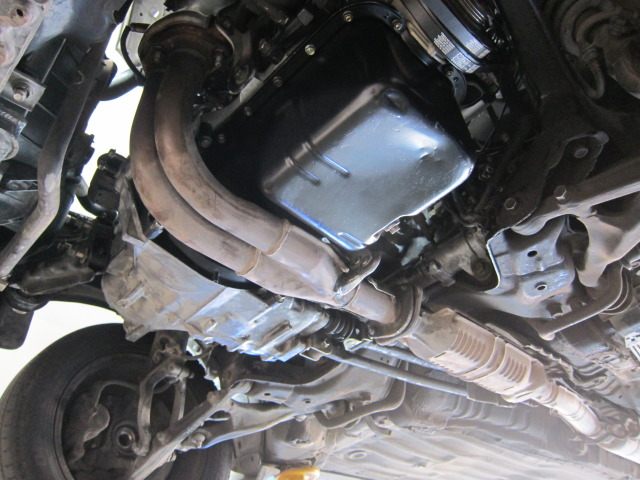
Now flip the engine over and install your clean oil pan with a fresh gasket. I just hand tighten the bolts here. maybe 9ftlbs
Install oil filter.
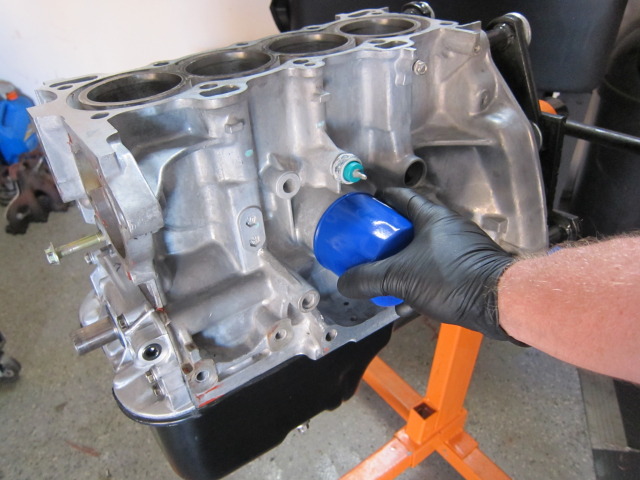
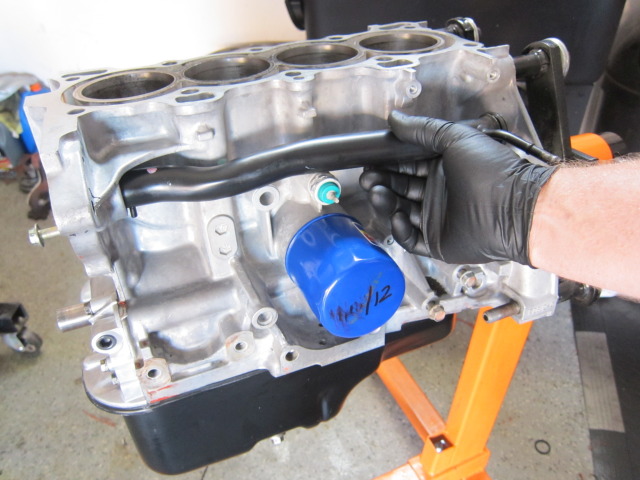
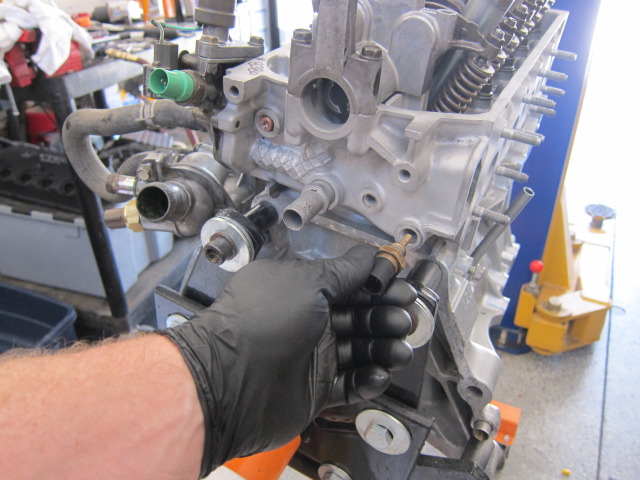
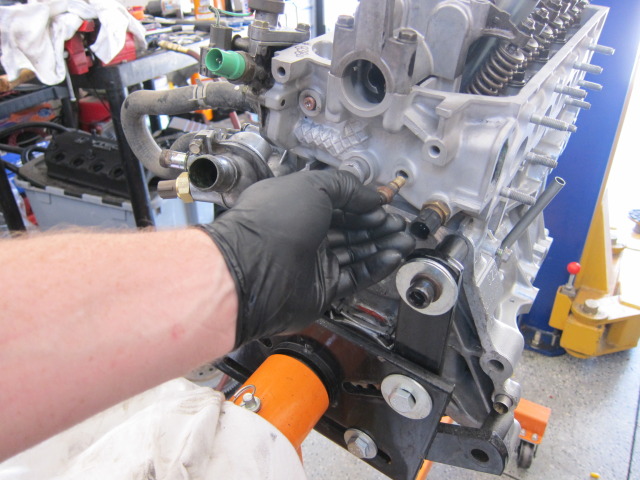
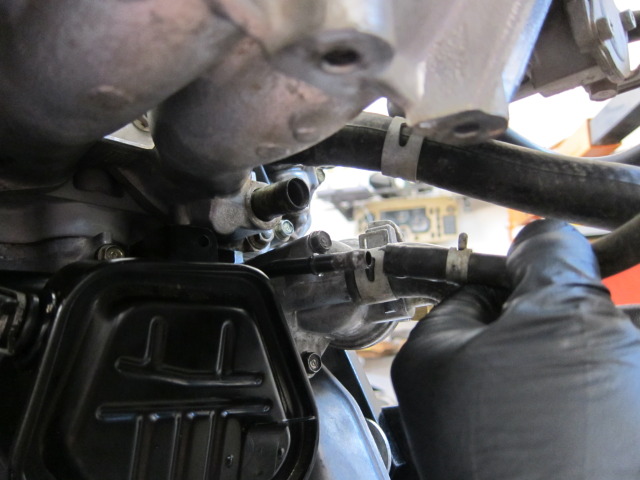
Install your water pump tube, make sure you use new rubber seals. you dont want these to leak after its installed.
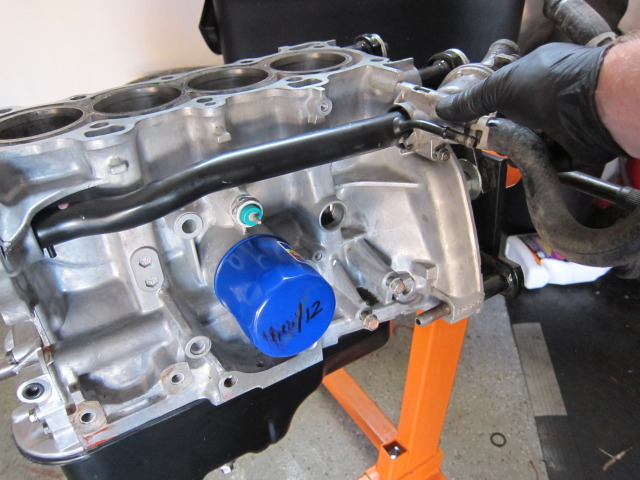
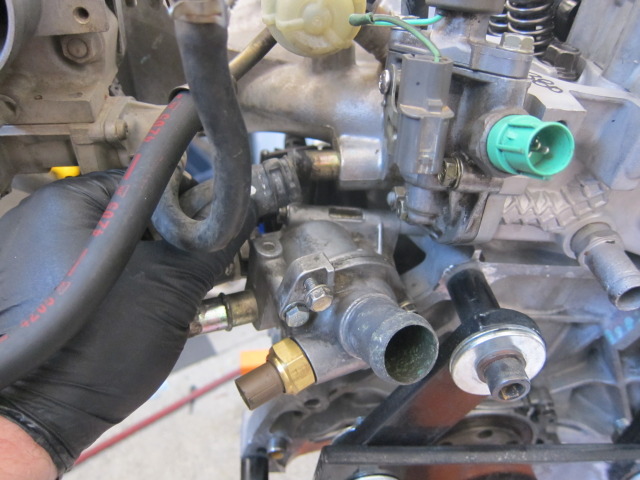
Install the thermostat housing with thermostat installed.
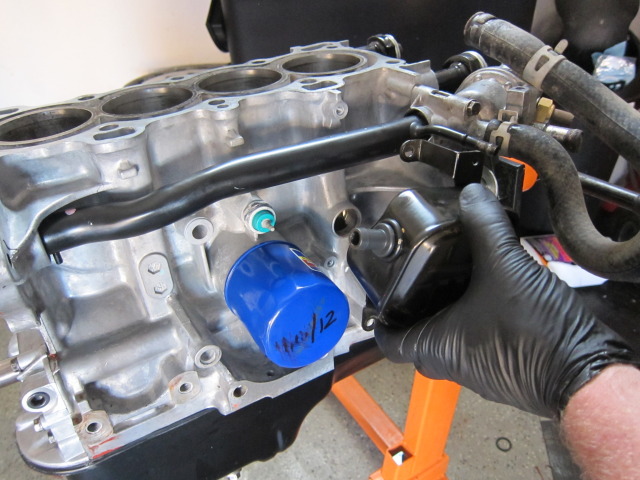
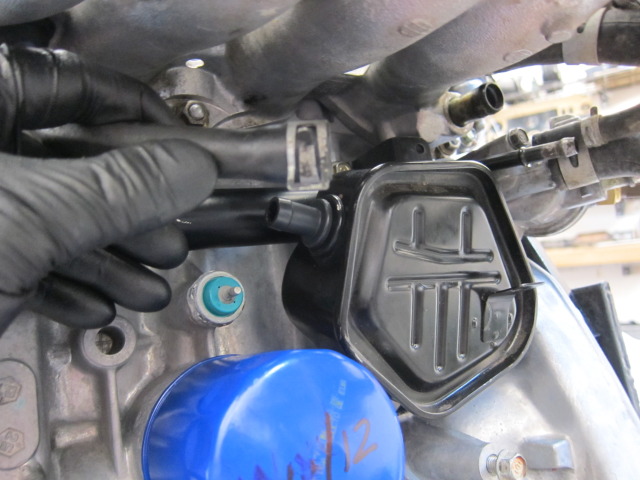
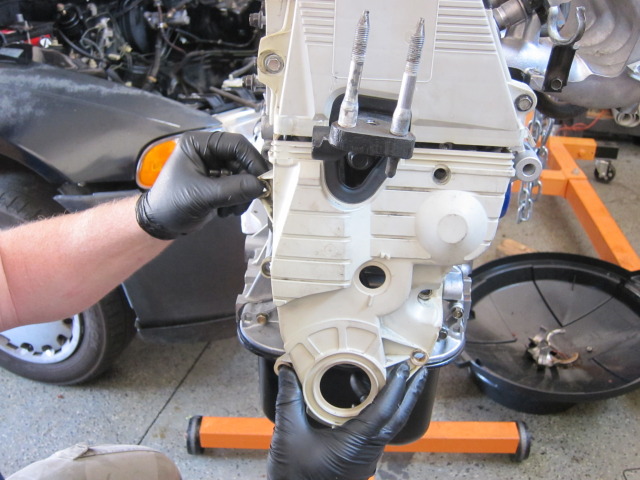
Install your PVC box as shown. apply a little sealant to the rubber gasket and slide into block.
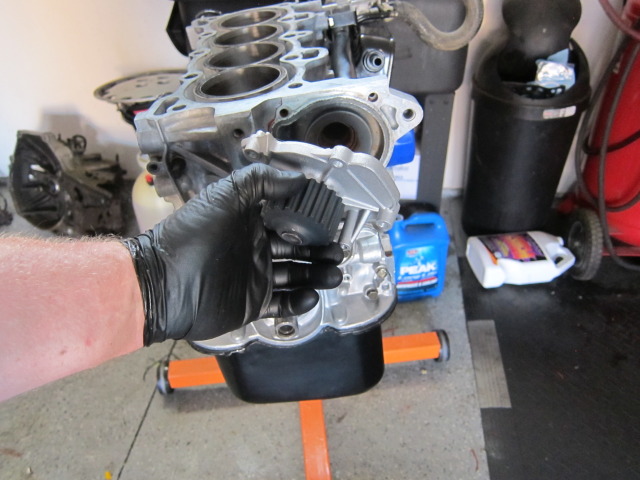
Install your fresh new water pump, making sure your gasket is in place.
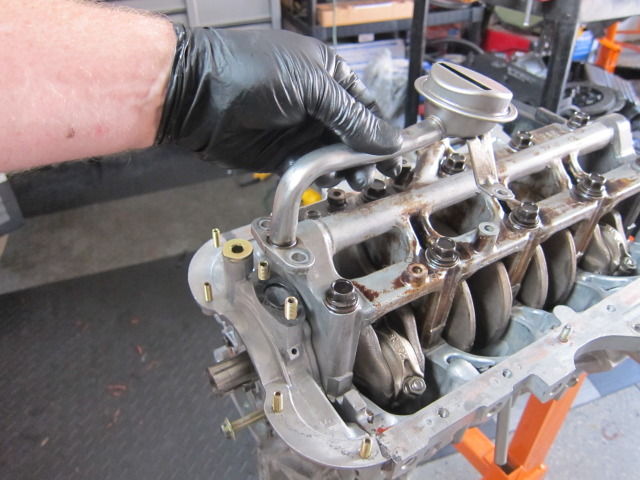
Install your dowl pins in the top of the block.

Now set your head gasket in place. I used a light high temp copper spray on mine to help seal any imperfections in the head block surface.
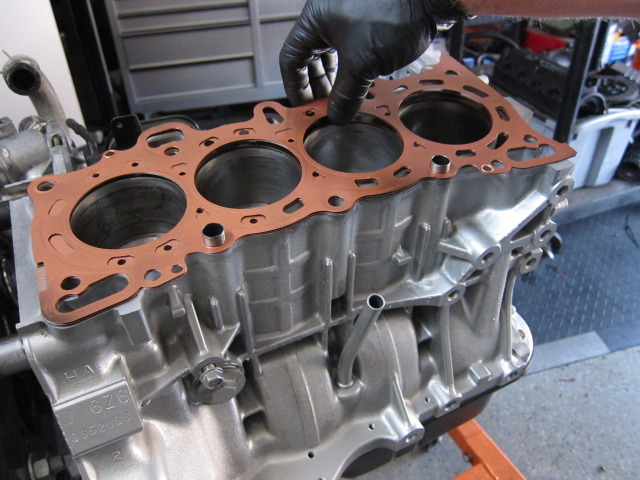
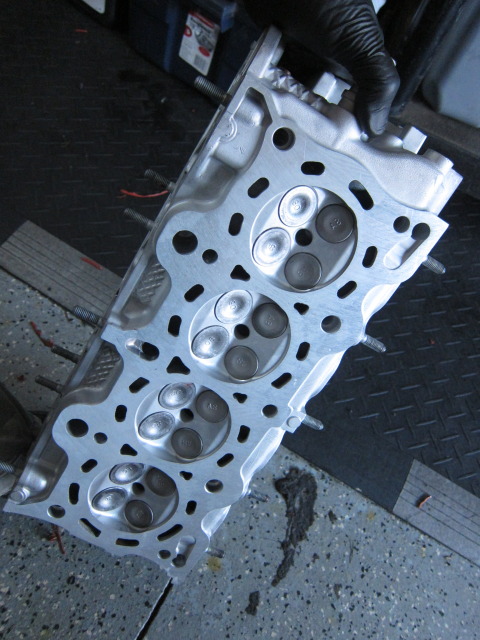
Time to install the freshly rebuilt head, This head has been surfaced for flatness, 3 angle valve job and new valve stem seals installed. My block was true and flat. Make sure your block and head are flat!! if not have it decked and or resurfaced.

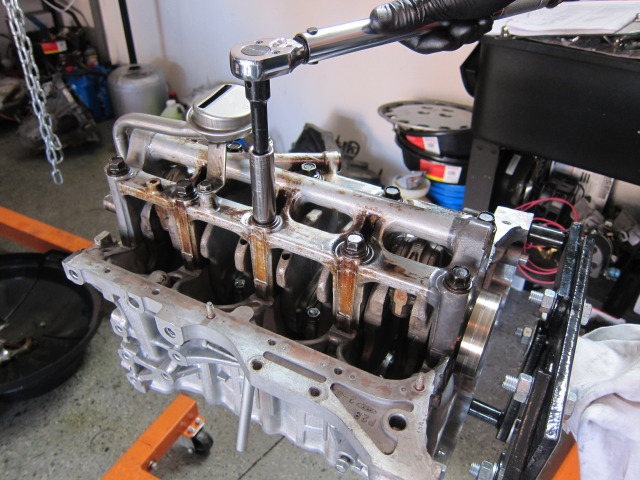
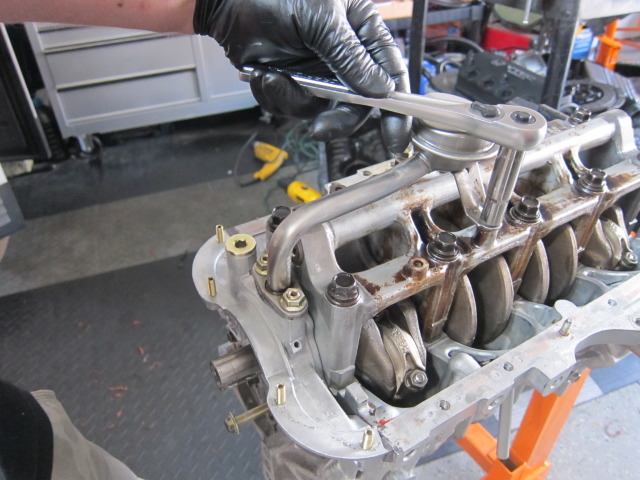
Install your headbolts and make sure you coat the threads and washers in fresh oil.
tighten the headbolts step#1 32ftlbs step#2 53ftlbs
Now flip the engine over and install your clean oil pan with a fresh gasket. I just hand tighten the bolts here. maybe 9ftlbs
Install oil filter.
Install your water pump tube, make sure you use new rubber seals. you dont want these to leak after its installed.
Install the thermostat housing with thermostat installed.
Install your PVC box as shown. apply a little sealant to the rubber gasket and slide into block.
Install your fresh new water pump, making sure your gasket is in place.
Install your dowl pins in the top of the block.
Now set your head gasket in place. I used a light high temp copper spray on mine to help seal any imperfections in the head block surface.
Time to install the freshly rebuilt head, This head has been surfaced for flatness, 3 angle valve job and new valve stem seals installed. My block was true and flat. Make sure your block and head are flat!! if not have it decked and or resurfaced.
Install your headbolts and make sure you coat the threads and washers in fresh oil.
tighten the headbolts step#1 32ftlbs step#2 53ftlbs
Last edited by CaliforniaDad; 04-28-2012 at 06:10 AM.
 good write up
Trending Topics
04-27-2012, 11:16 PM
#8
Ok I did this a few times on a A6 first and then on a Z6... There is one critical part you forgot.. You can toss away that plasti gauge bs **** away... Its a waste of time.. On the side of your z6/a6 or any honda block where the flywheel is there is capital letters and on the crank you use of this engine block there are # or its the other way around but what you do is go to honda dealer and get the bearing code list paper they have it and it tells you how to order new bearings for your honda engine if you use the right color bearing and I highly stress that all you guys rebuilding engines should use oem honda bearings the aftermarket **** is not as accurate and is inferrior to oem honda bearings.. John Deere tractors use the same bearings as honda and they are also coated the same way.. I have used a ACL crank and bearing kit on a A6 and it failed horribly.. USE OEM HONDA BEARINGS ONLY.... It will cost you around 200$ for all bearings but its well worth it.. SO use them codes and get your z6 or other honda engine built the right way.. Its all ready measure so all you need is the right color.. Bearing are cheaper for the D16Y engines because they are much newer the Z6/A6 bearings cost the same.. Unless you work at honda and you can do what you want..
04-28-2012, 03:53 AM
#10
Technical Hero
Join Date: May 2002
Location: Charlotte, NC, 28227
Posts: 9,876
Likes: 0
Received 28 Likes
on
20 Posts
NICE WRITEUP, seems like one or two of your pics don't match the description, of course I might be crazy. Pic #8 and #38 don't seem to match the description. #8 shows replacing the water pump and #38 shows replacing the oil breather box.
 04-28-2012, 06:24 AM
#13
No-Traction = Fun
Thread Starter
iTrader: (6)
Join Date: Feb 2010
Location: Follow Me on "InstaGram"
Posts: 2,679
Likes: 0
Received 3 Likes
on
3 Posts
Ok I did this a few times on a A6 first and then on a Z6... There is one critical part you forgot.. You can toss away that plasti gauge bs **** away... Its a waste of time.. On the side of your z6/a6 or any honda block where the flywheel is there is capital letters and on the crank you use of this engine block there are # or its the other way around but what you do is go to honda dealer and get the bearing code list paper they have it and it tells you how to order new bearings for your honda engine if you use the right color bearing and I highly stress that all you guys rebuilding engines should use oem honda bearings the aftermarket **** is not as accurate and is inferrior to oem honda bearings.. John Deere tractors use the same bearings as honda and they are also coated the same way.. I have used a ACL crank and bearing kit on a A6 and it failed horribly.. USE OEM HONDA BEARINGS ONLY.... It will cost you around 200$ for all bearings but its well worth it.. SO use them codes and get your z6 or other honda engine built the right way.. Its all ready measure so all you need is the right color.. Bearing are cheaper for the D16Y engines because they are much newer the Z6/A6 bearings cost the same.. Unless you work at honda and you can do what you want..
#1 Price
#2 Just about all the bearings were on a long back order.
The standard king bearing are pretty close to honda green bearings. All my clearances ended up right in the middle of factory spec's. I feel more than confident that this engine will last a long time.
I'm not sure what your talking about I looked at the pictures and they match the text. Let me know again what you see.
04-28-2012, 08:04 AM
#15
The Grumpiest
iTrader: (4)
Join Date: May 2008
Location: Oak Ridge, TN, USA
Posts: 28,333
Likes: 0
Received 16 Likes
on
15 Posts
Excellent resource. Will be using this for my engine build if I ever get around to it. The only issue I have is I'm not clear on where exactly the thrust washers go. But I'm sure when I'm ready I can Google it.
 04-28-2012, 09:22 AM
#18
I understand, but my customer did not want go use OEM honda bearings for 2 reasons.
#1 Price
#2 Just about all the bearings were on a long back order.
The standard king bearing are pretty close to honda green bearings. All my clearances ended up right in the middle of factory spec's. I feel more than confident that this engine will last a long time.
I'm not sure what your talking about I looked at the pictures and they match the text. Let me know again what you see.
 04-28-2012, 11:04 PM
#21
No-Traction = Fun
Thread Starter
iTrader: (6)
Join Date: Feb 2010
Location: Follow Me on "InstaGram"
Posts: 2,679
Likes: 0
Received 3 Likes
on
3 Posts
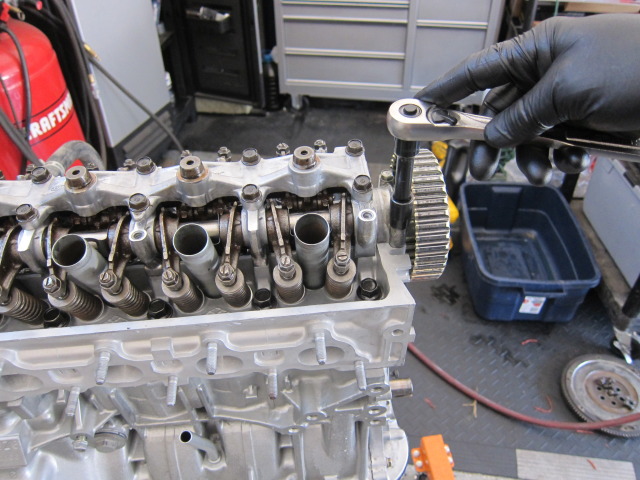
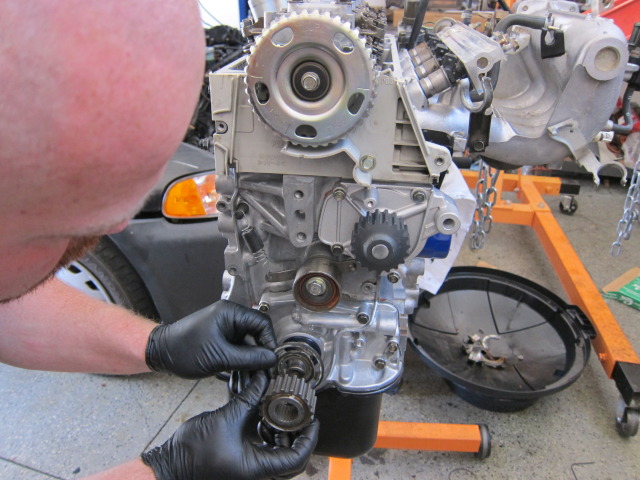
Okay the next thing we need to do is install the camshaft. But before you do that remove the camshaft gear and install a new camshaft seal.

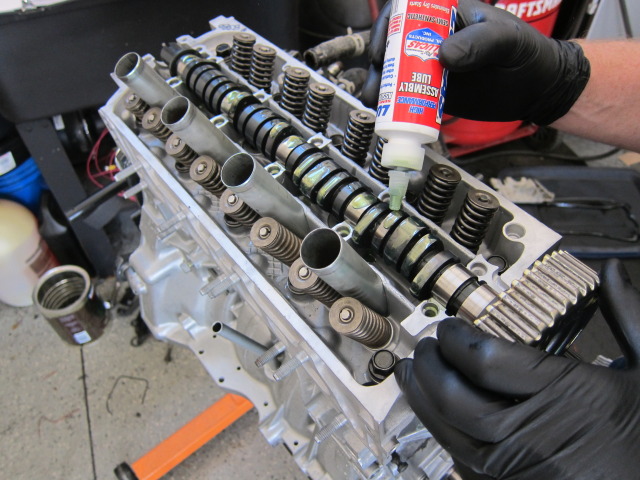
Now lets coat all the surfaces with assembly lube.
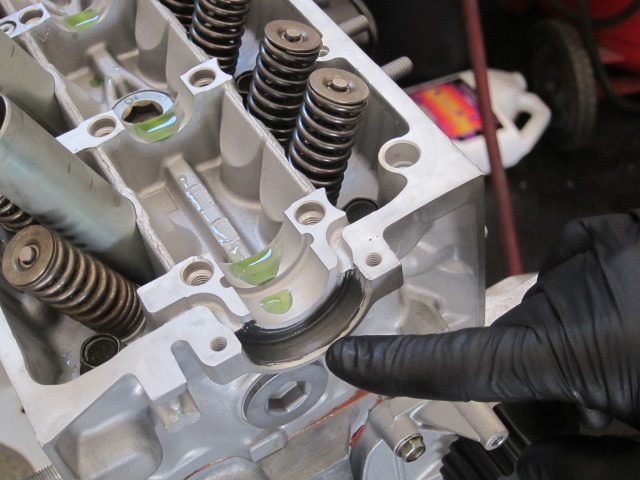
Put a thin layer of sealant here for the cam seal.
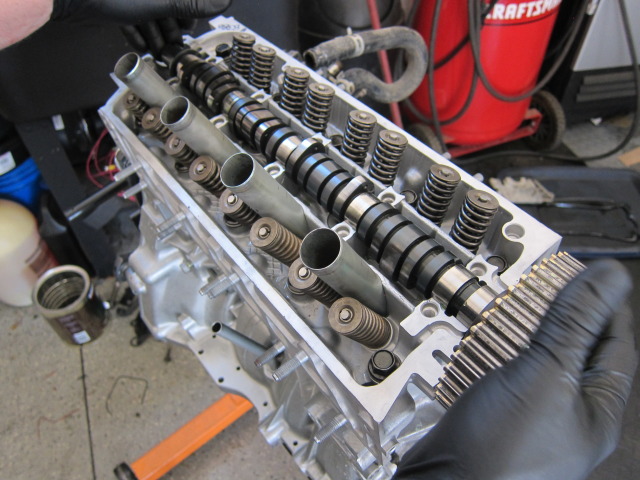
Lay in the camshaft and lube all lobes as shown.
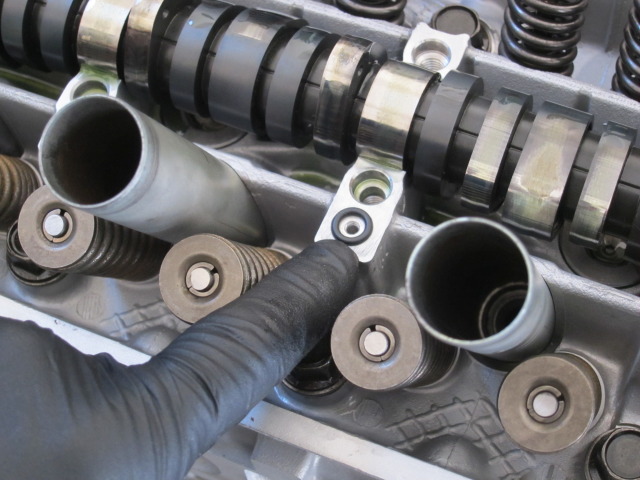
Don't for get the oil control O-ring here.
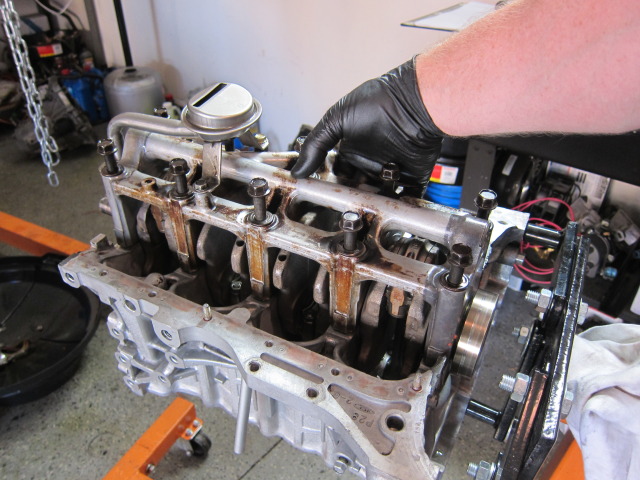
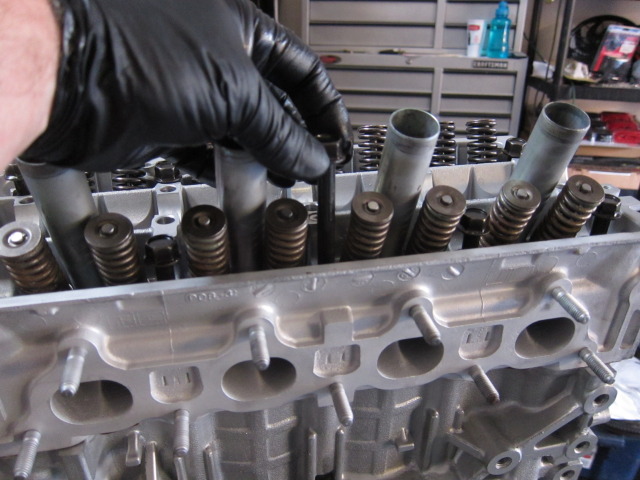
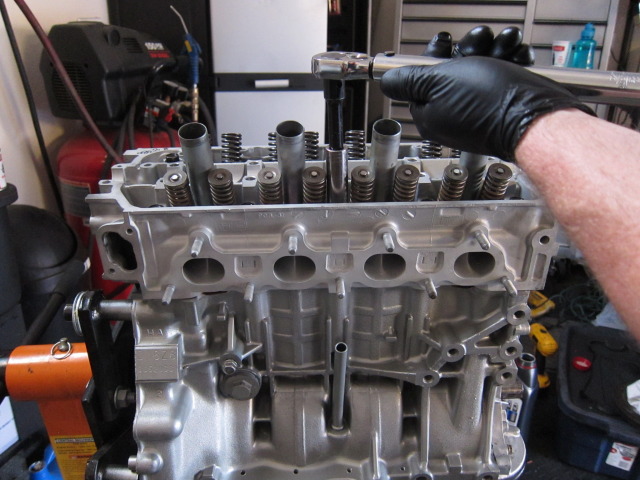
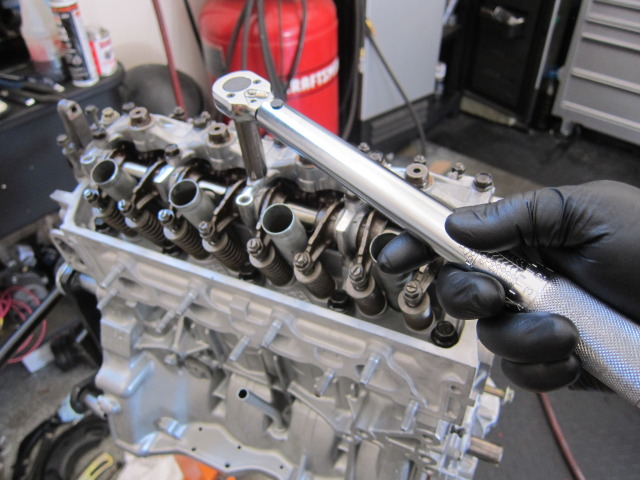
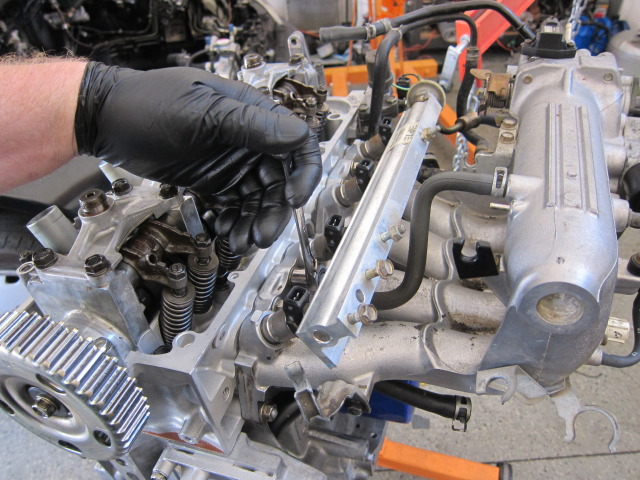
Install the upper half of the valvetrain
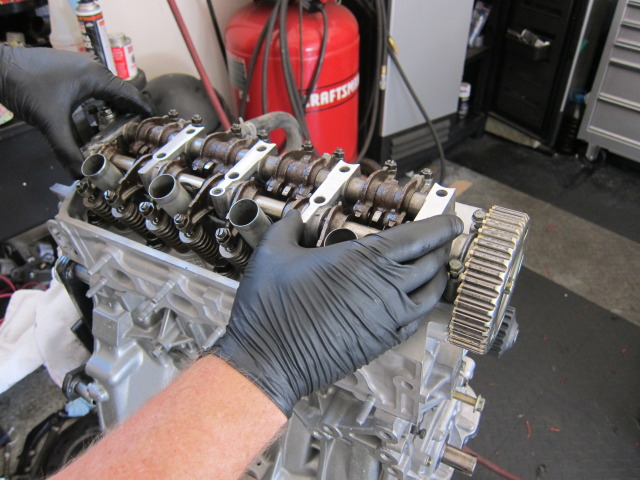
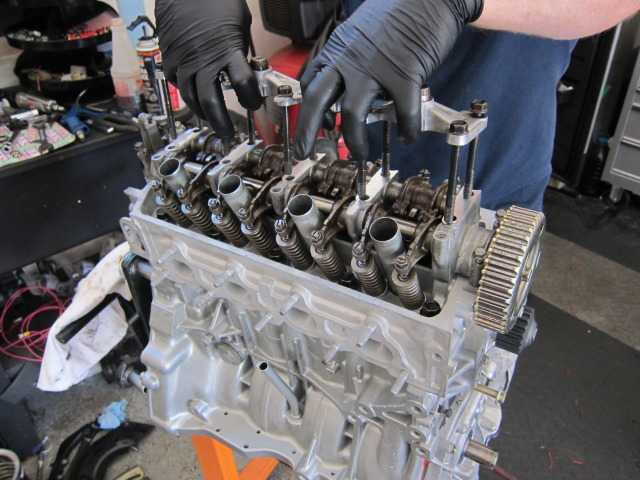
Here is the tightening sequence
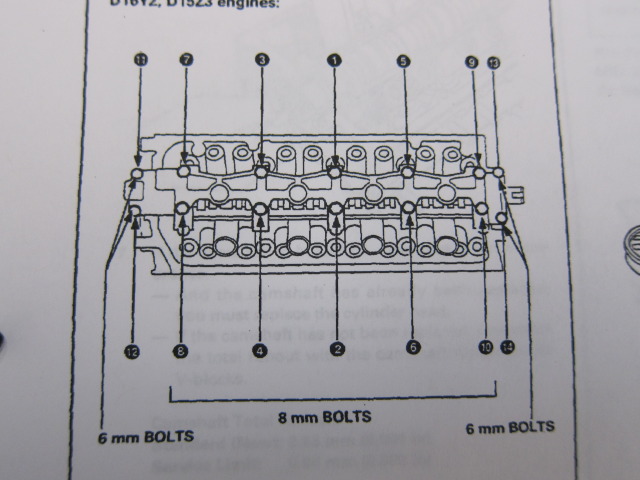
The 8mm bolts 18ftlbs and the 6mm bolts snug hand tight, or 8ftlbs
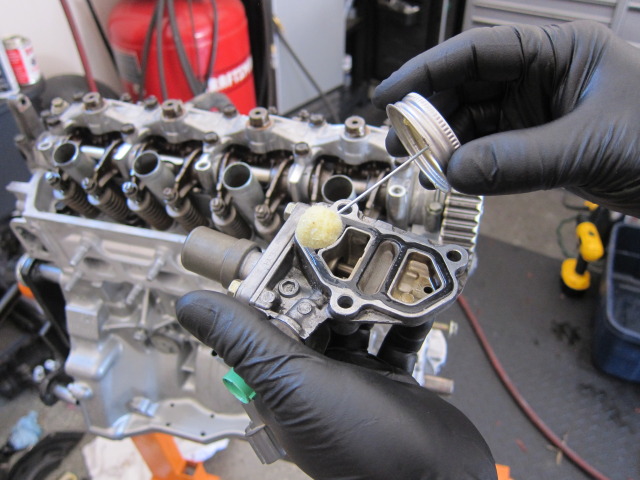
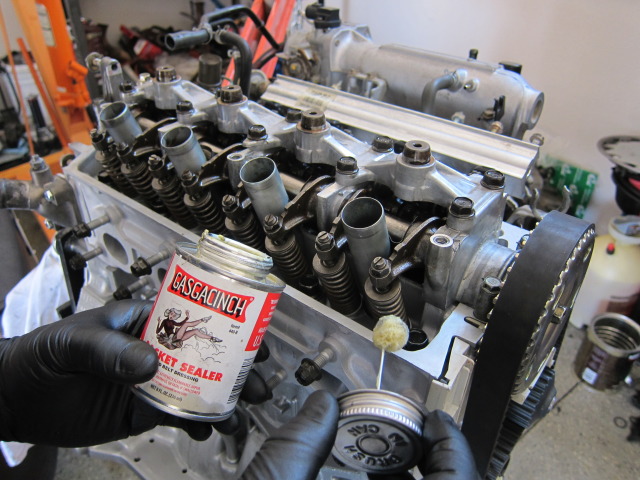
I like to use a little Gask-a-sinch on new seals, helps them stick in place. Now install the vtec solenoid.

Install the remaining sensors into the head.
Water neck and gasket installed next. I used gascasinch here as well.
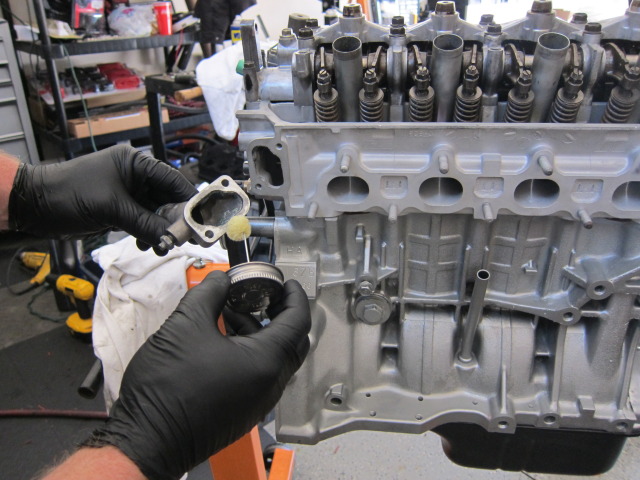
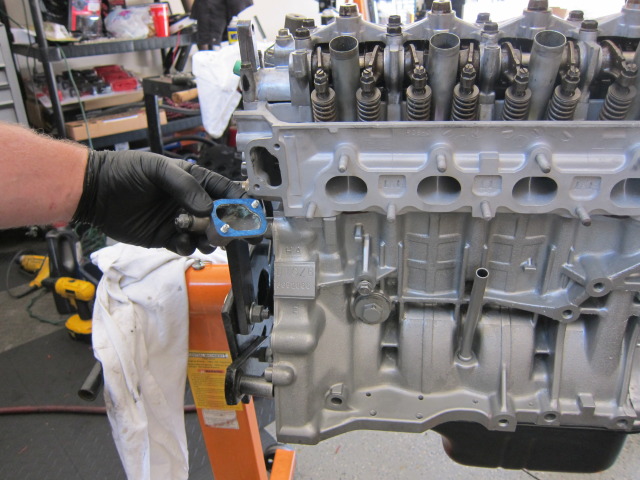
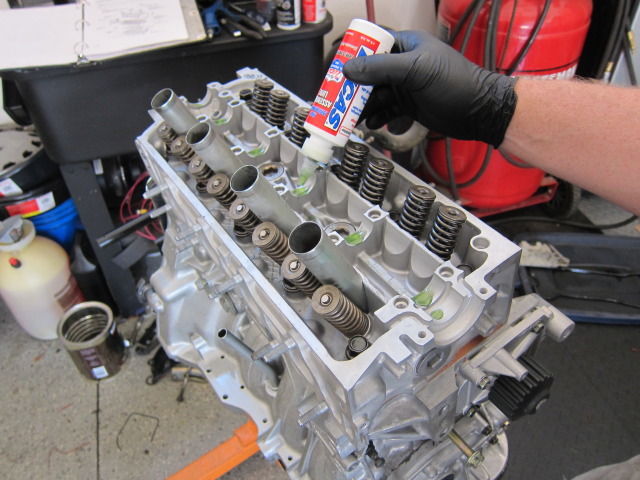
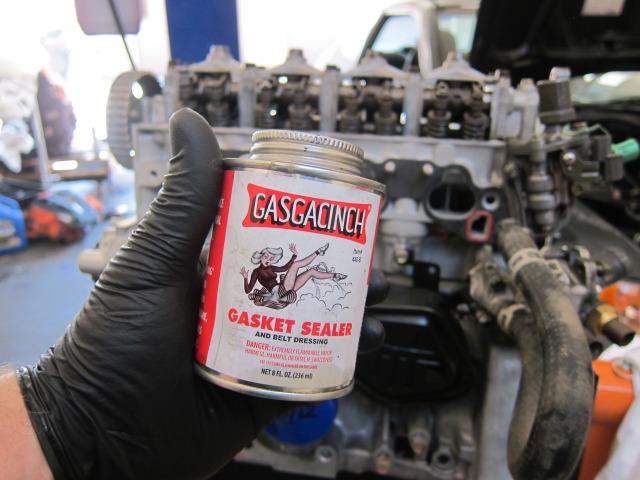
Install your intake manifold gasket, I used gascasinch here on both sides.
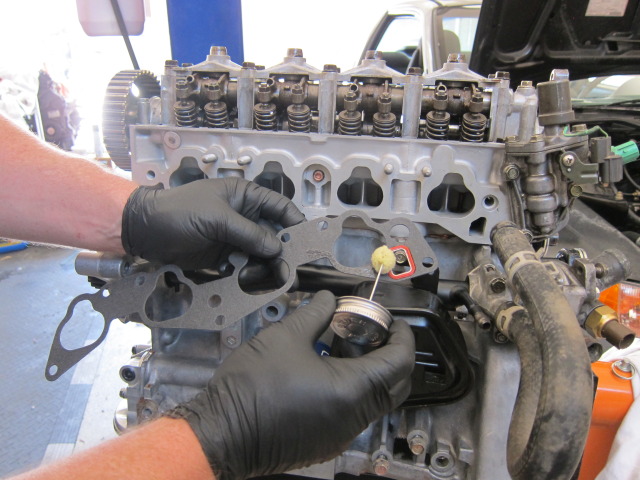

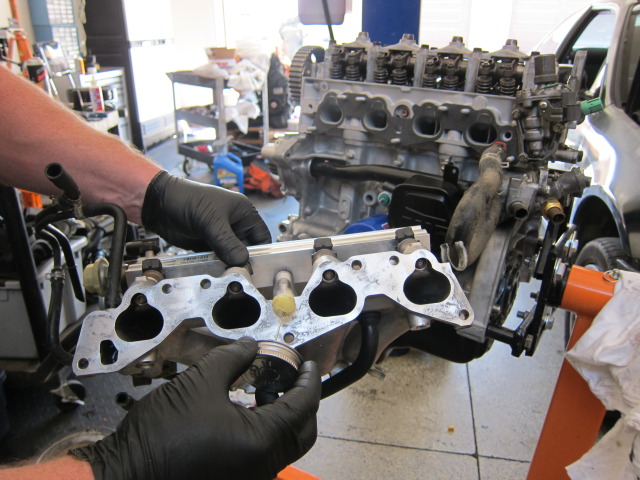
here is the product im using.
Install your intake manifold.
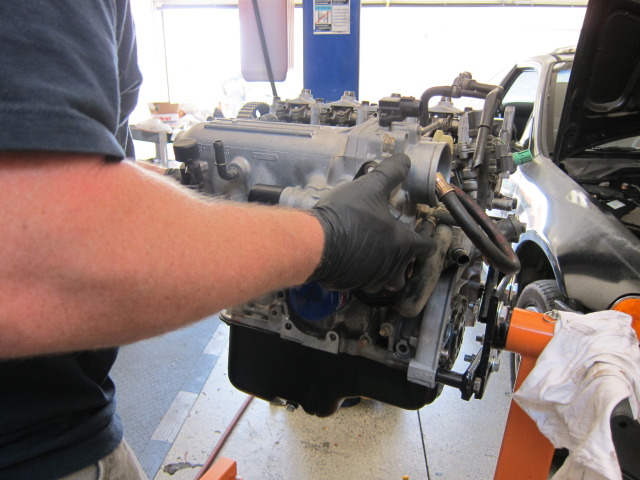
Hook up your PVC and water lines.
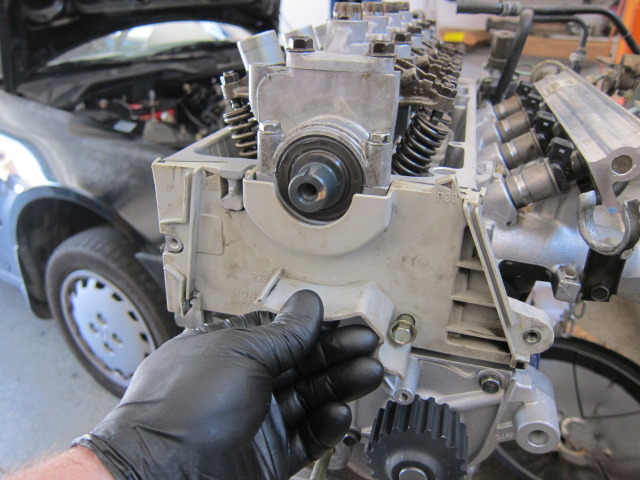
I forgot to install the timing cover before I dropped in the camshaft, So I just removed the cam-gear and re-installed the cover as shown.
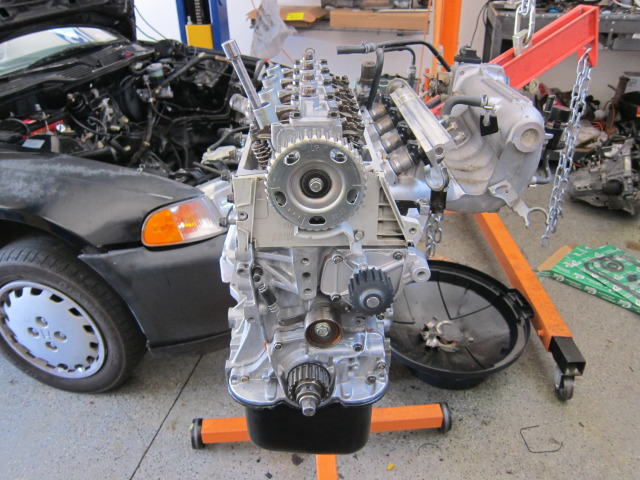
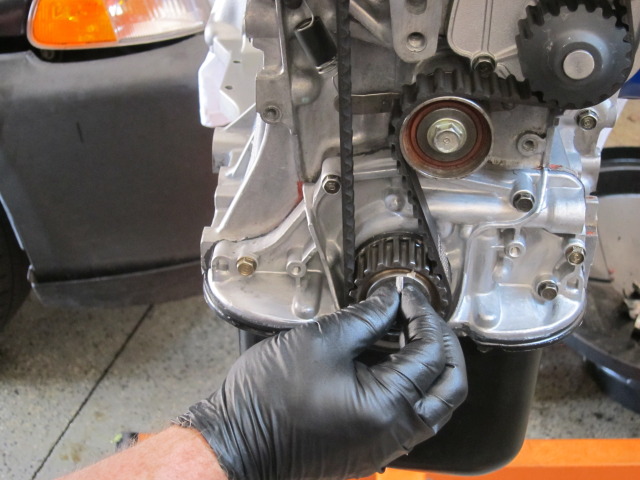
Install your timing belt tensioner pulley.

Install your inner timing belt washer and timing gear.
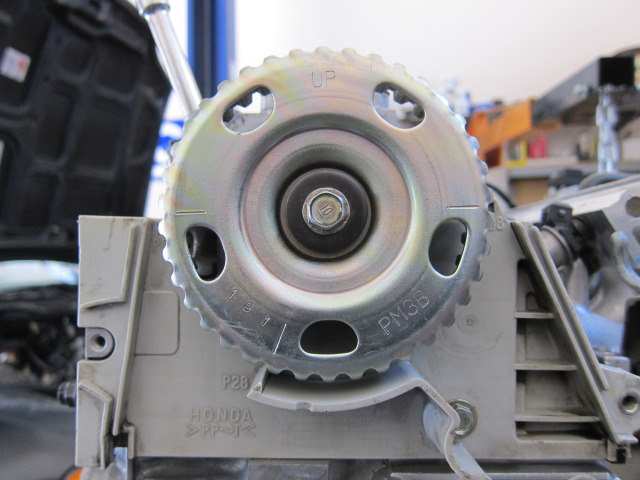
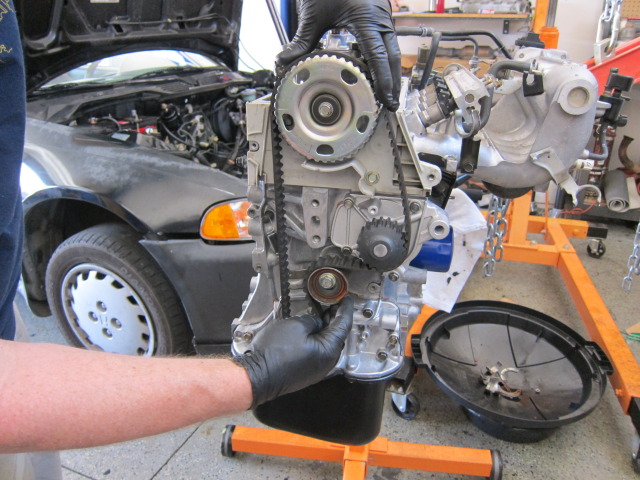
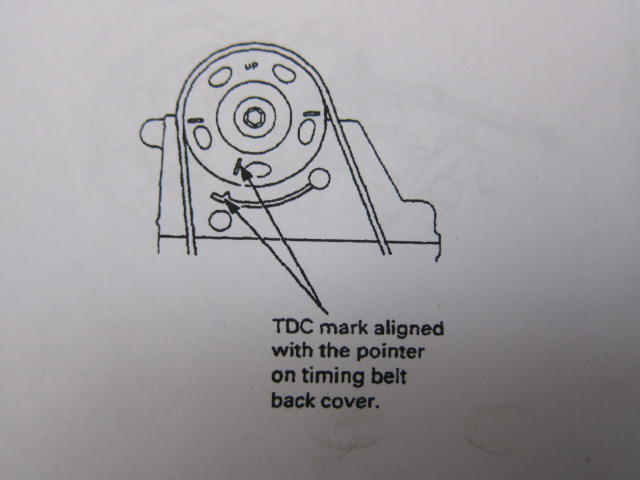
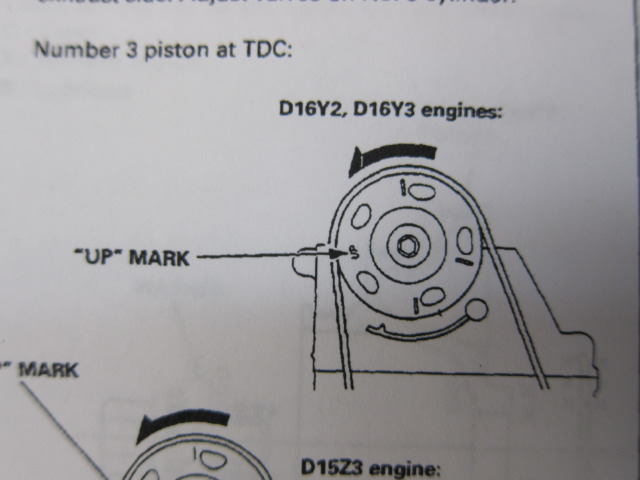
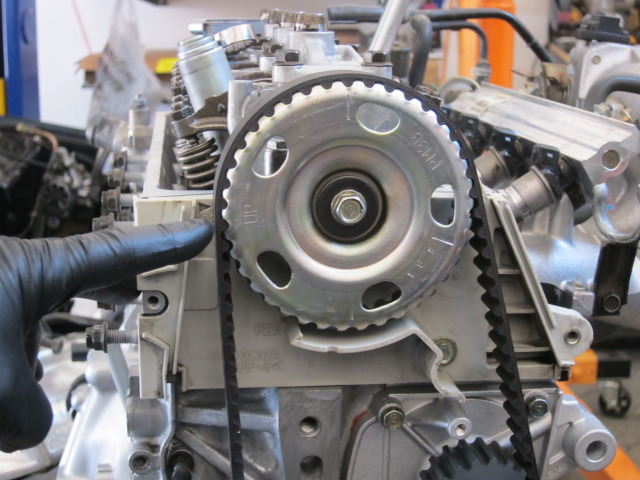
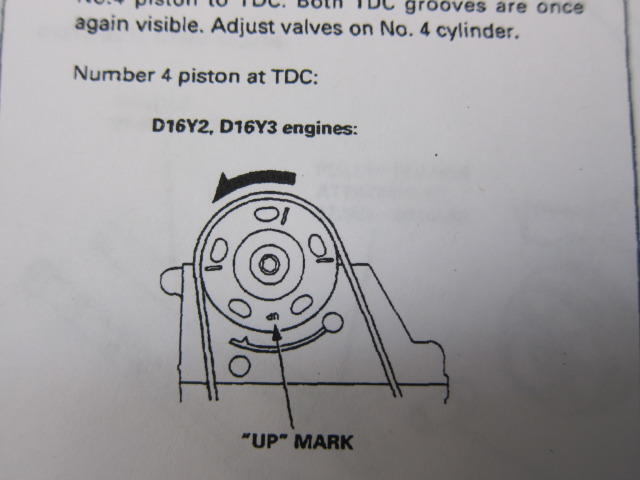
Now line up the cam gear on TDC as shown, as well as line up the crank gear at TDC.
Install your timing belt like this, #1 crank #2 tensioner #3 water pump #4 cam gear. then rotate the cam 3 theeth to set tension on the belt, now tighten up the tensioner pulley bolt.
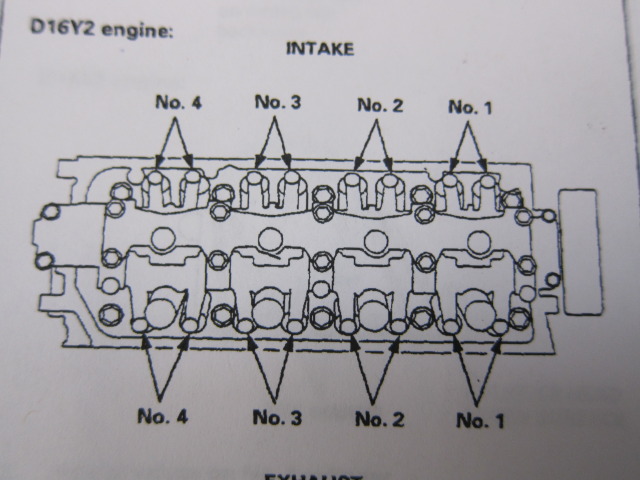
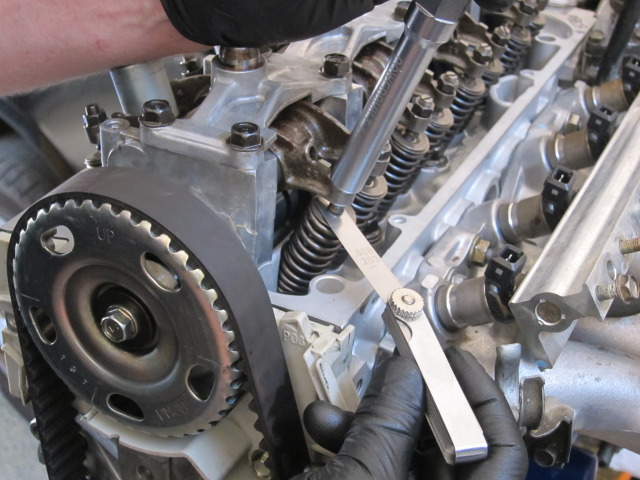
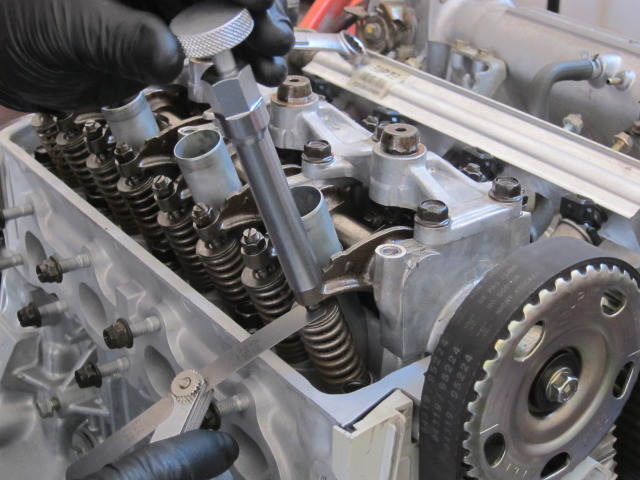
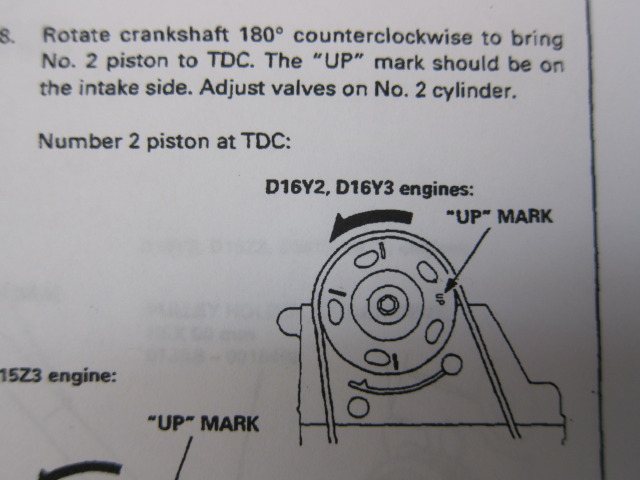
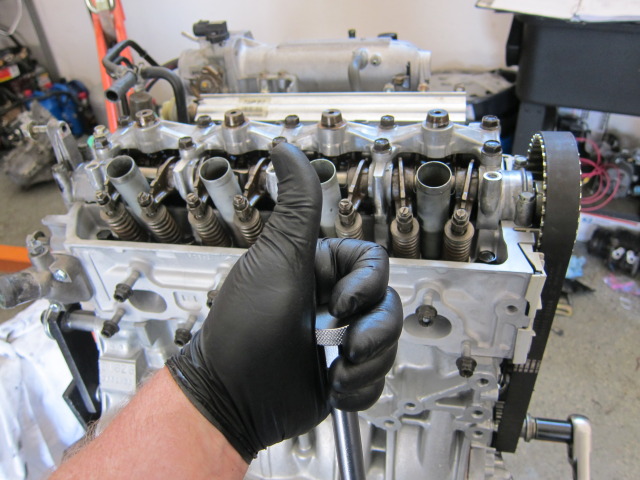
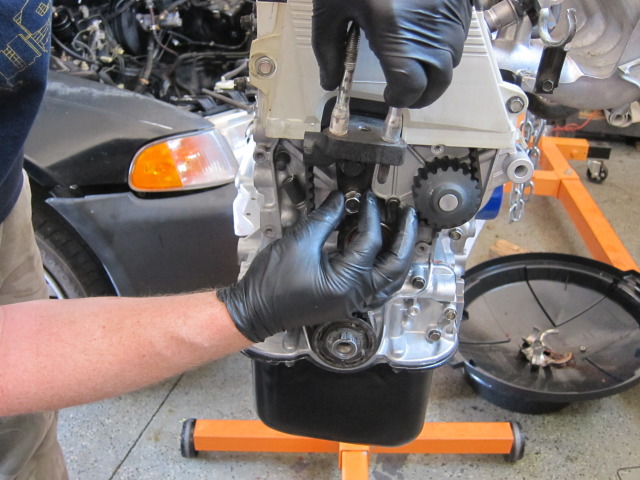
Now we can adjust the valves. rotate the engine over to TDC #1. The adjustment will go like this. #1 then #3 them #4 then #2
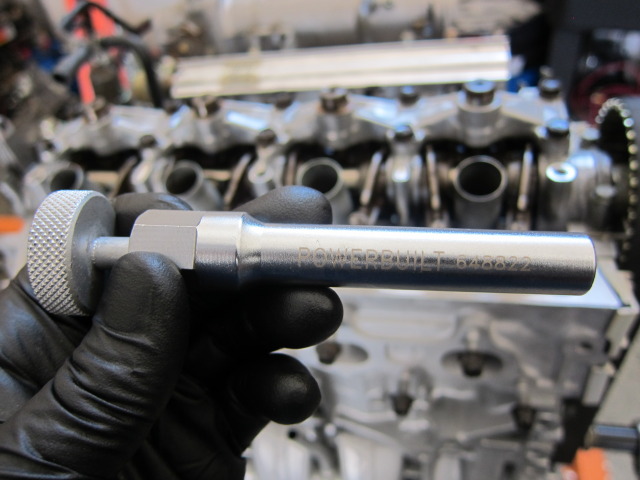
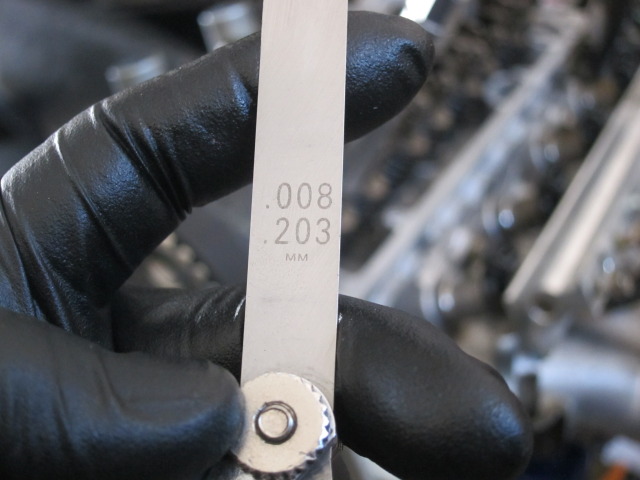
I'm using this valve adjustment tool that works great on honda heads.
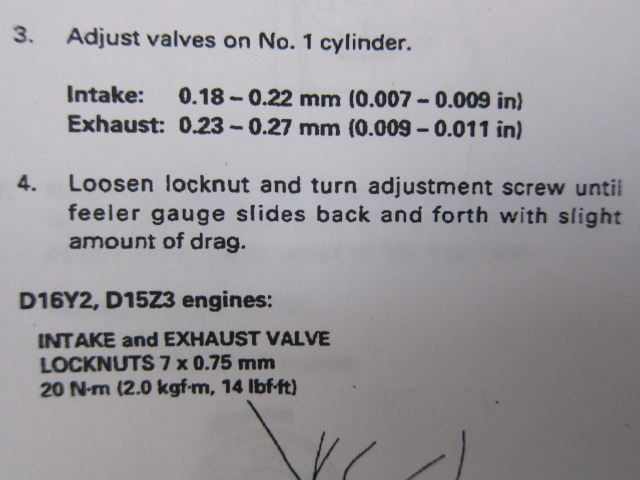
Starting with number 1 cyl, im setting the lash at .008" and the exhaust at a .010"
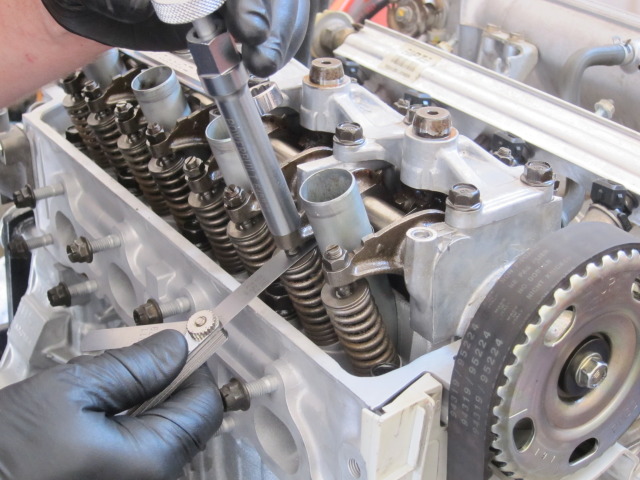
Once you have both intake and exhaust adjusted on cyl #1 rotate the crank as shown so you can do cyl #3
Same for Cyl #4
Then Cyl #2
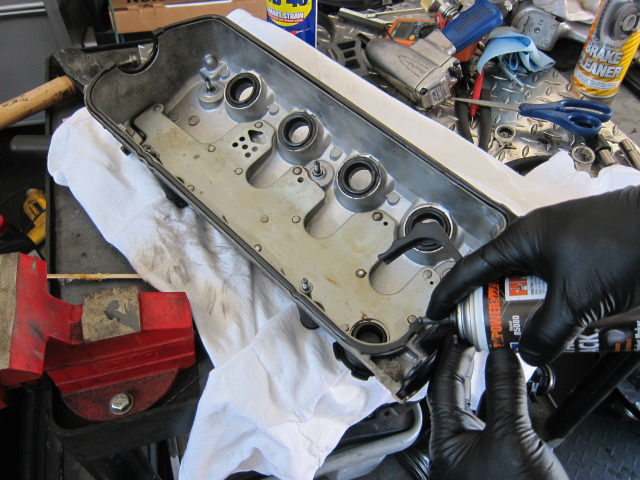
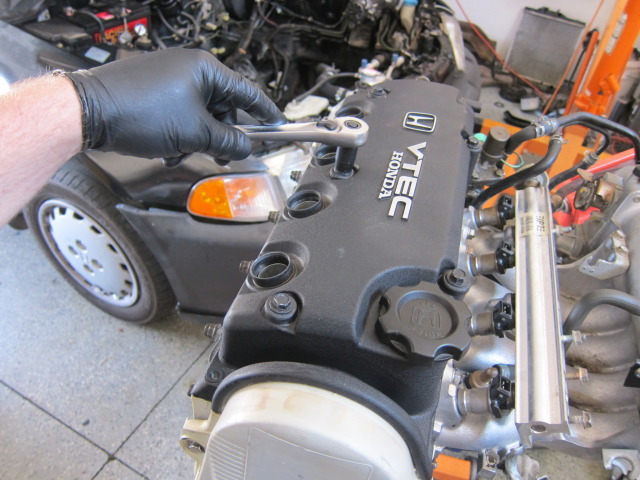
Now install your valve cover gaskets and grommets. I also used a little gaskasinch on the gasket and the head.
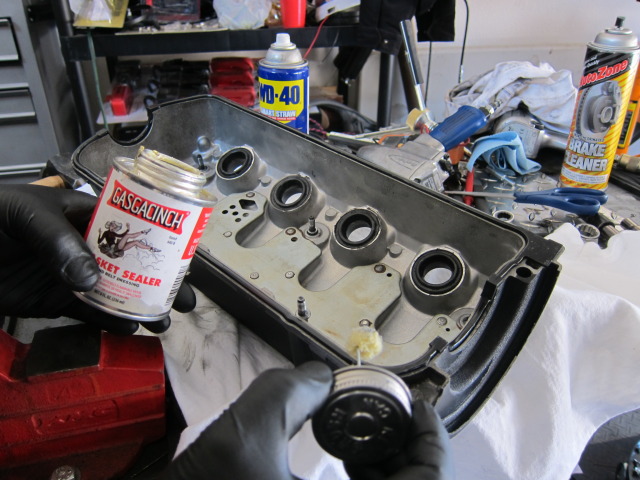
Don't forget a lil dab of sealant on the corners of the gasket at each curved point
Now install the upper timing cover just under the valve cover as shown.
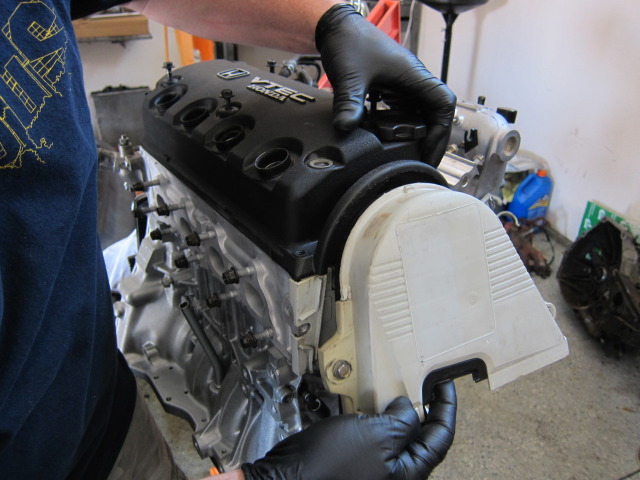
Tighten the bolts on the timing cover and the valve cover. I just did then hand tight "snug"
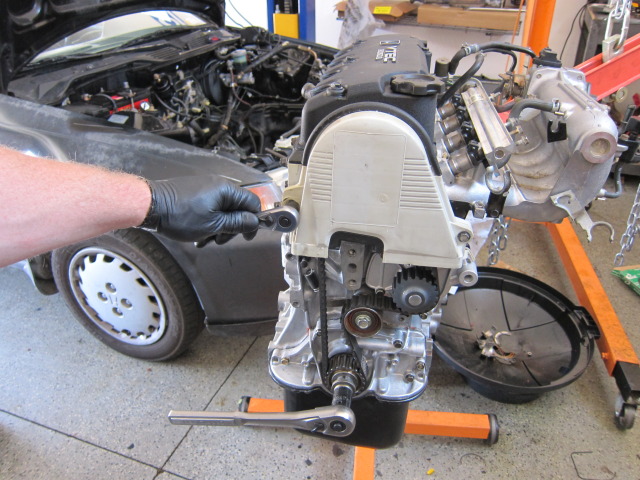
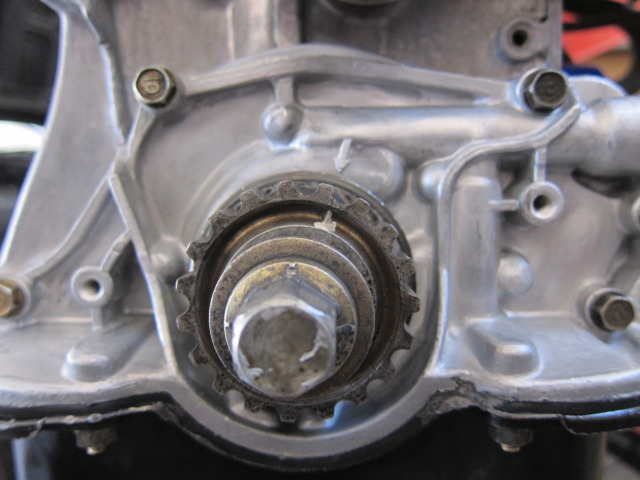
Install the crank pulley key and timing belt gear washer. Then install the lower part of the motor mount. 2 14mm bolts to 38ftlbs
Install the lower timing cover and all the bolts hand tight.
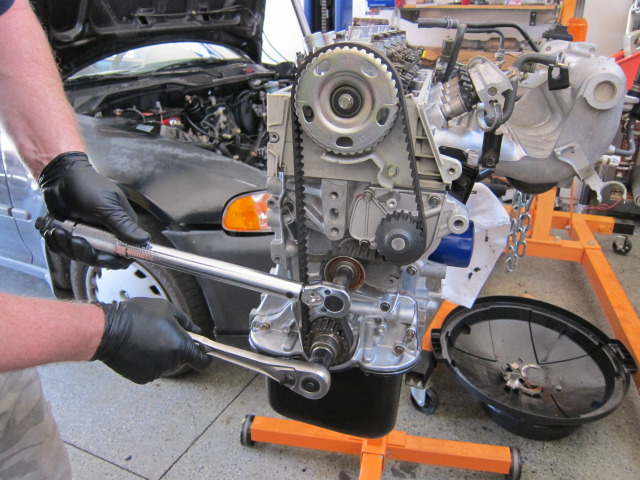
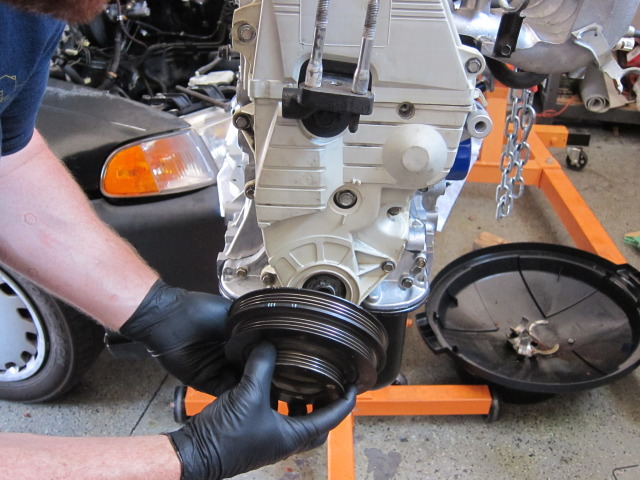
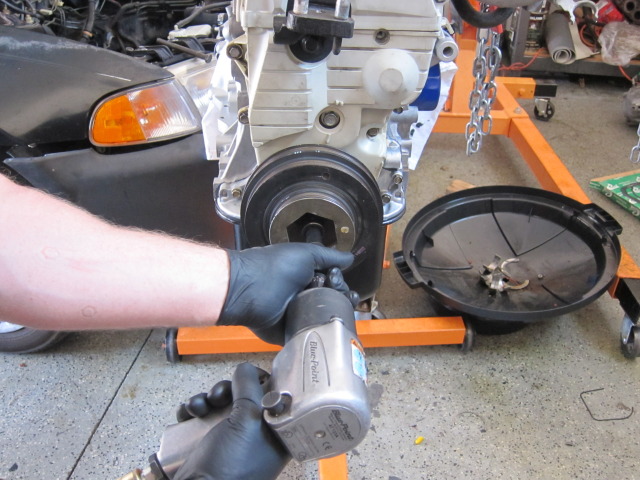
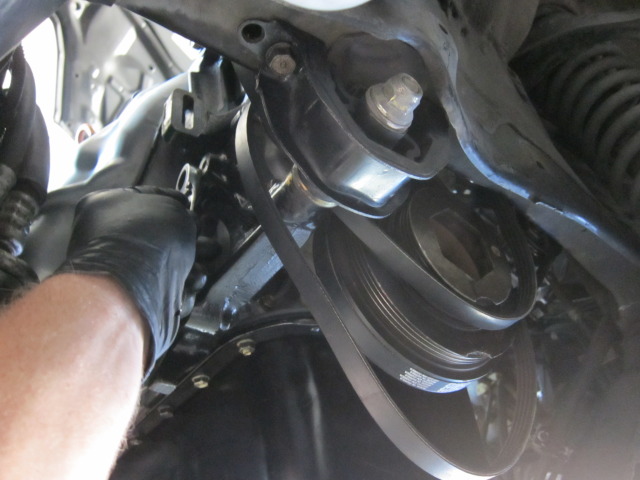
Install the crank pulley and crank pulley bolt. 134ft lbs
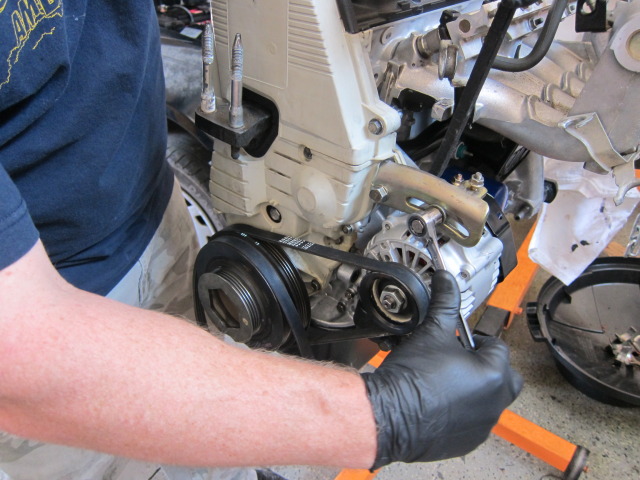
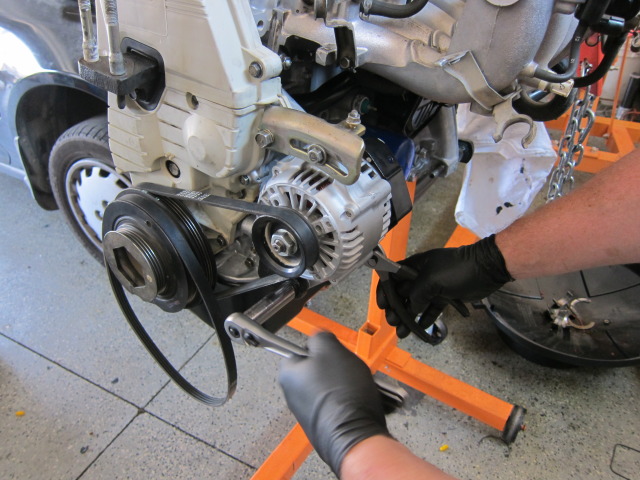
You can install the alternator and all the alternator brackets.
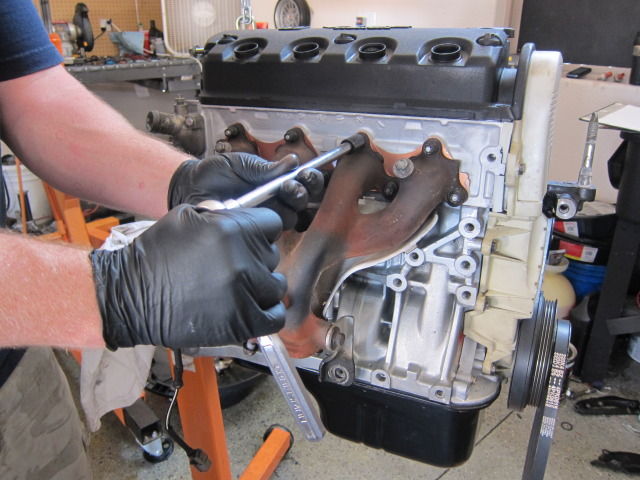
Install your exhaust manifold gasket. I prayed mine in a ultra high temp copper spray.
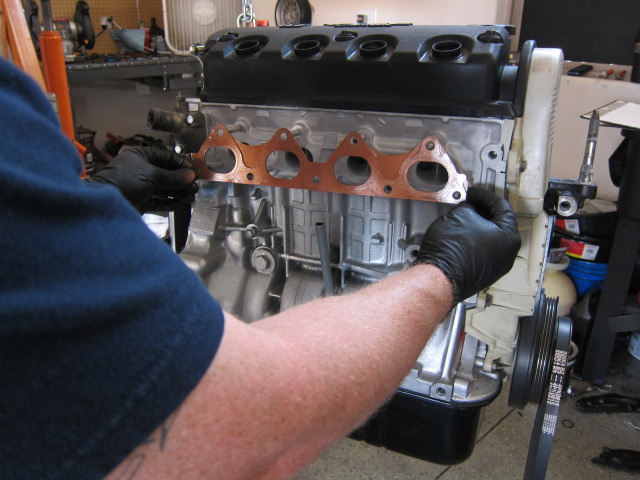
Install your exhaust manifold and cover as shown. (hand tight)


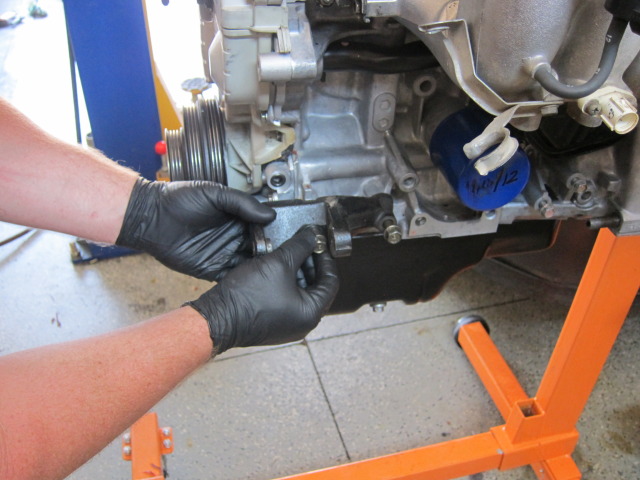
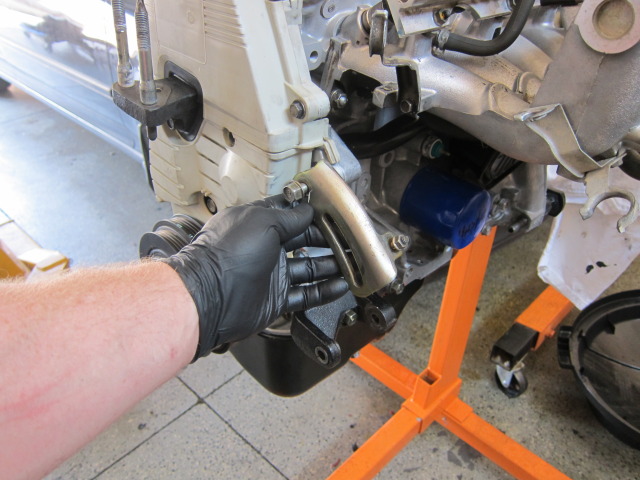
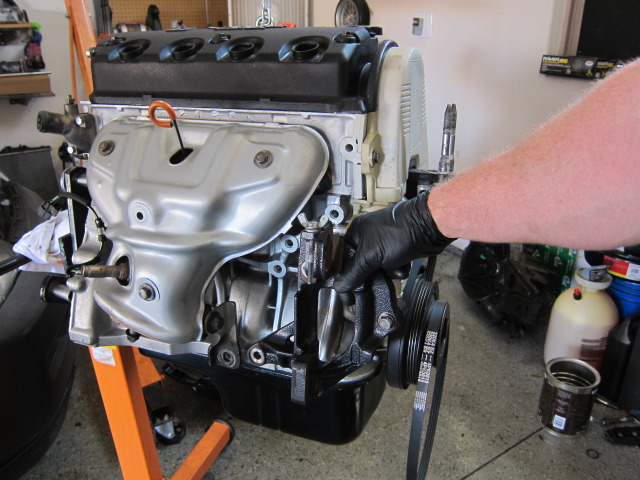
Install the power steering mounting bracket.
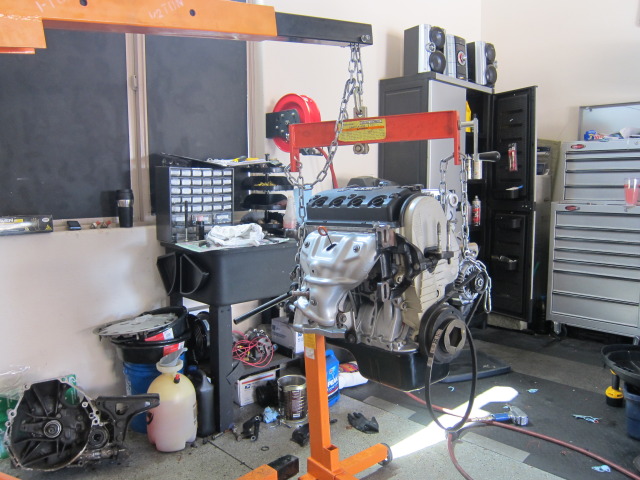
Lets get it off the engine stand so we can get the flywheel and clutch installed before we attached the trans.
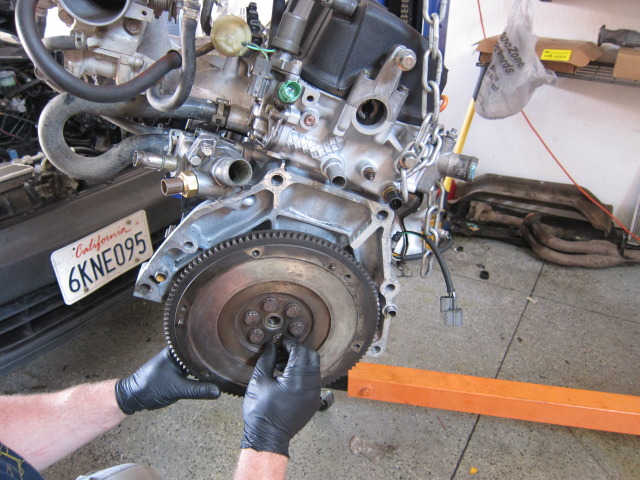
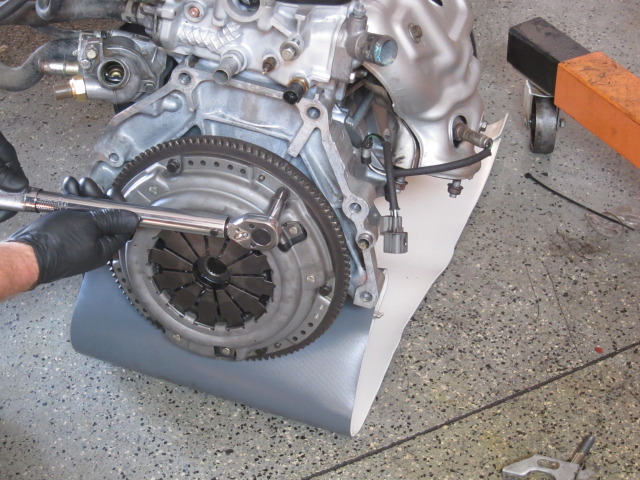
Install the flywheel and apply a little blue lock tight on the bolt threads, tighten to 87ft lbs
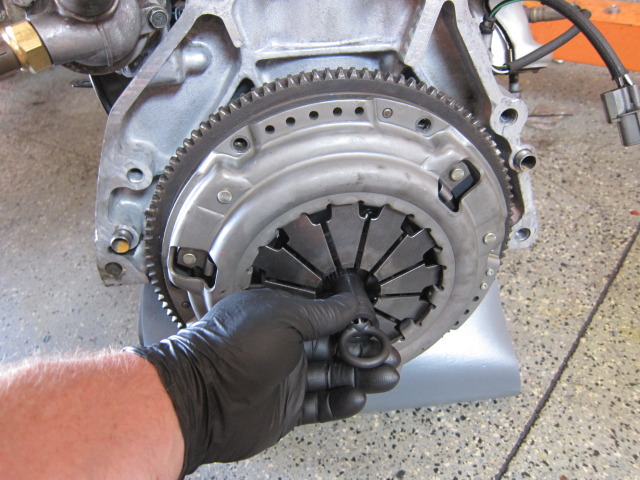
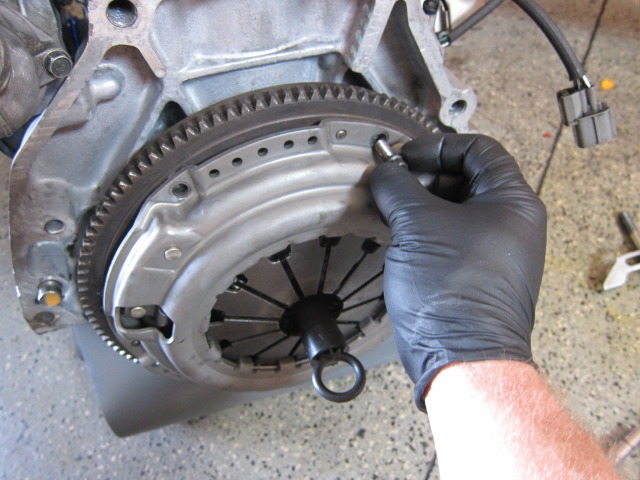
Install the clutch using a honda alignement tool. tighten the bolt to 22ft lbs
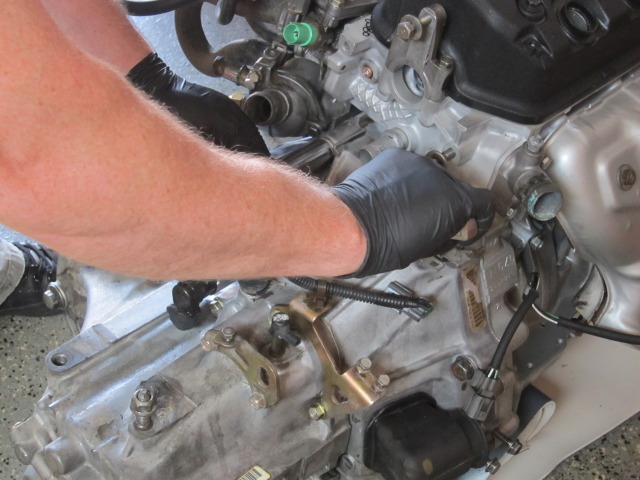
Install your transmission and tighten all the bolts to factory spec.
Now is a good time to install the engine wiring harness.
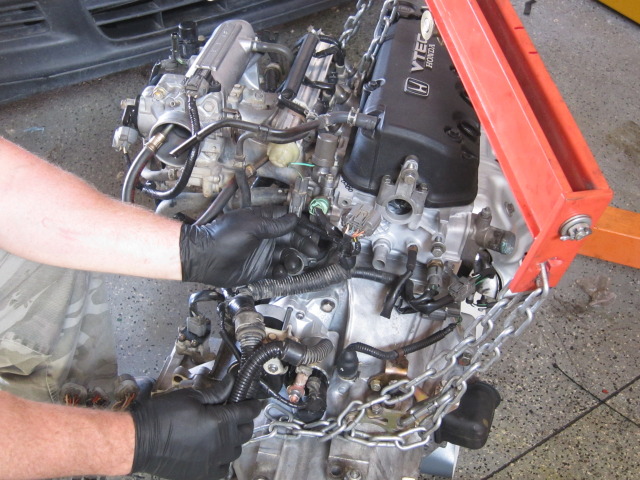
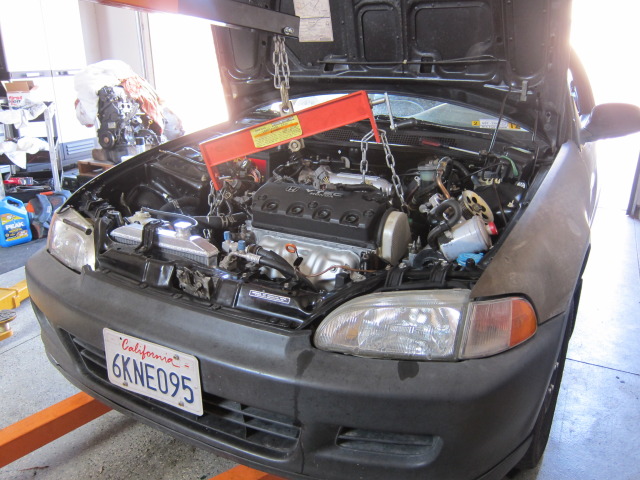
Lets get the bad boy stuffed back in the car.
All the next pictures are just hooking up all the remaining item to the engine.
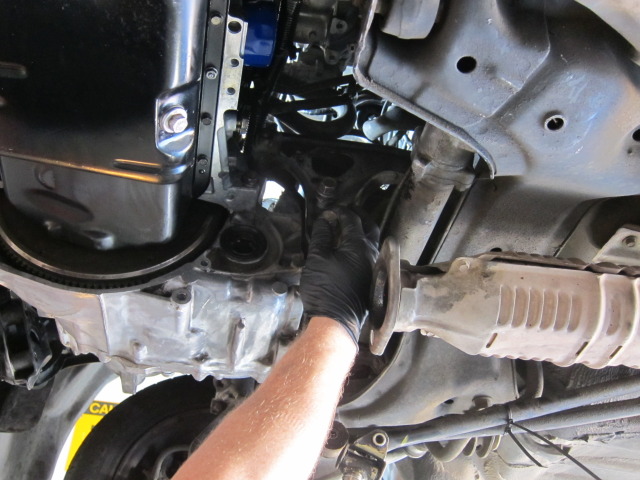
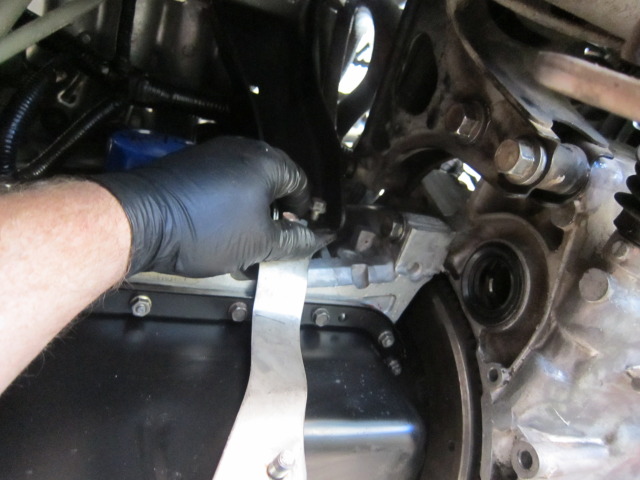
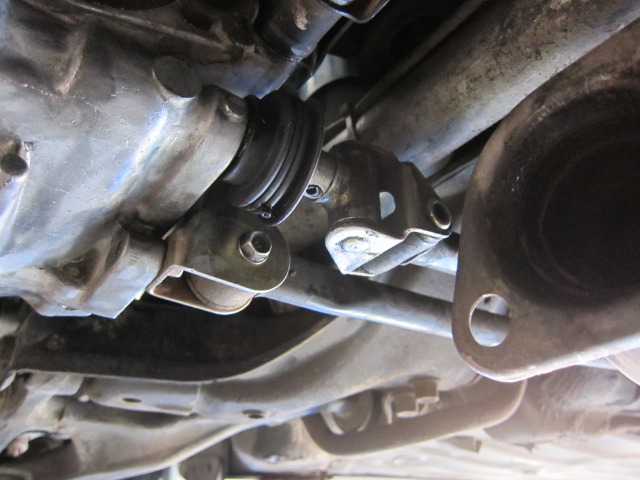
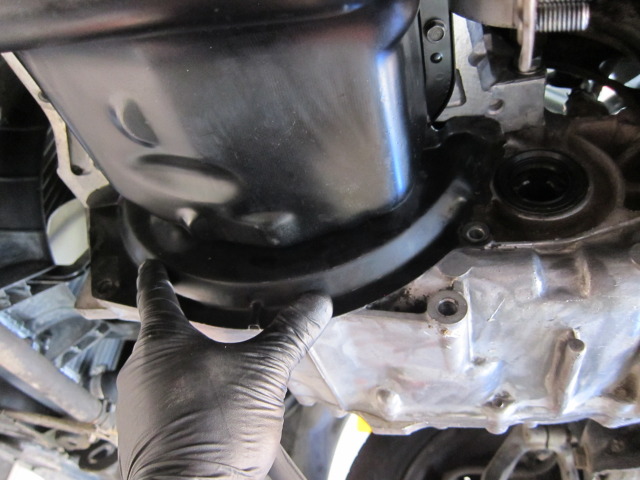
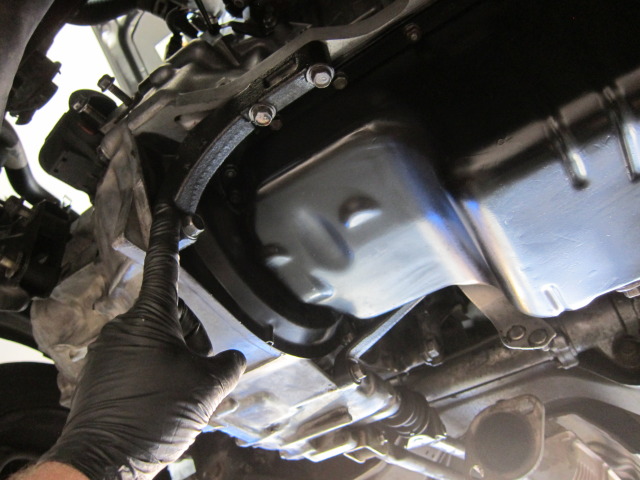
The rest is just hoses and vacuum lines ect ect.
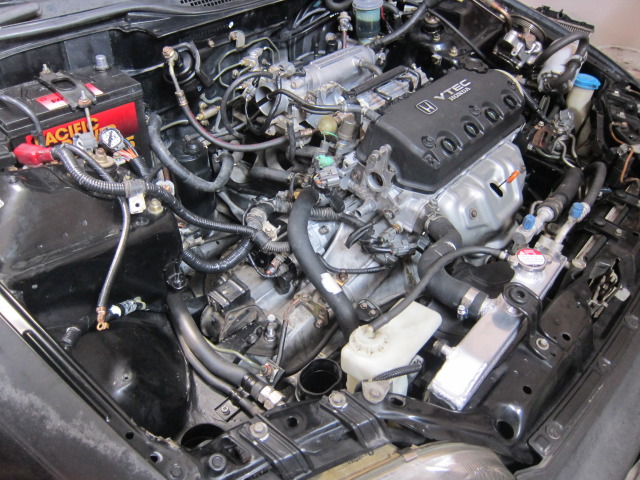
Well here it is!!! Sounds and runs so smooth. Not a leak in sight and smooth as a baby butt.
http://www.youtube.com/watch?v=Cr347...ature=youtu.be
Now lets coat all the surfaces with assembly lube.
Put a thin layer of sealant here for the cam seal.
Lay in the camshaft and lube all lobes as shown.
Don't for get the oil control O-ring here.
Install the upper half of the valvetrain
Here is the tightening sequence
The 8mm bolts 18ftlbs and the 6mm bolts snug hand tight, or 8ftlbs
I like to use a little Gask-a-sinch on new seals, helps them stick in place. Now install the vtec solenoid.
Install the remaining sensors into the head.
Water neck and gasket installed next. I used gascasinch here as well.
Install your intake manifold gasket, I used gascasinch here on both sides.
here is the product im using.
Install your intake manifold.
Hook up your PVC and water lines.
I forgot to install the timing cover before I dropped in the camshaft, So I just removed the cam-gear and re-installed the cover as shown.
Install your timing belt tensioner pulley.
Install your inner timing belt washer and timing gear.
Now line up the cam gear on TDC as shown, as well as line up the crank gear at TDC.
Install your timing belt like this, #1 crank #2 tensioner #3 water pump #4 cam gear. then rotate the cam 3 theeth to set tension on the belt, now tighten up the tensioner pulley bolt.
Now we can adjust the valves. rotate the engine over to TDC #1. The adjustment will go like this. #1 then #3 them #4 then #2
I'm using this valve adjustment tool that works great on honda heads.
Starting with number 1 cyl, im setting the lash at .008" and the exhaust at a .010"
Once you have both intake and exhaust adjusted on cyl #1 rotate the crank as shown so you can do cyl #3
Same for Cyl #4
Then Cyl #2
Now install your valve cover gaskets and grommets. I also used a little gaskasinch on the gasket and the head.
Don't forget a lil dab of sealant on the corners of the gasket at each curved point
Now install the upper timing cover just under the valve cover as shown.
Tighten the bolts on the timing cover and the valve cover. I just did then hand tight "snug"
Install the crank pulley key and timing belt gear washer. Then install the lower part of the motor mount. 2 14mm bolts to 38ftlbs
Install the lower timing cover and all the bolts hand tight.
Install the crank pulley and crank pulley bolt. 134ft lbs
You can install the alternator and all the alternator brackets.
Install your exhaust manifold gasket. I prayed mine in a ultra high temp copper spray.
Install your exhaust manifold and cover as shown. (hand tight)
Install the power steering mounting bracket.
Lets get it off the engine stand so we can get the flywheel and clutch installed before we attached the trans.
Install the flywheel and apply a little blue lock tight on the bolt threads, tighten to 87ft lbs
Install the clutch using a honda alignement tool. tighten the bolt to 22ft lbs
Install your transmission and tighten all the bolts to factory spec.
Now is a good time to install the engine wiring harness.
Lets get the bad boy stuffed back in the car.
All the next pictures are just hooking up all the remaining item to the engine.
The rest is just hoses and vacuum lines ect ect.
Well here it is!!! Sounds and runs so smooth. Not a leak in sight and smooth as a baby butt.
http://www.youtube.com/watch?v=Cr347...ature=youtu.be
Last edited by CaliforniaDad; 05-17-2012 at 05:39 PM.
 )
04-29-2012, 05:02 PM
)
04-29-2012, 05:02 PM
#25