
My 95 Civic CX hatch build
 10-18-2010, 05:05 AM
#1
talks to himself
Thread Starter
Hey everyone on H-T. I started my build last September and this Saturday I finally got my motor in and the car started. I just wanted to share my start-up video with all of you this morning. Eventually I'll add photos to this thread of everything that has been done.
Table of Contents
Body Work
Last year I decided that I wasn’t going to junk my Honda and that I was going to build it into something that I would be proud of. Here’s my build thread. The car still has a ways to go but I feel like my dad and I have done a lot. I still have a lot to learn too.
Before I get into the detail I need to thank my dad for all the help he’s given me along the way. There have been many issues during this build that I would not have been able to surmount without his help. The car wouldn’t be anywhere near as far along without him working on it while I’m out of town for work. And, I would not have learned as much and had as much fun without him around. Thanks dad.
Here’s what we started with:
A 1995 Honda Civic CX Hatchback with that's lived outside in Chicago its whole life and has been beaten to within inches of its life over the course of 196,000 miles.
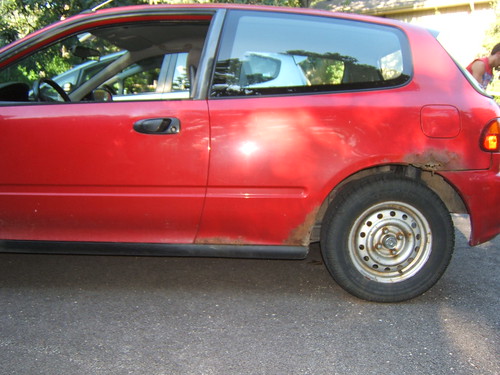
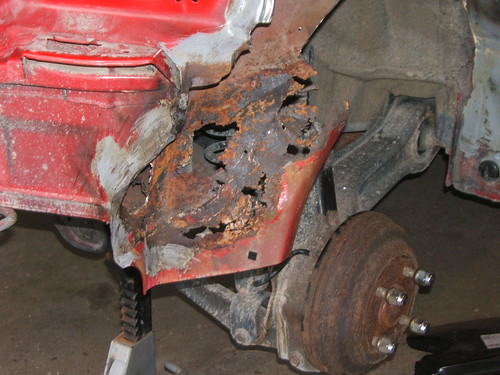
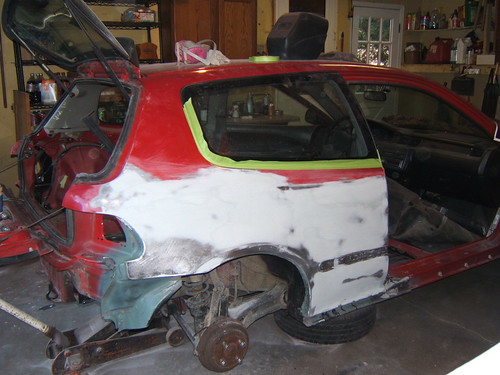
First on the list of things to do was repairing the body to get rid of all the Honda cancer rust. This was a bigger task than I had expected. The problem with rust is that it’s like an iceberg. What you see on the outside is usually only the tip of a much bigger issue. As you can see in the next couple of picture this was exactly the issue I had.
Here’s a picture of my passenger side rear wheel well with the quarter panel metal removed. The metal was almost completely gone and what was left was only good for a template.
I ordered a couple of items from fixmyrust.com. I first ordered the whole side skirt for both the driver and passenger side however the stamping quality on these were kind of poor. So, I ordered the quarter panel patch panels as well and used the side skirts to fabricate the inner wheel wells. Much props are due to my dad for doing all the fabrication work. The dude’s got skill.
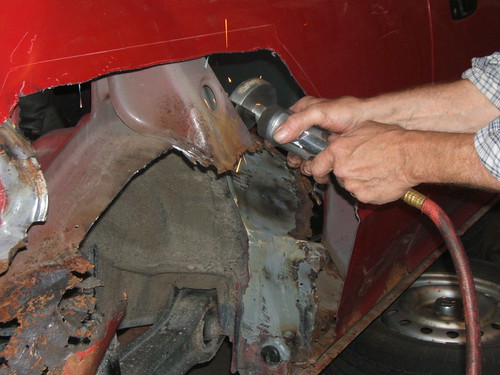
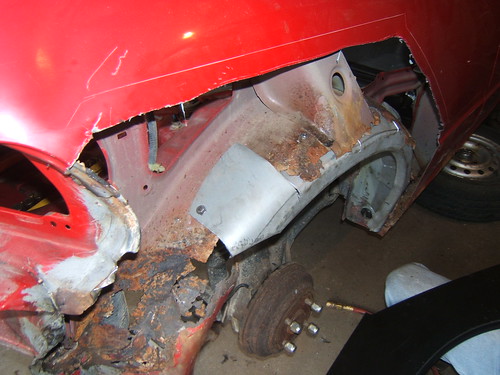
After much fabrication work we were able to weld in the rear quarter panel patch panels. He’s a picture with the rough welds.

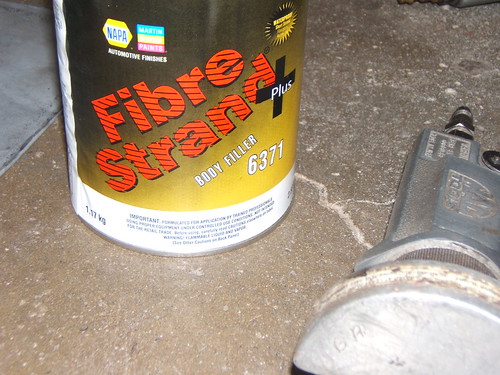
After the welds were ground down we applied a couple coats of fiber glass and then a couple coats of body fill and sanded like crazy between coats.
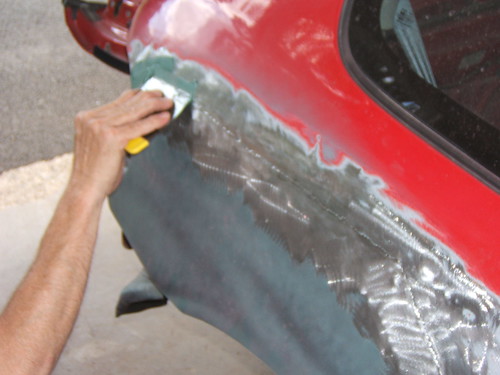
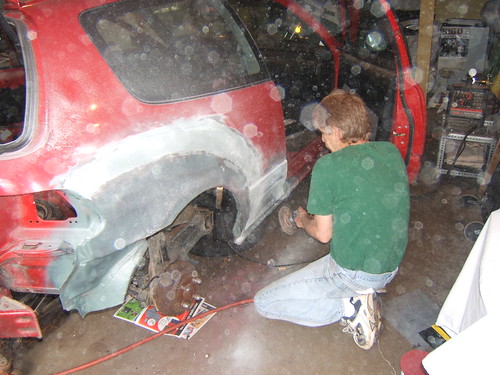
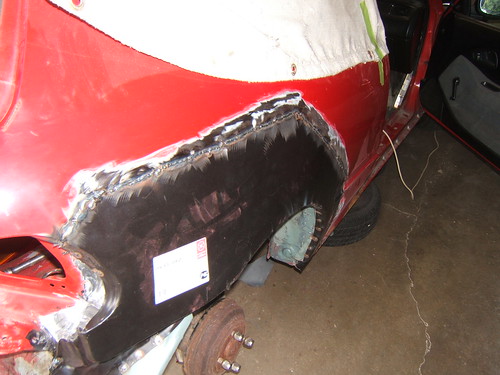
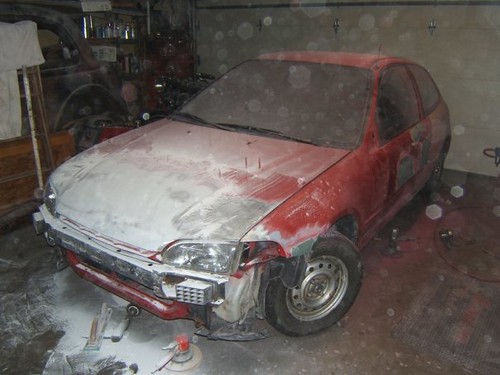
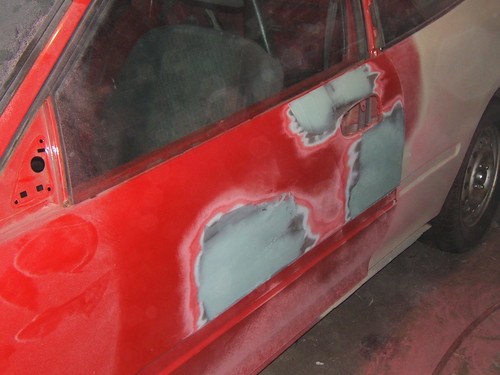
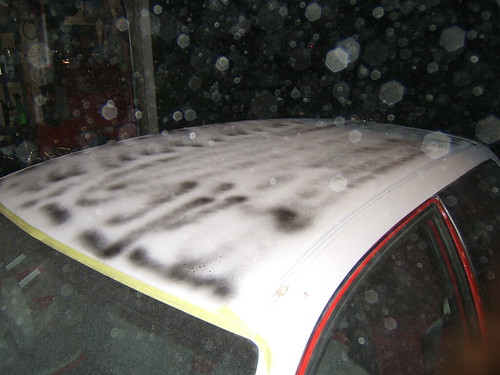
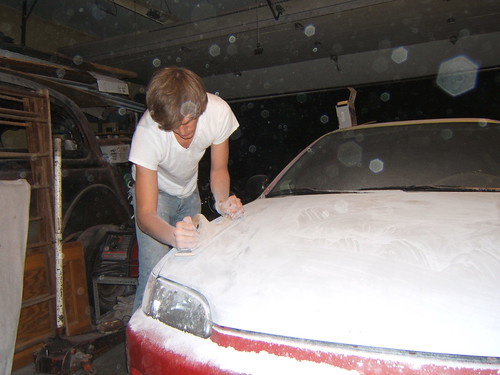
We started fixing a few dings here and there on the body and ended up doing the whole shell. The picture below shows just the tip of the hood after filled and sanded some of the damage but we ended up doing the whole hood. We also block sanded both doors, both rear quarter panels, and the roof.
It’s amazing what a skilled set of hands can feel.
In primer to prevent rust while we complete the body work.

Here’s a picture of me blocking the hood.
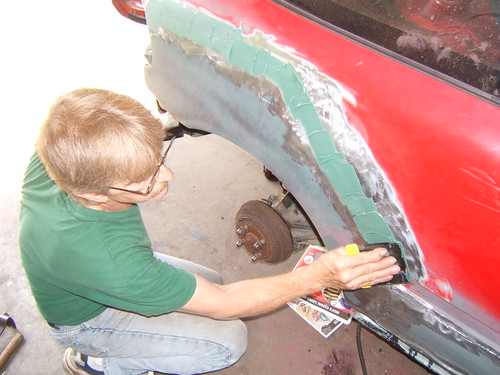
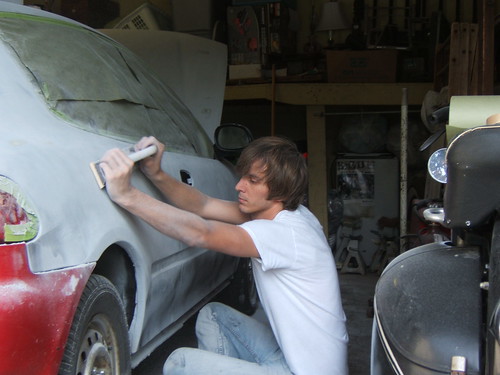
Me again blocking the rear passenger quarter panel.
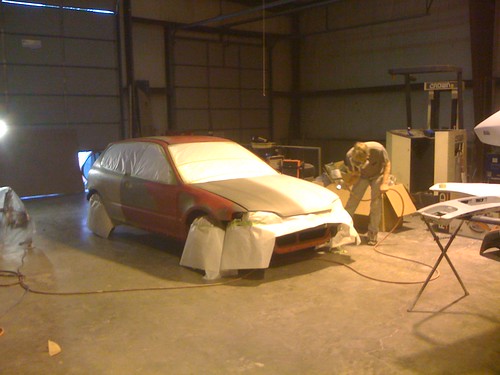
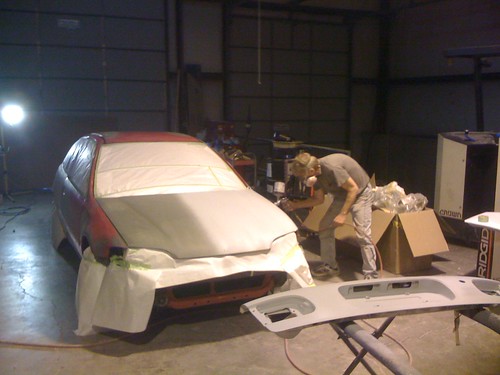
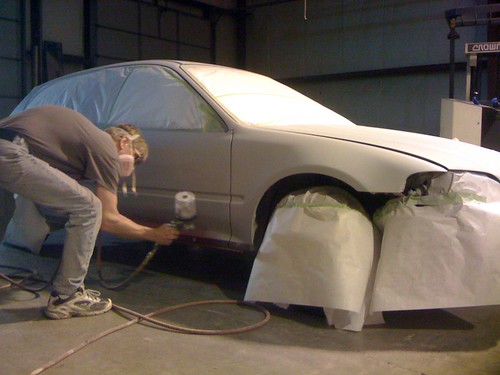
We didn’t have a paint booth so we made due with what we had. Here’s my dad laying down primer.
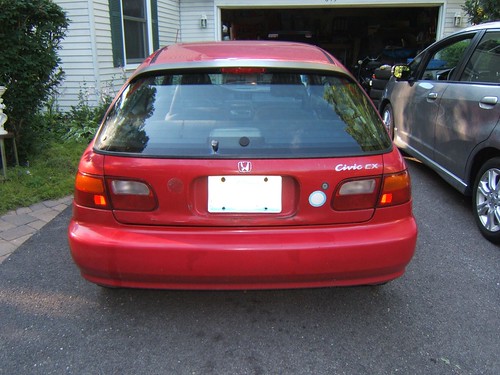
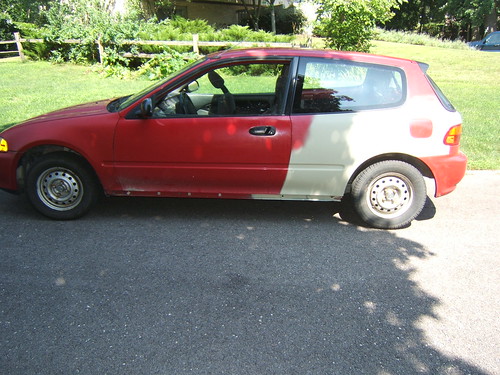
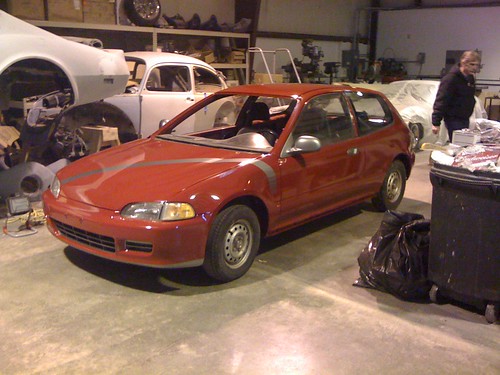
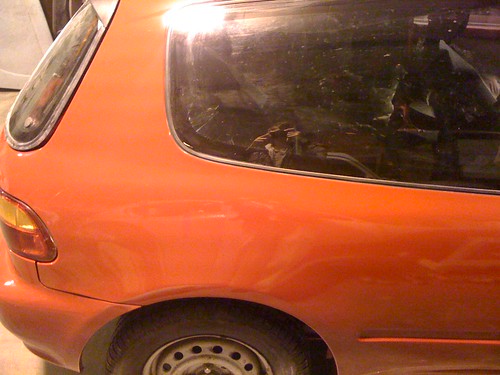
New paint and stripe! New glass is in too (Not shown here). The lighting makes the paint look orange but it’s the factory red.
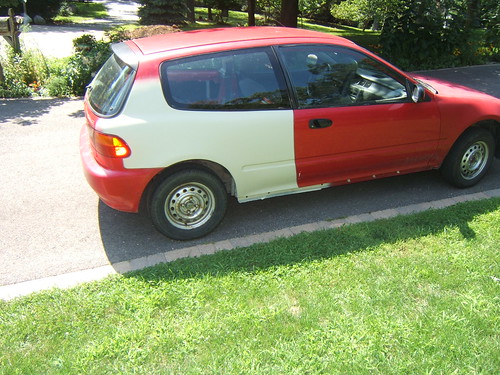
My hatch had damage so we bought one from a junk yard and cleaned it up.

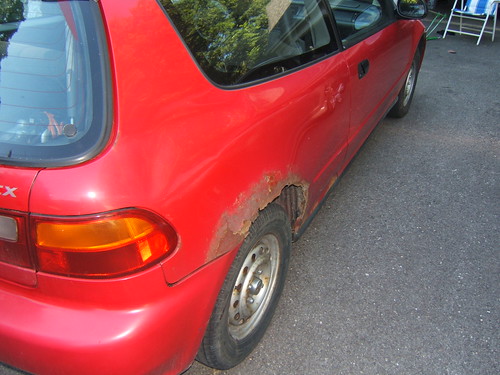
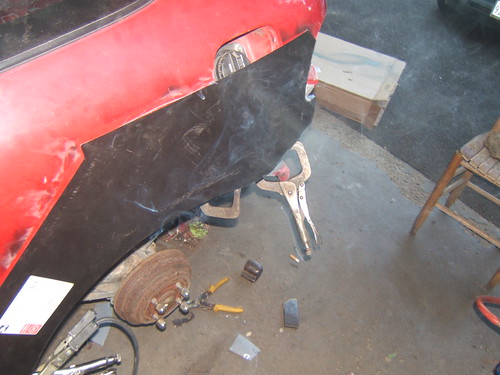
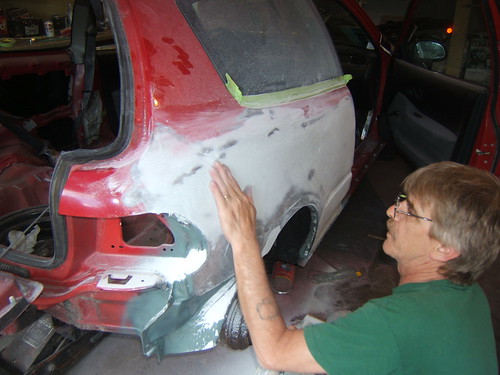
The passenger side rear quarter panel looks a lot nicer than it did, doesn’t it?
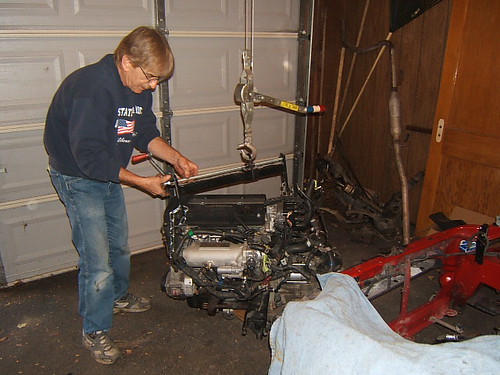
We drove the car home and a few weeks later (or months I can’t remember) pulled the motor old school style with a chain wrapped around a 4x4 that was laid across 2x6 rafters with a come-a-long. Just yank the motor, push the car back, and let the motor down!
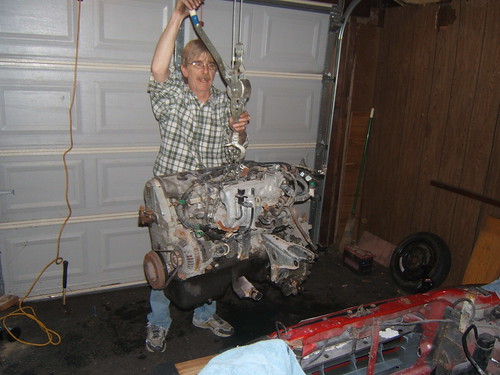
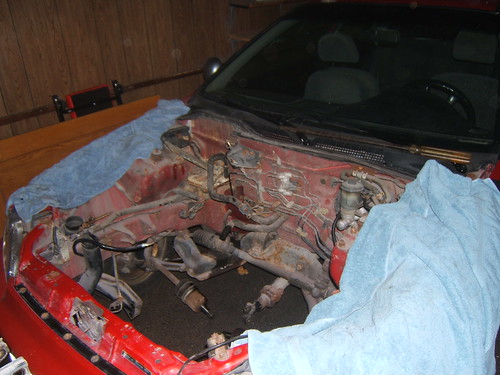
Here’s a shot with the motor out. It sat like this for some time while I contemplated what swap I wanted to do and scoured the internet for a good deal. I ended up deciding on a B18C1 which I bought from someone here on H-T in Indiana.
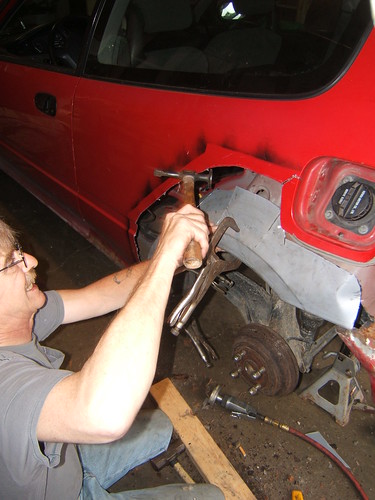
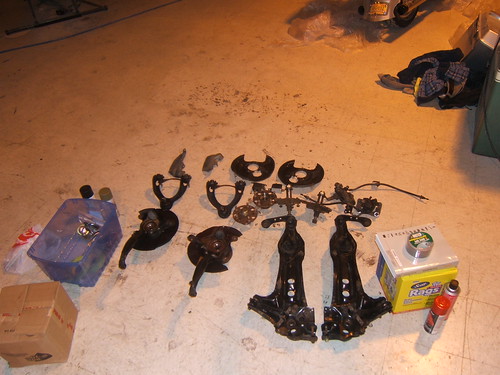
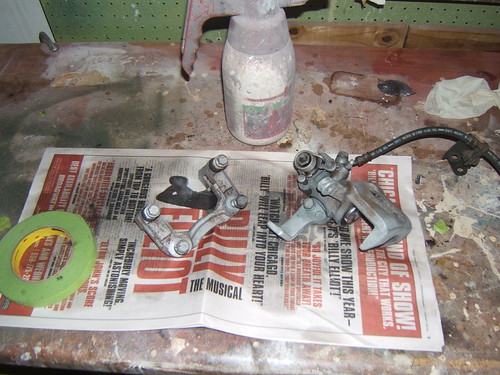
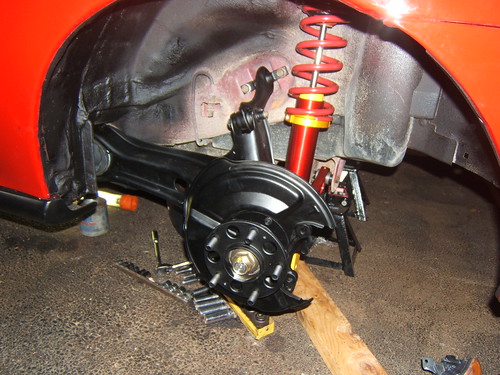
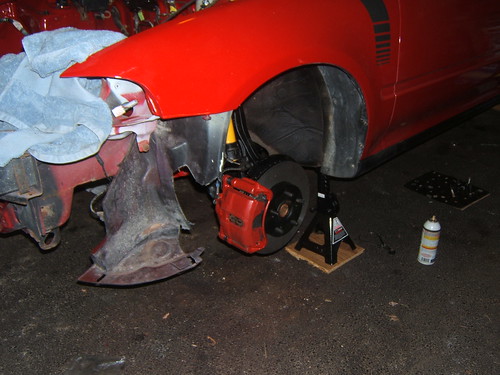
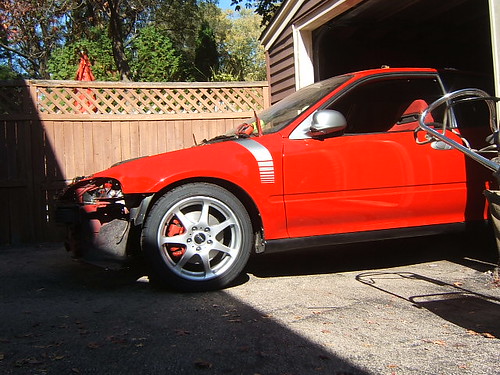
I also decided that with the increased power I was planning on it would be a good idea to switch to disc brakes on all four corners. Here’s a shot of the JDM 5-Lug conversion I bought from hondamotorsonline.com. Each part of the 5-lug conversion was sand blasted and re-painted (I should have powder coated them. Maybe I’ll do that when I decide to go with stiffer bushings). The front wheel bearings were replaced as well as all the bushings with OEM parts. All four calipers were re-built with new seals and painted red with high temperature caliper paint (P.S. the rattle can caliper paint is garbage. If you get any brake fluid on it at all, and you will when you lube the pistons up, it begins to immediately fade).
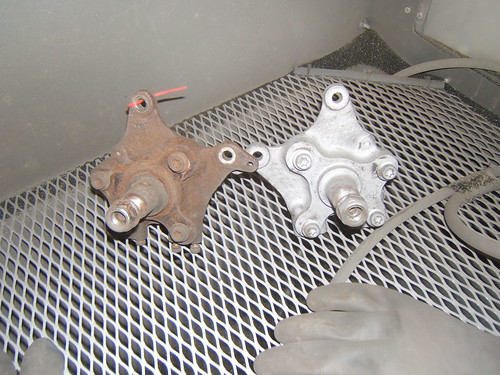
Sand blasting works wonders.
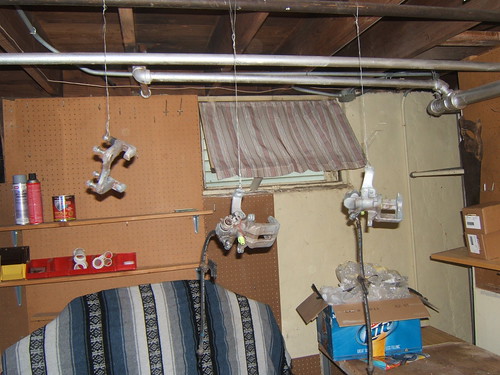
Back in the basement with my hood covered by a blanket I prep’d the calipers for paint.
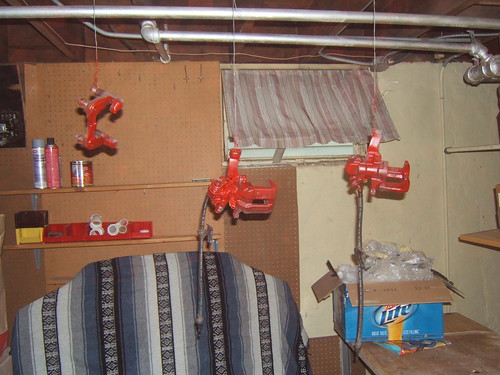
As you’ll see later, painting the calipers made a huge difference in the final appearance.
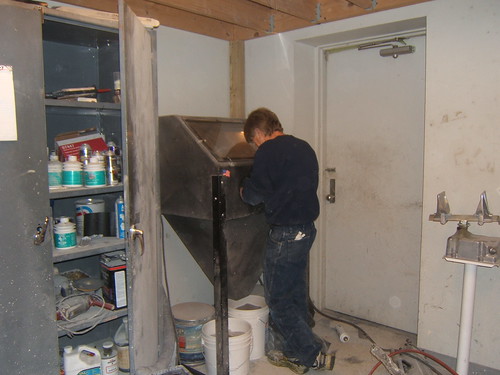
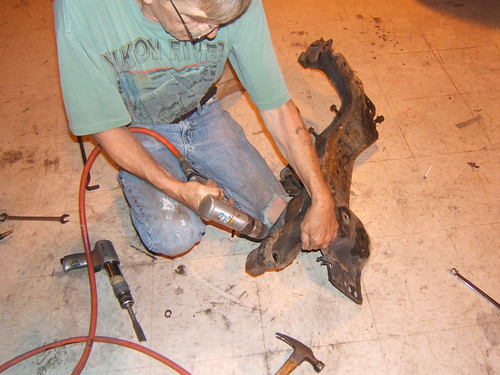
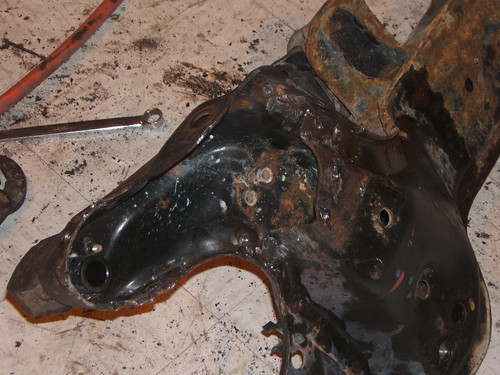
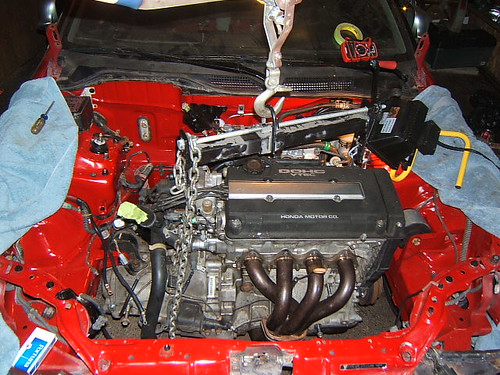
While taking a break from sand blasting and painting the suspension parts we were looking in the engine bay and a thought occurred to both of us “gee that engine cradle looks horrible. Let’s pull that out and clean it up too.” BAD IDEA. If you ever are considering working on your car’s suspension and it’s lived outside its whole life in Chicago TORCH EVERY BOLT before you try and remove any. During the removal we snapped a welded nut inside the engine cradle. Here’s my dad drilling out some spot welds. This didn’t work to great so we also used a weld splitter to break apart the spot welds on one of the cradle’s plates. We broke the plate loose, welded the nut back in , then re-welded the plate on… head ache.
Anyways, my dad got that done and he also repainted the engine bay.
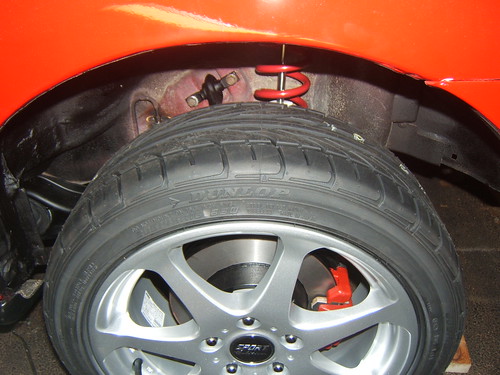
It took forever to find the correct front bearings for the 36mm hub. I asked specific questions regarding the bearing P/N on H-T but received no reply… I ended up buying USDM Type R bearings which were TINY. Then I bought Prelude bearings but for the wrong model (ID was too small). I finally got the correct bearings from a 1999 Honda CRV Manual 2WD. With the disc conversion I also upgraded to stainless steel brake lines and a bought shocks and struts from THMotorsports (super cool guys). Springs are 380/350lbs F/R and the struts are adjustable. I bought the 4040 Proportioning valve off ebay and the larger Master Cylinder and Brake Booster from a friend.

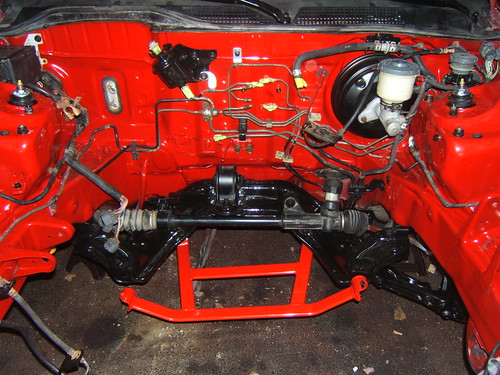
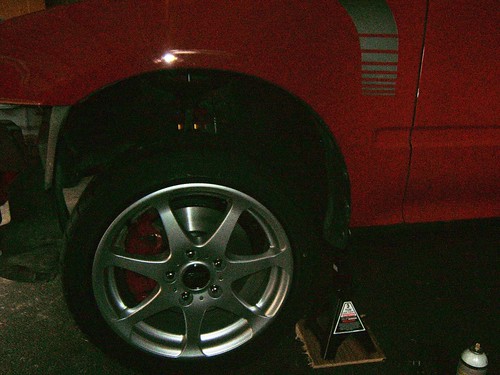
I went with Sport Edition wheels from tire rack. These things a niiiiiiice and REALLY LIGHT for 16”x7” wheels. I think tirerack lists them at 17.4 lbs. It’ll take a hell of a lot less energy to spin these wheels up than a 22lbs wheel would so it should improve my 0-60 times (of course this all depends on the relative radii of gyration). They’re also low pressure cast and shot peened. Shot peening, when done correctly greatly increases the tensile strength of a metal alloy (spokes experience both tension and compression when cornering) when done correctly so I’m confident that they’ll be nice and strong for my intended application. Oh, and more importantly, I bought Dunloop Direzza DZ101s tires. Not knowing a lot about tires but understanding how important they are I feel these will be excellent tires for the value. I haven’t driven on them yet but I’d be glad to let you know how they feel/sound once I get my car on the road. Also, you’ll notice that we decided to paint the engine bay as well. I’m really pleased with how this turned out.
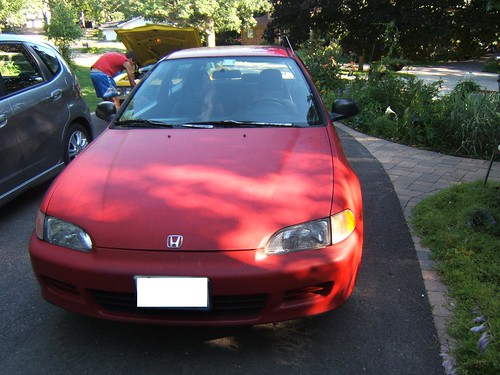
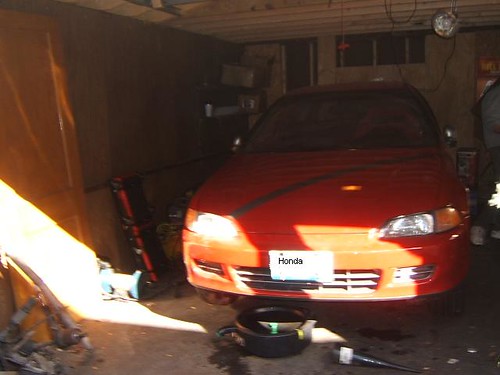
Another shot of the front. The lighting was really bad so I had Microsoft Picture Manager Auto-correct the lighting…
Here’s a shot of the rear. It was an absolute bitch removing my old rear trailing arms. The three bolts at the front of the training arm (two for the trailing arm bushing and one for the arm) where so rusted that it was nearly impossible to remove them. I was forced to move my car from my parents’ garage where there’s 220v power with a compressor to my garage where there’s no 120v power and no desire to buy a crappy compressor that runs on 120v… So, many of the bolts could only be removed by torching them first. Thank god rust has a different thermal expansion rate than steel…
Torch EVERYTHING!!!! If you don’t, you risk breaking welded nuts off inside the chassis. That SUCKS!
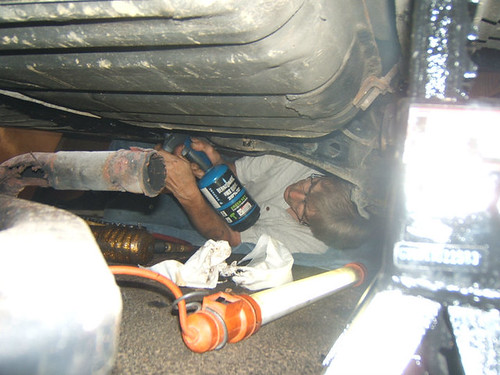
Many weeks later we finally decided to install the motor swap. Here’s a few pictures of us putting the motor in the car!
We dropped the motor in the same way we pulled it out. With a chain tossed over a 4x4 laid across my 2x6 rafters. Except, this time we used a balancing bar with a screw-crank mechanism that we could adjust the position of to adjust how level the motor was. Very simple tool that ended up being very useful when lining up the engine mounts.
Surprisingly the car fired up on THE FIRST TRY. Initially we didn’t have all the extra wiring done but you don’t need the O2 sensor, Knock Sensor, and VTEC wires hooked up to start the car. Any wiring that needed to be done that was present at the shock tower plugs was done through the plugs. If you’re looking to do this it’s really easy to go to a local junkyard and cut a portion of a wiring harness out of a civic for the pins. Usually they’ll give you the plugs for free. Currently the O2 sensors, knock sensor, and VTEC wires are wired up through the shock tower plugs and traced through the firewall through an old A/C hose that we’ll eventually fill with silicone. Again, I absolutely LOVE the look of these wheels. Especially with the larger Type R brakes filling up almost all the open space. If you can’t afford/justify buying BBS or Enkei wheels then I don’t see why you would buy anything else. Just my opinion though.
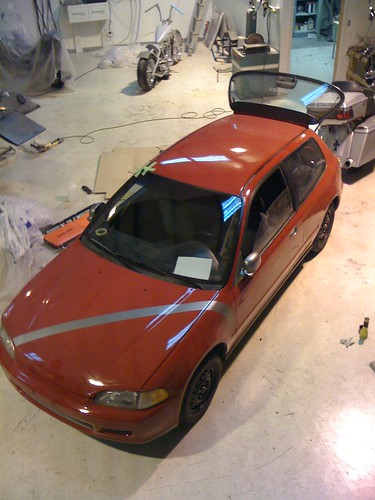
Here’s a better shot of the hood but before the brake conversion and some other work.
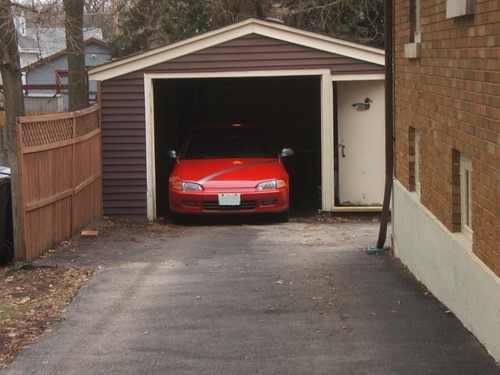
Final Shot:
I installed the OEM in-dash digital clock today. (7/3/11) $10 from the junk yard. I also replaced my broken driver-side headlight assembly.
Please feel free to leave your thoughts and opinions. I'll be compiling a list of websites/threads that I found useful during this build. If they're in the FAQ section of this forum then I will not be re-posting them.
Table of Contents
Body Work
- Rust Repair (this post)
- Painting (this post)
- Wet Sanding / Buffing
- Swap (this post)
- Problems: Pedal Feel: 1, 2, 3; Caliper Bolt Retention: 1
- Rotor and Pad Replacement / Rebuild: 1, 2, 3
- Pull / swap (this post)
- Teardown: 1, 2, 3, 4, 5, 6
- Parts Selection
- Machine Work: 1, 2
- Paint: 1, 2, 3
- Mock-up: Parts Installation: 1, 2, 3, 4, 5, 6, 7
- JRSC: Oil Cooler, FICV Hose, Fuel Rail (see below), Rebuild, Pulley, Manifold Intercooler
- Crack Identification and Repair: 1, 2
- Axle Debacle: 1, 2, 3
- Teardown: 1, 2
- Countershaft: 1, 2, 3
- Mainshaft: 1, 2
- Differential: 1, 2, 3
- Case: 1, 2, 3
- Fuel Pump Replacement: 1,
- Fuel Rail Debacle: Problem Identification, Machine Work: 1, 2, 3, 4
- Catch Can: Research, Selection, Installation
- To be added at a later time. Stay Tuned.
Last year I decided that I wasn’t going to junk my Honda and that I was going to build it into something that I would be proud of. Here’s my build thread. The car still has a ways to go but I feel like my dad and I have done a lot. I still have a lot to learn too.
Before I get into the detail I need to thank my dad for all the help he’s given me along the way. There have been many issues during this build that I would not have been able to surmount without his help. The car wouldn’t be anywhere near as far along without him working on it while I’m out of town for work. And, I would not have learned as much and had as much fun without him around. Thanks dad.
Here’s what we started with:
A 1995 Honda Civic CX Hatchback with that's lived outside in Chicago its whole life and has been beaten to within inches of its life over the course of 196,000 miles.
First on the list of things to do was repairing the body to get rid of all the Honda cancer rust. This was a bigger task than I had expected. The problem with rust is that it’s like an iceberg. What you see on the outside is usually only the tip of a much bigger issue. As you can see in the next couple of picture this was exactly the issue I had.
Here’s a picture of my passenger side rear wheel well with the quarter panel metal removed. The metal was almost completely gone and what was left was only good for a template.
I ordered a couple of items from fixmyrust.com. I first ordered the whole side skirt for both the driver and passenger side however the stamping quality on these were kind of poor. So, I ordered the quarter panel patch panels as well and used the side skirts to fabricate the inner wheel wells. Much props are due to my dad for doing all the fabrication work. The dude’s got skill.
After much fabrication work we were able to weld in the rear quarter panel patch panels. He’s a picture with the rough welds.
After the welds were ground down we applied a couple coats of fiber glass and then a couple coats of body fill and sanded like crazy between coats.
We started fixing a few dings here and there on the body and ended up doing the whole shell. The picture below shows just the tip of the hood after filled and sanded some of the damage but we ended up doing the whole hood. We also block sanded both doors, both rear quarter panels, and the roof.
It’s amazing what a skilled set of hands can feel.
In primer to prevent rust while we complete the body work.
Here’s a picture of me blocking the hood.
Me again blocking the rear passenger quarter panel.
We didn’t have a paint booth so we made due with what we had. Here’s my dad laying down primer.
New paint and stripe! New glass is in too (Not shown here). The lighting makes the paint look orange but it’s the factory red.
My hatch had damage so we bought one from a junk yard and cleaned it up.
The passenger side rear quarter panel looks a lot nicer than it did, doesn’t it?
We drove the car home and a few weeks later (or months I can’t remember) pulled the motor old school style with a chain wrapped around a 4x4 that was laid across 2x6 rafters with a come-a-long. Just yank the motor, push the car back, and let the motor down!
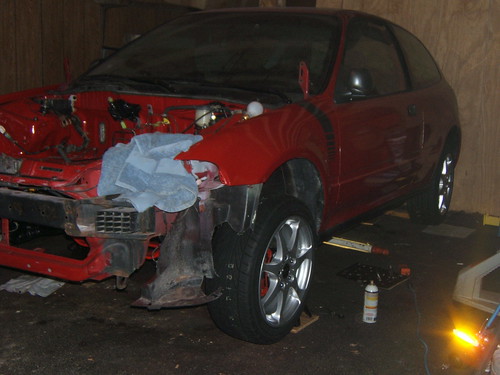
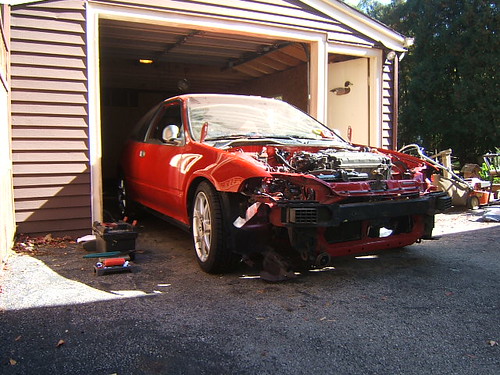
Here’s a shot with the motor out. It sat like this for some time while I contemplated what swap I wanted to do and scoured the internet for a good deal. I ended up deciding on a B18C1 which I bought from someone here on H-T in Indiana.
I also decided that with the increased power I was planning on it would be a good idea to switch to disc brakes on all four corners. Here’s a shot of the JDM 5-Lug conversion I bought from hondamotorsonline.com. Each part of the 5-lug conversion was sand blasted and re-painted (I should have powder coated them. Maybe I’ll do that when I decide to go with stiffer bushings). The front wheel bearings were replaced as well as all the bushings with OEM parts. All four calipers were re-built with new seals and painted red with high temperature caliper paint (P.S. the rattle can caliper paint is garbage. If you get any brake fluid on it at all, and you will when you lube the pistons up, it begins to immediately fade).
Sand blasting works wonders.
Back in the basement with my hood covered by a blanket I prep’d the calipers for paint.
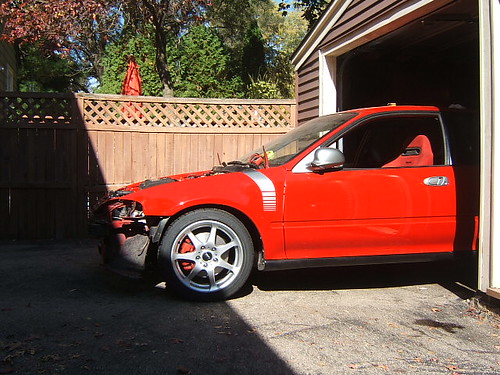
As you’ll see later, painting the calipers made a huge difference in the final appearance.
While taking a break from sand blasting and painting the suspension parts we were looking in the engine bay and a thought occurred to both of us “gee that engine cradle looks horrible. Let’s pull that out and clean it up too.” BAD IDEA. If you ever are considering working on your car’s suspension and it’s lived outside its whole life in Chicago TORCH EVERY BOLT before you try and remove any. During the removal we snapped a welded nut inside the engine cradle. Here’s my dad drilling out some spot welds. This didn’t work to great so we also used a weld splitter to break apart the spot welds on one of the cradle’s plates. We broke the plate loose, welded the nut back in , then re-welded the plate on… head ache.
Anyways, my dad got that done and he also repainted the engine bay.
It took forever to find the correct front bearings for the 36mm hub. I asked specific questions regarding the bearing P/N on H-T but received no reply… I ended up buying USDM Type R bearings which were TINY. Then I bought Prelude bearings but for the wrong model (ID was too small). I finally got the correct bearings from a 1999 Honda CRV Manual 2WD. With the disc conversion I also upgraded to stainless steel brake lines and a bought shocks and struts from THMotorsports (super cool guys). Springs are 380/350lbs F/R and the struts are adjustable. I bought the 4040 Proportioning valve off ebay and the larger Master Cylinder and Brake Booster from a friend.
I went with Sport Edition wheels from tire rack. These things a niiiiiiice and REALLY LIGHT for 16”x7” wheels. I think tirerack lists them at 17.4 lbs. It’ll take a hell of a lot less energy to spin these wheels up than a 22lbs wheel would so it should improve my 0-60 times (of course this all depends on the relative radii of gyration). They’re also low pressure cast and shot peened. Shot peening, when done correctly greatly increases the tensile strength of a metal alloy (spokes experience both tension and compression when cornering) when done correctly so I’m confident that they’ll be nice and strong for my intended application. Oh, and more importantly, I bought Dunloop Direzza DZ101s tires. Not knowing a lot about tires but understanding how important they are I feel these will be excellent tires for the value. I haven’t driven on them yet but I’d be glad to let you know how they feel/sound once I get my car on the road. Also, you’ll notice that we decided to paint the engine bay as well. I’m really pleased with how this turned out.
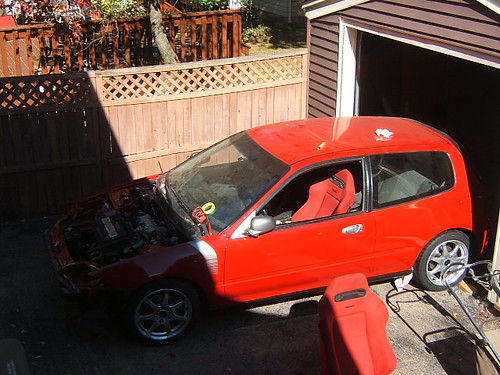
Another shot of the front. The lighting was really bad so I had Microsoft Picture Manager Auto-correct the lighting…
Here’s a shot of the rear. It was an absolute bitch removing my old rear trailing arms. The three bolts at the front of the training arm (two for the trailing arm bushing and one for the arm) where so rusted that it was nearly impossible to remove them. I was forced to move my car from my parents’ garage where there’s 220v power with a compressor to my garage where there’s no 120v power and no desire to buy a crappy compressor that runs on 120v… So, many of the bolts could only be removed by torching them first. Thank god rust has a different thermal expansion rate than steel…
Torch EVERYTHING!!!! If you don’t, you risk breaking welded nuts off inside the chassis. That SUCKS!
Many weeks later we finally decided to install the motor swap. Here’s a few pictures of us putting the motor in the car!
We dropped the motor in the same way we pulled it out. With a chain tossed over a 4x4 laid across my 2x6 rafters. Except, this time we used a balancing bar with a screw-crank mechanism that we could adjust the position of to adjust how level the motor was. Very simple tool that ended up being very useful when lining up the engine mounts.
Surprisingly the car fired up on THE FIRST TRY. Initially we didn’t have all the extra wiring done but you don’t need the O2 sensor, Knock Sensor, and VTEC wires hooked up to start the car. Any wiring that needed to be done that was present at the shock tower plugs was done through the plugs. If you’re looking to do this it’s really easy to go to a local junkyard and cut a portion of a wiring harness out of a civic for the pins. Usually they’ll give you the plugs for free. Currently the O2 sensors, knock sensor, and VTEC wires are wired up through the shock tower plugs and traced through the firewall through an old A/C hose that we’ll eventually fill with silicone. Again, I absolutely LOVE the look of these wheels. Especially with the larger Type R brakes filling up almost all the open space. If you can’t afford/justify buying BBS or Enkei wheels then I don’t see why you would buy anything else. Just my opinion though.
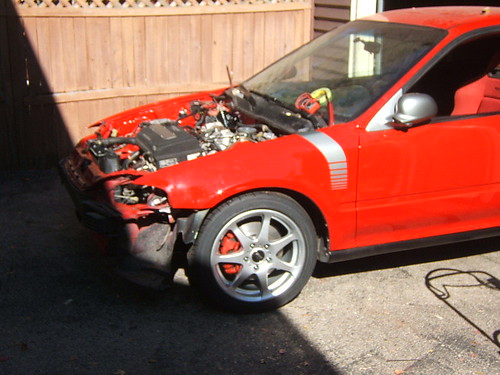
Here’s a better shot of the hood but before the brake conversion and some other work.
Final Shot:
I installed the OEM in-dash digital clock today. (7/3/11) $10 from the junk yard. I also replaced my broken driver-side headlight assembly.
Please feel free to leave your thoughts and opinions. I'll be compiling a list of websites/threads that I found useful during this build. If they're in the FAQ section of this forum then I will not be re-posting them.
Last edited by CX-Adam; 07-01-2013 at 08:49 AM. Reason: Update TOC

The following users liked this post:

 10-24-2010, 03:24 PM
#6
talks to himself
Thread Starter

Trending Topics
10-24-2010, 05:48 PM
#9
Honda-Tech Member
Damn...if I had those body work skills it would open up so many more options for purchases...there's alot of 5th gen hatches around here...the rust in the rear quarter always steers me away. Good stuff man and good luck with the rest.
10-24-2010, 08:37 PM
#10
talks to himself
Thread Starter
30+ years in the industry will do that to you. I'm pretty lucky to be around a guy who knows so much. I'd like another hatch but it's hard to find one that isn't already built or rusty as hell... or both.... The welding is the most difficult part. The block sanding is just time consuming but not overly difficult. It's a great tricep and forearm workout too.
 10-25-2010, 06:41 PM
#14
I love these threads. Thanks for saving another one. Hopefully you learned a few tricks from your Pops. Looks like he's a pretty handy guy to have around. Nice work!! I'll be tackling some rust of my own in the coming weeks. I'll be getting the quarter panels and rockers from fixmyrust, but I anticipate a similar problem underneath the outer shell. What gauge steel did you use for the pieces that you used to patch the rust underneath the outer shell? I need to pick some up too.
11-10-2010, 08:07 PM
#15
talks to himself
Thread Starter
I love these threads. Thanks for saving another one. Hopefully you learned a few tricks from your Pops. Looks like he's a pretty handy guy to have around. Nice work!! I'll be tackling some rust of my own in the coming weeks. I'll be getting the quarter panels and rockers from fixmyrust, but I anticipate a similar problem underneath the outer shell. What gauge steel did you use for the pieces that you used to patch the rust underneath the outer shell? I need to pick some up too.
Good luck with your work!

 jk looks really really clean keep up the good work


 11-11-2010, 02:57 AM
#21
Honda-Tech Member
Join Date: Feb 2009
Location: Montreal
Posts: 460
Likes: 0
Received 0 Likes
on
0 Posts
Very nice build! Good work.
Those wheels do look pretty cool too.
I am thinking about getting those same tires, I have read a lot of good reviews on them too. Have you tried them out yet?
Those wheels do look pretty cool too.
I am thinking about getting those same tires, I have read a lot of good reviews on them too. Have you tried them out yet?
11-11-2010, 03:31 AM
#22
talks to himself
Thread Starter
11-11-2010, 05:14 AM
#23
Wheres my titleeeee!
Join Date: Feb 2007
Location: West Haven, CT, USA
Posts: 698
Likes: 0
Received 0 Likes
on
0 Posts

