
Painting the valve cover
 12-10-2010, 10:48 AM
#1
Honda-Tech Member
Thread Starter
Join Date: Mar 2010
Location: California
Posts: 1,042
Likes: 0
Received 0 Likes
on
0 Posts
I picked up a gsr cover for $20. My bro's birthday is coming up so I want to make him the red wrinkle cover. I've searched on how to do it, and it seems everyone has their own technique.
Just to clarify the steps:
1. Clean the cover with soap and water to get all the dirt/oil off.
2. Use paint stripper to remove the old paint. There's no such thing as using too much of this.
3. Start Sanding the cover. This is where I'm confused. I've seen people use anything from one or two different grits, to about four or five. What do you recommend?
4. Tape off the holes.
5. Would it be easier to apply like a chapstik or vaseline to the letters, or sand them down after painting over them?
6. Do I primer?
7. Do I use paint thinner?
8. Apply about 3 coats of wrinkle paint with a 10 minute break between each coat.
9. Bake in oven at 200 degrees for how long?
10. Let sit for about an hour.
I know it's been covered, but with so many different ways of doing it I just want to make sure I'm getting it right.
 12-10-2010, 01:55 PM
#2
Honda-Tech Member
Join Date: May 2010
Posts: 233
Likes: 0
Received 0 Likes
on
0 Posts
All you have to sand is the Honda and vtec and Honda symbol. Just use masking tape to tape the letters off.. I used like an 800 grit sandpaper and you will see a nice result.. You don't need to use primer.. Just read the back of the vht wrinkle can and it tells you what to do..
12-10-2010, 02:00 PM
#3
Honda-Tech Member
Thread Starter
Join Date: Mar 2010
Location: California
Posts: 1,042
Likes: 0
Received 0 Likes
on
0 Posts
Ok so ill pass on the primer and buy 800 grit. I have 150, 220, 320, and 600. Masking the bottom letters looks like a pain in the a$$. Any other suggestions?
12-10-2010, 02:21 PM
#4
Honda-Tech Member
Join Date: Jul 2005
Location: millbrae, ca, usa
Posts: 197
Likes: 0
Received 0 Likes
on
0 Posts
There's a thread on TI (team-integra) that uses this same process to polish up oil covered headers. And the same process can be applied to any metallic surface.
I doubt this is necessary. I would just use 2 types, a 220 to remove any unwanted materials from the metallic surface. Then use the 800 to get the smooth finish (although the polish look won't matter since you're painting over it).
I'm looking at doing this too, however, the one part that tripped me out is when you stated to place the valve cover in the oven for an hour?!
Really 1 hr?
I thought it would be a lot less...?
12-10-2010, 03:26 PM
#6
Honda-Tech Member
Thread Starter
Join Date: Mar 2010
Location: California
Posts: 1,042
Likes: 0
Received 0 Likes
on
0 Posts
This process of the sand paper grits you are talking about is the "polishing" technique.
There's a thread on TI (team-integra) that uses this same process to polish up oil covered headers. And the same process can be applied to any metallic surface.
I doubt this is necessary. I would just use 2 types, a 220 to remove any unwanted materials from the metallic surface. Then use the 800 to get the smooth finish (although the polish look won't matter since you're painting over it).
I'm looking at doing this too, however, the one part that tripped me out is when you stated to place the valve cover in the oven for an hour?!
Really 1 hr?
I thought it would be a lot less...?
The baking part I was unsure of. I Googled how to do this and the only thread I found that had a time frame for baking stated 45min - 1 hour. I'm still waiting on people's input to make sure everything I have is right.
Also, I don't have any other way to bake it other than the oven in our kitchen. Would I ruin the oven by putting it in there?
12-10-2010, 03:28 PM
#7
Honda-Tech Member
As you said OP, there are many ways of doing this and here are a few that have worked quite well for people (apologies if you have seen them before):
http://www.hondaclub.com/forum/artic...-painting.html
http://www.c-speedracing.com/howto/r...valvecover.php
http://www.*************/forums/engi...lve-cover.html
Most of those high-temp paints and such are good to go without primer. Most people tend to go without it. It should say on the can whether it's recommended or not.
As far as sanding goes, just make sure you start with a reasonably low grit and end up with a finer grit. 600 will probably be just fine, though I personally would go with something around 800-1000.
You will definitely need something like paint thinner to get rid of the existing coating.
Trending Topics
12-10-2010, 03:29 PM
#8
Honda-Tech Member
Thread Starter
Join Date: Mar 2010
Location: California
Posts: 1,042
Likes: 0
Received 0 Likes
on
0 Posts
12-10-2010, 03:34 PM
#9
Honda-Tech Member
Thread Starter
Join Date: Mar 2010
Location: California
Posts: 1,042
Likes: 0
Received 0 Likes
on
0 Posts
He said let it sit for an hour (to let it cool). As far as oven time, some say as low as 20 min, others say 2 hours (at 200 degrees). I'd just put it in somewhere in the middle.
As you said OP, there are many ways of doing this and here are a few that have worked quite well for people (apologies if you have seen them before):
http://www.hondaclub.com/forum/artic...-painting.html
http://www.c-speedracing.com/howto/r...valvecover.php
http://www.*************/forums/engi...lve-cover.html
Most of those high-temp paints and such are good to go without primer. Most people tend to go without it. It should say on the can whether it's recommended or not.
As far as sanding goes, just make sure you start with a reasonably low grit and end up with a finer grit. 600 will probably be just fine, though I personally would go with something around 800-1000.
You will definitely need something like paint thinner to get rid of the existing coating.
thanks for the links. I actually got some info from the c-speed link and the hondaclub link.
 good to know I was on the right track.
 I bought paint stripper to remove the old paint off of the cover. However, I bought the aerosol as opposed to the liquid in the tin can because that just looked like a lot of stripper. As I drove home, I was thinking about ways I could get the paint off and I wonder if I had bought the liquid, then I could pour a lot out into something and submerge the valve cover in there. This way I would get every nook and cranny. Bad idea?
12-10-2010, 06:00 PM
#10
Honda-Tech Member

Join Date: Dec 2010
Location: Lemont, IL
Posts: 19
Likes: 0
Received 0 Likes
on
0 Posts
Save yourself a lot of time and effort, have the cover bead blasted. Its also does better job at getting all the nooks and cranies cleaned out. I have a cheap Harbor Freight blasting cabinet and using glass bead you can get aluminum pretty darn smooth, almost to a polished finish if you do it right. You would want to leave the cover slightly rough for better paint adhesion though. Do not use a primer unless it specifically says to, most primers are not rated for the temps you will be subjecting the VC to. If you have an oven that you can used to cure paint in, I would also suggest baking the cover before blasting it as this will help to drive out any oil collected in the tighter areas. The step by step process I use is as follows:
1. Spray the part down liberally with non-chlorinated brake clean, I normally use at least one can on the first go around.
2. Bake the part at 200 degrees for half hour if you have access to an oven (do not use your household oven, you will contaminate it and make you house reek like all getout plus its unhealthy to do this in your house). If you are buying an craigslist oven to do this I recommend electric BTW. Easier to hook up and less chance of contamination.
3. After the cover has cooled somewhat, blast it with another can of brake clean until all oil/dirt residue is removed. Make sure to remove as much grease and oil as possible so that you dont clog up the blaster.
4. Bead blast the cover with glass bead. You might need to use normal blasting sand if the cover is exceptionally dirt/stained but be careful as this can remove material and damage your part. Finish with glass bead if you use sand first.
5. Clean off blasting dust with another can of brake clean
6. Wipe down the part with paint thinner/mineral spirits on a clean lint free rag.
7. Tack cloth the part to remove any dust/lint
8. Start spraying, follow the directions on the can as closely as possible. Pay attention to temp/humidity requirements especially with wrinkle paint.
9. Bake part if recommened, not absolutly necessary. I've painted many intakes/valve covers without baking. Just make sure to let the paint cure completely before reinstallation.
10. Sand off any raised areas that you want to have bare. Start with 400 grit and work your way up to 1000 wet. You can use buffing wheels and compounds on a drill to polish, just be careful of your new paint. Wheels and compound can be purchased at Ace Hardware.
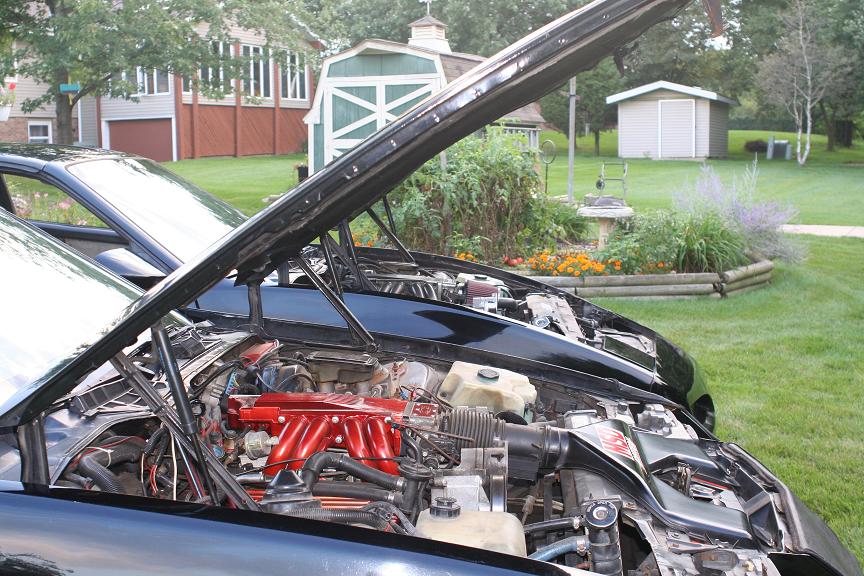
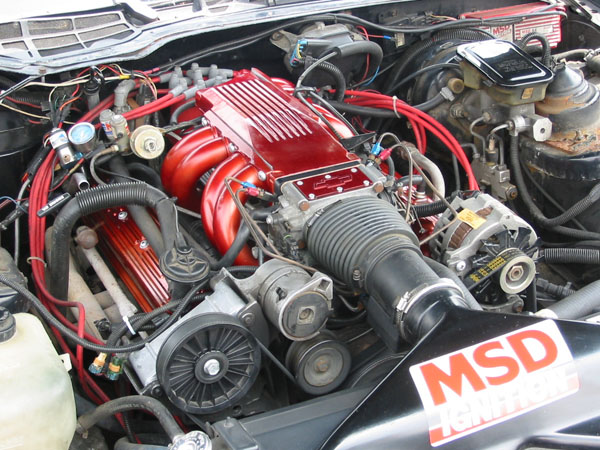
Here are the intakes I did on my Camaro and Firebird. I used Duplicolor Metalcast paint that give it an anodized look. The Camaro is red and the firebird in the background is smoke.
Good luck!
P.S. A better option is to get the part powder coated if affordable. It will last longer and look better, plus it will save you a lot of work and money too if you have to buy an oven to bake the part. Craftsman and others make home powdercoat kits too if you want to do it yourself. I'd love to do this myself but no room to set it all up.
1. Spray the part down liberally with non-chlorinated brake clean, I normally use at least one can on the first go around.
2. Bake the part at 200 degrees for half hour if you have access to an oven (do not use your household oven, you will contaminate it and make you house reek like all getout plus its unhealthy to do this in your house). If you are buying an craigslist oven to do this I recommend electric BTW. Easier to hook up and less chance of contamination.
3. After the cover has cooled somewhat, blast it with another can of brake clean until all oil/dirt residue is removed. Make sure to remove as much grease and oil as possible so that you dont clog up the blaster.
4. Bead blast the cover with glass bead. You might need to use normal blasting sand if the cover is exceptionally dirt/stained but be careful as this can remove material and damage your part. Finish with glass bead if you use sand first.
5. Clean off blasting dust with another can of brake clean
6. Wipe down the part with paint thinner/mineral spirits on a clean lint free rag.
7. Tack cloth the part to remove any dust/lint
8. Start spraying, follow the directions on the can as closely as possible. Pay attention to temp/humidity requirements especially with wrinkle paint.
9. Bake part if recommened, not absolutly necessary. I've painted many intakes/valve covers without baking. Just make sure to let the paint cure completely before reinstallation.
10. Sand off any raised areas that you want to have bare. Start with 400 grit and work your way up to 1000 wet. You can use buffing wheels and compounds on a drill to polish, just be careful of your new paint. Wheels and compound can be purchased at Ace Hardware.
Here are the intakes I did on my Camaro and Firebird. I used Duplicolor Metalcast paint that give it an anodized look. The Camaro is red and the firebird in the background is smoke.
Good luck!
P.S. A better option is to get the part powder coated if affordable. It will last longer and look better, plus it will save you a lot of work and money too if you have to buy an oven to bake the part. Craftsman and others make home powdercoat kits too if you want to do it yourself. I'd love to do this myself but no room to set it all up.
12-10-2010, 08:17 PM
#11
Honda-Tech Member
Thread Starter
Join Date: Mar 2010
Location: California
Posts: 1,042
Likes: 0
Received 0 Likes
on
0 Posts
I really appreciate the time you took to write up all that, but I don't really want to spend the money to blast the cover. It's not a professional job. Just some backyard special.
Judging by what everyone is telling me. It looks like I won't use a primer. You made a good point that not all primers may withstand the heat.
Although, I will use a degreaser to clean the cover. I don't know why I didn't think of that before.
Judging by what everyone is telling me. It looks like I won't use a primer. You made a good point that not all primers may withstand the heat.
Although, I will use a degreaser to clean the cover. I don't know why I didn't think of that before.
12-10-2010, 08:53 PM
#12
Honda-Tech Member
actually, I made a typo. I actually DID mean to bake it for an hour. I don't know how long I should let it cool off for. I figured overnight. I wasn't installing it anytime soon so cooling didn't matter.
thanks for the links. I actually got some info from the c-speed link and the hondaclub link. good to know I was on the right track.
I bought paint stripper to remove the old paint off of the cover. However, I bought the aerosol as opposed to the liquid in the tin can because that just looked like a lot of stripper. As I drove home, I was thinking about ways I could get the paint off and I wonder if I had bought the liquid, then I could pour a lot out into something and submerge the valve cover in there. This way I would get every nook and cranny. Bad idea?
thanks for the links. I actually got some info from the c-speed link and the hondaclub link.
good to know I was on the right track. I bought paint stripper to remove the old paint off of the cover. However, I bought the aerosol as opposed to the liquid in the tin can because that just looked like a lot of stripper. As I drove home, I was thinking about ways I could get the paint off and I wonder if I had bought the liquid, then I could pour a lot out into something and submerge the valve cover in there. This way I would get every nook and cranny. Bad idea?
You can submerge the valvecover, it won't hurt it a bit. Like you said, just sounds like a lot of stripper to use eh? Only thing it'll hurt is paint and skin so beyond that you're straight. Go ahead and use whatever method you think works for you best.
12-10-2010, 09:43 PM
#13
Honda-Tech Member
Thread Starter
Join Date: Mar 2010
Location: California
Posts: 1,042
Likes: 0
Received 0 Likes
on
0 Posts
It would seem like an hour is the average time in the oven, so I'd say you are indeed on the right track.
You can submerge the valvecover, it won't hurt it a bit. Like you said, just sounds like a lot of stripper to use eh? Only thing it'll hurt is paint and skin so beyond that you're straight. Go ahead and use whatever method you think works for you best.
You can submerge the valvecover, it won't hurt it a bit. Like you said, just sounds like a lot of stripper to use eh? Only thing it'll hurt is paint and skin so beyond that you're straight. Go ahead and use whatever method you think works for you best.
How does everyone bake them? All I've got is the oven in the kitchen.
12-10-2010, 10:06 PM
#14
Honda-Tech Member
Join Date: Oct 2007
Location: Northeast TN
Posts: 1,367
Likes: 0
Received 0 Likes
on
0 Posts
ok i got 2 responses to what ive read so far lol
1) i would def not tape off all of the letters. i did it to the first valve cover i did and it took me literally 45 min to an hour and then after all that there was still some paint on the letters. so here are my recommendations on this...first off, like you mentioned about the chap stick on the letters. i have tried it on a couple of things and it is really messy and hard to just keep on the letters. i accidentally got it between the letters once and it didnt turn out the best. so what i have done for the last like 5 VC's ive done is paint the entire cover and then go back with an air powered die grinder i guess it is lol and just keep it straight on the fresh paint that you want removed. it takes the paint off effortlessly and also polishes the letters up quite a bit. i have found that this is the best way to take care of that issue.
2)not very helpful on this part bc ive never done wrinkle red before but i have heard some people say they just use the oven in their kitchens to let the paint bake. someone told me that the paint they used didnt give off any smells or fumes after it was sprayed so you wouldnt have to worry about your pizza tasting like spray paint if this is the truth. lmao
12-10-2010, 10:11 PM
#15
Honda-Tech Member
Thread Starter
Join Date: Mar 2010
Location: California
Posts: 1,042
Likes: 0
Received 0 Likes
on
0 Posts
ok i got 2 responses to what ive read so far lol
1) i would def not tape off all of the letters. i did it to the first valve cover i did and it took me literally 45 min to an hour and then after all that there was still some paint on the letters. so here are my recommendations on this...first off, like you mentioned about the chap stick on the letters. i have tried it on a couple of things and it is really messy and hard to just keep on the letters. i accidentally got it between the letters once and it didnt turn out the best. so what i have done for the last like 5 VC's ive done is paint the entire cover and then go back with an air powered die grinder i guess it is lol and just keep it straight on the fresh paint that you want removed. it takes the paint off effortlessly and also polishes the letters up quite a bit. i have found that this is the best way to take care of that issue.
2)not very helpful on this part bc ive never done wrinkle red before but i have heard some people say they just use the oven in their kitchens to let the paint bake. someone told me that the paint they used didnt give off any smells or fumes after it was sprayed so you wouldnt have to worry about your pizza tasting like spray paint if this is the truth. lmao
1) i would def not tape off all of the letters. i did it to the first valve cover i did and it took me literally 45 min to an hour and then after all that there was still some paint on the letters. so here are my recommendations on this...first off, like you mentioned about the chap stick on the letters. i have tried it on a couple of things and it is really messy and hard to just keep on the letters. i accidentally got it between the letters once and it didnt turn out the best. so what i have done for the last like 5 VC's ive done is paint the entire cover and then go back with an air powered die grinder i guess it is lol and just keep it straight on the fresh paint that you want removed. it takes the paint off effortlessly and also polishes the letters up quite a bit. i have found that this is the best way to take care of that issue.
2)not very helpful on this part bc ive never done wrinkle red before but i have heard some people say they just use the oven in their kitchens to let the paint bake. someone told me that the paint they used didnt give off any smells or fumes after it was sprayed so you wouldnt have to worry about your pizza tasting like spray paint if this is the truth. lmao
I am very worried about my pizza smelling like paint. If anyone can verify this before I do it, I'd be a happy man.
12-10-2010, 10:13 PM
#16
Honda-Tech Member
Join Date: Oct 2007
Location: Northeast TN
Posts: 1,367
Likes: 0
Received 0 Likes
on
0 Posts
lol i hear you on the pizza thing...id be pissed if my pizza tasted like paint haha and yeah that should work just fine. obviously, just keep an eye on it to make sure you dont nick the paint with the wheel. just hold it straight on it and grind that paint off. should be easier than hell. lol
12-10-2010, 10:15 PM
#17
Honda-Tech Member
Thread Starter
Join Date: Mar 2010
Location: California
Posts: 1,042
Likes: 0
Received 0 Likes
on
0 Posts
lol i hear you on the pizza thing...id be pissed if my pizza tasted like paint haha and yeah that should work just fine. obviously, just keep an eye on it to make sure you dont nick the paint with the wheel. just hold it straight on it and grind that paint off. should be easier than hell. lol
12-10-2010, 10:30 PM
#18
Honda-Tech Member
Join Date: Feb 2009
Location: Salem, Oregon
Posts: 816
Likes: 0
Received 0 Likes
on
0 Posts
There is incubators that you can put the VC in but obviously you don't have access to one. There is a few things that I have tried and tested like baking for extended periods of time 1.5 hours and letting sit overnight.
Recently I even felt so lazy as to paint it, let it dry in room temperature for 1.5 hours then put it on and went and ripped on my car. Valve cover wrinkling was amazing once the drive was done...but the next morning it was nearly flat.
One great thing about the wrinkle paint is....if you dont get the wrinkles you were searching for apply a second coat and repeat. I believe it says that on the back of the can....and it works
12-11-2010, 10:16 AM
#19
Honda-Tech Member
12-11-2010, 12:00 PM
#21
Honda-Tech Member
I know it sounds kinda honkey...but I didn't want to use the oven because I did this project over the holidays at my parents place...I would've cooked it up at my place with no issues...so I turned the propane grill on till the temp was about 200 degrees and used that Then when you're done your VC smells like cedar chips lol
Then when you're done your VC smells like cedar chips lol
12-11-2010, 01:10 PM
#22
Honda-Tech Member
Thread Starter
Join Date: Mar 2010
Location: California
Posts: 1,042
Likes: 0
Received 0 Likes
on
0 Posts
I know it sounds kinda honkey...but I didn't want to use the oven because I did this project over the holidays at my parents place...I would've cooked it up at my place with no issues...so I turned the propane grill on till the temp was about 200 degrees and used that Then when you're done your VC smells like cedar chips lol
Then when you're done your VC smells like cedar chips lol
12-11-2010, 03:12 PM
#25
Honda-Tech Member
Dont use a wire wheel!
I made this mistake because I rarely work with aluminum...it will put deep *** scratches in it. Granted I realized quickly before I did any real damage...just sharing my stupidity to save others.
I made this mistake because I rarely work with aluminum...it will put deep *** scratches in it. Granted I realized quickly before I did any real damage...just sharing my stupidity to save others.

