
How-To: Replace Internal Seal of Distributor (Internal Oil Leak)
 02-01-2008, 11:20 AM
#1
Honda-Tech Member
Thread Starter
Join Date: Jan 2008
Location: Lawrence, KS, 66046
Posts: 85
Likes: 0
Received 0 Likes
on
0 Posts
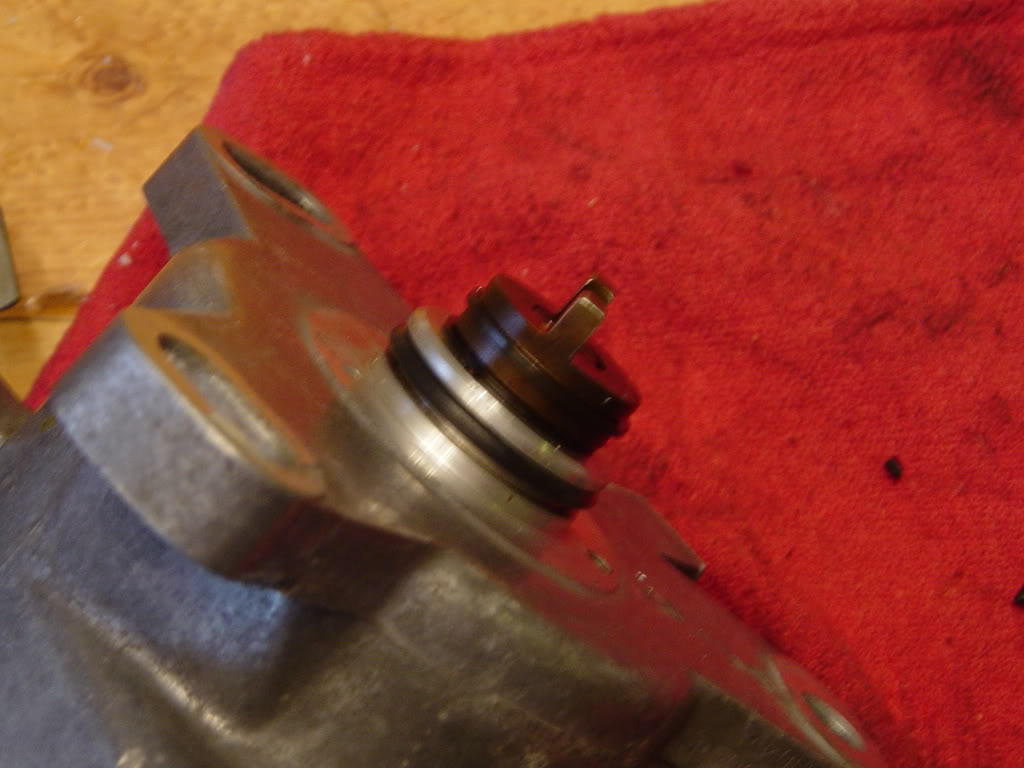
After removing the cap and rotor remove the three screws that hold the shaft assembly in place. You will most likely need some small vice grips or else the screws will strip fairly easily.
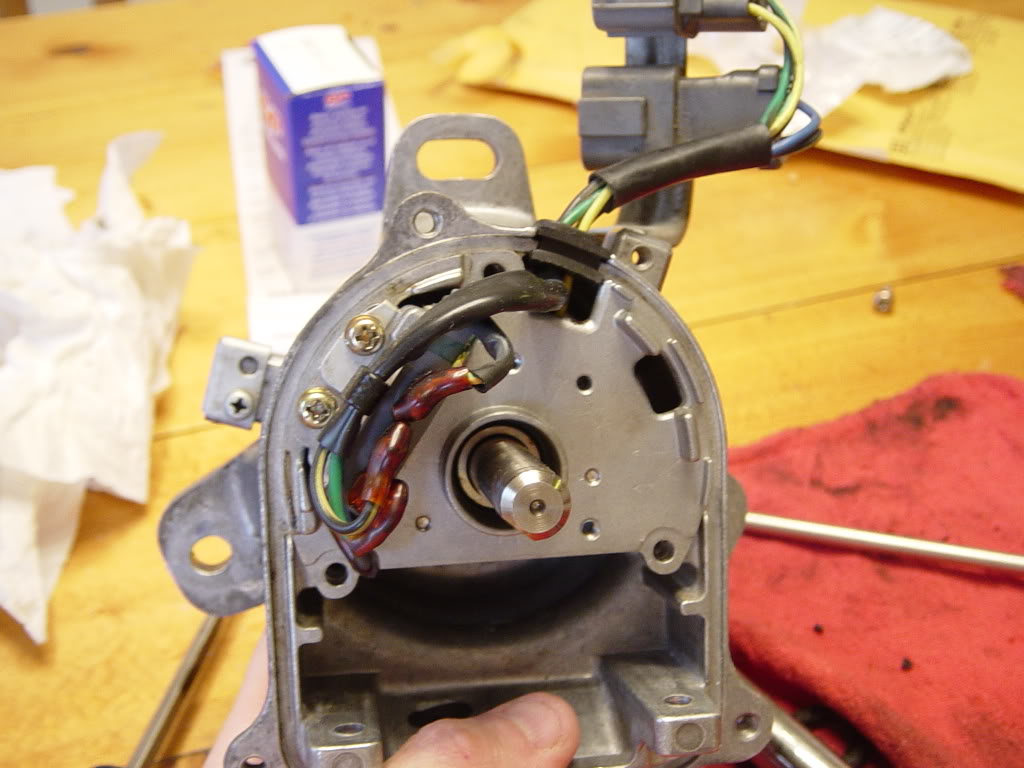
Then take the snap ring off and the pin will fall out. This allows the shaft to slide right out.
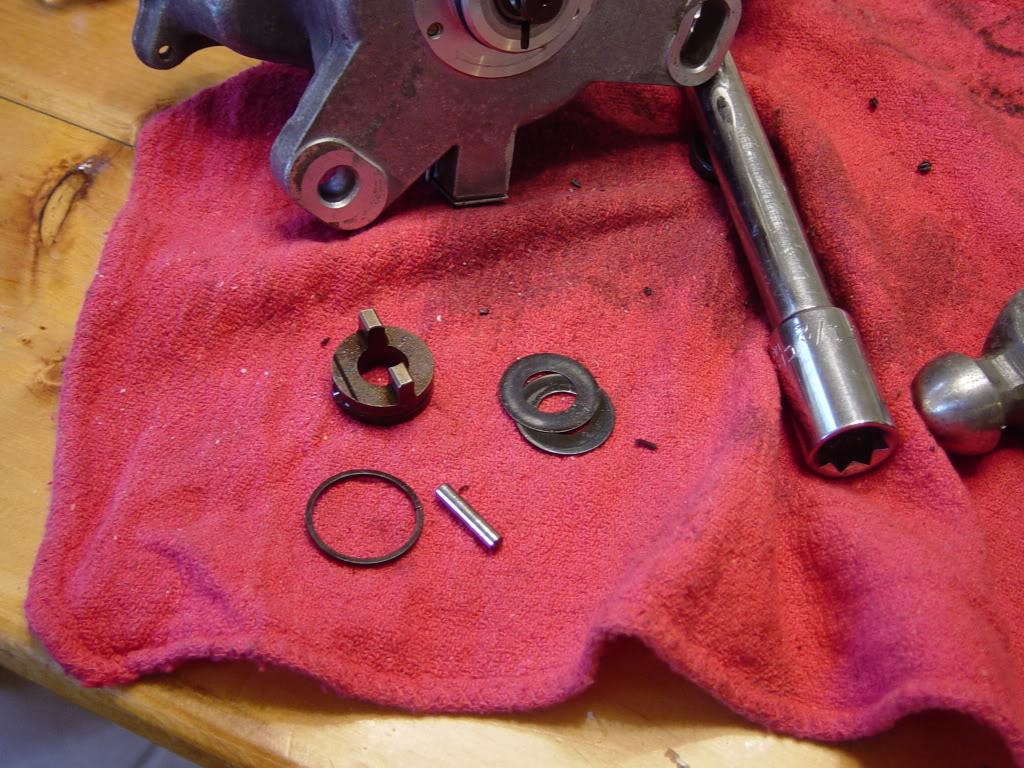
With the shaft out remove the pickup. So you won't damage it removing the seal. Tap the new seal in lightly so you won't damage it.
Here is the dizzy housing seal removed, compare to the new one.
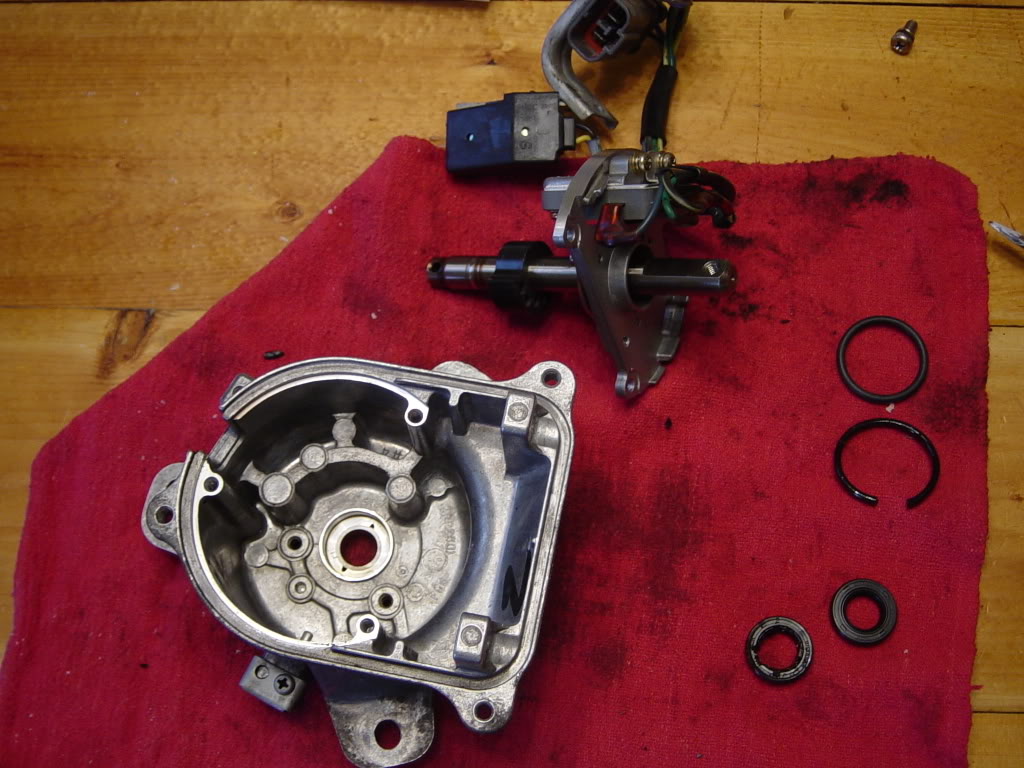
Here is where the o-ring is located
The seal was purchased at partstrain.com

Then take the snap ring off and the pin will fall out. This allows the shaft to slide right out.

With the shaft out remove the pickup. So you won't damage it removing the seal. Tap the new seal in lightly so you won't damage it.

Here is the dizzy housing seal removed, compare to the new one.

Here is where the o-ring is located

The seal was purchased at partstrain.com

 02-01-2008, 12:53 PM
#4
Junior Member
Join Date: Jan 2008
Location: Atlanta, Ga, US
Posts: 46
Likes: 0
Received 0 Likes
on
0 Posts
Sorry for my ignorance. Did you replace internal seal and external o-ring? I just replaced my external o-ring and learned that the shaft has a lot of play. I wonder if there's bearing inside (if any) was worn out.
Thanks
Thanks
02-01-2008, 01:27 PM
#5
Honda-Tech Member
Thread Starter
Join Date: Jan 2008
Location: Lawrence, KS, 66046
Posts: 85
Likes: 0
Received 0 Likes
on
0 Posts
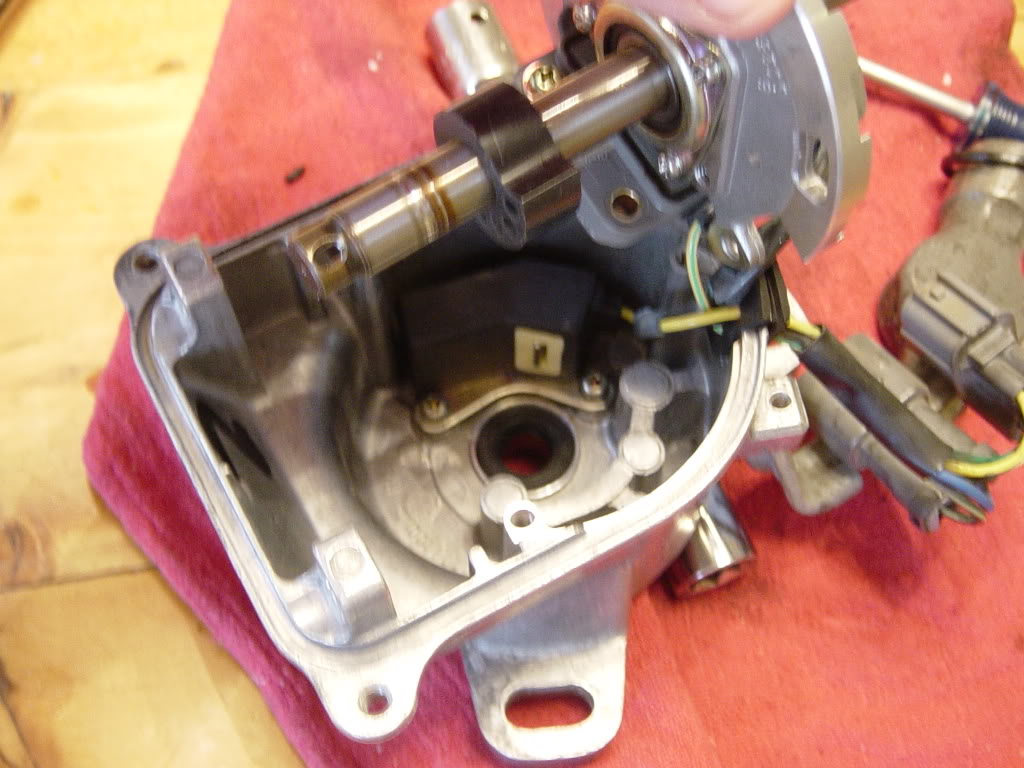
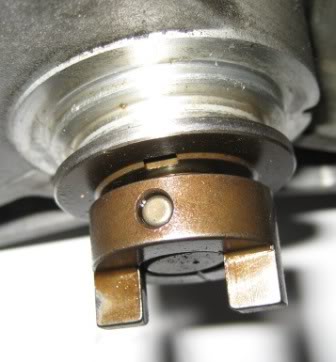
I replaced both the o-ring and seal. You can see where the bearing is in pic 3 next to my finger. It is held in place by the three screws. You would most likely have to press it on and off to replace. My bearing was fine so I didn't replace it.
02-02-2008, 09:57 AM
#6
Honda-Tech Member
Join Date: May 2007
Location: Huntersville, NC, USA
Posts: 91
Likes: 0
Received 0 Likes
on
0 Posts
ok i'm pissed! about a year ago mine started to leak so I just grabbed a new distributor from Honda. I looked for a week to find this seal. Guess I should of looked harder! Oh well, now I have a good distributor for sale. The old one with a new seal.
Thanks man, that's some good news that you can get the seal.
Thanks man, that's some good news that you can get the seal.
Trending Topics
02-03-2008, 08:41 AM
#9
Join Date: Dec 2007
Location: Lubbock, TX, US
Posts: 49
Likes: 0
Received 0 Likes
on
0 Posts
Sorry I missed this new thread and kept posting on the old one... 
Anyway, I used the previous write up and replaced the O-ring. The pictures really helped! Thank you.
However, I could not remove the distributor because the electrical connectors did not want to detach. I did press the tab and pulled hard on the casing... no luck. I stopped short of using vice-grip to pull them apart. Any suggestions?
02-03-2008, 10:47 AM
#10
WARNING! Be sure to reinstall the part that interfaces with the cam in the same postion it came off the distributor shaft. If you do not, you will have the distributor 180 degrees out. The tangs are offset, not centered, which is how you can only put it in one way to the cam. However, you can rotate it 180 when you put the pin back on the shaft. Your engine will not run if you do this. I found out today. Thanks again for the pics and info.
The following users liked this post:
02-03-2008, 04:12 PM
#12
Join Date: May 2006
Location: Free bullets if you find me sucka, Washington
Posts: 1,184
Likes: 0
Received 1 Like
on
1 Post
<TABLE WIDTH="90%" CELLSPACING=0 CELLPADDING=0 ALIGN=CENTER><TR><TD>Quote, originally posted by Lapog »</TD></TR><TR><TD CLASS="quote">However, I could not remove the distributor because the electrical connectors did not want to detach. I did press the tab and pulled hard on the casing... no luck. I stopped short of using vice-grip to pull them apart. Any suggestions? </TD></TR></TABLE>
flathead use it to unhook the clips you might have3 to pull with a little force..those plugs probably havent been unhooked in years huh? and I dont know if this has been said but REMEBER TO MARK YOUR TIMING!!! with a permenat marker when you take teh dissy off the head..just draw a line...
flathead
use it to unhook the clips you might have3 to pull with a little force..those plugs probably havent been unhooked in years huh? and I dont know if this has been said but REMEBER TO MARK YOUR TIMING!!! with a permenat marker when you take teh dissy off the head..just draw a line...
02-03-2008, 04:20 PM
#13
Join Date: Dec 2007
Location: Lubbock, TX, US
Posts: 49
Likes: 0
Received 0 Likes
on
0 Posts
Well, actually I did use a flat head to keep the tab open and still it wouldn't slide out. Perhaps I was too gentle, but the marks on my fingers tell me I was not 
Anyway, I'll give it a go again soon. May be I'll really tug hard this time, if it breaks, so be it
Yes, I did mark the position of the rotor (wrt to distributor body) and drew several lines all over the distributor housing aligning with the body of the engine. Putting it back couldn't have been easier
Now, waiting for the seal to arrive to dismantle again... sometime next weekend.
02-03-2008, 04:41 PM
#14
No damage done. Wasted a couple of hours for me trying to figure it out. Anyway, I used a chisel to lightly mark across the distributor body and rocker assembly (top mounting bolt on the distributor) to give a reference point for the timing. I was afraid to use a marker since I knew I would be using carb cleaner to clean all the oil off. When I reinstalled the distributor, all I had to do was line the marks up.
02-04-2008, 03:13 AM
#15
H-T Order of Merit
I never understood how people could do that. Hell, I didn't even think it could be done.
My friend had replaced a coolant hose and removed the distributor to get to the hose easier. When they put it back on the car didn't run and they couldn't figure it out. So they call me and I go over and take a look. Go to take the distributor off and that things was really wedged in there. It should be pretty easy.
If you have to force it in then you know it's off.
02-04-2008, 03:35 PM
#16
If I just want to replace the external seal (where the distributor butts up against the head and the camshaft end bearing), do I just pull the dist, wedge the new little seal in there, and reverse? I noticed the outside seal looked pretty brittle when I took off my rocker arm assembly a few days ago, but I didn't think to preemptively buy one so I couldn't do it at the time.
02-04-2008, 04:31 PM
#17
Join Date: Dec 2007
Location: Lubbock, TX, US
Posts: 49
Likes: 0
Received 0 Likes
on
0 Posts
That's what I did. Should be 15min job max., if you have the right tools. Remember to clean out the area where old O-ring was.
Oh! the oil will leak down the transmission and create a little pool right below where the tranny-drain is. It worried me first time, until I bent down under the car and looked up to see the oil slick.
Oh! the oil will leak down the transmission and create a little pool right below where the tranny-drain is. It worried me first time, until I bent down under the car and looked up to see the oil slick.
02-04-2008, 04:53 PM
#18
My car doesn't leak anything, but my lower rocker arm oil seals literally snapped in half when I pulled them out to replace them, so that little thing can't be in much better shape 
02-05-2008, 05:45 AM
#19
Junior Member
Join Date: Jan 2008
Location: Atlanta, Ga, US
Posts: 46
Likes: 0
Received 0 Likes
on
0 Posts
Sorry for my ignorance. Did you replace internal seal and external o-ring? I just replaced my external o-ring and learned that the shaft has a lot of play. I wonder if there's bearing inside (if any) was worn out.
Thanks
Thanks
02-07-2008, 12:48 AM
#21
Junior Member
Join Date: Nov 2005
Posts: 105
Likes: 0
Received 0 Likes
on
0 Posts
I have a '99 Accord and the distributor is also leaking oil on the inside. I got stuck on removing the pin at the base. My distributor doesn't have a ring that holds the pin. It's just a pin that is force fitted. I've tried hammering it out, but to no avail.
Do I need to hit it harder? I'm afraid to break something. Or maybe, once removed, it won't go back in as tight?
Any help would be great.
Thanks.
Modified by 2BFI at 1:58 AM 2/7/2008
Modified by 2BFI at 2:00 AM 2/7/2008
Modified by 2BFI at 2:04 AM 2/7/2008
Do I need to hit it harder? I'm afraid to break something. Or maybe, once removed, it won't go back in as tight?
Any help would be great.
Thanks.
Modified by 2BFI at 1:58 AM 2/7/2008
Modified by 2BFI at 2:00 AM 2/7/2008
Modified by 2BFI at 2:04 AM 2/7/2008
02-07-2008, 04:19 AM
#22
Junior Member
Join Date: Jan 2008
Location: Atlanta, Ga, US
Posts: 46
Likes: 0
Received 0 Likes
on
0 Posts
Kbud, you saved my day. I am glad I read your warning. I took mine out when I put it back in, the car didn't start. I turned it 180 degree, put it back, and started right up.
Two more WARNINGS , people.
When I took mine out, one part of the cap seal was hanging outside. That explain why my rotor got stuck to the shaft since it rusted. I had to spray DW-40 on it for couple hours. so be careful when you put the cap back on. Make sure the seal is seating properly.
I also learned that the shaft was too loose. the little black piece (see picture 3) was pushed too far up. I just moved it down by hitting it with hammer lightly.
The car is running smoothly now.
2BFI, you may have an after market shitty part. I may be wrong though. I would go the auto part and ask to see one.
Good Luck