
DIY: Driver's Seat Rock (oddmut)
 01-16-2008, 07:53 AM
#1
Member
Thread Starter
Join Date: Oct 2005
Location: Los Angeles, CA, USA
Posts: 1,114
Likes: 0
Received 0 Likes
on
0 Posts
Driver Seat Rocking, How to Fix
Here’s what it looks like when your bushings are busted and cause your seat to rock.

Tools needed:
12mm socket
14mm socket
Flat Head
Philips Head
Parts needed:
Washer A 6; Part number: 90501-S3N-003
Bush A 6; Part number: 90502-S3N-013
Spacer 5 for 2001-2002 6 for 2003; Part number: 90503-S3N-003
First things first, if you have the stock radio make sure you have the anti-theft code for the radio, the write down the frequencies for the preset buttons.
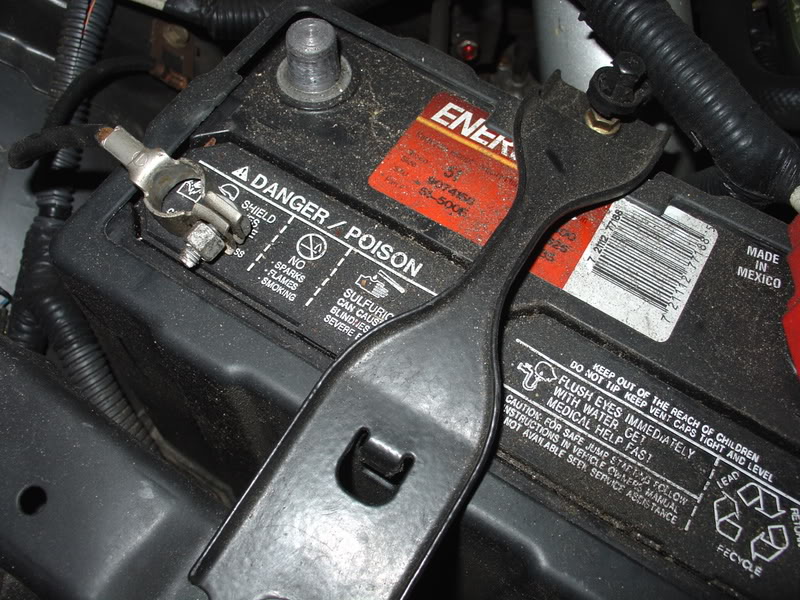
Disconnect your battery and wait at least 3 minutes.
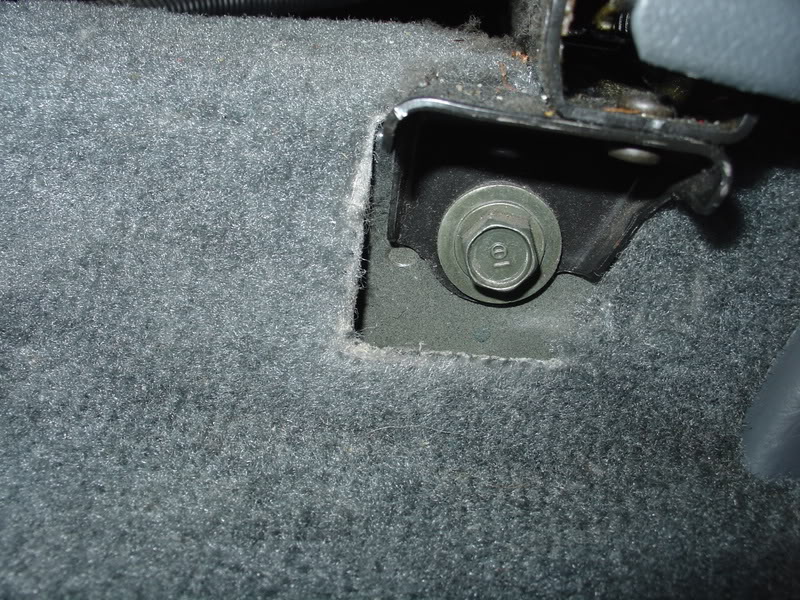
Go ahead and remove the plastic covers from the back and unscrew the bolts (14mm)
Once removed go ahead and remove the 2 bolts from the front.

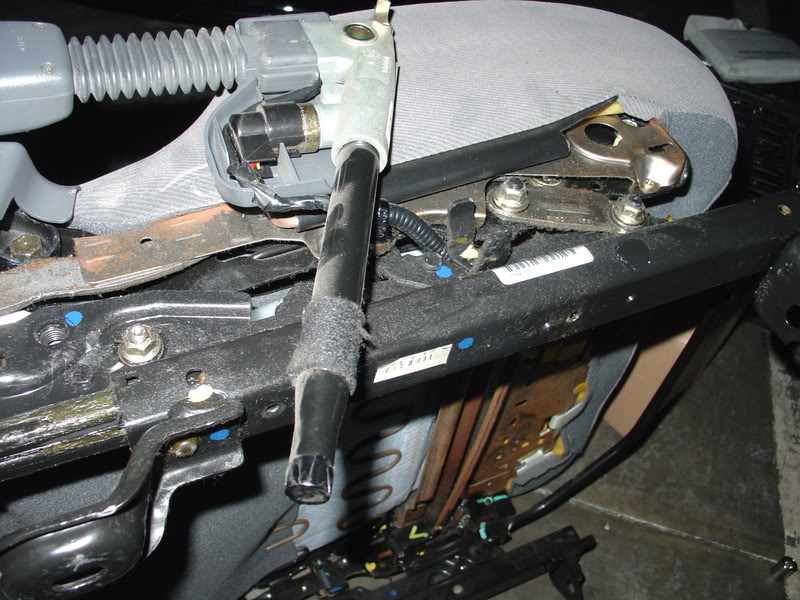
Tilt your seat forward and push it back to reveal the plugs underneath the seat.
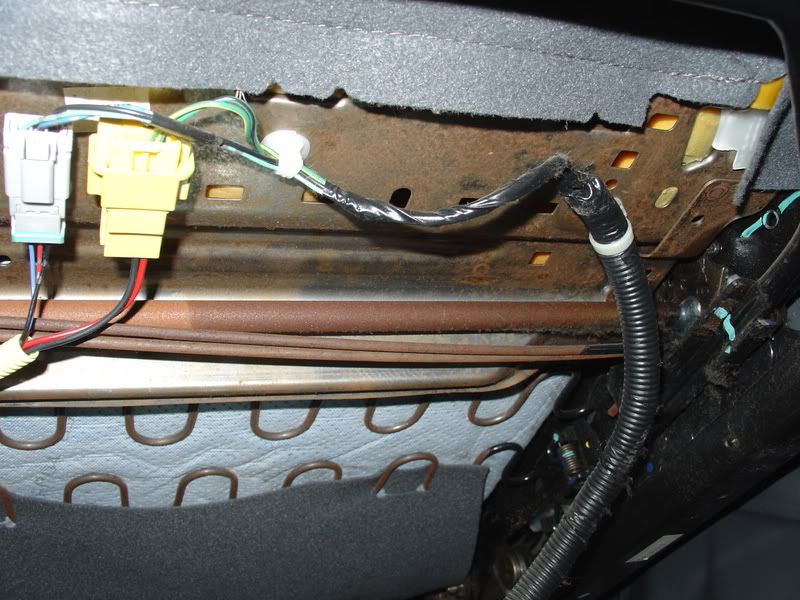
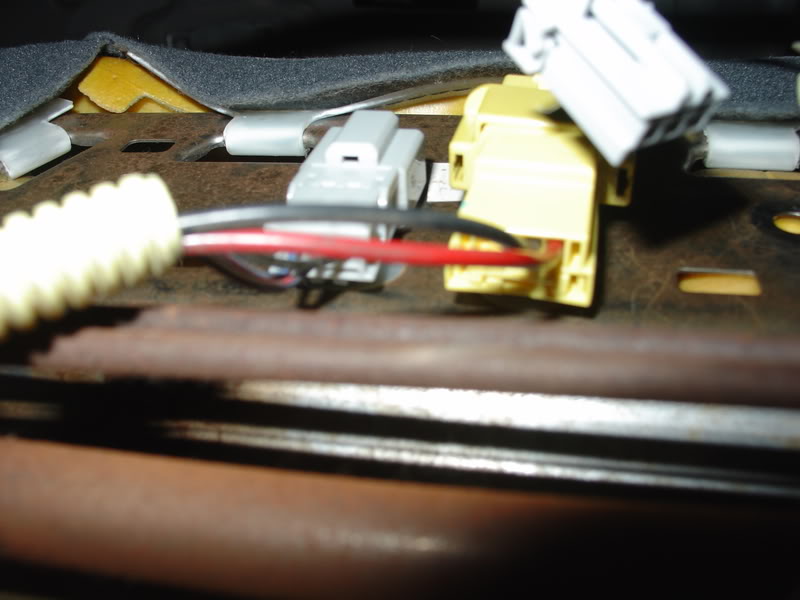
Once it is revealed go ahead and unplug. The gray plug has a little button to push and it removes. To remove the yellow grab the sides and it will slide up and then pop out.
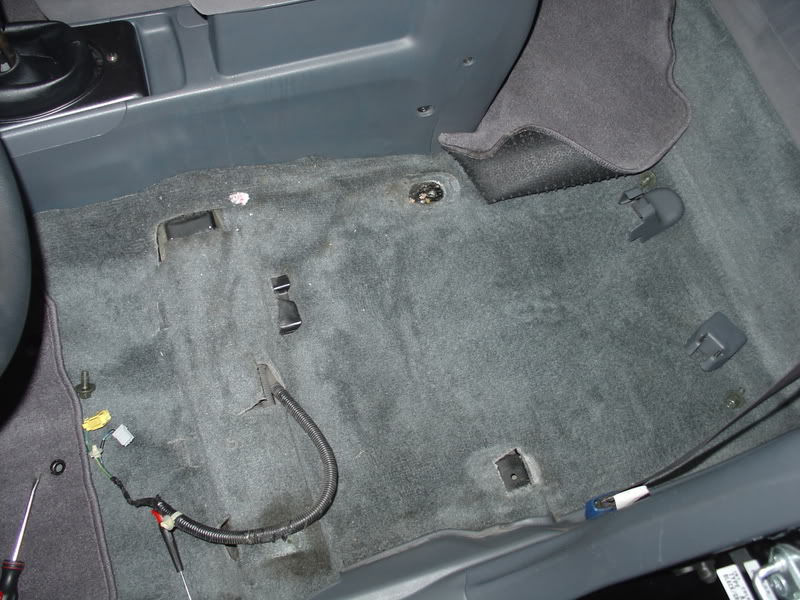
When that is done and seat is removed. Car looks like this.
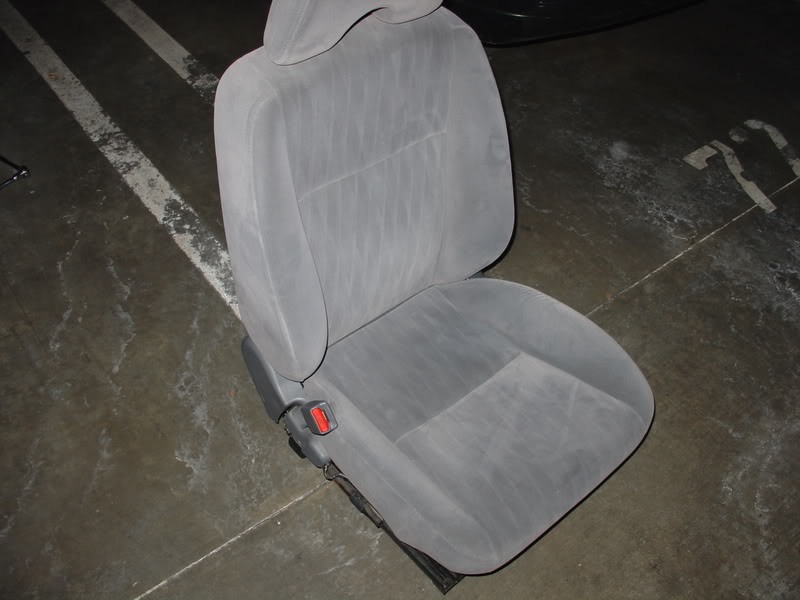
Here’s my seat out of my car.
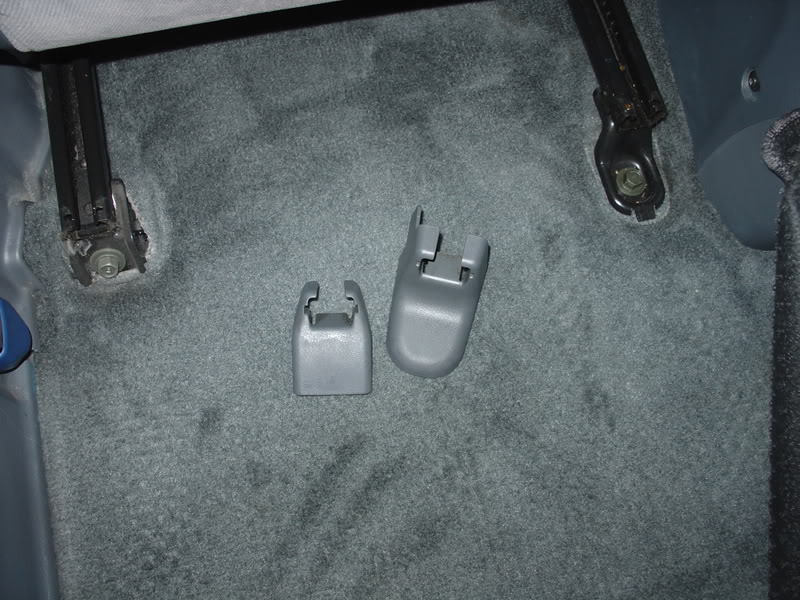
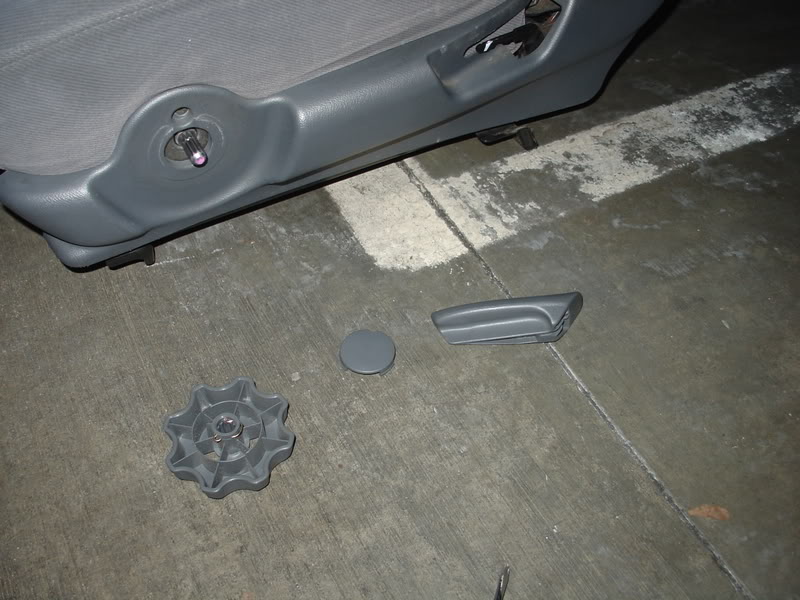
Pull on the lever to remove it. Use a flathead to remove the cap of the height adjuster. Use the same flat head to push out the C pin in the adjuster and pull off at same time.
Once off use a Philips head and unscrew the screw.
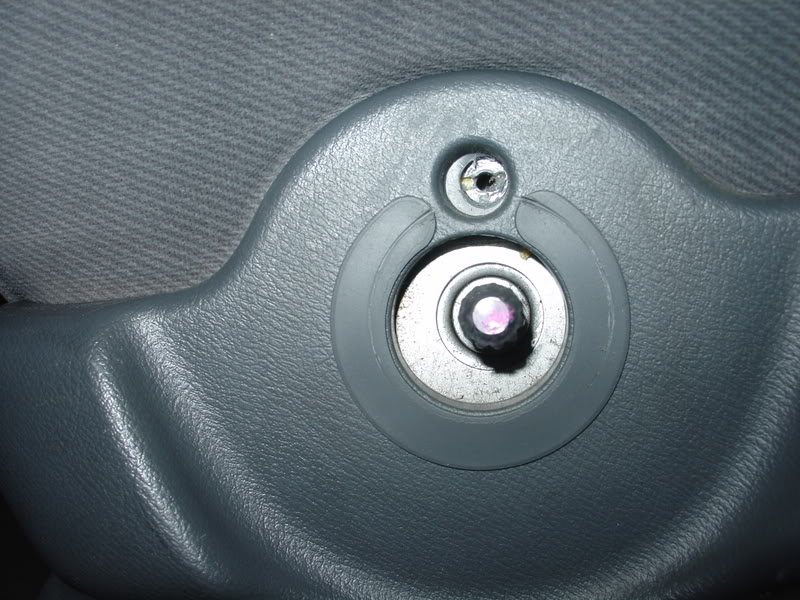
The plastic piece is held in by a clip at the front, a hook in the middle and a plastic screw like thing at the back.

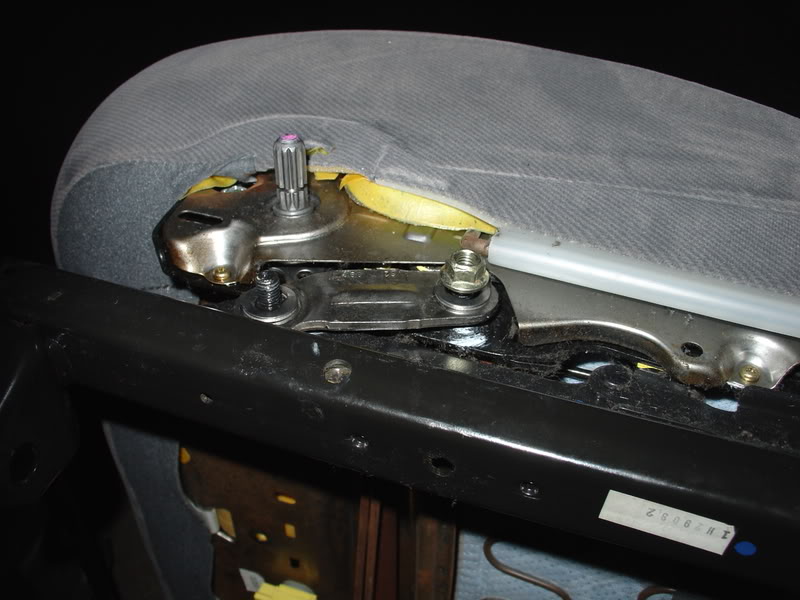
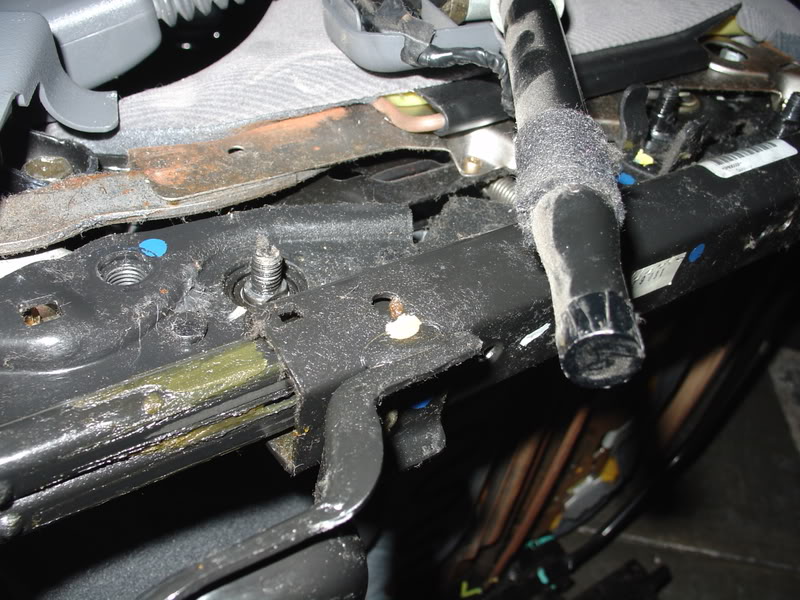
At this point I have my chair sideways and I remove the 3 nuts and do not discard like the TSB says because you will need them to put it back together. Go ahead and take note of the parts when removed as well as their position as you will replace those parts exactly how it came off.
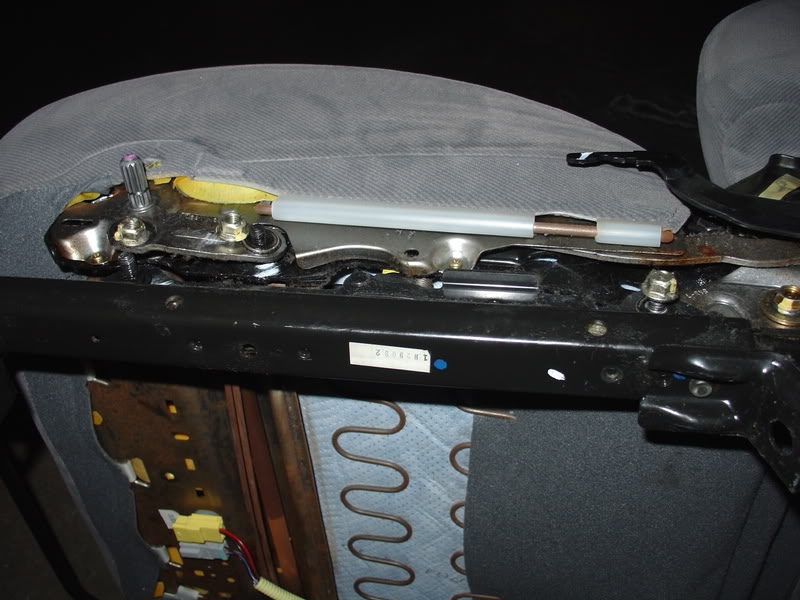
At this point I removed the nut and the washer. Replaced the bushing. The silver part on the screw is the bushing.

I’ve replaced the bushing and put back the rail ontop. Placed the washer in place and put the nut back on. I have not tight it yet.
Remove the front piece. Replace the bushings in the outboard link.

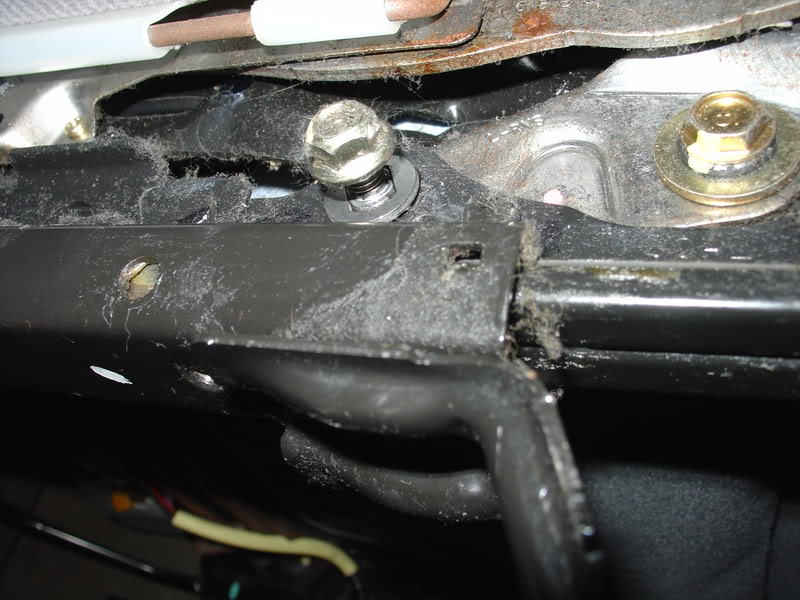
Place the outboard link back in place. On the left side there is a spacer then a washer. On the right there is just a washer. Screw the nuts back on. If you have the chair on it’s side like how I did. Do not put the plastic piece back on till last so you don’t scratch it up.
Flip the chair over and remove the screw (14mm) holding the seat belt buckle. Careful as there is a collar, spring washer, and toothed lock washer underneath the seat belt buckle.

Flip the seat belt buckle over and out of the way. Remove the 3 nuts.
Once removed go ahead and do the same procedure on this side as done on the other side. The only difference is that for 2001-2002 vehicles the spacer for the inboard link is not put back thus you will have 2 spacers to use for the back screw. That is why I said 5 spaces for 2001-2002 models. 2 spacers on the outside and 3 on the inside.
For the back nut for the 2003 it says to discard the spacer on the back screw, then it says to install 3 spacers on the back screw. At this point you will be short 2 spacers. That’s why I noted earlier to buy 6 for 2003 models. 2 on the outside and 4 on the inside.
Once all that is done, go ahead and put the plastic piece back on on the outside part of the seat. Lever and the adjuster back on.
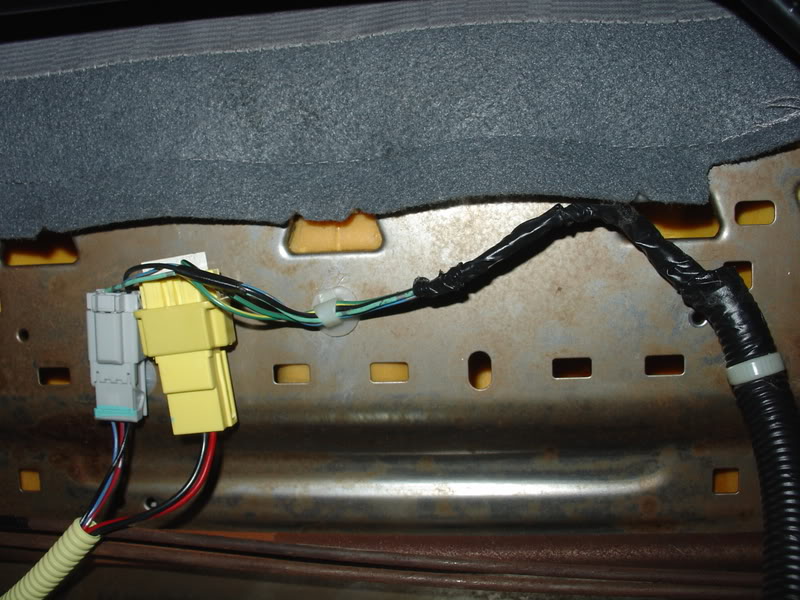
Once that’s done go ahead and put your seat back in the car. I kept my wires and the clips intact and put it back together the way I took it out like so.
Then I just bolt it all in place. Reconnect the battery.
Turn the ignition switch to ON(II) and check SRS. If indicator comes on for 6 seconds and turns off. You’re good. Stays on check for codes and troubleshoot.
If stock radio put back the anti-theft code in and set back the radio station presets.
Set your clock and any other setting which you had.
Check Step 25 in the TSB.
For 2001 2drs check step 26 in the TSB.
Link for TSB https://honda-tech.com/zerothread/2189650
I did this with my phone as my flash light and my camera beside me and the little if none at all light in the apartment garage.
Vwola! No more rocking chair. I know the rocking chair is nice but not in a damn car.
Edited: to add TSB link.
Modified by oddmut at 8:25 PM 1/17/2008
Here’s what it looks like when your bushings are busted and cause your seat to rock.
Tools needed:
12mm socket
14mm socket
Flat Head
Philips Head
Parts needed:
Washer A 6; Part number: 90501-S3N-003
Bush A 6; Part number: 90502-S3N-013
Spacer 5 for 2001-2002 6 for 2003; Part number: 90503-S3N-003
First things first, if you have the stock radio make sure you have the anti-theft code for the radio, the write down the frequencies for the preset buttons.
Disconnect your battery and wait at least 3 minutes.
Go ahead and remove the plastic covers from the back and unscrew the bolts (14mm)
Once removed go ahead and remove the 2 bolts from the front.
Tilt your seat forward and push it back to reveal the plugs underneath the seat.
Once it is revealed go ahead and unplug. The gray plug has a little button to push and it removes. To remove the yellow grab the sides and it will slide up and then pop out.
When that is done and seat is removed. Car looks like this.
Here’s my seat out of my car.
Pull on the lever to remove it. Use a flathead to remove the cap of the height adjuster. Use the same flat head to push out the C pin in the adjuster and pull off at same time.
Once off use a Philips head and unscrew the screw.
The plastic piece is held in by a clip at the front, a hook in the middle and a plastic screw like thing at the back.
At this point I have my chair sideways and I remove the 3 nuts and do not discard like the TSB says because you will need them to put it back together. Go ahead and take note of the parts when removed as well as their position as you will replace those parts exactly how it came off.
At this point I removed the nut and the washer. Replaced the bushing. The silver part on the screw is the bushing.
I’ve replaced the bushing and put back the rail ontop. Placed the washer in place and put the nut back on. I have not tight it yet.
Remove the front piece. Replace the bushings in the outboard link.
Place the outboard link back in place. On the left side there is a spacer then a washer. On the right there is just a washer. Screw the nuts back on. If you have the chair on it’s side like how I did. Do not put the plastic piece back on till last so you don’t scratch it up.
Flip the chair over and remove the screw (14mm) holding the seat belt buckle. Careful as there is a collar, spring washer, and toothed lock washer underneath the seat belt buckle.
Flip the seat belt buckle over and out of the way. Remove the 3 nuts.
Once removed go ahead and do the same procedure on this side as done on the other side. The only difference is that for 2001-2002 vehicles the spacer for the inboard link is not put back thus you will have 2 spacers to use for the back screw. That is why I said 5 spaces for 2001-2002 models. 2 spacers on the outside and 3 on the inside.
For the back nut for the 2003 it says to discard the spacer on the back screw, then it says to install 3 spacers on the back screw. At this point you will be short 2 spacers. That’s why I noted earlier to buy 6 for 2003 models. 2 on the outside and 4 on the inside.
Once all that is done, go ahead and put the plastic piece back on on the outside part of the seat. Lever and the adjuster back on.
Once that’s done go ahead and put your seat back in the car. I kept my wires and the clips intact and put it back together the way I took it out like so.
Then I just bolt it all in place. Reconnect the battery.
Turn the ignition switch to ON(II) and check SRS. If indicator comes on for 6 seconds and turns off. You’re good. Stays on check for codes and troubleshoot.
If stock radio put back the anti-theft code in and set back the radio station presets.
Set your clock and any other setting which you had.
Check Step 25 in the TSB.
For 2001 2drs check step 26 in the TSB.
Link for TSB https://honda-tech.com/zerothread/2189650
I did this with my phone as my flash light and my camera beside me and the little if none at all light in the apartment garage.
Vwola! No more rocking chair. I know the rocking chair is nice but not in a damn car.
Edited: to add TSB link.
Modified by oddmut at 8:25 PM 1/17/2008
 01-16-2008, 08:09 AM
#6
Member
Thread Starter
Join Date: Oct 2005
Location: Los Angeles, CA, USA
Posts: 1,114
Likes: 0
Received 0 Likes
on
0 Posts
<TABLE WIDTH="90%" CELLSPACING=0 CELLPADDING=0 ALIGN=CENTER><TR><TD>Quote, originally posted by LatinEM2 »</TD></TR><TR><TD CLASS="quote">Good DIY! </TD></TR></TABLE>
Thanks!
<TABLE WIDTH="90%" CELLSPACING=0 CELLPADDING=0 ALIGN=CENTER><TR><TD>Quote, originally posted by devani »</TD></TR><TR><TD CLASS="quote">goood DIY...
dealer replaced thme twice on my car....</TD></TR></TABLE>
Thanks! So lucky. anyways it was easy and fun but hard since I had no light...
Thanks!
<TABLE WIDTH="90%" CELLSPACING=0 CELLPADDING=0 ALIGN=CENTER><TR><TD>Quote, originally posted by devani »</TD></TR><TR><TD CLASS="quote">goood DIY...
dealer replaced thme twice on my car....</TD></TR></TABLE>
Thanks! So lucky. anyways it was easy and fun but hard since I had no light...
Trending Topics
01-17-2008, 10:51 AM
#9
Member
Thread Starter
Join Date: Oct 2005
Location: Los Angeles, CA, USA
Posts: 1,114
Likes: 0
Received 0 Likes
on
0 Posts
<TABLE WIDTH="90%" CELLSPACING=0 CELLPADDING=0 ALIGN=CENTER><TR><TD>Quote, originally posted by Jstans84 »</TD></TR><TR><TD CLASS="quote">Very nice DIY!</TD></TR></TABLE><TABLE WIDTH="90%" CELLSPACING=0 CELLPADDING=0 ALIGN=CENTER><TR><TD>Quote, originally posted by daddy2be »</TD></TR><TR><TD CLASS="quote">good diy! the pics are very helpful </TD></TR></TABLE>
tried to make it very user friendly and thorough. Thanks for the loving guys for whoever posted. yar yar!
</TD></TR></TABLE>tried to make it very user friendly and thorough. Thanks for the loving guys for whoever posted. yar yar!
01-17-2008, 10:59 AM
#11
Member
Thread Starter
Join Date: Oct 2005
Location: Los Angeles, CA, USA
Posts: 1,114
Likes: 0
Received 0 Likes
on
0 Posts
<TABLE WIDTH="90%" CELLSPACING=0 CELLPADDING=0 ALIGN=CENTER><TR><TD>Quote, originally posted by daddy2be »</TD></TR><TR><TD CLASS="quote">when it comes to DIYs pix are worth a thousand words </TD></TR></TABLE>
</TD></TR></TABLE>
01-17-2008, 07:24 PM
#14
Member
Thread Starter
Join Date: Oct 2005
Location: Los Angeles, CA, USA
Posts: 1,114
Likes: 0
Received 0 Likes
on
0 Posts
<TABLE WIDTH="90%" CELLSPACING=0 CELLPADDING=0 ALIGN=CENTER><TR><TD>Quote, originally posted by InanimateCarbonRod »</TD></TR><TR><TD CLASS="quote">Thanks for the great DIY! I gotta do this too. Do you by chance have a link to the TSB?
</TD></TR></TABLE>
https://honda-tech.com/zerothread/2189650
I'm gonna add it into the post so ppl don't need to ask.
I gotta do this too. Do you by chance have a link to the TSB?</TD></TR></TABLE>
https://honda-tech.com/zerothread/2189650
I'm gonna add it into the post so ppl don't need to ask.
01-18-2008, 12:36 AM
#15
WTF...honda wants around $4 per bushing x 6, another $1-$2 for each of the other parts...the total price of the kit would be over $40.
that's such a rip off...those parts are dirt cheap to produce. imo, they should give those parts out for free because the seat design is a piece of ****...
that's such a rip off...those parts are dirt cheap to produce. imo, they should give those parts out for free because the seat design is a piece of ****...
01-07-2010, 09:06 AM
#17

Join Date: Dec 2009
Posts: 4
Likes: 0
Received 0 Likes
on
0 Posts
This is a definite for my list of repairs. I have had a rocking chair in my car for years now. The first time it happened I was able to just tighten the said nuts and it went away. The second time was a no go. I have been rocking ever since. Thanks.
01-08-2010, 05:36 AM
#19

I came across the TSB for this shortly after buying my car last year. I have not been looking forward to the trouble of pulling out the seat etc. Thank you so much for what looks like a superior DIY report. www.bkhondaparts.com prices:
Washer A 6; Part number: 90501-S3N-003 = $1.03 x 6
Bush A 6; Part number: 90502-S3N-013 = $3.5 x 6
Spacer 5 for 2001-2002 6 for 2003; Part number: 90503-S3N-003 = $1.43 x (5 or 6, depending)
Before shipping costs, about $36, like noted above. (Didn't know if the above was the online price or local dealer price.)
I am contemplating substitutes from my local True Value hardware store and/or the junkyard.
 01-12-2010, 02:06 PM
#21
I took my driver's seat out today and inspected all six seat frame bushings. Thanks to the photos and directions above, along with the TSB, it is a pretty easy job for someone with wrench etc. experience. The rear inboard bushing and the rear outboard bushing were somewhat chewed up. As an experiment, I switched them with two good ones from the front. The rocking is gone for now.
I have removed Honda seats before and have become acquainted with clips and hooks attaching plastic covers like the recline cover. I still managed to break the recline cover middle hook and chipped off a piece of the rear outboard "plastic screw thing" as oddmut calls it.
The bushings are made of a metal. After looking at them, I do not expect to find anything at Lowe's or True Value to substitute for them. I am going to keep thinking about this though. I wonder how long they last in general. $3.50 each from online OEM parts places is a lot. With luck in a few years my local junkyard will start having these newer Civics, and I can get a handful of the bushings now and then from it.
Questions:
--I torqued the four, 10 mm nominal diameter bolts (14 mm socket) fixing the seat to the car frame to 29 ft-lbs., per the 92-95 Civic manual for one of the 10 mm bolts holding the seat to the car frame. Anyone have the shop manual torque for these four bolts? The TSB gives the torque for all the other bolts involved here.
-- The TSB calls for four spacers. Per the TSB, three of them go on the rear inboard mounting stud. The fourth goes on the outboard side, but I cannot tell where. Anyone know?
-- Is there any reason not to re-use the six old washers (the ones with the rectangle shape cut out of the middle)?
Last edited by honda.lioness; 01-13-2010 at 01:46 AM.
03-14-2012, 02:30 AM
#24
Honda-Tech Member
Join Date: Feb 2006
Posts: 6
Likes: 0
Received 0 Likes
on
0 Posts
 Its a pain to have the SRS light on for something that simple.

