
DIY: Cabin Air Filter Replacement (With Pictures)
 12-21-2007, 08:54 AM
#1
Thread Starter
Join Date: Dec 2006
Location: Knoxville, TN, U.S.A.
Posts: 227
Likes: 0
Received 0 Likes
on
0 Posts
DIY: Cabin Air Filter Replacement (With Pictures)
This will cover how to replace both cabin air filters. This is very easy to do!
Both cabin air filters should be replaced every year or every 25,000 miles (or so)…
Tools/Materials needed:
None
Optional Tools/Materials:
Small flathead screwdriver
Parts needed:
2X - Honda OEM Cabin Air Filters - P/N: 80292-S5D-A01 (or retail parts store equivalent)
1. Before beginning, make sure you have all the required tools, materials, and parts on hand.
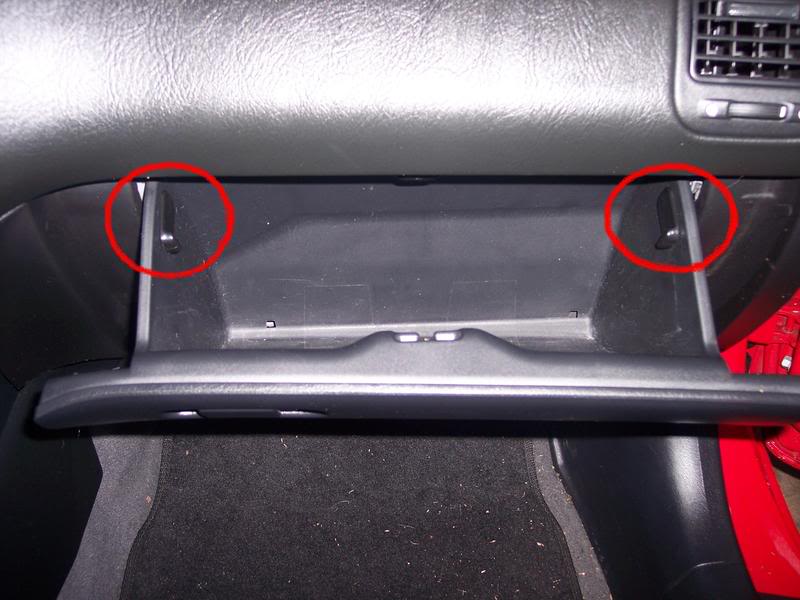
2. Open the glove box and remove all of its contents (set them in the driver’s seat for now).
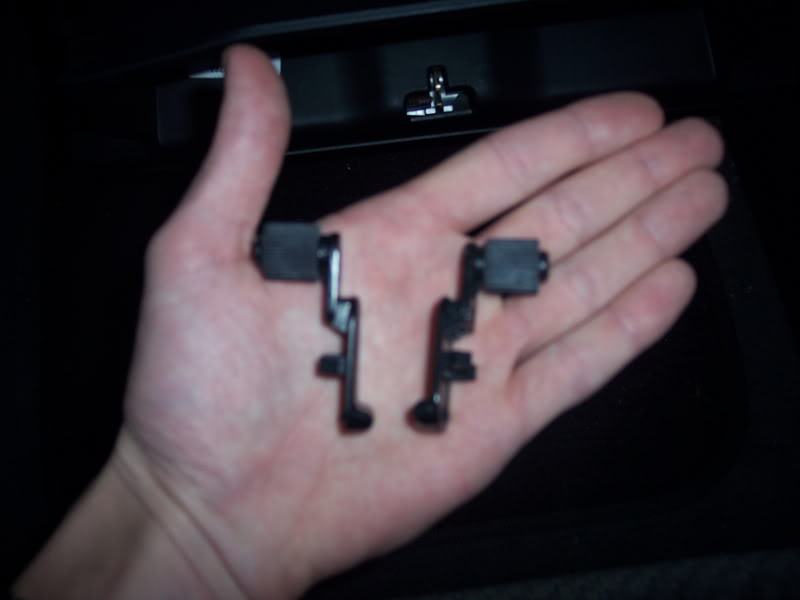
3. Notice the two black clips. These keep the glove box from falling outwards. You will want to remove these from the glove box to allow the glove box to fall all the way forward. They may be a little awkward/tricky to remove, but you should be able to do so without any tools (a small flathead screwdriver might come in handy here, but be gentle as to not break the PLASTIC pieces). I found it easy to squeeze the clip while pushing inwards from outside of the glove box. They might fall behind the dash, but they can be easily recovered once the glove box swings forward. Once both clips are removed, allow the glove box to fall forward and rest in the down position.
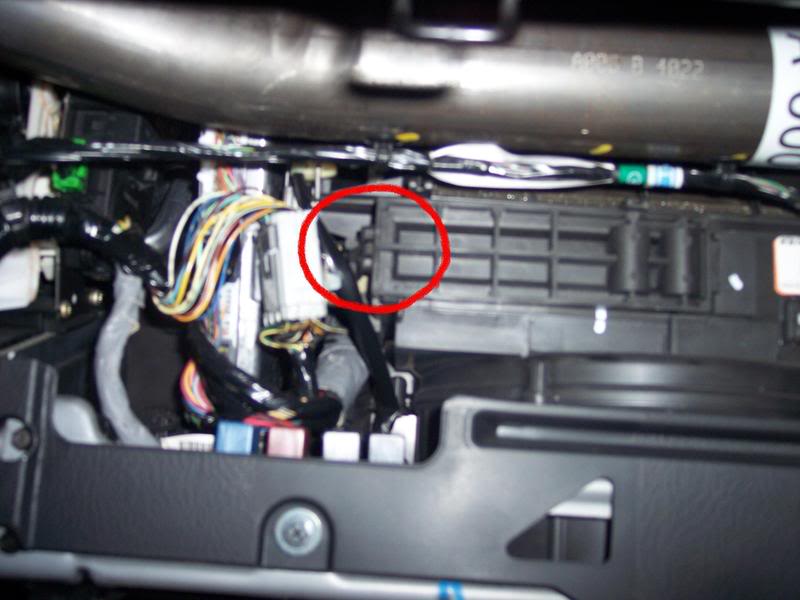
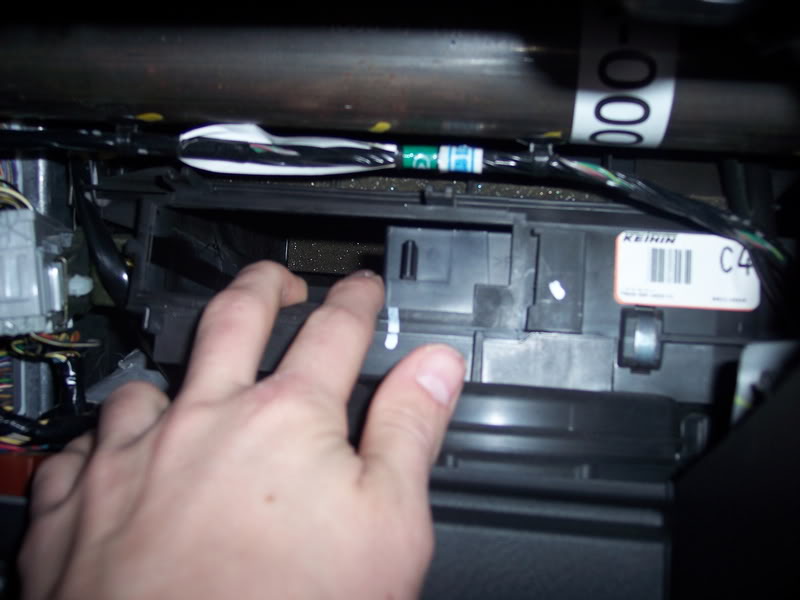
4. Once the glove box is out of the way, you will see a black plastic cover (to the right of all the wires). This can be removed by simply pulling out on the tab on the left hand side and sliding the cover out. This will give you access to slide out both cabin air filters, which rest inside of a black plastic frame.
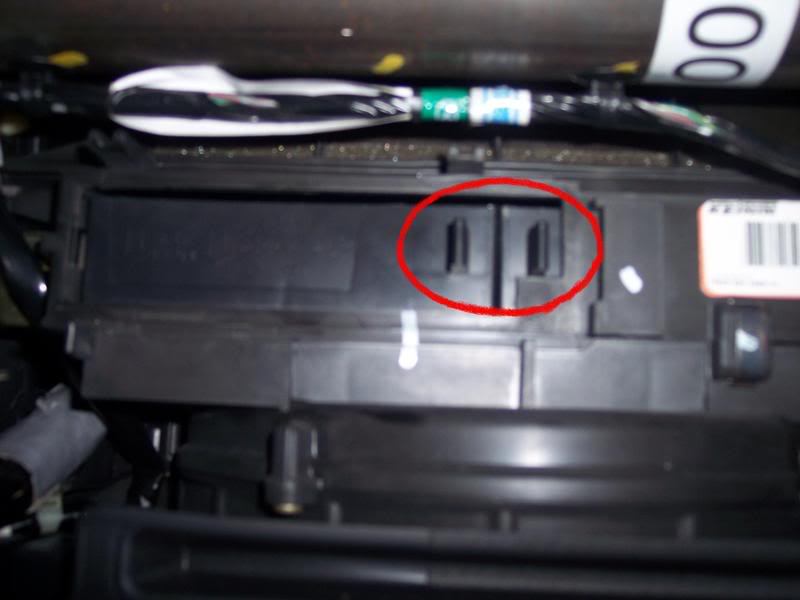
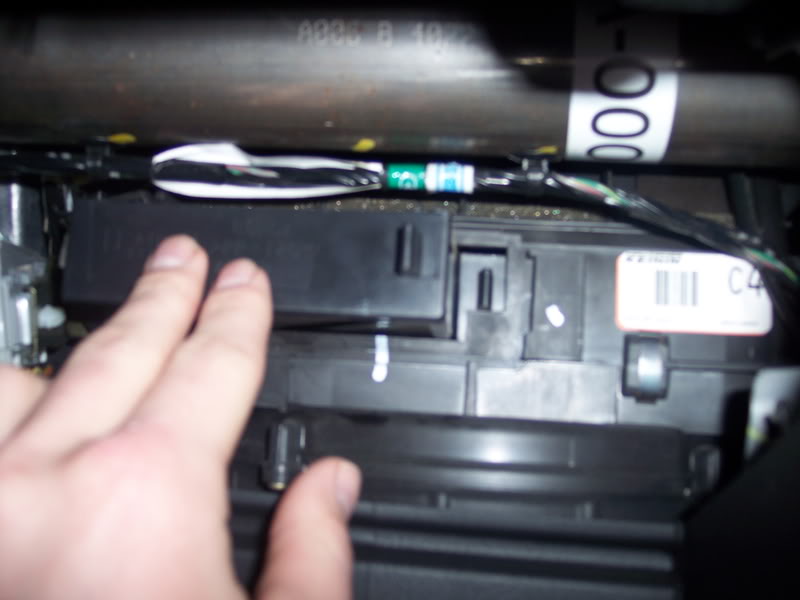
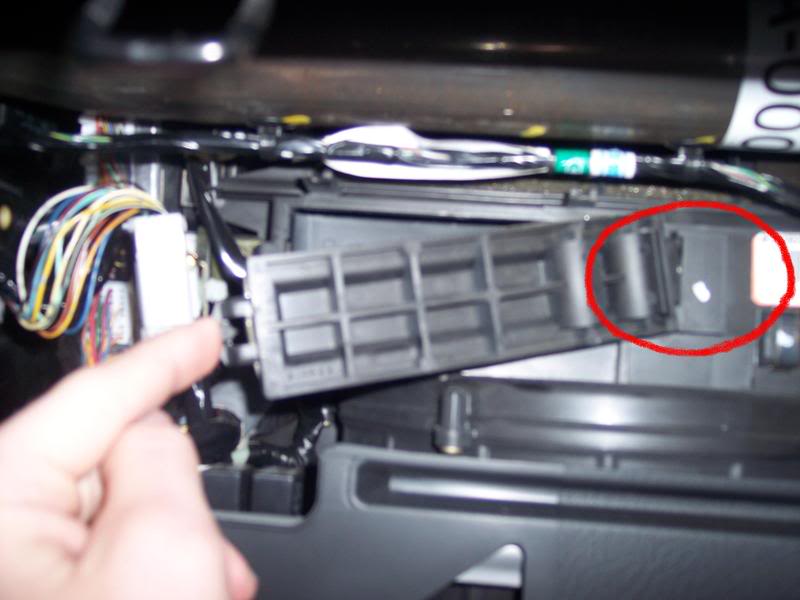
5. As you are sliding both of the filters/frames out, make a mental note of their position (within the air box as well as the filters themselves within the frame). The filter on the left (will have a plastic pull on the right) will pull straight out. The filter on the right (will have a plastic pull on the left) will have to be moved over to the left and then pulled straight out. You may also notice how much dust, hair, pine needles, leaves, etc…have gathered here. They are doing their job of filtering the air circulating through the car. Which could be comparable to the filter on the A/C-Heat unit in your house/apartment.
6. Before removing the old filters from the frames, set them on the floor and take a look at how the filters sit in each frame. Remove one of the old filters and replace it with a new one the same way it was on before, and then do the same with the other. If you frantically removed the old ones without looking at how they were seated in the frame, each filter should say “Air Flow” with an Arrow. This will tell you how to position the filter in the frame.
7. Now that you have your new filters installed into each frame, it is now time to insert them back into the air box. First you will want to install the frame that has the plastic pull on the left hand side (with the frame opening up)…slide it straight into the box then push it over to the right within the box. Next grab your frame that has the plastic pull on the right (with the frame opening up) and this one just slides straight in.
8. Once both frames are placed back into the air box, then you can re-install the black plastic cover. First, insert the lip (on the right side of the piece) into right side of the air box. Then clip the left side of the plastic cover back onto the left side of the air box.
9. Now the trickiest part is putting the plastic clips (that keep the glove box from falling forward) back onto the glove box. Take one of the clips and start closing the glove box, but leave just enough room for your hand to fit in. What you need to do is slide the plastic clip through the hole (from the inside), with the glove box almost shut. This allows the clip to slide in behind the stoppers that are mounted on the inside of the dash. Once you figure out how to pop one side in, the other side should be a little easier to understand.

(Sorry for bad picture)
10. Open and close your glove box to make sure it functions properly. Once it passes the test, throw everything back into the glove box and close it.
Now you can enjoy your nice clean air…At least for another year or 25,000 miles!
Modified by JimmyM86 at 9:03 AM 12/23/2007
Modified by JimmyM86 at 9:10 AM 12/23/2007
Modified by JimmyM86 at 9:11 AM 12/23/2007
Modified by JimmyM86 at 9:19 AM 12/23/2007
Modified by JimmyM86 at 9:36 AM 12/23/2007
Modified by JimmyM86 at 9:37 AM 12/23/2007
Modified by JimmyM86 at 9:39 AM 12/23/2007
This will cover how to replace both cabin air filters. This is very easy to do!
Both cabin air filters should be replaced every year or every 25,000 miles (or so)…
Tools/Materials needed:
None
Optional Tools/Materials:
Small flathead screwdriver
Parts needed:
2X - Honda OEM Cabin Air Filters - P/N: 80292-S5D-A01 (or retail parts store equivalent)
1. Before beginning, make sure you have all the required tools, materials, and parts on hand.
2. Open the glove box and remove all of its contents (set them in the driver’s seat for now).
3. Notice the two black clips. These keep the glove box from falling outwards. You will want to remove these from the glove box to allow the glove box to fall all the way forward. They may be a little awkward/tricky to remove, but you should be able to do so without any tools (a small flathead screwdriver might come in handy here, but be gentle as to not break the PLASTIC pieces). I found it easy to squeeze the clip while pushing inwards from outside of the glove box. They might fall behind the dash, but they can be easily recovered once the glove box swings forward. Once both clips are removed, allow the glove box to fall forward and rest in the down position.
4. Once the glove box is out of the way, you will see a black plastic cover (to the right of all the wires). This can be removed by simply pulling out on the tab on the left hand side and sliding the cover out. This will give you access to slide out both cabin air filters, which rest inside of a black plastic frame.
5. As you are sliding both of the filters/frames out, make a mental note of their position (within the air box as well as the filters themselves within the frame). The filter on the left (will have a plastic pull on the right) will pull straight out. The filter on the right (will have a plastic pull on the left) will have to be moved over to the left and then pulled straight out. You may also notice how much dust, hair, pine needles, leaves, etc…have gathered here. They are doing their job of filtering the air circulating through the car. Which could be comparable to the filter on the A/C-Heat unit in your house/apartment.
6. Before removing the old filters from the frames, set them on the floor and take a look at how the filters sit in each frame. Remove one of the old filters and replace it with a new one the same way it was on before, and then do the same with the other. If you frantically removed the old ones without looking at how they were seated in the frame, each filter should say “Air Flow” with an Arrow. This will tell you how to position the filter in the frame.
7. Now that you have your new filters installed into each frame, it is now time to insert them back into the air box. First you will want to install the frame that has the plastic pull on the left hand side (with the frame opening up)…slide it straight into the box then push it over to the right within the box. Next grab your frame that has the plastic pull on the right (with the frame opening up) and this one just slides straight in.
8. Once both frames are placed back into the air box, then you can re-install the black plastic cover. First, insert the lip (on the right side of the piece) into right side of the air box. Then clip the left side of the plastic cover back onto the left side of the air box.
9. Now the trickiest part is putting the plastic clips (that keep the glove box from falling forward) back onto the glove box. Take one of the clips and start closing the glove box, but leave just enough room for your hand to fit in. What you need to do is slide the plastic clip through the hole (from the inside), with the glove box almost shut. This allows the clip to slide in behind the stoppers that are mounted on the inside of the dash. Once you figure out how to pop one side in, the other side should be a little easier to understand.
(Sorry for bad picture)
10. Open and close your glove box to make sure it functions properly. Once it passes the test, throw everything back into the glove box and close it.
Now you can enjoy your nice clean air…At least for another year or 25,000 miles!
Modified by JimmyM86 at 9:03 AM 12/23/2007
Modified by JimmyM86 at 9:10 AM 12/23/2007
Modified by JimmyM86 at 9:11 AM 12/23/2007
Modified by JimmyM86 at 9:19 AM 12/23/2007
Modified by JimmyM86 at 9:36 AM 12/23/2007
Modified by JimmyM86 at 9:37 AM 12/23/2007
Modified by JimmyM86 at 9:39 AM 12/23/2007
 05-14-2008, 12:44 PM
#2
Join Date: May 2008
Location: Pasadena, TX, US
Posts: 1
Likes: 0
Received 0 Likes
on
0 Posts
where can u buy replacement filters? local autozone or dealr item only? maybe thats y it smells funny in the car sometimes.
05-14-2008, 02:10 PM
#3
<TABLE WIDTH="90%" CELLSPACING=0 CELLPADDING=0 ALIGN=CENTER><TR><TD>Quote, originally posted by slow_4dr »</TD></TR><TR><TD CLASS="quote">where can u buy replacement filters? local autozone or dealr item only? maybe thats y it smells funny in the car sometimes.</TD></TR></TABLE>
http://handaaccessories.com/civmaint01.html
http://handaaccessories.com/civmaint01.html
 05-16-2008, 08:39 PM
#7
<TABLE WIDTH="90%" CELLSPACING=0 CELLPADDING=0 ALIGN=CENTER><TR><TD>Quote, originally posted by vroomboom »</TD></TR><TR><TD CLASS="quote">what does the cabin air filter do?</TD></TR></TABLE>
Filters the air being put through the interior via the interior fan, so you don't have tons of allergens and dust coming into the cabin.
Filters the air being put through the interior via the interior fan, so you don't have tons of allergens and dust coming into the cabin.

Thread
Thread Starter
Forum
Replies
Last Post
misterghost
Honda Civic (2006 - 2015)
4
03-18-2008 07:41 PM

