
Finally did my 'Fender Swap' - how-to DIY type post
 01-27-2006, 10:19 PM
#1
B A N N E D
Thread Starter

Ok, so I posted about it before and I finally got it all done. I don't know if I took enough pictures but I'll show what I got.
Ok there's alot to do before just pulling the fender off so make sure you have some time. I'd give yourself maybe 4 hours if you don't have all the right tools, lighting, experience, etc.
So lets say your friend was driving your car. There's snow tires on the front, but he decides to drive around corners in a spirited fashion anyway. Around the turn, he hits some wet spot and hits a dump truck. Now, this is where you are.
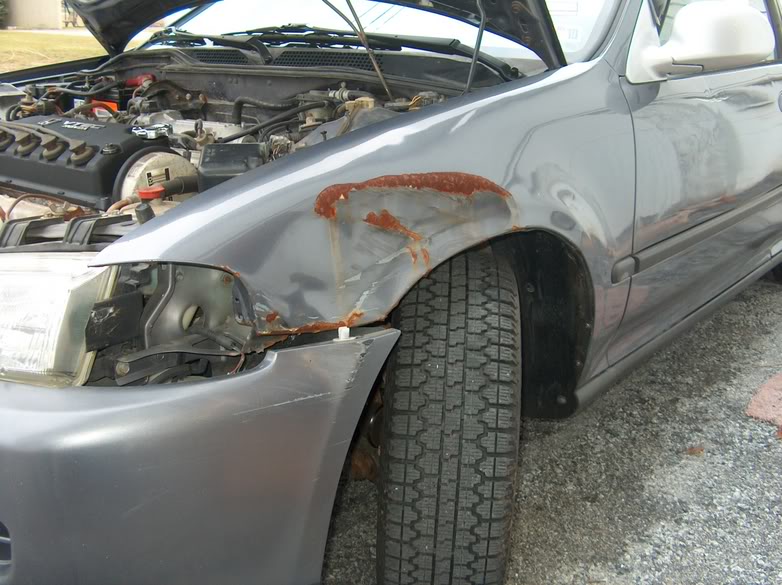
and here

and the impact broke off the side view mirror too, so now you have JDM units that don't match - gotta love that inspection sticker!

To do this w/o messing up paint, I recommend a medium phillips head screwdriver, a 10mm 6pt socket with a 10" extension, a ratchet, and a ratcheting 10mm combination wrench. Oh and wire cutters to cut naughty fasteners.
So if you're sick of the corner light not fitting right and of course the unsightly dent in your front left fender, it's time to change it out! If you've got any other stuff to do, like run wires from the door to the car, install headlights, corner lights, bumper pole, or side markers, I'd do it now. Also, if your hood latch cable is broken or something, you'll be able to see it when the fender is out of the way. I won't give any more detail than that as I know it's a sensitive subject.
There's no real order, but the following need to be done.
Remove the screws at the leading edge of the fender liner. They're mostly plastic and should unscrew easily. If they just turn but don't come out, cut them with wire cutters and remember to get a new one later.
Remove the screws that hold the fender liner to the side skirt.
Remove the screw fasteners that hold the side skirt on. Same thing. IF they won't come out, cut it and remember to get one of these too.
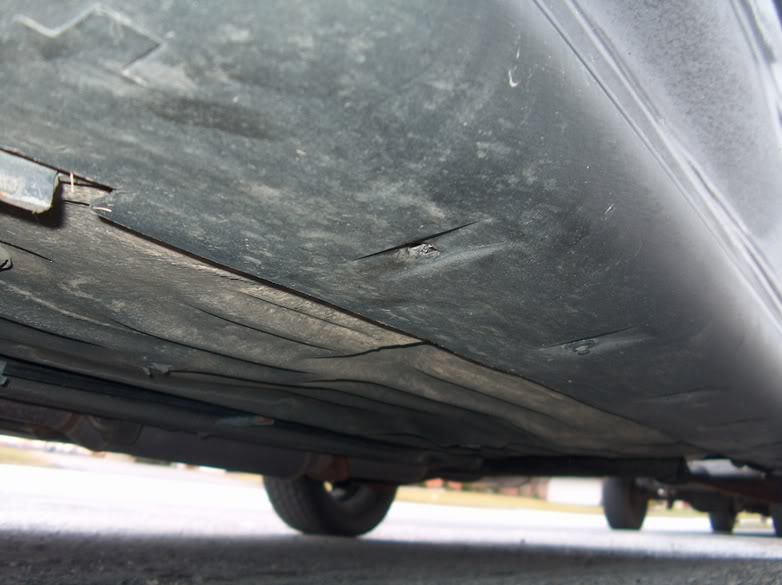
Once the screws are all out, slide the sideskirt forward. You may have to 'hit it from the back' (of the car) with the palm of your hand or some other soft, blunt object. You need to jar it loose for it to slide forward. (I forgot this step and just ripped it off and ended up breaking some of the clips.
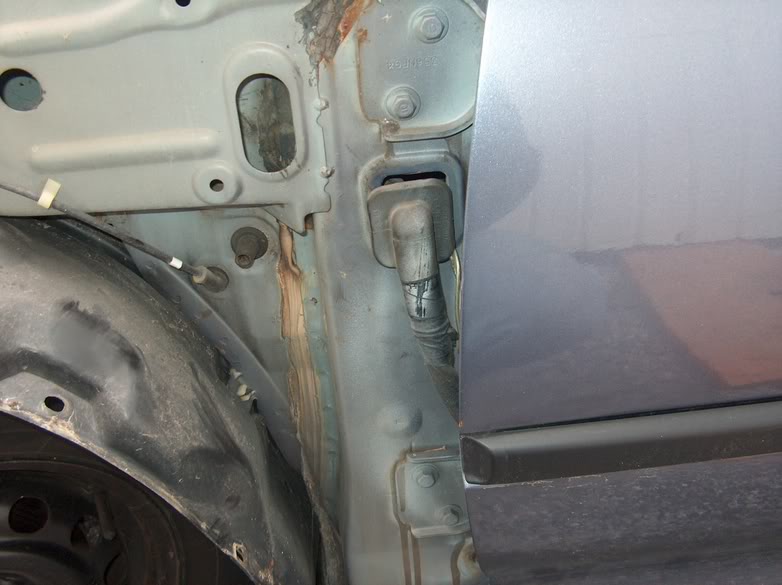
Remove the three 10mm bolts seen in this picture - one may be partly hidden by the rubber seal at the top of the image.

Remove the pin from the door hinge- the one that prevents the door from going out too far. You need to gently hyperextend the door to get to these 10mm bolts-
there are 2 in the door jam area. One is below the A- pillar and the other is just above where the side skirt was.
There is also another 10mm bolt at the bottom edge of the fender where the side skirt was.
There is a 10mm bolt in here. I couldn't take a pic when it was on, so this will have to do.

Also remove the screw that goes through the white 'jaunt' seen in the middle of the above picture.
Double check that you didn't miss a screw or bolt and the whole fender should be loose now. Close the door, lift the fender up and rotate towards the back so the tabs come out clear, and that should be your newly freed fender!! Remove the side molding from the back and stick it on your new fender.
Installation is reverse of removal, but be sure to transfer all the screw-tabs or fasteners if your new fender didn't have them.
TO LINE UP the fender is quite difficult. I'd say get all the 10mm bolts started (except for the one thats a pain in the *** to get to, the one directly behind the turnsignal) and shut the door and hood. IF your gaps are unsightly, fix it! push or pull the fender into the position that looks best and tighten the closest bolt. If you need to move it back to fit with teh door better, tighten the top bolt (in the door jam area) first, then the bottoms.
If you needed to run wires from the door to the car, this plug pops out fairly easily allowing just that.
While the fender is off, I decided it would be the easiest time to put on my JDM headlights so I did all the wiring and such with the fender off, but when I did the other side, it really wasn't any harder, so it really wasn't necessary.
I also tried my hardest to get the alignment right, but I'm not satisfied with it, so I think I'd like to take the car to the Honda body shop and have them line it up. I know it isn't very DIY but it's hard to do even with help.
Ok there's alot to do before just pulling the fender off so make sure you have some time. I'd give yourself maybe 4 hours if you don't have all the right tools, lighting, experience, etc.
So lets say your friend was driving your car. There's snow tires on the front, but he decides to drive around corners in a spirited fashion anyway. Around the turn, he hits some wet spot and hits a dump truck. Now, this is where you are.
and here
and the impact broke off the side view mirror too, so now you have JDM units that don't match - gotta love that inspection sticker!
To do this w/o messing up paint, I recommend a medium phillips head screwdriver, a 10mm 6pt socket with a 10" extension, a ratchet, and a ratcheting 10mm combination wrench. Oh and wire cutters to cut naughty fasteners.
So if you're sick of the corner light not fitting right and of course the unsightly dent in your front left fender, it's time to change it out! If you've got any other stuff to do, like run wires from the door to the car, install headlights, corner lights, bumper pole, or side markers, I'd do it now. Also, if your hood latch cable is broken or something, you'll be able to see it when the fender is out of the way. I won't give any more detail than that as I know it's a sensitive subject.
There's no real order, but the following need to be done.
Remove the screws at the leading edge of the fender liner. They're mostly plastic and should unscrew easily. If they just turn but don't come out, cut them with wire cutters and remember to get a new one later.
Remove the screws that hold the fender liner to the side skirt.
Remove the screw fasteners that hold the side skirt on. Same thing. IF they won't come out, cut it and remember to get one of these too.
Once the screws are all out, slide the sideskirt forward. You may have to 'hit it from the back' (of the car) with the palm of your hand or some other soft, blunt object. You need to jar it loose for it to slide forward. (I forgot this step and just ripped it off and ended up breaking some of the clips.
Remove the three 10mm bolts seen in this picture - one may be partly hidden by the rubber seal at the top of the image.
Remove the pin from the door hinge- the one that prevents the door from going out too far. You need to gently hyperextend the door to get to these 10mm bolts-
there are 2 in the door jam area. One is below the A- pillar and the other is just above where the side skirt was.
There is also another 10mm bolt at the bottom edge of the fender where the side skirt was.
There is a 10mm bolt in here. I couldn't take a pic when it was on, so this will have to do.
Also remove the screw that goes through the white 'jaunt' seen in the middle of the above picture.
Double check that you didn't miss a screw or bolt and the whole fender should be loose now. Close the door, lift the fender up and rotate towards the back so the tabs come out clear, and that should be your newly freed fender!! Remove the side molding from the back and stick it on your new fender.
Installation is reverse of removal, but be sure to transfer all the screw-tabs or fasteners if your new fender didn't have them.
TO LINE UP the fender is quite difficult. I'd say get all the 10mm bolts started (except for the one thats a pain in the *** to get to, the one directly behind the turnsignal) and shut the door and hood. IF your gaps are unsightly, fix it! push or pull the fender into the position that looks best and tighten the closest bolt. If you need to move it back to fit with teh door better, tighten the top bolt (in the door jam area) first, then the bottoms.
If you needed to run wires from the door to the car, this plug pops out fairly easily allowing just that.
While the fender is off, I decided it would be the easiest time to put on my JDM headlights so I did all the wiring and such with the fender off, but when I did the other side, it really wasn't any harder, so it really wasn't necessary.
I also tried my hardest to get the alignment right, but I'm not satisfied with it, so I think I'd like to take the car to the Honda body shop and have them line it up. I know it isn't very DIY but it's hard to do even with help.

The following users liked this post:
01-27-2006, 10:23 PM
#2
Honda-Tech Member
Join Date: Jul 2005
Location: New York
Posts: 1,392
Likes: 0
Received 0 Likes
on
0 Posts
<TABLE WIDTH="90%" CELLSPACING=0 CELLPADDING=0 ALIGN=CENTER><TR><TD>Quote, originally posted by 99CivicSiBrian »</TD></TR><TR><TD CLASS="quote">So lets say your friend was driving your car. There's snow tires on the front, but he decides to drive around corners in a spirited fashion anyway. Around the turn, he hits some wet spot and hits a dump truck. Now, this is where you are.</TD></TR></TABLE>
happens everyday . would seem to be a very easy DIY even for car noobs but still good stuff to post for the lazy ones who dont like to figure things out on their own
happens everyday
. would seem to be a very easy DIY even for car noobs but still good stuff to post for the lazy ones who dont like to figure things out on their own
01-27-2006, 10:26 PM
#3
B A N N E D
Thread Starter
<TABLE WIDTH="90%" CELLSPACING=0 CELLPADDING=0 ALIGN=CENTER><TR><TD>Quote, originally posted by amej8 »</TD></TR><TR><TD CLASS="quote">happens everyday . would seem to be a very easy DIY even for car noobs but still good stuff to post for the lazy ones who dont like to figure things out on their own </TD></TR></TABLE>
Yeah I figured for the guy who thinks he has to pay $300 for someone to put it on, just DIY and keep the dough. I guess I could rattle can it and it would look aight. I'm still uploading pics of the finished product.
B
. would seem to be a very easy DIY even for car noobs but still good stuff to post for the lazy ones who dont like to figure things out on their own </TD></TR></TABLE>Yeah I figured for the guy who thinks he has to pay $300 for someone to put it on, just DIY and keep the dough. I guess I could rattle can it and it would look aight. I'm still uploading pics of the finished product.
B

Trending Topics
03-16-2006, 09:06 PM
#8
<TABLE WIDTH="90%" CELLSPACING=0 CELLPADDING=0 ALIGN=CENTER><TR><TD>Quote, originally posted by EJacul8 »</TD></TR><TR><TD CLASS="quote">if you dont know how to replace fenders on a civic.. you probably shouldnt have a tool set 
i cant swap fenders faster then i can change my oil </TD></TR></TABLE>
were you born knowing how to change a fender? people got to start from somewhere.
i cant swap fenders faster then i can change my oil </TD></TR></TABLE>
were you born knowing how to change a fender? people got to start from somewhere.
03-16-2006, 09:56 PM
#9
Join Date: Nov 2005
Location: so cal
Posts: 2,725
Likes: 0
Received 0 Likes
on
0 Posts
<TABLE WIDTH="90%" CELLSPACING=0 CELLPADDING=0 ALIGN=CENTER><TR><TD>Quote, originally posted by 99CivicSiBrian »</TD></TR><TR><TD CLASS="quote">I forgot this step and just ripped it off and ended up breaking some of the clips.</TD></TR></TABLE>
haha did the same thing when i replaced my fender on my old sol. didnt know it slides out
haha did the same thing when i replaced my fender on my old sol. didnt know it slides out
06-22-2007, 09:10 PM
#12
Join Date: Nov 2004
Location: millerwaukee, WI
Posts: 17
Likes: 0
Received 0 Likes
on
0 Posts
while ur in there u might want reroute ur hood release cable to inside the engine bay, I heard thieves will reach in behind the wheel well liner to release the hood.
 11-05-2009, 07:37 PM
#16
Honda-Tech Member
Join Date: Apr 2008
Location: Lost Gates
Posts: 2,313
Likes: 0
Received 0 Likes
on
0 Posts


Thread
Thread Starter
Forum
Replies
Last Post
ShinotakuX
Honda Civic / Del Sol (1992 - 2000)
10
09-15-2008 01:25 PM