
diy filled b series block, with writeup, comments welcome
 11-24-2005, 09:38 PM
#1
Thread Starter

Join Date: Jul 2005
Location: somewhere in, ct
Posts: 778
Likes: 0
Received 0 Likes
on
0 Posts
heres the deal. filling a stock sleeve block to handle mucho boost for under 50 dollars.
full info on devcon here
http://www.devcon.com/techinfo/108.pdf
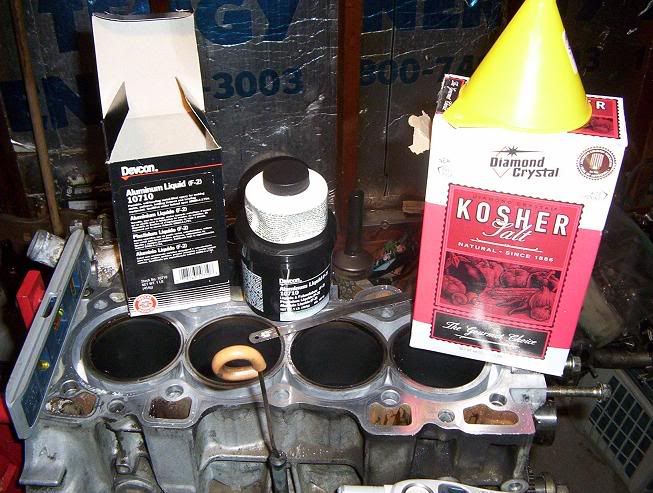
the supplies.
1. DEVCON LIQUID ALUMINUM F-2 (1 lb ) for b series ( 3/4) lb for d series
2. BOX OF TABLE SALT.
3. 80 GRIT SAND PAPER.
4. CONTACT CLEANER
5. HACKSAW BLADE ( for measuring)
6. SHARPIE
7. 19MM WRENCH
8. FUNNEL
8 BEER ( optional)
10. LEVEL
HERE ARE THE STEPS
1. gather all supplies, listed above.
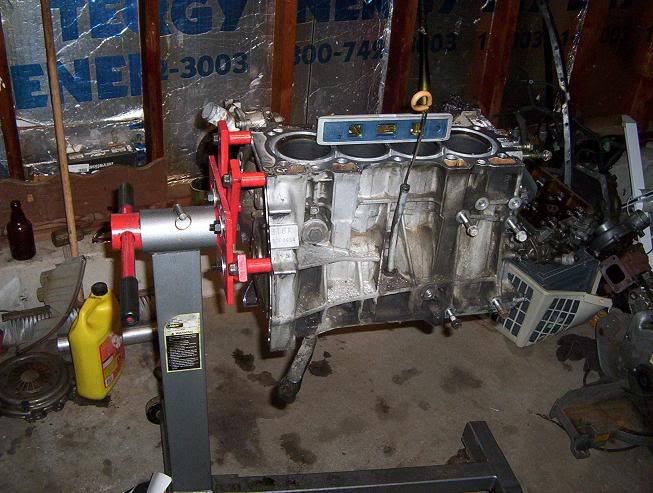
2. put block on a level surface, make sure its level. if on a stand level the stand front to back and side to side.
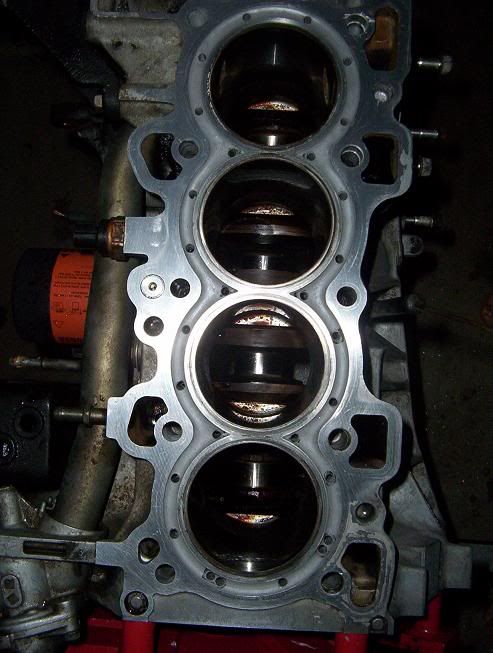
3. take 80 grit sand paper and skuff the water jacket and sleeve so the devcon will bond when poured. after you sand it, spray with a contact cleaner to remove, oils, grit, ect.
4. take your hacksaw blade., this is your ghetto marking tool. place blade along sleeve where the water pump hole is. the end of the blade will be even with the top of the water pump hole. where the blade intersects with the deck draw a line.
that will be your measurement as to how far up to fill your jacket with salt.
5.pour salt evenly around the jacket until it meets your measurement you determine with your hacksaw measuring stick. be sure to take the blade and poke the salt to remove ait pockets and have it sit uniform.
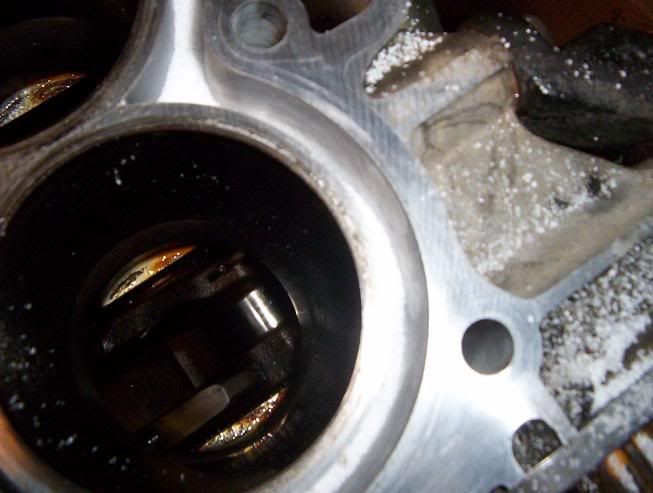
6. after the salt is air pocket free and to the level you desire., mix your epoxy.
stir together for at least 4 minutes. after the mixture is a uniform grey color pour it through the funnel and into your jacket.
when its all poured it will look like this.
7. now after you pour the devcon, you will need to skim your finger around the top of the sleeve, to 1, even out the pour, and 2. smooth it out. and make sure none of it sits above the gaset surface. there should be a bit of sleeve uncovered at the very top, prob like 1/16 inch.
8. let the devcon sit for 4 hrs. at room temp. then for 4 hrs it must be cured at 200 degrees. i put the block and a space heater inside a big box and let it bake out. be sure to keep a close eye on it, uncase you light up the box. hehe
9. let sit for another 18 hrs after that.
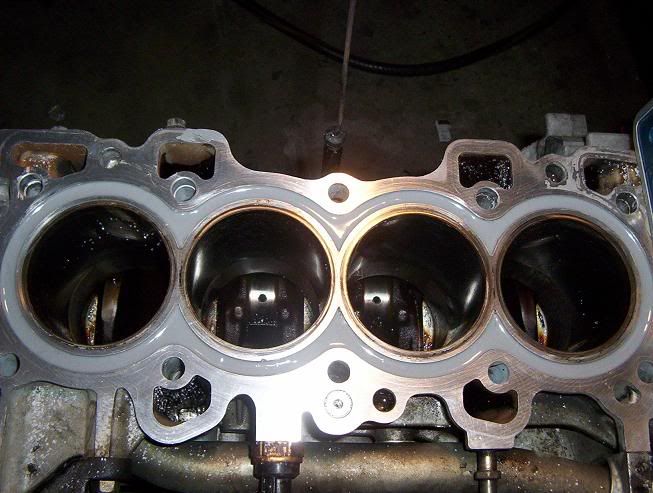
10. after it is hard. take an old headgasket. lay it on top of the block, and mark the coolant holes with your sharpie.
11. drill holes in the devcon 1 size smaller than the hole in the headgasket.
12. once holes are drilled, remove the freeze plug with a 19mm.
13. take your hose, and flush the salt out of the sleeves until you see no more coming out and the water shoots out of the holes drilled in the devcon evenly.
14. replace drain plug, and oil cyl walls to prevent rust.
15. hone or bore block and assemble.
16. drinka beer to celebrate your 50 dollar filled block and all the hard boost it will endure.

brought to you by ccfab da stallion drinker.
Modified by ccfab at 11:58 PM 11/24/2005
full info on devcon here
http://www.devcon.com/techinfo/108.pdf
the supplies.
1. DEVCON LIQUID ALUMINUM F-2 (1 lb ) for b series ( 3/4) lb for d series
2. BOX OF TABLE SALT.
3. 80 GRIT SAND PAPER.
4. CONTACT CLEANER
5. HACKSAW BLADE ( for measuring)
6. SHARPIE
7. 19MM WRENCH
8. FUNNEL
8 BEER ( optional)
10. LEVEL
HERE ARE THE STEPS
1. gather all supplies, listed above.
2. put block on a level surface, make sure its level. if on a stand level the stand front to back and side to side.
3. take 80 grit sand paper and skuff the water jacket and sleeve so the devcon will bond when poured. after you sand it, spray with a contact cleaner to remove, oils, grit, ect.
4. take your hacksaw blade., this is your ghetto marking tool. place blade along sleeve where the water pump hole is. the end of the blade will be even with the top of the water pump hole. where the blade intersects with the deck draw a line.
that will be your measurement as to how far up to fill your jacket with salt.
5.pour salt evenly around the jacket until it meets your measurement you determine with your hacksaw measuring stick. be sure to take the blade and poke the salt to remove ait pockets and have it sit uniform.
6. after the salt is air pocket free and to the level you desire., mix your epoxy.
stir together for at least 4 minutes. after the mixture is a uniform grey color pour it through the funnel and into your jacket.
when its all poured it will look like this.
7. now after you pour the devcon, you will need to skim your finger around the top of the sleeve, to 1, even out the pour, and 2. smooth it out. and make sure none of it sits above the gaset surface. there should be a bit of sleeve uncovered at the very top, prob like 1/16 inch.
8. let the devcon sit for 4 hrs. at room temp. then for 4 hrs it must be cured at 200 degrees. i put the block and a space heater inside a big box and let it bake out. be sure to keep a close eye on it, uncase you light up the box. hehe
9. let sit for another 18 hrs after that.
10. after it is hard. take an old headgasket. lay it on top of the block, and mark the coolant holes with your sharpie.
11. drill holes in the devcon 1 size smaller than the hole in the headgasket.
12. once holes are drilled, remove the freeze plug with a 19mm.
13. take your hose, and flush the salt out of the sleeves until you see no more coming out and the water shoots out of the holes drilled in the devcon evenly.
14. replace drain plug, and oil cyl walls to prevent rust.
15. hone or bore block and assemble.
16. drinka beer to celebrate your 50 dollar filled block and all the hard boost it will endure.
brought to you by ccfab da stallion drinker.
Modified by ccfab at 11:58 PM 11/24/2005
 11-24-2005, 09:55 PM
#2
Honda-Tech Member
Join Date: Jul 2004
Location: JDM is the NEW RICE, VA, USA
Posts: 1,288
Likes: 0
Received 0 Likes
on
0 Posts
so how much boost do u think this will hold? have u tested it to see how much whp u can make?  to this plan though, def. beats $1000 sleeve job
to this plan though, def. beats $1000 sleeve job
11-24-2005, 09:57 PM
#3
Who is Mr Robot?
iTrader: (2)
Join Date: Jul 2004
Location: ATL - Where the Pimps and Players dwell
Posts: 21,474
Likes: 0
Received 10 Likes
on
10 Posts
looks good...
but because of the salt the devcon will now pour past the salt... in effect its like a blockguard
but because of the salt the devcon will now pour past the salt... in effect its like a blockguard
11-24-2005, 10:00 PM
#4
Thread Starter
Join Date: Jul 2005
Location: somewhere in, ct
Posts: 778
Likes: 0
Received 0 Likes
on
0 Posts
yes, it fills approx 1.5 inches of the sleeve. then it is drilled.
i would definately call it a hmt block guard.
blacksi on hmt ran a simialr setup for 2 yrs in his drag car making 470ish whp at 32 psi on a t4/60-1
it has been run time and time again,
i will personally be taking this block into the 20-25 psi range to see what happens
there are also numerous people daily driving these filled blocks with no overheating issues whatsoeever
11-24-2005, 10:01 PM
#5
Thread Starter
Join Date: Jul 2005
Location: somewhere in, ct
Posts: 778
Likes: 0
Received 0 Likes
on
0 Posts
also, the devcon is of a thick consistency, and does not pour past the salt.
you must pack the salt in as tightly as possible. thats why i used table salt and not rock salt like some use.
it is much finer and packs together much tighter
you must pack the salt in as tightly as possible. thats why i used table salt and not rock salt like some use.
it is much finer and packs together much tighter
11-24-2005, 10:05 PM
#6
Who is Mr Robot?
iTrader: (2)
Join Date: Jul 2004
Location: ATL - Where the Pimps and Players dwell
Posts: 21,474
Likes: 0
Received 10 Likes
on
10 Posts
ah, better than a blockguard then... that .5" inch piece of metal is a joke... this stuff is thikcer and it wont distort sleeves... im gonna try this with my d-series boosted go kart
Trending Topics
11-25-2005, 12:15 AM
#8
Honda-Tech Member
Join Date: May 2002
Location: BeLlInGhAm, Wa
Posts: 3,599
Likes: 0
Received 0 Likes
on
0 Posts
<TABLE WIDTH="90%" CELLSPACING=0 CELLPADDING=0 ALIGN=CENTER><TR><TD>Quote, originally posted by ccfab »</TD></TR><TR><TD CLASS="quote">it is much finer and packs together much tighter</TD></TR></TABLE>

 11-25-2005, 08:09 AM
#11
Junior Member
Join Date: Jul 2004
Location: Sacramento, CA, USA
Posts: 520
Likes: 0
Received 0 Likes
on
0 Posts
This is nothing new. Some know I am not really into the import scene, but very much into the domestic stuff. Filling blocks is really nothing new. Does it help...? ABSOLUTELY. In a domestic block you just fill the water passages up normally to the freeze plugs, sometimes all the way up. We run ours on methanol so no water is needed, so all our blocks are filled. It greatly strengthens the block itself. I cant give you a number for boost, but know when you have a 4.75" stroke billet steel crank swinging around in there at 7500+ RPM, you need as much strength as you can get....and we've never had any problems with it.
Kyle
Kyle
 11-25-2005, 08:09 PM
#20
Honda-Tech Member
<TABLE WIDTH="90%" CELLSPACING=0 CELLPADDING=0 ALIGN=CENTER><TR><TD>Quote, originally posted by ccfab »</TD></TR><TR><TD CLASS="quote">if you have any shred of patience and common sense, i cant see anyone ever messing up this install</TD></TR></TABLE>
Ahh, and there in lies the problem! lol
Ahh, and there in lies the problem! lol
11-25-2005, 09:04 PM
#24