
Battle Monkey's EK Hatch - AutoX/DD
 07-05-2013, 06:36 PM
#51
Honda-Tech Member
Thread Starter
iTrader: (1)

Join Date: Oct 2010
Location: USA
Posts: 168
Likes: 0
Received 0 Likes
on
0 Posts
I have a guy coming to see it tomorrow. He seems really interested and serious. Hopefully all goes well...
I washed and detailed the whole car today. Kindof her "potentially going away" present.
This car is so clean... Definitely going to miss it.
Then I got the red curry from a new restaurant today. It was a little too salty or something near the end though. But still tasty.

Here's an old picture of the car that I just found. Really cool shot...

I washed and detailed the whole car today. Kindof her "potentially going away" present.
This car is so clean... Definitely going to miss it.
Then I got the red curry from a new restaurant today. It was a little too salty or something near the end though. But still tasty.
Here's an old picture of the car that I just found. Really cool shot...
Last edited by Battle Monkey; 10-10-2013 at 05:32 AM.

 10-05-2013, 08:10 PM
#53
Honda-Tech Member
Join Date: Mar 2009
Location: Dirty Jersey 973
Posts: 1,212
Likes: 0
Received 0 Likes
on
0 Posts
Where are the updates? This build was going so well and being done properly for once...
Awesome I am in for more
Awesome I am in for more
10-09-2013, 06:25 AM
#54
Honda-Tech Member
Thread Starter
iTrader: (1)
Join Date: Oct 2010
Location: USA
Posts: 168
Likes: 0
Received 0 Likes
on
0 Posts
Hey guys, sorry for being so dormant lately. I actually have been working on a new project... It's not a true EK9, nor is it rhd; it had a full B16B swap with S4C LSD trans, all fully authentic parts, etc. The plan is to stitch weld the entire chassis in the next year or two, and to have a 100% LHD replica EK9 that get's tracked and autocrossed as much as any other car would. Not a trailer queen that just goes to shows.


Some of the things I've been up to;
Tuning... 162whp@8600/113wtq@7200

Installing the ugliest (yet functional) suspension setup known to man.

Cleaning up the trunk area...
From this;

To this;

Replacing the crappy pads with Stoptech SP.

Installed these.

Alignment specs: Front ... -3.2/-1.7 camber, zero toe all around
Detailed it.

Went to a show

And last night I began mocking up the intake shield/box setup for when my new intake arrives.

If people who have been following the old build still seem interested in following the new one, I will go ahead and post the rest of the pictures and write-ups that I have compiled since owning the car.
As far as those who really loved the beater build, I apologize for the latest changes. I am still driving it everyday, but it will probably be sold after winter... Hopefully you will still enjoy my new build, and find that I am bringing the same functional principles to this car.
Additional posts can also be found at www.battlemonkeyenterprises.com
Some of the things I've been up to;
Tuning... 162whp@8600/113wtq@7200
Installing the ugliest (yet functional) suspension setup known to man.
Cleaning up the trunk area...
From this;
To this;
Replacing the crappy pads with Stoptech SP.
Installed these.
Alignment specs: Front ... -3.2/-1.7 camber, zero toe all around
Detailed it.
Went to a show
And last night I began mocking up the intake shield/box setup for when my new intake arrives.
If people who have been following the old build still seem interested in following the new one, I will go ahead and post the rest of the pictures and write-ups that I have compiled since owning the car.
As far as those who really loved the beater build, I apologize for the latest changes. I am still driving it everyday, but it will probably be sold after winter... Hopefully you will still enjoy my new build, and find that I am bringing the same functional principles to this car.
Additional posts can also be found at www.battlemonkeyenterprises.com
10-09-2013, 12:48 PM
#60
Honda-Tech Member
Thread Starter
iTrader: (1)
Join Date: Oct 2010
Location: USA
Posts: 168
Likes: 0
Received 0 Likes
on
0 Posts
Wow, this is very good news guys thanks for the insight! It looks like there may be a place for this car afterall! I had pretty much chalked it up that it could only just be a hobby car, and would probably have to get something else for SCCA comp.
10-09-2013, 01:04 PM
#61
Honda-Tech Member
iTrader: (1)
Join Date: Oct 2009
Location: Florida
Posts: 455
Likes: 0
Received 0 Likes
on
0 Posts
SMF is a fun class, not going to be seriously/nationally competitive with a very streetable car. But you can build a very fun, fast, streetable trackday/autox/TT car within class rules and probably be competitive on a local/regional level in SMF.
10-10-2013, 07:00 AM
#62
Honda-Tech Member
Thread Starter
iTrader: (1)
Join Date: Oct 2010
Location: USA
Posts: 168
Likes: 0
Received 0 Likes
on
0 Posts
7-24-13
Last night, my buddy helped me wash, claybar, and wax the car. Got a lot of little specks of buildup off of the finish, and were able to correct a good amount of the swirling. Eventually we'd like to hit it with some more aggressive polish, but this will do for now.
clay bar, 3 passes with polish, 1 coat of wax


Took the car out after work today and got some better pictures of it in the daylight.


Really nice reflection after the detail!


Last night, my buddy helped me wash, claybar, and wax the car. Got a lot of little specks of buildup off of the finish, and were able to correct a good amount of the swirling. Eventually we'd like to hit it with some more aggressive polish, but this will do for now.
clay bar, 3 passes with polish, 1 coat of wax
Took the car out after work today and got some better pictures of it in the daylight.
Really nice reflection after the detail!
10-10-2013, 07:02 AM
#63
Honda-Tech Member
Thread Starter
iTrader: (1)
Join Date: Oct 2010
Location: USA
Posts: 168
Likes: 0
Received 0 Likes
on
0 Posts
8-5-2013
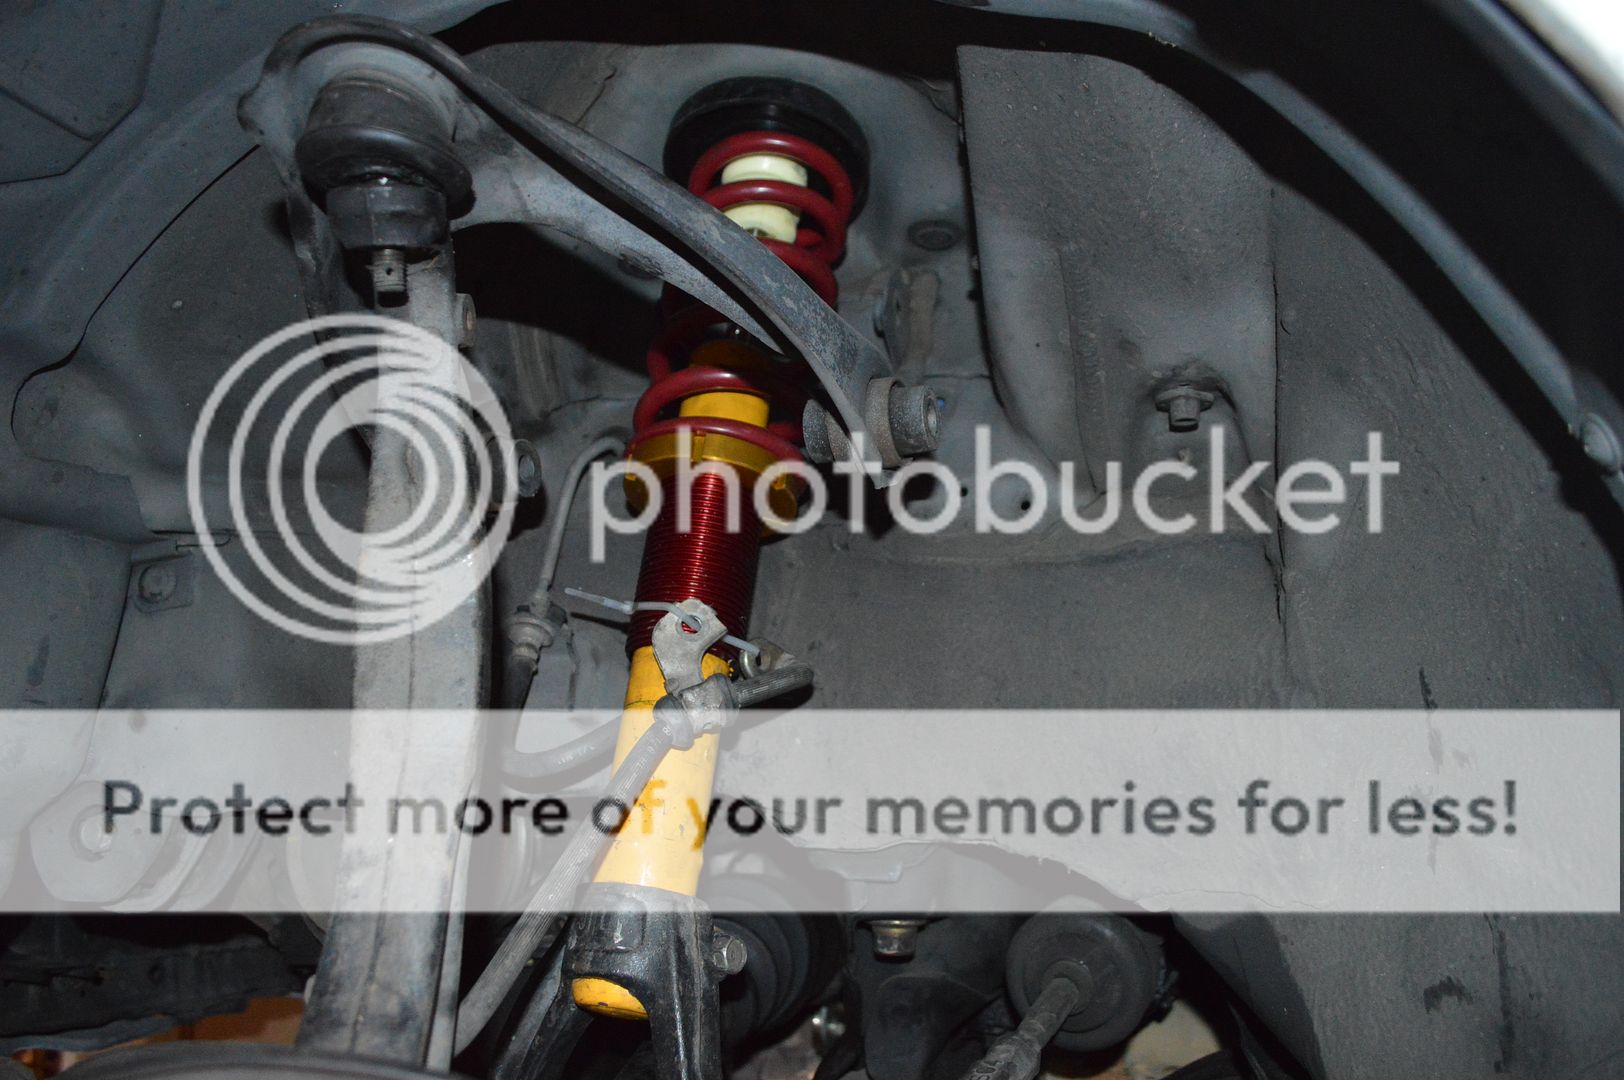
I assembled the Koni Yellows the other day. Here are some pictures.
It was a PITA because I had to drill out the top mount bushings, as they were too small of a diameter to fit over the damper.


8-6-2013
Installed the Koni Yellows tonight. Overall took about 3 hours. I was taking my time, and I had never disassembled a Honda suspension before. Everything was pretty straight forward, and NONE of the bolts were seized! Gotta love California cars!
I ended up going with 400lb F/500lb R, figured it was the best setup for autocross.
The old HKS Hipermax


Here you can see the difference in the length of the damper. The Konis have a good bit more droop, at least 1.5" more.

Rear mounted up

Anti-seize!

Getting the lower mount attached to the control arm.

Out with the old!

Removing the unnecessary "bling"


Other side done!

The front


Aaaaand apparently I was starting to get tired because I didn't take any more pics of the front.
Here are how the heights were after the first time dropping the car back down.
RL

FL

FR

RR


Right now, I think that it's probably pretty close to stock CTR height. The springs still need to settle a little bit too, and I haven't driven the car. I'm not 100% done, I still need to clean up the rear plastic panels and the chopped up hole cutouts for the strut bar.
I'm excited to get testing them! No time tonight, but maybe tomorrow!
*Ride height is 12.5" from hub center to edge of the fender all around
I assembled the Koni Yellows the other day. Here are some pictures.
It was a PITA because I had to drill out the top mount bushings, as they were too small of a diameter to fit over the damper.
8-6-2013
Installed the Koni Yellows tonight. Overall took about 3 hours. I was taking my time, and I had never disassembled a Honda suspension before. Everything was pretty straight forward, and NONE of the bolts were seized! Gotta love California cars!
I ended up going with 400lb F/500lb R, figured it was the best setup for autocross.
The old HKS Hipermax
Here you can see the difference in the length of the damper. The Konis have a good bit more droop, at least 1.5" more.
Rear mounted up
Anti-seize!
Getting the lower mount attached to the control arm.
Out with the old!
Removing the unnecessary "bling"
Other side done!
The front
Aaaaand apparently I was starting to get tired because I didn't take any more pics of the front.
Here are how the heights were after the first time dropping the car back down.
RL
FL
FR
RR
Right now, I think that it's probably pretty close to stock CTR height. The springs still need to settle a little bit too, and I haven't driven the car. I'm not 100% done, I still need to clean up the rear plastic panels and the chopped up hole cutouts for the strut bar.
I'm excited to get testing them! No time tonight, but maybe tomorrow!
*Ride height is 12.5" from hub center to edge of the fender all around
10-10-2013, 07:10 AM
#64
Honda-Tech Member
Thread Starter
iTrader: (1)
Join Date: Oct 2010
Location: USA
Posts: 168
Likes: 0
Received 0 Likes
on
0 Posts
7-29-2013
Here is how the rear interior panels are currently cut to accommodate the rear strut bar. Is there a rear panel that has a molding to fit the bar? Or what do you guys do?
I was thinking that I could cut the opening to be round, and use some black rubber trim to finish the edge. Then find some 1/8" rubber sheeting with a slit cut in it to cover the gap and surround the brace.

8-7-2013
Some of you may remember me complaining about how choppy the trunk plastic was cut to accommodate the strut bar. I had some time after work today, so I dremeled it out a little bit to clean it up. It still needs some finishing touches, but I think it looks A LOT better already.
Before

After


The plan is still to use some thin rubber from an Autozone floor mat to fill the gap. My only hesitation is that I maybe should dremel out the hole a little larger so that I can fit my hand in there to adjust the rear dampers.
8-8-2013
Messed around with one of the strut openings tonight, but I think I'm gonna need to use some sort of adhesive to secure the rubber matting. Looks perfect though.


Here is how the rear interior panels are currently cut to accommodate the rear strut bar. Is there a rear panel that has a molding to fit the bar? Or what do you guys do?
I was thinking that I could cut the opening to be round, and use some black rubber trim to finish the edge. Then find some 1/8" rubber sheeting with a slit cut in it to cover the gap and surround the brace.
8-7-2013
Some of you may remember me complaining about how choppy the trunk plastic was cut to accommodate the strut bar. I had some time after work today, so I dremeled it out a little bit to clean it up. It still needs some finishing touches, but I think it looks A LOT better already.
Before
After
The plan is still to use some thin rubber from an Autozone floor mat to fill the gap. My only hesitation is that I maybe should dremel out the hole a little larger so that I can fit my hand in there to adjust the rear dampers.
8-8-2013
Messed around with one of the strut openings tonight, but I think I'm gonna need to use some sort of adhesive to secure the rubber matting. Looks perfect though.
10-10-2013, 07:13 AM
#65
Honda-Tech Member
Thread Starter
iTrader: (1)
Join Date: Oct 2010
Location: USA
Posts: 168
Likes: 0
Received 0 Likes
on
0 Posts
9-7-2013
Well I just got back from my 2-week honeymoon in Hawaii (Maui and O'ahu). It is rough getting used to life back in the continental US...
Here are a few pictures from the trip


While on my trip I also ordered up some new parts for the hatch


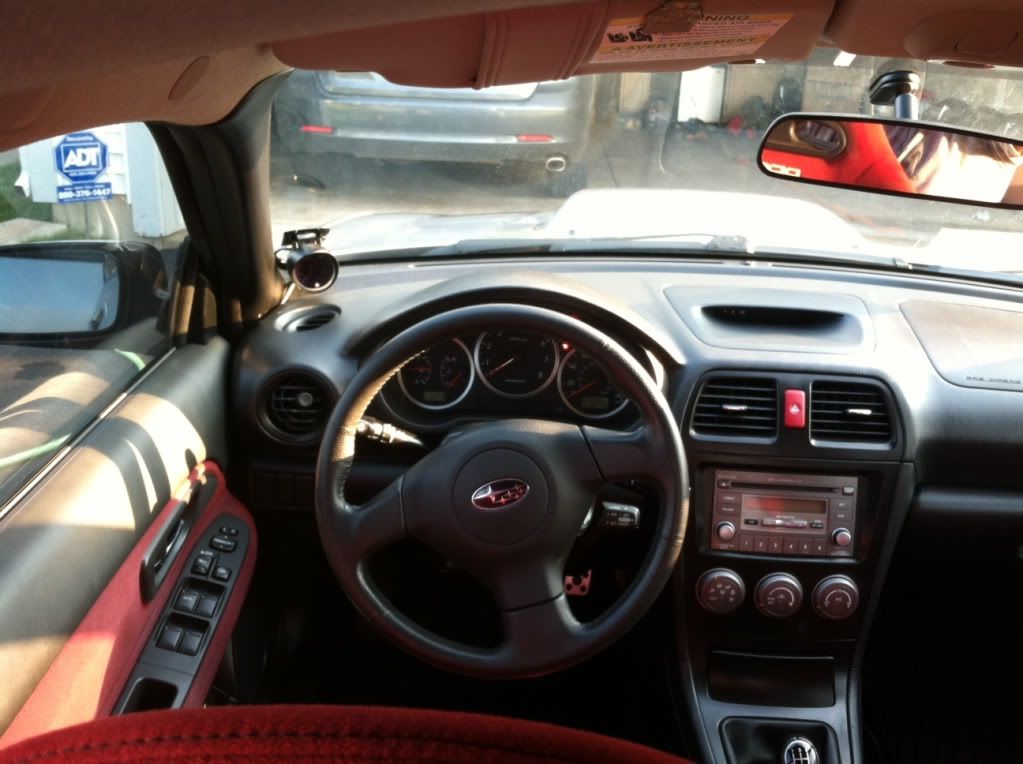
I also had some time to fix the broken ignition switch/steering lock and windshield wiper switch


Well I just got back from my 2-week honeymoon in Hawaii (Maui and O'ahu). It is rough getting used to life back in the continental US...
Here are a few pictures from the trip
While on my trip I also ordered up some new parts for the hatch
I also had some time to fix the broken ignition switch/steering lock and windshield wiper switch
10-10-2013, 07:18 AM
#66
Honda-Tech Member
Thread Starter
iTrader: (1)
Join Date: Oct 2010
Location: USA
Posts: 168
Likes: 0
Received 0 Likes
on
0 Posts
9-27-2013
Well I finally had some free time to install my front camber kit and Stoptech pads. I also bled the brakes with Amsoil Series 600 fluid.

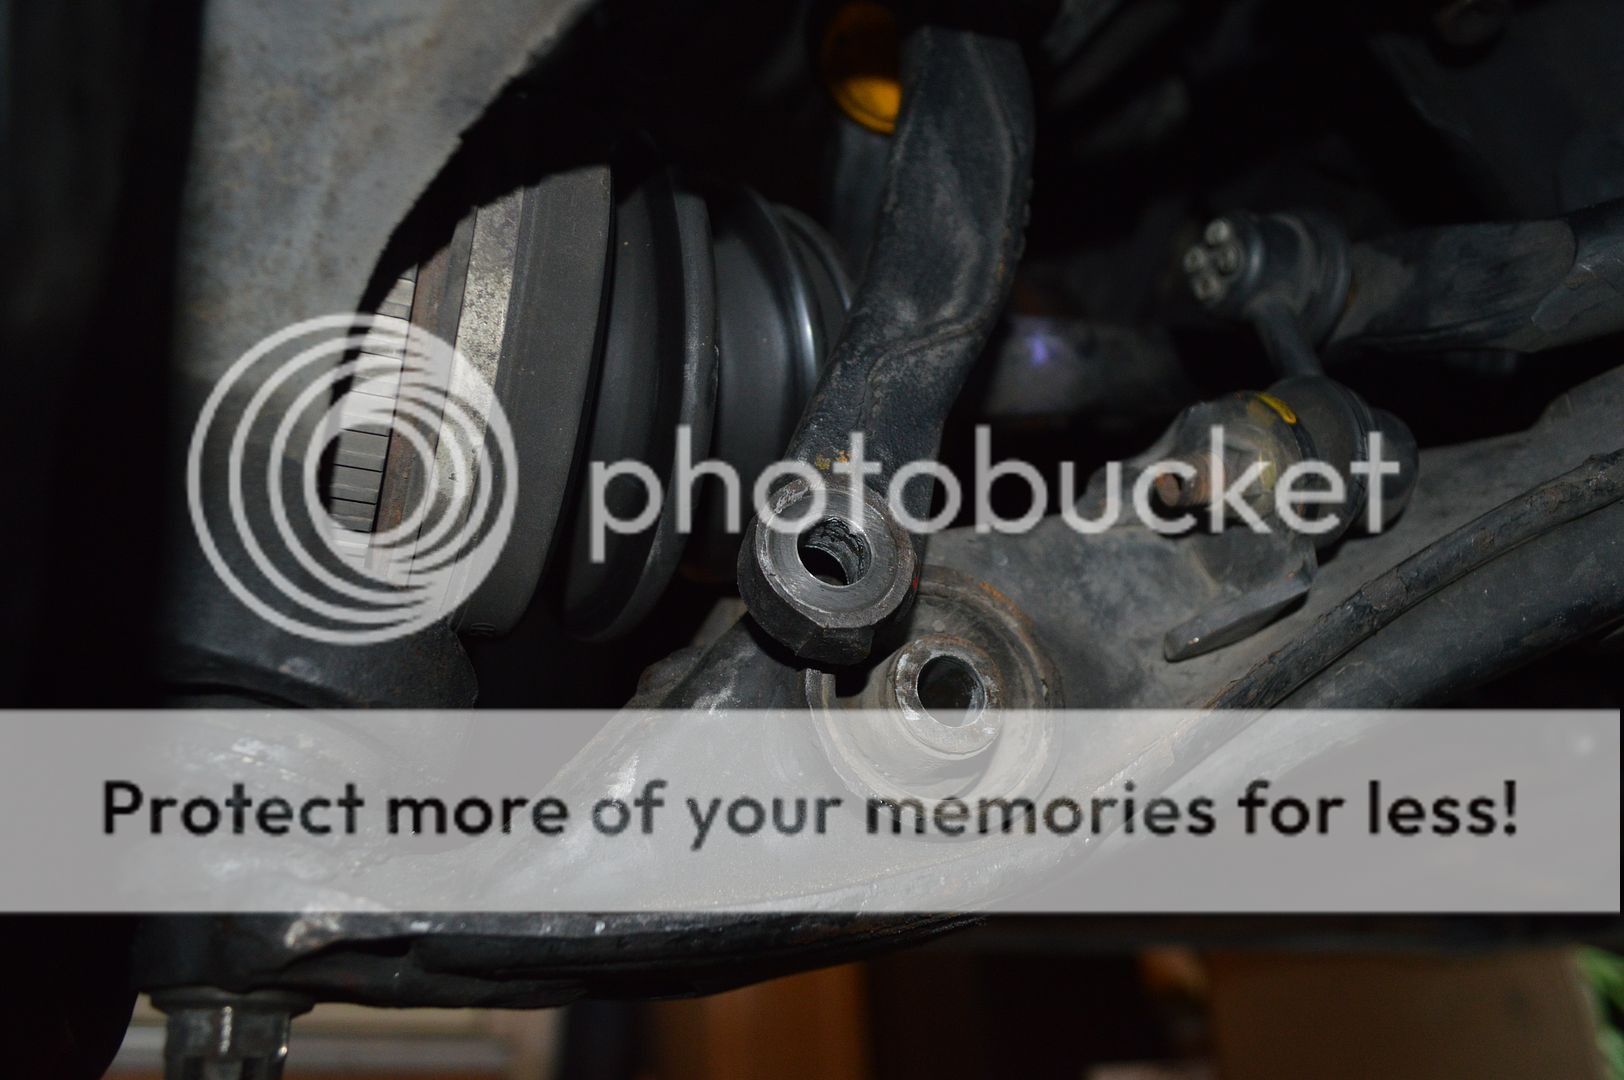


I also shimmed the rear arms with 2 washers under each bolt to help correct the rear camber a little. I'm hoping to get between -3 and -3.5 in front, and -1 to -1.5 rear/


bleeding the brakes

after!


Alignment and BFG Rivals should be on the car Saturday AM! Then car will be all set for autox and the track!
9-29-2013
Alignment specs: Front ... -3.2 camber zero toe , Rear ... -1.7 camber zero toe
Got the car cleaned up and went to a show today.


Well I finally had some free time to install my front camber kit and Stoptech pads. I also bled the brakes with Amsoil Series 600 fluid.
I also shimmed the rear arms with 2 washers under each bolt to help correct the rear camber a little. I'm hoping to get between -3 and -3.5 in front, and -1 to -1.5 rear/
bleeding the brakes
after!
Alignment and BFG Rivals should be on the car Saturday AM! Then car will be all set for autox and the track!
9-29-2013
Alignment specs: Front ... -3.2 camber zero toe , Rear ... -1.7 camber zero toe
Got the car cleaned up and went to a show today.
10-10-2013, 07:19 AM
#67
Honda-Tech Member
What helper springs are you using? Are they only for the back? Was the car black at one point in time? Clean car man. If your looking for some more caster if you take the front upper arms and switch them from side to side, it will increase the caster. I did this on my hatch and the steering was so much better afterwards.
Last edited by HatchVX; 10-10-2013 at 07:24 AM. Reason: Adding some info
10-10-2013, 07:28 AM
#68
Honda-Tech Member
iTrader: (1)
Join Date: Oct 2009
Location: Florida
Posts: 455
Likes: 0
Received 0 Likes
on
0 Posts
Definently open those holes in the rear plastics, running the rear shocks soft on the street and stiff at autox makes a big difference. The other method is pulling the rear speakers out.
10-10-2013, 07:35 AM
#69
Honda-Tech Member
Thread Starter
iTrader: (1)
Join Date: Oct 2010
Location: USA
Posts: 168
Likes: 0
Received 0 Likes
on
0 Posts
I am using Swift helper springs on the rear only, 2.5" long 60 lb. I will be getting another set for the fronts, as well since the springs don't fit in the perch... Even the rears are pretty much maxed out, but at least the springs are not rattling loose at full droop.
The car was painted before I got it, but I am guessing it was black. Although all of the door jambs are white, and I really can't find much other trace of black paint anywhere. So they did a pretty nice job.
The car was painted before I got it, but I am guessing it was black. Although all of the door jambs are white, and I really can't find much other trace of black paint anywhere. So they did a pretty nice job.

 10-14-2013, 08:47 AM
#73
Honda-Tech Member
Thread Starter
iTrader: (1)
Join Date: Oct 2010
Location: USA
Posts: 168
Likes: 0
Received 0 Likes
on
0 Posts
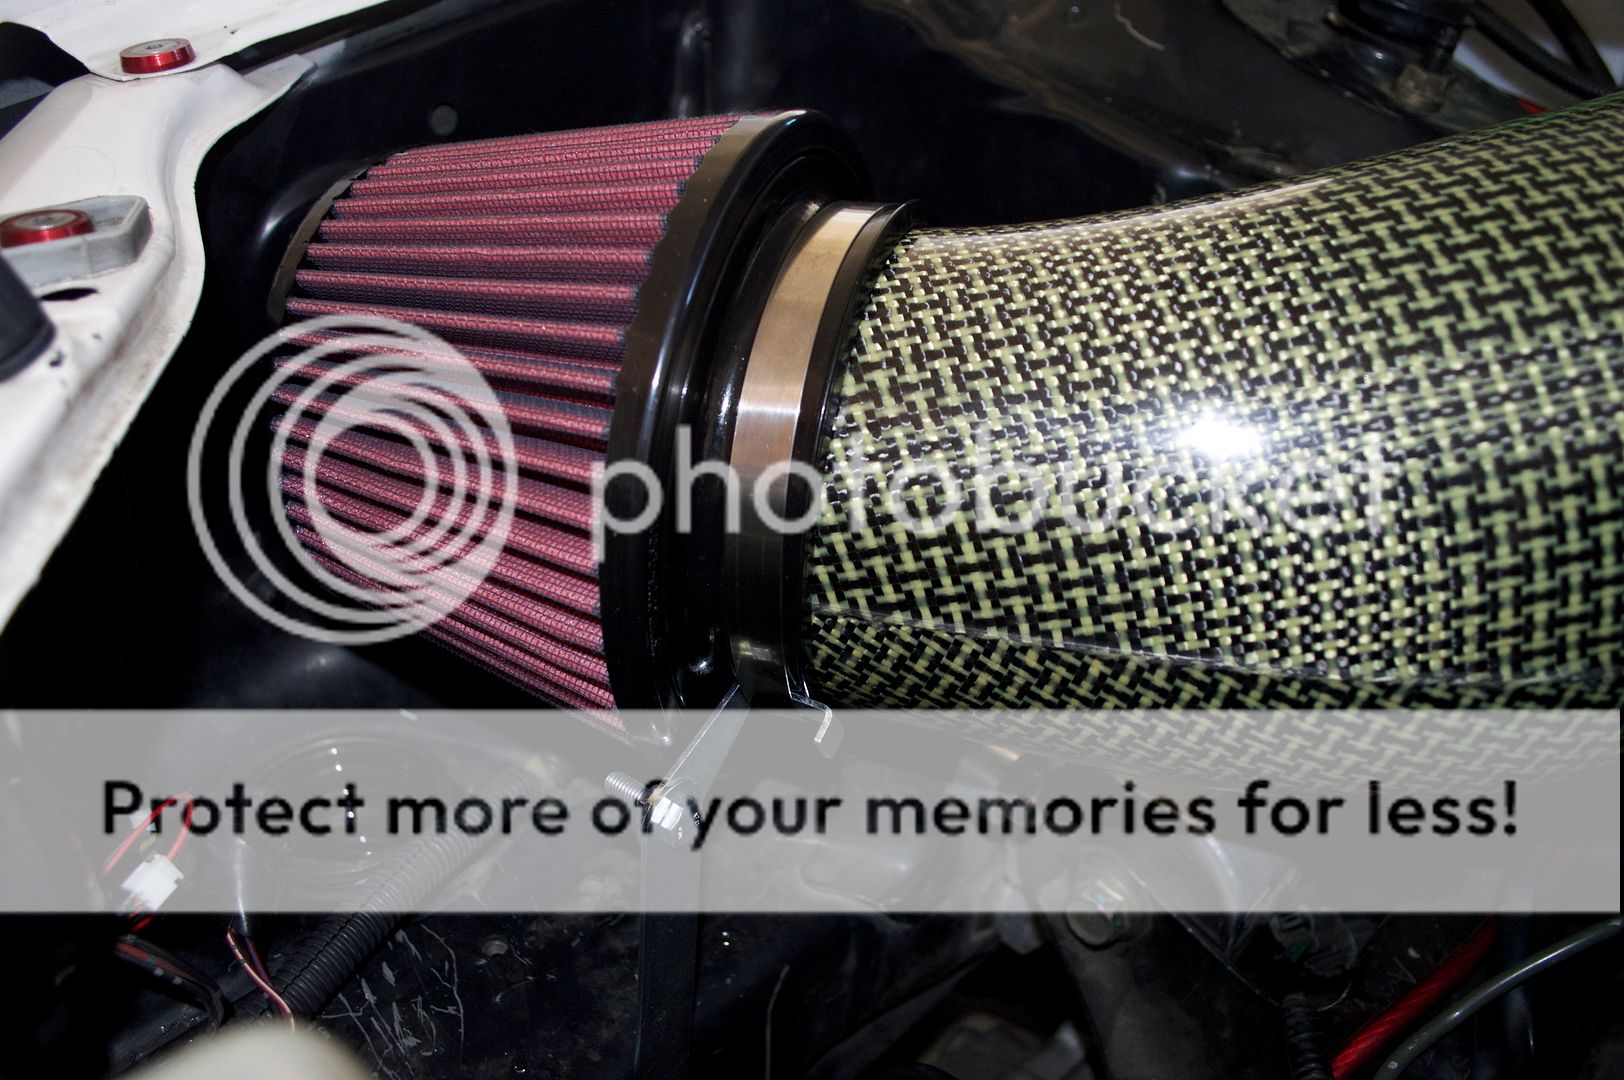
Is That An Intake? Or Are You Just Happy To See Me?
[...]
This past weekend, I was forced to replace my old Spoon intake elbow due to the broken mounting tab leaving a nice sized hole in my intake... This was not good, and led to considerable losses during tuning. My tuner, Mikey, bolted up just a plain old aluminum tube to see what kind of losses we were seeing due to the restrictive/hole-y setup, and we gained 7whp! Zero tuning change, simply run-over-run...
This past weekend, the CTR received its new intake and I had the joy of installing it.
The intake of choice, against the pleas of my tuner at ProFunction since the intake had already been ordered, was the Password:JDM Power Chamber. I must admit that I was a little bit intrigued by this... Throbbing whale-****, monstrosity of an intake. Regardless of the performance, I can say with much assurance that my car is rocking a jones that has far more girth than your's.
Ok let's get to it... The intake itself looks decent in person, but the construction is very thin and multiple times through the installation I thought that it was going to crumble in my hands. I wish that they would've at least done one more kevlar overlay with an overlapping seam to give it a little more rigidity, but hey I'm not the one making the thing... They did short me by a hose clamp and about 3" of tubing in the kit, as well, luckily I have hundreds of random old parts from all of my previous cars laying around the garage so I was able to scrounge up what I needed to finish the install.


The size of the fatty intake made it difficult to get lined up properly and took a couple of shots at it. I also had to trim about 1/4" off of reducing coupler in order to get the intake to sit near-flush with the entry of the 70mm throttle body.

In order to improve the cold air flow to the intake, I had to route some tubing from the front bumper to a hole near the fender... Problem is that not all 96-00 civics come pre-cut with the hold. So $15 at home depot later, I found myself drilling at my car's frame with a 2 1/2" hole saw drill attachment.


Ducting all plumbed in, cut edge finished and sealed.


I did have one casualty... I snapped off a damn valve cover stud while installing the spark plug cover... Stupid thing was so brittle...

Now I just need to figure out the best way for running the heatshield...
[...]
This past weekend, I was forced to replace my old Spoon intake elbow due to the broken mounting tab leaving a nice sized hole in my intake... This was not good, and led to considerable losses during tuning. My tuner, Mikey, bolted up just a plain old aluminum tube to see what kind of losses we were seeing due to the restrictive/hole-y setup, and we gained 7whp! Zero tuning change, simply run-over-run...
This past weekend, the CTR received its new intake and I had the joy of installing it.
The intake of choice, against the pleas of my tuner at ProFunction since the intake had already been ordered, was the Password:JDM Power Chamber. I must admit that I was a little bit intrigued by this... Throbbing whale-****, monstrosity of an intake. Regardless of the performance, I can say with much assurance that my car is rocking a jones that has far more girth than your's.
Ok let's get to it... The intake itself looks decent in person, but the construction is very thin and multiple times through the installation I thought that it was going to crumble in my hands. I wish that they would've at least done one more kevlar overlay with an overlapping seam to give it a little more rigidity, but hey I'm not the one making the thing... They did short me by a hose clamp and about 3" of tubing in the kit, as well, luckily I have hundreds of random old parts from all of my previous cars laying around the garage so I was able to scrounge up what I needed to finish the install.
The size of the fatty intake made it difficult to get lined up properly and took a couple of shots at it. I also had to trim about 1/4" off of reducing coupler in order to get the intake to sit near-flush with the entry of the 70mm throttle body.
In order to improve the cold air flow to the intake, I had to route some tubing from the front bumper to a hole near the fender... Problem is that not all 96-00 civics come pre-cut with the hold. So $15 at home depot later, I found myself drilling at my car's frame with a 2 1/2" hole saw drill attachment.
Ducting all plumbed in, cut edge finished and sealed.
I did have one casualty... I snapped off a damn valve cover stud while installing the spark plug cover... Stupid thing was so brittle...
Now I just need to figure out the best way for running the heatshield...
10-15-2013, 01:50 PM
#75
Honda-Tech Member
Join Date: Dec 2007
Location: where your ROTAs made from
Posts: 1,079
Likes: 0
Received 0 Likes
on
0 Posts
are you going?
http://www.gingermanraceway.com/even...ck-fall-finale
http://www.gingermanraceway.com/even...ck-fall-finale