

 03-25-2015, 09:48 AM
Last edit by: IB Advertising
See related guides and technical advice from our community experts:
Browse all: Engine and Powertrain
- Honda: How to paint your engine cover
Step by step instructions for do-it-yourself repairs.
Browse all: Engine and Powertrain

Official: Post Your Valve Cover (56k warning)

 08-21-2009, 08:13 AM
#7877
Honda-Tech Member
iTrader: (1)
Join Date: May 2008
Location: Where pigs fly
Posts: 1,039
Likes: 0
Received 0 Likes
on
0 Posts
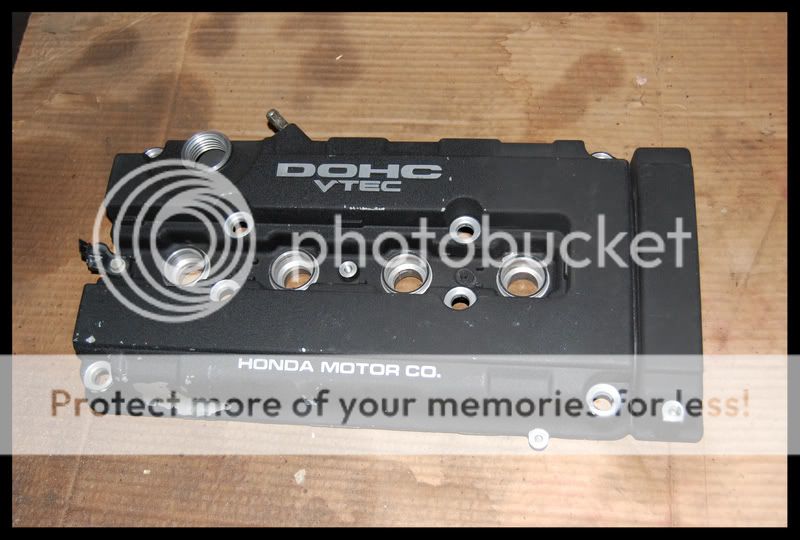
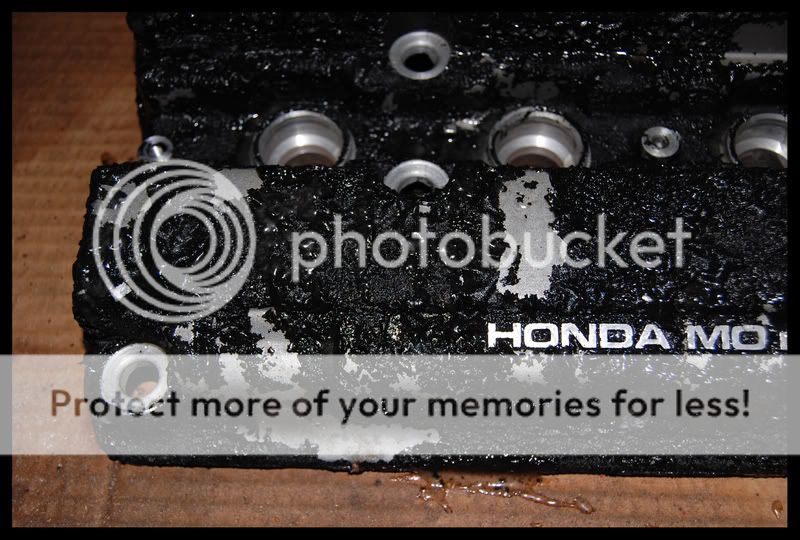
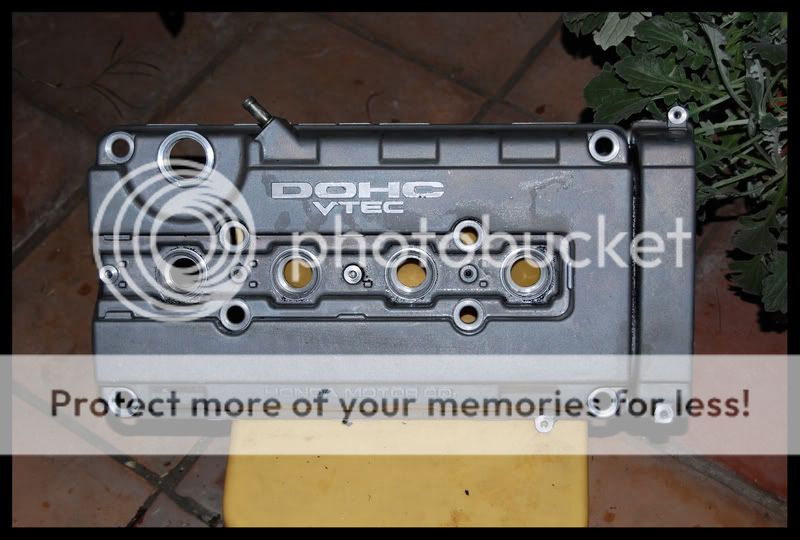
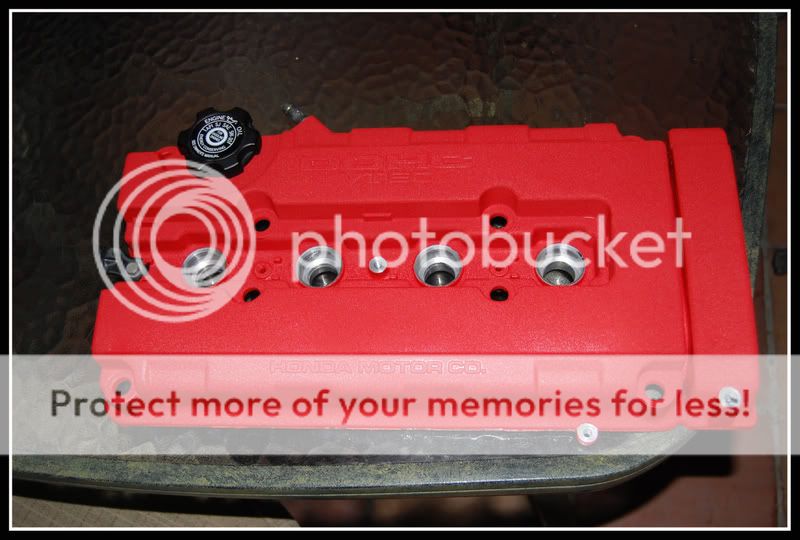
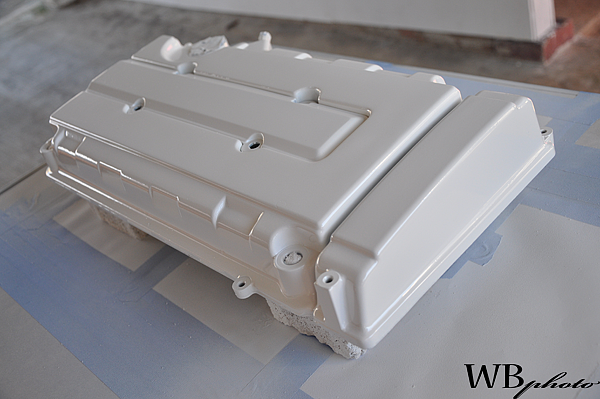
So here it is, if you've ever wanted to strip the OE wrinkle heat coating from your valve cover. If this cover would have been perfect, I'd never strip it, but since it had some blemishes, decided on making my own poor man's type-r valve cover.
The Victim:
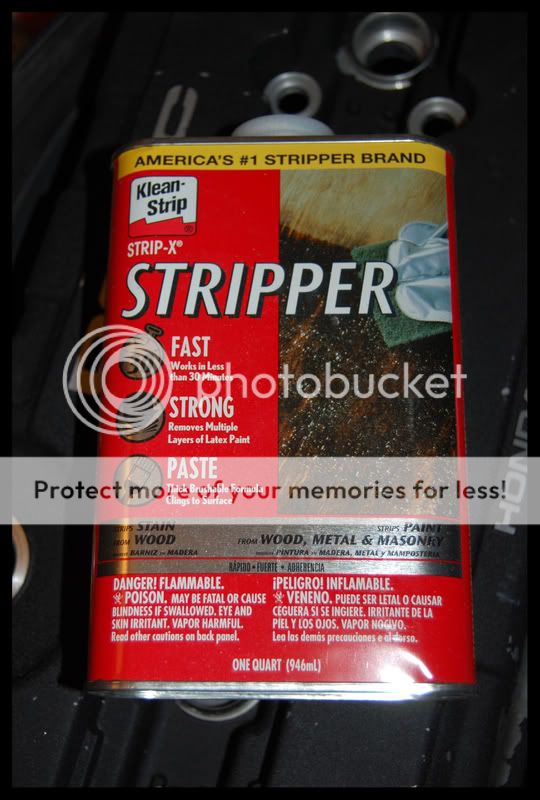
The Murder weapon: this works much better than the spray version of the same product. KEEP this AWAY from your SKIN...if it gets on it, believe me, you'll notice. Latex gloves don't help by the way.
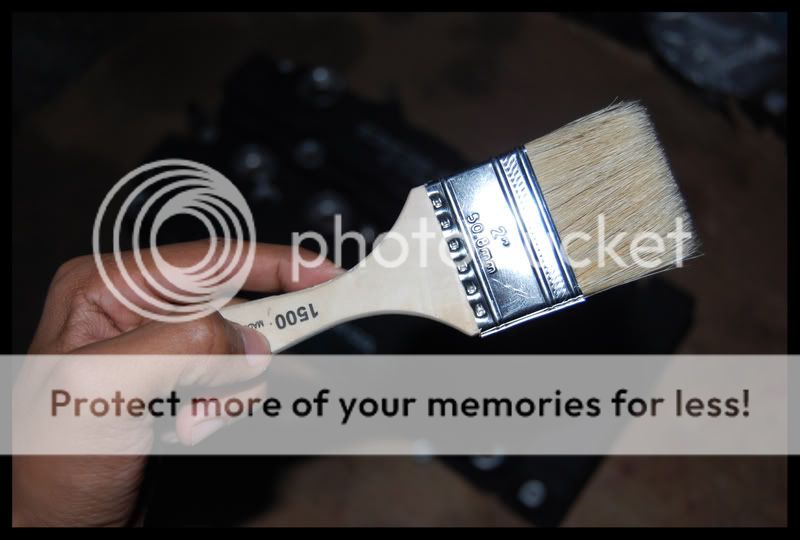
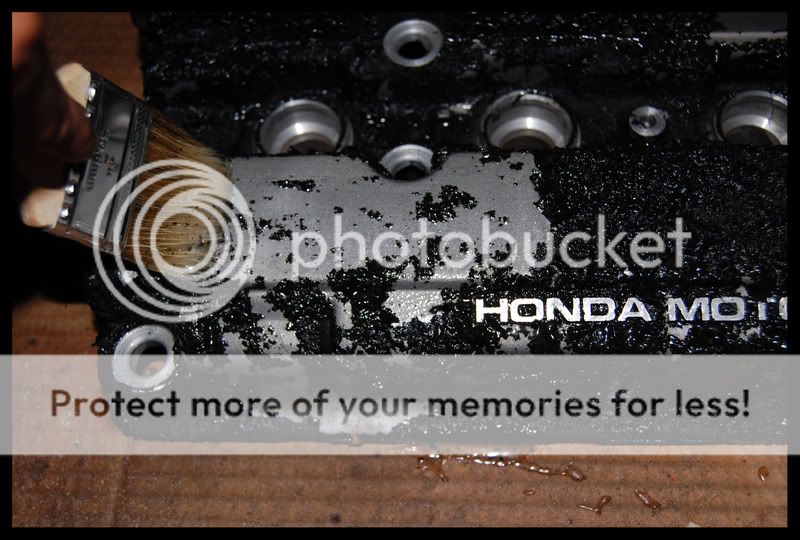
The accomplice: try and stay away from nylon bristle brushes, since the stripper will eat right through it, opt for a cheap throw away "natural" bristle brush.
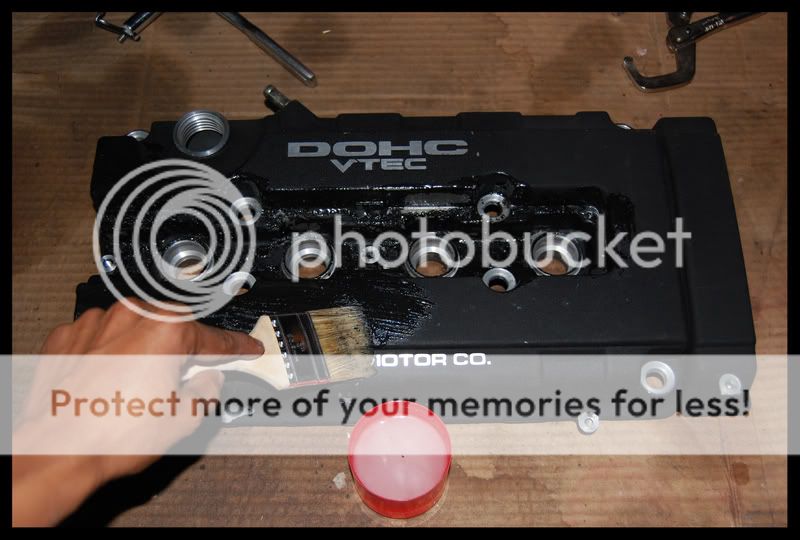
Just start applying it, it doesn't need too heavy of a coat either.
This is only after a couple of minutes, it starts to bubble. They recommend leaving it on from 15-30 minutes, but will start to work much faster.

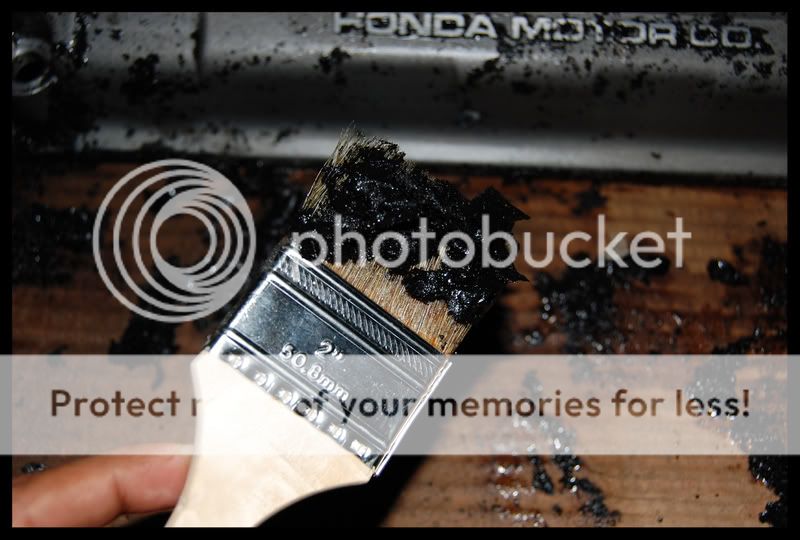
After a while, it will start to fall off on it's own.
You can then use the brush to start sweeping it off.

No need for a crazy scrubber, the brush works fine for the OE coating....if you're trying to remove actual paint from a previous paint job, it might be more difficult.
Also, no need for going crazy with the paint stripper, what's in the little red cup is all I used. It's the top from a can of shaving cream.
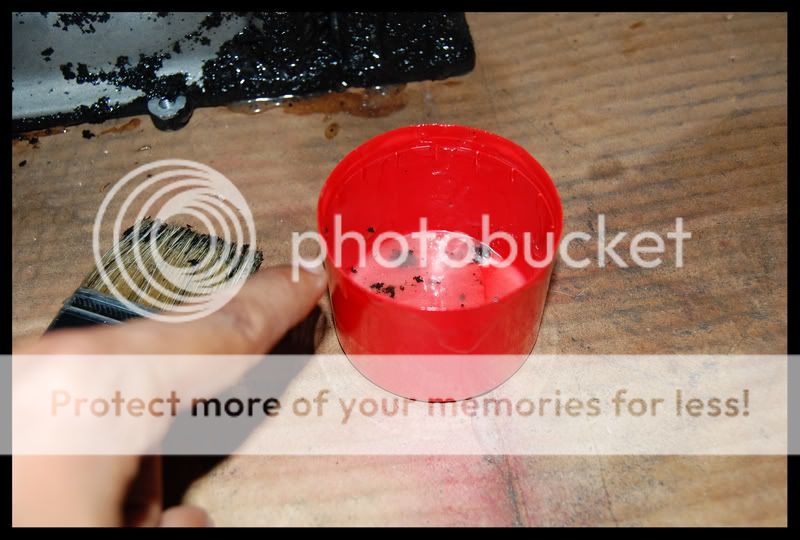
After taking off as much as I could with the brush, I set the cover down on the floor and hosed it down with a garden hose and a little pressure.
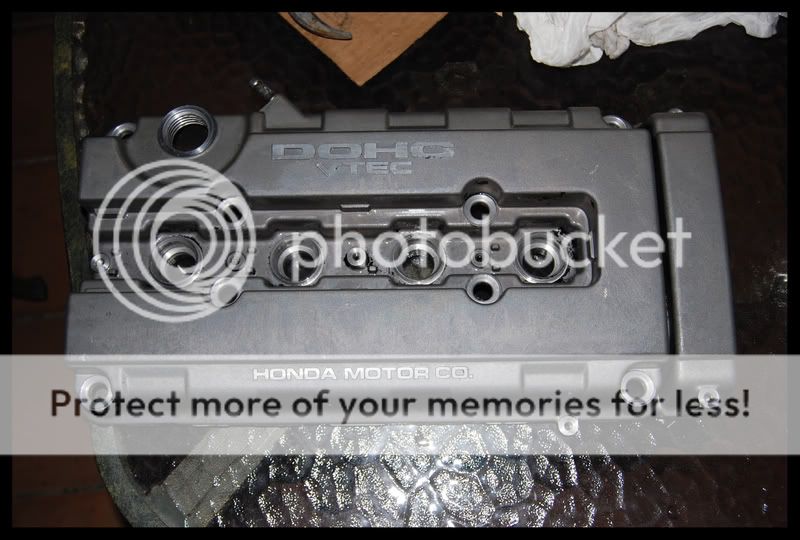
The results: There are still tiny bits of the heat coating, but that comes off with just a little more stripper.
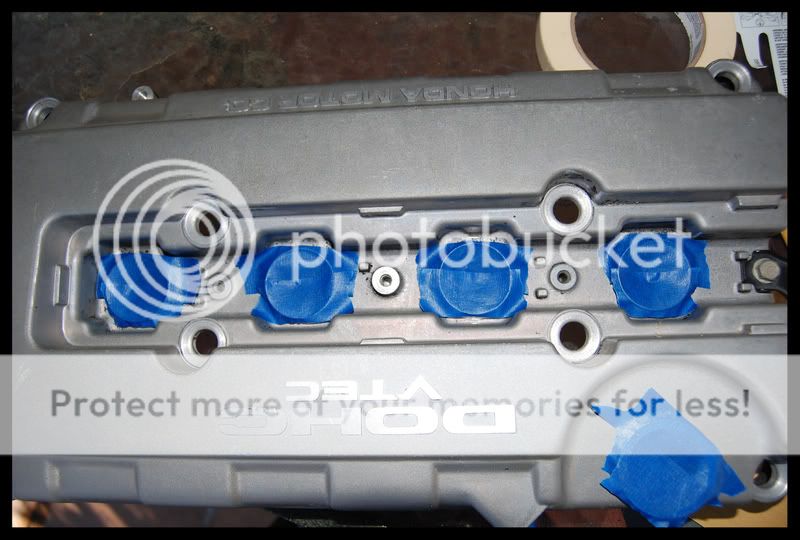
Part 2: if you've ever wanted to re-coat your valve cover with a wrinkle heat coating.
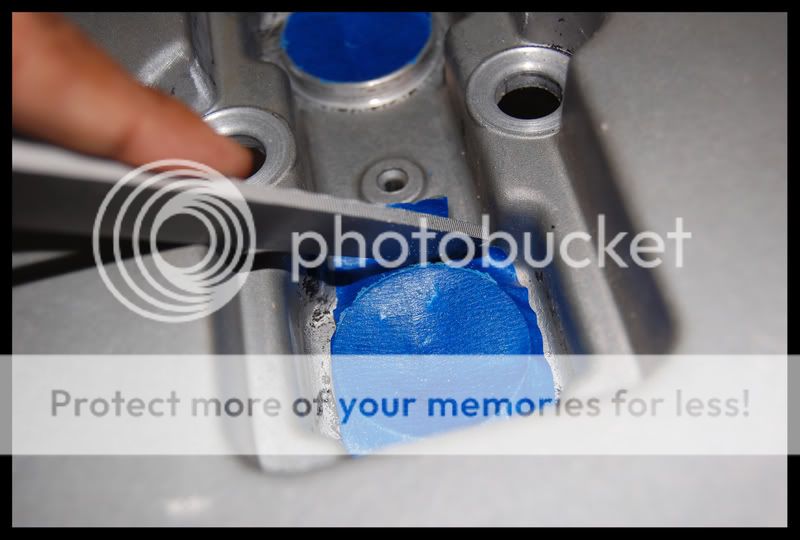
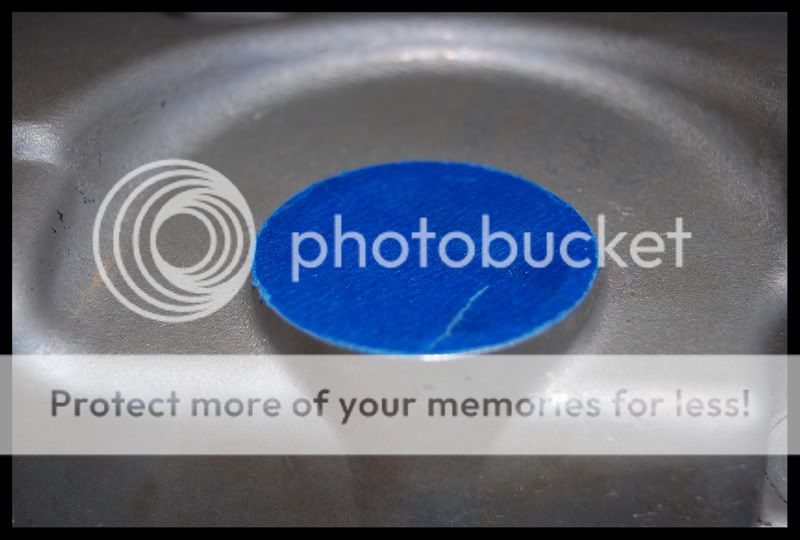
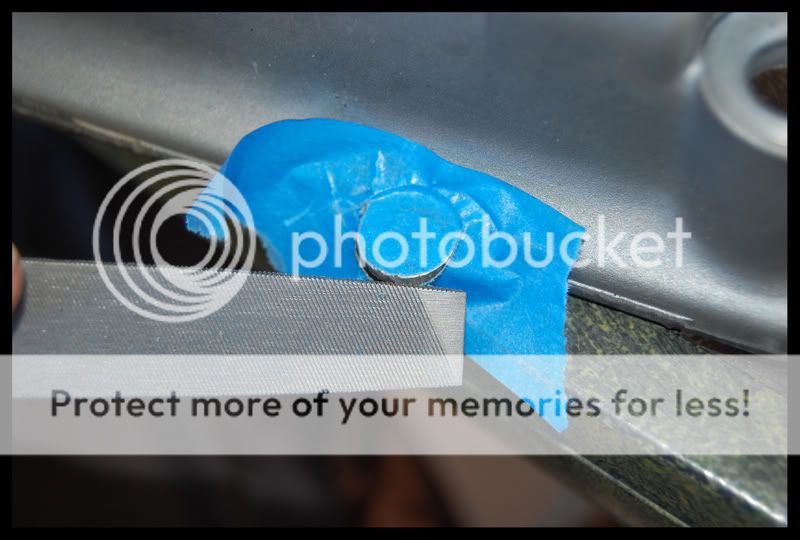
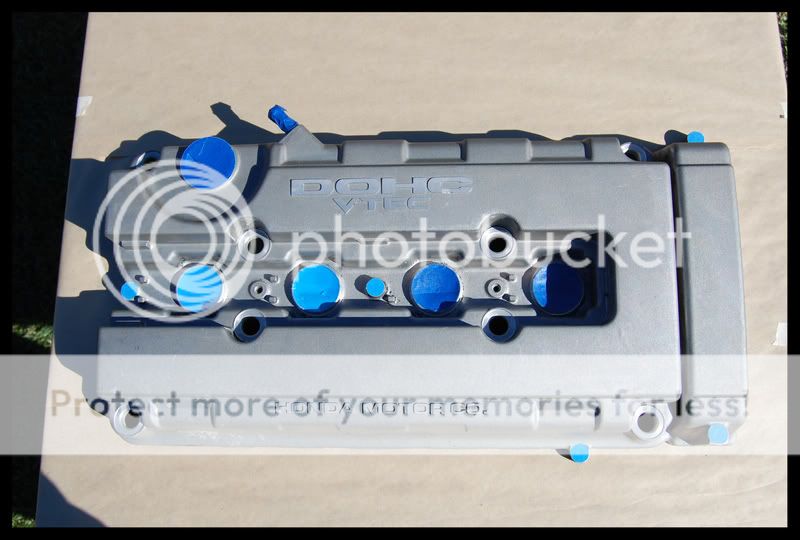
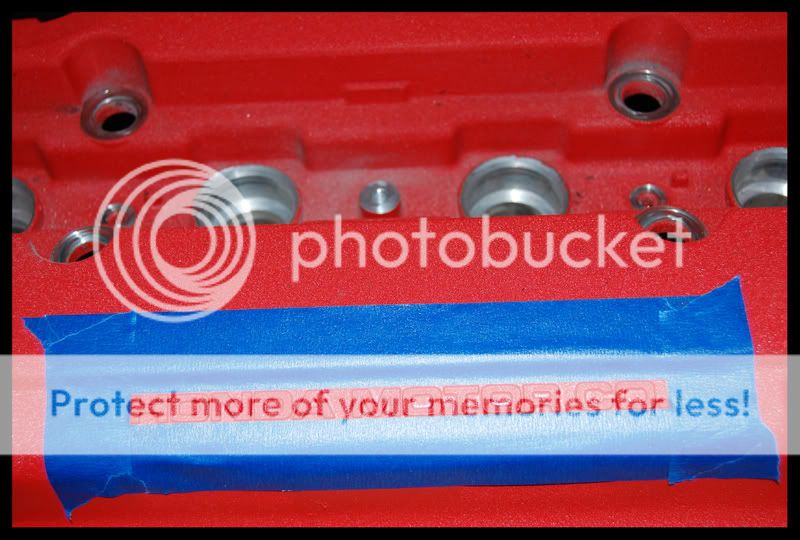
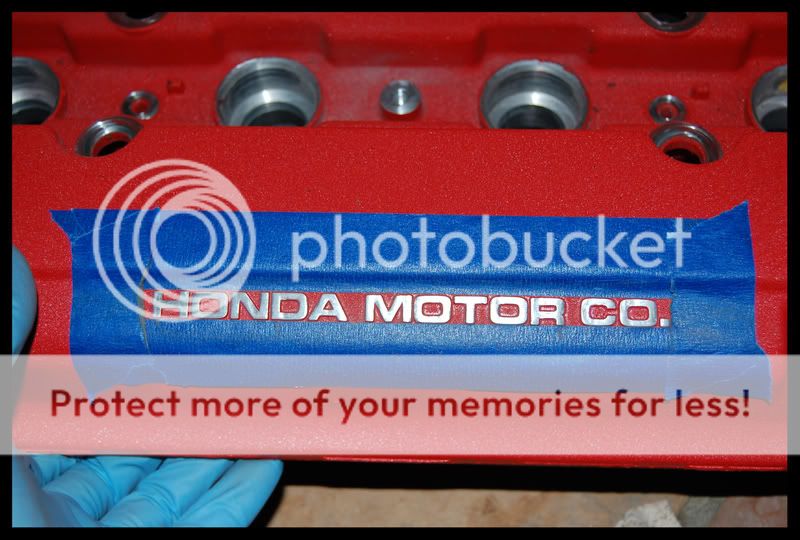
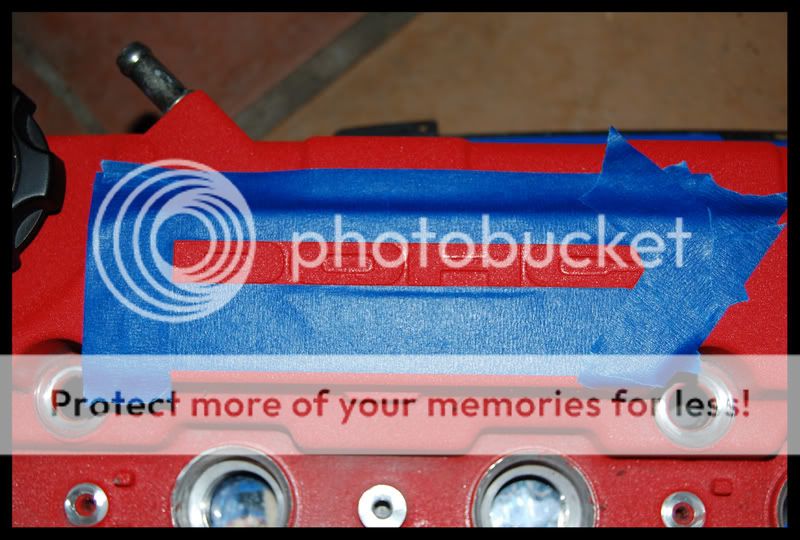
After stripping your valve cover and making sure it's clean and free of dust, you can start to cover up what you don't want sprayed.
I use a file to file away the tape I don't want, this is how I used to remove the excess grip tape from my skateboards back in the day. I would recommend using a smaller file than I did, this was the only one I could find in my garage.
Pretty good results
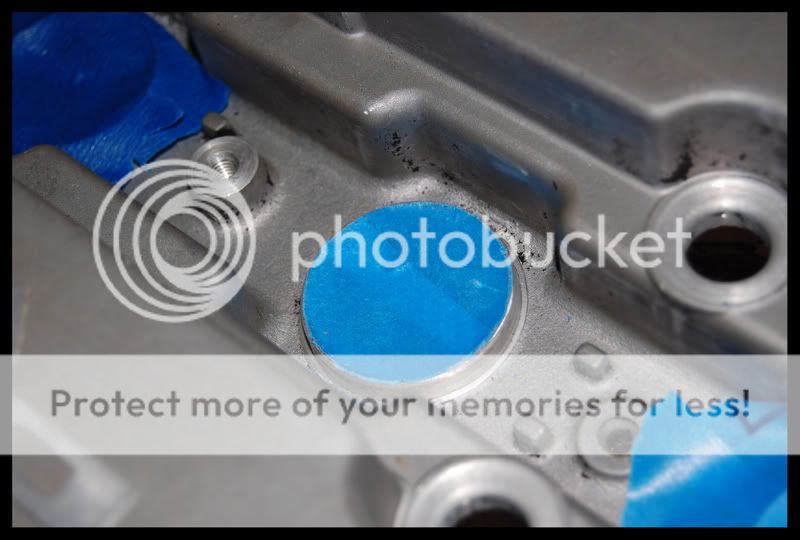

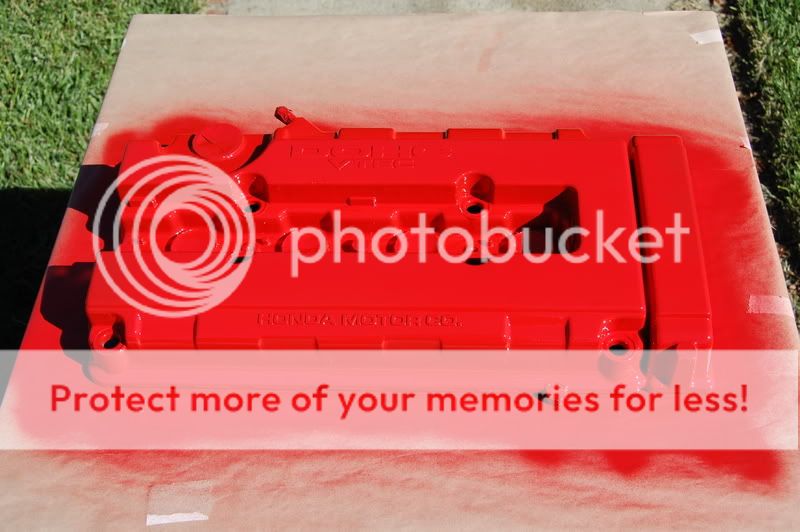
Once you've got everything covered up, it's time to start spraying.
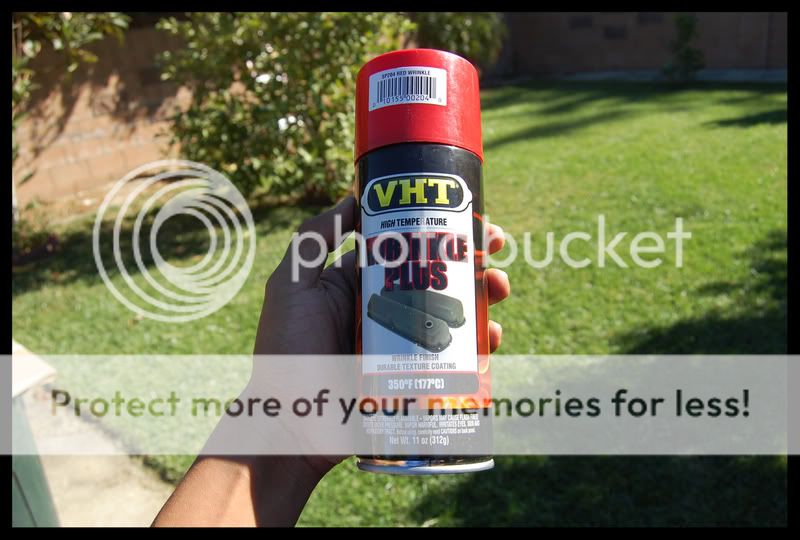
My weapon of choice, VHT Wrinkle Plus, this comes in either red or black and you can purchase it from Summit Racing for about $11
I would recommend doing this on a hot day, as the heat helps the wrinkles be nice and tight.
FIRST COAT - Nice and even, don't over do it, as you'll do 3 or 4 coats in total. Obviously try not to get any drips.
SECOND COAT - I let it set for about 10 min before I applied the second coat, again, nice even coat.
THIRD COAT - At this point, the paint had already started to wrinkle, don't be scared, if this is the case, it's still safe to put on another coat, I found that this actually gives you a smaller wrinkle in the end, more like the OEM Honda heat coating.

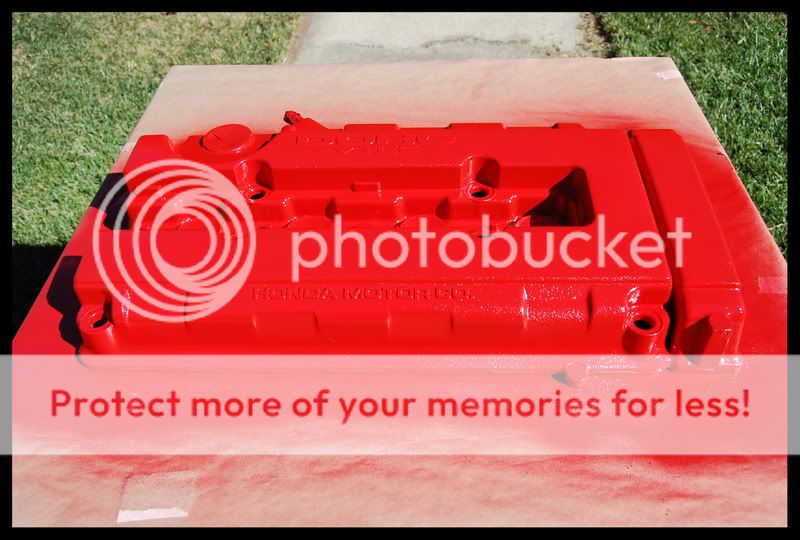
FOURTH AND FINAL COAT - This is your last coat, so make it count, make sure you cover any bare ares. **Once your valve cover dries, DO NOT re-spray it, as the wrinkles will NOT match up**
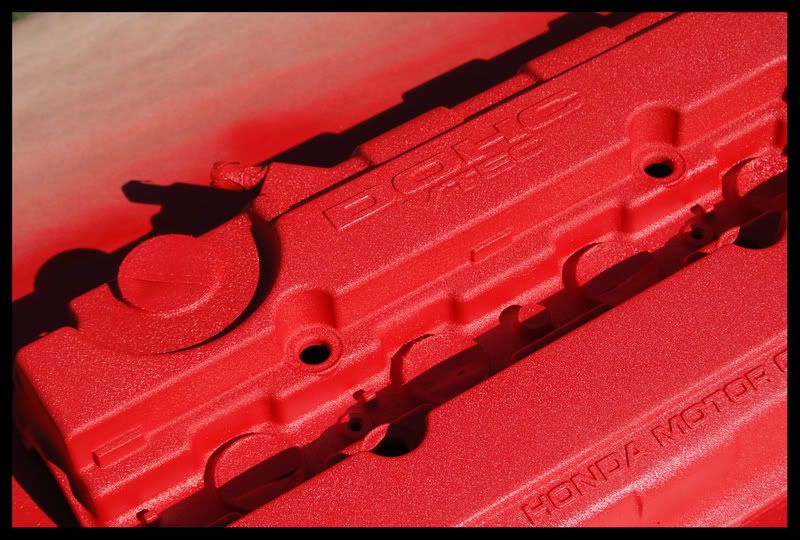
End results - The texture came out nice and even. Keep in mind that this paint cures VERY VERY SLOWLY, as in 3 to 4 days. It dries somewhat fast, but the paint is still soft, so anything you do can alter the wrinkle, you can actually leave a big old finger print on it if you're not careful.


Part 3:
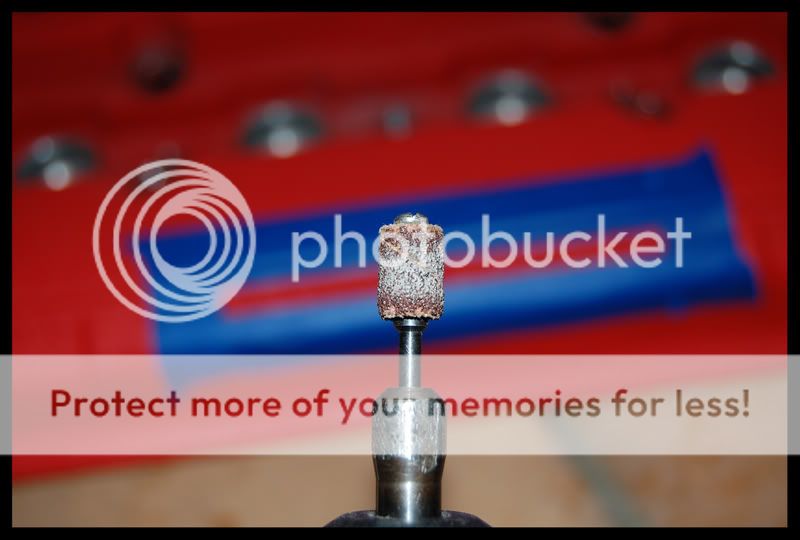
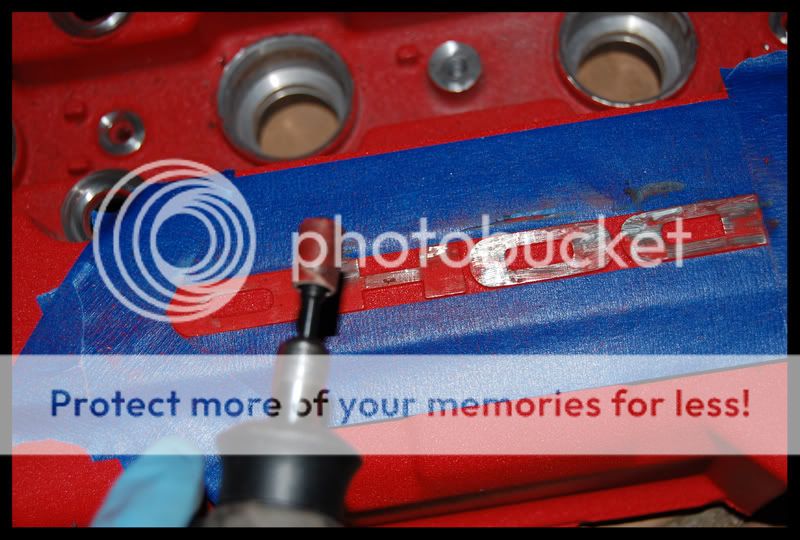
After giving the valve cover PLENTY of time to dry and cure, you can start on the last step.
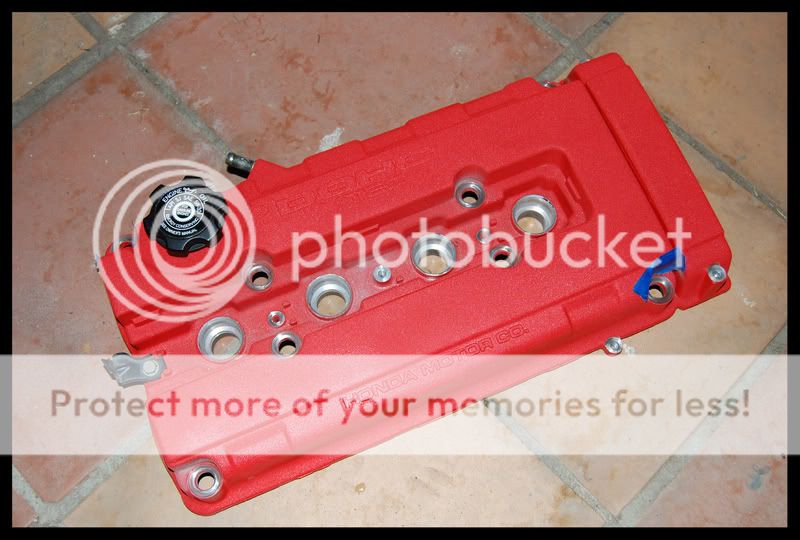
I used my Dremel with a small sanding disc for the holes around the valve cover.
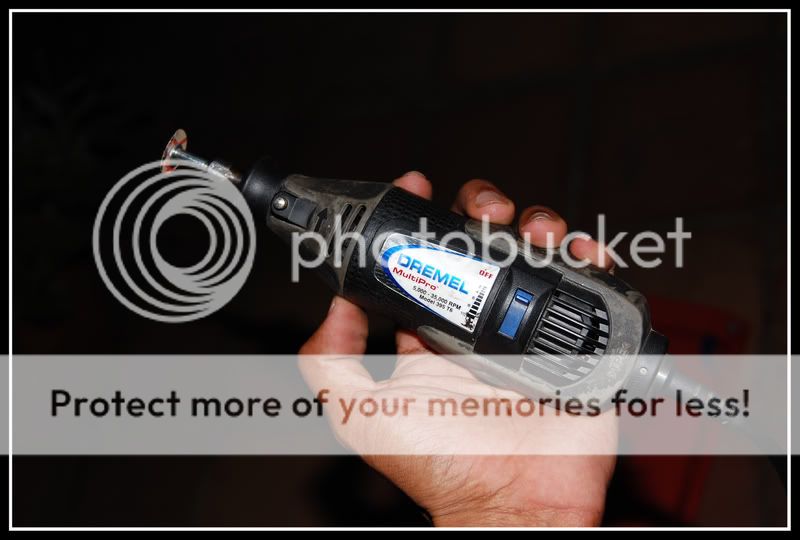
Just take your time. I wasn't too concerned with getting these super clean free of paint, since they get covered up by those...ummm whatever you call em.
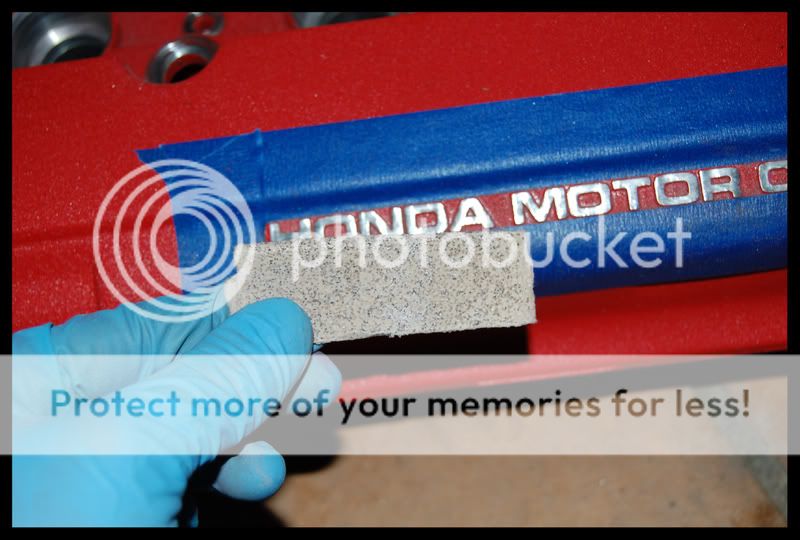
Got to work on the lower part. I put a couple layers of tape all the way around, since if you do only one and you make a mistake, the sanding cylinder will eat right through it.
Take it SLOW...no one needs a hero...
I got it pretty clean with the dremel, but decided to finish it off by hand with some rough sand paper. Just back and forth back and forth so you get a nice even looking "grain" to the metal.
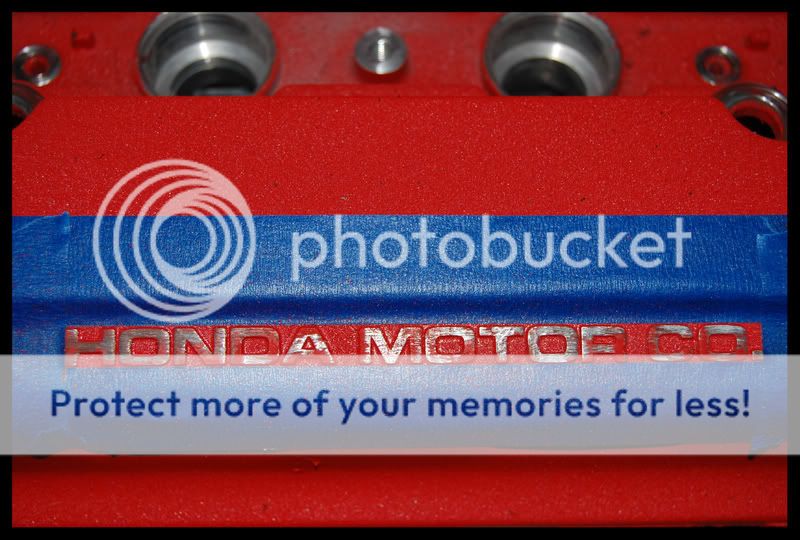
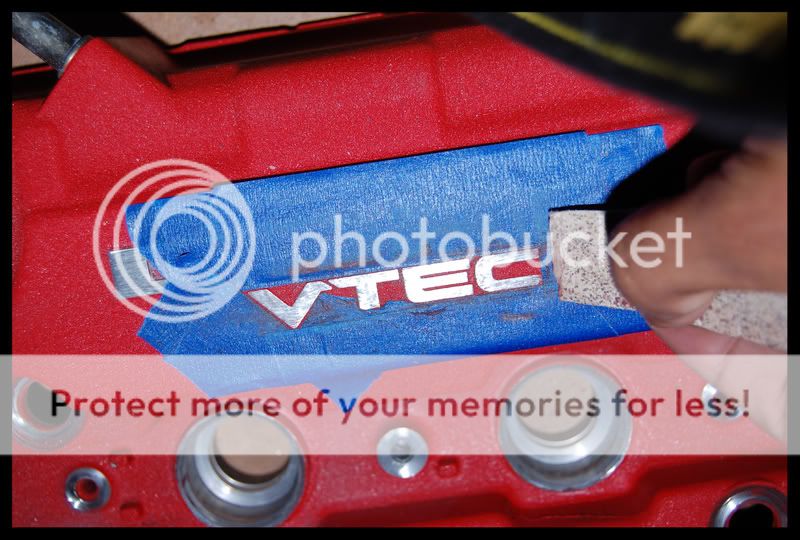
Now I moved up top to the DOHC. Same process.
Then to the VTEC, which was what I was the most nervous about, since it wasn't as raised as the other lettering on the cover.
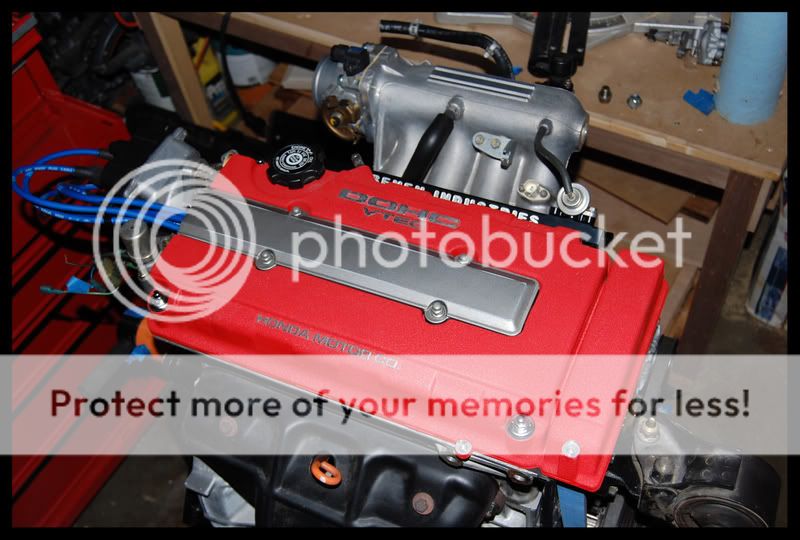
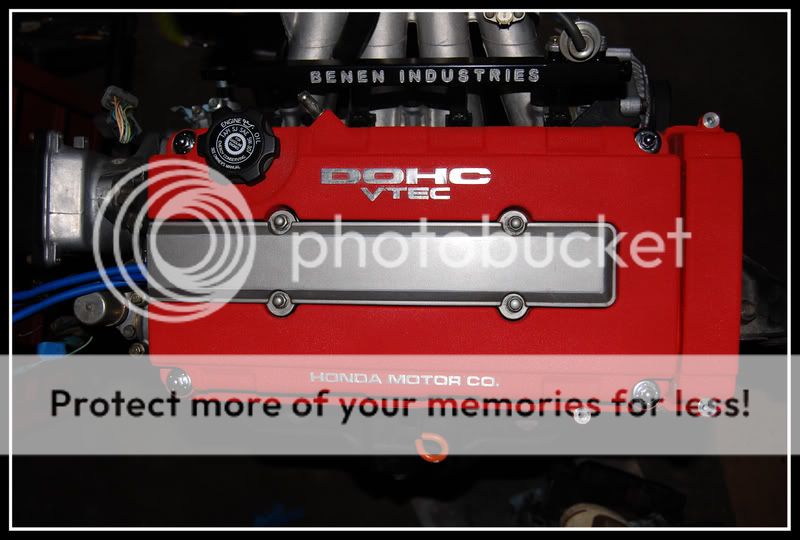
DONE!
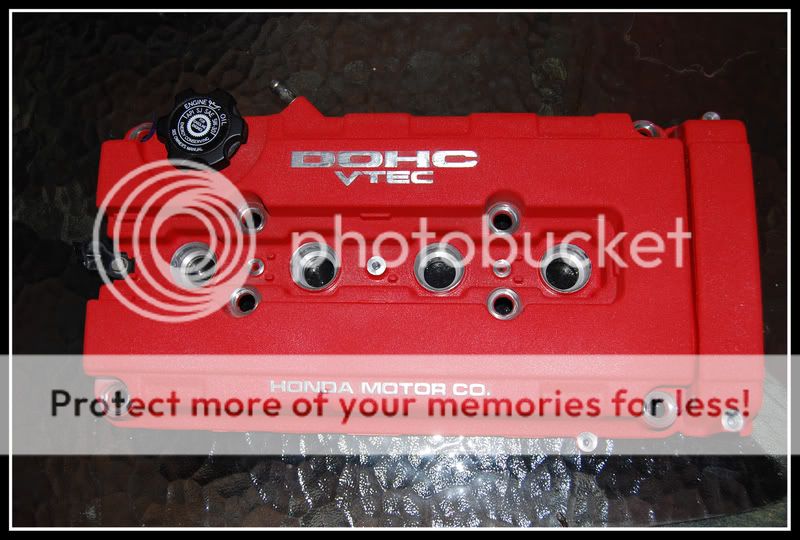
I didn't really clean it before I put it on, but it still looks pretty nice.
Not bad for $11 worth of paint and a little work
The Victim:

The Murder weapon: this works much better than the spray version of the same product. KEEP this AWAY from your SKIN...if it gets on it, believe me, you'll notice. Latex gloves don't help by the way.

The accomplice: try and stay away from nylon bristle brushes, since the stripper will eat right through it, opt for a cheap throw away "natural" bristle brush.

Just start applying it, it doesn't need too heavy of a coat either.

This is only after a couple of minutes, it starts to bubble. They recommend leaving it on from 15-30 minutes, but will start to work much faster.

After a while, it will start to fall off on it's own.

You can then use the brush to start sweeping it off.


No need for a crazy scrubber, the brush works fine for the OE coating....if you're trying to remove actual paint from a previous paint job, it might be more difficult.

Also, no need for going crazy with the paint stripper, what's in the little red cup is all I used. It's the top from a can of shaving cream.

After taking off as much as I could with the brush, I set the cover down on the floor and hosed it down with a garden hose and a little pressure.

The results: There are still tiny bits of the heat coating, but that comes off with just a little more stripper.

Part 2: if you've ever wanted to re-coat your valve cover with a wrinkle heat coating.
After stripping your valve cover and making sure it's clean and free of dust, you can start to cover up what you don't want sprayed.

I use a file to file away the tape I don't want, this is how I used to remove the excess grip tape from my skateboards back in the day. I would recommend using a smaller file than I did, this was the only one I could find in my garage.

Pretty good results


Once you've got everything covered up, it's time to start spraying.

My weapon of choice, VHT Wrinkle Plus, this comes in either red or black and you can purchase it from Summit Racing for about $11

I would recommend doing this on a hot day, as the heat helps the wrinkles be nice and tight.
FIRST COAT - Nice and even, don't over do it, as you'll do 3 or 4 coats in total. Obviously try not to get any drips.

SECOND COAT - I let it set for about 10 min before I applied the second coat, again, nice even coat.

THIRD COAT - At this point, the paint had already started to wrinkle, don't be scared, if this is the case, it's still safe to put on another coat, I found that this actually gives you a smaller wrinkle in the end, more like the OEM Honda heat coating.

FOURTH AND FINAL COAT - This is your last coat, so make it count, make sure you cover any bare ares. **Once your valve cover dries, DO NOT re-spray it, as the wrinkles will NOT match up**


End results - The texture came out nice and even. Keep in mind that this paint cures VERY VERY SLOWLY, as in 3 to 4 days. It dries somewhat fast, but the paint is still soft, so anything you do can alter the wrinkle, you can actually leave a big old finger print on it if you're not careful.


Part 3:
After giving the valve cover PLENTY of time to dry and cure, you can start on the last step.

I used my Dremel with a small sanding disc for the holes around the valve cover.

Just take your time. I wasn't too concerned with getting these super clean free of paint, since they get covered up by those...ummm whatever you call em.

Got to work on the lower part. I put a couple layers of tape all the way around, since if you do only one and you make a mistake, the sanding cylinder will eat right through it.


Take it SLOW...no one needs a hero...

I got it pretty clean with the dremel, but decided to finish it off by hand with some rough sand paper. Just back and forth back and forth so you get a nice even looking "grain" to the metal.


Now I moved up top to the DOHC. Same process.


Then to the VTEC, which was what I was the most nervous about, since it wasn't as raised as the other lettering on the cover.

DONE!

I didn't really clean it before I put it on, but it still looks pretty nice.

Not bad for $11 worth of paint and a little work


Last edited by Circusraven; 08-21-2009 at 08:38 AM.
 08-21-2009, 09:01 AM
#7880
Honda-Tech Member
Join Date: Jan 2006
Location: NOVA
Posts: 1,318
Likes: 0
Received 0 Likes
on
0 Posts
nice. I always just use aircraft paint remover out of the spray can, and the last time I did mine I used high temp paint also. I would spray your heat shield and bolt fresh with high temp mid to high gloss also!
08-24-2009, 08:49 AM
#7881
Who the fack changed my title?!
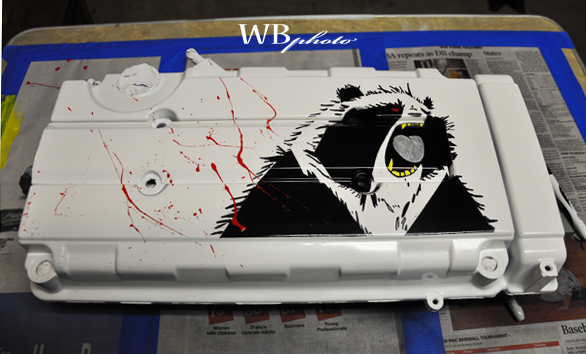
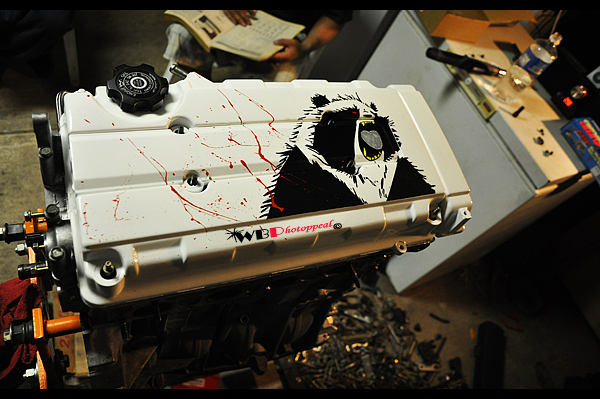
this is cool! did you stencil it or air brush this togeather? ive got a few things up my sleeve that im going to incorporate on my cover but just cant seem to figure out how to do it
 08-26-2009, 04:10 PM
#7884
Honda-Tech Member
08-27-2009, 11:22 AM
#7885
Honda-Tech Member
Join Date: Sep 2006
Posts: 1,220
Likes: 0
Received 0 Likes
on
0 Posts
mine before my car got stolen... i have some more pics of it in the bay. i sprayed it myself and have a ton of other valve cover pics that i've done. and no it's not powder, i just baked it so it cures fast. 10min wait isn't soo bad lol

08-27-2009, 05:45 PM
#7887
Honda-Tech Member
Join Date: Nov 2004
Location: Vancouver, WA
Posts: 1,277
Likes: 0
Received 0 Likes
on
0 Posts
Has anyone used regular spray paint, non high temp? I wanna camo my valve cover but I couldnt find and high temp colors that I wanted at my local hardware store
08-27-2009, 06:02 PM
#7888
Honda-Tech Member
Join Date: Sep 2006
Posts: 1,220
Likes: 0
Received 0 Likes
on
0 Posts
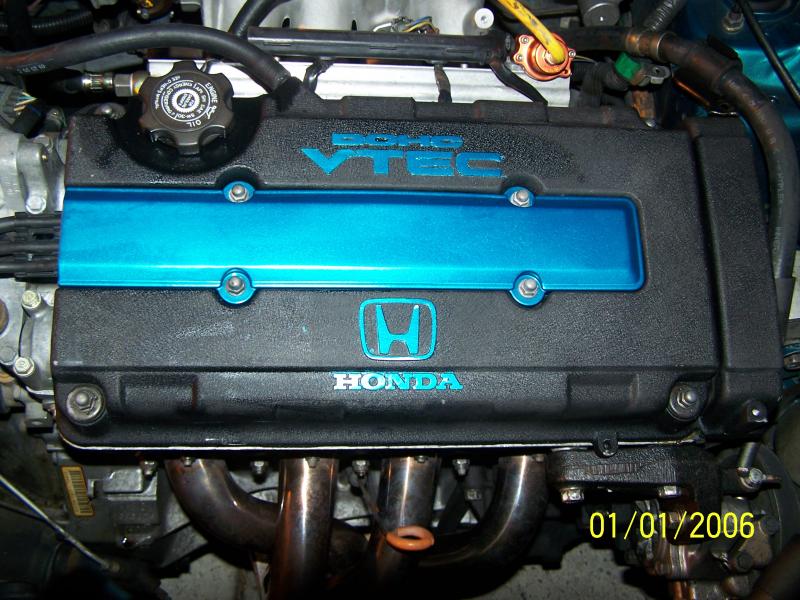
the blue one that i painted is spray paint... and i even bake them. But i don't just spray like an animal. i prep everything up. and i primer, sand, etc


 08-31-2009, 08:31 AM
#7894
Honda-Tech Member
Join Date: Mar 2006
Location: Slurrey, BC, Canada
Posts: 174
Likes: 0
Received 0 Likes
on
0 Posts
<TABLE WIDTH="90%" CELLSPACING=0 CELLPADDING=0 ALIGN=CENTER><TR><TD>Quote, originally posted by imola-red dc2 »</TD></TR><TR><TD CLASS="quote">not sure if posted this in this thread or not.
shaved everything off this and sprayed it wrinkle black.
 </TD></TR></TABLE>
hey i bought that haha. Here it is now. (the camo is the current)

shaved everything off this and sprayed it wrinkle black.
</TD></TR></TABLE>hey i bought that haha. Here it is now. (the camo is the current)
where did you get the CF Intake? That's cool
--------
08-31-2009, 09:03 AM
#7895
Honda-Tech Member
Join Date: Mar 2009
Location: Tennakee
Posts: 3,444
Likes: 0
Received 0 Likes
on
0 Posts
09-01-2009, 02:00 PM
#7896
Honda-Tech Member
how did you guys take off the header cover? i undo the 2 bolts on my dx civic and then the cable is blocking it, if i take that cable off will anything bad happen? lol, and i know how to take off the valve cover so im good.
09-02-2009, 01:29 PM
#7897
Honda-Tech Member
Join Date: Jun 2004
Location: Sherman Oaks, CA, United States
Posts: 7,539
Likes: 0
Received 4 Likes
on
4 Posts
I can't even figure out how to google for it. "Laser metal color" results in a bunch of scientific and patent pages...
Sorry if it is an absurd request.
09-02-2009, 01:35 PM
#7898
Honda-Tech Member
Join Date: Apr 2009
Location: ut
Posts: 603
Likes: 0
Received 0 Likes
on
0 Posts
If I remember right there should be 3 bolts, and the "cable" should just be the wires to the o2 sensor in the headers.. Un screw the o2 or just work your way around the wire.
09-02-2009, 09:41 PM
#7899
Honda-Tech Member

Join Date: Jun 2006
Location: Brighton, Co
Posts: 268
Likes: 0
Received 0 Likes
on
0 Posts
Heres mine (which is FOR SALE)
h22 valve cover
White with Purple/Orange splatter, then orange/copper pearls (mid coat), and it's been cleared/wet sanded and re-cleared. Shaved, cam gear cut outs, and so on.
PM me for info.
heres pics:


PM me if interested.
h22 valve cover
White with Purple/Orange splatter, then orange/copper pearls (mid coat), and it's been cleared/wet sanded and re-cleared. Shaved, cam gear cut outs, and so on.
PM me for info.
heres pics:
PM me if interested.