
DIY LEDs for Stock Cluster
 07-13-2008, 05:13 PM
#1
Honda-Tech Member
Thread Starter
Join Date: Mar 2005
Location: Da Hook,NY
Posts: 299
Likes: 0
Received 0 Likes
on
0 Posts
I found out a way to change the bulbs and such on ur stock instrument cluster so u can have a very personalized and custom look. I found this out here on HT, but i decided to do my own write up on this subject alone. This is my first write up so let me know if things need to be changed or if you have questions...new to this write up stuff lol 
Total Time estimated: 15-20min
what u need:
Phillips Head Screw Driver
Pliers(just in case you cant get them damn holders out with the bulbs)
BIG GUNS! lol
lol
oh and dont forget smarts!(like u need much to do this lol)
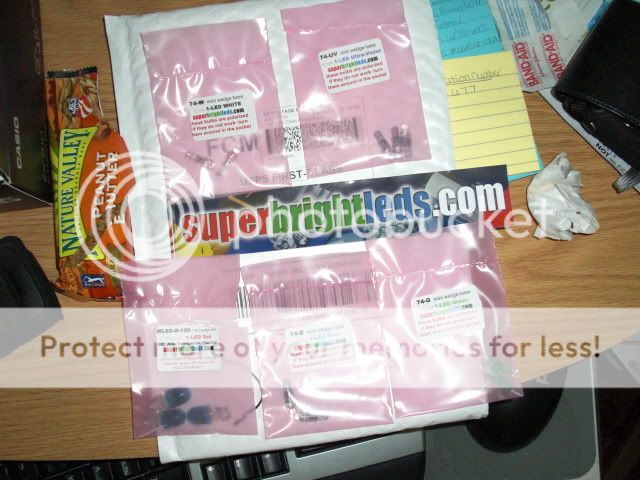
I got the new LED blubs from:
SuperBrightLEDS
DIY
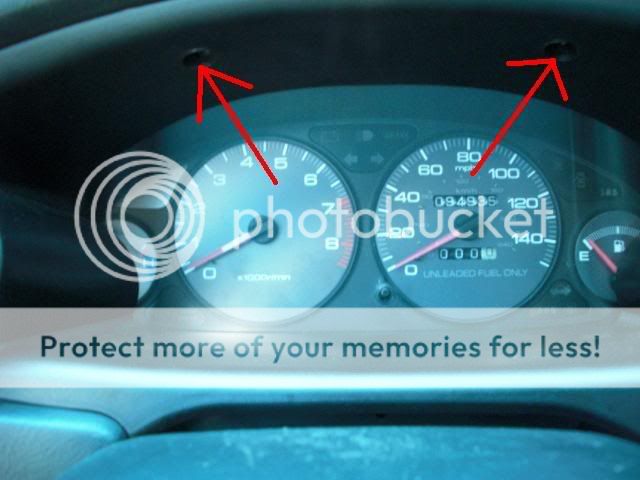
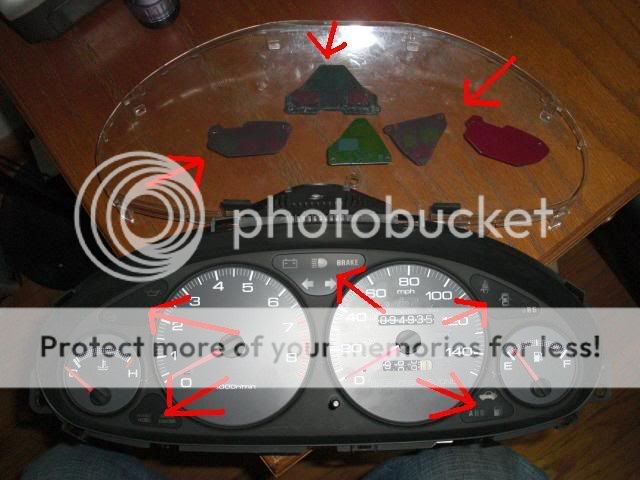
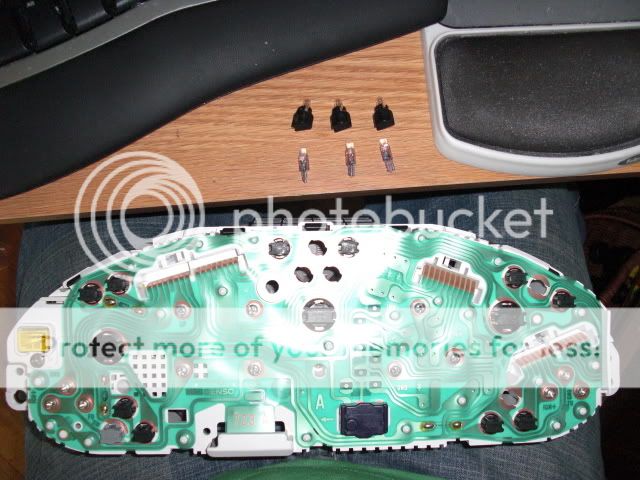
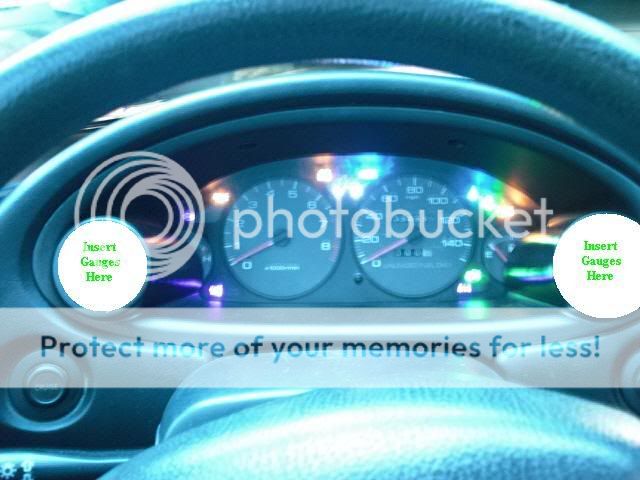
1. Ok so first was to take out the cluster by removing the bezel and removing the 3 connectors on the back.
Arrows indicate screws to be removed in order to take out bezel,connectors, and cluster.
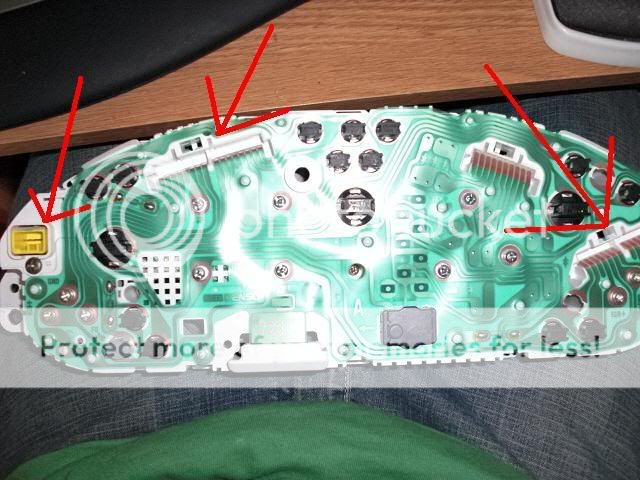
2. Next is to remove the colored plates that give the color for your directionals, high beam light, main. req. light, door open light, ect. This is because behind the face plate of your cluster there are these plates that make up the actual colors of your stock lights. Its a pain to remove the face plate but this is the only way to remove these plates. If you dont remove these then all of your LEDs wont show the right color(except the ones for your speedometer, tach, and backlighting) I didnt have pix of removing the face plate but i ended up breaking mine...just be careful with it. 1 bulb you cant change from the back like the rest so if u wish to change this bulb u need to do so while the face plate is off....its the SRS light.
These are the plates needed to be removed and where they are placed under the face plate.
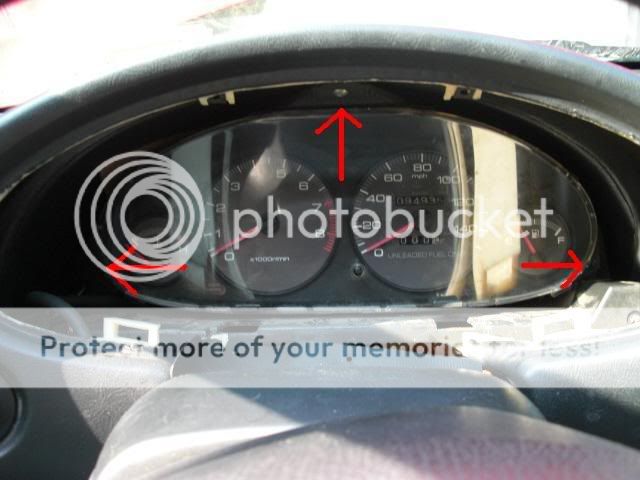
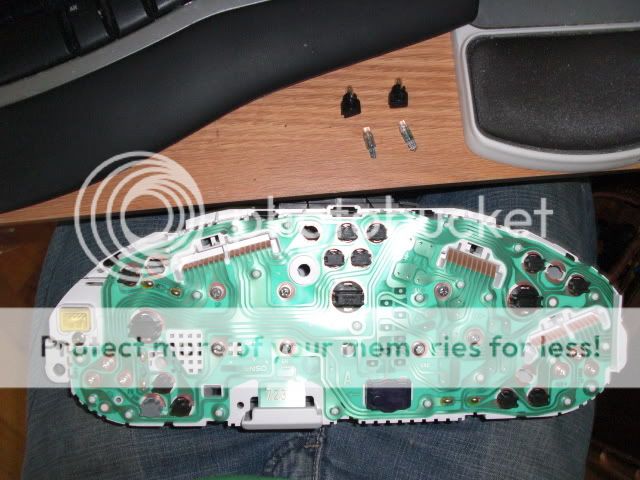
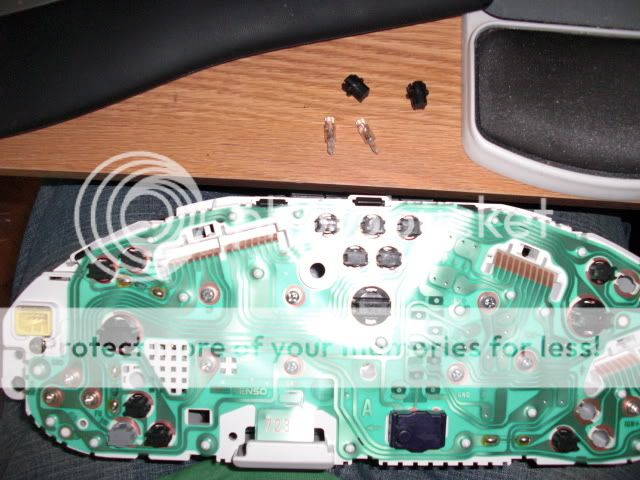
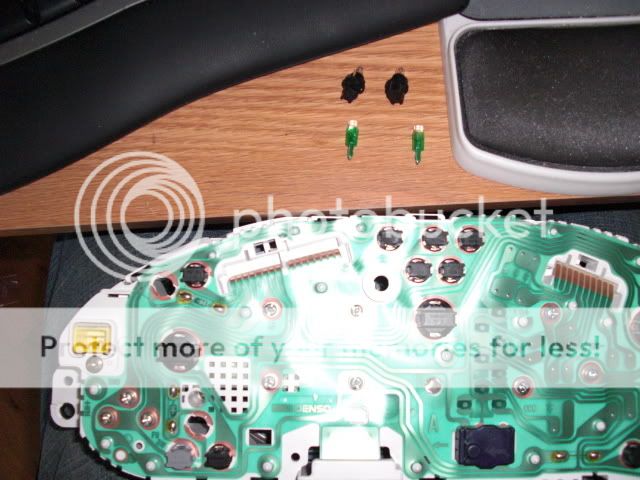
3. Ok so now that you have the plates removed you can place the face plate back on and then turn the cluster over to find the bulbs and which ones are placed where. The first bulbs i change were the easiest, the bigger main bulbs. Then changed a bunch of the smaller bulbs.
The bigger bulbs are for the main lights behind the speedometer, tach, ect. and the smaller ones are for the other stuff(the gas light indicator bulb is a larger size bulb so i didnt bother changing it.
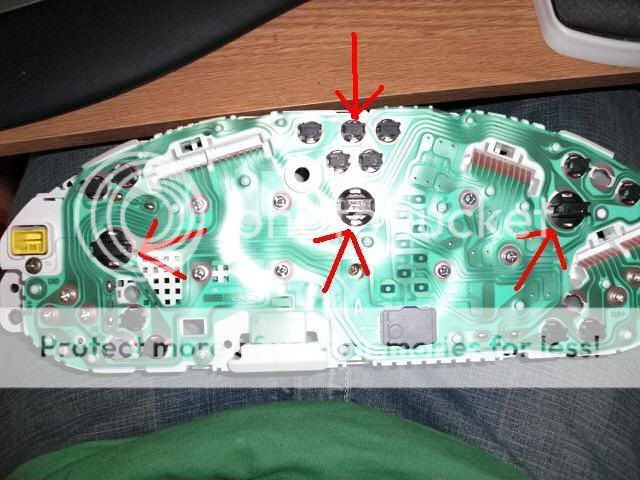
So big bulbs first.....
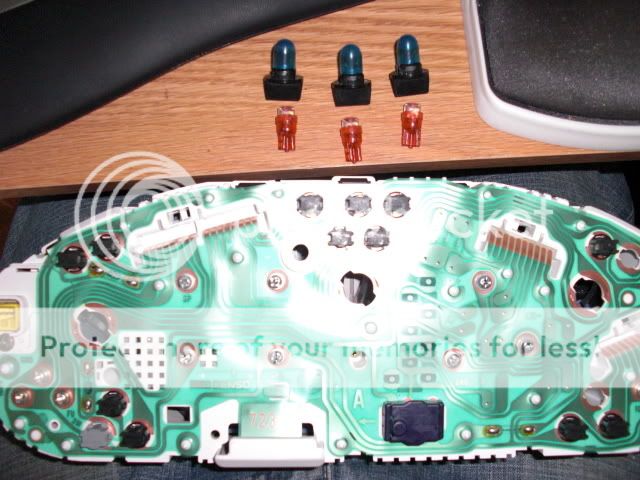
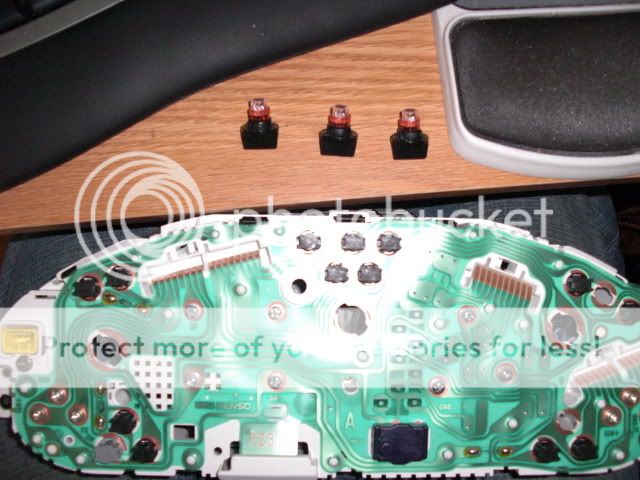
Then i change out the other bulbs....
4. Be careful which bulbs you buy and how long the wedge part of the bulb is...i bought some that i thought were right but they were short..i actually dont know if they even make the wedge part longer. The problem i encountered was the new LEDS, was that they tended to push the stock holder for the bulbs apart, this in turn made it harder to put the holder with bulb back into place. Not a huge deal, you will just need to play around wit the bulb and holder until they work.
5. Now replace your cluster and bezel. If the lights arent working then you need to take the cluster back out and wiggle the bulbs around. I ended up taking the bulbs in and out a few times. Not such a big deal but all my bulbs now work! So may be a little bit frustrating, but you just need to relax and play around alittle
  ....with the bulbs that is! silly people..what were u thinking?
here is some pix of my stuff from earlier this morning....im gonna take more in just a few min...

lol
well i will brb wit more pix
just did new pix...ok...new camera (not used to it yet) so the pix came out crappy..... lol
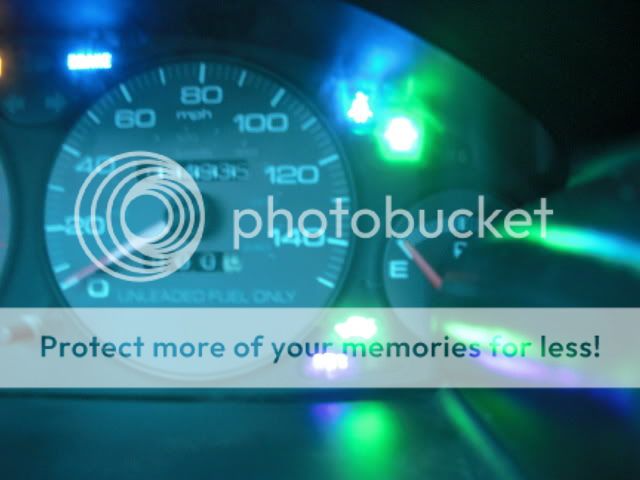
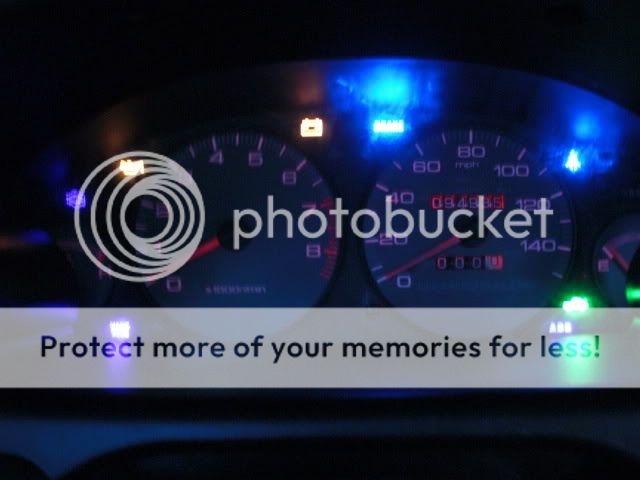
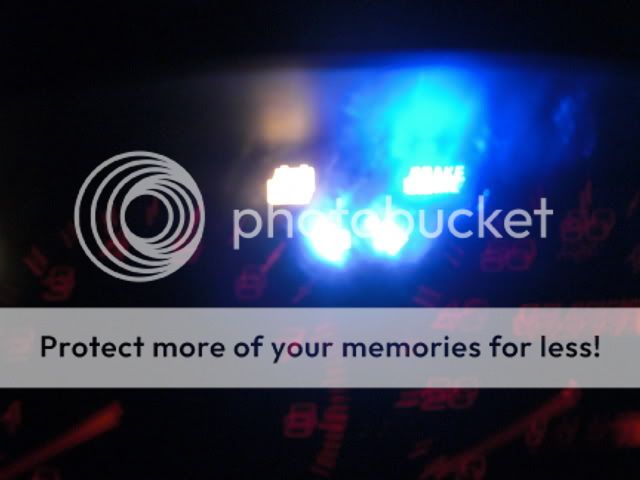
main lights in red.
check engine, mani req. and ABS in the UV(came out purplish)
blinkers and high beam in white.
door open and trunk open in green.
ebrake and seat belt in blue.
other lights i didnt change are the natural yellow-orange ones(thats what they look like cause of the color plates being removed.....


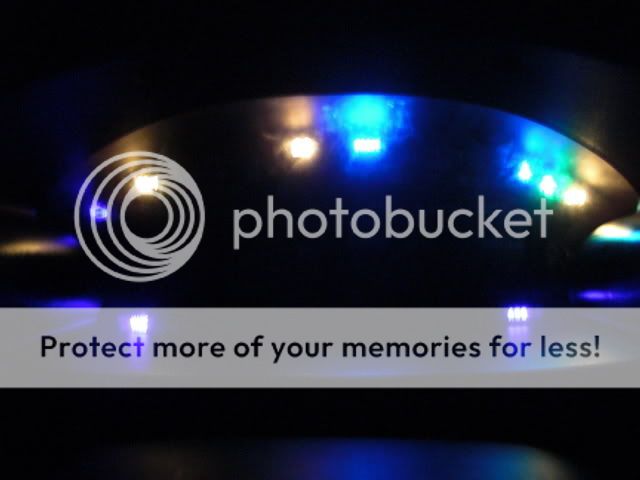
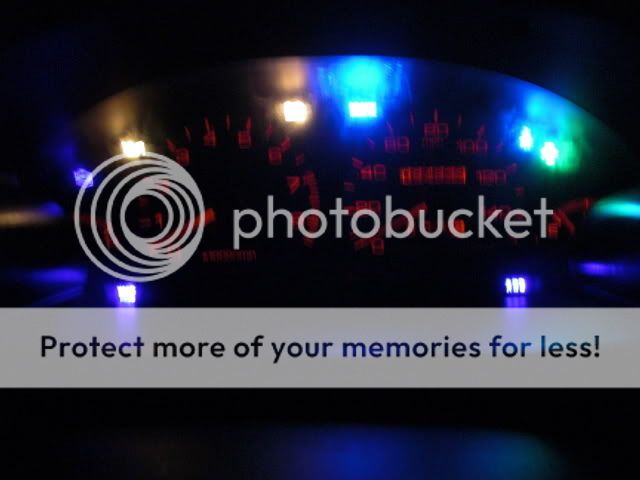
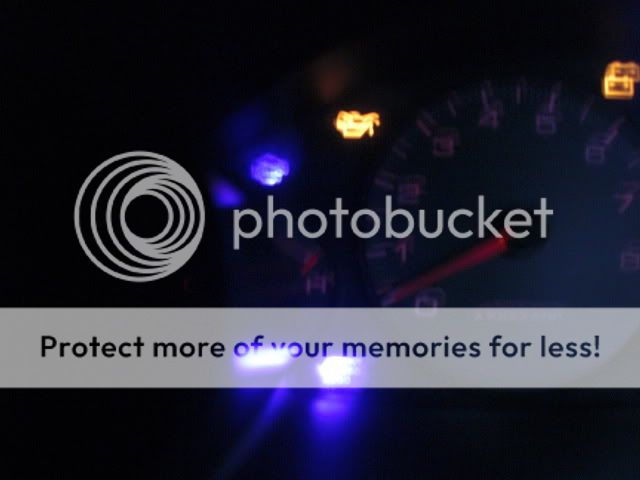
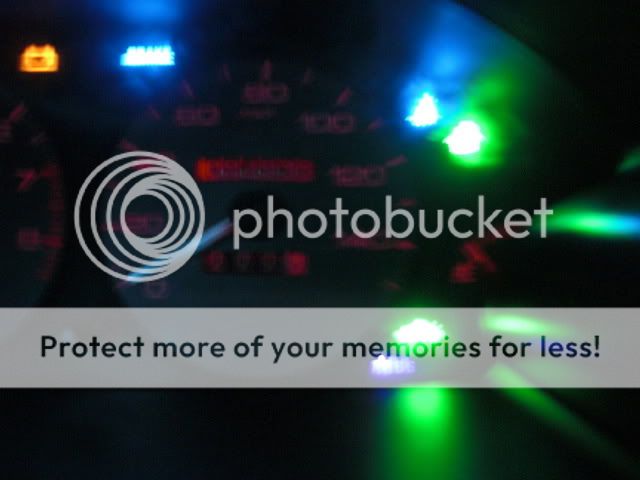
ok....i will def try to get better pix next time...but these lights look sweet in person...and the red isnt even that bright....so it looks good...the red ones are the 120 degree bulbs not 90...i think the 90 would have been alot brighter
look for more of my DIY stuff to come!
Thanks,
B-Turbo
Modified by BDaTurboTeg at 10:01 PM 7/13/2008
Modified by BDaTurboTeg at 8:07 AM 7/14/2008
Total Time estimated: 15-20min
what u need:
Phillips Head Screw Driver
Pliers(just in case you cant get them damn holders out with the bulbs)
BIG GUNS!
loloh and dont forget smarts!(like u need much to do this lol)
I got the new LED blubs from:
SuperBrightLEDS
DIY
1. Ok so first was to take out the cluster by removing the bezel and removing the 3 connectors on the back.
Arrows indicate screws to be removed in order to take out bezel,connectors, and cluster.
2. Next is to remove the colored plates that give the color for your directionals, high beam light, main. req. light, door open light, ect. This is because behind the face plate of your cluster there are these plates that make up the actual colors of your stock lights. Its a pain to remove the face plate but this is the only way to remove these plates. If you dont remove these then all of your LEDs wont show the right color(except the ones for your speedometer, tach, and backlighting) I didnt have pix of removing the face plate but i ended up breaking mine...just be careful with it. 1 bulb you cant change from the back like the rest so if u wish to change this bulb u need to do so while the face plate is off....its the SRS light.
These are the plates needed to be removed and where they are placed under the face plate.
3. Ok so now that you have the plates removed you can place the face plate back on and then turn the cluster over to find the bulbs and which ones are placed where. The first bulbs i change were the easiest, the bigger main bulbs. Then changed a bunch of the smaller bulbs.
The bigger bulbs are for the main lights behind the speedometer, tach, ect. and the smaller ones are for the other stuff(the gas light indicator bulb is a larger size bulb so i didnt bother changing it.
So big bulbs first.....
Then i change out the other bulbs....
4. Be careful which bulbs you buy and how long the wedge part of the bulb is...i bought some that i thought were right but they were short..i actually dont know if they even make the wedge part longer. The problem i encountered was the new LEDS, was that they tended to push the stock holder for the bulbs apart, this in turn made it harder to put the holder with bulb back into place. Not a huge deal, you will just need to play around wit the bulb and holder until they work.
5. Now replace your cluster and bezel. If the lights arent working then you need to take the cluster back out and wiggle
the bulbs around. I ended up taking the bulbs in and out a few times. Not such a big deal but all my bulbs now work! So may be a little bit frustrating, but you just need to relax and play around alittle ....with the bulbs that is! silly people..what were u thinking?here is some pix of my stuff from earlier this morning....im gonna take more in just a few min...
lol
well i will brb wit more pix
just did new pix...ok...new camera (not used to it yet) so the pix came out crappy..... lol
main lights in red.
check engine, mani req. and ABS in the UV(came out purplish)
blinkers and high beam in white.
door open and trunk open in green.
ebrake and seat belt in blue.
other lights i didnt change are the natural yellow-orange ones(thats what they look like cause of the color plates being removed.....
ok....i will def try to get better pix next time...but these lights look sweet in person...and the red isnt even that bright....so it looks good...the red ones are the 120 degree bulbs not 90...i think the 90 would have been alot brighter
look for more of my DIY stuff to come!
Thanks,
B-Turbo
Modified by BDaTurboTeg at 10:01 PM 7/13/2008
Modified by BDaTurboTeg at 8:07 AM 7/14/2008
 07-13-2008, 10:49 PM
#2
Junior Member
Join Date: Dec 2007
Location: Staring down the barrell of my 12 ga. Texas, USA
Posts: 491
Likes: 0
Received 0 Likes
on
0 Posts
<TABLE WIDTH="90%" CELLSPACING=0 CELLPADDING=0 ALIGN=CENTER><TR><TD>Quote, originally posted by BDaTurboTeg »</TD></TR><TR><TD CLASS="quote">
I got the new LED blubs from:
SuperBrightLEDS
</TD></TR></TABLE>
bad link
easy though
I got the new LED blubs from:
SuperBrightLEDS
</TD></TR></TABLE>
bad link
easy though
07-14-2008, 04:46 AM
#4
07-14-2008, 08:10 AM
#5
Join Date: Apr 2008
Location: Chilliwack, BC, Canada
Posts: 360
Likes: 0
Received 0 Likes
on
0 Posts
You can still dim the LED's I have them in my car and have for the last 6 years and the dimmer works fine, it wont go 100 black but they will get dimmer.
07-14-2008, 08:39 PM
#6
Honda-Tech Member
Thread Starter
Join Date: Mar 2005
Location: Da Hook,NY
Posts: 299
Likes: 0
Received 0 Likes
on
0 Posts
that is true the dimmer still works but just for the main LEDs...the idiot lights or warning indicators are always bright when on....but thats only when they come on or when u use them(turn signals and high beams)....i dont mind it much...i will have a continuation of this DIY where i will change the lights for the climate control, ashtray, and ect....plus maybe a few other spots for lights
lol when i get to it i will def be makin a play by play...
lol when i get to it i will def be makin a play by play...
Trending Topics
07-23-2008, 07:15 AM
#8
Honda-Tech Member
Thread Starter
Join Date: Mar 2005
Location: Da Hook,NY
Posts: 299
Likes: 0
Received 0 Likes
on
0 Posts
<TABLE WIDTH="90%" CELLSPACING=0 CELLPADDING=0 ALIGN=CENTER><TR><TD>Quote, originally posted by digdug18 »</TD></TR><TR><TD CLASS="quote">could you please add specifically what models you used and which you said wont work, please include model numbers if you could...</TD></TR></TABLE>
what models do u mean? the bulbs? or the cluster? i got everything to work it was just a pain cause the wedge part on the bulbs werent long enough and had to be forced into the holders....they might have longer wedge parts for other bulbs but i didnt look into it
what models do u mean? the bulbs? or the cluster? i got everything to work it was just a pain cause the wedge part on the bulbs werent long enough and had to be forced into the holders....they might have longer wedge parts for other bulbs but i didnt look into it
07-23-2008, 08:16 AM
#9
Honda-Tech Member
Join Date: May 2008
Location: USA
Posts: 819
Likes: 0
Received 0 Likes
on
0 Posts
On SuperBrightLEDs.com the bulb model I was using were "B8.5D" bulbs. But the ones I'm using were direct replacements. I'm not using the same bulb holder, it already came with its own.
08-03-2008, 06:34 AM
#11
Honda-Tech Member
Thread Starter
Join Date: Mar 2005
Location: Da Hook,NY
Posts: 299
Likes: 0
Received 0 Likes
on
0 Posts
<TABLE WIDTH="90%" CELLSPACING=0 CELLPADDING=0 ALIGN=CENTER><TR><TD>Quote, originally posted by atmospheric SOUL »</TD></TR><TR><TD CLASS="quote">Nice Write up ! I`ll be sure to do this ! </TD></TR></TABLE>
awesome!
thanks too...i wasnt sure about what people would say lol...its easy as mom making apple pie..... mmmm pie....
well once i get my other stuff in, i will be adding to this DIY write up....lets hope i get to it soon!
</TD></TR></TABLE>awesome!
thanks too...i wasnt sure about what people would say lol...its easy as mom making apple pie.....
mmmm pie....well once i get my other stuff in, i will be adding to this DIY write up....lets hope i get to it soon!

 08-19-2008, 11:11 AM
#17
What is the fifth picture down supposed to be? Where are those arrows pointing too?
What model bulbs go where and how much did you spend on bulbs? I will do this but I need to figure out which to get and what colors to go with.
Also is that as bright as your cluster gets, kinda dimm.
What model bulbs go where and how much did you spend on bulbs? I will do this but I need to figure out which to get and what colors to go with.
Also is that as bright as your cluster gets, kinda dimm.
08-20-2008, 11:11 AM
#20
Junior Member
The three main illumination bulbs are 194's (I used high watt white units in my buddies integra and it was pure white and clearly visible), the other lights are 74's.
I personally would suggest getting these types of bulbs shown below:
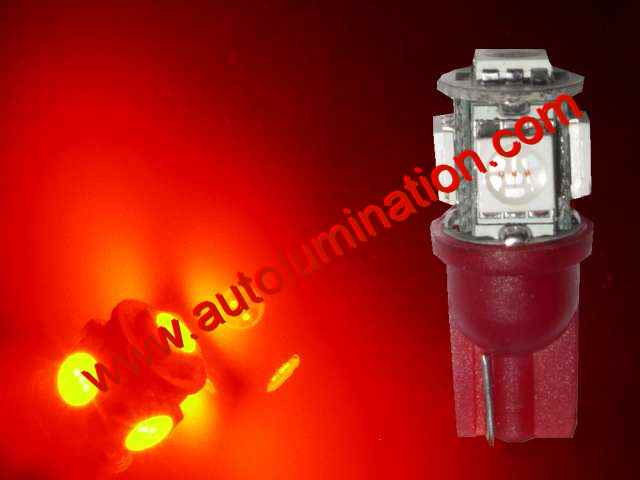
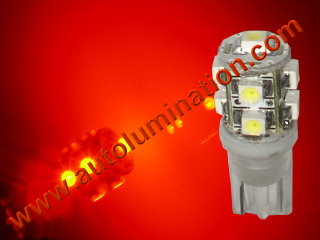
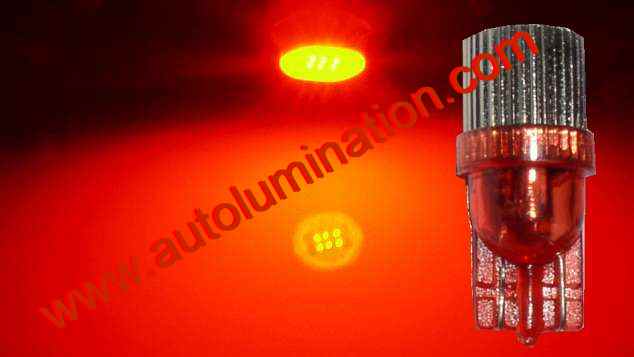
^bright units but will cause hot spotting^
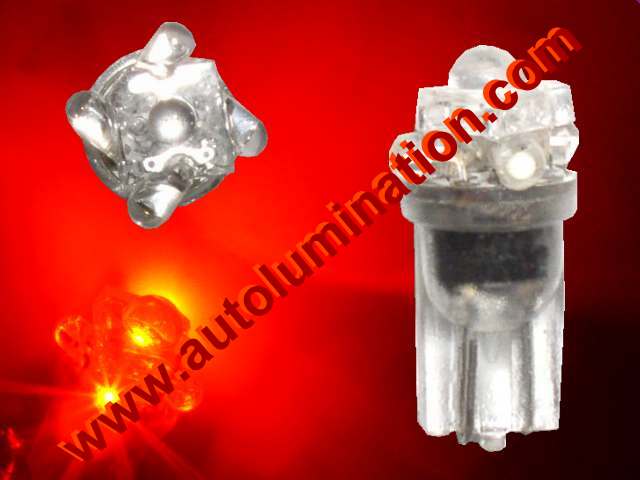
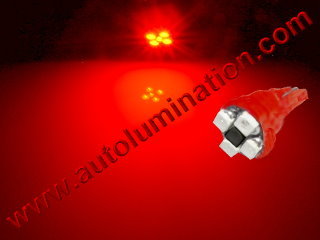
The units with side firing led's will better fill the cluster with light and it will proved a more even illumination than the simple forward firing units. The integra cluster had the benifit that the main illumination bulbs are 194's which have a large size and bulb selection, the civic's suffer with the single (or dual with an dx) 194 and then multipul 74's. The 74's have a smaller size and more limited led selection (mostly single forward firing units that aren't that bright) which leads to a dimm cluster...
I personally would suggest getting these types of bulbs shown below:
^bright units but will cause hot spotting^
The units with side firing led's will better fill the cluster with light and it will proved a more even illumination than the simple forward firing units. The integra cluster had the benifit that the main illumination bulbs are 194's which have a large size and bulb selection, the civic's suffer with the single (or dual with an dx) 194 and then multipul 74's. The 74's have a smaller size and more limited led selection (mostly single forward firing units that aren't that bright) which leads to a dimm cluster...
08-21-2008, 03:48 PM
#22
Honda-Tech Member
Join Date: Jan 2006
Location: Rochester, New York -> Santa Clara, CA
Posts: 10,443
Likes: 0
Received 2 Likes
on
2 Posts
You'll never get clear photos at night time with that point & shoot you're using.
You need a DSLR to get a shot of that at night. Doubt even the manual aperture and shutter controls (if u even have them) on a point and shoot would be enough to grab a good photo of that.
Good write-up though, added to the FAQ section.
You need a DSLR to get a shot of that at night. Doubt even the manual aperture and shutter controls (if u even have them) on a point and shoot would be enough to grab a good photo of that.
Good write-up though, added to the FAQ section.
08-21-2008, 10:23 PM
#24
Junior Member
<TABLE WIDTH="90%" CELLSPACING=0 CELLPADDING=0 ALIGN=CENTER><TR><TD>Quote, originally posted by EddieLe76 »</TD></TR><TR><TD CLASS="quote">so if you dont want to change the illumination of anything but just the main part of the cluster, all you would need is three 194 bulbs?? </TD></TR></TABLE>
Yep...
Yep...